PCB Horse

The idea of this project came to me while I was trying to decide what to get my sister. She is obsessed with horses and even has her own, which is named "Electronic Chip" I now knew what I needed to do. I'm sorry for the lack of pictures I didn't think of making an instructable till I saw the PCB contest and decided to give it a shot.
The basic idea of what I was trying to do was to cut out a horse from old computer boards. Then add a mane and tail with striped wire and lastly to put it in a frame to protect it and to add a layer of protection.
The tools you will need are:
-Something to cut the PCB with ( I just used a basic cutting disc on a Dremel )
-Soldering Iron (optional but I used this to attach the mane to the head. You could use any glue that would work)
-Superglue( to attach the limbs to the main body)
The supplies:
-PCB (You do not need one big piece to cut it out, I used five small pieces and then glued them together)
-Wood (Used to build the frame)
-Cardboard (Used as the back of the frame)
-Small stranded wire ( used to make the mane and tail)
The Stencil

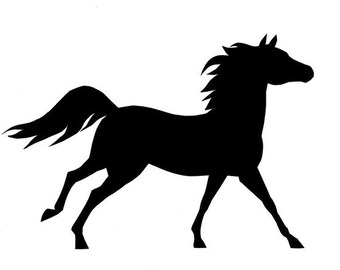
The first thing you are gonna need to do is to print out a stencil of the horse you want to make. I chose this one because it looked like it would be easy enough to cut out but you could choose anyone you liked.
LINK TO PICTURE I CHOSE
https://i.etsystatic.com/17439735/d/il/330c9e/1519...
Once you have your stencil printed you need to cut it out. Then you should cut off the legs and head so that those can be cut separately.
The PCB
This step is fairly simple all you need to do is to take your cut up horse and tape/glue each part onto the PCB. I only had enough actual PCB to do the body and the head so I used old ram sticks for the legs and they worked really well. Once you have all the pieces taped on you need to cut them, I did this with just a Dremel.
--WARNING--
ONE OF THE COMPONENTS OF PCB IS FIBERGLASS AND WHEN YOU CUT IT, IT TURNS INTO DUST AND BREATHING IN LITTLE FIBERS OF GLASS INTO YOUR LUNGS IS BAD!!!!!!!! WEAR SAFETY EQUIPMENT AND USE A VACCUM TO SUCK UP THE DUST BEFORE YOU CAN BREATH IT. CUT AT YOUR OWN RISK
Assembling the Horse
Once all your pieces are cut out you must assemble them. I did this by clamping down the main body with the leg side up and just superglued each leg in place. Make sure all the legs are oriented the right way I had to go back after they had dried because I didn't notice that one leg was backwards. The head can be attached in the same way.
Adding Hair


To make the mane I simply striped about an inch off of some 22 AWG stranded wire that I got off of Amazon(1st Image). then I cut that piece of wire leaving about a 1/8th of an inch of sheathing on(2nd Image). Twist the end of the wire as you are pulling the last bit of sheathing off so that they stay together(3rd Image), repeat 6-7 times or until the head is full. I was able to solder these directly onto the back edge of the head, but you could easily just glue these in place. for the tail I did the same thing except I used longer bits of wire.
The Frame
After I dropped this and all the legs broke off I decided that I should build a frame to protect this and to give it a nice display. To make the frame I simply took some scrap wood I found and cut it into four pieces, two at 12 inches long and two more at 9 inches. Then I used some wood glue and clamped the two short pieces between the two long ones. for the back I just used some thin cardboard from a box I found, it was about the thickness of a notebook cover and I glued it to the back of the frame.
Finishing Touches
When I went to put this in the frame it looked a little to flat and far back so I cut up a few squares of foam board and stuck them behind the horse so that it now sits about half an inch from the back of the frame. I also used a Cricut machine to cut out the name of the horse and stick it to the frame. All in all, I think it turned out pretty well if you have any questions ill be sure to check this and I would appreciate it if you could vote for this in the PCB contest. Thanks for reading.