PCB Etching Solution - Cupric Chloride
by vreinkymov in Workshop > Science
105667 Views, 108 Favorites, 0 Comments
PCB Etching Solution - Cupric Chloride

Purpose:
According to The Real Elliot's instructable titled Stop using Ferric Chloride etchant! (A better etching solution.), cupric chloride + hydrochloric acid is an excellent PCB (printed circuit board) etching solution. According to Adam Seychell's Etching with
Air Regenerated Acid Cupric Chloride, more copper(II) ions enhance etching speed. The purpose of this instructable is to show how to prepare an etching solution with lots of copper(II) ions so that etching can proceed quickly starting with the first board etched.
Summary:
A solution with copper(II) chloride will be made by electrochemically creating copper powder, oxidizing it into copper(II) oxide, reacting it with hydrochloric acid, and finally converting it into copper(II) chloride with hydrogen peroxide. This is a much faster way of making copper(II) oxide than letting copper metal corrode in hydrochloric acid.
Cut & Soften Electrodes


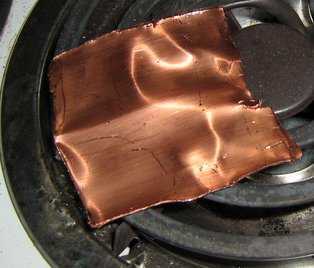
1. Cut a square from scrap copper tubing, approximately 2.5" x 3.0" inches.
2. Unfold the square as best as possible, don't try to make it perfect yet.
3. Put the copper on a hot plate to oxidize and soften the copper.
4. When it turns black (oxidizes) turn the hot plate off and wait for the piece to cool.
2. Unfold the square as best as possible, don't try to make it perfect yet.
3. Put the copper on a hot plate to oxidize and soften the copper.
4. When it turns black (oxidizes) turn the hot plate off and wait for the piece to cool.
Pour Acid & Clean Copper


1. Pour about 11 oz. muriatic acid (25% hydrochloric acid) into a glass jar, its color should be clear.
2. Carefully place the cooled piece of oxizided copper into the jar, it will change the acid a yellow-green color.
3. Place the copper into a bowl of water to clean it, set the acid aside.
2. Carefully place the cooled piece of oxizided copper into the jar, it will change the acid a yellow-green color.
3. Place the copper into a bowl of water to clean it, set the acid aside.
Flatten, Cut, and Drill Copper


1. Since the copper is softer, flatten it with pliers.
2. Cut the copper into two electrodes, approximately 2.5" x 1" and 2.5" x 2".
3. Drill a hole into the top of each electrode.
4. Place leftover scraps aside.
2. Cut the copper into two electrodes, approximately 2.5" x 1" and 2.5" x 2".
3. Drill a hole into the top of each electrode.
4. Place leftover scraps aside.
Select Electrolysis Source
Select either a resistor limited voltage source or a voltage limited current source for electrolysis. Below is an overview of both options:
1. Resistor Limited Voltage Source - Step 5:
Overview:
This is a DC voltage source with a resistor in series to limit the current.
Pro: Simple, cheap, and easy to build.
Con: Lots of power loss. The resistor dissipates V*V/R watts electrodes have apprixmately 0.5 - 1.0 V drop.
2. Voltage Limited Current Source - Step 6:
Overview:
This is a DC current source using switching techniques.
Pros: Higher efficiency. Preferred for electrochemistry.
Cons: Higher circuit cost and complexity.
Resistor Limited Voltage Source


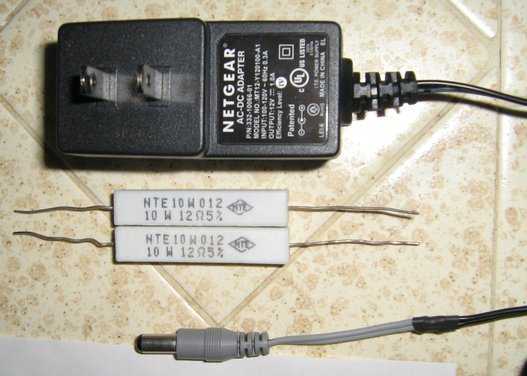
1. Get a suitable DC adapter greater than 1V 1A (ex. 12V).
2. Resistor Value = DC Voltage / Current Limit (ex. 12V / 0.5A = 24Ω).
3. Resistor Power = 2 * DC Voltage * Current Limit (ex. 2 * 12V * 0.5A = 12W).
2. Resistor Value = DC Voltage / Current Limit (ex. 12V / 0.5A = 24Ω).
3. Resistor Power = 2 * DC Voltage * Current Limit (ex. 2 * 12V * 0.5A = 12W).
Voltage Limited Current Source


Attached as PDF file is my design for a switch-mode current source constructed out of general purpose parts. The most specialized part is the inductor, which is 560mH and saturates at 1.5A. It's variable from around 0.150 to 1.100 A. The large inductor value is chosen to minimize ripple. The switching frequency is around 100kHz. The link provides a schematic. All components were purchased on Mouser. The substrate (FR4 PCB) was purchased on E-bay. Soldering took a LONG time since traces had to be routed individually.
Downloads
Wiring the Electrodes


1. The smaller, corroding electrode goes through a red wire to the positive (+) terminal of the power source.
2. The larger, accumulating electrode goes through a white wire to the negative (-) terminal of the power source.
3. Immerse the electrodes into the muriatic acid used for cleaning as pictured.
4. Add hydrogen peroxide (3% pharmacy type) to the muriatic acid, turning it green.
Optional Steps:
5. Add scrap copper to the muriatic acid.
6. Block the jar top with a wad of dry paper towels to minimize acid release due to electrode bubbling.
Copper Powder Formation


At regular intervals of 1 hour:
1. Clear off the accumulaled copper electrode by shaking it.
2. If the negative electrode corrodes too much, switch electrode polarities.
You can terminate the reaction at any time you want. I decided to run it for about 4-5 hours. Pictured are the electrodes during and after use.
1. Clear off the accumulaled copper electrode by shaking it.
2. If the negative electrode corrodes too much, switch electrode polarities.
You can terminate the reaction at any time you want. I decided to run it for about 4-5 hours. Pictured are the electrodes during and after use.
Separate & Wash


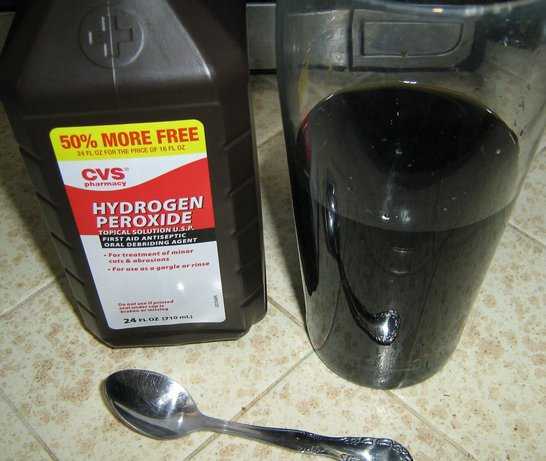
1. Pour the used electrolyte into a separate container (the drinking glass as pictured - DO NOT DRINK OR TELL WIFE).
2. Wash the remnants with water (the jar as pictured).
3. Add 1/2 tsp. of hydrogen peroxide to the used electrolyte, changing its color (do NOT stir with a metal spoon - use plastic).
4. Allow 30 minutes to settle.
2. Wash the remnants with water (the jar as pictured).
3. Add 1/2 tsp. of hydrogen peroxide to the used electrolyte, changing its color (do NOT stir with a metal spoon - use plastic).
4. Allow 30 minutes to settle.
Oxidize Copper Powder & Scrap


1. Dispose of the water used to wash the copper powder & scrap mixture.
2. Place copper powder & scrap mixture onto the larger electrode plate.
3. Place electrodes & scrap onto the hot plate.
4. Oxidize the electrodes & pile with heat until blackening.
5. Allow everything to cool.
2. Place copper powder & scrap mixture onto the larger electrode plate.
3. Place electrodes & scrap onto the hot plate.
4. Oxidize the electrodes & pile with heat until blackening.
5. Allow everything to cool.
Finalize Mixture


1.Recombine the electrolyte and oxidized copper, the solution will turn dark green-black.
In 15 minute increments:
1. Add 1/2 tsp. fulls of hydrogen peroxide (3% - general purpose type).
2. Stir the mixture with a plastic utensile (straw).
When the mixture is light green:
1. Filter it.
2. Store it.
In use, the mixture will become dark-black, recharge it by adding hydrogen peroxide.
In 15 minute increments:
1. Add 1/2 tsp. fulls of hydrogen peroxide (3% - general purpose type).
2. Stir the mixture with a plastic utensile (straw).
When the mixture is light green:
1. Filter it.
2. Store it.
In use, the mixture will become dark-black, recharge it by adding hydrogen peroxide.