PC Auth With Arduino and RFID/NFC Card
by MicheleMeattini in Circuits > Arduino
4665 Views, 5 Favorites, 0 Comments
PC Auth With Arduino and RFID/NFC Card
Hello everyone!
How many times have you come home after a long day of work or a stressful school, do you go home and want to relax in front of your PC?
So you get home, turn on your PC and you get the screen to type in your password because your PC doesn't have a fingerprint in Windows Hello ... that's boring.
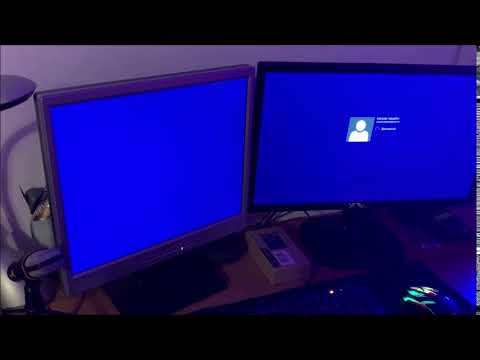
Imagine then instead of entering the password to pull a small NFC chip out of your pocket and pass it over the reader and done, the PC is unlocked and ready to play your favorite music or your movie on Netflix.
Supplies
- Tag NFC/RFID
- Arduino Pro Micro / Arduino DUE / Arduino UNO with HID unlocked
- NFC/RFID Reader RC522
- Cables
You can buy the whole kit from the amazon link of Elegoo (if you use an arduino one you have to modify it to use the Keyboard library): Link Elegoo
Materials and Schemes

For our project we need a microcontroller with a processor that supports the HID (Human Interface Devices) protocol so that it can result to the PC as an input device (keyboard in this case).
The microcontrollers that support this HID class are those with the ATmega32U4 microprocessor, so you can use Arduino pro Micro, Arduino DUE, Arduino Leonardo or Arduino UNO but in case you need to unlock the HID protocol by writing a suitable bootloader on it.
In this guide I will not explain how to modify Arduino UNO but if you look on the internet you will find many guides.
I will use Arduino Due for this project.
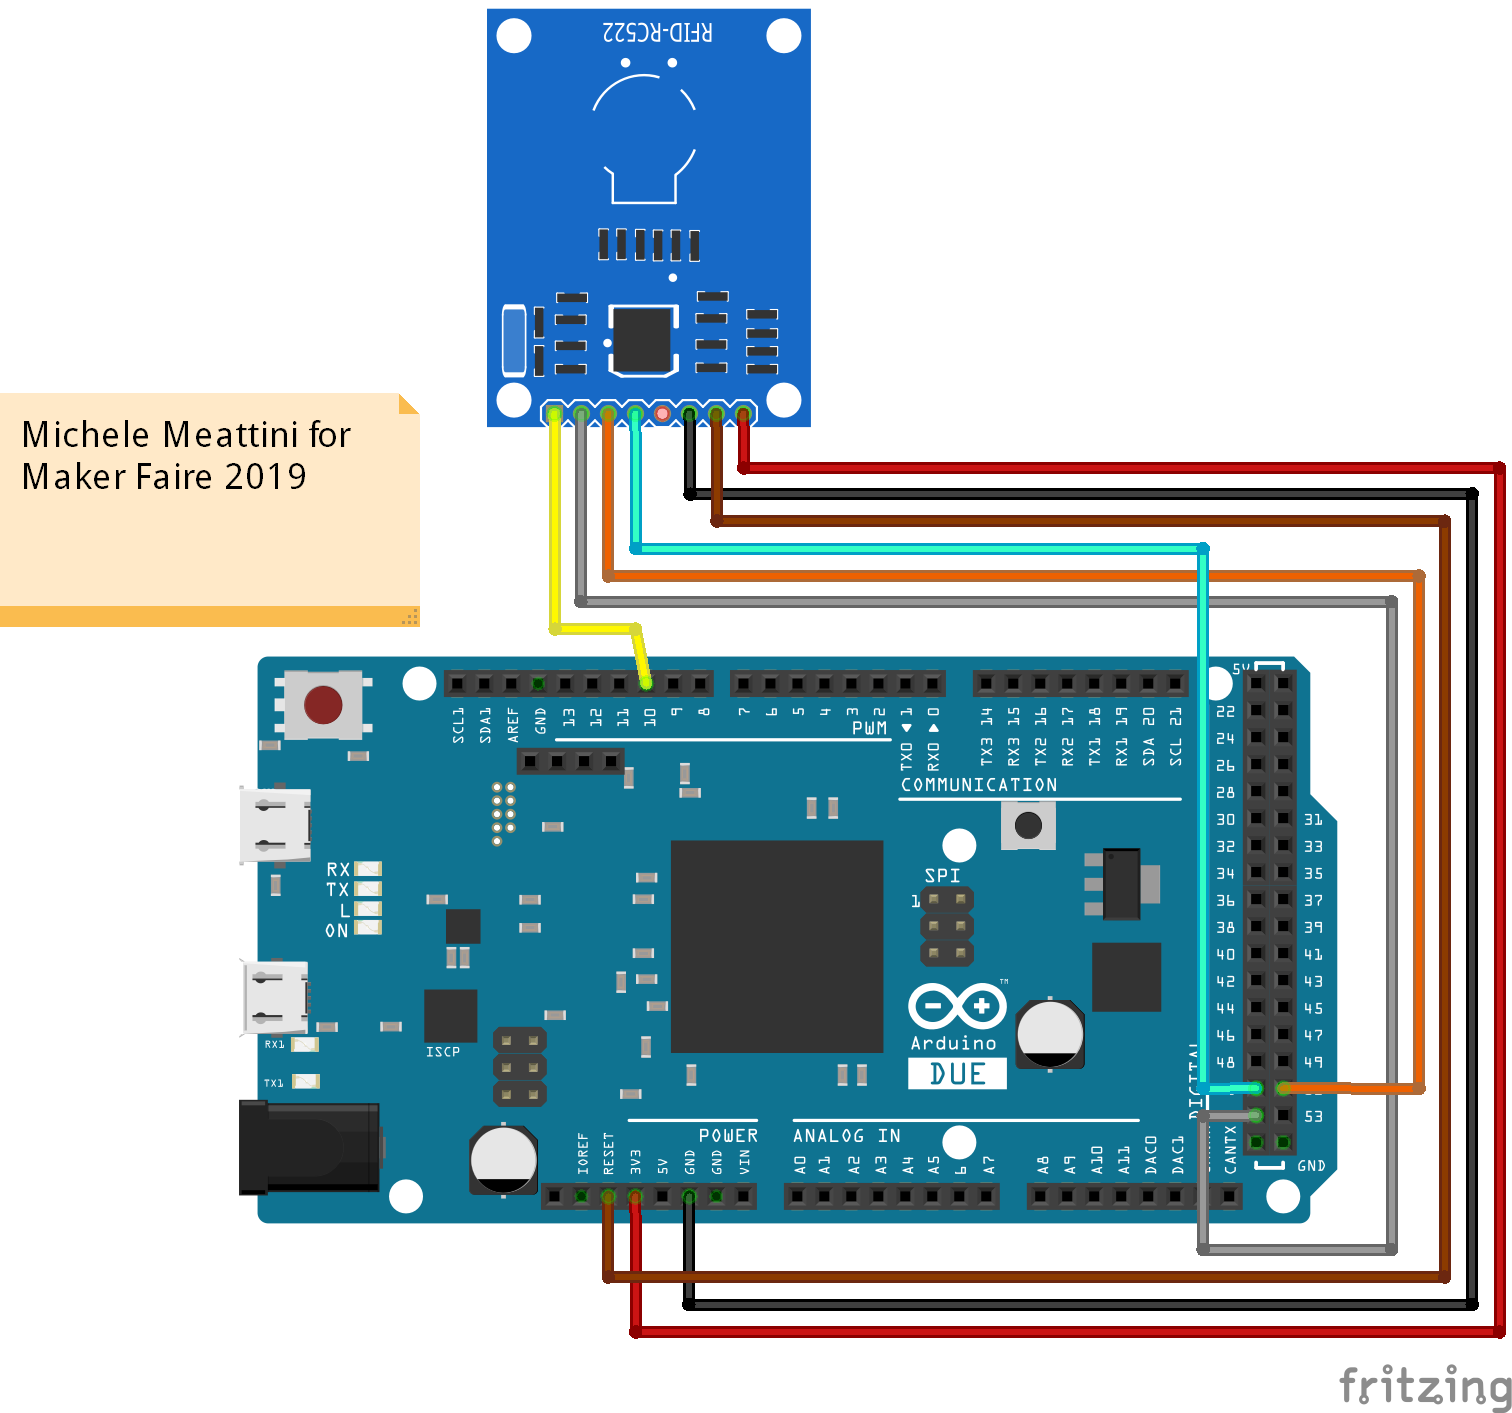
The first thing to do is the circuit shown in the diagram above, it is very important to respect the colors so in error mode during the assembly phase you can understand which cable has been connected incorrectly.
The links to do are these:
Pin 1 -> D10
Pin 2 -> D52
Pin 3 -> D51
Pin 4 -> D50
Pin 5 -> Nothing
Pin 6 -> GND
Pin 7 -> Reset
Pin 8 -> 3,3V
Install Arduino DUE Drivers and Import the Library
Before continuing we need to install the Arduino Due card drivers and import the library that will allow us to use the RFID / NFC reader.
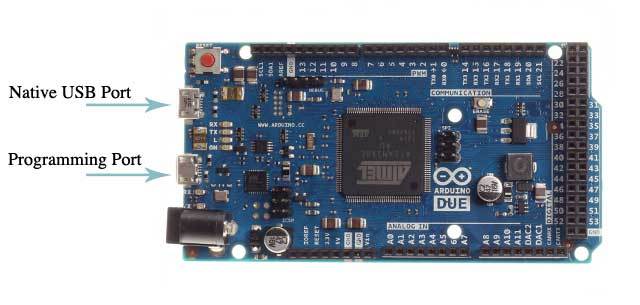
First open the Arduino IDE, connect our Arduino Due to the PC on the Programming Port and select the board from the tab menu and the COM port. If you don't find Arduino DUE in the list of cards here I leave you a link on how to install the drivers.
How to install Arduino Due drivers
The first thing to do is import the library that will allow us to read the NFC / RFID tags.
The library is called MFRC522, once you have downloaded the zip file simply import it to the Arduino IDE.
How to install libraries in Arduino IDE
The other step is to import the keyboard library, which will allow us to use our arduino as a keyboard in our computer
Then download the "Keyboard-Master" zip file and import it like you did with the previous library.
Read the Tag Decimal Code
After importing the library it will be necessary to establish which NFC tag will be enabled to access our PC.
So first of all download the "RFIDReadTag.zio" file.
Extract it and open the .ino file, through which we will be able to read the decimal codes of our RFID / NFC tag.
Connect Arduino to the programming port, the central one.
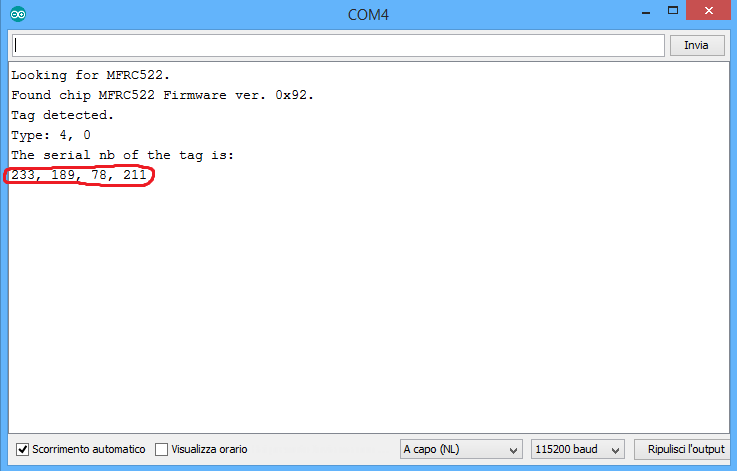
Load the program on Arduino and open the serial monitor.
Then pass the NFC / RFID tag with which you want to unlock your PC and read what is written in the serial monitor.
Save the serial nb (circled in red) of the tag in the notepad or write in a piece of paper so that afterwards we could set it as login.
Downloads
Set the Hex Code and Password in the Final Program

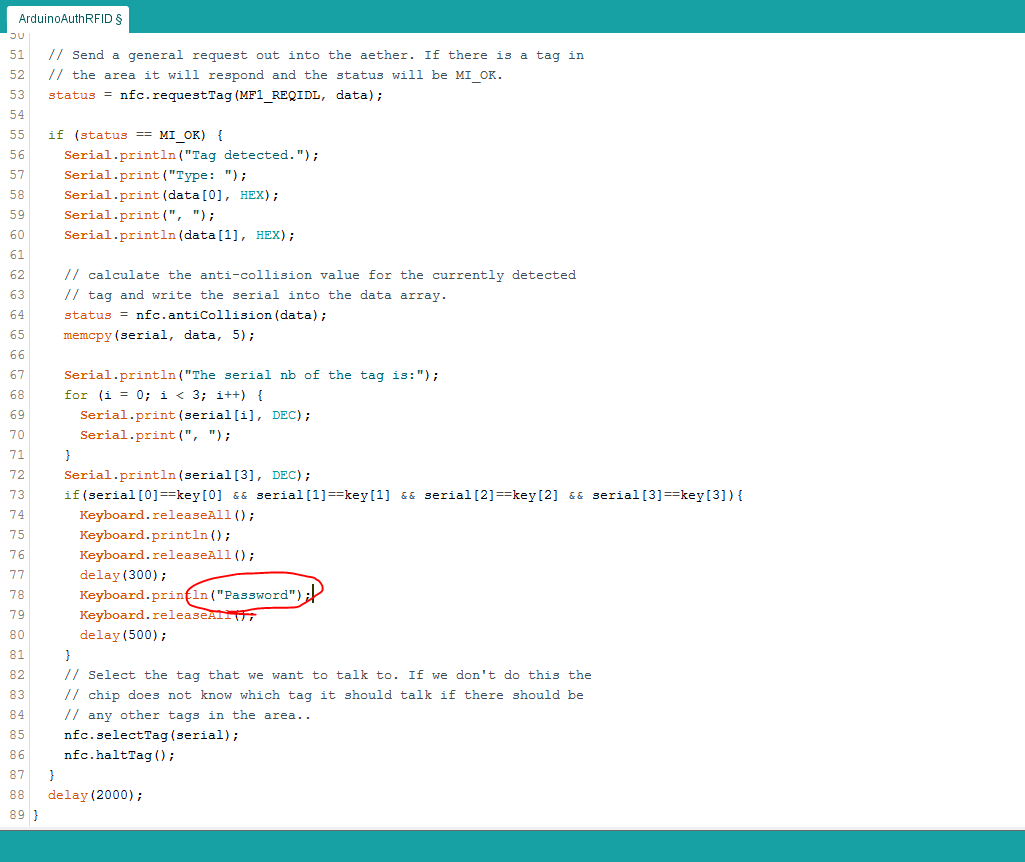
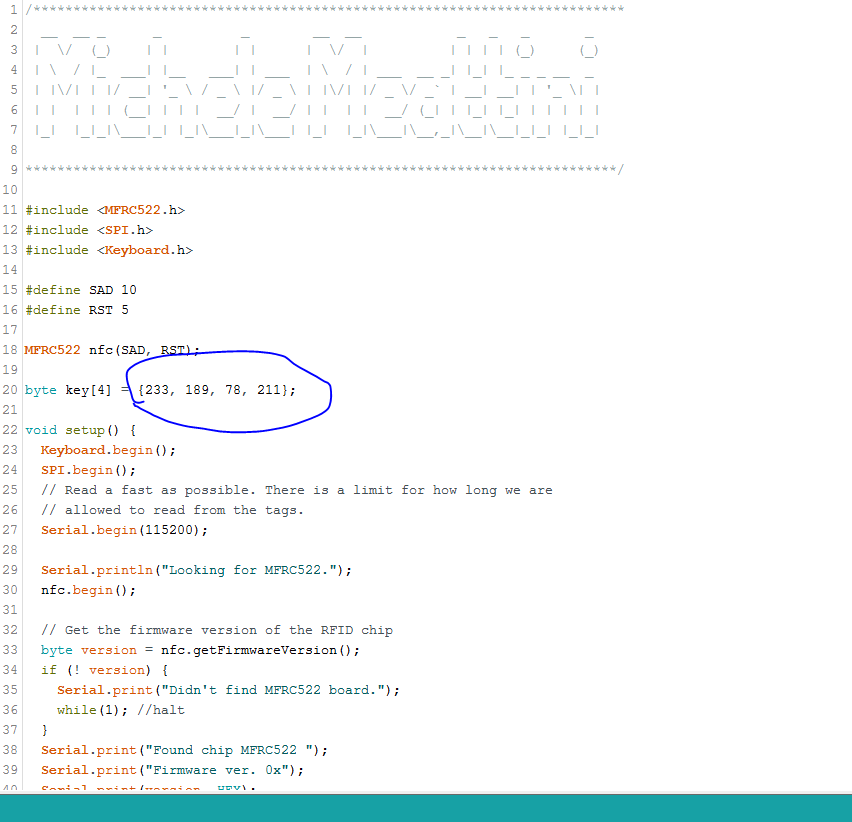
The last step is to import the dec code and password of our PC into the arduino program.
We should set that when the rfid reader reads the code of our tag then through the keyboard library write the password in the notepad of our computer.
What you need to do download ArduinoAuthRFID.zip if you have windows 10 or ArduinoAuthRFID_Windows8 if you have windows 8 open the ino file.
Next you need to replace the blue field in photo with your decimal code that you saved before and in the red field your password to unlock the PC. (On Windows 8 you need to press enter twice to access the password screen while on Windows 10 you need only once, This code is Ready for Windows8.1).
Upload the code to Arduino.
Unplug the micorusb from the arduino and connect the plug to the native Port(See Picture), that Arduino port will be able to write on the PC as a keyboard.
At this point, all you have to do is try the whole thing by turning off the PC and turning it back on again, making it unlocked by him!