"Good Ideas" Holiday Ornament
by Brillist in Living > Christmas
2568 Views, 17 Favorites, 0 Comments
"Good Ideas" Holiday Ornament

'Tis (always) the season for good ideas! This 3D printable lightbulb ornament clips around your existing Christmas tree lights, so it shines from the inside out. This Instructable will walk you through:
- Creating 3D text from a drawing
- Creating a hollow 3D lightbulb with text on it
- Preparing the model for printing
At each step, you'll learn what software to use, and tips on how to do things quickly and easily.
Extrude the Text

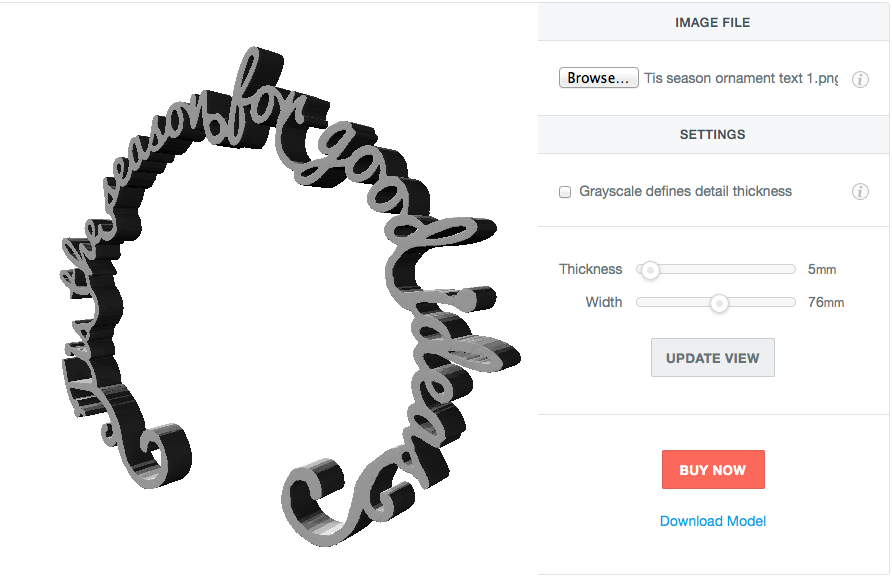
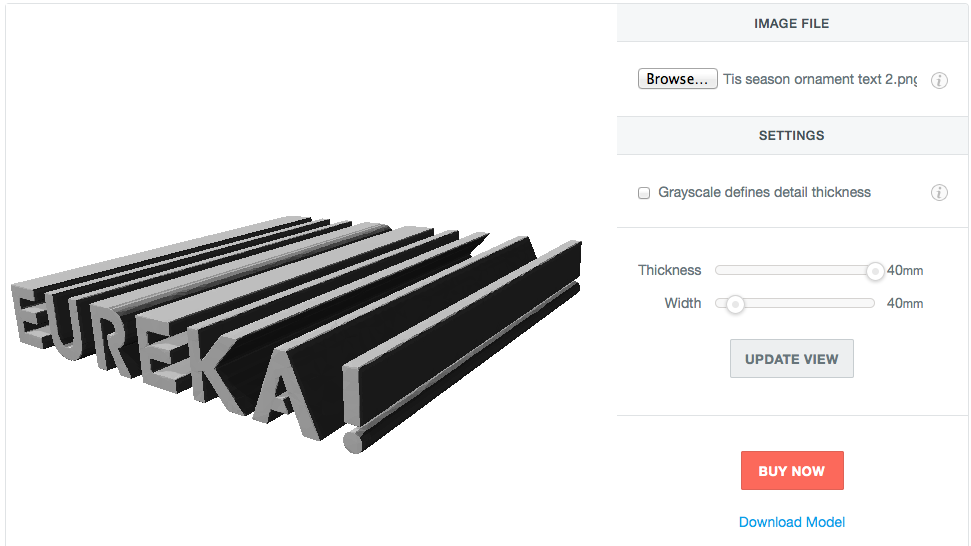
Pen your merry holiday sentiment and create a sharp black-and-white image of it.
Some design tips:
- For the "Eureka!" text, avoid floating white bits (like in the "R" and "A") by adding a white runner in such spots.
- For the "'Tis the season for good ideas" text, avoid floating black bits. In this case, connect the dots on the "i"s.
- Make the curlicues before the beginning "T" and after the ending "s" quite long, so they will securely intersect with the sides of the lightbulb.
- Finally, to hang the ornament, you can either thread a string through loops in the letters (like the "o" in "season" and the "f" in "for") and attach a wire hook to that thread, like hanging a picture frame - or you can create a loop at the center the ornament, like at the base of the letter "n" in "season," as shown.
Then, make two images: one of the "Eureka!" text, and the other of the "'Tis the season" text. Use https://www.shapeways.com/creator/2dto3d to take your black and white text and extrude these into 3D shapes. It's best to make a thin extrusion of "'Tis the season," and a really thick extrusion of "Eureka," as shown. Press "Download Model," and you will get two .x3db files.
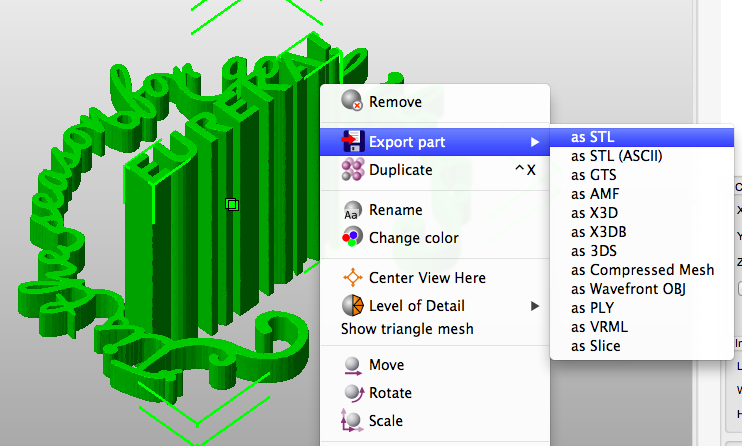
Use Netfabb (http://www.netfabb.com/) to convert these .x3db file into STL files. Just open the file in Netfabb, and export the file as an STL.
Make the Lightbulb
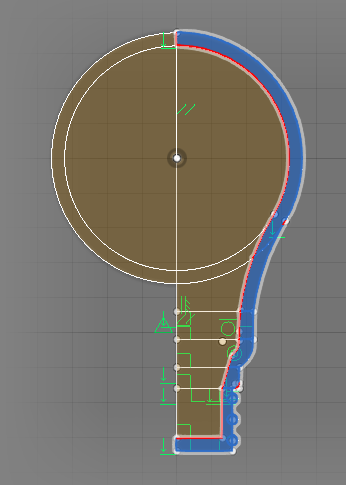
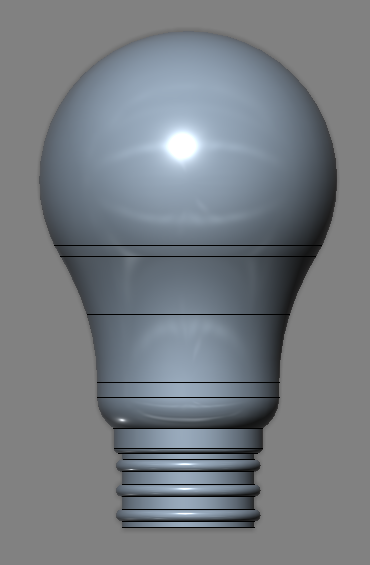
In Inventor Fusion or in Solidworks or in your CAD program of choice, create your lightbulb. If you just trace one half of the outline of the bulb, then trace the inner boundary, and revolve that shell it around a central axis, you can make the lightbulb quickly. Export this as an STL file.
Add the Eureka! Text to the Lightbulb
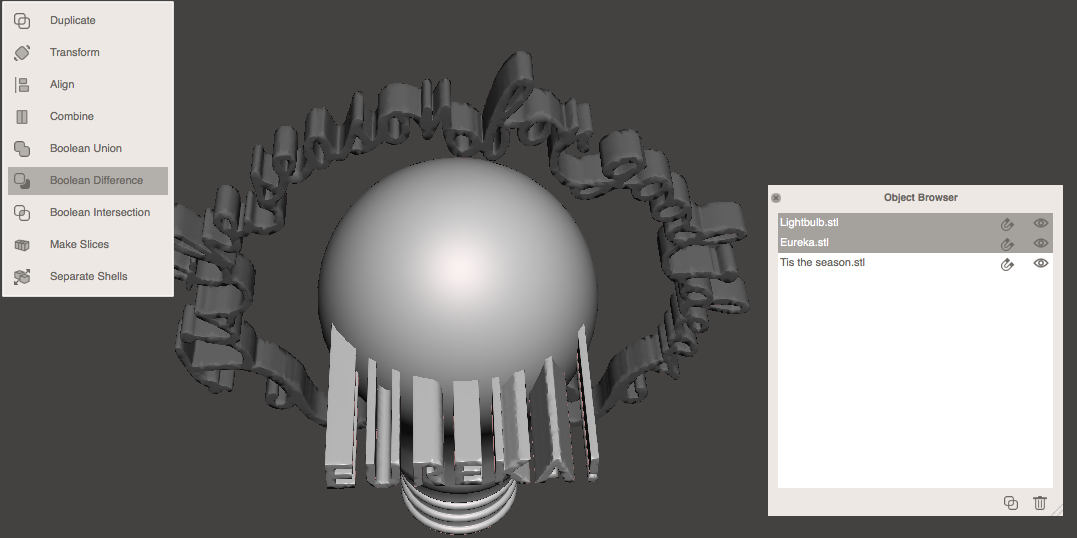
Using Meshmixer (http://www.123dapp.com/meshmixer), import both the ornament text STLs and the lightbulb STL. Use the object browser to toggle between files. You may need to resize or rotate (Edit → Transform) one or the other to get the proportions right.
Select the Eureka! text and reposition/resize it so that it's cutting into the front of the lightbulb.
Then, using your keyboard, select lightbulb shell first and the the Eureka! shell second in the objects browser. A dialog will appear; select Boolean Difference. This will cut a text-shaped set of holes out of your lightbulb.
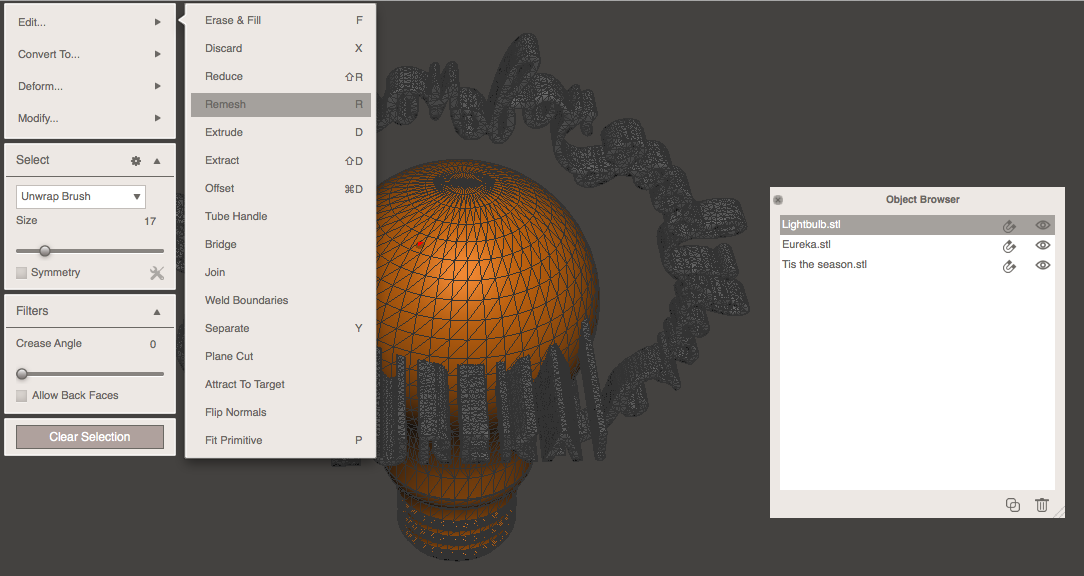
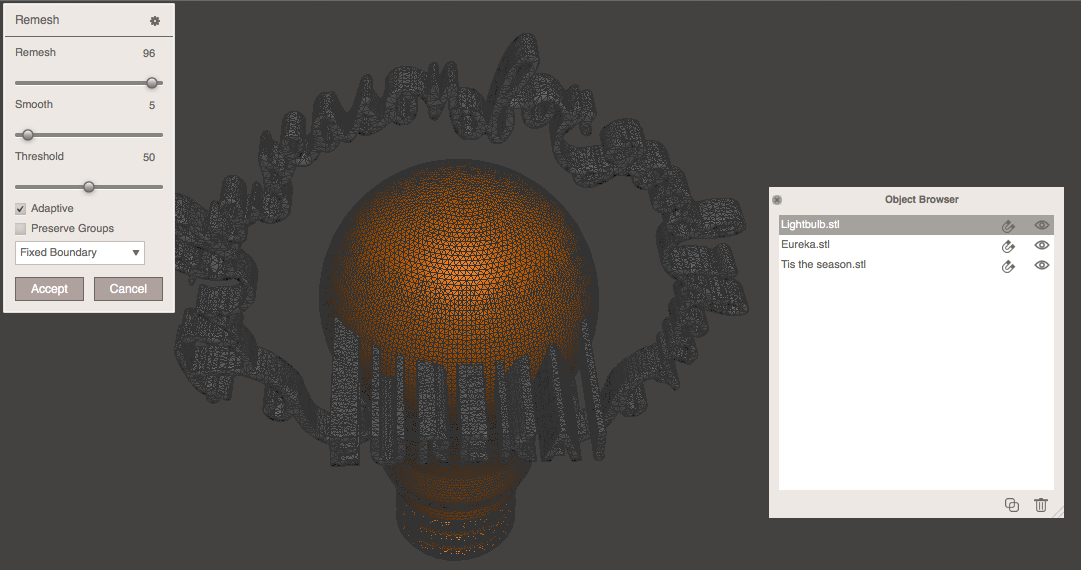
(Troubleshooting: if the Boolean operation fails, try View → Toggle Wireframe, select the rougher mesh, and then remesh it so it's finer - that is, has a higher triangle count. Then try the Boolean operation again.)
Connect the "'Tis the Season" Text to the Rest of the Lightbulb
Now, if you successfully designed your text so that it already intersects with the bottom of the lightbulb, congratulations. You can skip to the "Combine" part at the end of this step.
If you didn't, then you have a problem. The ornament will hang from the text over the lightbulb. If the text isn't connected to the lightbulb, then there's nothing holding the lightbulb up - and nothing holding your light, either!
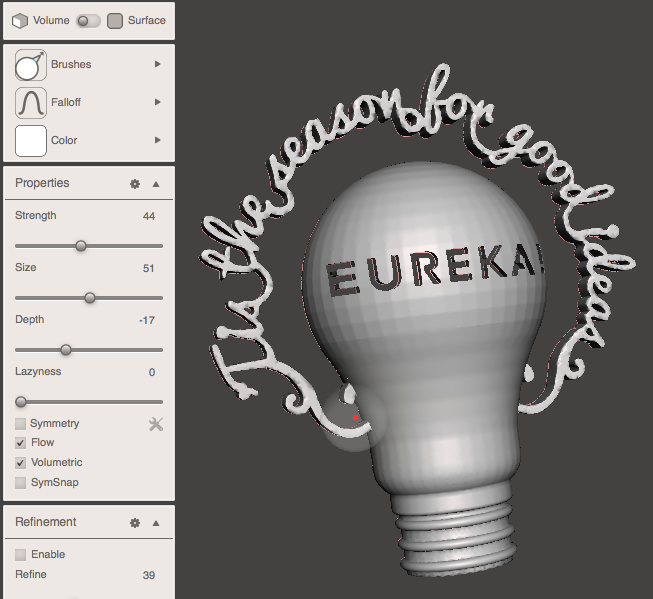
The good news is that you can use Meshmixer to sculpt the text so that it intersects. Select the text, then go to Sculpt → Brushes → Drag. Then, pull the ends of the text (the "T" at the start and the curlicue after the last "s" in this example) and artfully pull them toward the base of the lightbulb.
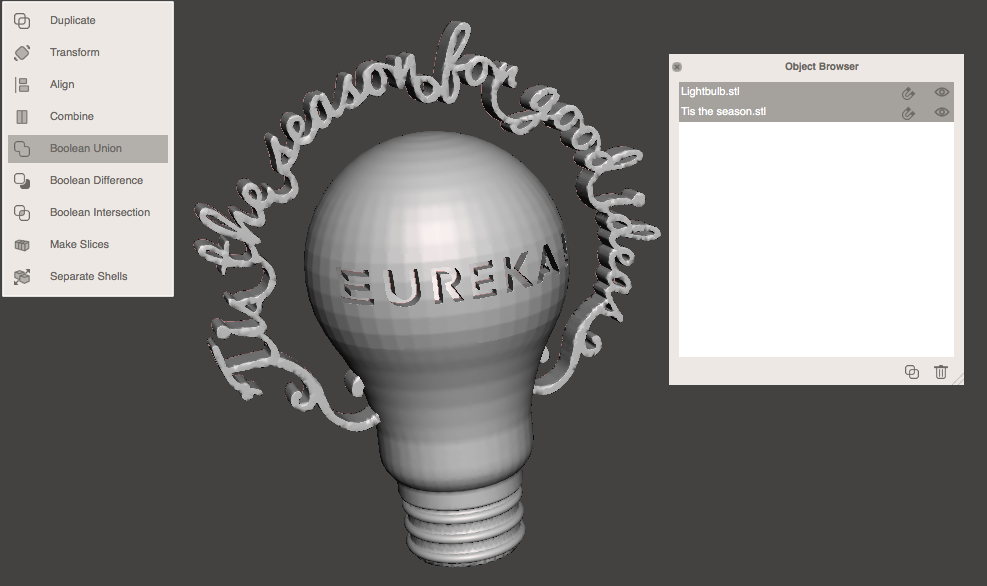
When you're done adjusting, using your keyboard, select the two shells, and combine them using "Combine" or "Boolean Union."
Final Step! Slice, Print, and Admire!
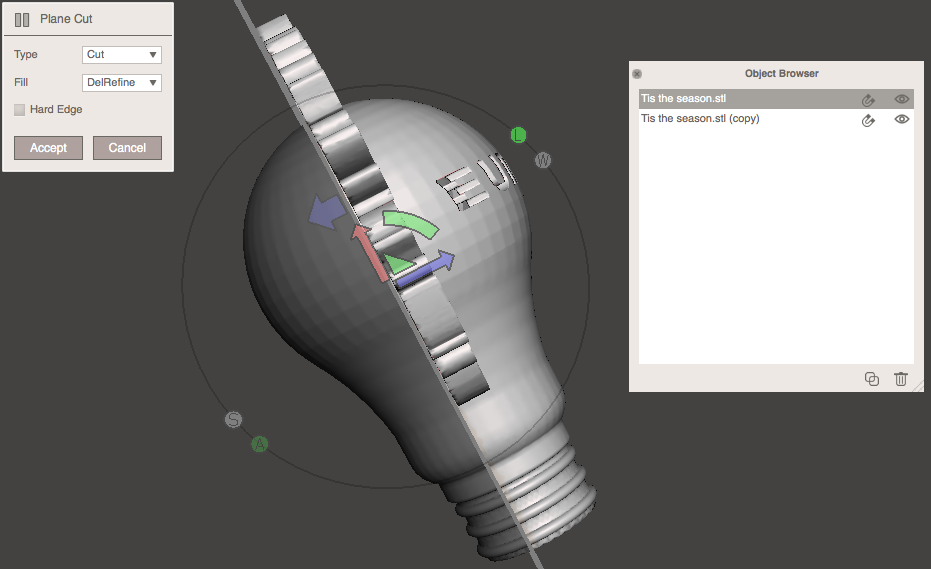
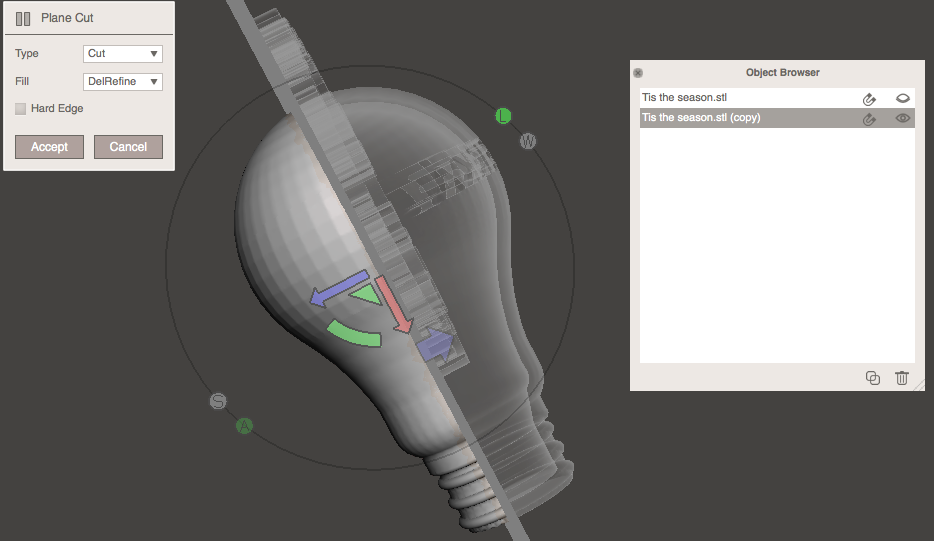
Now, to insert a light so the ornament shines, then you need to slice the ornament in half to allow a little Christmas light to fit inside.
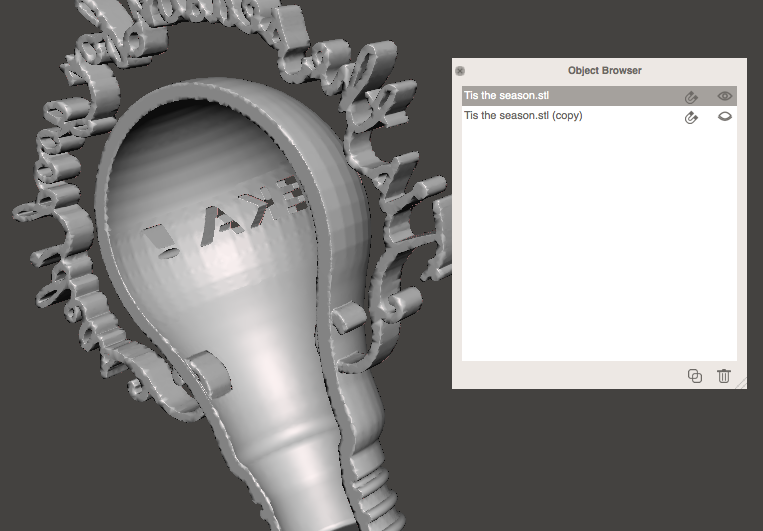
Still in Meshmixer, duplicate your model. Selecting the first copy, choose Edit → Plane Cut → Cut. Adjust the cutter plane so that it is just behind (but parallel to) the text, and hit Accept. Then, select the second copy and also set the cutter plane to right behind the text. However, before cutting, using the rotate arrow, flip it 180 degrees to the original (use the tick marks to get an exact measurement). Then hit Accept.
Now you have your two parts of the ornament! You'll see there is a hollow space in the center of the lightbulb. When you print out the ornament, be sure to hollow out any support material from this area. If you have a string of lights, this will allow you to feed one light inside the hollow space, with the rest of the lights outside of it. You can tape or glue the ornament around the light.
Then, you can tie a string between the letter "o" in "season" and the loop in the letter "f" in "for" (like the back of a picture frame on the wall), loop your wire hook around the string, and hang your lovely new ornament on the tree! (Alternatively, you can loop the thread through the center loop at the base of the "n" in "season," attach your wire hook to that, and you're done.)
'Tis (always) the season for good ideas. Hope you enjoy!