Organic Root Clock
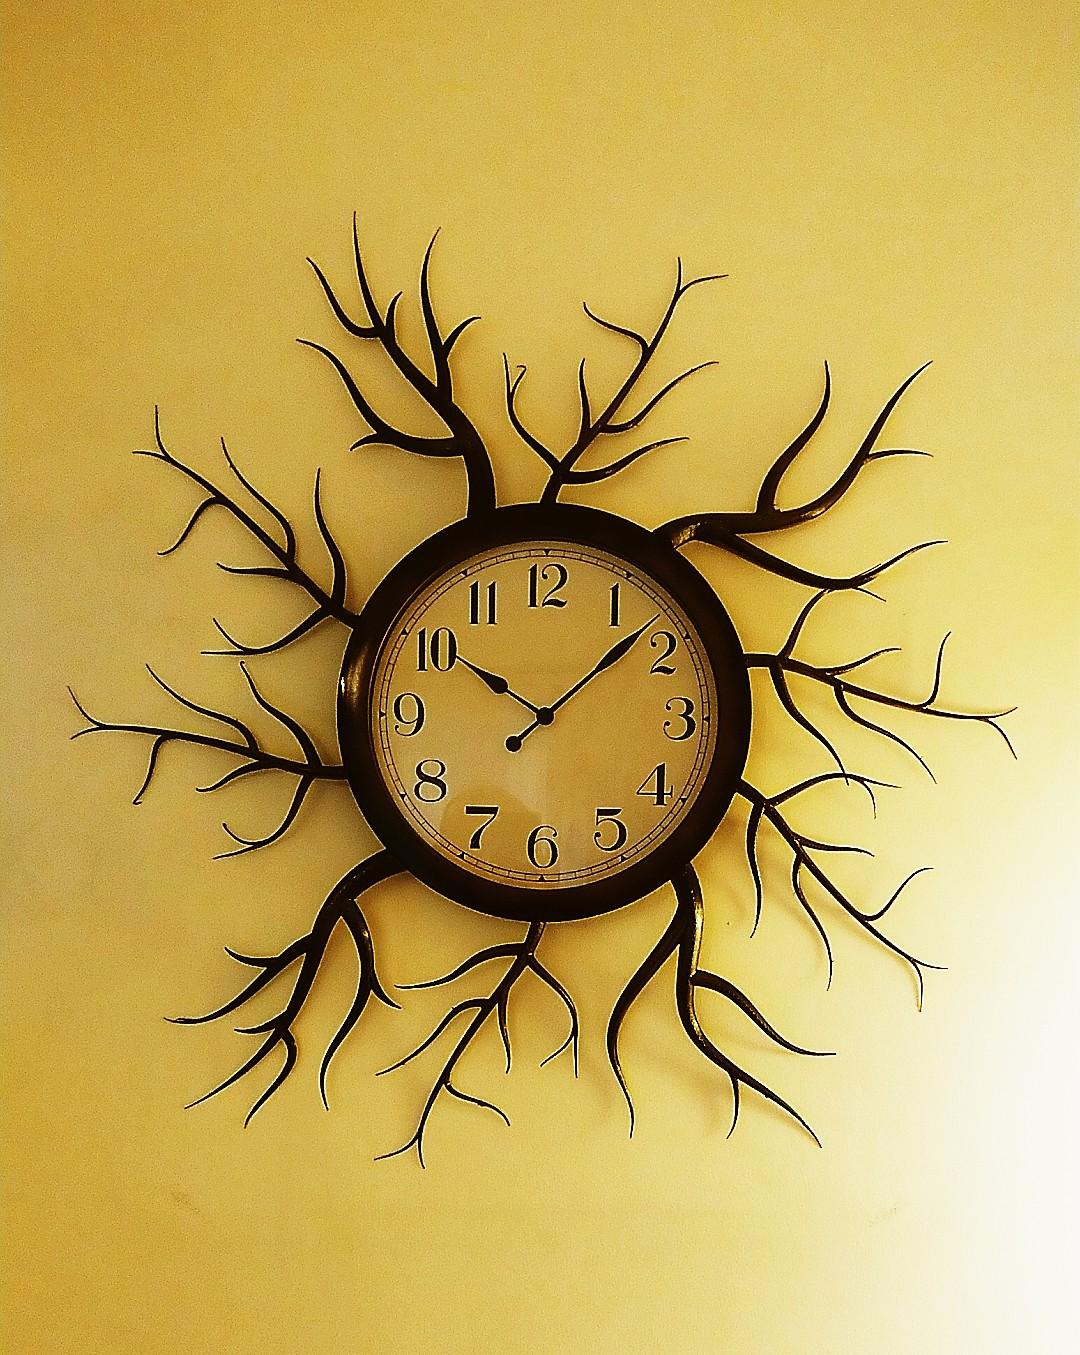
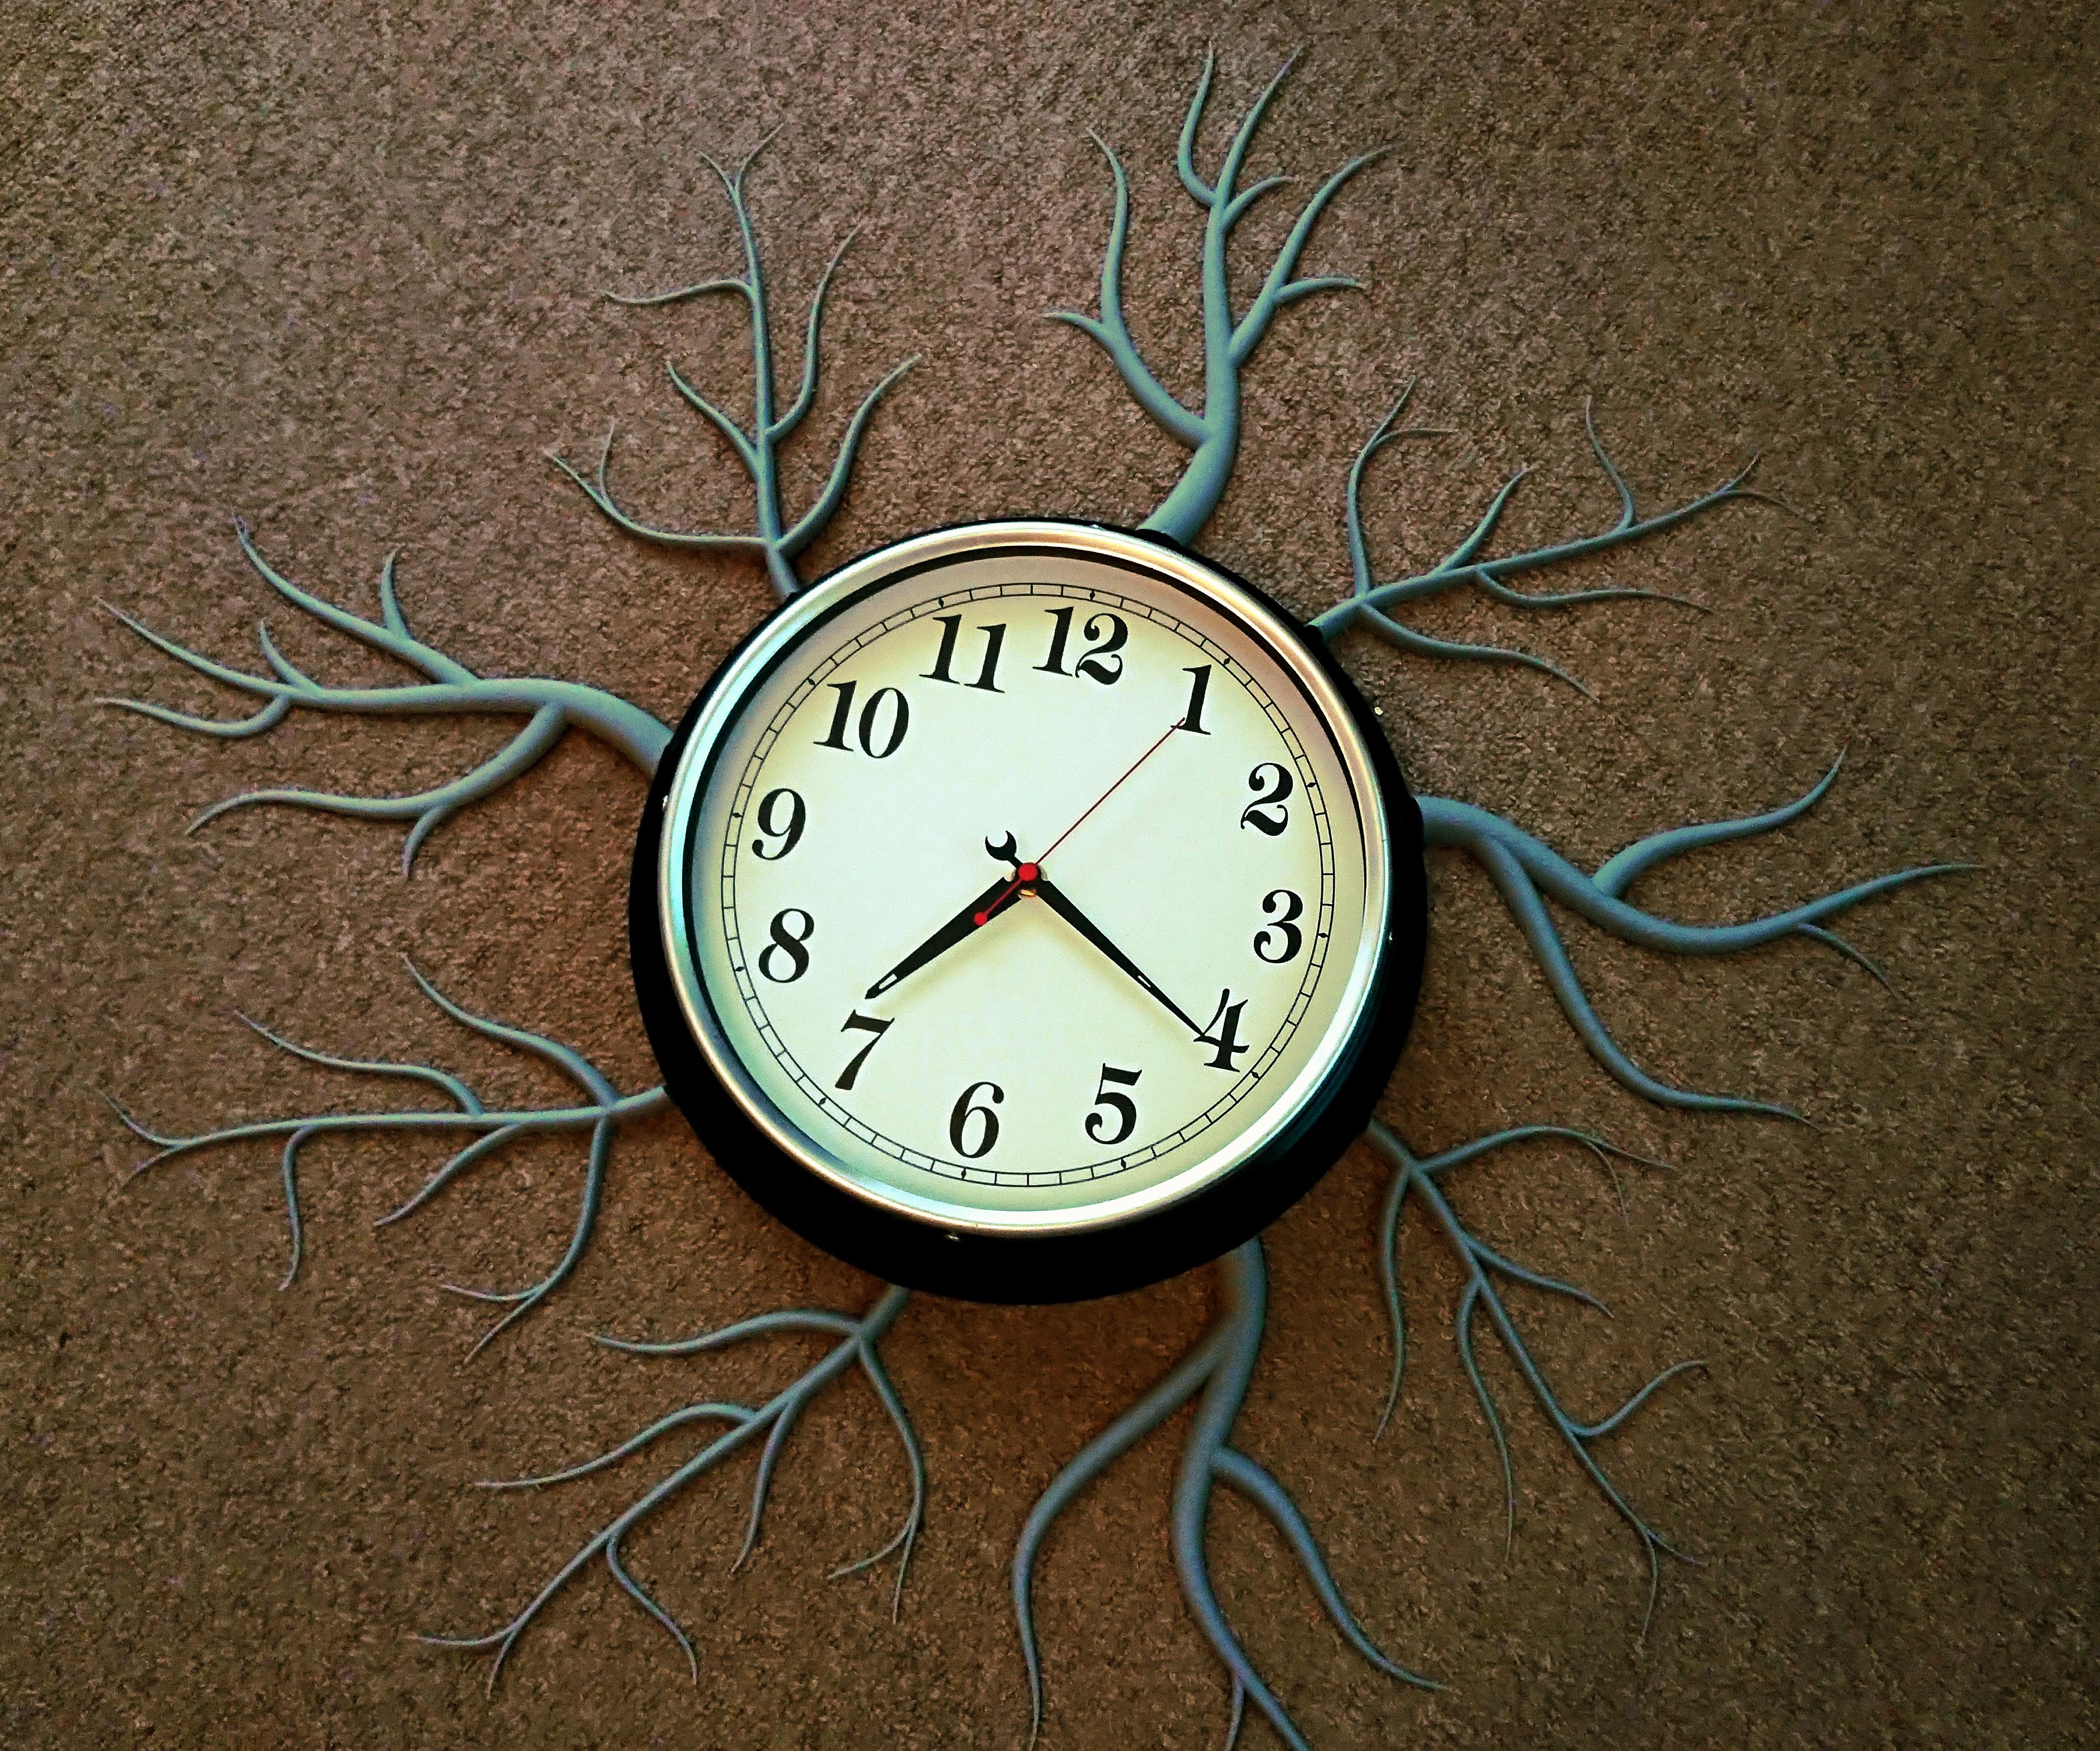
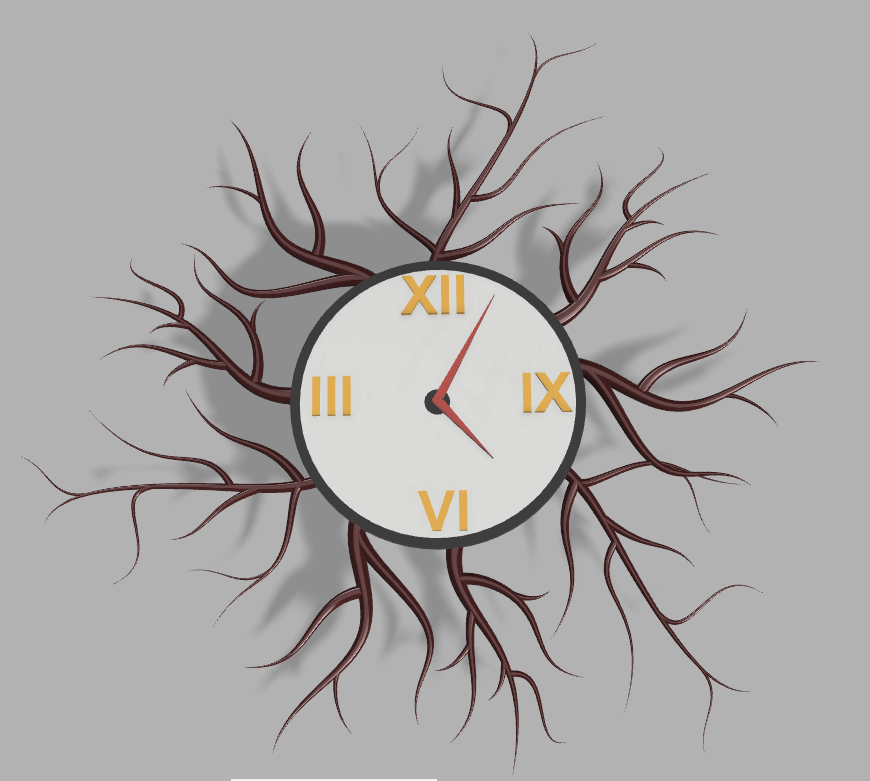
A while ago I started to play with Fusion 360 and ZBrush and organic shapes like LED flowers, voronoi patterns and kaiju (aka monsters). Few weeks ago I come up with idea of making wall clock with roots, that looks natural, organic.
In this Instructable I will how you step by step how to quickly create organic shapes in Fusion 360 and how to attach them to the clock.
Supplies
- Wall clock
- PLA (or any other 3D printing material)
- Acrylic spray paint (black, brown, green)
- Superglue (Gorilla superglue)
- Insulation tape
Tools:
- 3D Printer
- Hair dryer
- Scissors
Software:
- 3D printing slicing software (for example Cura, Simplify, Sli3er)
- Fusion 360
Fusion 360 Part 1
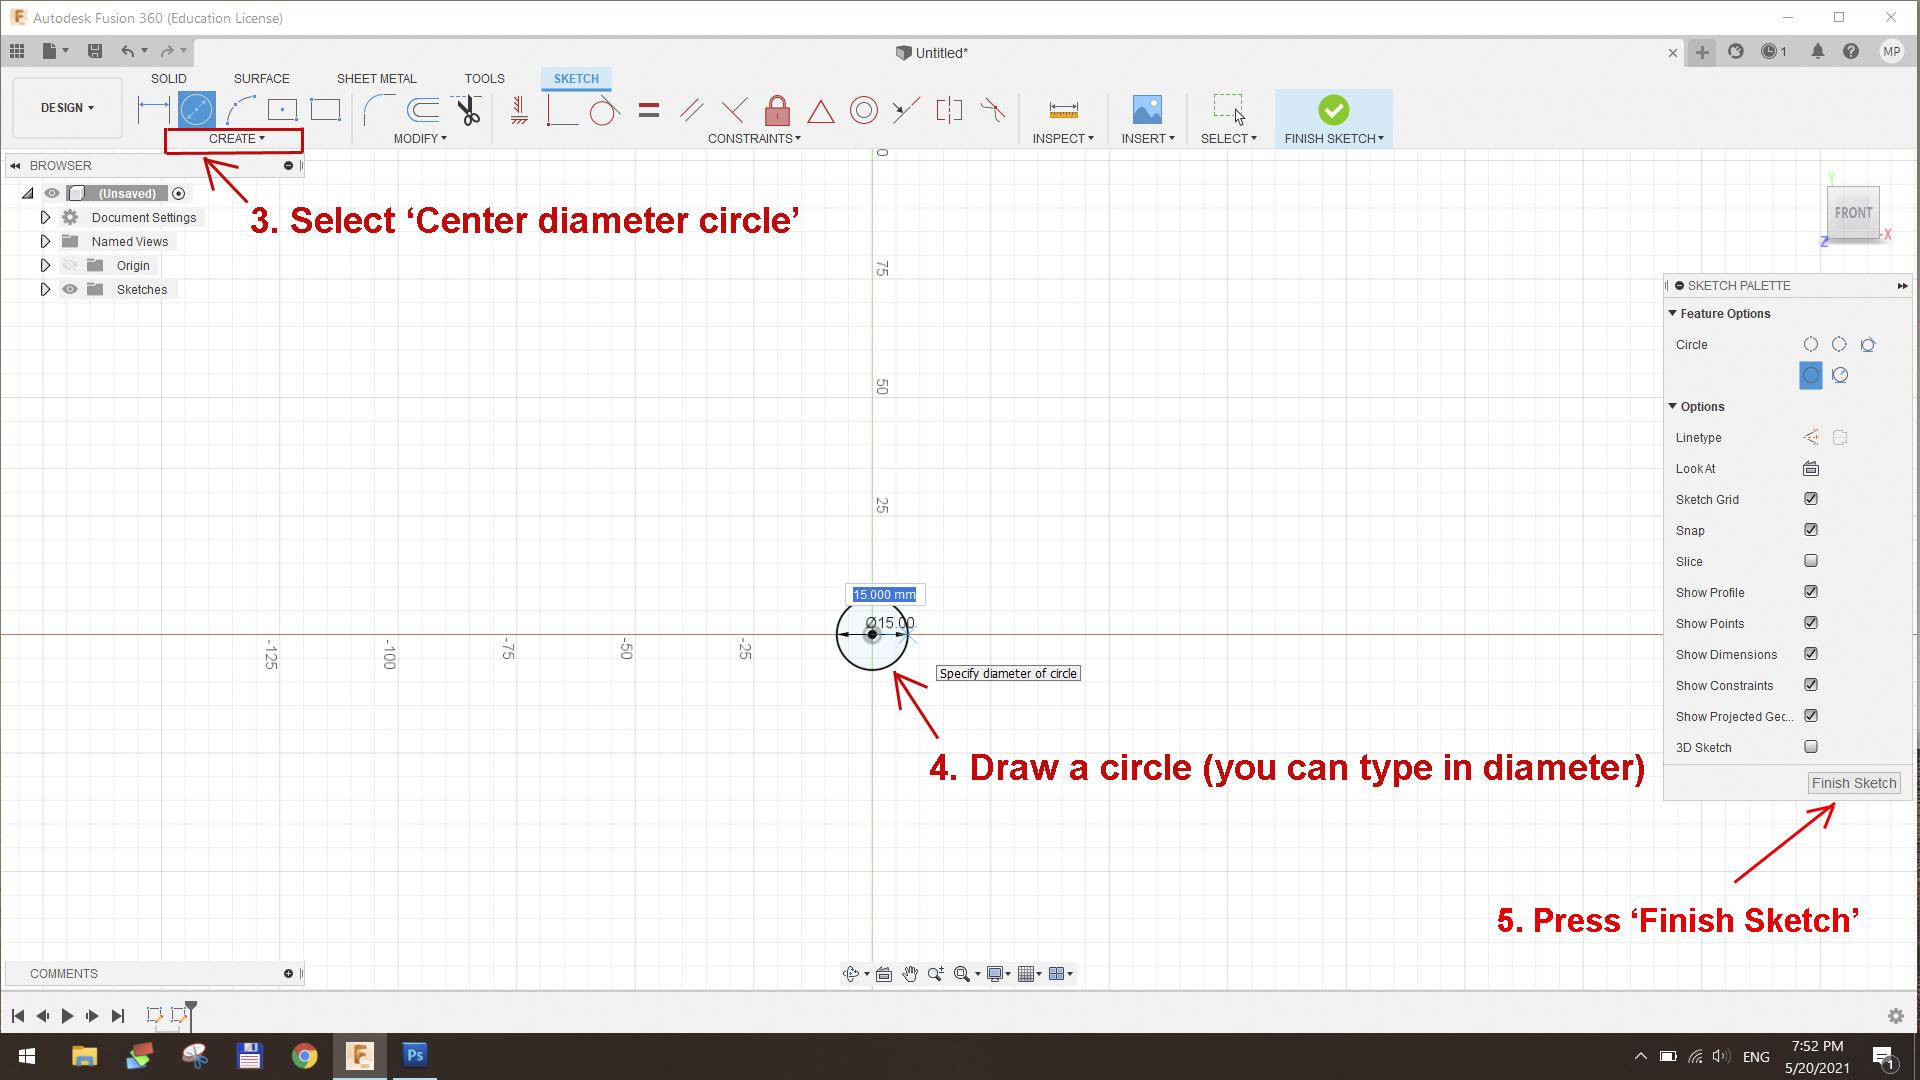
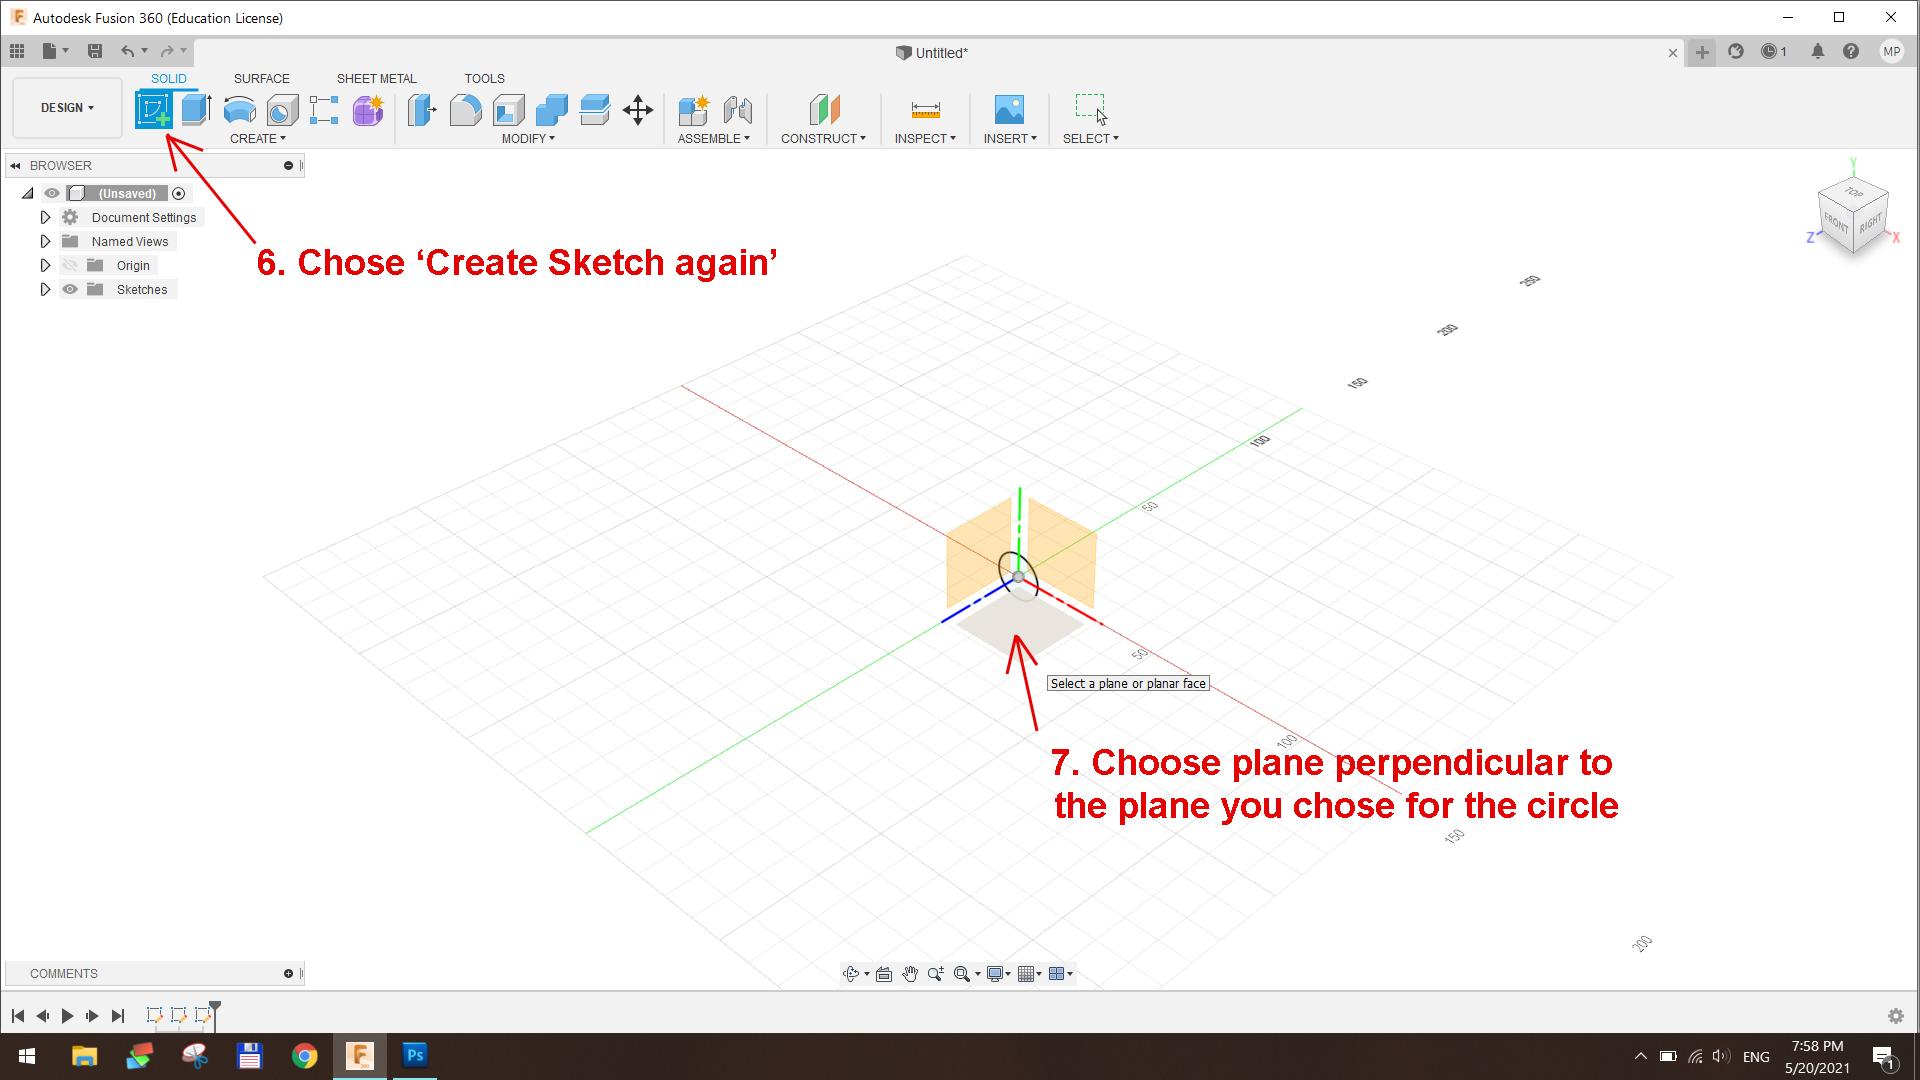
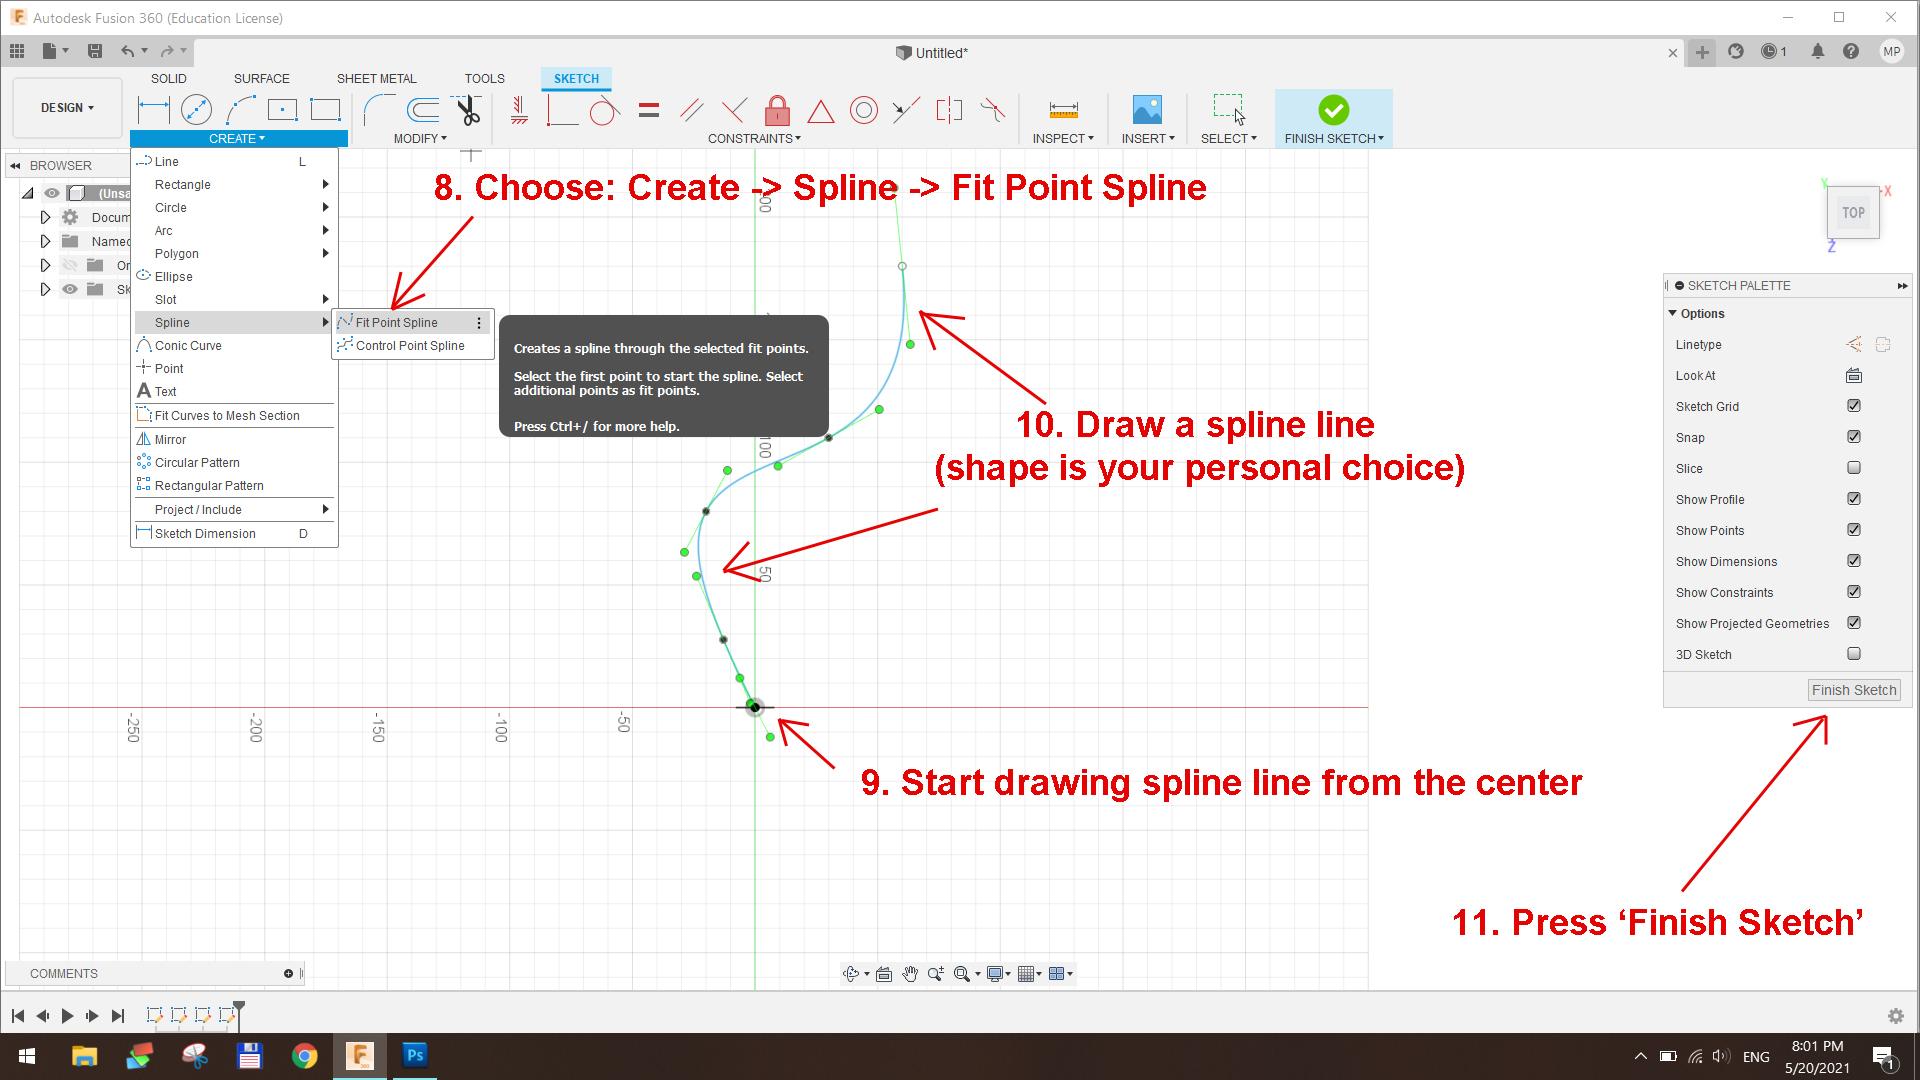
You can download Fusion 360 from here: https://www.autodesk.co.uk/products/fusion-360/per...
After downloading, make sure you sign up and select hobbyist license for personal use and you will get a free subscription of Fusion 360.
Once it's installed, I would recommend to watch quick introduction tutorial, which you can find on YouTube to familiarize yourself with the interface, menu and mouse/keyboard controls.
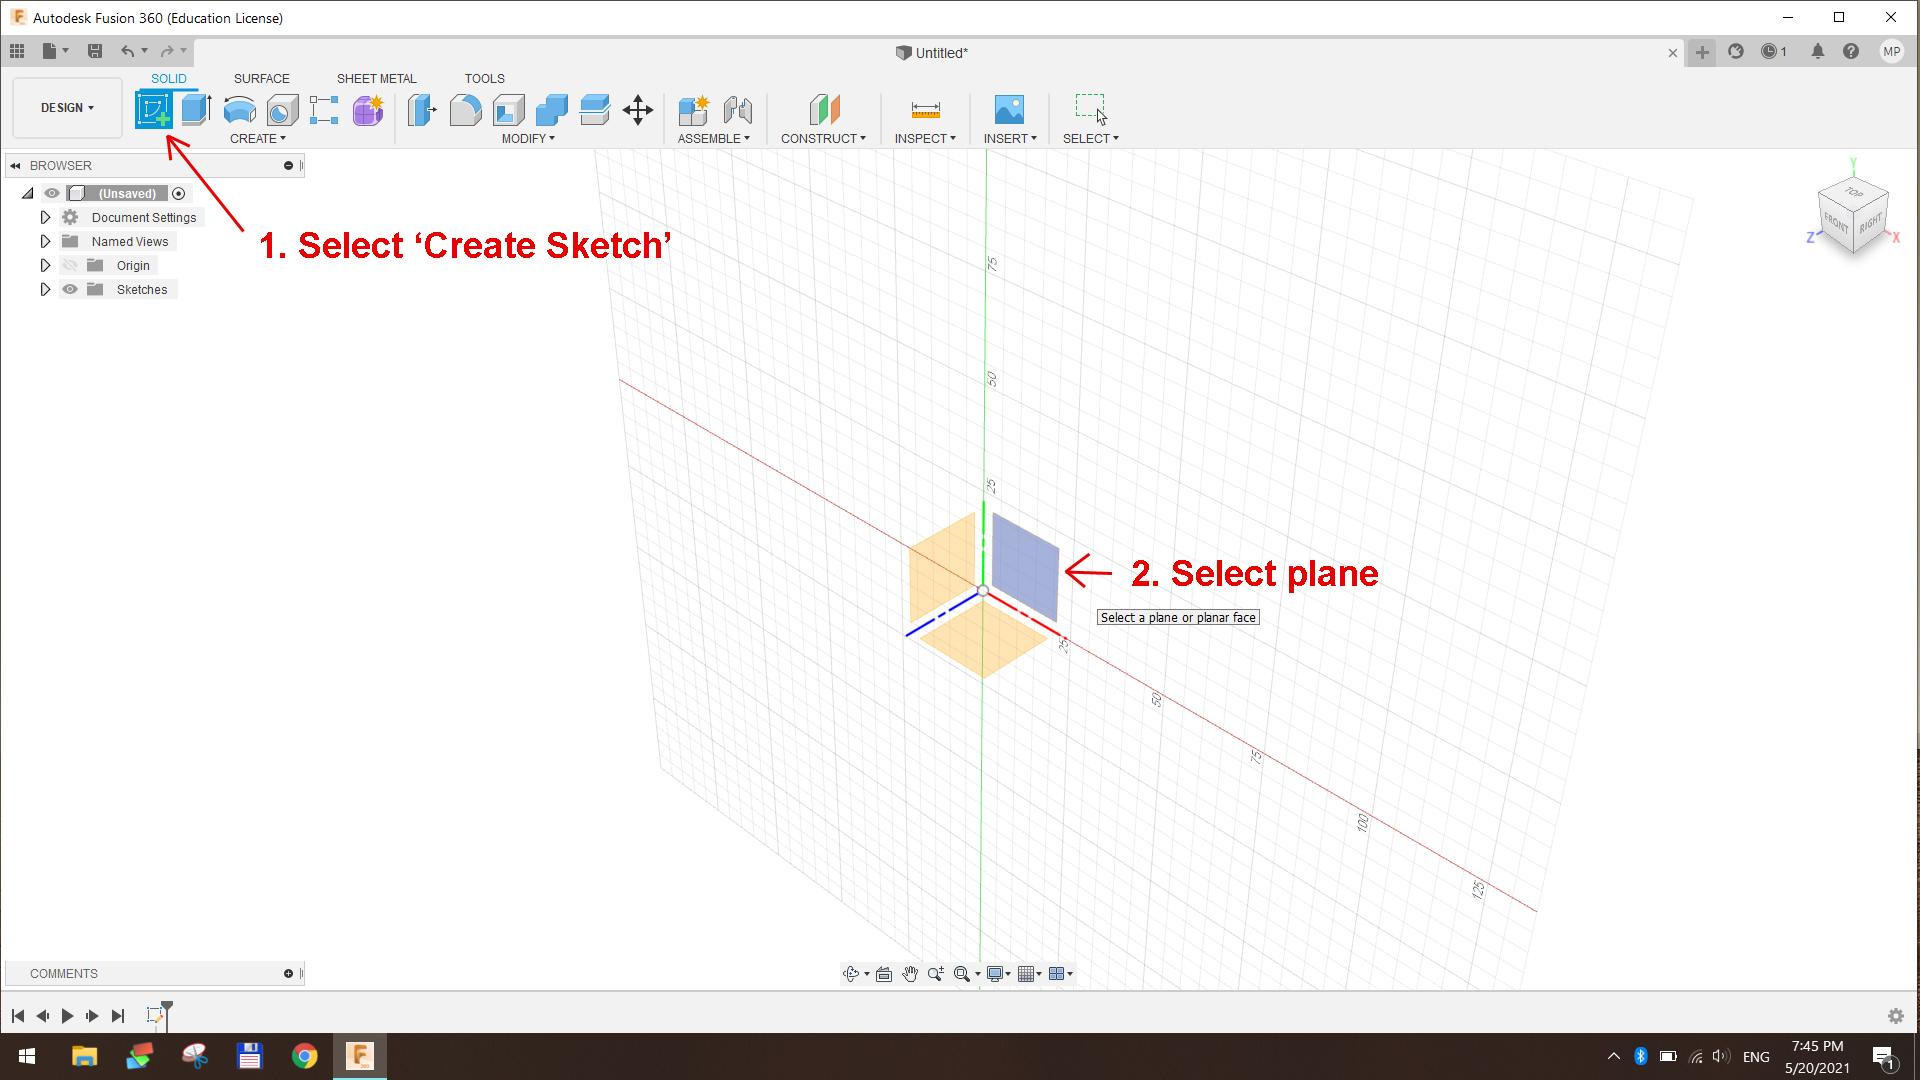
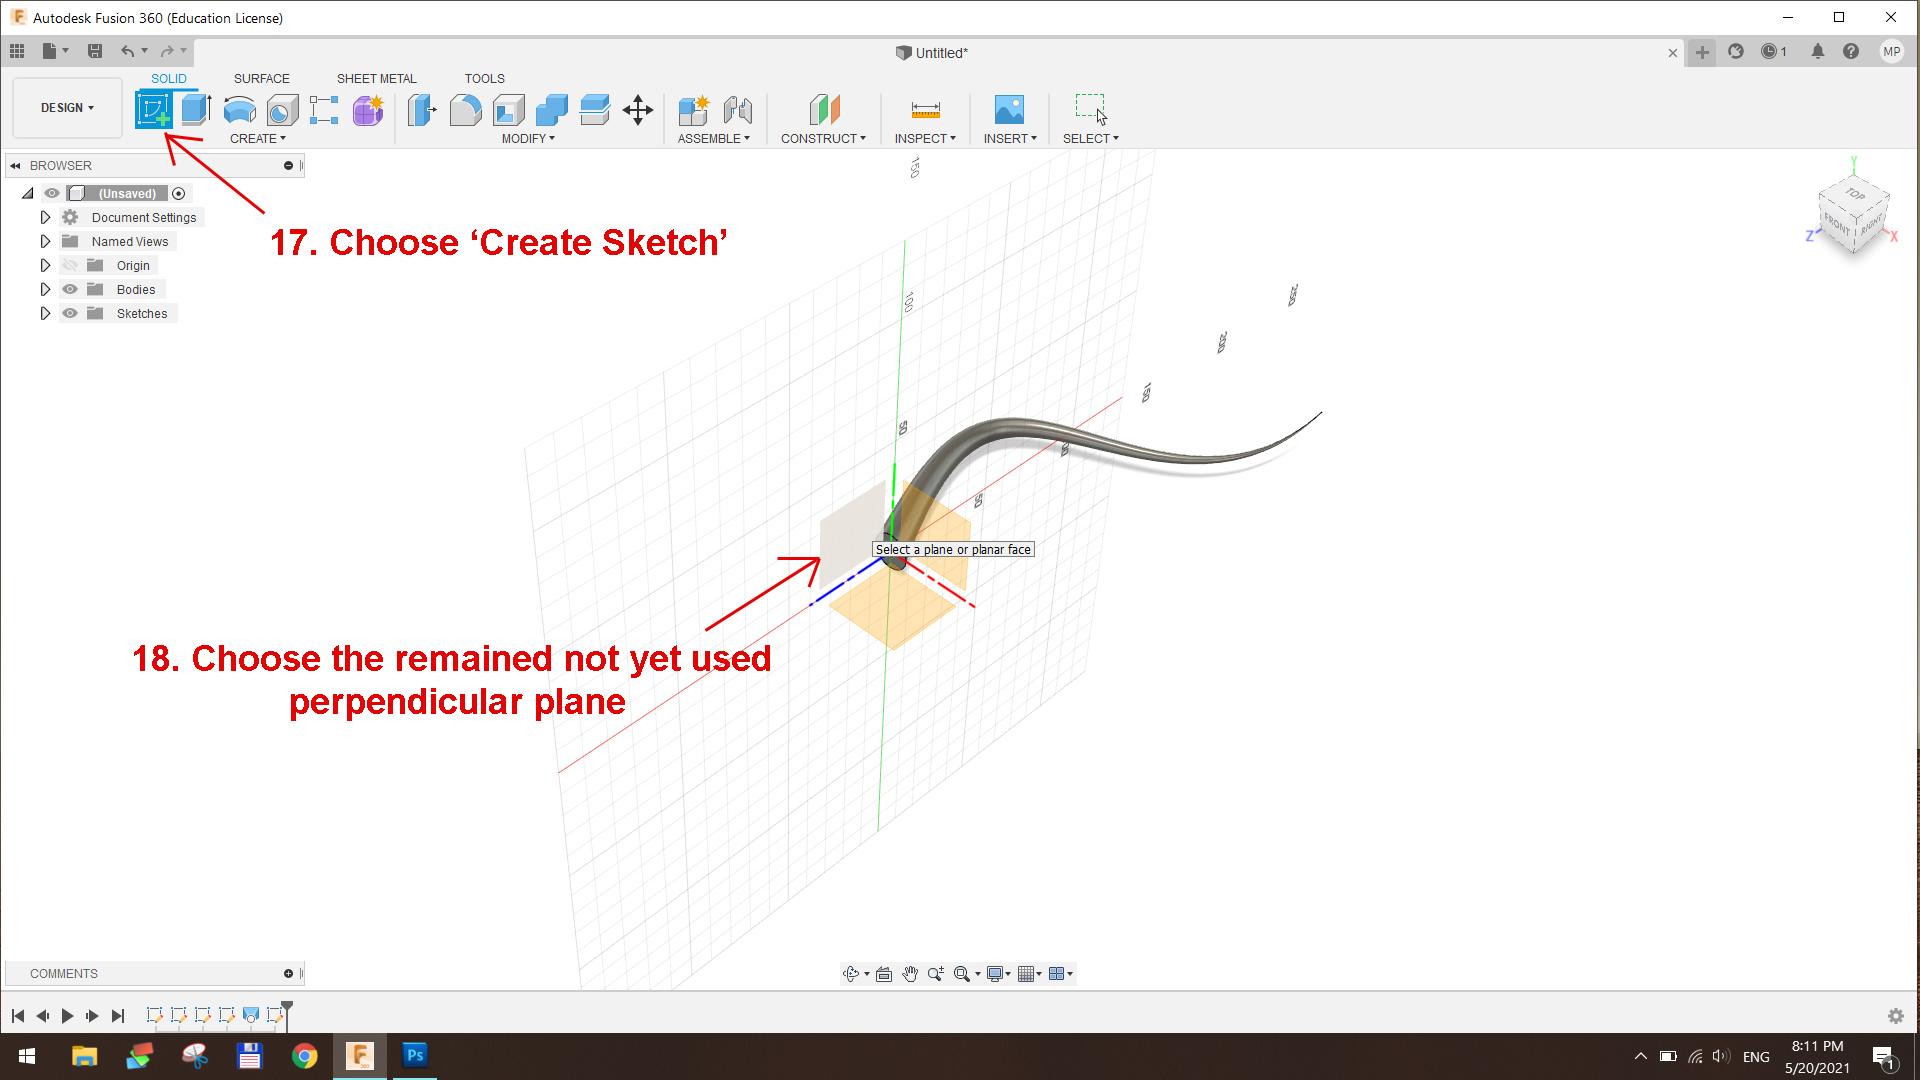
Now we are ready to make our own root like shapes. Above you can see screenshots with step by step instructions. We are starting with selecting the plane (we have x, y, z to choose) and then we draw a circle. After that we choose another plane (perpendicular to the plane with the circle) and we draw a spline line (please see above pictures)
Fusion 360 Part 2
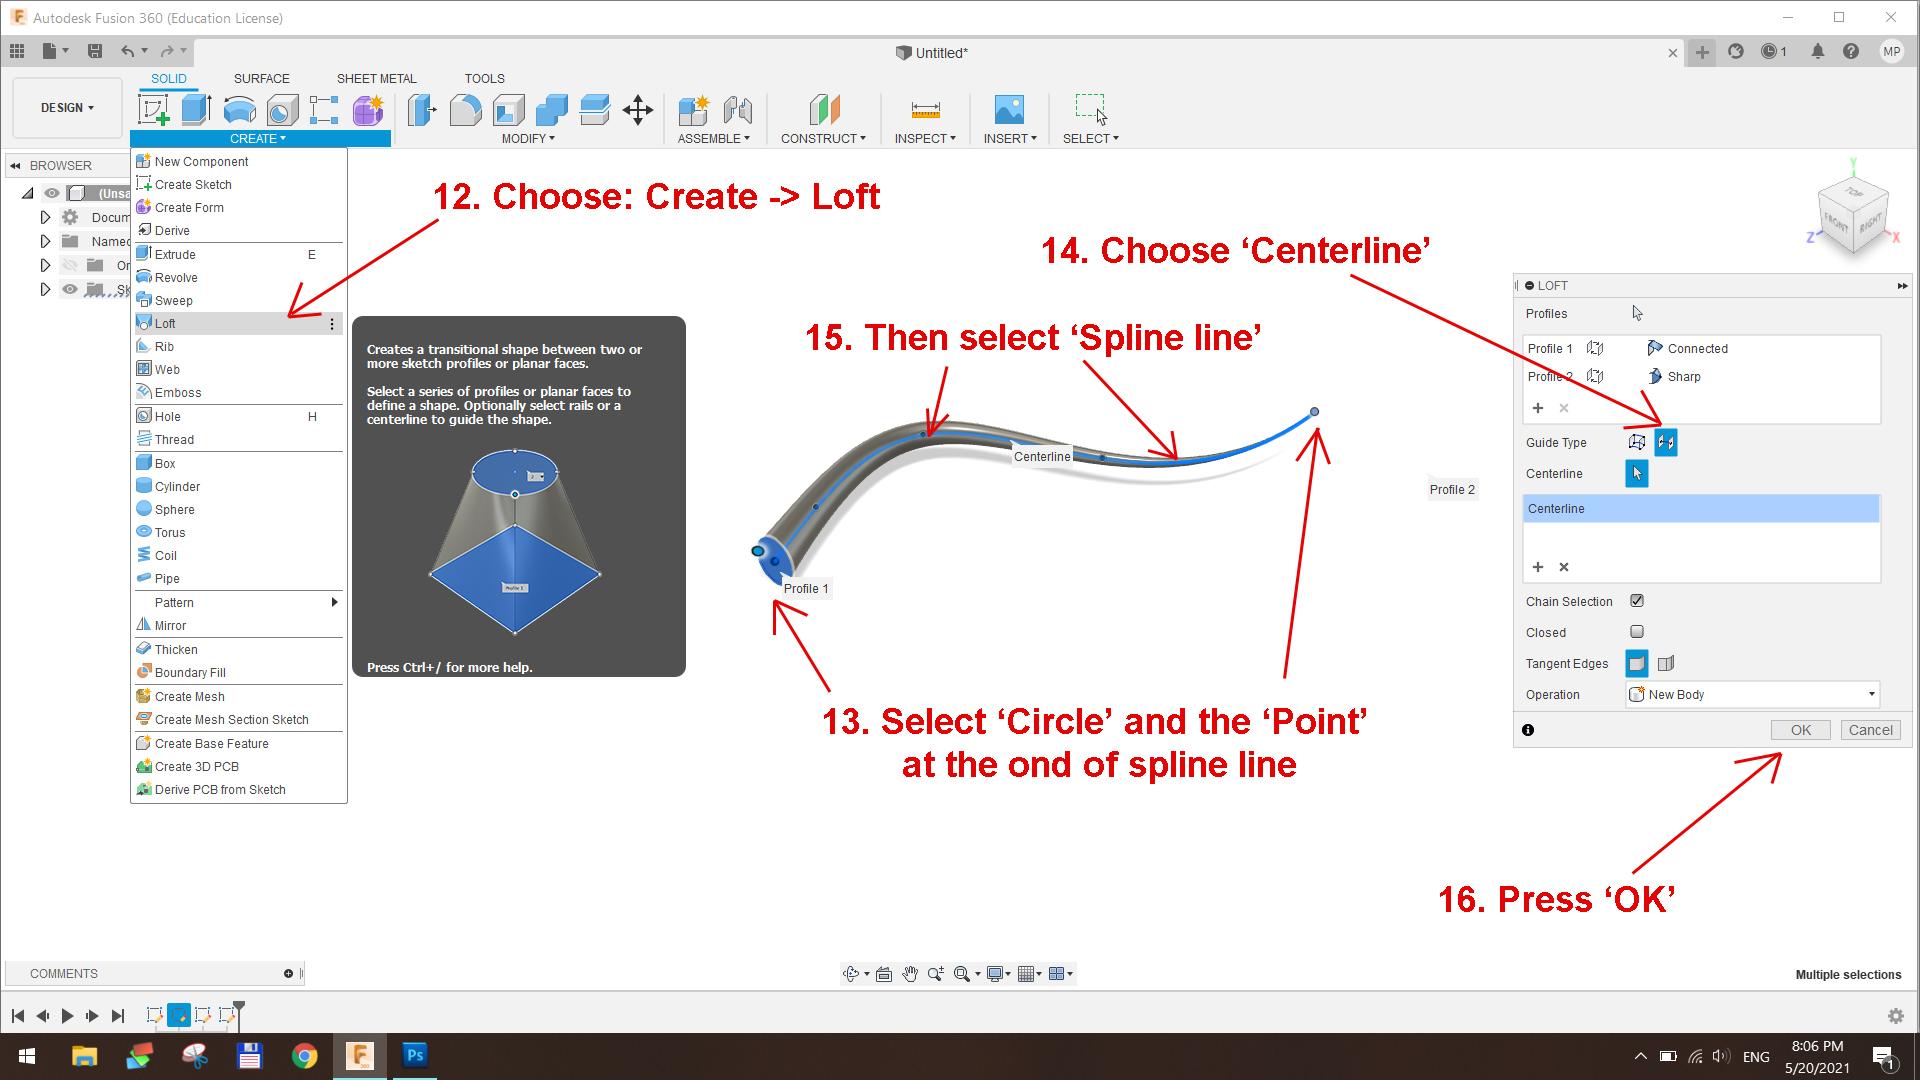
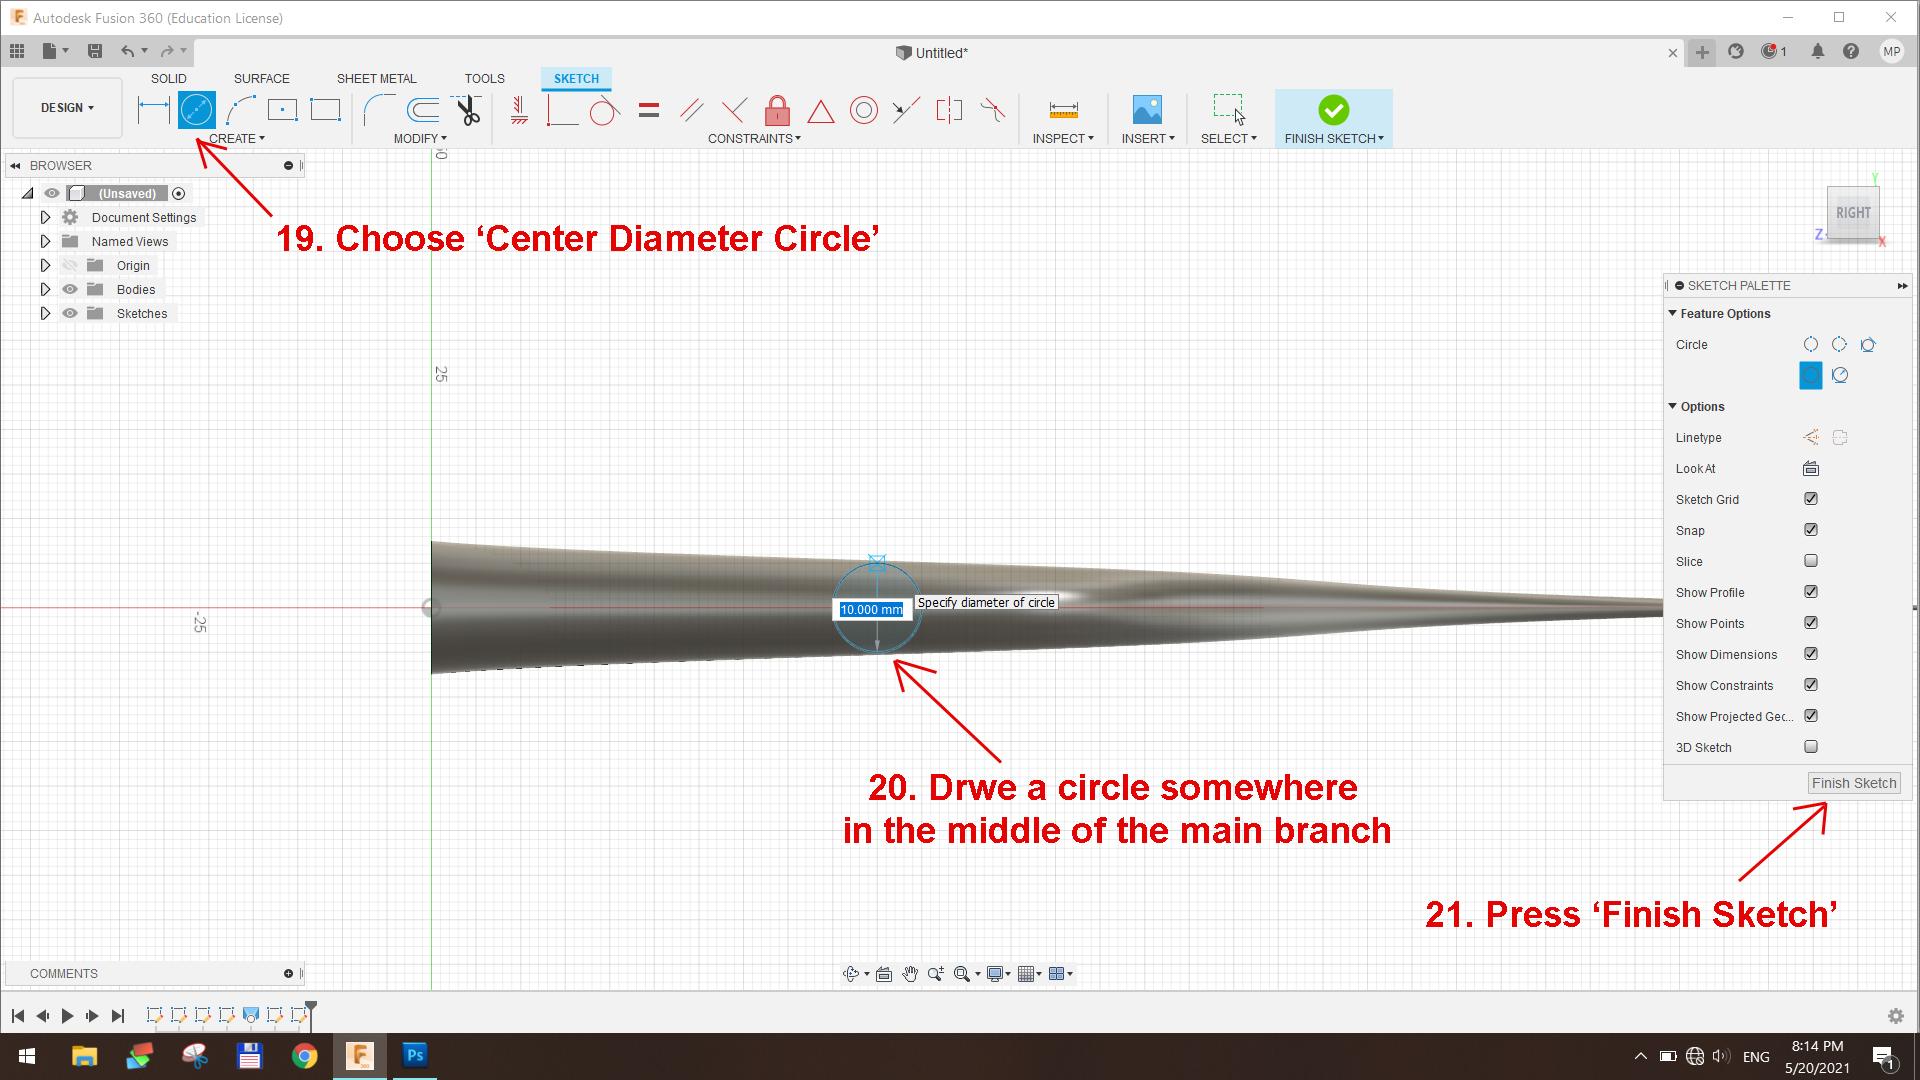
Now we can use 'Loft' tool (see above pictures for detailed instructions). We have to select our circle as the start point and the point at the end of spline line as the end point.
Fusion 360 will connect the circular surface with the point in the straight line. To make the circular pattern follow the spline line, you have to select 'Centerline' in the additional window which should appear on the left side of your screen (see above picture step 14).
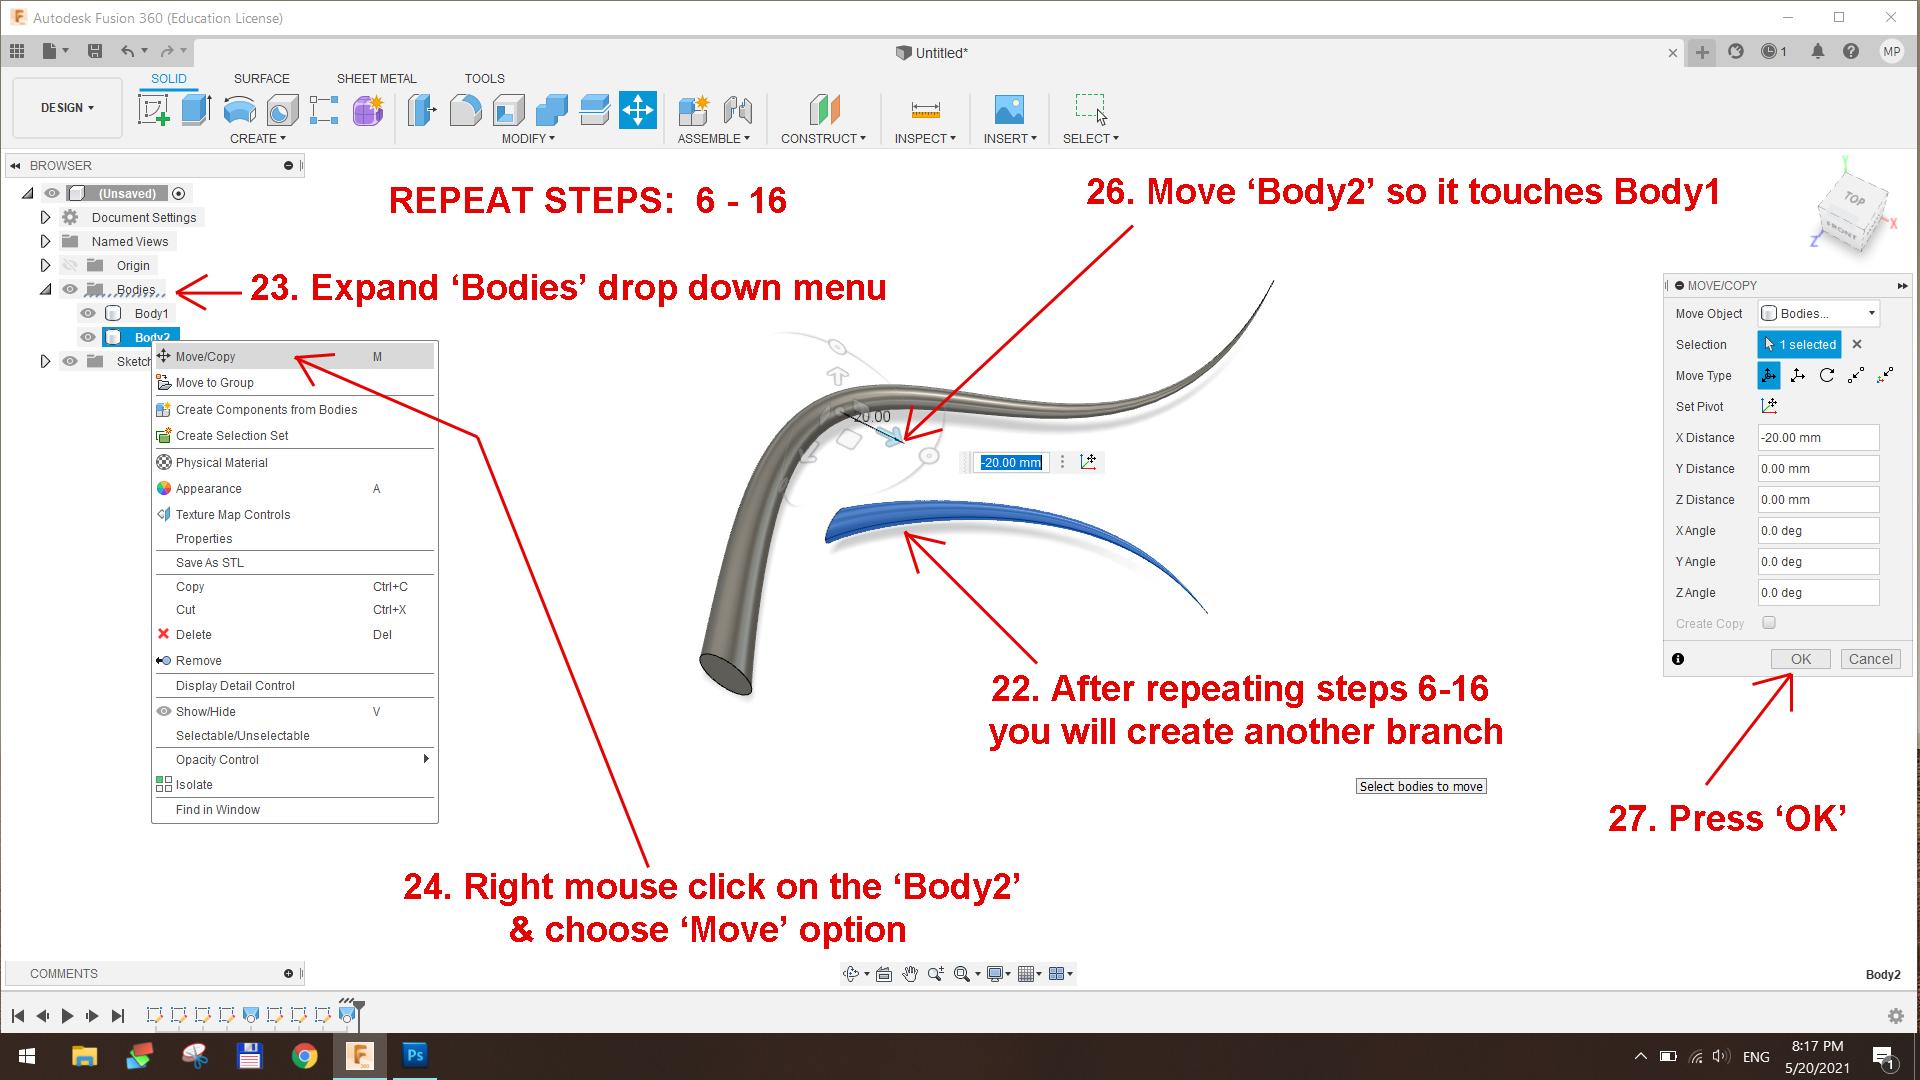
Once you will have your main root shape, choose another plane and draw another circle somewhere in the middle of the first shape and then repeat steps 6 to 16 to create another root like shape, but slightly smaller.
Fusion 360 Part 3
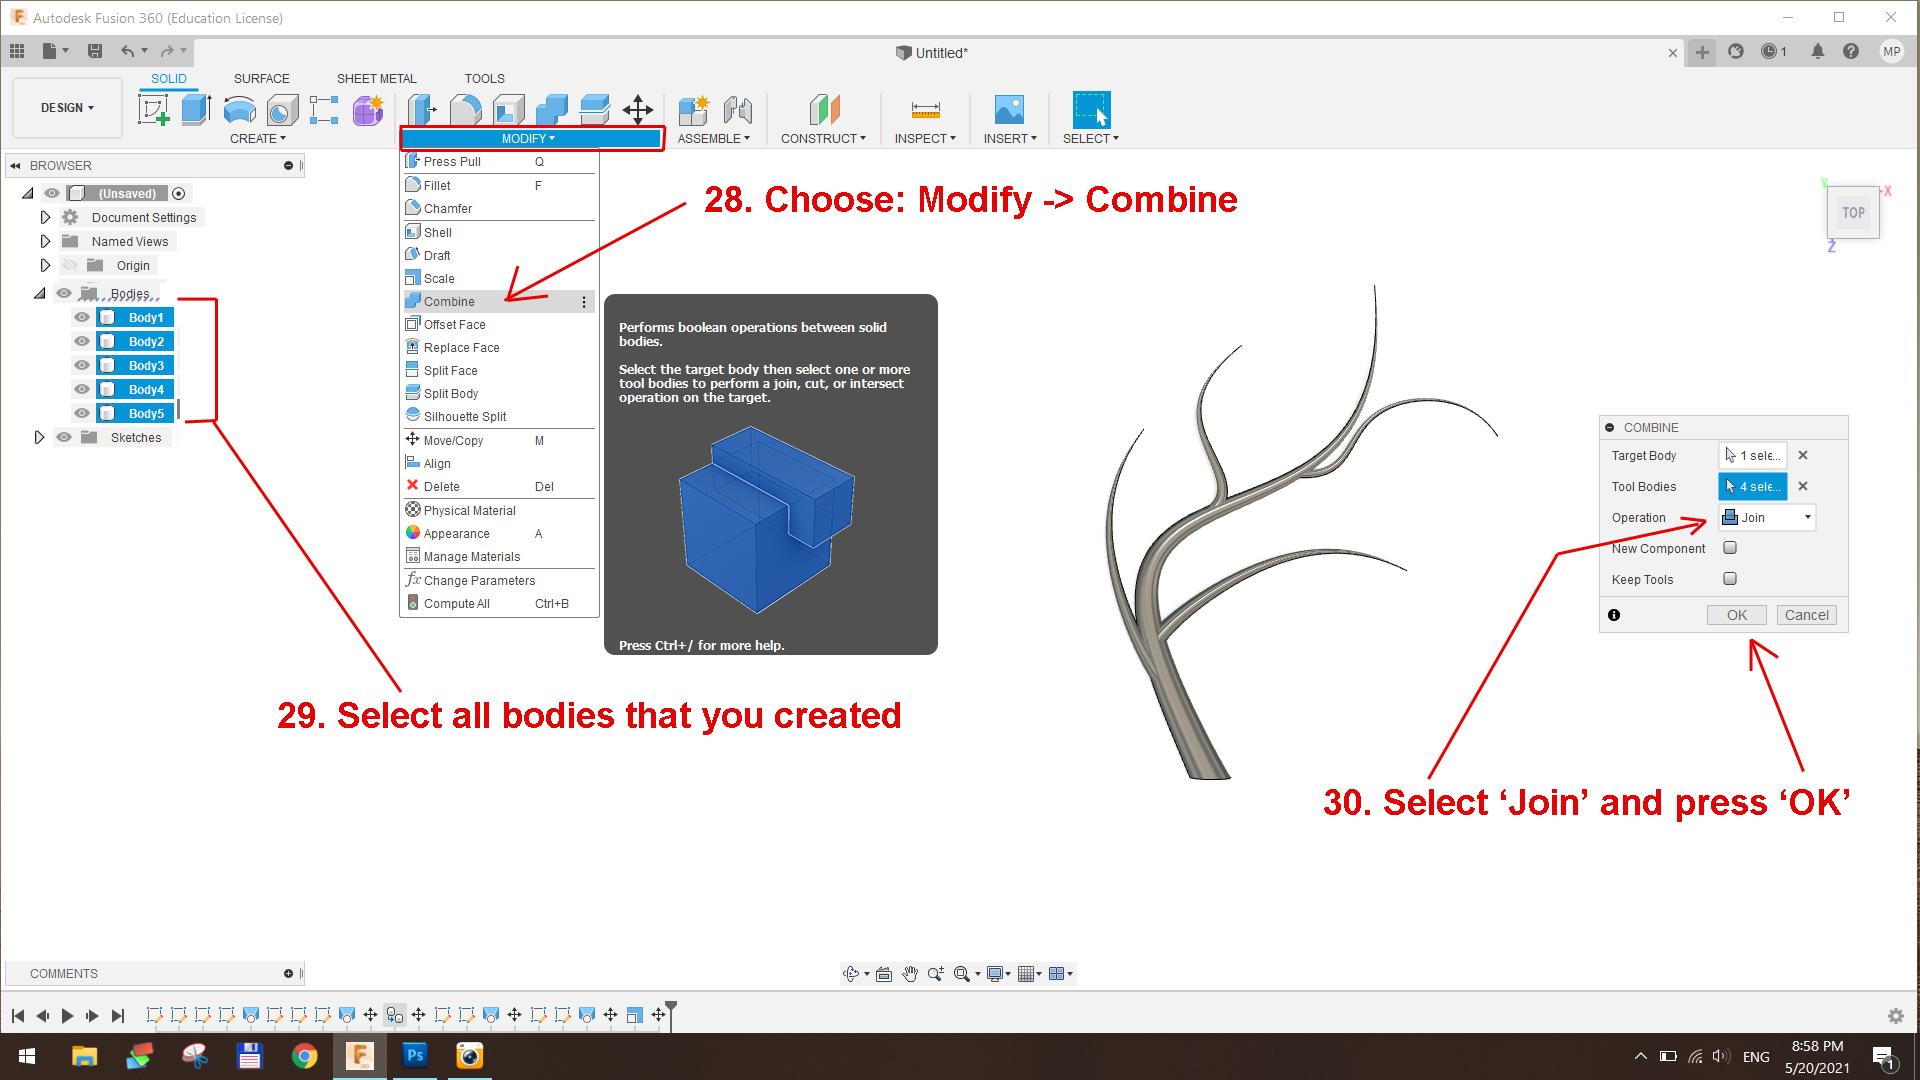
Repeat steps 6 to 16 couple more times to create more various size and shape roots and arrange them to your liking.
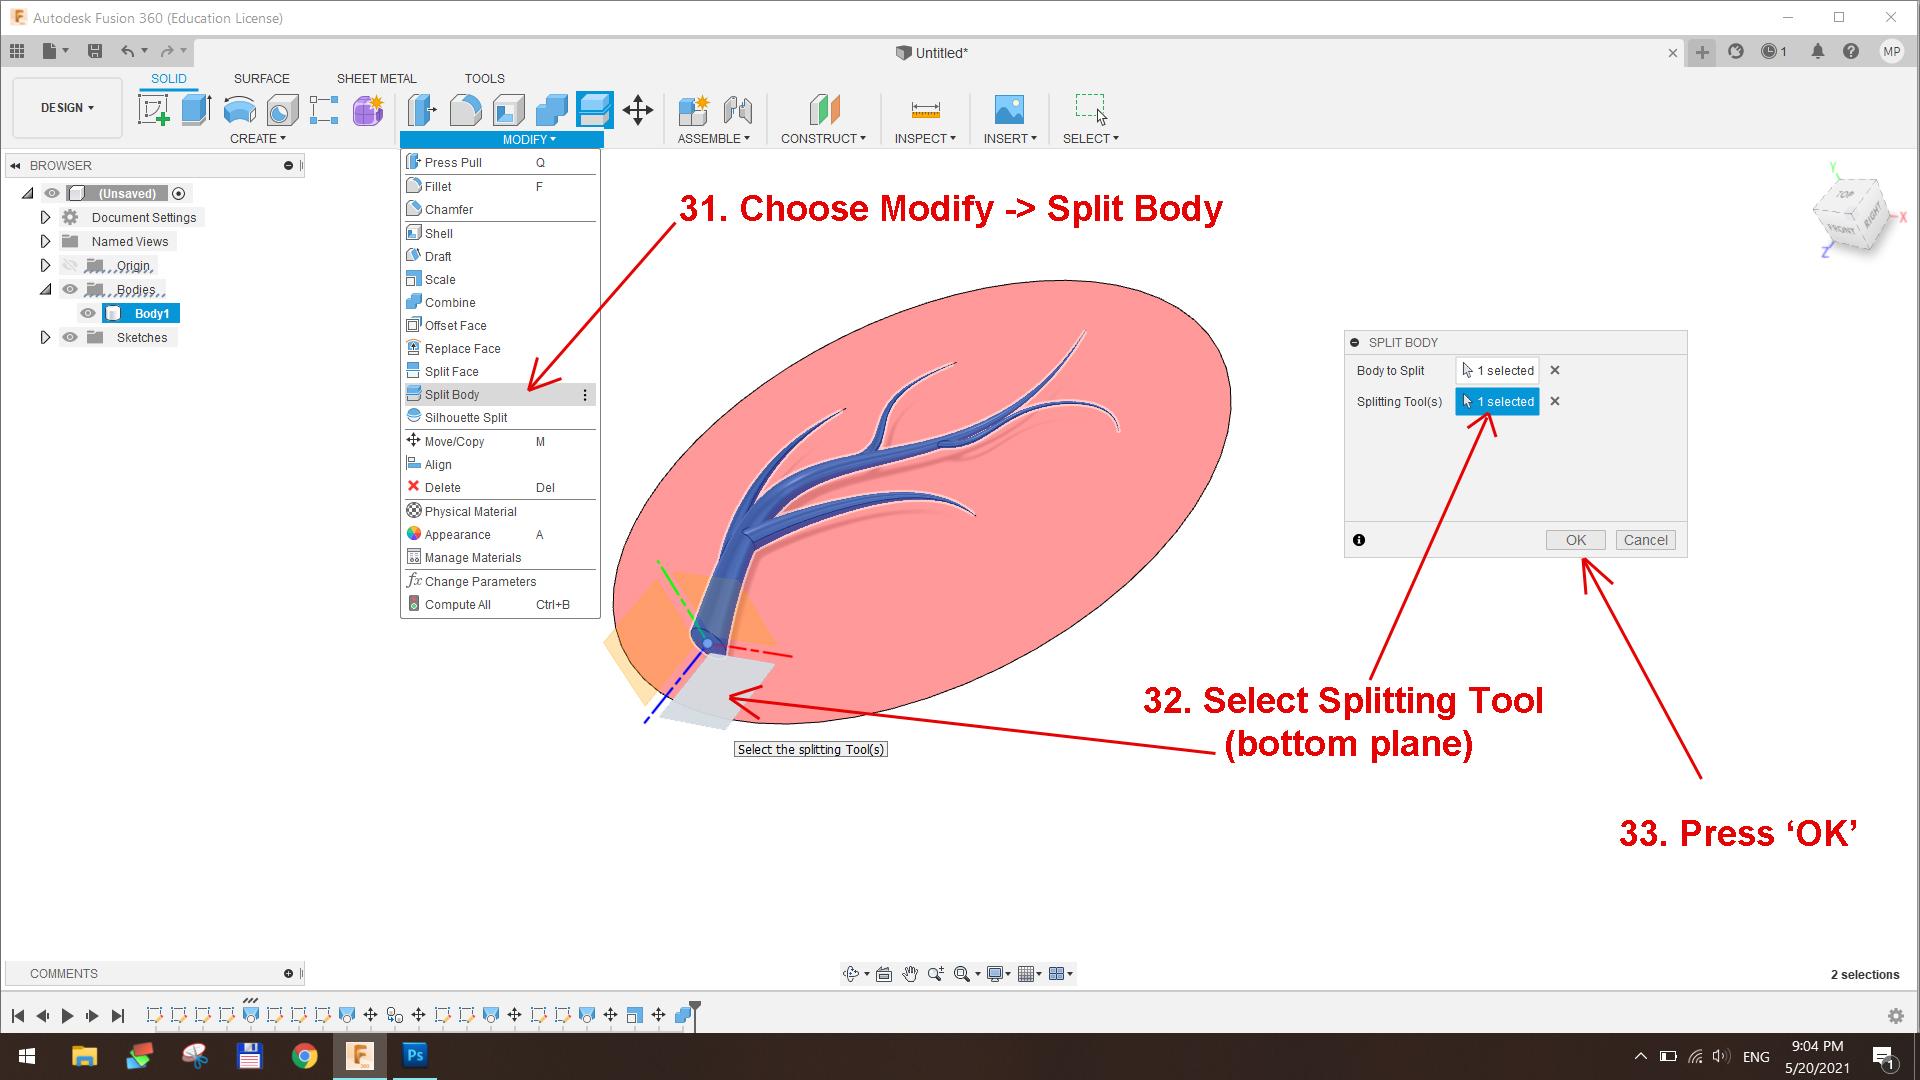
Make sure all roots are touching each other, otherwise Fusion 360 won't be able to combine them all into one solid model. Once you happy with the root arrangement go to Modify -> Combine and select all individual bodies (see picture above, step 28-30).
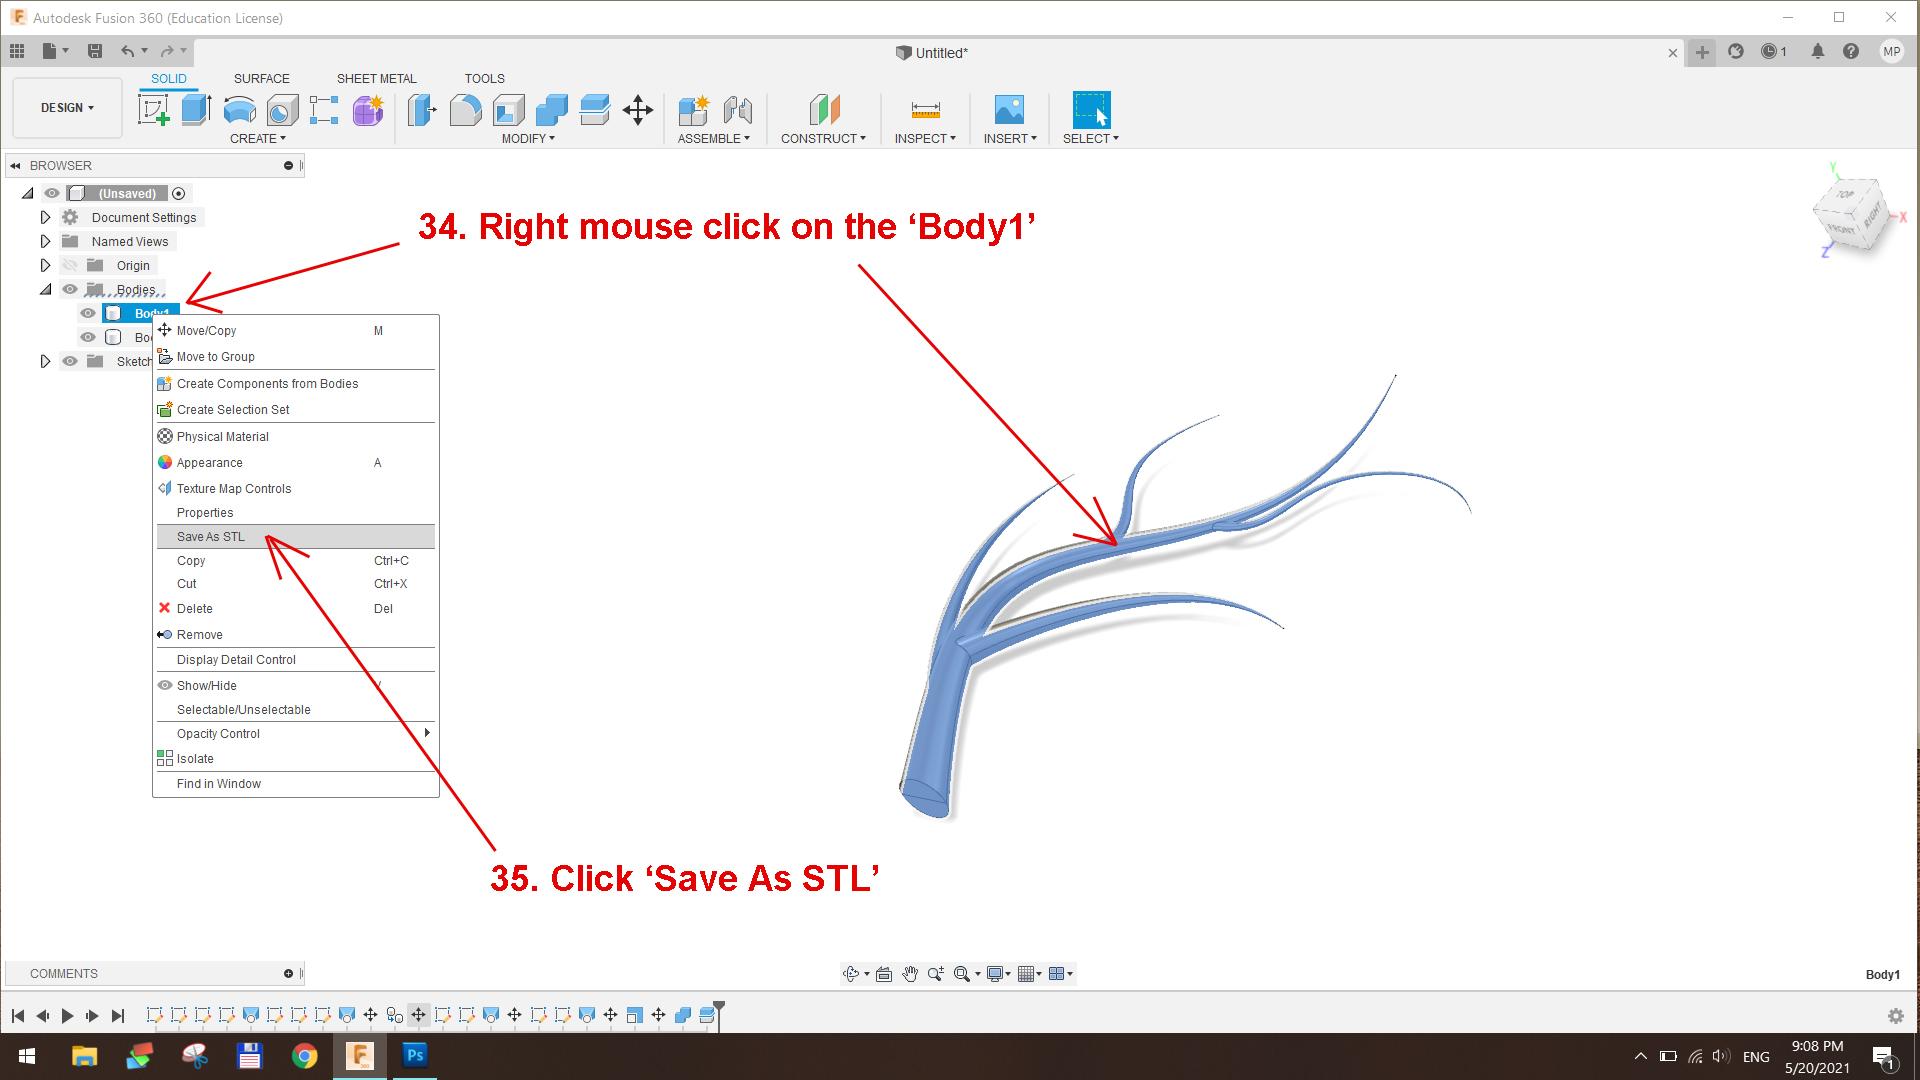
For easier 3D printing we want the roots to be flat at the base. The easiest way to do that is to split them in half and print the top part. To do that follow steps 31 to 35.
You can repeat all above steps to create more different roots, as many as you like. If you wish to skip part with creating your own root shapes you can download them in the next step as I designed few different shapes.
3D Printing
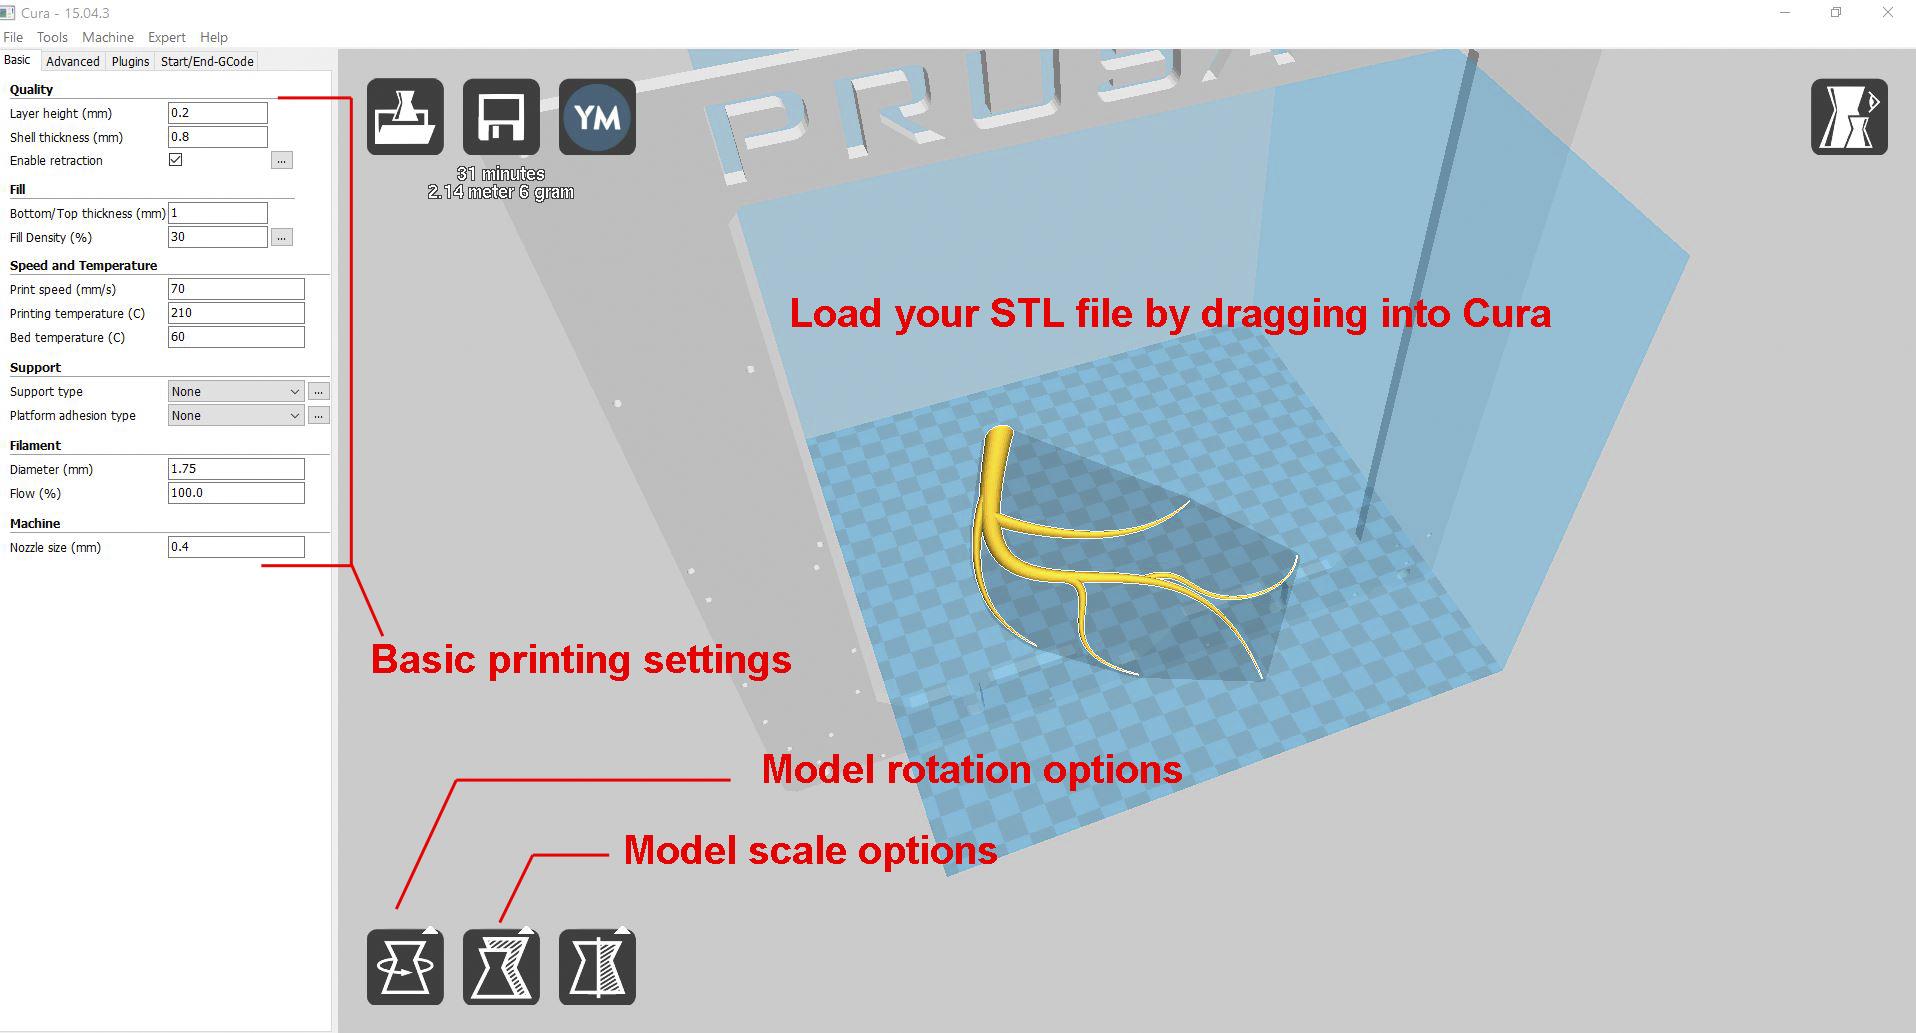
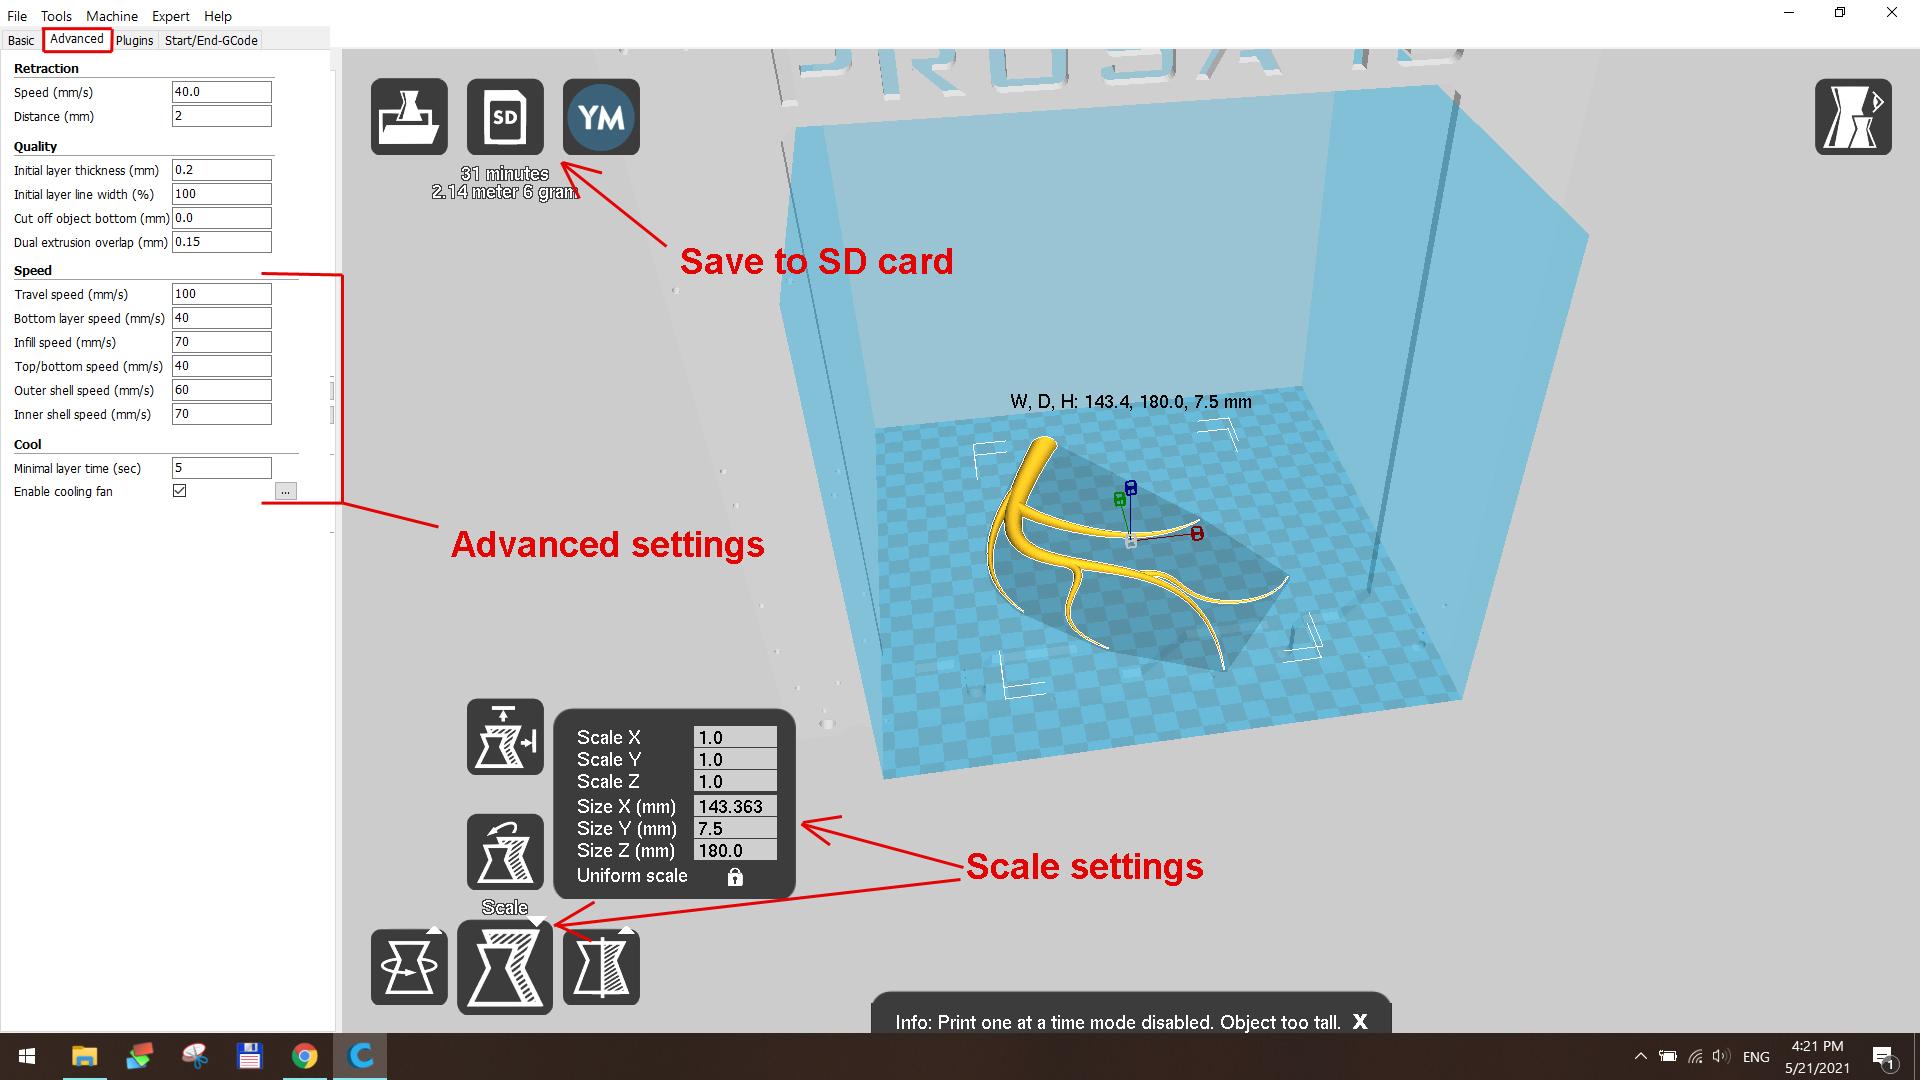
Now it's time to 3D print our root shapes. At this point I'm sure that you have your favourite slicing software, but in case you are beginning your journey with 3D printing I recommend to start with Cura: https://ultimaker.com/software/ultimaker-cura
You can get the newest version of the software, or if you like simpler, older version like me, you can click 'find previous version' at the bottom of the webpage.
I usually print in PLA (I recommend Polymaker brand) and I use 205 degrees Celsius for the hotend temperature and 50 degrees Celsius for the heated bed. Most of my prints are with 0.2mm layer height, but if you wish to print fine details then I would recommend to set 0.1mm layer height.
Infill between 20% - 30% is sufficient for this project and printing speed about 60mm/s (this depends on the make and model of your printer of course).
Attaching Roots
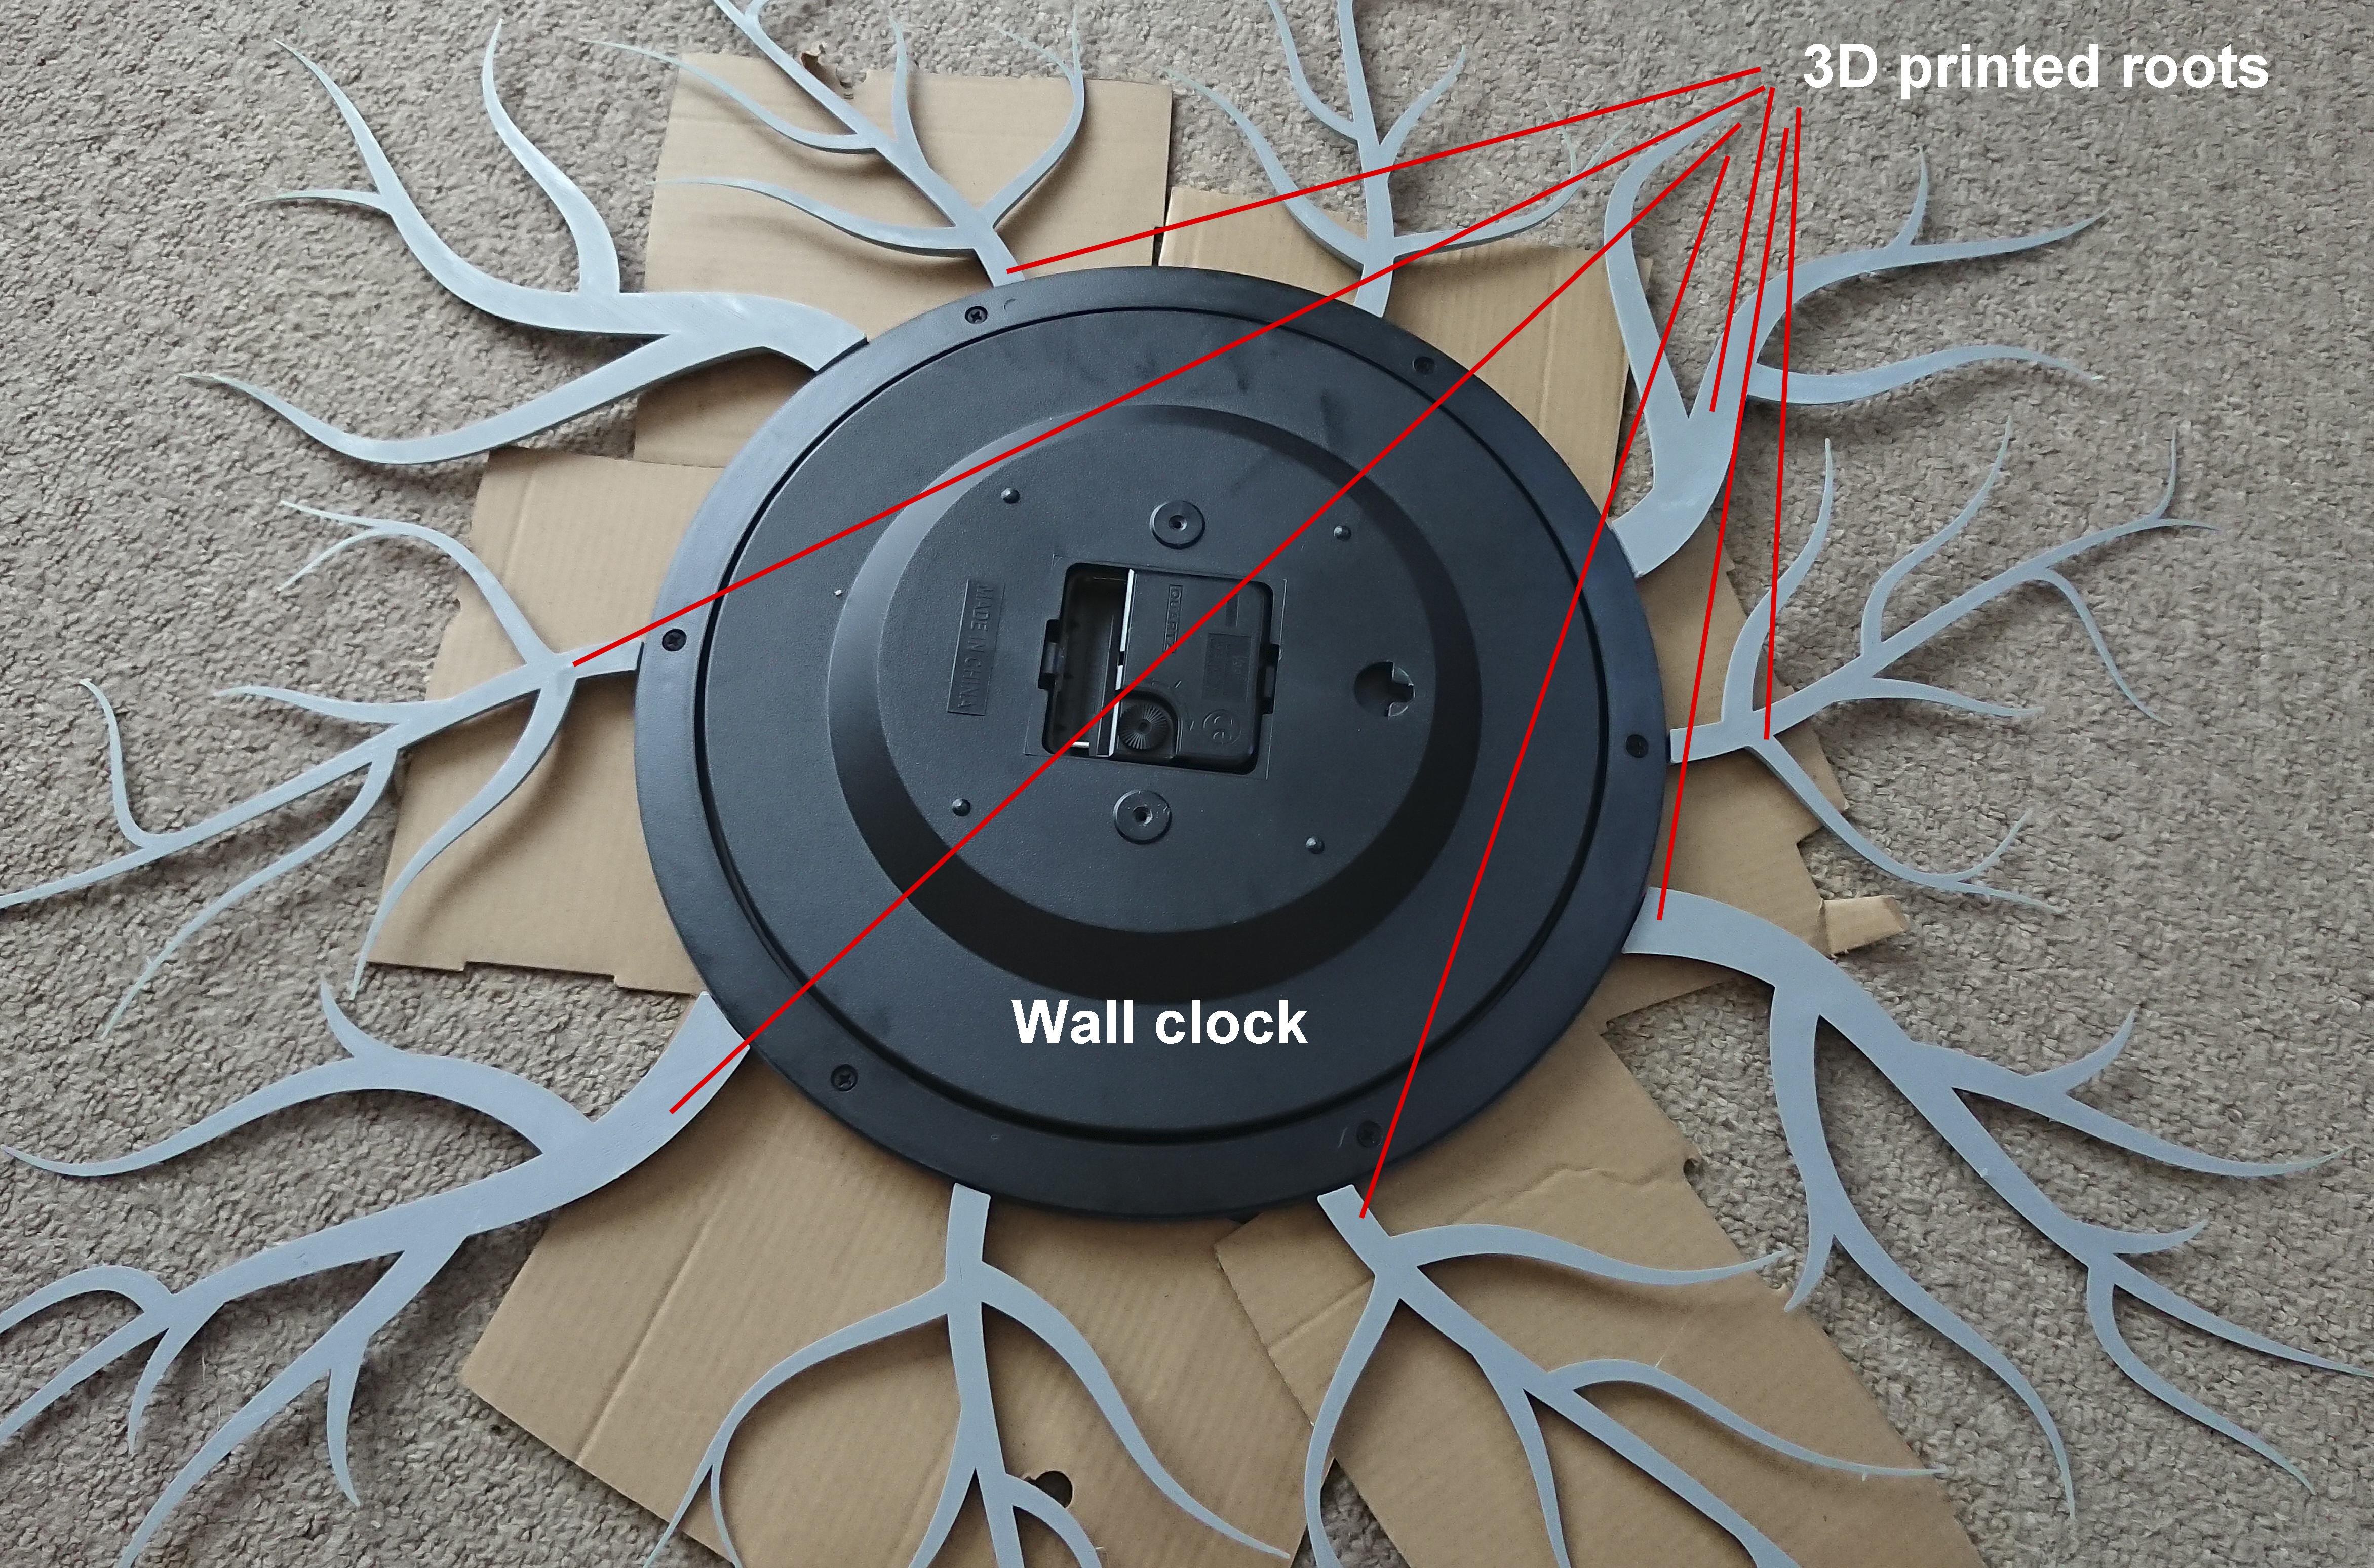
- Place your clock upside-down on the piece of cardboard (this is to protect your floor from glue and paint)
- Arrange the 3D printed roots around your clock the way you like it
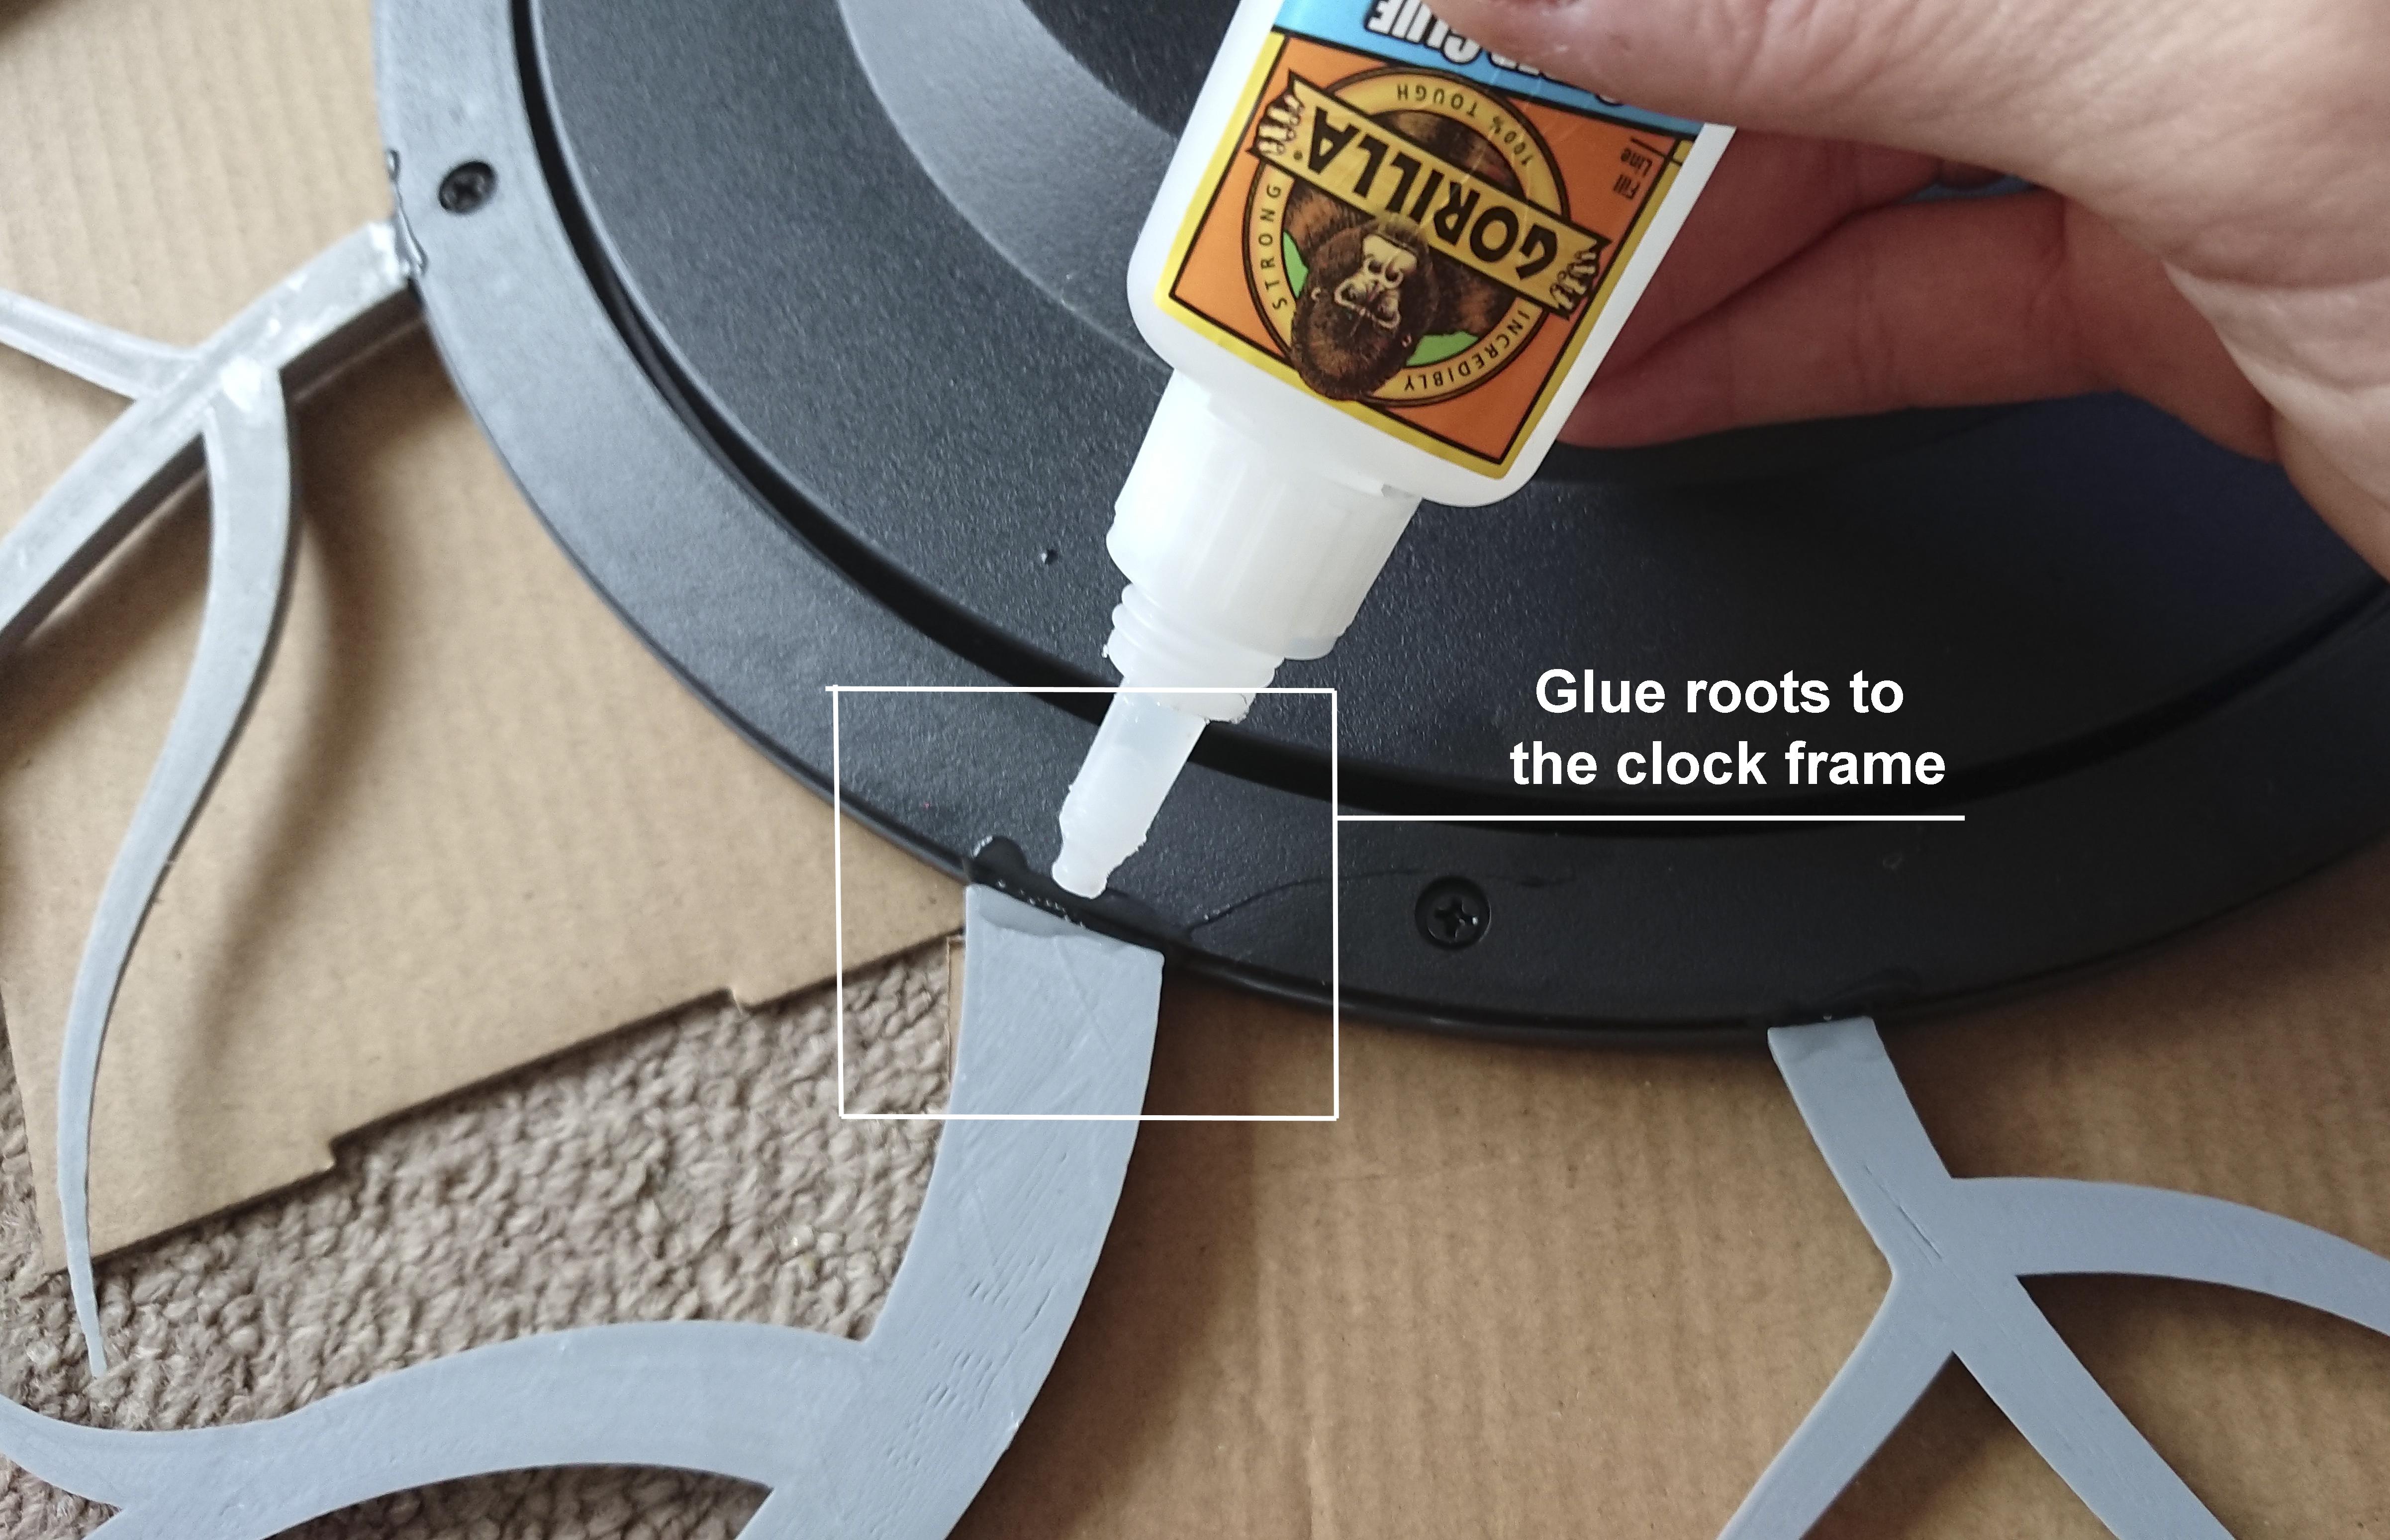
- Use superglue and glue the roots to the frame of the clock (see picture above)
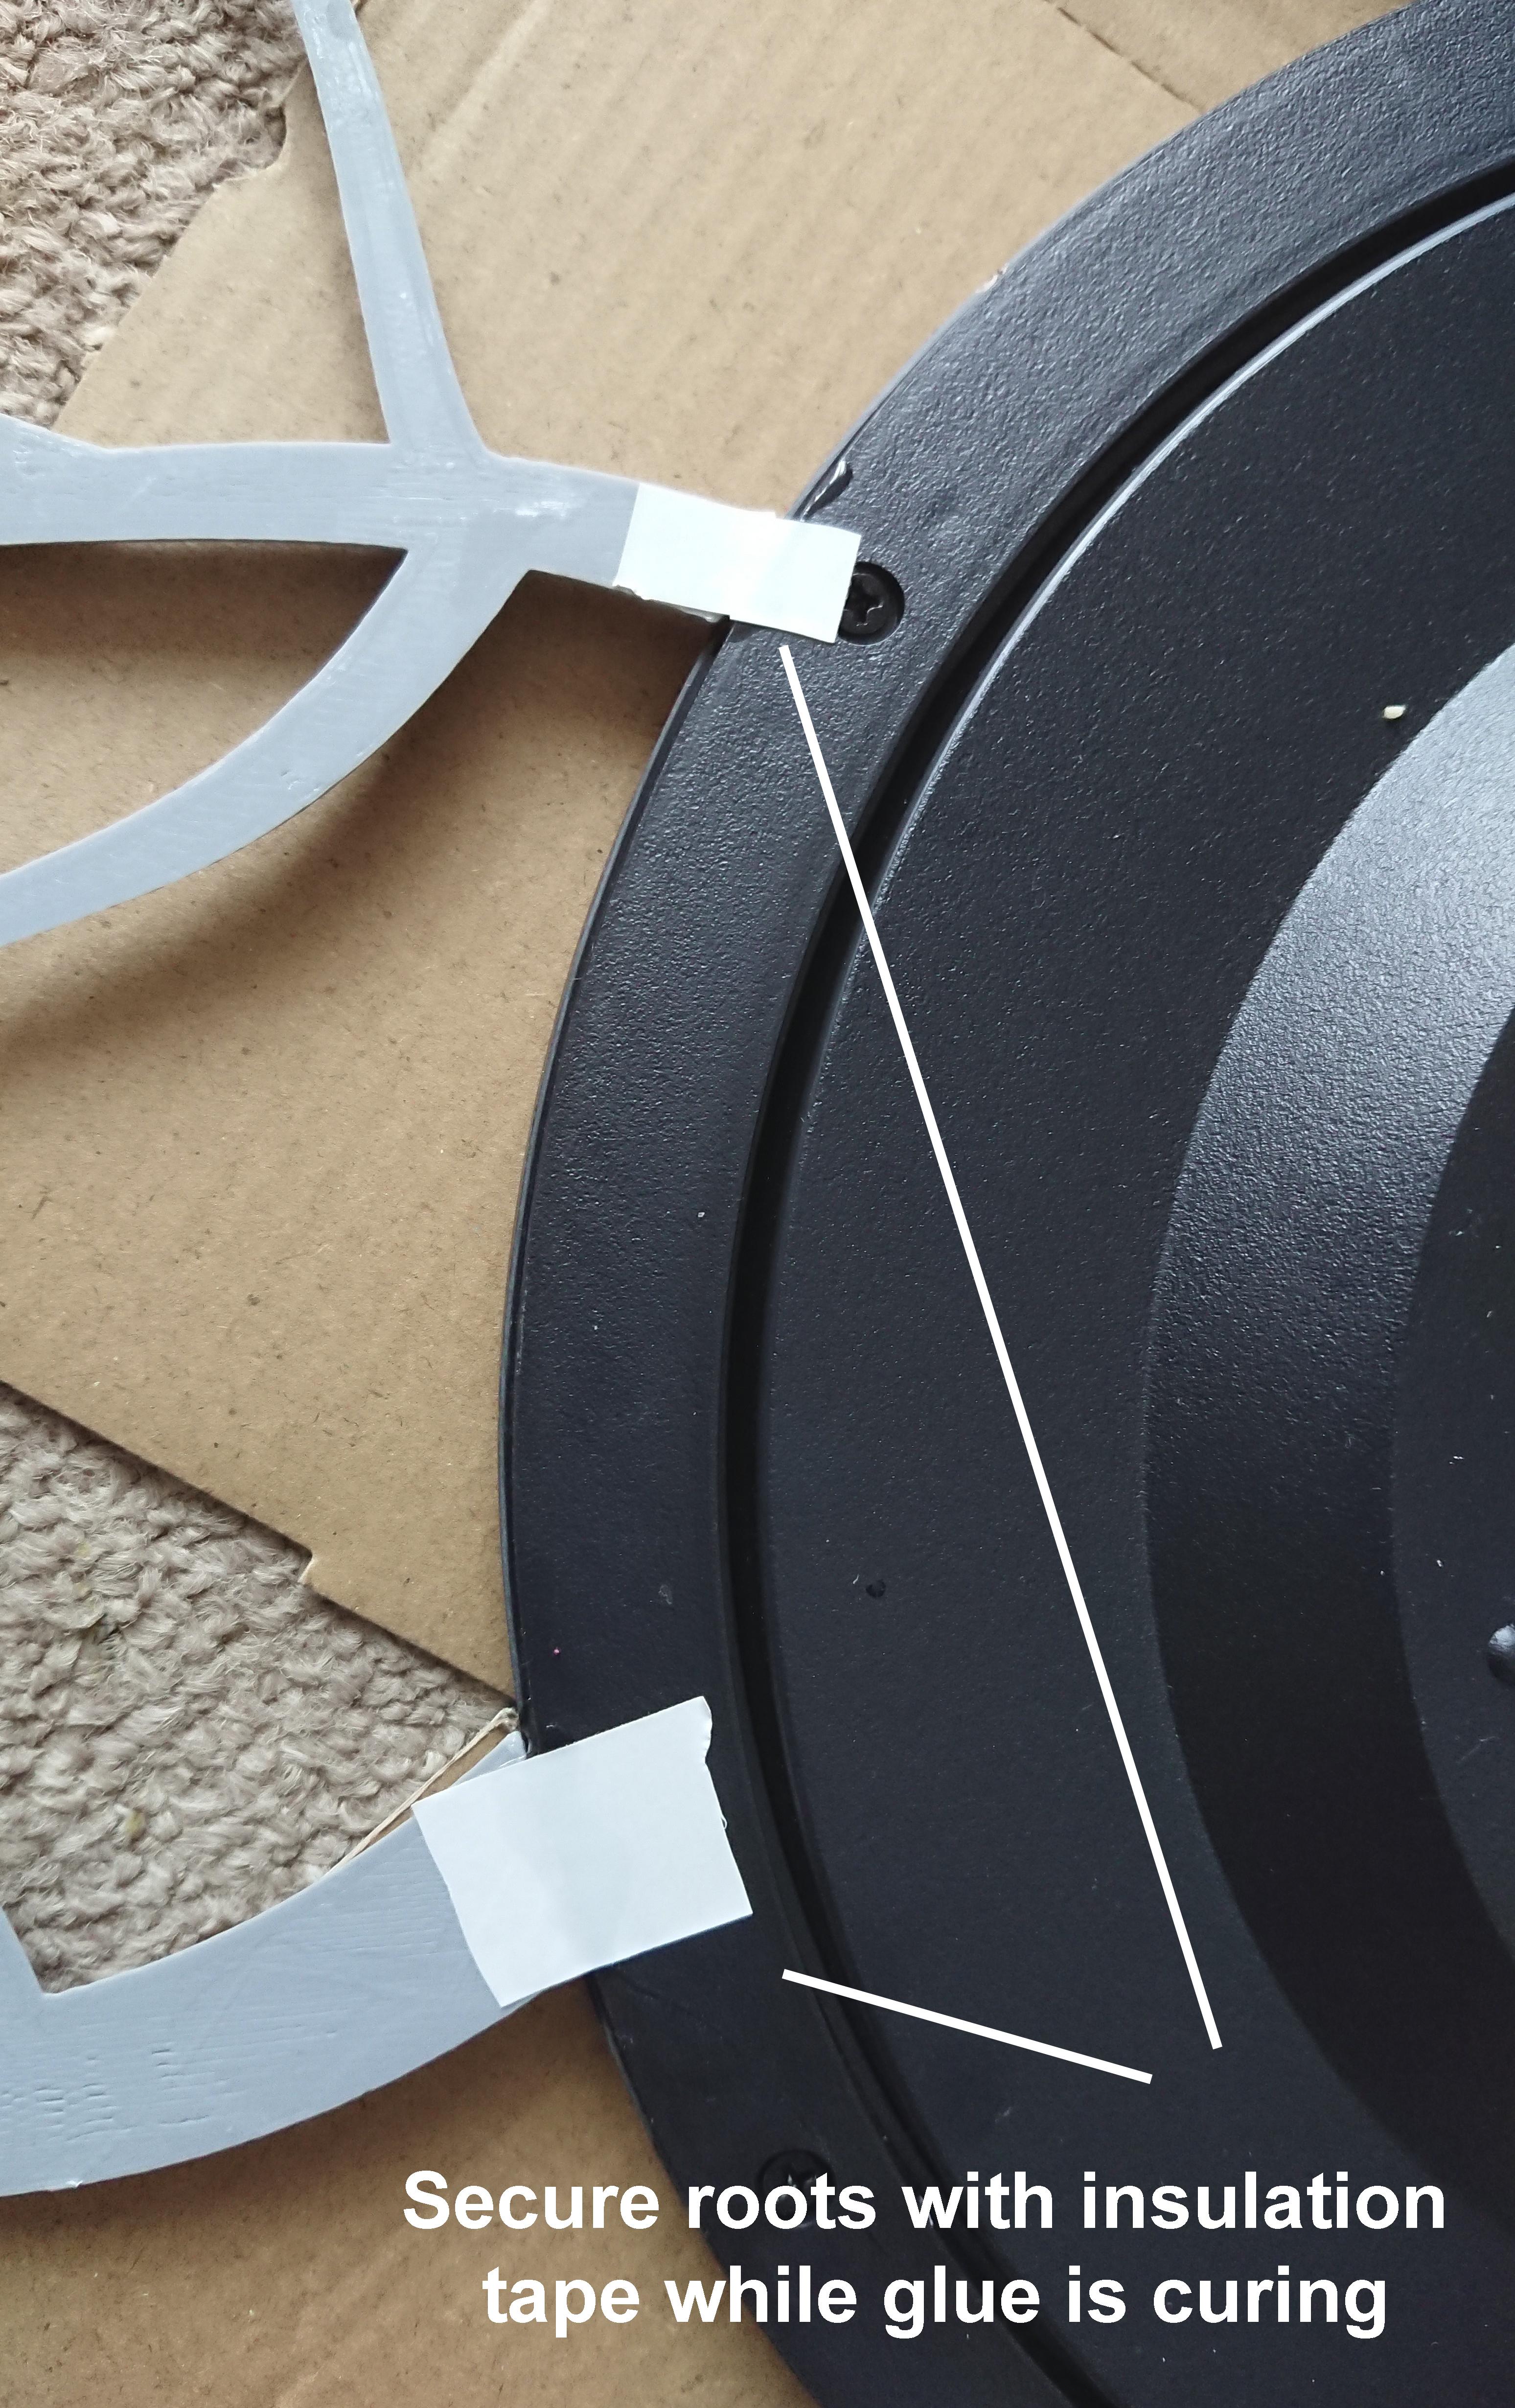
- You can add small piece of the insulation tape to make sure the root won't move from the clock frame while the glue is curing
Paining and Reshaping
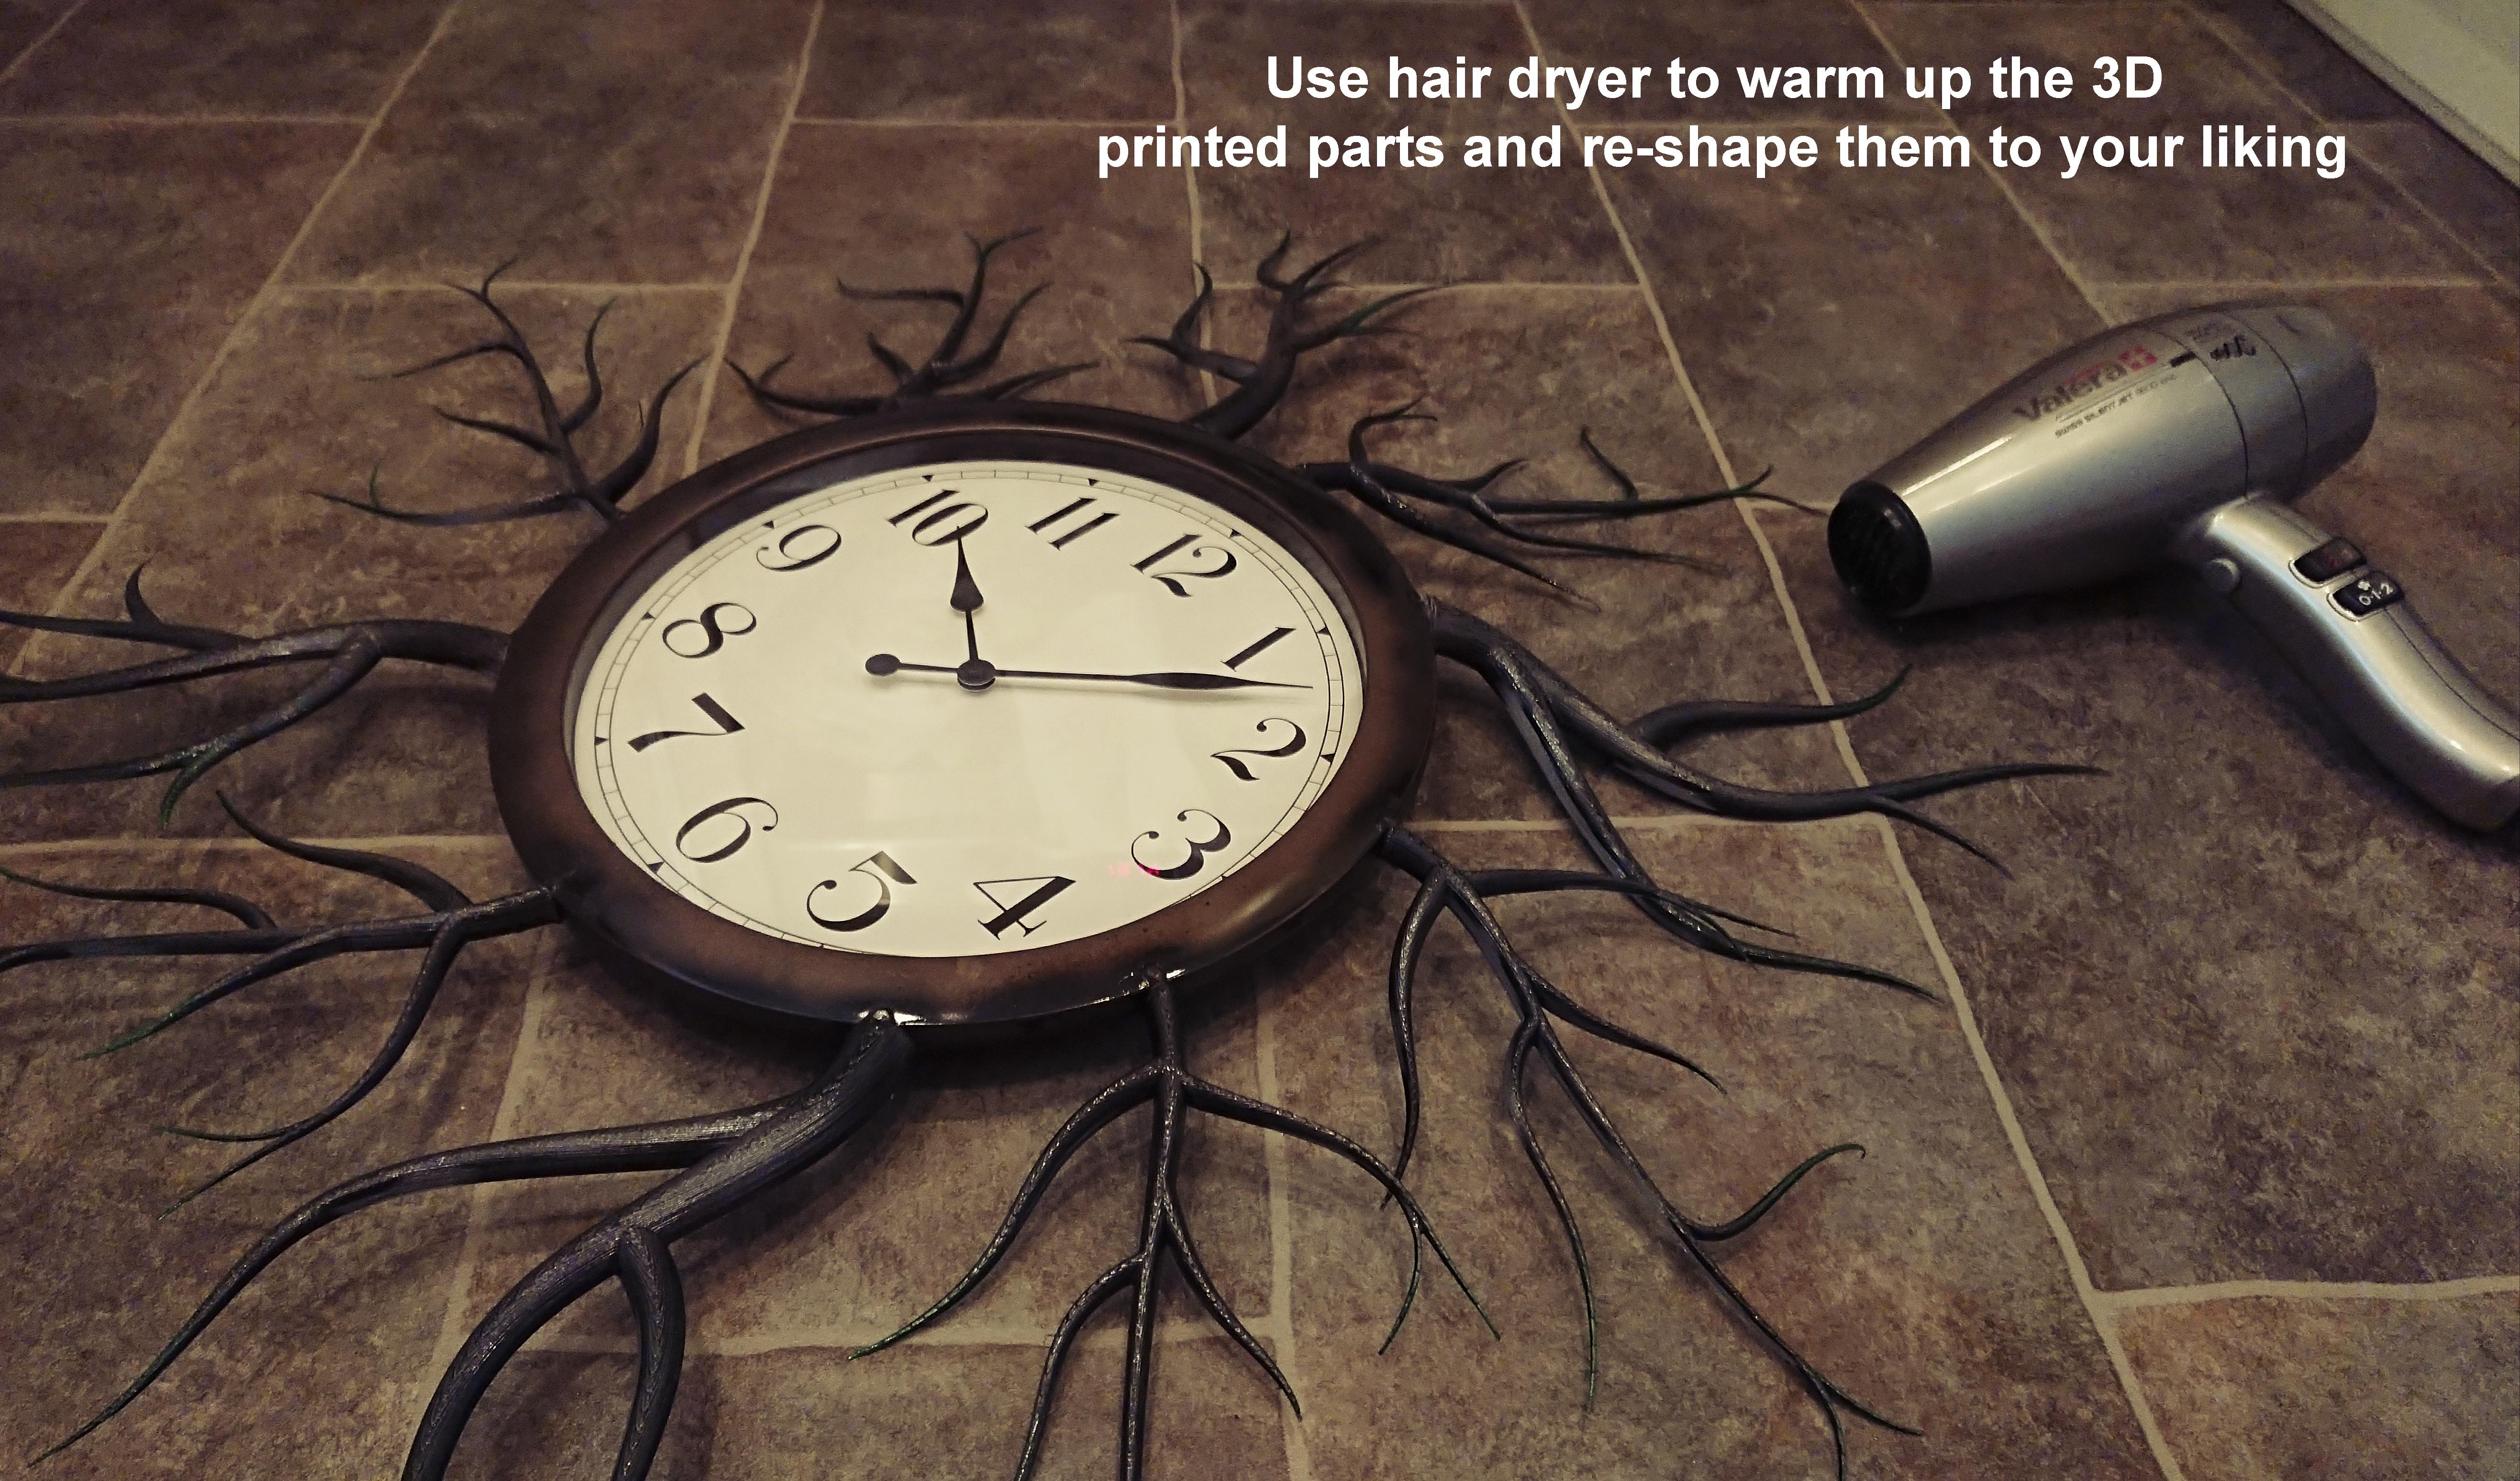
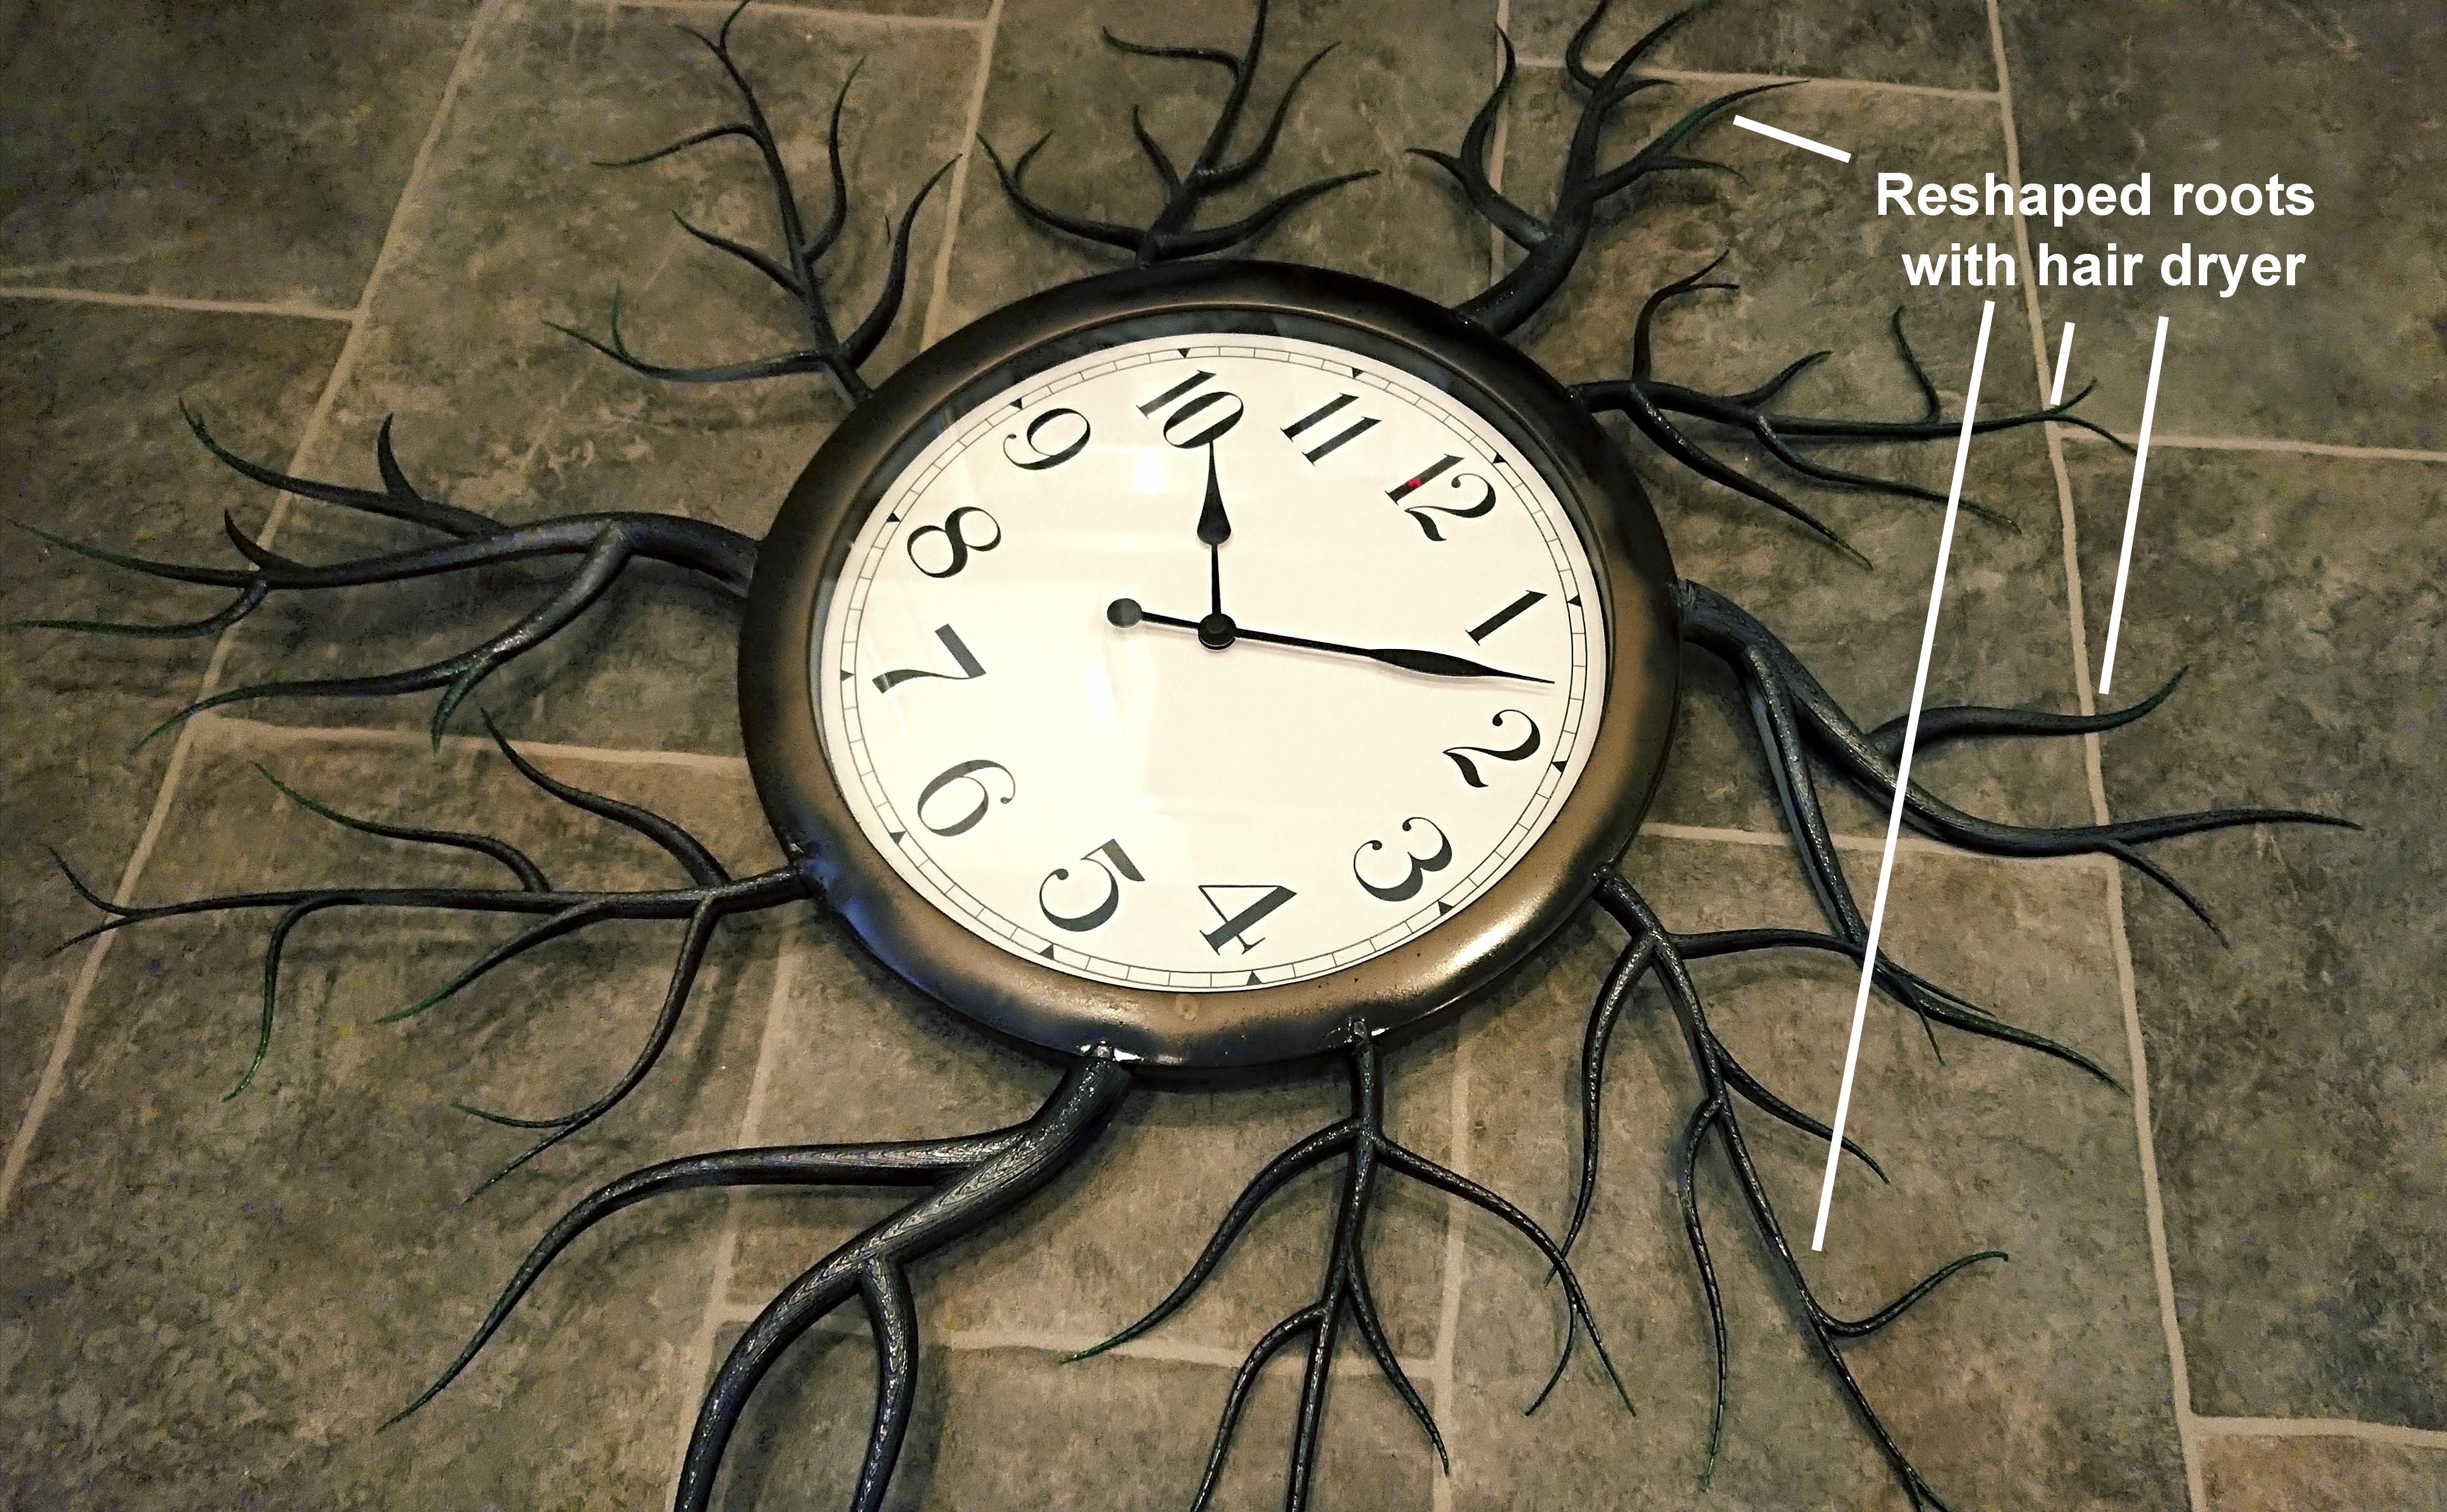
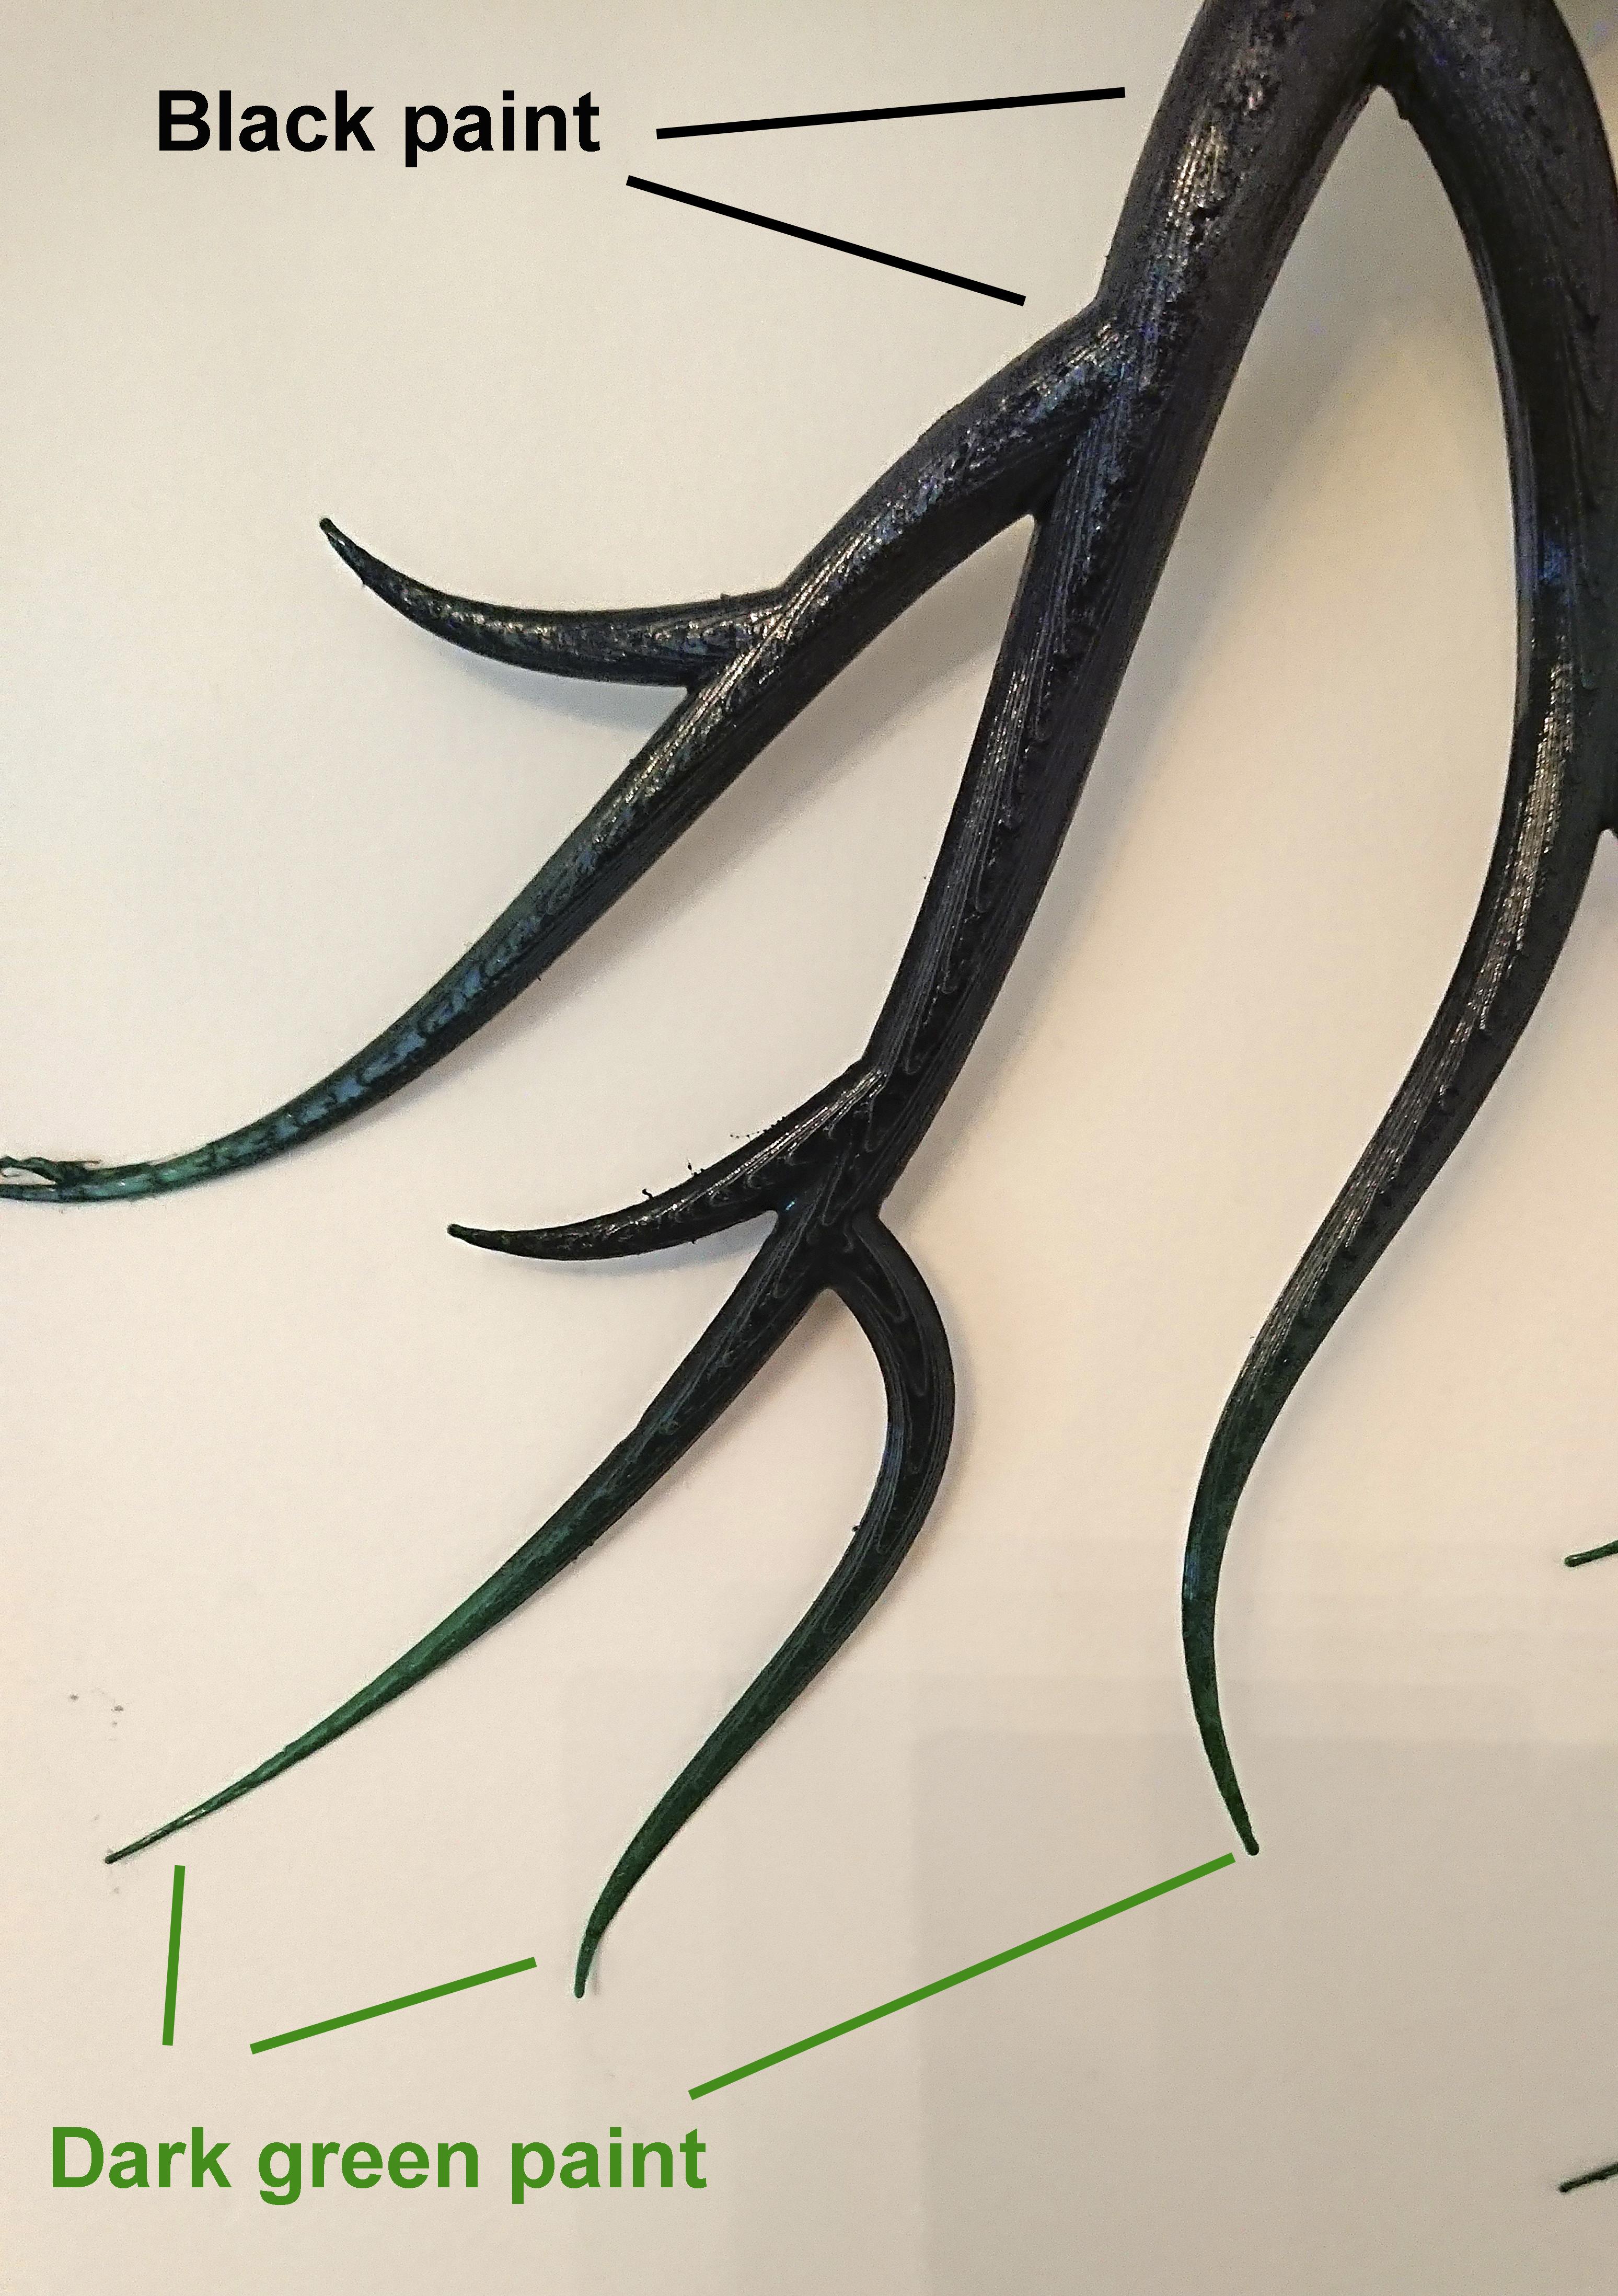
Once the glue is cured you can move on to painting. I decided to use black paint as a base and then spray the tips of the roots with a little bit of green paint.
It's really up to you which colour scheme you choose and if you change your mind later you can always re-paint it :)
When the paint is dry, you can use a hair dryer to soften the plastic and reshape the roots a little bit. In my case I lowered them a little bit so they stick to the wall (see picture above).
Your Organic Root Clock
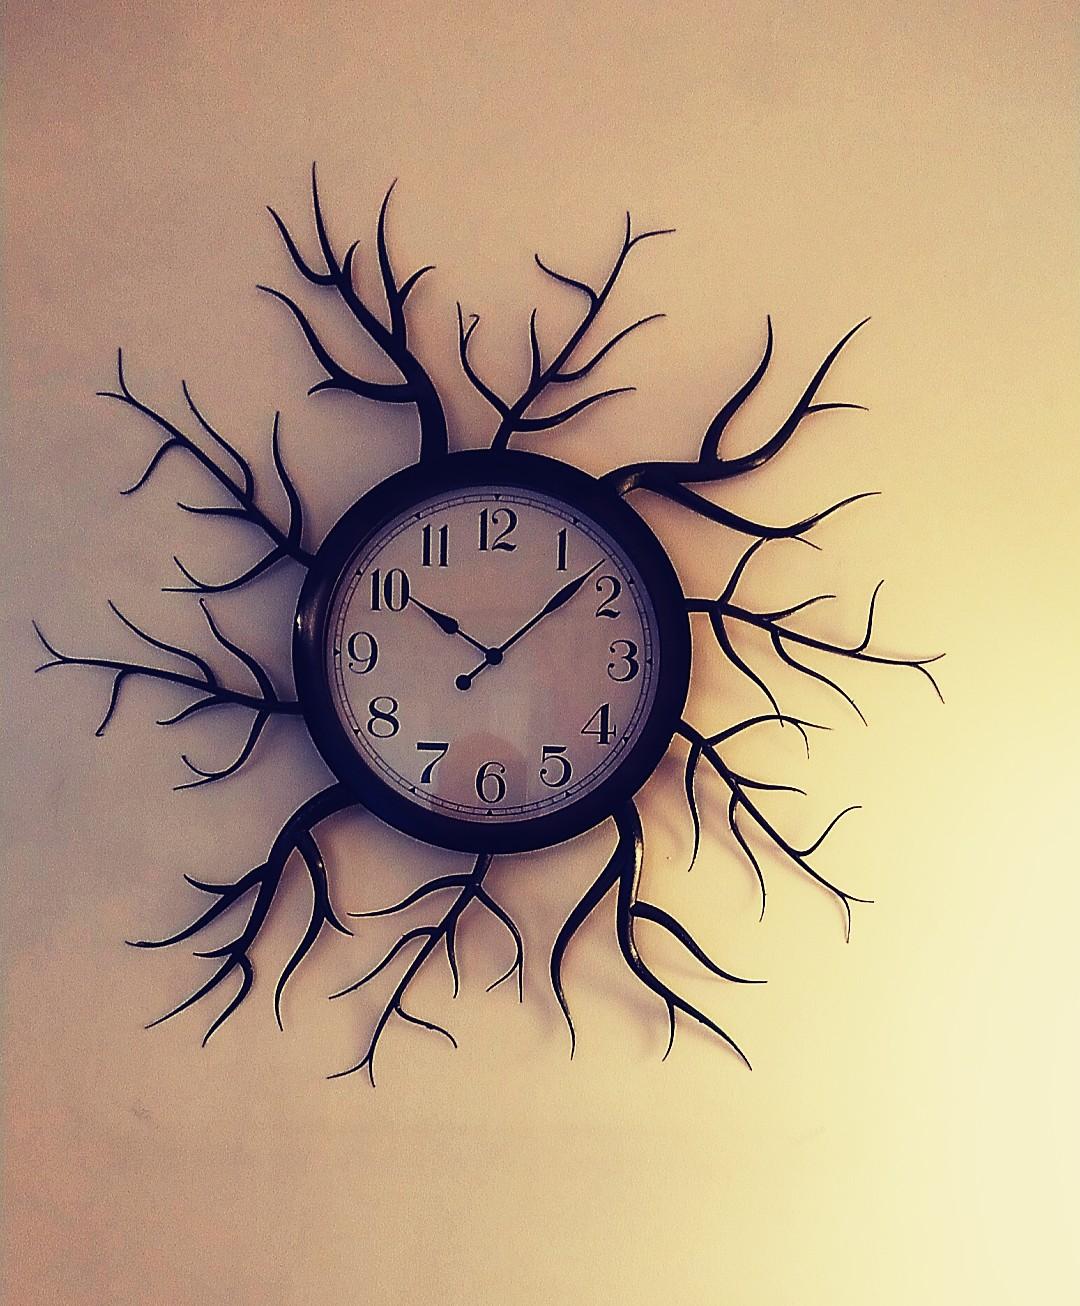
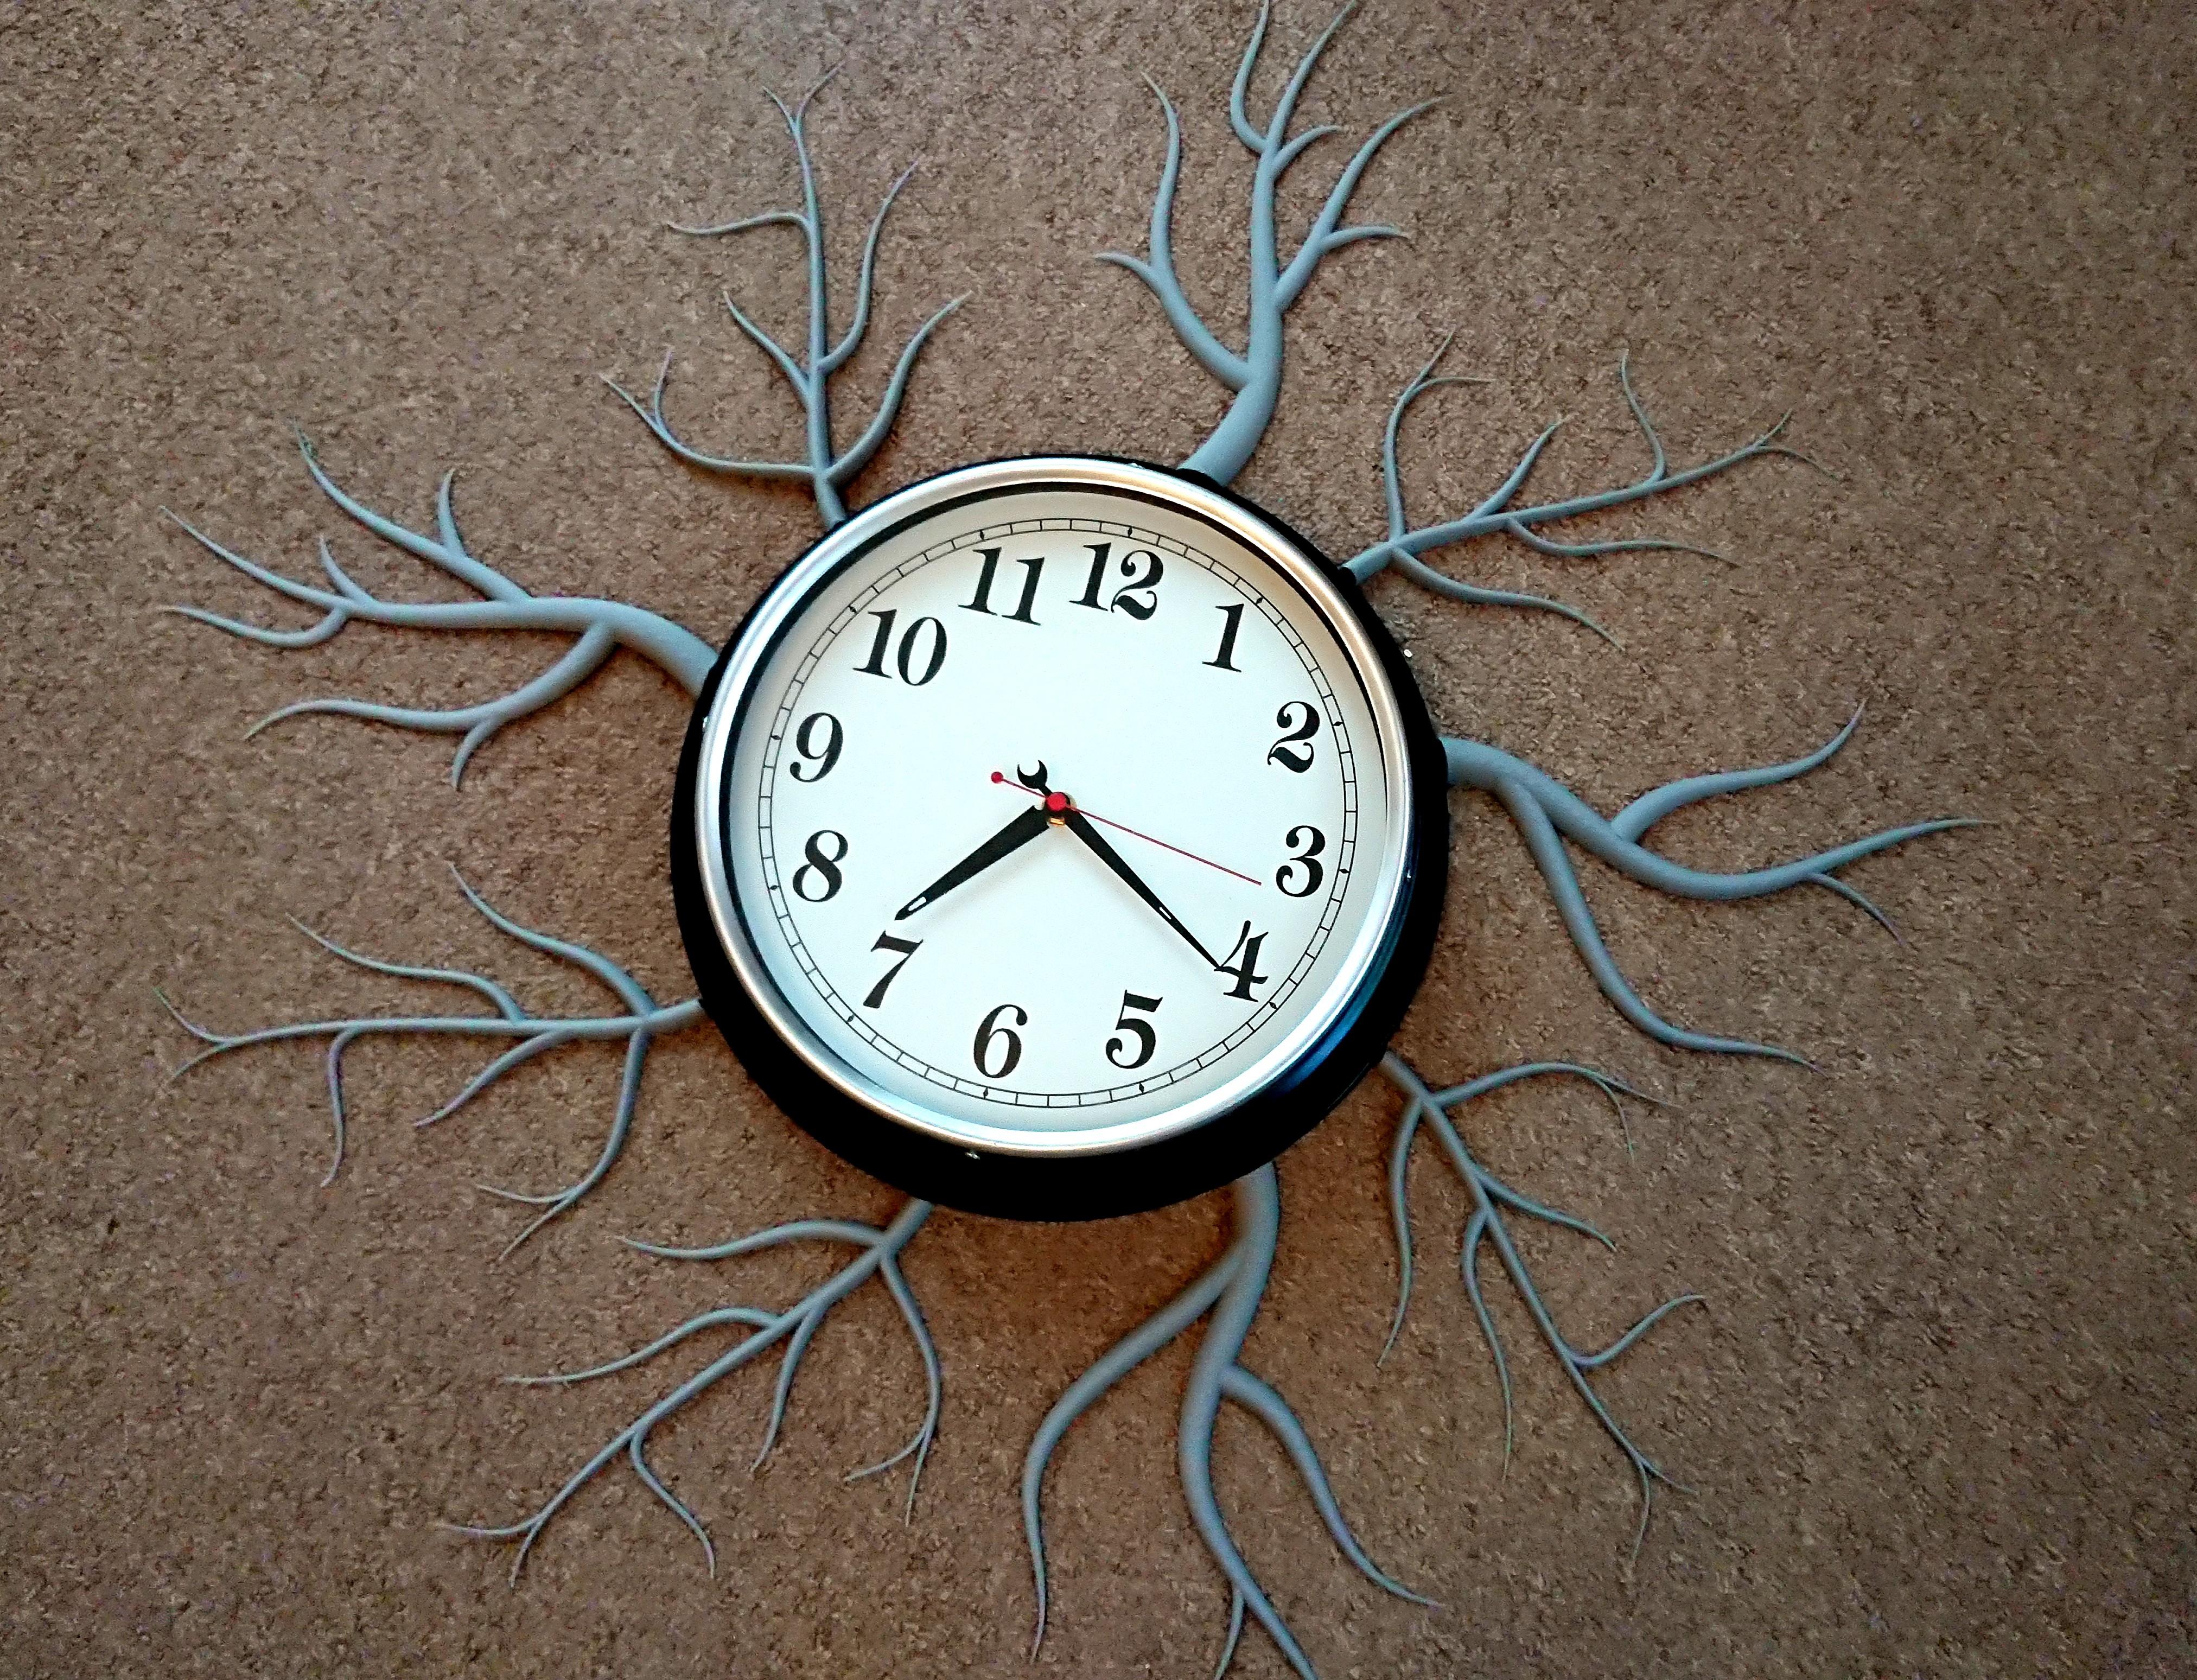
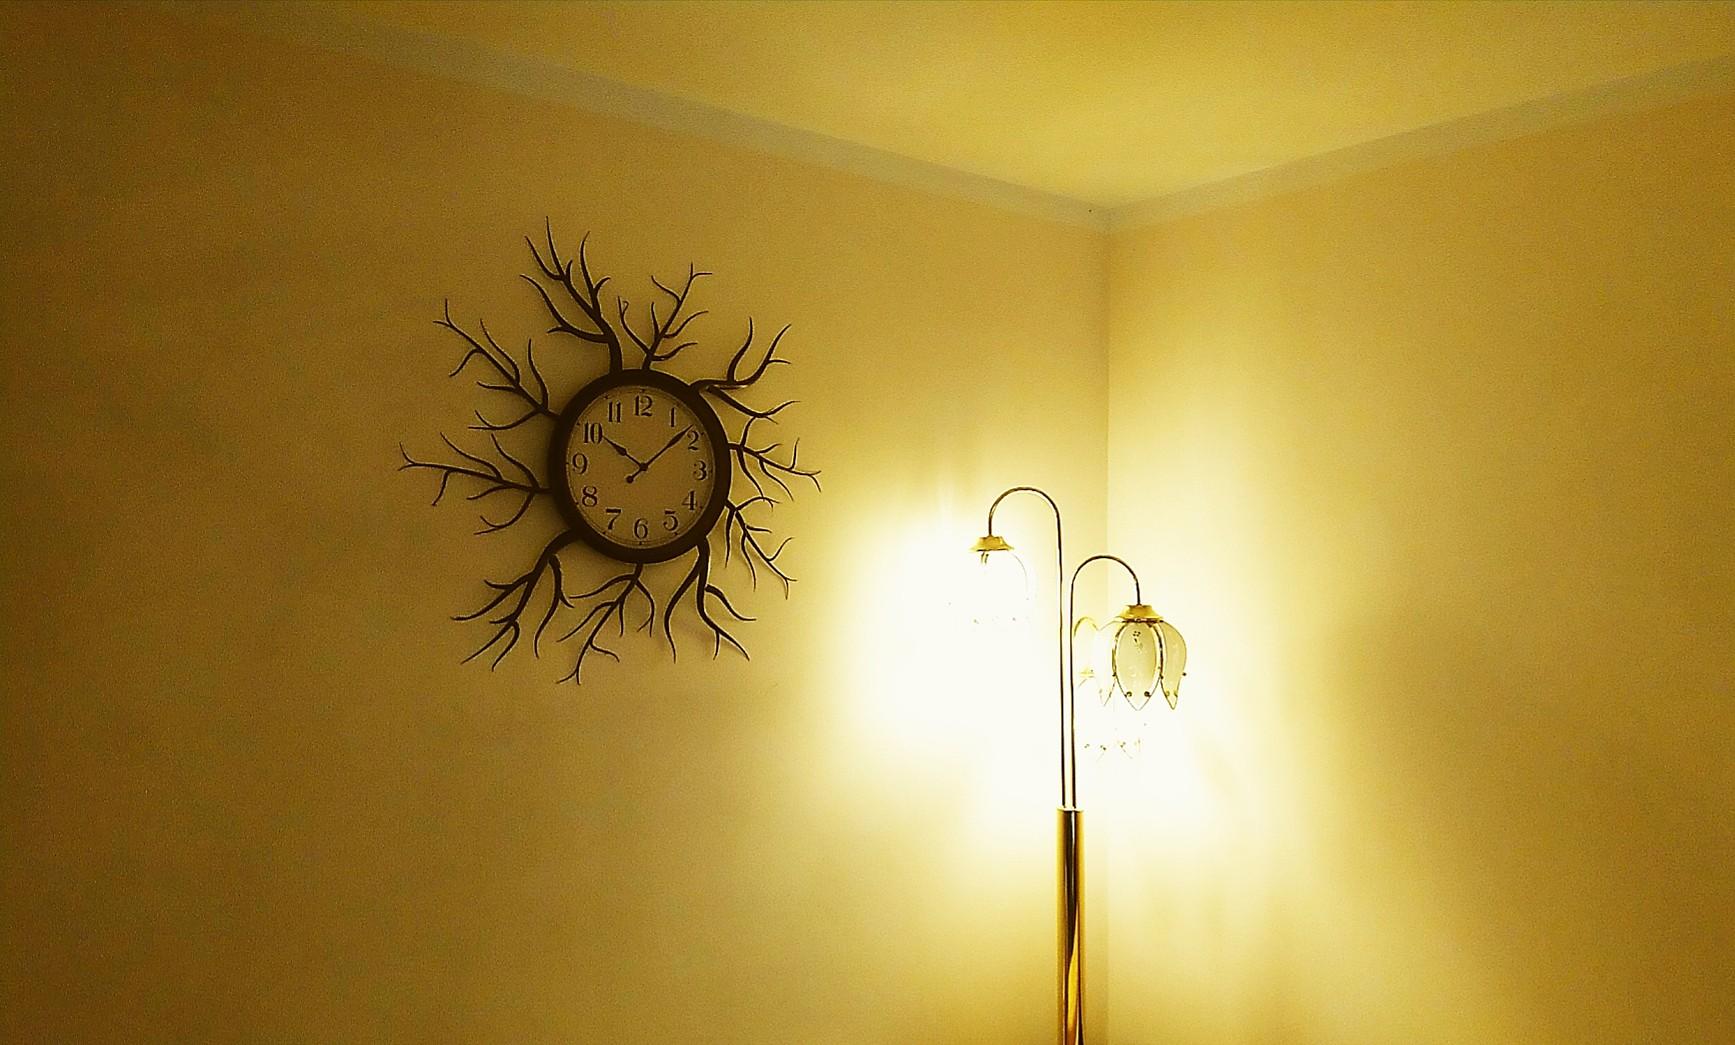
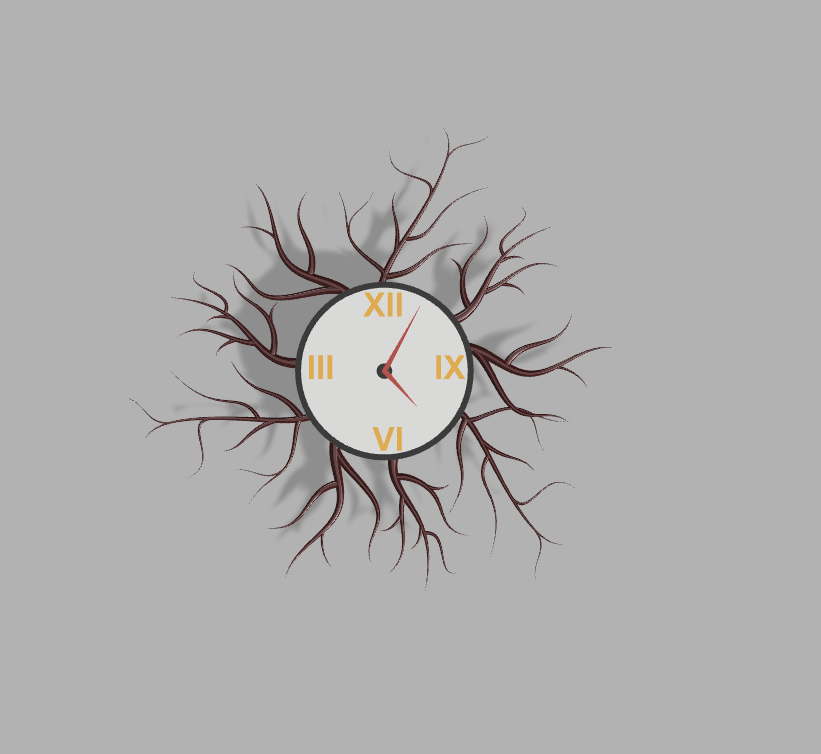
Your clock is finished :D Above you can see two different versions of the clock, one with roots printed in grey plastic and the other with painted and re-shaped roots.
I hope you enjoyed this Instructable and if you make this clock please post some pictures :)