Openscad: Saving STLs
by steve.m.graves in Workshop > 3D Printing
8053 Views, 71 Favorites, 0 Comments
Openscad: Saving STLs
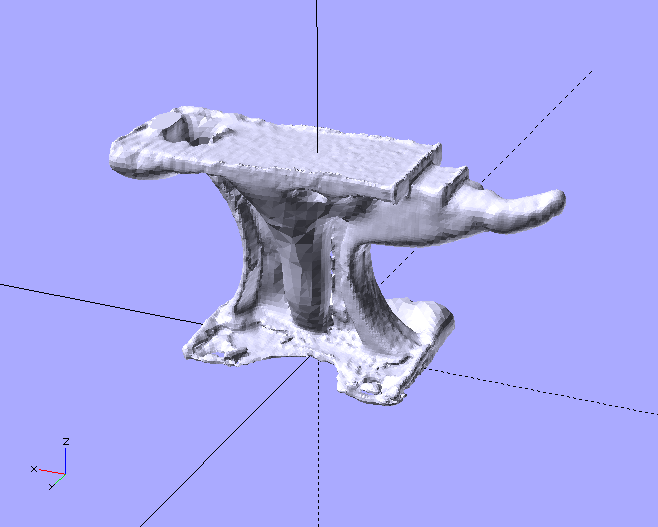
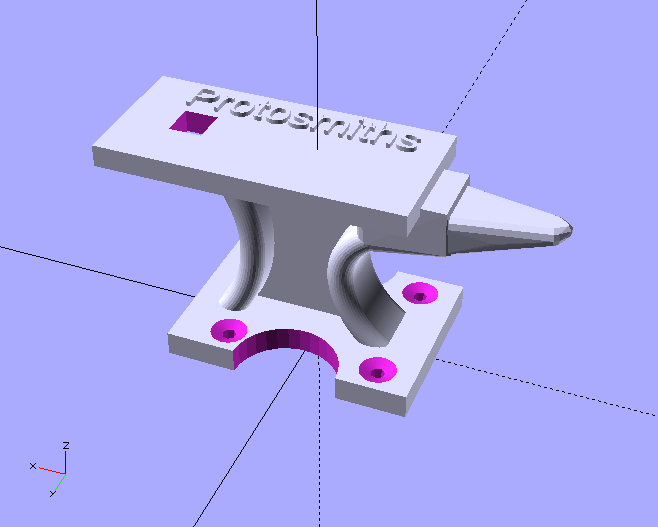
I am a big fan of OpenSCAD, I use it almost exclusively to create 3D models to print. But it is not very good at fixing bad STLs. In fact, it is very good at breaking good ones. If you import a good one and do some simple operations on it, chances are good it will be broken when exported. To fix bad STLs, instead of OpenSCAD I use Blender or Meshlab amongst other tools.
OpenSCAD is very good at making good STLs. It is very simple to use and to understand with the proper explanation of the syntax. (See link below). I can work pretty quickly in OpenSCAD.
In most cases, one should really recreate the bad STL. For example, a scanned object will typically have a less than smooth surface. OpenSCAD can recreate a mathematically smooth surface.
I have developed some techniques for using OpenSCAD to recreate a broken or bad STL. Just as it is very good at making good STLs, it is very good at recreating a bad STL to make a good one. In fact many of these techniques are useful for creating complex solids in general.
Here is a short preview of what we will cover.
We are going to use the STL as a template to guide our construction. We are going to show how one can use the animate view to put OpenSCAD into an interactive mode. We are going to create a pointer tool to allow us to take measurements of the STL. We are going to use the hull with the pointer to recreate arbitrary shapes. We are going to use trajectories to create paths for sweeps to recreate some other unusual geometry. We are going to reuse the paths with hulls to recreate a web between the sweeps. We are going to use a technique that allows us to create a shape once and use it in several places.
As you can see, this Instructable is really for the advanced OpenSCAD user. If you are a beginner and would like to ultimately understand what is going on here, I have written an OpenSCAD Instructable for background concepts.
Recreating the Original 3D Printer
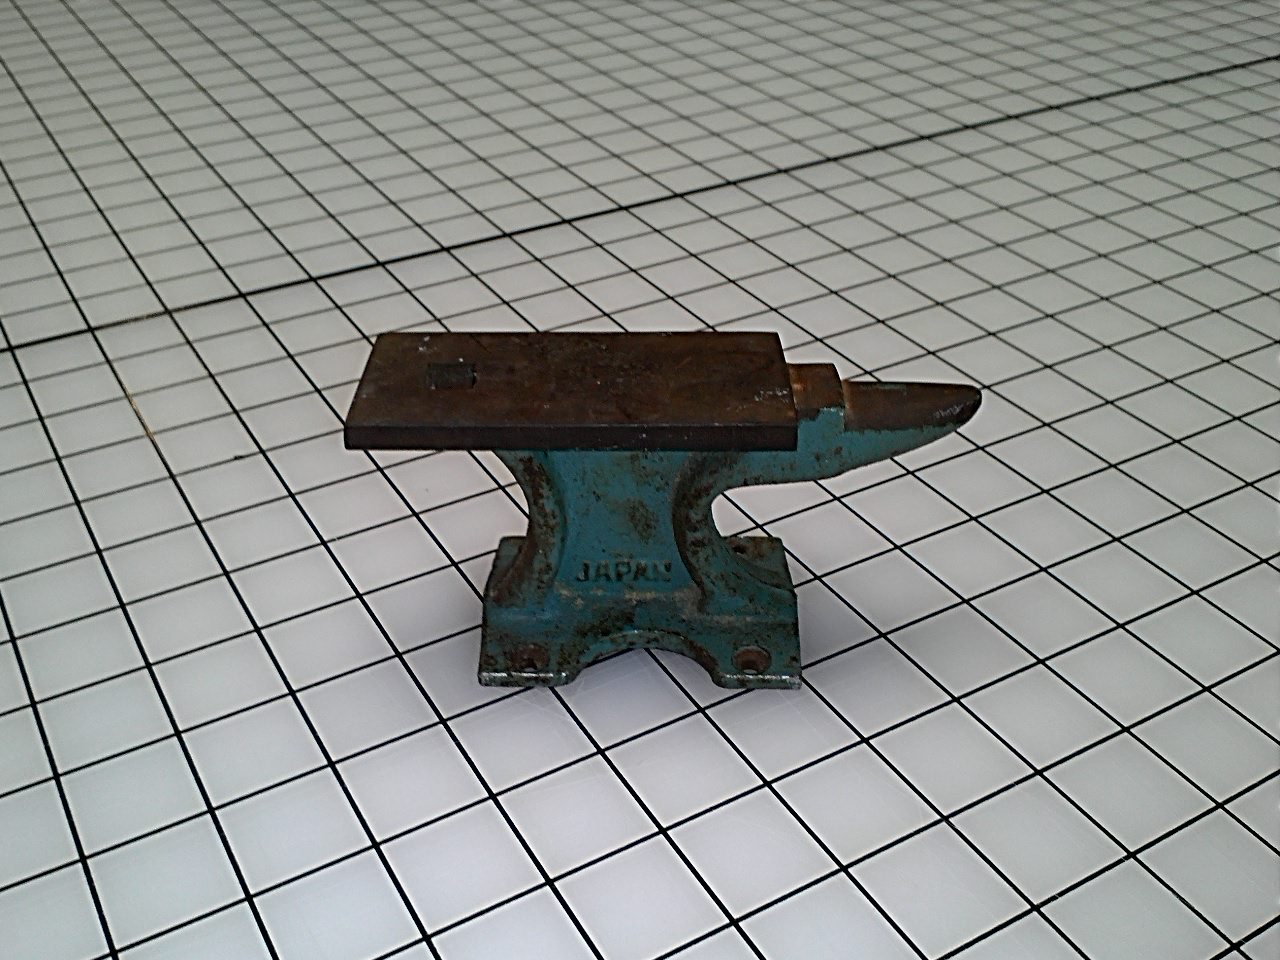
I am starting a new business doing rapid prototyping. My partner was looking through the garage and found an anvil, he said "look the original 3D printer". We liked the concept and decided to use the anvil as a motif for our business.
It would be nice to have a 3D model of an anvil to print.
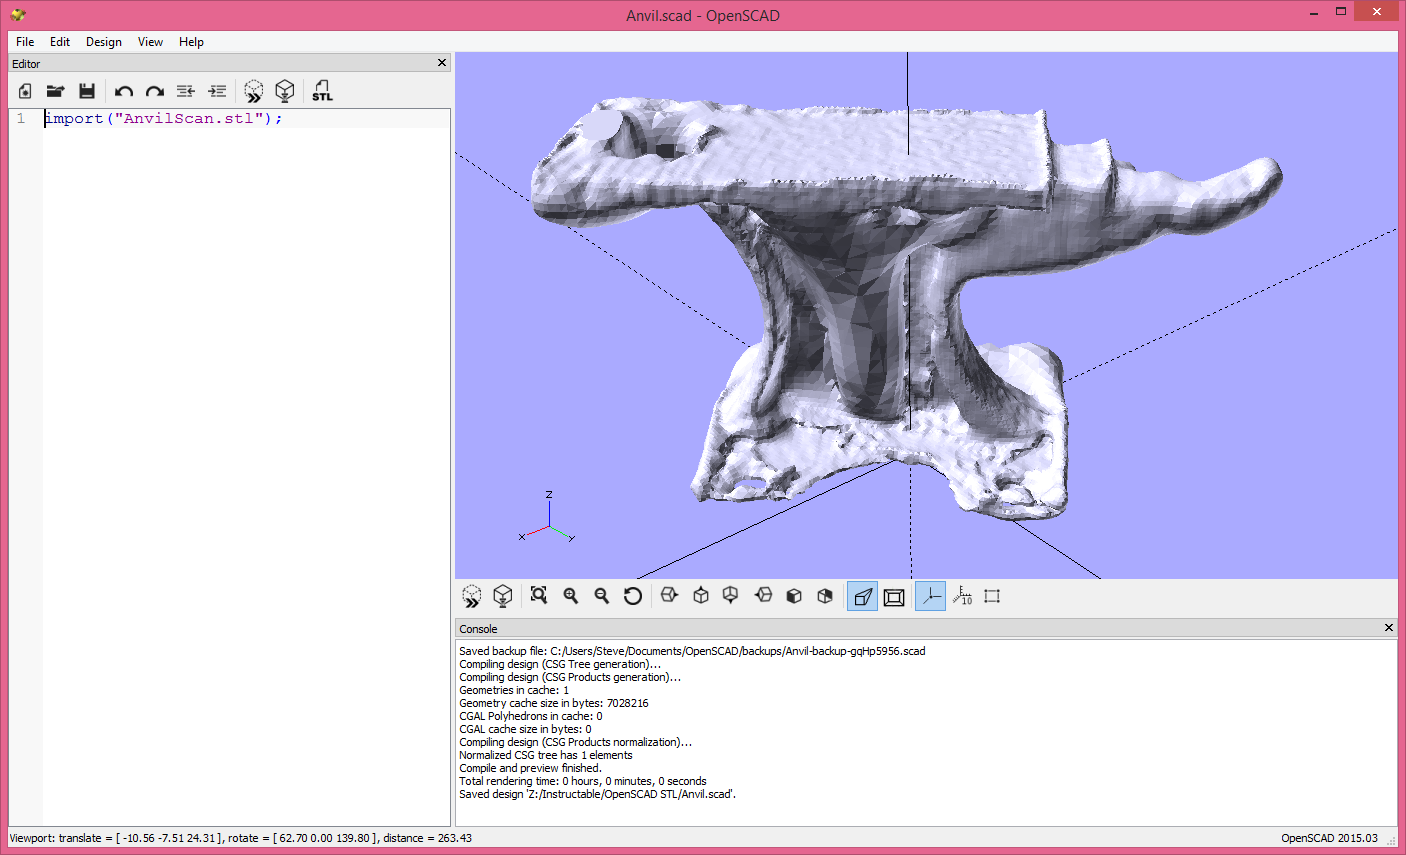
We scan a cute little anvil we found. The major brand scanner we have does a terrible job. OpenSCAD to the rescue.
I have uploaded the STL. Download it and play along with me.
Downloads
Import and Prepare to Orient the STL
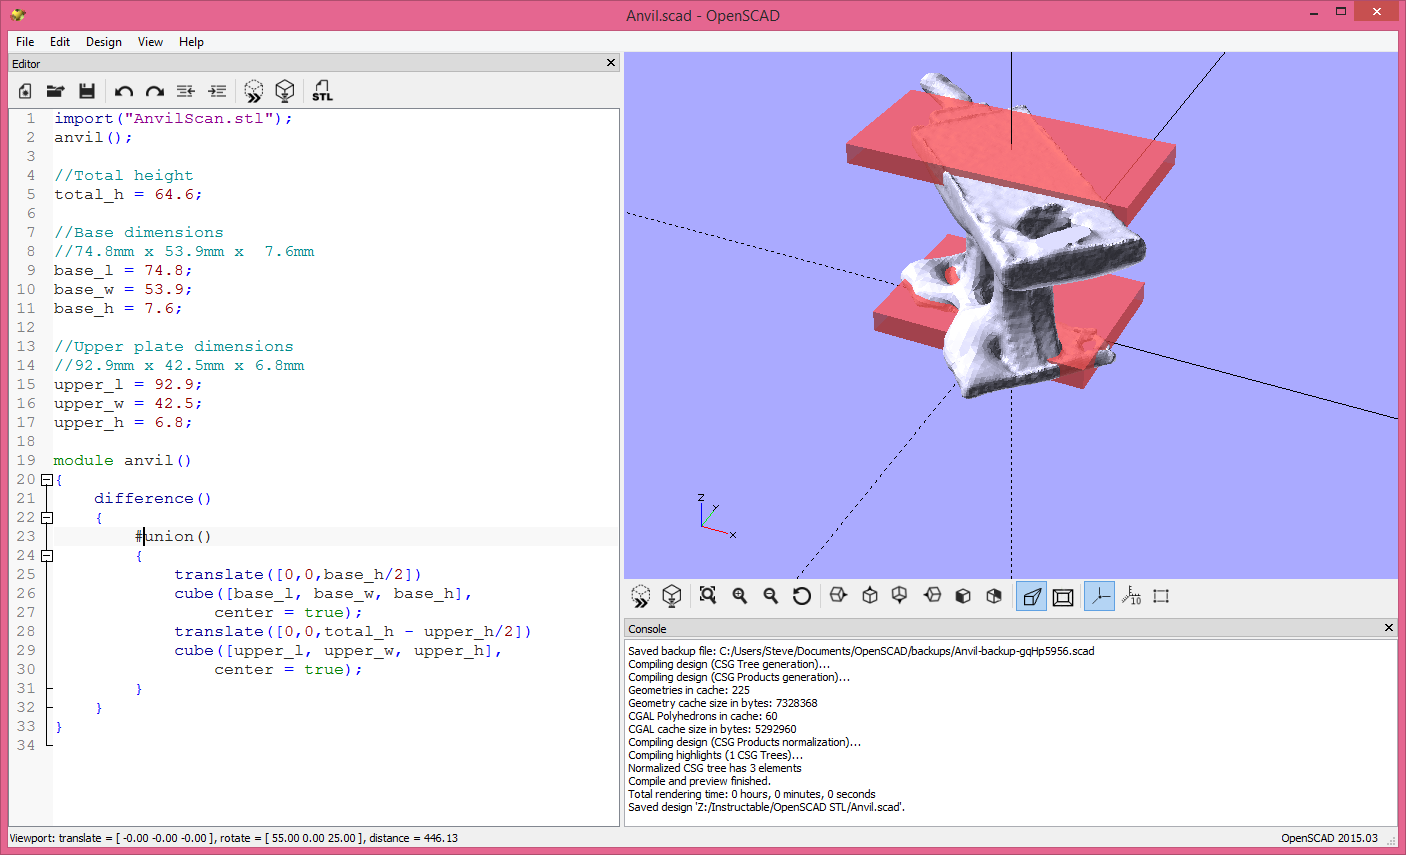
Here is the first trick. Use the "#" or "%" modifier on the STL or the solid being created in OpenSCAD. The "#" modifier makes a solid a translucent pink. The "%" modifier makes an even more transparent grey. One can build up a new model of the STL using the STL as a point of reference. One can see the OpenSCAD created parts even as they move inside the STL or can see the STL as it moves inside of the OpenSCAD parts.
The second trick, use the animate view in OpenSCAD to create a semi-interactive environment. One can also use the $vpr and the $vpt system variables with this trick.
NOTE: the viewport values are shown at the bottom left of the OpenSCAD screen. These are the values that we are going to use programmatically.
OpenSCAD is known as a non-interactive program. And it basically is. But there is a way to get a kind of interactive control. In animate view, OpenSCAD will constantly rebuild the solids. Granted it will get very slow with complicated solids, but one can generally simplify by commenting out code to work in a specific area of the design. OpenSCAD uses a cache and generally only the solid being changed must be rebuilt. OpenSCAD is reasonably responsive in animate view in most cases.
We want to orient the STL in a way that gives us the most natural coordinate system for OpenSCAD. I am thinking that I want to center the anvil on the base. I measure the base and I get 74.8mm x 53.9mm x 7.6mm. I will create a cube of those dimensions and sit it on the surface of the X-Y plane. I also have a flat section on top. It is 92.9mm x 42.5mm x 6.8mm. The total height of the anvil is 64.6mm.
We will align the STL to these parts. I am not going to move the upper part to its proper position on the x axis. While I can measure that offset, it is not as easy as it will be to align the shape to the STL. This is one of the measurements that aligning to the STL is much faster and easier.
As we go along, I will be uploading AnvilStepx.scad as a reference. The version for Step 2 is below.
Downloads
Using Animation Mode
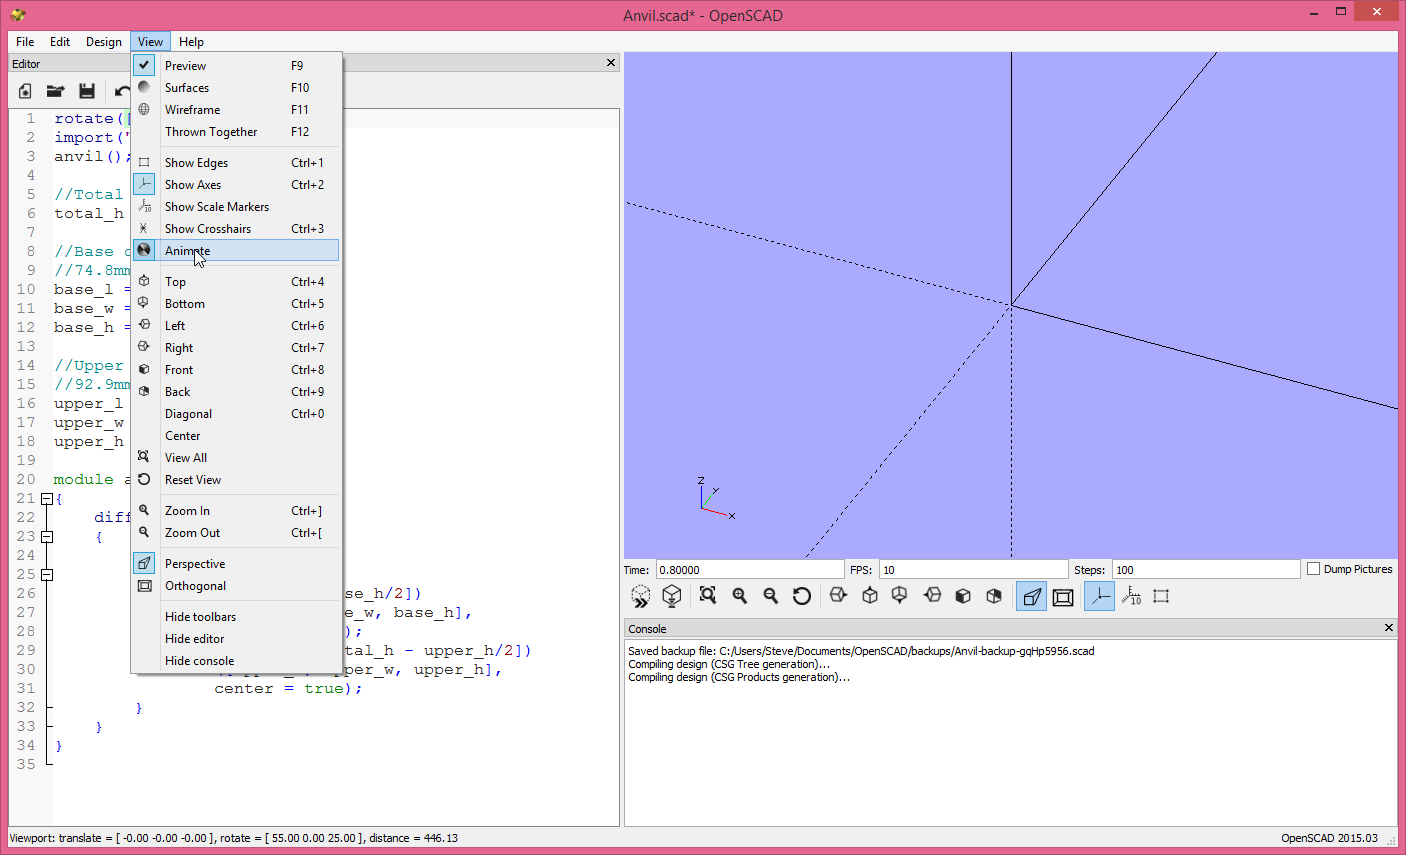
We want to align our STL with the OpenSCAD solids we have created. This allows us to work in a natural coordinate system. In particular, we want to have the symmetrical plane of the anvil aligned on an OpenSCAD plane.
I will be doing a series of transformations to get this STL into the best orientation for OpenSCAD. Another STL would probably have a different series of transformations. In general, every STL will be best aligned with a unique series of transformations. For example, if the STL is far from the origin, one would want to translate it close to the origin first. In our case, I want to rotate on the Z axis first.
This is one place where the animate view is useful. There are two approaches to use with the animate view. The first uses the viewport control. To do that add the line
rotate([0,0,$vpr[2]])
in front of the STL import.
The second approach is to edit the Z value while animation is running. To do this add the line
rotate([0,0,0])
and edit the Z parameter when the animation is running.
I am going to use the second approach. The viewport approach is a little more difficult for rotations. We will see the viewport approach when we translate the STL.
Now for the magic. Go to the View menu and go to "animate" as shown. After that selection the view screen will have boxes appear along the bottom as shown. It doesn't exactly matter what you put in them, but the "FPS:" and the "Steps:" boxes must have values. I have put 100 in "Steps:" and 10 in "FPS:". "FPS:" stands for Frames Per Second. On my computer, OpenSCAD is not able to do 10/sec, but it goes as fast as it can. It is fast enough to get very quick feedback when I make changes.
Orient the STL (rotate on Z Axis)
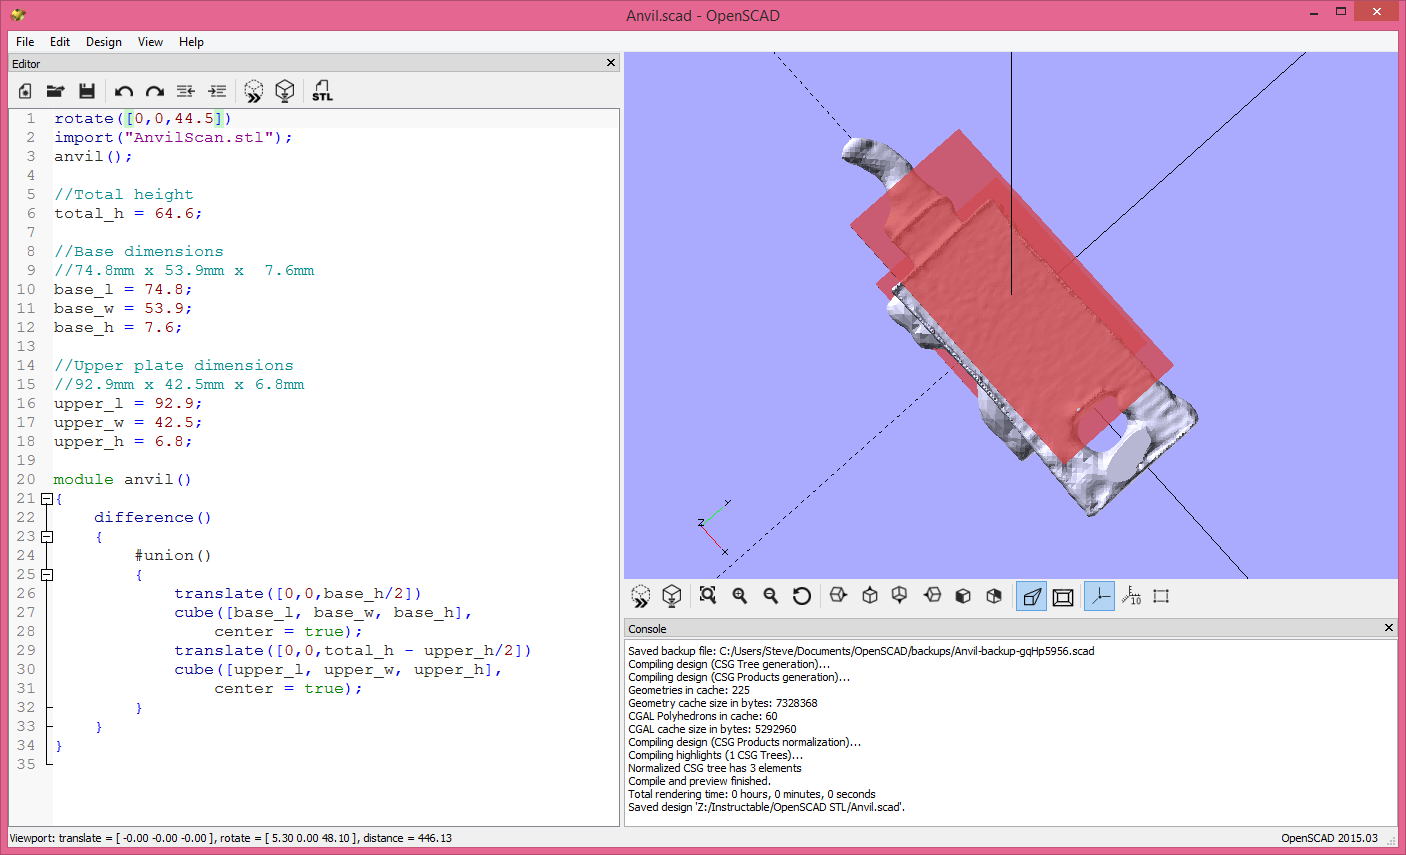
Now that the animate view is running, edit the Z rotation in the rotate transform of the STL. Tweak it until the STL is aligned with the OpenSCAD solids.
One can move around in the viewport to find the best view to make the adjustment. Using the viewport rotation variable restricts how we move around in the view. This is the main reason I didn't use that technique here.
I came up with a value of 44.5 degrees. That value might get tweaked as we make other adjustments and put the STL into a position that makes the needed Z rotation clearer. One can stop the animation by selecting "Animate" in the View menu.
I tried to figure out a way to show what changed in each scad file. After this point I will include a diff file that shows the changes from the previous step.
Translate the STL
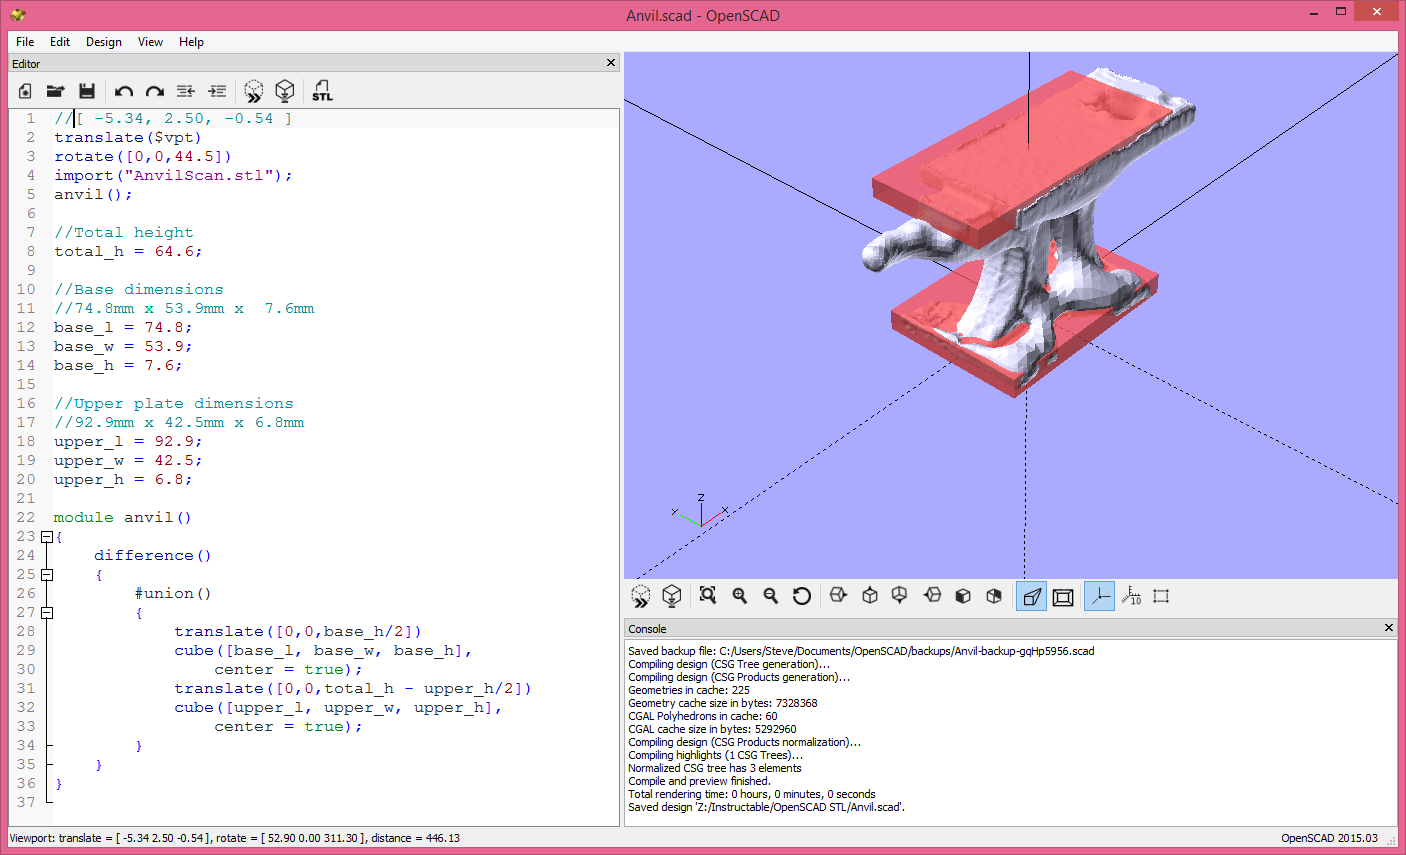
Now is the time to use the viewport translation variables.
One has control over the viewport values with the mouse and so it will appear that OpenSCAD is interactive.
The reason the viewport translation variables are handy is that they only change when panning. This allows one to rotate to various positions to make an adjustment. In fact, it is required that we rotate around to move an object to a point in 3D space. We need to look at the results of the pans from several directions. The pan happens at right angles to the view. One pan alone will not normally move the object to a given 3D location. In theory, an arbitrary location can take at least 3 pans from 3 orthogonal views. It certainly takes at least three views to be sure one has the object positioned correctly.
One problem with assigning the $vpt value to an object is that it basically "fixes" the object to the center of the screen. It appears like the coordinate system and all other objects are moving, not the object. But one can get one's head around this and move a desired location to the object or rotate everything around the object interactively.
Add the following line in front of the rotate transform of the STL.
translate($vpt)
Now start the animation again. When one pans it will appear as if the OpenSCAD objects are moving and the STL is stationary.
On my computer, I found the viewport translation to be very touchy. It is difficult to fine tune position. For that I go back to manual editing. When one is close, use the following trick to get the $vpt to paste into the translate.
OpenSCAD has this cool feature. In the Edit menu are viewport paste commands. We can paste the viewport translation in place of $vpt. I have created a comment (//) in the scad file and pasted there using "Paste viewport translation" in the Edit menu.
Fine Tune the STL Alignment
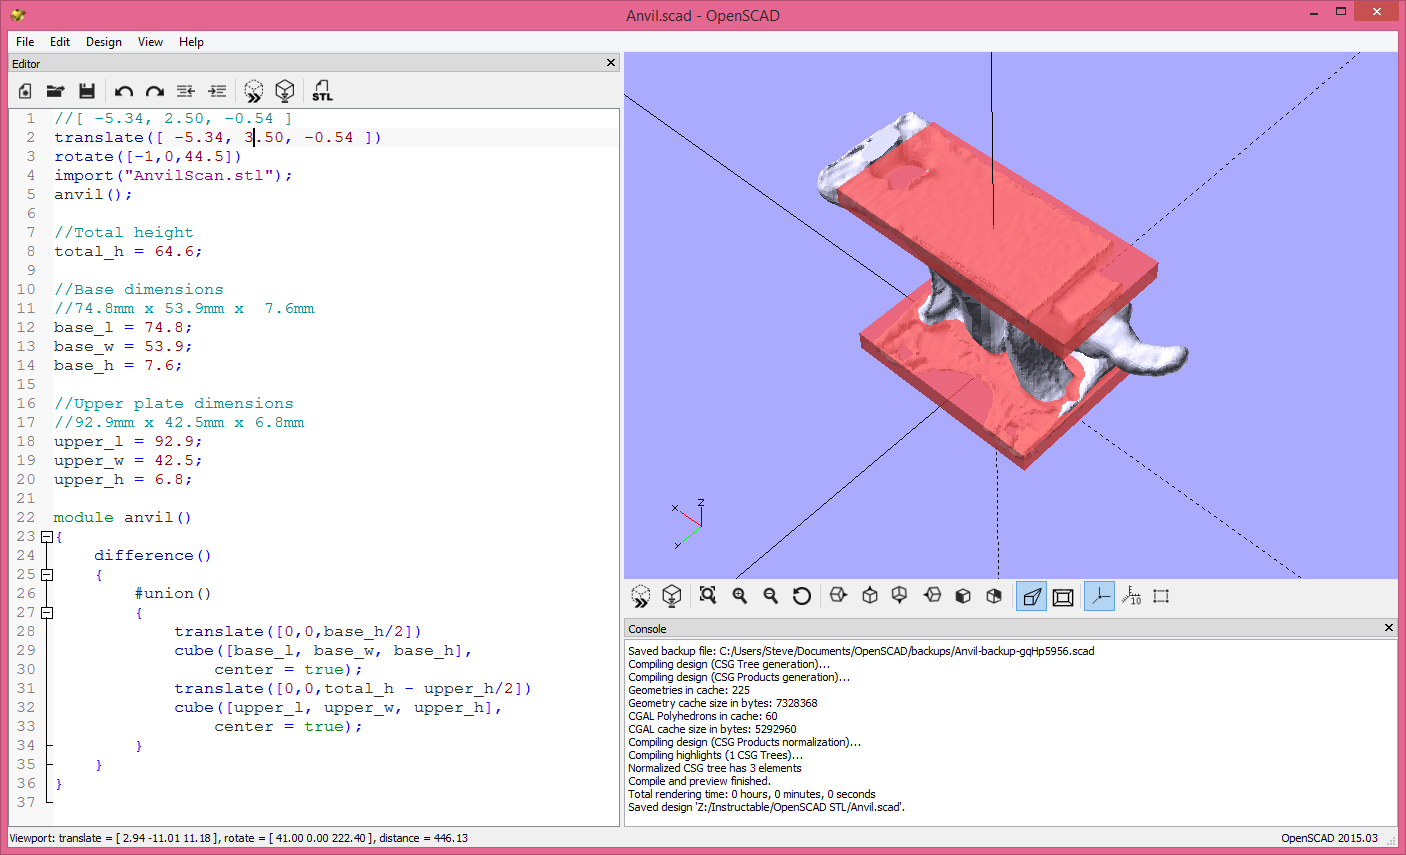
I got the STL translation close and see that I need to make adjustments other than translation. One can see that the when the base is aligned, the top is off center. That indicates that we need some rotation around the X and Y axis as well. In fact, we will probably need to tweak all rotations and all translations. And let me point out that OpenSCAD does the rotations in the order X,Y and Z. When one tweaks the X rotation, the action of Y and Z rotations will change since those axises were moved by the X rotation. To change the order, one might add separate rotation transformations in the desired order. And one might also put a rotate to happen after (before in code) the translate. It doesn't matter how one gets there, just get the STL aligned using the needed order and combinations of transforms.
My tweaks are the the file below.
Move the Upper Block Into Position
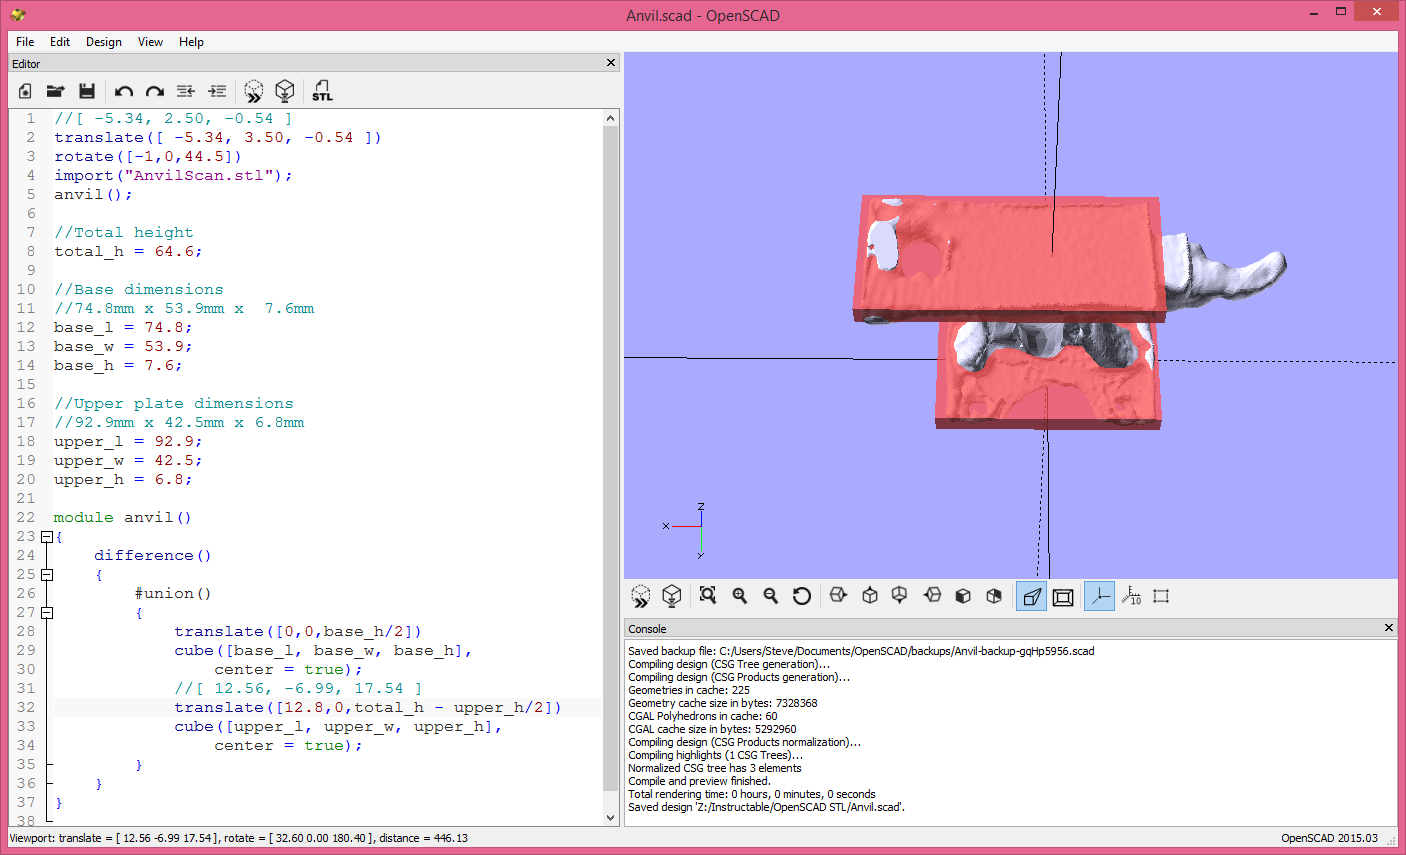
Now our STL is aligned into the position where we will recreate it.
The upper block is not in the right position. I didn't move it into the proper x position when I placed it earlier. Now we can see where it goes relative to the STL. We can move it in animate view by editing the x value in the translate transformation of it or we can use the $vpt and pan it into position. Or we can do both.
We will start out using pan to get it close. Change the x value in the translate to $vpt[0] and start animate view. Then pan it into position and paste the value of $vpt into a comment. Copy the first value in the array to the X position and then edit to fine tune.
Making a Measuring Device
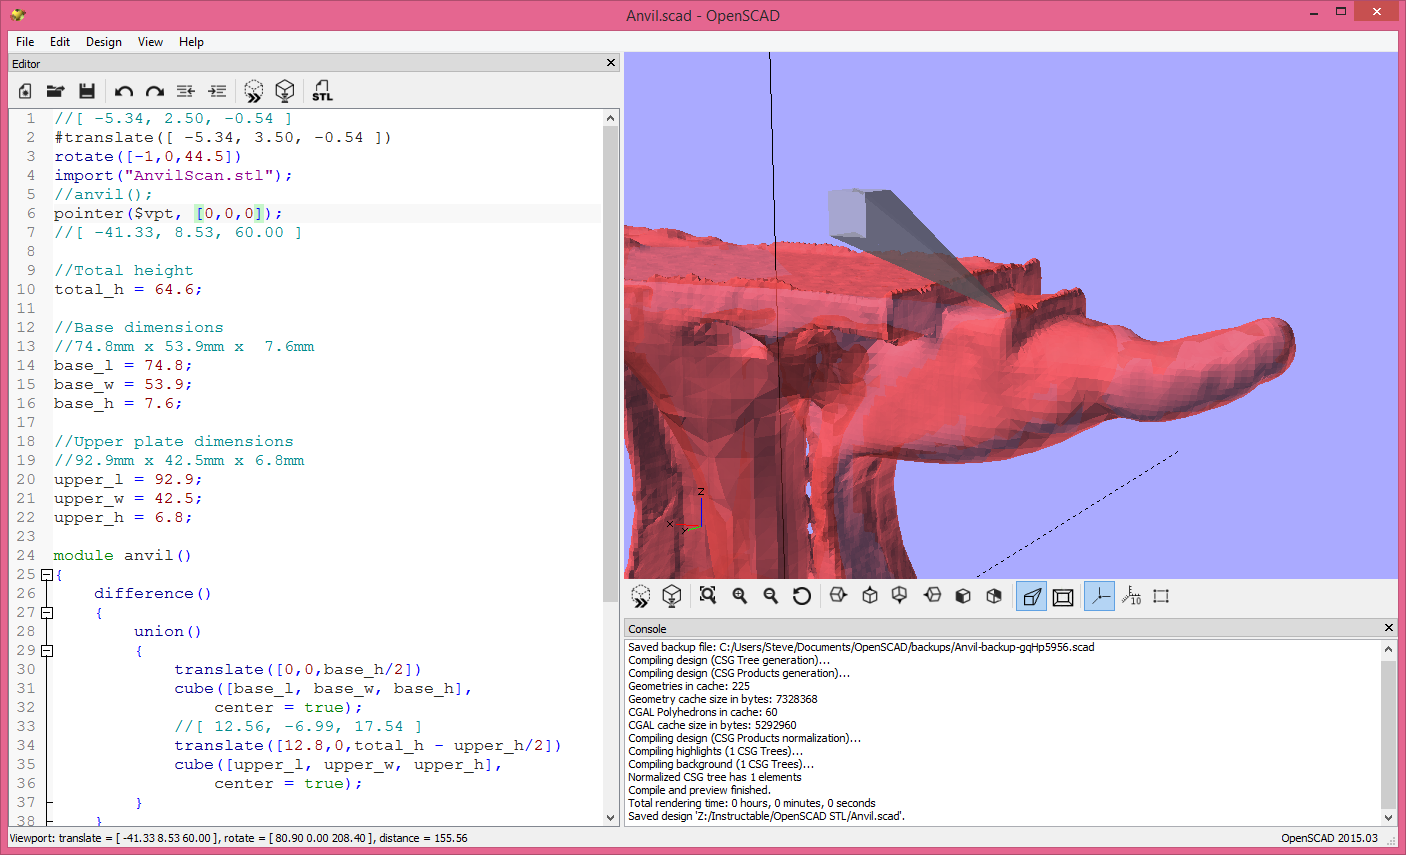
The best way to measure an object is on the real thing. But those measurements are relative to two points or surfaces on the part. It is more difficult to determine a point in the 3D space that is in our OpenSCAD coordinate system.
In the code below a module called "pointer" has been added. It is made up of a hull with a very small cube with center = false and a larger cube further out in the first quadrant. The center = false puts a corner of the small cube at the origin. We can then pass parameters for rotate and translate transforms. The translate can be passed $vpt for interactive measurement. The rotate transform allows us to get the pointer in an orientation best for where we are measuring. Passing $vpt ties the point of the pointer to the viewport translation and allows us to move it around by panning. We will need to rotate to different views to pan to the exact point. We can zoom in very close because the zoom is centered on the viewport translation. We can tweak the pointer even more accurately by editing the values after we get close.
We can make some very precise measurements.
Using the Pointer and the Hull to Create an Arbitrary Shape
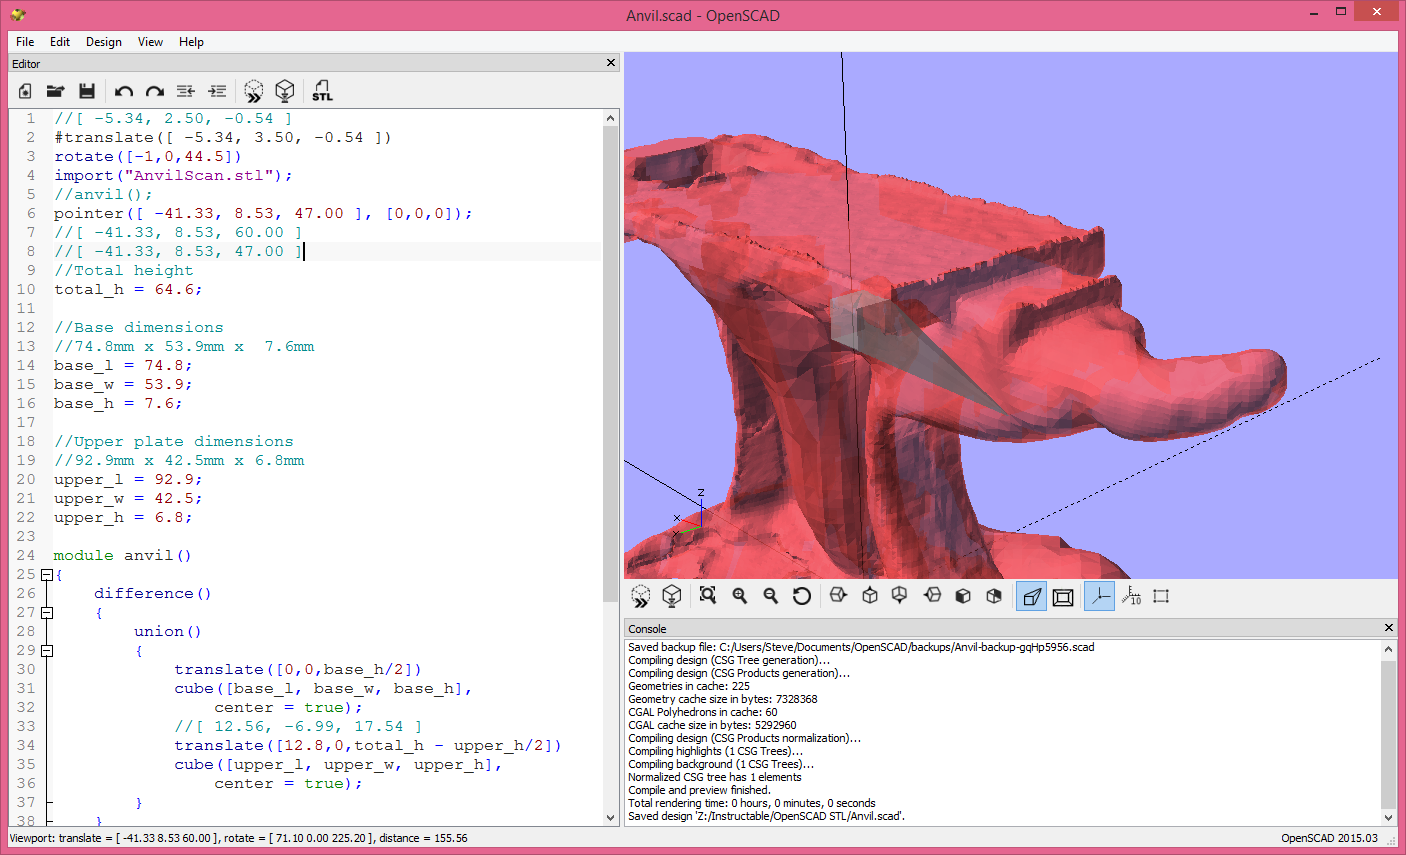
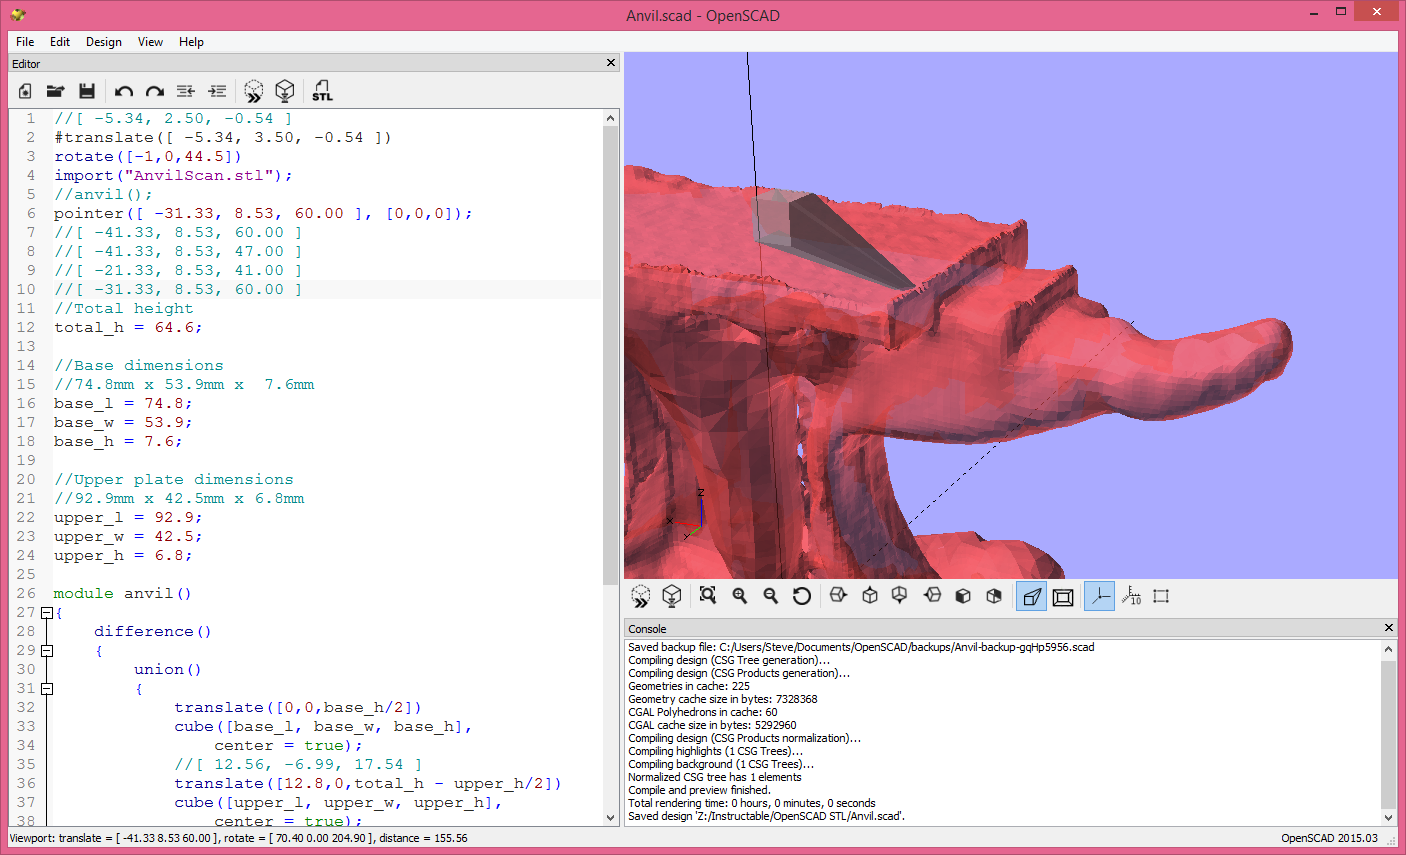
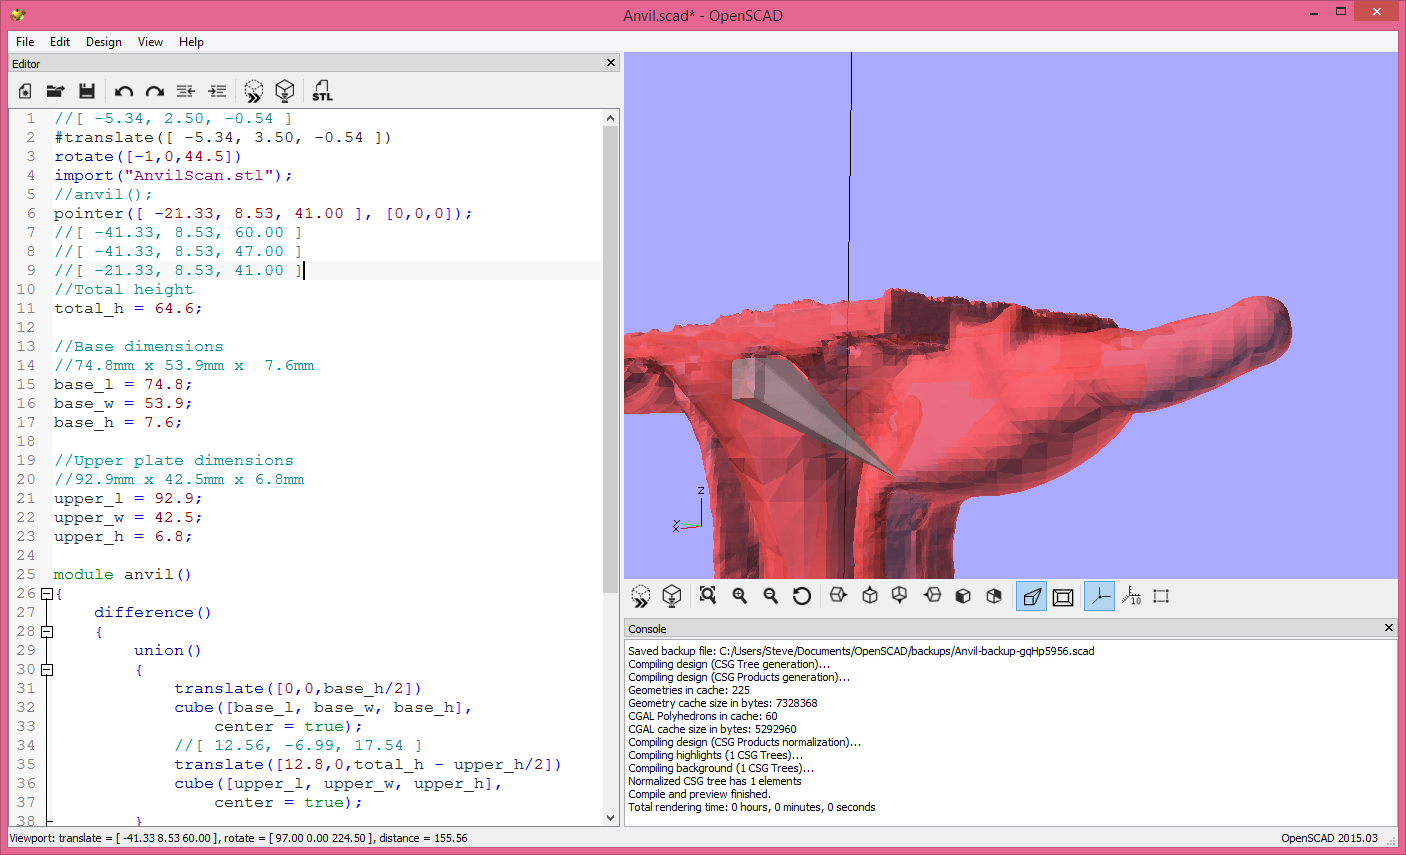
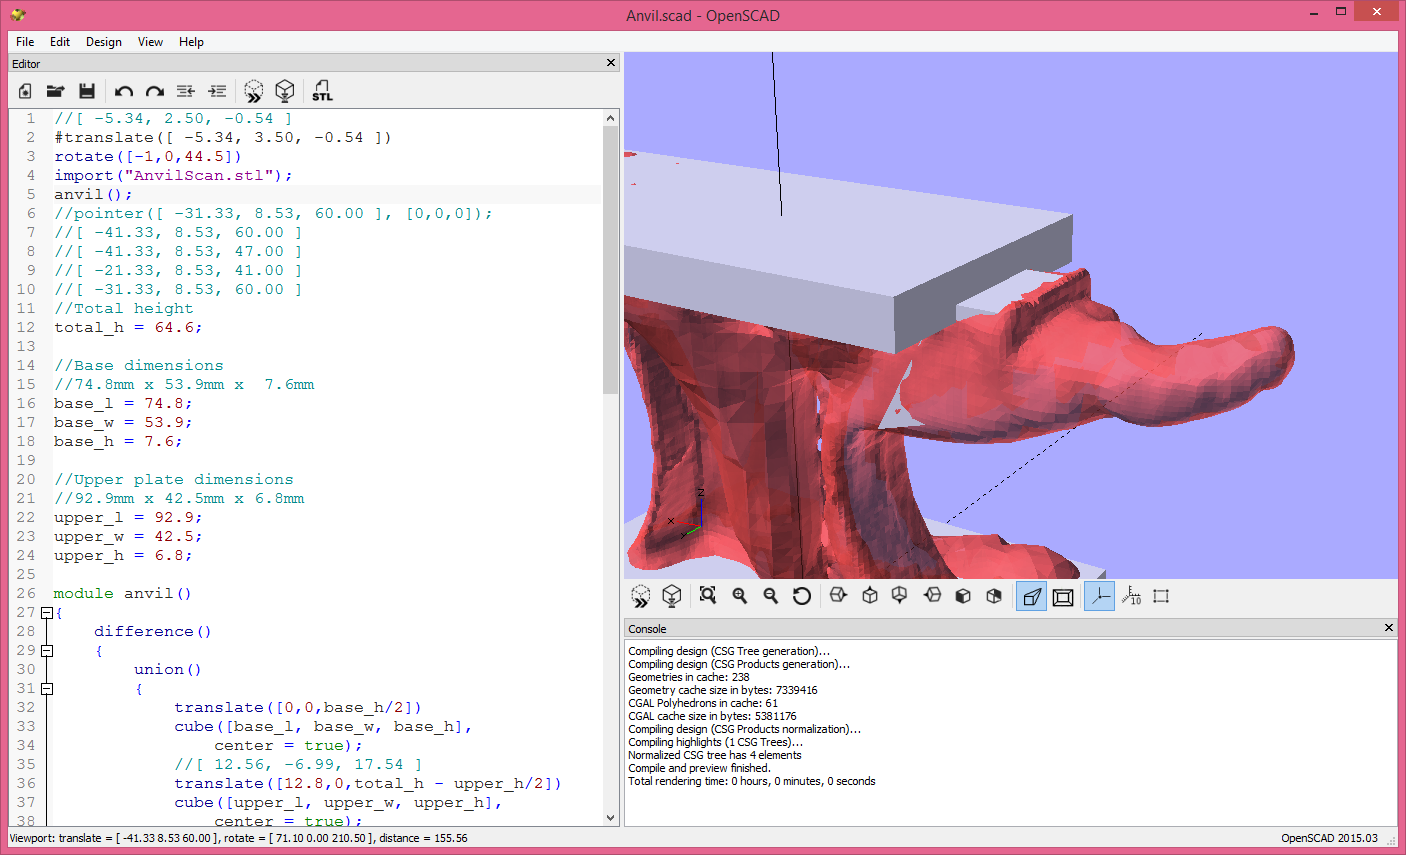
It can be a little PITA to make a shape and rotate/translate it into position. The hull gives us a very easy way to create a lot of shapes on the spot if we know the dimensions. We will use our pointer and the hull to recreate a part of the anvil.
I have written a routine (hull_shape) that takes shapes from a bracket brace list to be the shapes in the corners of the hull. The parameters are an array of vectors to be the positions of the shapes in the list to be hulled, an array for which shape in the list to use at that point and three booleans representing symmetry around each axis as parameters.
The rounded shape at the bottom of the part I am recreating is actually flatter on the real part. The scanner has given it a bloated shape. I know a convex hull will work here.
I measure all the points of my hull on one side of the x axis. I pass all these points in an array and use the y_sym = true to get another set of points on the other side of the x axis. I pass a very small cube as the shape at each corner.
NOTE: Hull_shape is a module I use a lot when recreating STLs. It allows one to take unusual orientations and shapes and recreate them with a few measurements. And one can break up non-convex shapes into convex shapes and union them together.
Introducing the Sweep
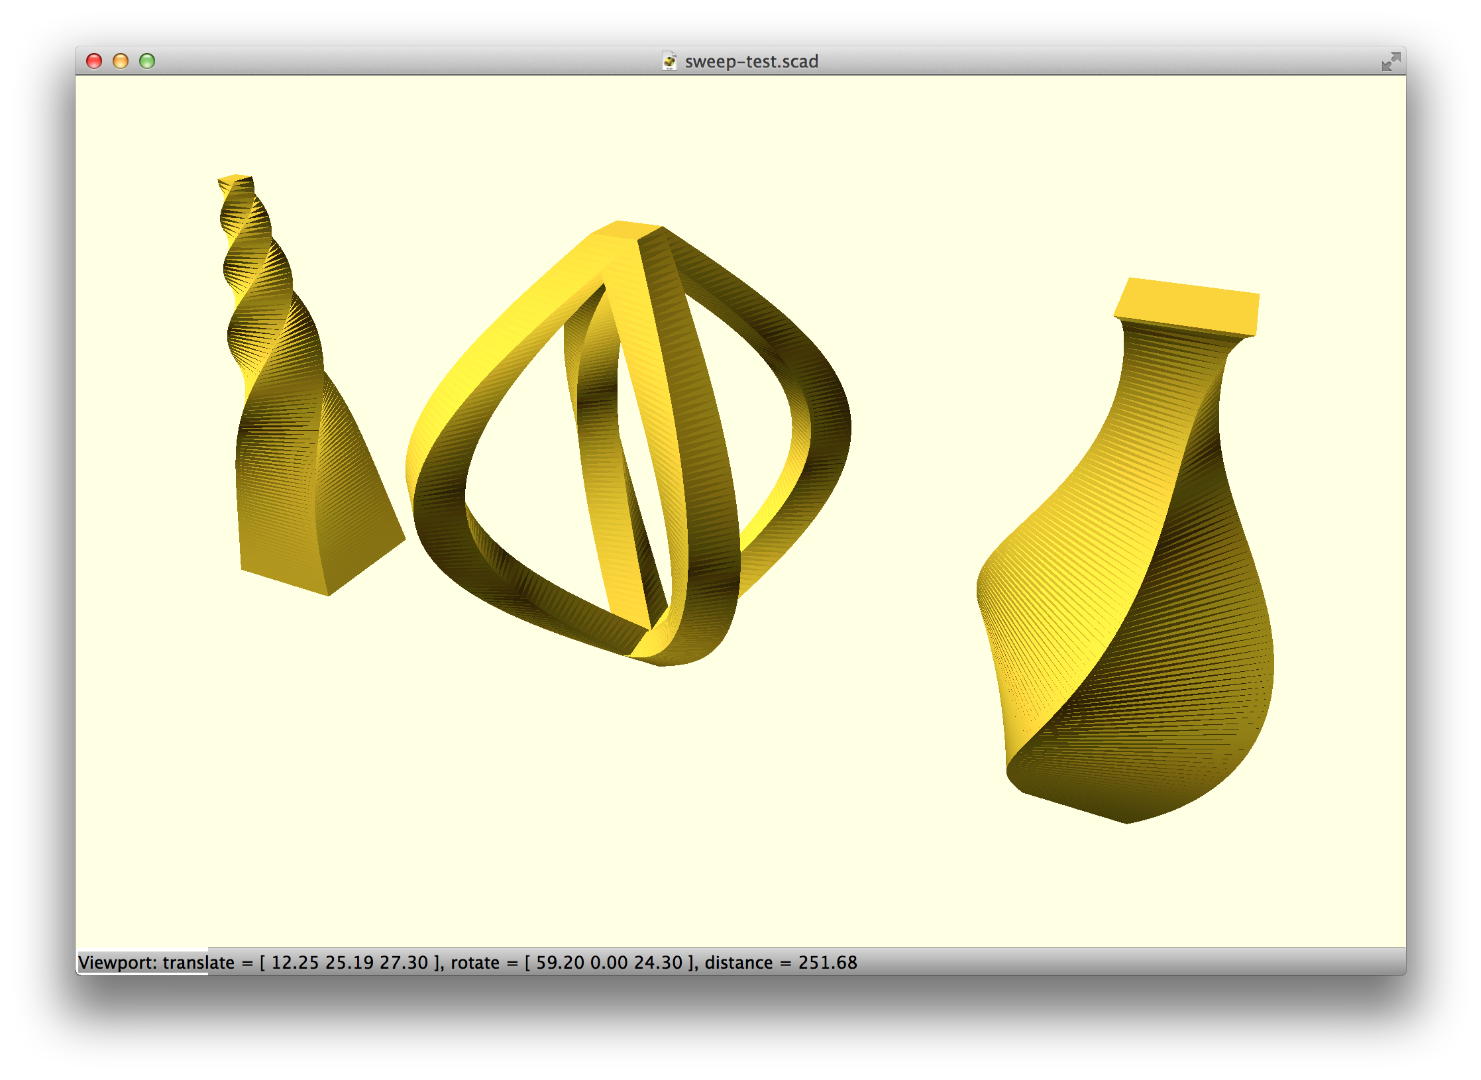
The OpenSCAD released in March of 2015 has a new feature called List Comprehensions. This has allowed for some really useful modules to be written. These are not part of the language, they are written on top of OpenSCAD and need a library that one can download from the following link.
https://github.com/openscad/scad-utils/archive/master.zip
Sweep is taking a 2D shape and "sweeping" it along a path. There is a way to make a path called a trajectory. Creating a trajectory is like flying a plane. One can pitch, roll, yaw while moving along the path . Using the STL as a template we can adjust our flight to match the STL. There are two ribs on the anvil which lend themselves to the sweep.
Sweep is not part of the above utilities. The utilities have the code to do the trajectory. Sweep is part of the List Comprehension Demos. The Demos are found at the link below. The image above is from sweep-test.scad in the demos.
https://github.com/openscad/list-comprehension-demos/archive/master.zip
BTW, all you Linux users. Chances are you will need to break out of the repository. Chances are your repository doesn't have the latest version. You will need the latest to continue from here.
Using the Sweep to Create a Rib
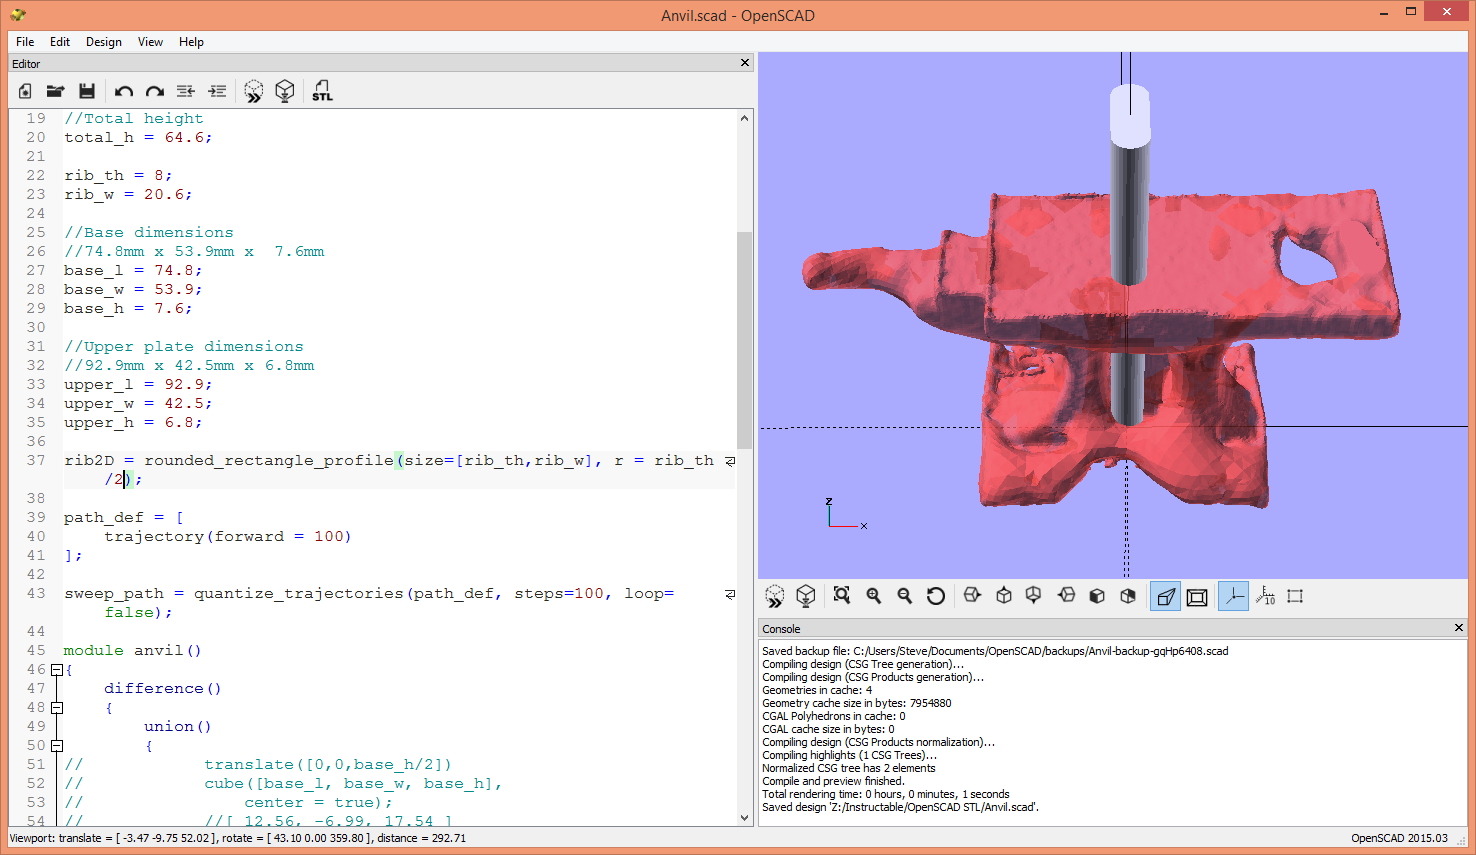
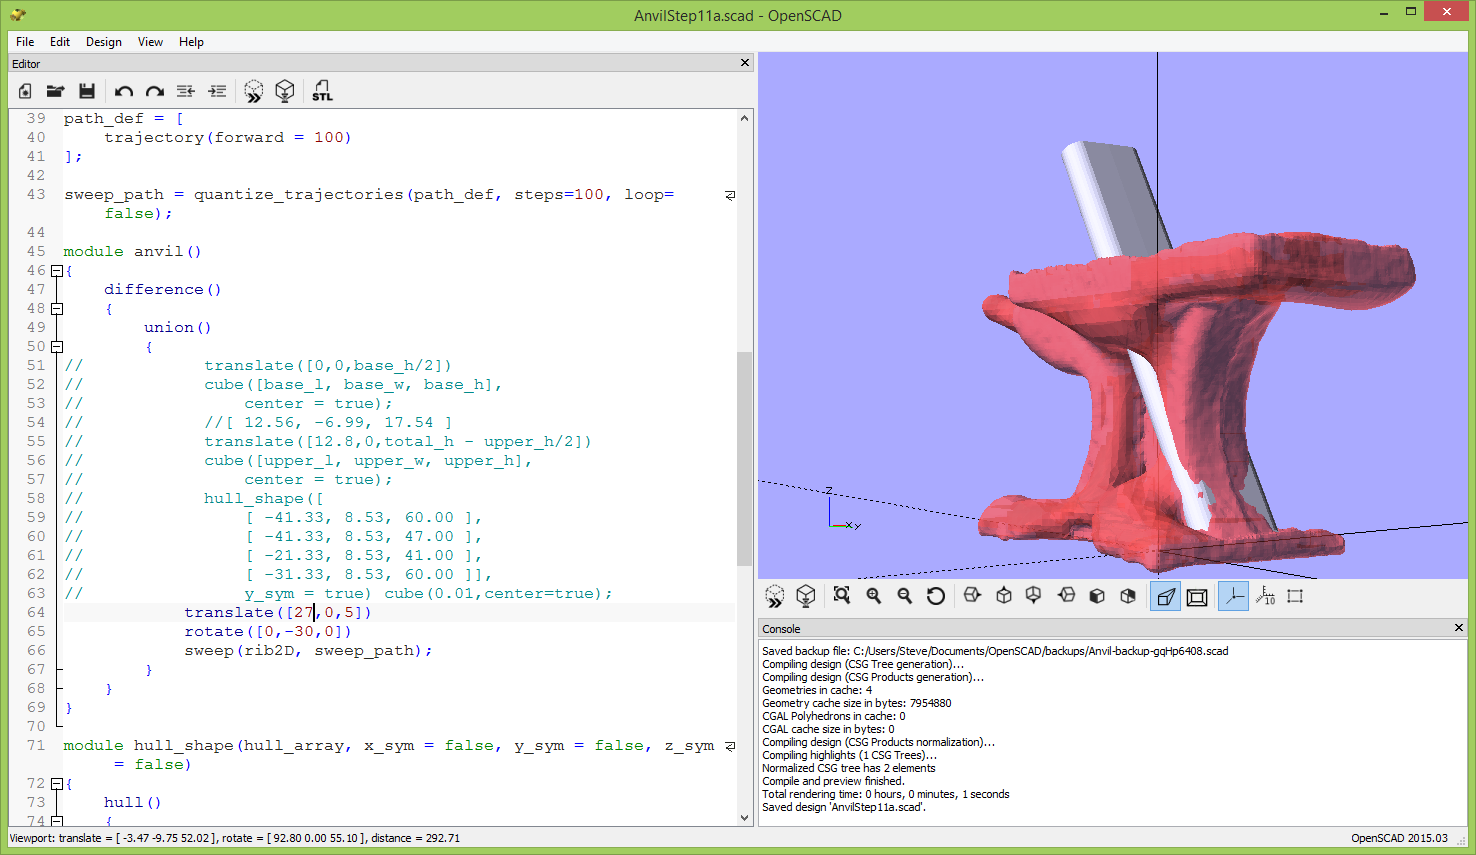
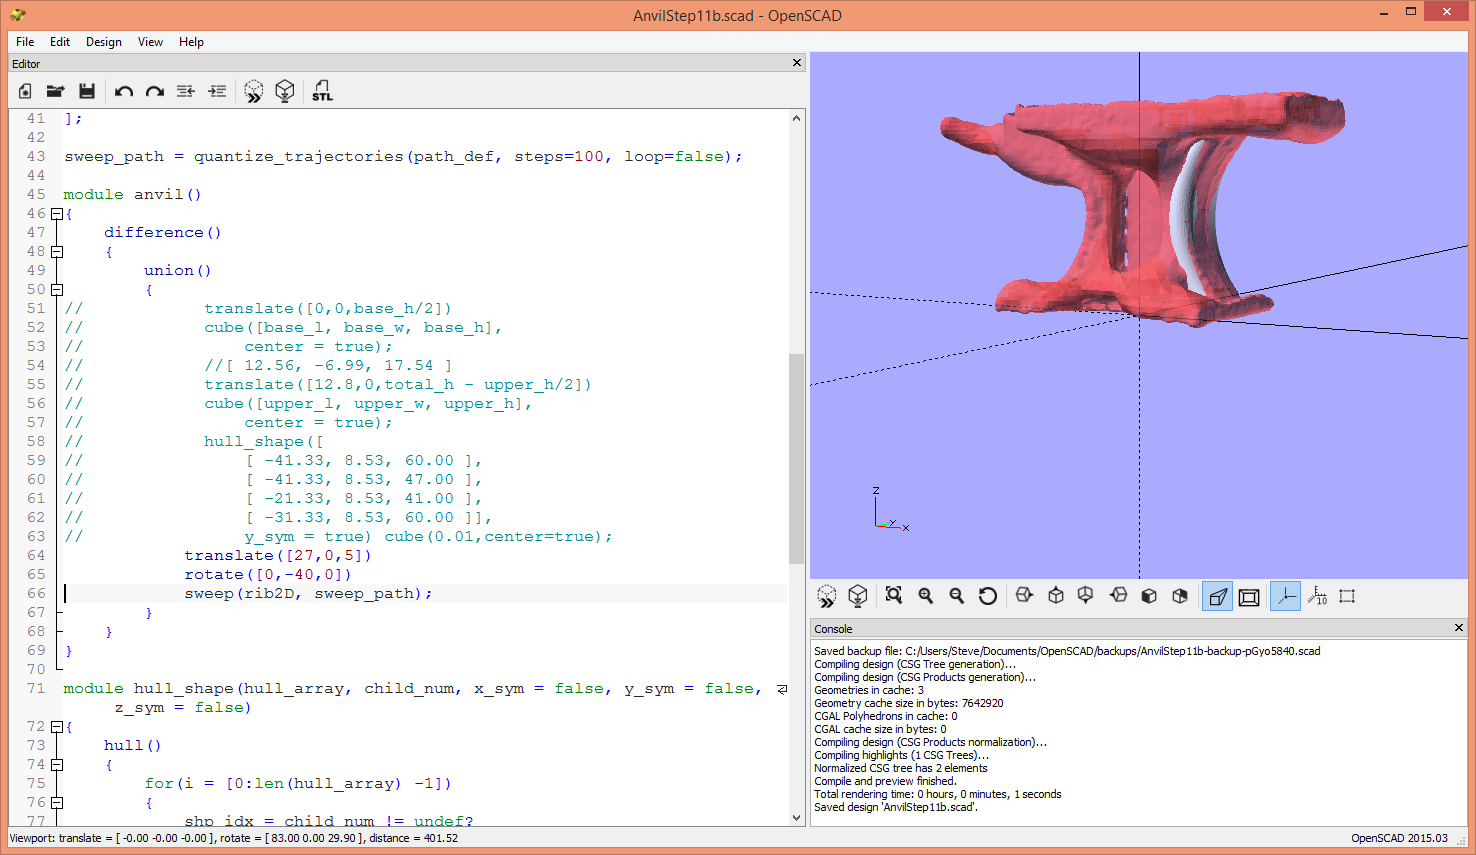
The sweep works by transforming a 2D shape along a path and connecting the corresponding points in adjacent 2D shapes to make a 3D shape. For that reason our shape must be created with a polygon. We can create a polygon using points calculated in a List Comprehension.
The anvil rib has a 2D cross section like a hot dog in profile. A file in the List Comprehensions Demo called extrusion.scad has a module called "rounded_rectangle_profile". I measure the thickness and the width of the rib (8mm x 20.6mm) and use those measurements to make our 2D shape. I create a path with a trajectory of 100mm forward. Trajectories start along the Z axis. Trajectories must be turned into a path. A path is just a series of multimatrix transforms. List Comprehensions allows us to create a list of transforms to define a path. Now I set up a call to sweep with the 2D shape and the path. We see that in the first image above.
We add a rotate and translate transform to the sweep created solid. Then in animate view, we fine tune the starting point of the path. Then we can adjust the trajectory to fit the curve of the STL. This may require adjusting the starting point as well.
Using the Sweep, 2nd Rib
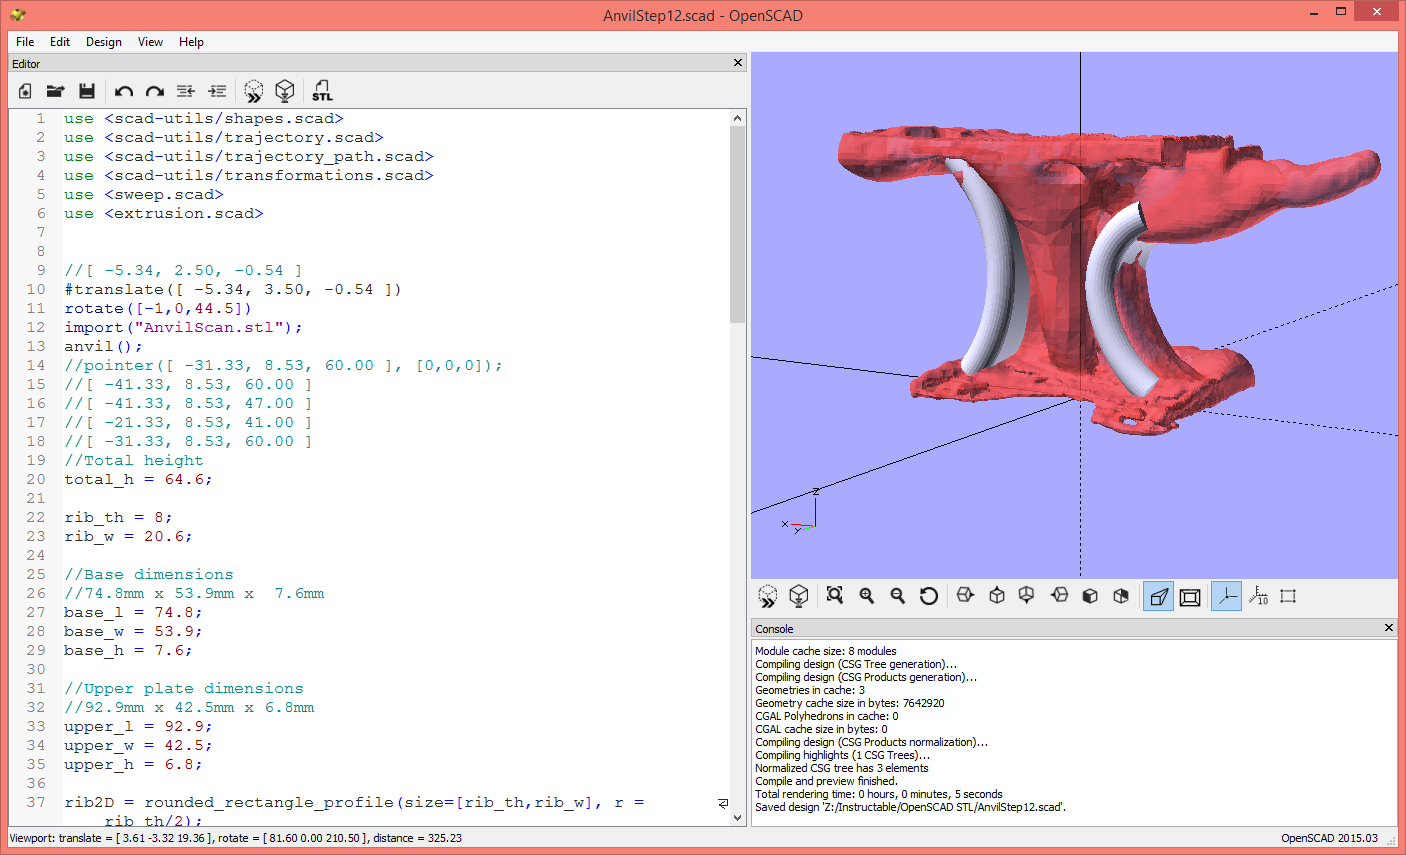
Now we create another path for the 2nd rib. This has an added twist. It does not have a constant radius. The trajectory makes this easy to handle. We add another segment with a different length and amount of pitch. In animate view we can adjust the parameters to get the shape we desire.
Making a Clean Transition to the Nose Block
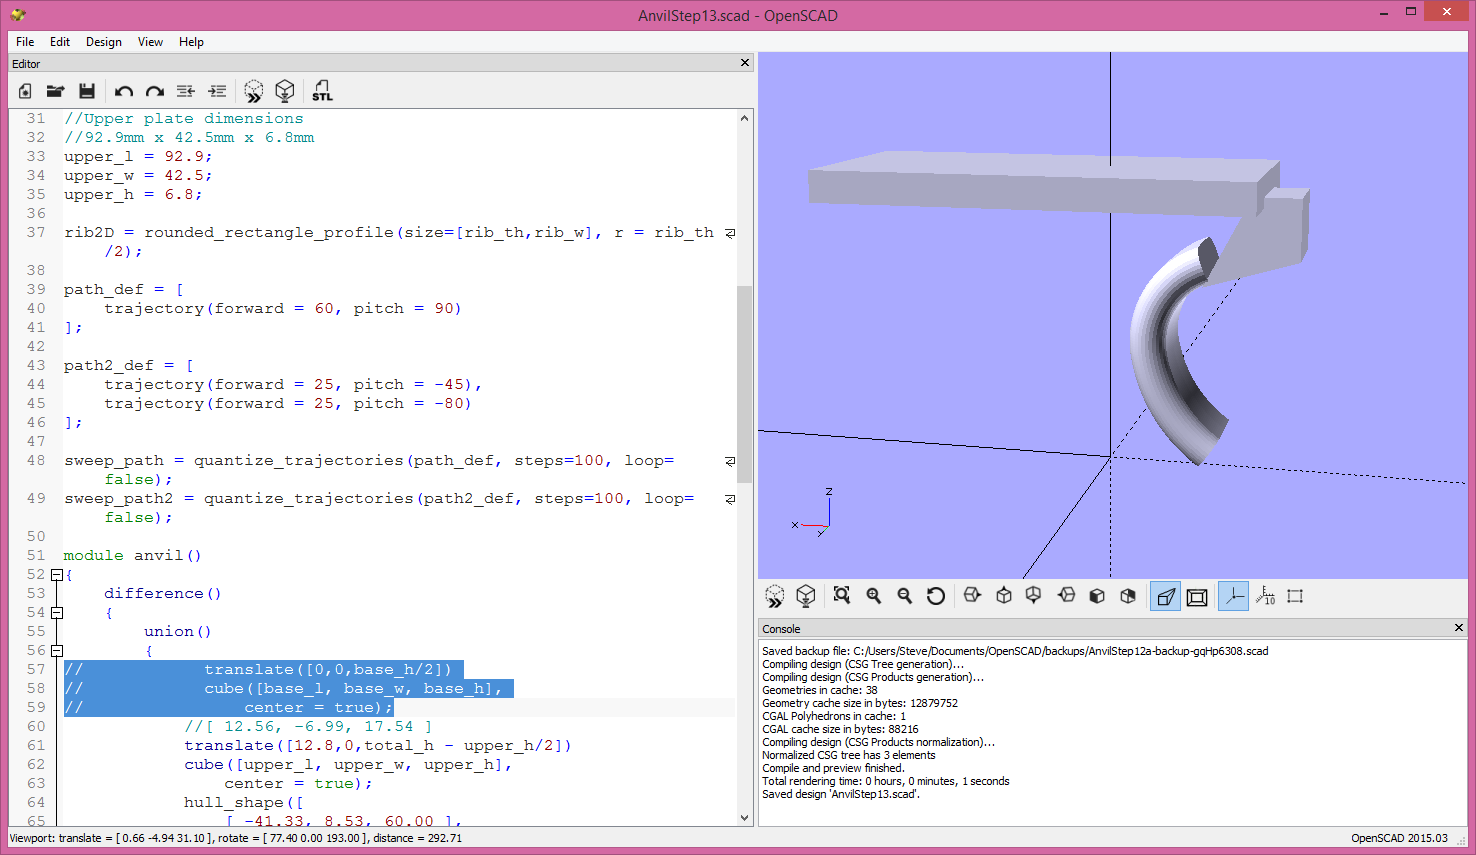
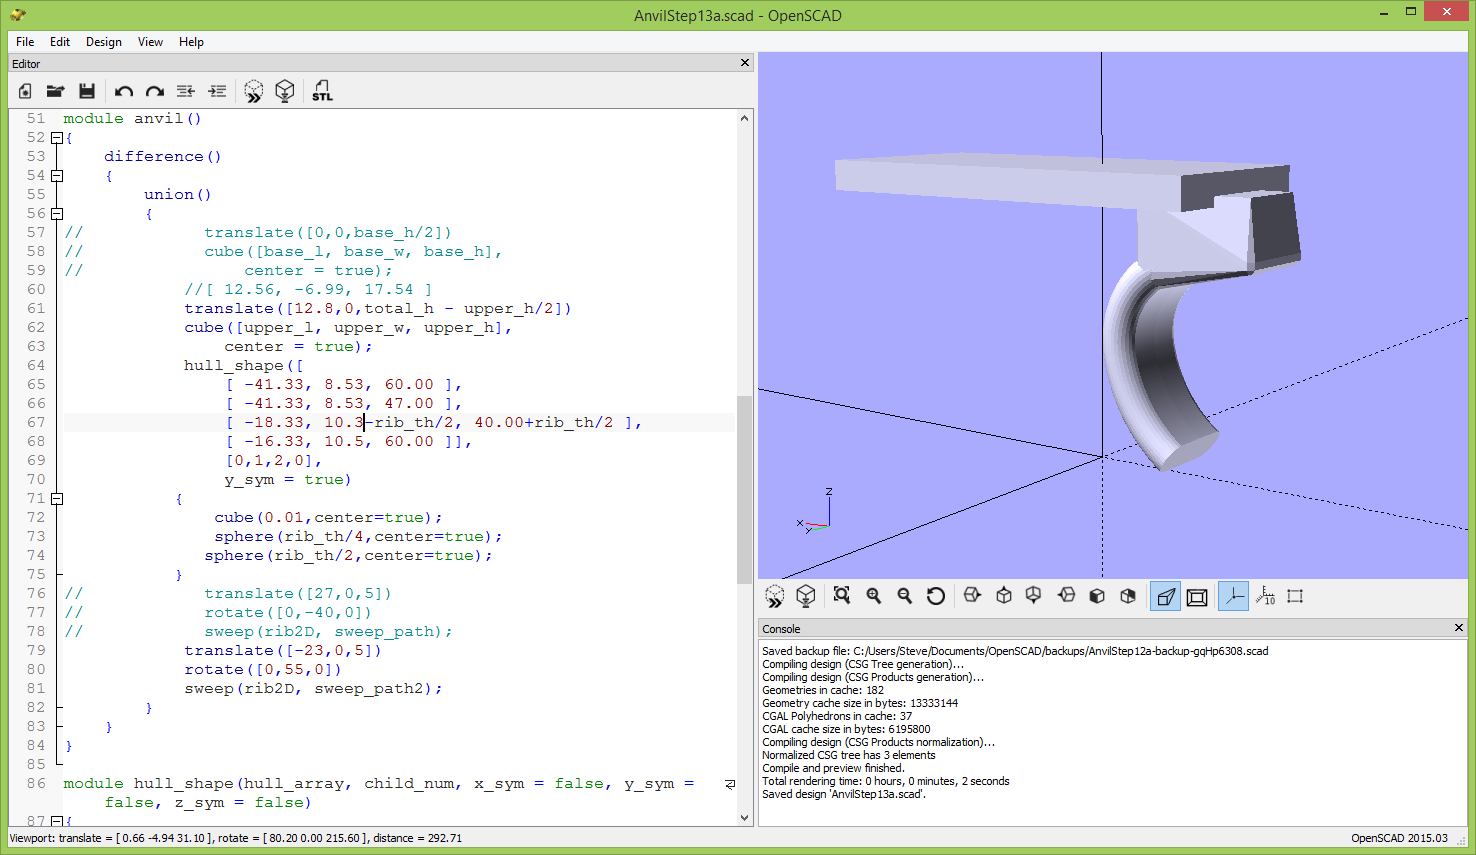
Now we turn off the STL and parts of the OpenSCAD recreation to fine tune the joint between the rib and the nose block. Here is another example of the power of the hull. I use the hull_shape module with multiple shapes and an array which determines at which point each shape applies. This allows us to create a round surface that more or less seamlessly transitions from the rib to the nose. Note there are now spheres at two corners (four after symmetry is applied).
Creating the Web Between the Ribs
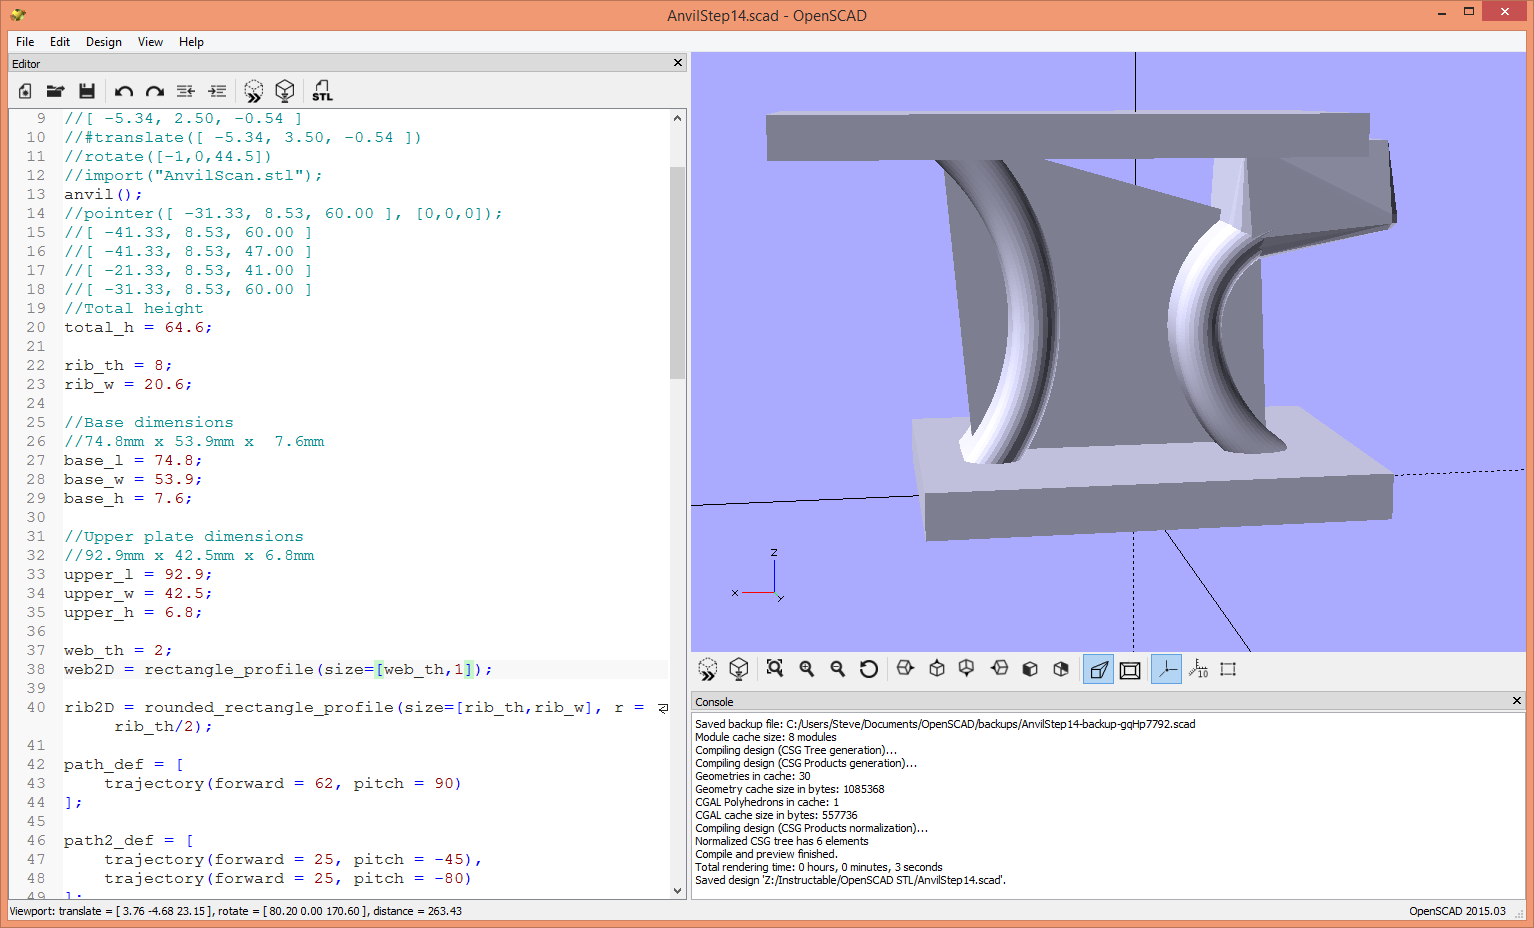
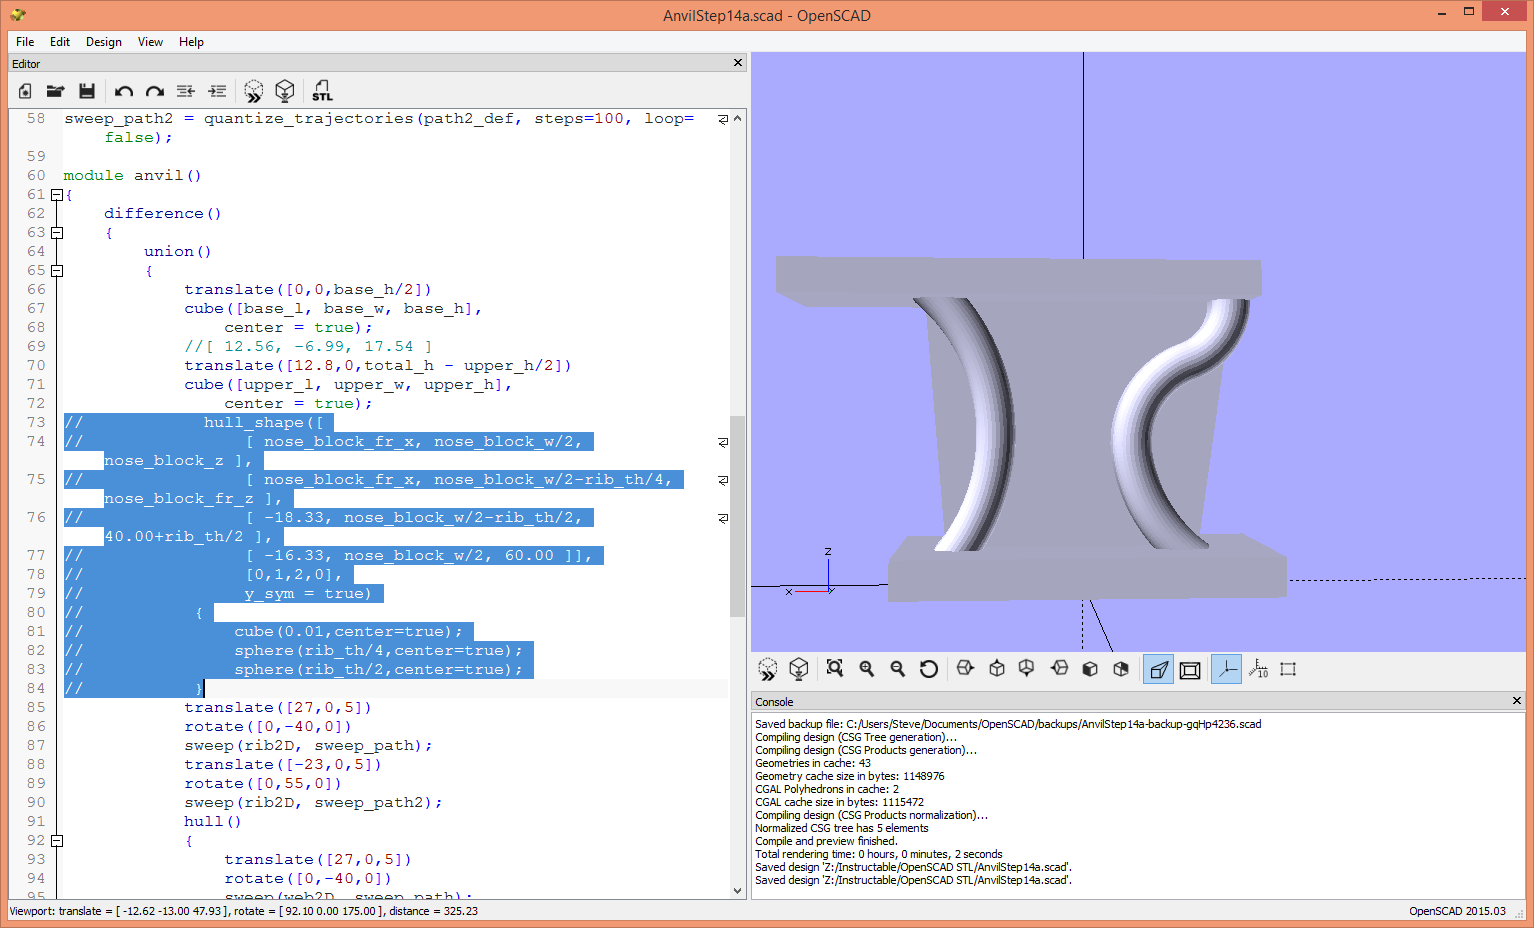
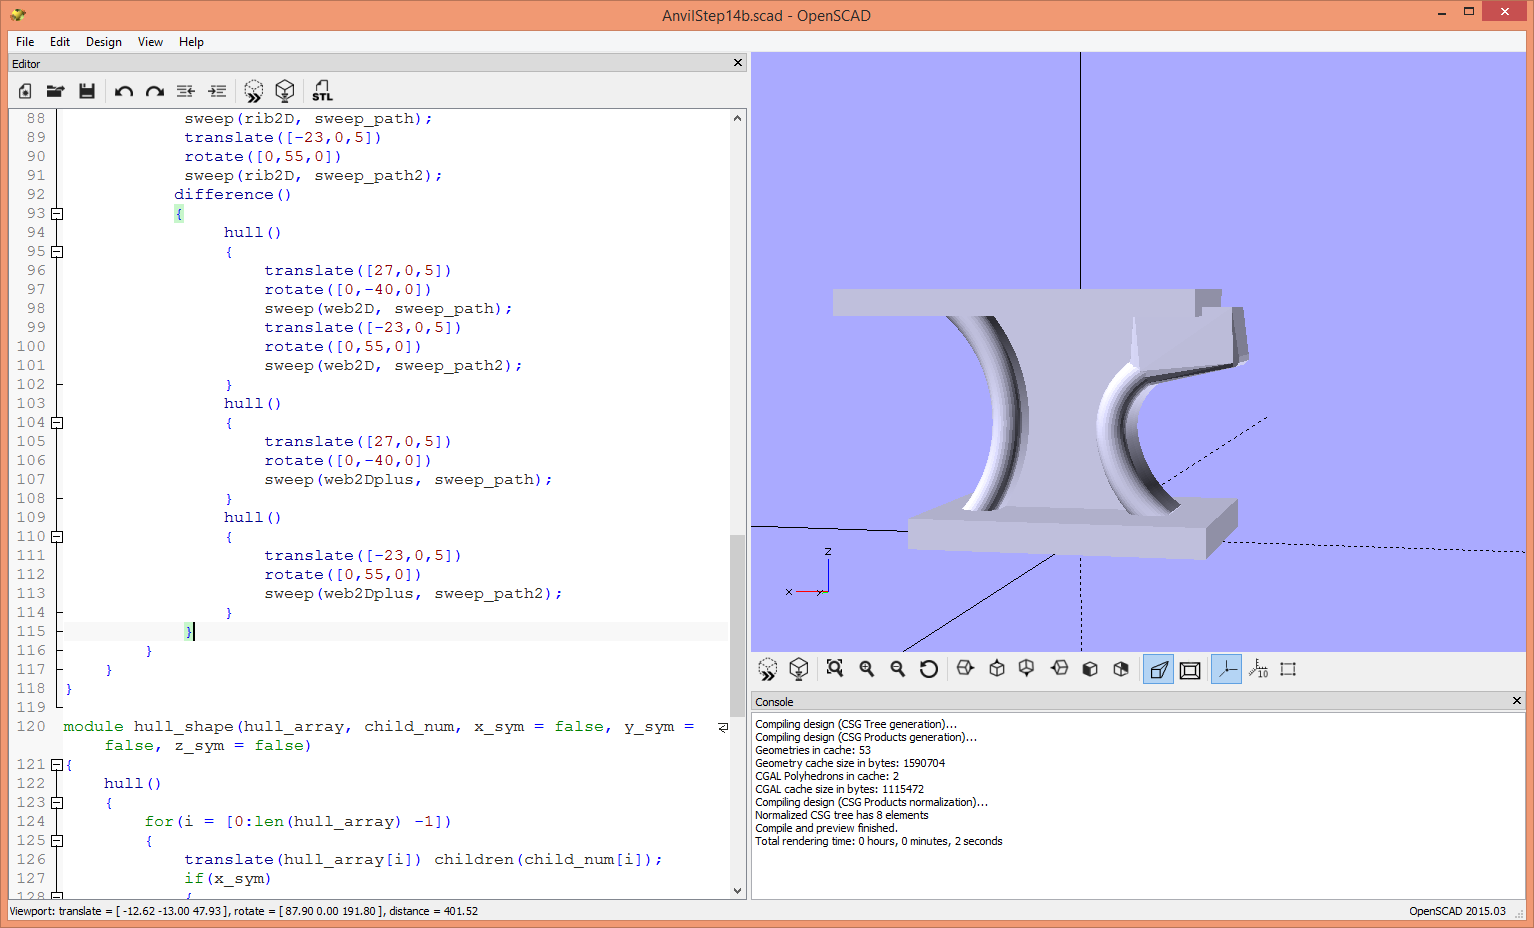
Down the middle of the anvil there is a web. Here is another advantage to the paths. We can do sweeps again along those paths with a 2D shape with the width of the web. We hull them to give us our web. There are a couple of problems. One the web doesn't go all the way to the top. And two, the hull gives us a web going between the back sides of the sweeps. There are simple solutions to both problems.
The first is solved by extending our path to the top on the nose side. Shown in AnvilStep14a.scad.
The second is solved by differencing away the (slightly larger) hull of each sweep individually. This leaves the web between the hulls. Shown in AnvilStep14b.scad.
Note that I have parametrized the nose block and adjusted the values to improve how the sweep extension fits inside the block.
Creating the Nose
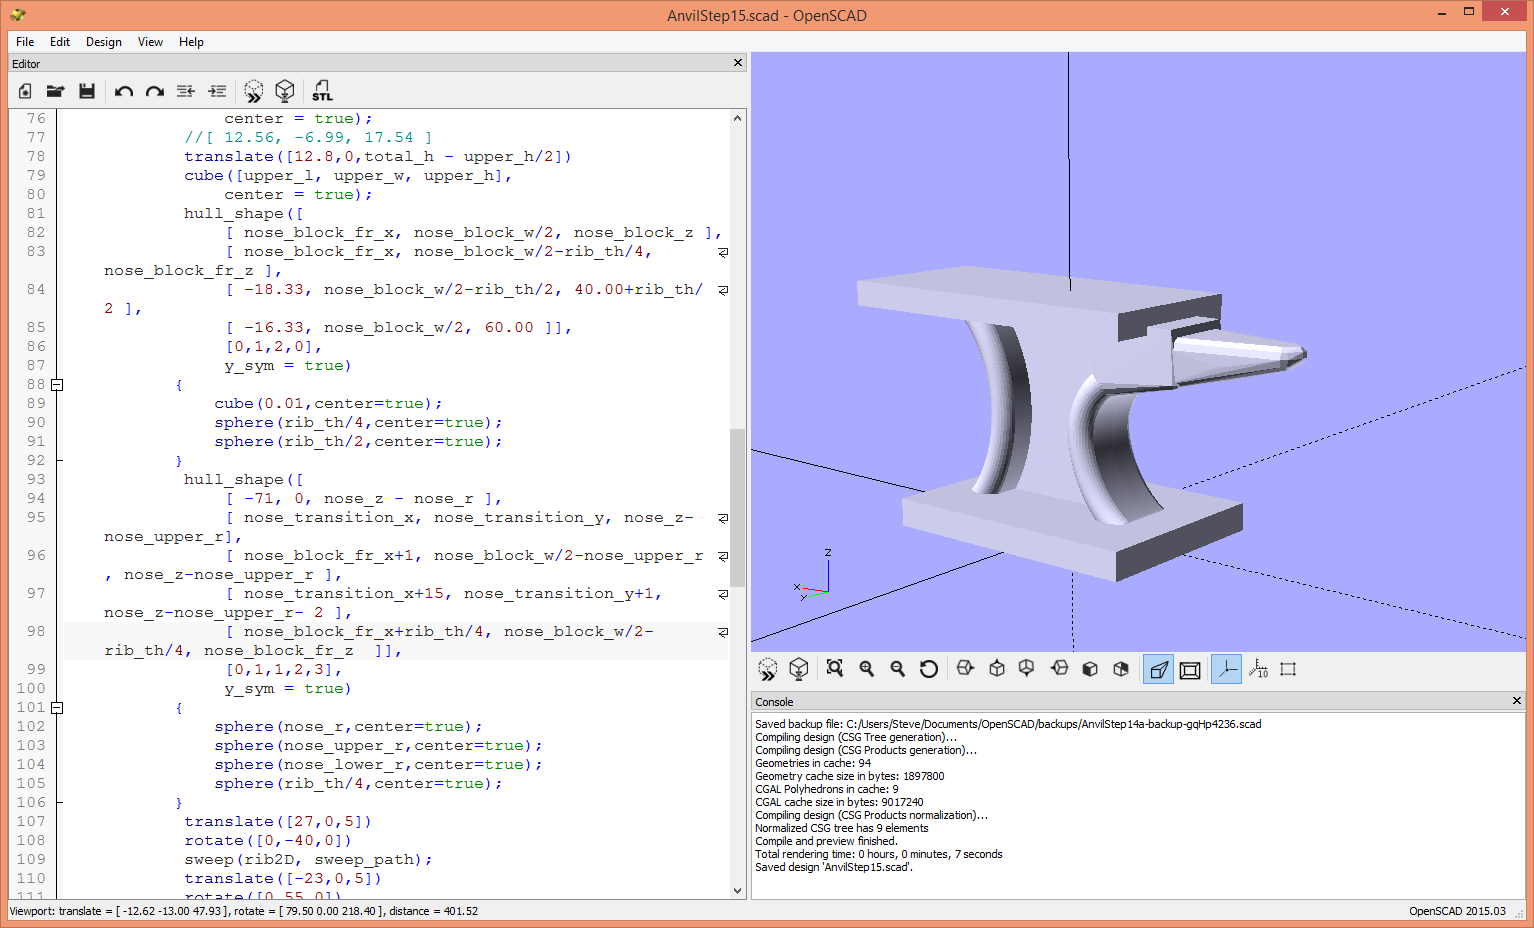
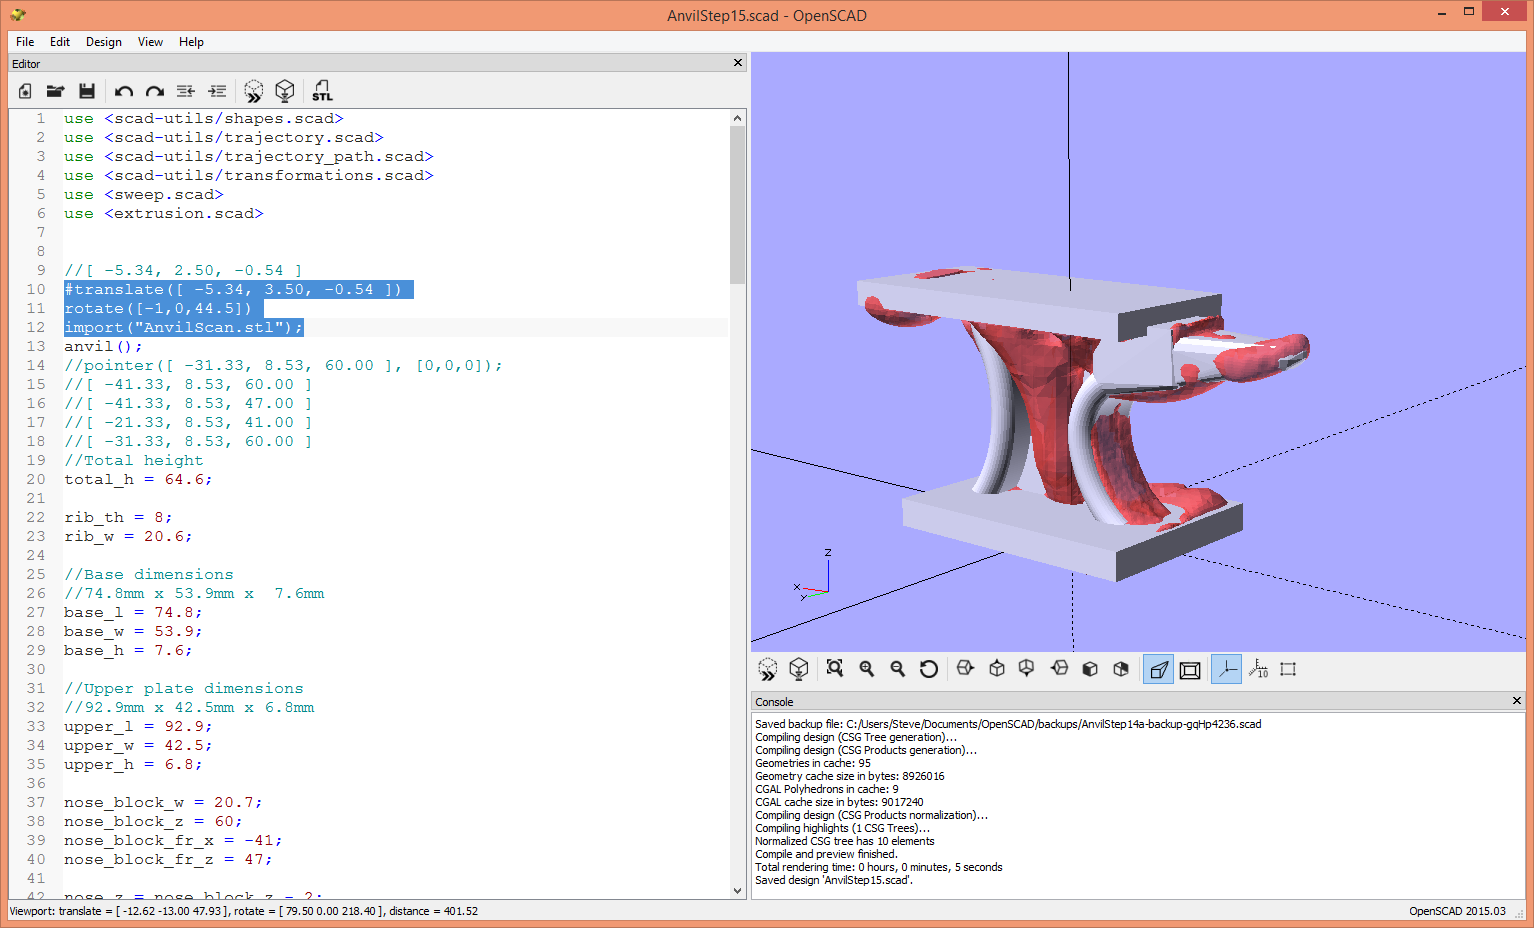
We use hull_shape to sculpt the nose and make it transition into the nose block cleanly
Creating a Single Solid and Using It in Multiple Places
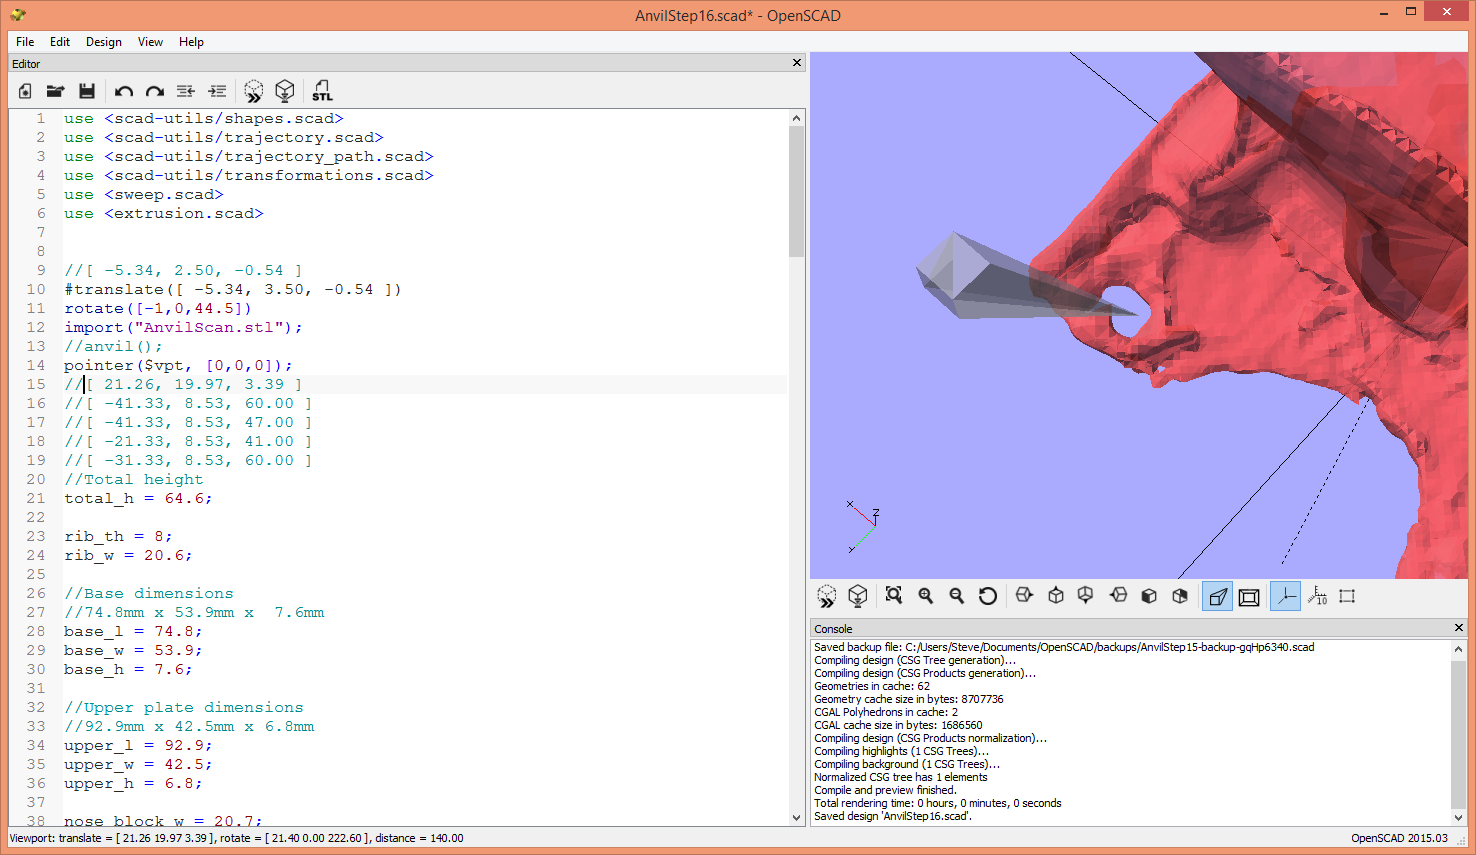
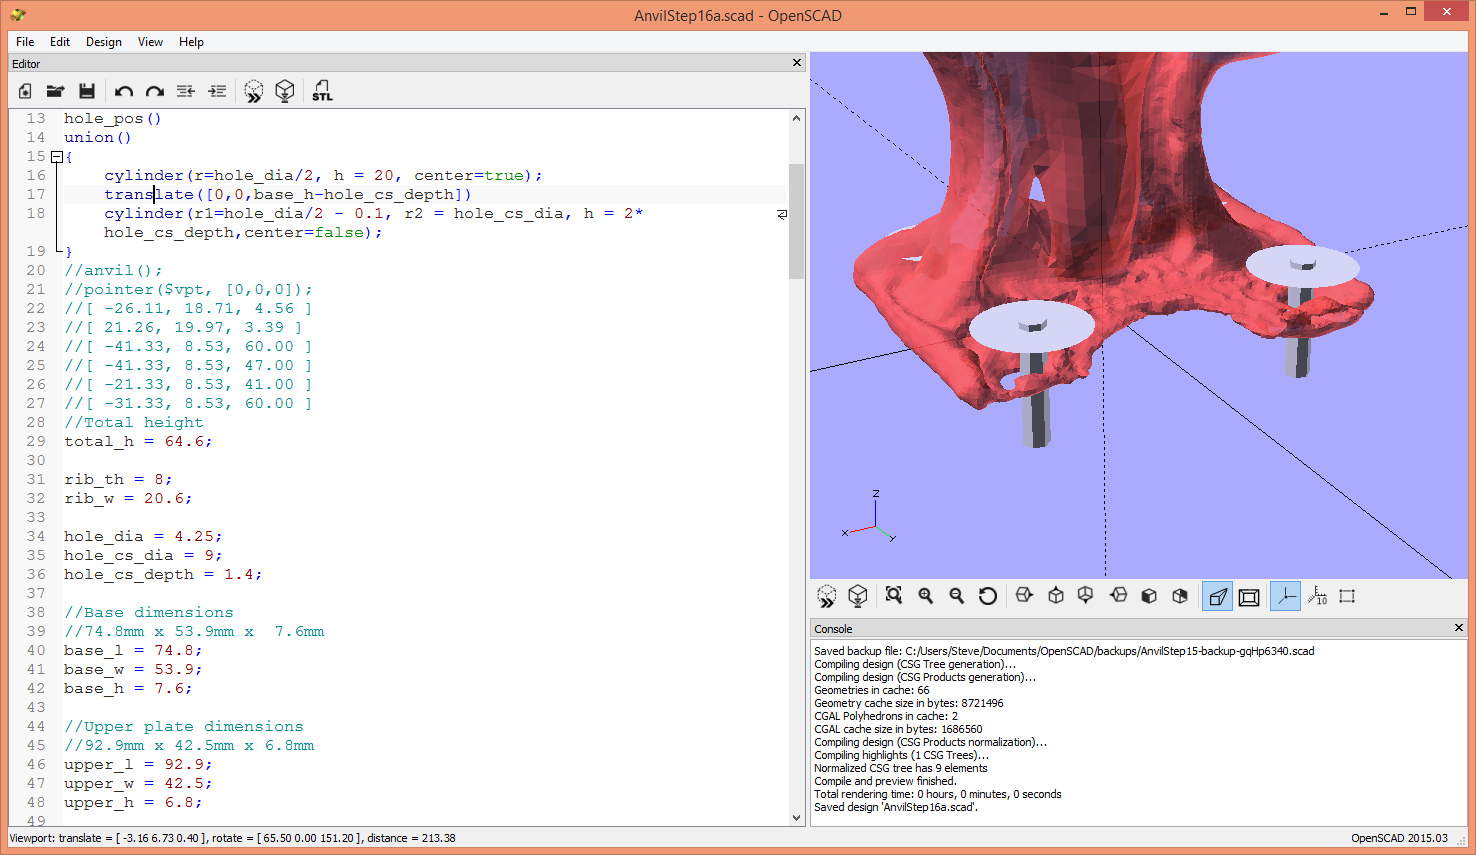
We have created all of the positive parts of the anvil. Now to subtract away the negative parts. The anvil has four mounting holes with countersinks.
If you have read "OpenSCAD: The Instructable" you will know that solids can't be stored in variables. That doesn't mean one can't use a single solid in multiple places. When I have that situation I write a module. Then children(0) acts like a variable and can be used in multiple places.
I use the pointer and animate view to determine the position of the holes. Then I write my module and look at it in the positive to verify.
Final Steps
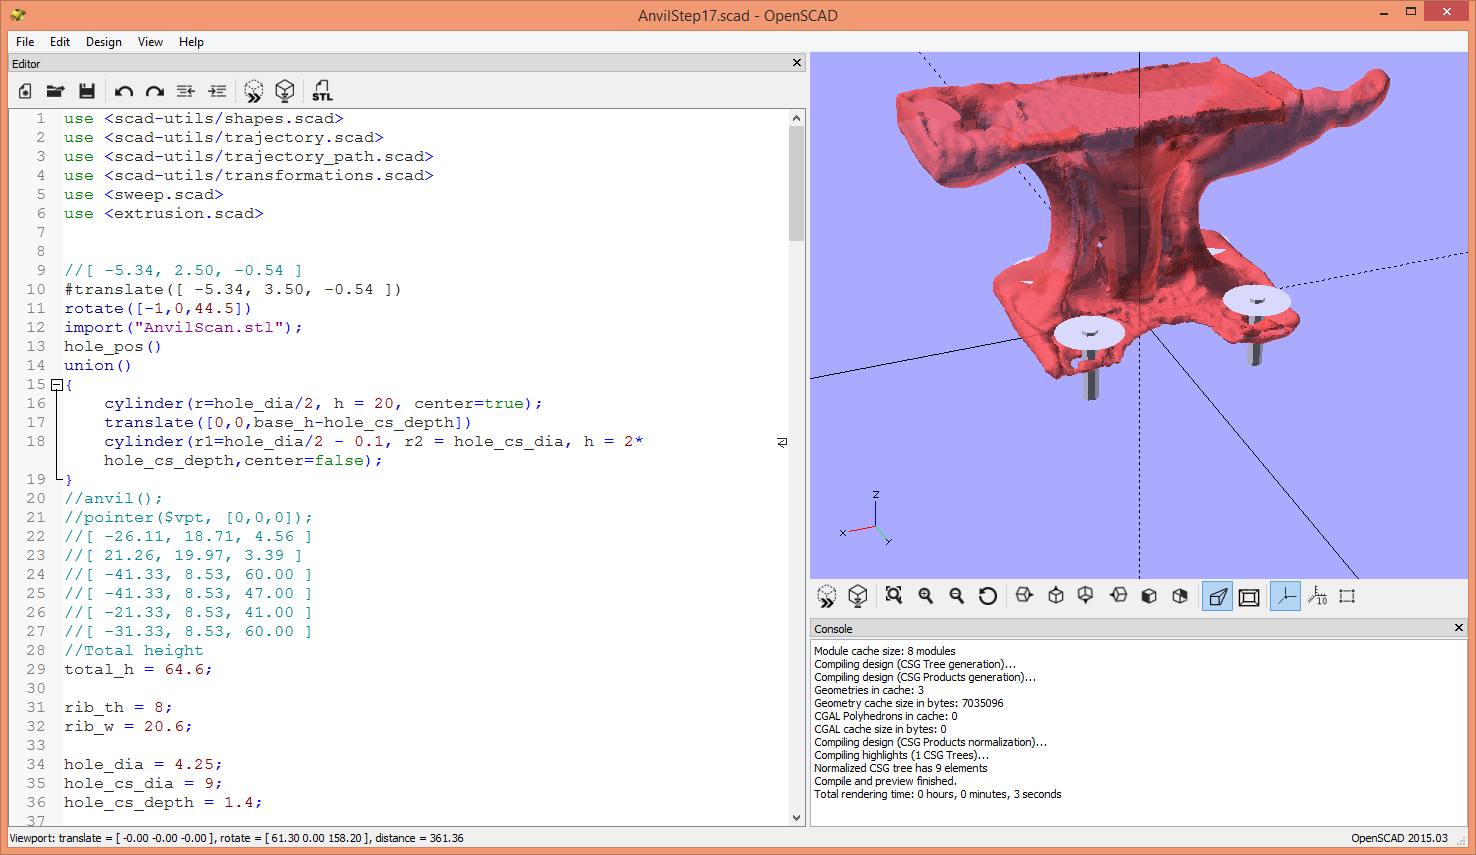
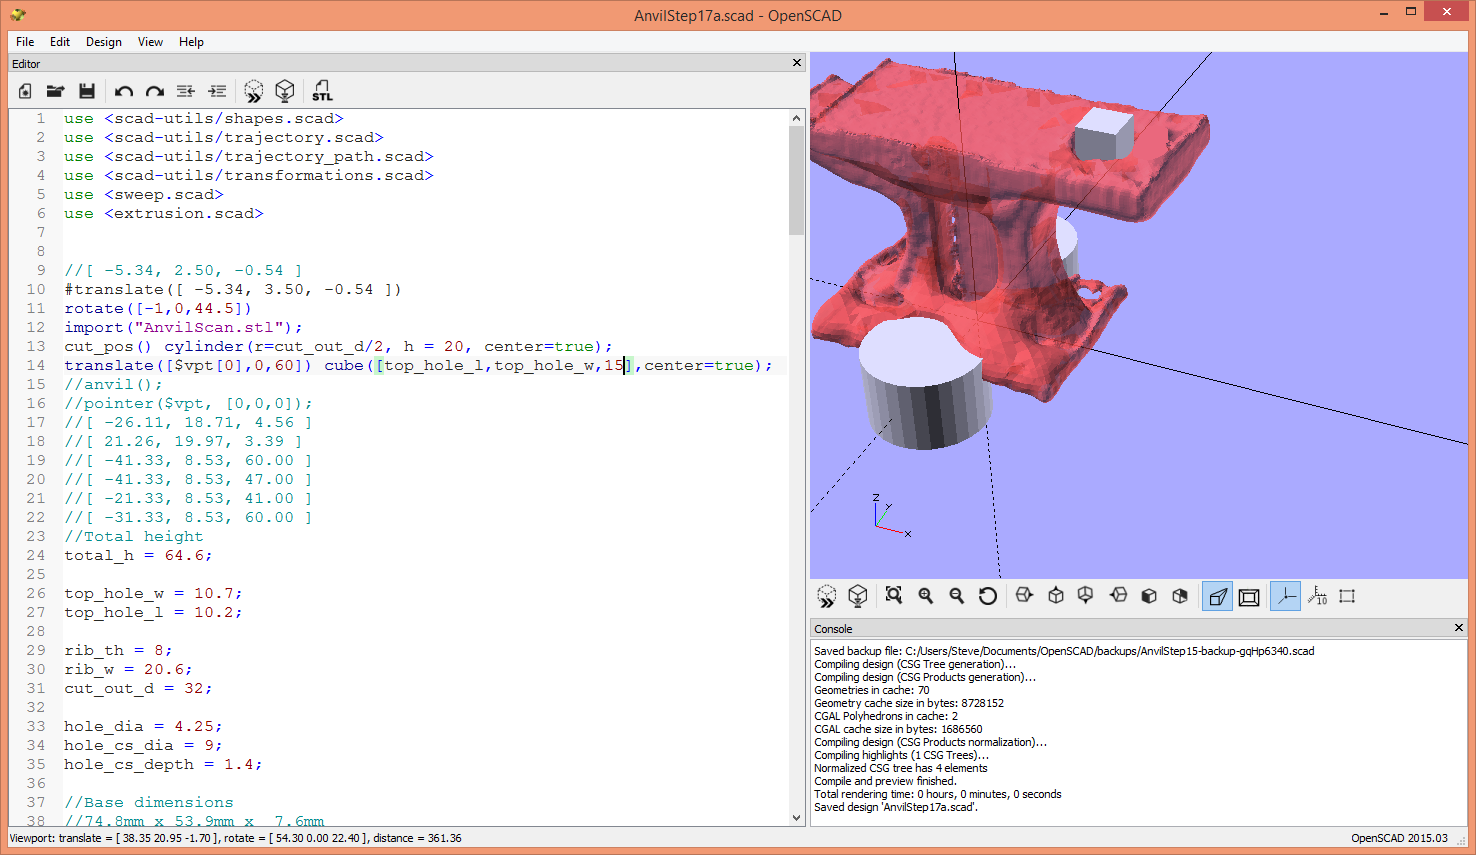
We have a couple of more areas to difference away. I take some measurements and use animate view to position. them in the positive. Then I move them to the difference in the anvil.
Our Beautiful Anvil!
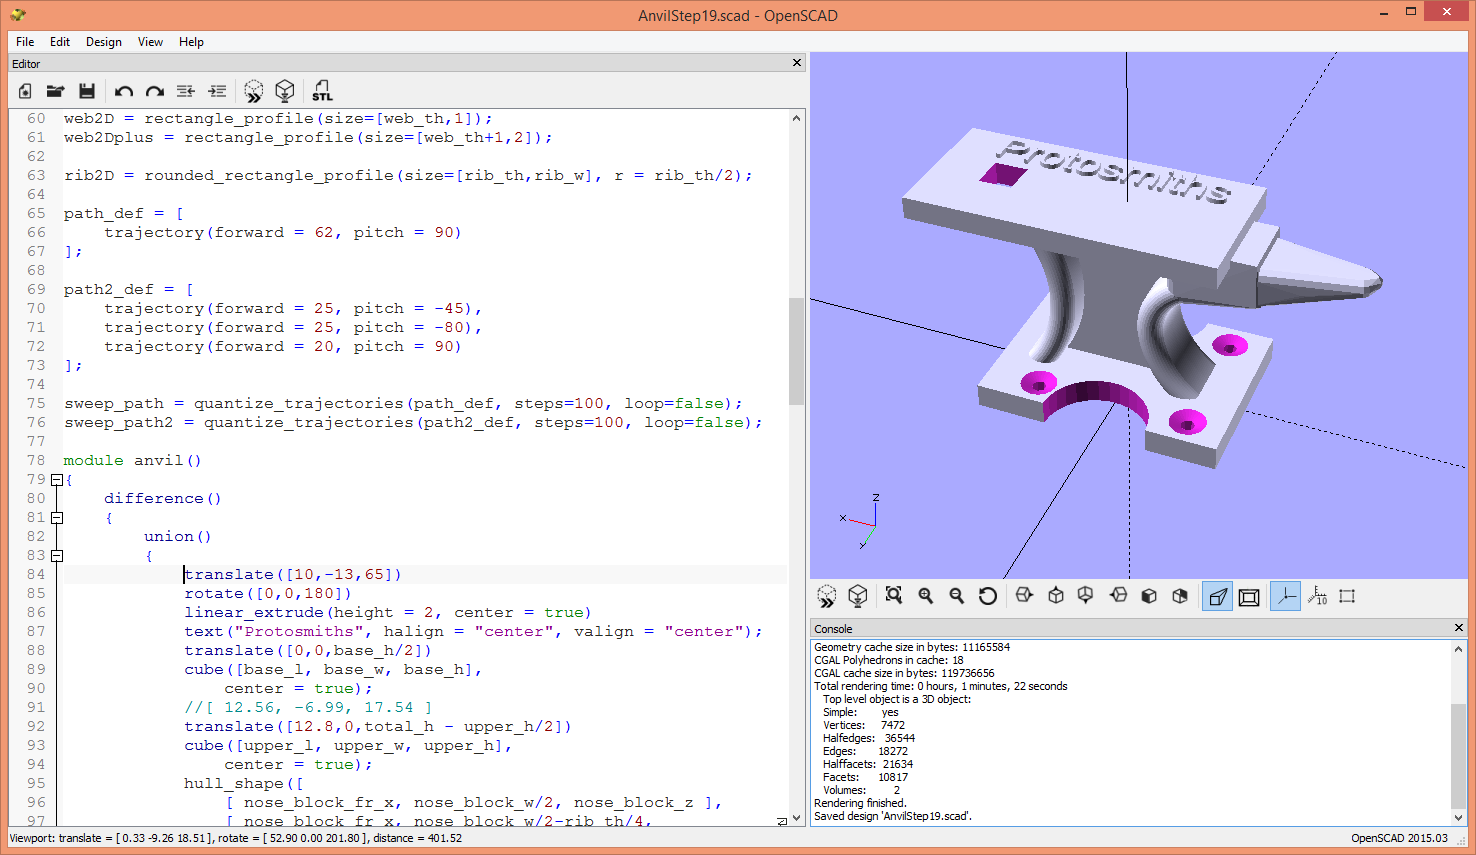
When you F6 compile the code we have written you will get
"PolySet has nonplanar faces. Attempting alternate construction"
This has happened to me every time I have used the sweep. It doesn't seem to cause a problem, because the compile completes and the object is manifold and printable.
These techniques have made a manifold 3D model. That is one of the side benefits of using the hull so much. Hulls are naturally manifold.
If I weren't writing this Instructable, recreating the anvil wouldn't have taken me very long. These techniques work very well for me. I hope that you will find these techniques are useful as well.