Opencv Face Recognition

Face recognition is quite common thing now a days, in many applications like smart phones, many electronic gadgets.This kind of technology involves lot of algorithms and tools etc.. which uses some embedded embedded SOC platforms like the Raspberry Pi and open source computer vision libraries like OpenCV, you can now add face recognition to your own applications like, security systems.
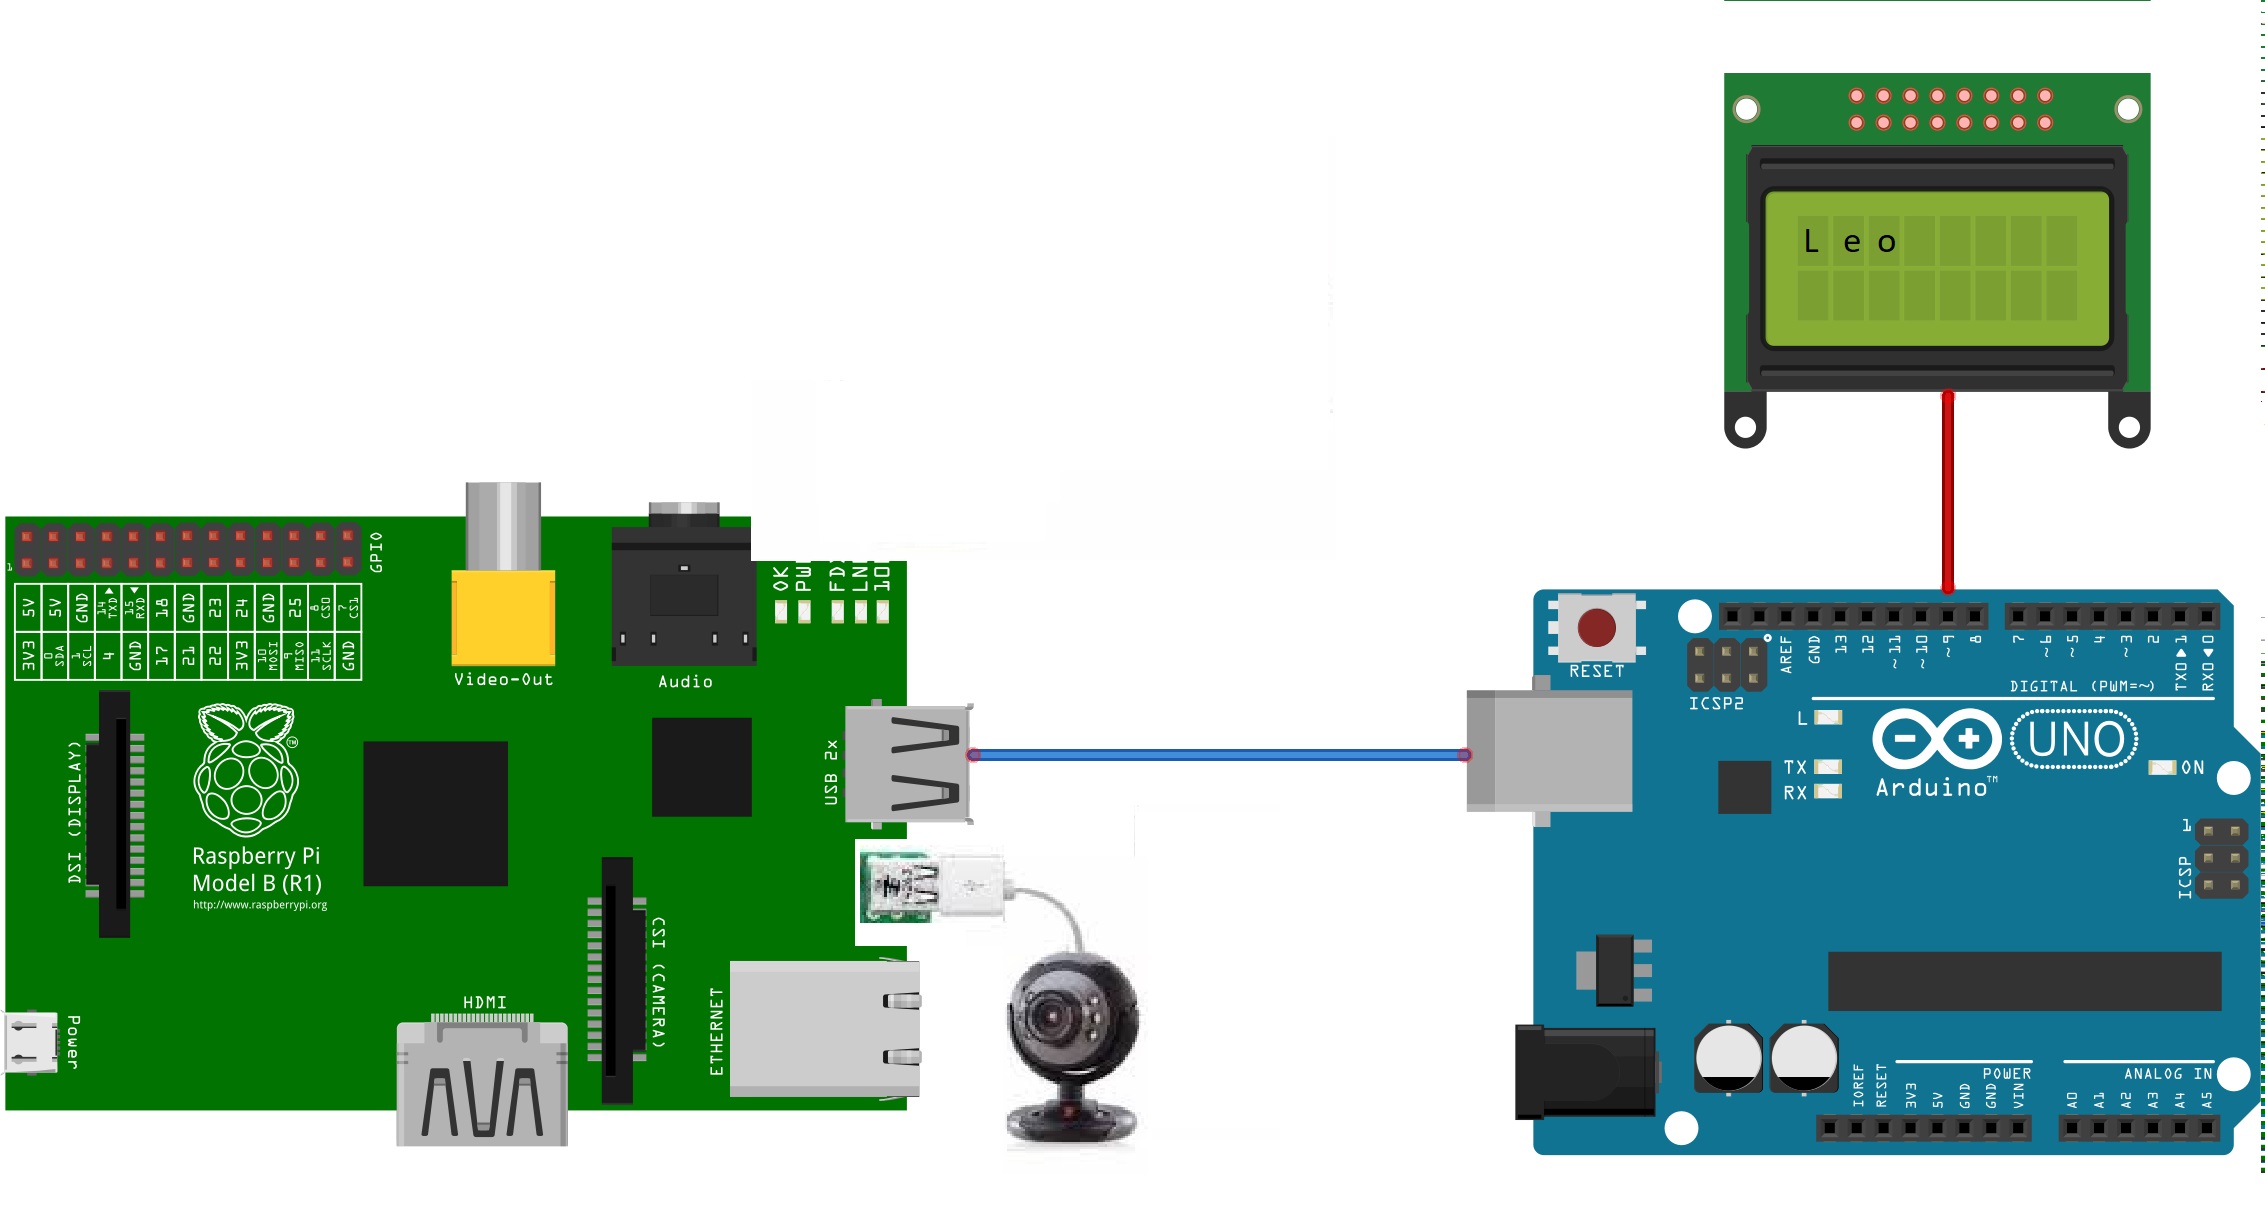
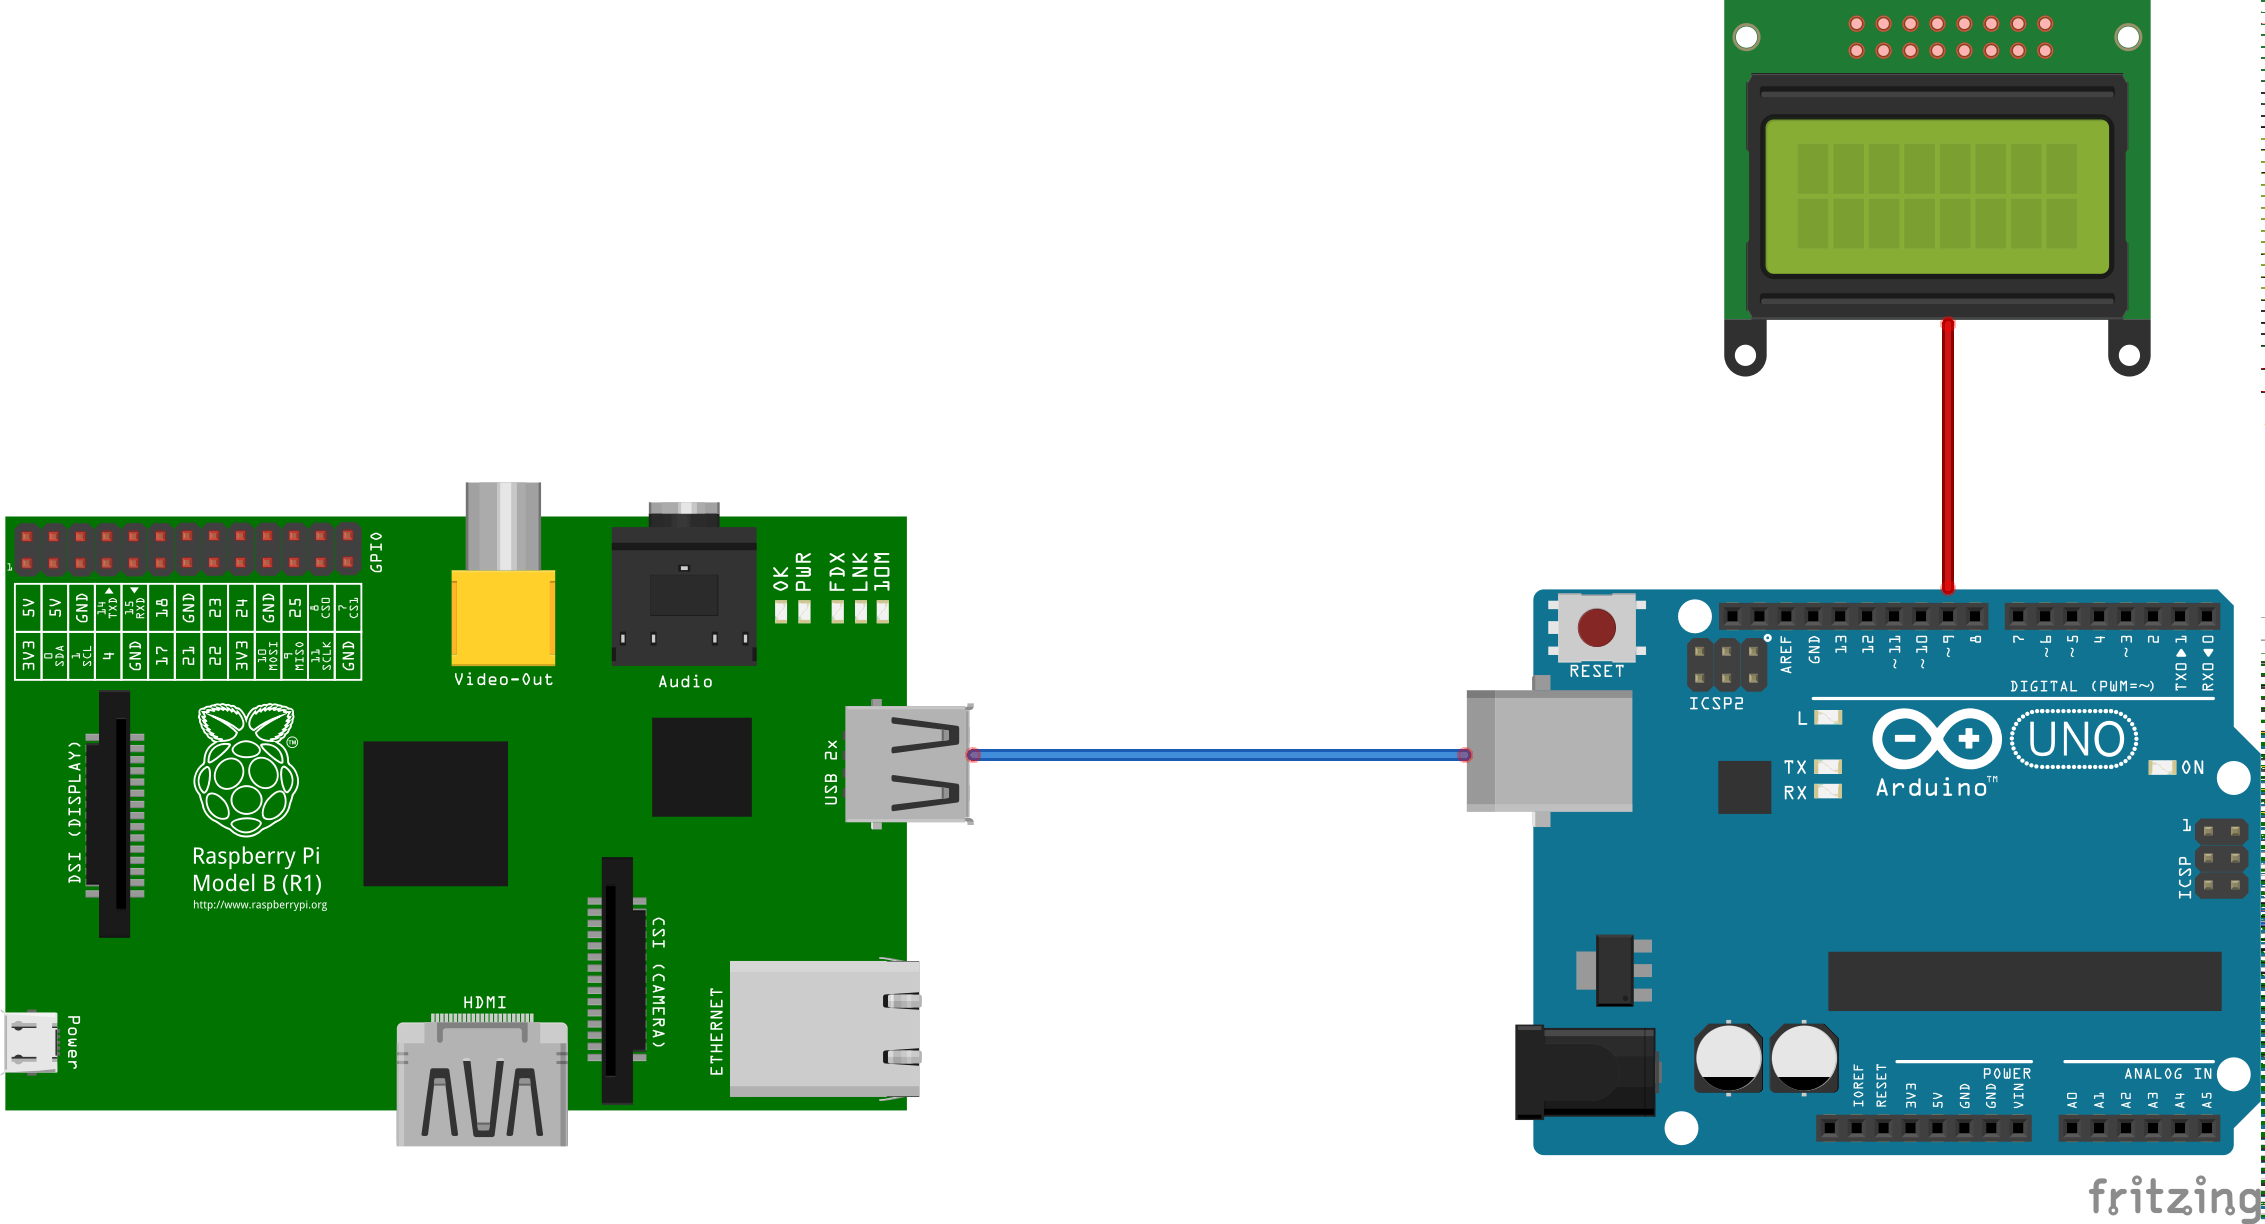
In this project, I’ll tell you how to build a face recognition by using a Raspberry Pi and we have used arduino+Lcd to display the name of the person..
Things You Need

1.RASPBERRY PI
2.ARDUINO UNO / NANO
3.16x2 lCD DISPLAY
4.RASPI-CAMERA / WEBcam (i prefer webcam for better results)
Opencv-Intro and Installation

OpenCV (open source computer vision library) is a very useful library — it provides many useful features such as text recognition, face recognition, object detection, the creation of depth maps, and machine learning.
This article will show you how to install Opencv and other libraries on Raspberry Pi that will come in handy when doing object detection and other projects. From there, we will learn how to perform image and video operations by executing an object recognition and machine learning project. Specifically, we will write a simple code to detect faces in an image.
What is OpenCV?
OpenCV is an open source computer vision and machine learning software library. OpenCV is released under a BSD license making it free for both academic and commercial use. It has C++, Python, and Java interfaces and supports Windows, Linux, Mac OS, iOS, and Android. OpenCV was designed for computational efficiency and a strong focus on real-time applications.
How to Install OpenCV on a Raspberry Pi ?
To install OpenCV, we need to have Python installed. Since Raspberry Pis are preloaded with Python, we can install OpenCV directly.
Type the commands below to make sure your Raspberry Pi is up to date and to update the installed packages on your Raspberry Pi to the latest versions.
sudo apt-get update
sudo apt-get upgrade
Type the following commands in the terminal to install the required packages for OpenCV on your Raspberry Pi.
sudo apt install libatlas3-base libsz2 libharfbuzz0b libtiff5 libjasper1 libilmbase12 libopenexr22 libilmbase12 libgstreamer1.0-0 libavcodec57 libavformat57 libavutil55 libswscale4 libqtgui4 libqt4-test libqtcore4
Type the following command to install OpenCV 3 for Python 3 on your Raspberry Pi, pip3 tells us that OpenCV will get installed for Python 3.
sudo pip3 install opencv-contrib-python libwebp6
Now, OpenCV should be installed.
(if any errors were occured: still you can do it by following below link
https://www.instructables.com/id/Raspberry-Pi-Hand... )
Now don't be hurry we need to check it whether it was installed properly or not
Test your opencv by:
1.go to your terminal and typr "python"
2.then type "import cv2" .
3.then type " cv2.__version__" .
then install these libraries
pip3 install python-numpy
pip3 install python-matplotlib
Test code to detect faces in an image:
import cv2
faceCascade = cv2.CascadeClassifier("haarcascade_frontalface_default.xml");
image = cv2.imread('your file name') #example --> cv2.imread('home/pi/Desktop/filename.jpg')
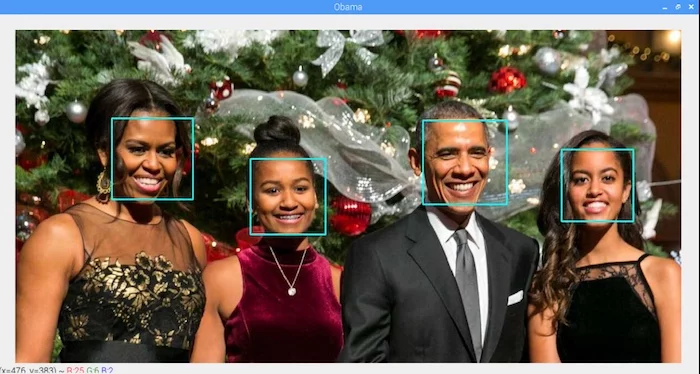
you will get the output like a square boxes were formed on the faces of people who are in the picture.
Detecting and Recognizing Face in a Real Time Video
import cv2
import numpy as np
import os
import serial
ser = serial.Serial('/dev/ttyACM0', 9600, timeout=1) # /dev/ttyACM0 might change in your case,depends on the arduino
cascadePath = "haarcascade_frontalface_default.xml"
faceCascade = cv2.CascadeClassifier(cascadePath)
recognizer=cv2.face.createLBPHFaceRecognizer()
images=[]
labels=[]
for filename in os.listdir('Dataset'):
im=cv2.imread('Dataset/'+filename,0)
images.append(im)
labels.append(int(filename.split('.')[0][0]))
#print filename
names_file=open('labels.txt')
names=names_file.read().split('\n')
recognizer.train(images,np.array(labels))
print 'Training Done . . . '
font = cv2.FONT_
HERSHEY_SIMPLEXcap=cv2.VideoCapture(1) # your video device
lastRes=''count=0
while(1):
_,frame=cap.read()
gray=cv2.cvtColor(frame,cv2.COLOR_BGR2GRAY)
faces = faceCascade.detectMultiScale(gray, 1.3, 5)
count+=1
for (x,y,w,h) in faces:
cv2.rectangle(frame,(x,y),(x+w,y+h),(255,0,0),2)
if count>20: res=names[recognizer.predict(gray[y:y+h, x:x+w])-1]
if res!=lastRes :
lastRes=res
print lastRes
ser.write(lastRes)
count=0
break
cv2.imshow('frame',frame)
k = 0xFF & cv2.waitKey(10)
if k == 27:
break
cap.release()
ser.close()
cv2.destroyAllWindows()
Running the Code

1. Download the files attached in the previous step
2. copy your gray photos ( 6 images/ samples.....) to your dataset folder
1.Tom Cruise--> 1_1,1_2,1_3,1_4,1_5,1_6 (data set image number for more open dataset folder)
2. Brad Pitt--->2_1,2_2,2_3,2_4,2_5,2_6
3. Leo--->3_1,3_2,3_3,3_4,3_5,3_6
4. Ironman-->4_1,4_2,4_3,4_4,4_5,4_6
like the above you can add the labels for the respective persons,
so if the pi detects any face among 1_1,1_2,1_3,1_4,1_5,1_6, then it was labled as Tom Cruise, so please be careful while uploading the photos....................
and then connect your arduino to your raspberry Pi and make changes in the main.py code
ser = serial.Serial('/dev/ttyACM0', 9600, timeout=1) 3.put all the downloaded files (main.py, dataset folder,haarcascade_frontalface_default.xml in one folder.)
3.Now open up Raspi-terminal run your code by "sudo python main.py"
4.arduino lcd will show you the detected face name