One Washing Machine Selector Knob to Rule Them All...
by andrewt in Workshop > Repair
10834 Views, 23 Favorites, 0 Comments
One Washing Machine Selector Knob to Rule Them All...
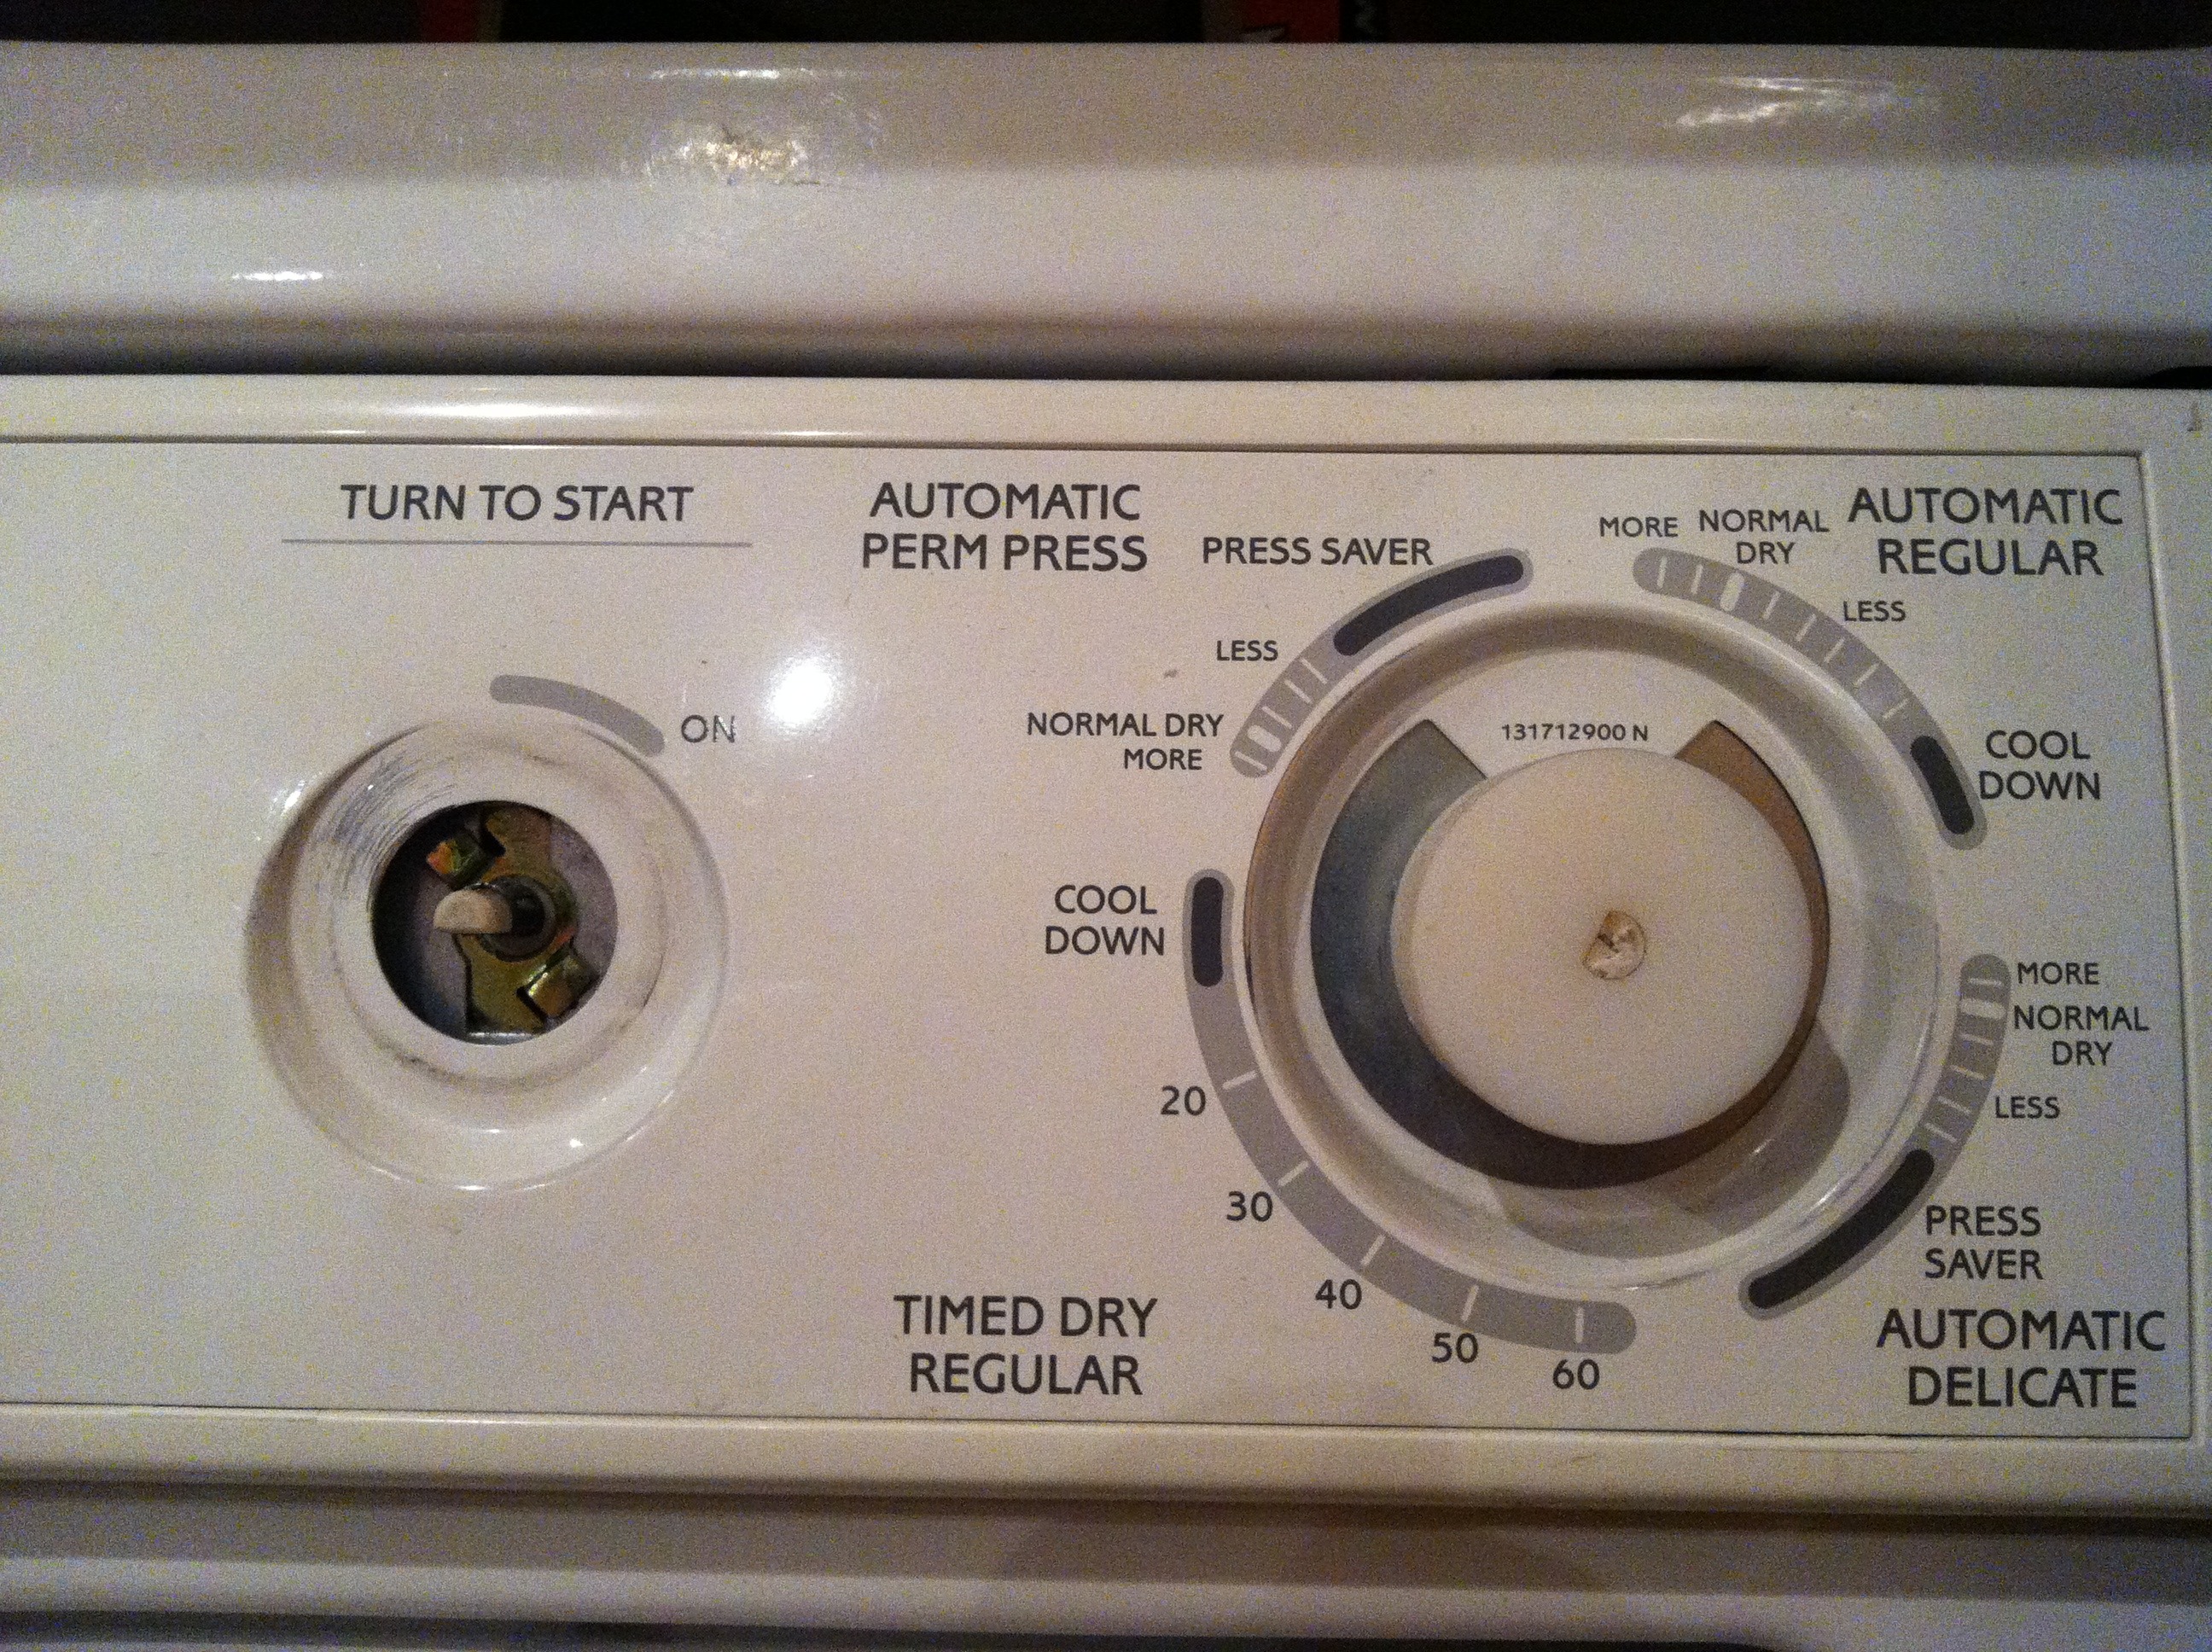
Even as a kid, I thought that the knob on our washing machine was janky, and I knew that whoever made it tried to use the least possible material. I distinctly remember that it even needed a little metal band around the column to keep it from breaking. Turns out, the little metal band only holds out so long.
So, as a somewhat competent adult empowered with free 3D design tools, I did something about it.
The goal here is a solid, 3D printed knob that fits over the existing selector pin - the 1/4" metal post with a flat side that destroys stock plastic knobs. I used 123D Design to make the knob model and then printed it on an Objet Connex500. Granted, I'm extremely lucky to have access to the printer, but the 123D line of apps is totally free, and I think the newest MakerBot can handle it!
Here is a model of the knob when finished. It's very simple, just meant to be a base on which you can make a custom handle. Click the "3D View" button at the bottom to see it in space.
Dimension the Original to Recreate It.
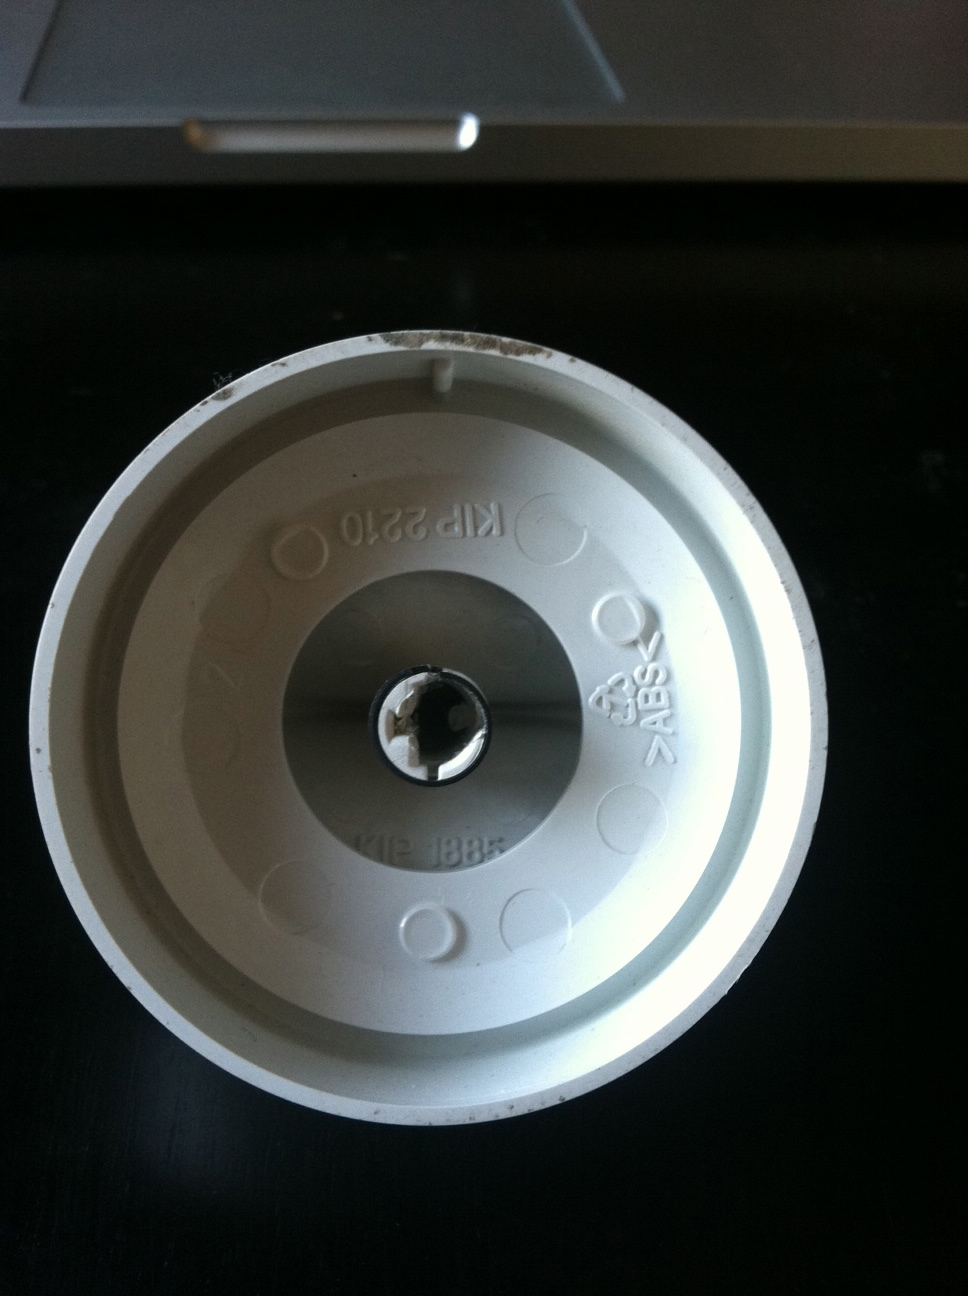
First, let's look at the original. The manufacturer made them with lots of negative space to save production costs, but that severely limits lifespan. There's a lot of torque on the plastic and it eventually just snaps.
To start, take some measurements. I used analog calipers and found it had a 1/4" post with two little shelves that create the flat side - like a capital D. Yours may have different measurements (mine was actually about .24 inches).
The important dimensions are:
1. the overall diameter of the post
2. how much was taken off the post to create the flat side - it turns out that on this particular style, the flat side is created by removing 1/4 of the post diameter.
3. depth of the post - how far it sticks out from the machine.
Build It in 123D Design.
You can use just about any 3D Design app can do it, but I'm using 123D Design, download it for free at http://www.123dapp.com/design.
Start with the base - I'm calling the side that faces toward the washing machine the base. You can design the knob face however you want (I may do a lego one), but just so I know if fits, I'm starting with a simple cylinder base that fits over the post for now.
The overall dims will be: 1 1/2" in diameter (the knob itself) and 3/4" deep (that way it can just slip over the post and still have good purchase).
If that description makes no sense, just go to the next steps.
Sketch the Overall Profile.
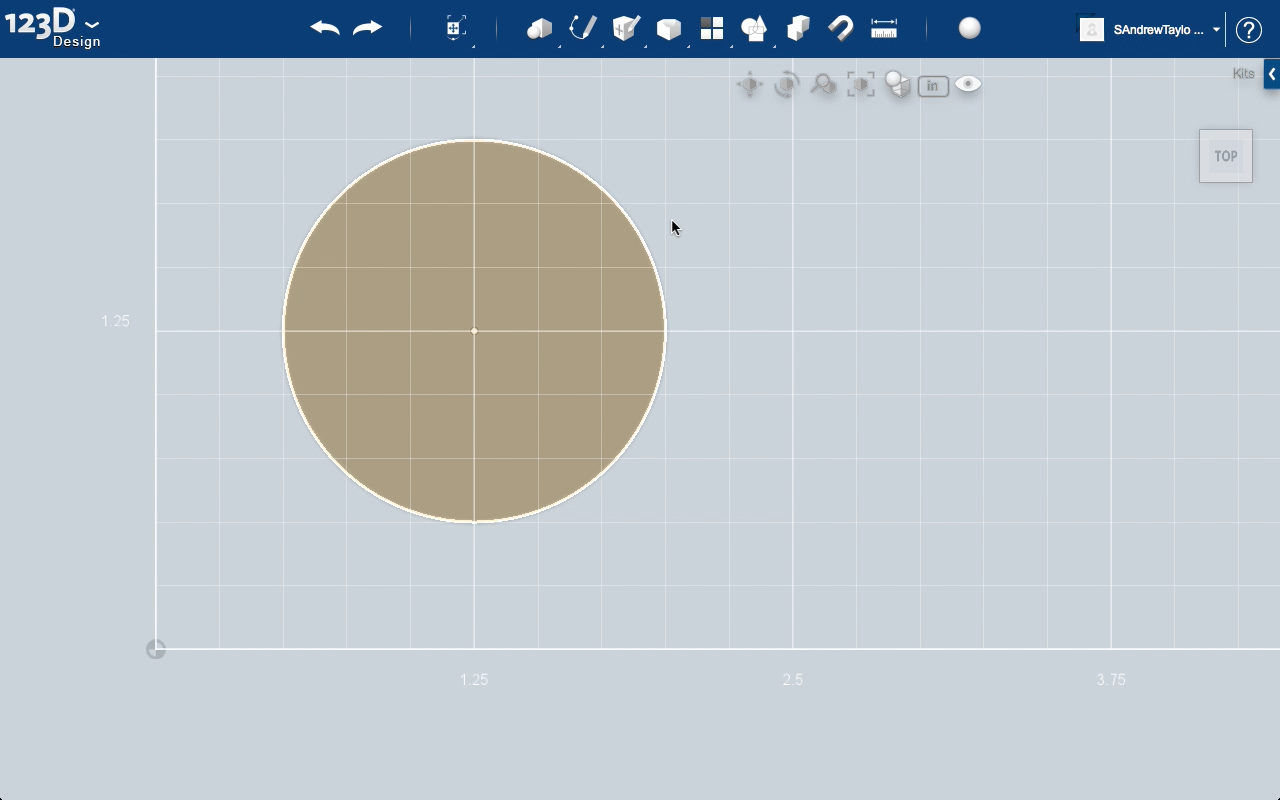
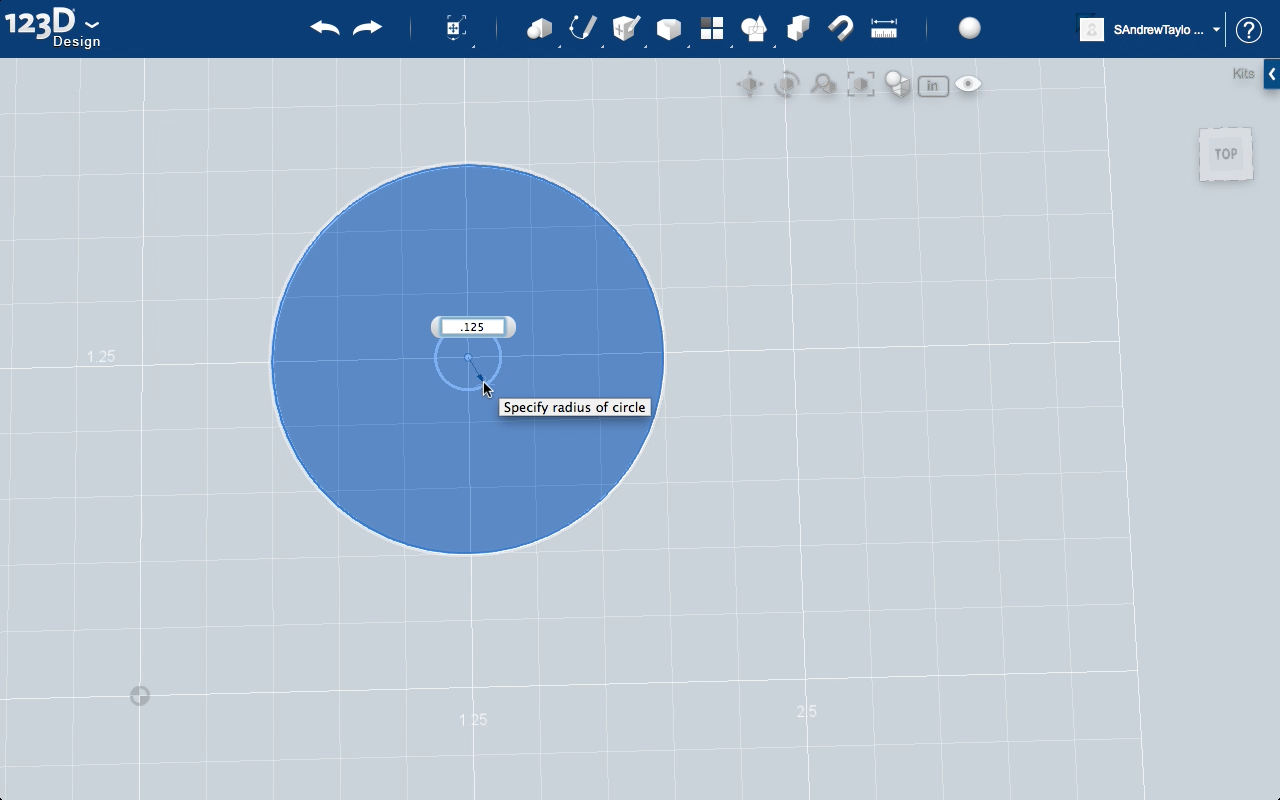
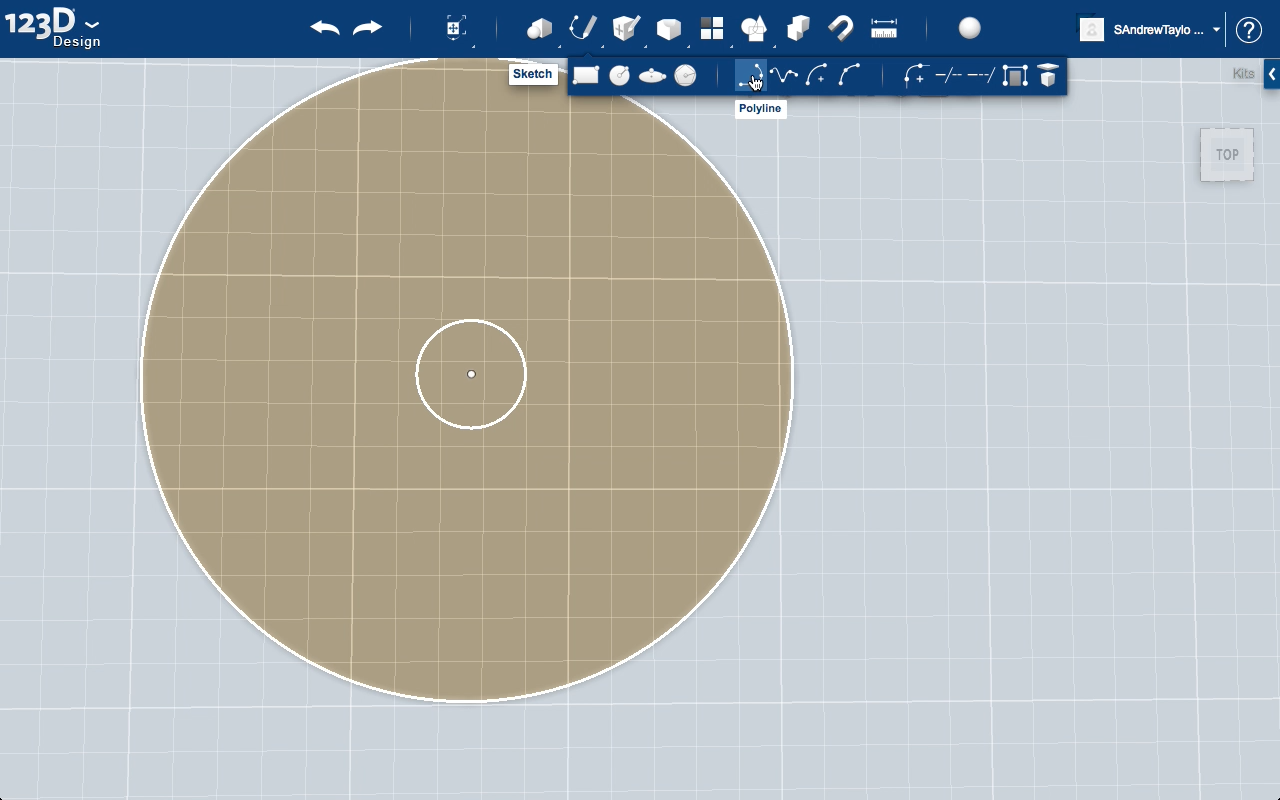
To make this little guy, we're going to rely on a couple simple functions in 123D Design, primarily the 'Sketch' and 'Extrude' features.
At the top menu bar, there is a little pencil drawing some points. That's the 'Sketch' menu button. That creates a drop-down, from which you can select some basic shapes to start sketching.
Once selected, click anywhere in the empty work plane to specify that you want to begin, and it will ask you to click once to set the center point and again to define the radius length. RADIUS, not diameter, so we put in .75" or 3/4 inch to make a 1 1/2" diameter.
With a 1 1/2" circle defining the footprint of the knob, you can think about it lik you were looking at it from the top. I know the post is 1/4" in diameter (ignoring the flat side for a bit), so I used the circle sketch again to create another circle with the same centerpoint as the other, only this time with a 1/8" (.125") radius.
Sketched the Overall Profile, Now Add the Flat-side Post.
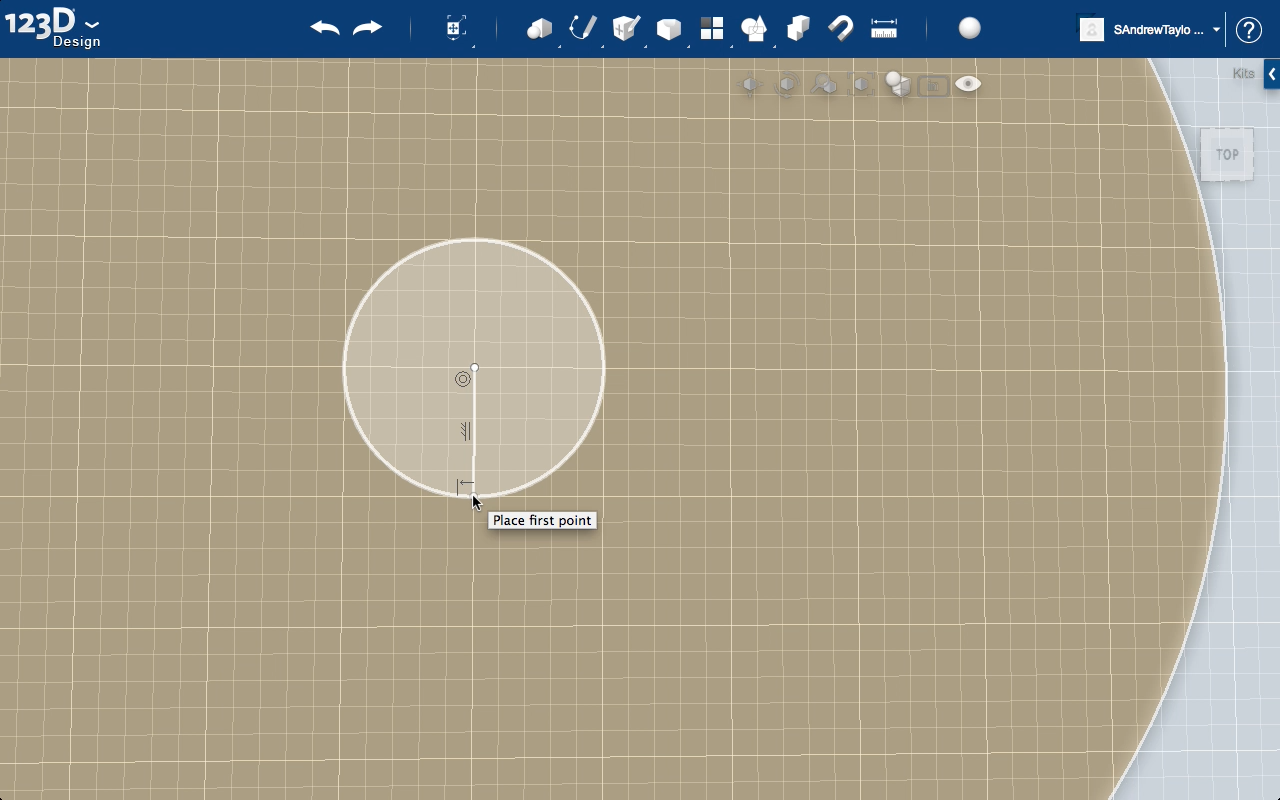
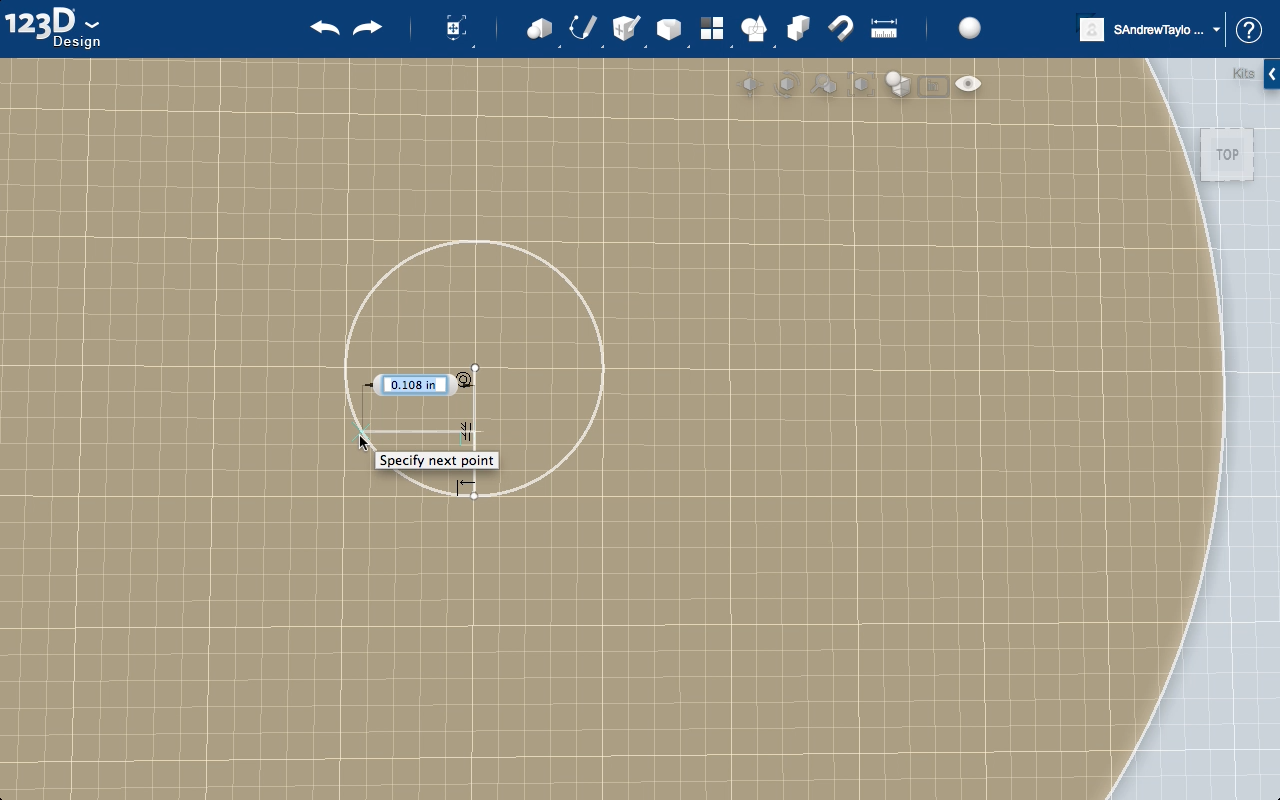
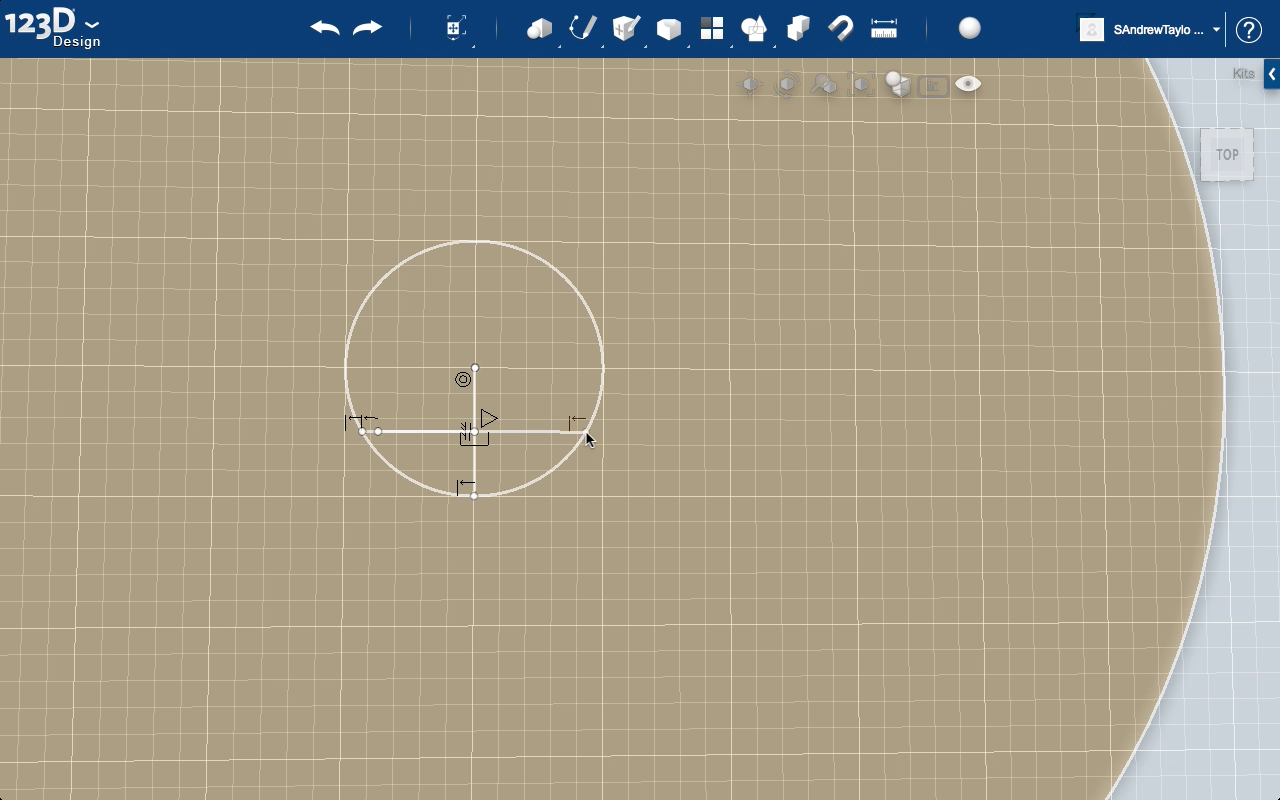
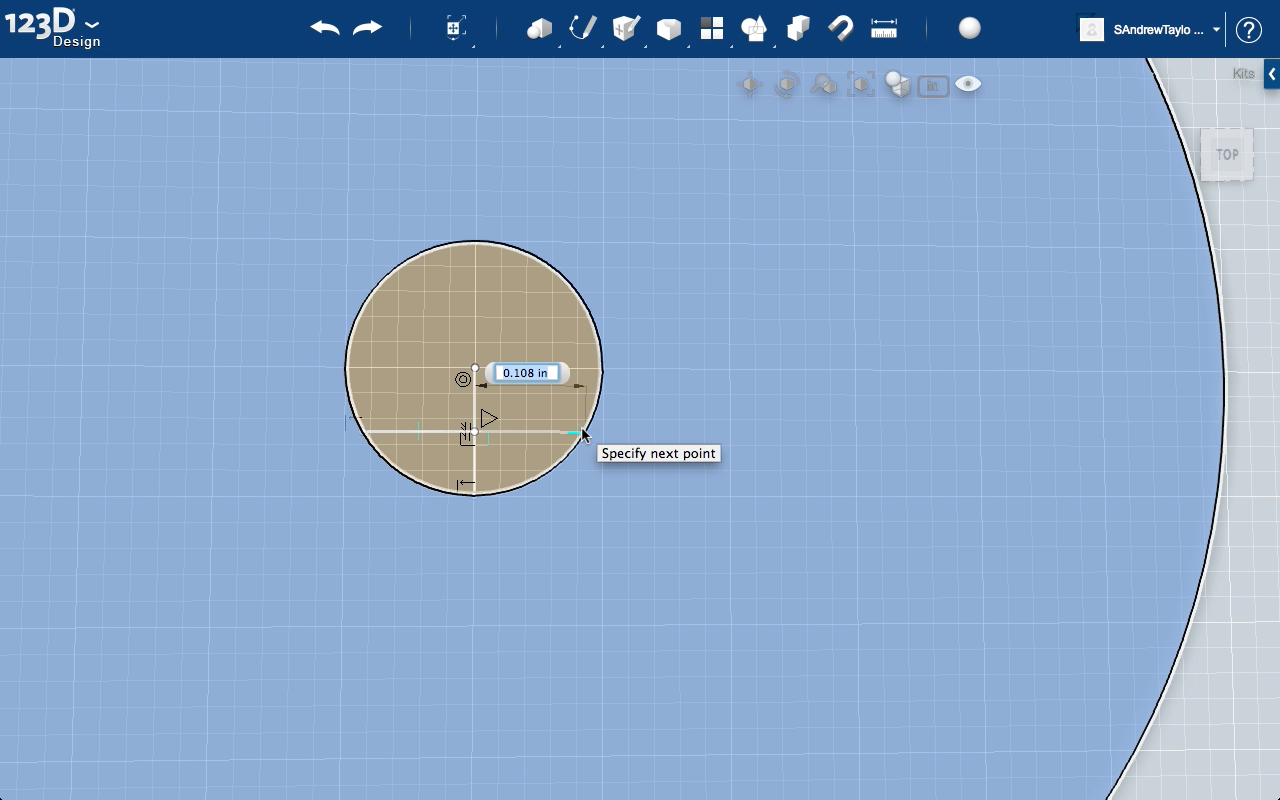
Now we want to create a line that will snug up to the flat side of the post. There's a few ways to do this, but I'm going to do the simplest one, using a few line segments.
The shaft of the selector control is essentially a 1/4" cylinder with 1/16" shaved off to create a flat side, which allows for the knob to turn it. So now we need to fill that space in our model.
Under the same "Sketch" drop-down, select the Polyline tool. When asked to select the plane in which to place the sketch, select the SMALL 1/4" circle.
Then place your first point at the center of the circle - it should snap and give you a little green box when you're at center. At "Specify Next Point", click at the bottom of the circle. This line is effectively a radius, defining the halfway point of the circle and it's going to help us measure the flat side placement.
Since 1/16" is one-fourth of 1/4", we can split our circle in half twice to find where our line should be.
Use the Polyline tool again and find the halfway point on our radius line, it will show a green arrow when you're on it. Select that as the first point and the next on the circle - making a line segment that is perpendicular to our radius line. Like a sideways T.
This line creates another section in our model - one that you can select independently of the others. Try selecting the different parts.
Then do the Polyline once again, finding the center of the radius and going to the other side.
Ready to Give It Volume.
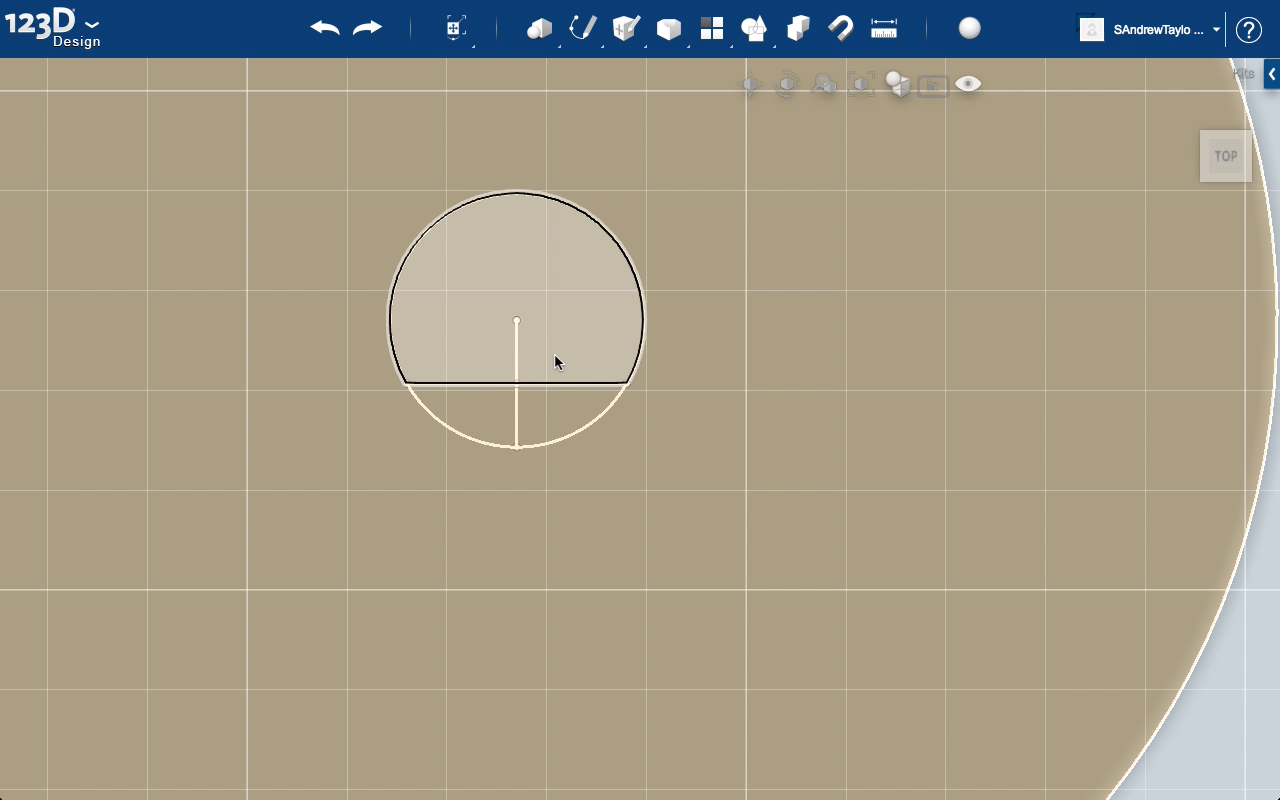
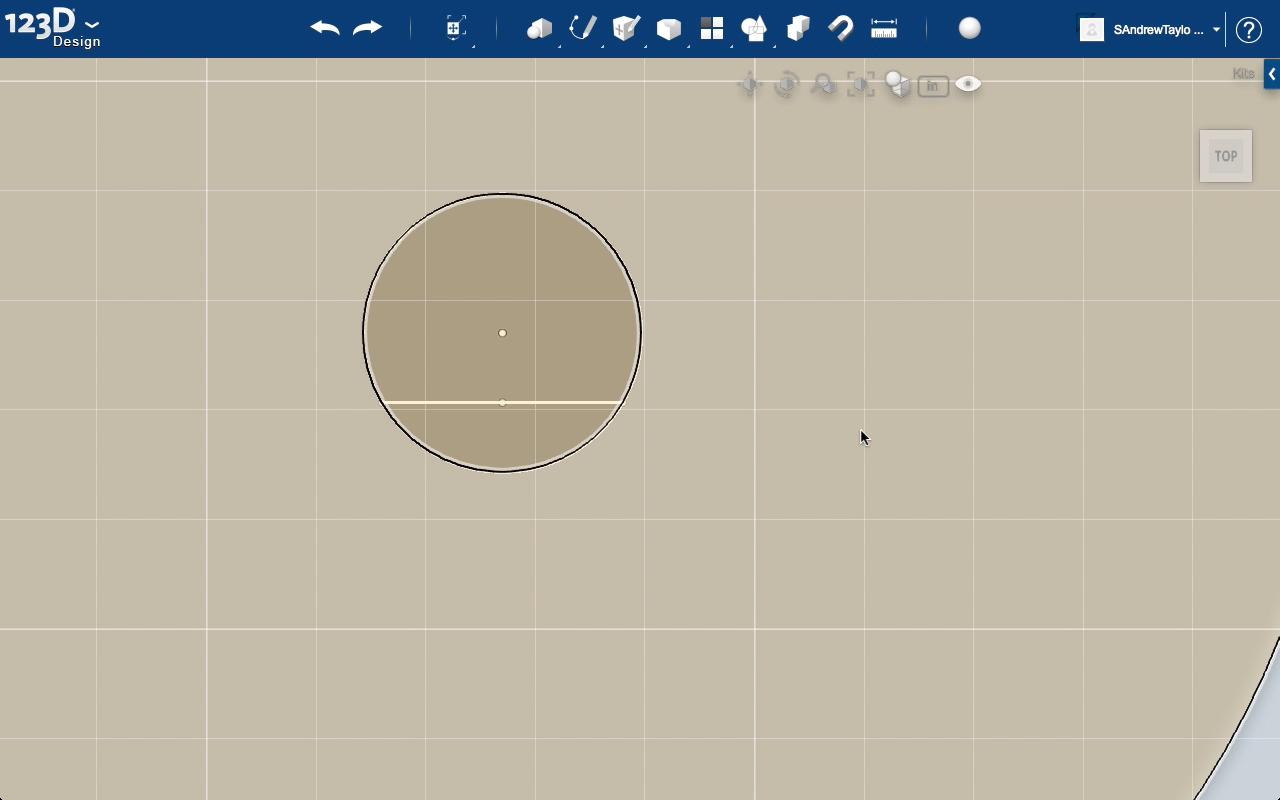
Once you have the lines drawn - you can then click to select the original vertical radius line and delete it.
Then you'll have the profile sketch for your knob!
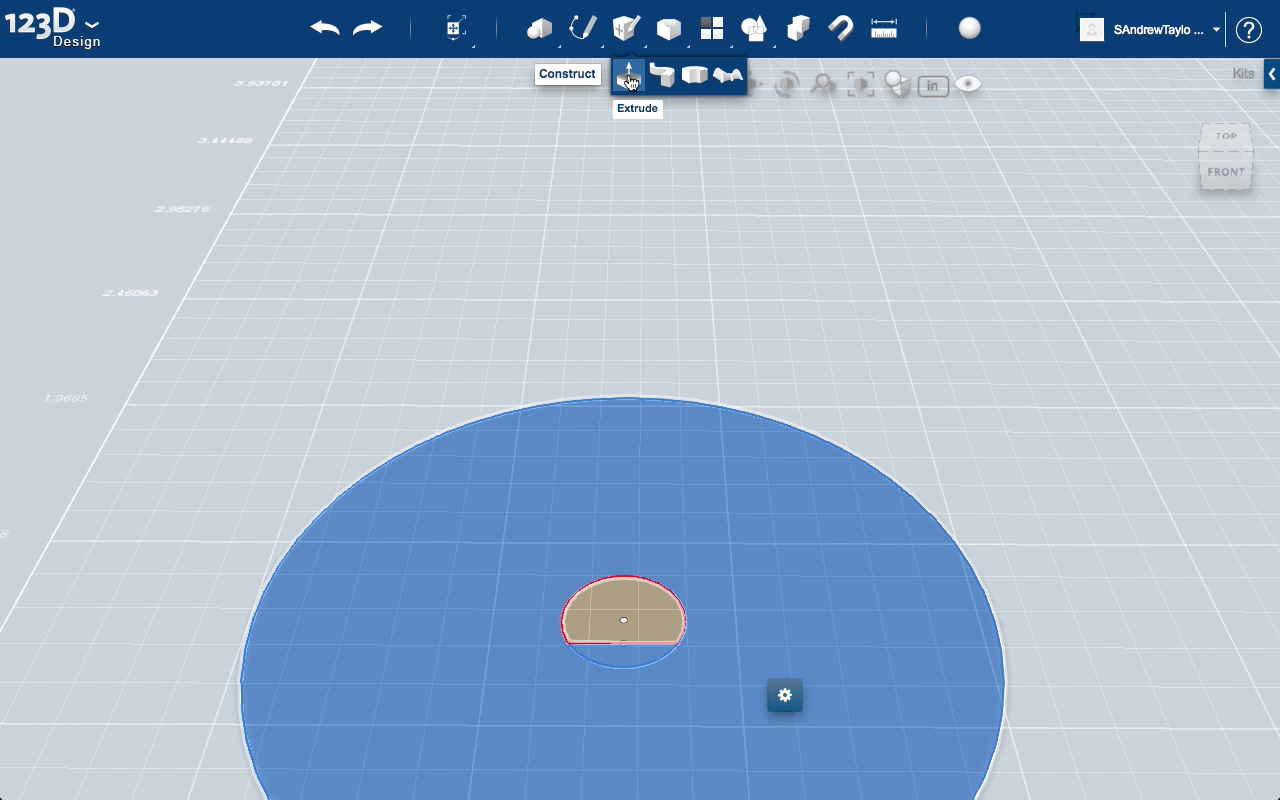
All that's left is to give it the third dimension and some volume using the Extrude feature.
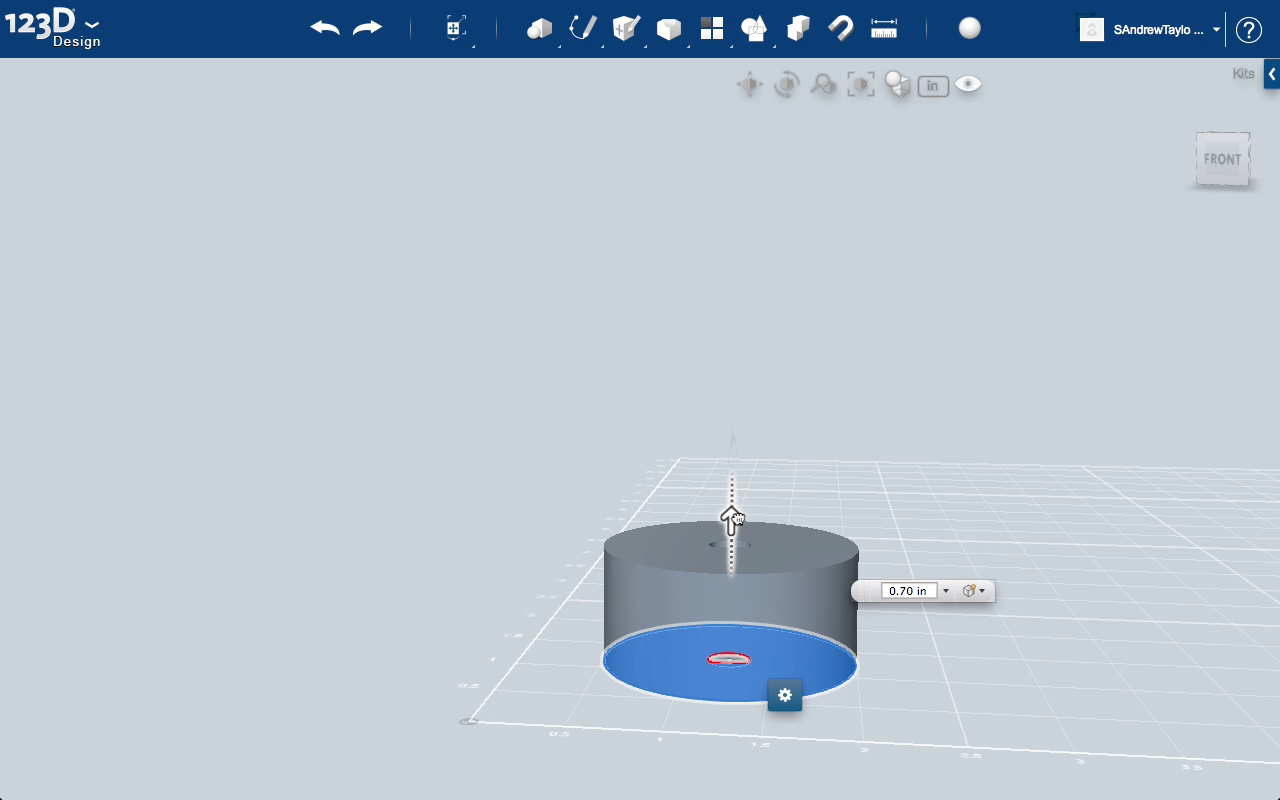
Extrude basically means creating a 3D volume that's based on a 2D shape. Like a cylinder is an extruded circle, a cube is an extruded square, etc.. So we're going to extrude our shape, leaving the center circle empty for the post.
Start by selecting the areas that we want to have volume. That's the shell (big circle) and the little shape that we made in the previous step (the flat-side filler).
In the Construct drop-down, click Extrude. Then the arrow will allow you to raise the model to whatever height you like or you can specify in the dimension box. I made mine just under 3/4".
Hit Enter to Commit And, Voila...!
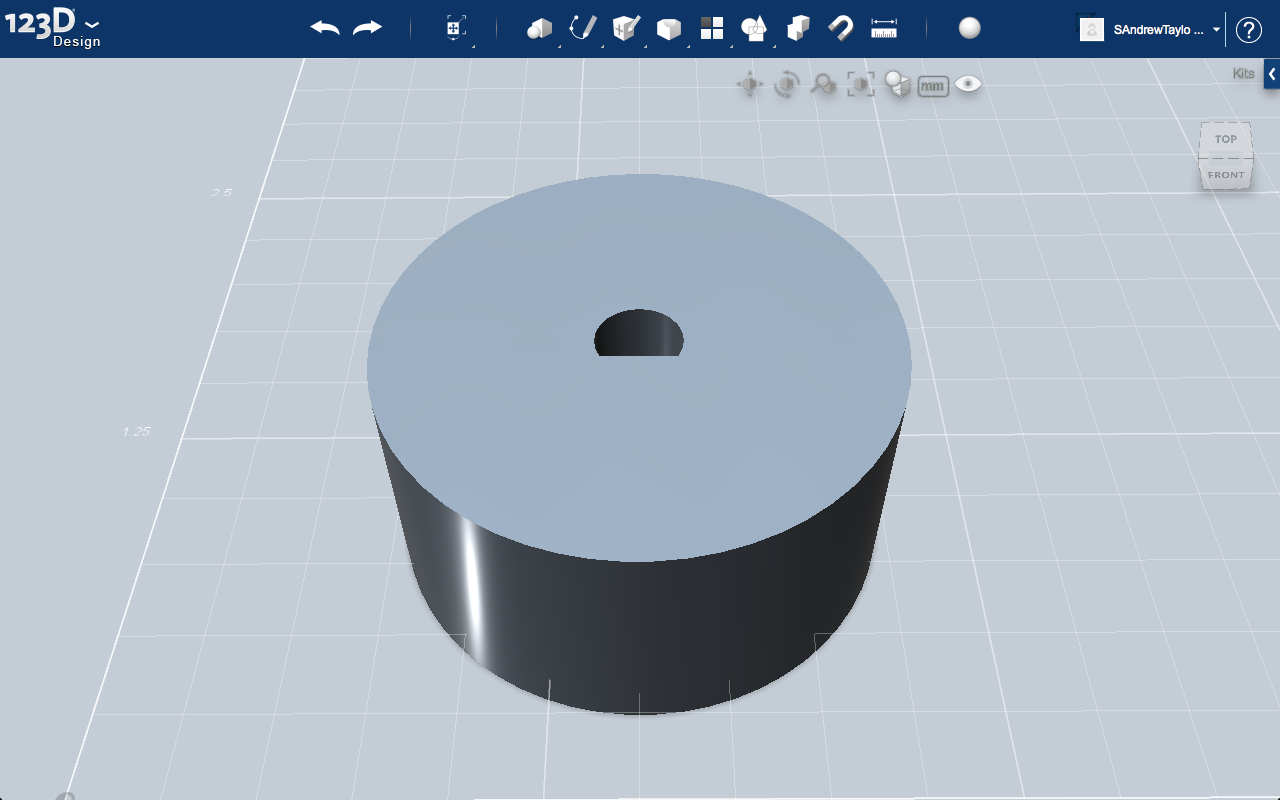
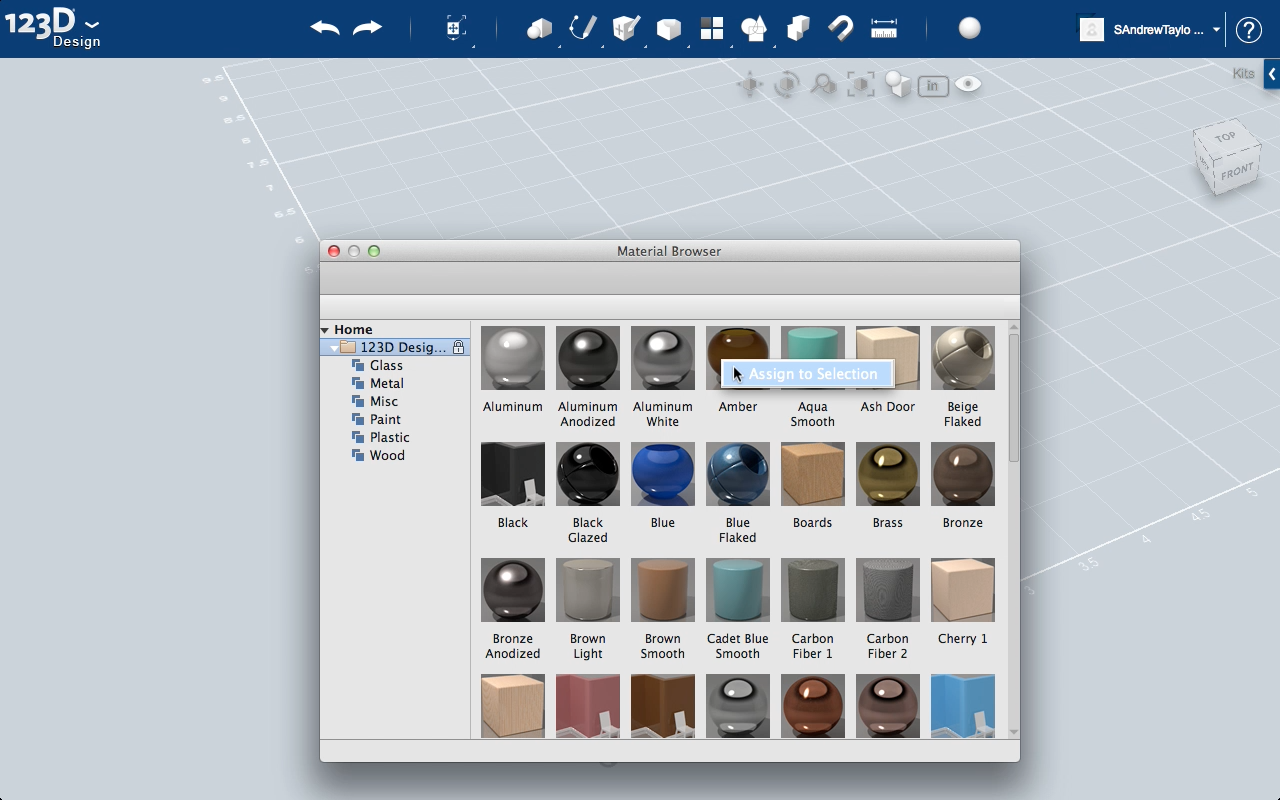
That's about it. Now you can put different surface materials on your model to see what it would look like in chrome. Click the little sphere at the top that opens up the Materials Browser. Right-click on a material and click Assign to Selection.
Now you can save it to "My Projects" and share it in the gallery.
To 3D print, you can use the Export function under the 123D Design menu at the top left. This creates an STL file that is recognized on most 3D printers.
From here, you could also send it to a 3D printing service like Sculpteo or Shapeways if you don't have access to a 3D printer.
OR
You can take this model into 123D Make (via your models page on the 123D Gallery) and create stackable slices that you can cut out on a laser printer. I'm going to do one in acrylic using stacked pieces.
UPDATE:
Here is a link to the original file - http://www.123dapp.com/FullPreview/Index.cfm/ID/1131722
This is just the base, on which you can do custom fillets, grips, whatever. My laundry was starting to back up, so I just needed a plain knob. :)
I've also embedded the 3D viewer here - click on the "3D View" tab to see it in the round.