One Transistor Audio for Pi Zero W
by rgrokett in Circuits > Raspberry Pi
37003 Views, 100 Favorites, 0 Comments
One Transistor Audio for Pi Zero W
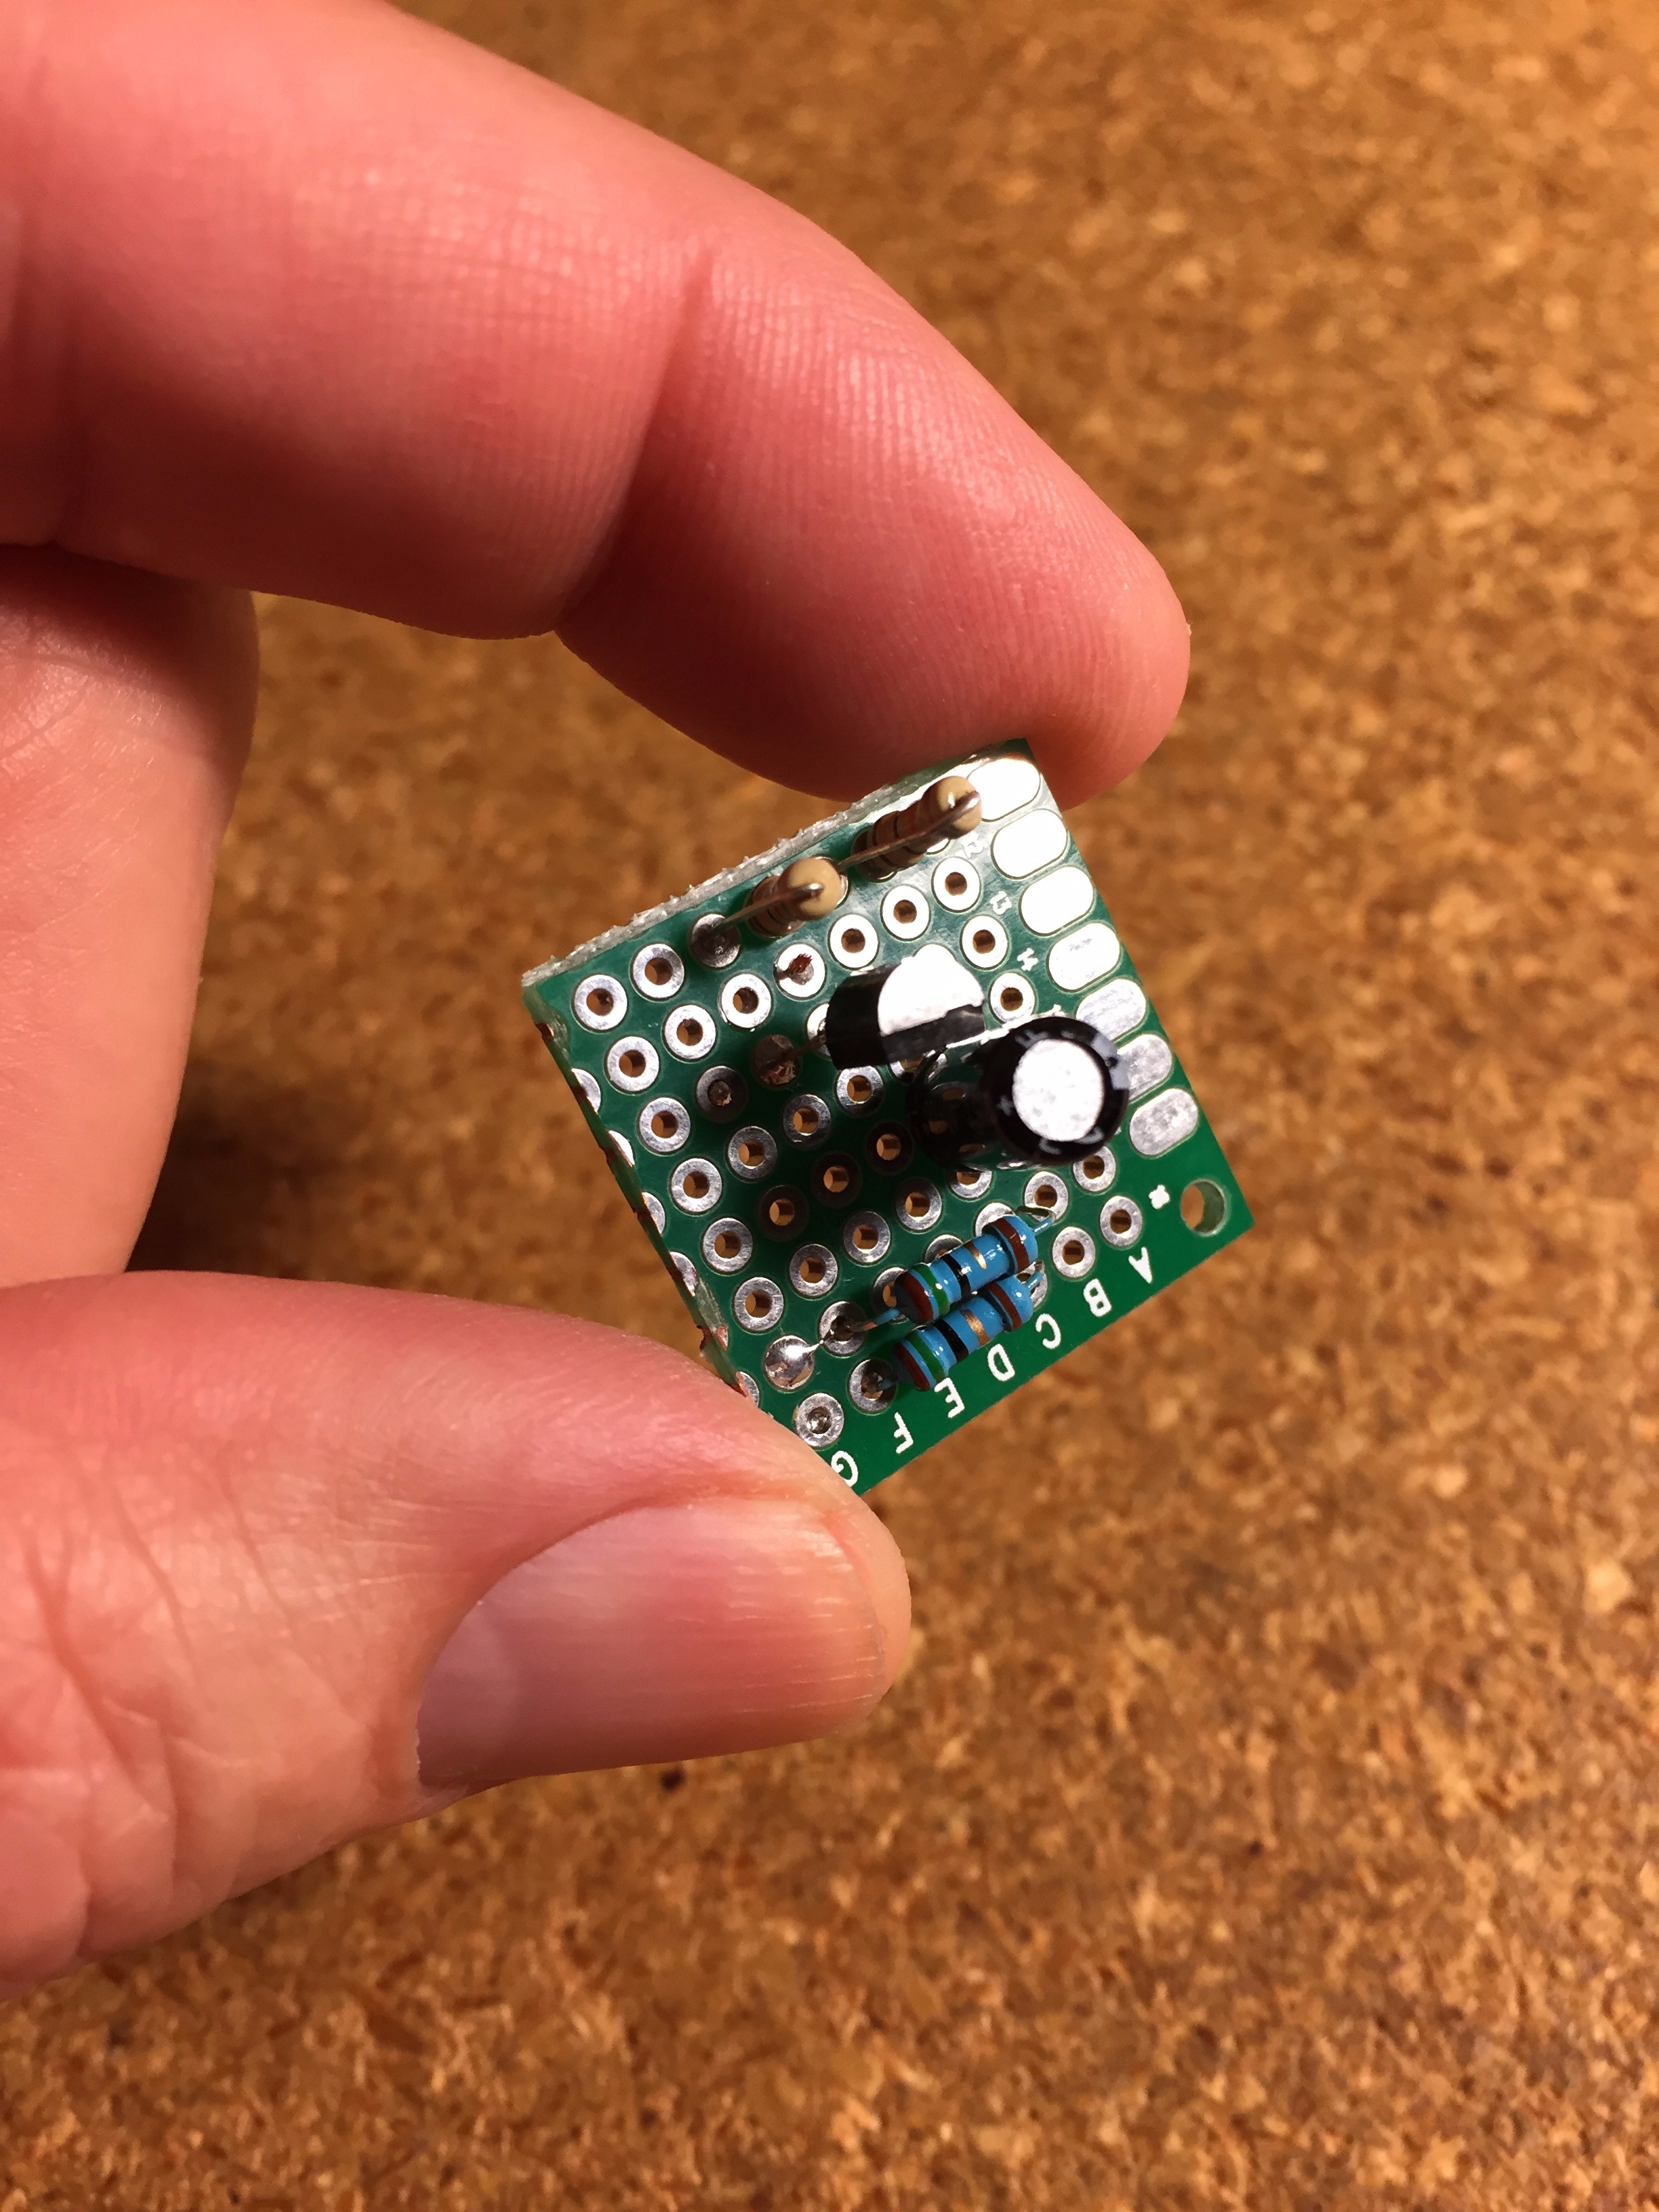
The Raspberry Pi Zero (and Zero W) are amazing devices for such a low cost. But they are missing one feature needed for many projects. That is sound. The only audio they have by default is via HDMI TV monitor. They support “earphone” audio, but lack the jack and audio filter circuitry that the bigger Raspberry Pi’s have.
I wanted simple audio, good enough for speech and sound effects, but not necessarily high fidelity. There are plugin modules for adding sound (including high quality stereo) available, such as this one: https://www.adafruit.com/product/3346 but I was after something simple from spare parts I already had.
This describes a one transistor mono amplifier capable of driving a small speaker and providing decent sound, much better than just a buzz or beep. All that is needed are a few resistors and capacitors, a 2N2222 NPN transistor and a small speaker. It runs off the Raspi’s 5V power and only needs 3 wires to connect to Pi.
Parts List
- 1 – 2N2222 NPN transistor
- 1 – 270 ohm resistor
- 1 – 150 ohm resistor
- 1 – 8 ohm resistor (use 1/2 watt if continuous playing expected)
- 1 – 15K resistor
- 1 – 0.01uf capacitor
- 1 – 10uf capacitor
- 1 – small 8 ohm speaker 2" or less.
Small Perf board or breadboard plus wire.
A Raspberry Pi Zero or Zero W with Raspbian Jessie installed.
For smallest size, all you need is a postage stamp size perf board, but requires soldering skills.
Wiring Instructions
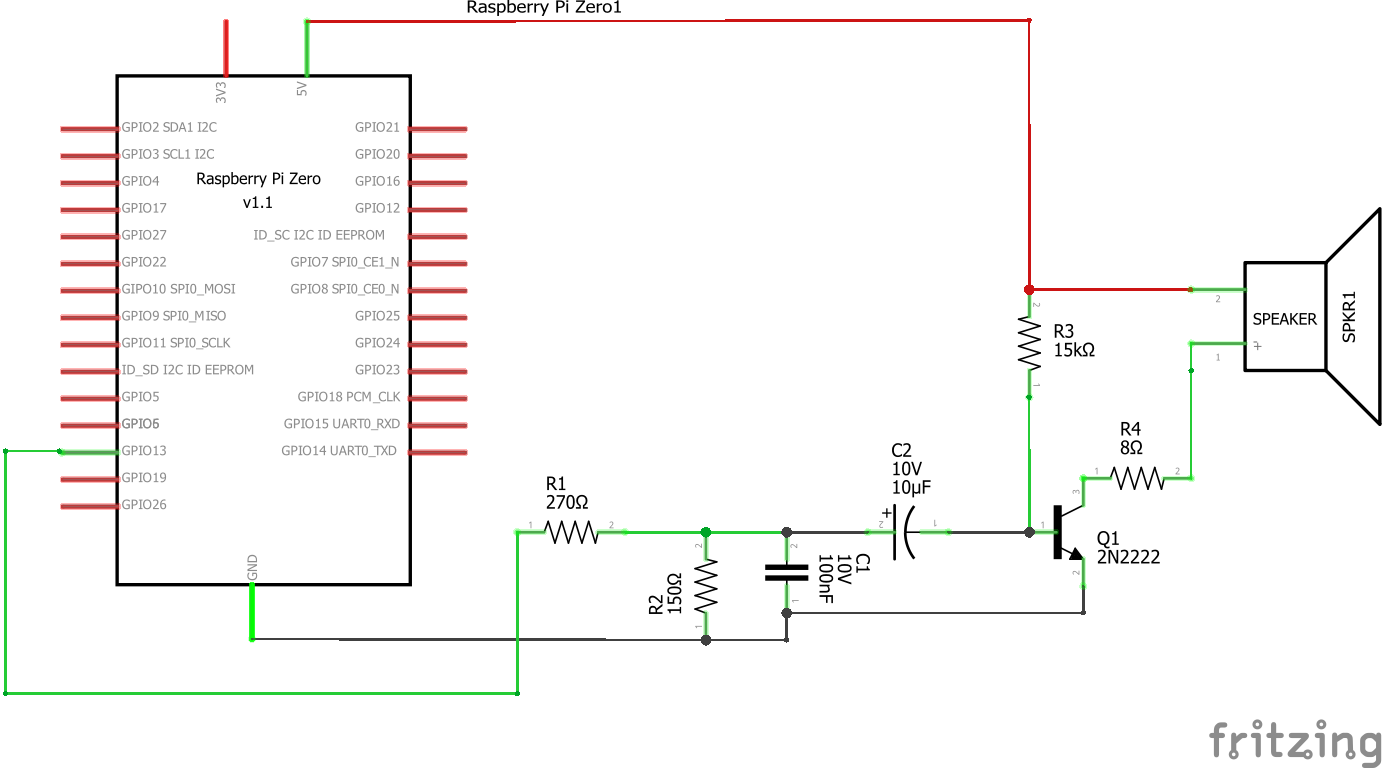
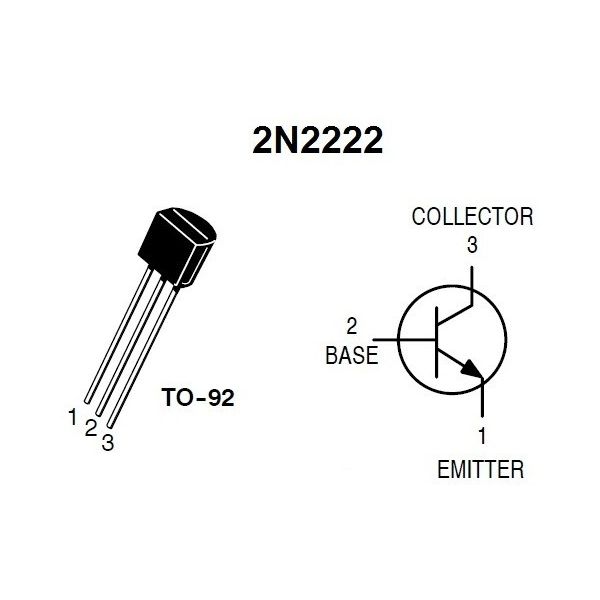
- Wire up the components as shown in the schematic.
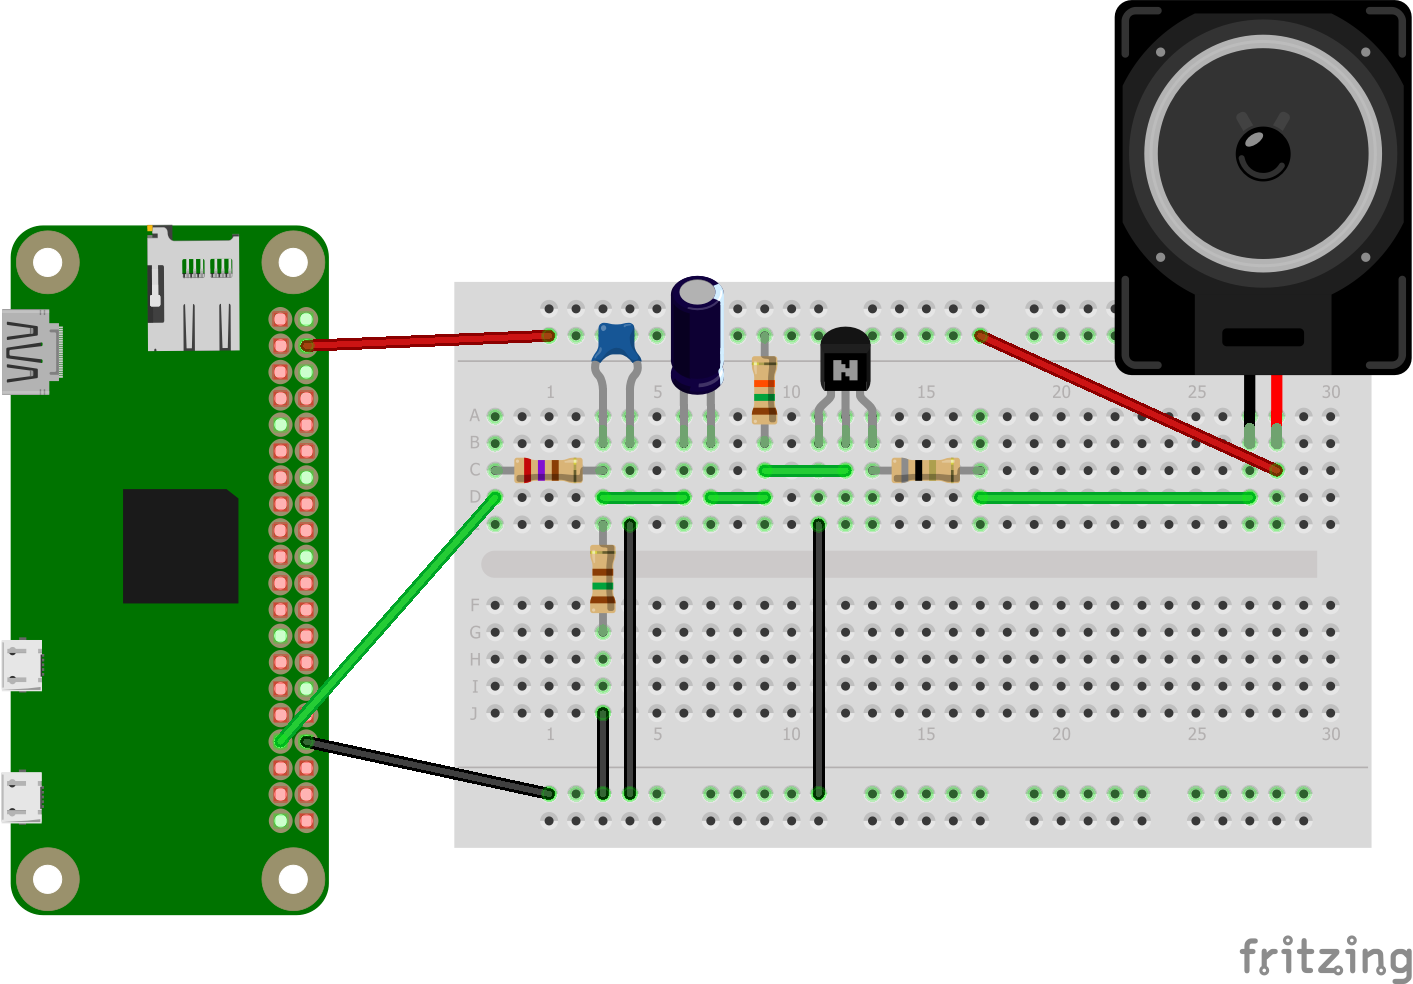
If you are using a breadboard, you can also look at the fritzing breadboard diagram.
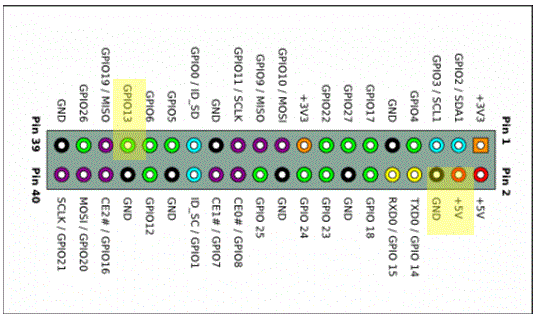
Note that the values are not especially critical, so if you can’t match exactly, just use close. - You can connect to the Pi Zero GPIO connections either with header pins or solder wires directly to the appropriate pins as in the GPIO figure above.
Software Configuration
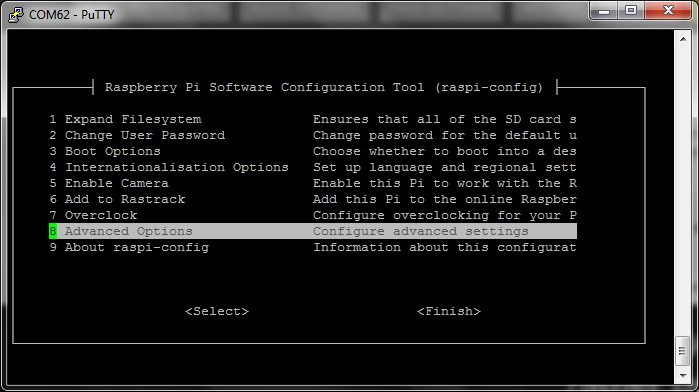
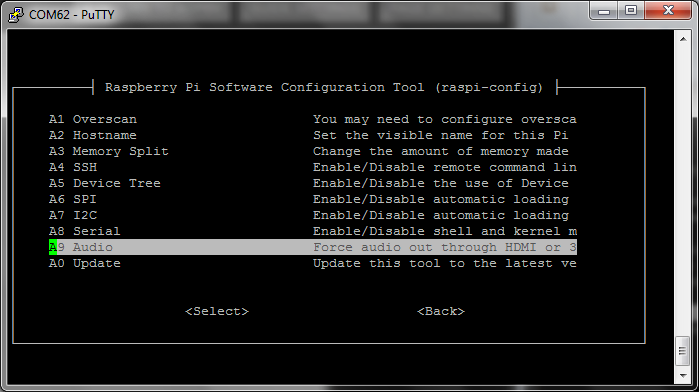
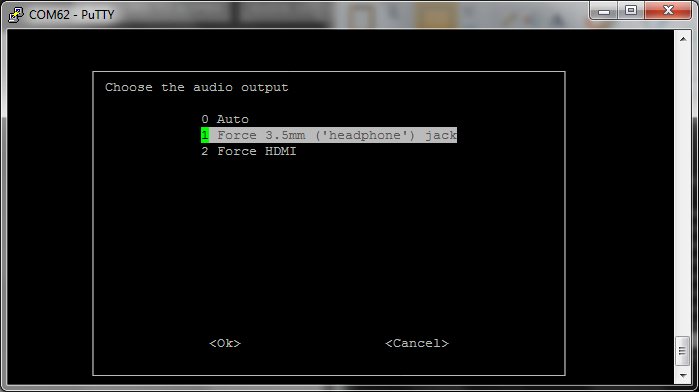
No special software beyond Raspbian Jessie is needed. But you should use the latest version and will need command-line access such as via SSH. You DO NOT need the GUI for this to work, so you can use Jessie Lite, if desired. Also, you DO NOT need Internet connection for this project, other than to originally install Jessie and update it to the latest version.
1) Log into your Pi Zero via terminal or SSH.
2) You have to remap the Pulse Width Modulation (PWM) pins to alternates so to be accessible from the GPIO connector. To do this execute the following to edit the config file:
$ sudo nano /boot/config.txt
Append the following line to the bottom and save the change:
dtoverlay=pwm-2chan,pin=18,func=2,pin2=13,func2=4
3) Note that this will allow stereo, but only one channel is actually used by this amp.
4) Redirect the audio to the (non-existent) audio jack:
$ sudo raspi-config
Go to ADVANCED -> AUDIO -> FORCE 3.5mm headphone jack
(See screen shots above.)
5) Click FINISH to exit
6) REBOOT your Pi to pick up the changes
$ sudo reboot
Testing
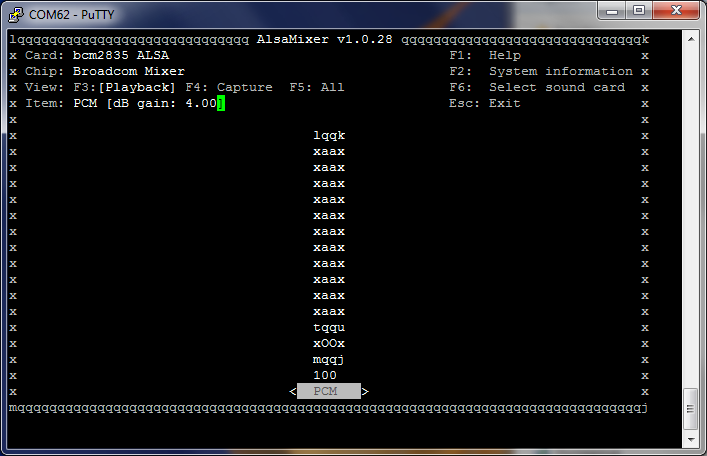
Assuming all went well with the hardware and configuration changes, try it out:
$ aplay /usr/share/sounds/alsa/Front_Center.wav
You should hear audio now!
If you need to adjust the volume, use:
$ alsamixer
Use the Up/Down arrows on the keyboard to set the volume as high as desired.
Press ESC key to exit.
Finally
You can play any type audio file that the “aplay” program handles. I suggest .WAV files.
$ aplay myaudio.wav
There are also other programs like "mpg123" for mp3 files and even Google Text-to-Speech (but this requires Internet connection):
$ sudo apt-get install pip mpg123
$ sudo pip install gTTS
$ gtts-cli "Hello there my wonderful friend" | mpg123
Note that there may be slight buzz or hum as the filtering is minimal here.
Also the audio is MONO only (or one side of stereo).
You could duplicate the circuit and connect the second input into GPIO pin 18 for Stereo, but you would probably be better off with one of the higher quality (and cheap) stereo add-on boards such as from Adafruit. These start as low as $3.95 and can give more high fidelity stereo audio and drive larger speakers.
FINISHED!
Many "thanks" goes to Learn Adafruit tutorial for audio config details used in this document:
https://learn.adafruit.com/adding-basic-audio-oupu...