Oil Level Monitoring Sensor for Home Assistant Using ESPHome
by frapais in Circuits > Sensors
3690 Views, 4 Favorites, 0 Comments
Oil Level Monitoring Sensor for Home Assistant Using ESPHome


This is a custom ESPHome sensor for Home Assistant. It uses an ESP32 board and a waterproof ultrasonic sensor to measure the remaining oil level in a home heater's tank. The electronics are mounted inside a custom 3D-printed enclosure that screws on the tank's lid, with the Ultrasonic sensor pointing down to the surface of the liquid. This way, the sensor can measure the distance between the liquid and the top of the tank. Knowing the dimensions of the dank, we can easily calculate the remaining liquid and the liquid consumed from a known starting volume. More details about how it works can be found here.
Supplies
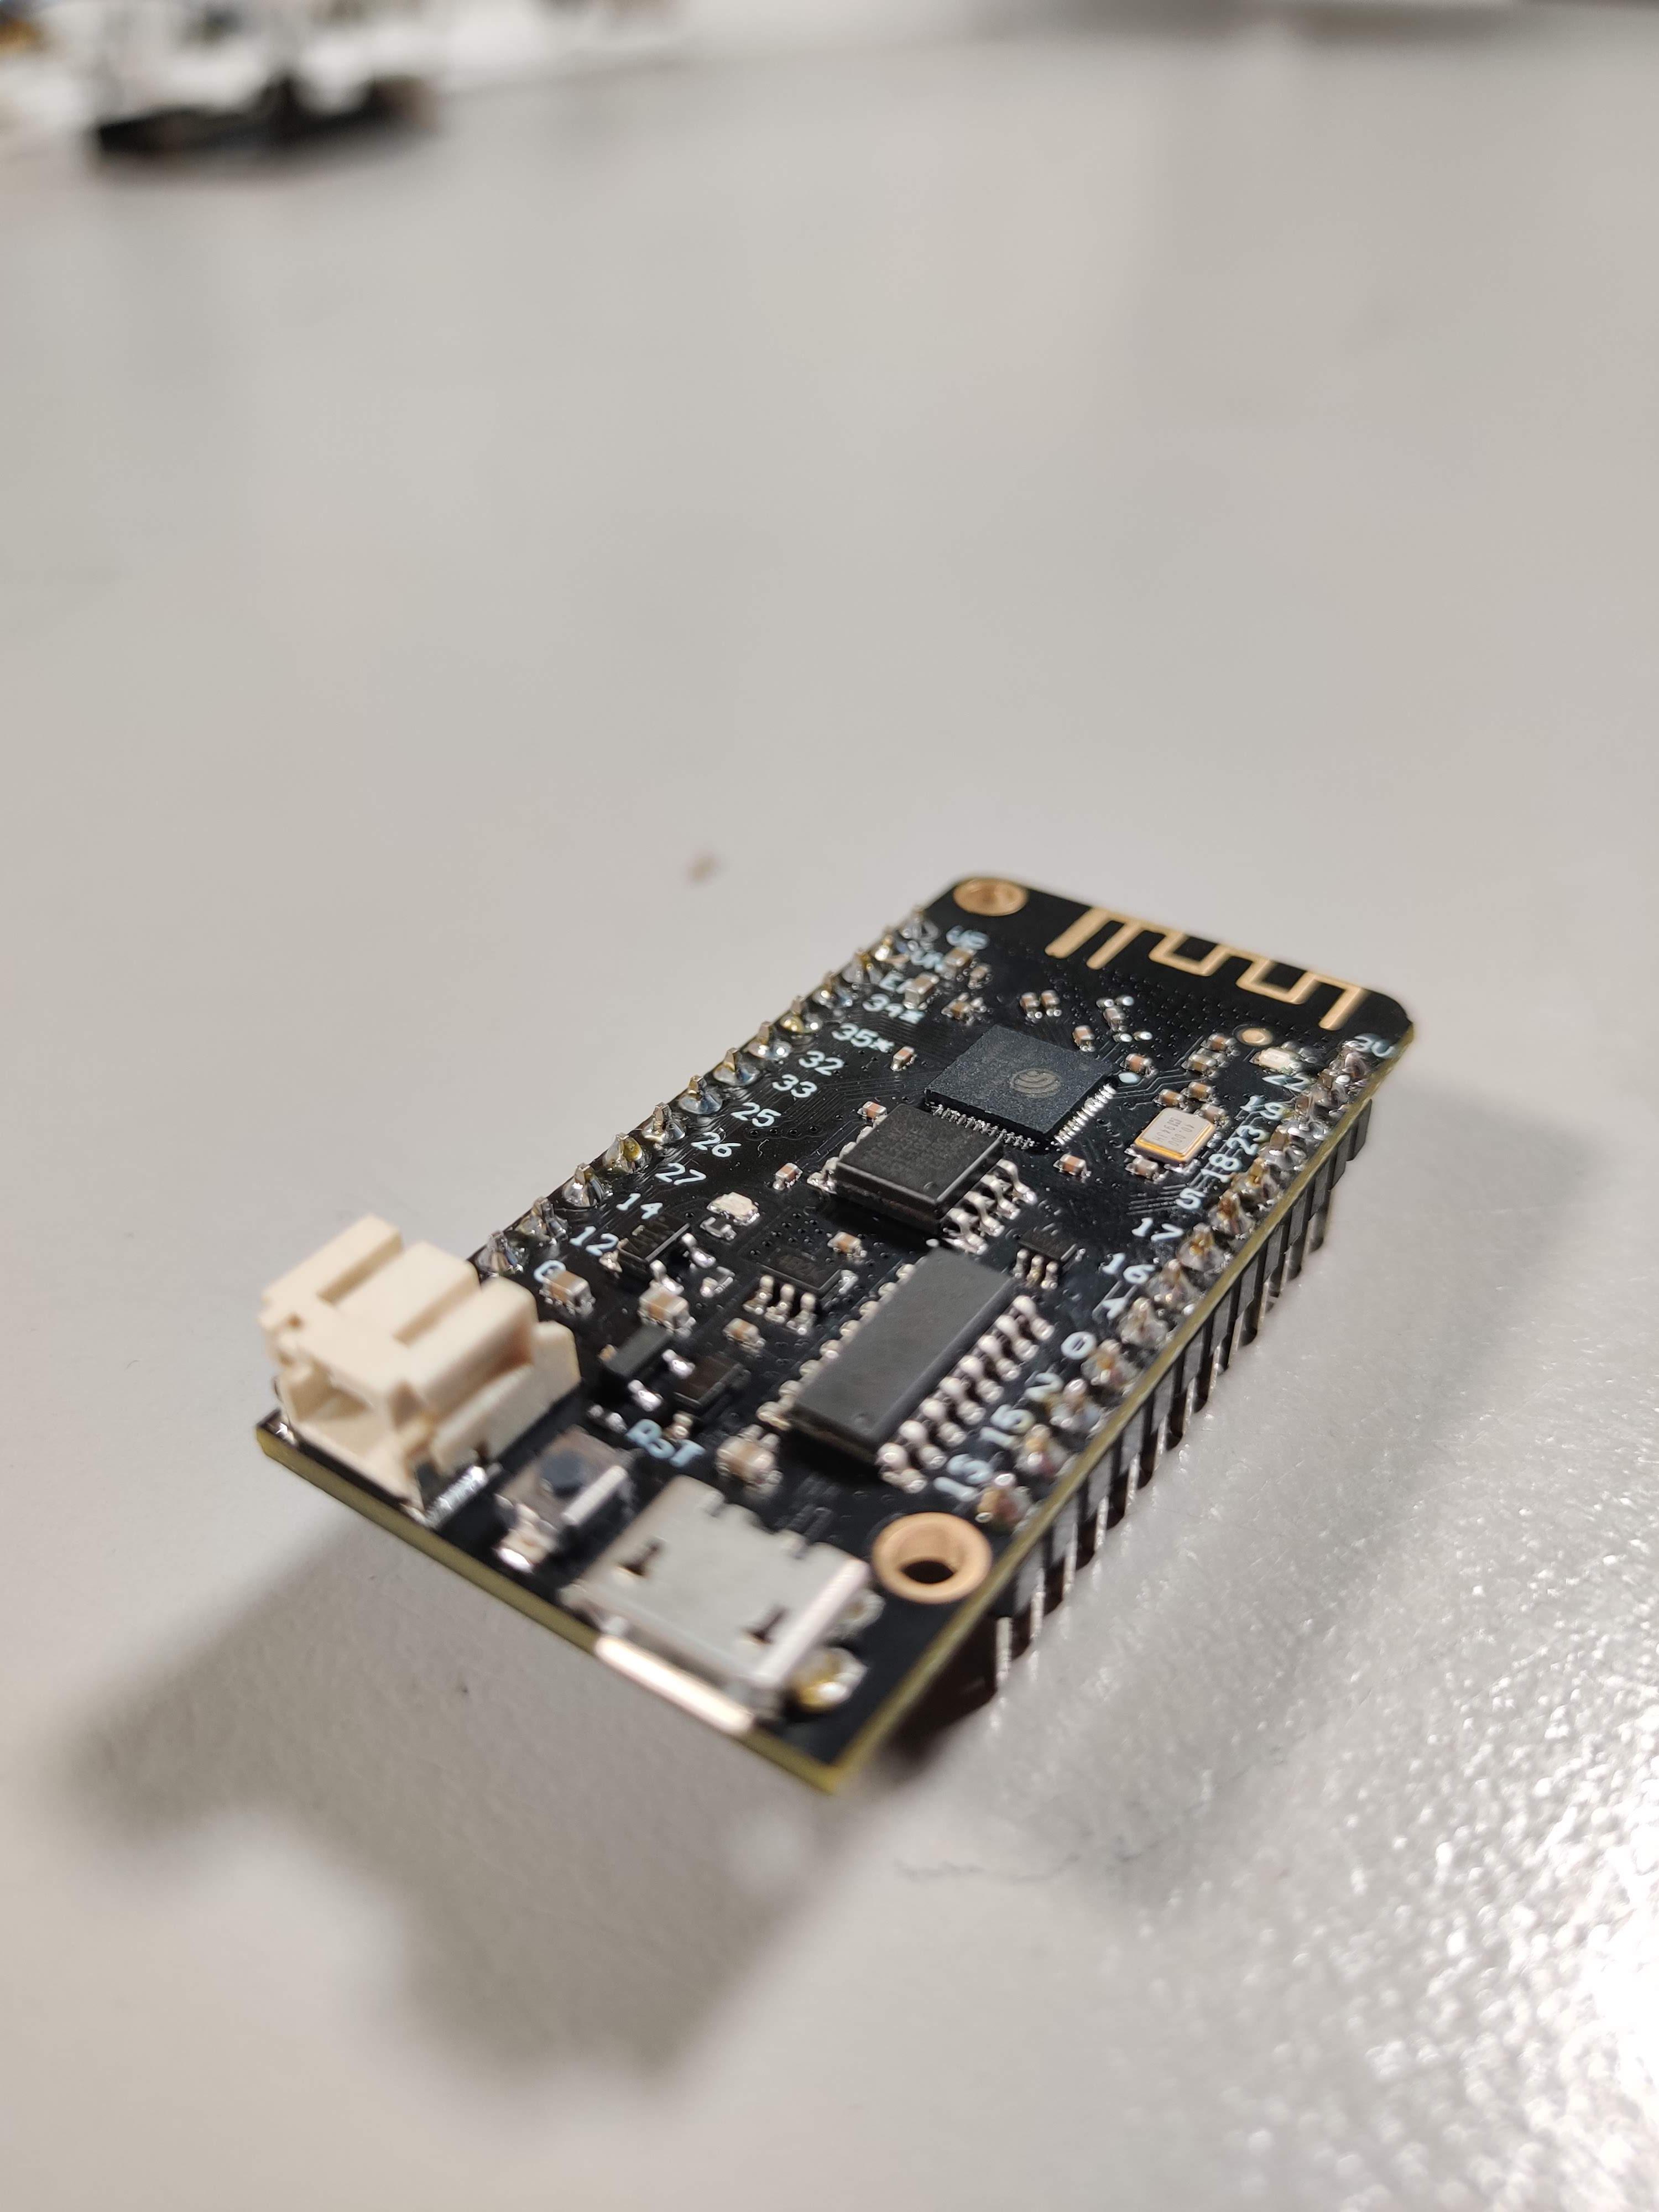
- ESP32 board (supporting battery power/charge)
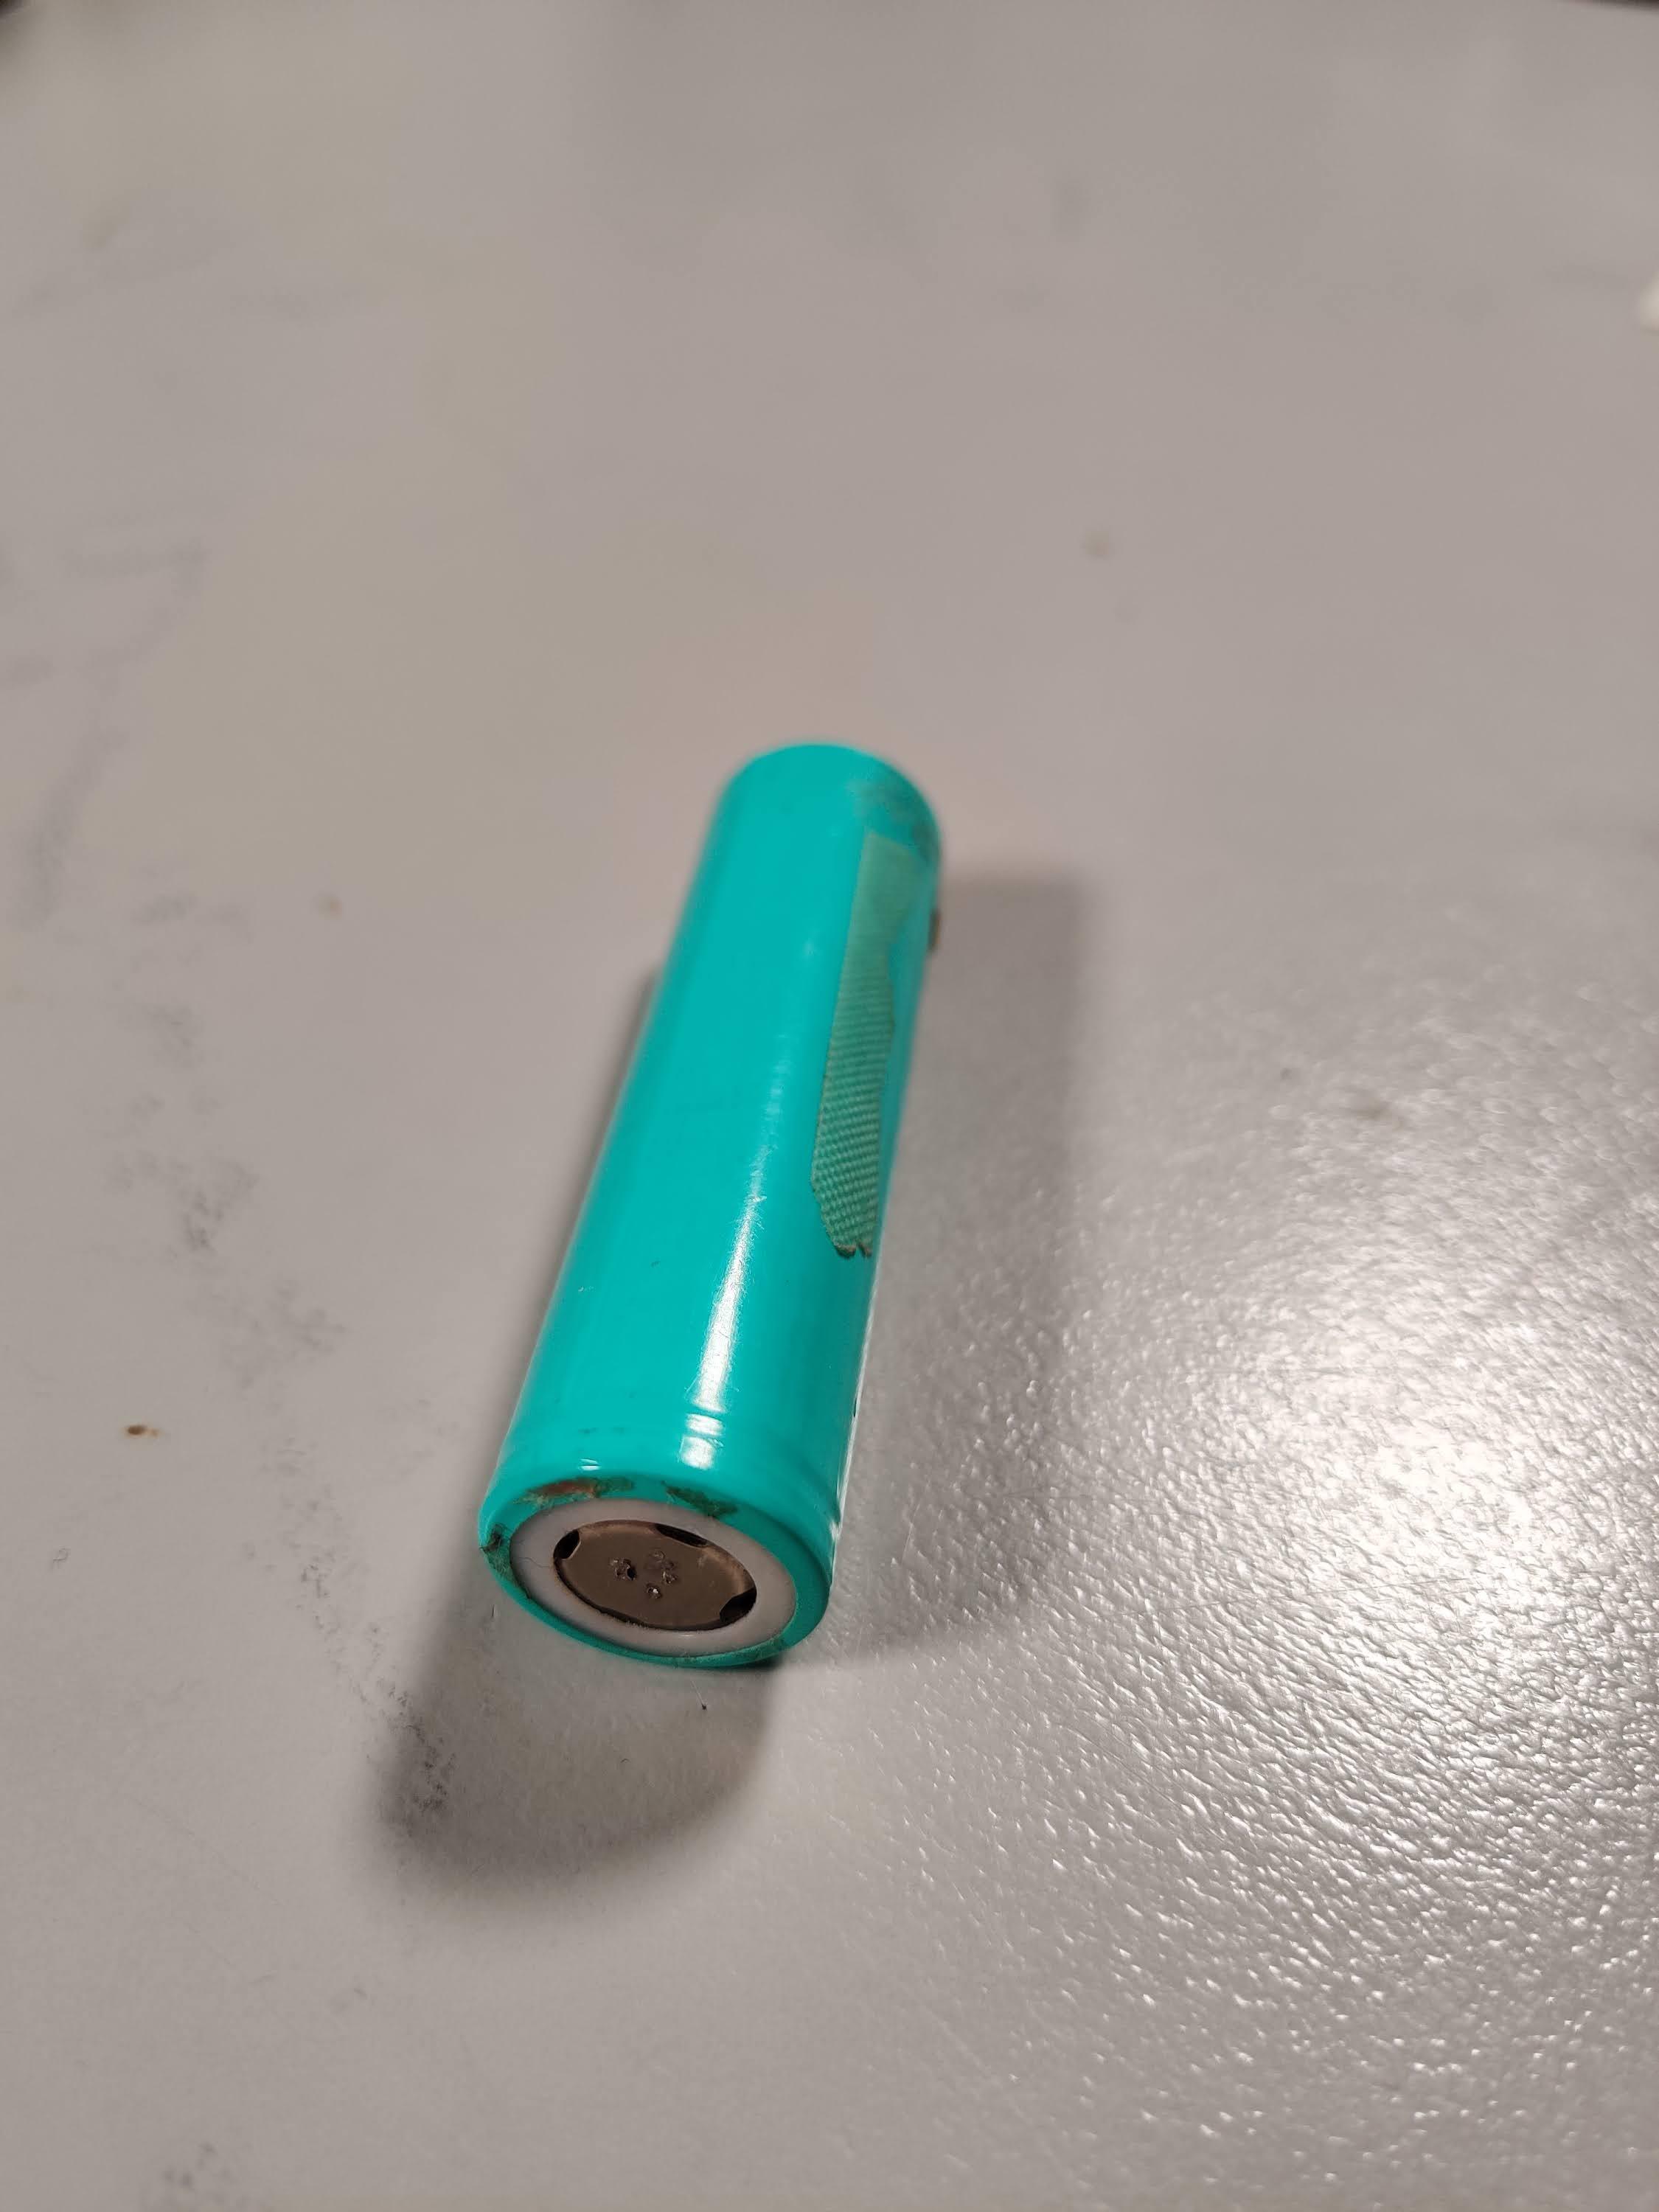
- 18650 lithium battery
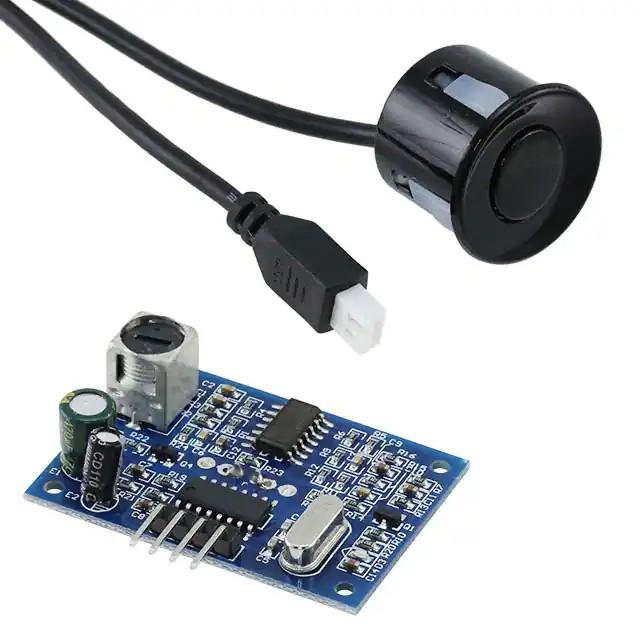
- Waterproof Ultrasonic sensor
- 2 resistors
Hardware Assembly
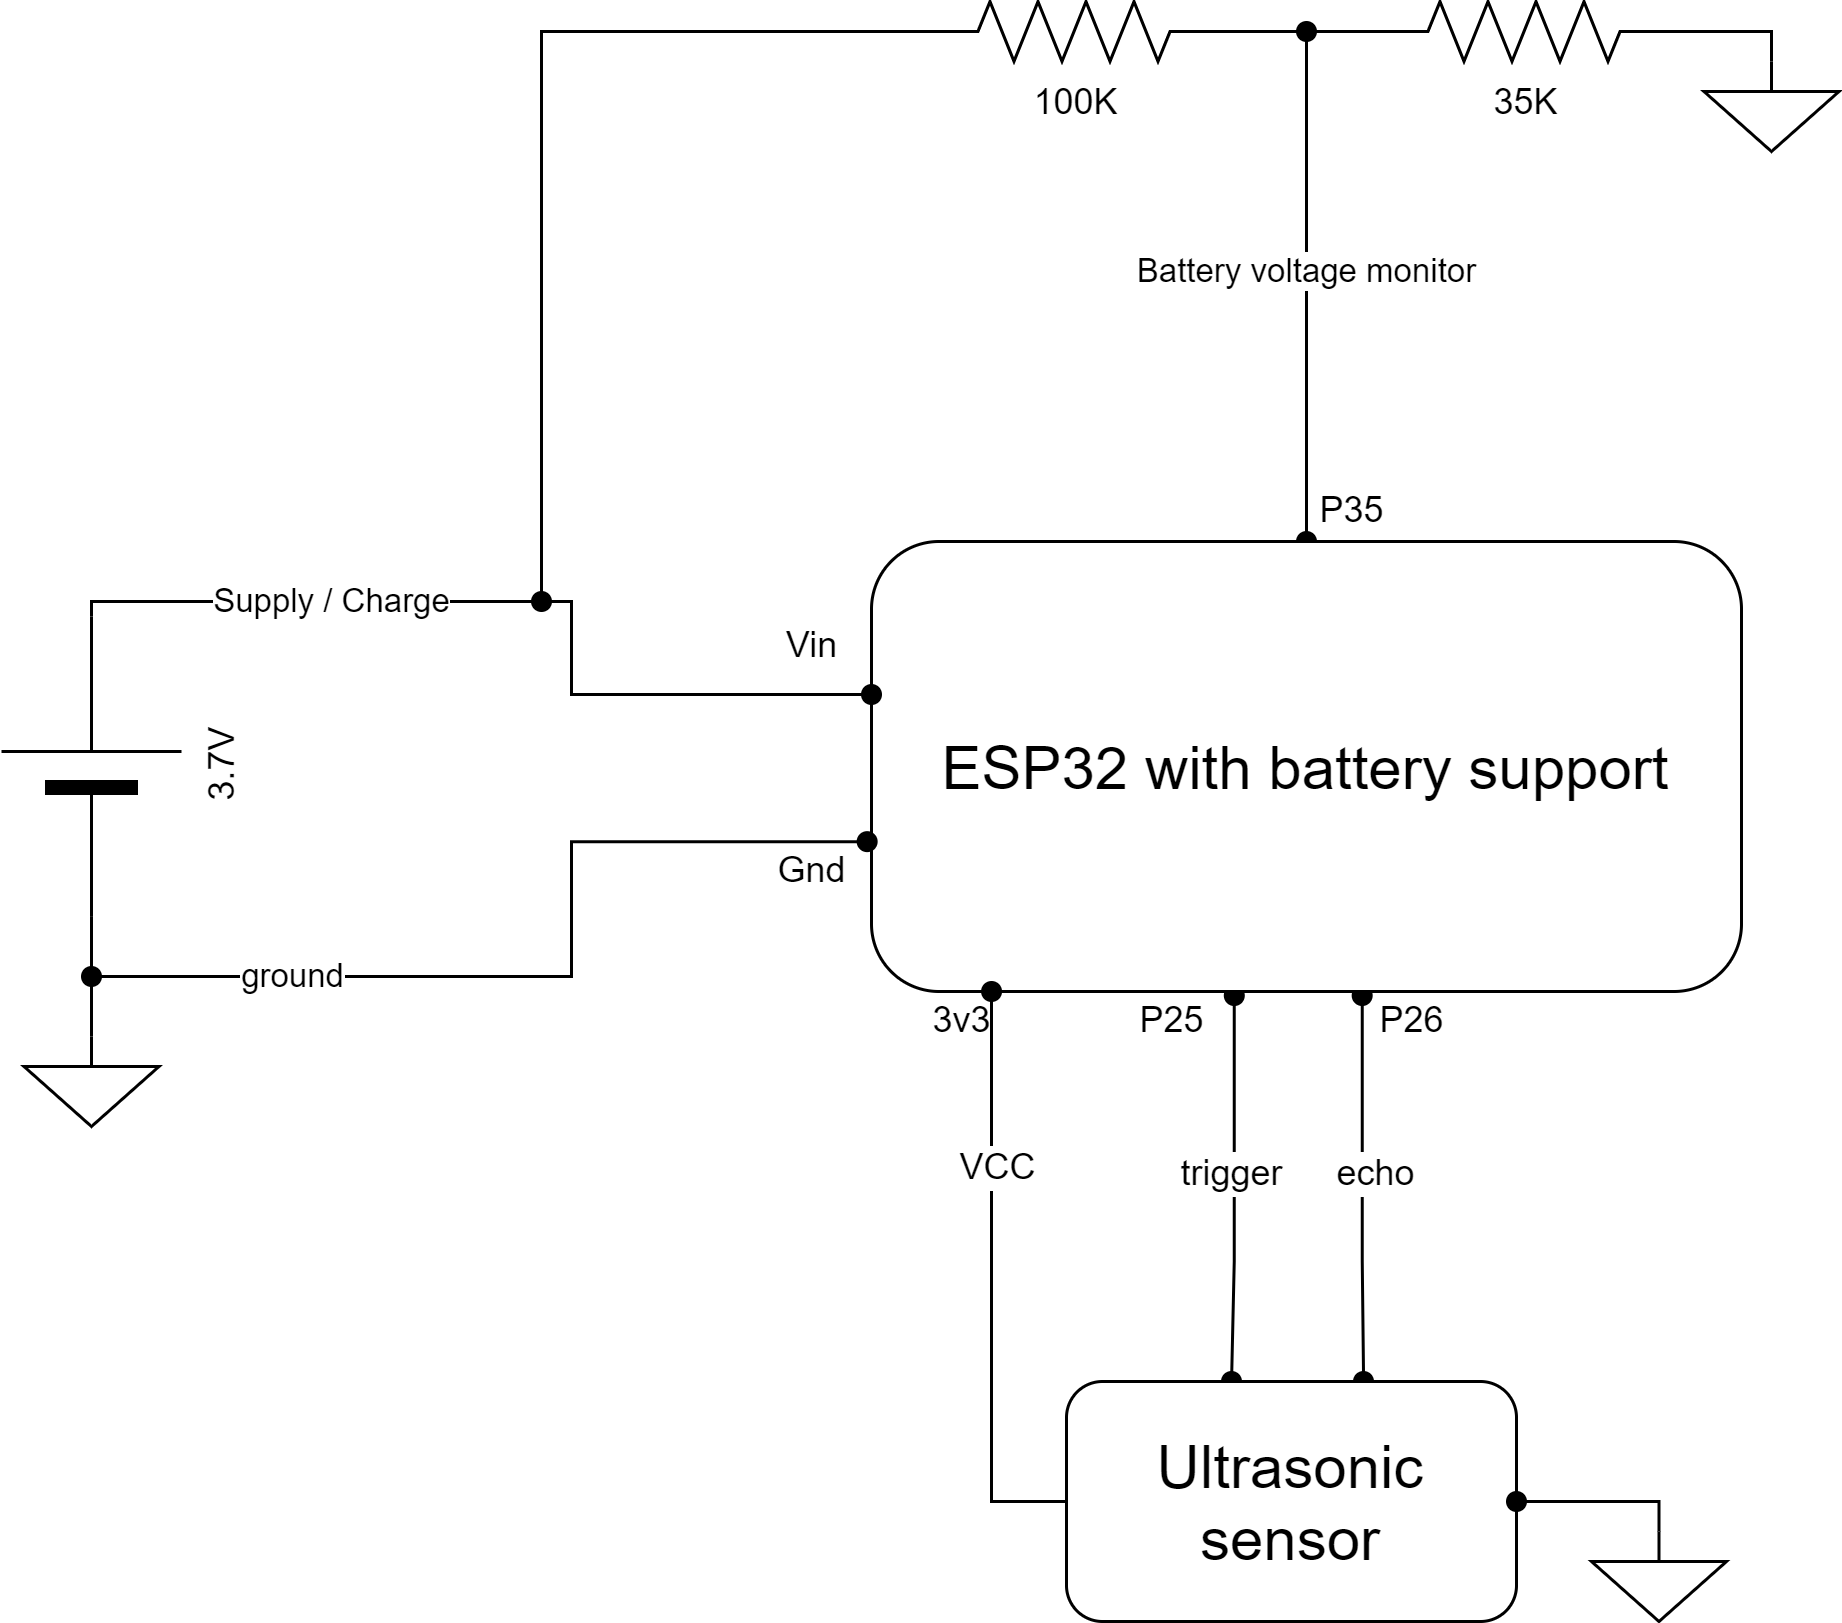
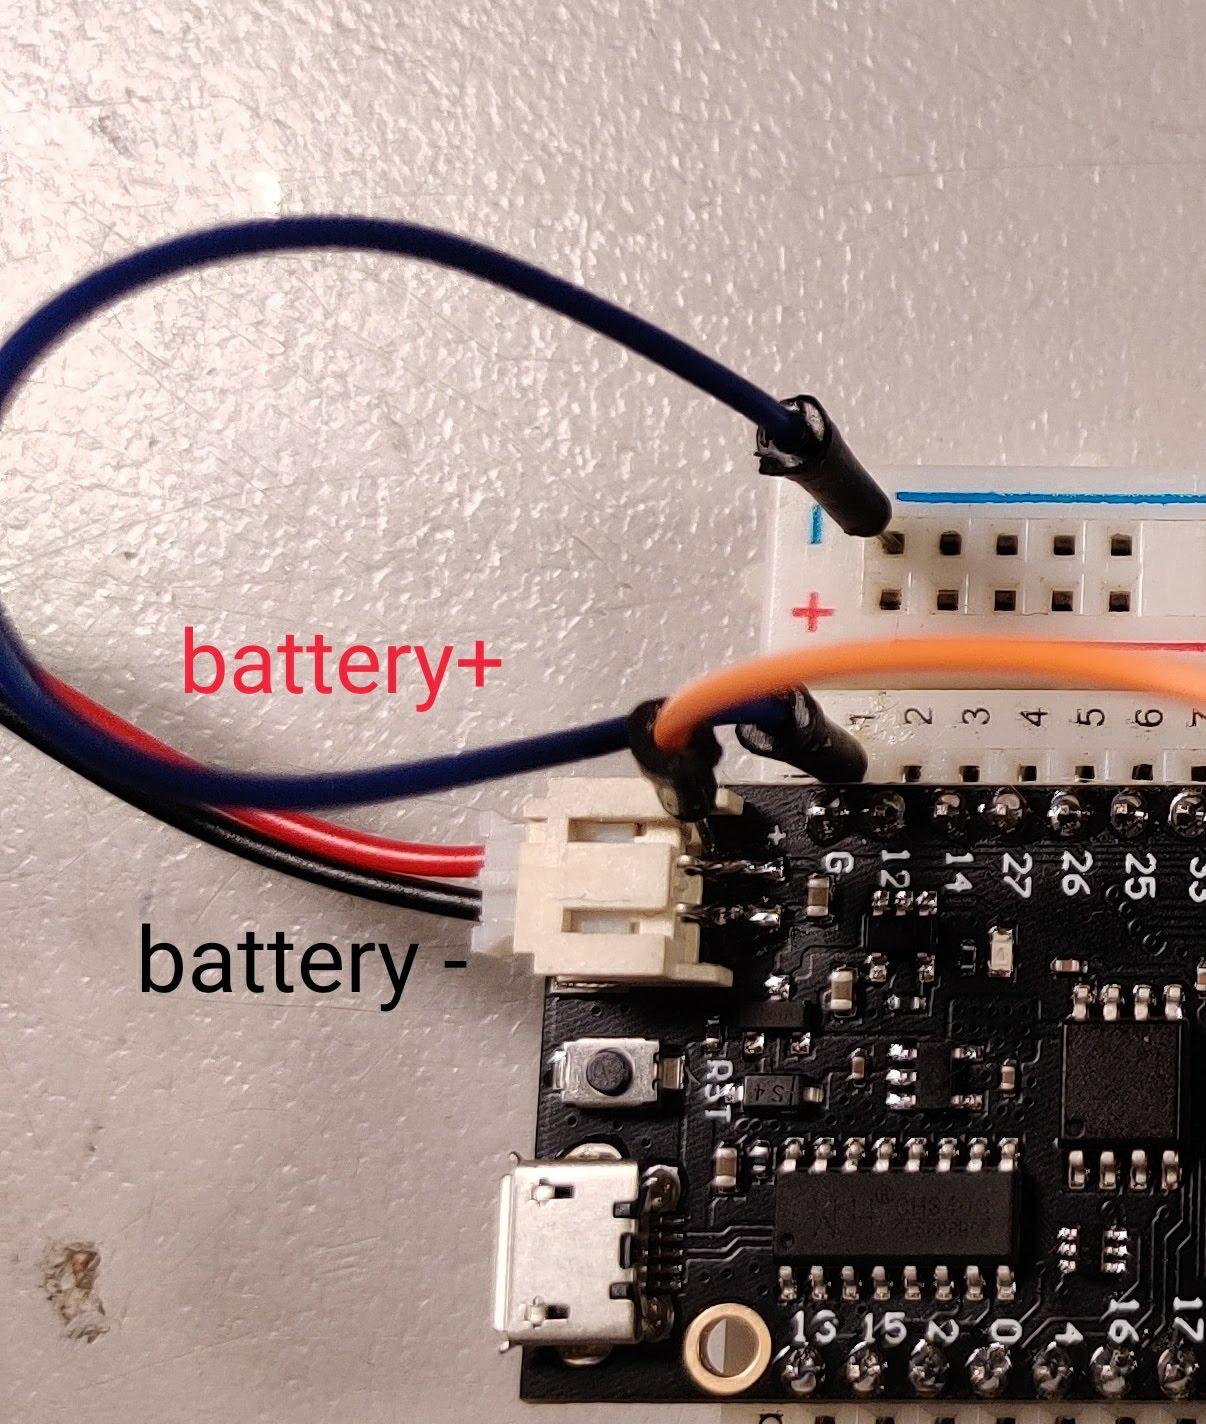
First, you have to follow the schematic and connect all the components accordingly.
You will notice that the main components are the ESP32, the Ultrasonic sensor, and the battery, but we also have a Voltage Divider with 2 resistors 100K and 35K, to measure the battery's voltage with the ESP.
Create a Voltage Divider
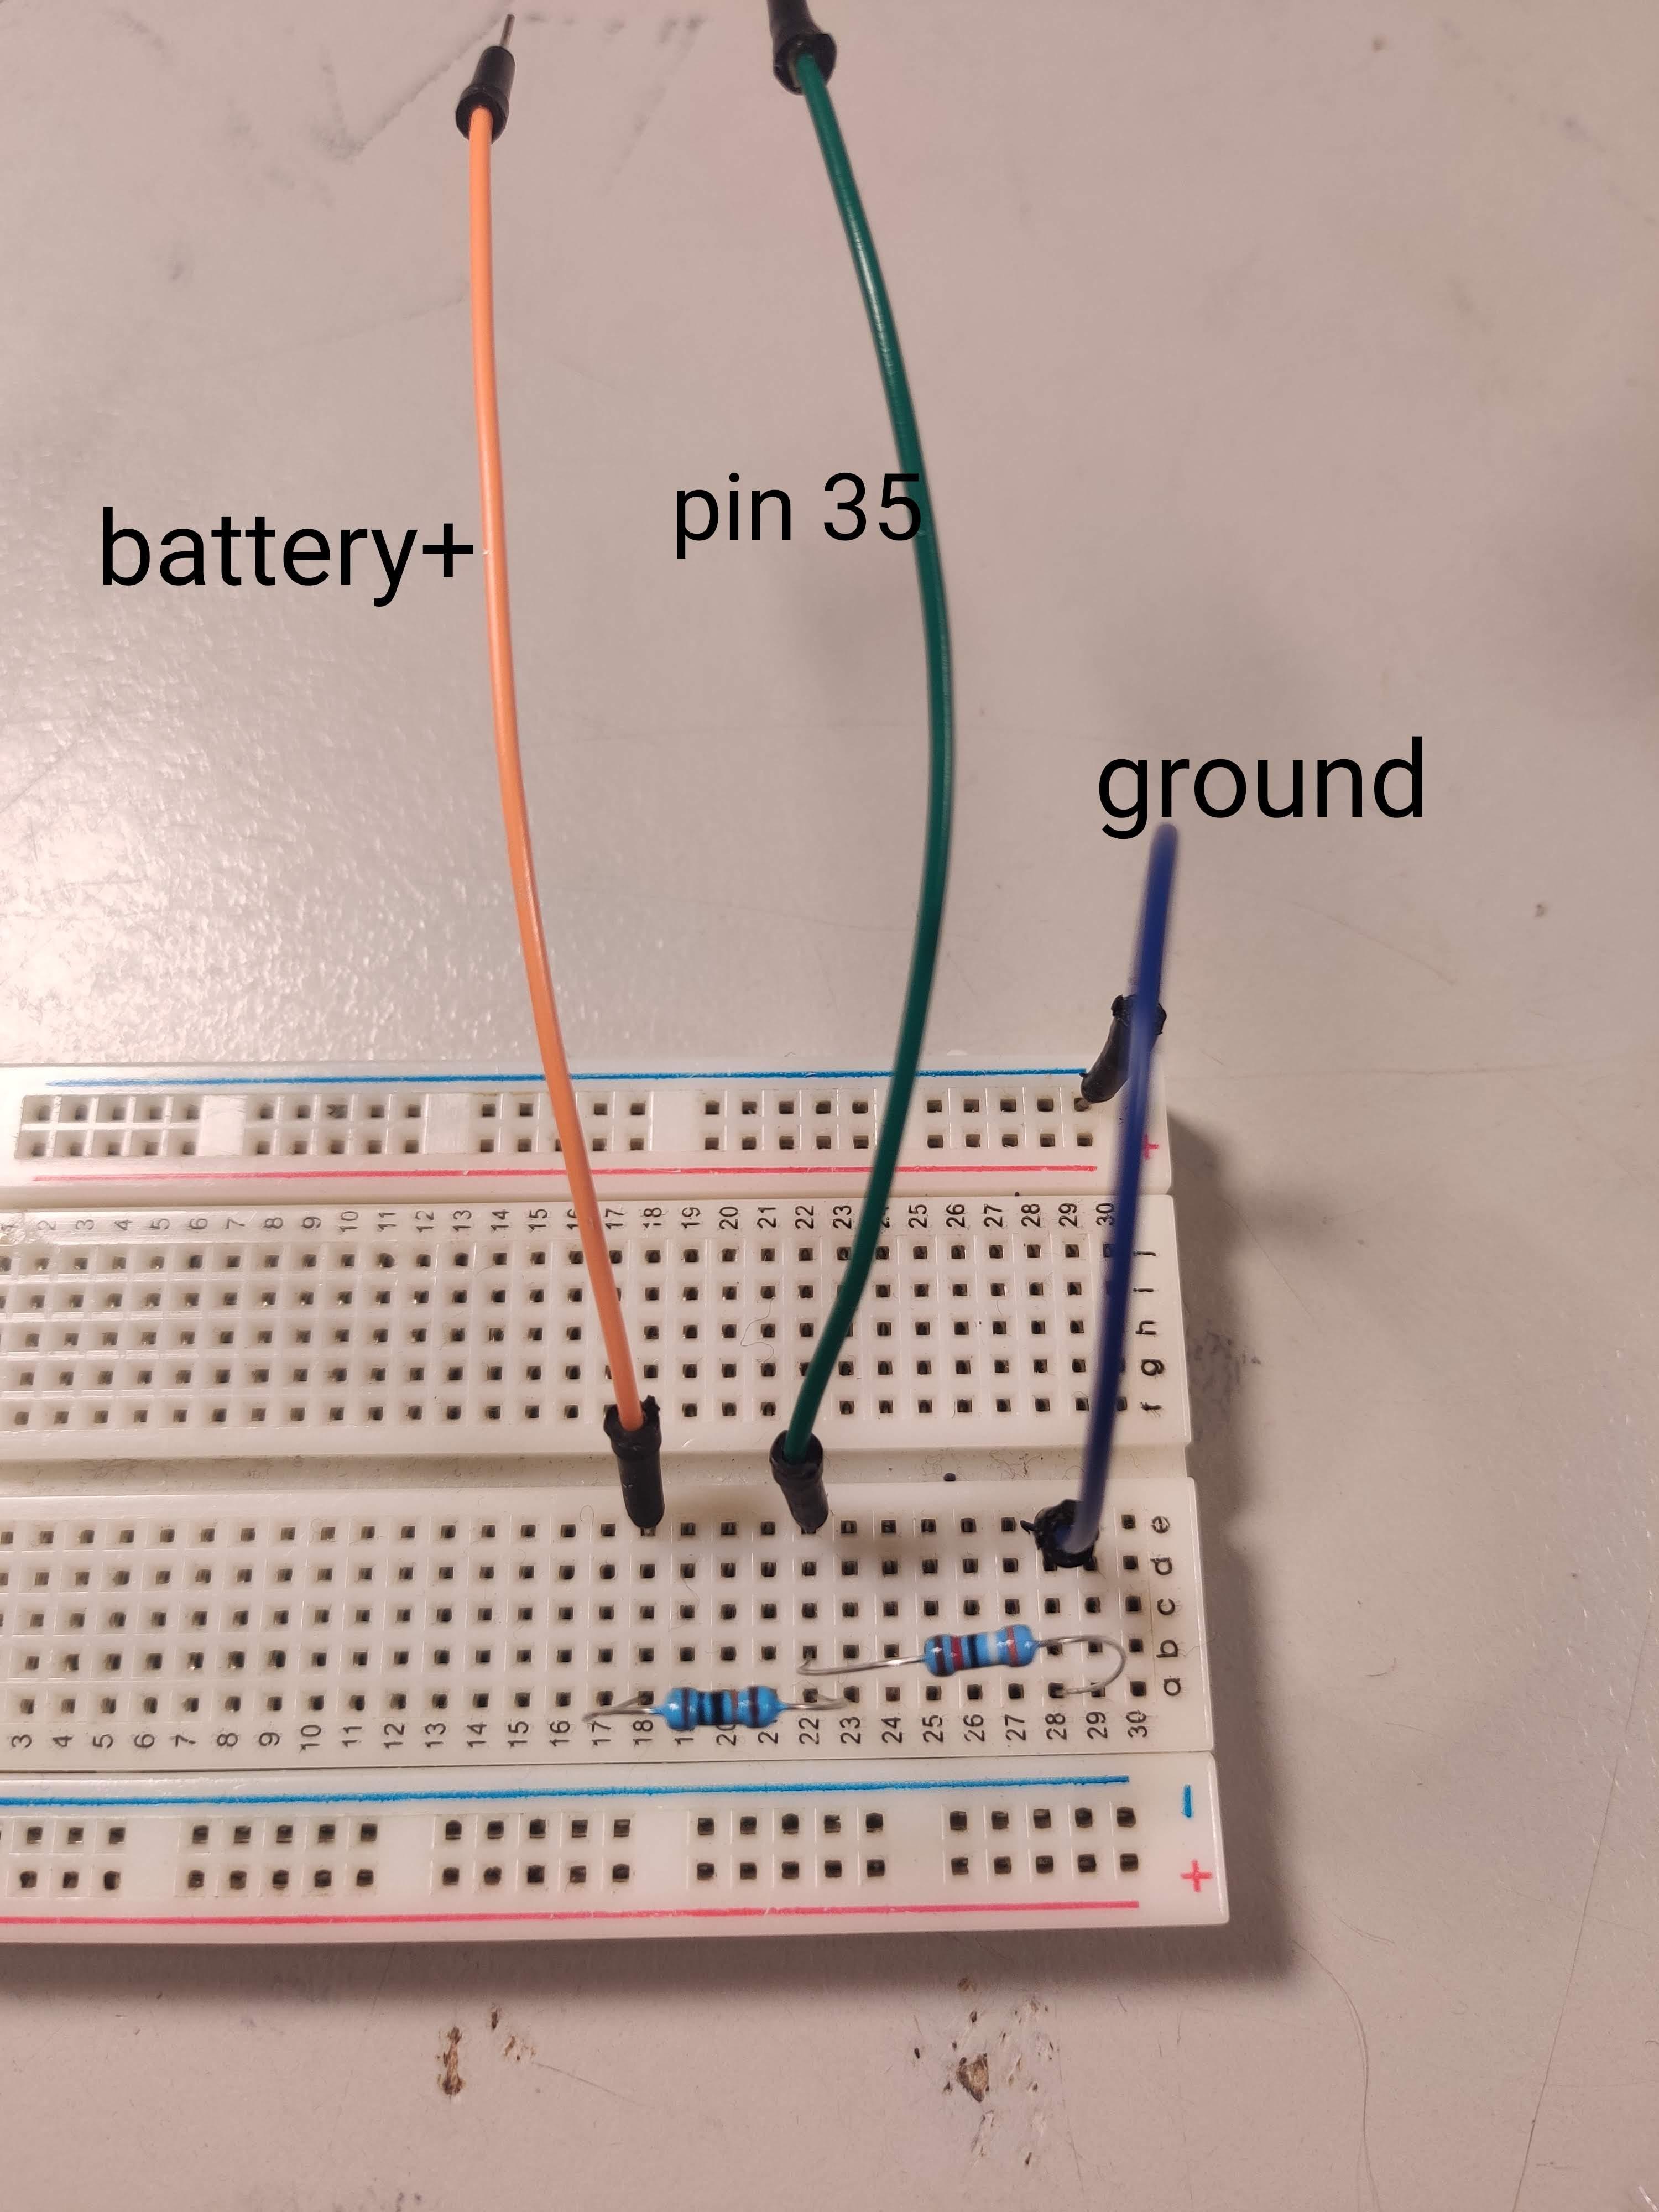
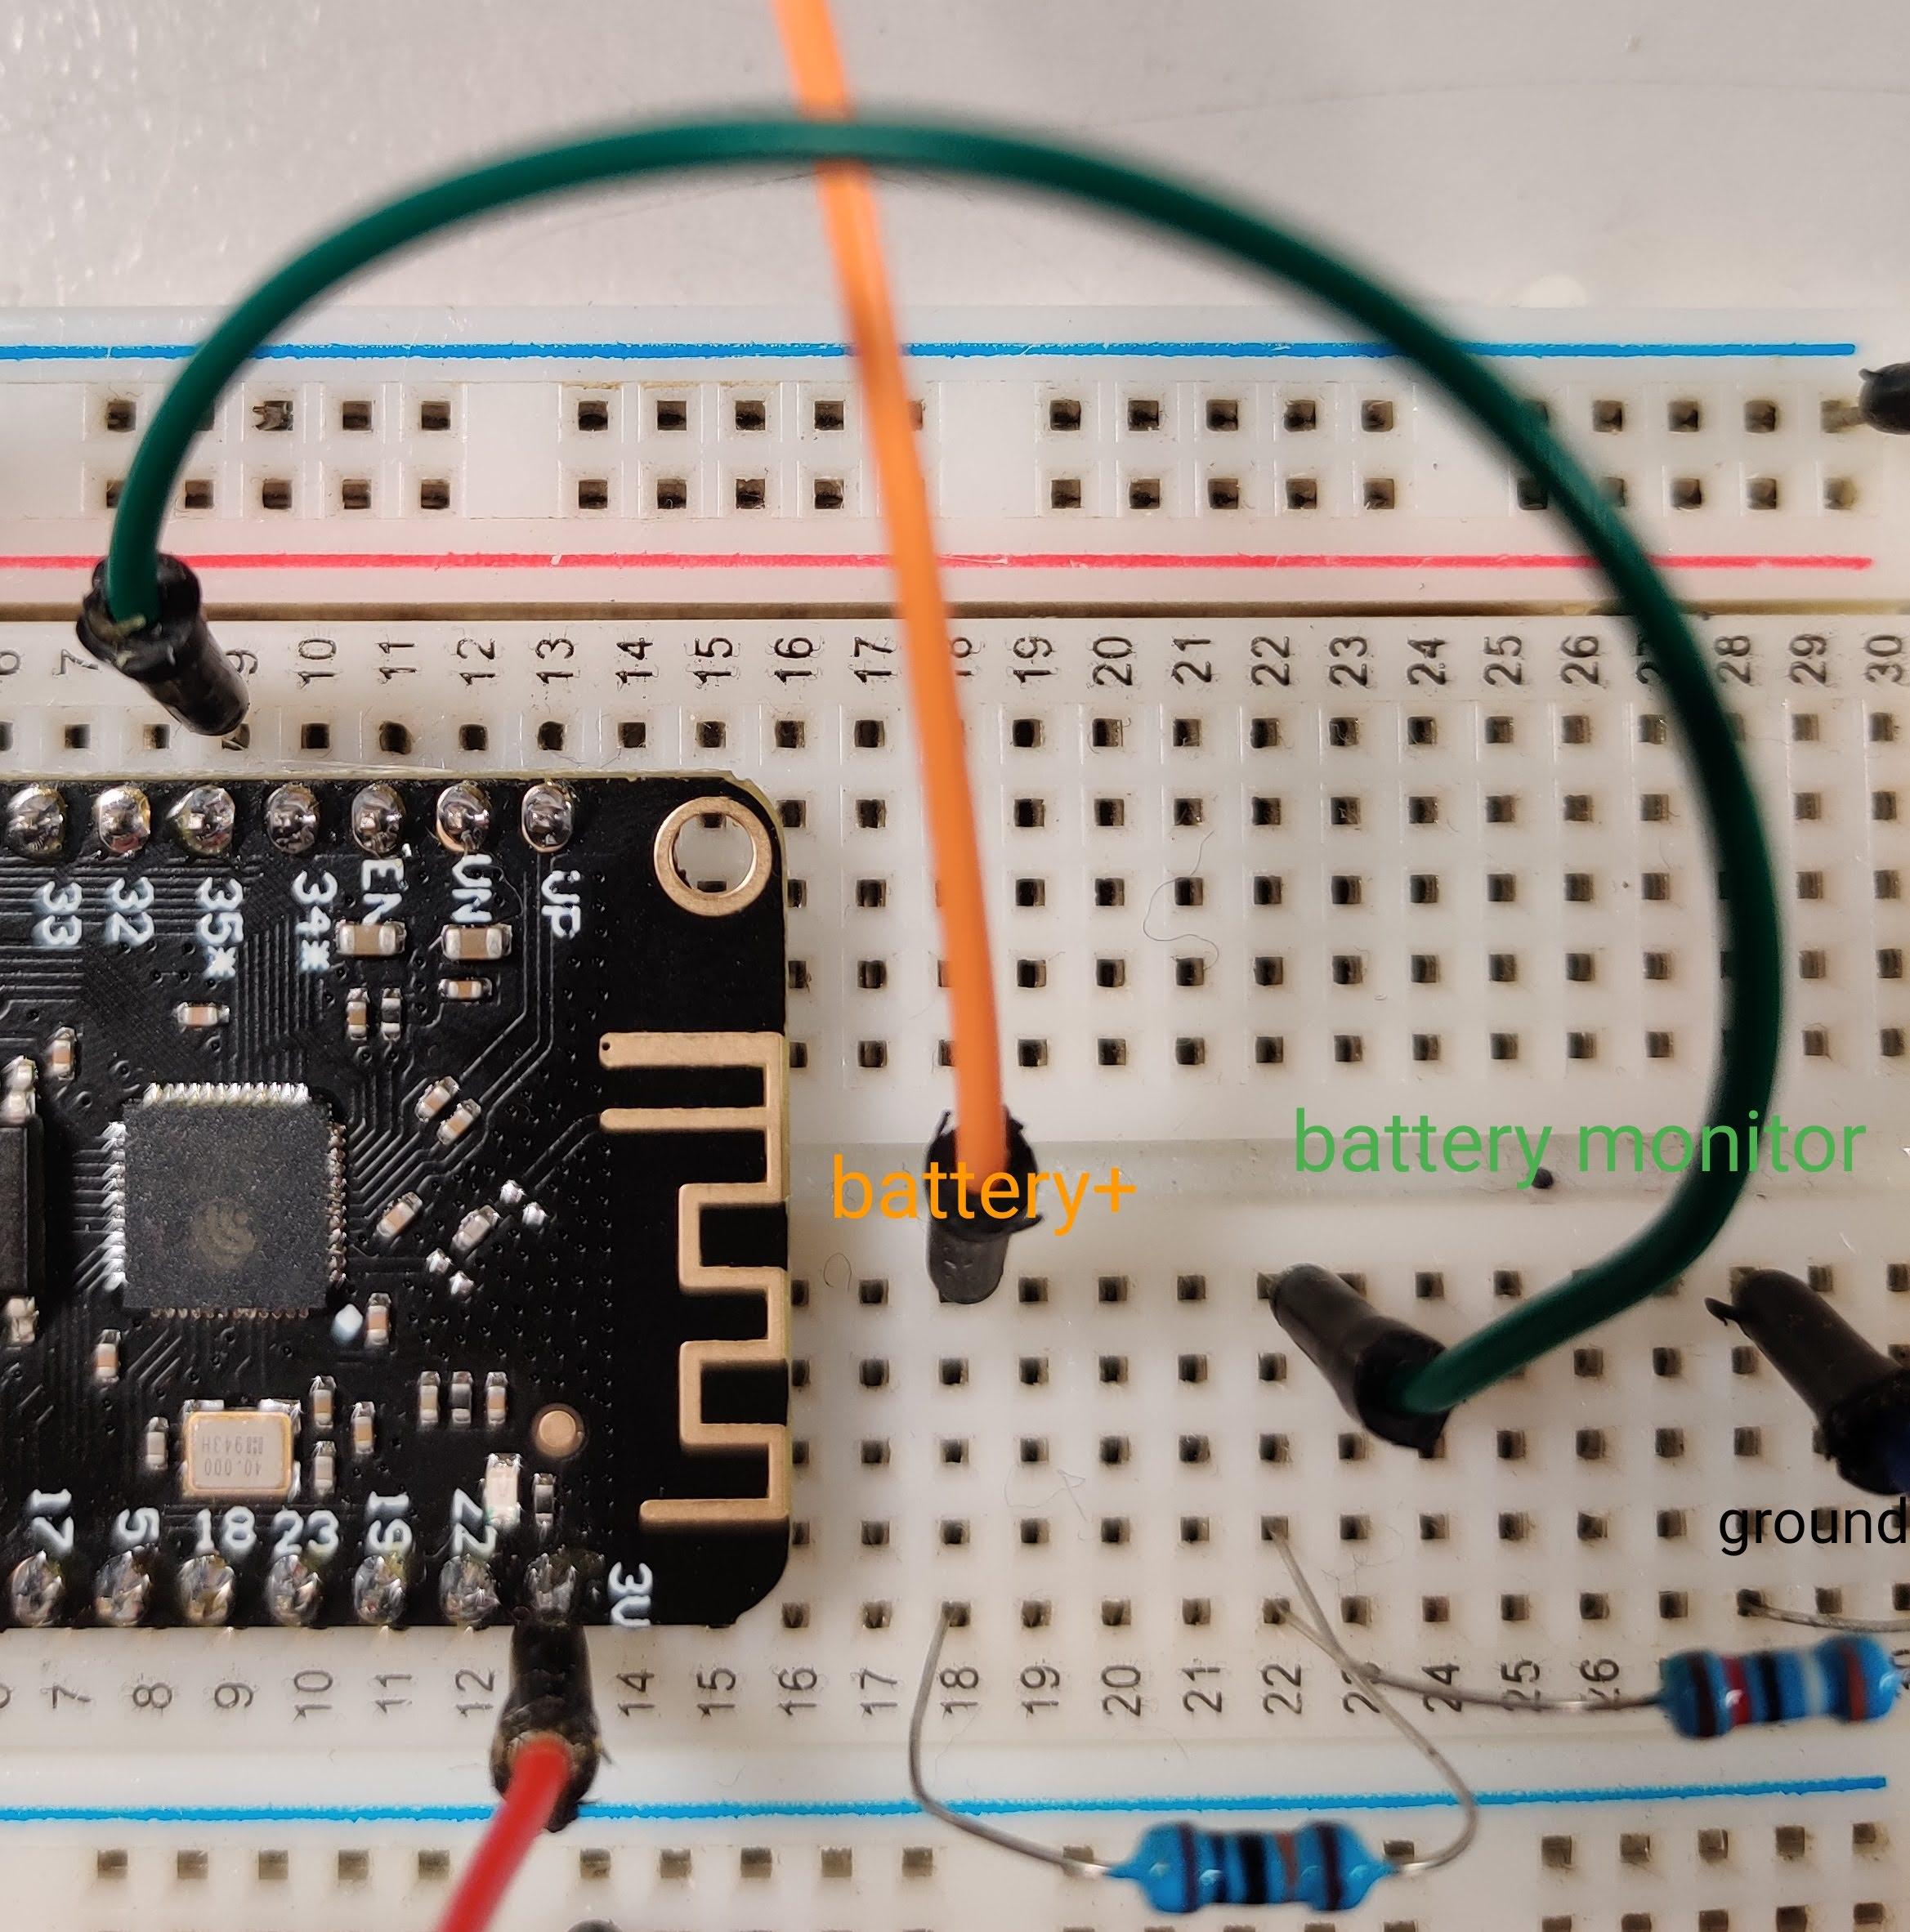
We need a voltage divider to reduce the maximum battery voltage of 4.2V to 1.1V in order to be able to measure it, as the ADC of the ESP32 cannot measure higher voltages. This way, we will be able to measure the battery level.
Connect the Ultrasonic Sensor
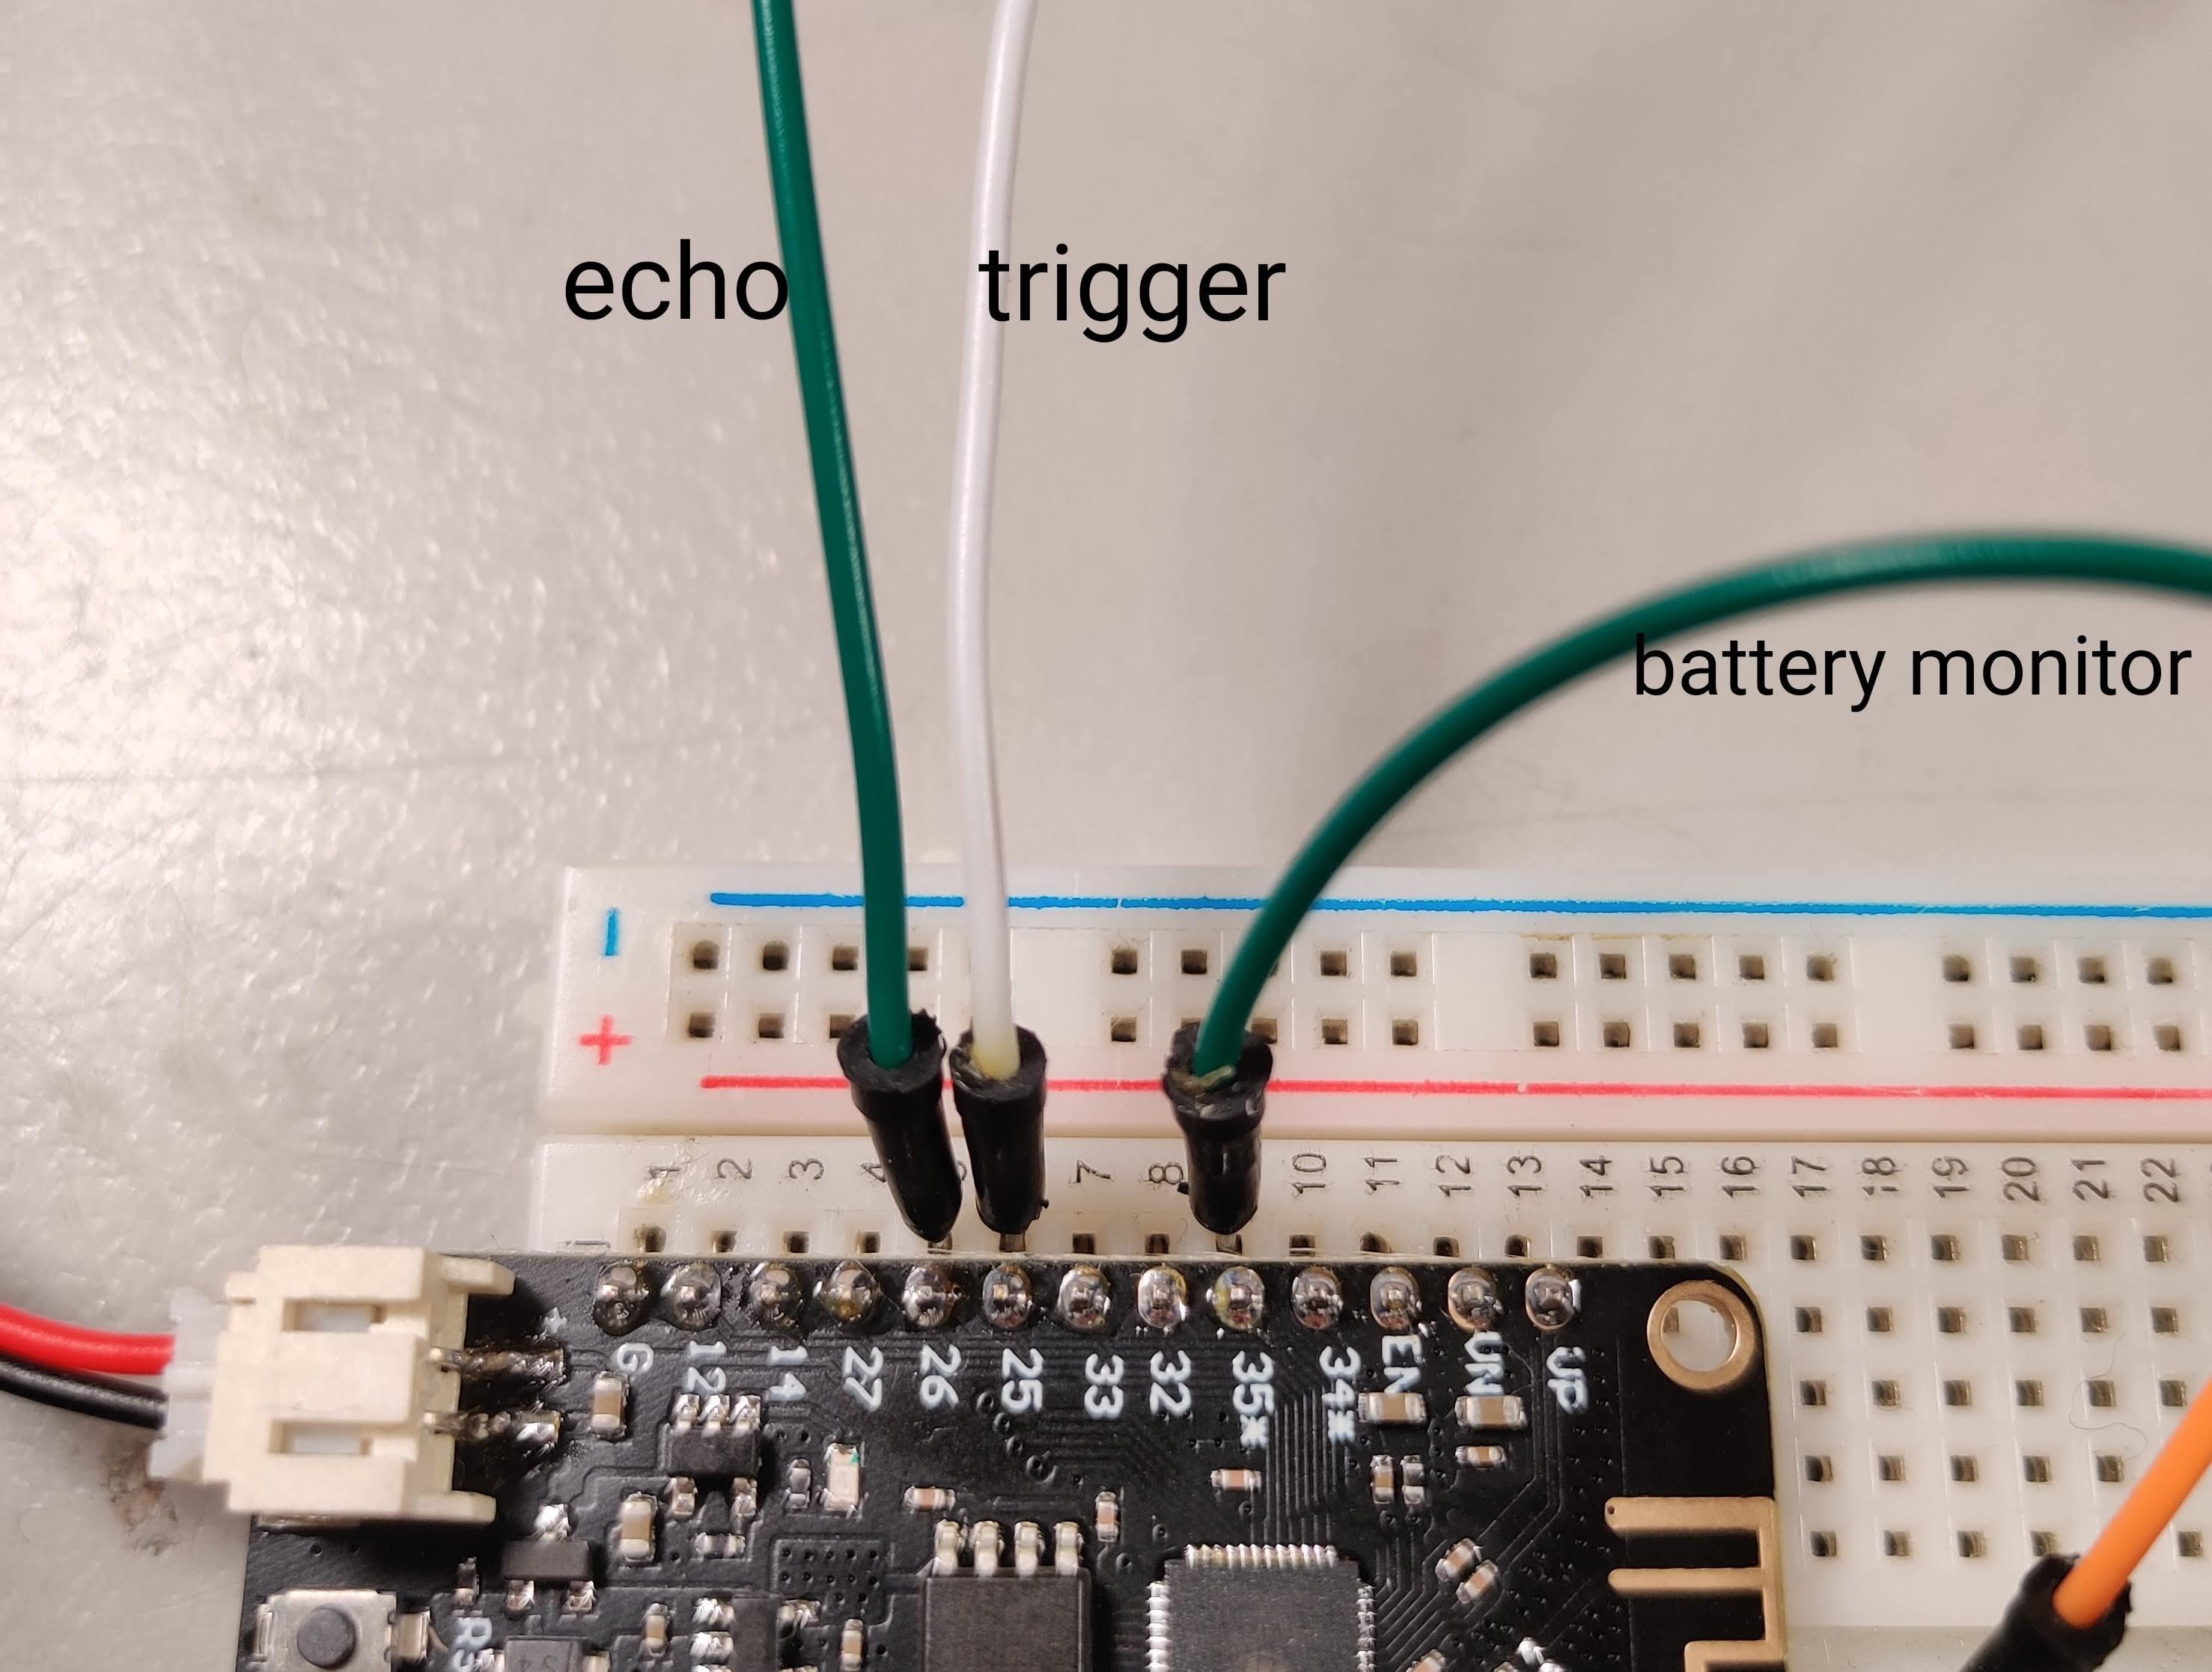
Next, we need to add the Ultrasonic sensor. VCC and GND of the sensor are connected to 3.3v and Gnd respectively, whereas Trigger goes to pin 25 and Echo to pin 26.
Create a New ESPHome Device
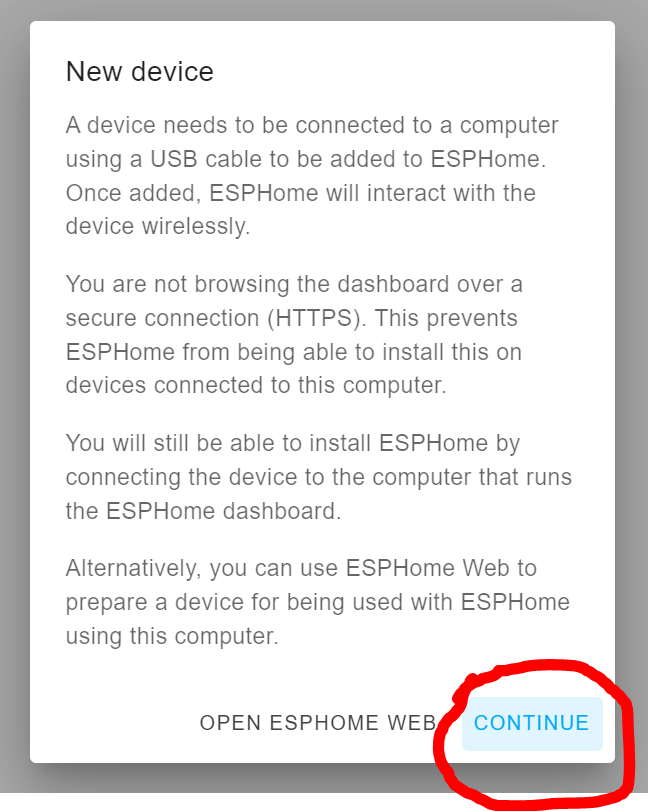
Add a new device from ESPHome Dashboard and follow all the steps provided by the platform.
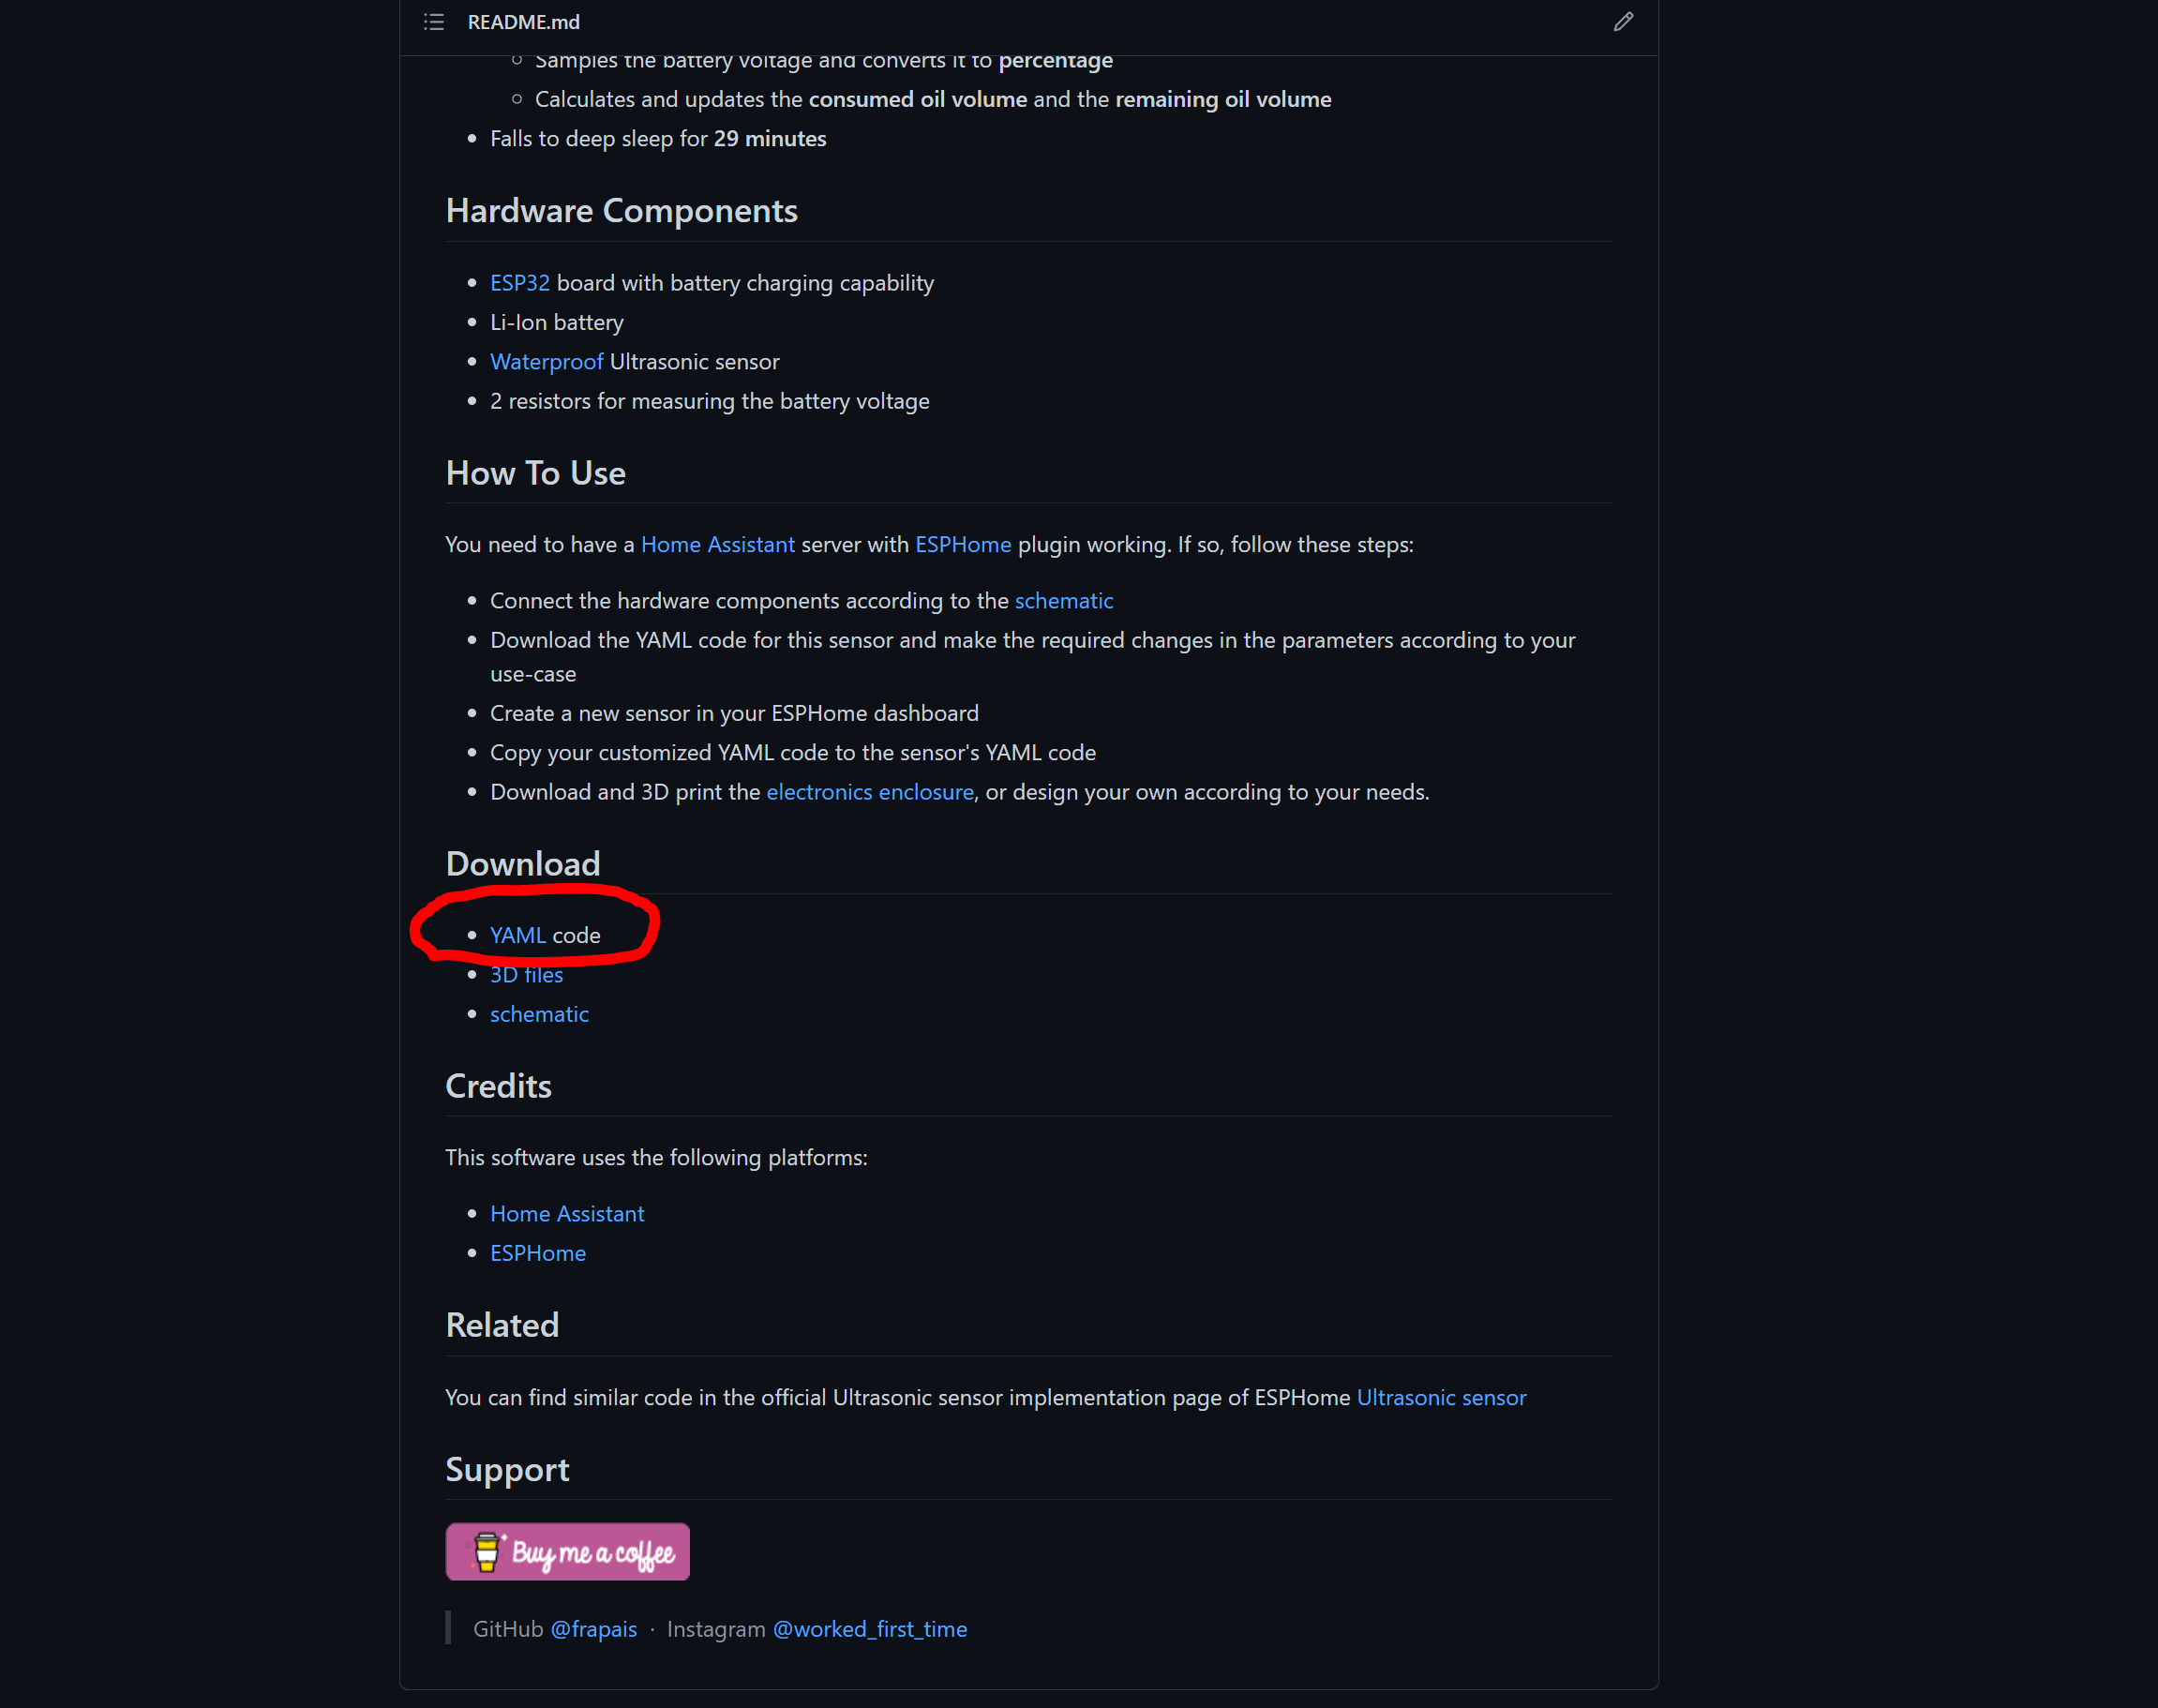
Download Code
Update YAML Code
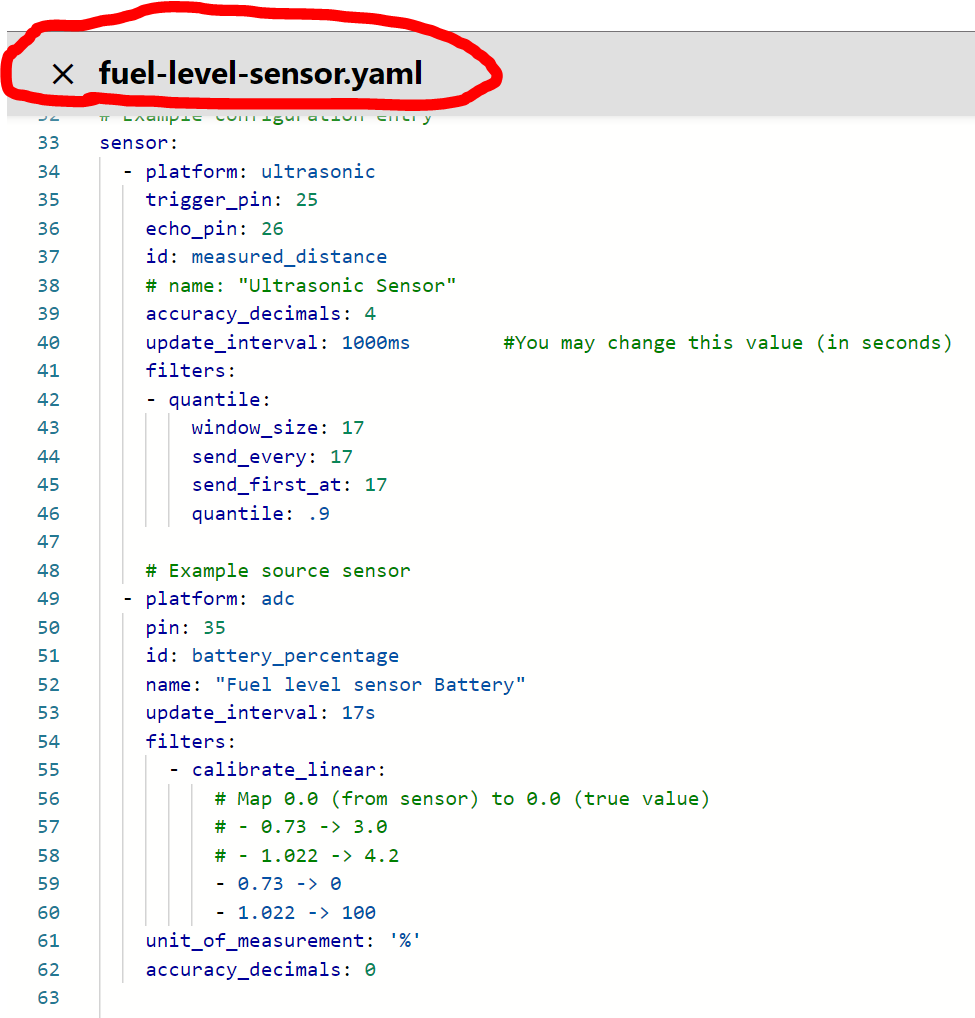
Now you can upload or copy-paste your customized YAML code to the newly created sensor in your ESPHome dashboard.
Install the Code on the ESP32
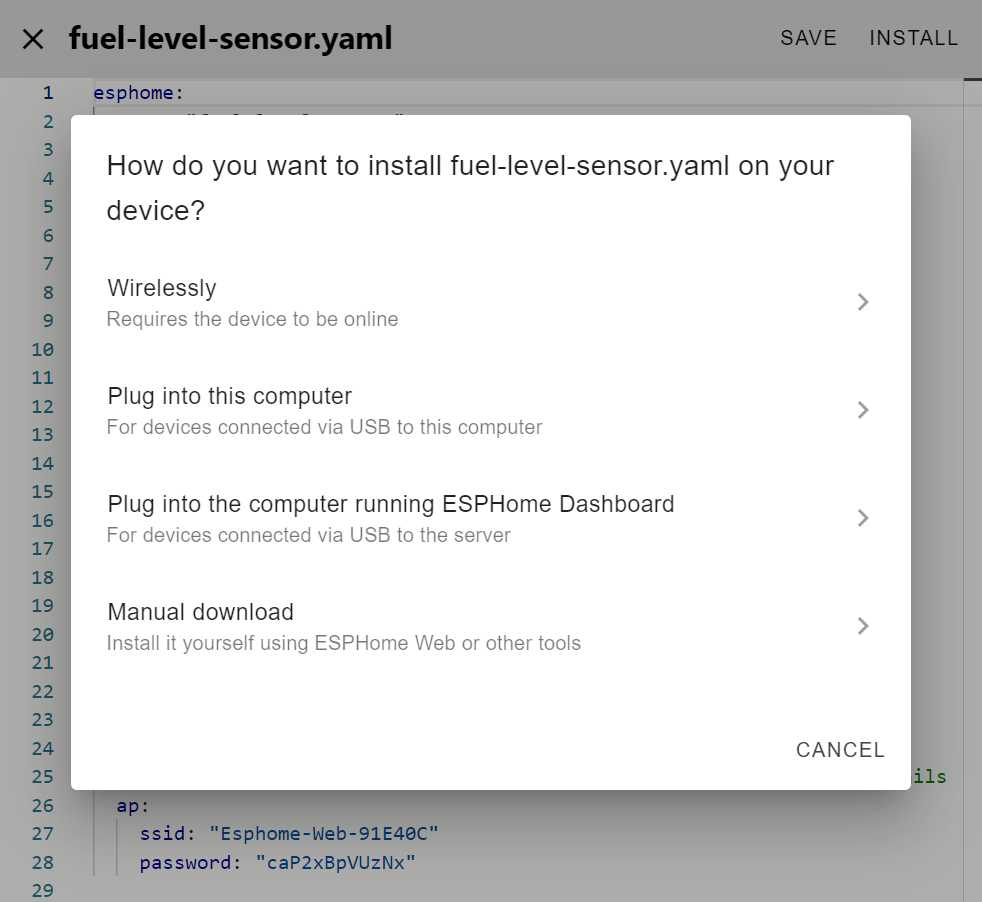
Now is the time to compile and upload the code to the ESP32 hardware. ESPHome offers many ways to do that, including Over-The-Air upload.
Close It All Up
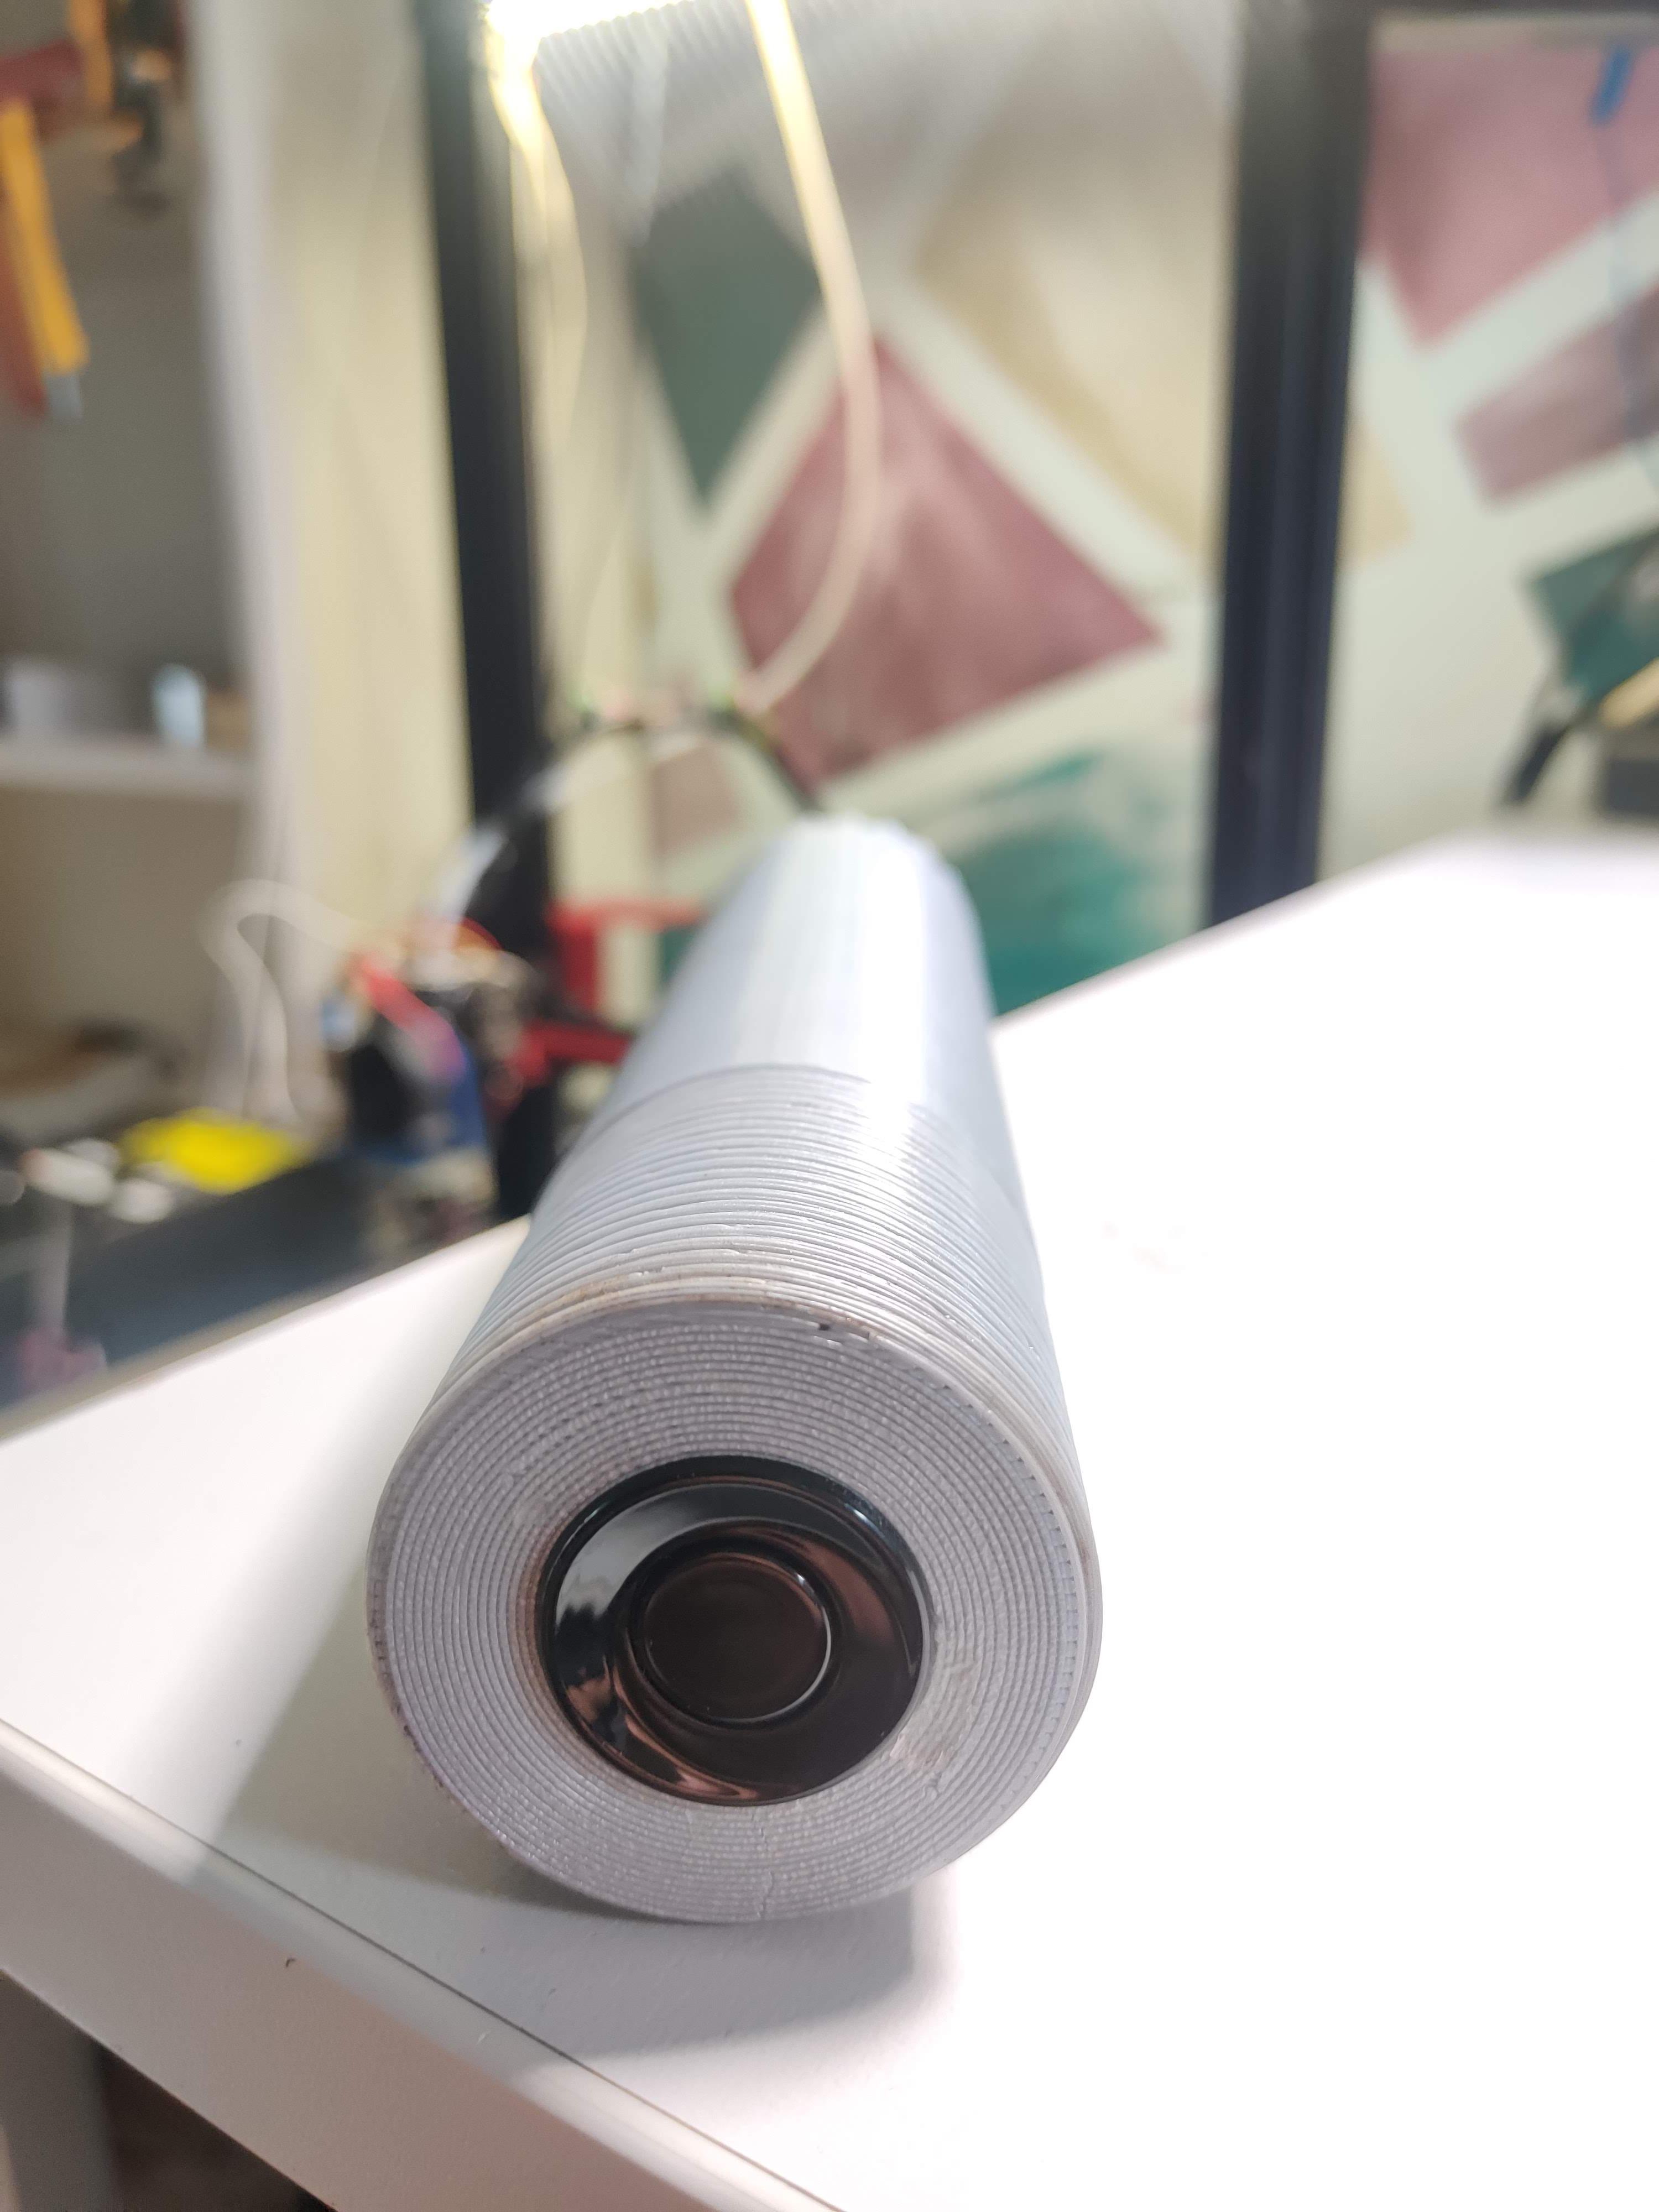
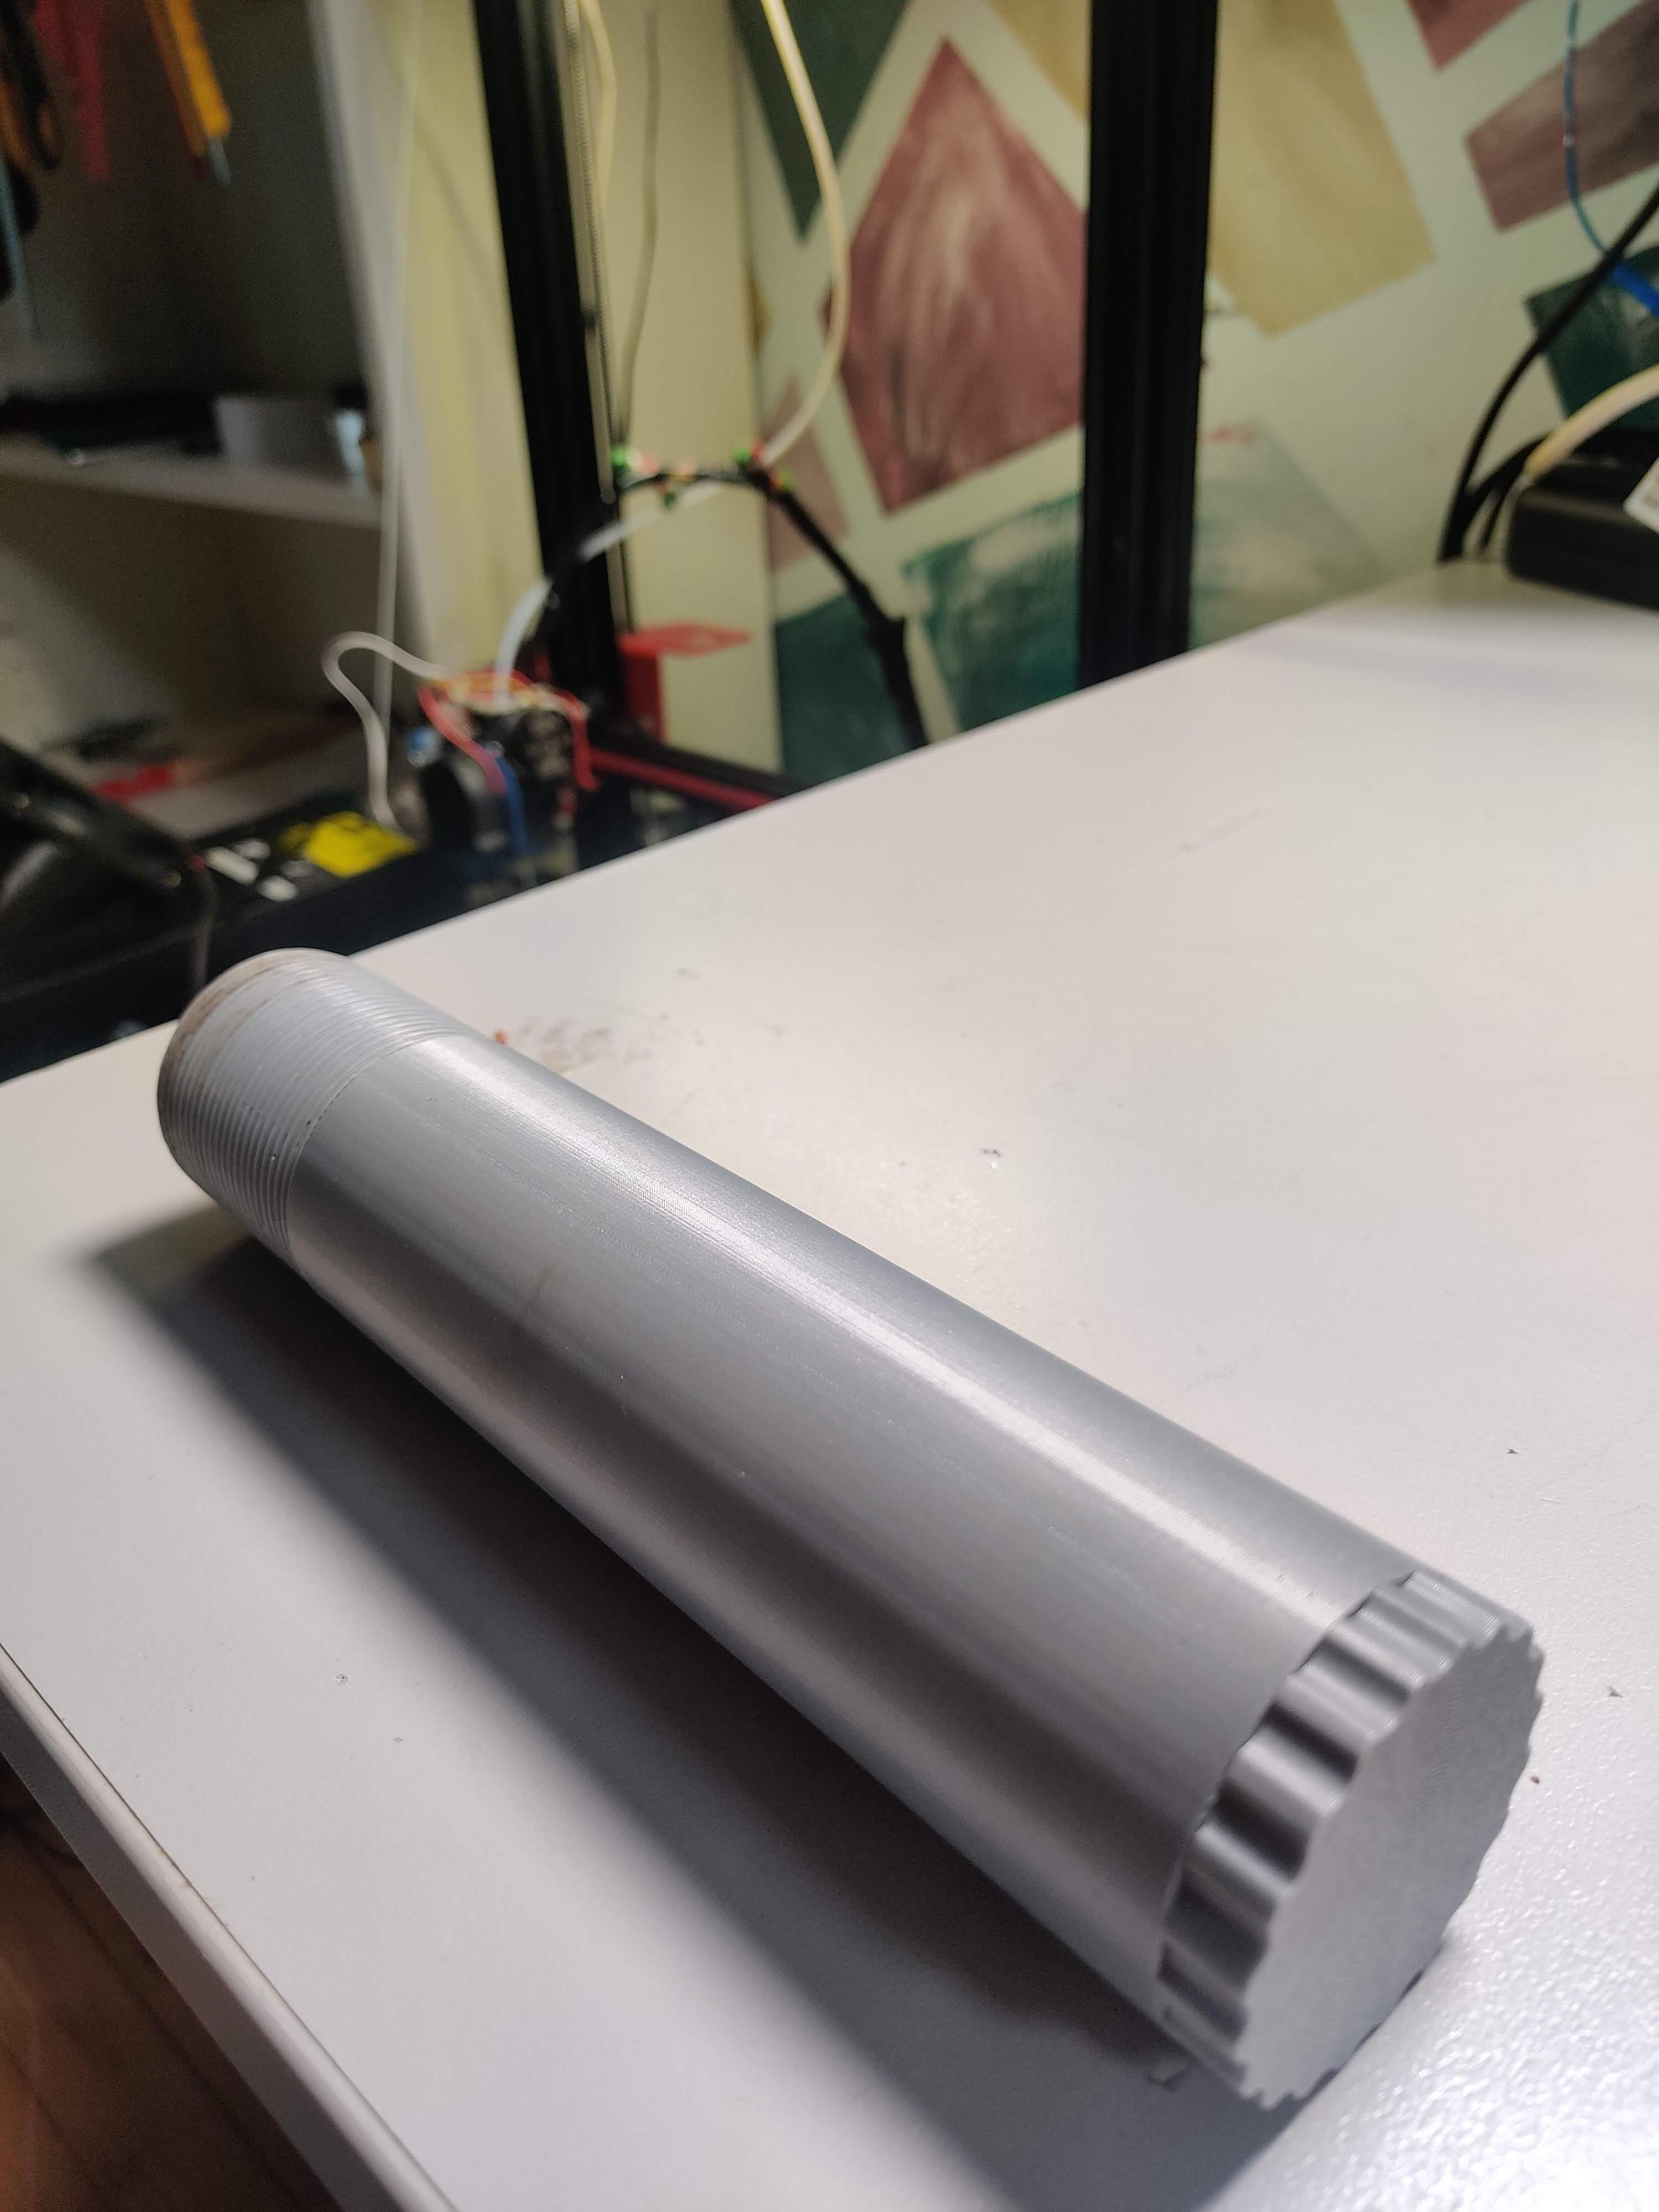

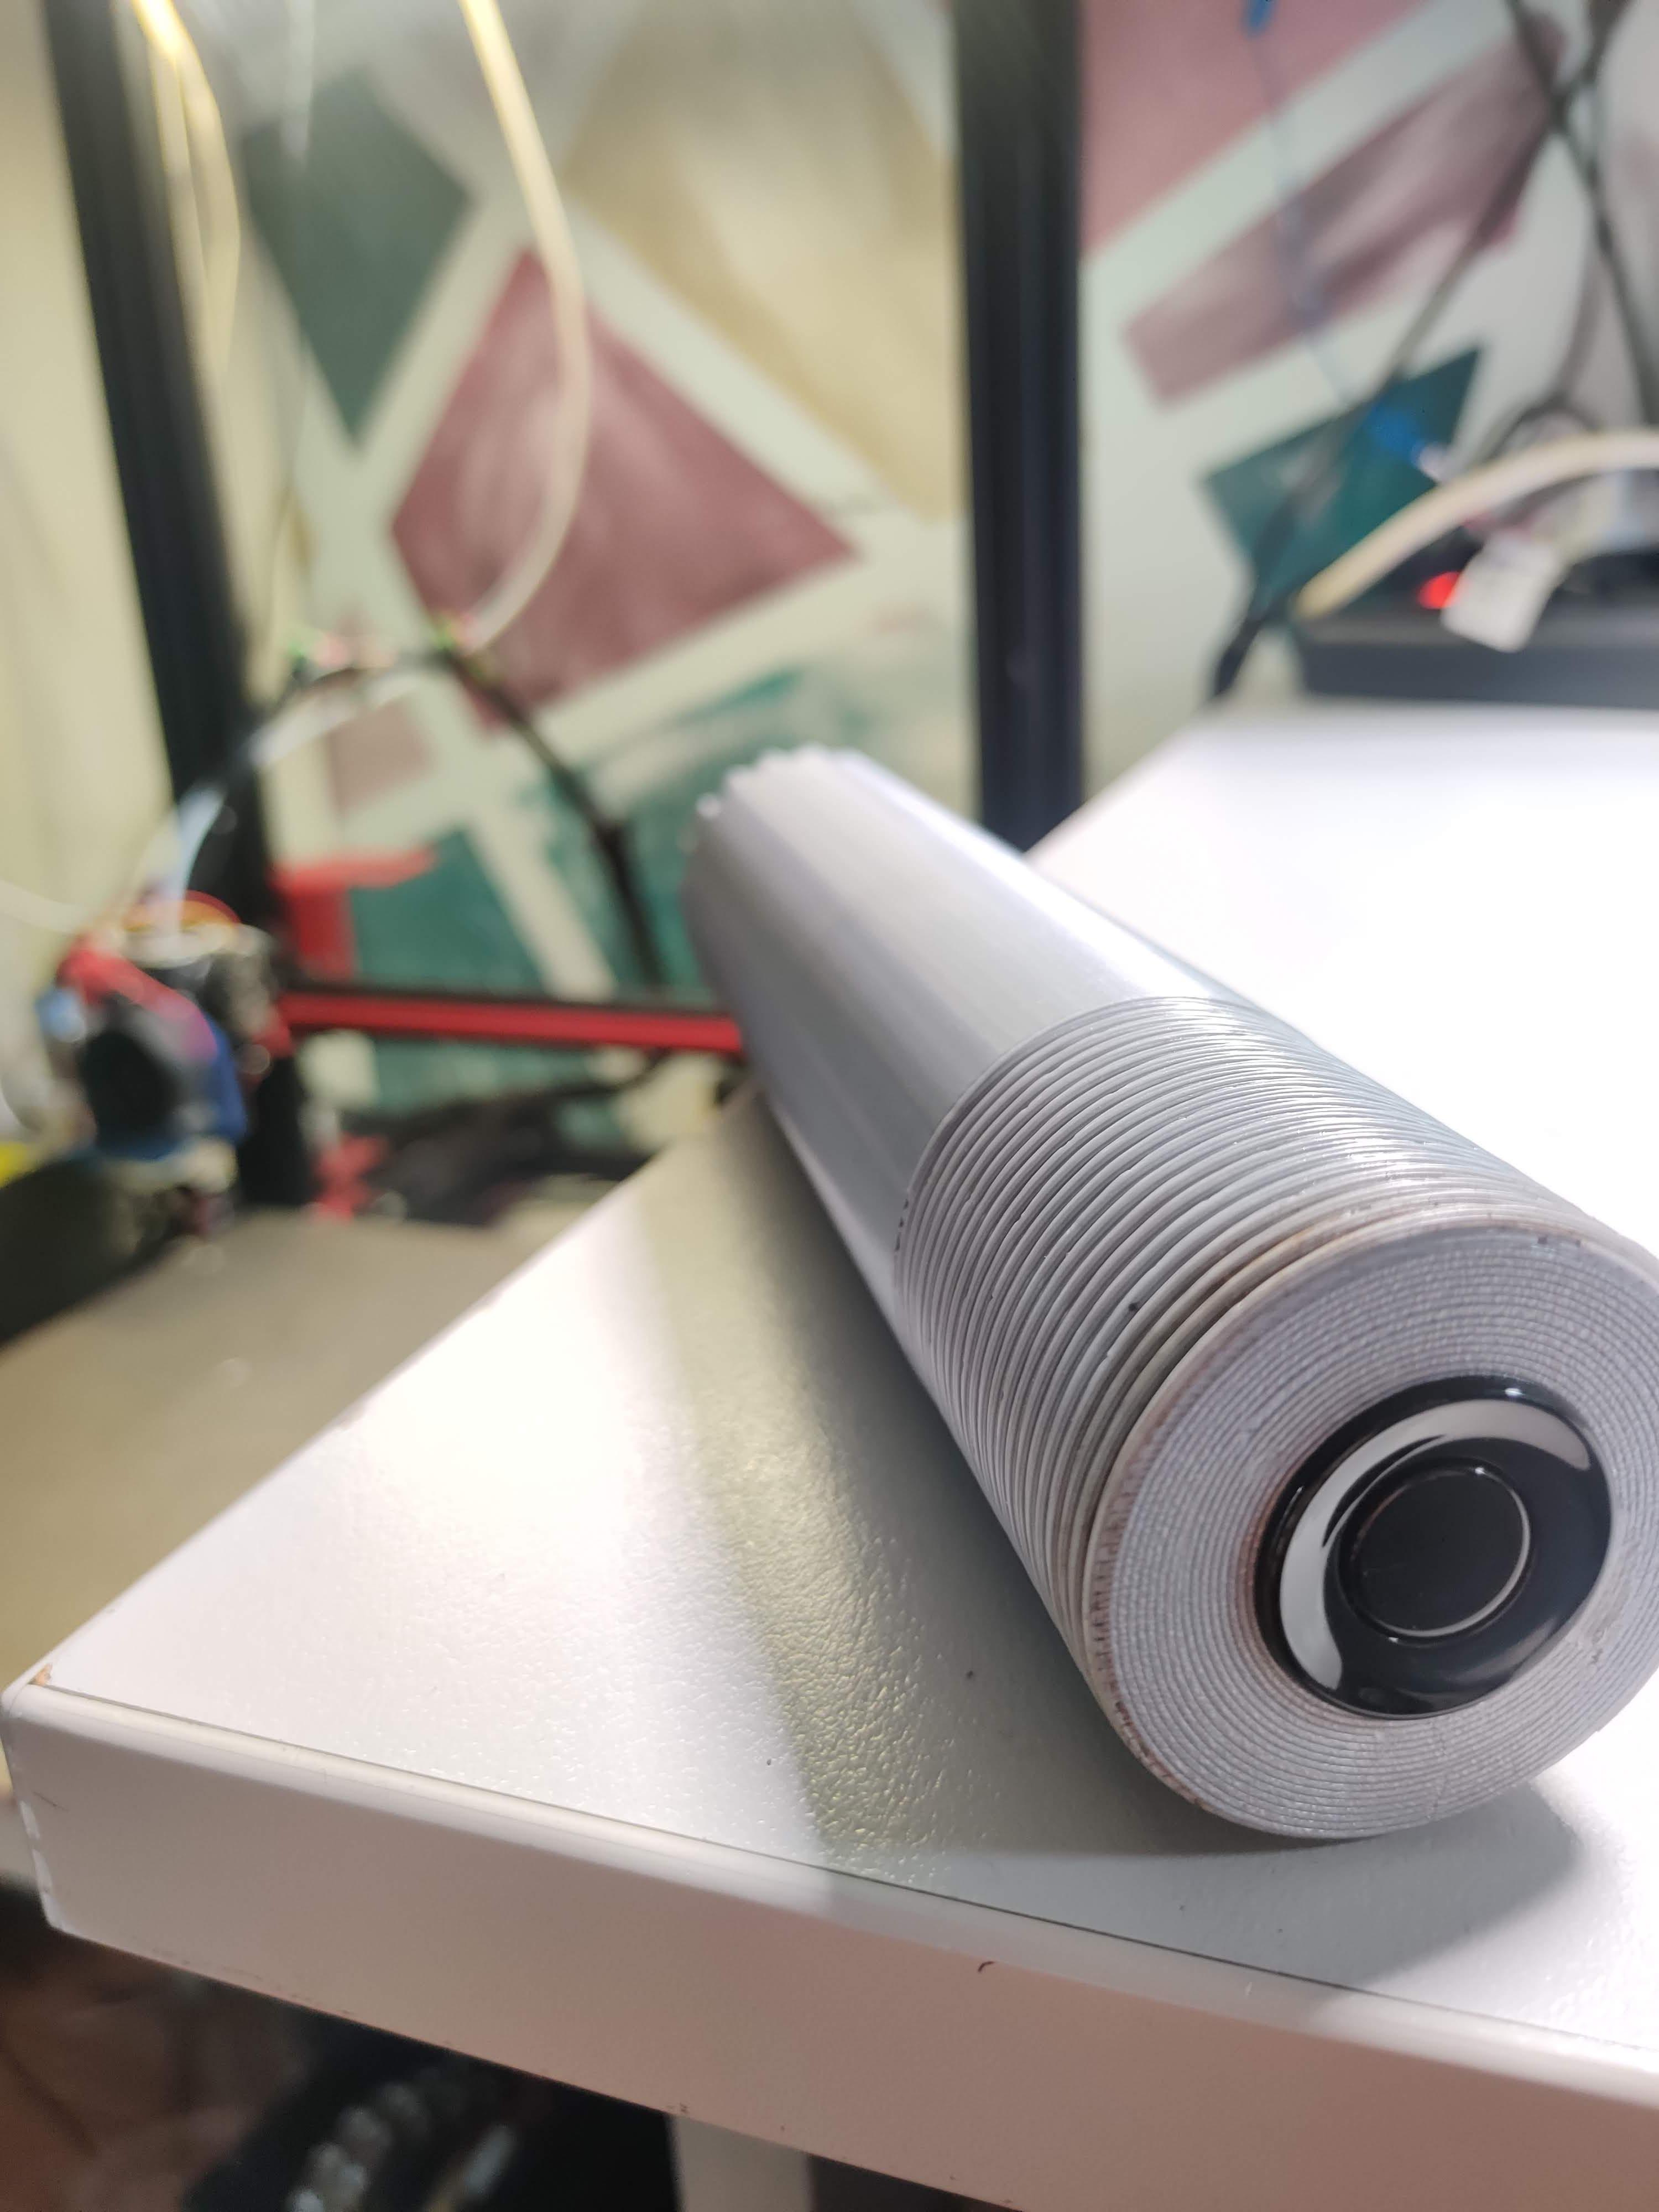
In this step, you should design a custom enclosure to house the electronics in such a way that the Ultrasonic sensor is in a fixed position facing the surface of the liquid you want to measure. For my oil tank, I designed an enclosure with matching threads for screwing in the lid's place. However, it is unlikely that these threads will fit in your tank's lid. Nevertheless, you can download my design and/or modify it and print it yourself.
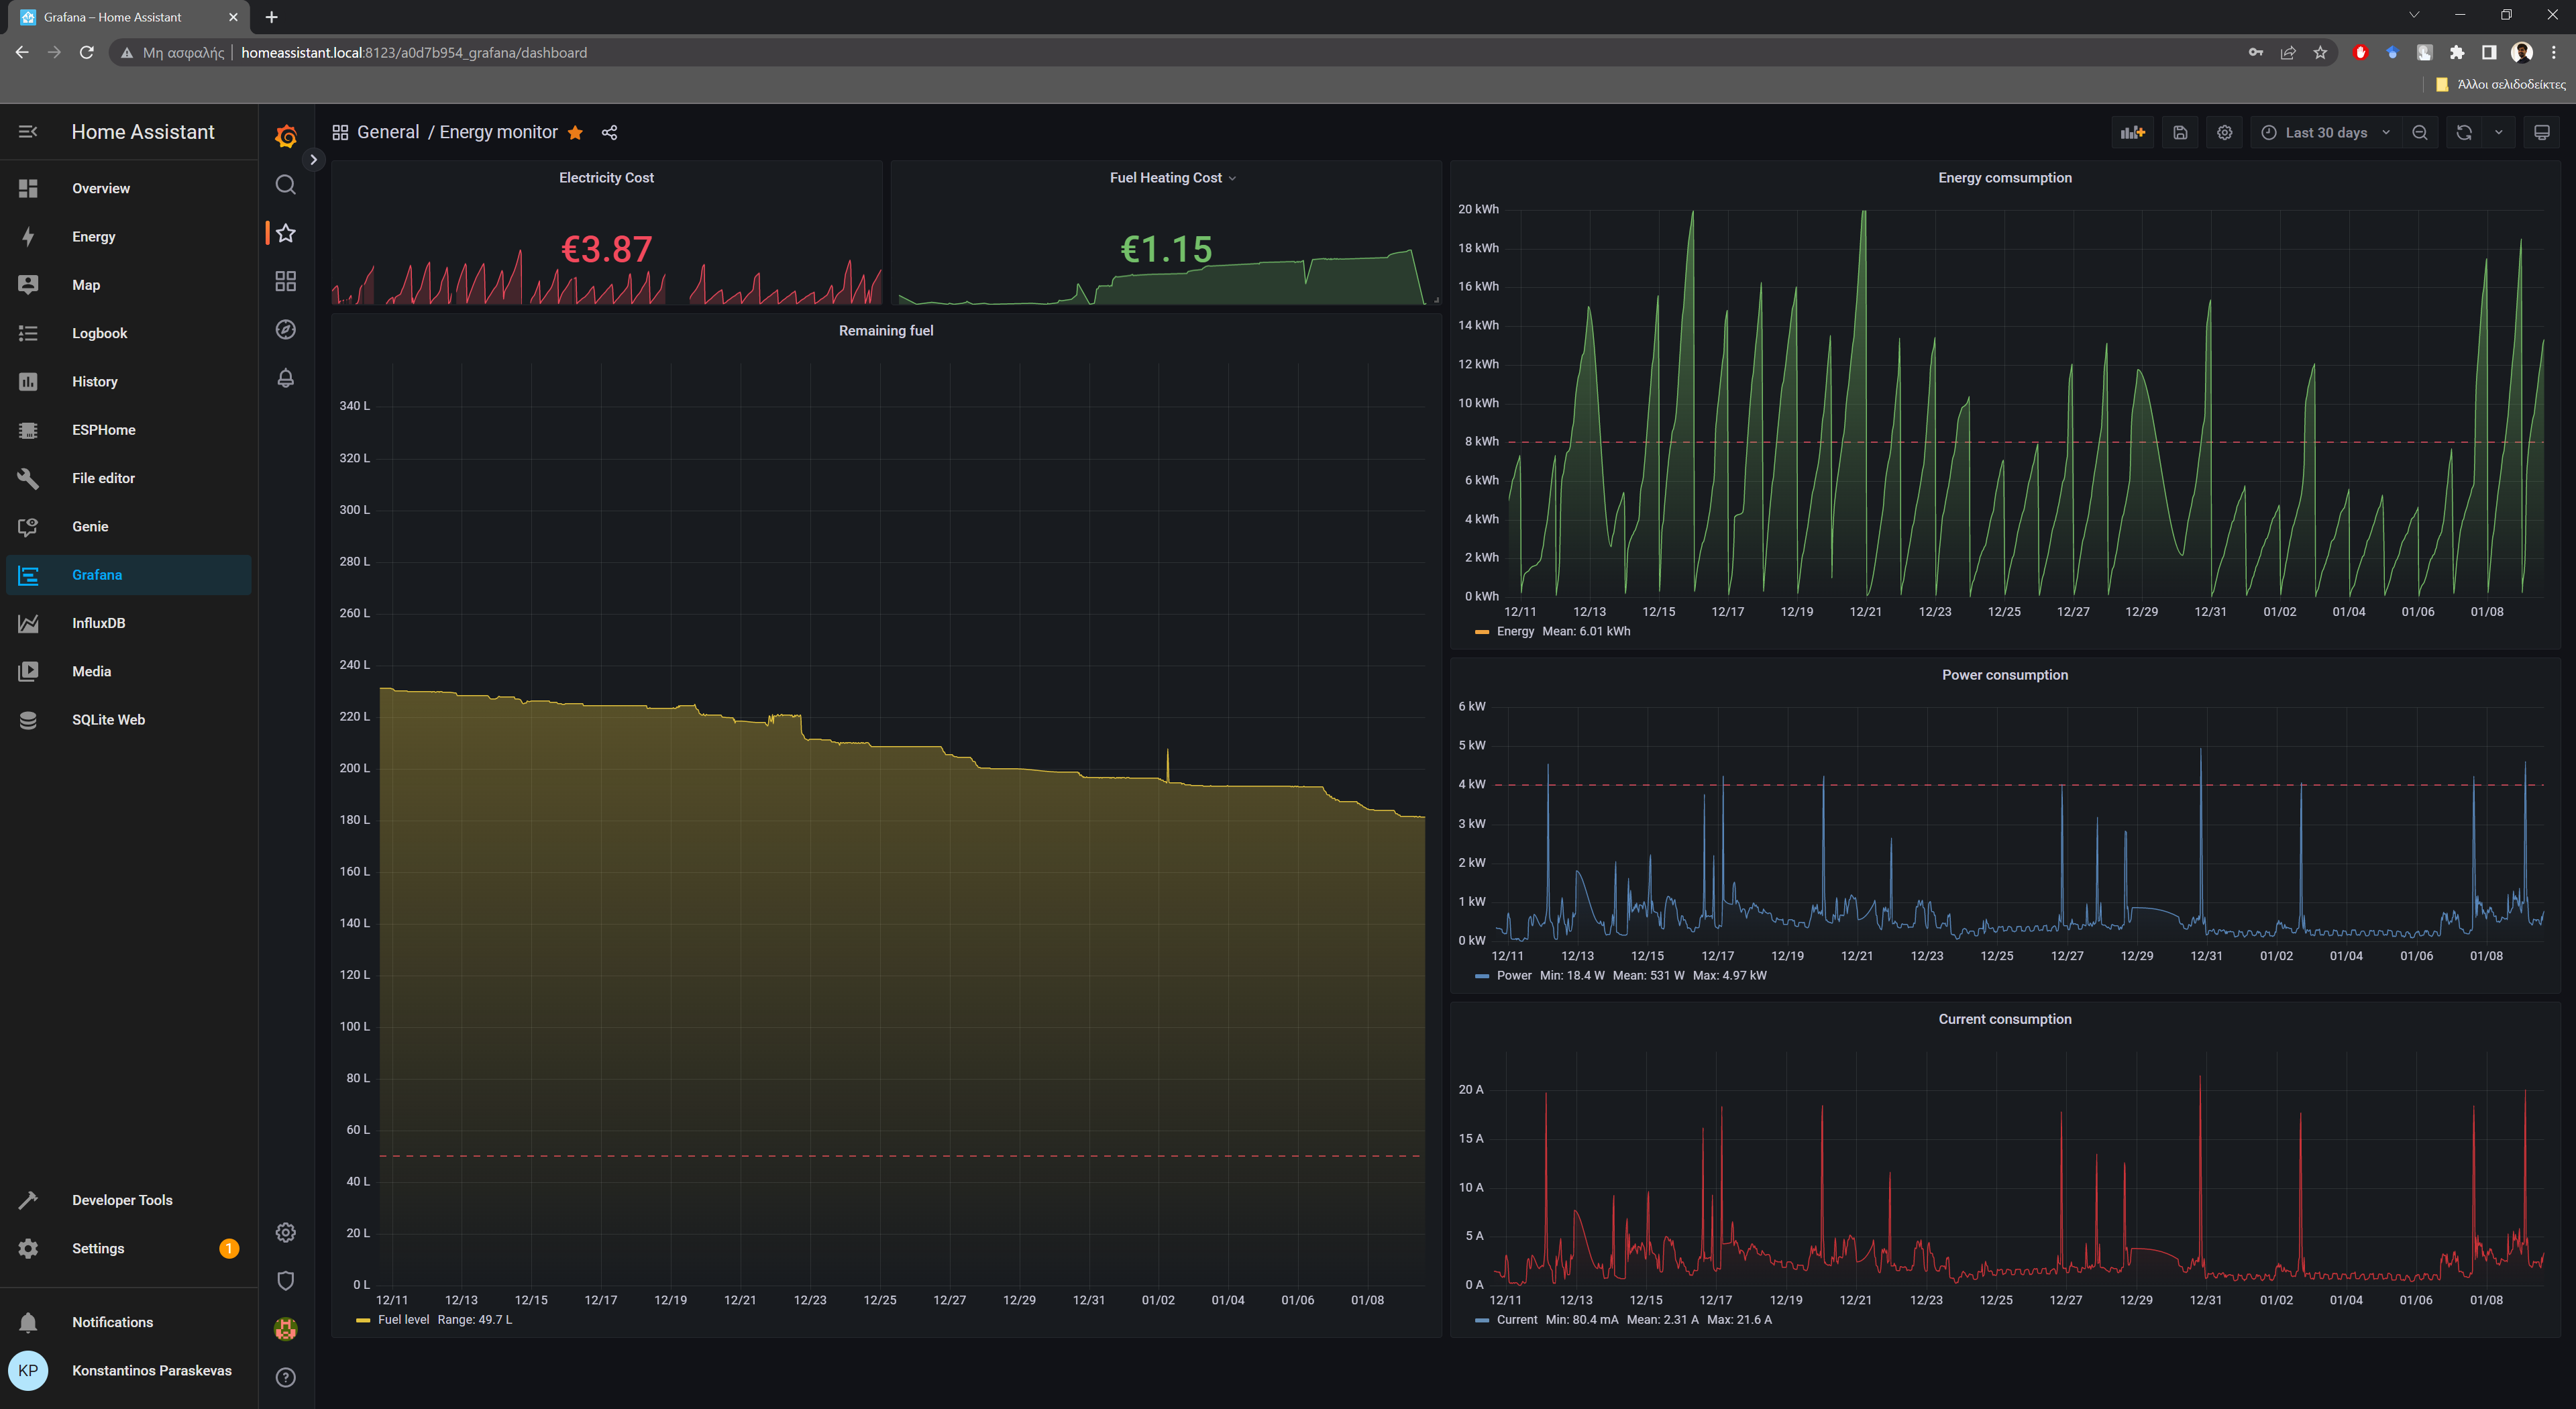
Enjoy Your Graphs!

Once we have installed the sensor on the oil tank and implemented the sensor on our Home Assistant server, we can create beautiful graphs and see our oil level dropping on cold days...
We may not be able to stop the oil consumption, but we can monitor it and set alerts to refill the tank before the oil runs out.