Office Portal: a Nerdy Solution to Make Distant Colleagues Feel Nearby.
by merijndewit in Circuits > Raspberry Pi
288 Views, 0 Favorites, 0 Comments
Office Portal: a Nerdy Solution to Make Distant Colleagues Feel Nearby.
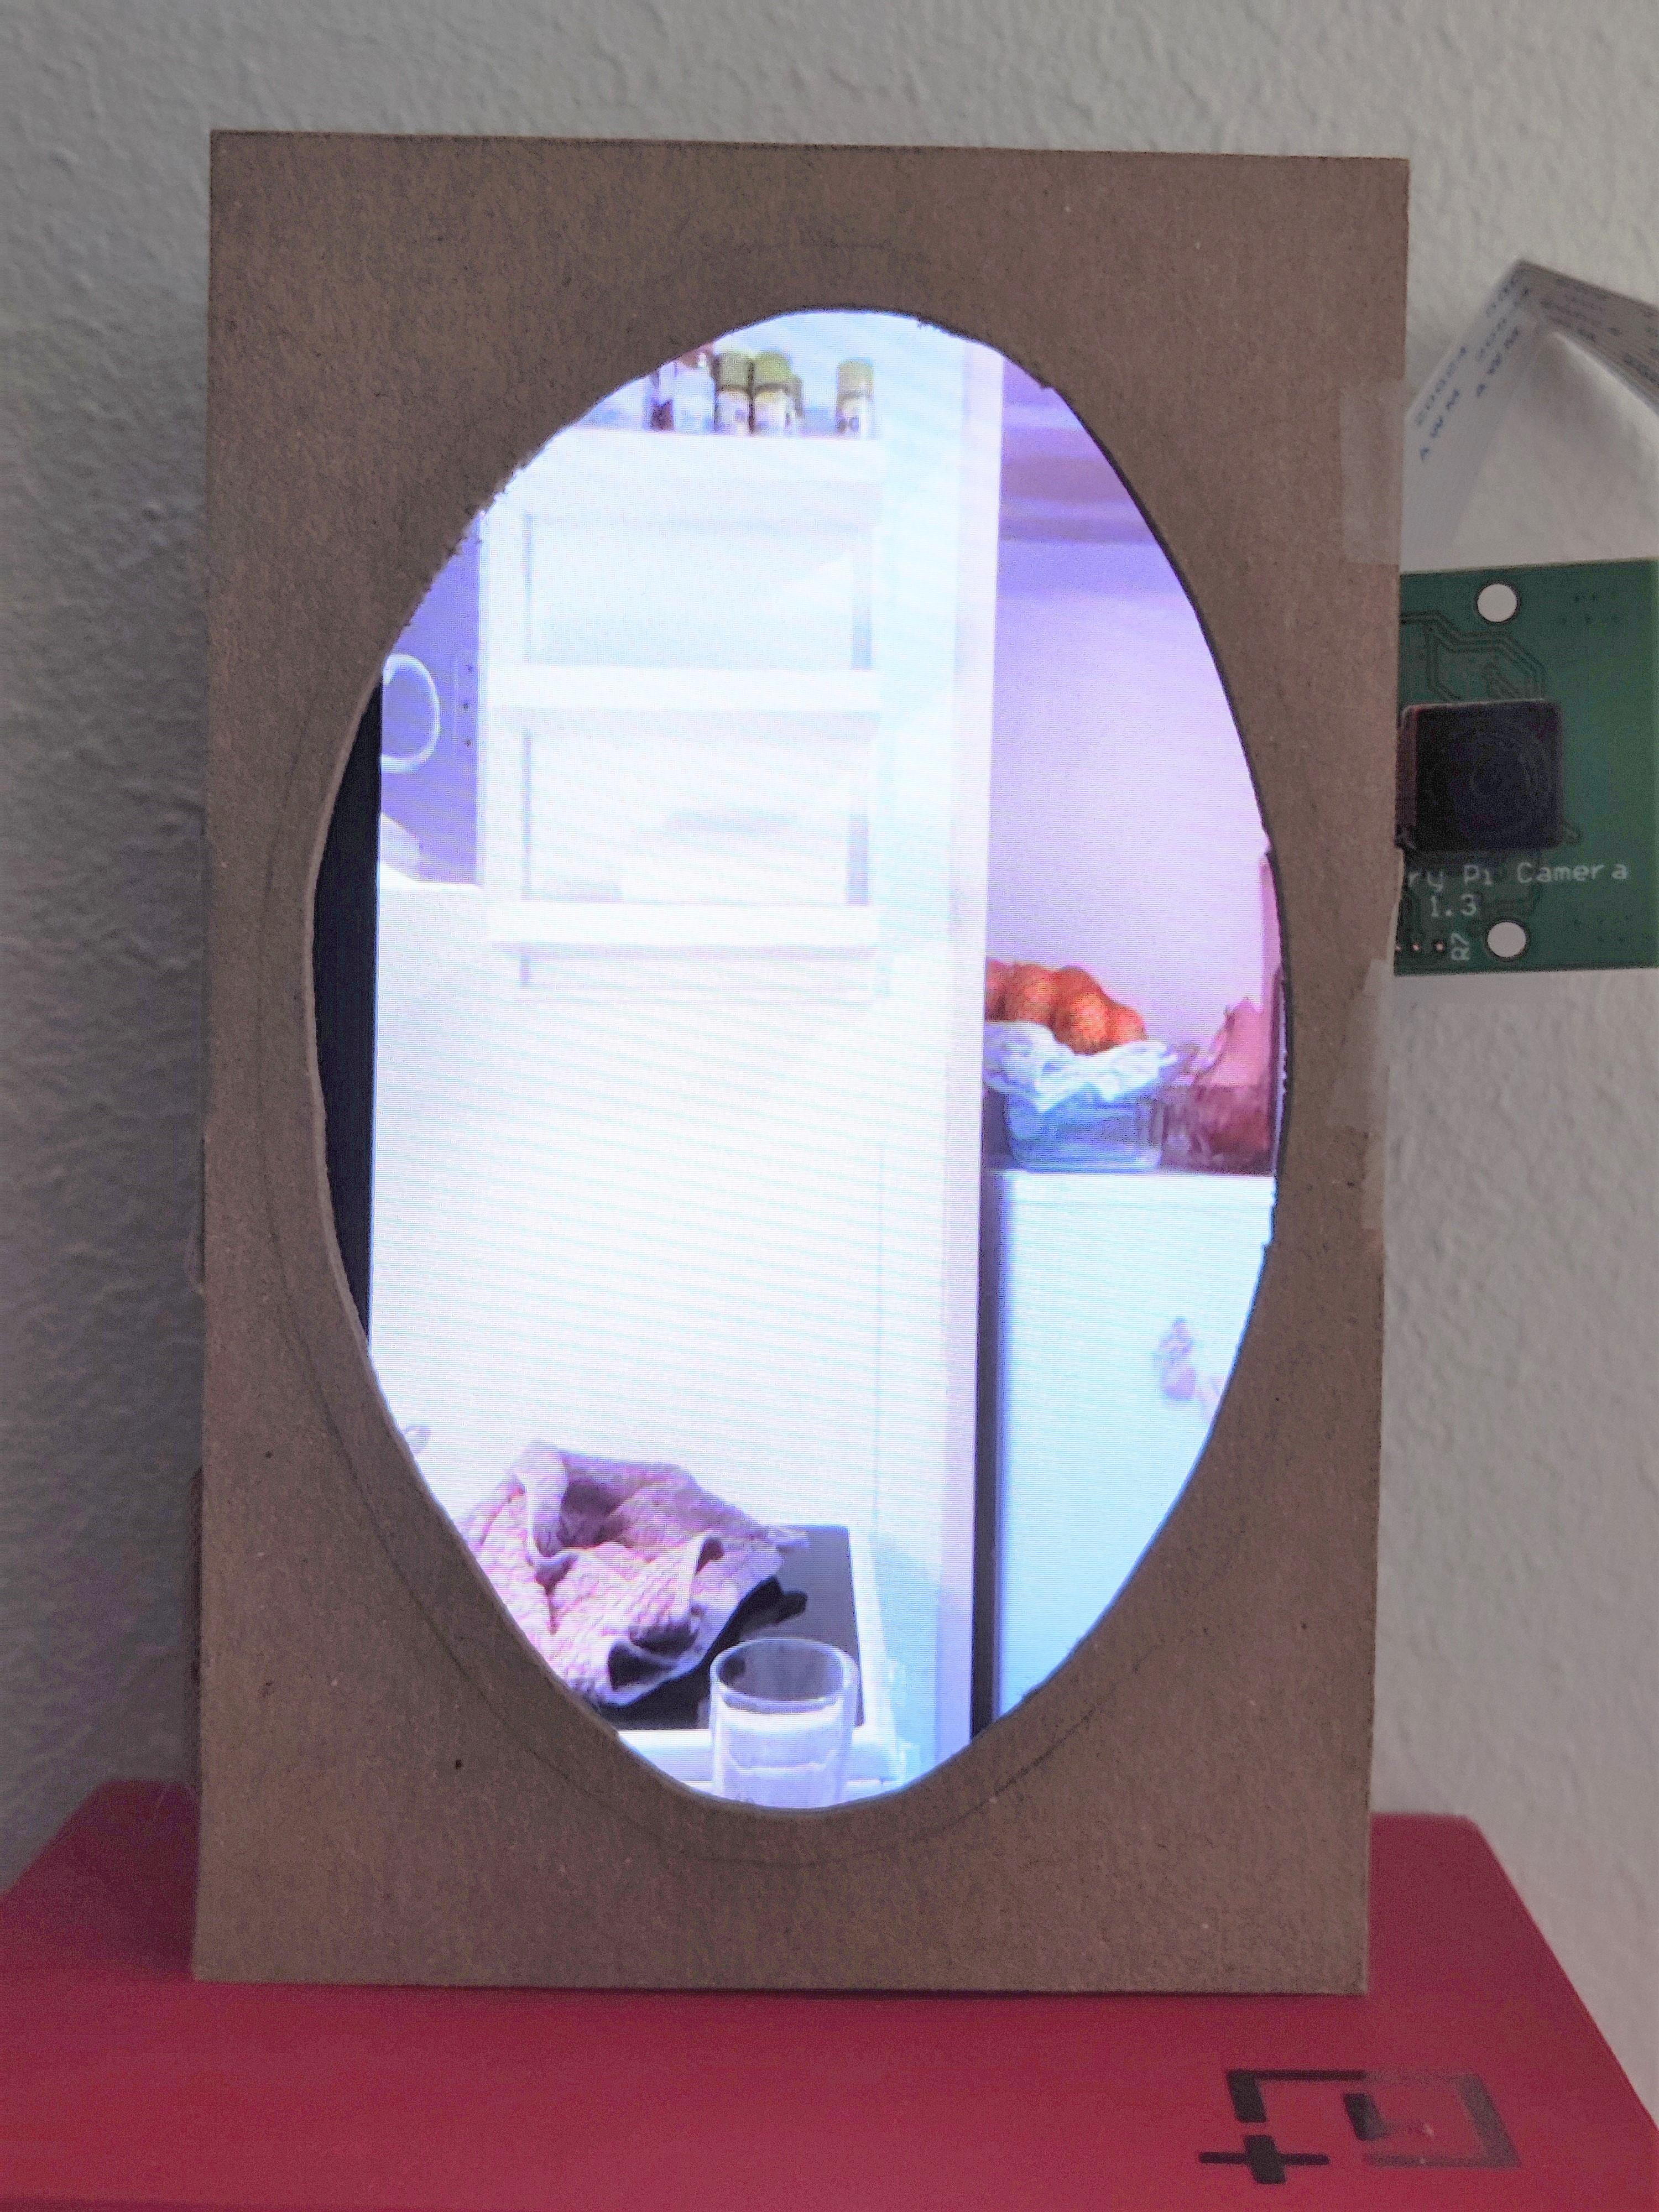
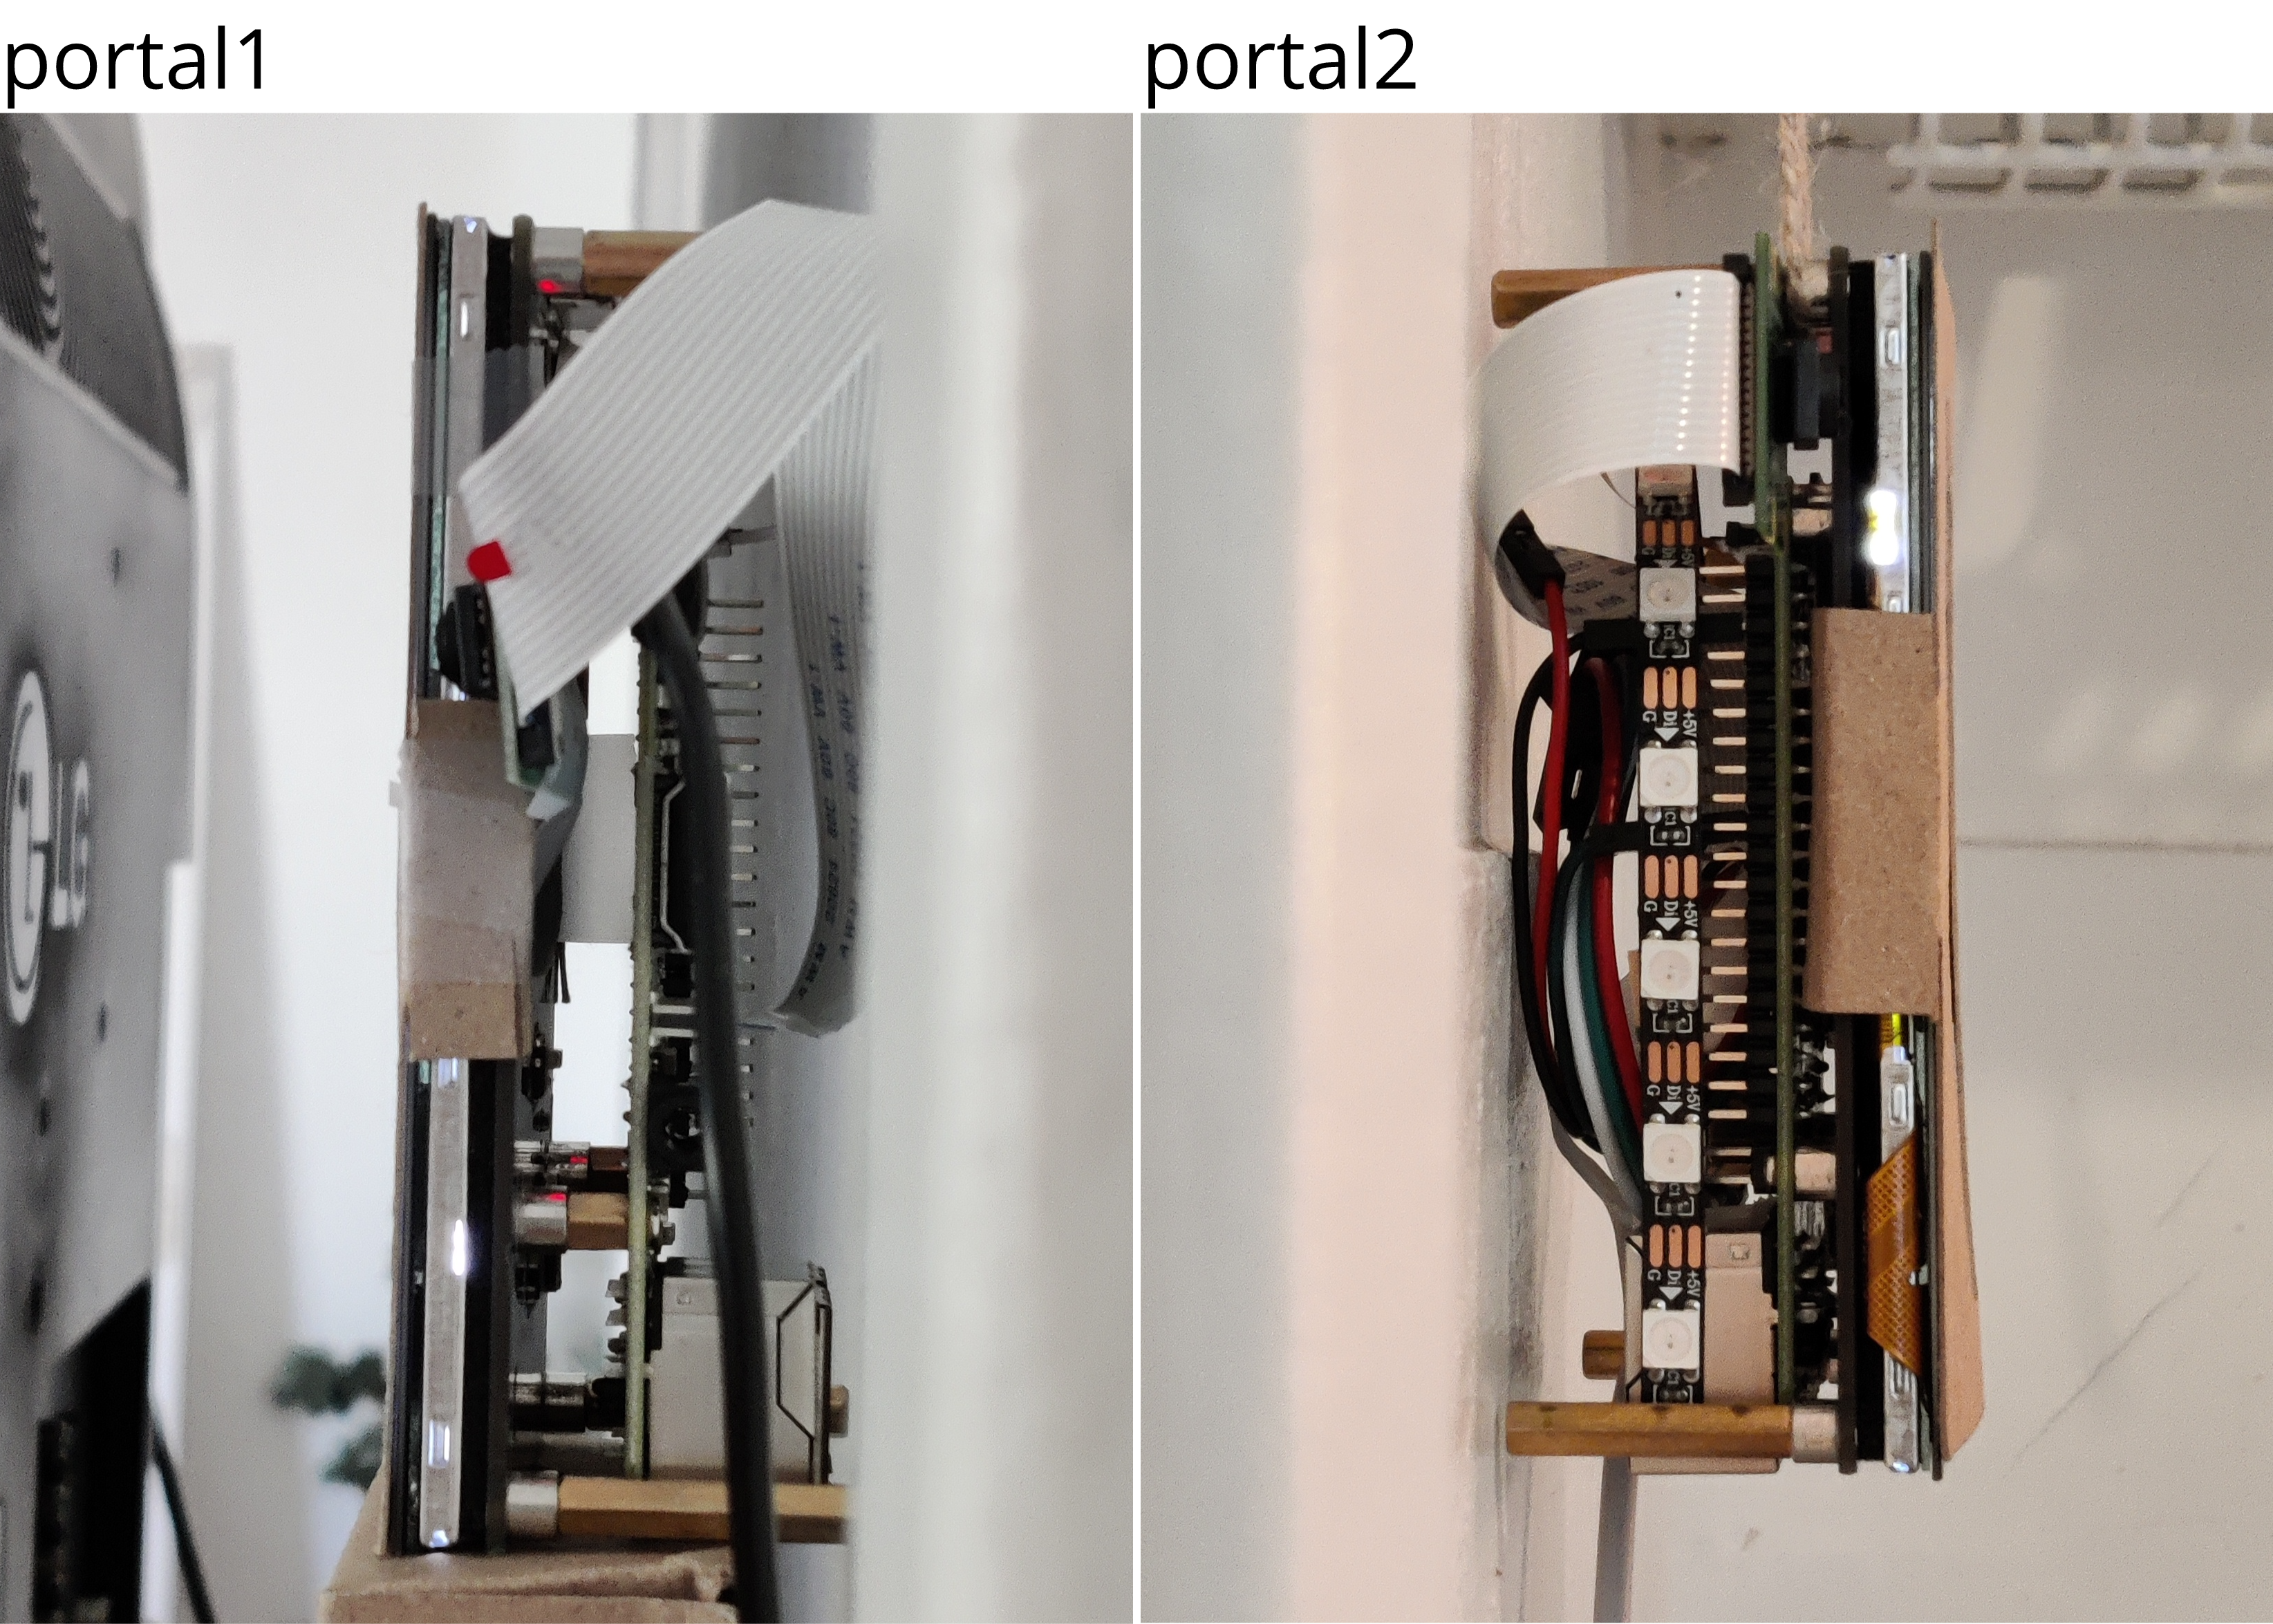
In this time of covid, we work a lot remotely from each other, for example in another space. One can feel lonely here. So we came up with the idea to create an office portal and make it accessible to everyone using Github. With the Office Portal, you can look into another room. With this project, we hope to reduce loneliness in the office by bringing your colleagues a little closer with the help of IT. The GitHub page contains all instructions on how to make an Office Portal yourself, as well as all the necessary code.
All the instructions are from the GitHub page:
https://github.com/merijndewit/Office_Portal
For the project, we want to make two portals that stream video to each other. Streaming with decent quality and delay can be really hard on the raspberry pi. Luckily we've made a python program that makes it a lot easier! It’s recommended that you start with installing the Office Portal program on both PIs. And Then making the portals themselves. All the instructions to make a functioning portal from software to hardware are written down below! Hang them both in separate office rooms and will end up with an awesome portal to make your office less lonely!
Installing
We have multiple ways for installing Office Portal on your raspberry pi. The recommended way is to use the GUI. It is really simple to install and only requires a few steps. But if you want to use/install Office Portal in a different way then you can! We made a different file (because it is so long) for other ways of using/installing Office Portal [Here](https://github.com/merijndewit/Office_Portal/blob/main/Other.md). If you are happy using the GUI then continue to Installing GUI.
Installing Office Portal (GUI)
The steps below will guide you in installing office portals. First, we are going to enable a few things in raspi-config and then we are going to clone the GitHub project and run it!
First, get the latest release of Raspberry Pi OS with desktop and recommended software: https://www.raspberrypi.org/software/operating-systems/
After you installed raspberry pi os and booted into the os connect to a wifi network and check for updates with:
sudo apt-get update -y && sudo apt-get upgrade -y
Then we have to enable the SPI interface and the camera to do this type:
sudo raspi-config
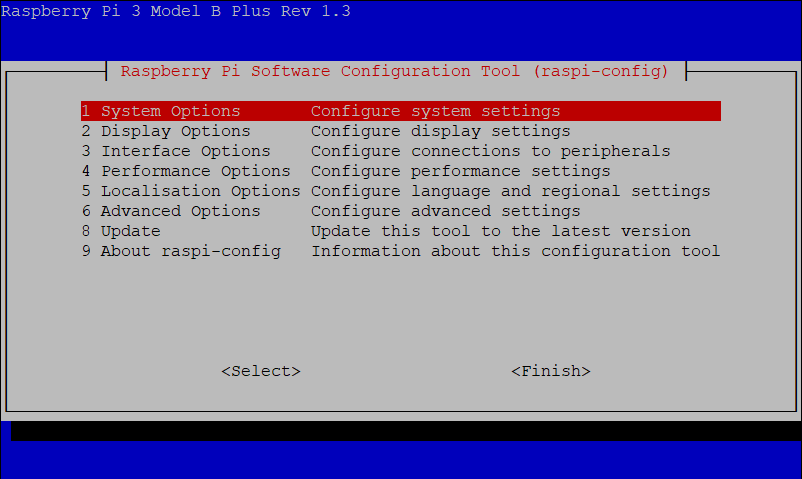
You should see a menu pop up like in the picture. Go to option 3 (interface options). And enable the camera interface and the SPI interface. When you are done click on “Finish” and reboot the pi.
Then we clone the project from GitHub:
git clone https://github.com/merijndewit/Office_Portal.git
After we've cloned the project we want to execute it:
sudo Office_Portal/GUI/OfficePortal-0.1/main_Office_Portal
Then Office Portal should launch and you can use the GUI!
Using Office_Portal (GUI)
Once the GUI application of Office Portal has started we can see an instruction screen. we can navigate through the pages with the arrow buttons on the bottom of the page, we can also exit the application by pressing on the  button.
Dependencies
Once we go to the next page from the introduction page we can see all the dependencies that need to be installed. Click on the **check** button. If you see a **green checkmark** next to the button you've just clicked then the dependency is installed. If you see a **download button** next to the button you've just clicked then the dependency is not yet installed and it needs to be installed. To install it is really easy you just have to click on the **Install all** button and the program will install all missing dependencies for you. It can take a bit until it’s installed (approx 10 min) when the **download button** disappears and a **green checkmark** appears the dependency has been installed. If you want to install them individually you can click on the **download button** next to the dependency you want to install.
>Note: Gstreamer-Tools has to be installed before installing RpiCamSrc
Options
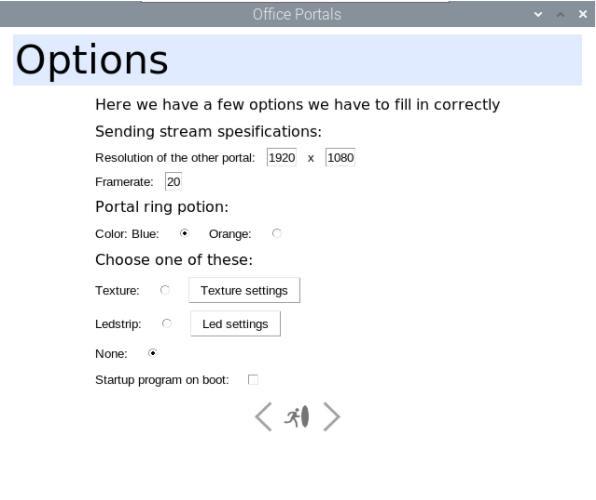
On the options page, we can change the stream specifications. You can change the resolution of the stream and framerate that you are sending to the other pi.
We also have an option for the portal ring. We can use the portal ring to make our portal look more like a portal. We can use an LED strip or a digital mask. If you don’t want either of those you can click on None and continue to the next page. If you want to make use of an on-screen mask or LED strip then you can select blue or orange depending on which color you want the mask/led strip to be of the portal. If you want to make use of an on-screen mask.
Then you can select Texture. When you click on the button Texture Settings a menu opens with more options. The first option is the resolution (default is 1080p). If you have a 720p resolution screen then select 720p. If you have a monitor with a different resolution than 1080/720p or you want to use a custom on-screen digital mask then click the checkbox and click on Browse and select your custom mask.
Note: Only .PNG is supported another file type will not work.
If you want to use an LED strip then select Ledstrip. When you click on the button Ledstrip Settings a menu opens with extra settings. Here you can adjust the brightness of the LEDs. If you want to use a custom color for the LED strip select the checkbox and in the boxes below enter the Decimal RGB code. The first box is the red value, the second is green, and the third is blue. The values go from 0-255. When you press the button to show color the led strip will show the color of the custom RGB value.
When you entered the options you want you can continue to the next page.
Advanced Options
Here you can change the bitrate and port of the stream you are sending. You do not have to change the settings, only when you encounter a problem.
Note: the port has to be the same on both PIs
Connect to other PI
Here we can see the IP address of this pi. When you are on the same screen on the other pi we need to enter this pis IP into the textbox of the other pi's IP. then with the other pi, we need to fill its IP into the textbox. once you’ve done that we can go to the final page!
Stream and Receive
When you are on this page on both PIs we are ready to click receive on both pis. When we click on Ready the pi will try to receive the stream of the other pi. When you've clicked Ready on both pis the portal should be open!
Load config file
To make things easier for the next time using Office Portal you can click on the button Load settings on the first page of the program. This will look if you run the program once before. If you see "no config file found" next to the button then you cant load the config file. If a button appears that says "Load config" then you can click on it to load the previous configuration. It will take you directly to the Stream and Receive page
Hardware
There are a lot of options for the hardware. To make sure that you are picking the right materials for the project, We wrote down what is required/recommended for the project.
Raspberry PI
For the raspberry pi, we have a lot of options. For this project, I’ve tested the raspberry pi 4B, 3B+, and the zero w. The zero w was not powerful enough for this project when testing, that’s why I do not advertise using it or this project. The PI 3b+ and 4b worked perfectly!
>Note: The delay of the stream in our test was less than 400ms
Monitor/Television
It’s best for the Monitor/Television to be the same size. Otherwise, it can look a bit odd if one portal is bigger than the other. We recommend not choosing a resolution greater than 1080p, a higher resolution Monitor/Television is usually more expensive and the pi's cant handle a higher resolution than 1080p. The aspect ratio is also an important one. **16:9** and **4:3** are highly recommended. The most important is that the Camera has to support that aspect ratio most camera modules for the raspberry pi can support 16:9 and 4:3, But make sure to check the documentation of that camera. If you do have a different aspect ratio it can result in black bars on the screen or stretching (something you don’t want). Also, an important one is to be sure you can remove the foot of the Monitor/Television, also the flatter the better because you want to try to hide the Monitor/Television.
>Note: The Monitor/Television is the most expensive part of the project, so maybe you can find a Monitor/Television at a second-hand store. Or maybe at an online marketplace like eBay. This will bring the cost of the project down a lot! Just remember all the points written above!
Camera
For this project, only camera modules with a CSI interface are supported. The CSI camera module is directly connected to the GPU, this means the CPU usage is really low using a CSI camera compared to a USB device. Camera modules are also really cheap (the cheapest ones are around 5€). Another advantage is that camera modules are really small so they are less noticeable/easier to hide.
A few important things to note when you are looking for a CSI camera is that you choose one that supports the aspect ratio of your television. Otherwise, this can cause problems so make sure you check the documentation of the camera module. Also, some cameras don’t have their full FOVwhen using 1080p. When you are using a camera module that is not using full FOV then the video looks zoomed-in you don’t want this because it can look weird and you won’t be able to see as much of the other room.
Some great documentation of the Pi camera's can be found [Here](https://picamera.readthedocs.io/en/release-1.3/fov.html)
Tip for mounting the camera:
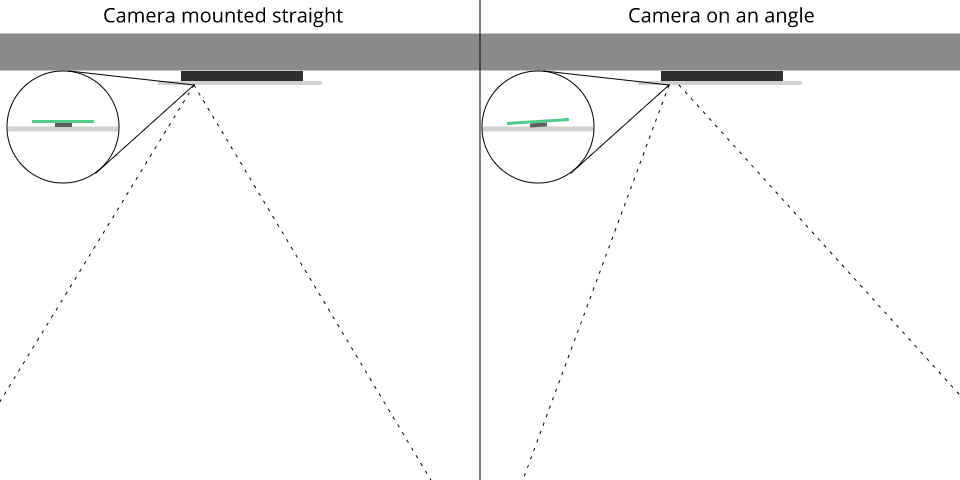
The camera will be mounted at the side of the television. Ideally, we would want to mound the camera in the center of the television, but it would partly block the television screen. That’s why it's recommended mounting the camera at an angle:
It is not as good as mounting the camera in the center but it is the best solution we found.
Mask (optional)
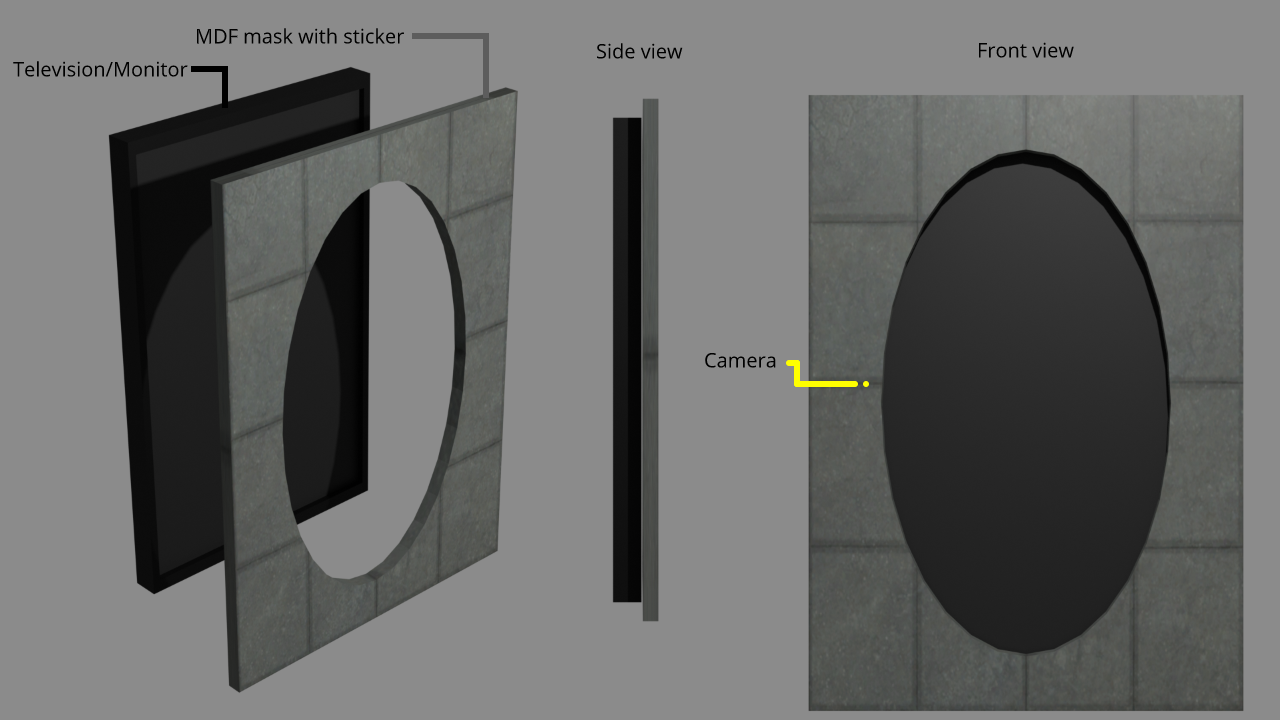
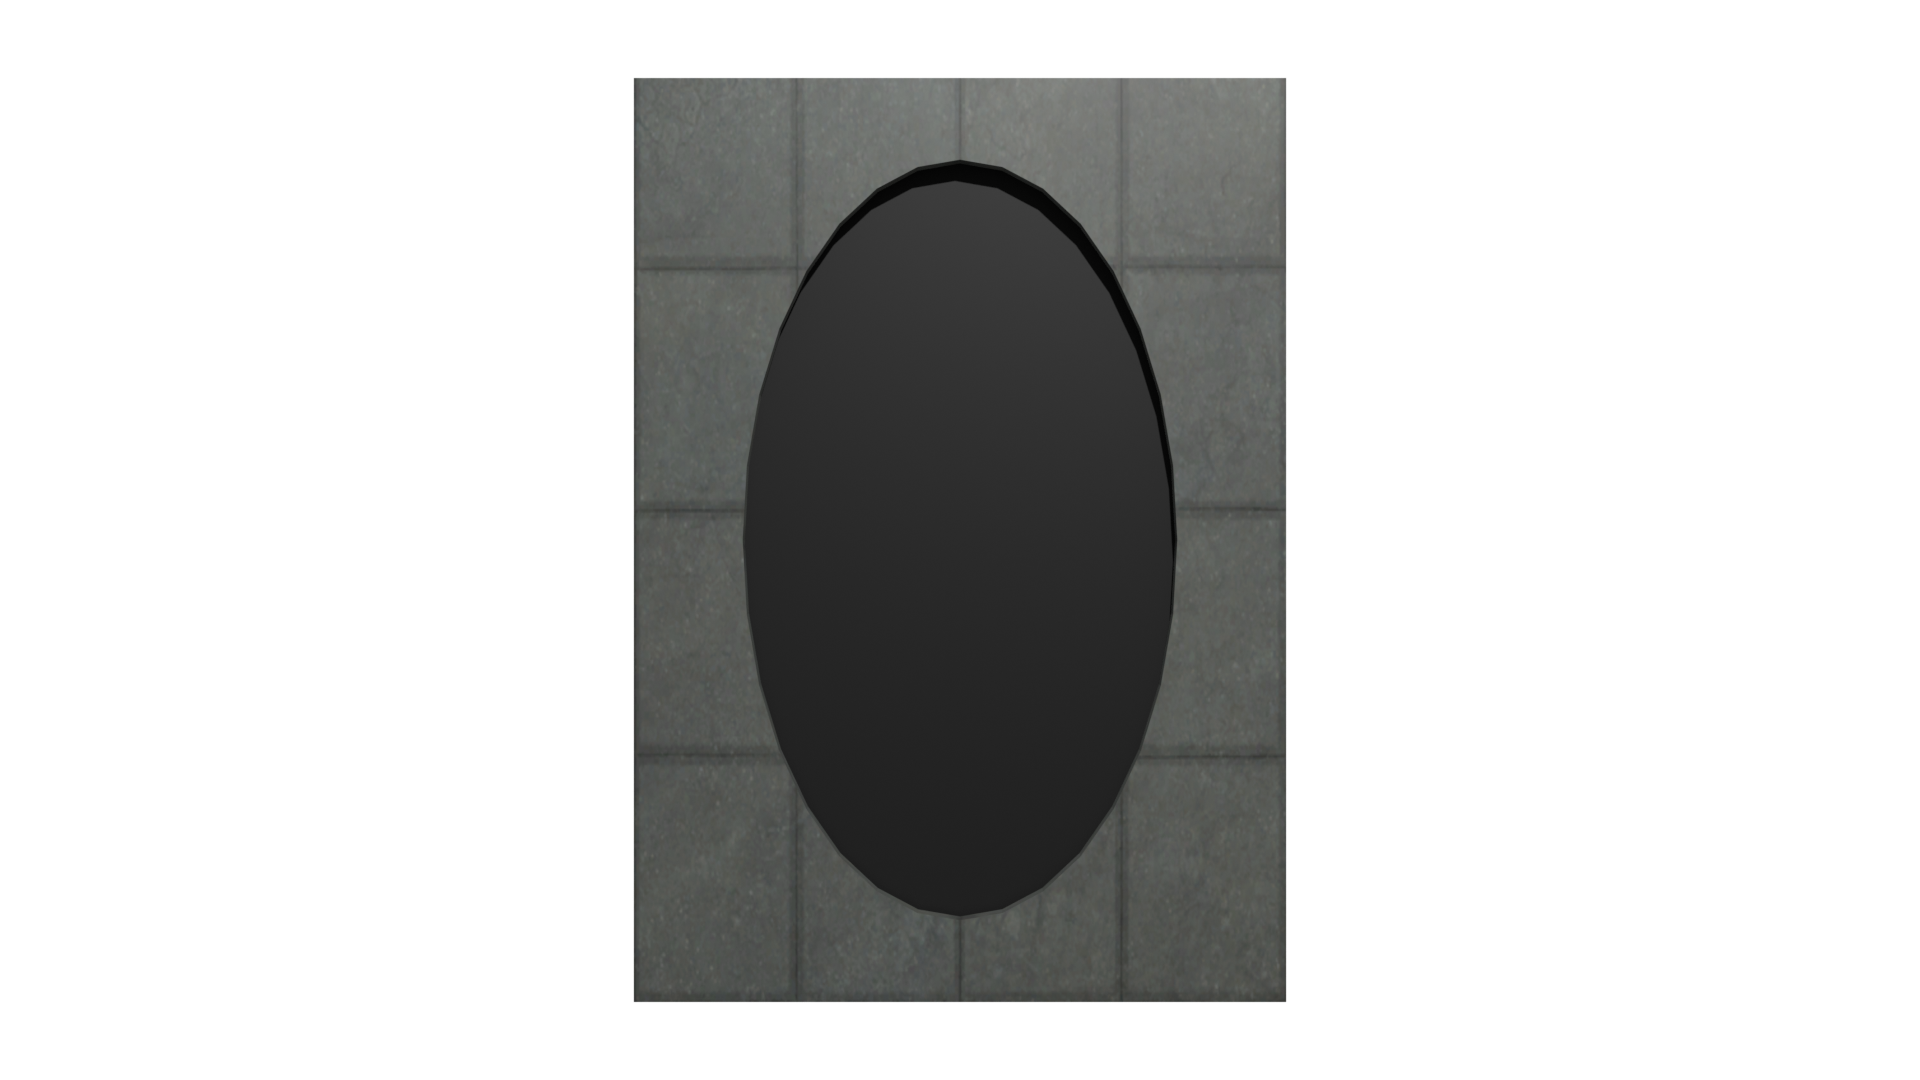
If you want the portal to look as much as a portal then making a mask over the monitor/television is the best option. You can also combine it with an LED strip to make it even more special. You can make the mask as large or larger than the television. Below here is an example:
The sketch above is an example of the layout of the portal. It’s gonna be different for everyone, but it is important to hide as much as possible from the hardware behind the mask.
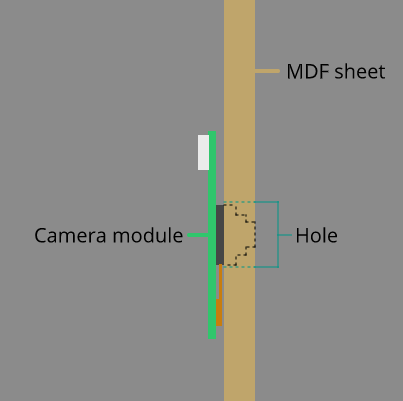
The mask is an MDF sheet with an oval hole in the middle. You can draw an oval on the sheet and saw it out with a reciprocating saw. Or a CNC machine for the best result. Make sure you won’t be able to see the borders of the television/monitor. There is also a small hole in the MDF sheet for the CSI camera. This hole has to be really small so we see the least of the camera:
For the texture on the MDF sheet, you can do anything you like. In the 3D model, we've used the wall texture of the game Portal. You can order a printed wrap/sticker from your local (web)store with https://ia801903.us.archive.org/14/items/portalte...
If you are crafty you can also paint a texture you like on the mask.
LED strip (optional)
The led strip makes the portal look cooler. We use the LED strip as an "Ambilight" that shines against the wall Where the portal is mounted on. This makes a cool effect and is similar to the game portal.
For the LED strip you want to use the ws2812b with a rated voltage of 5V.
One ws2812b on the led strip consumes around 0.18 watts if you multiply this by the amount of LEDs you have on your led strip then you have the amount of power your led strip uses.
Note: The number of watts drawn by one LED can vary between manufacturers so please check the description carefully.
If the led strip is more than 5 watts then you need to use a separate power supply.
For the power supply, you can use an old phone charger (that can provide enough power). Or you can buy a power supply on the internet that provides 5 volts and is powerful enough.
You can also power your raspberry pi from the power supply if it is powerful enough.
Note: For the raspberry pi 3 amps at 5 volts is recommended.
Note: The program Office Portal supports the ws2812b LED strip. If you want to use another one you have to modify the python script for now.
Note: The Office Portal program uses the GPIO 18 [pwm] on the raspberry pi.
We hope you enjoy Office Portal!