Oceanarium
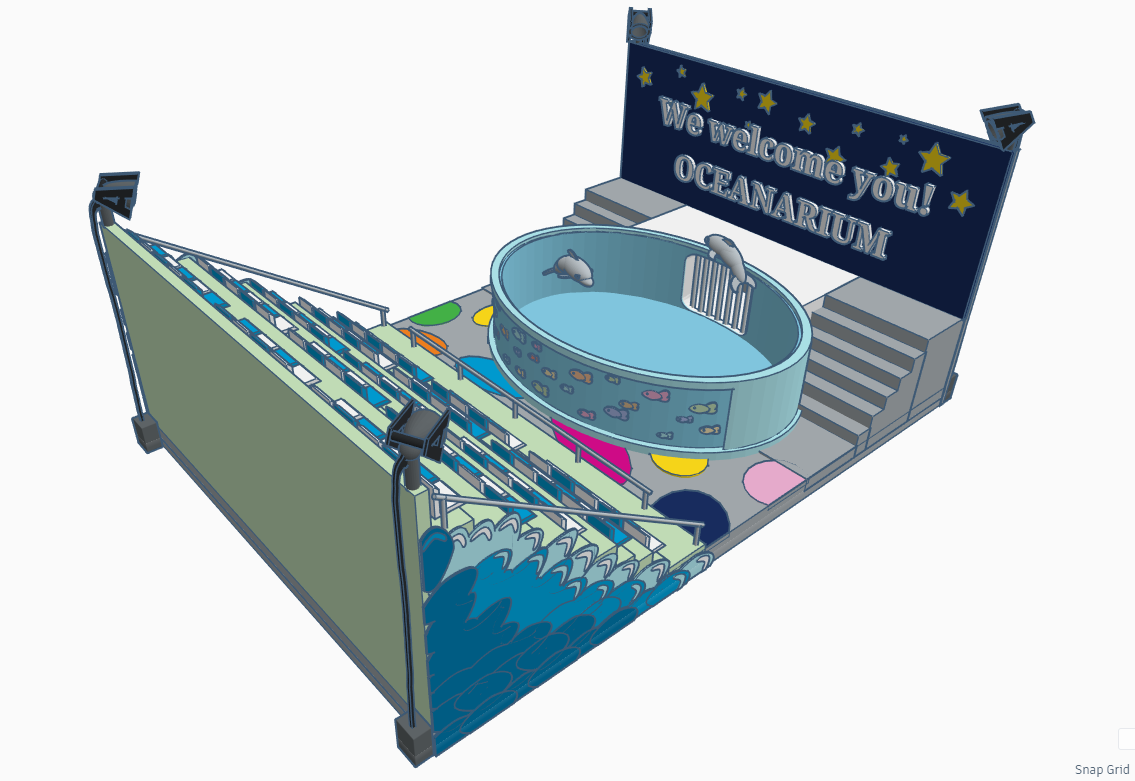
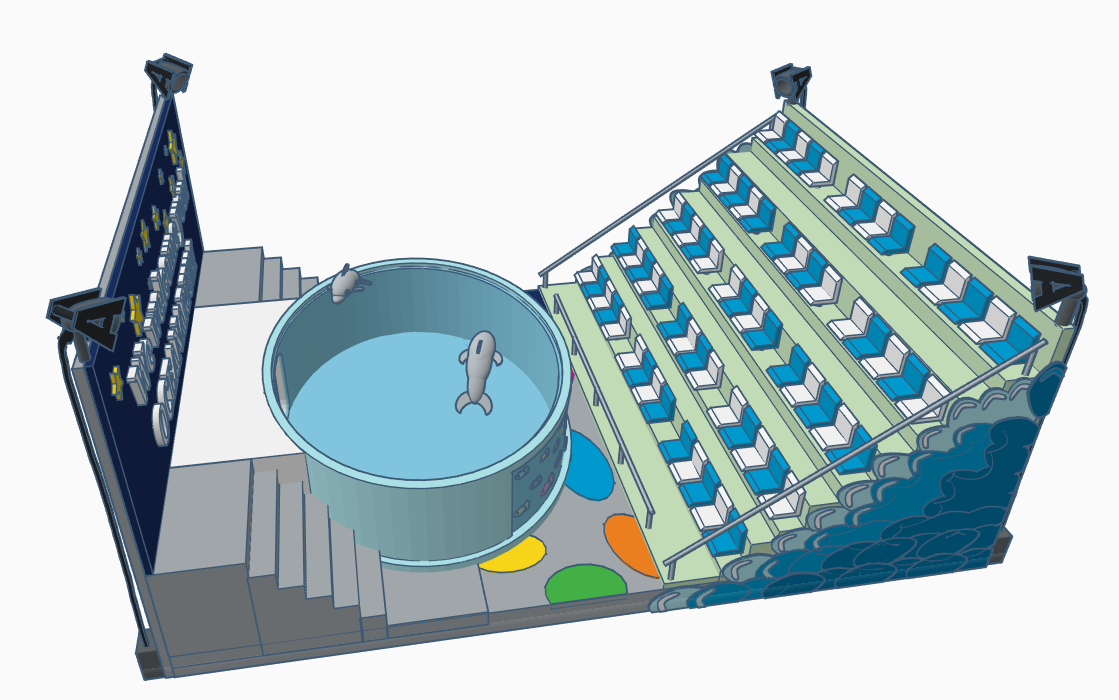
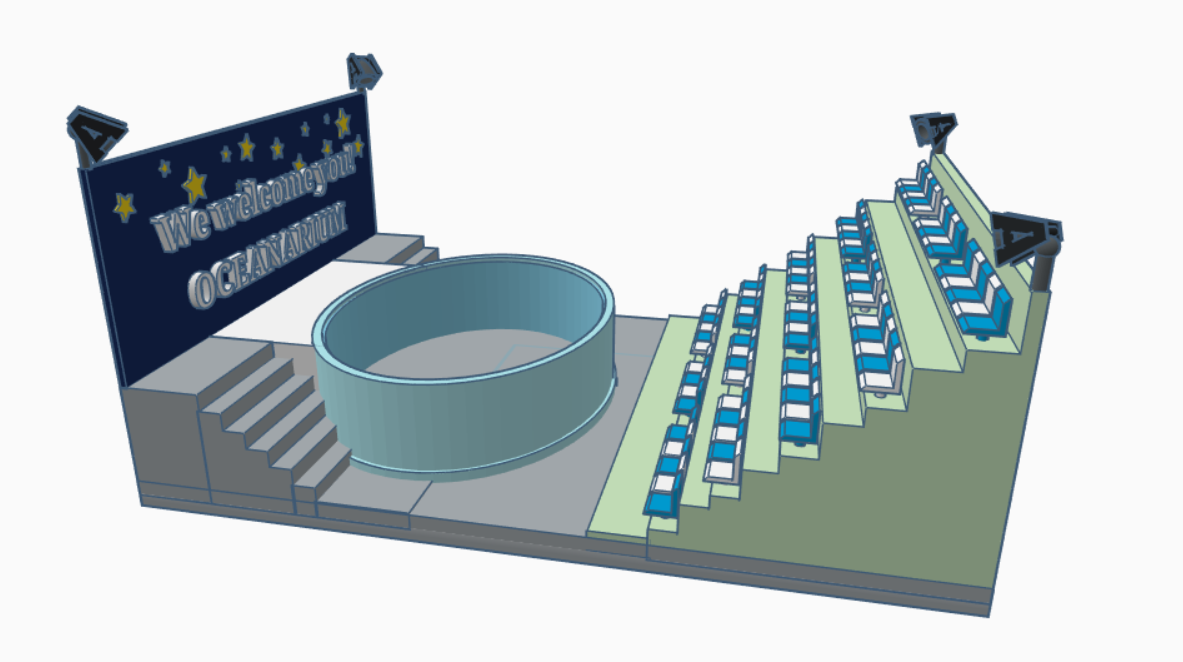
This is the oceanarium I've created for the TinkerCAD design competition.
I will now document, and teach you how to make it to the best of my abilities! I won't be using any specific measurements in this instructable, so sizing is all up to you.
Ground and Basin
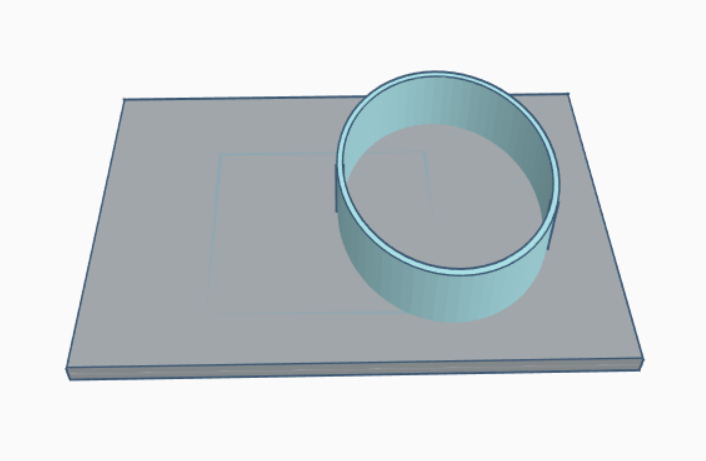
Start out with dragging in a box and a cylinder.
Make the box a rectangular shape, like on the picture. When you're satisfied with "the ground", you can start shaping your cylinder into an oval-like shape.
Click on your cylinder and press "ctrl+d" to copy it.
Hold down "shift" and make the copied cylinder a little smaller and move it up a bit. Turn the copied cylinder into a hole and group it with your original cylinder.
Scene and Stairs
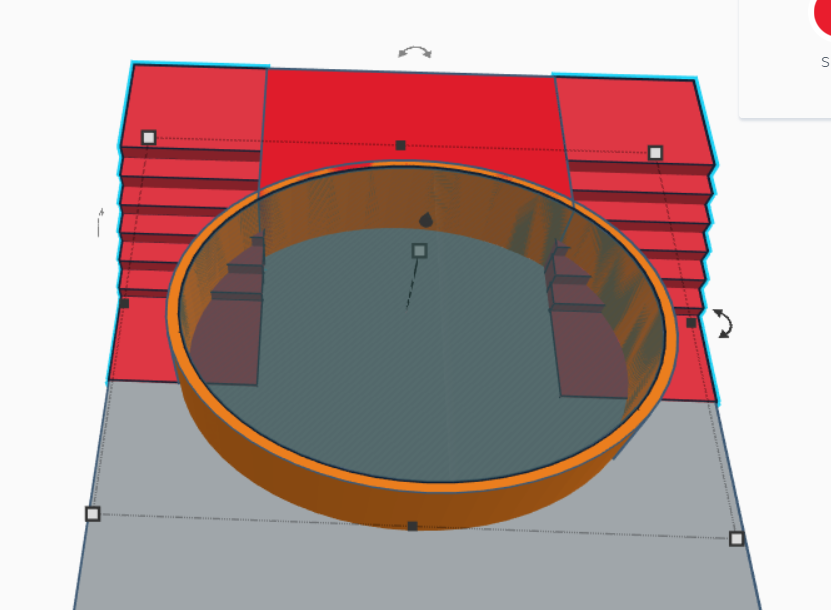
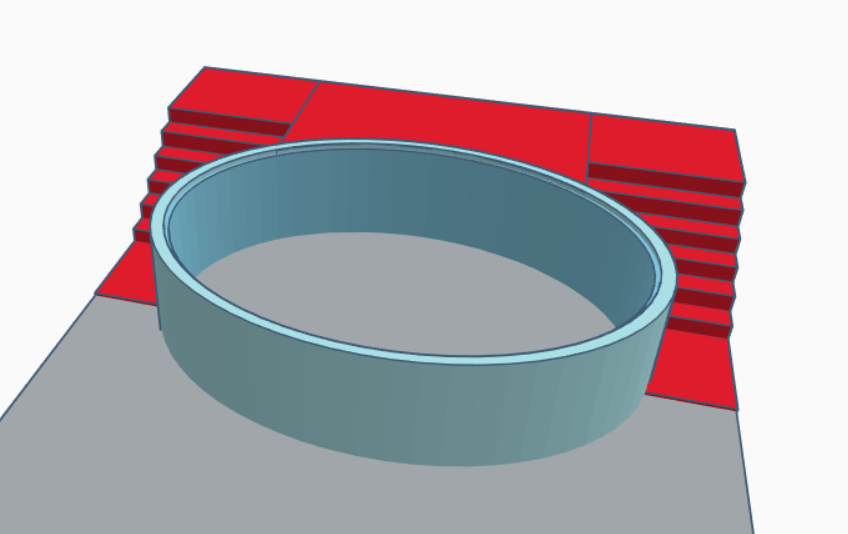
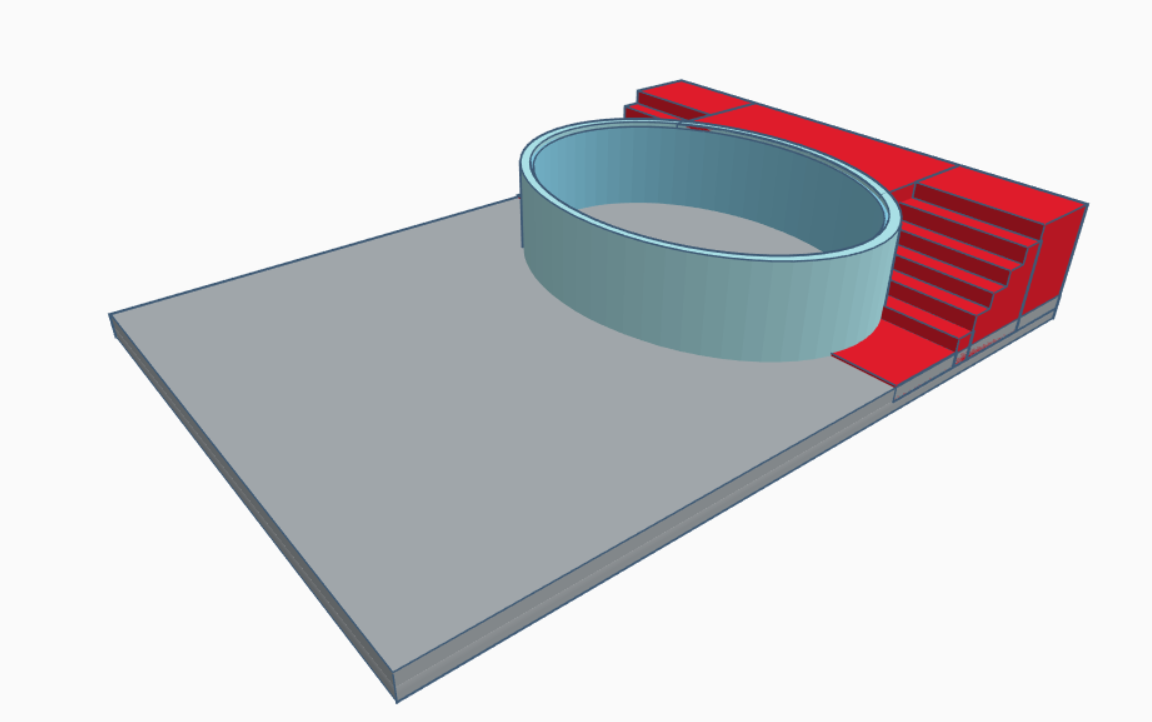
To make the scene, drag in a box and give it the same height as your basin. You can make the scene as wide as you want to, just make sure it goes out to the edge of your "ground".
Copy that box with "ctrl+d" and move it to the right edge. Adjust the size to match your scene and ground.
Once you've done that, simply copy it again by pressing "ctrl+d", move it forward and adjust the height so it's lower than your scene. You have now created the first step of your staircase. Repeat this action with "ctrl+d" until you have stairs all the way to the ground. Group your stairs together.
At last, select the entire staircase you've made and copy it (ctrl+d). Move your copied staircase to the opposite side of your scene until it looks like the stairs in the picture.
You can now click on your basin and ungroup it. Make the cylinder hole a little taller, make sure it goes above your scene and through your ground.
Select both cylinders of your basin, your scene, and both staircases (everything but the ground), and go ahead and group them all together. You should end up with something like the last two pictures.
Background Sign
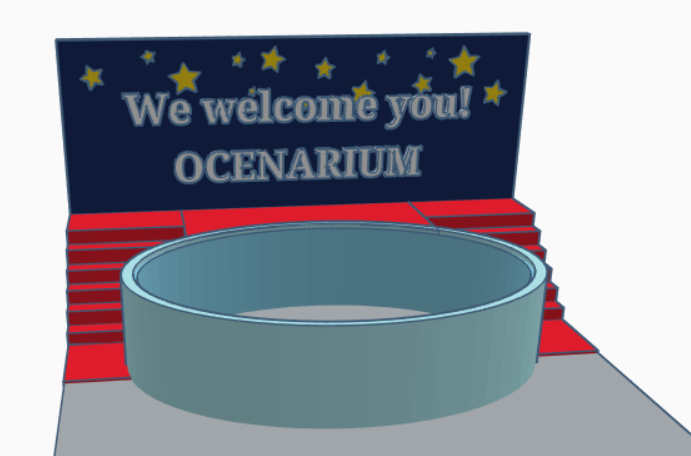
Drag in a new box and set the width to the same number as the width of your ground. Keep your new box horizontal on your build plate, for now, this will make it easier for you to follow the next two instructions.
Go to "Find more shapes" on the right side of your screen and choose "texts and numbers". Drag in a new text and write what you want your sign to say. For example; mine says "We welcome you! OCEANARIUM".
Select your text and sign and use the "align" tool in the top left to center your text in the middle of your sign.
Proceed to go back to your "basic shapes" menu through "Find more shapes". Scroll down all the way and drag in a star (the yellow flat one, not the fancy one). Make the star the size you want it to be and place it on your sign.
Copy that star with "ctrl+d" to create more of them all over your sign. Use "shift" while changing the size of your stars to make sure it stays in a star-shape.
Once you're satisfied with your sign, go ahead and group the text, stars, and background. Click on your finished sign and rotate in 90 degrees and move it behind your scene, as shown in the picture.
Spectator Row
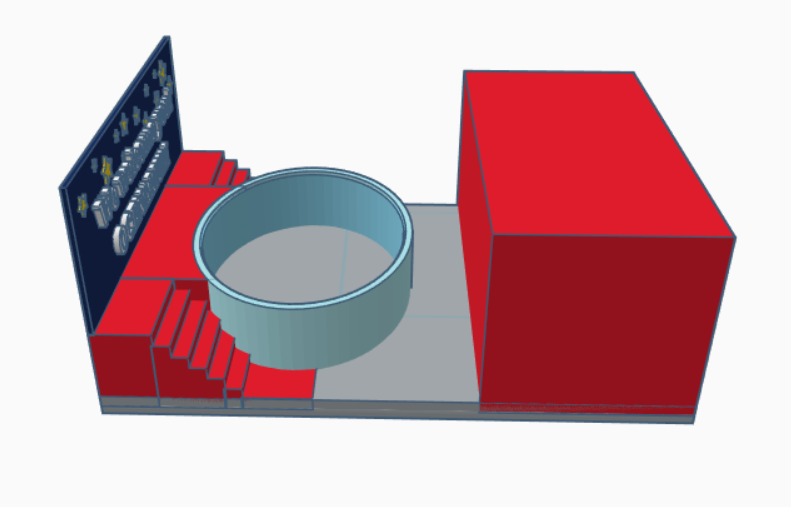
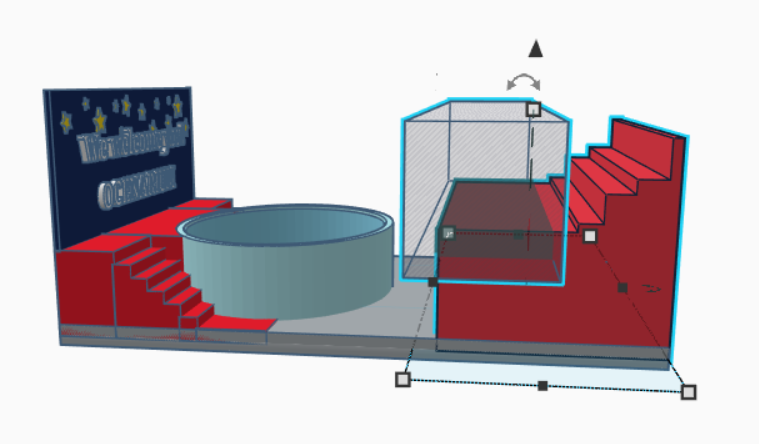
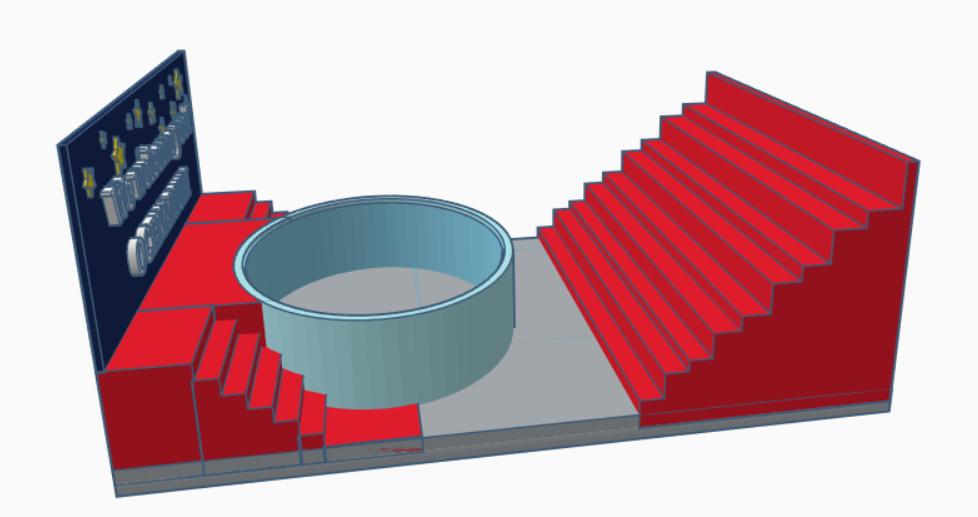
To make your spectator row, for all the people coming to view your show, drag in a box and make it the same width as your ground.
Proceed to drag in a box hole and make it super big, it has to go beyond the edges of your spectator row box. Use your new hole box to copy (ctrl+d) and place downwards, as to create something looking like a giant staircase.
Once you've done that, select all your hole boxes and the spectator row box and group them. Are you satisfied with the form it took in the end? If not, simply ungroup and move the holes and group them again. If you're satisfied, then let's proceed to step 5!
Chairs
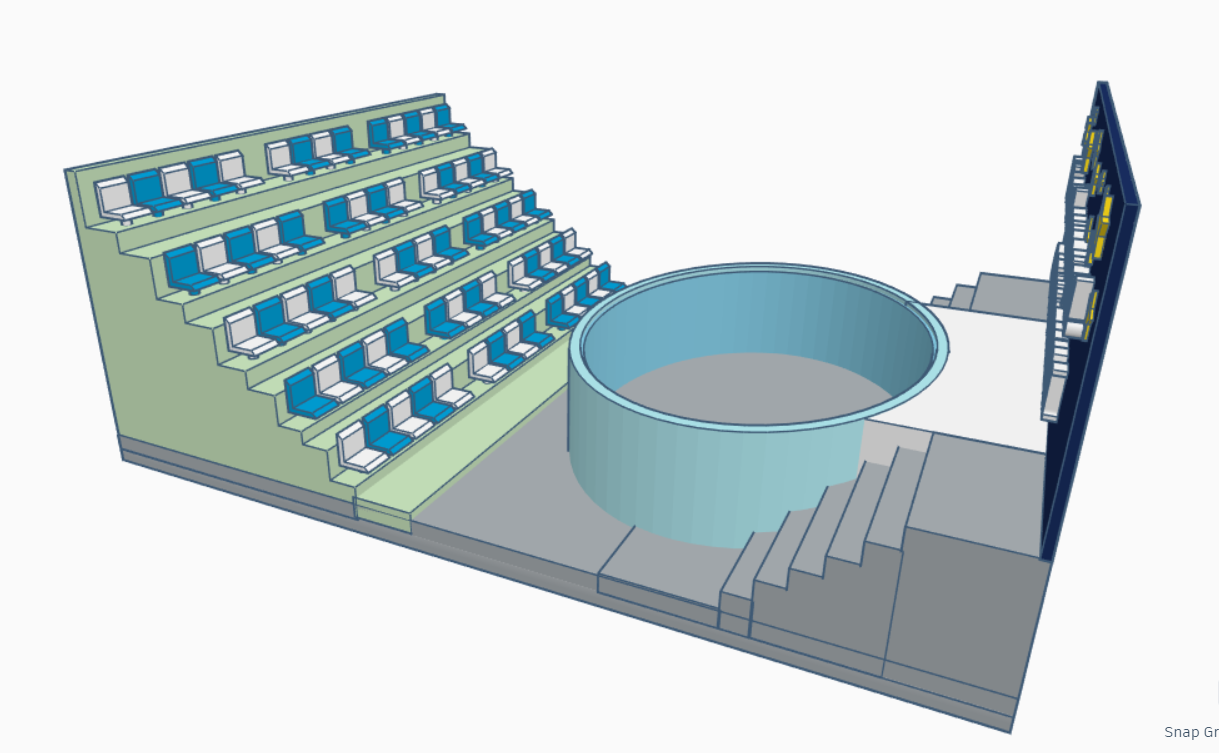
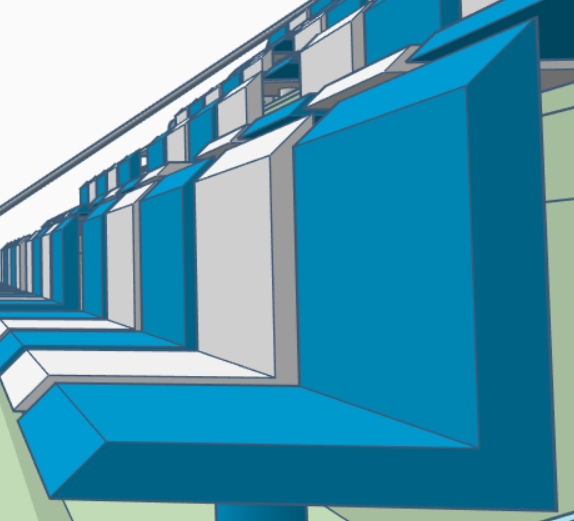
It's about time to create some chairs for your spectators!
Drag in a "wedge" and a box hole from your shape bar. Place your hole on top of your wedge and move the hole up a little, look at picture two for reference. Group those two shapes together.
Now drag in a new cylinder and place your seat on top of it. The align tool can once again help you center your seat and cylinder. Once you have done that, group the seat and cylinder, turning it into a wonderful chair.
Now for the fun part! Place the chair in the top left of your spectator row and copy it with "ctrl+d". Move the copied chair to the right until you have achieved the desired distance between the two chairs.
Now copy the copied chair with "ctrl+d" and you'll see that TinkerCAD automatically put the new copied chair to the right side of your first copied chair! Press "ctrl+d" as many times as it takes to fill out the entire row.
You can move and adjust the sizes of the chairs as you wish, to make it look good. Once you have the top row, select all your chairs and copy them with "ctrl+d". You can now move these copied chairs down two rows, as to make sure your spectators also have a place to walk. Continue to copy the rows of chairs until there's no more space for them.
Now one last thing, zoom out a bit and make a path for your spectators to walk on. Select and delete two vertical rows of chairs. For example: Mine was 16 chairs a row, so I deleted the 6th and the 11th chair in each row to create a beautiful balance.
Stage Lights
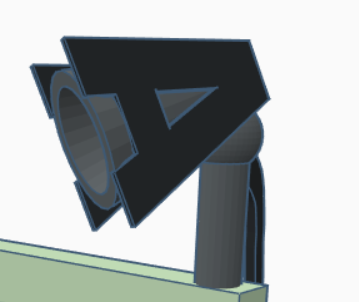
No scene without stage lights! Time to create some!
Drag in paraboloid from your shape menu. Copy it with "ctrl+d" and make it slightly smaller, turn it into a hole as well. Group the two paraboloids.
Now go to "find more shapes" and click on "texts and numbers" again. Drag in an "A" shape and rotate it 90 degrees. Fit it on the side of your paraboloid so the bottom of the A and the bottom of the paraboloid touch. Copy that A and move it to the opposite side of the paraboloid.
Drag in a cylinder and make it long and thin. Rotate it 90 degrees so it becomes horizontal and place it between the tops of the two A's. Group those four things together.
Now it's time to drag in a cylinder and a sphere, so go ahead and go back to your basic shape menu and do that. Done? Now place the sphere on top of the cylinder, like it is in picture two. Group your sphere and cylinder.
Using picture two as a reference, place your paraboloid group on top of the sphere and cylinder, but wait a little bit longer with grouping them together.
Select your paraboloid group and your sphere/cylinder group and move them up to stand on top of the edge of your sign, on the corner of course. Move and rotate your paraboloid group to point down at your basin and scene. Once you've done that, go ahead and copy your stage light and place it in all four corners of your oceanarium.
Make sure those paraboloid groups are always pointing towards the basin and scene! And make sure they're still in contact with the sphere and cylinder as well!
Wires to Your Stage Lights

Your stage lights need a power source, don't they? Let's give them one!
To make the wires, drag in a "scribble" from your shape menu. It will open a secondary window, allowing you to manually draw the shape you want. What you're going to draw, is a long line the folds to the right in the ends.
Once satisfied with your scribble, go ahead and click "done". Make the wire thin and rotate it 90 degrees! And make as long as you need it to be to reach from your stage light and all the way down to the ground.
Now drag in a new box and give it rounded edges. You round the edges by adjusting the "radius" option on the right side of your screen. I recommend adjusting the radius to somewhere around 1.50.
Now make the box slightly rectangular and place it at the end of your wire.
Select your wire and power box and copy them with "ctrl+d" to all the other stage lights as well!
Railing
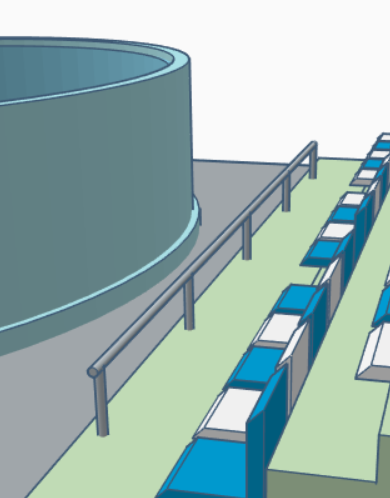
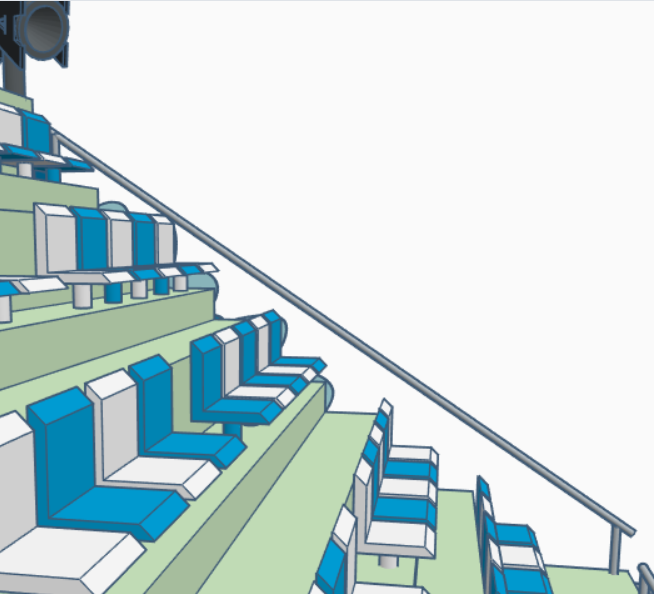
Wait, we can't have your spectators falling off the spectators' row, now can we? make some railings to help them stay safe!
You only need to use cylinders for this, so go ahead and drag one in from the shape menu. I'll wait for you, so no rush.
Make your cylinder long and thin, using "shift" would be a great idea. When they had the diameter you want them to have, make them looooooong. Copy your cylinder with "ctrl+d" and try to mimic the pictures, two rails on the sides of the spectator rows, and one in front so they don't get too close to the basin.
Floor Decoration
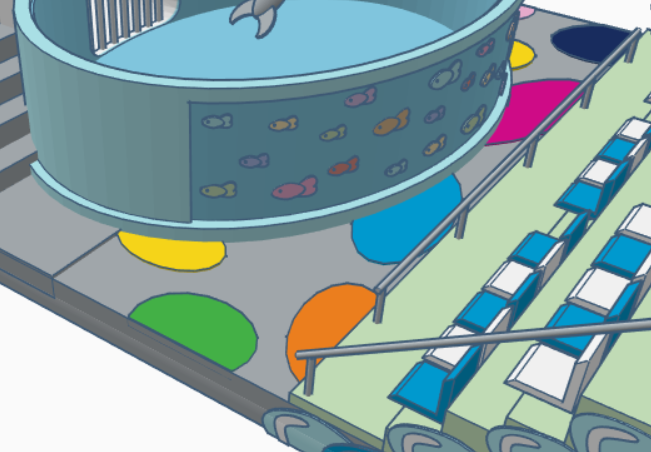
Ignore the fish and basin, we'll get to that soon. Instead, turn your attention to the floor! Before it was plain and boring, but now it's time to spice it up a bit with some fancy colors.
It's a relatively easy thing to do, simply drag in a cylinder, adjust the height so it's just above your regular ground, and copy it with "ctrl+d". You choose the colors and sizes as usual of course.
Waves
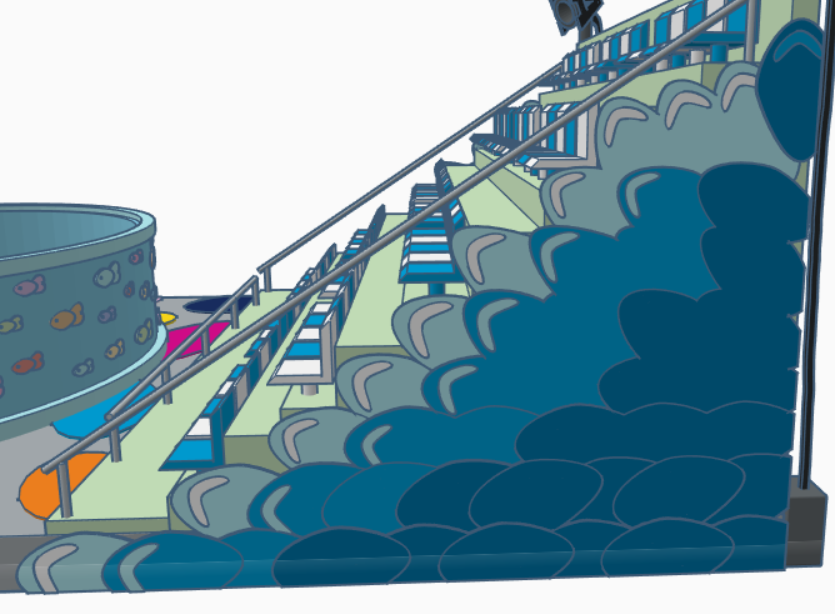
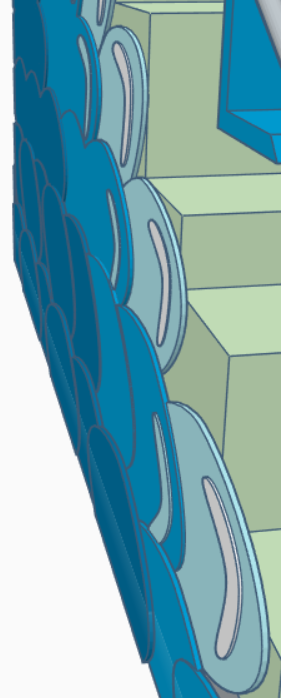
Let's decorate the otherwise boring sides of your spectators' row!
We'll need to drag in an extrusion shape now, you can find it in "find more shapes"-"featured". When you drag it in, a small window opens where you can drag and adjust the shape of your extrusion.
Make your extrusion look like an egg or a scale. When you're satisfied with the shape, go ahead and adjust the height of the extrusion, make it thin (about 0.02 or 0.03 should be just fine).
Now, rotate your extrusion 90 degrees and use picture one as a reference to try and use your extrusion to create waves. I personally started from the bottom and worked my way up to the top.
When you've covered the entire side of the spectators' row, adjust the middle and bottom extrusions so they're not all on top of each other, but in layers, the bottom ones being dragged out the furthest, and the top ones connecting with the spectators' row (look at picture two for reference).
To make them look more like waves, drag in a new extrusion from your shape menu. Your goal is to try and make it look like a boomerang. When you've done this, adjust the height like with the first extrusion and rotate it 90 degrees.
Place your boomerang (foam) on the tips of the waves, as you can see in picture one.
Panorama View Into the Basin
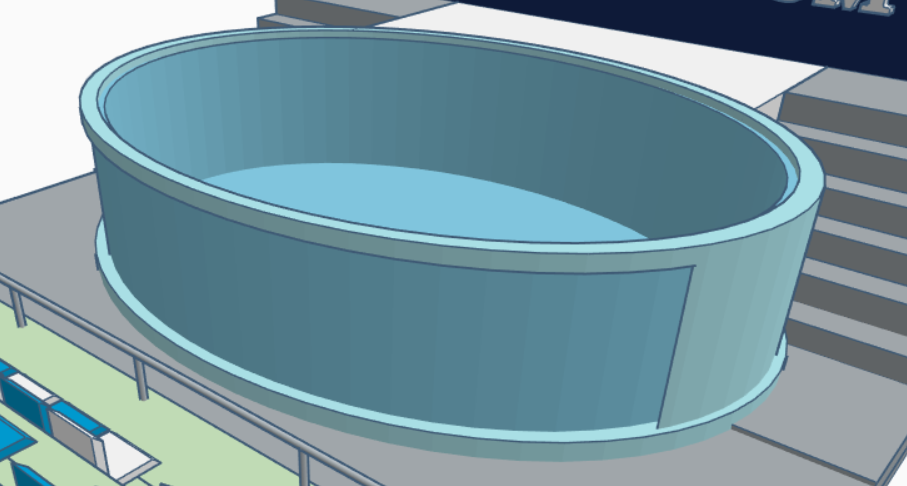
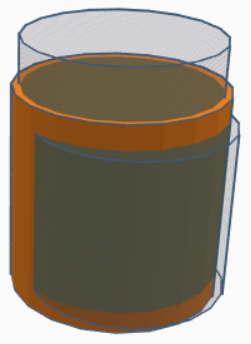
Let's give the spectators a little extra treat now we're at it, shall we?
Once again, ungroup your basin and copy the cylinder hole by pressing "ctrl+d".
Now all you need to do is take that copied hole and move it forward, look at picture two as an example.
Now, to make sure there isn't just a big hole in the side of your basin and all the water will flow out, we need something resembling glass to hold the water in.
To achieve this, select your basin (not any of the holes) and copy it with "ctrl+d".
Make the copied basin and little bit smaller in every way by holding down "shift" on your keyboard while carefully adjusting the size. Place your copied basin in the middle of the original one, the bottom of your copied basin just be just above the original.
Gate and Wall
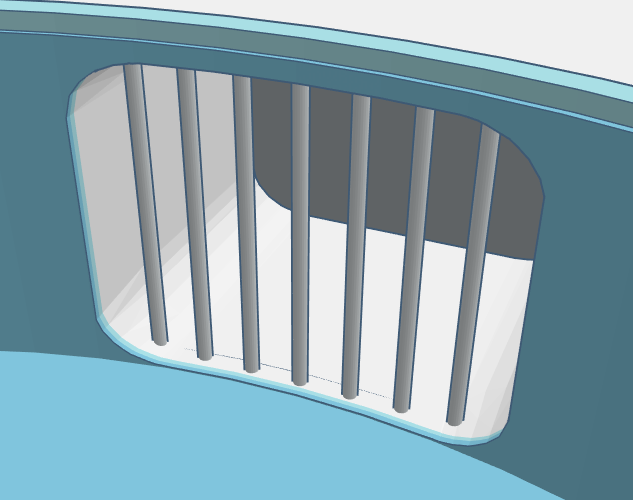
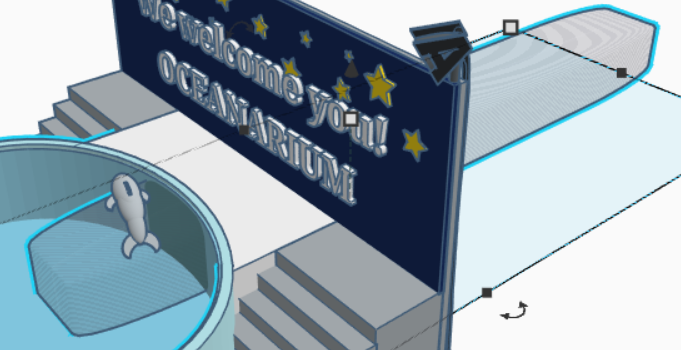
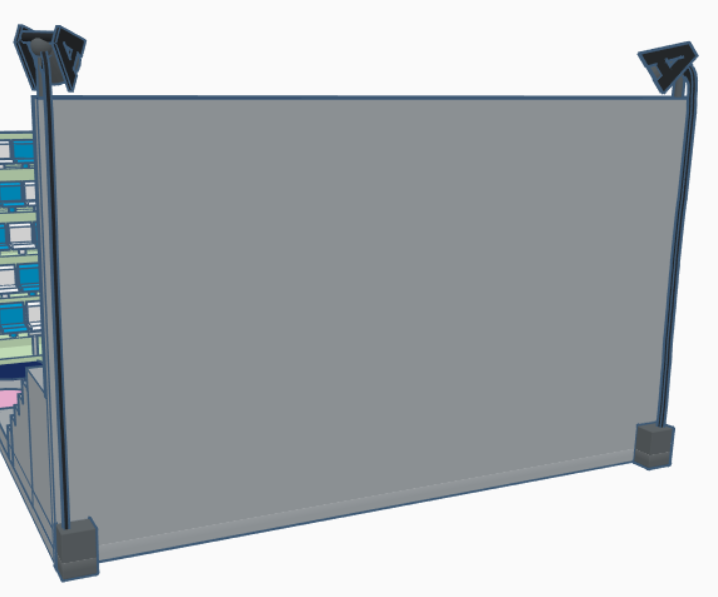
Your dolphins need a way into the basin, so let's make them a gate!
Drag in a new box from your shape menu and edit the radius to 3.50. Once you've done that, make your box a hole and place it in your basin (shown on picture two). Make it long so it goes through everything.
Select your basin, the hole you've just made, and the scene and group it all together.
But wait, now you have a hole leading out into the nothingness?! Let's fix that with a quick wall.
Drag in a new box and give it the same width as your sign. Now adjust the height of the wall so it covered everything behind the sign and stage, as shown in picture 3.
The last thing to do in this step is to make the metal bars in your gate. You hardly need my instructions for this task, but I'll give them to you just in case.
Pull in a new cylinder from your shape menu and make it thin and tall so it can reach from the ground to the ceiling under your stage! Now use "ctrl+d" to copy that cylinder, move it to the side until you've gained the distance you want and copy the copied cylinder.
You'll notice it does the same thing as the chairs and places your new copy with the same distance as the first copy has from the original cylinder.
Fish
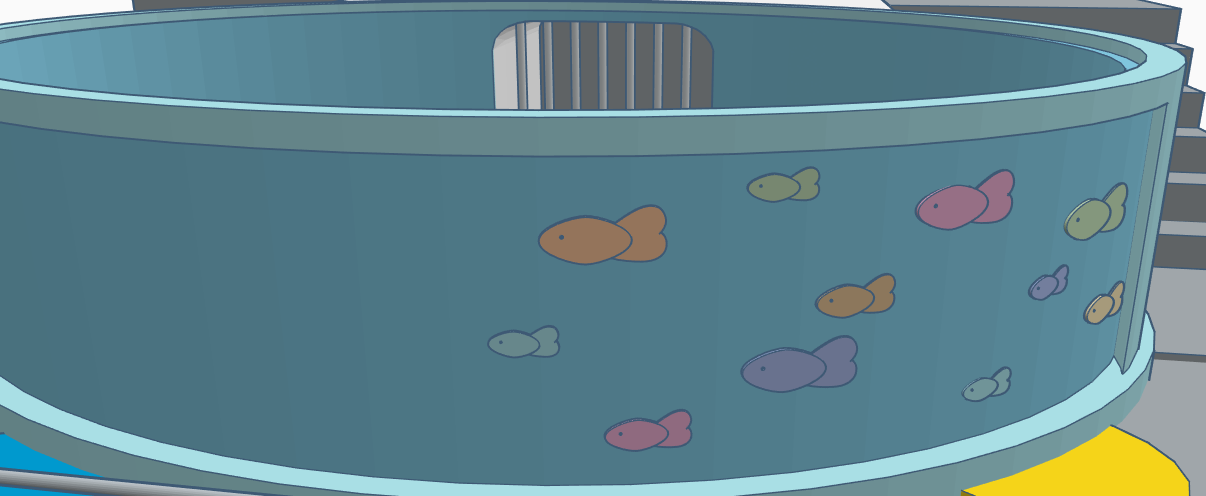
Let's make some fish for your basin!
Drag in an extrusion shape from your shape menu (go to "find more shapes" and pick "featured").
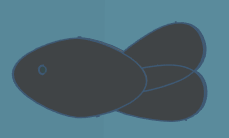
Once again, adjust your extrusion to match the form of an egg or scale, the same as with your waves.
Drag in a new extrusion and make it into an oval-like shape, but smaller in one end than the other.
Adjust the height of your two extrusions, the main body (your first extrusion in this step) should be slightly thicker than your fins (your oval extrusion).
Copy your oval extrusion and move them to make the fins on your fish, the thin part "inside" the fish, see picture two for reference.
Once you've done this, drag in a cylinder for the eyes. Make it a hole and adjust the size, make it thin and tall enough to go through your fish. Place the cylinder where you think the eye would be and go ahead and group your extrusions and cylinder.
Now it's time to employ your fish in your basin!
Rotate your brand new fish 90 degrees and drag it over to your basin. Rotate your fish as needed to "hang" on the side of your basin. Now, copy your fish as many times as you need to to fill out the entire side of your basin, of course, rotating them to "hang" onto your basin.
You can adjust the sizes of your fish by pressing down "shift" and holding the sliders, that way it will stay in shape, just getting bigger and/or smaller.
Dolphin
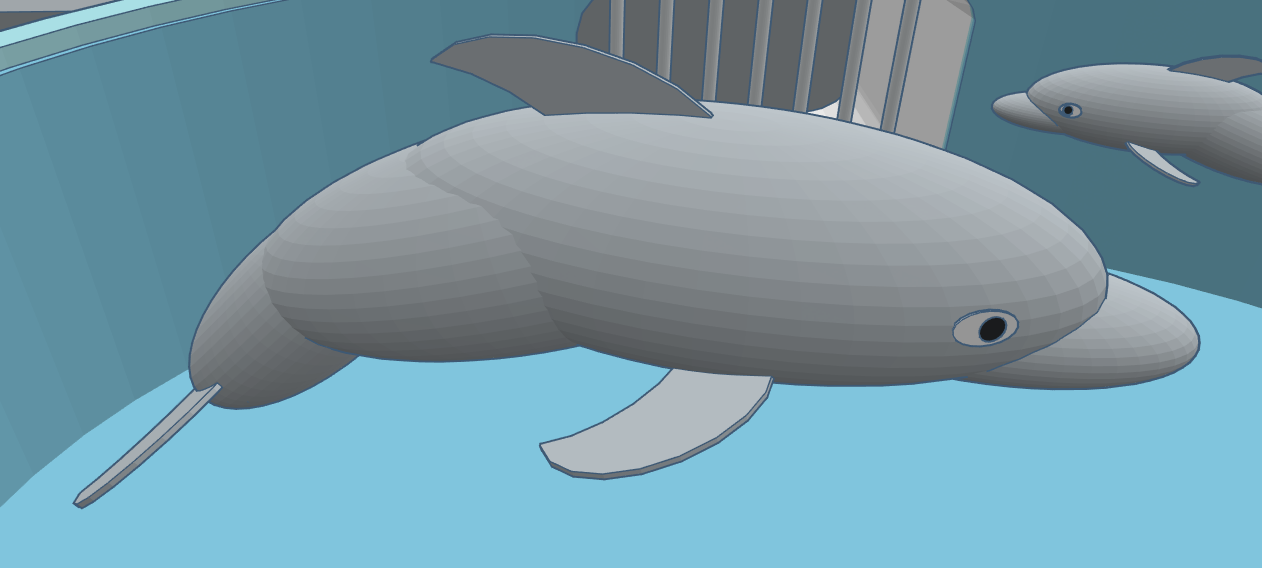
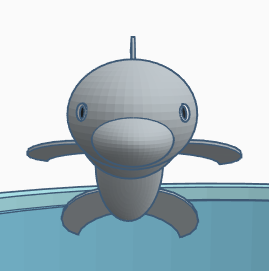
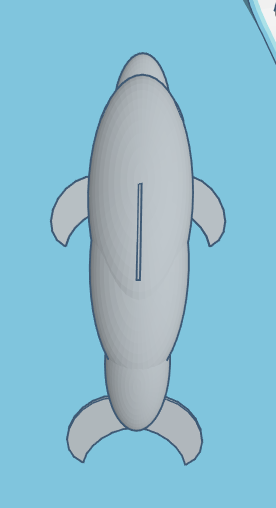
Congratulations! You've reached the last step! It's time to make a couple of dolphins for your spectators to watch!
Go to your shape menu and drag in a sphere. Pull on your sphere to make it longer and more like an oval, I recommend finding a picture of a dolphin to use as a reference.
Copy your oval sphere with "ctrl+d" and adjust the size so it's a little smaller than the other one. Select both spheres and align them with your "align tool", in the top right of your screen.
If your copied sphere goes through the "back" of the original one, simply drag in a box hole and place it where your spheres are colliding. Group it with your copied sphere.
Now take your copied sphere and copy it by pressing "ctrl+d" again. Move your new copied sphere to make the end of the dolphin tail, which naturally means: make it slightly smaller again. Use the three pictures as reference.
When you've made the body, it's time for the fins.
Drag in a new cylinder from your shape menu and adjust the height to "thin", size doesn't matter for now. Copy your cylinder with "ctrl+d" and make your copy an oval shape and a hole.
Now use the hole to place on the edge of your original cylinder to obtain the form of a dolphin fin. Once satisfied with the shape, group the two cylinders and move your new fin to the edge of your smallest sphere.
Adjust the rotation and size as needed to make it look as natural as possible. Once done, copy your fin to the other side of your tail and rotate it to match your first fin.
Copy your fin again with "ctrl+d" and move it up to the main (biggest) sphere to make the side fins. Do the same as with your tail and rotate and adjust the size on both sides of your dolphin.
Once you've finished doing that, copy your fin one last time to make the slightly bigger back fin on the dolphins back. Adjust the size and length to make it a little bigger and align it in the middle of your big sphere (body).
You're almost done! Just drag in a new cylinder for the eyes, make it thin and oval. Drag in another cylinder from your shape menu, this is the last shape you need!
Place your round cylinder on top of your oval-shaped cylinder and adjust the height as needed. Group the two cylinders and move the eye up to the dolphin's head.
Place the eye on the side, like it is in the two first pictures above, and rotate it to match with the round edges of your sphere. Once you've done that, copy your eye and move it to the other side of your dolphin. Match the copied eye with the head, group your entire dolphin together and you're done!
You can now move your dolphin to the basin and place it as you see fit! You can copy your dolphin as well with "ctrl+d" to make two dolphins and adjust the size of the second dolphin to be smaller or bigger if you want.
Thank You for Reading My Instructable
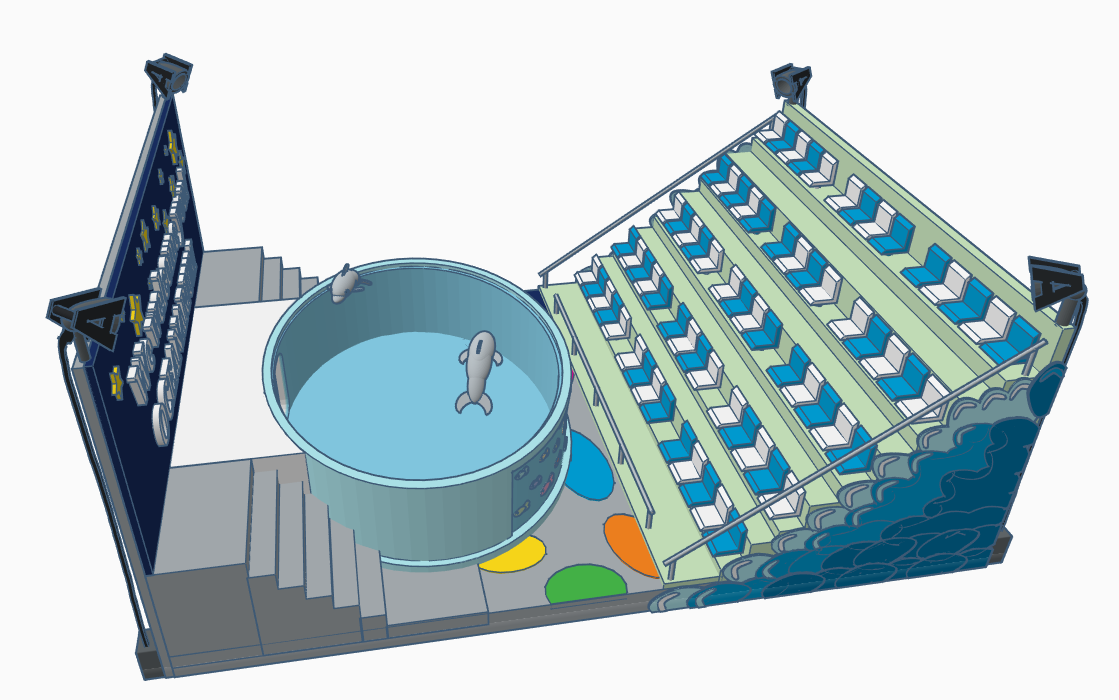
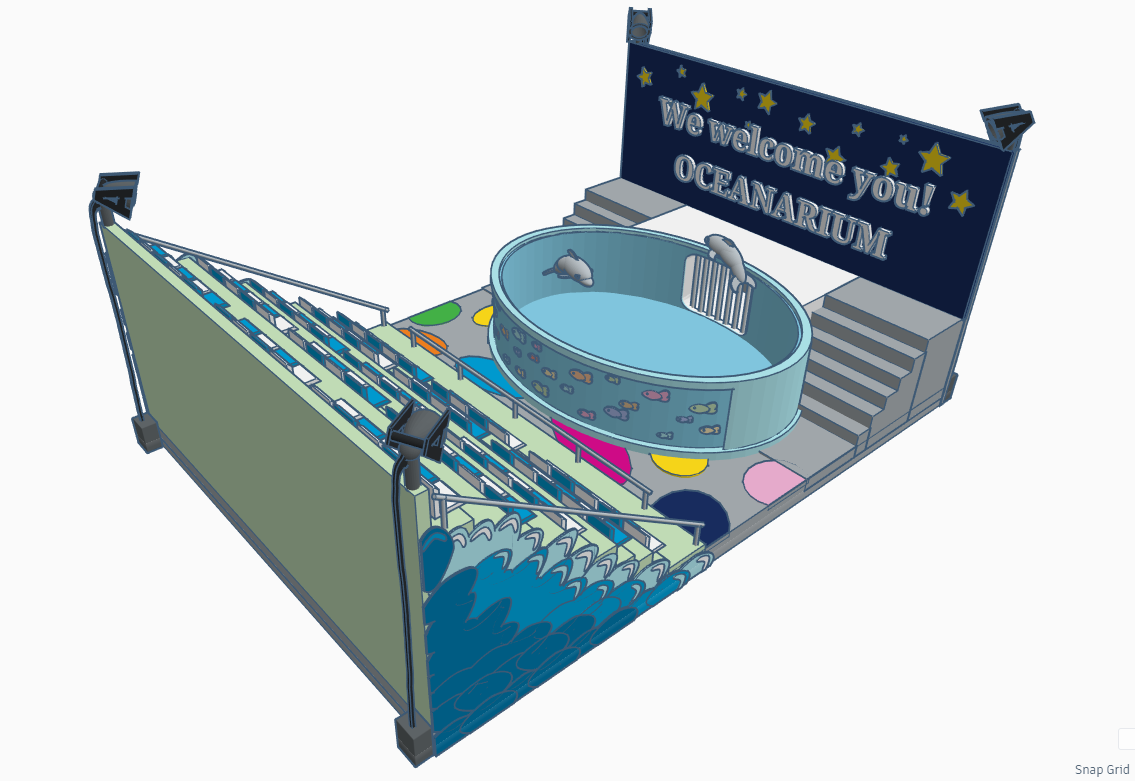
You've reached the end! Thank you so much for reading my instructable, I hope it was manageable and easy to follow :)