OW! That's Hot! Cup Gripper
by FinleyLangdon in Living > Life Hacks
149 Views, 2 Favorites, 0 Comments
OW! That's Hot! Cup Gripper
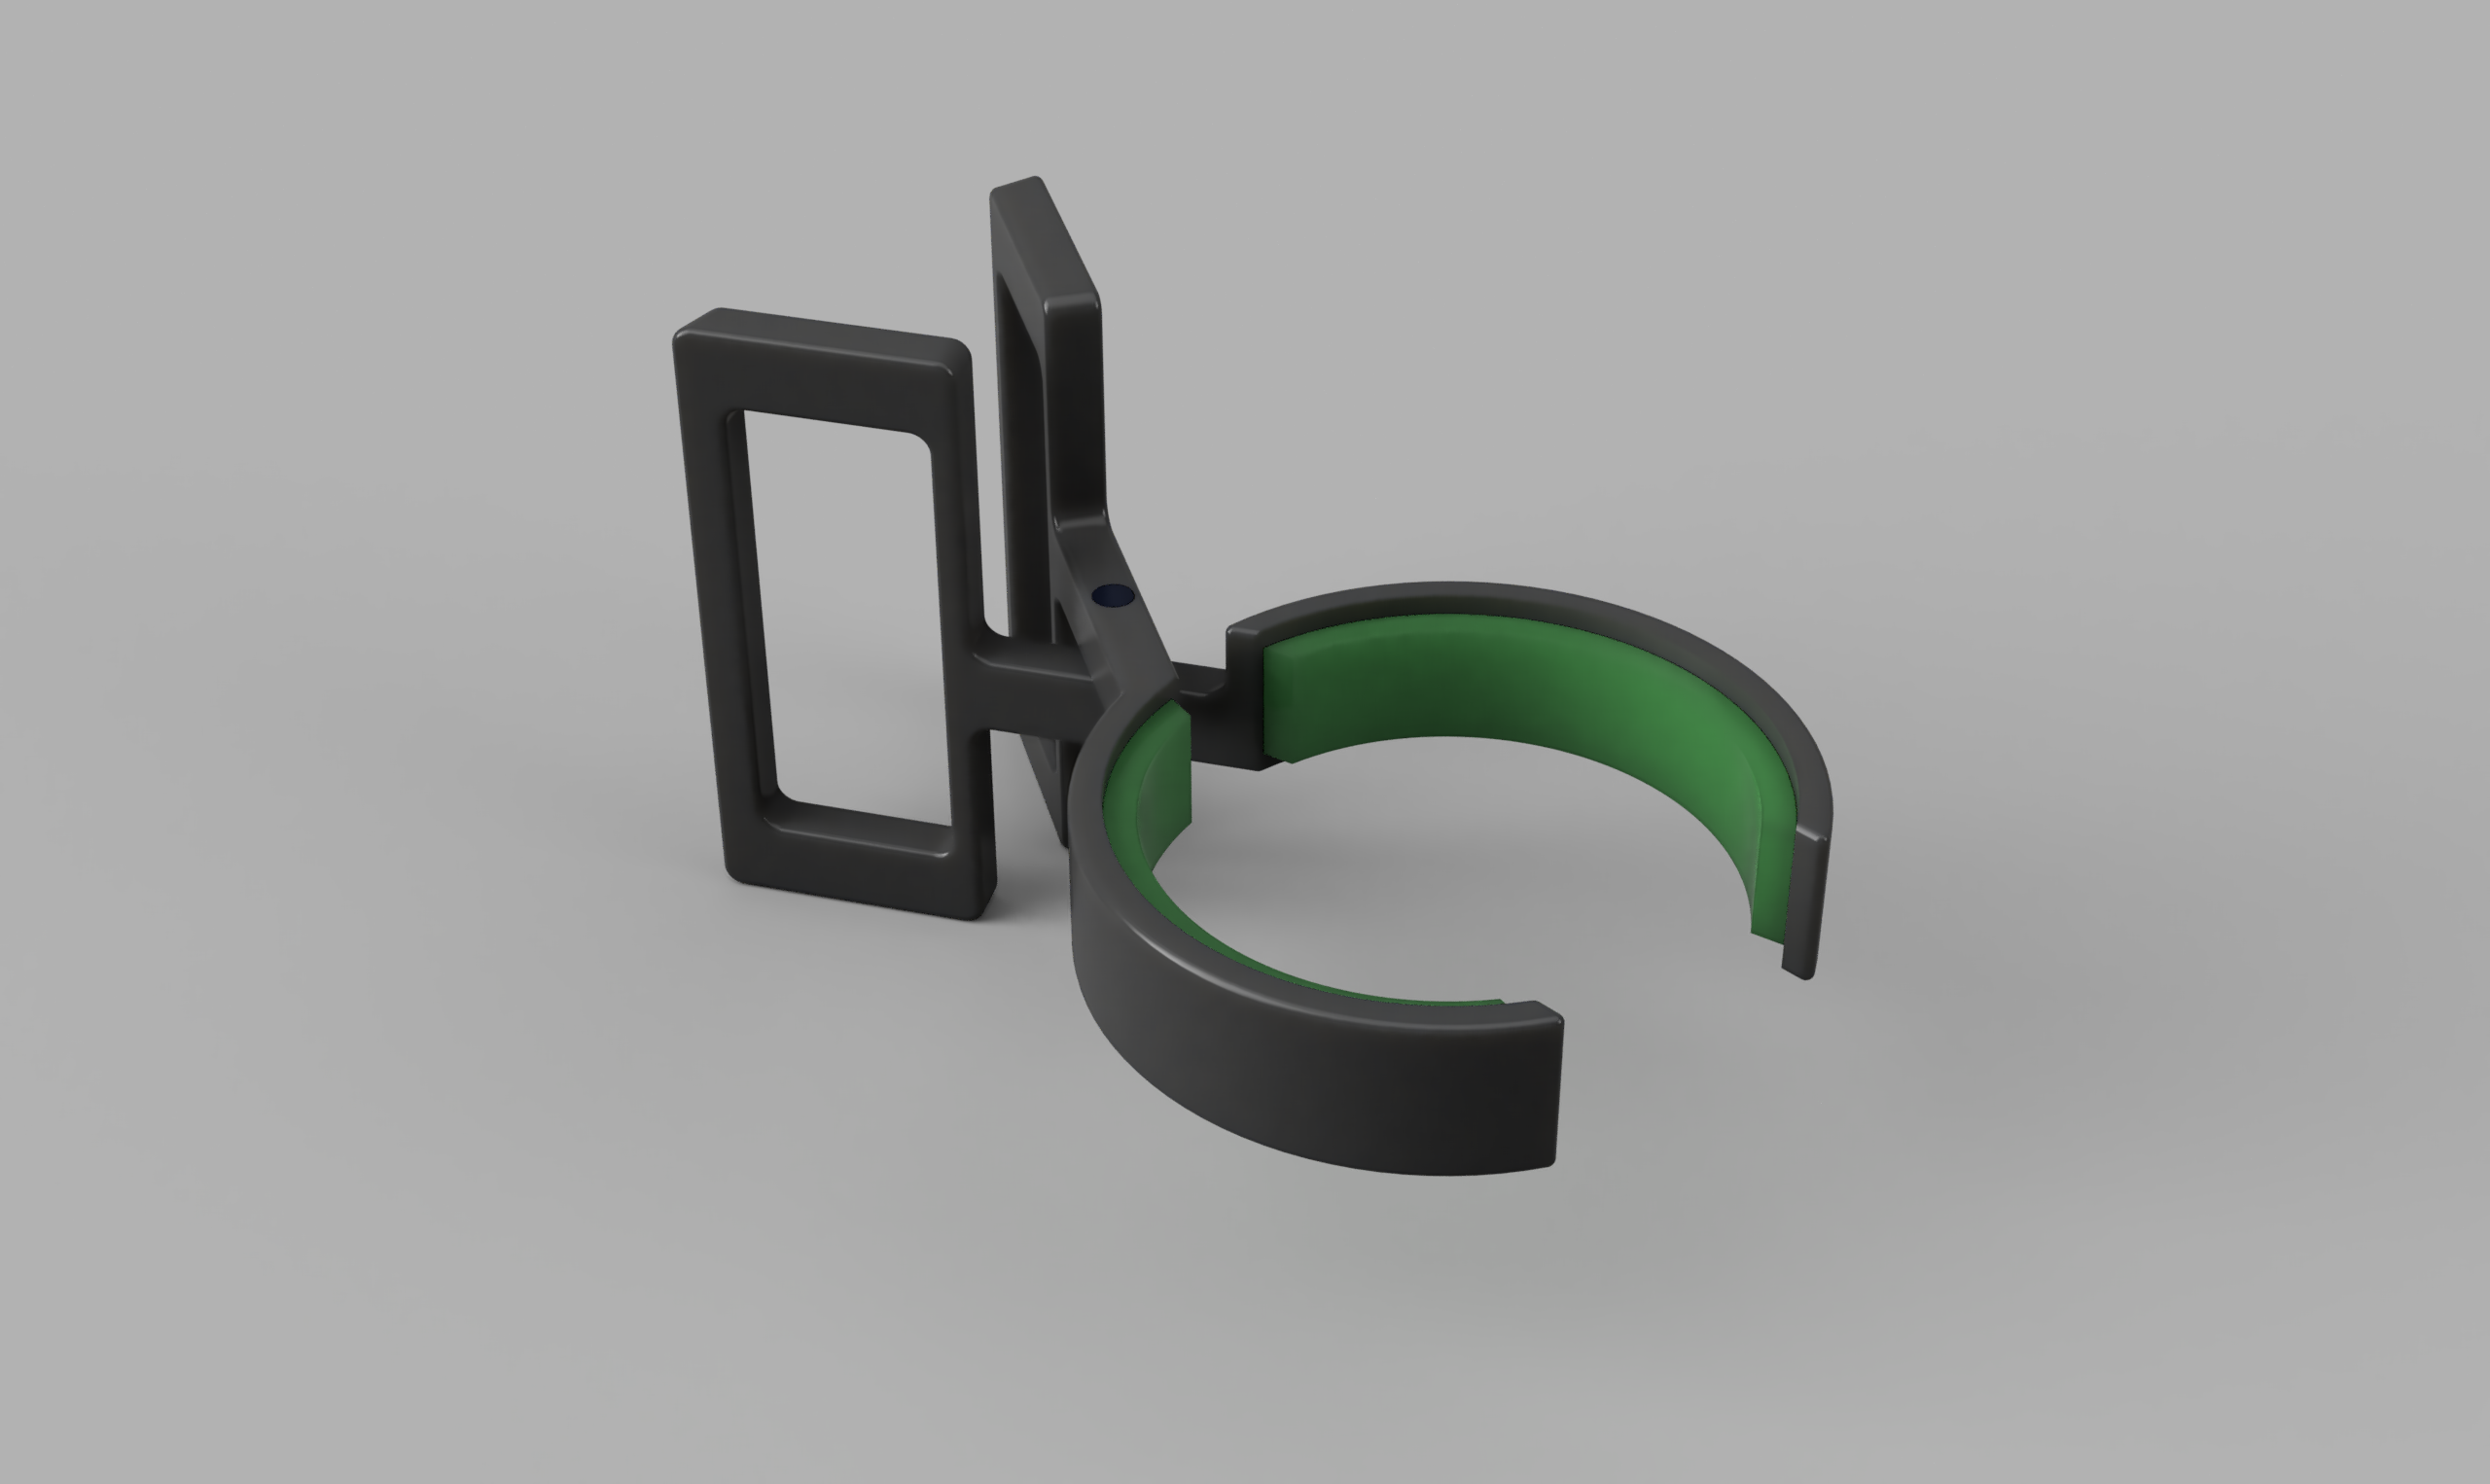
I made the OW! That's Hot! Cup Gripper so when picking up hot liquids in a cup, you won’t burn yourself. When printing, the pin will be in PLA, the two arms will be in PLA, and the two grips will be in TPU
Supplies
Fusion 360, a computer, glue, and a 3d printer that can print PLA and TPU.
The Sketch
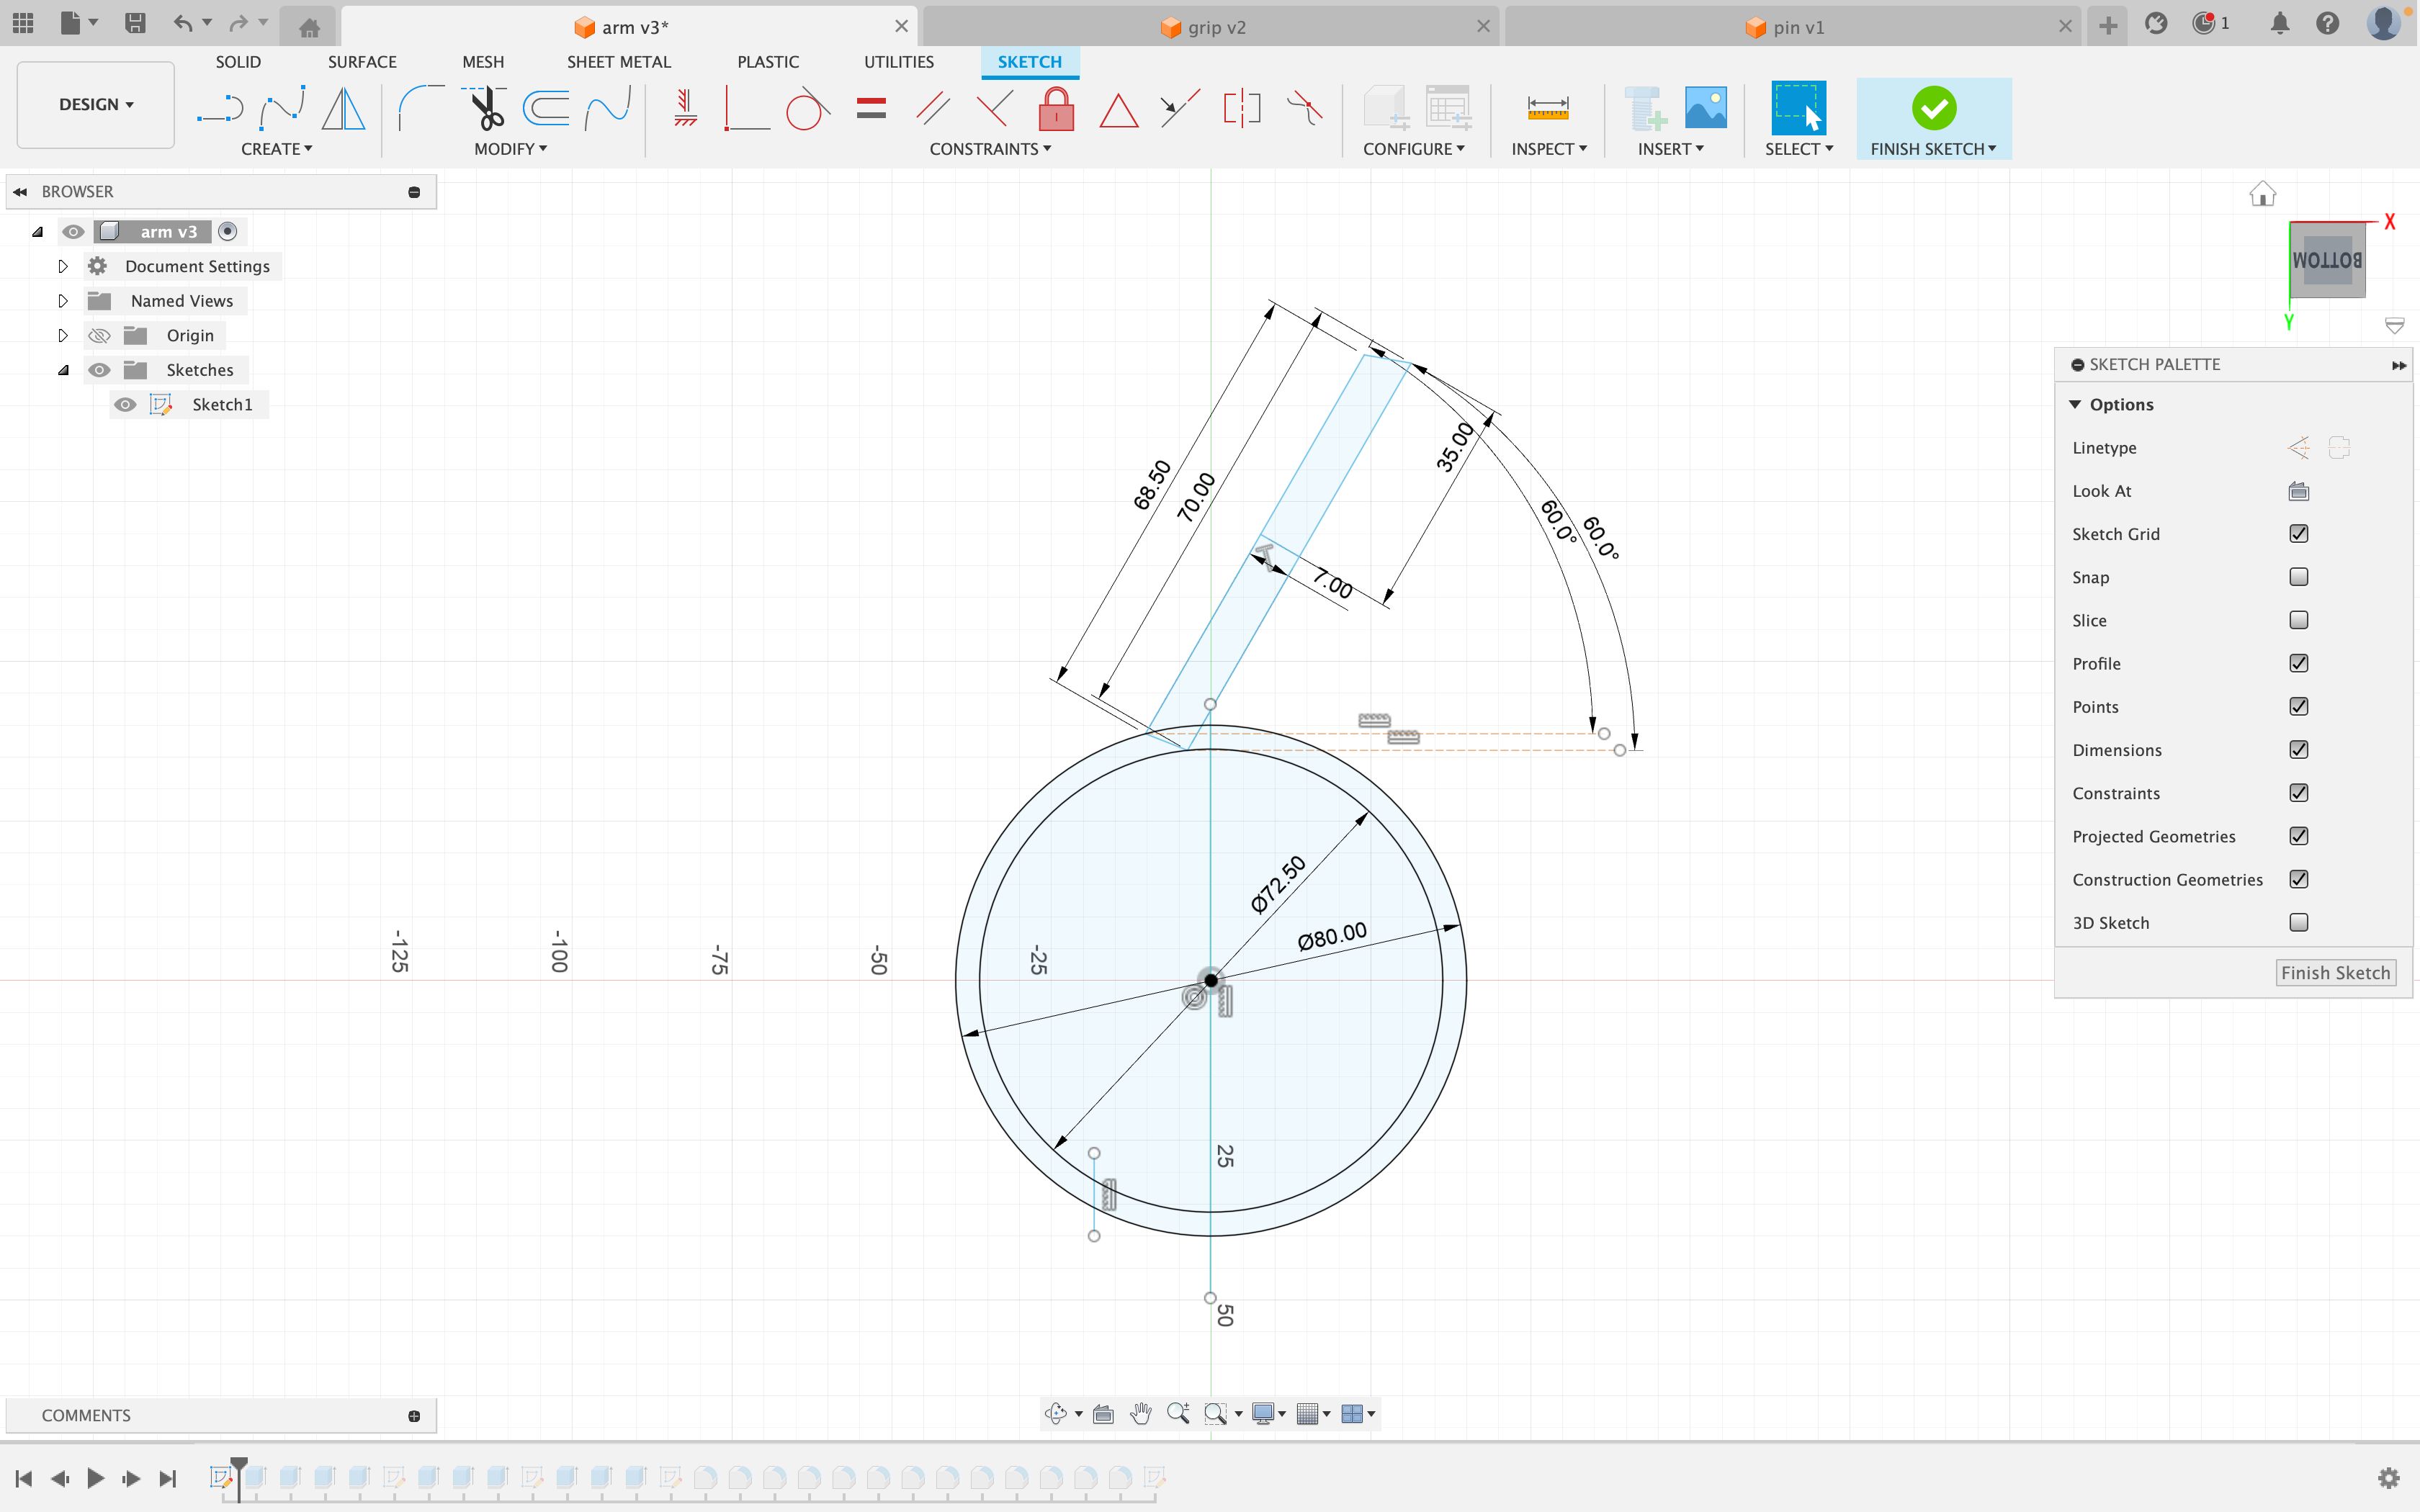
First, make an 80mm circle, then, you can either inset it by 7.5mm, or make another circle inside the first one that is 72.5mm. Next, add a 68.5mm line on the larger circle at a 60 degree angle, and a 70mm on the smaller circle at a 60 degree angle as shown in the picture. No add two lines connecting the two lines together on the top and bottom. Now add one more line half way down the big rectangle you just made like shown in the picture. Finally, add a line going across the two circles like shown at the bottom of the picture. Now you have completed the initial sketch.
Extrusion Part 1
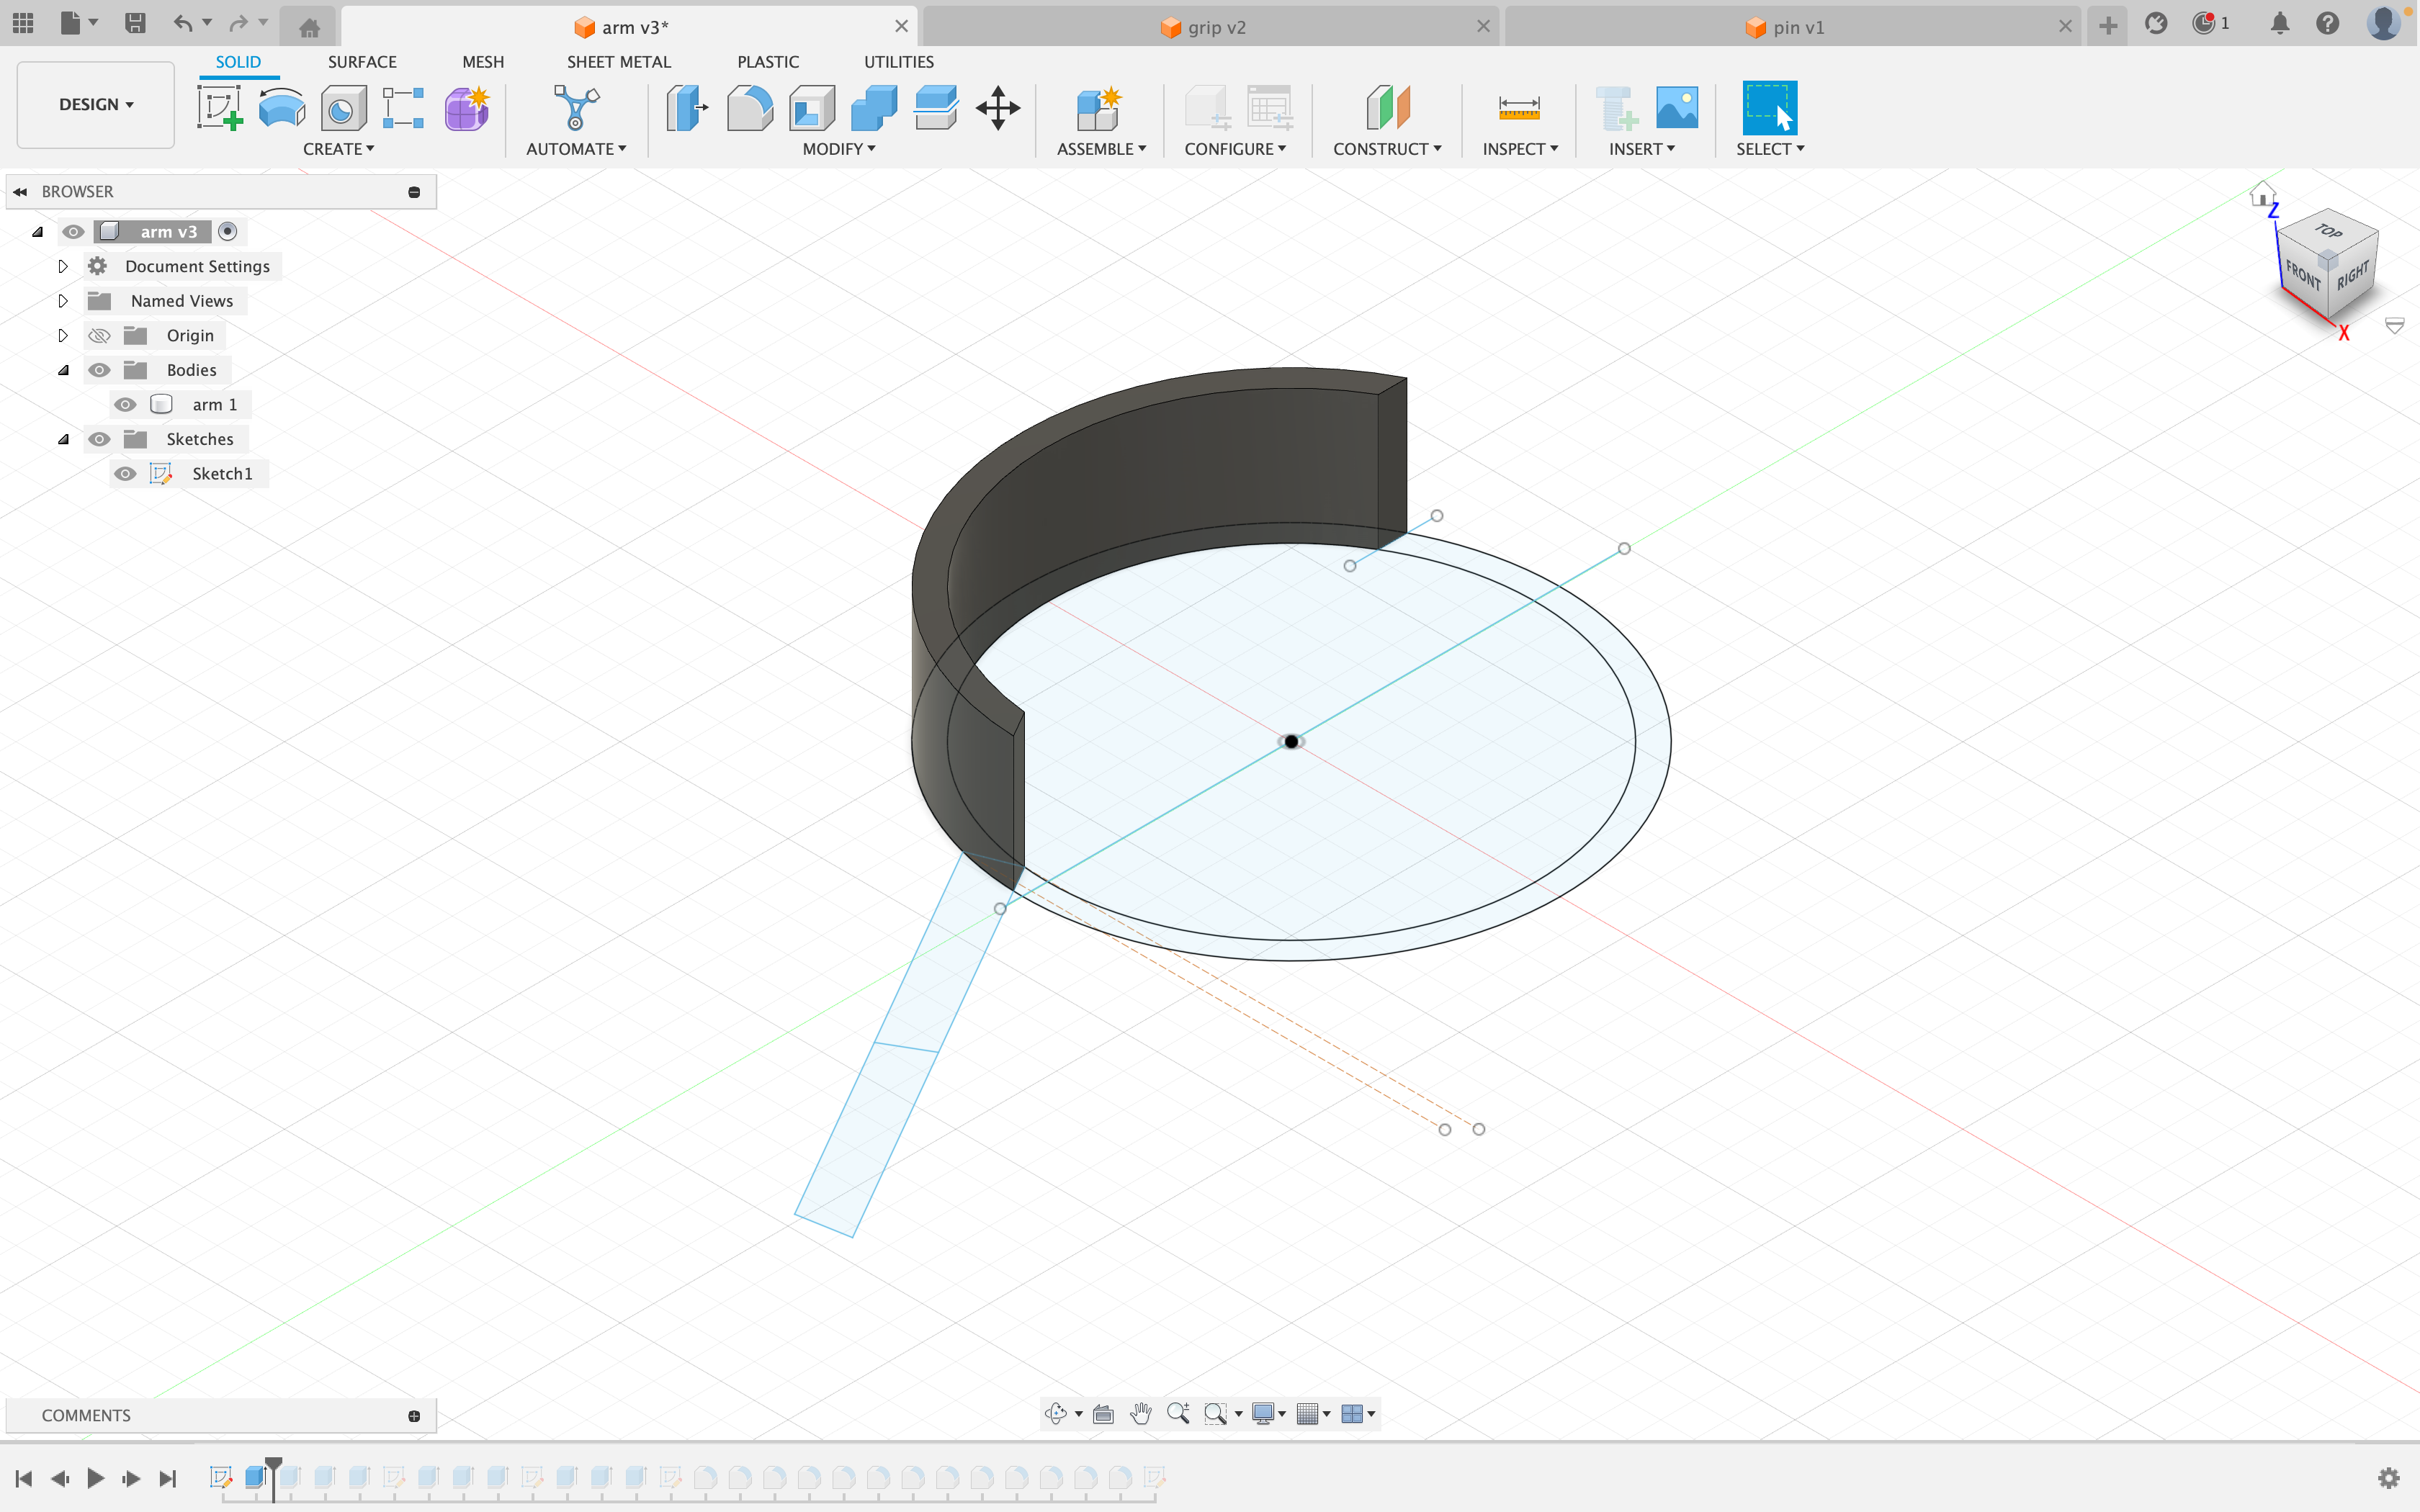
First, we will extrude this half of the circle by 20mm.
Extrusion Part 2
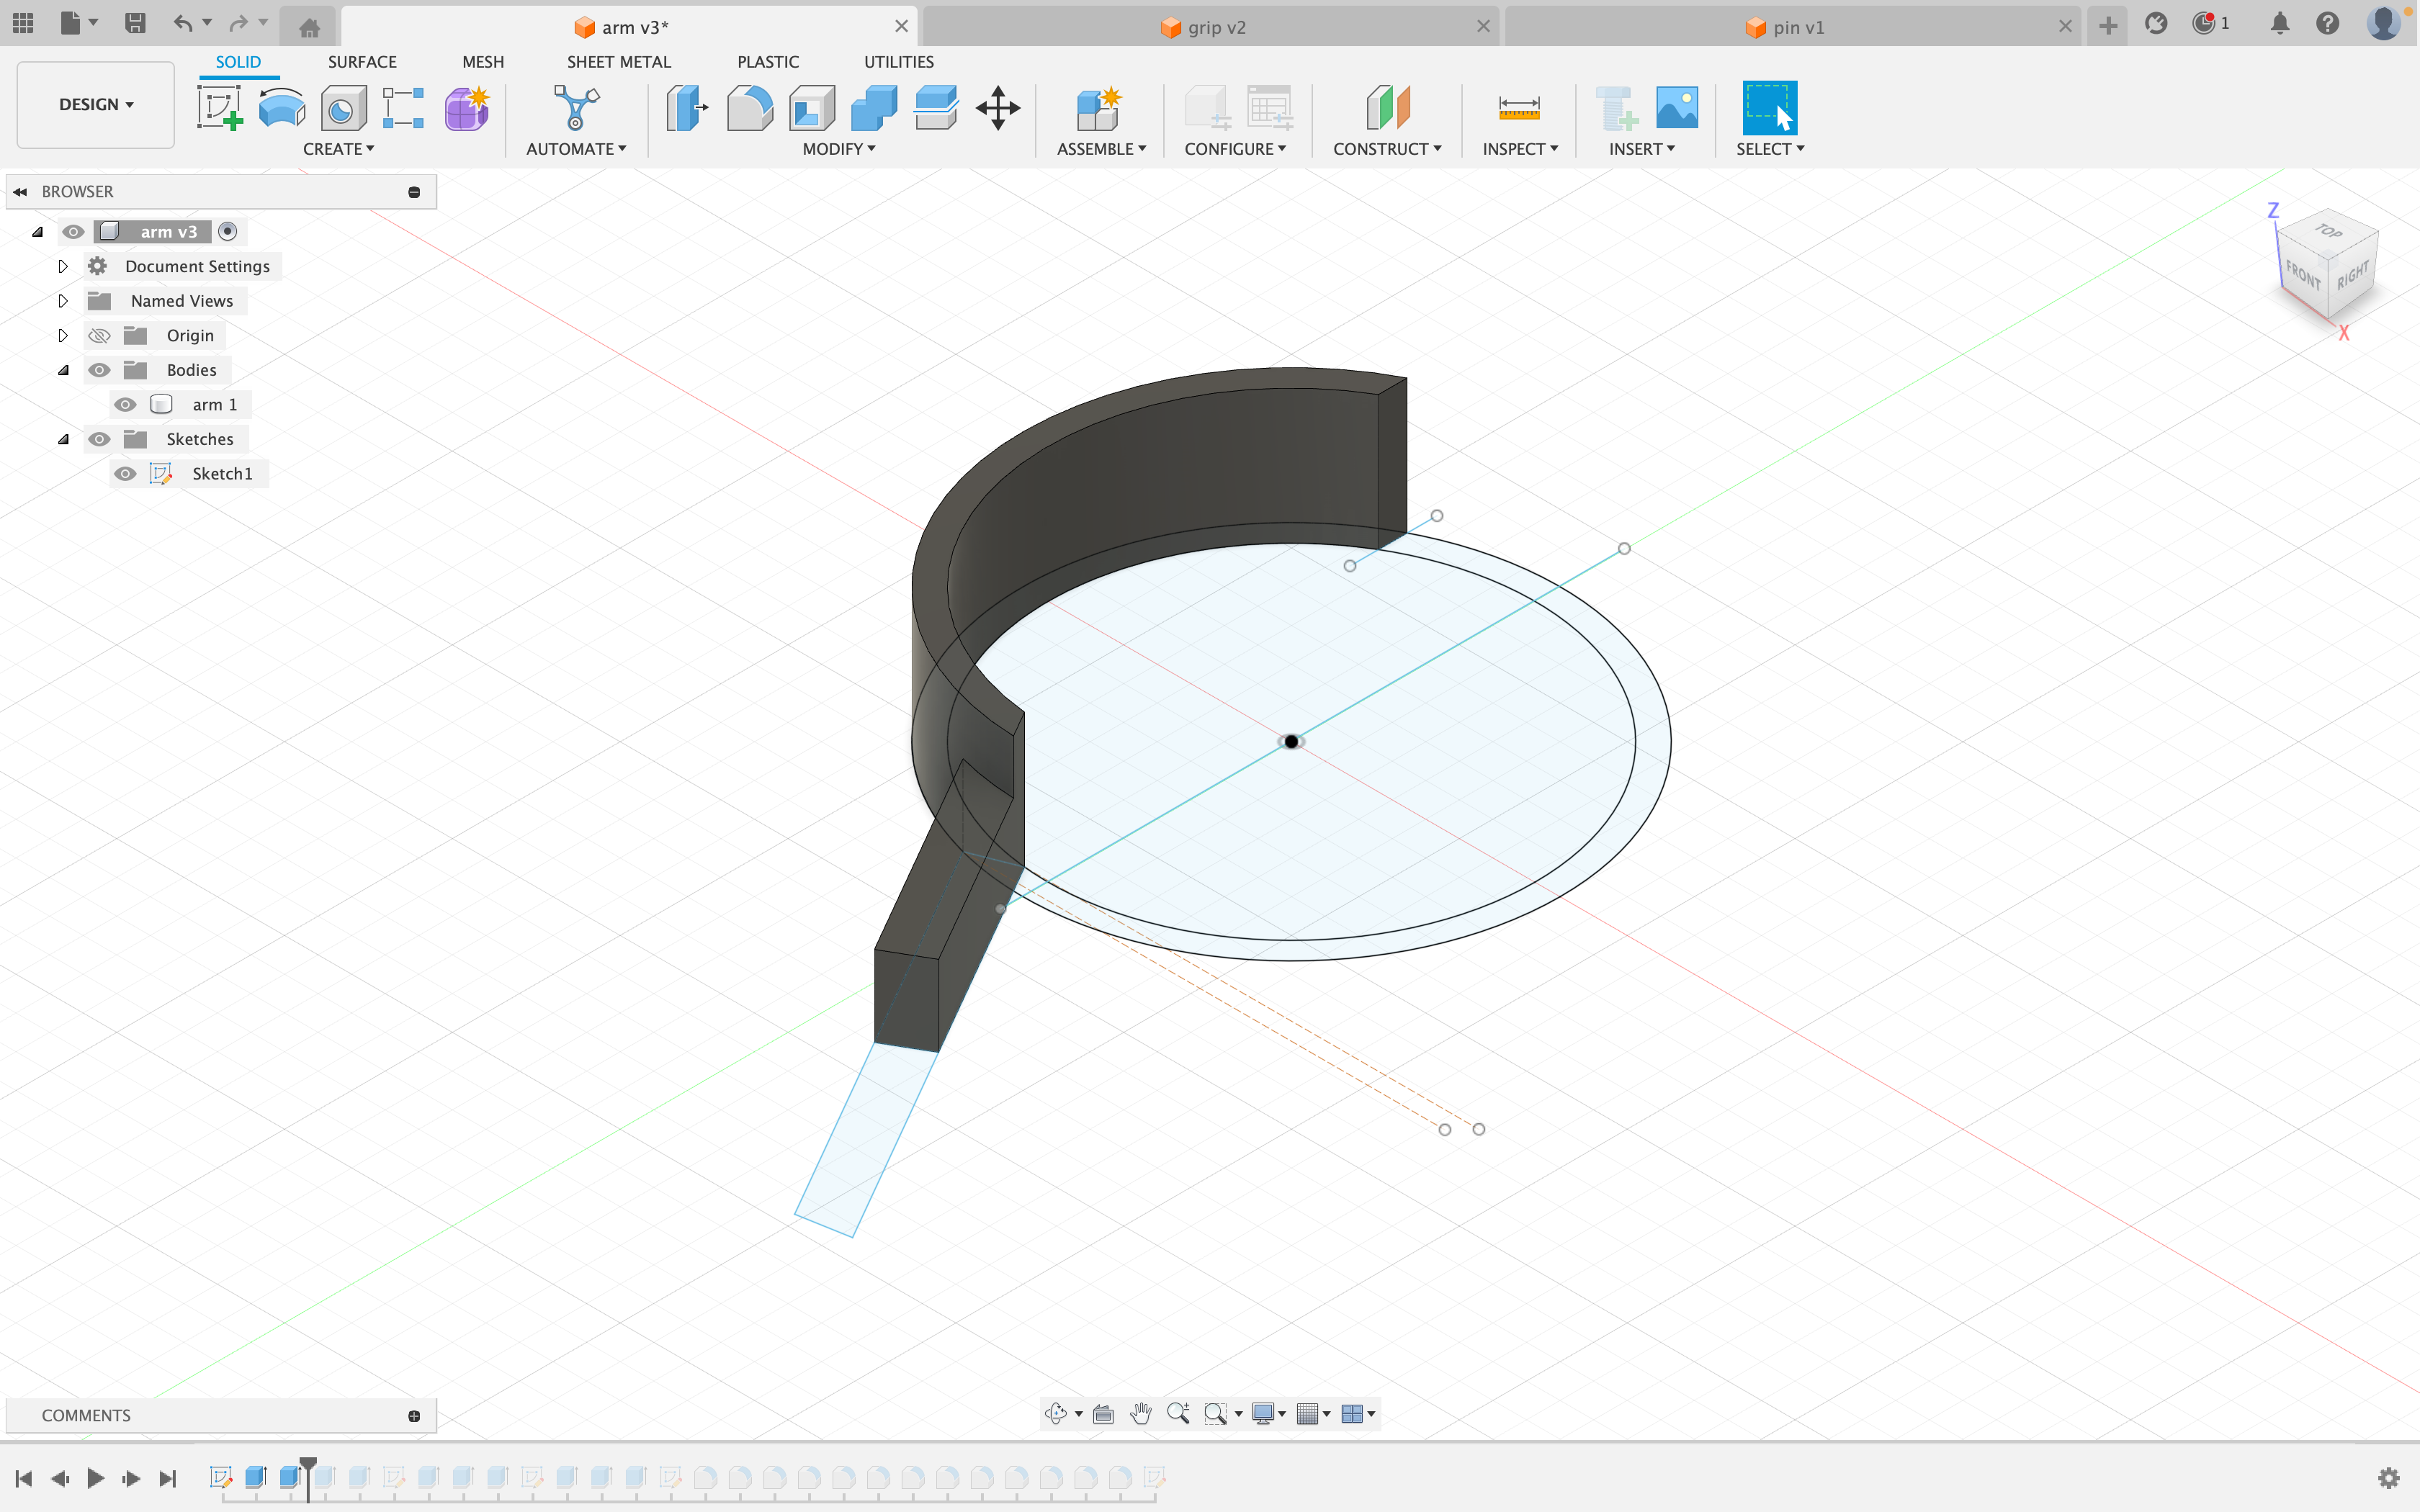
Next, extrude the first half of the handle up 10mm.
Extrusion Part 3
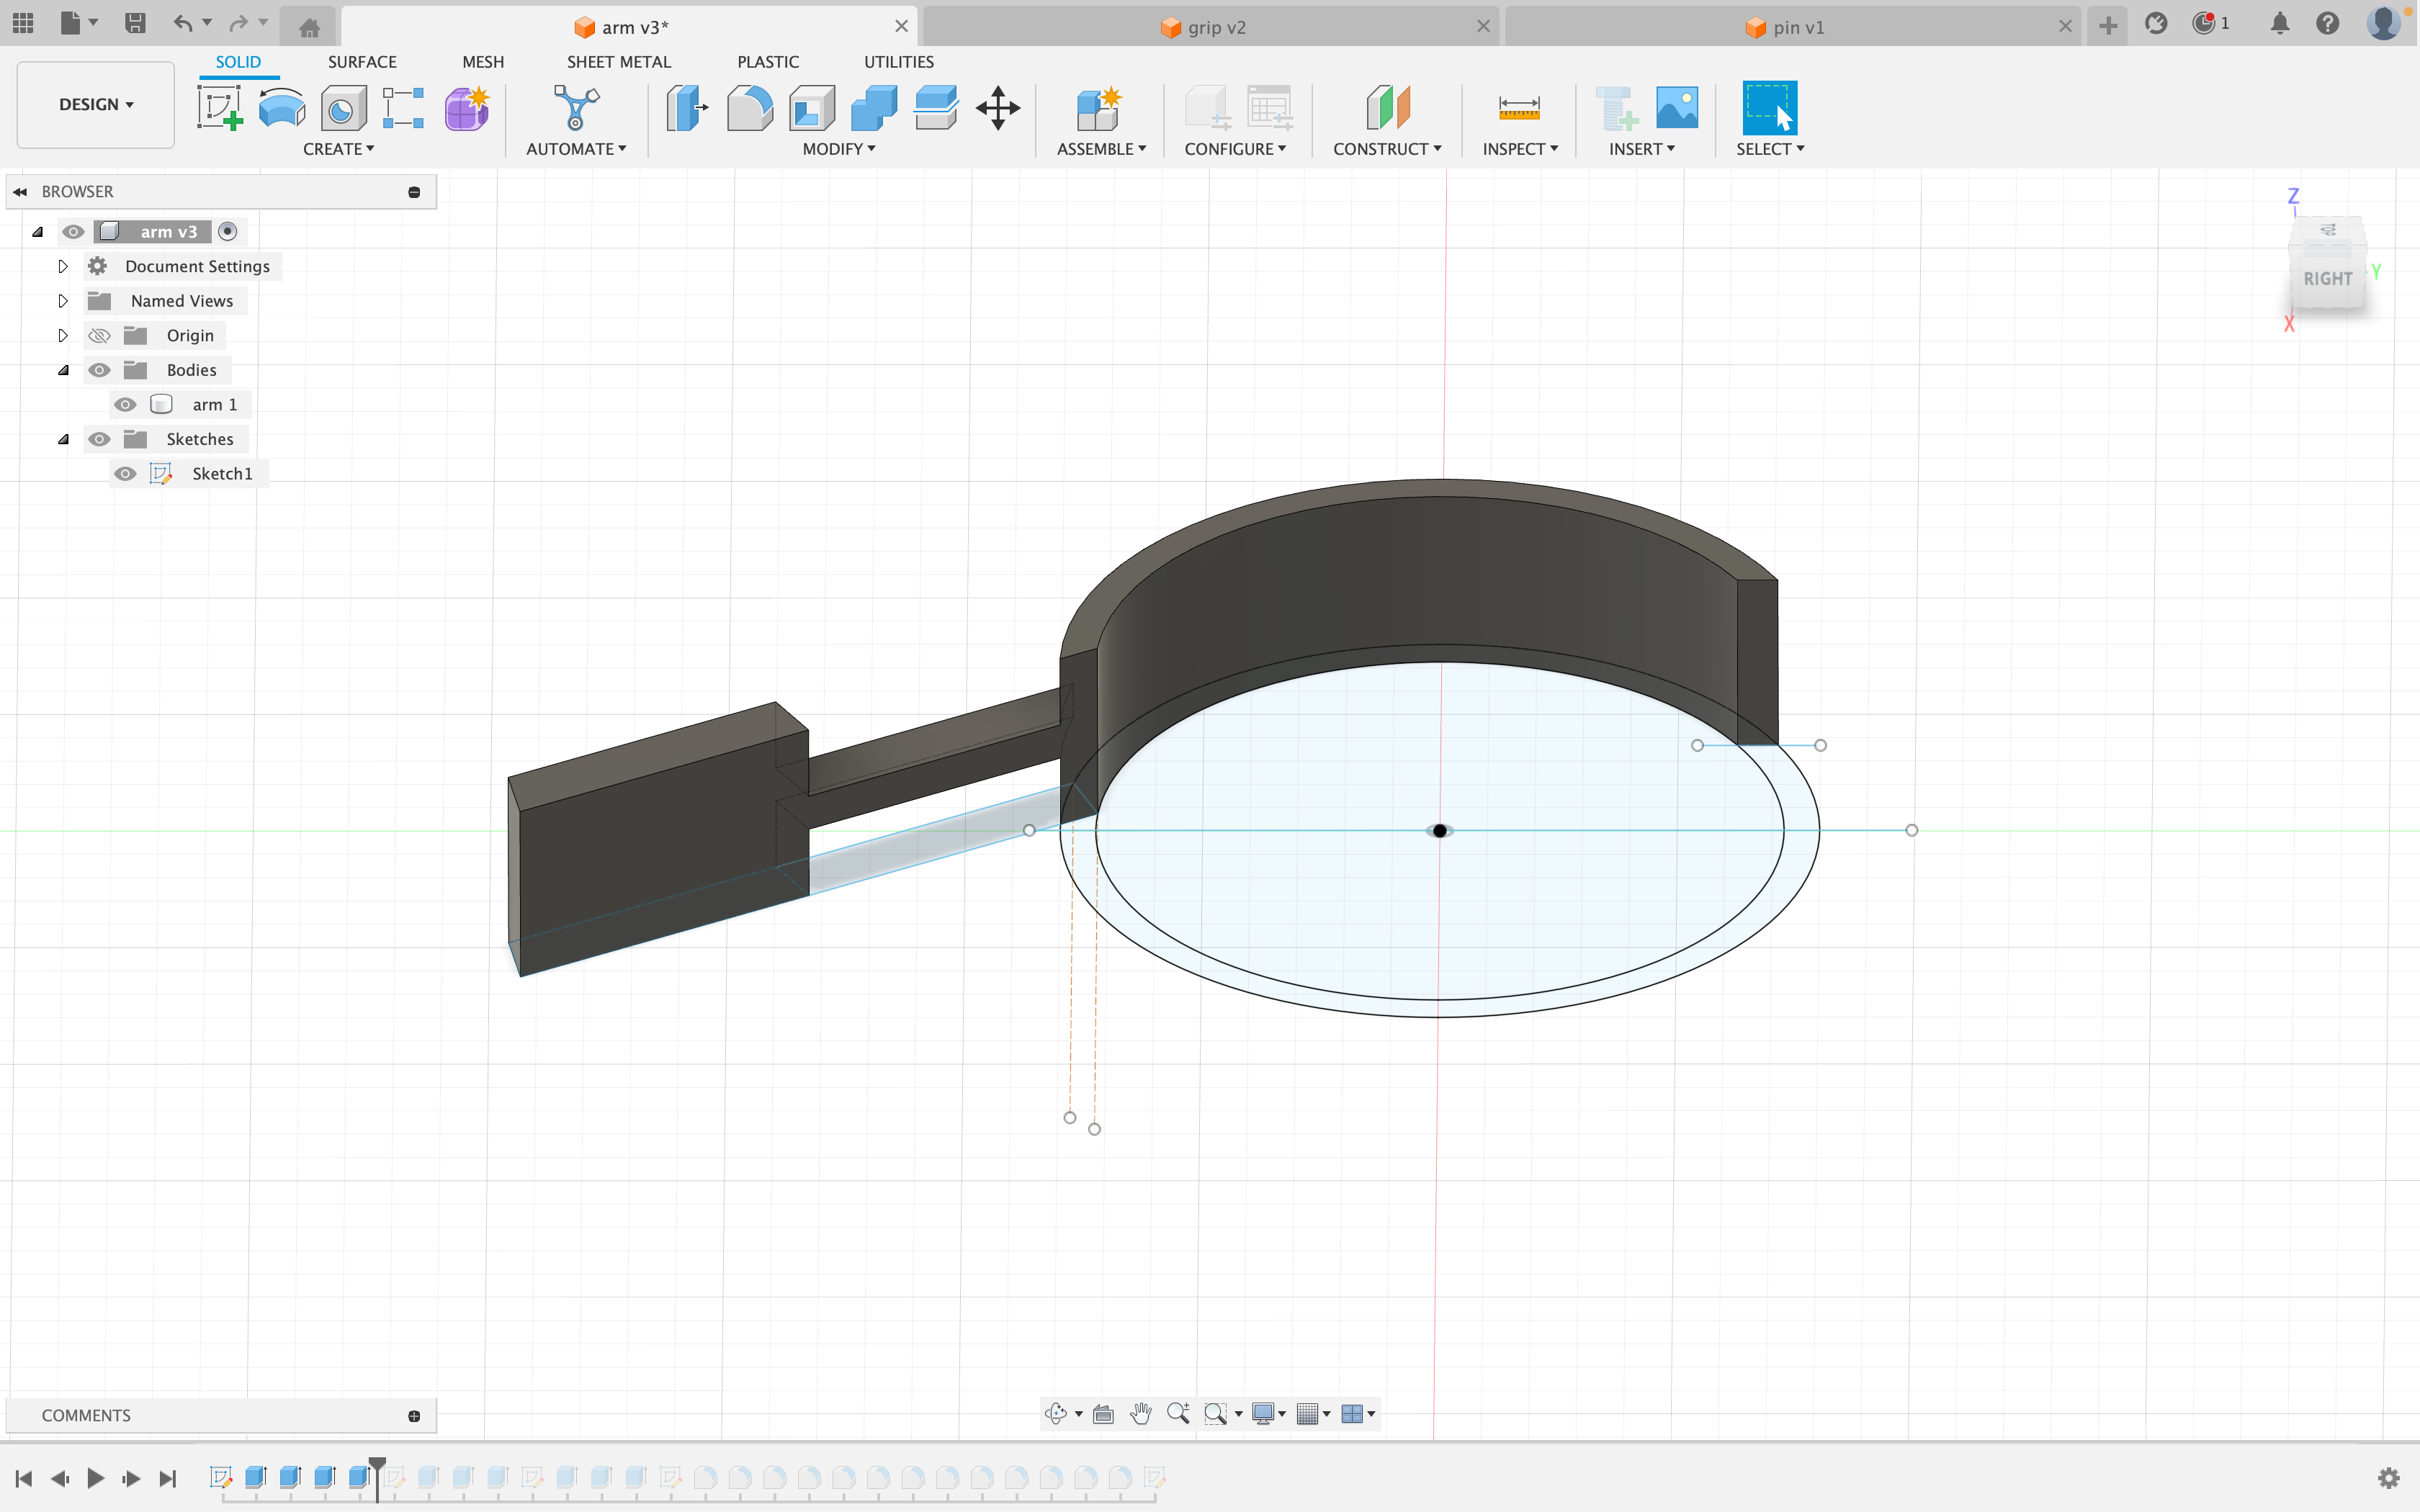
Now we need to cut the first part of the handle. You can do this by extruding into it by 5mm like shown in the picture. Next, we will extrude the second part up 20mm.
Extrusion Part 4/ New Sketch
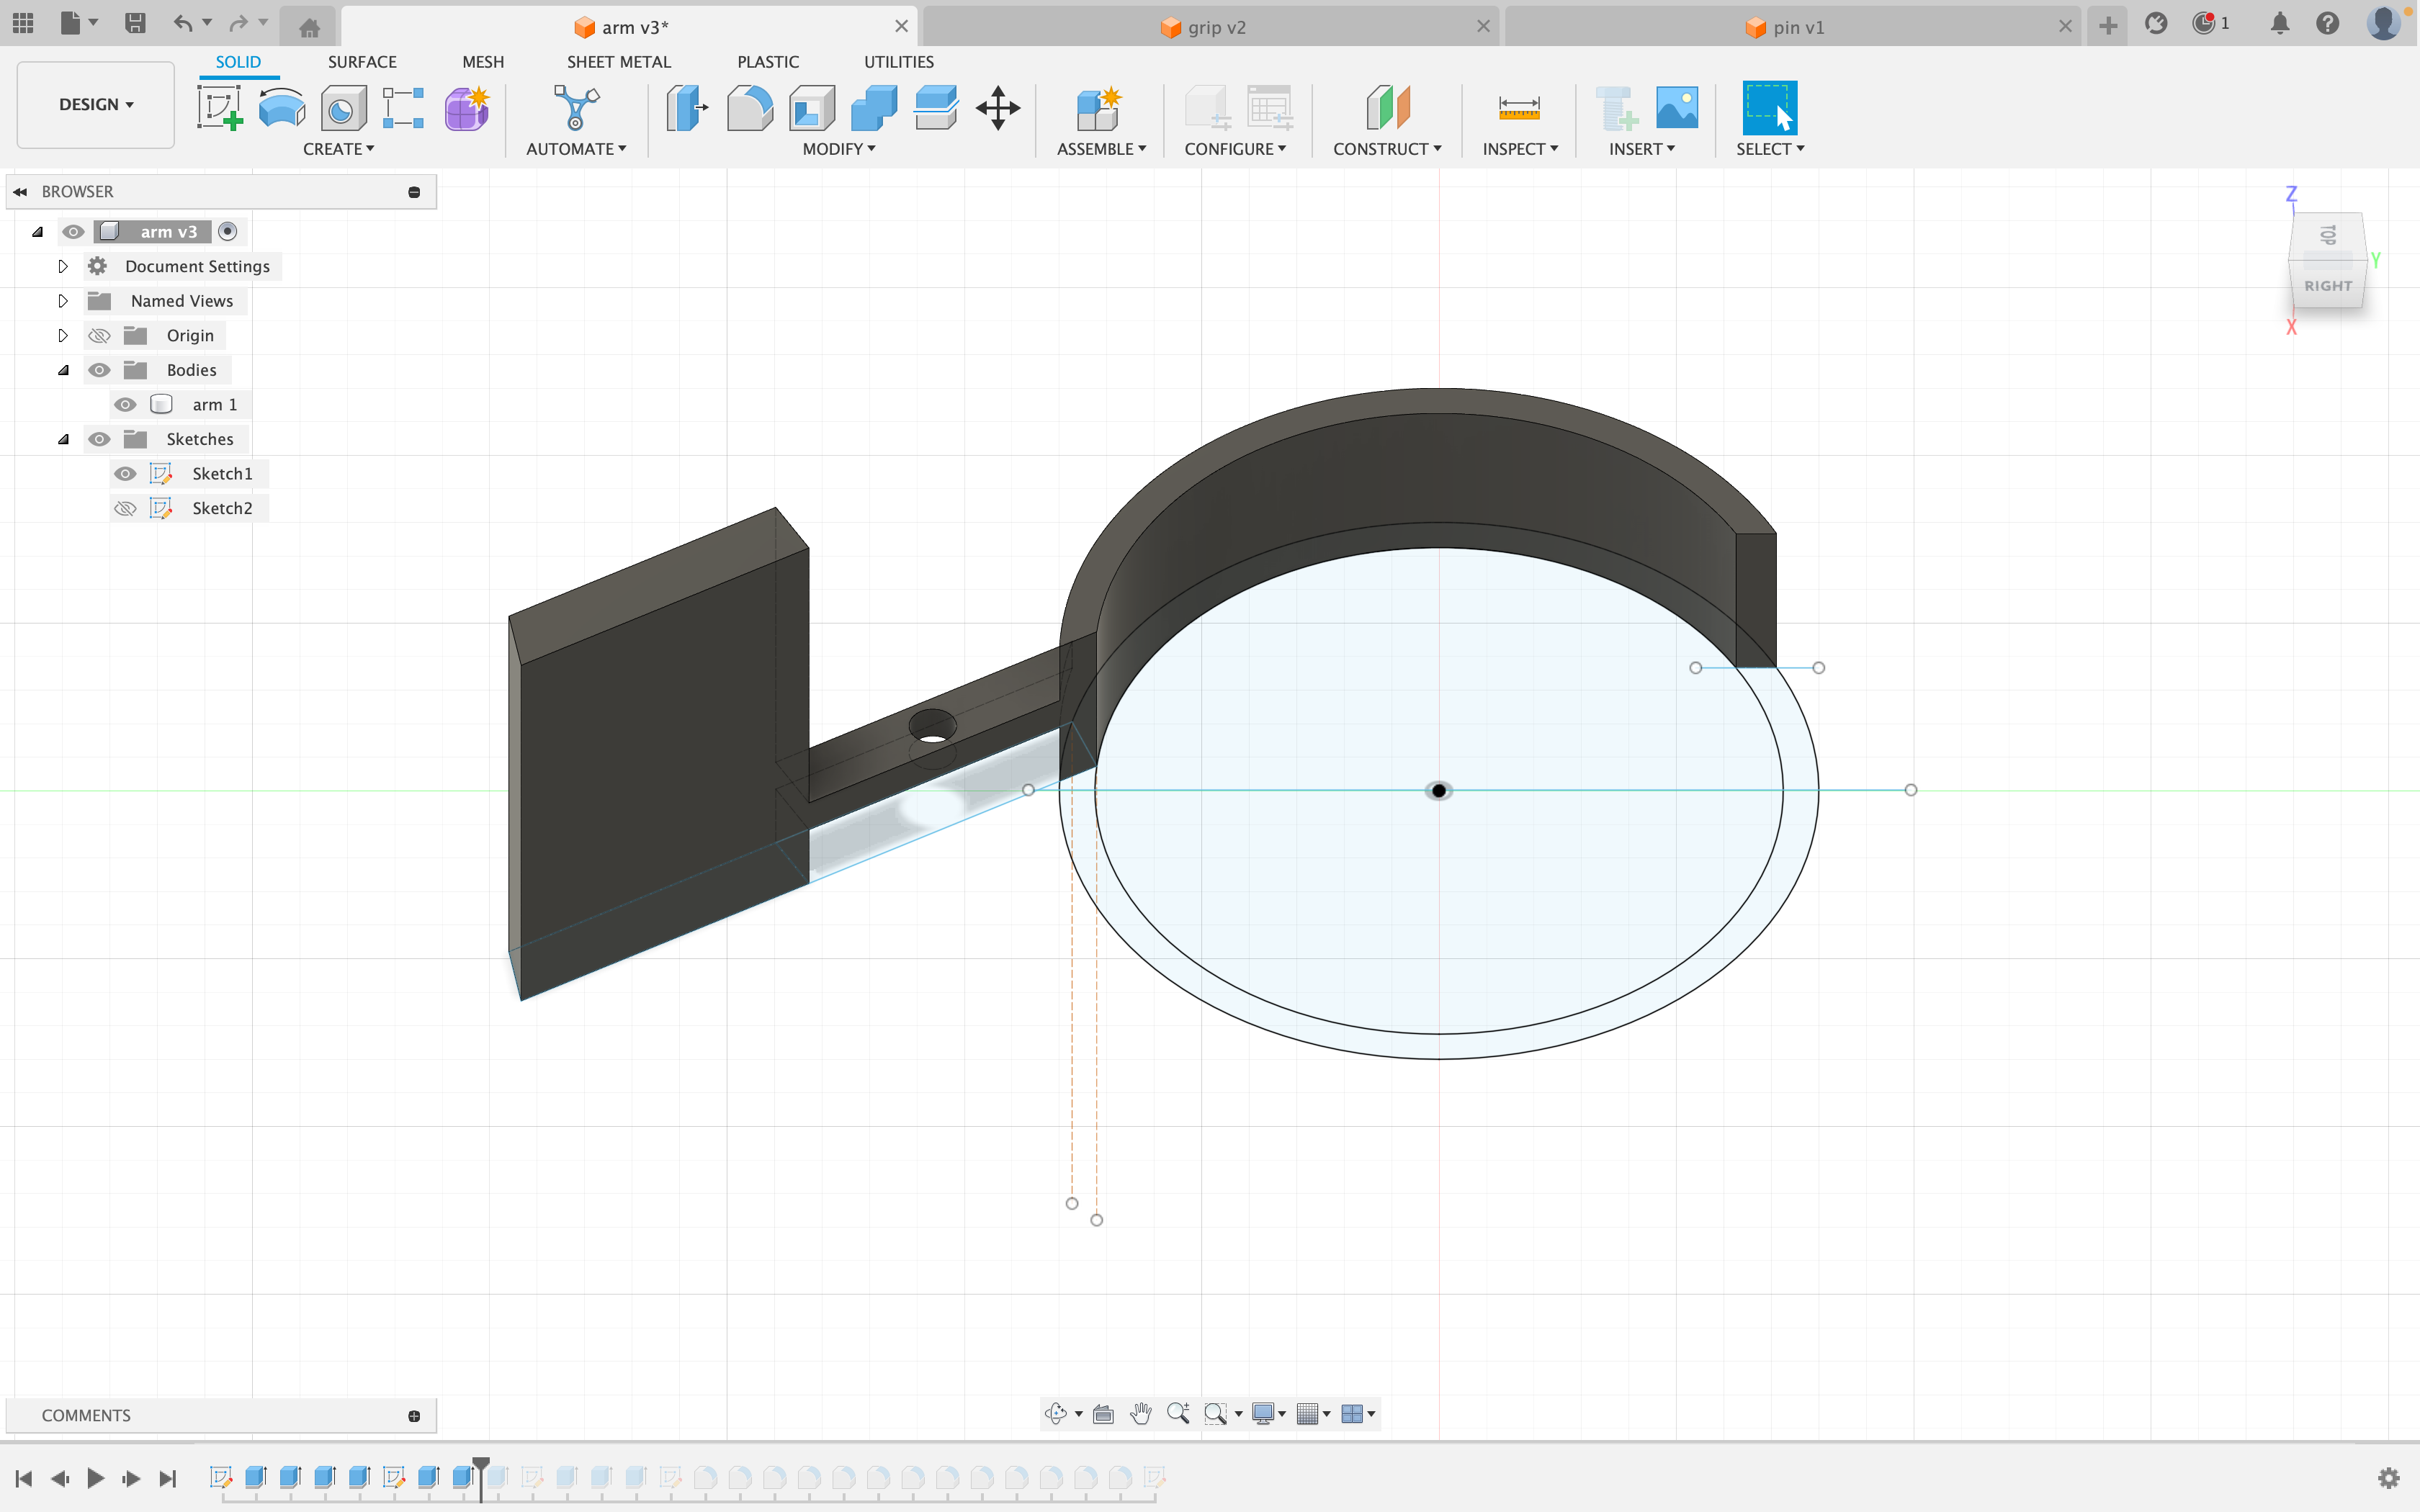
Now create a sketch on the thin part of the handle. Create a centered 5mm circle and then click finish sketch. Now extrude that circle down and cut a hole in the handle. Now click on the top plain of the handle and extrude up 30mm
Extrusion Part 5
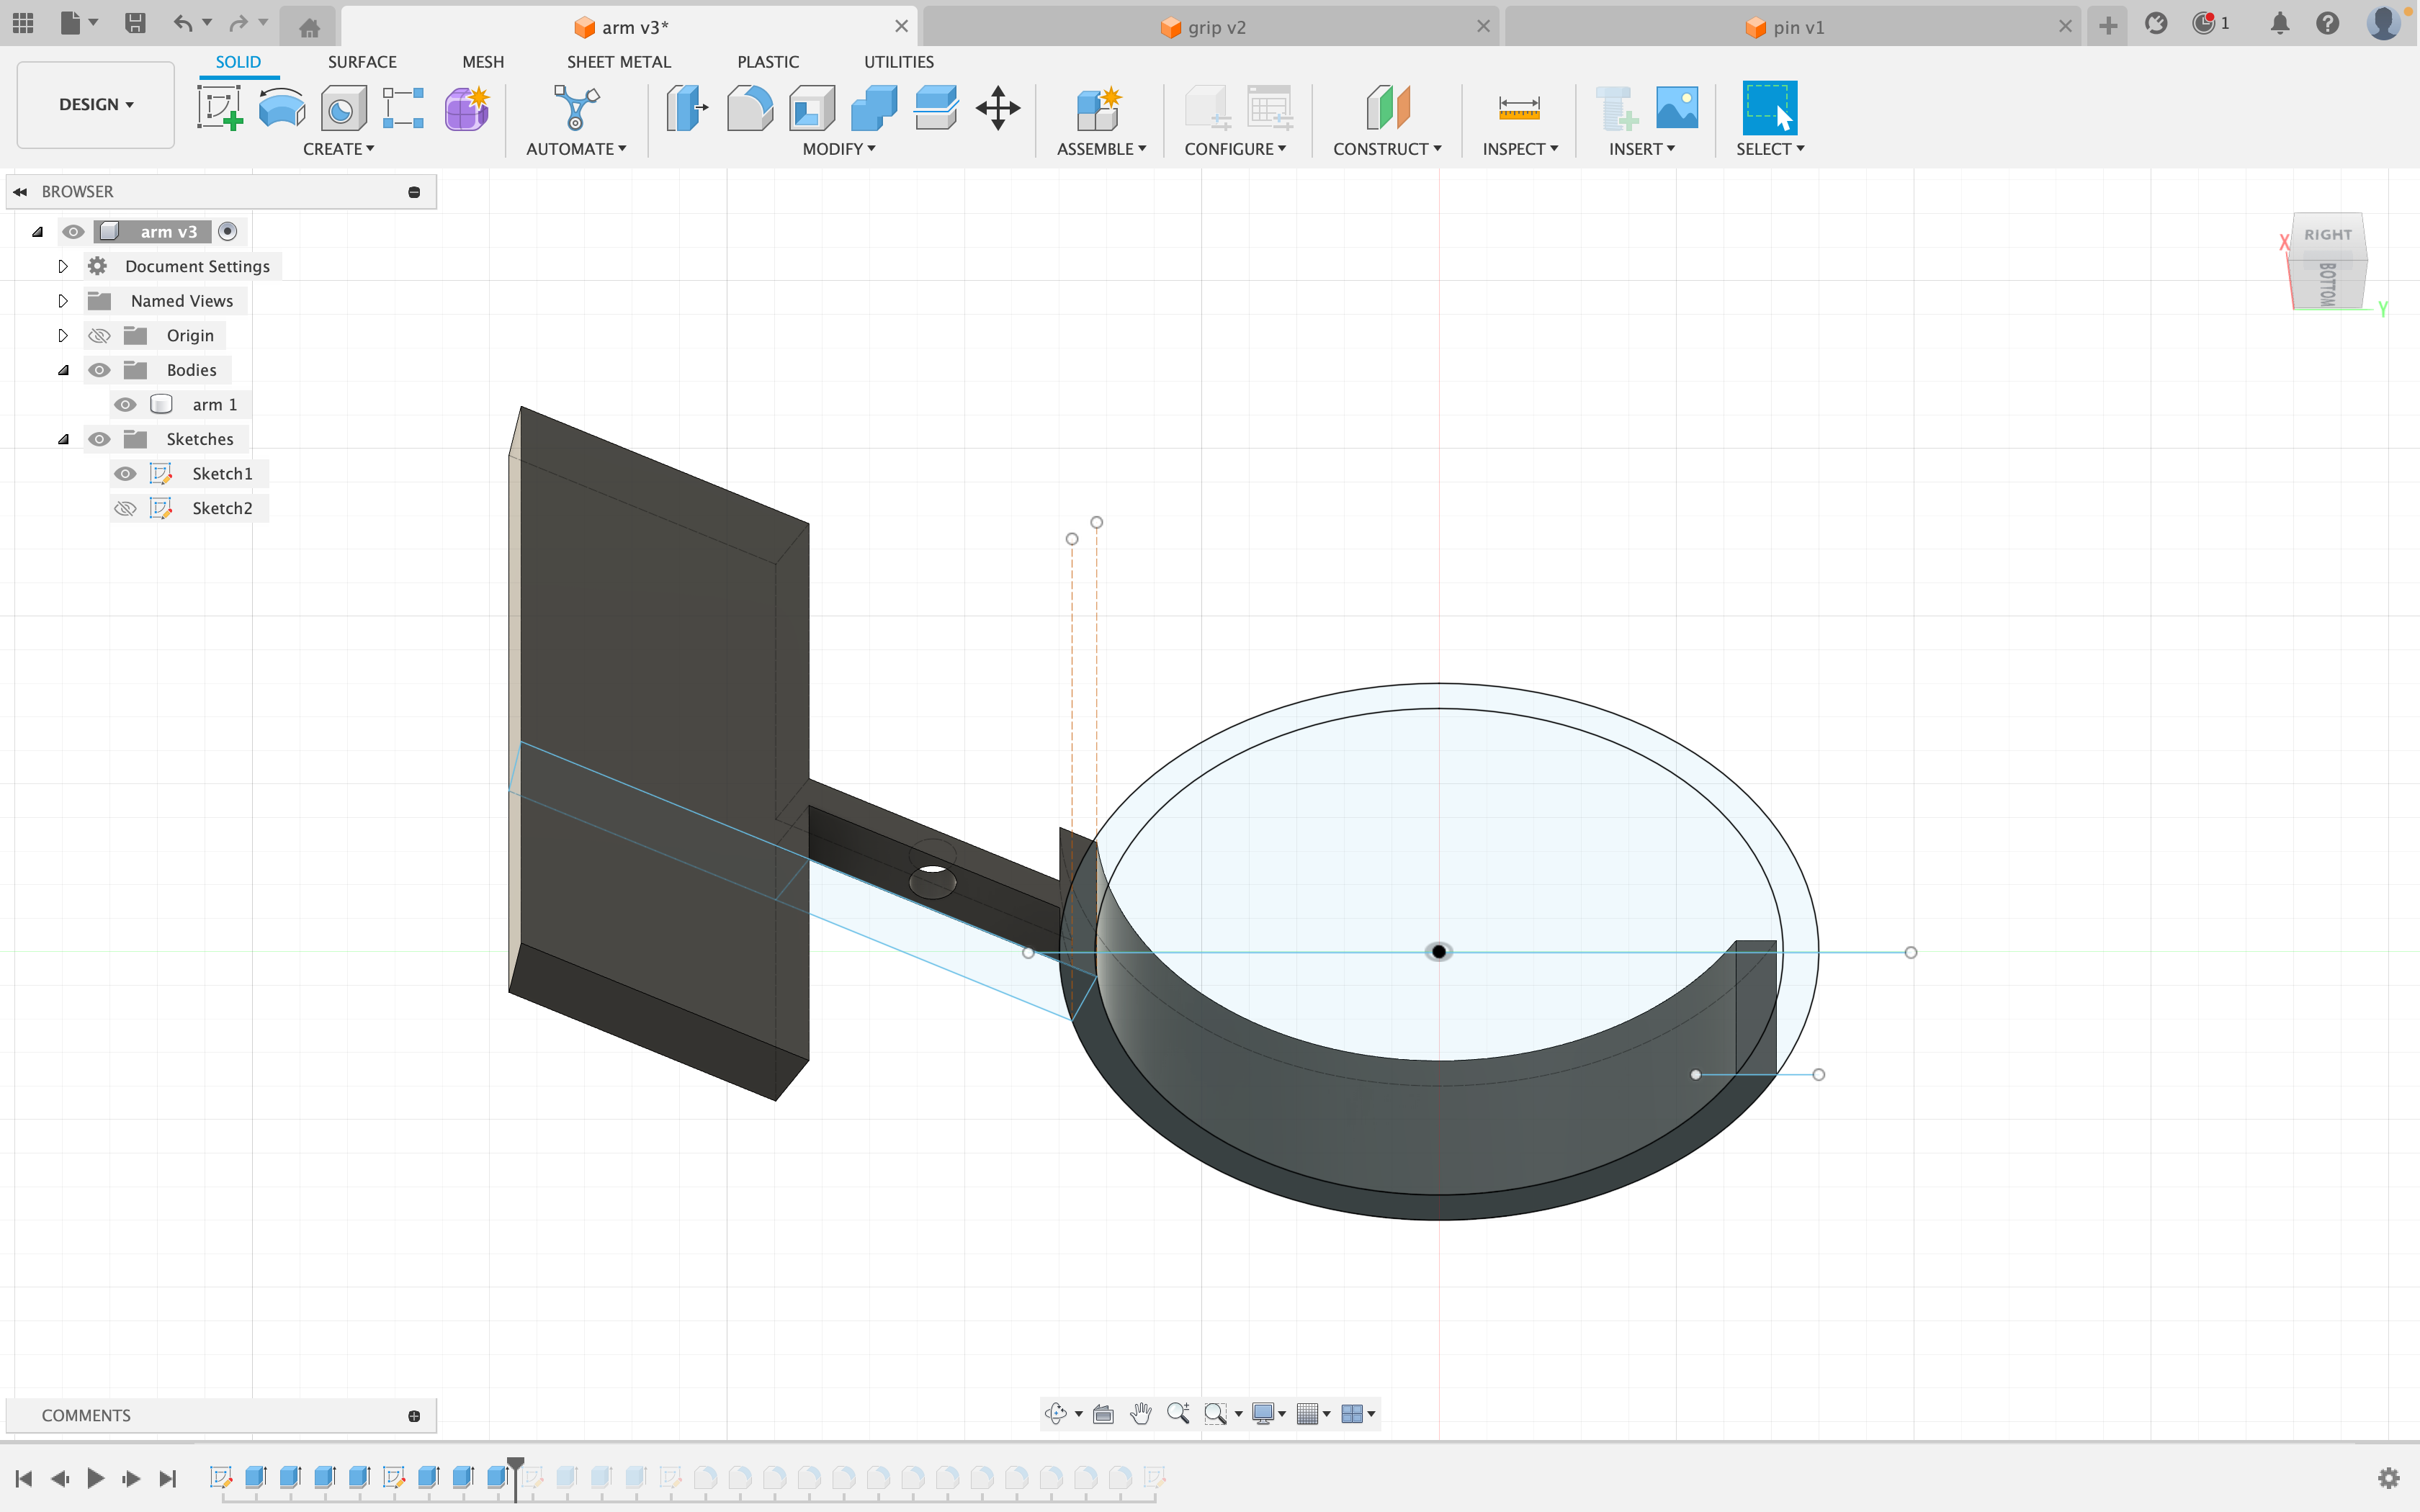
Now extrude the bottom plain of the handle by 30mm. Now you can turn off your sketches.
Handle Sketch
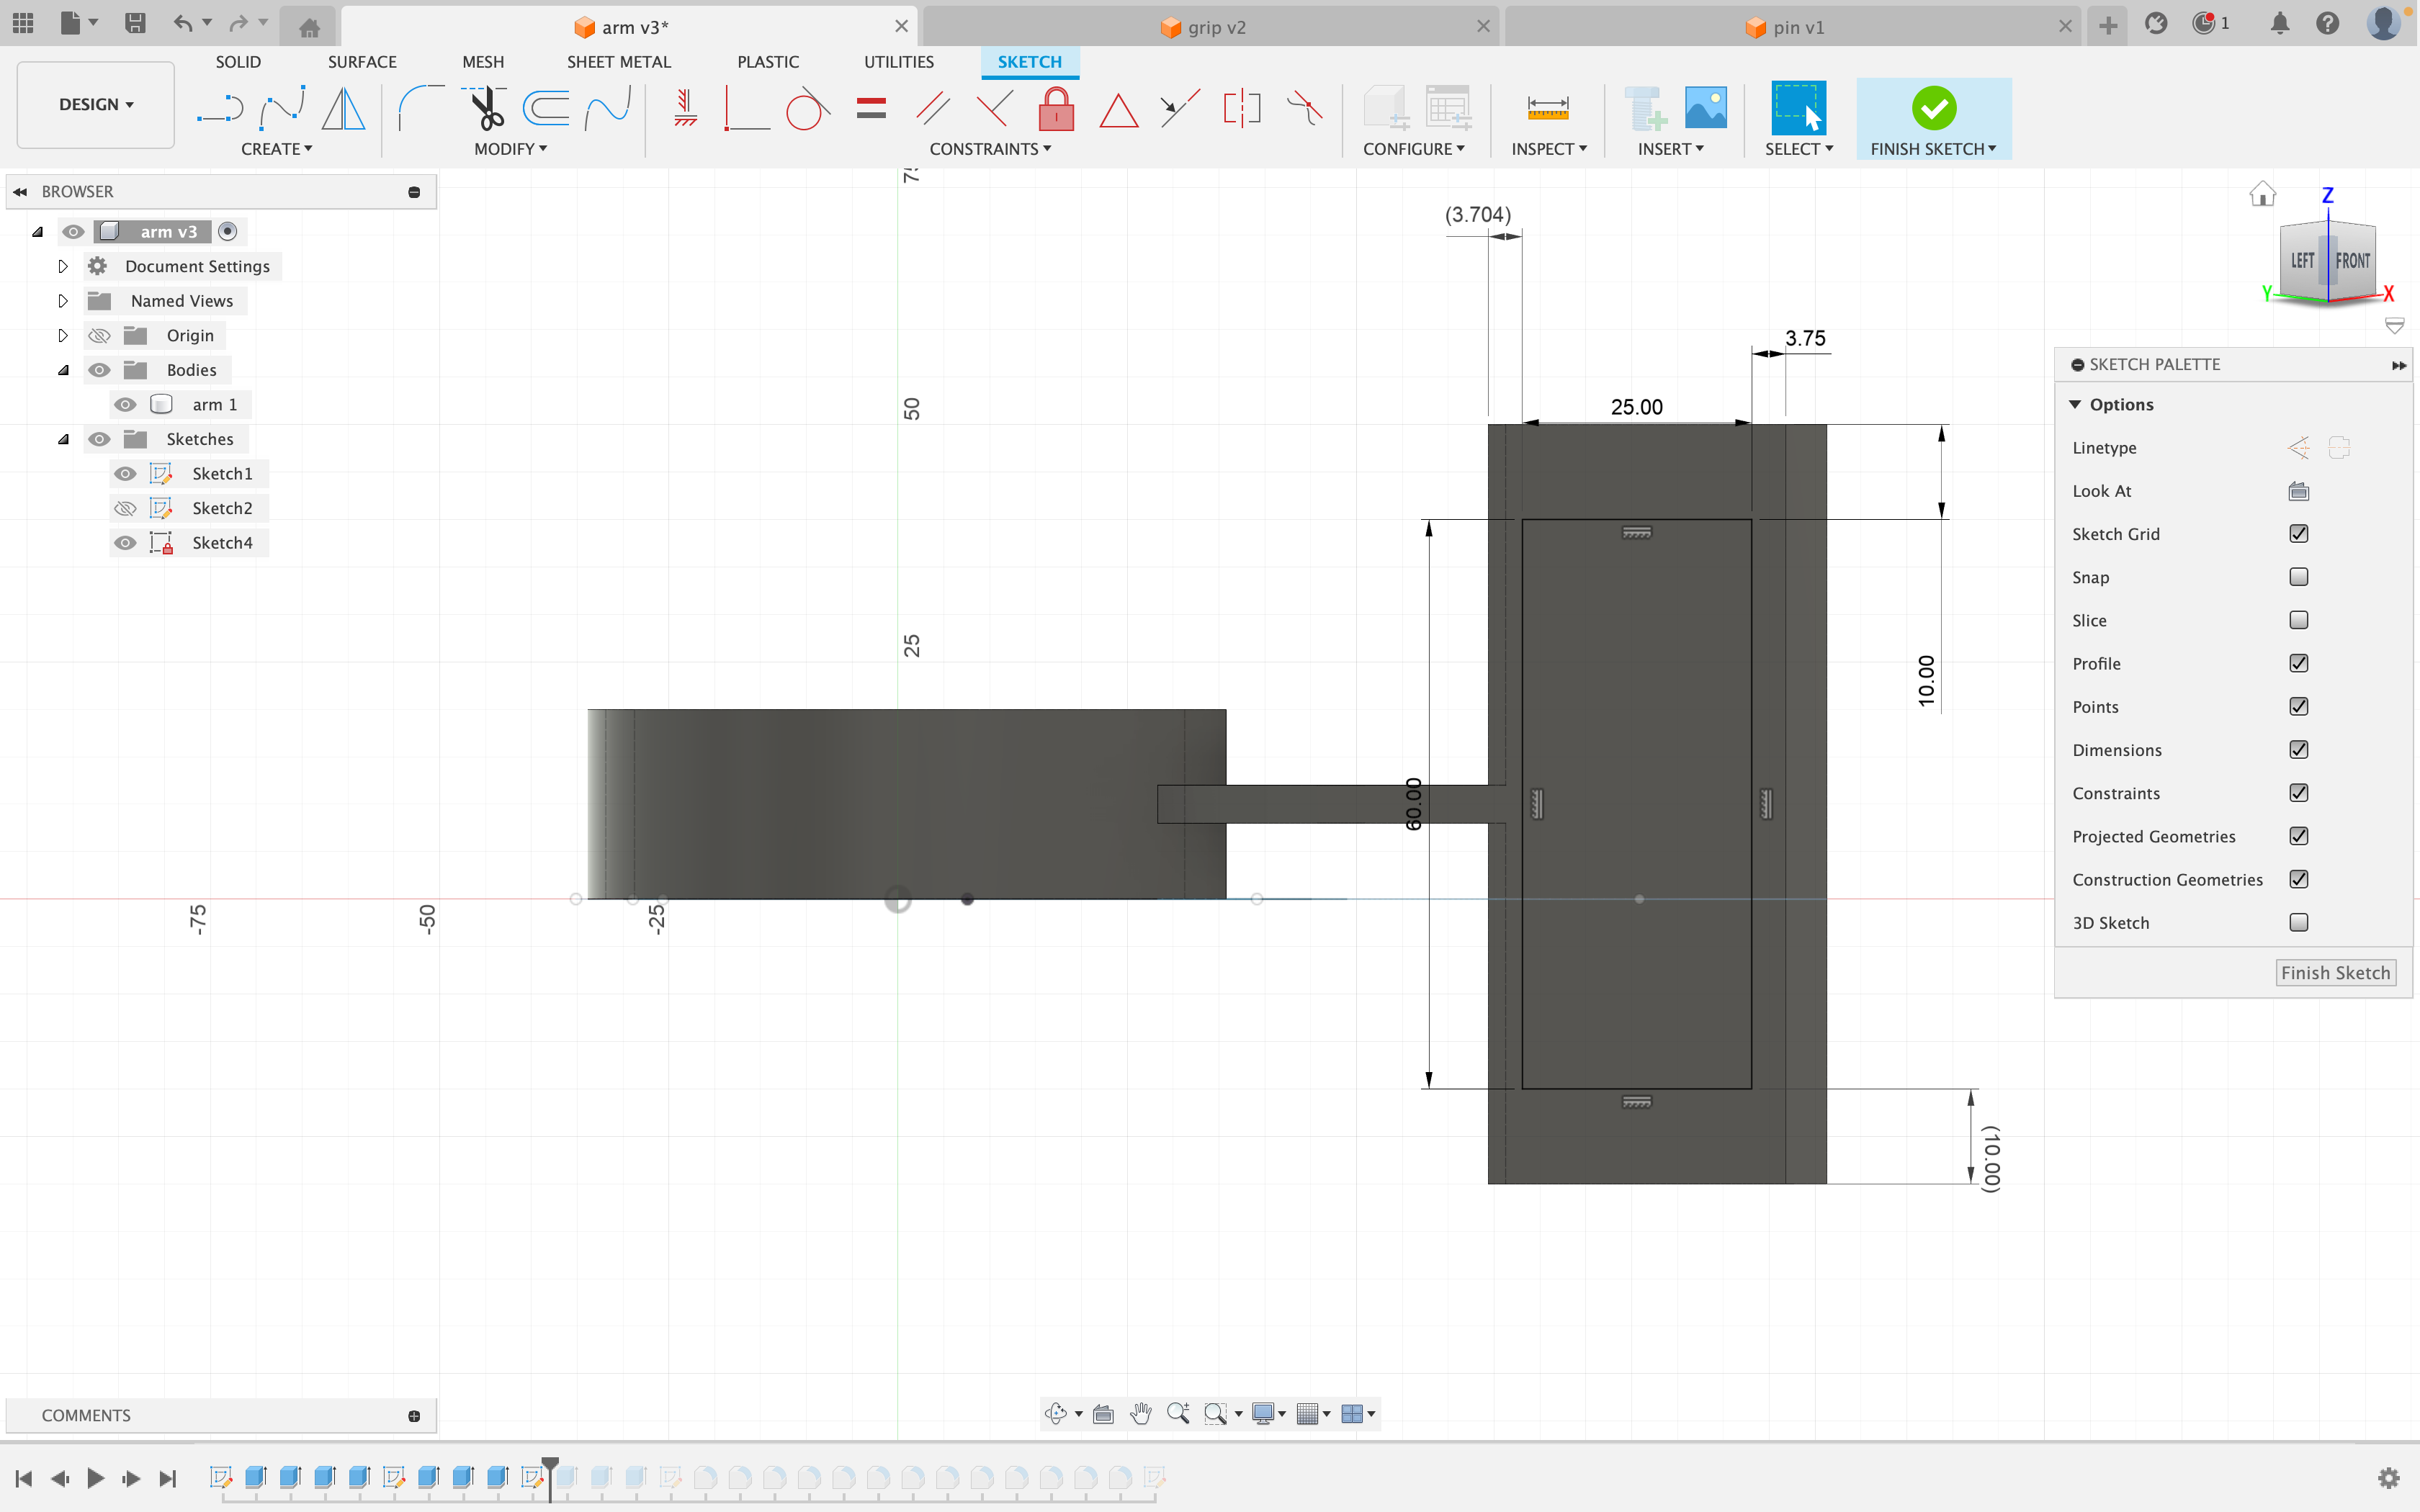
Create a sketch on the handle and create a centered rectangle that's dimensions are 25mm by 60mm.
Extrusion
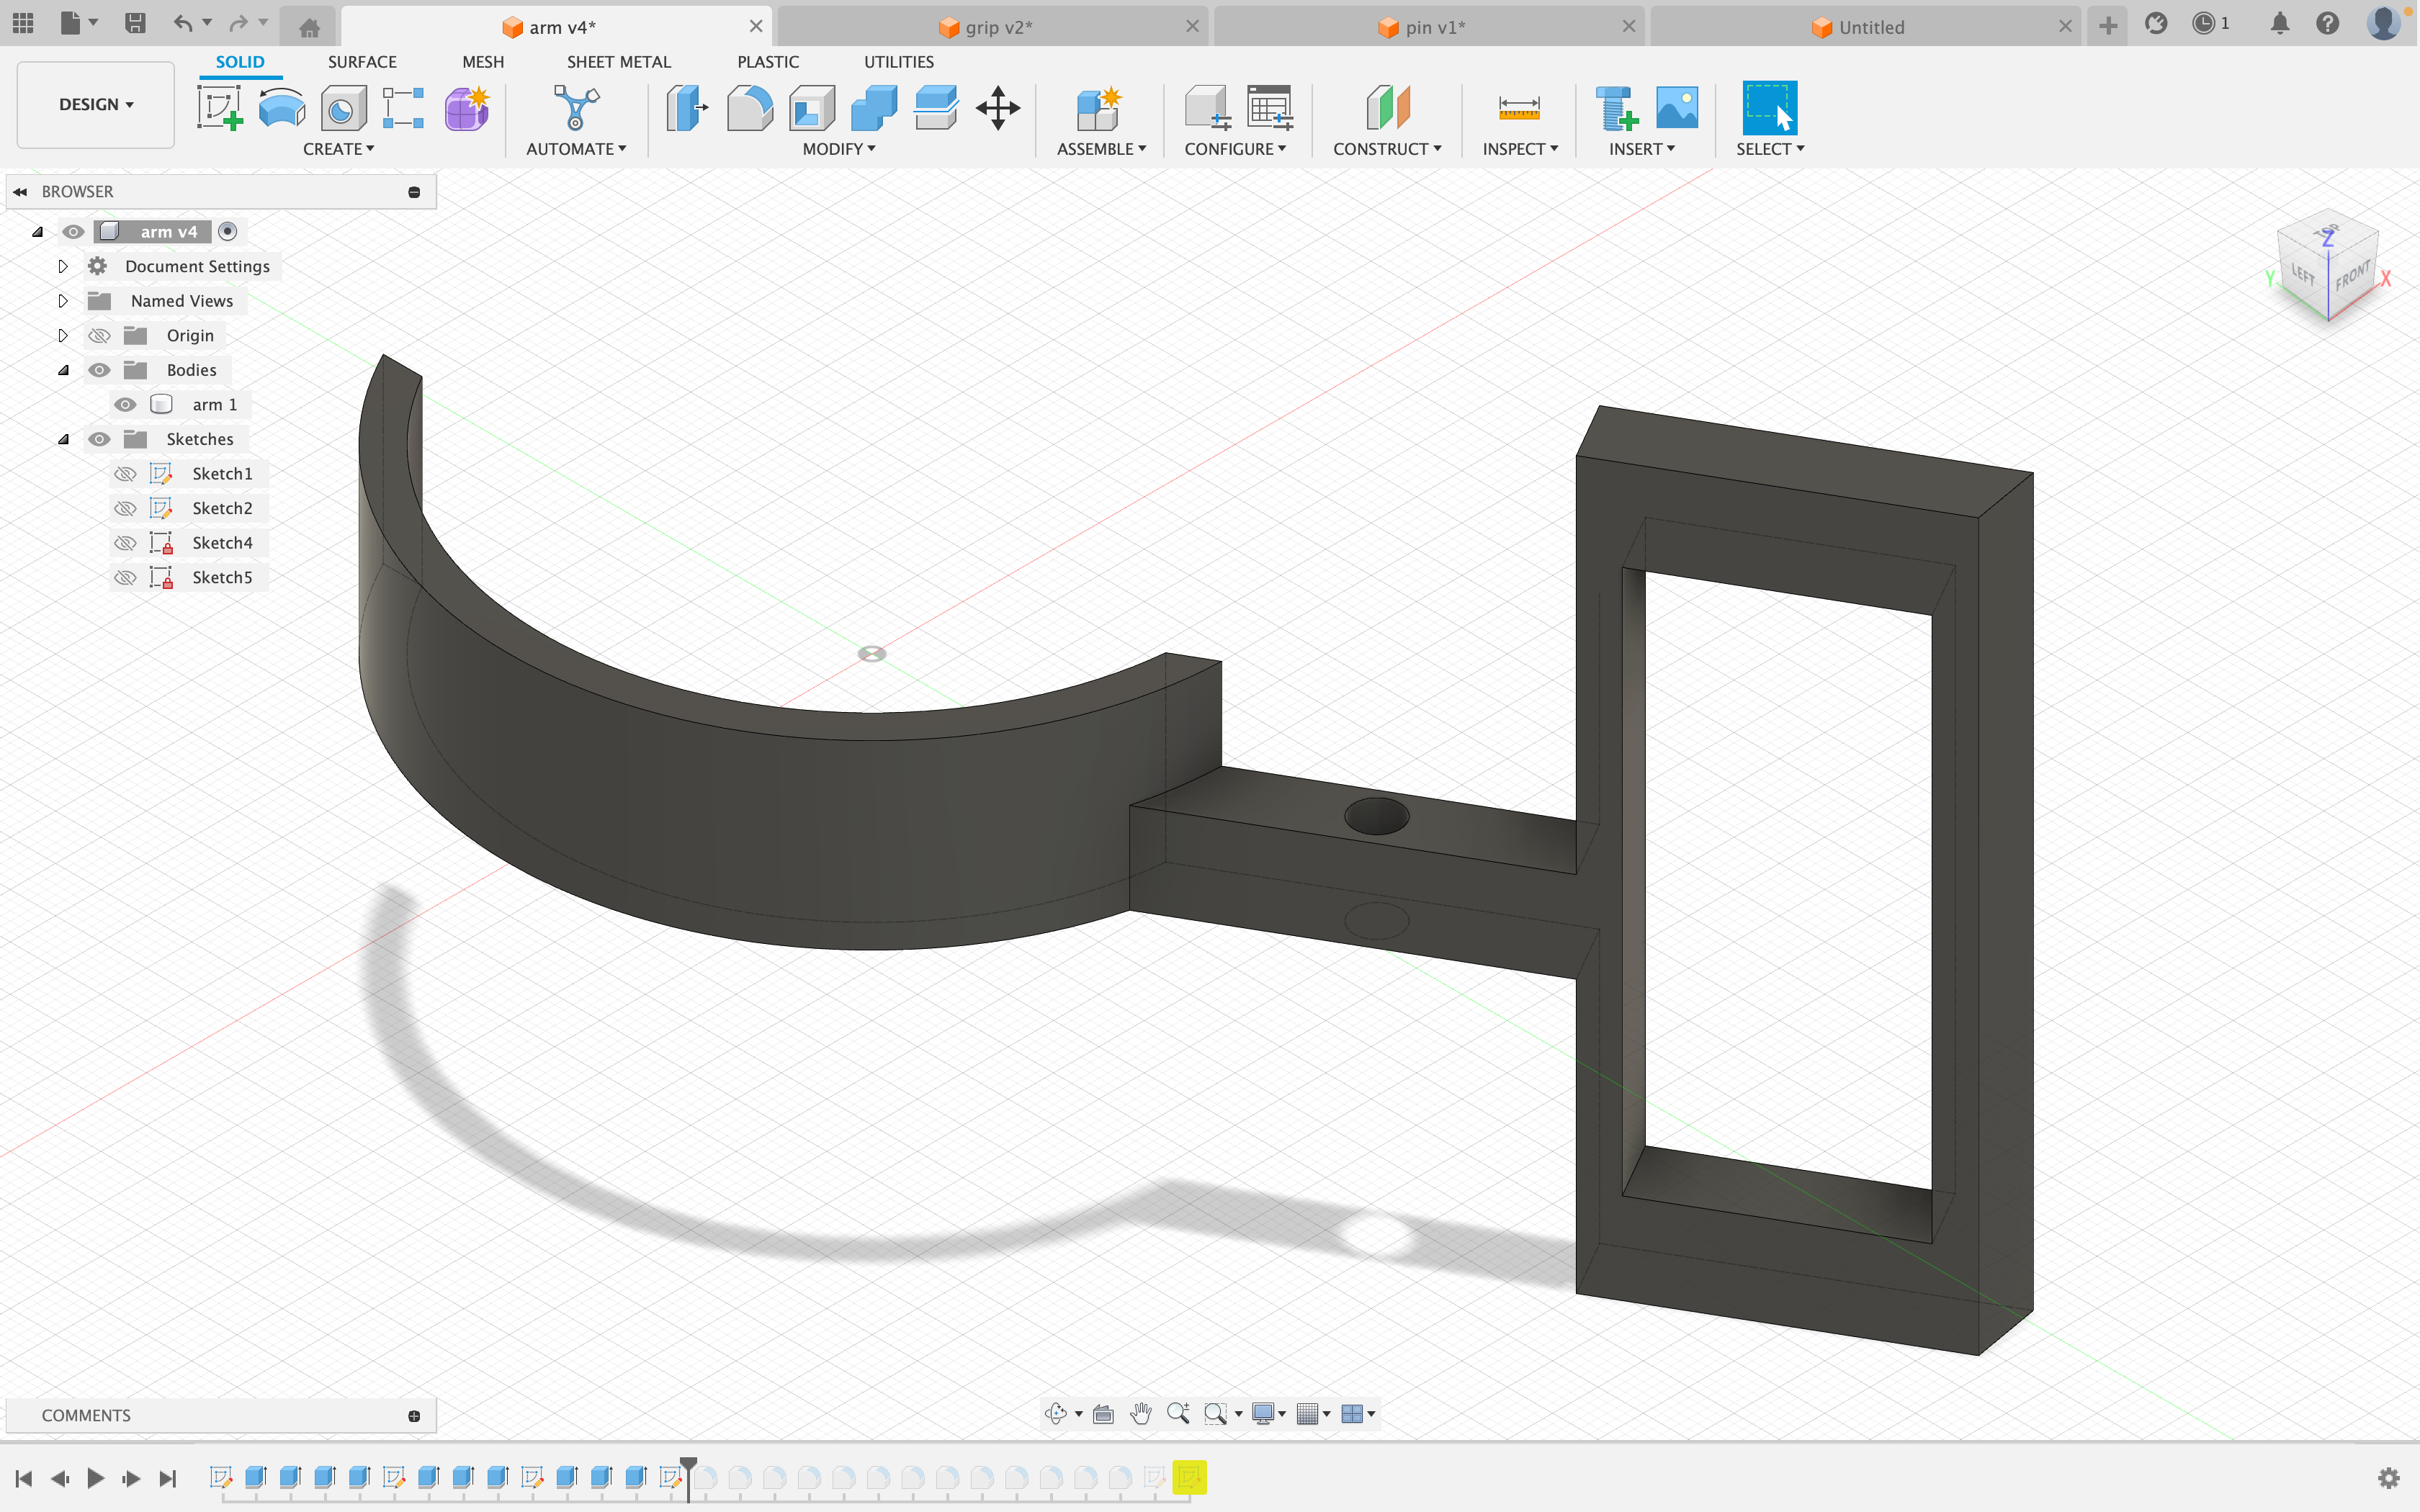
Now extrude the rectangle so it cuts through the handle. Finally extrude the thin part down 5mm.
Filleting (optional, But Highly Recommended)
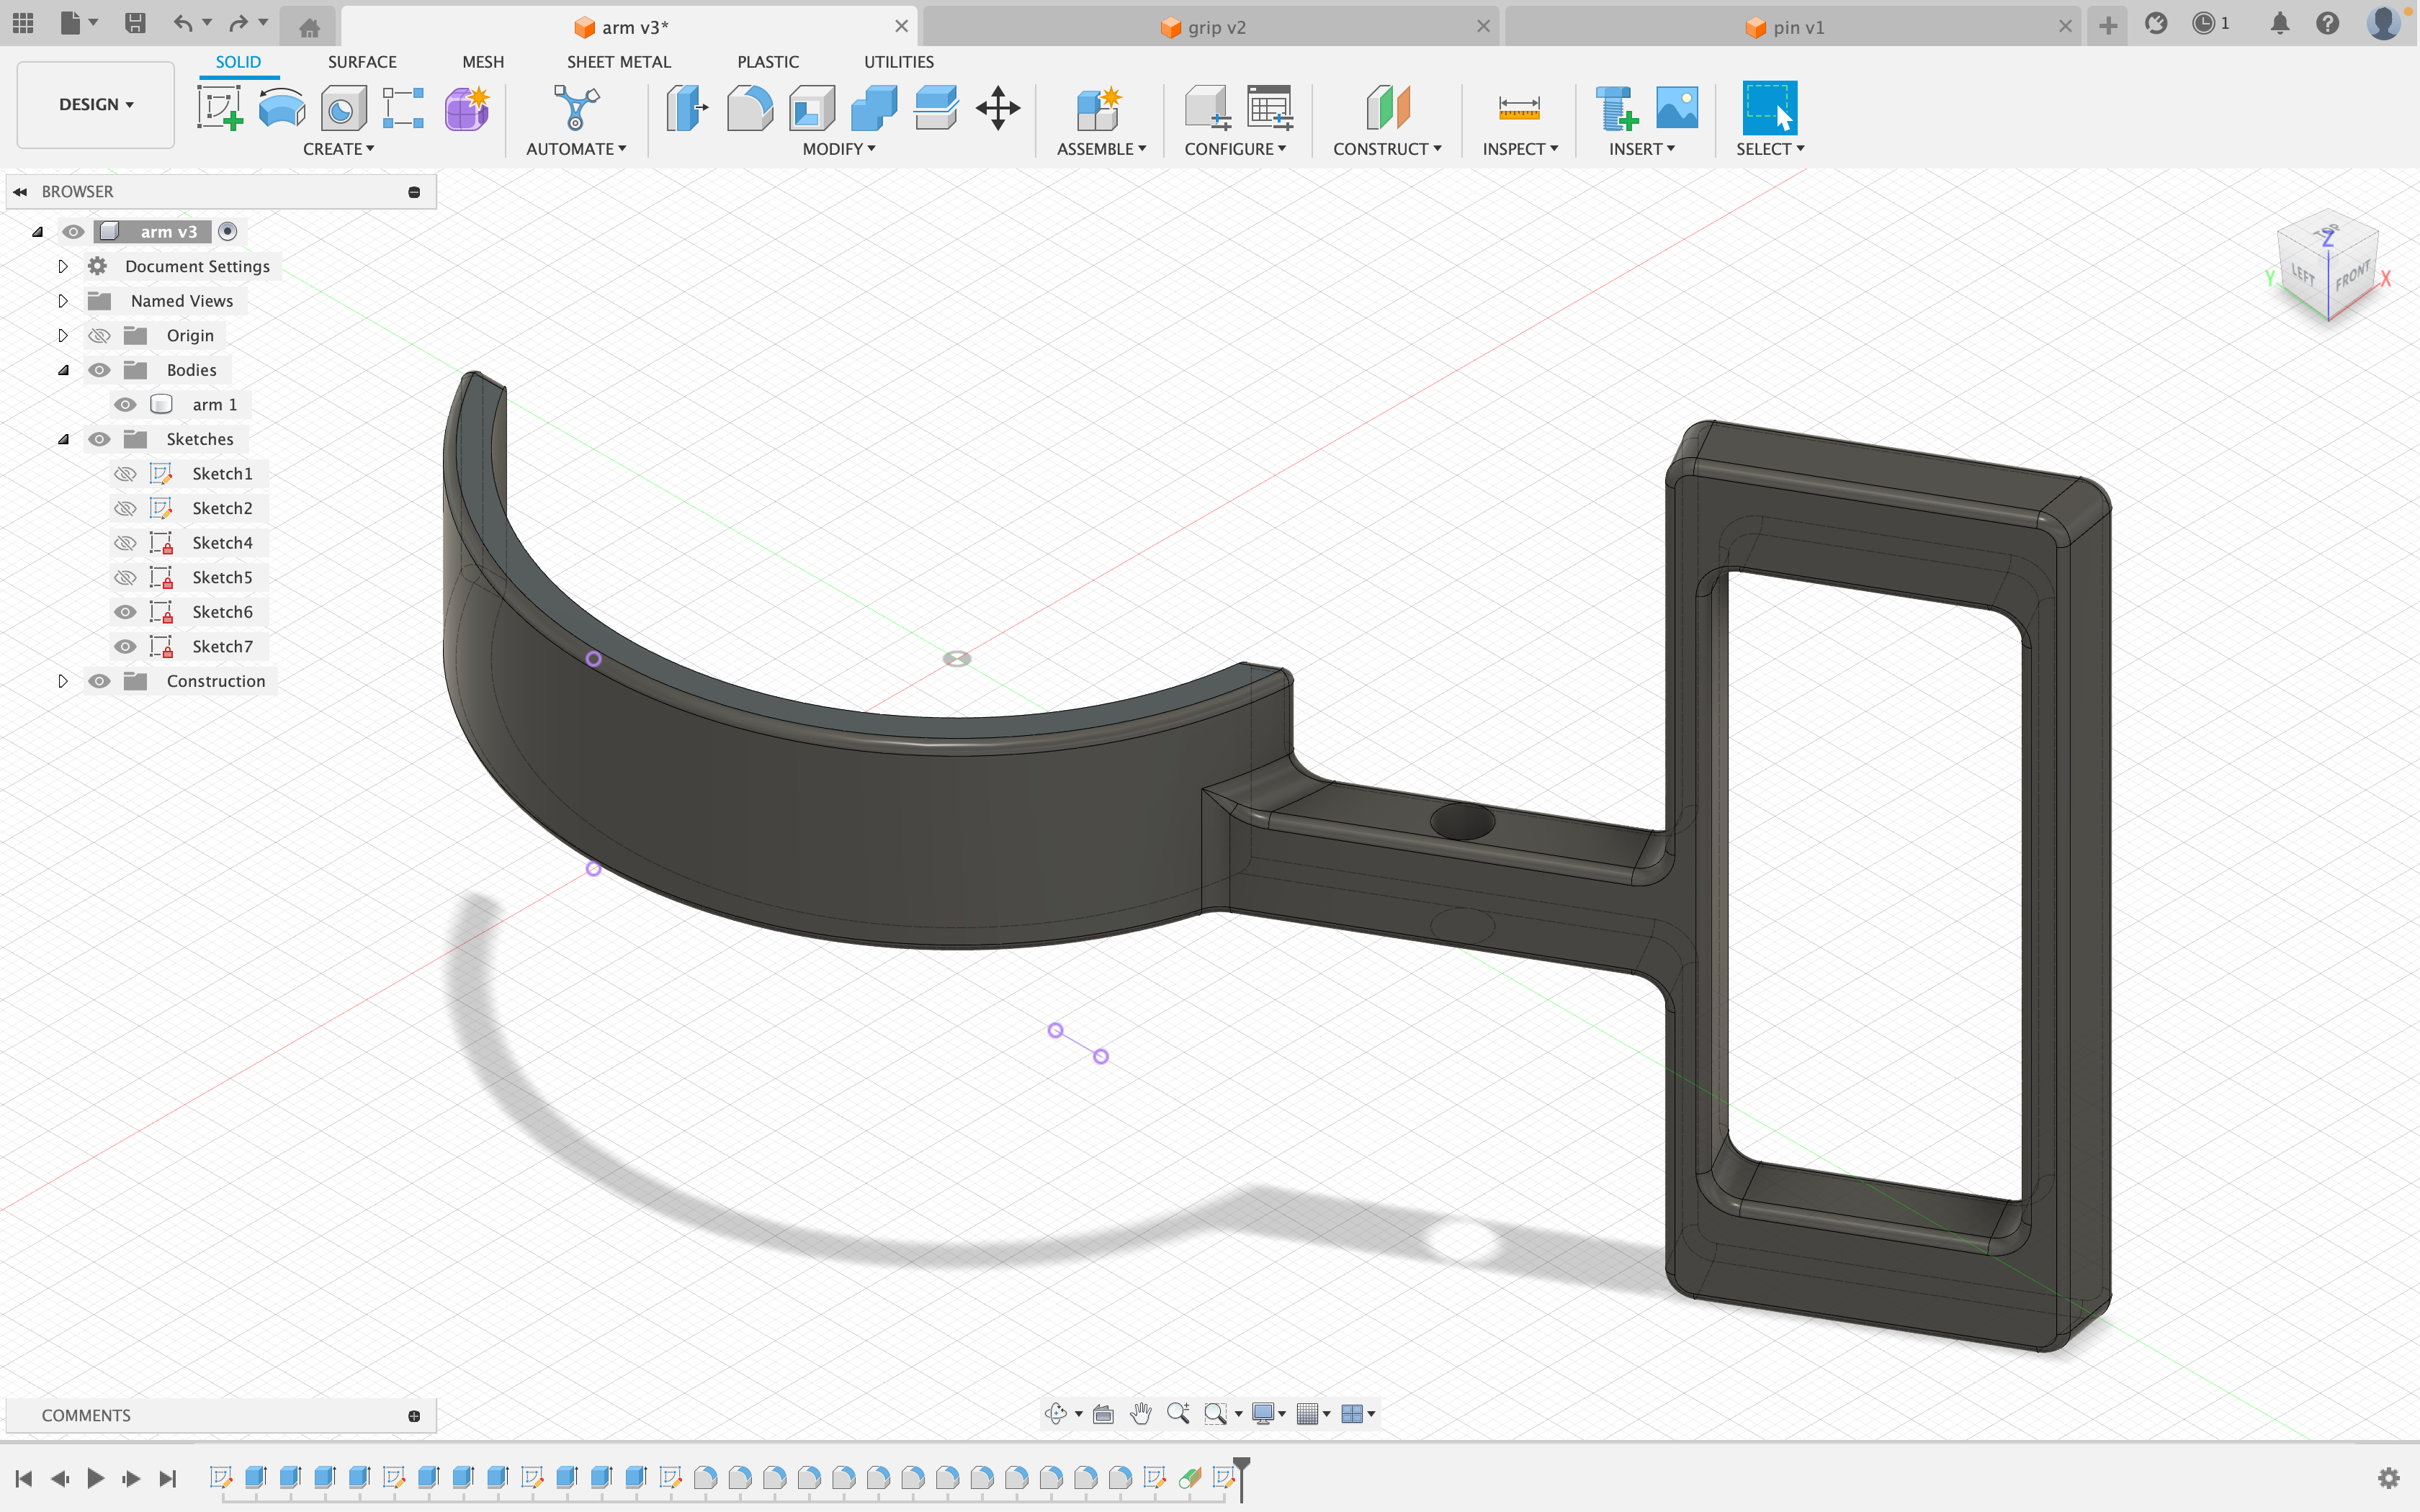
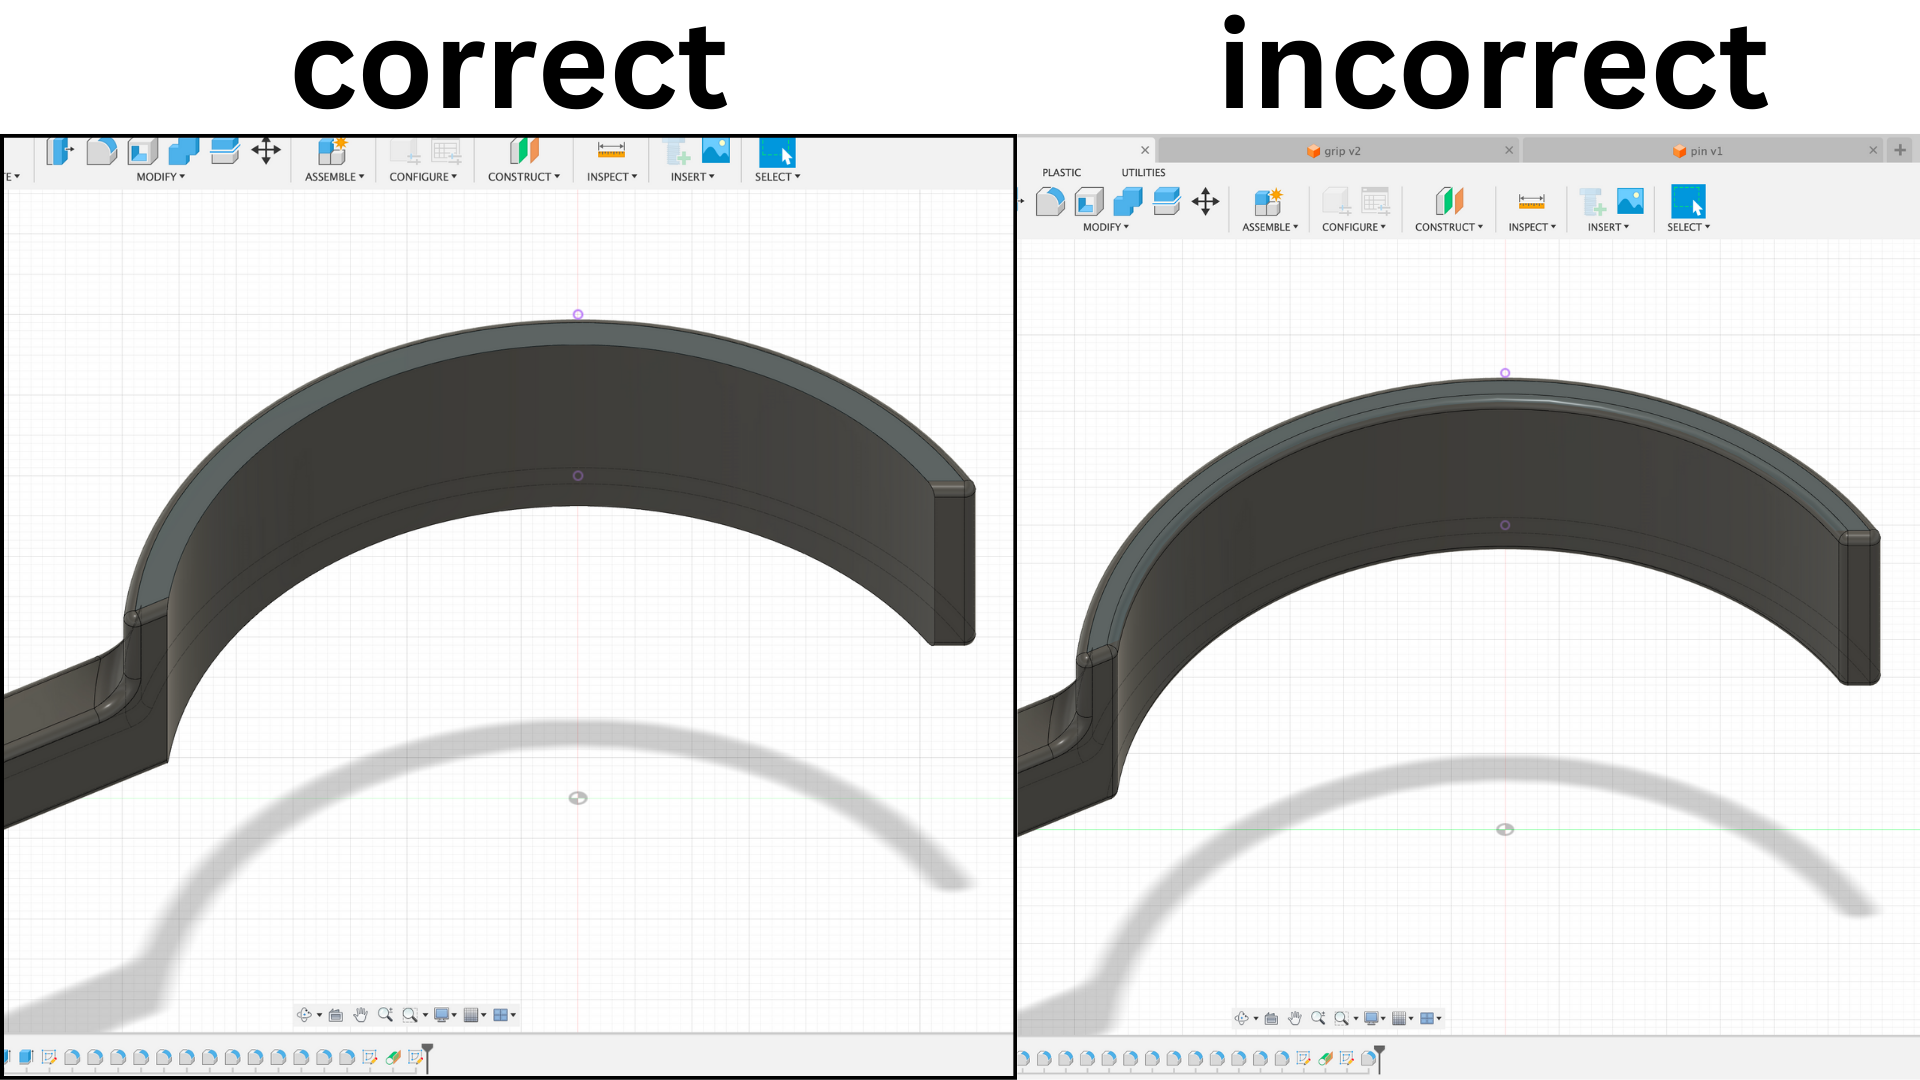
Make sure to select all edges except for the inside grip and the pin hole. Fillet them 1mm. Congratulations! You’ve finished the arm!
Sketching the Grip
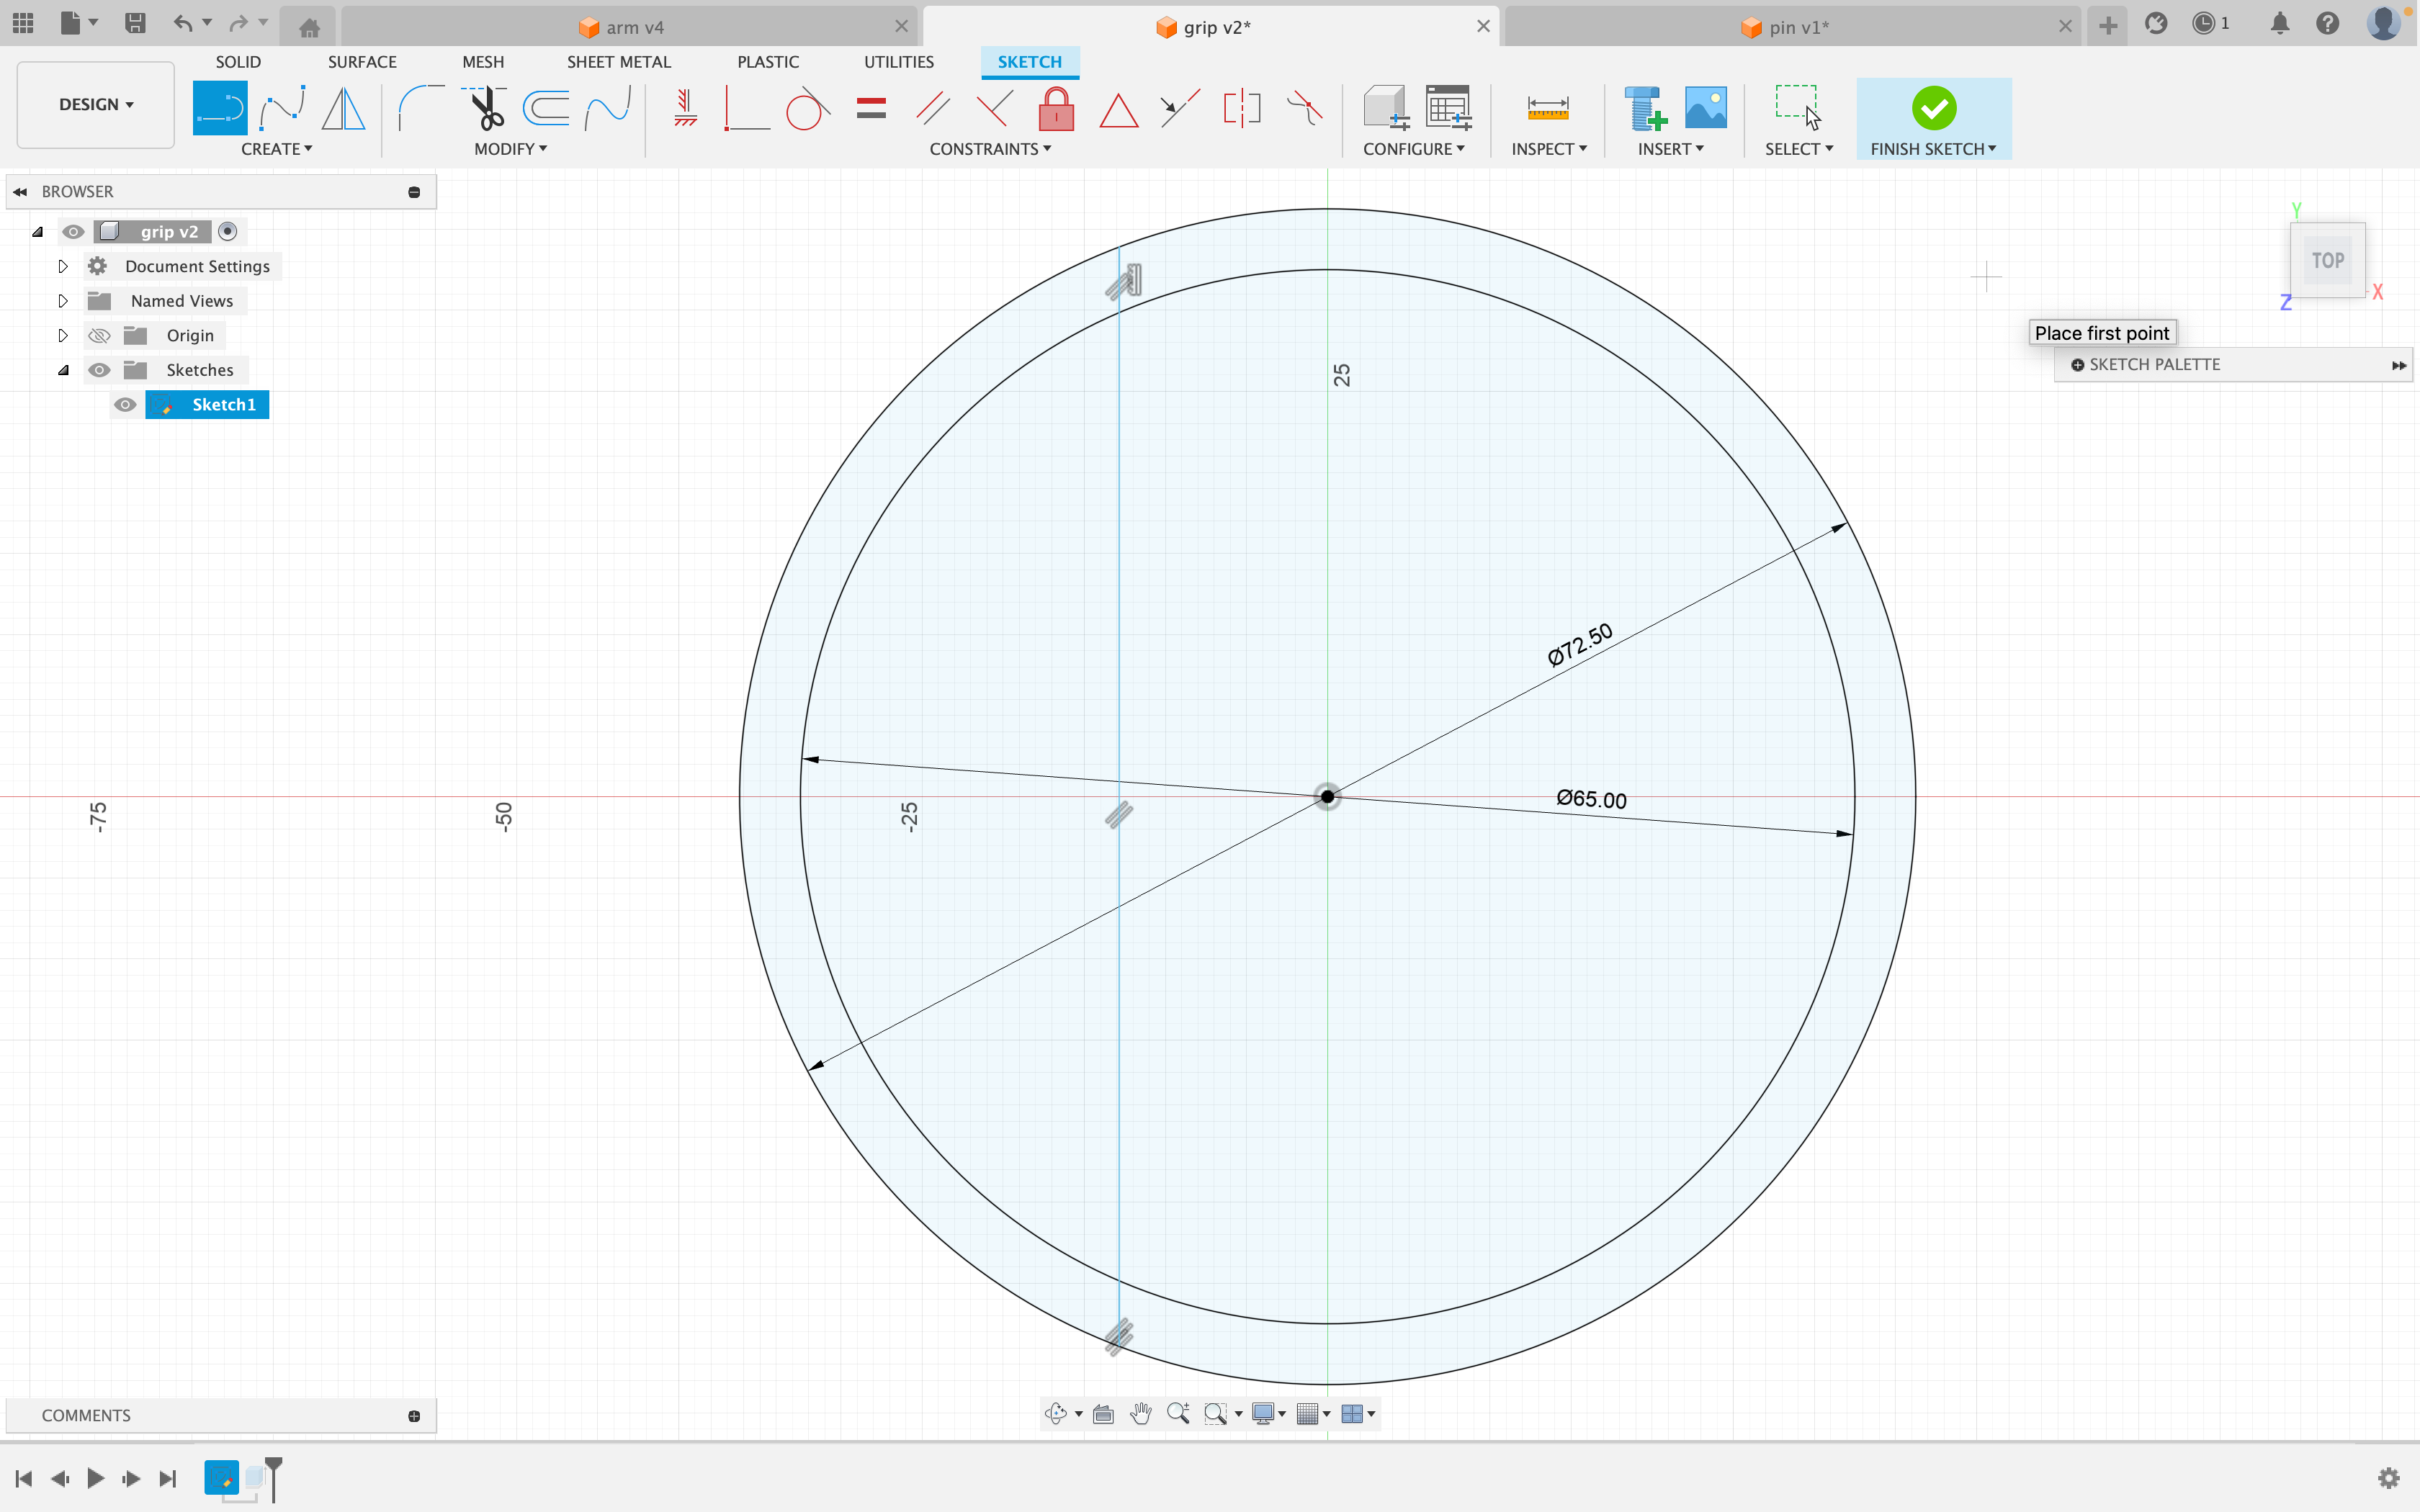
First, create a circle that is 72.5mm, and then another inside it that is 65mm. Now create a line that goes across the circle that is 12.8mm away from the center point. Use the picture as reference.
Extruding
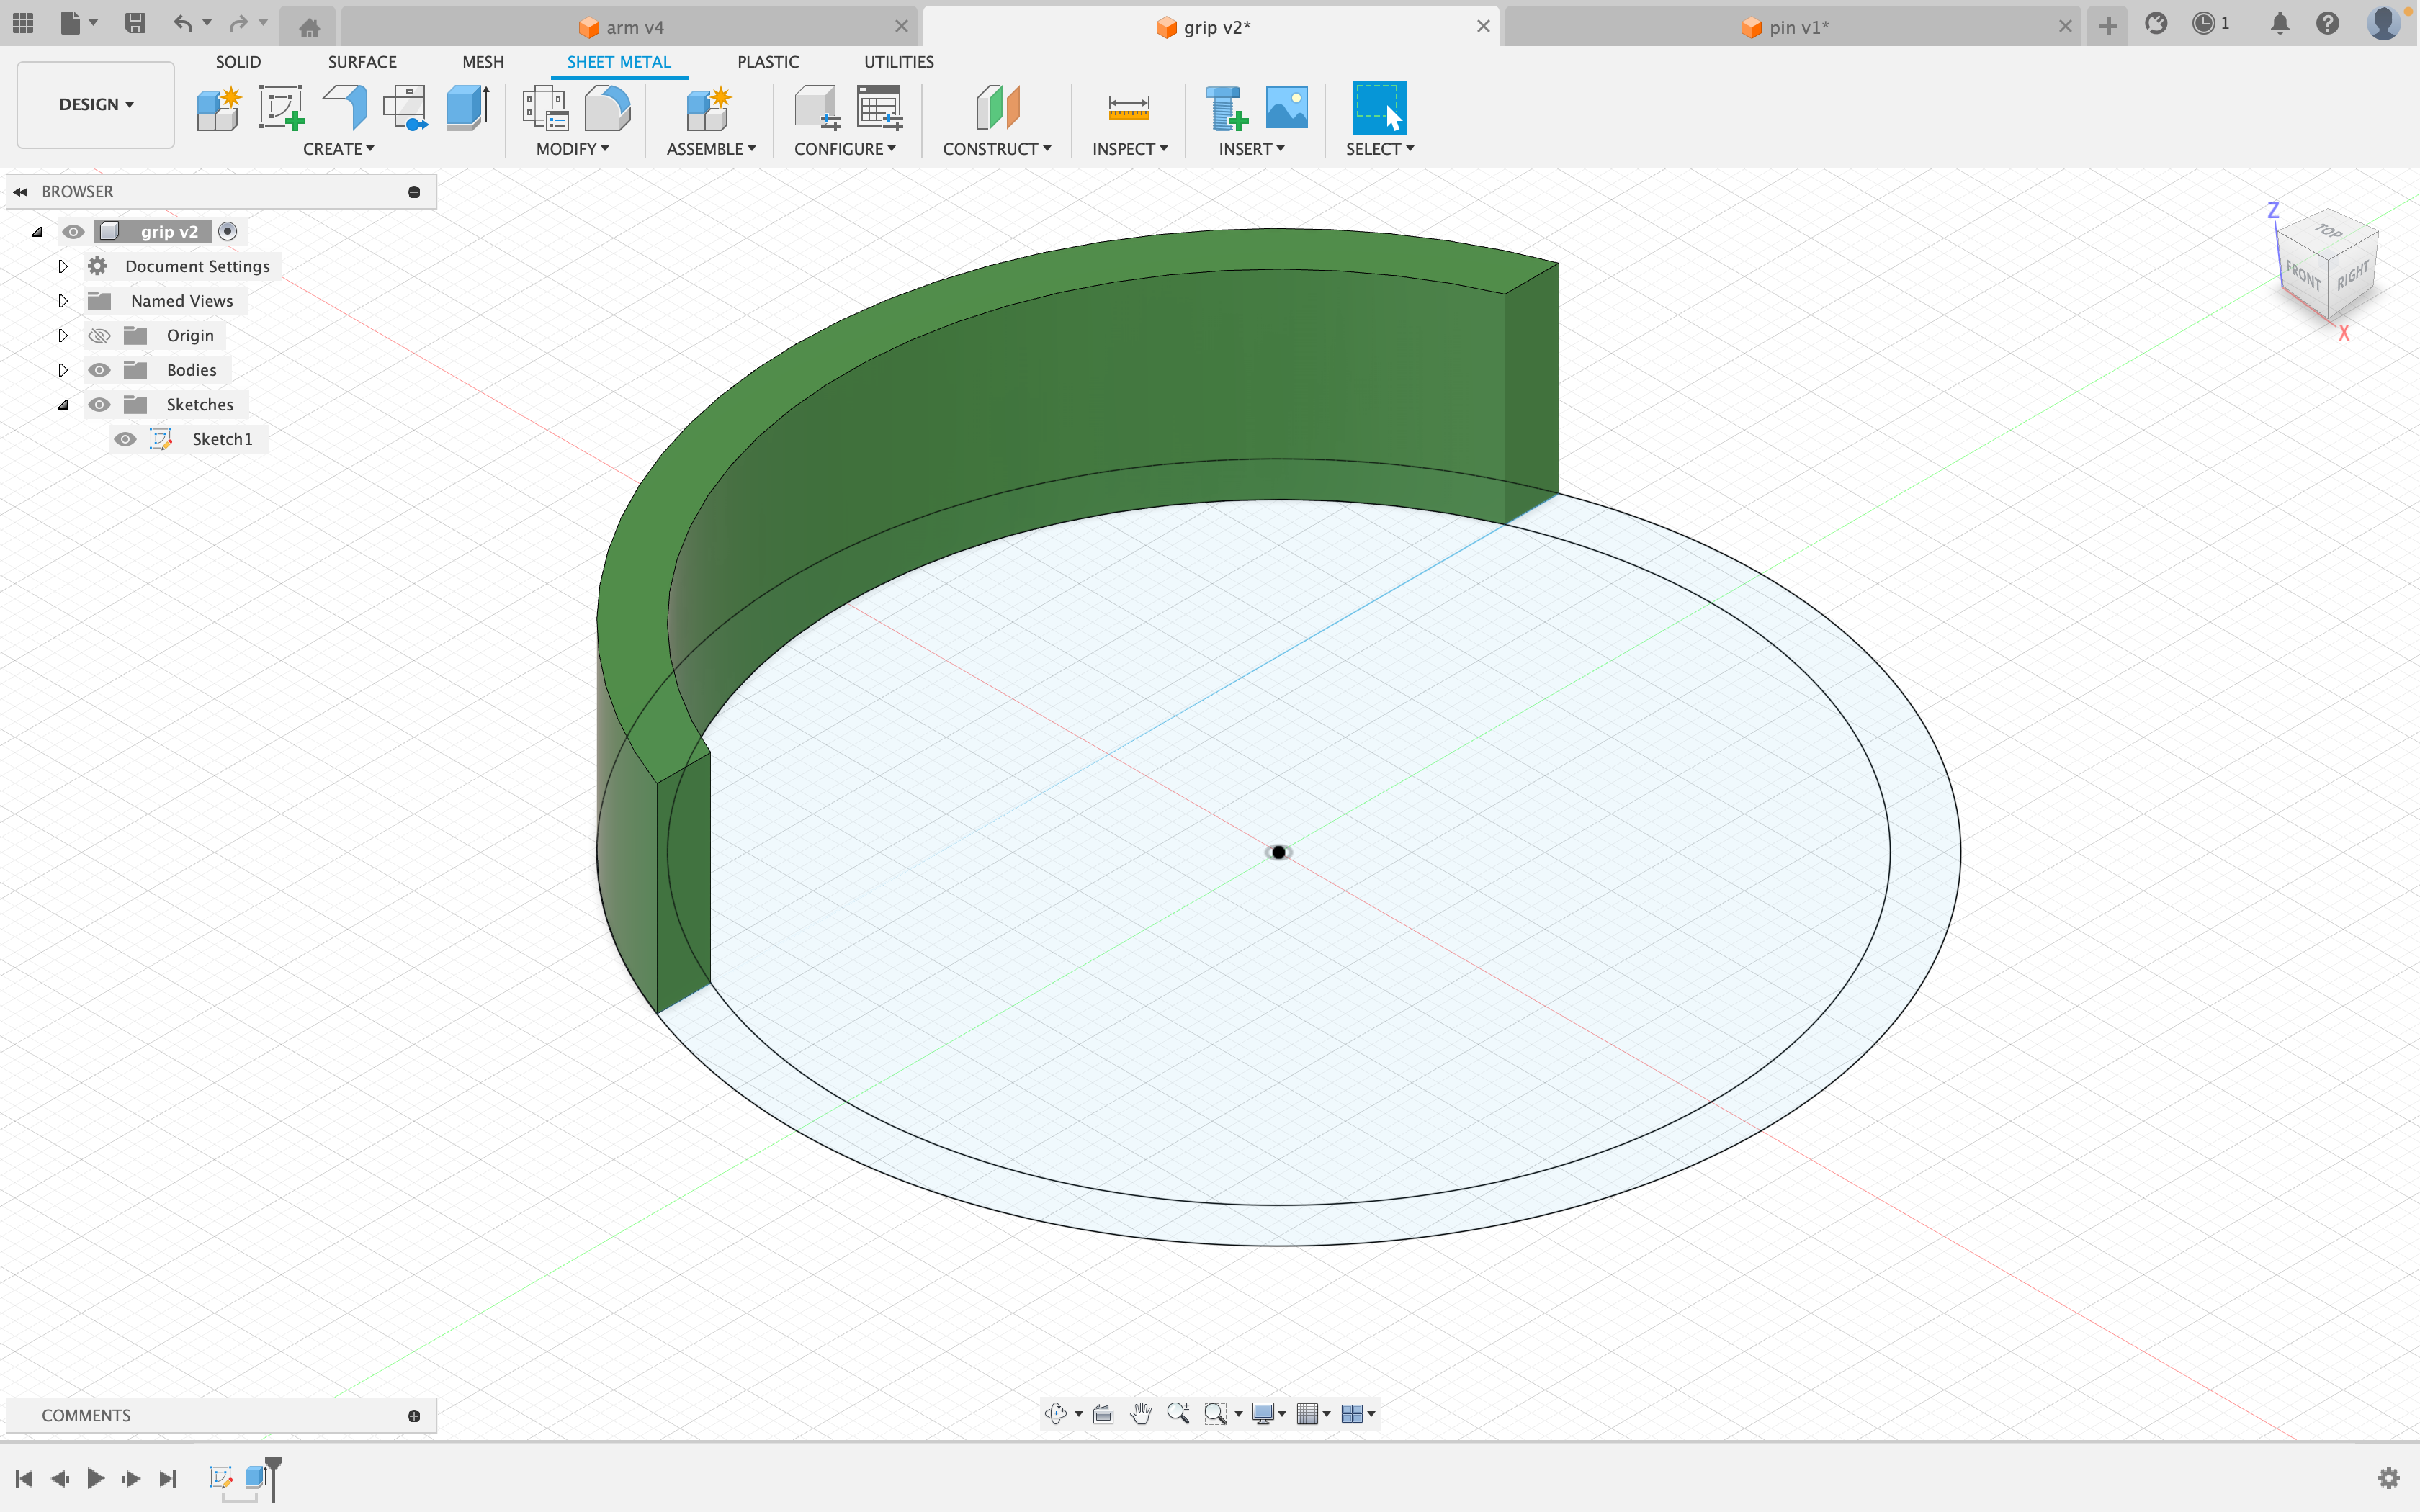
Now extrude this up 15mm.
Sketching and Extruding the Pin
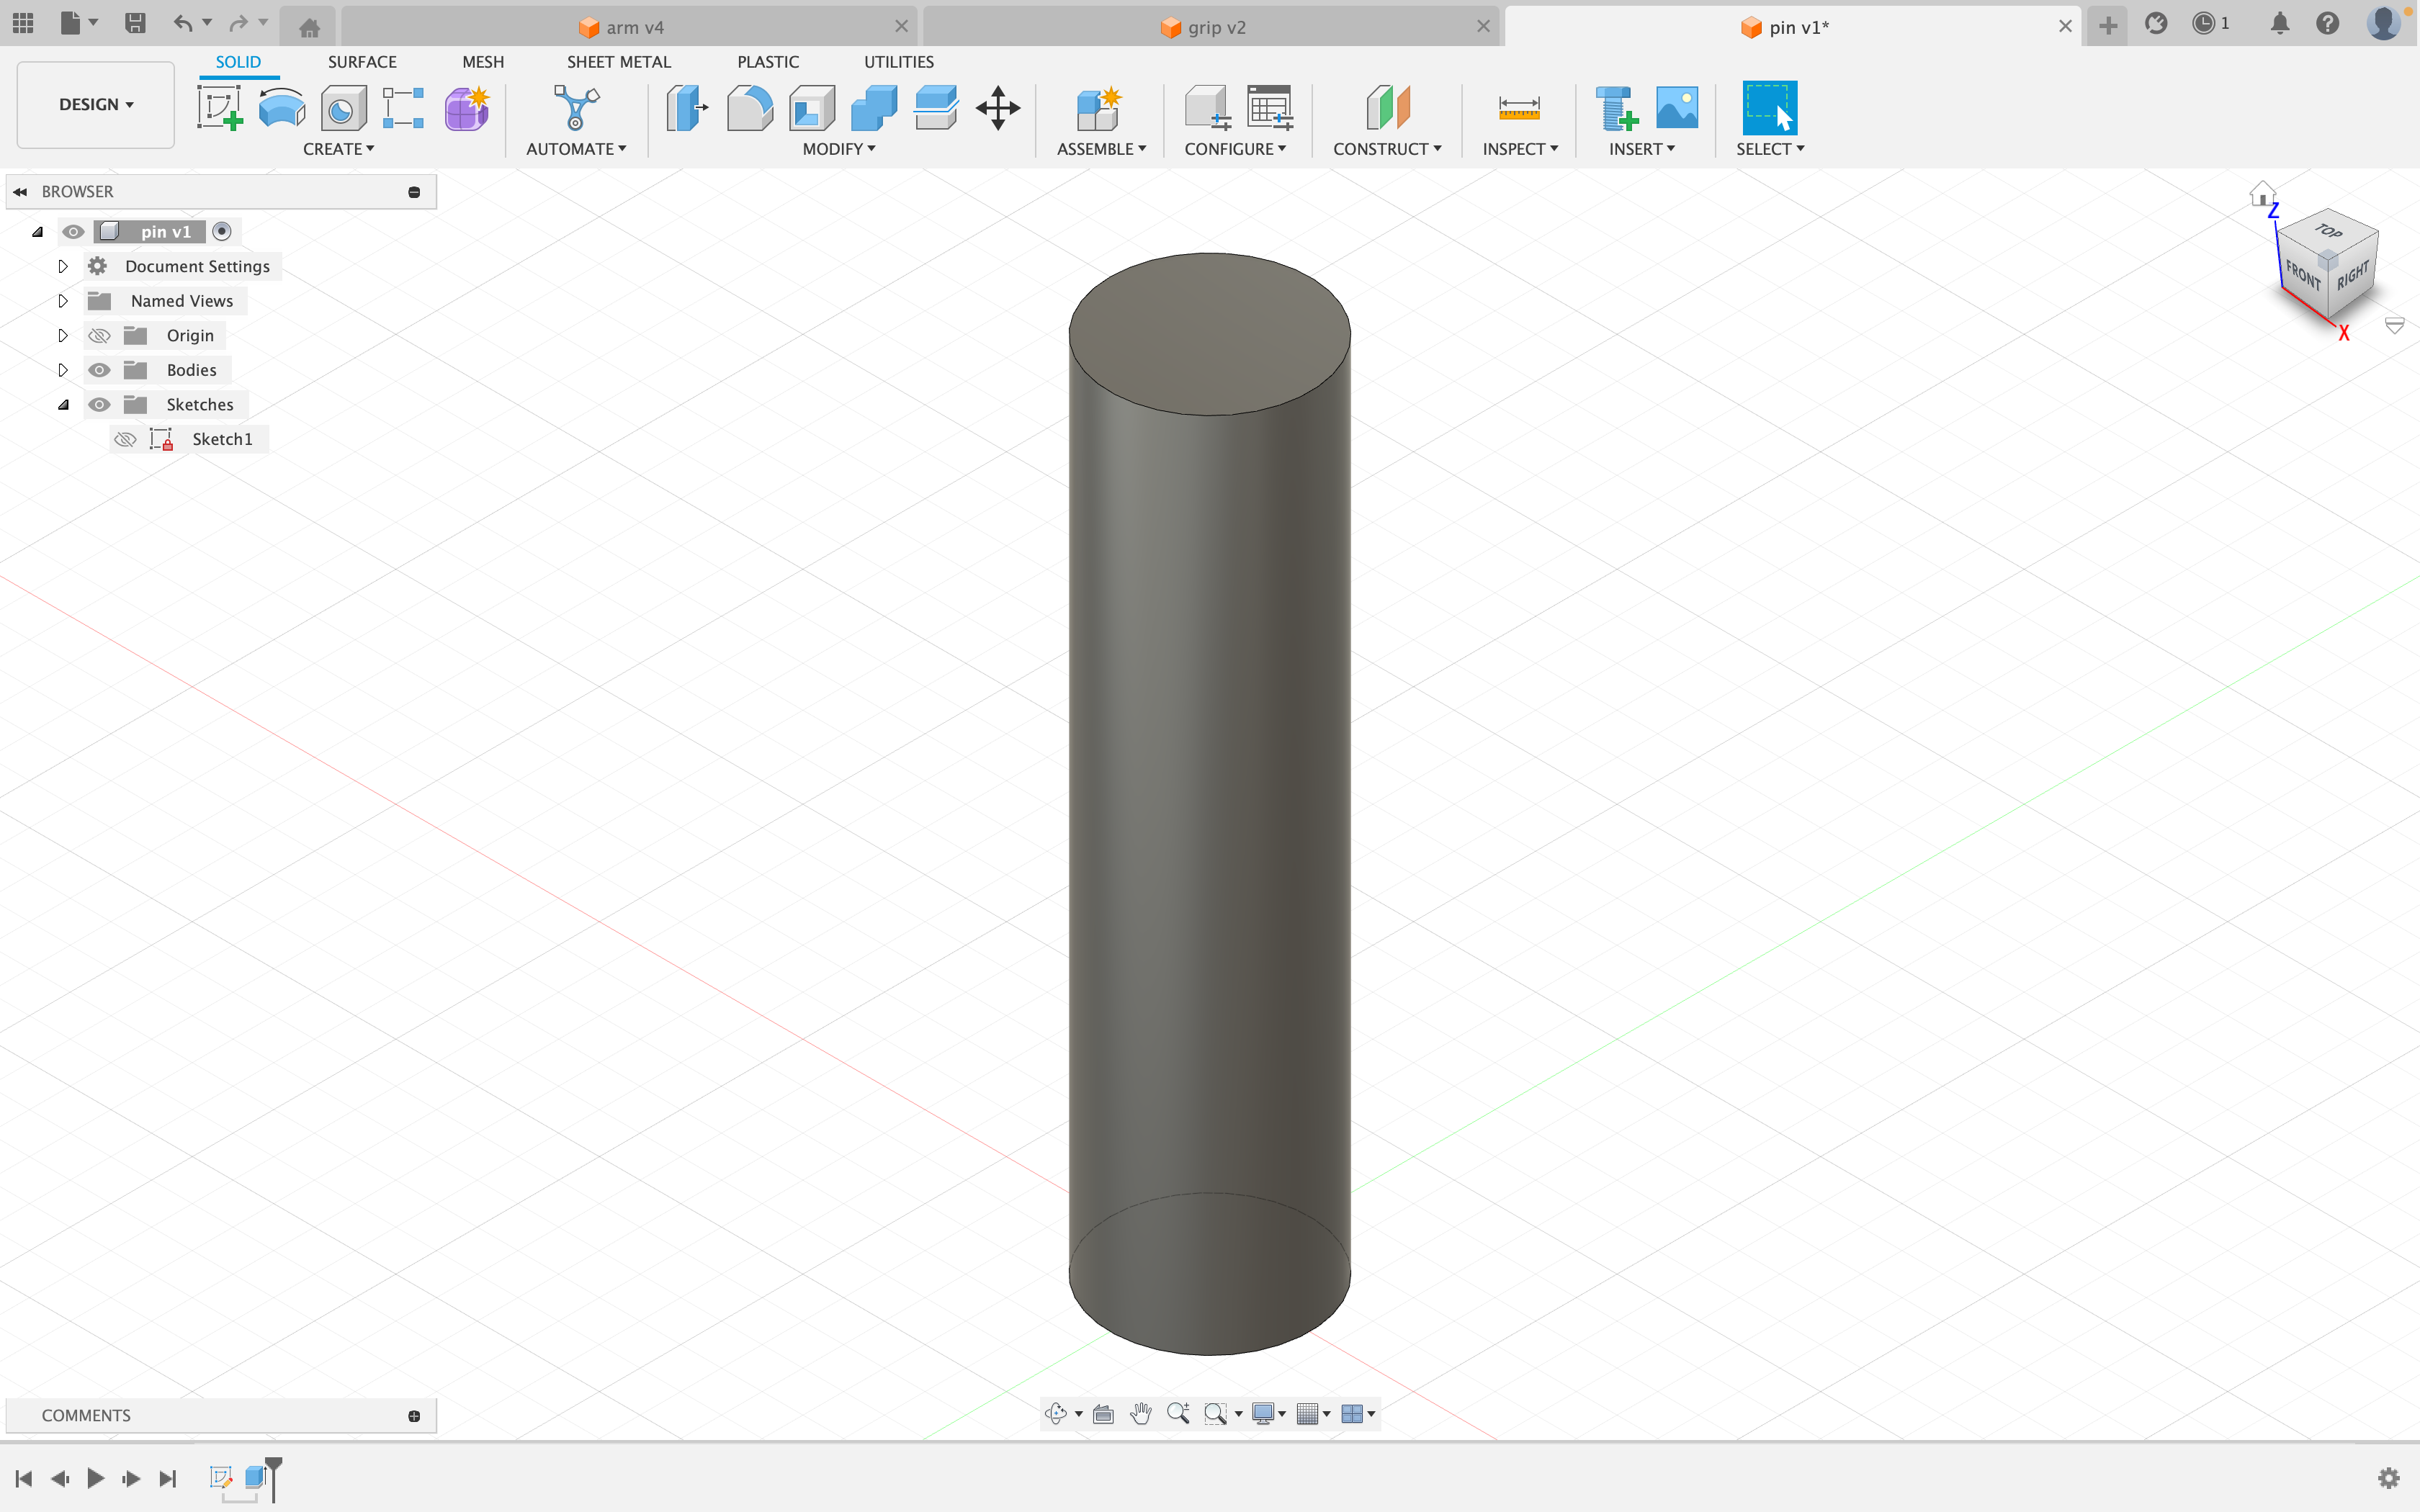
Create a 4.9mm circle… and that’s it! Now extrude it up 20mm.