Node-Red Telegram Bot With Temperature Logger Part-1
by Common9899 in Circuits > Raspberry Pi
1724 Views, 3 Favorites, 0 Comments
Node-Red Telegram Bot With Temperature Logger Part-1

Node-RED is a powerful tool for creating and connecting IoT applications with a graphical interface. It allows you to drag and drop nodes that can perform various functions, such as reading sensors, sending messages, storing data, and more. One of the nodes that Node-RED supports is the Telegram bot node, which enables you to communicate with your IoT devices using the popular messaging platform Telegram.
In this article, I will show you how to use Node-RED and Telegram bot to send temperature data from a DHT11 sensor connected to a Raspberry Pi. You will be able to ask your Telegram bot for the current temperature and receive a reply with the sensor reading. You will also be able to set up a notification system that will alert you when the temperature exceeds a certain threshold.
To follow this tutorial, you will need the following components:
- A Raspberry Pi with Node-RED installed (you can follow this guide to install Node-RED on your Raspberry Pi)
- A DHT11 temperature and humidity sensor
- A Telegram account and a Telegram bot token (you can follow this guide to create a Telegram bot and get its token)
Get PCBs for Your Projects Manufactured
You must check out PCBWAY for ordering PCBs online for cheap!
You get 10 good-quality PCBs manufactured and shipped to your doorstep for cheap. You will also get a discount on shipping on your first order. Upload your Gerber files onto PCBWAY to get them manufactured with good quality and quick turnaround time. PCBWay now could provide a complete product solution, from design to enclosure production. Check out their online Gerber viewer function. With reward points, you can get free stuff from their gift shop. Also, check out this useful blog on PCBWay Plugin for KiCad from here. Using this plugin, you can directly order PCBs in just one click after completing your design in KiCad.
Connect the DHT11 Sensor to the Raspberry Pi
The first step is to connect the DHT11 sensor to the Raspberry Pi using the breadboard and the jumper wires. The DHT11 sensor has four pins: VCC, Data, NC (not connected), and GND. Connect the VCC pin to the 3.3V pin of the Raspberry Pi, the GND pin to the GND pin of the Raspberry Pi, and the Data pin to the GPIO 4 of the Raspberry Pi.
Install the Node-red-contrib-dht-sensor Node
To read data from the DHT11 sensor, we will use a Node-RED node called node-red-contrib-dht-sensor. To install this node, open a terminal on your Raspberry Pi and run the following command:
npm install node-red-contrib-dht-sensor
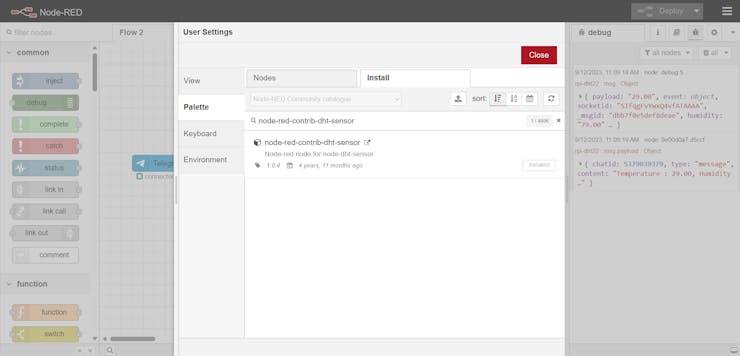
Then restart Node-RED by running:
node-red-stop
node-red-start
Then add the DHT11 node and open the properties then choose your DHT11 pin.
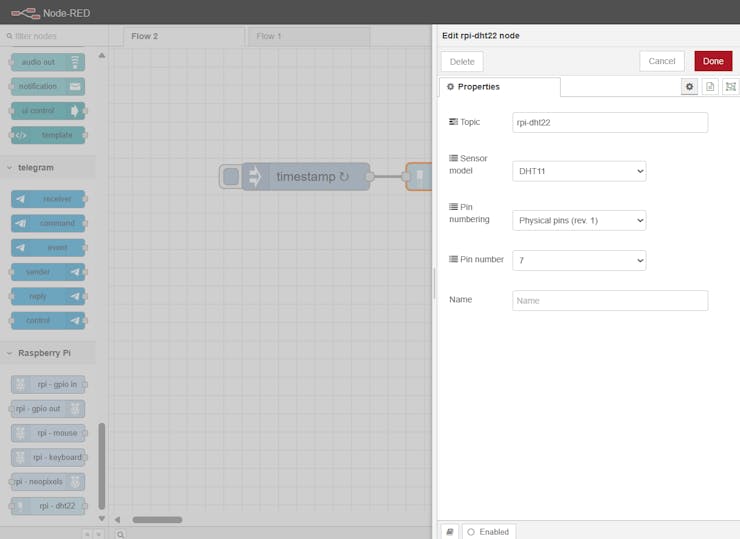
Here is the simple flow to get the DHT11 temperature and humidity data.

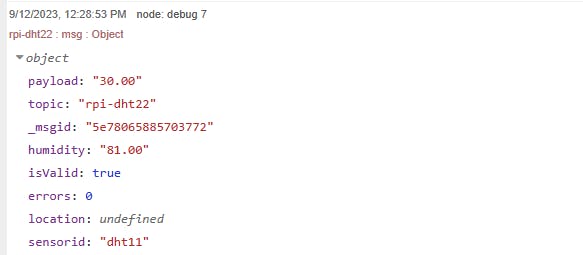
And here are the debug log results.
Setting Up the Telegram Bot
Go to Google Play or App Store, download, and install Telegram. In my case, I'm using telegram web. First, search for “botfather” and click the BotFather as shown below.
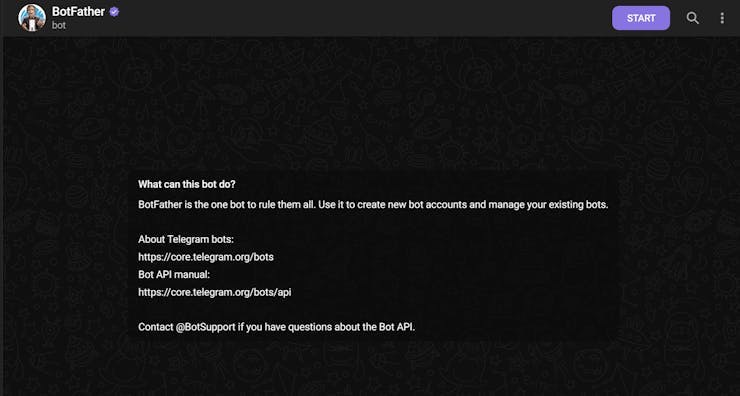
Next, start the BotFather, and use /newbot to create a new bot.
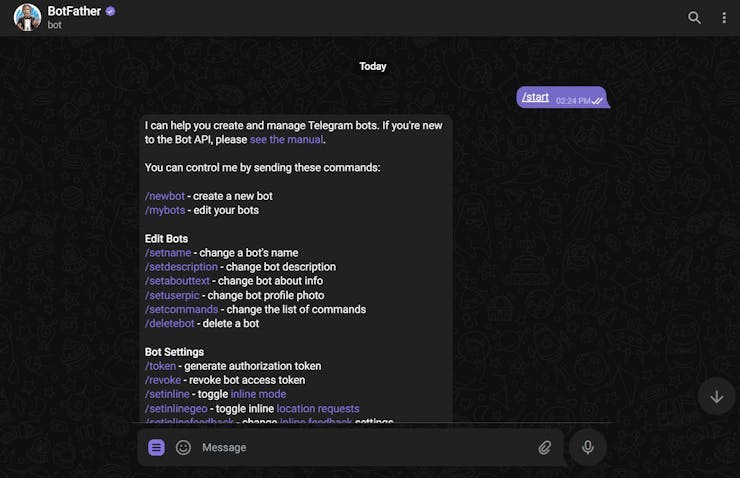
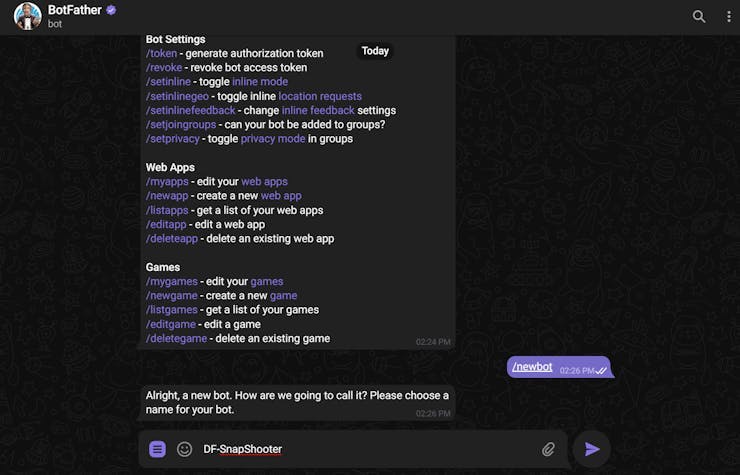
Next, name your bot.
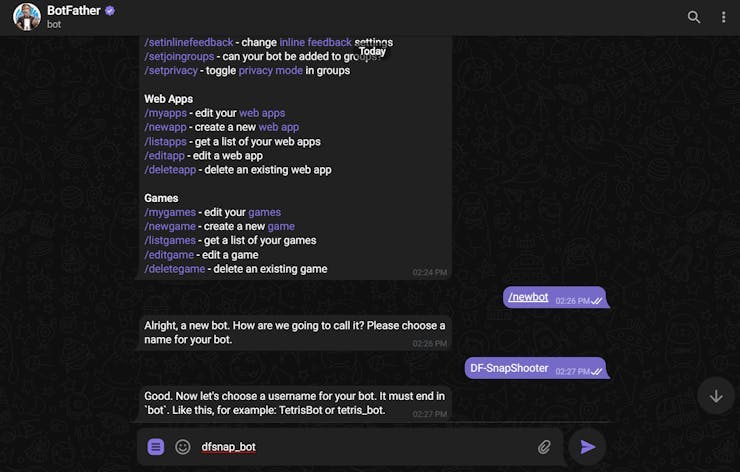
Then, mention the username.
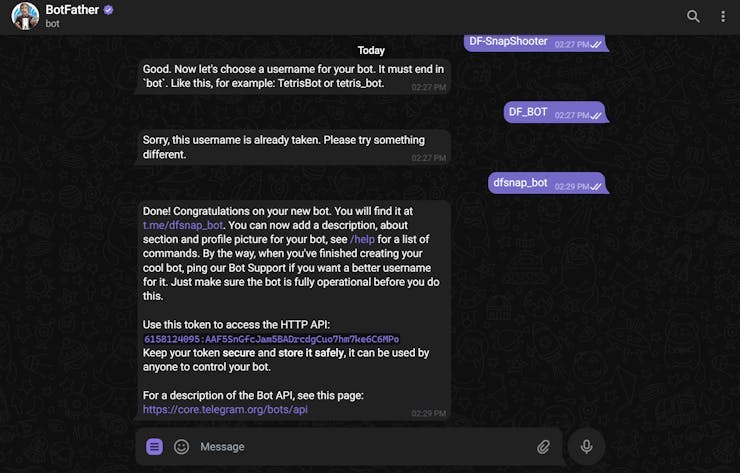
Finally, it will show you the api key.
Creating a User for Telegram Bot
Anyone that knows your bot username can interact with it. To make sure that we ignore messages that are not from our Telegram account (or any authorized users), you can get your Telegram User ID.
In your Telegram account, search for “IDBot”
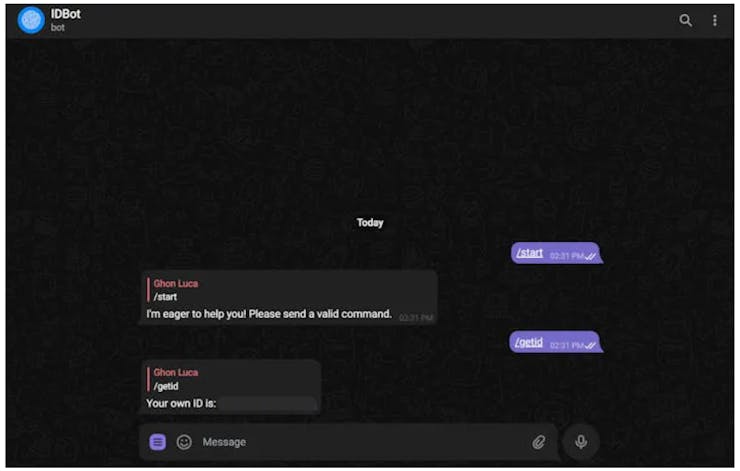
Start a conversation with that bot and type /getid. You will get a reply with your user ID. Save that user ID because you’ll need it later in this tutorial.
Configure the Telegram Bot Node
To communicate with the Telegram bot, we will use a Node-RED node called node-red-contrib-telegrambot. To install this node, open a terminal on your Raspberry Pi and run the following command:
npm install node-red-contrib-telegrambot
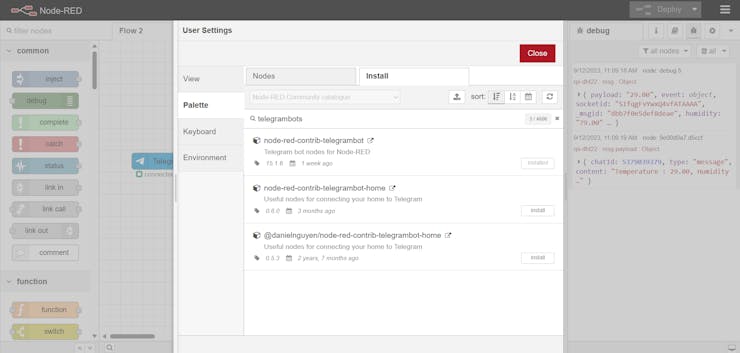
Then restart Node-RED by running:
node-red-stop
node-red-start
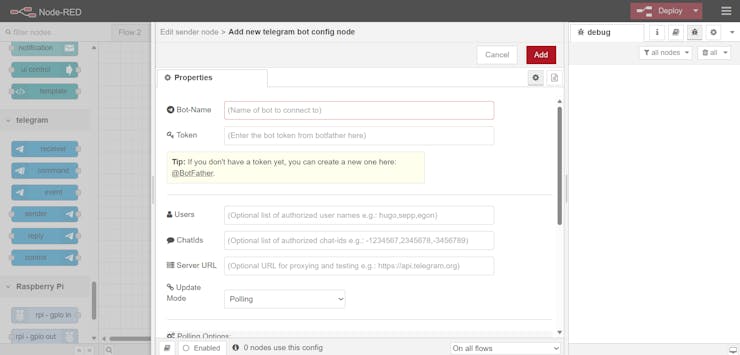
Then open your Node-RED editor in your browser (usually http://raspberrypi:1880) and drag a Telegram receiver node and a Telegram sender node from the palette to the workspace. Double-click on the Telegram receiver node and click on the pencil icon next to Bot configuration.
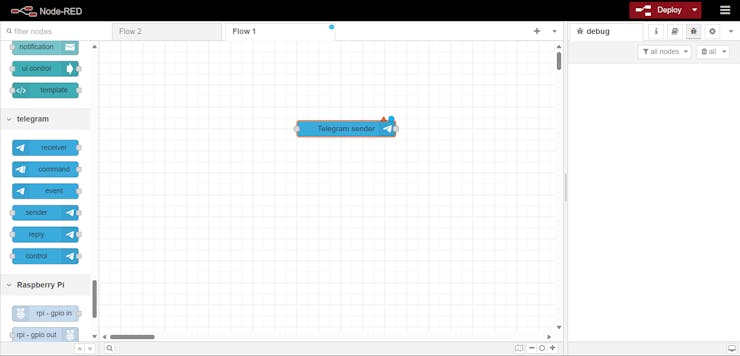
Enter your bot name and token that you obtained from BotFather in step 1. Then click on Add and Done.
Create a Flow to Request Temperature Readings
To request temperature readings from the DHT11 sensor, we will create a simple flow that consists of three nodes: a Telegram receiver node, a DHT11 sensor node, and a Telegram sender node.
In this flow, if you trigger the node, it will send you the temp and humi data to the Telegram bot.
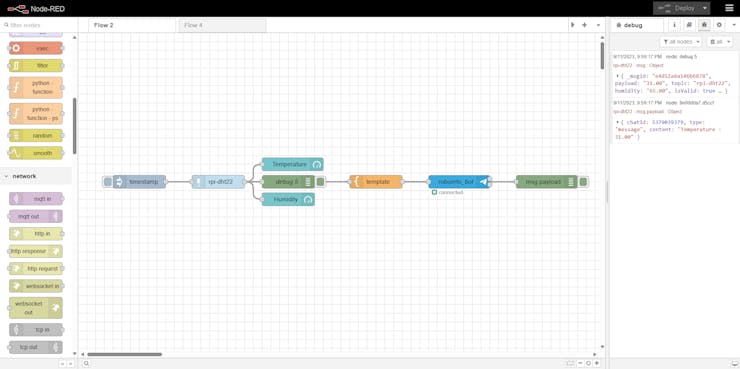
Here is the function that transfers the sensor data to the Telegram bot.
Note: In the chatID add your telegram chat ID.

Here is the complete JSON flow:
[
    {
        "id": "eb8f9c0d054be30c",
        "type": "tab",
        "label": "Flow 2",
        "disabled": false,
        "info": "",
        "env": []
    },
    {
        "id": "f2f9819ae972ae60",
        "type": "rpi-dht22",
        "z": "eb8f9c0d054be30c",
        "name": "",
        "topic": "rpi-dht22",
        "dht": "11",
        "pintype": 1,
        "pin": "7",
        "x": 640,
        "y": 240,
        "wires": [
            [
                "9113d1cb21f22ab6",
                "ea63aa67.c972f"
            ]
        ]
    },
    {
        "id": "9113d1cb21f22ab6",
        "type": "debug",
        "z": "eb8f9c0d054be30c",
        "name": "debug 5",
        "active": true,
        "tosidebar": true,
        "console": false,
        "tostatus": false,
        "complete": "true",
        "targetType": "full",
        "statusVal": "",
        "statusType": "auto",
        "x": 800,
        "y": 200,
        "wires": []
    },
    {
        "id": "ea63aa67.c972f",
        "type": "template",
        "z": "eb8f9c0d054be30c",
        "name": "",
        "field": "payload",
        "fieldType": "msg",
        "format": "handlebars",
        "syntax": "mustache",
        "template": "{\"chatId\": XXXXXXXXXXXXXXX,\n\"type\":\"message\",\n\"content\":\"Temperature : {{payload}}, Humidity : {{humidity}}\"}",
        "output": "json",
        "x": 820,
        "y": 260,
        "wires": [
            [
                "9e00d0a7.d5ccf",
                "600063bd96d765e6"
            ]
        ]
    },
    {
        "id": "9e00d0a7.d5ccf",
        "type": "debug",
        "z": "eb8f9c0d054be30c",
        "name": "",
        "active": true,
        "tosidebar": true,
        "console": false,
        "tostatus": false,
        "complete": "payload",
        "targetType": "msg",
        "statusVal": "",
        "statusType": "auto",
        "x": 990,
        "y": 200,
        "wires": []
    },
    {
        "id": "600063bd96d765e6",
        "type": "telegram sender",
        "z": "eb8f9c0d054be30c",
        "name": "roboerto_bot",
        "bot": "ae1a60539b8e5308",
        "haserroroutput": true,
        "outputs": 2,
        "x": 1030,
        "y": 260,
        "wires": [
            [],
            []
        ]
    },
    {
        "id": "b6d651f1ea520a5a",
        "type": "inject",
        "z": "eb8f9c0d054be30c",
        "name": "",
        "props": [
            {
                "p": "payload"
            },
            {
                "p": "topic",
                "vt": "str"
            }
        ],
        "repeat": "",
        "crontab": "",
        "once": false,
        "onceDelay": 0.1,
        "topic": "",
        "payload": "",
        "payloadType": "date",
        "x": 420,
        "y": 240,
        "wires": [
            [
                "f2f9819ae972ae60"
            ]
        ]
    },
    {
        "id": "ae1a60539b8e5308",
        "type": "telegram bot",
        "botname": "roboerto_bot",
        "usernames": "",
        "chatids": "",
        "baseapiurl": "",
        "updatemode": "polling",
        "pollinterval": "300",
        "usesocks": false,
        "sockshost": "",
        "socksprotocol": "socks5",
        "socksport": "6667",
        "socksusername": "anonymous",
        "sockspassword": "",
        "bothost": "",
        "botpath": "",
        "localbotport": "8443",
        "publicbotport": "8443",
        "privatekey": "",
        "certificate": "",
        "useselfsignedcertificate": false,
        "sslterminated": false,
        "verboselogging": false
    }
]
Conclusion
In this article, you learned how to use Node-RED and Telegram bot to send temperature data from a DHT11 sensor connected to a Raspberry Pi. You also learned how to request sensor readings and receive alerts using Telegram commands and messages. You can use this project as a starting point for your own IoT applications that involve Node-RED, Telegram bot, and Raspberry Pi. You can also extend this project by adding more sensors, nodes, and functions to create more complex and interactive flows. Have fun!
