Nintendo 64 Controller Joystick Replacement
by bdacosta in Workshop > Repair
1030 Views, 1 Favorites, 0 Comments
Nintendo 64 Controller Joystick Replacement
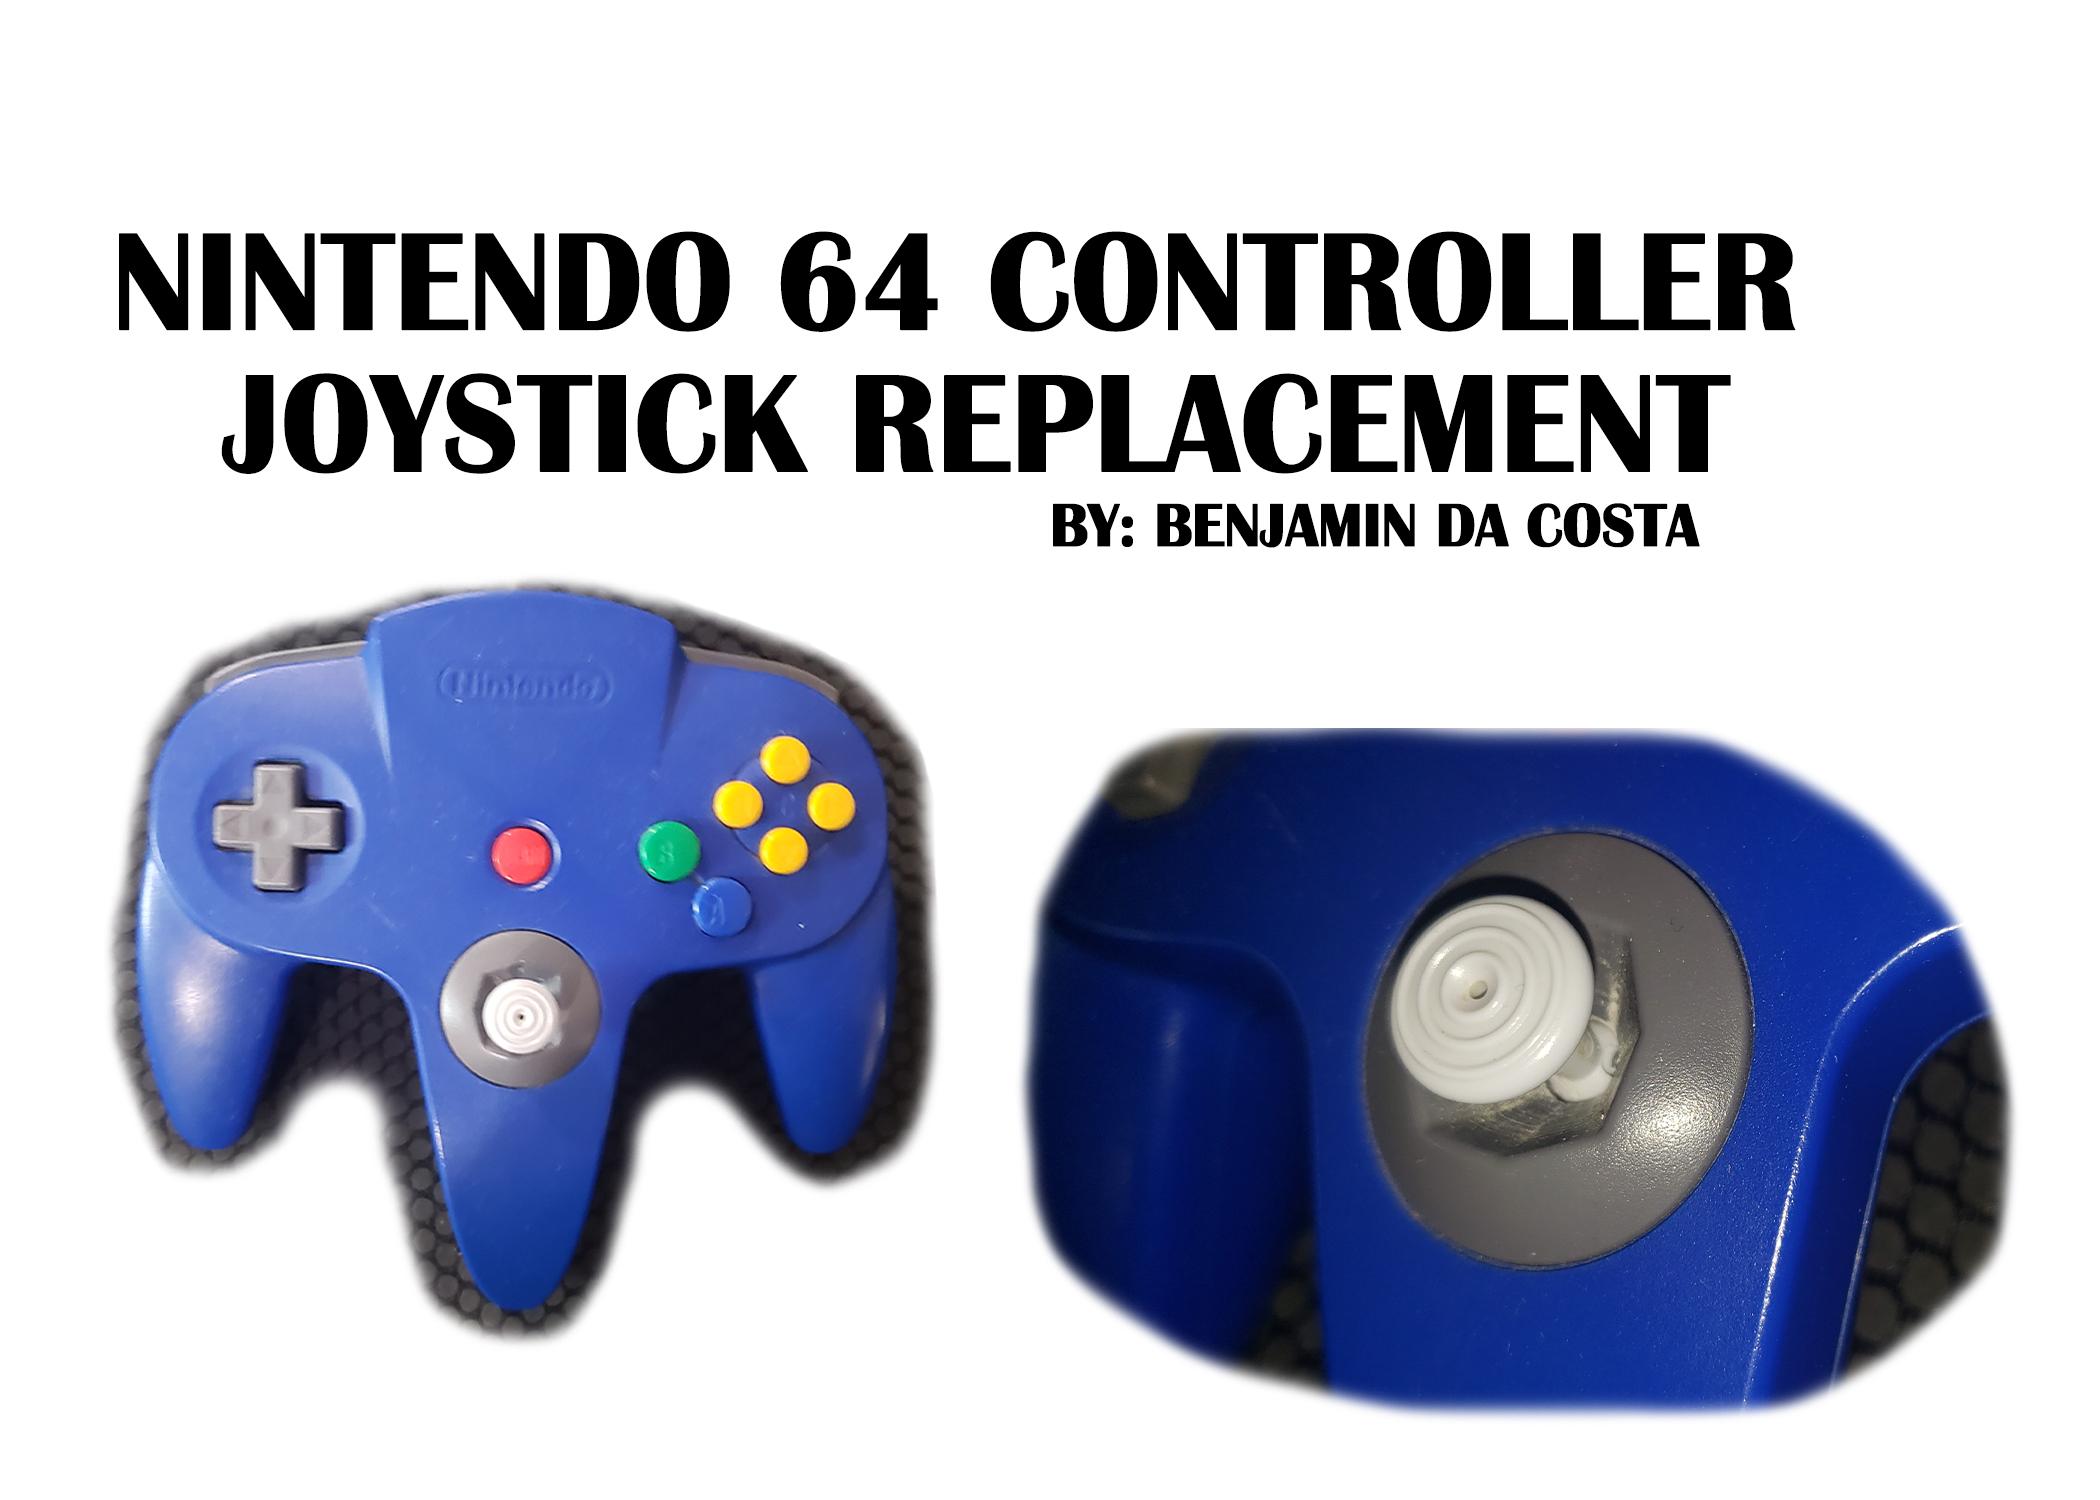
Hello!
If you stumbled across this tutorial you are most likely looking for a way to replacement your loose thumbstick on your Nintendo 64 Controller.
This is tutorial is intended for people experienced in small parts that are looking for help in replacing a Nintendo 64 Controller Joystick.
The controller suffers a design flaw that causes that plastic to grind against itself and wear down over time. This will result in a loose joystick. The most effective way of resolving this problem is to replace them with after market parts that can be found online by a variety of different small businesses.
Difficulty: Easy
Material List
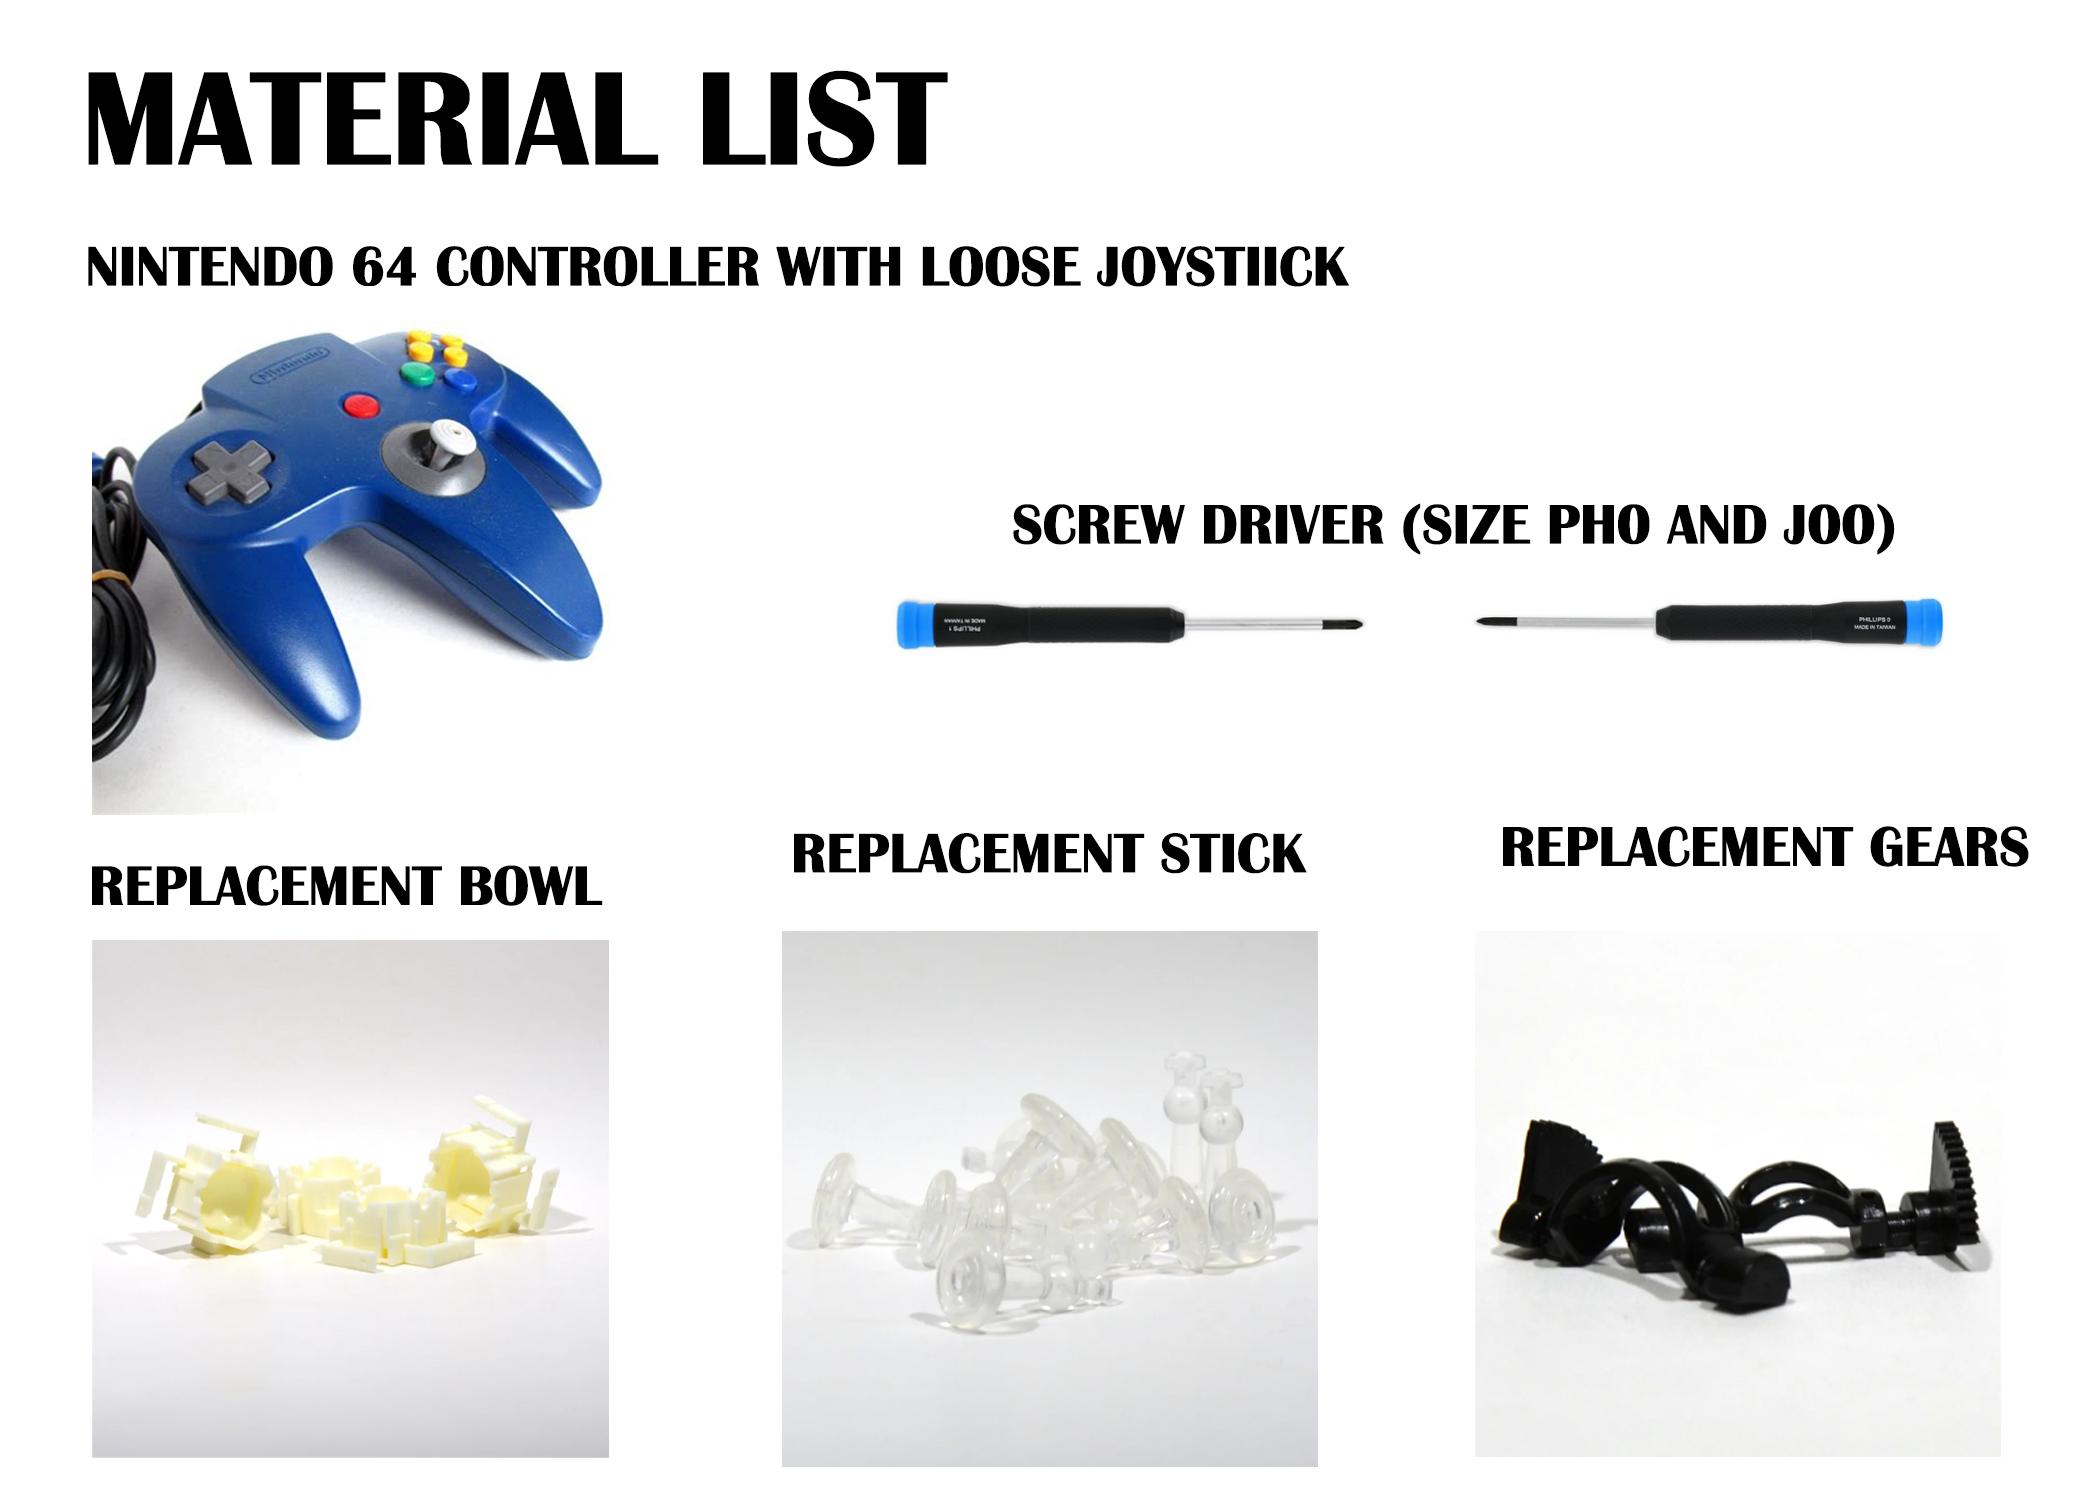
These are the materials that I use in repairs. Alternatives are flexible depending on budget and accessibility.
Screwdrivers:
Replacement Parts (stock is sold out, alternatives can be found of the same quality):
Step 1: Unscrewing the Back
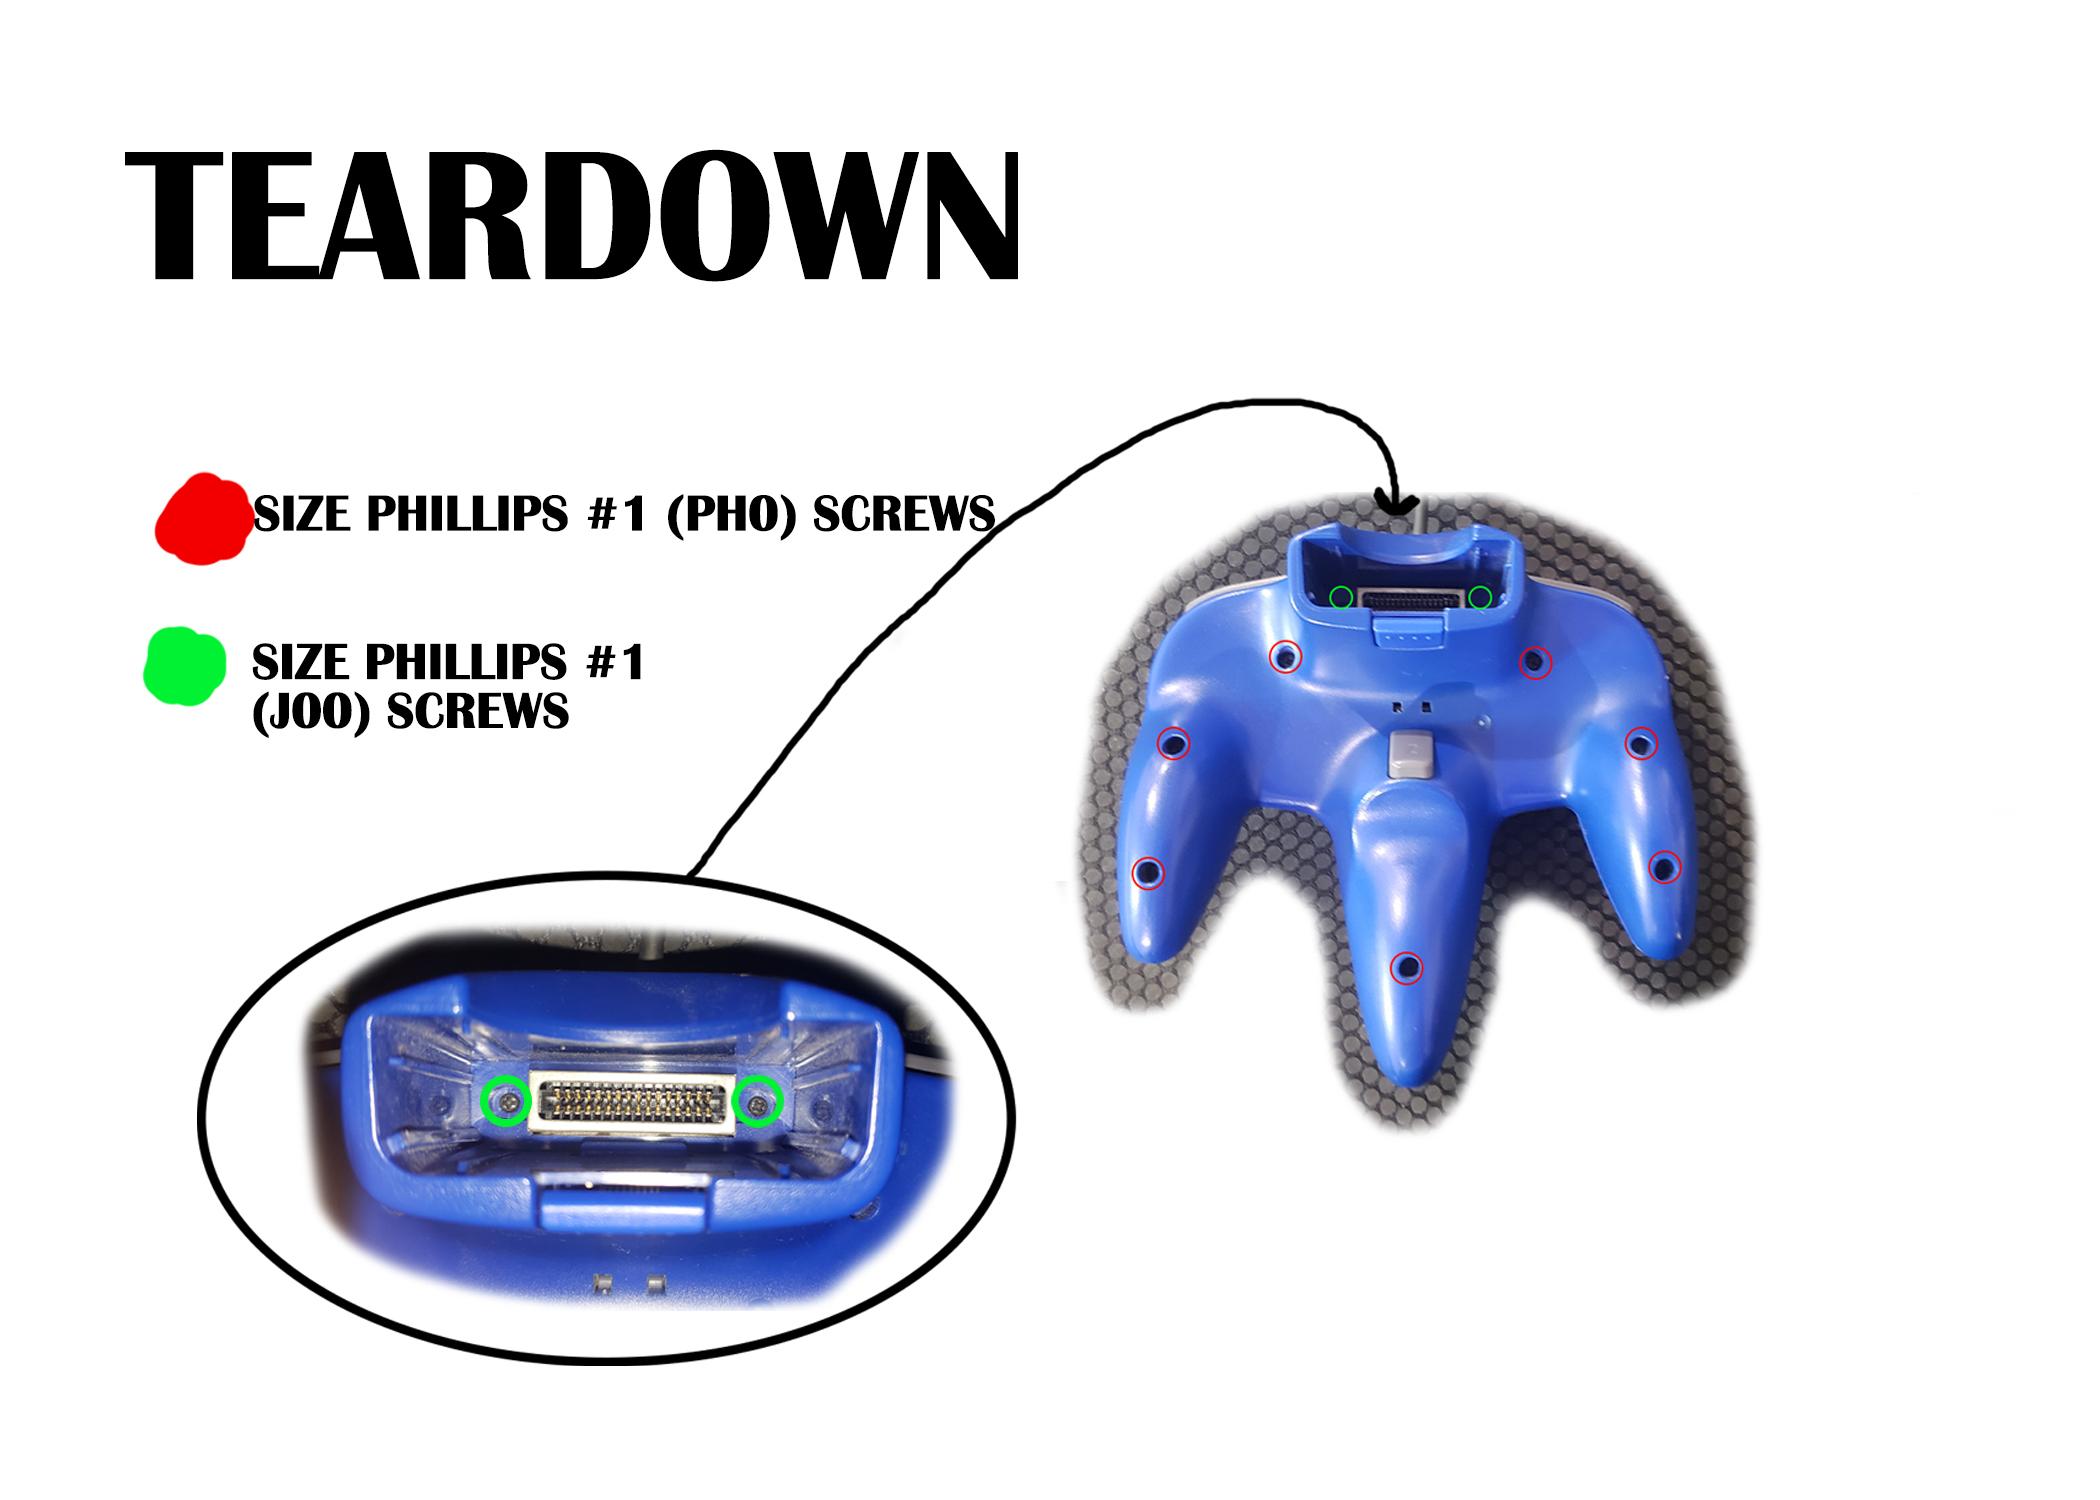
The first step in replacing the joystick of a Nintendo 64 Controller is to open it up.
There are 9 screws that need to be removed before you can open the controller.
Before unscrewing it is important to understand that the Nintendo 64 is old and the screws may be fragile. Make sure to use force down and not to strip the screw.
7 (circled in red) can be opened with the PH0 (Phillips #1) size screw driver. These screws are the only ones that need to be used by the PH0 size and you can remove the rest of the screws with the J00 size screw driver.
2 (circled in green) can be opened with the J00 (Phillips #0) size screw driver. A flashlight can help see where the screws are located.
Step 2: Removing the Joystick Housing
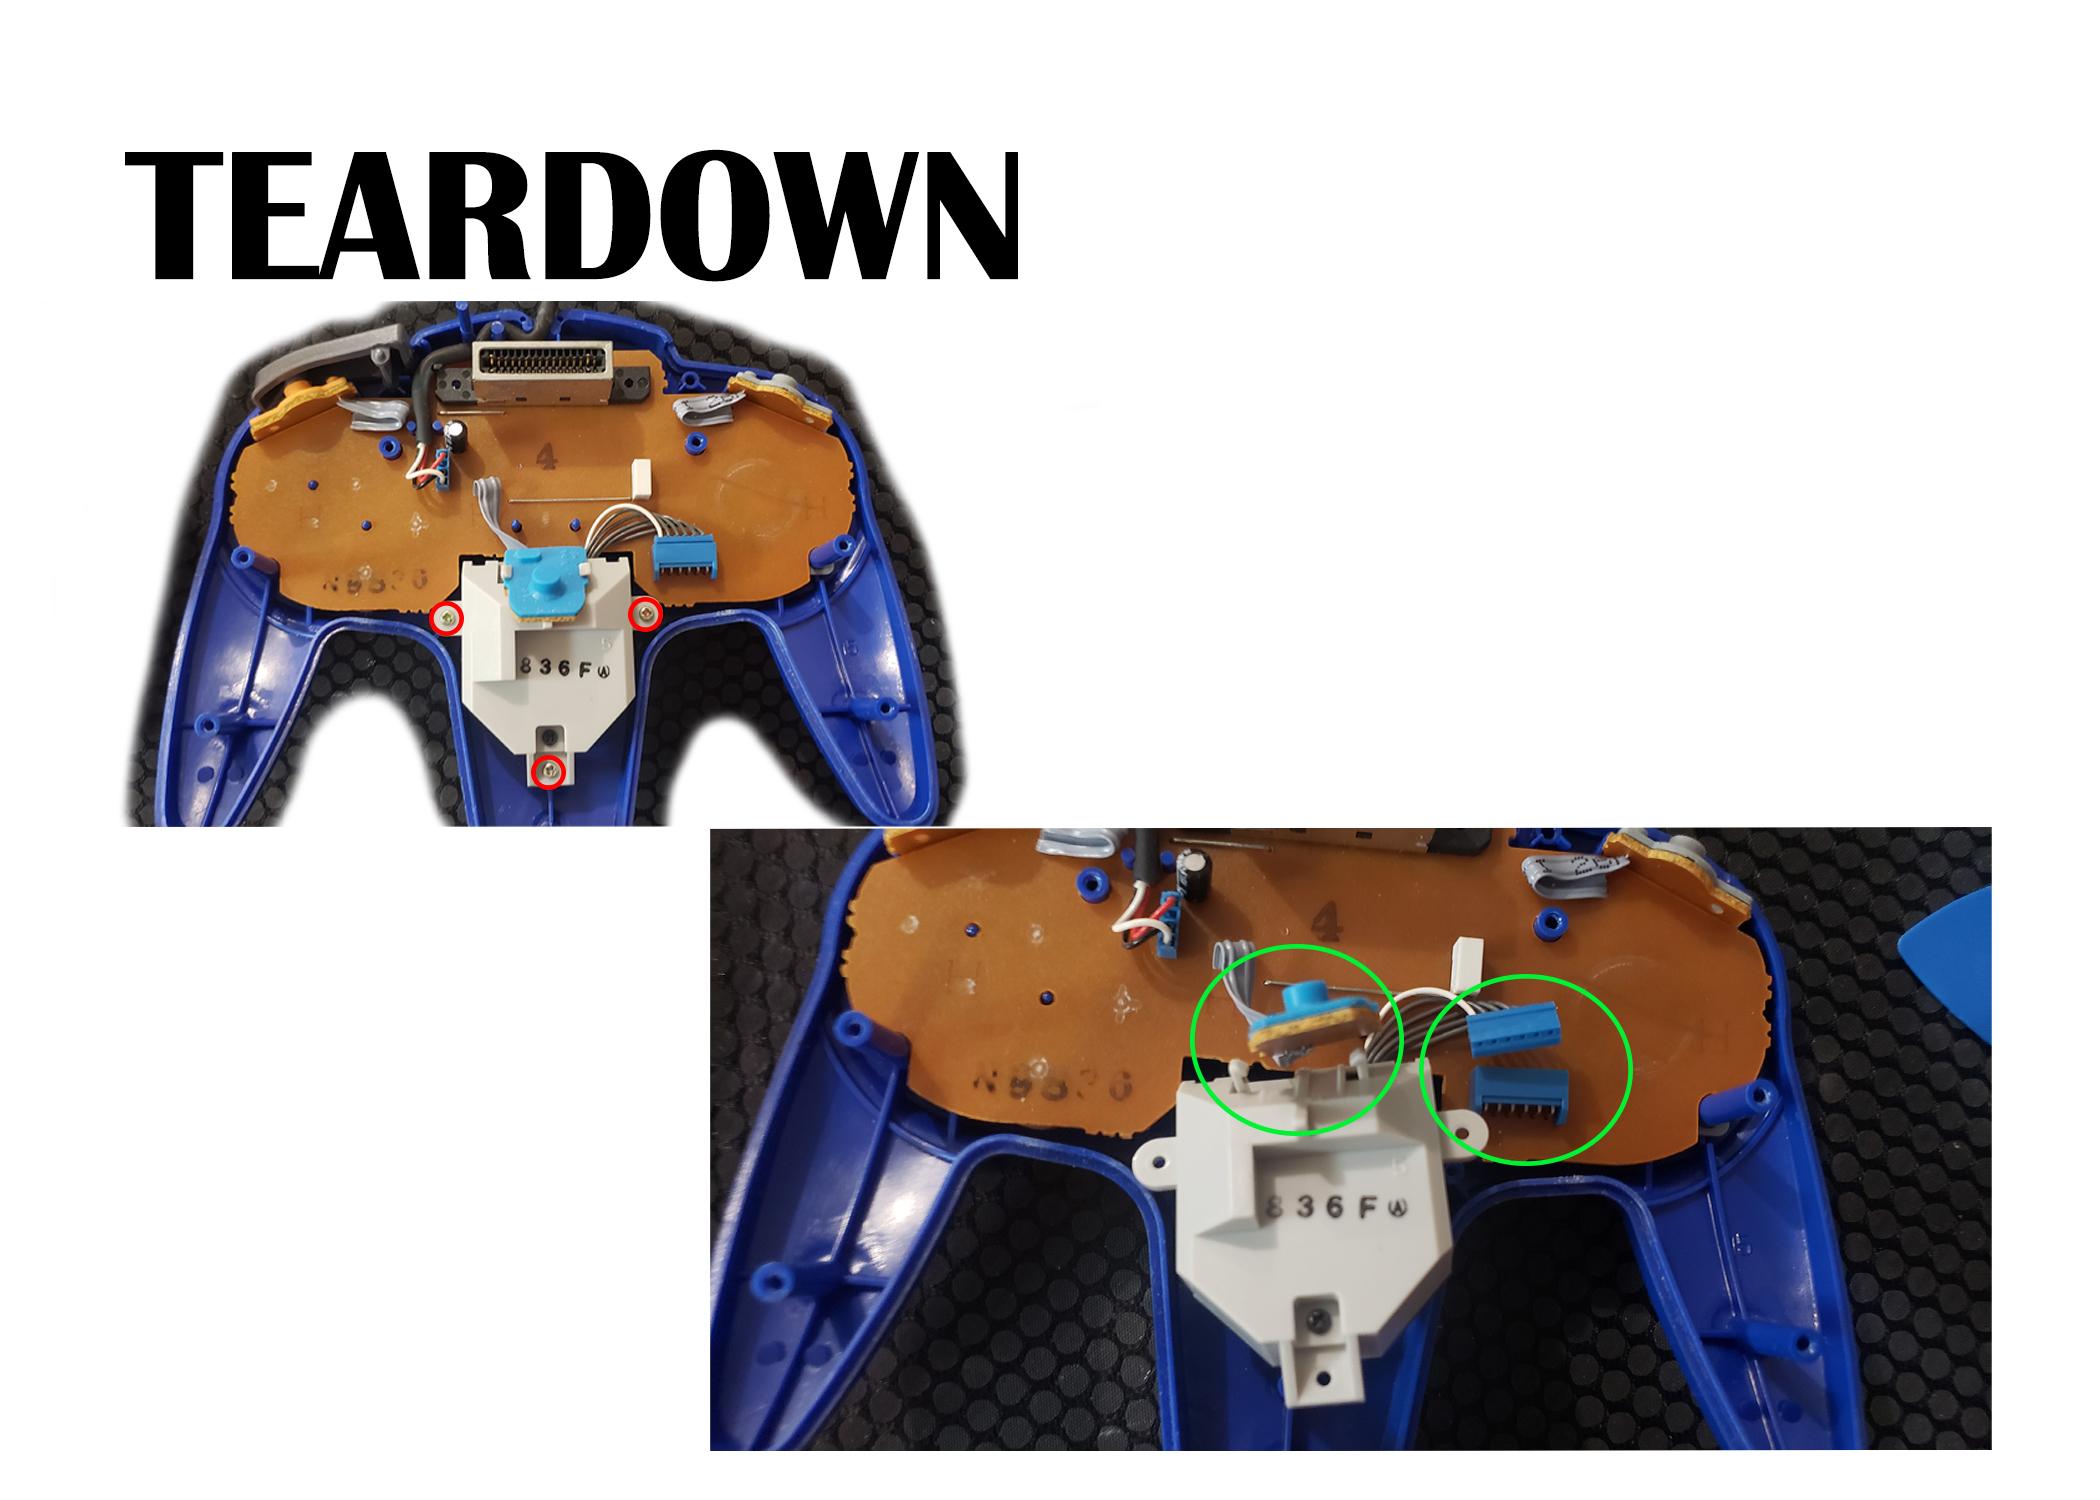
Once opened you can now begin the process of getting the thumb stick.
There are 3 screws (circled in red) holding down the housing for the thumbstick that will need to be removed.
Next, there is a ribbon cable and button ( in green) that can be clicked out of place. This is needed to free the housing of the thumbstick from the rest of the controller.
Step 3: Disassembling Joystick
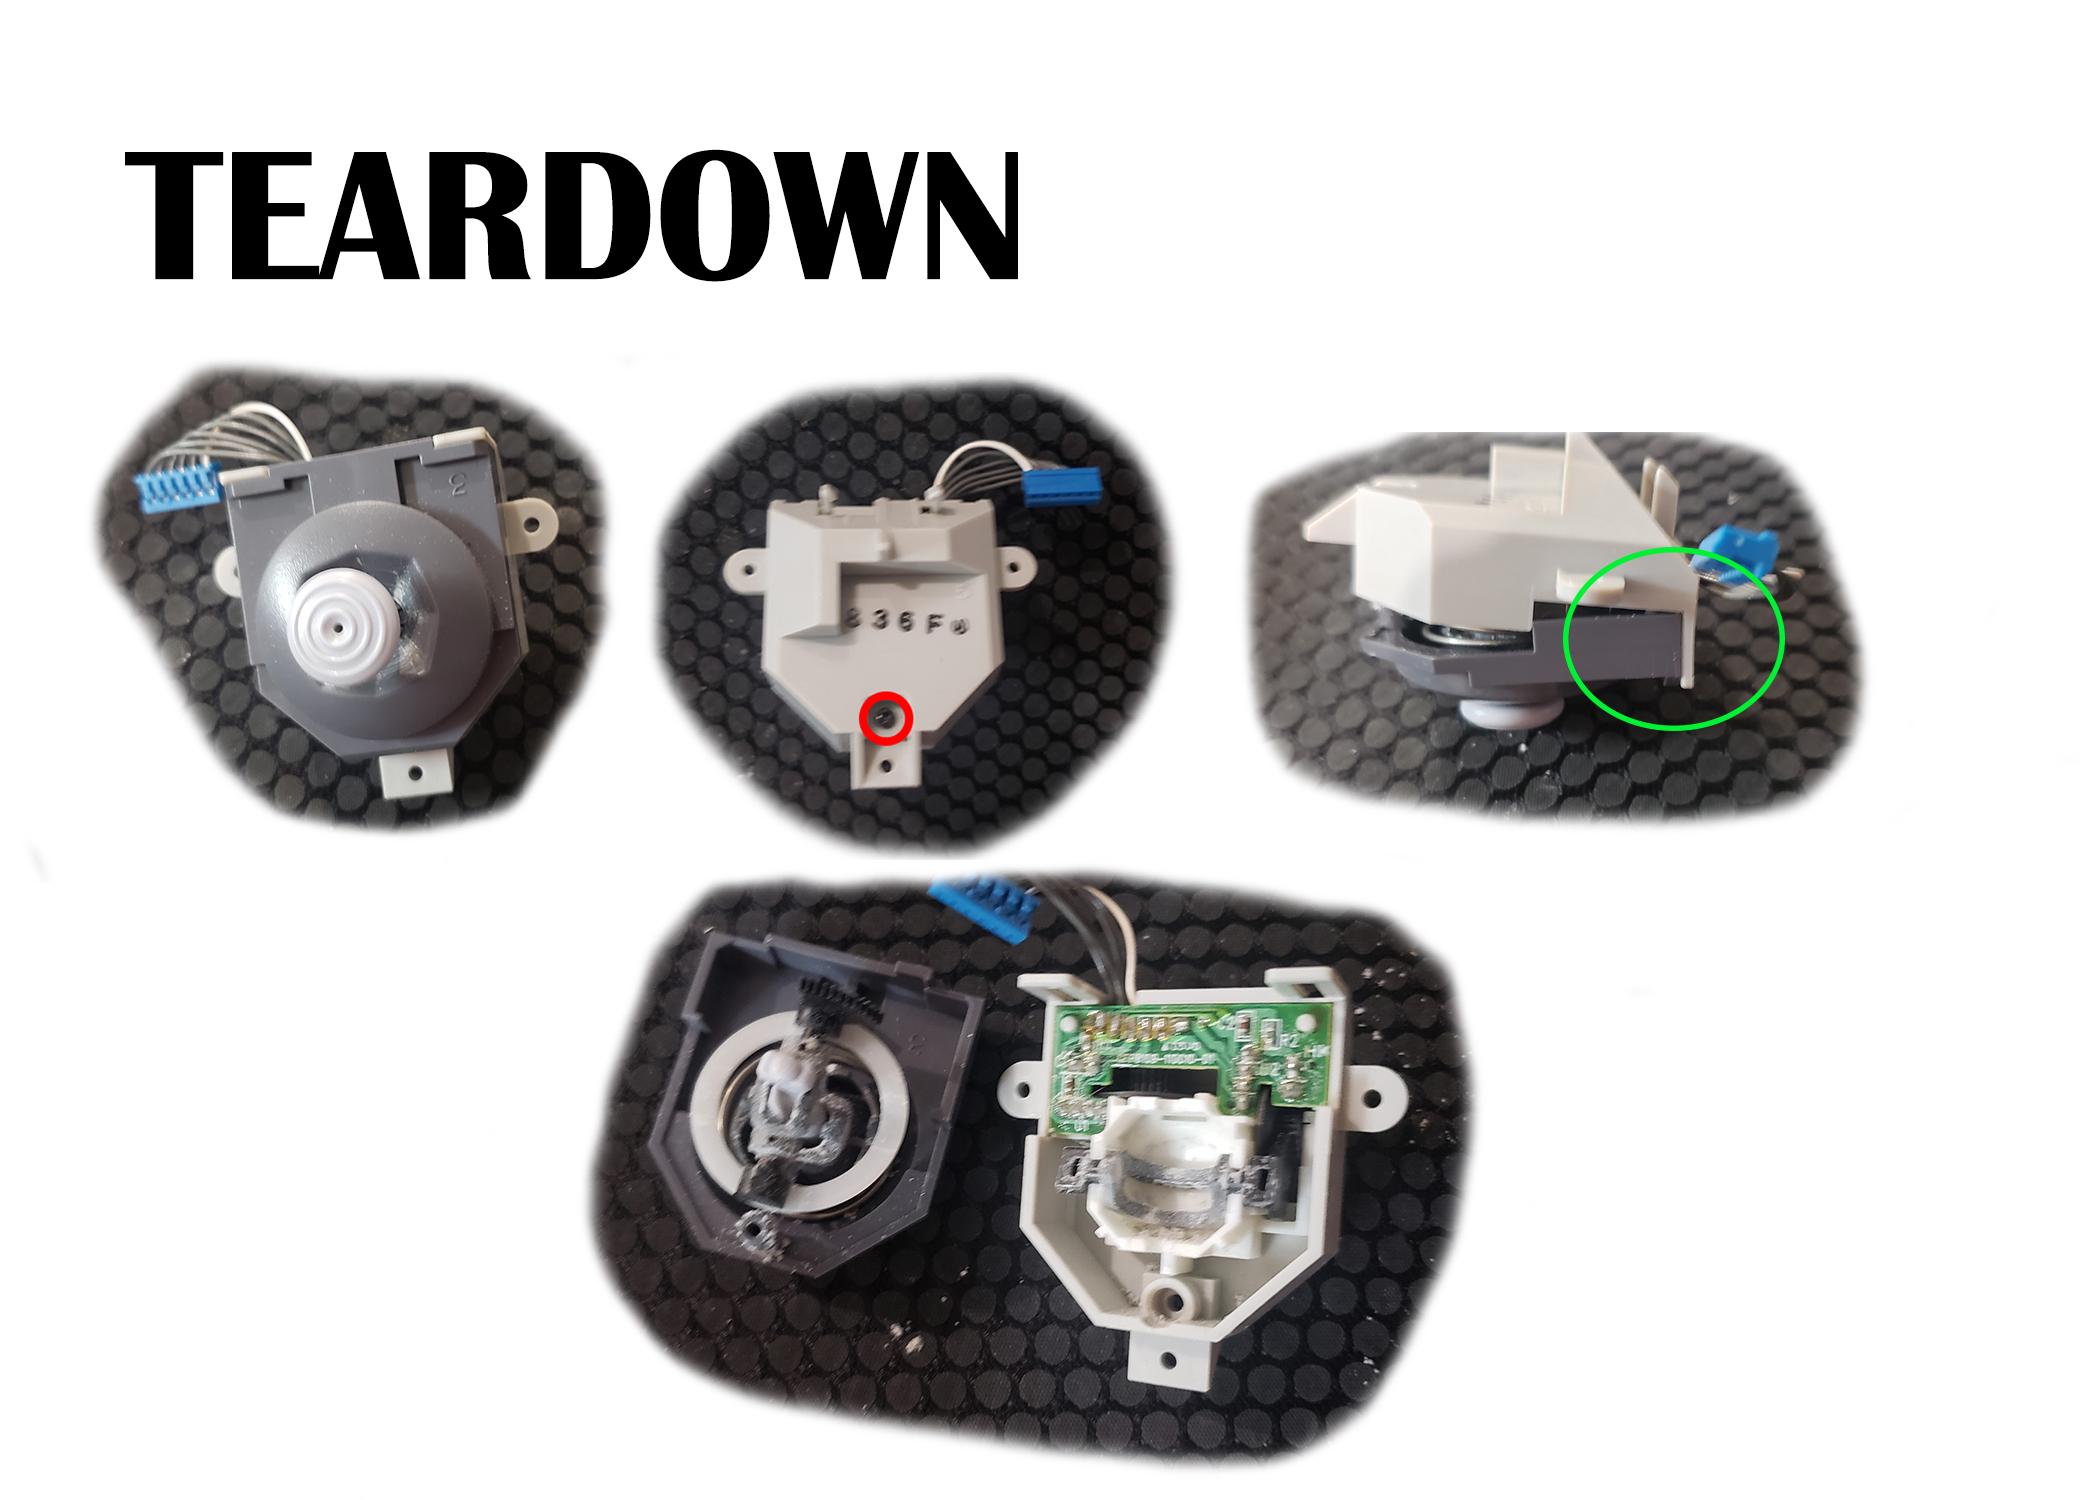
Now that the thumbstick is removed from the controller we will be able to open it up.
The last screw (in red) will be removed. This will pop open the housing with a spring inside.
There is a clip (in green) holding the top and the bottom together.
BE CAREFUL NOT TO BEND THE TOP AND BOTTOM
These clips are very fragile and break easily. Just pop the clips with a pick or thin piece of plastic. I found this way the best way to avoid breaking.
Now with the top and bottom separated you can take each part out.
Step 4: Replacing Items
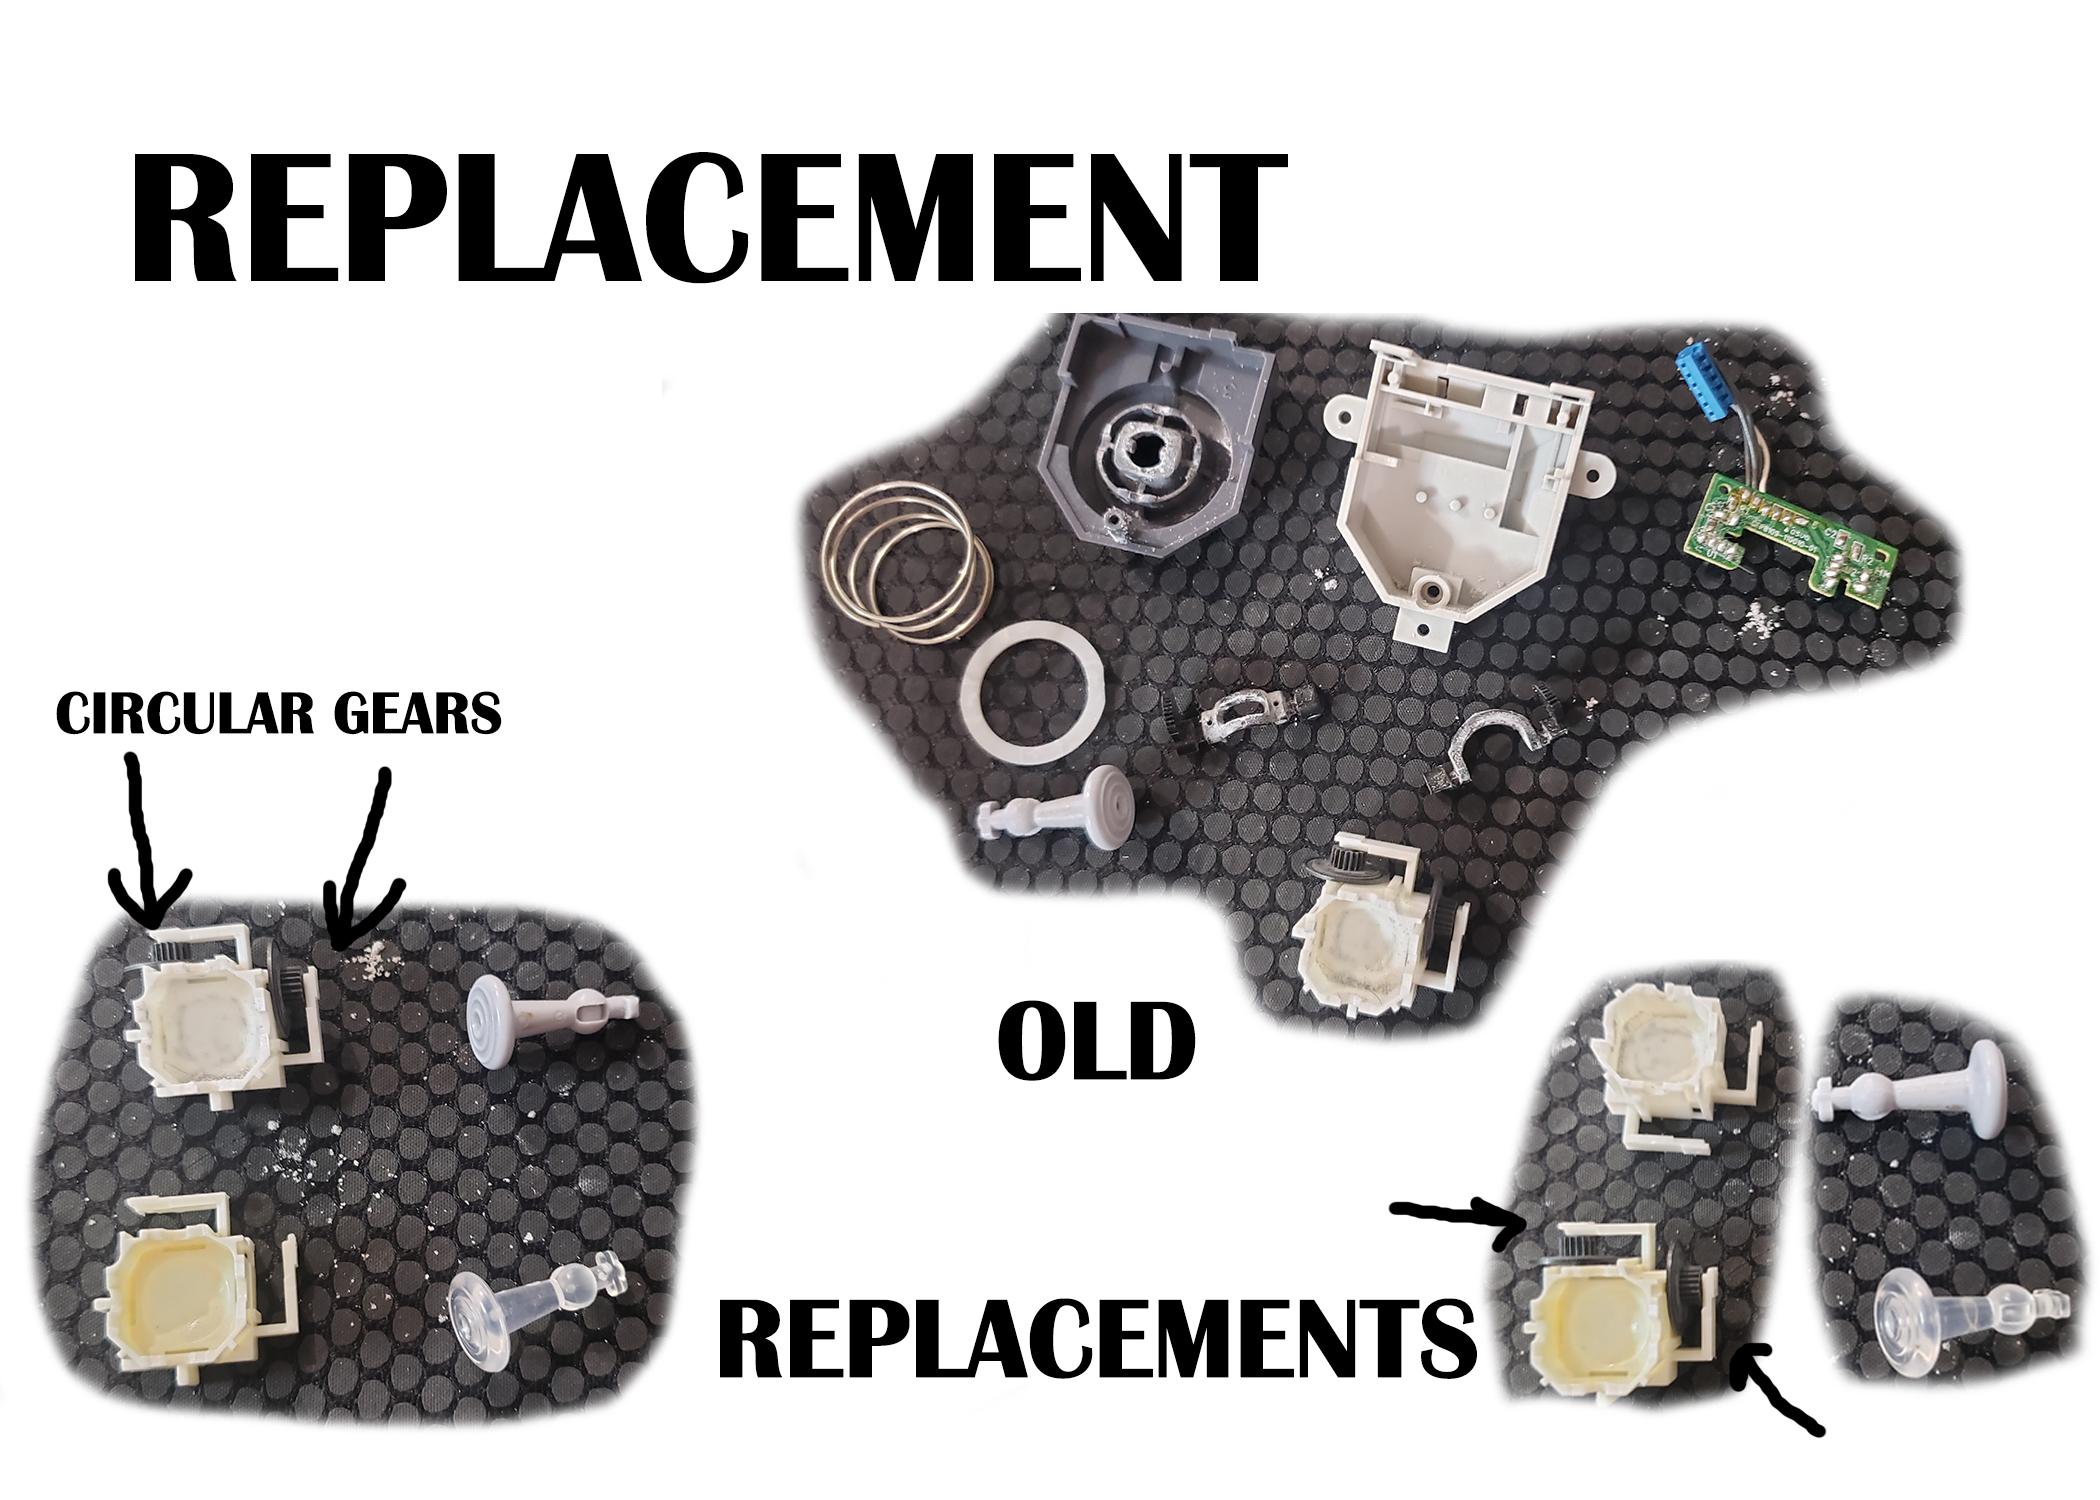
With each part separated we can get out our new replacement parts.
There are two gears on the old bowl that need to be moved to the new replacement bowls (shown in picture)
The sides of the bowl can be pulled to pop the circle gears out of place. Again be careful not to break anything with the old plastic.
The circle gears slide in place into the new bowls as shown in the picture.
Step 5: Assembling Joystick
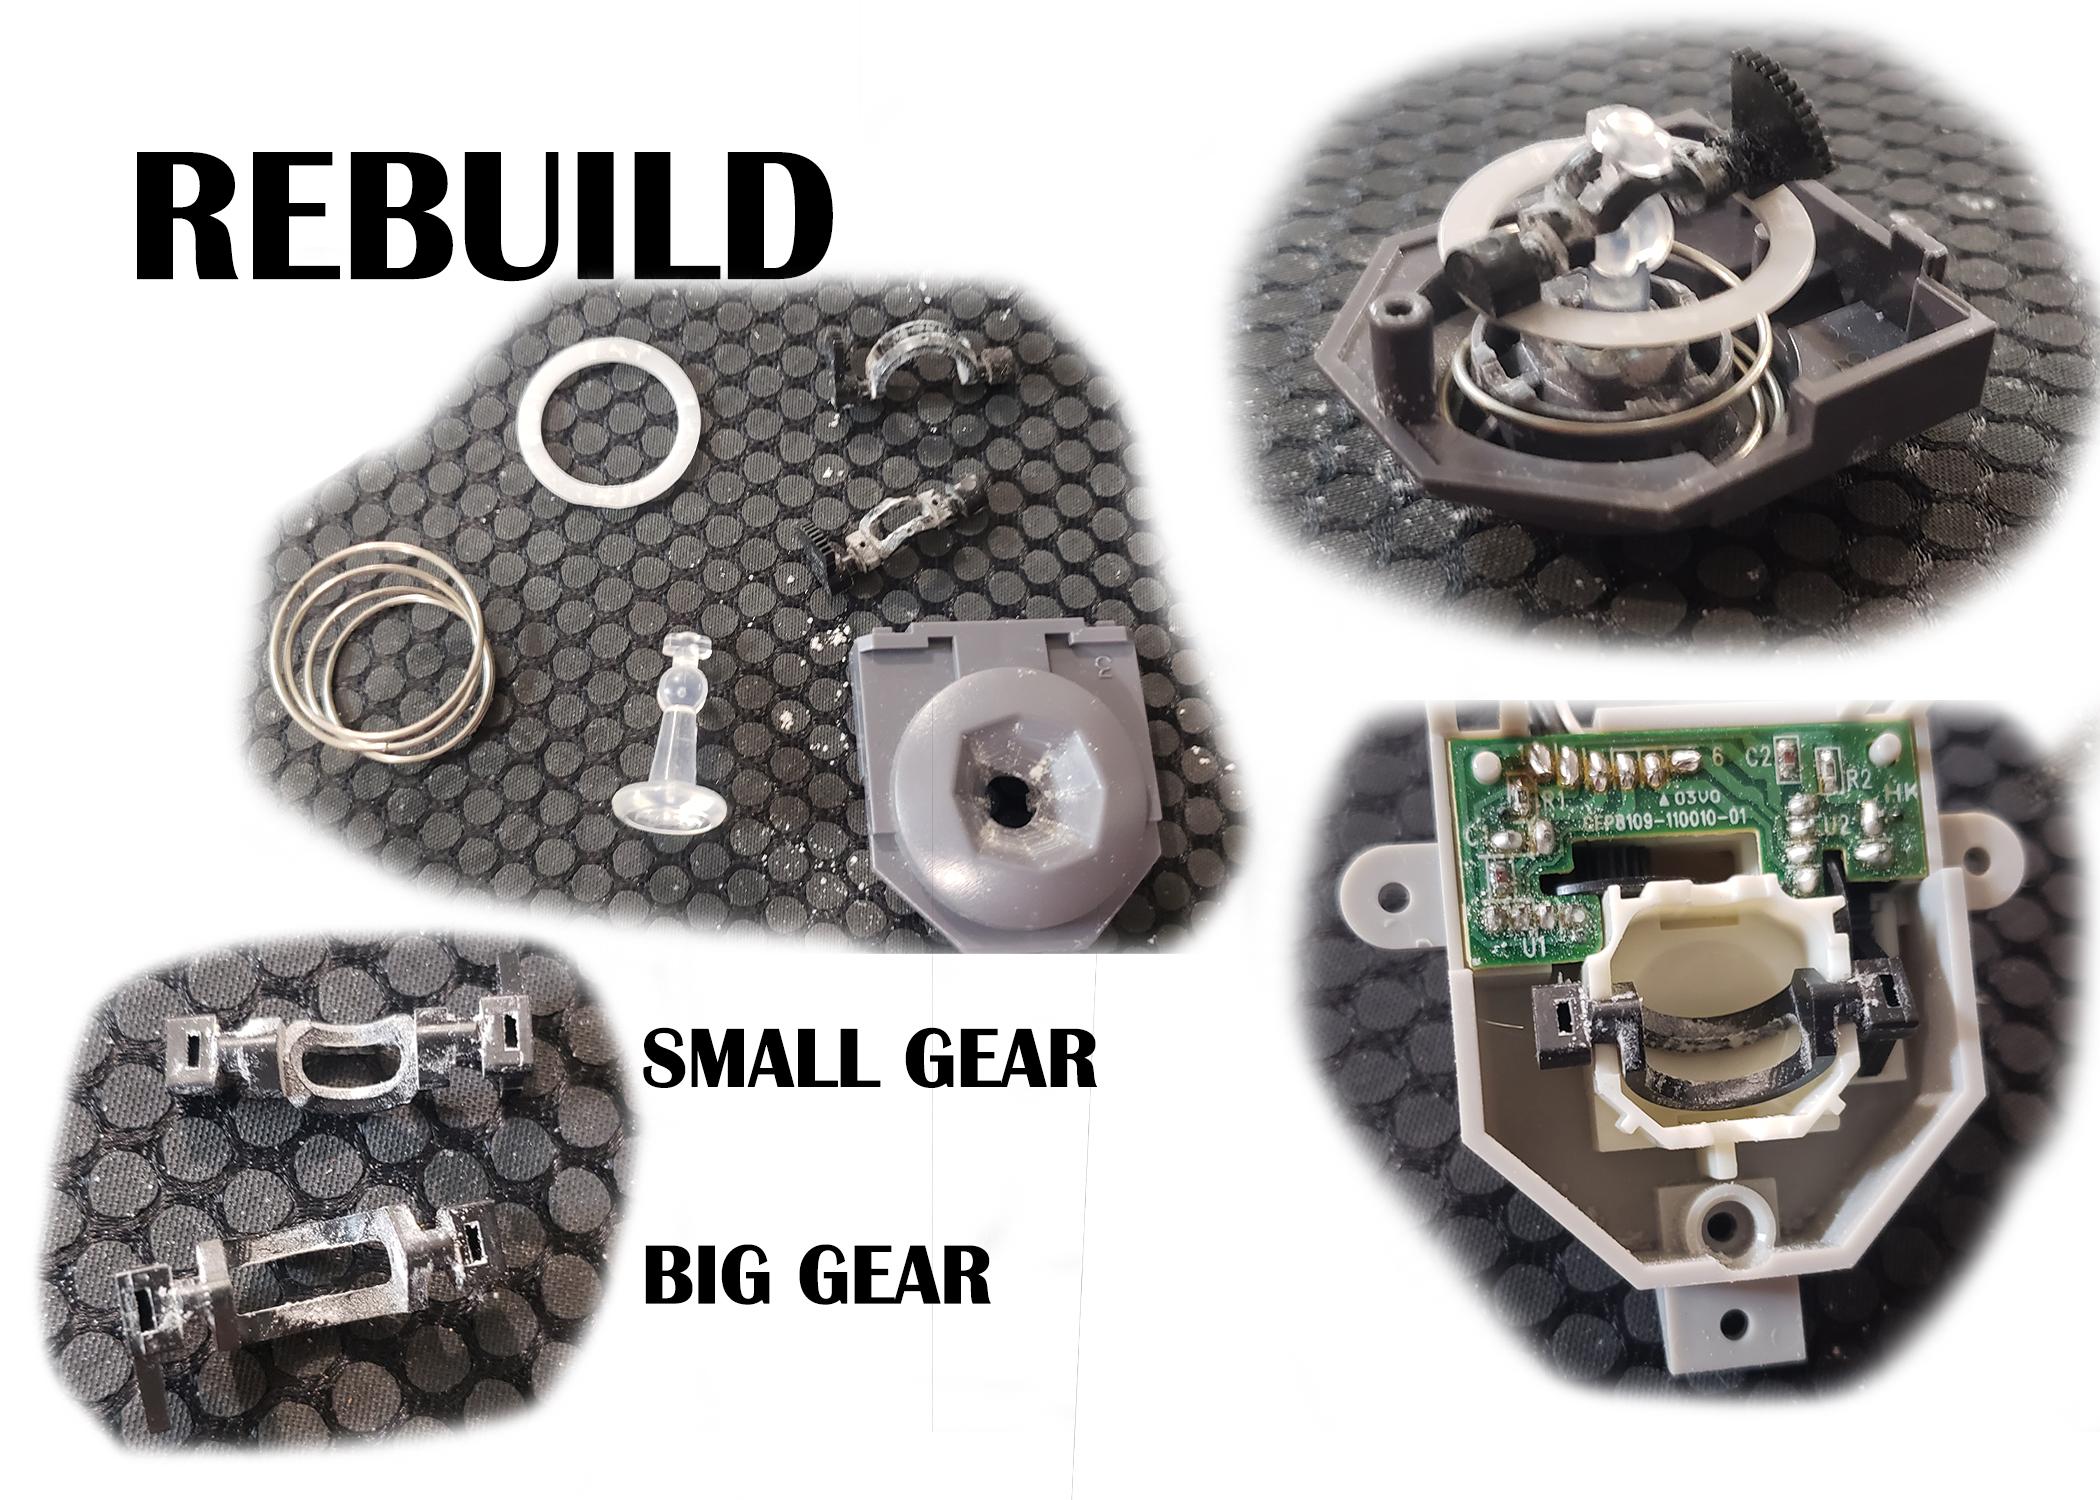
Now we can begin putting back the thumbstick.
This part can be confusing at first, just make sure to reference the pictures if needed.
The new bowl can be placed into the bottom housing and the motherboard placed on top.
There are 2 rotating gears (black) that will need to be put back in a particular way.
They may look identical, but if looked more closely you will notice a difference. I have labeled them in the picture for reference.
The Big Gear will be placed on the bottom shell horizontally as show in the picture.
Next, the top of the thumbstick will need to be reassembled.
The thumbstick will be placed into the front of the top housing. Flip the housing upside down so that the bottom is sticking up. Place the spring in the housing with the white plastic ring sitting on top.
Now push the small gear through the thumbstick so that the teeth of the gear are facing north.
The spring should have tension holding the gear and thumbstick together.
Step 6: Assembling Joystick Cont.
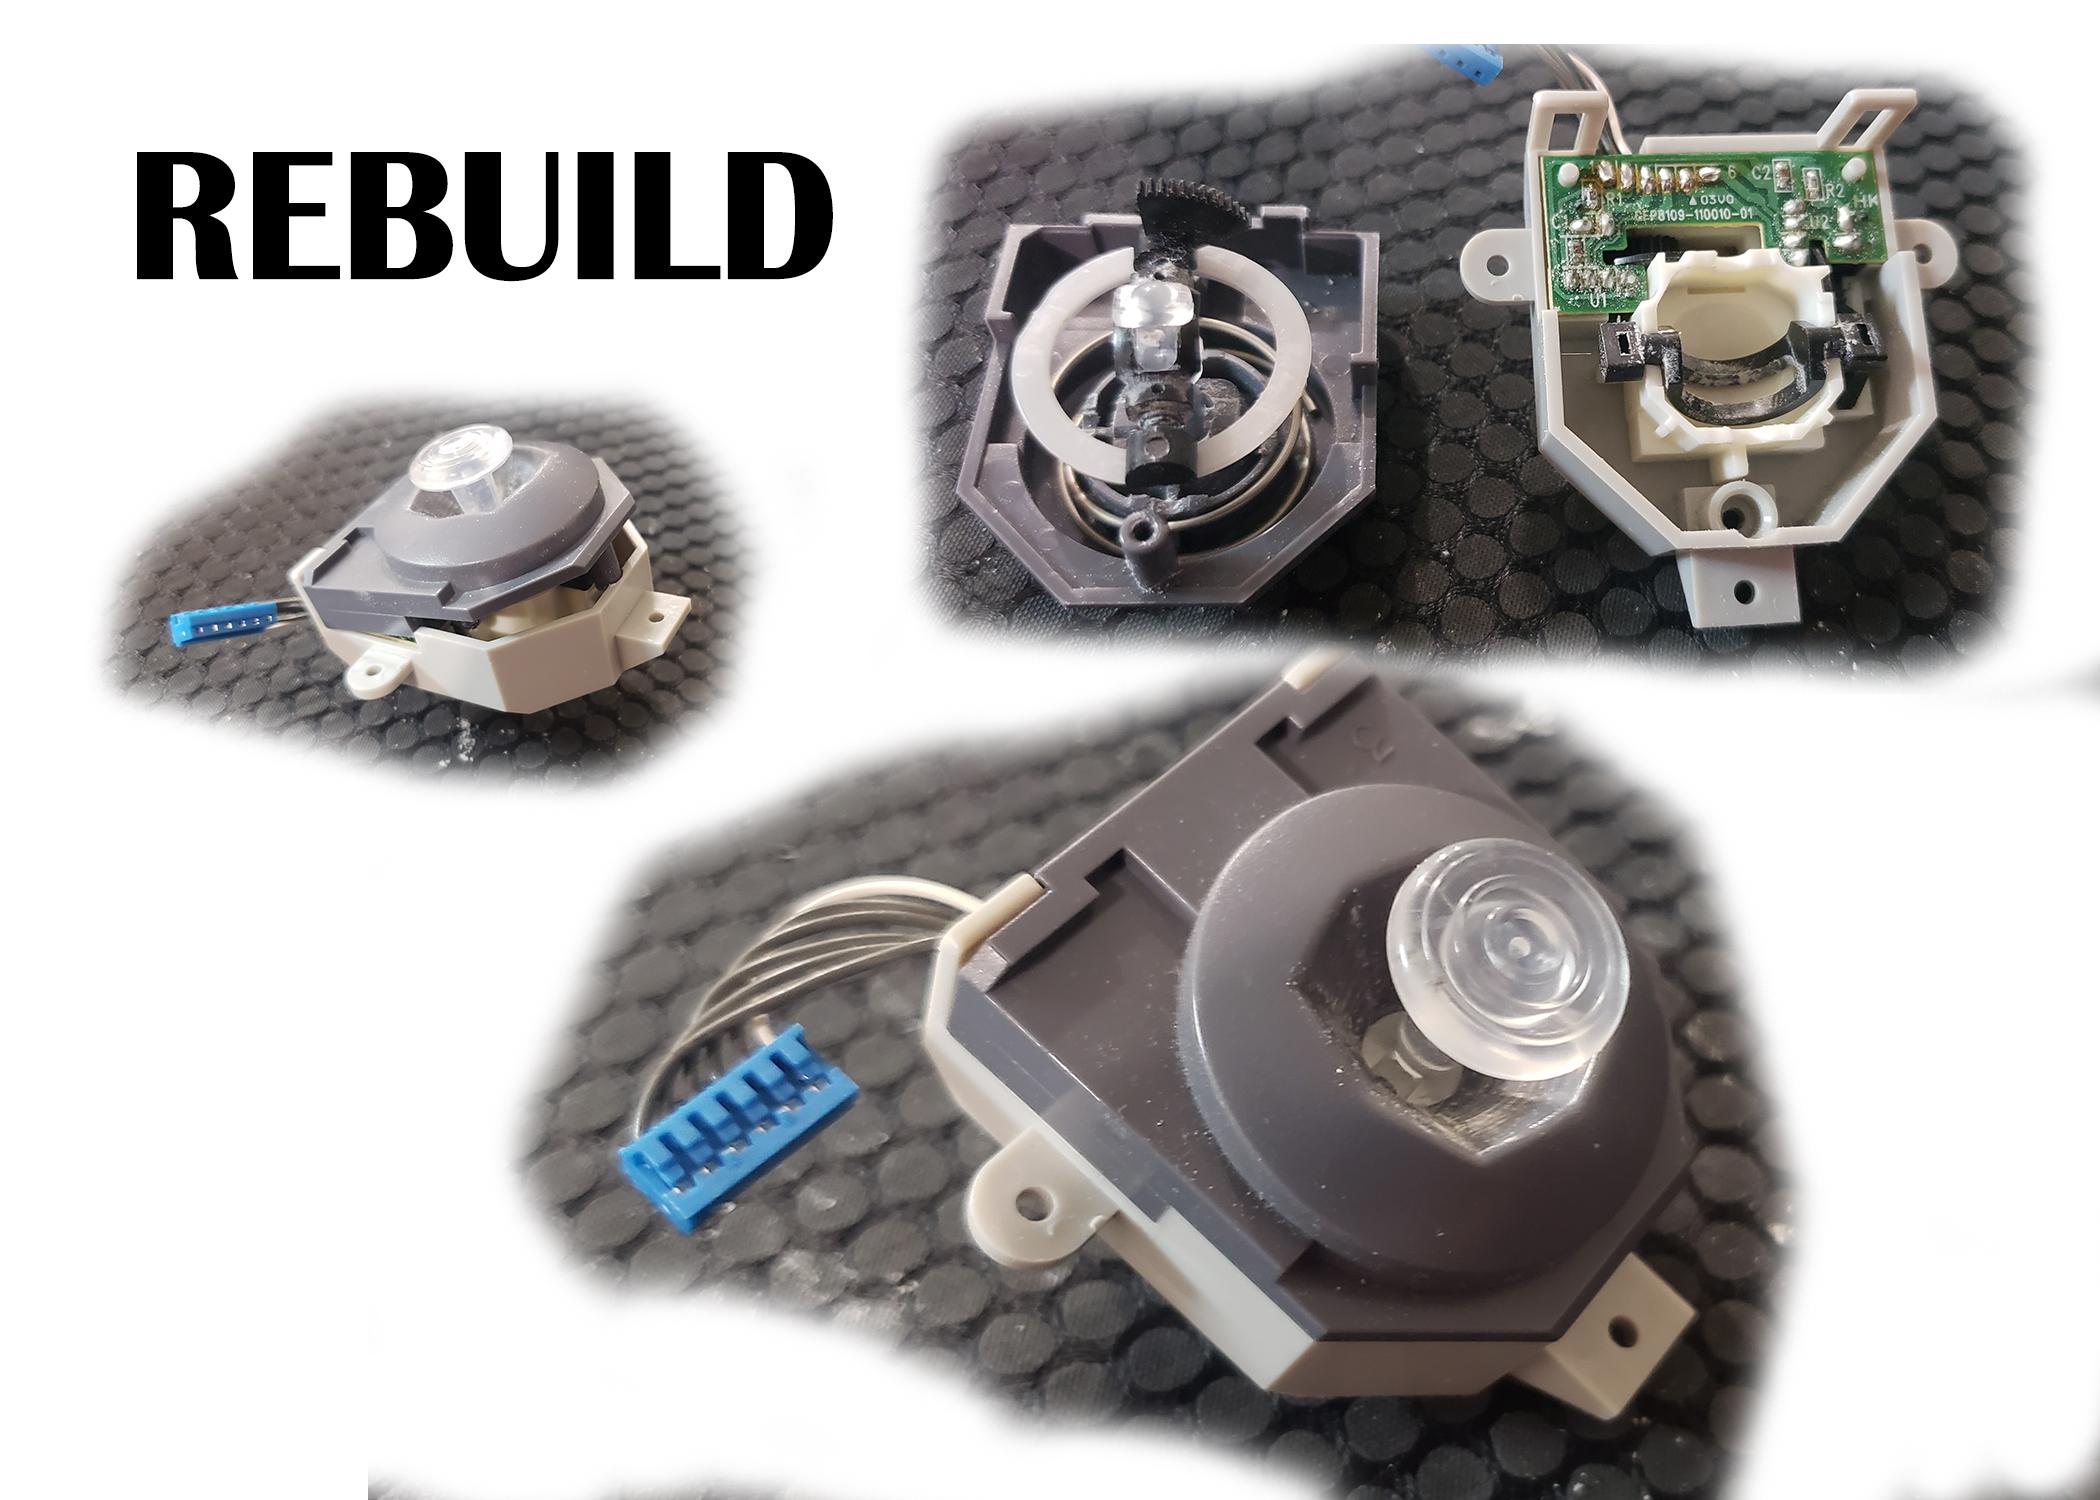
Finally, you can place the two sides of the housing on top of one another.
They should click back into place.
Push down on the thumbstick and screw the screw back into place to hold the housing together once again.
Step 7: Closing Controller Shell
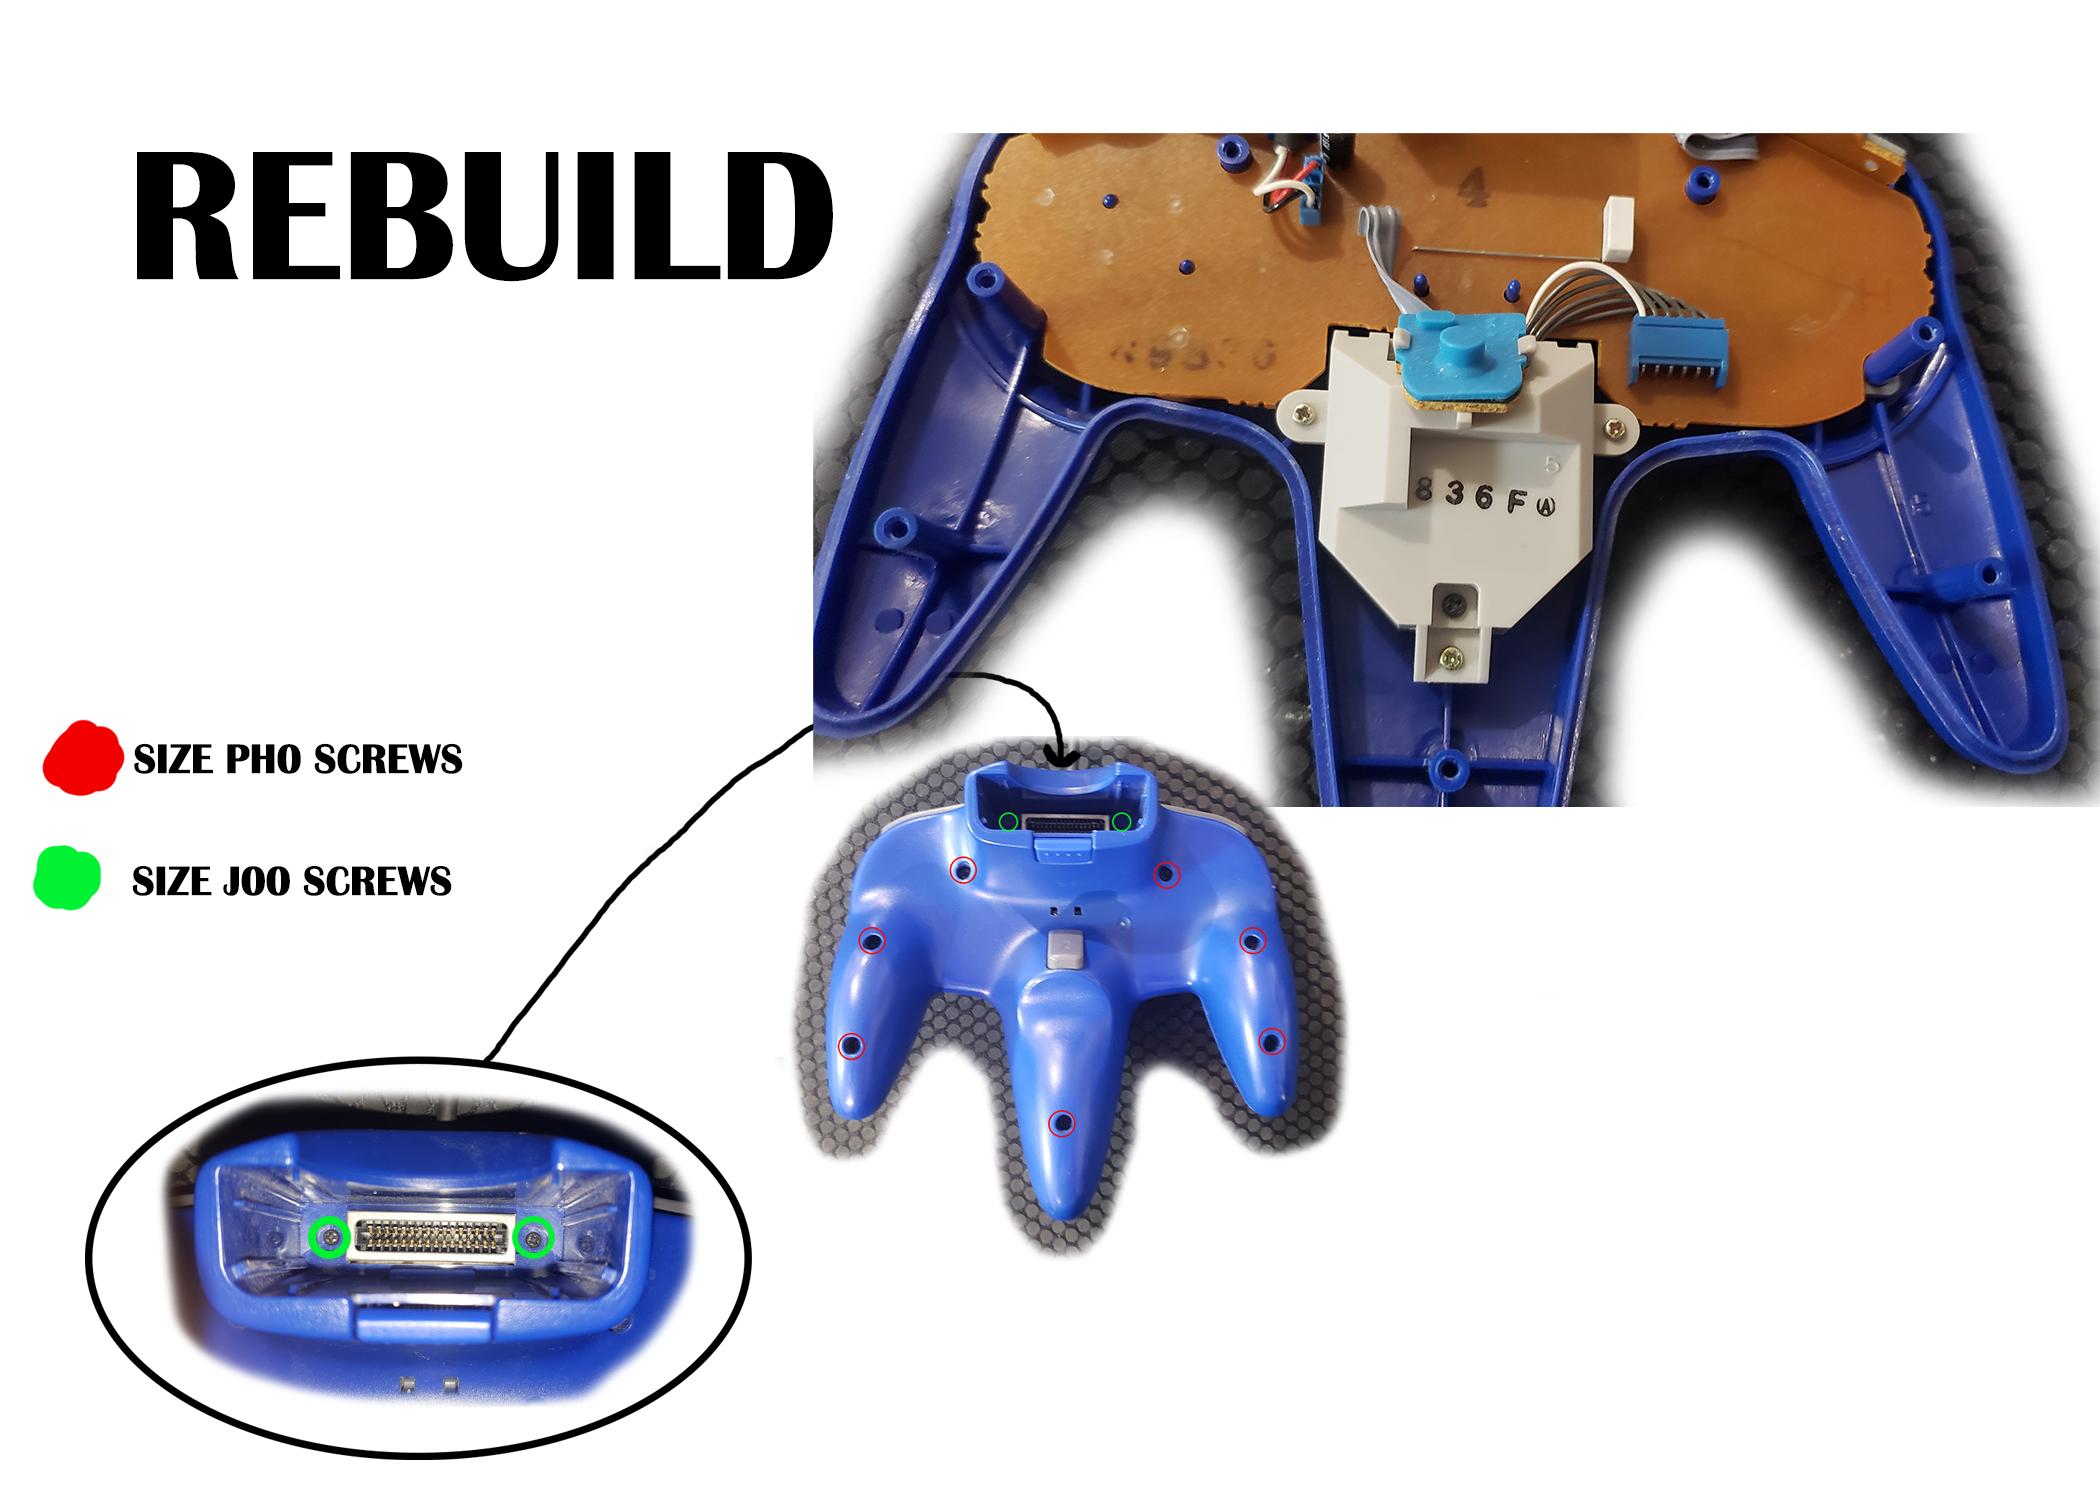
We can now put the thumbstick back into the shell of the controller and screw them back into place.
Remember to clip the button and ribbon cable back to the rest of the controller.
You can now place the back of the controller shell and screw in the screws like before.
DONE!
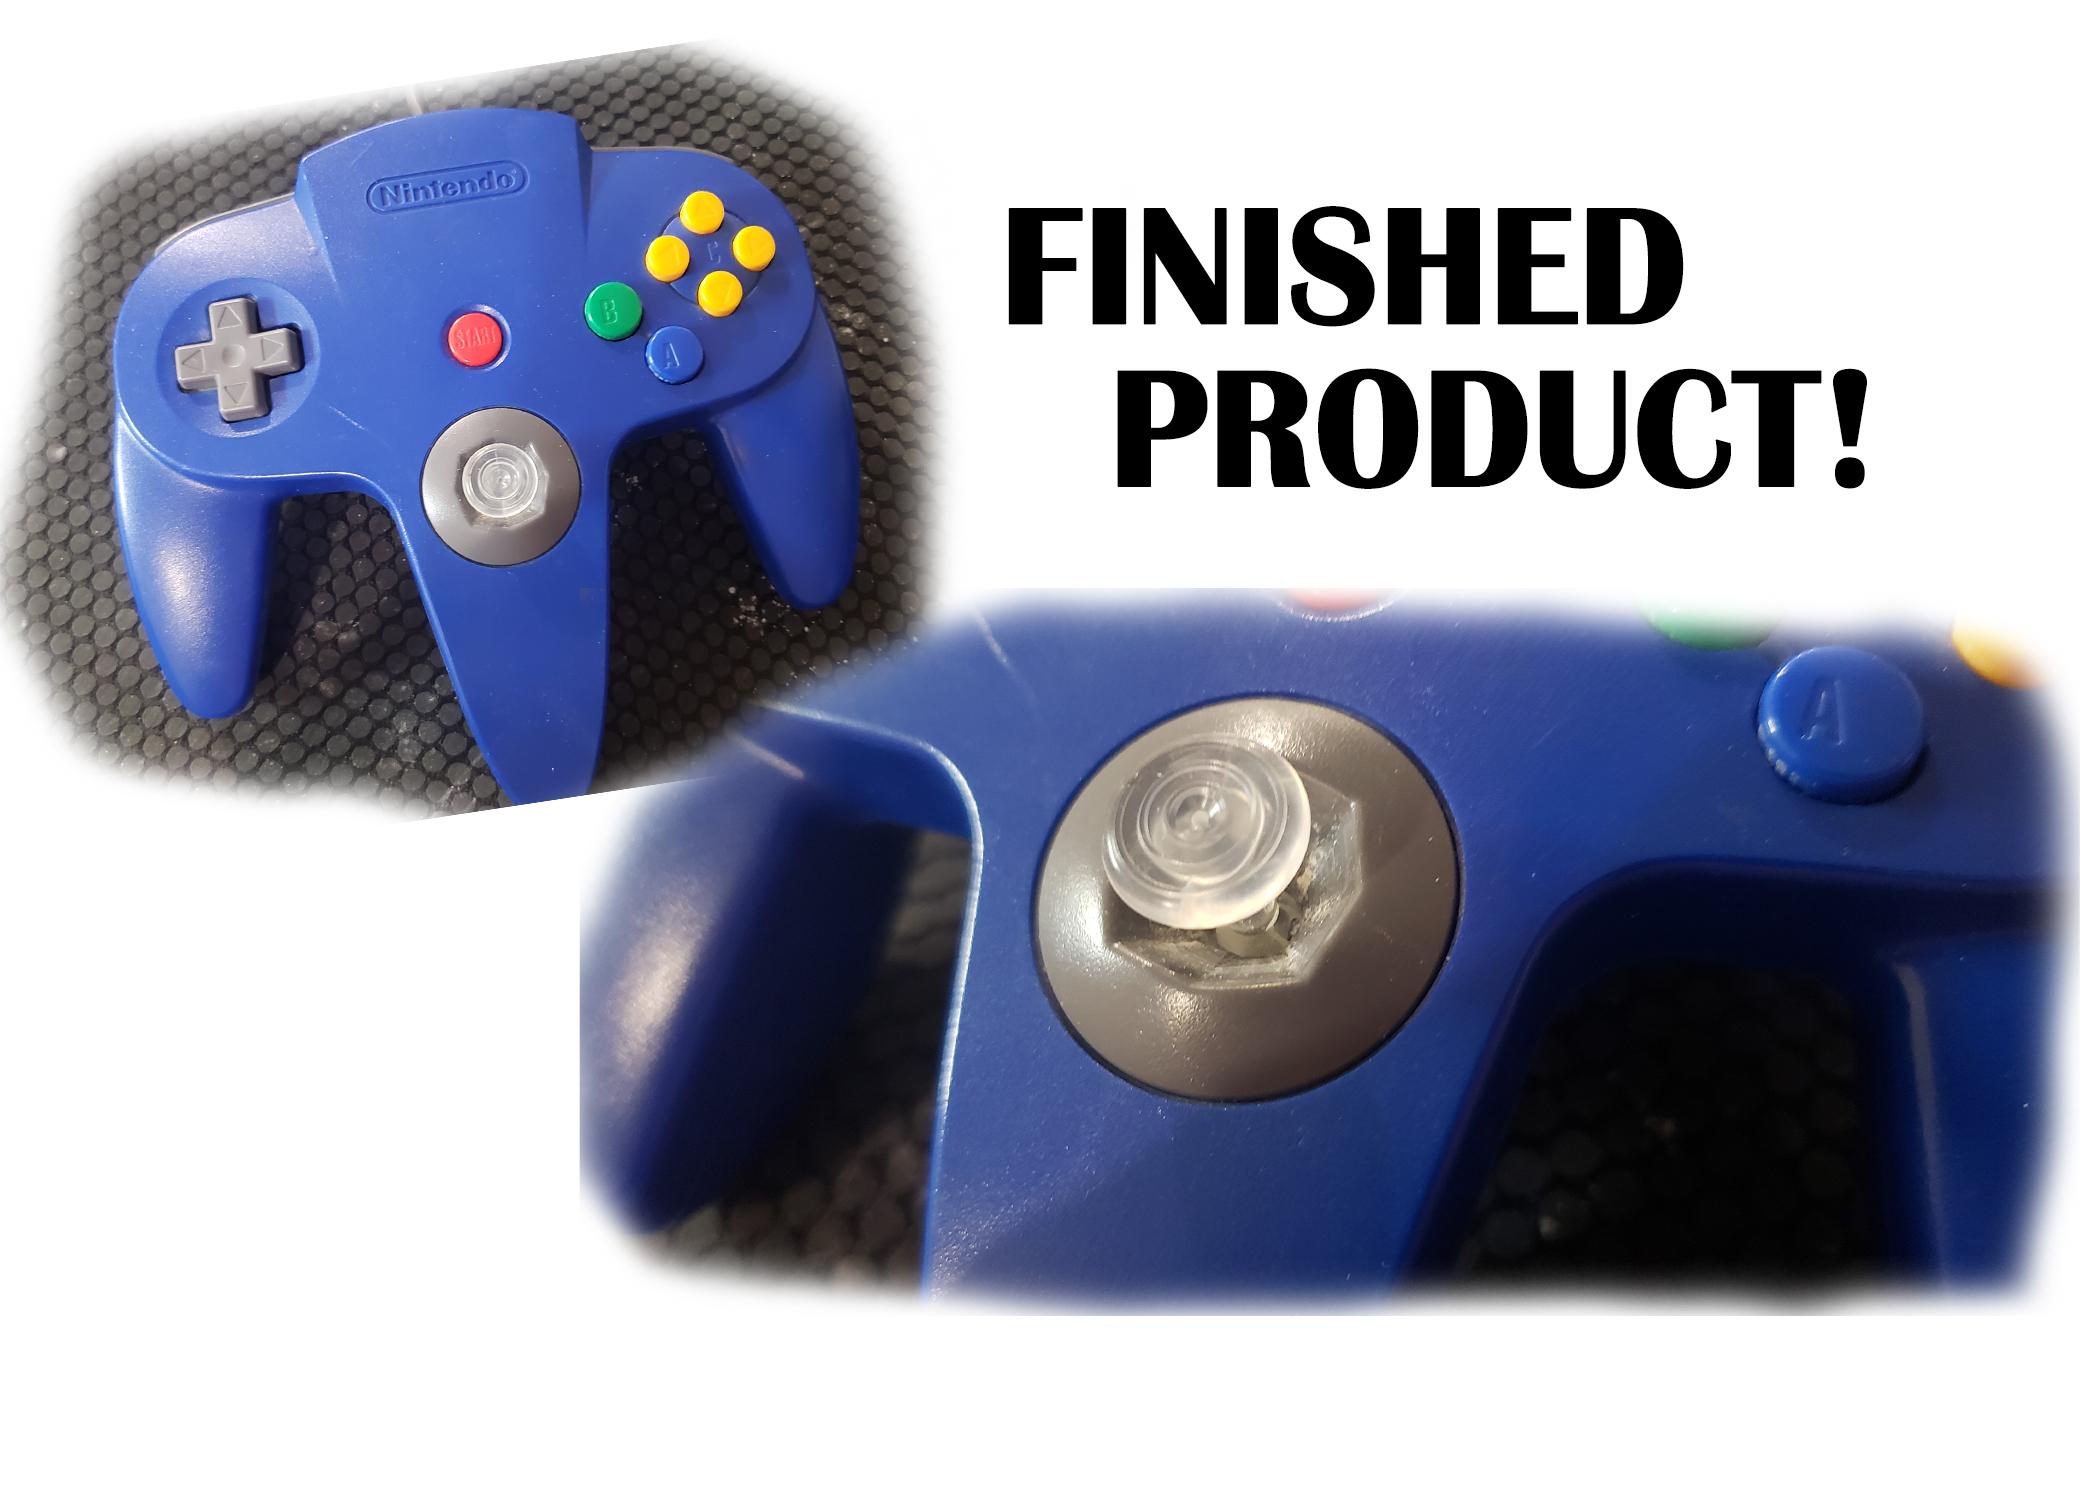
You did it!
Now you have replaced your Nintendo 64 Controller Thumbstick!
Now you have a joystick that works better than it did when it was new!