Network of Temperature Sensors
by elizabethna in Circuits > Raspberry Pi
4556 Views, 23 Favorites, 0 Comments
Network of Temperature Sensors
Temperature and humidity are vital data in your lab, kitchen, manufacturing line, office, killer robots, and even your home. If you need to monitor multiple locations or rooms or spaces you need something that is reliable, compact, accurate and affordable. You can buy expensive sensors but if you are monitoring multiple rooms this can cause your expenses to skyrocket. This tutorial will show you how to build these sensors and monitor your data without breaking the bank.
This is a perfect application for a $14 Raspberry Pi Zero WH as this device is compact, inexpensive, powerful, and has built-in WiFi. The setup for each sensor node is going to cost ~$31 plus shipping, taxes, and the case. You can easily get each item above in bulk to minimize shipping costs with the exception of the Raspberry Pi Zero WH, which may be more challenging outside of the UK. You cannot find a vendor that allows you to purchase more than one Zero per Raspberry Pi Foundation rules.
We are using the $14 Zero WH instead of the $10 Zero W since the Zero WH has the header pre-soldered, which will make our project assembly super quick and easy. We are using the DHT22 temperature/humidity sensor because of its temperature accuracy (+/- 0.5 °C), humidity range (0–100%), and low cost. We also want something really easy to wire up without having to add a pull-up resistor.
Supplies
- Raspberry Pi Zero WH ($14)
- Micro SD card ($4)
- Raspberry Pi power supply ($8)
- DHT22 Temperature/Humidity Sensor ($5)
- (Optional) Raspberry Pi Zero W case ($6)
Assembly
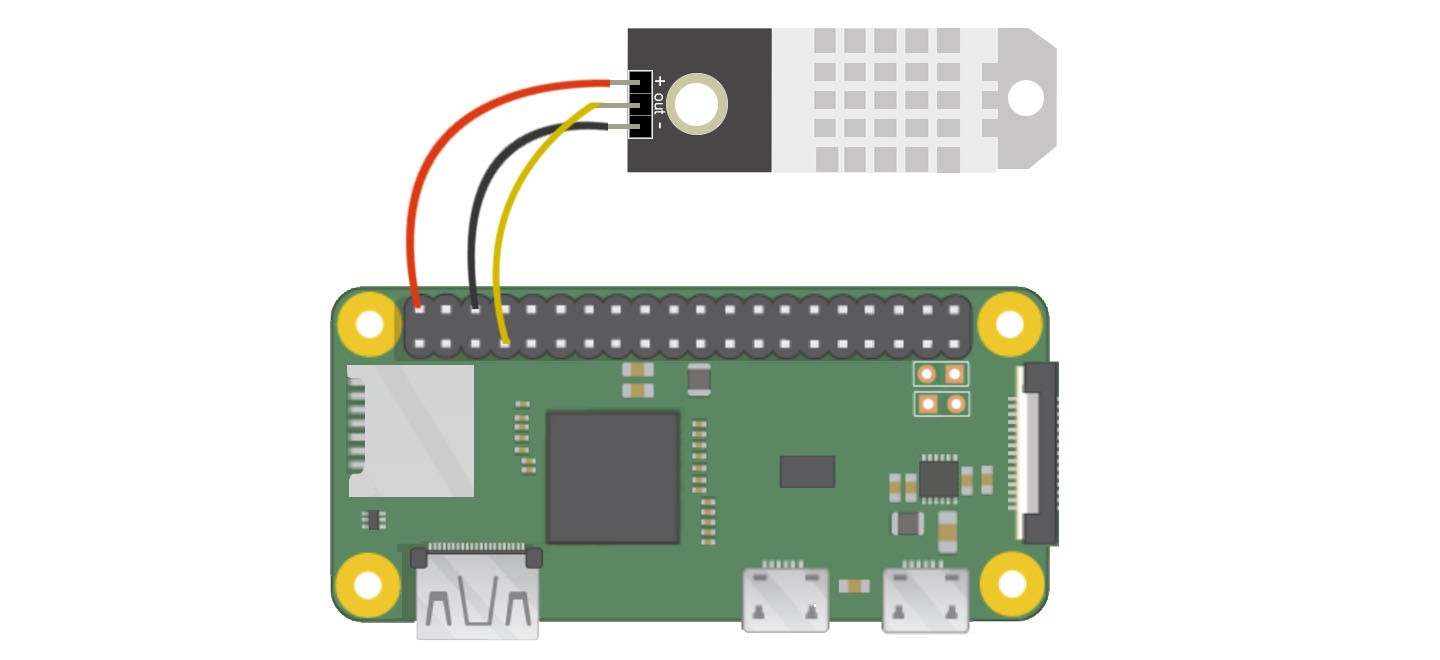
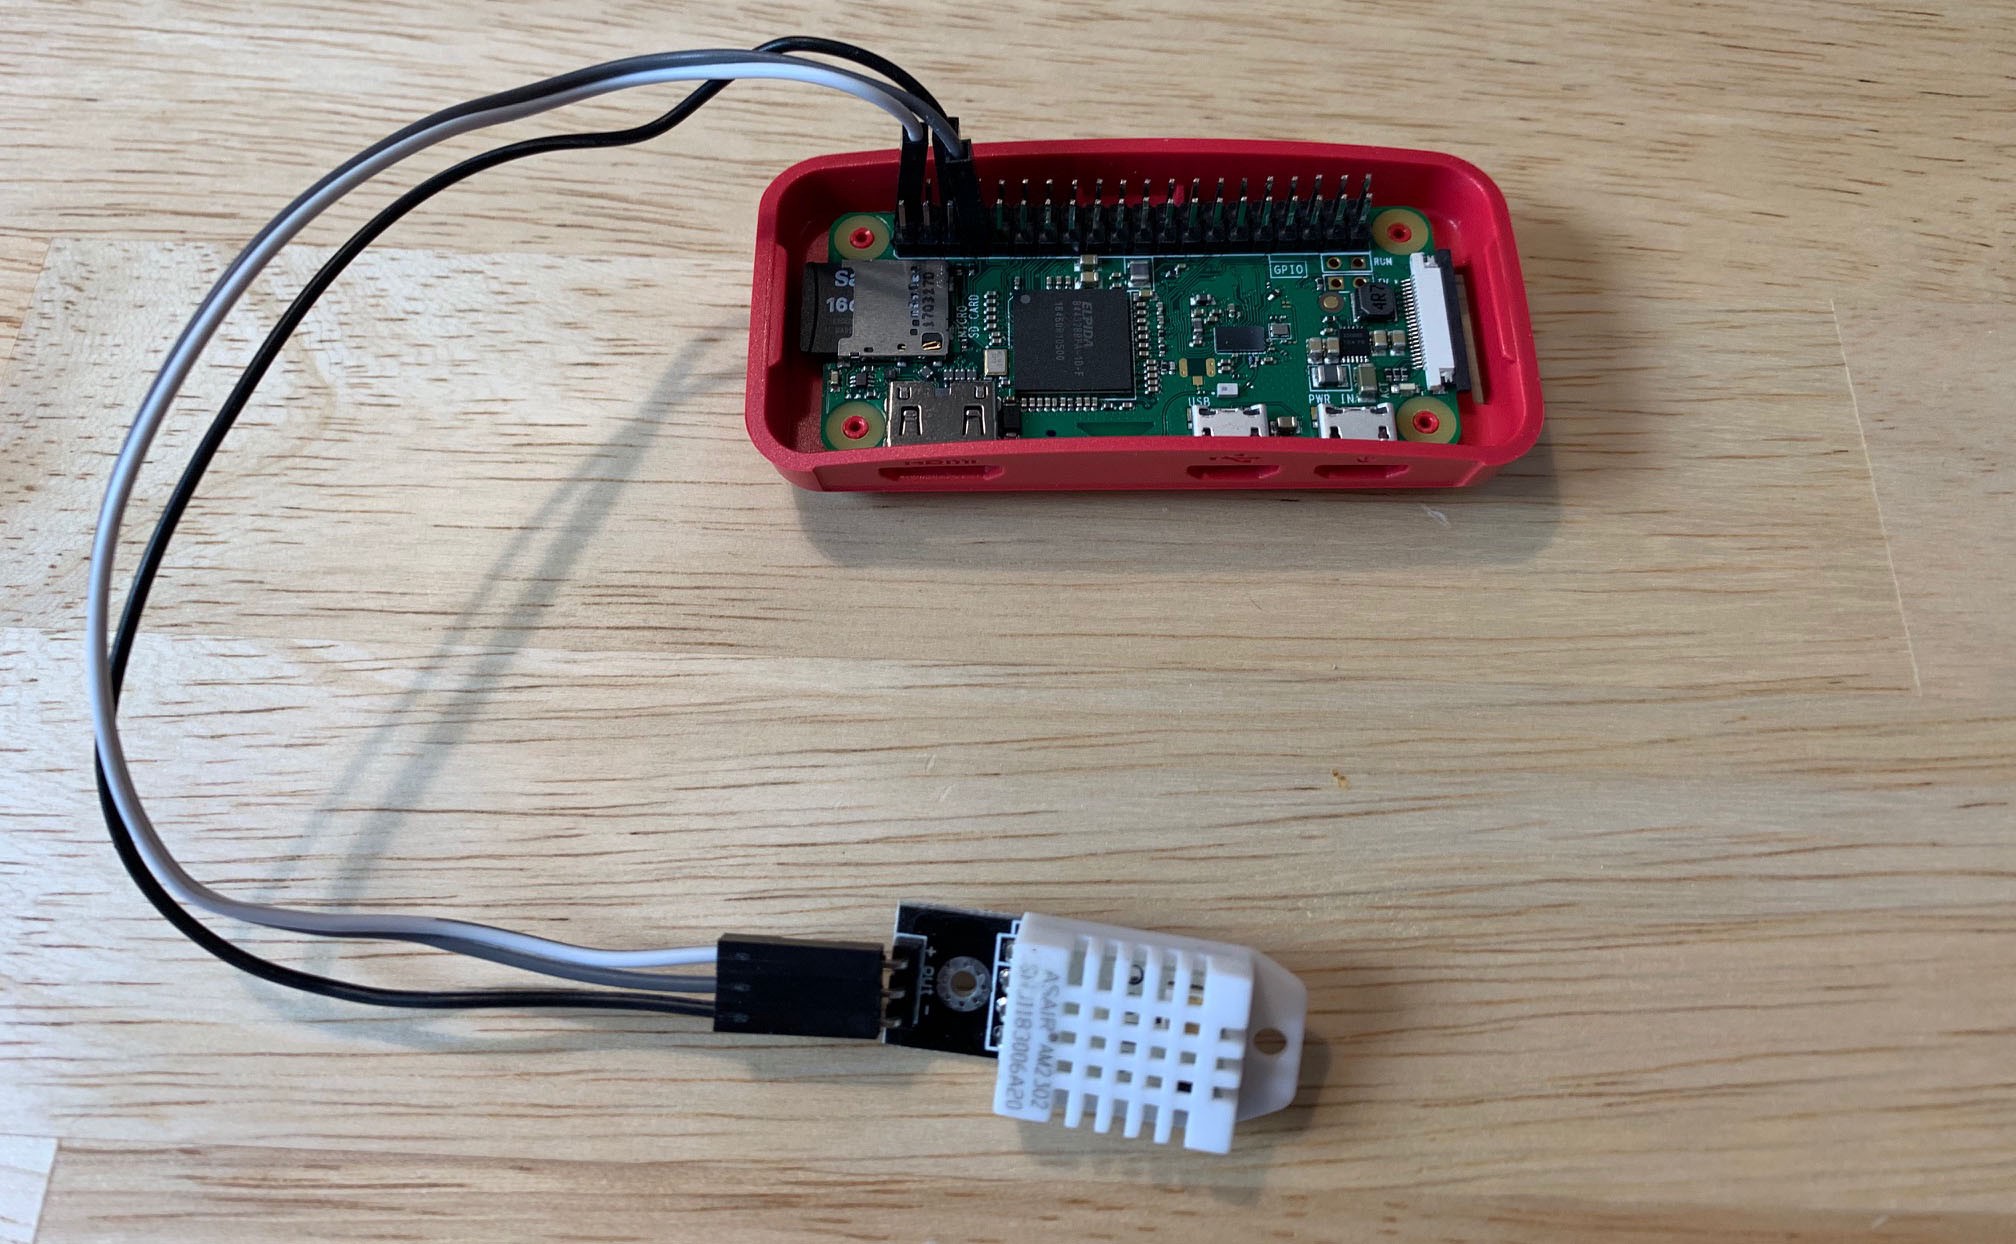
The DHT22 will have three pins that you will need to connect to your Pi Zero WH: 5V, Ground, and data. The power pin on the DHT22 will be labeled ‘+’ or ‘5V’. Connect this to pin 2 (the top right pin, 5V) of the Pi Zero WH. The Ground pin on the DHT22 will be labeled ‘-’ or ‘Gnd’. Connect this to pin 6 (two pins below the 5V pin) on the Pi Zero WH. The remaining pin on the DHT22 is the data pin and will be labeled ‘out’ or ‘s’ or ‘data’. Connect this to one of the GPIO pins on the Zero WH such as GPIO4 (pin 7). Your connections should look like the included picture.
Software Setup
You will need a monitor and keyboard to setup your Pi Zero WH the first time. Once it is setup, you won’t need either a monitor or a keyboard to run when deployed in your space. We want to keep each node as small and compact as possible.
- You need to install the standard Raspbian operating system so your Pi Zero WH will boot. You can follow the instructions on Raspberry Pi's website to setup your Pi Zero WH.
- Connect your Pi Zero WH to your WiFi network. You can follow the instructions on Raspberry Pi's website to connect your Pi Zero WH to WiFi.
- Install the Adafruit DHT Python module on your Pi to make reading DHT22 sensor data super easy. Enter the following in your command prompt:
$ sudo pip install Adafruit_DHT
You now have everything you need to communicate with your sensor. Next, you need a destination for your sensor data so you can turn that data into an awesome dashboard or an SMS/email alert. We will use Initial State for this step of the project.
- Register for an account at https://iot.app.initialstate.com.
- Install the ISStreamer module on your command prompt:
$ sudo pip install ISStreamer
Python Script
With our operating system installed along with our two Python modules for reading sensor data and sending data to Initial State, we are ready to write our Python script. The following script will create/append to an Initial State data bucket, read the DHT22 sensor data, and send that data to a real-time dashboard. All you need to do is modify lines 6–11.
import Adafruit_DHT
from ISStreamer.Streamer import Streamer
import time

# --------- User Settings ---------
SENSOR_LOCATION_NAME = "Office"
BUCKET_NAME = ":partly_sunny: Room Temperatures"
BUCKET_KEY = "rt0129"
ACCESS_KEY = "PLACE YOUR INITIAL STATE ACCESS KEY HERE"
MINUTES_BETWEEN_READS = 10
METRIC_UNITS = False
# ---------------------------------

streamer = Streamer(bucket_name=BUCKET_NAME, bucket_key=BUCKET_KEY, access_key=ACCESS_KEY)
while True:
	humidity, temp_c = Adafruit_DHT.read_retry(Adafruit_DHT.DHT22, 4)
	if METRIC_UNITS:
		streamer.log(SENSOR_LOCATION_NAME + " Temperature(C)", temp_c)
	else:
		temp_f = format(temp_c * 9.0 / 5.0 + 32.0, ".2f")
		streamer.log(SENSOR_LOCATION_NAME + " Temperature(F)", temp_f)
	humidity = format(humidity,".2f")
	streamer.log(SENSOR_LOCATION_NAME + " Humidity(%)", humidity)
	streamer.flush()
	time.sleep(60*MINUTES_BETWEEN_READS)
- Line 6 - This value should be unique for each node/temperature sensor. This could be your sensor node’s room name, physical location, unique identifier, or whatever. Just make sure it is unique for each node to ensure that the data from this node goes to its own data stream in your dashboard.
- Line 7 - This is the name of the data bucket. This can be changed at any time in the Initial State UI.
- Line 8 - This is your bucket key. It needs to be the same bucket key for every node you want displayed in the same dashboard.
- Line 9 - This is your Initial State account access key. Copy+paste this key from your Initial State account.
- Line 10 - This is the time between sensor reads. Change accordingly.
- Line 11 - You can specify metric or imperial units.
After you have set lines 6–11 in your Python script on your Pi Zero WH, save and exit the text editor. Run the script with the following command:
$ python tempsensor.py
Repeat these steps for each sensor node. As long as each node is sending data to Initial State using the same access key and bucket key, all data will go into the same data bucket and show up on the same dashboard.
Dashboard
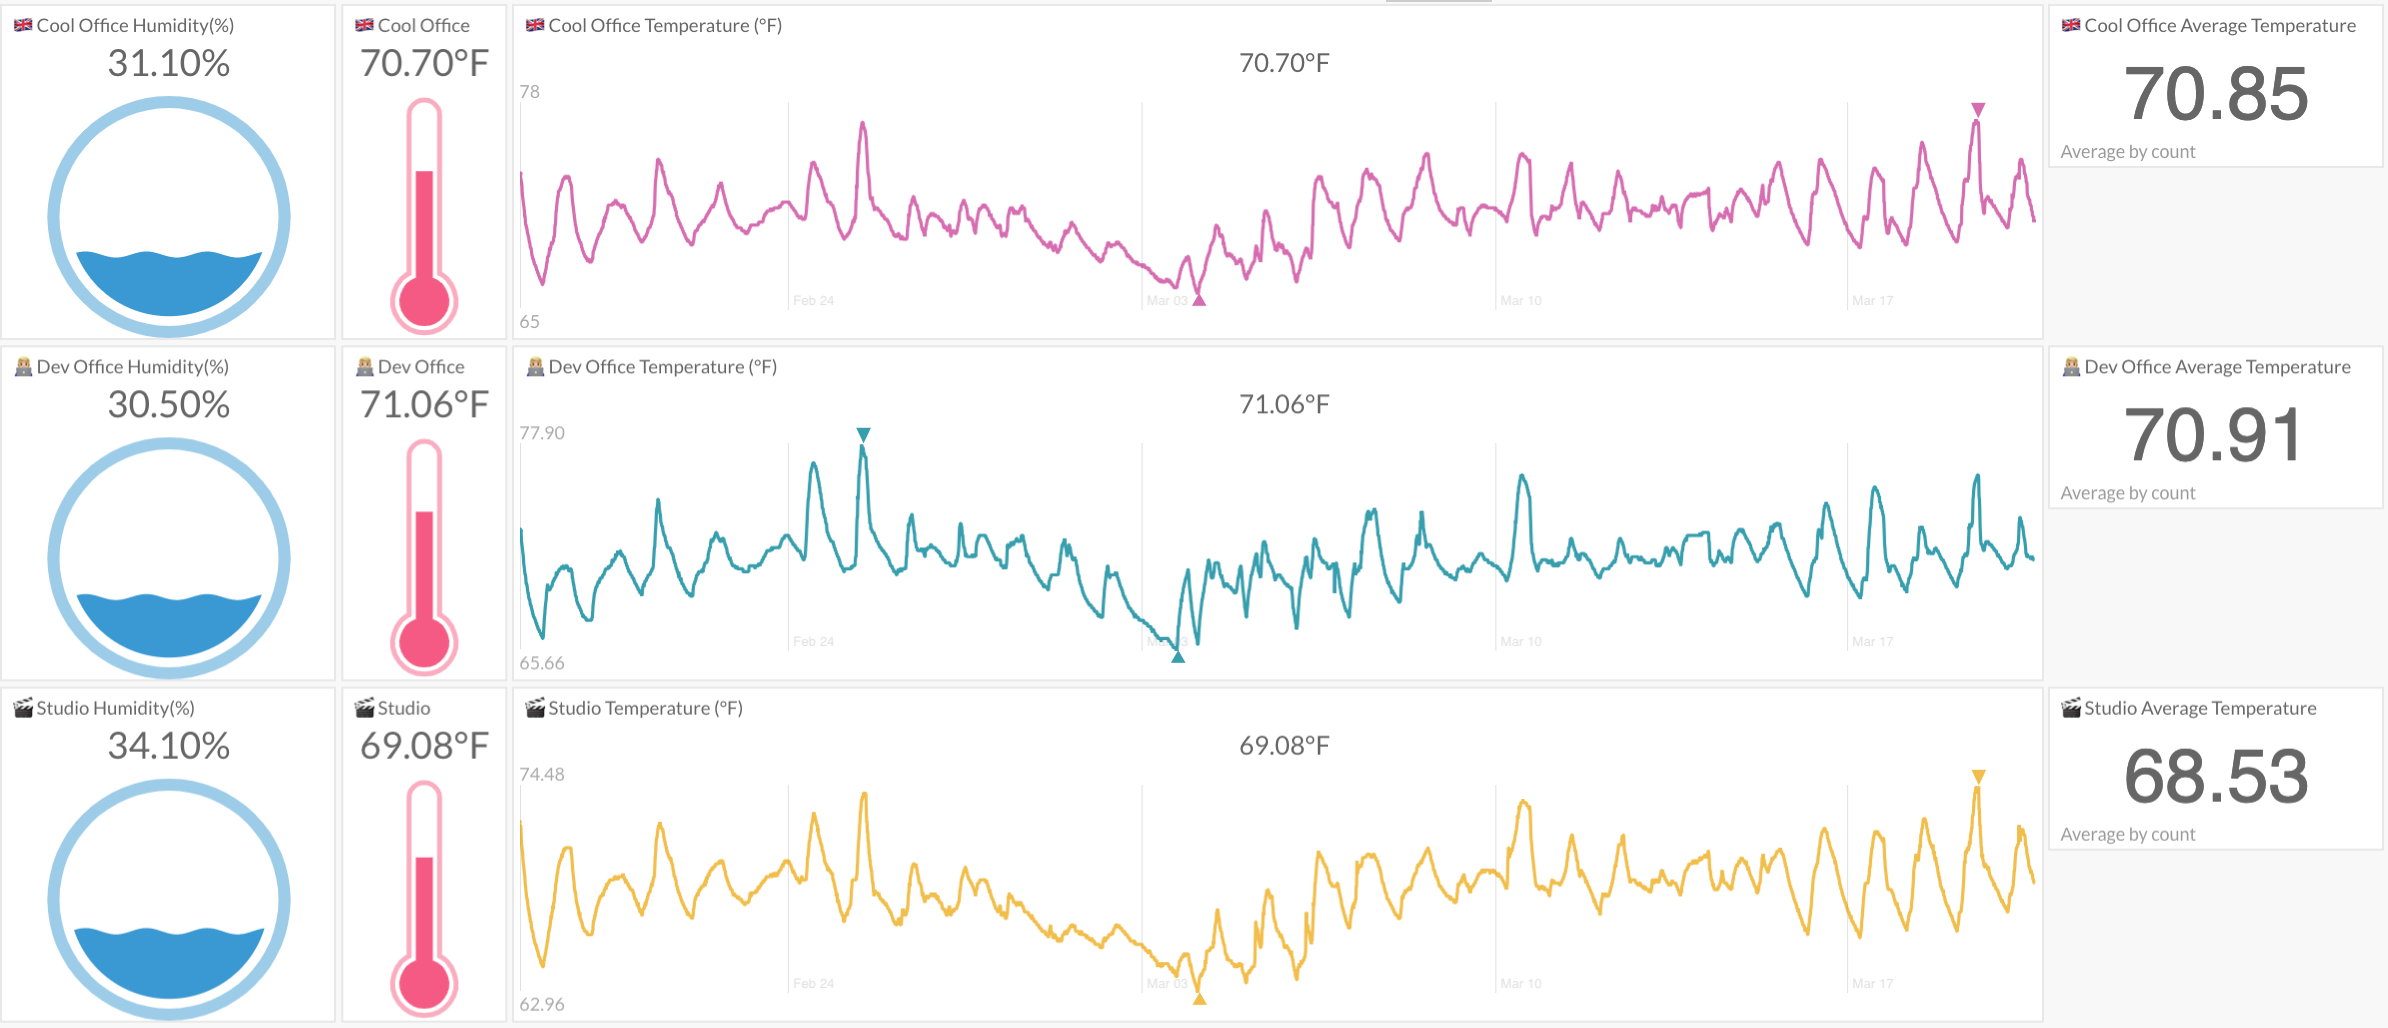
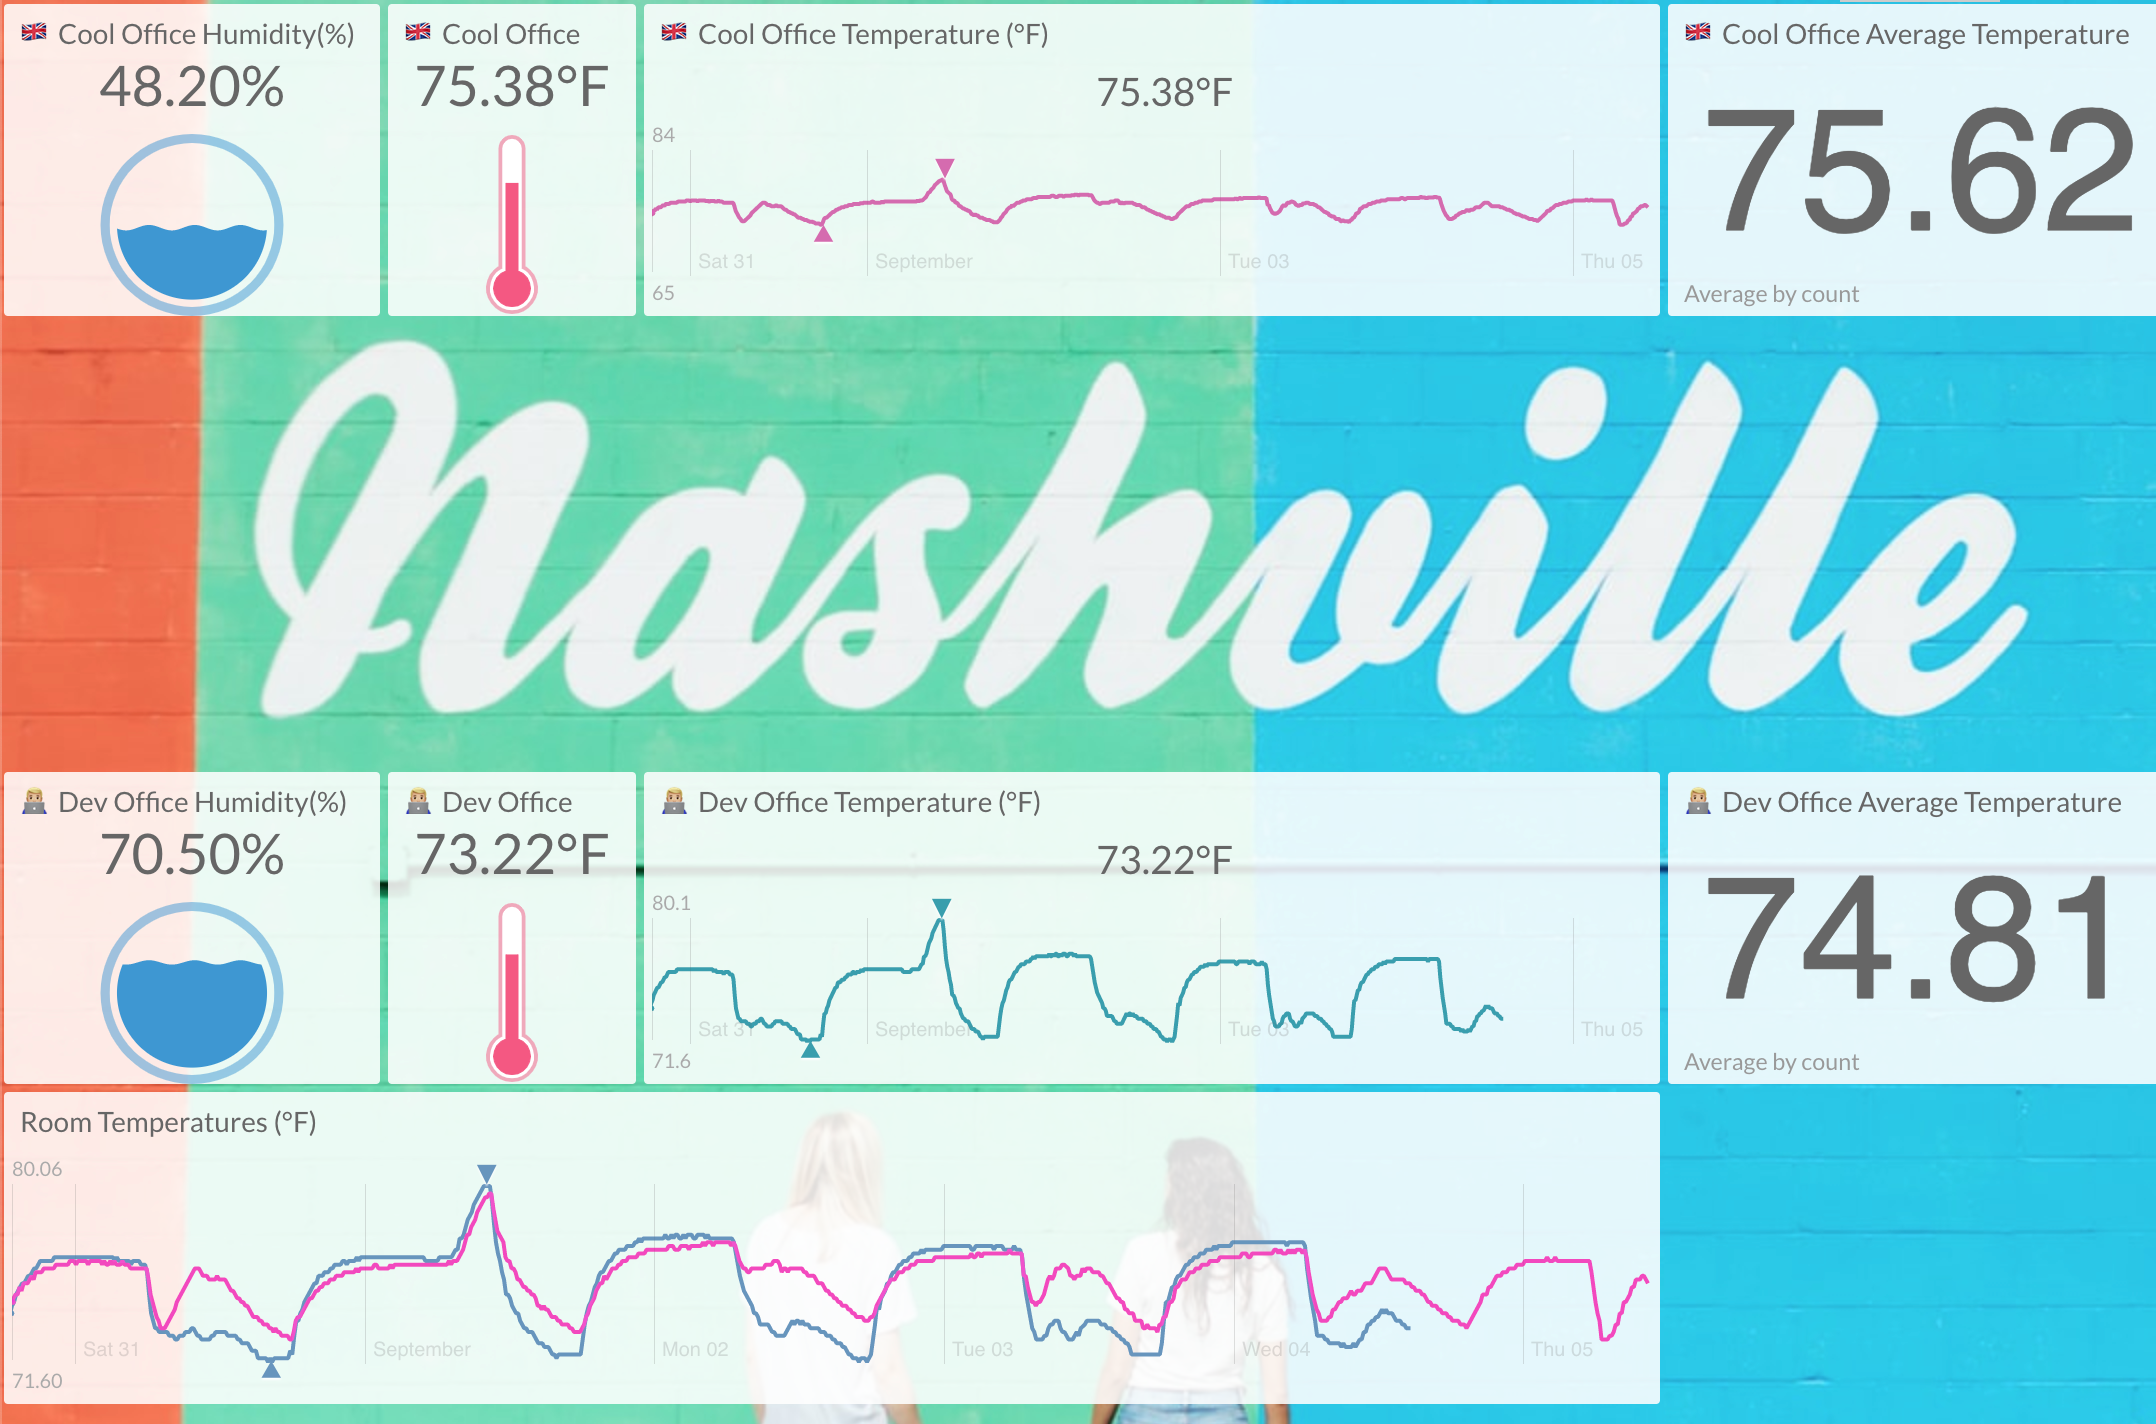
Go to your Initial State account, click on the bucket name on your bucket shelf, and view your data in your dashboard. You can customize your dashboard and set up SMS/email triggers. The picture included shows a dashboard with three sensor nodes collecting temperature and humidity for three different rooms.
You can choose to add a background image to your dashboard.
Auto Run & Monitor Process and IP
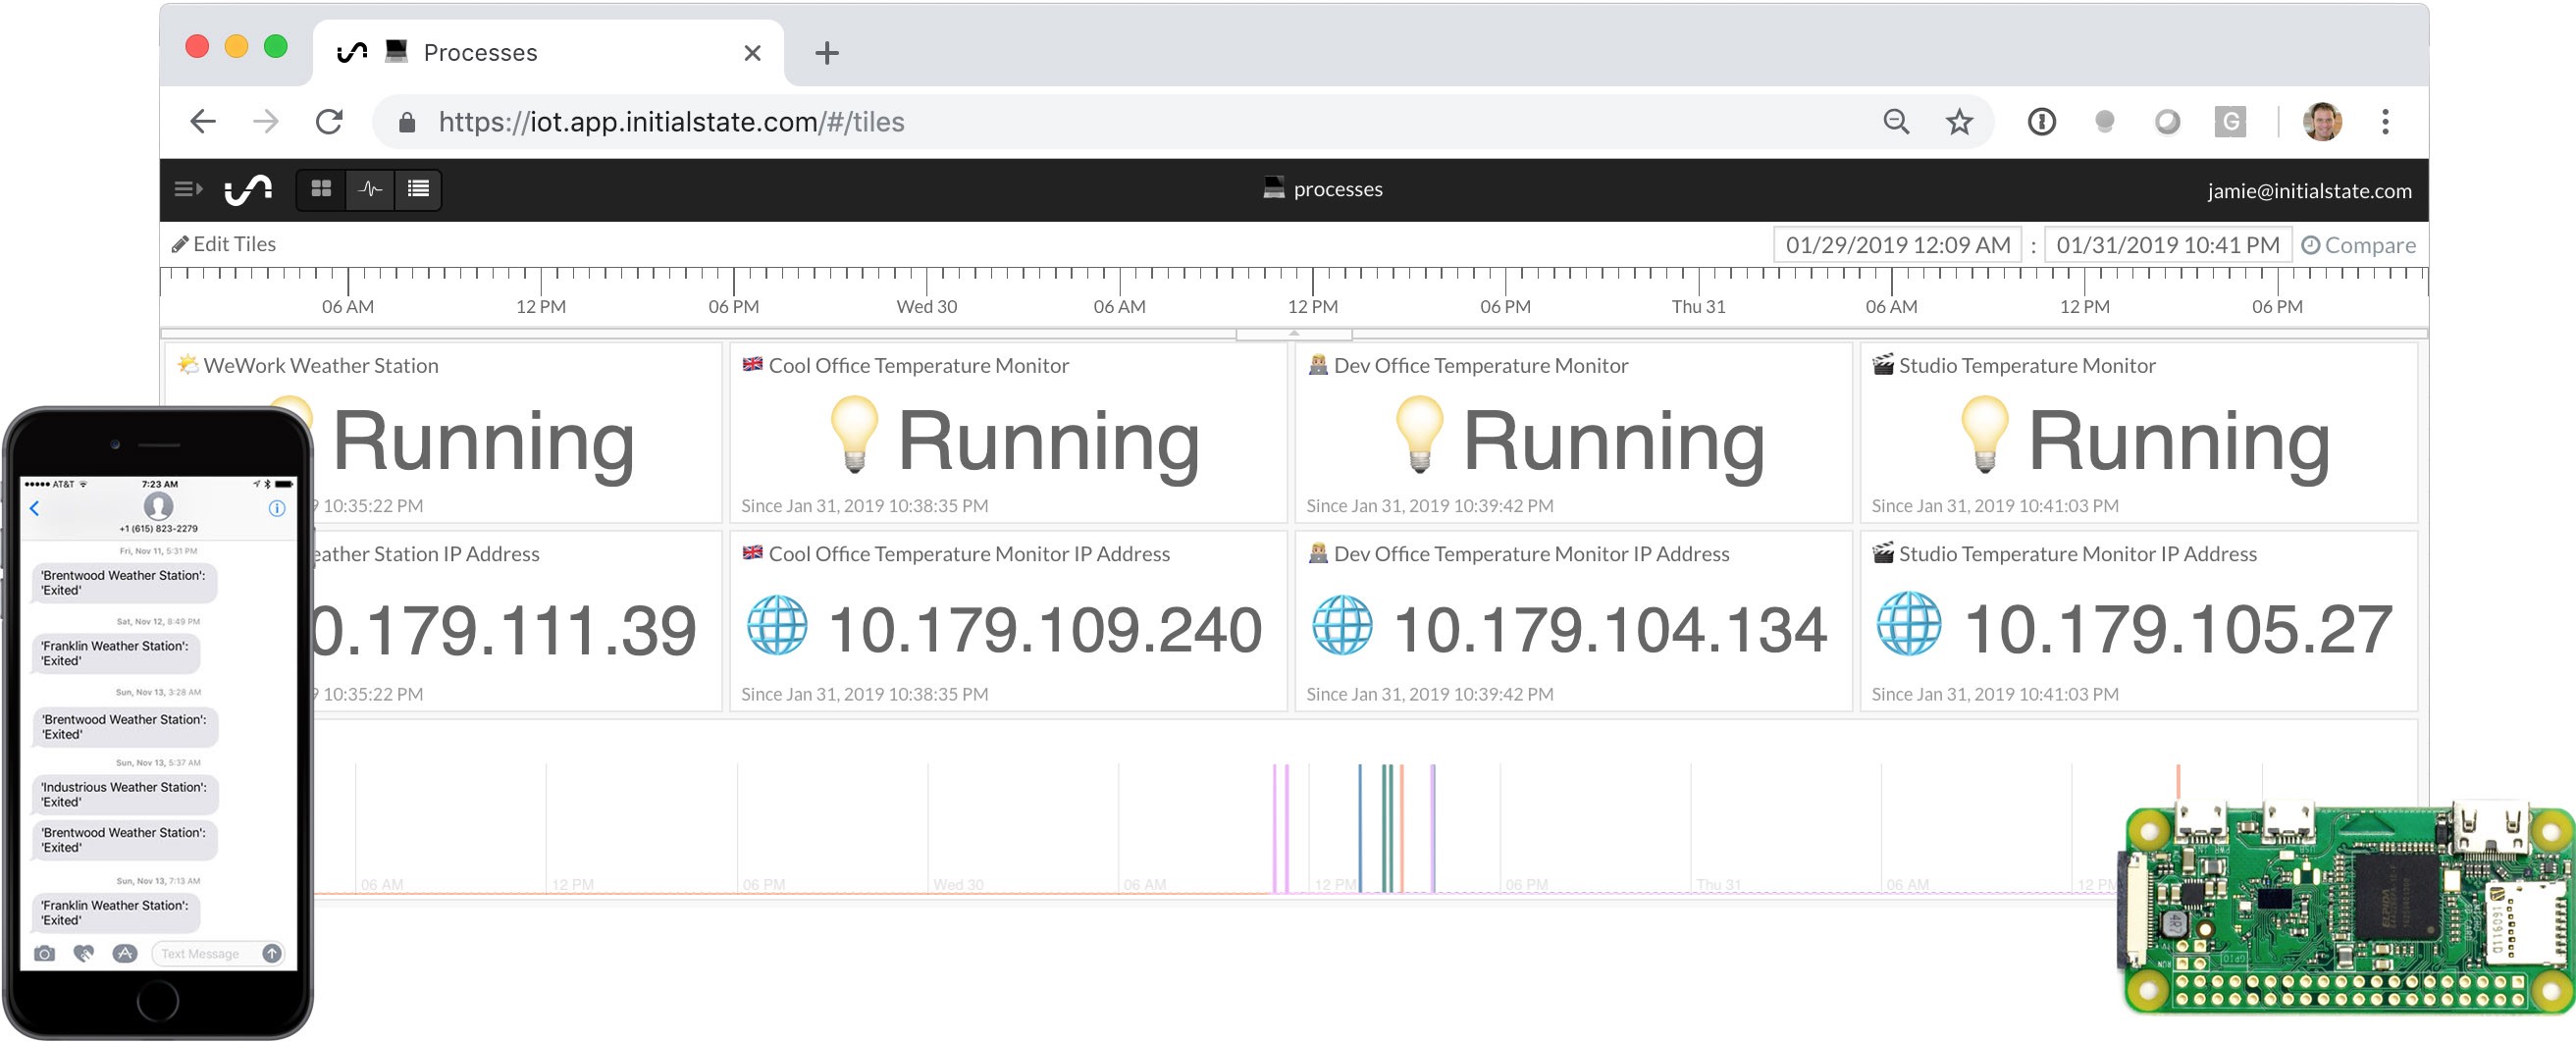
Once you have multiple nodes deployed, you are going to want a way to monitor each node to ensure it is functioning. You will probably run each sensor node without a monitor or keyboard/mouse to keep it compact. That means you will want each node to boot and run your script automatically. You can use your Initial State account to create a handy process/IP address dashboard as shown above. A detailed tutorial on creating this dashboard and setting up your Pi Zero WH to auto-run your Python script on boot can be found here.
Conclusion
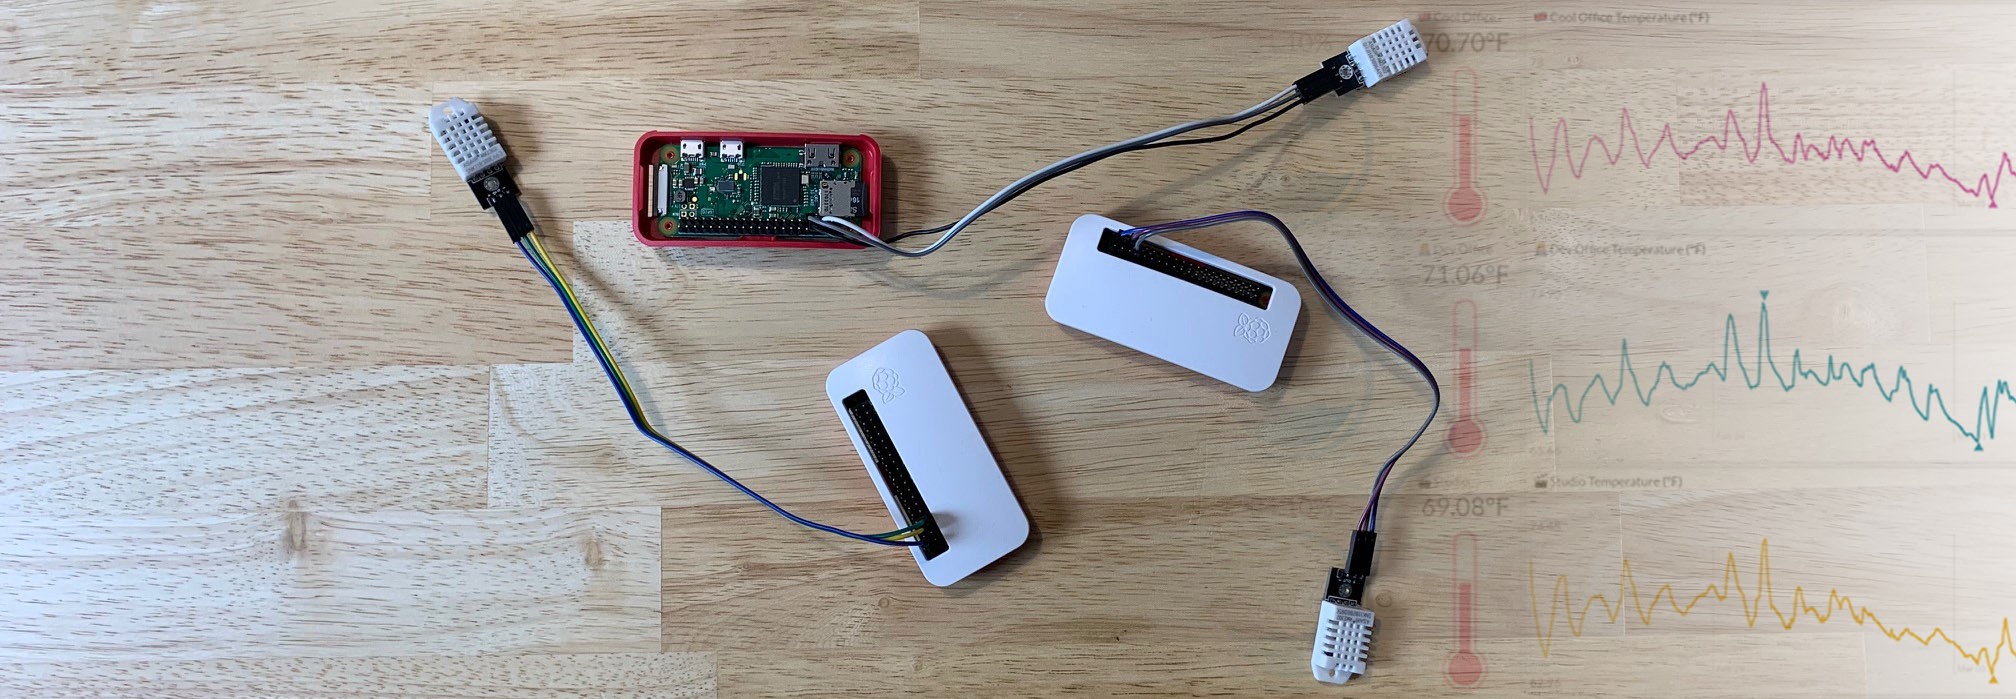
Once you get a single sensor node up and running, it is easy and relatively inexpensive to duplicate your setup as many times as needed. Using a Pi Zero WH gives you the flexibility to run other tasks since it has so much horsepower. For example, you can use one of the Pi Zero WH's to pull local weather data from a weather API and add it to your sensor dashboard. If you decide to decommission your sensor nodes, you can reuse your Pi Zero WH's for other projects. This flexibility helps future-proof your project investment.