Neopixel Led Strip Reacting to Myoware Muscle Sensor
by mhmolenaar in Circuits > Arduino
780 Views, 3 Favorites, 0 Comments
Neopixel Led Strip Reacting to Myoware Muscle Sensor
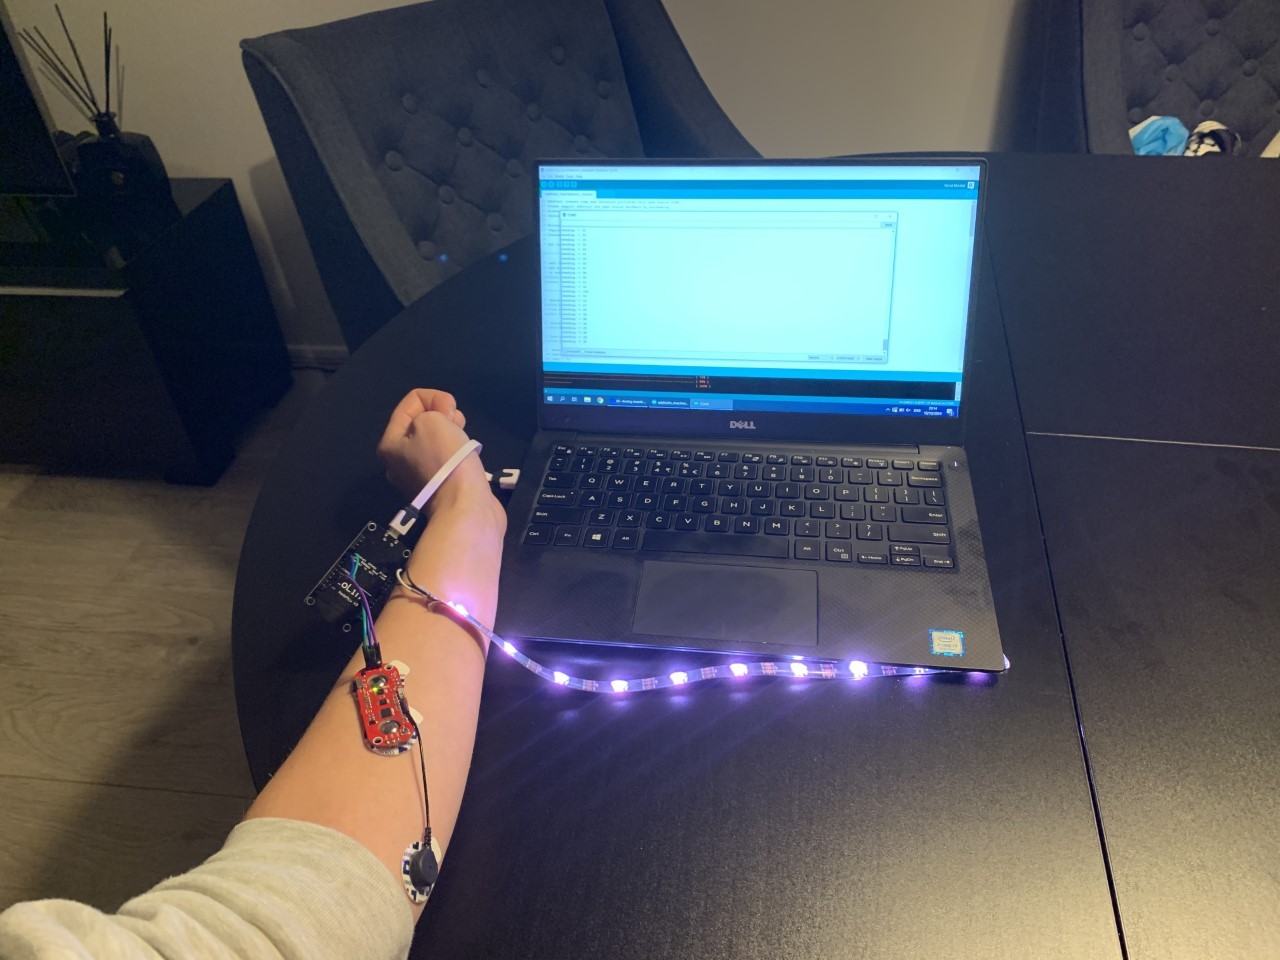
The goal is to install a muscle sensor with the help of Arduino and processing the incoming data with Adafruit IO and retrieving output with a trigger so that te light turns from white to red for one minute.
What is a Muscle Sensor
The Muscle Sensor measures the electrical activity of a muscle and produces an analog output signal that can easily be read by a microcontroller.
Electromyography (EMG) measures muscle response or electrical activity in response to a nerve's stimulation of the muscle. The test is used to help detect neuromuscular abnormalities. During the test, one or more small needles (also called electrodes) are inserted through the skin into the muscle.
For this project you need:
-MyoWare muscle sensor
-EMG electrodes
-NodeMCU (esp8266)
-Silicone cover wire
-USB micro cable
-Neopixel led strip
Libraries you will need:
-Adafruit io Arduino (at least version 2.3.0)
-Adafruit Neopixel (version 1.2.5)
-Adafruit MQTT library (1.0.3)
-Arduino HttpClients (0.4.0)
If you don't have te libraries installed yet. Then go to Sketch> include Library> Manage Libraries ... type: [the library name you want to install] in the search field.
Connecting Myoware Muscle Sensor (especially for Those Who Never Worked With It Before)
If you have never worked with a Myoware Muscle Sensor, it is good to first understand how this sensor is connected and readable in the Serial monitor in Arduino. This operation is a standard procedure that is in many manuals already been described. The Adafruit platform has a clear description of how this works in a few steps:
https://learn.adafruit.com/getting-started-with-my...
Check
If all these steps are made, you will see in your serial monitor that the values change when you tighten your muscles. When you make a fist and tighten your muscle the values should go up and when you relax your muscle these values should go down again.
Important
This step is only to set up the sensor. The code you have used isn't necessary for the rest of the manual. Only the way you put up the sensor itself remains the same for the upcoming steps.
Adafruit IO Setup
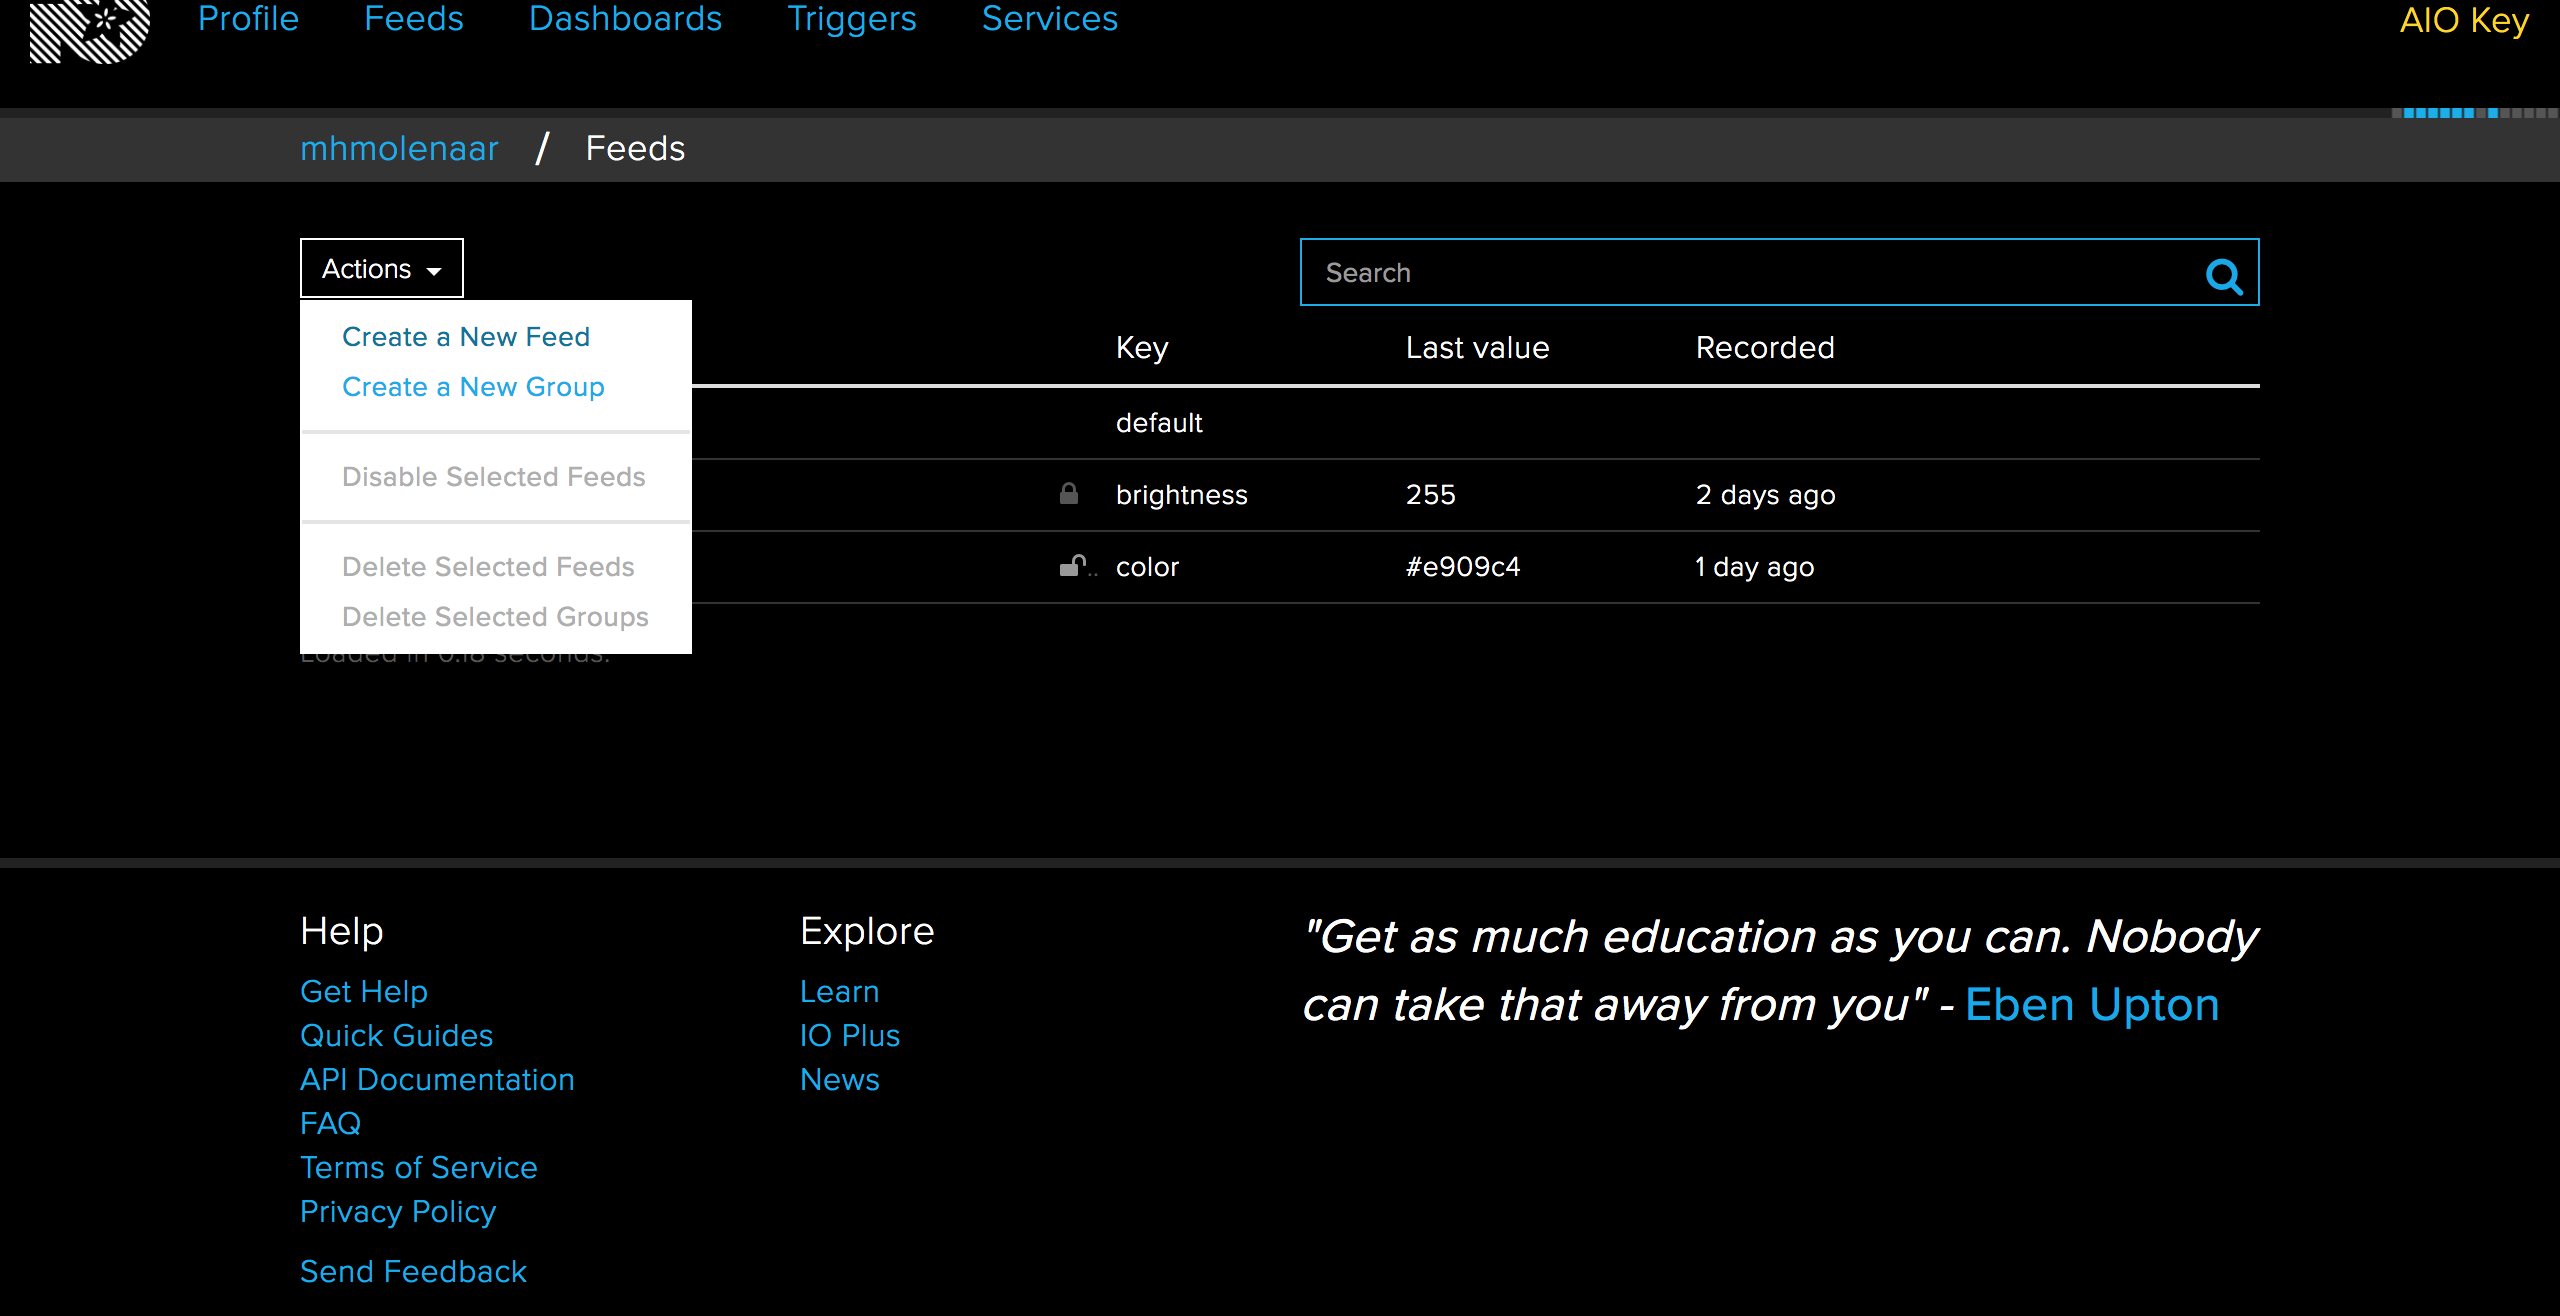
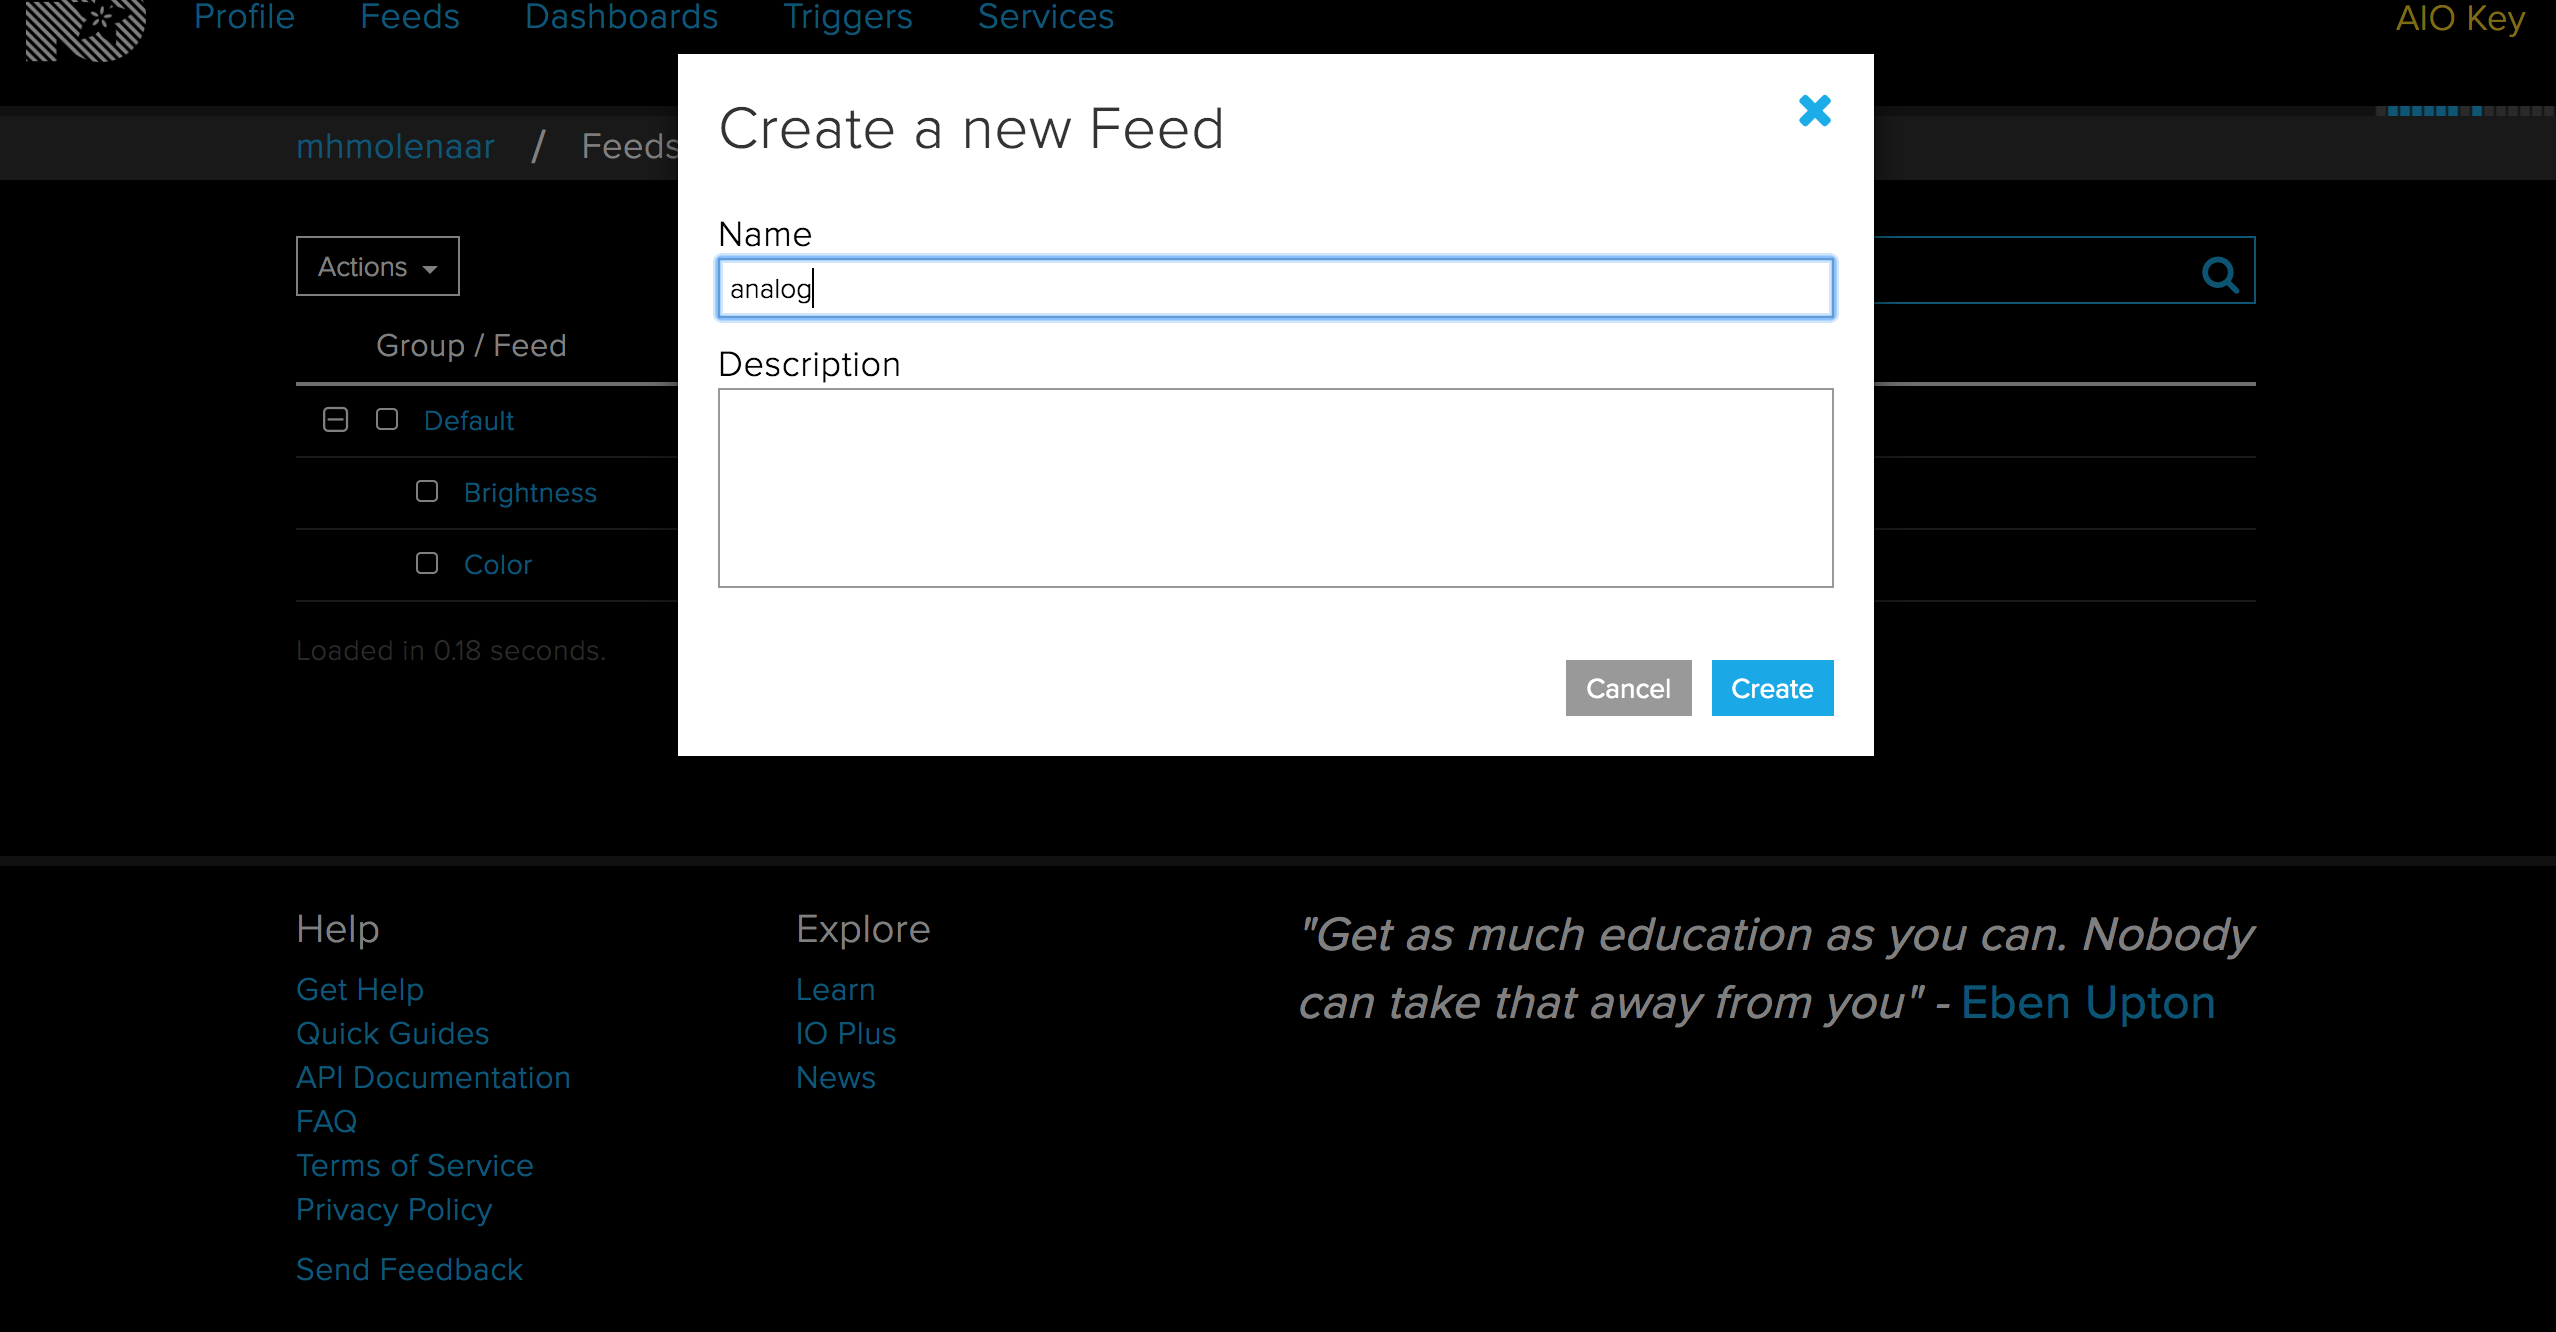
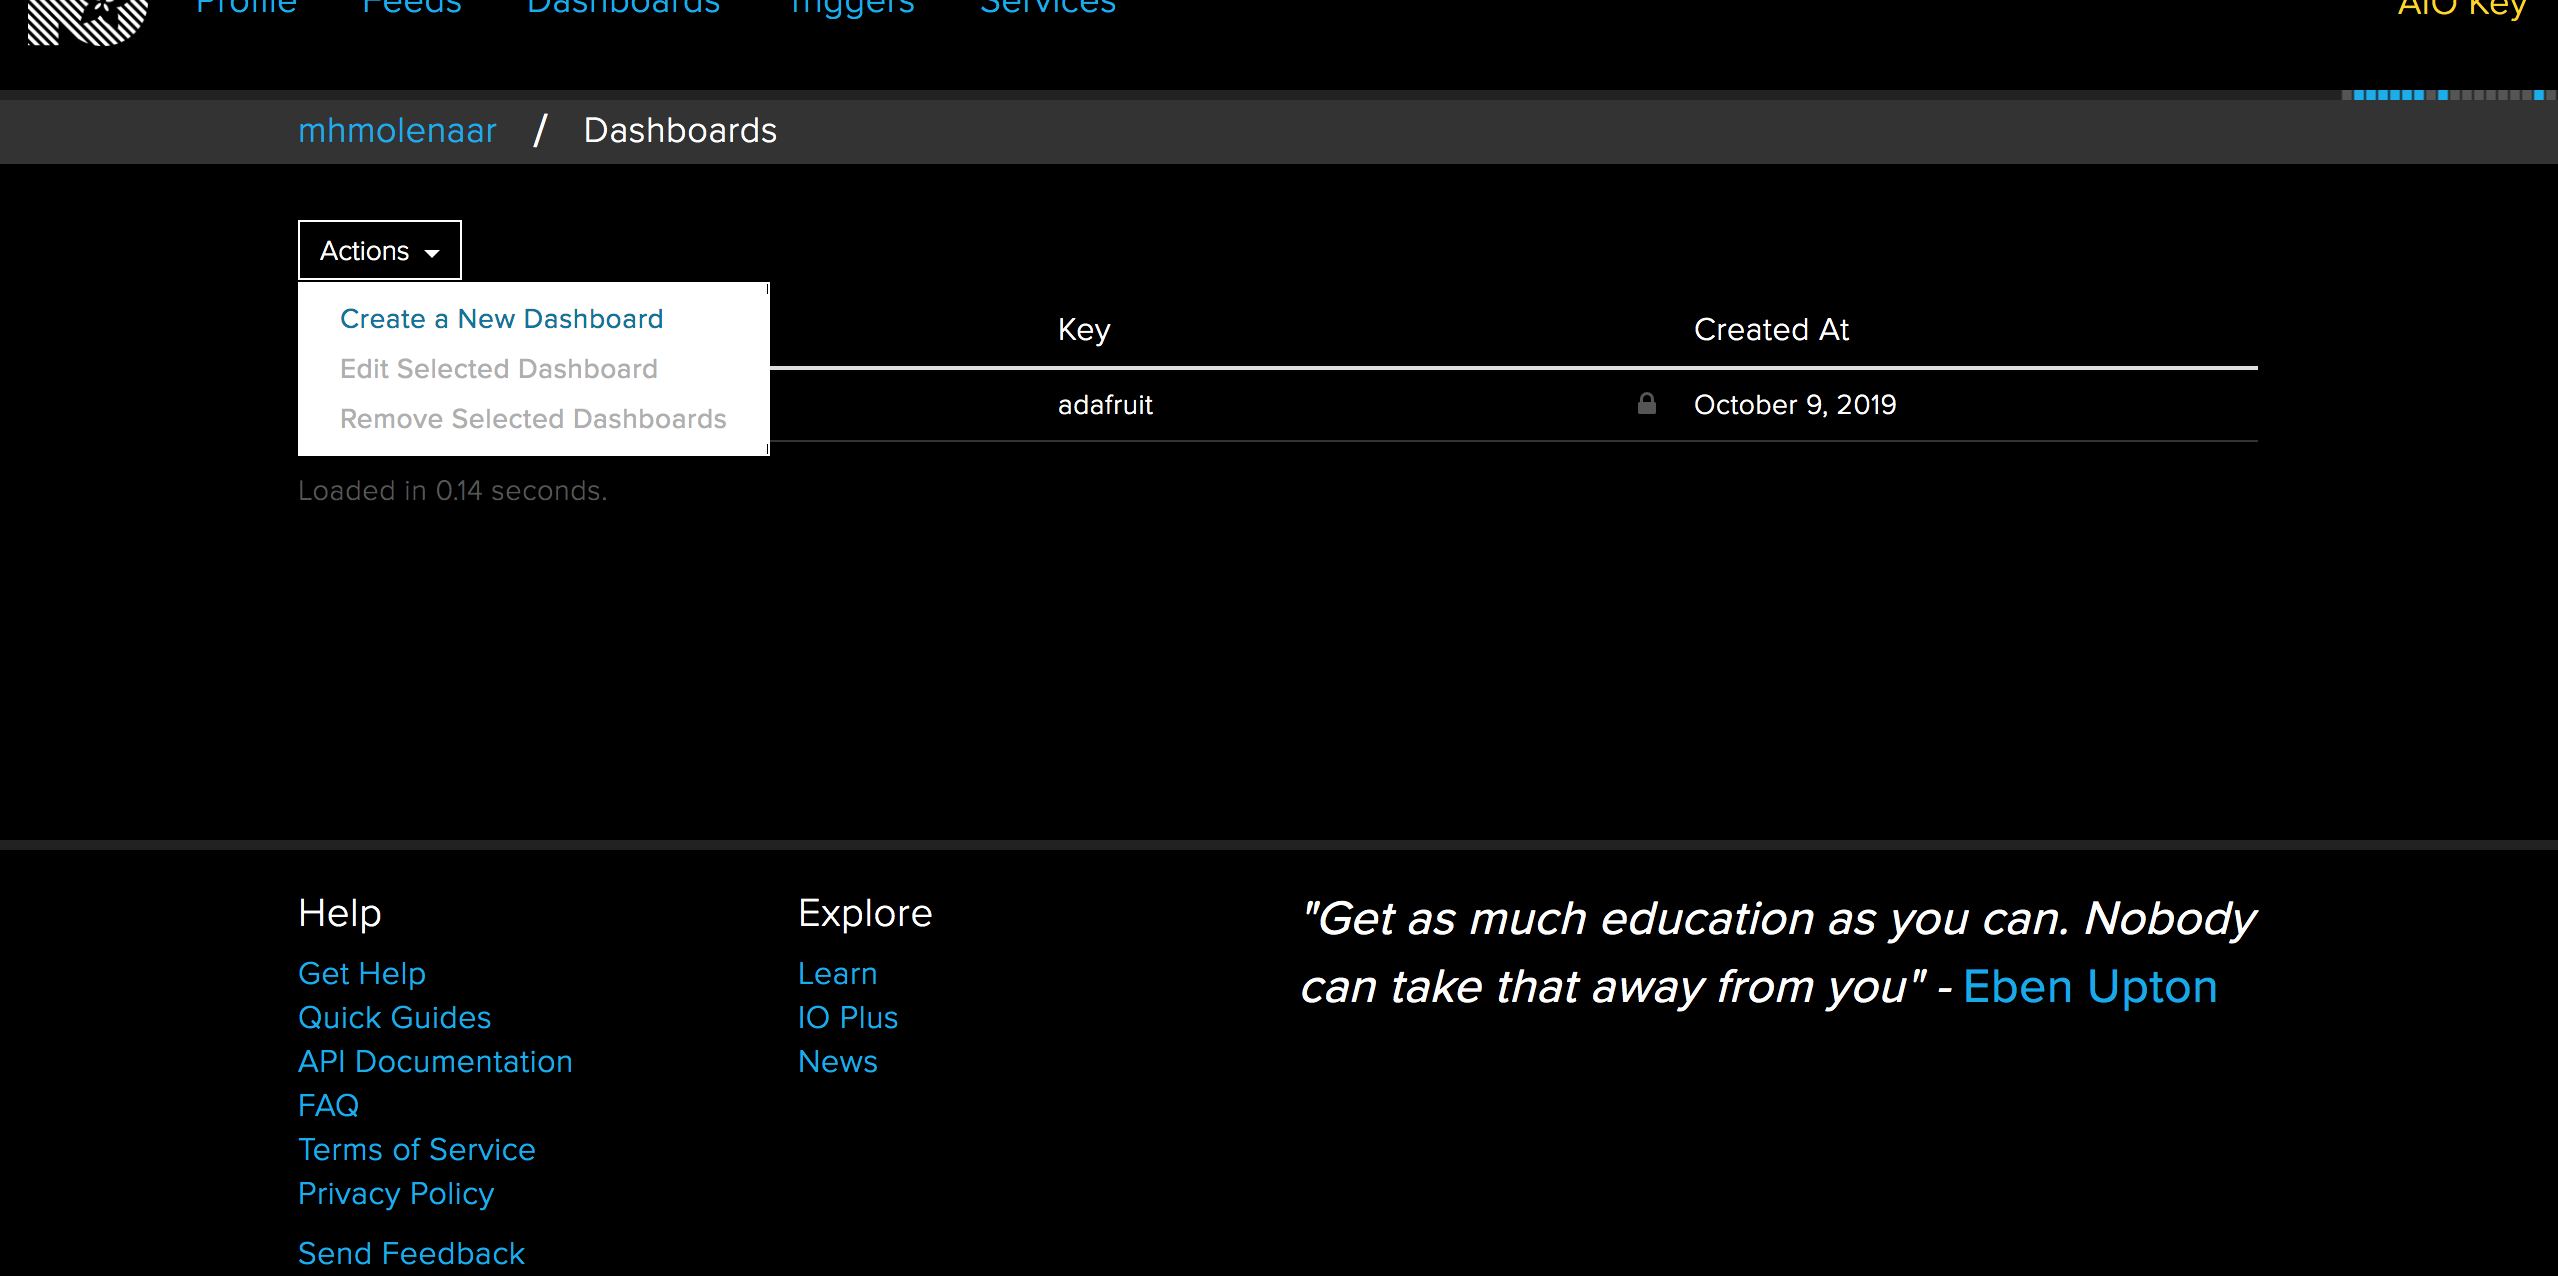
The first step is to login or create an acount in Adafruit IO, browse to Adafruit IO. Adafruit IO is a cloud platform, that you can connect to over the internet. Adafruit IO makes data useful with data connections.
When you are in your account:
Create the Analog Feed
Next, you will need to create a feed called Analog. If you need help getting started with creating feeds on Adafruit IO, check out the Adafruit IO Feed Basics guide (As on photo 1 and 2).
Adding the Gauge Block and the Line chart Block
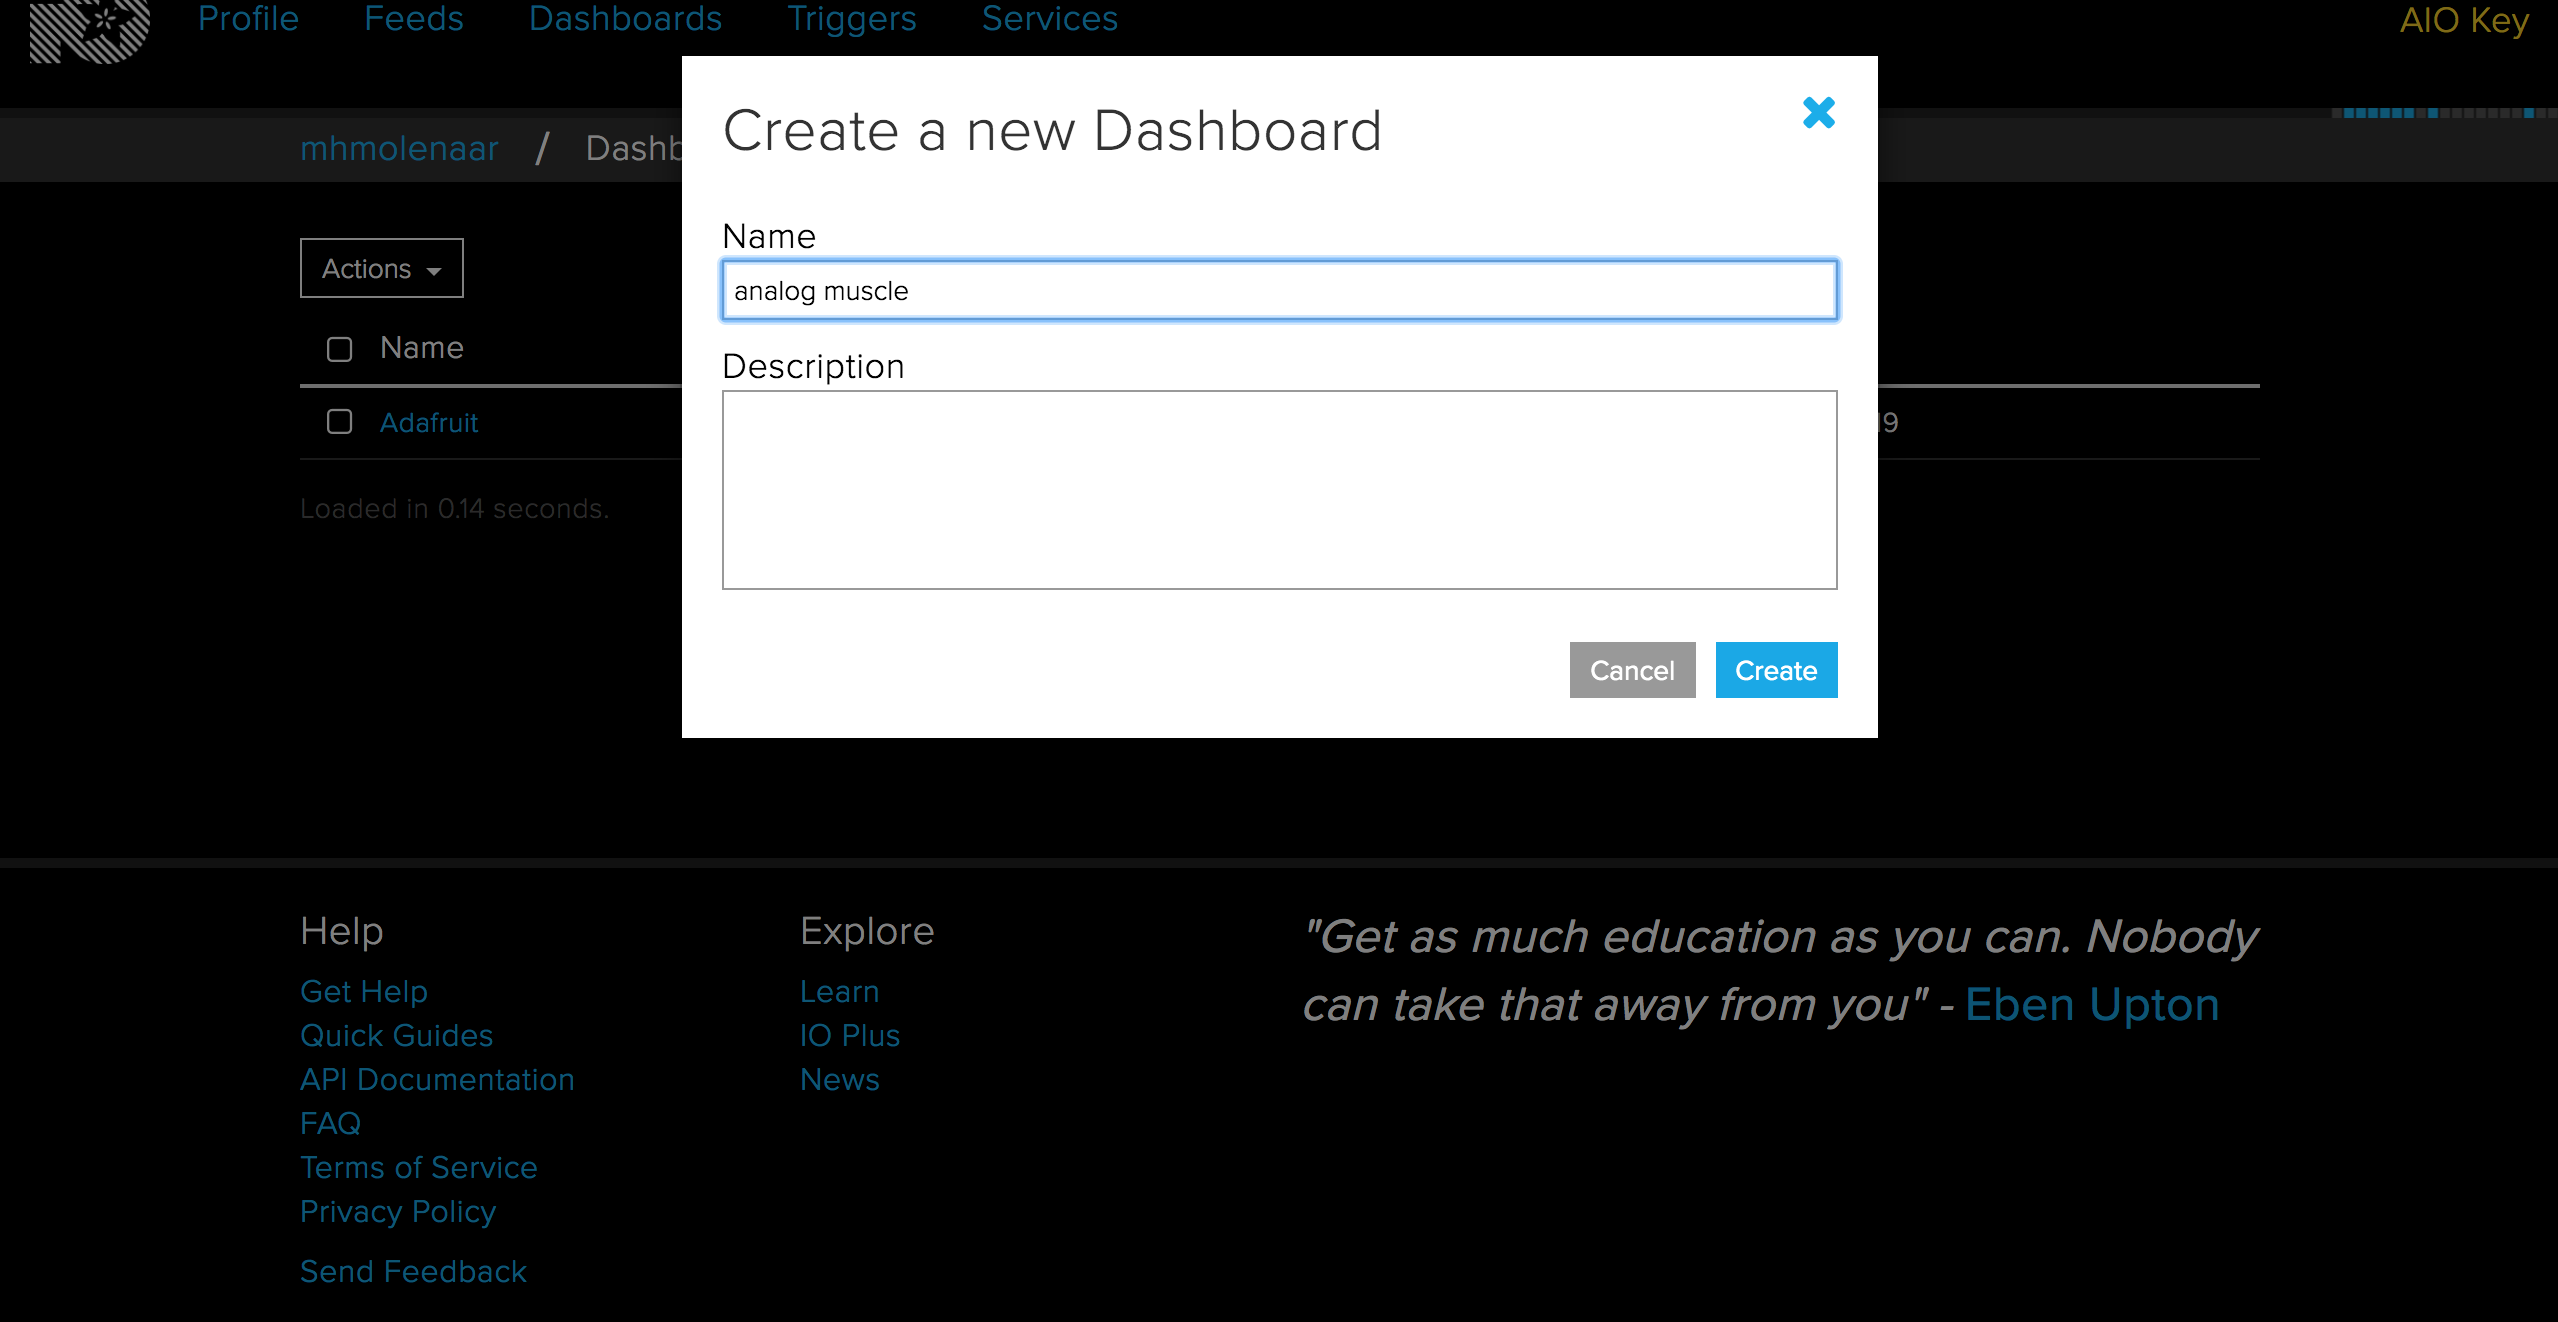
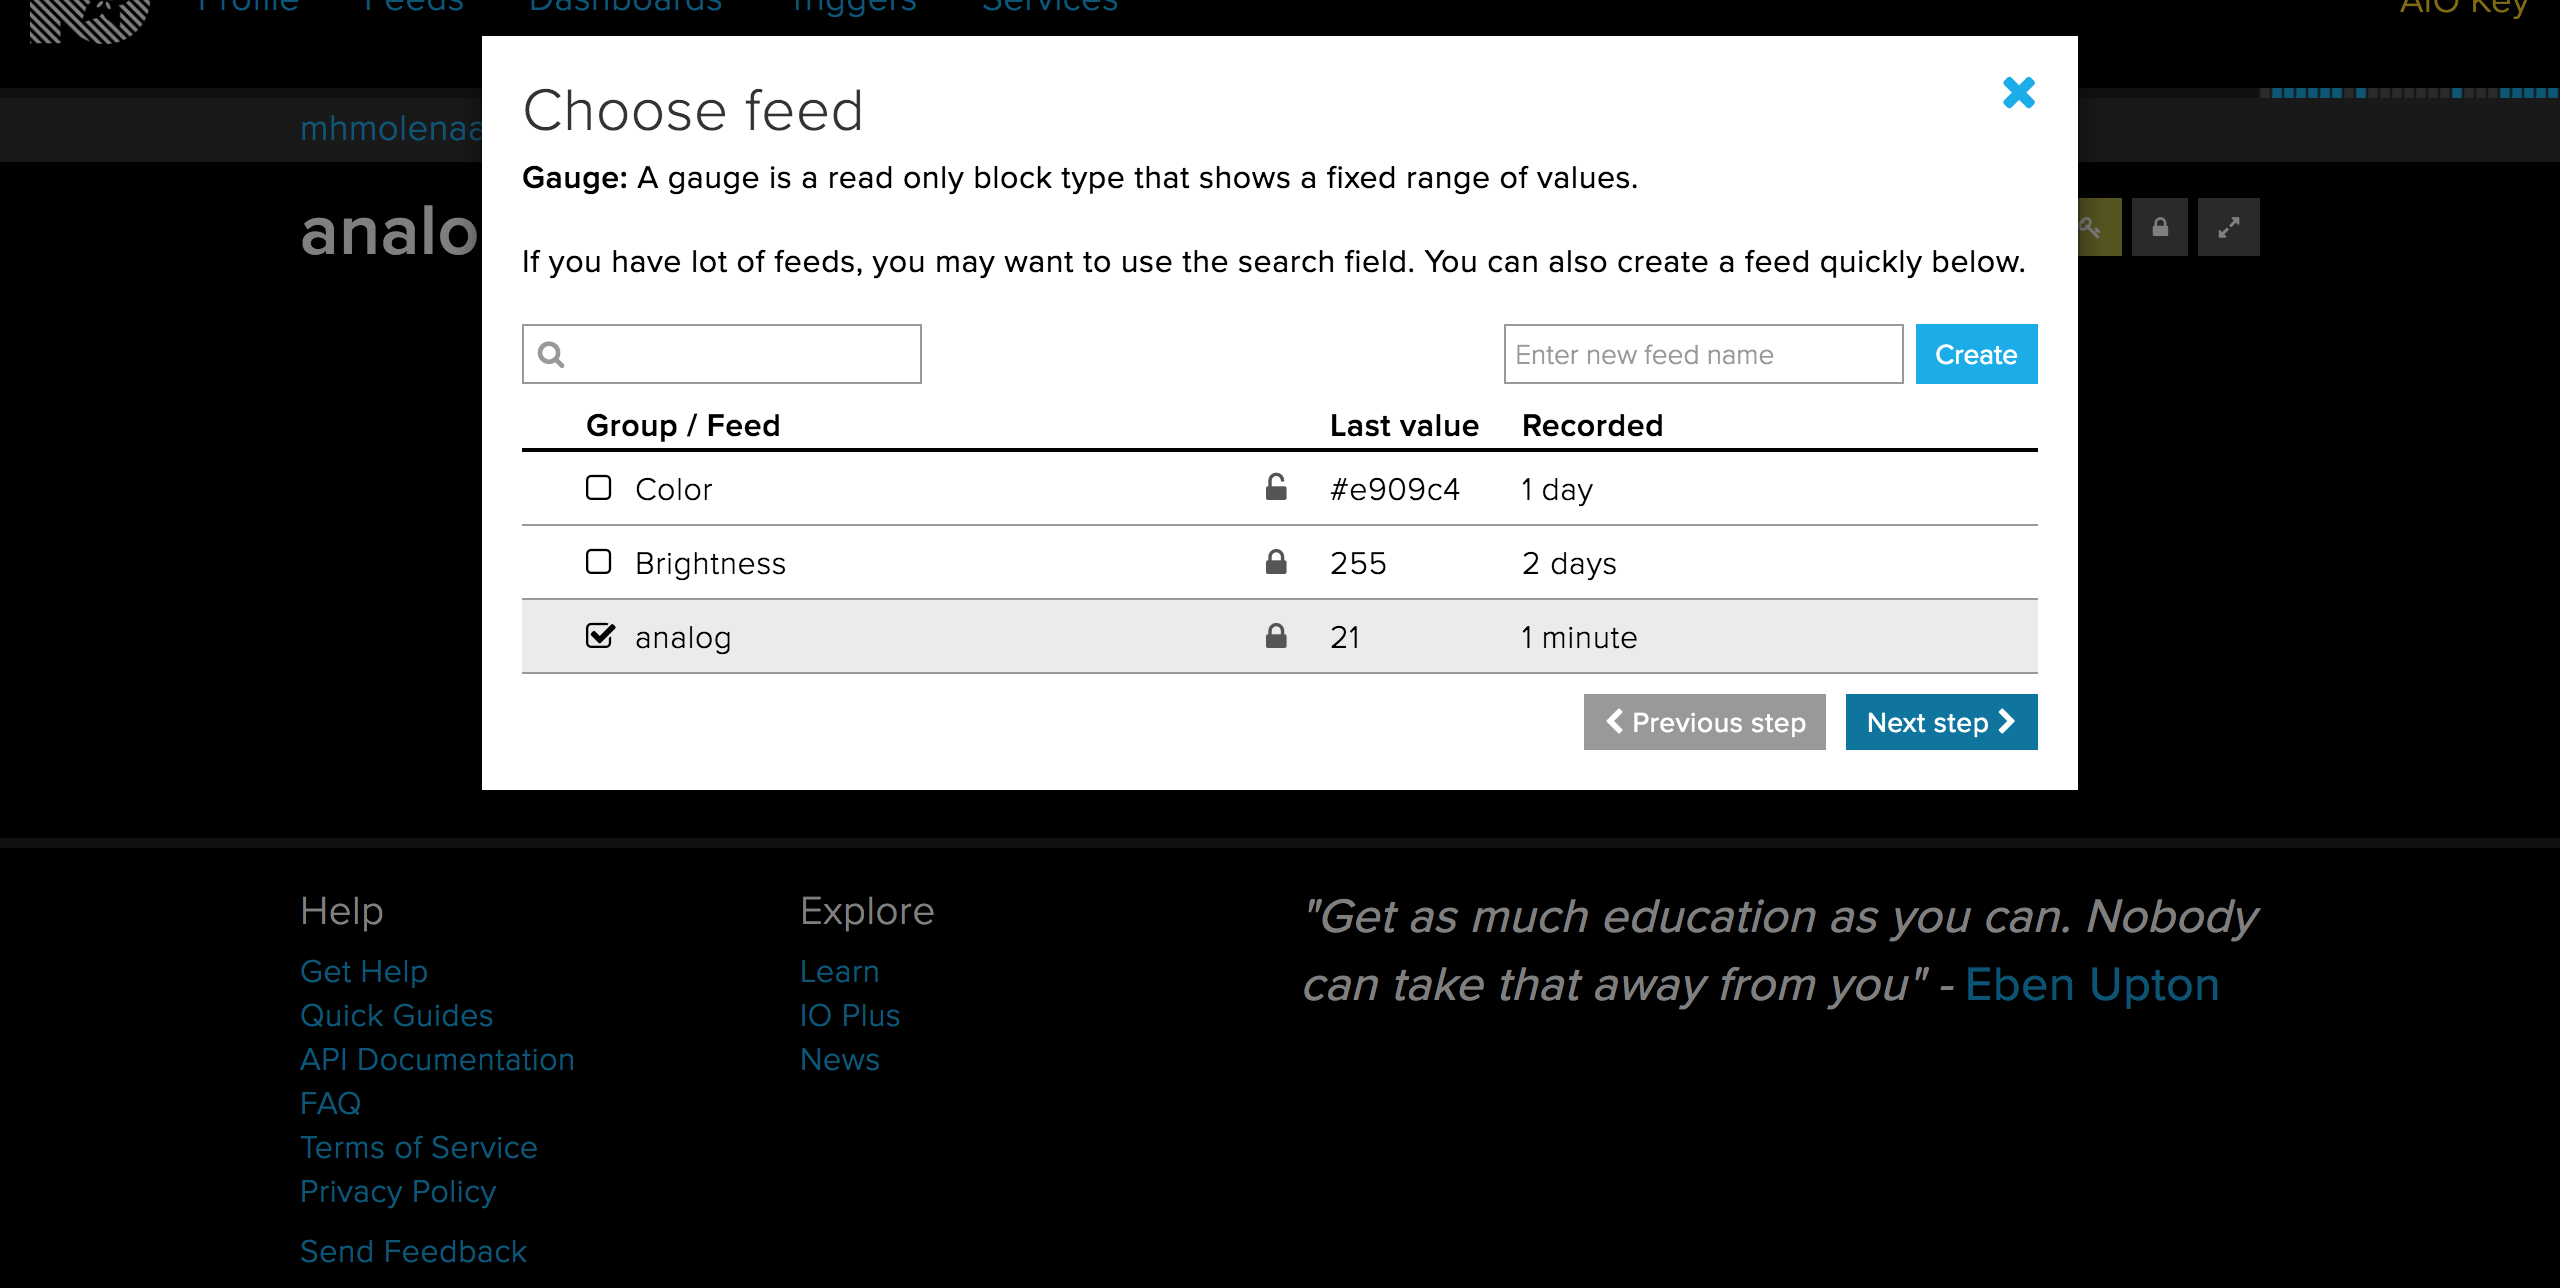
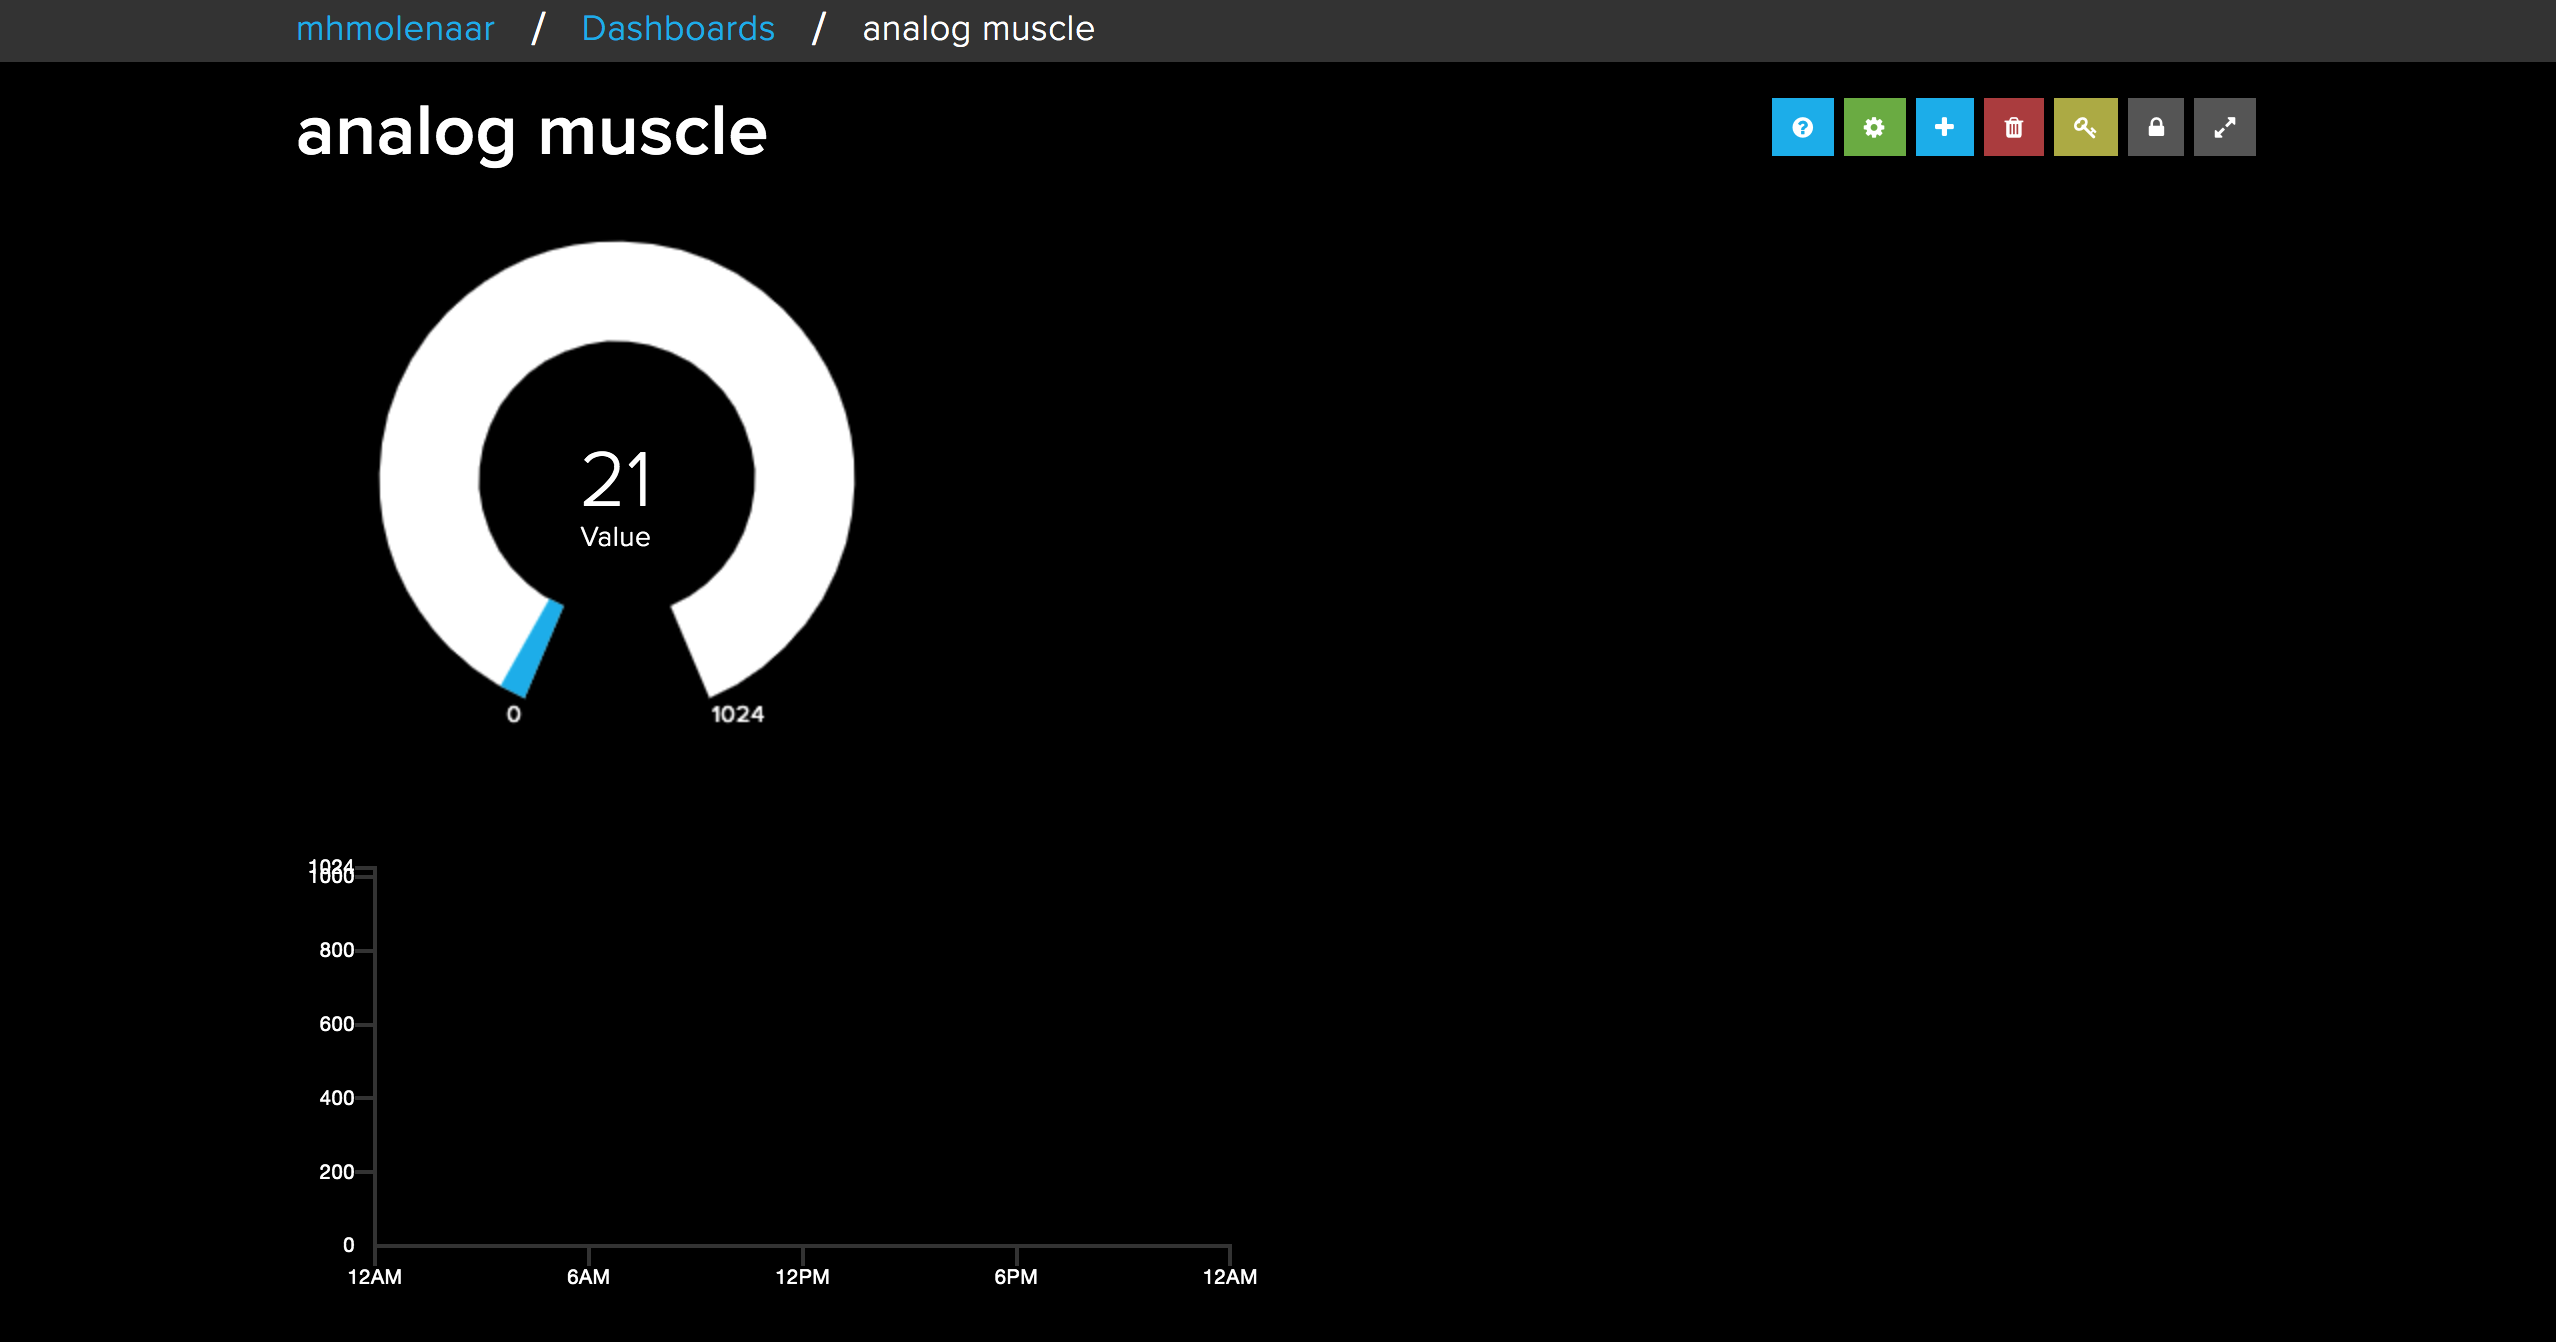
Next, create a new dashboard and name it as you want it to name (shown in photos 3, 4 and 5 to make a new dashboard). Make sure you have selected the Analog feed as the data source.
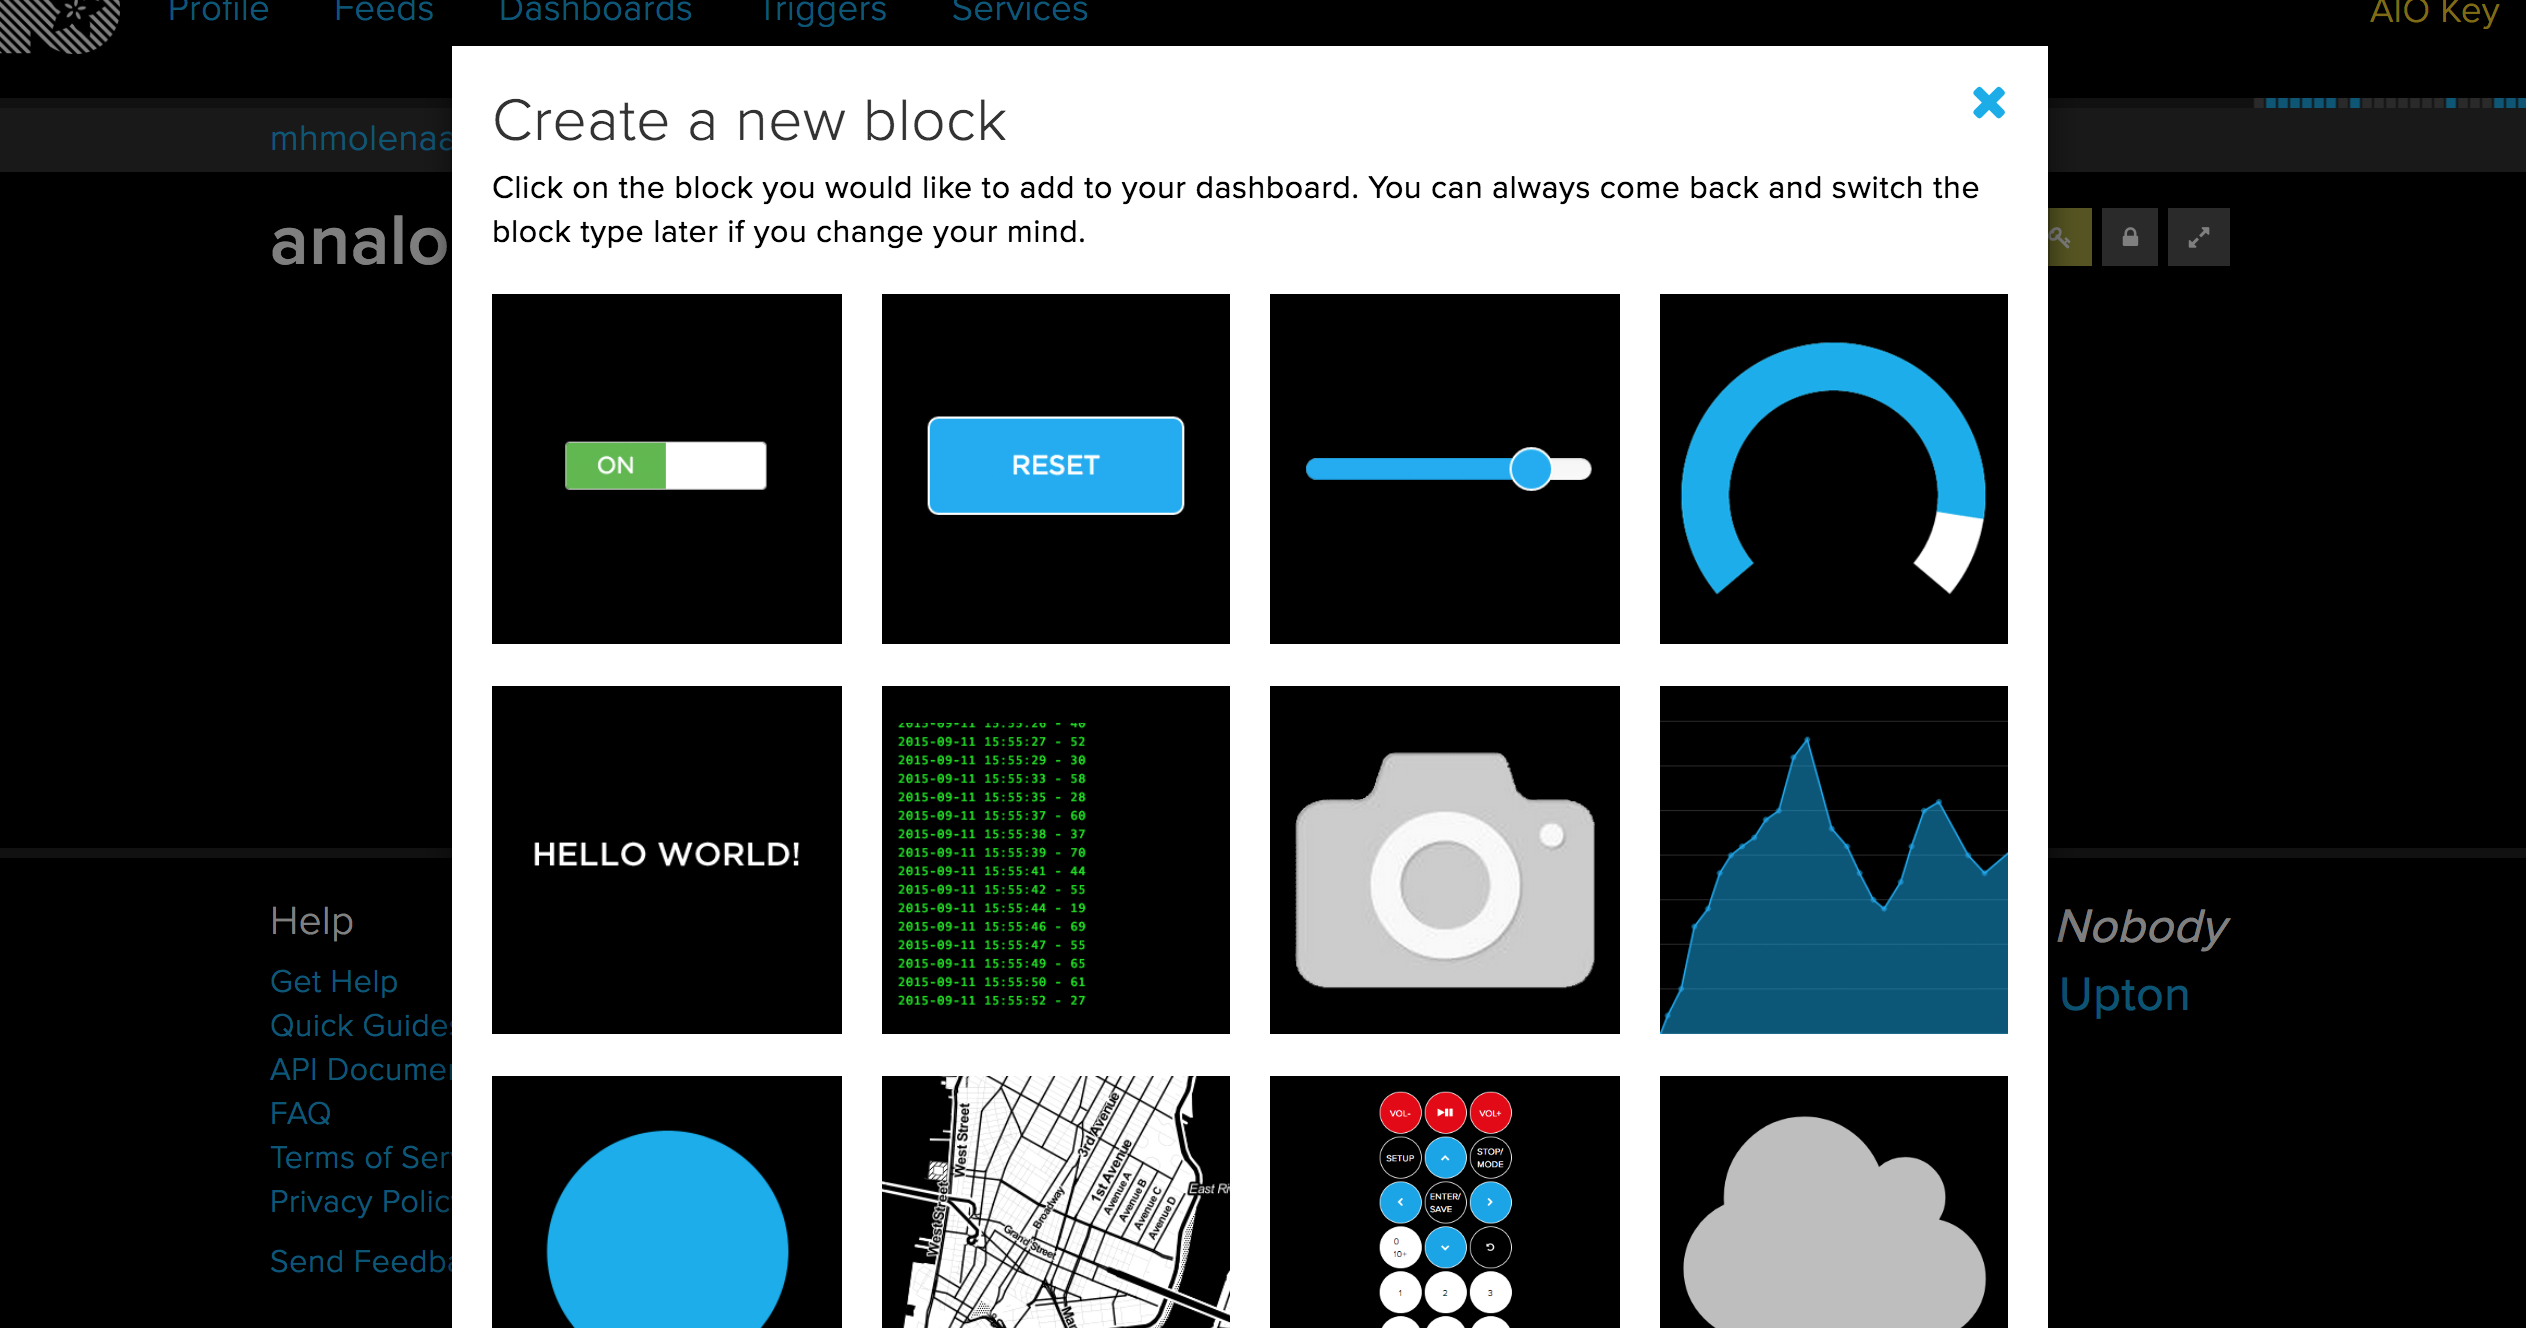
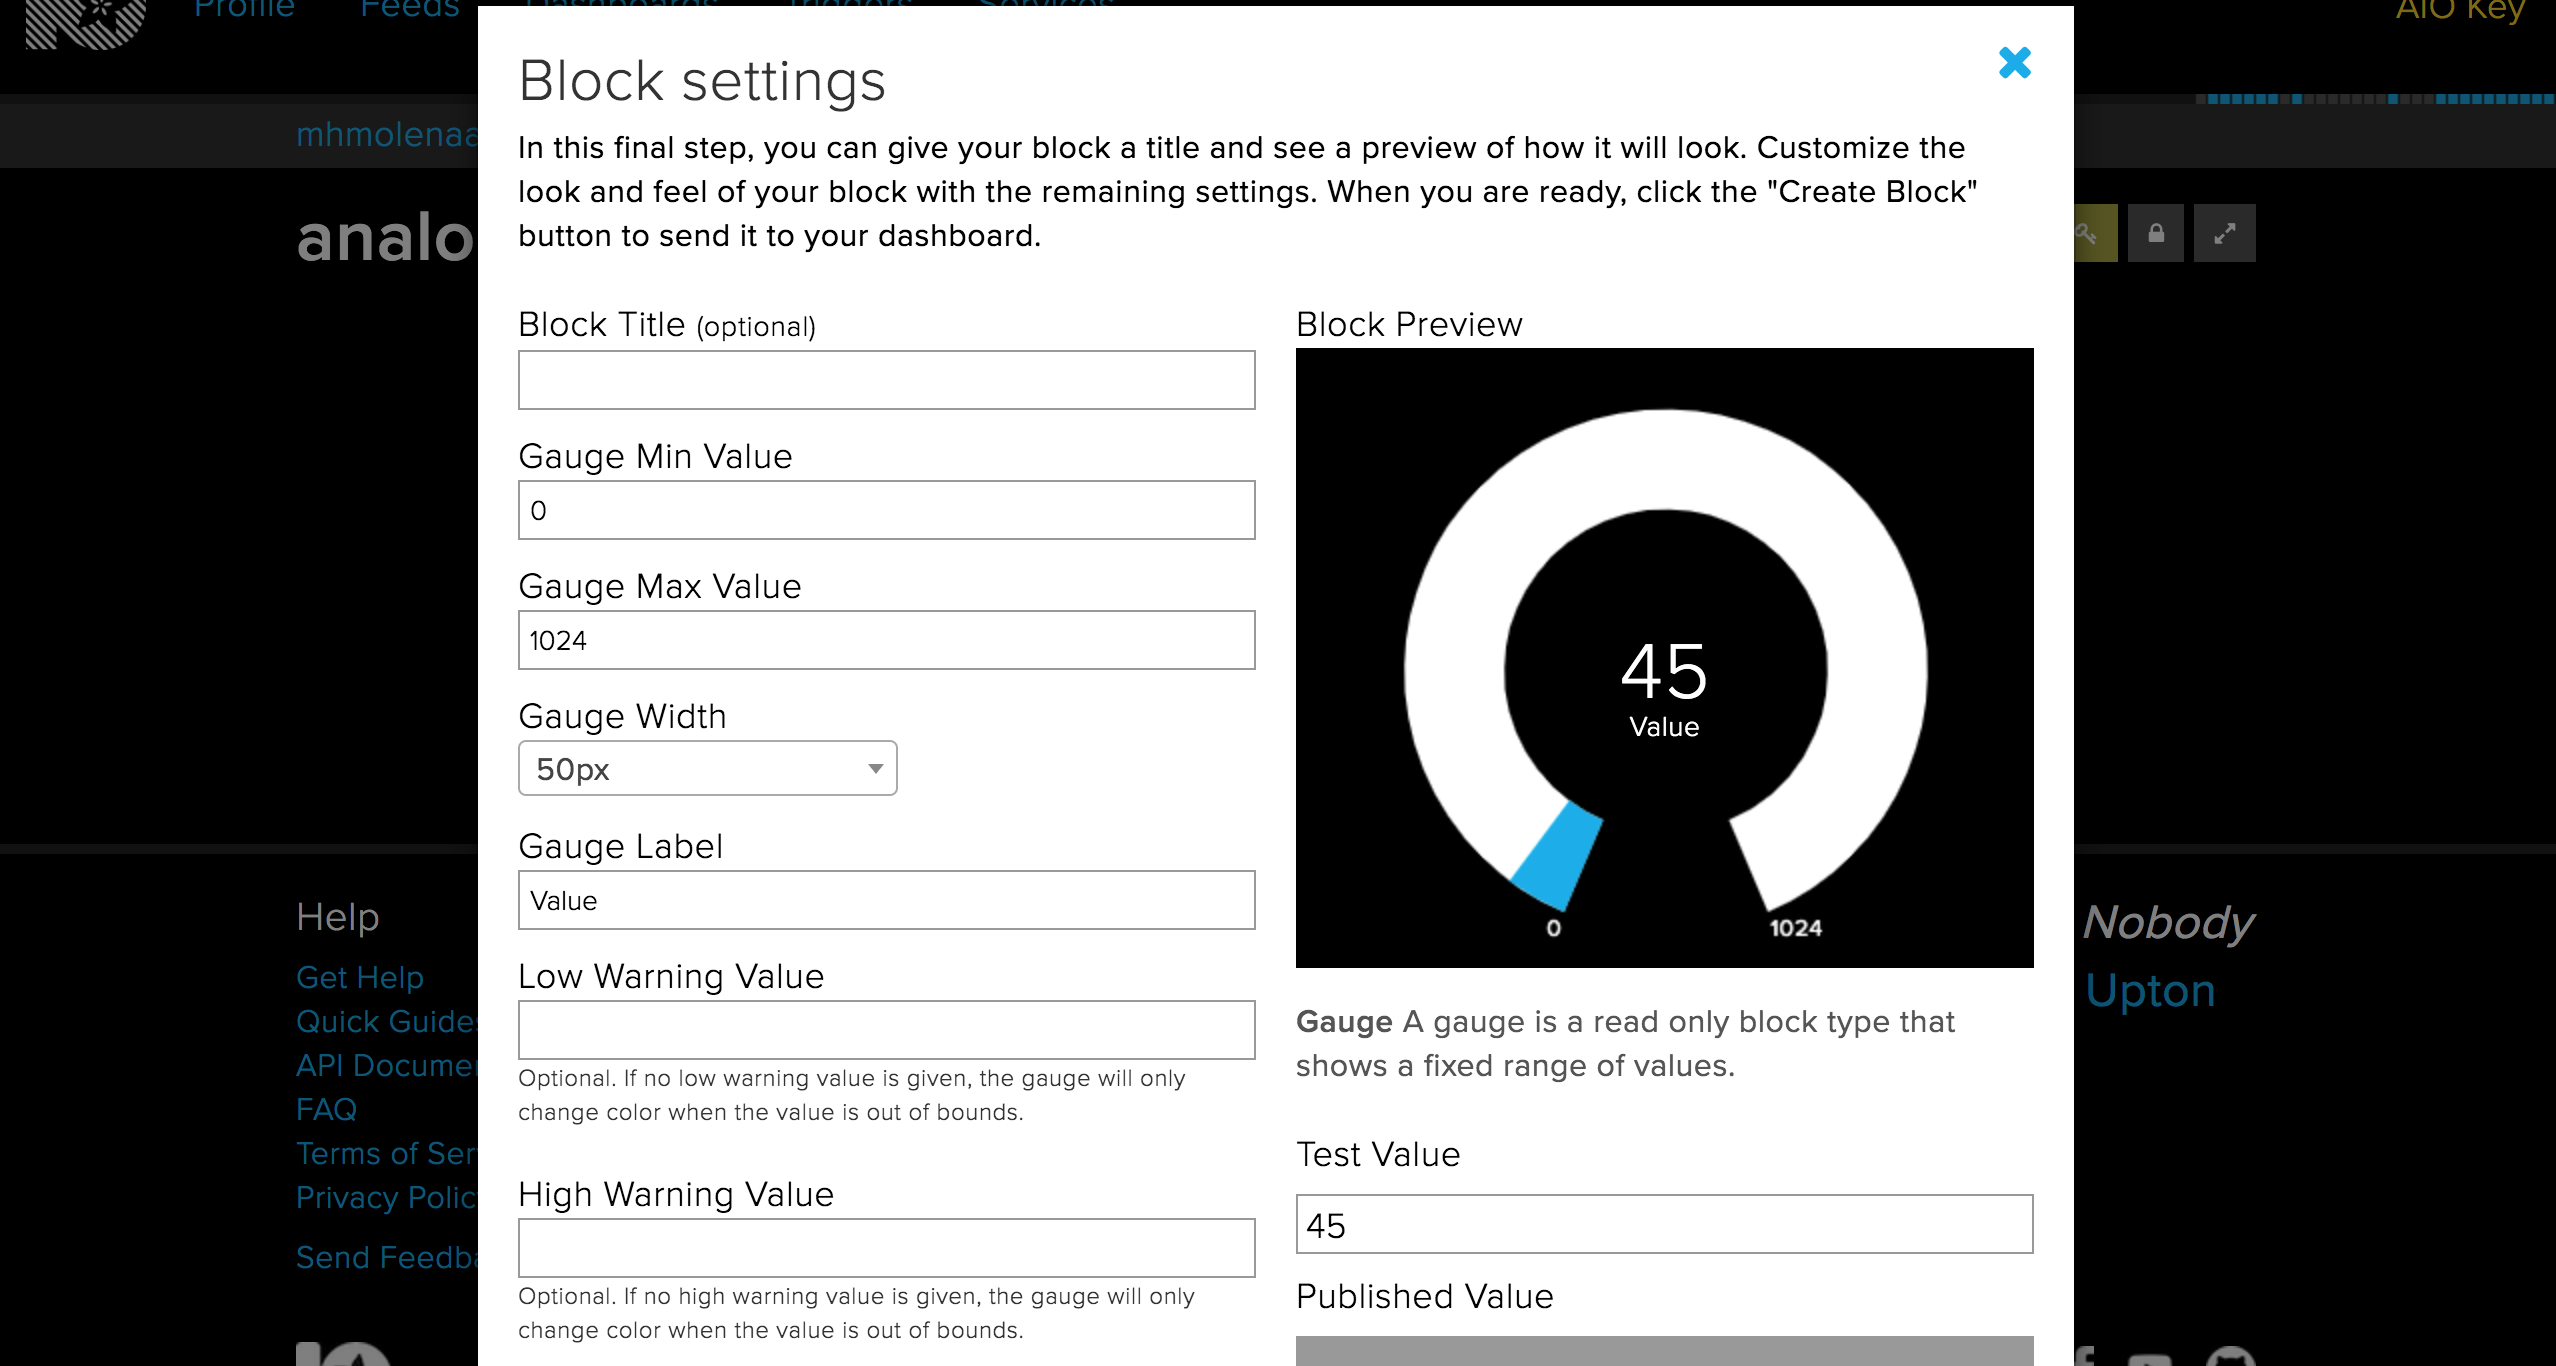
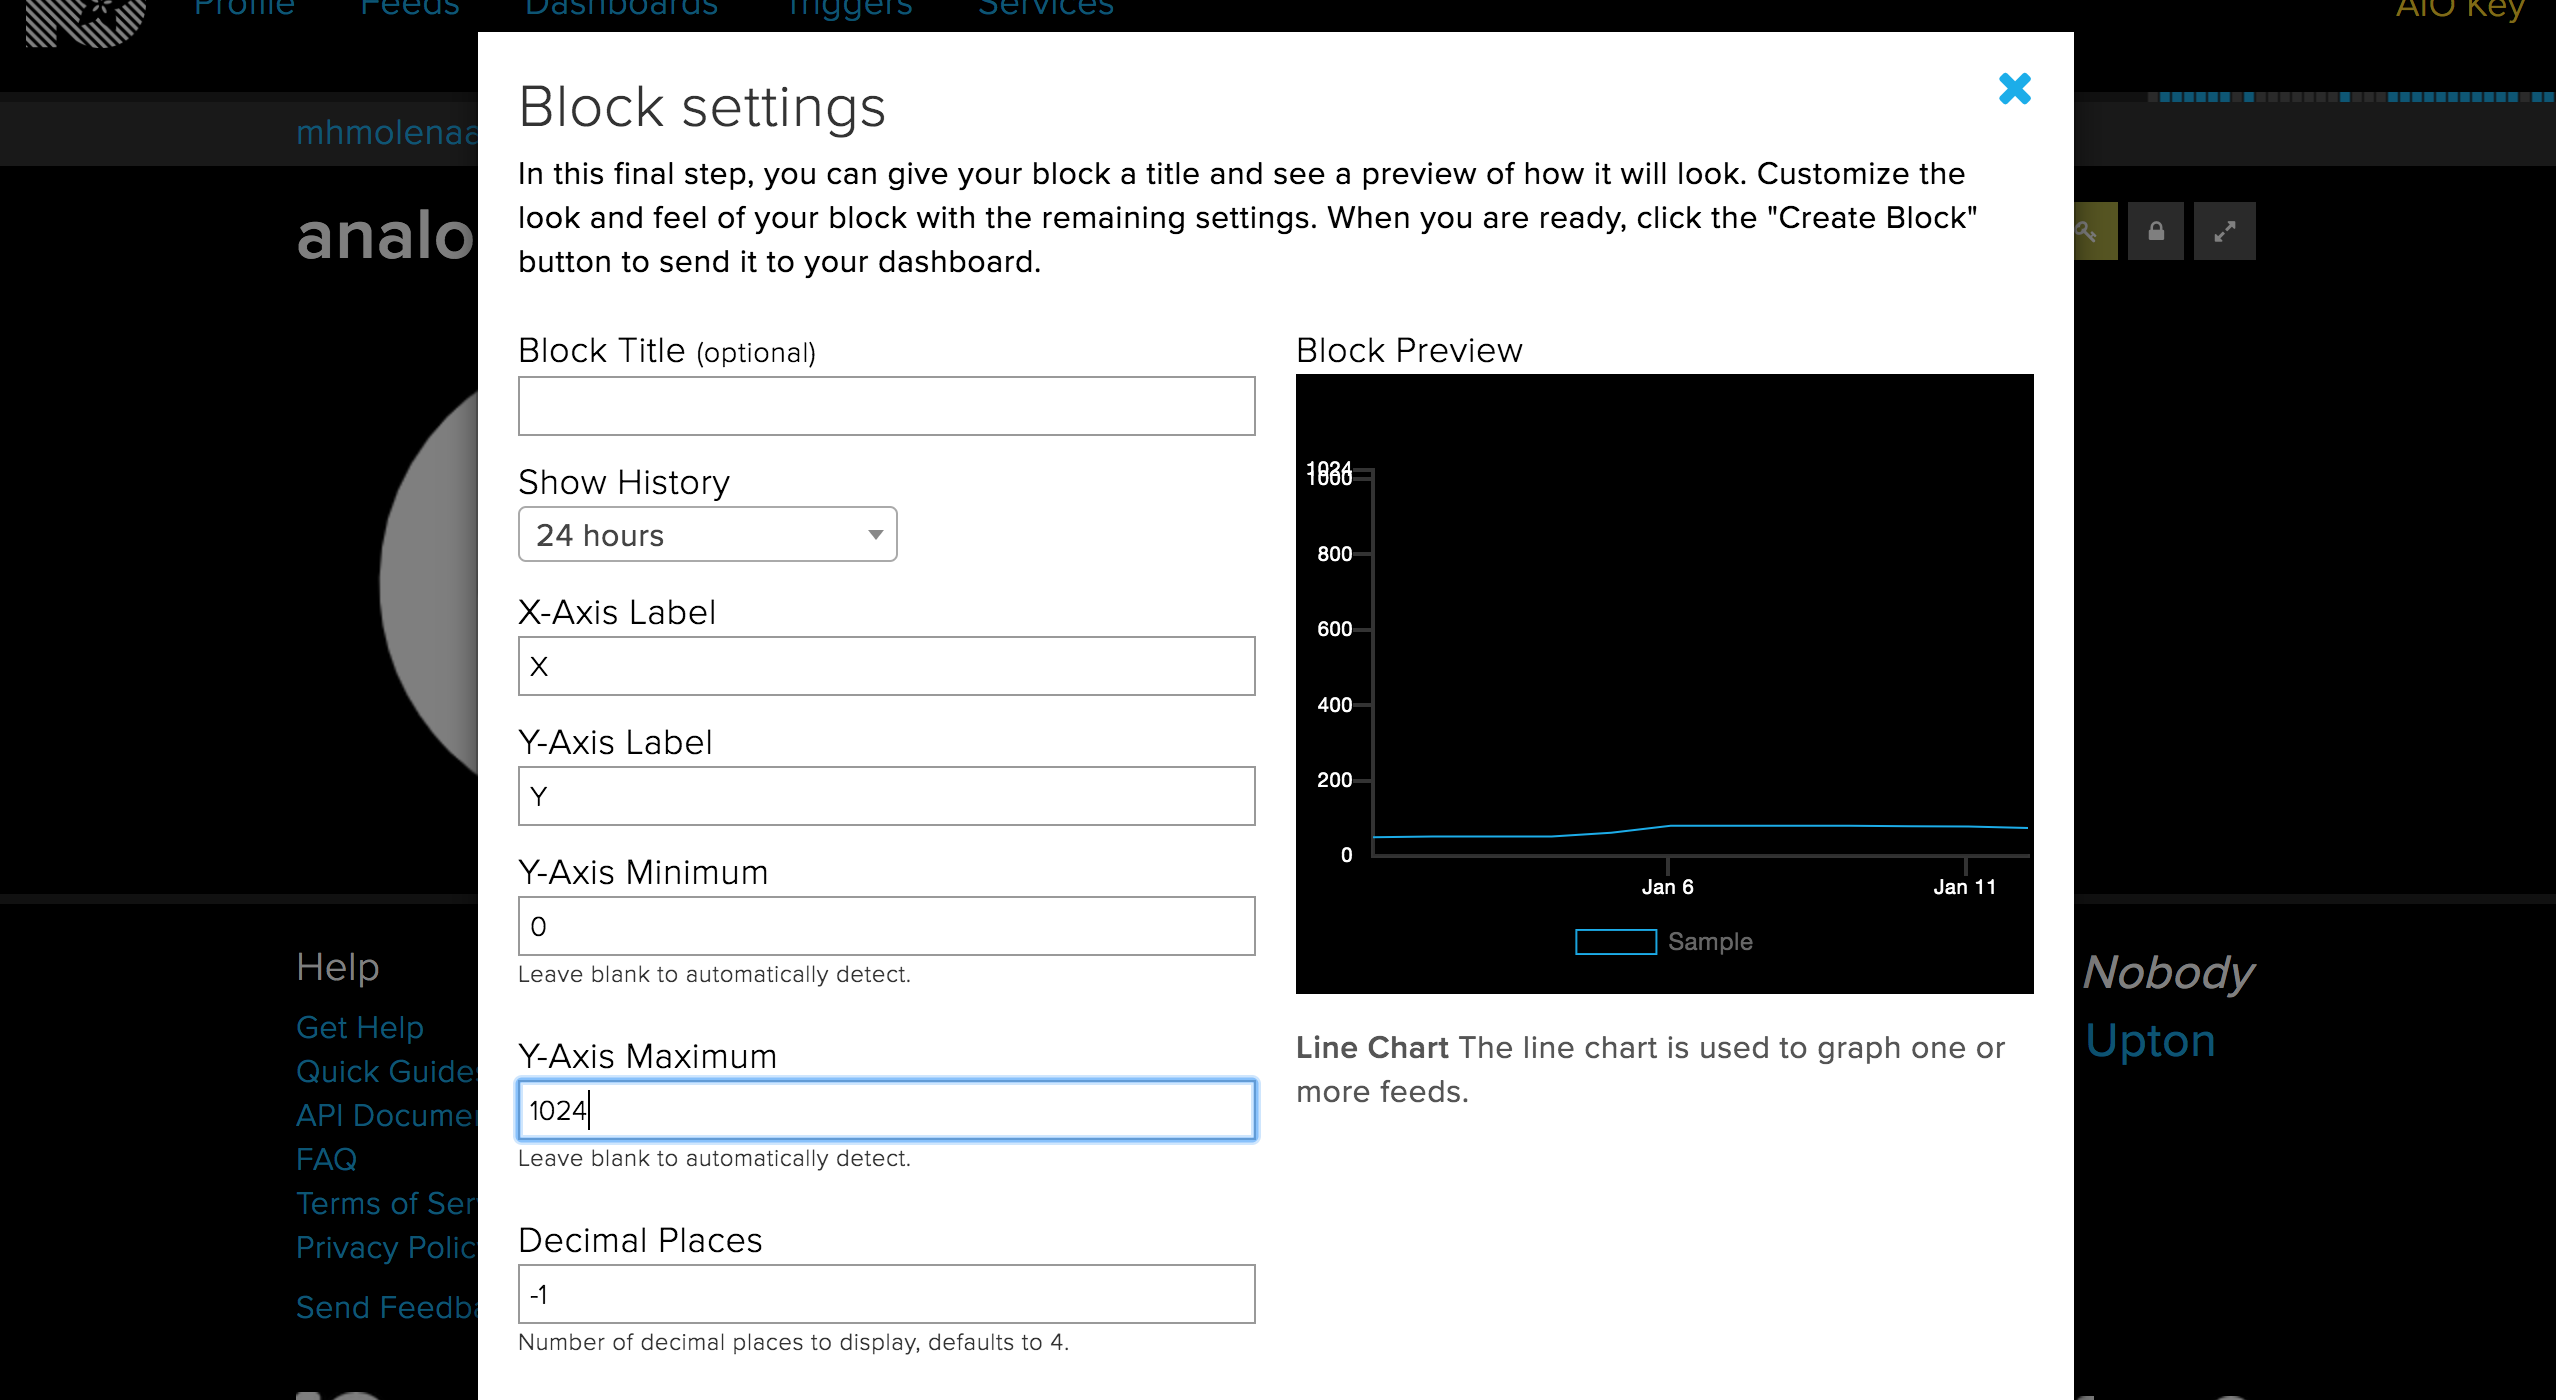
When you're in the dashboard add a new Gauge block trough click on the blue plus in the top right corner. Name the block whatever you would like (shown in photos 6 and 7), and give it a max value of 1024 and a min value of 0 (values of the muscle sensor).
Repeat the same with the Line chart block (photo 8) as above with the Gauge block.
Check
If you have done al above, you must have a similar screen like the last photo.
Arduino Input
In step 1 you have done the setup of wiring the MyoWare Muscle sensor correctly. This step we will dive into the Arduino code that comes with connecting to step 2 the Adafruit IO dashboard. At the end of this step, you will see the input values of the Myoware Muscle sensor in the two Blocks that you have set up.
Arduino setup
Make sure you have al the libraries installed that are noted above in the introduction.
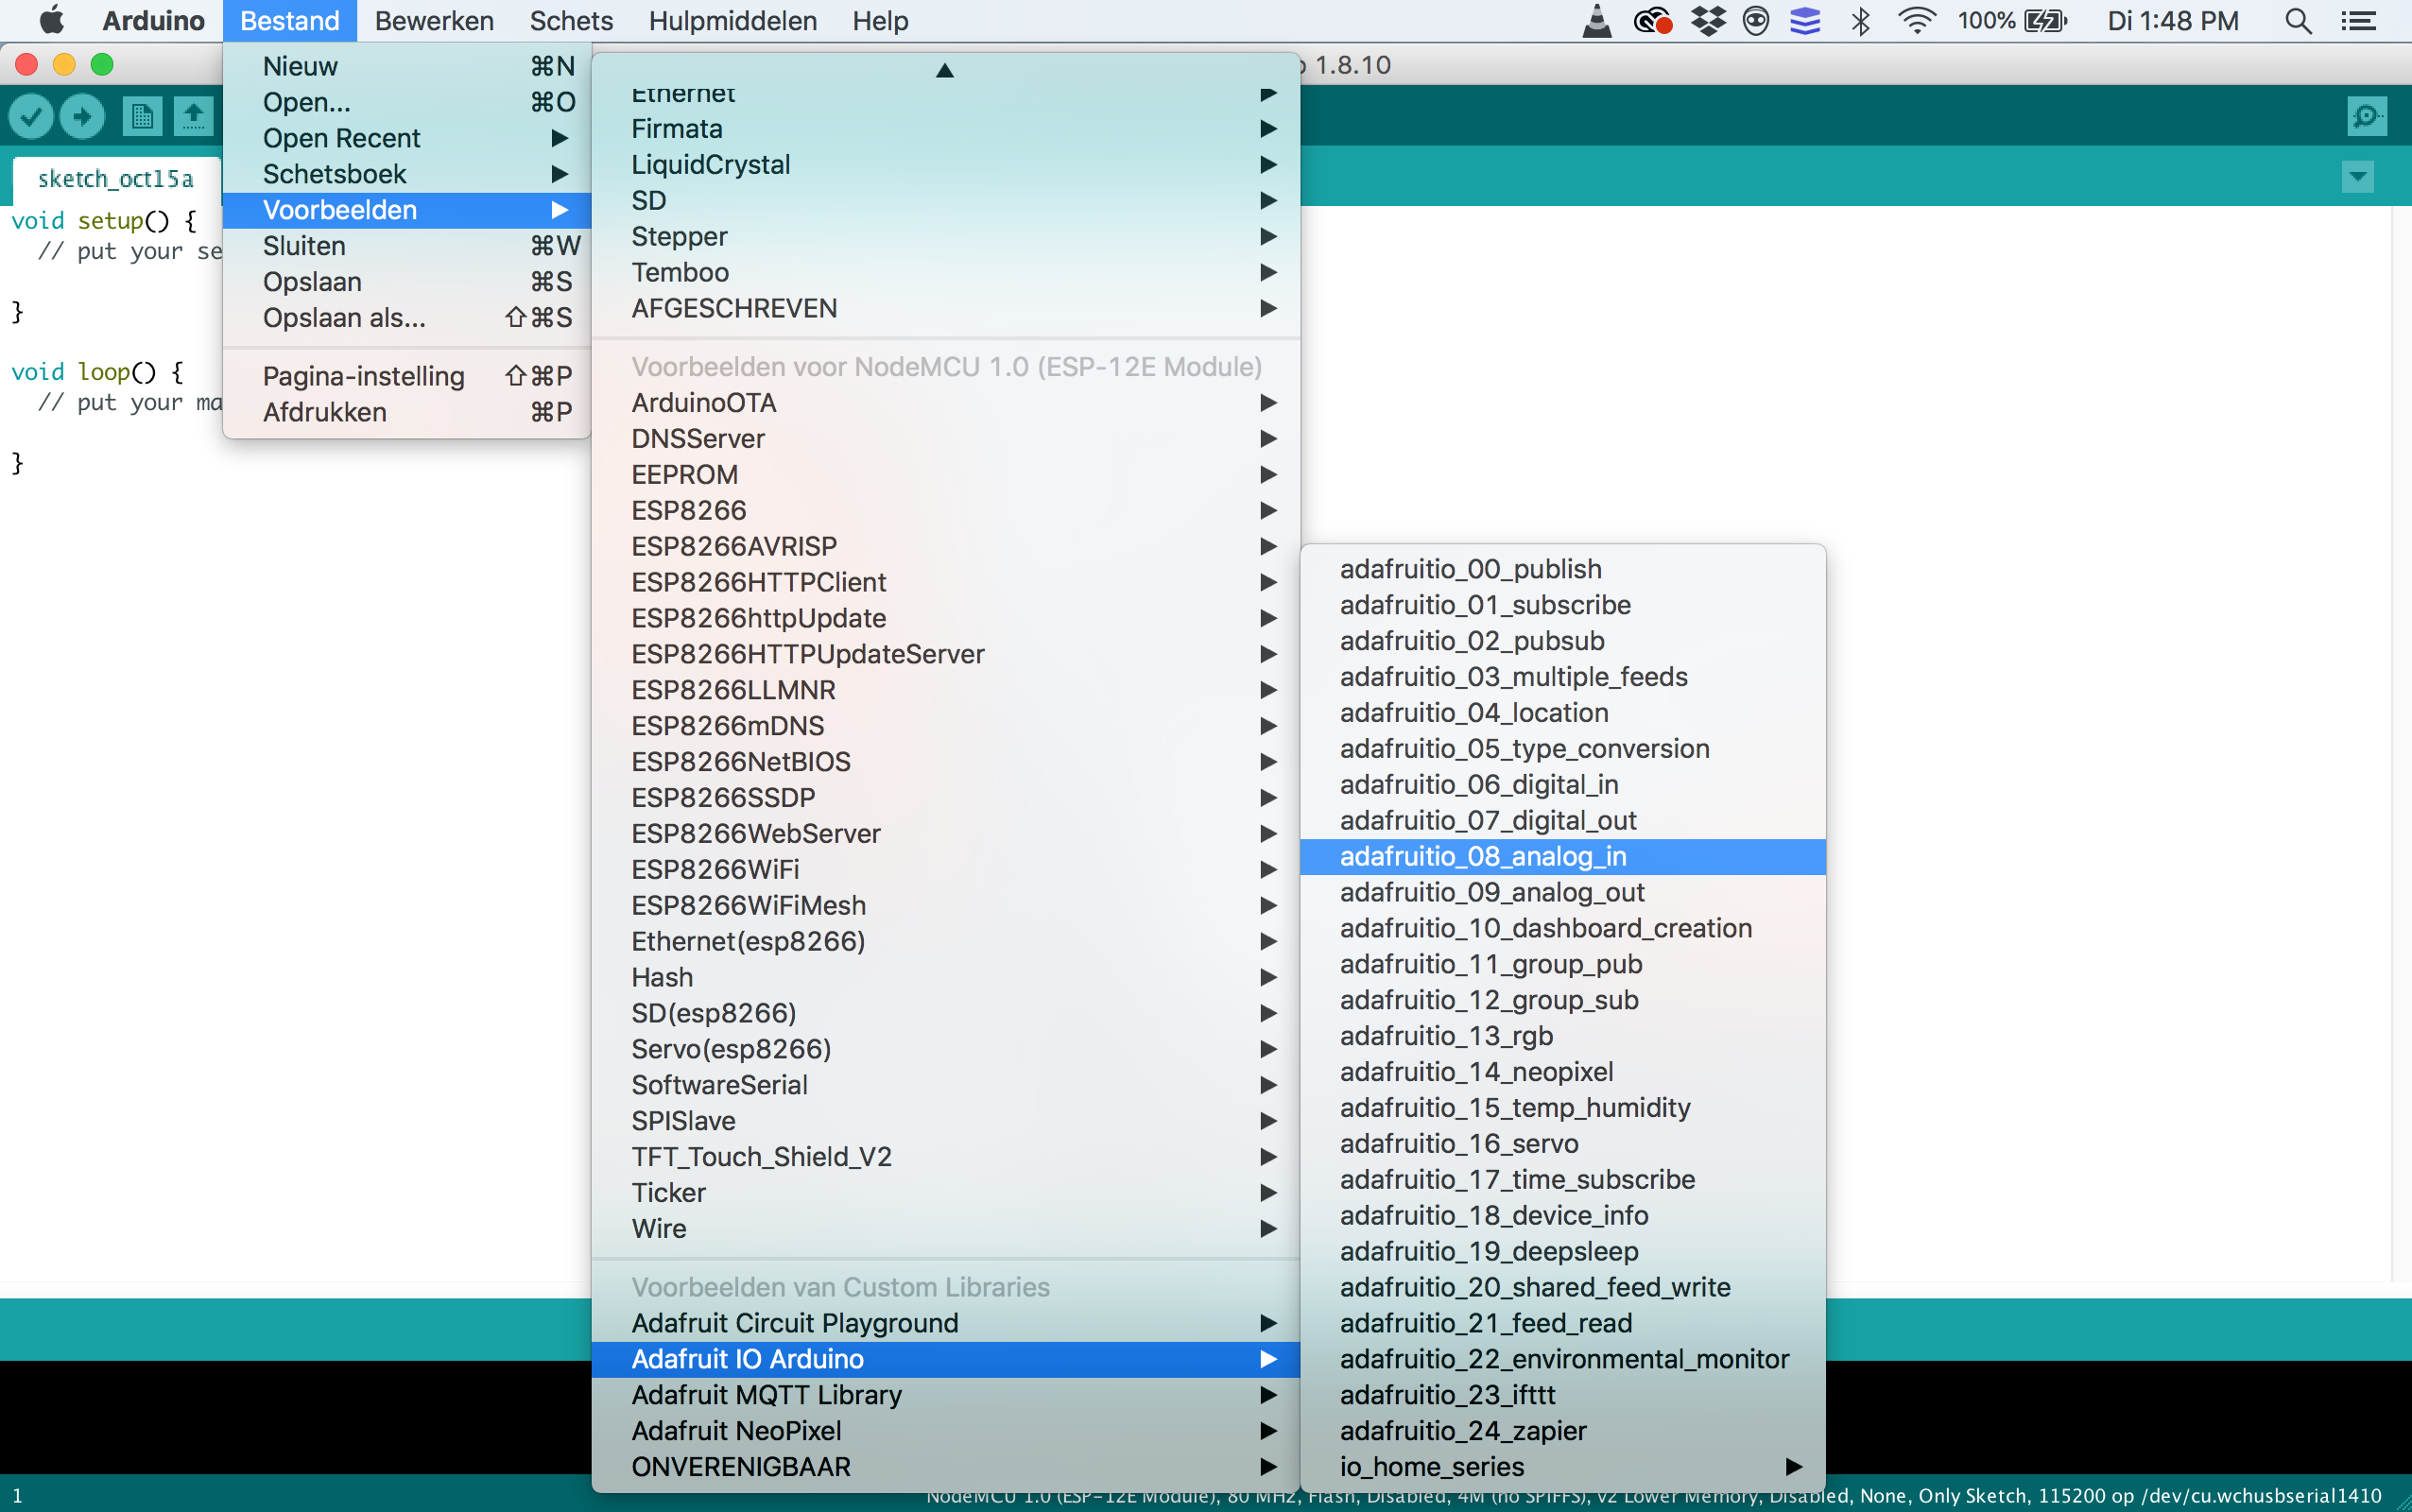
We are going to work with a example sketch. So open File> Example> Adafruit IO Arduino> adafruitio_08_analog_in (photo 1). Why this sketch? because we are first setting up the input part of this manual. The MyoWare Muscle sensor makes use of analog output. If you want to dive more in to the topic about analog.
Arduino Network Config
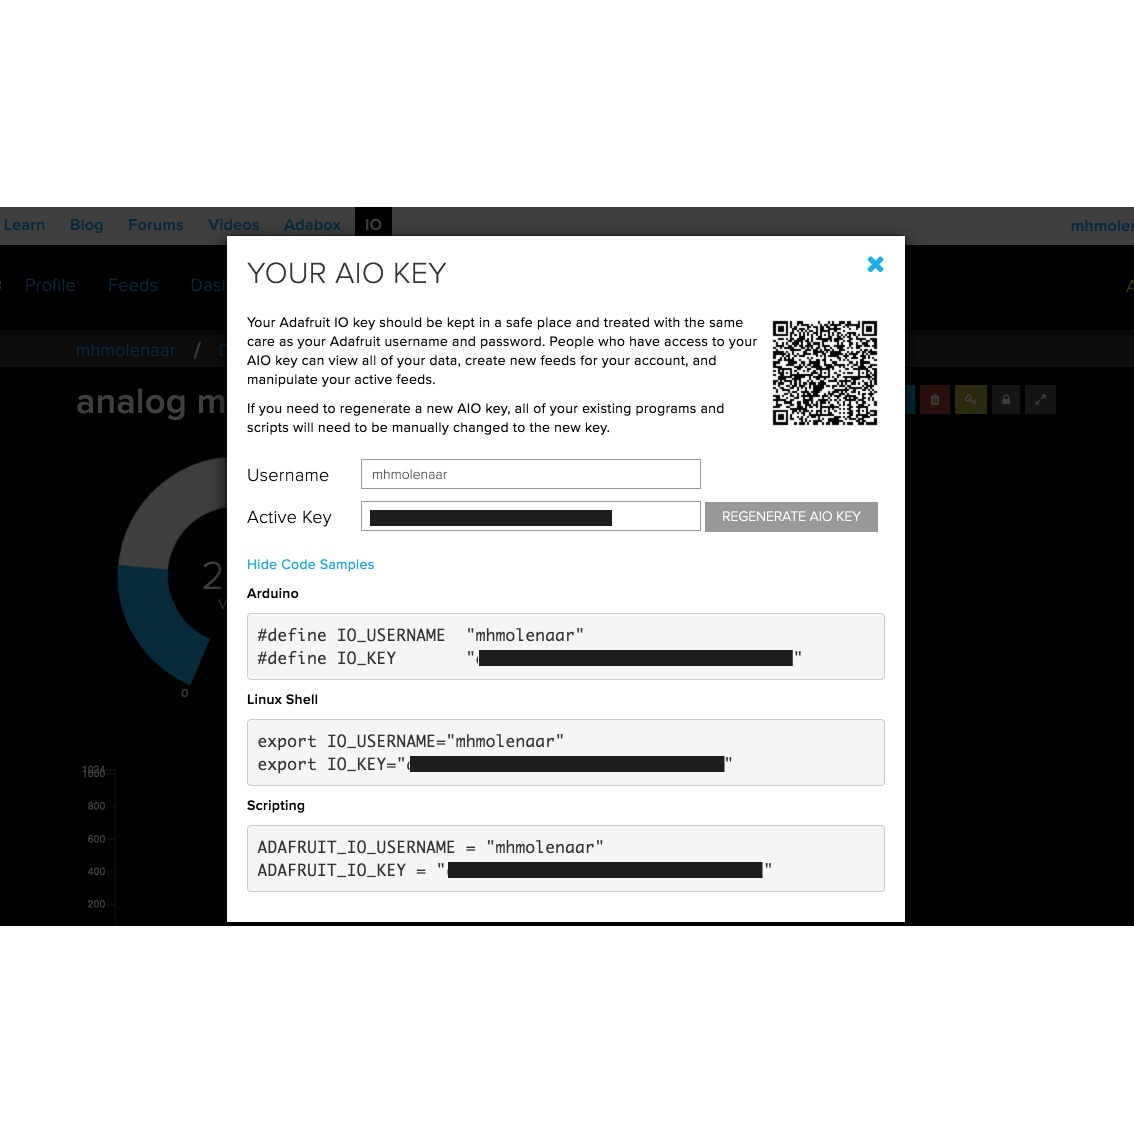
To configure the network settings, click on the config.h tab in the sketch. You will need to set your Adafruit IO username in the IO_USERNAME define, and your Adafruit IO key in the IO_KEY define. You can find your username and key in the upper right of the screen in your Arduino IO (example on photo 2)
#define IO_USERNAME    "your_username"
#define IO_KEY         "your_key"
WiFi Config
WiFi is enabled by default in config.h so if you are using one of the supported WiFi boards, you will only need to modify the WIFI_SSID and WIFI_PASS options in the config.h tab.
#define WIFI_SSID       "your_ssid"
#define WIFI_PASS       "your_pass"
Arduino Code
If you have changes te settings above, we can go further to the actual code, adafruit_08_analog_in. The defeault pin in this example is statet on AO. This is the right pin as you have placed your muscle sensor on the board in step 2.
This example uses a photocell sensor, because we use a muscle sensor we will change this name. It doesn't matter if you do this, it will only make it semantically tidier. Change PHOTOCELL_PIN to MUSCLESENSOR_PIN do this in two places of the sketch.
/************************ Example Starts Here *******************************/
// analog pin 0
#define PHOTOCELL_PIN A0
In the last codeline there is put up a delay. This delay is 1 second, we are going to set is to 2 seconds so 2000. We do this because there is a license on Adafruit IO with a data limit, under two seconds this sketch exceeds that data limit and it will give a THROTTLE WARNING. What means that there aren't coming any values in. Setting this to two seconds prevents this.
// wait one second (1000 milliseconds == 1 second)
  delay(2000);
This was what you had to change in the sketch to make it work. If you want to know exactly how the whole code works. You can find it on learn Adafruit, with an explanation of every code blocks.
Check
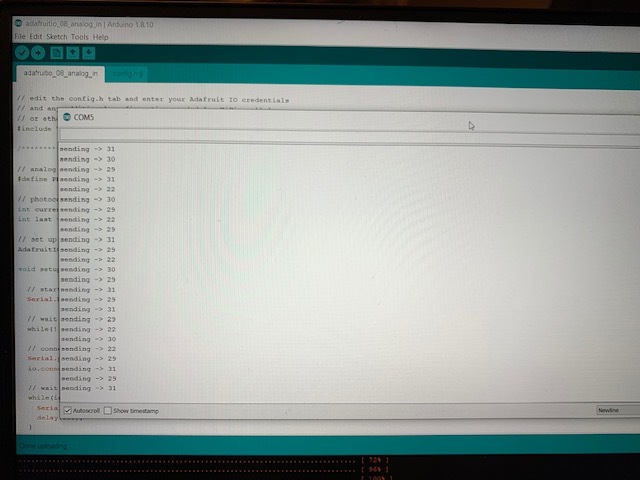
Upload the sketch to your board, and open the Arduino Serial Monitor. Your board should now connect to Adafruit IO.
you can now tighten your arm, and you should see the changing values being sent to Adafruit IO (as in photo 3). If you do not see any values in the Serial monitor, check whether you have set the Baud rate in the Serial monitor to 115200.
Adafruit IO Dashboard
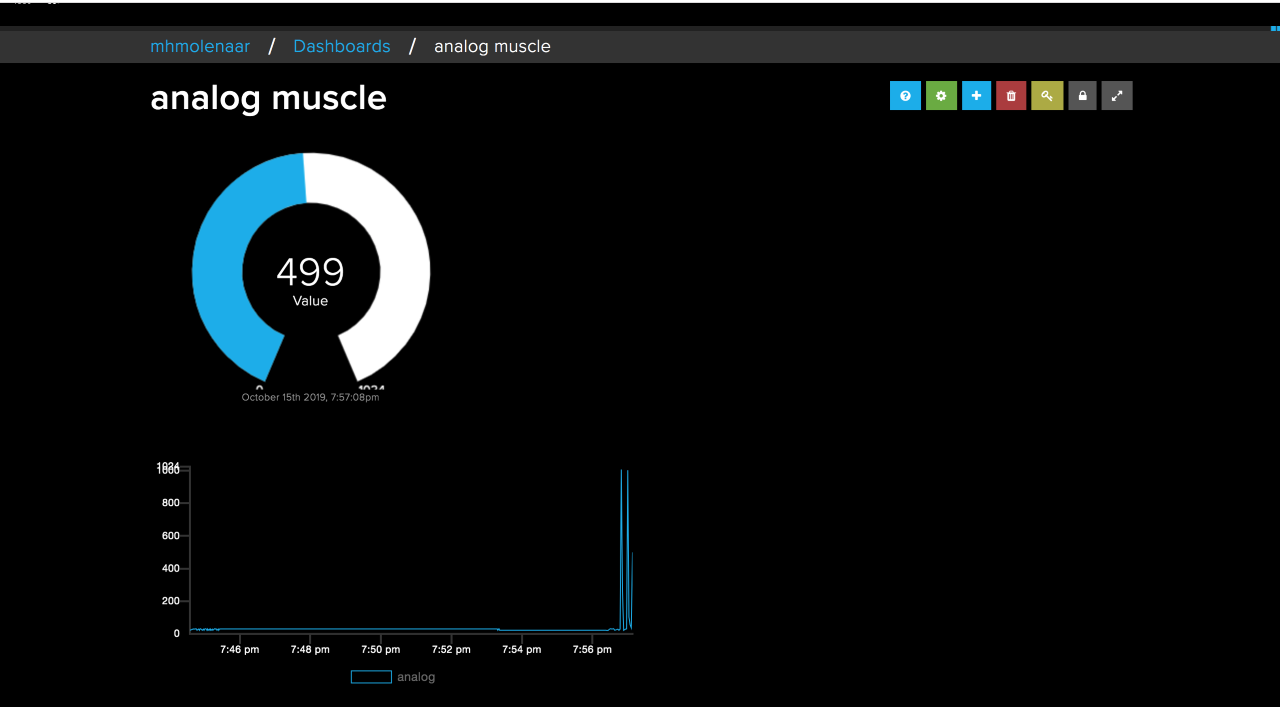
Check your dashboard on Adafruit IO, and you should see the gauge and the line chart respond to the changes the MyoWare Muscle Sensor values.
Adafruit IO Trigger Setup
Until now we have been able to make input from the MyoWare Muscle sensor to Adafruit IO working. Now we are going to get started to read this information. So that after 5 times a value above X of the Muscle sensor is detected, an action is performed by the Neopixel led strip.
This section was for me where I had to investigate how I can read the Adafruit IO history. I had worked with Feeds and Dashboards before, so I thought that the feed and dashboard that were created could read this and create an action here in Arduino. So far I have not succeeded. After a lot of research and Adafruit IO, I discovered that an action can be triggered with the Trigger function in Adafruit IO. Learn more about Triggers.
An extra Feed
Before we can make a Trigger we must create an other feed so we can name it in Arduino to get te output. Create a feed with the name AlertTriggered.
Create a Trigger
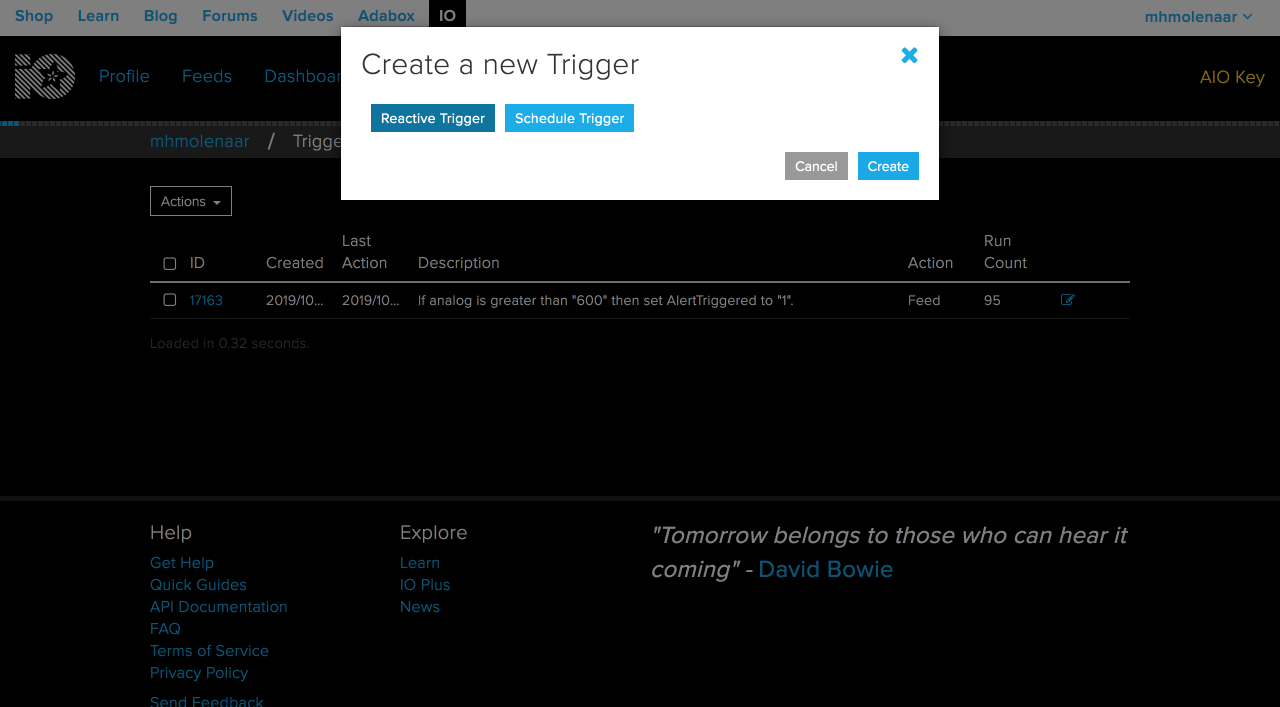
Next to the headers Feed and Dashboard is Trigger, go here. Create a new trigger. You will be asked if you want to create a Reactive Trigger or Schedule Trigger, choose Reactive Trigger and click on create. This is because you only want to trigger something when something happens (photo 1).
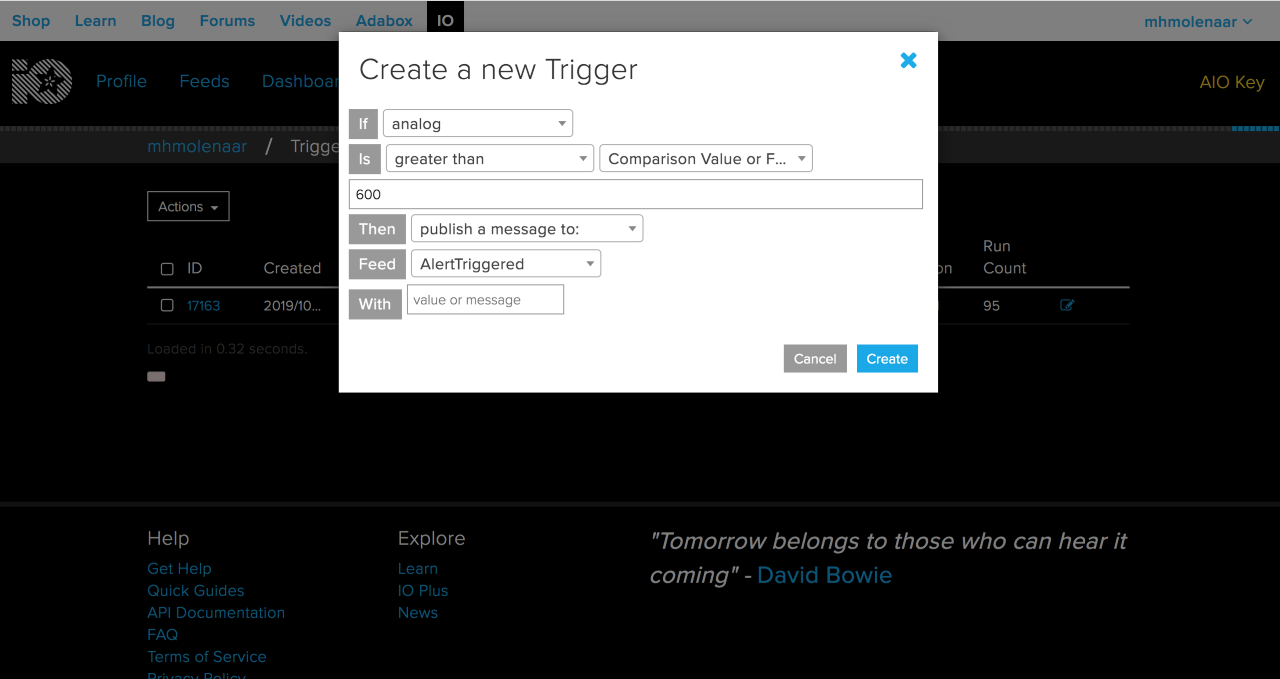
A number of things must be set (Next steps are also shown in photo 2).
-Select the analog feed at the first If, so the input will be taken from here.
-Is you select greather than, this because you want to trigger something when the value exceeds such a number.
-Comperison value you can enter your desired number to activate the trigger. I did 600 in this case.
-With arduino you will have to receive a feedback when it exceeds 600: so at Then select publish a message to:.
-After which you can select your second Feed created AlertTriggered.
At last click on create.
Neopixel Output
The final step is to generate the output. Done in the Arduino sketch that you have editied, by calling the AlertTriggered feed (that you created in the previous step).
To be able to generate output you must first connect the Neopixel led strip to the NodeMCU.
- + 5v (left) wire of your led strip on the 3v of your NodeMCU
- GND (right) wire on G of the Node (G = GND)
- Center wire DIN of the LED on D5 (or any other D port)
Code
I have included the whole sketch with alternations in to this step as a file (can be found on the bottom of this step). This is the same sketch you have worked with in the last few steps but now the final Sketch is included with the steps you must do in order to have generate the output. adafruitio_musclesensor_neopixel file. This works with the config.h you have previously set with your data. Al the code blocks are included with comments so you can see what is happening.
What output data has been coded
In this code I have created a trigger, when the AlertTriggered (what we declared in the previous step over a value greater than 600) is triggered more than 5 times. This means when it is triggered, the Neopixel led strip is set from white to red. This will happen for a minute and than the red state is going to fade and is looped to the white state again.
Serial Monitor
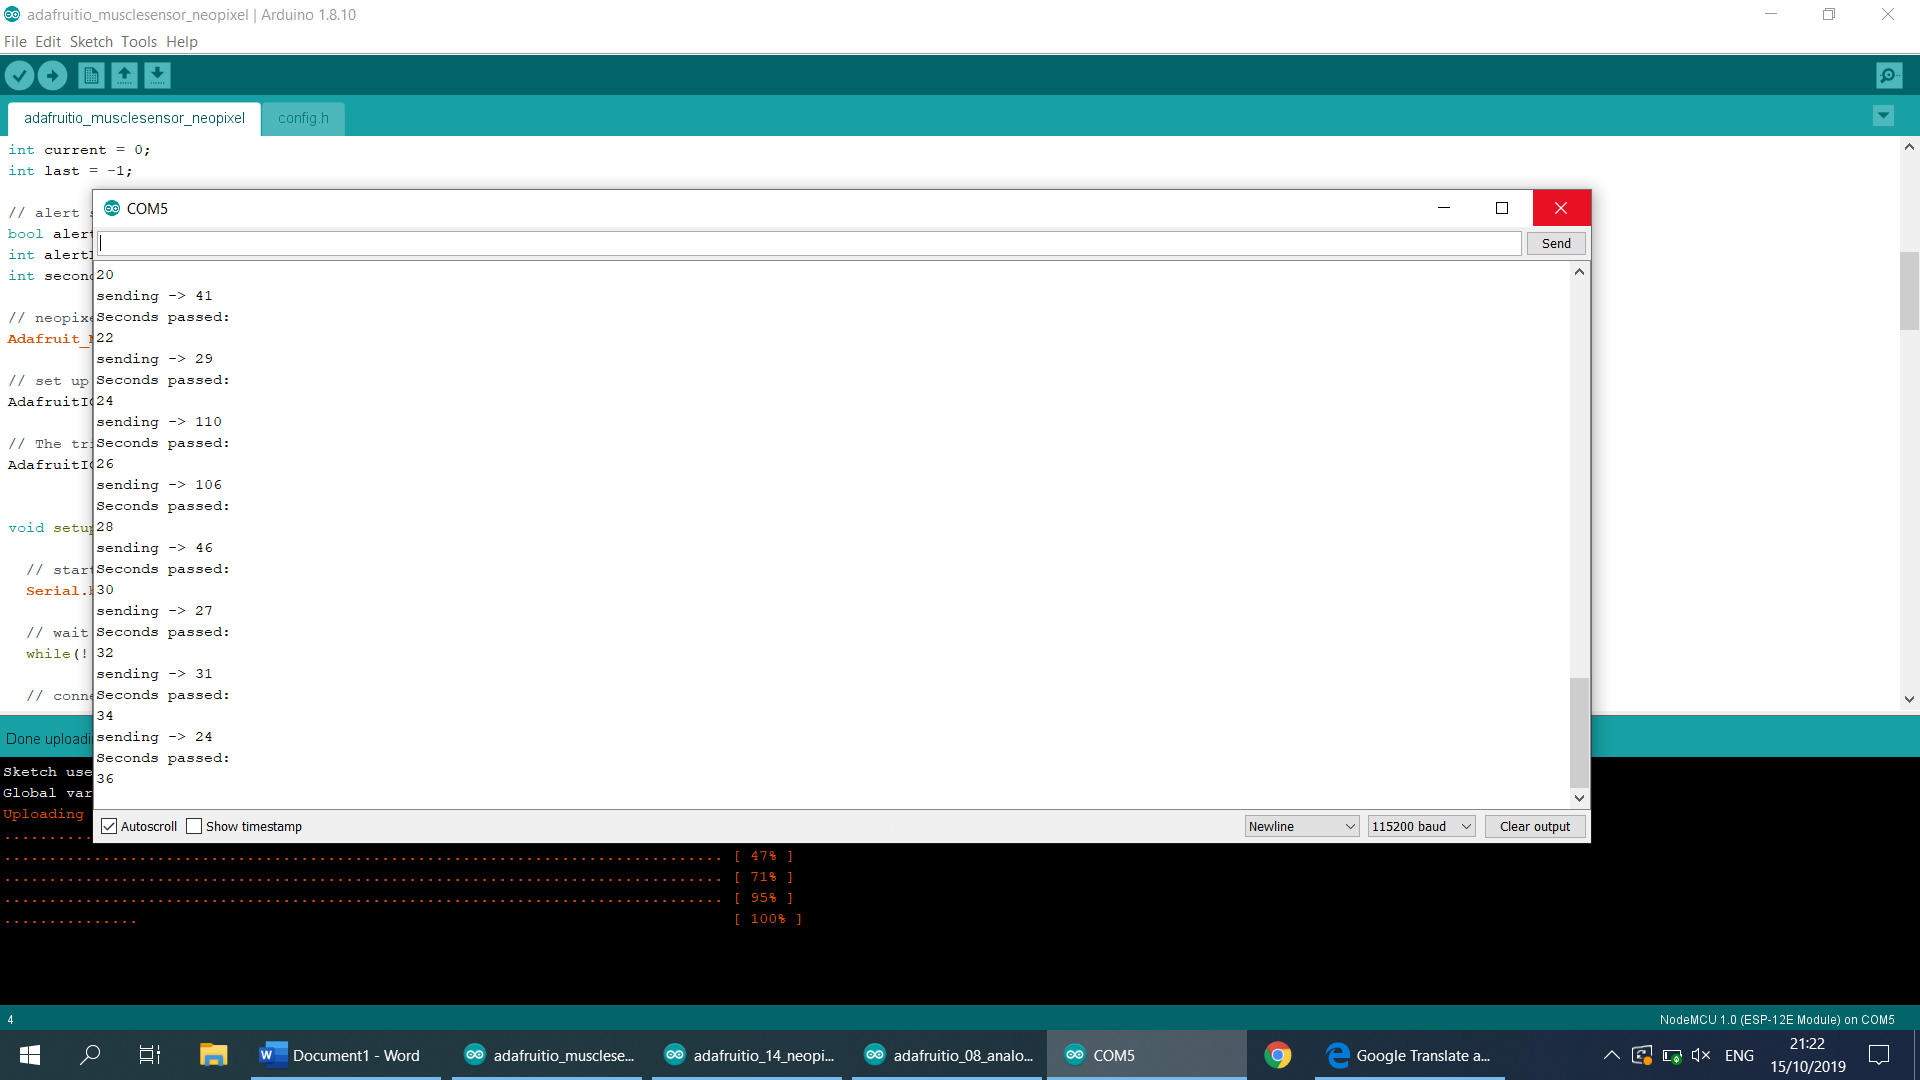
To make it clearer for you as a programmer, the last set of code is for the Serial Monitor. What the values are and when you have triggers the alert level. Together with adding seconds when the Alert state is on, until after 60 seconds it switches to Alert state off again. This part is therefore optional.
//to show the passing seconds in the Serial Monitor when the alartstate is on
    Serial.println("Seconds passed:");
    Serial.println(secondsPassed);
  } else {
      secondsPassed = 0;
  }
Check
If you have the steps done or have get the sketch adafruitio_musclesensor_neopixel file with your own config.h you can upload it to your NodeMCU. If it's done you must see something similar as down below in your Serial Monitor:
Connecting to Adafruit IO...
Adafruit IO connected.
Sending -> 23
Sending -> 78
Photo 1 is the Serial Monitor when it's in Alertmode.
It doesn't work? Check the following things
- Check if the config.h is included in the right way
- Have you put in the right Adafruit IO Username and Key
- Have you put in the right SSID an Wifi password
- Do you have placed the wiring of the MyoWare Muscle Sensor right and from the Neopixel Led Strip
Or check the previous steps.
Downloads
Results
Hooray you're done! To demonstrate and see the end product in action I have included a video.