NHL Bedside Hockey Light and LCD
by WillA25 in Circuits > Gadgets
3508 Views, 20 Favorites, 0 Comments
NHL Bedside Hockey Light and LCD
Introduction
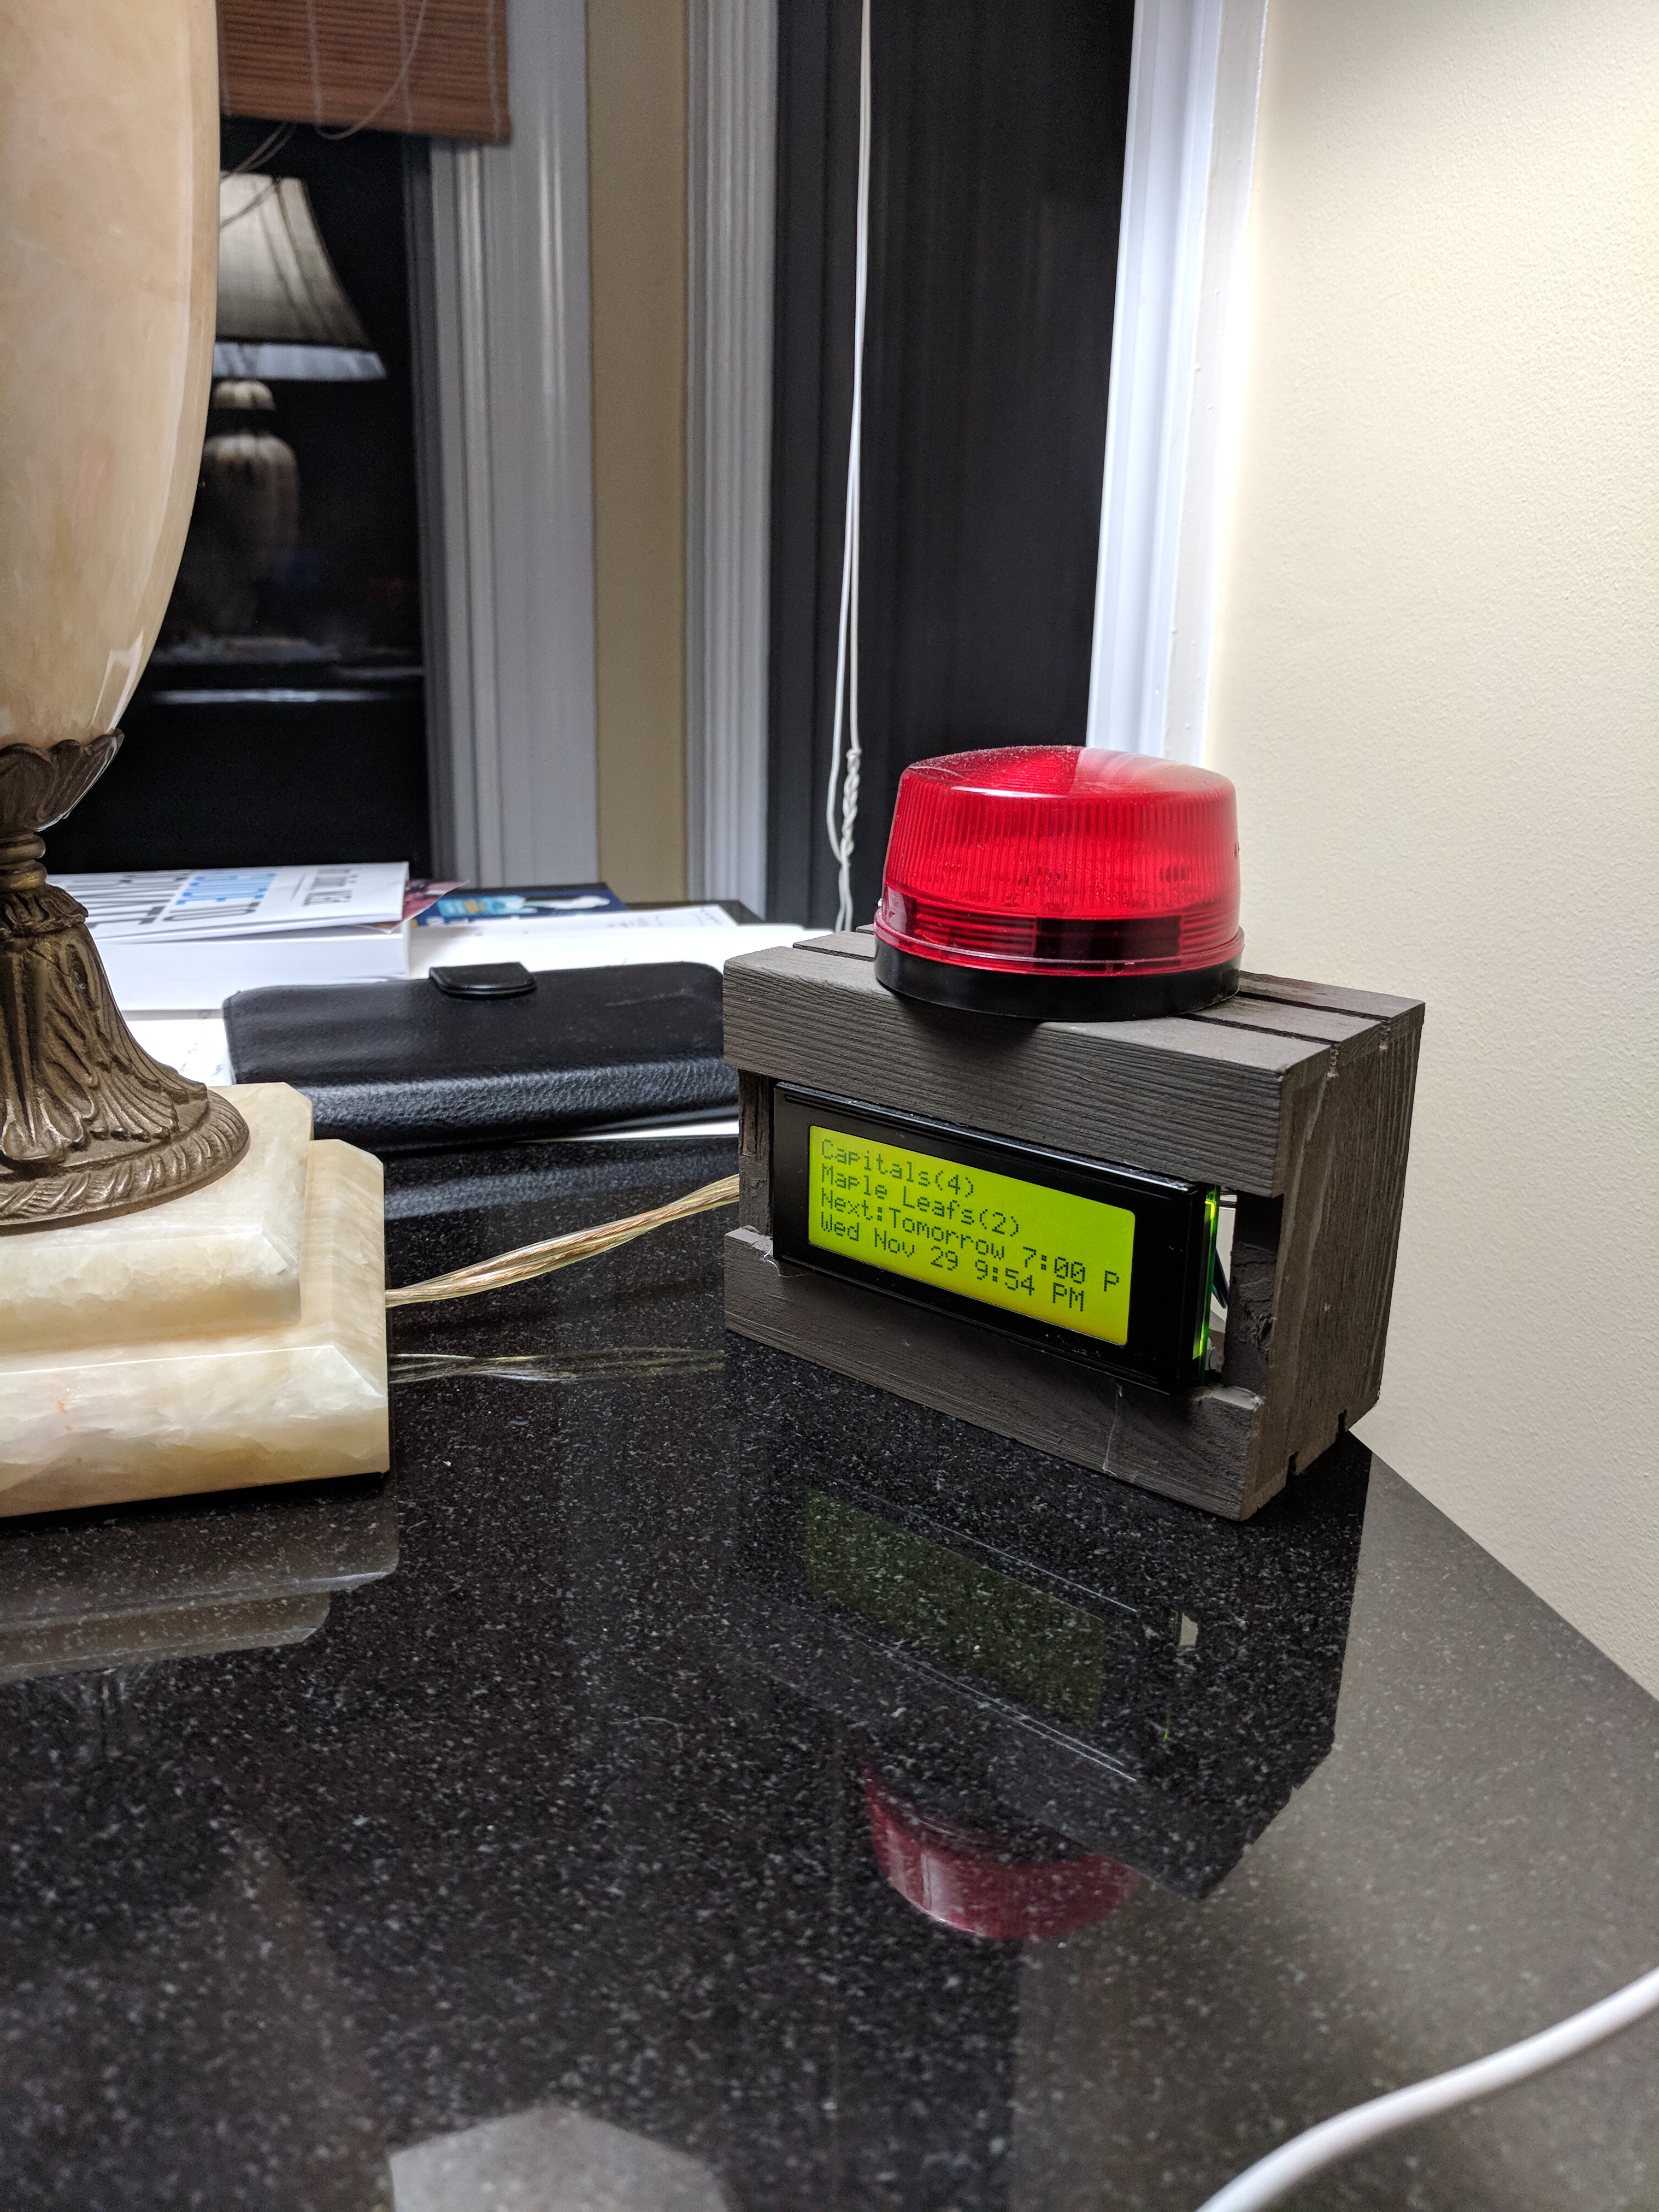
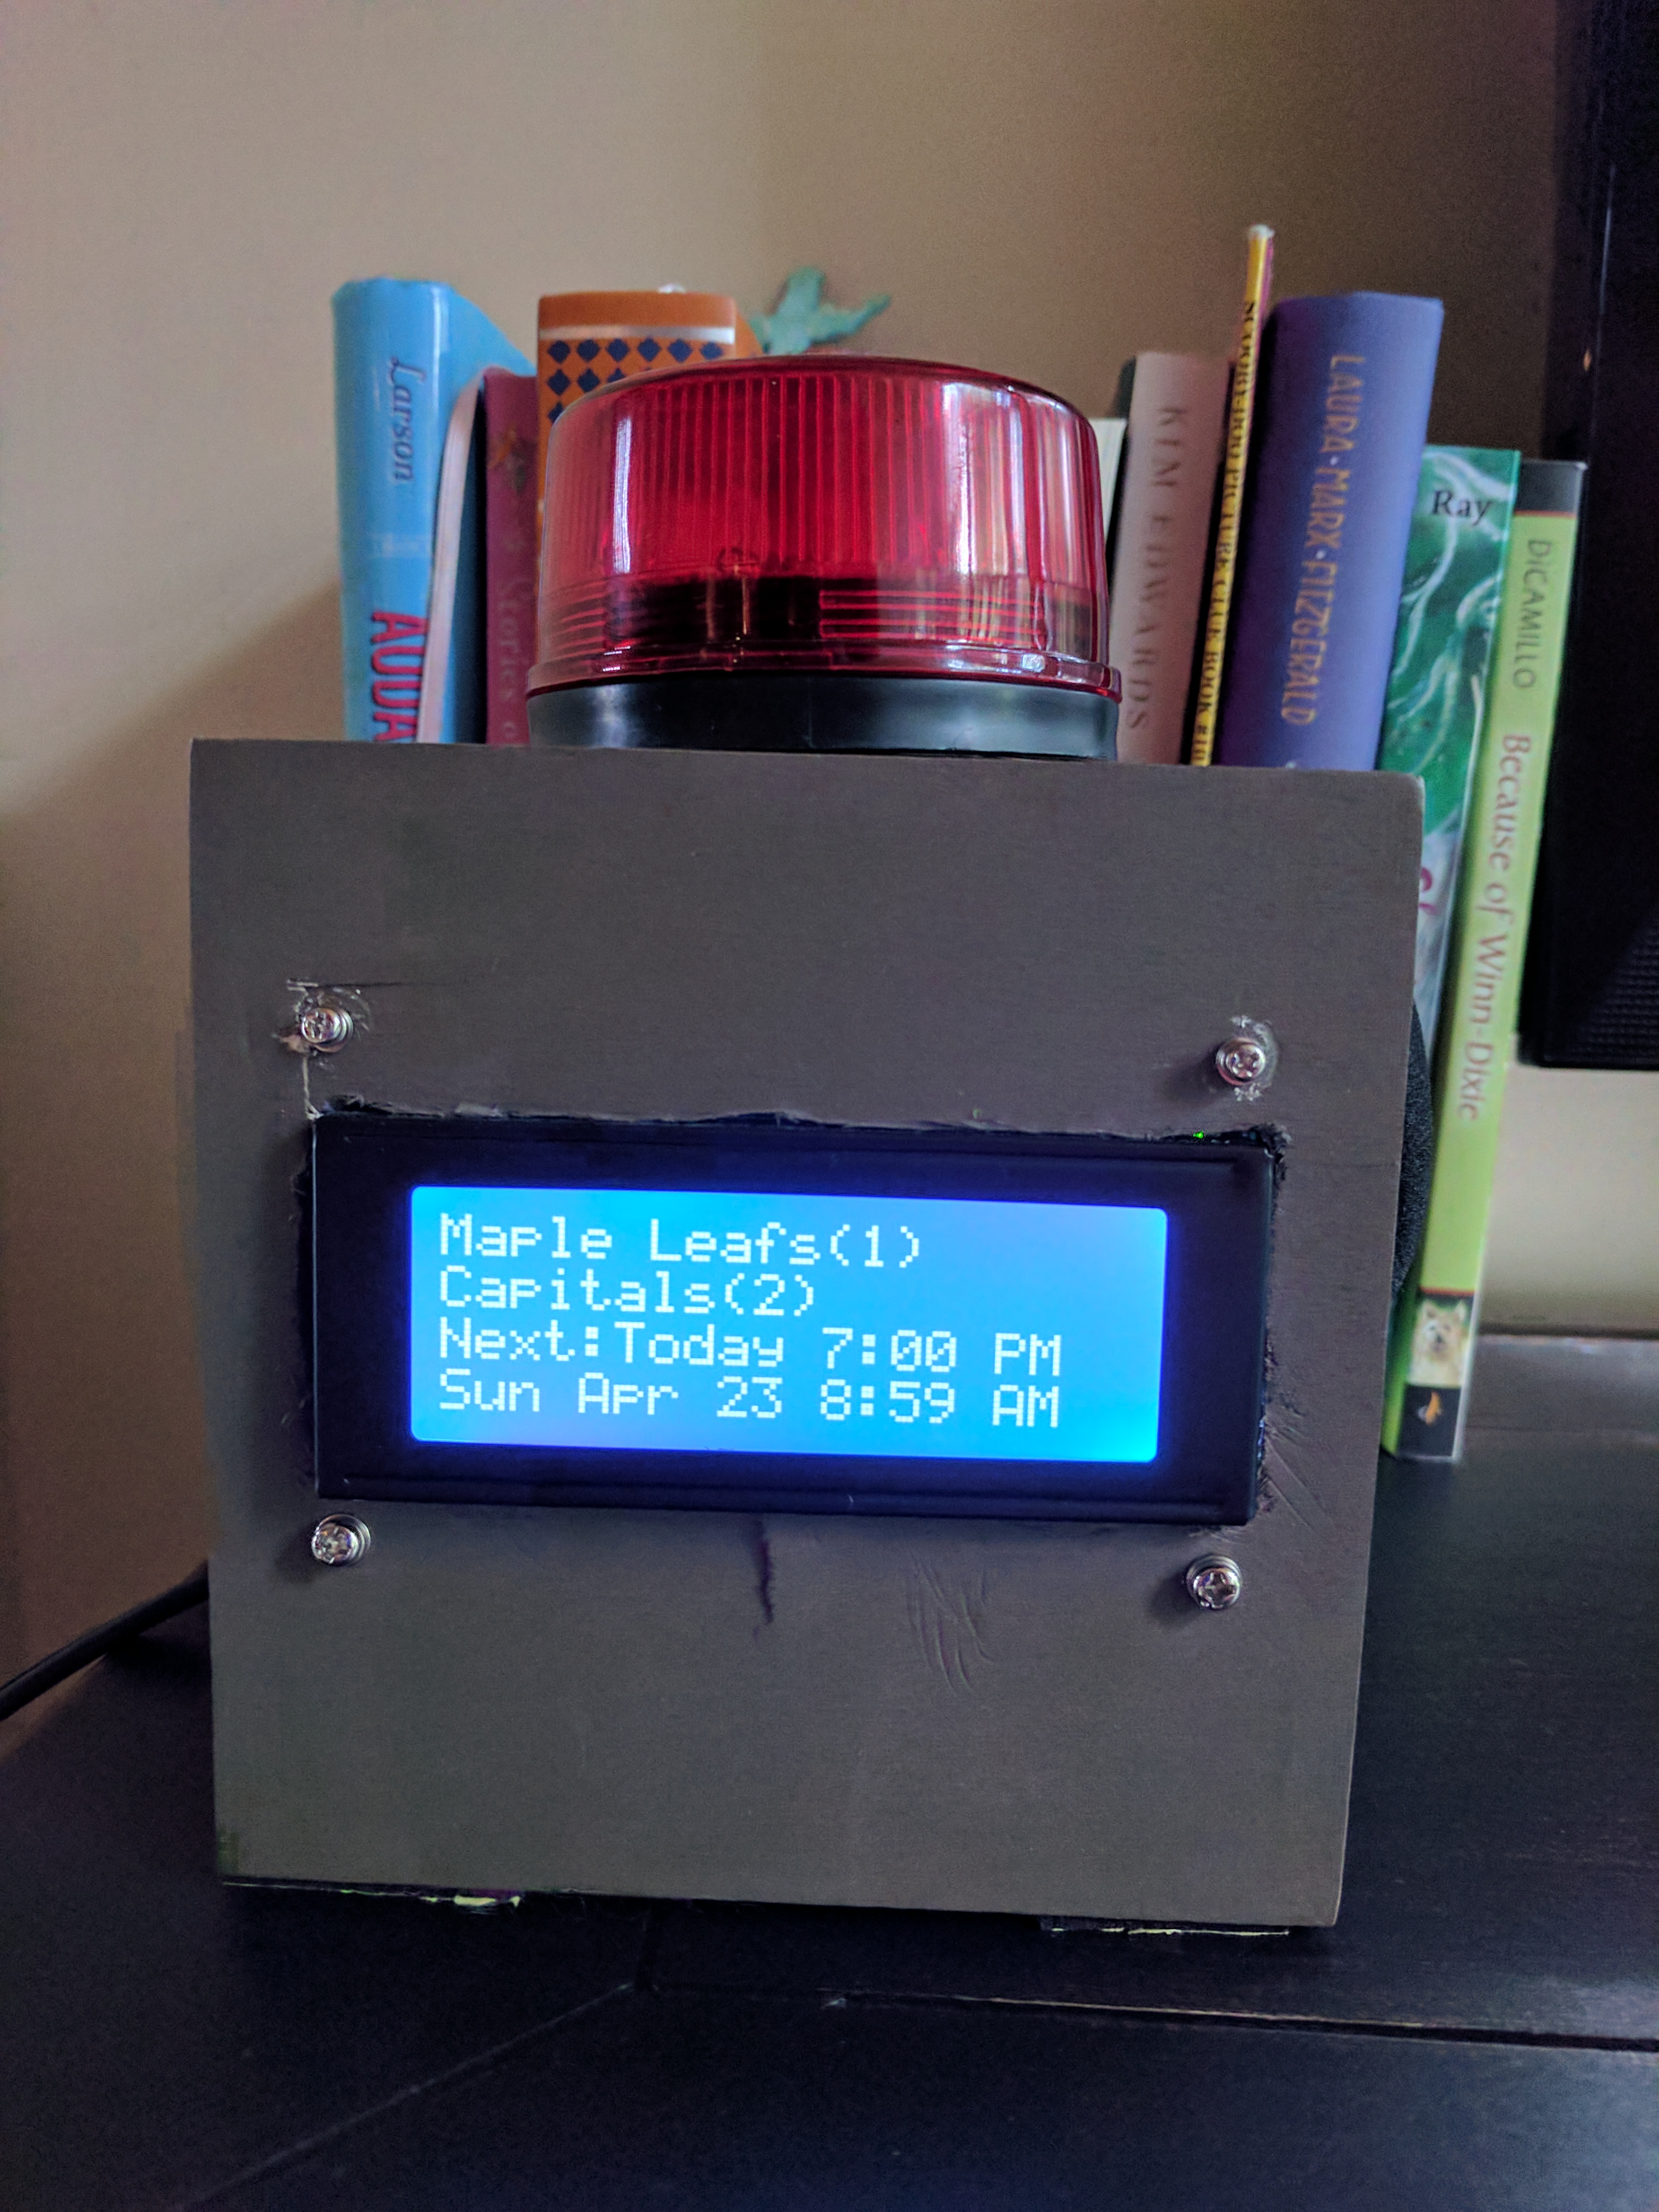
The "NHL Light" is for hockey fans who want to follow their team, but cannot watch every game. It's best feature is that it simulates a goal score with a hockey horn (custom to your team), and light.
In addition to the hockey horn and light, the "NHL Light", has a display that provides current, or most recent game's score, game time or time of next game, and current date and time.
The "NHL Light" runs on a simple list of parts, that is easy to assemble electronics, and code that is freely available.
Features
- Webpage based configuration for selecting your team and wifi
- Plays light and horn when your team scores (even when you are the away team)
- Plays sound to announce beginning of the game
- Plays a sound to announce conclusion of the game
- Provides time and date of next game, if no game in progress.
- Displays the current game time and period, if game is in progress.
- Displays current date and time.
Step 1: Assemble Your Parts
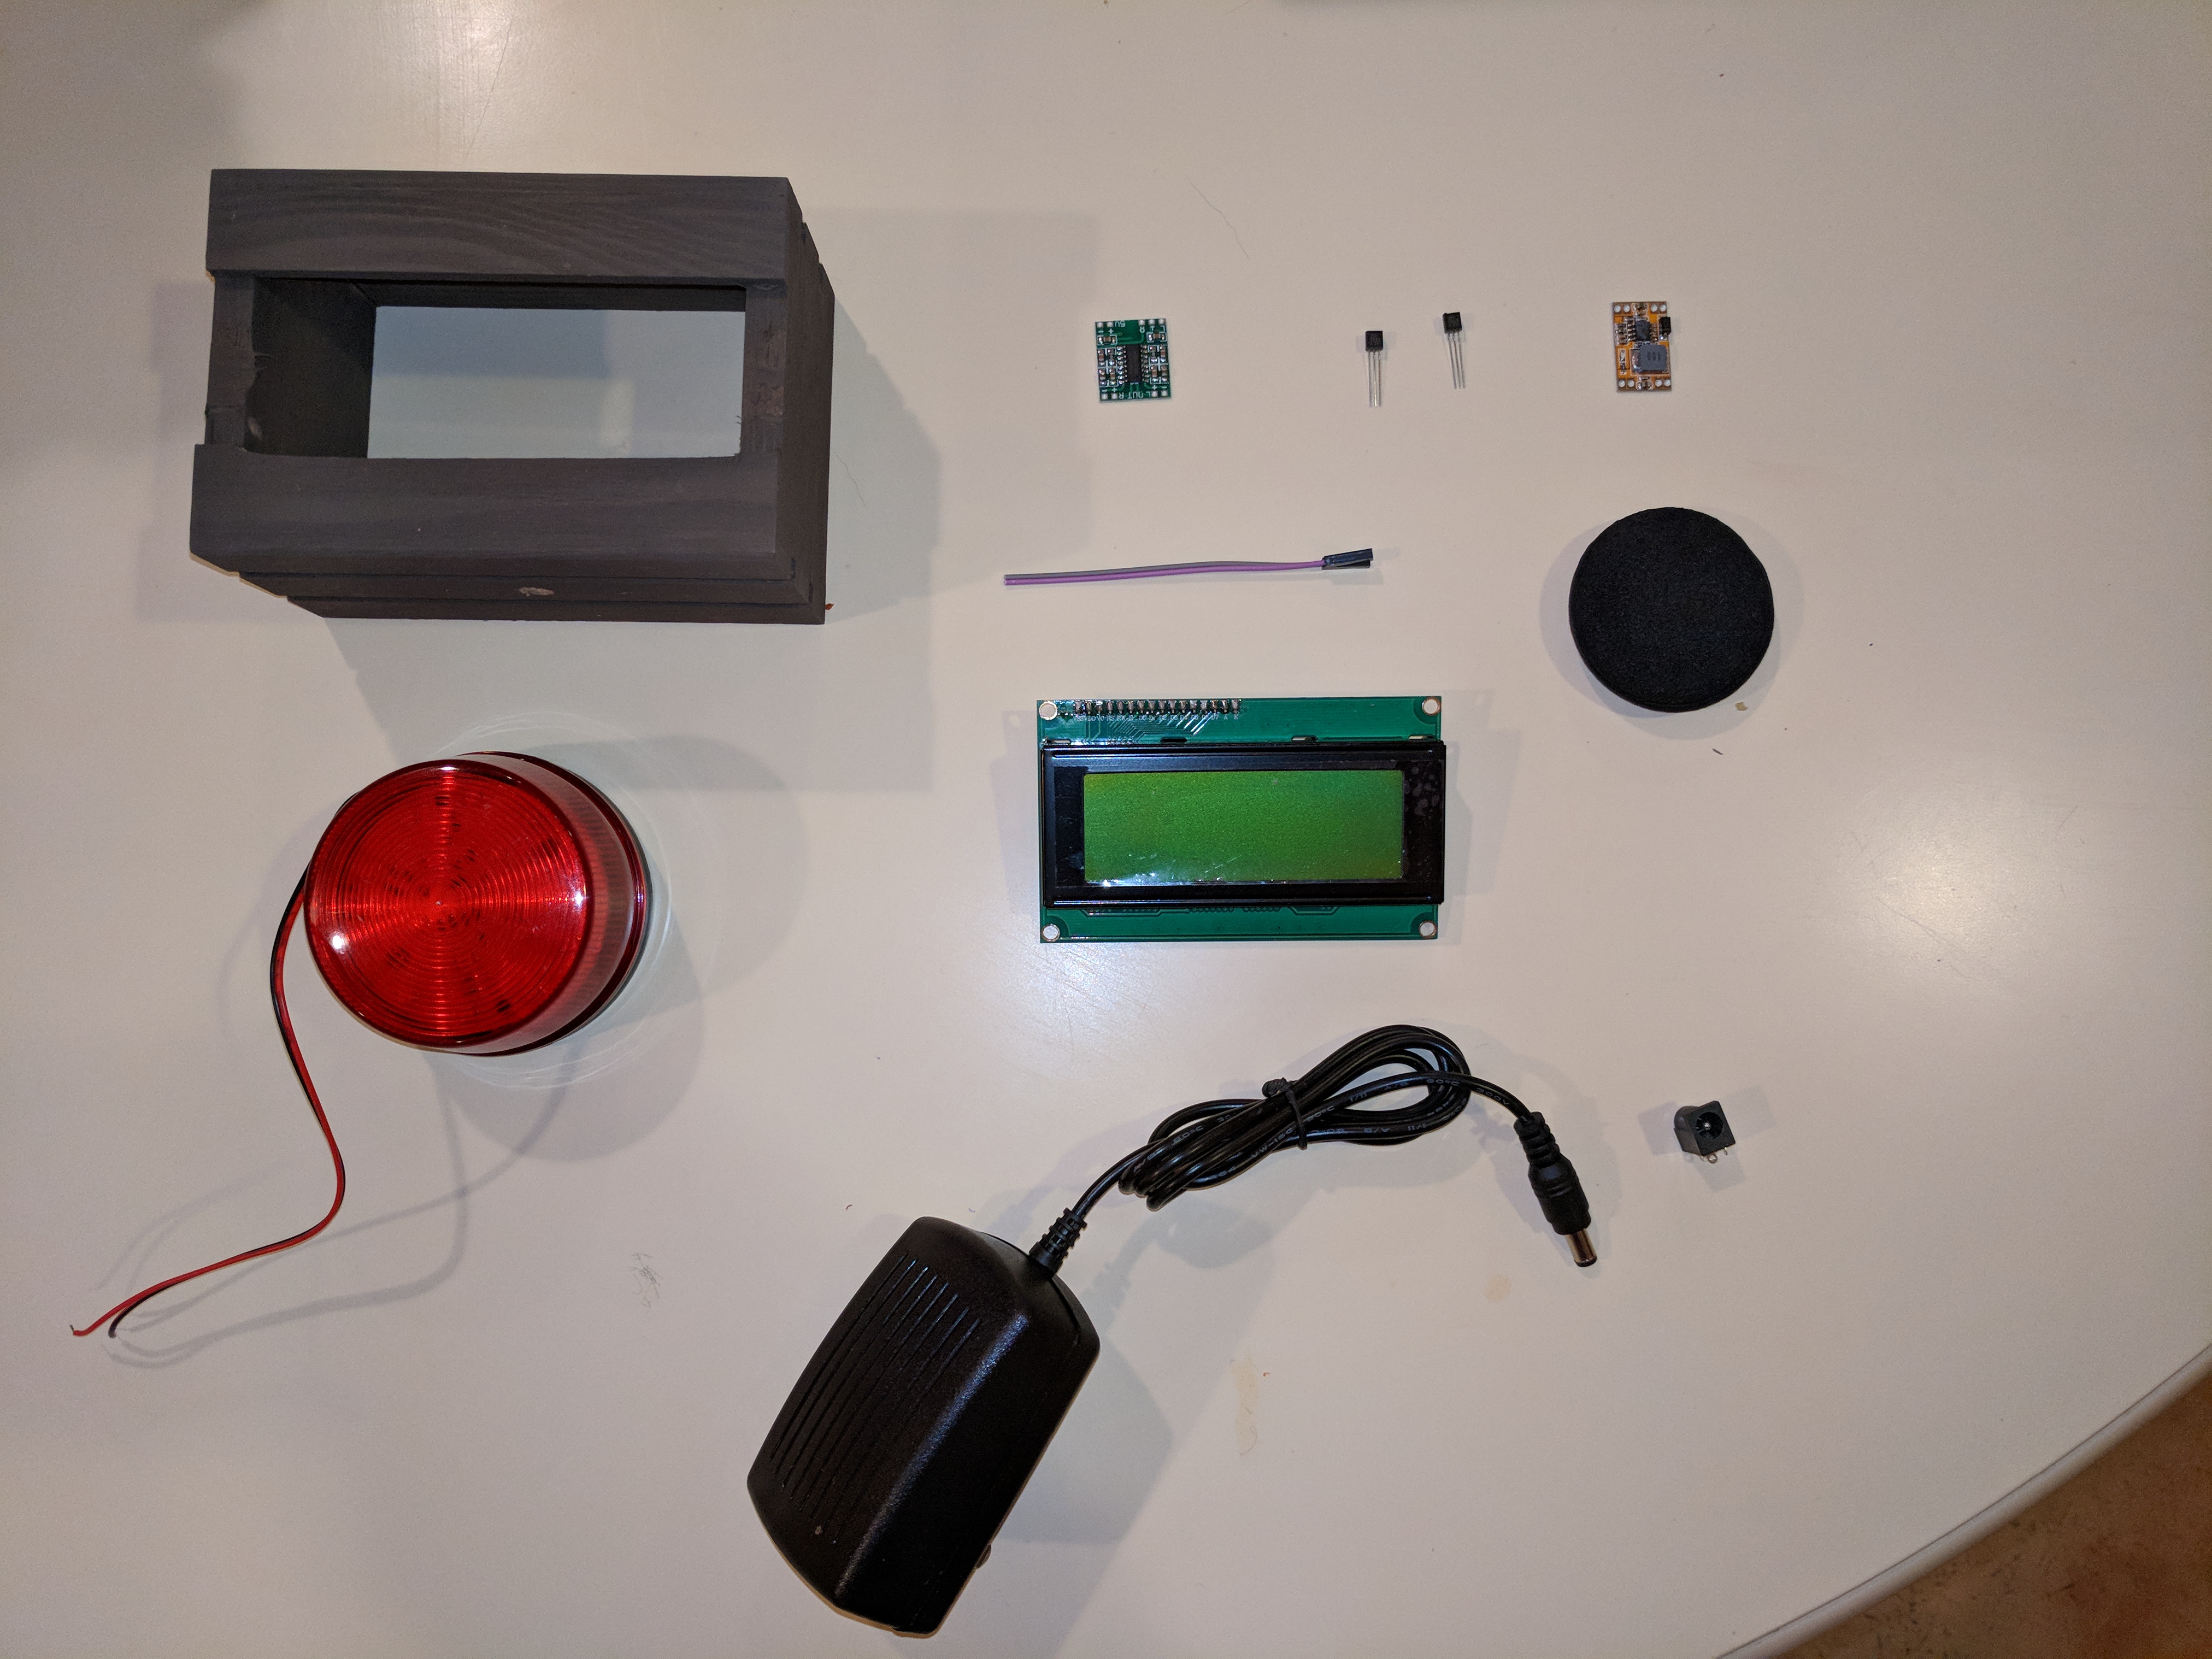
- Raspberry Pi W*
- Amazon
- I prefer to get mine from Microcenter, but can be found online for less at other places.
- $10
- SD Card (4gb minimum)*
- speaker - Amazon - ~$2 *
- amp - PAM8403* - Amazon - ~$1 each
- light - Amazon - ~$5
- Case - $1*
- Michael's
- I recommend small wooden craft case from Michael's craft store, but will leave to you!
- I2C 2004 LCD - $3-7
- Amazon
- The code supports 3 types of LCD's, but I2C 2004 is the one I have settled on as best value and size. (SSD1306 is also possible)
- 2 transistors - 2N2222A- Amazon
- Misc Wires / solder12V
- power supply - Amazon
- 12V -> 5V buck converter - Amazon
*There is flexibility when it comes to selecting this part.
NOTE: You can start on most of this project with just your raspberry Pi, while you wait for other items to ship.
Step 2: Wiring and Electronics
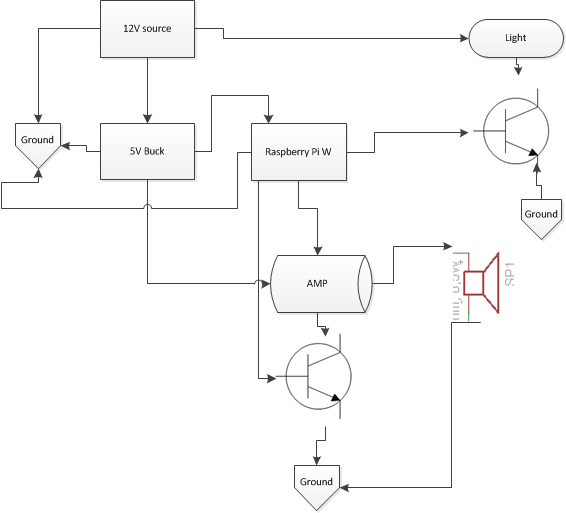
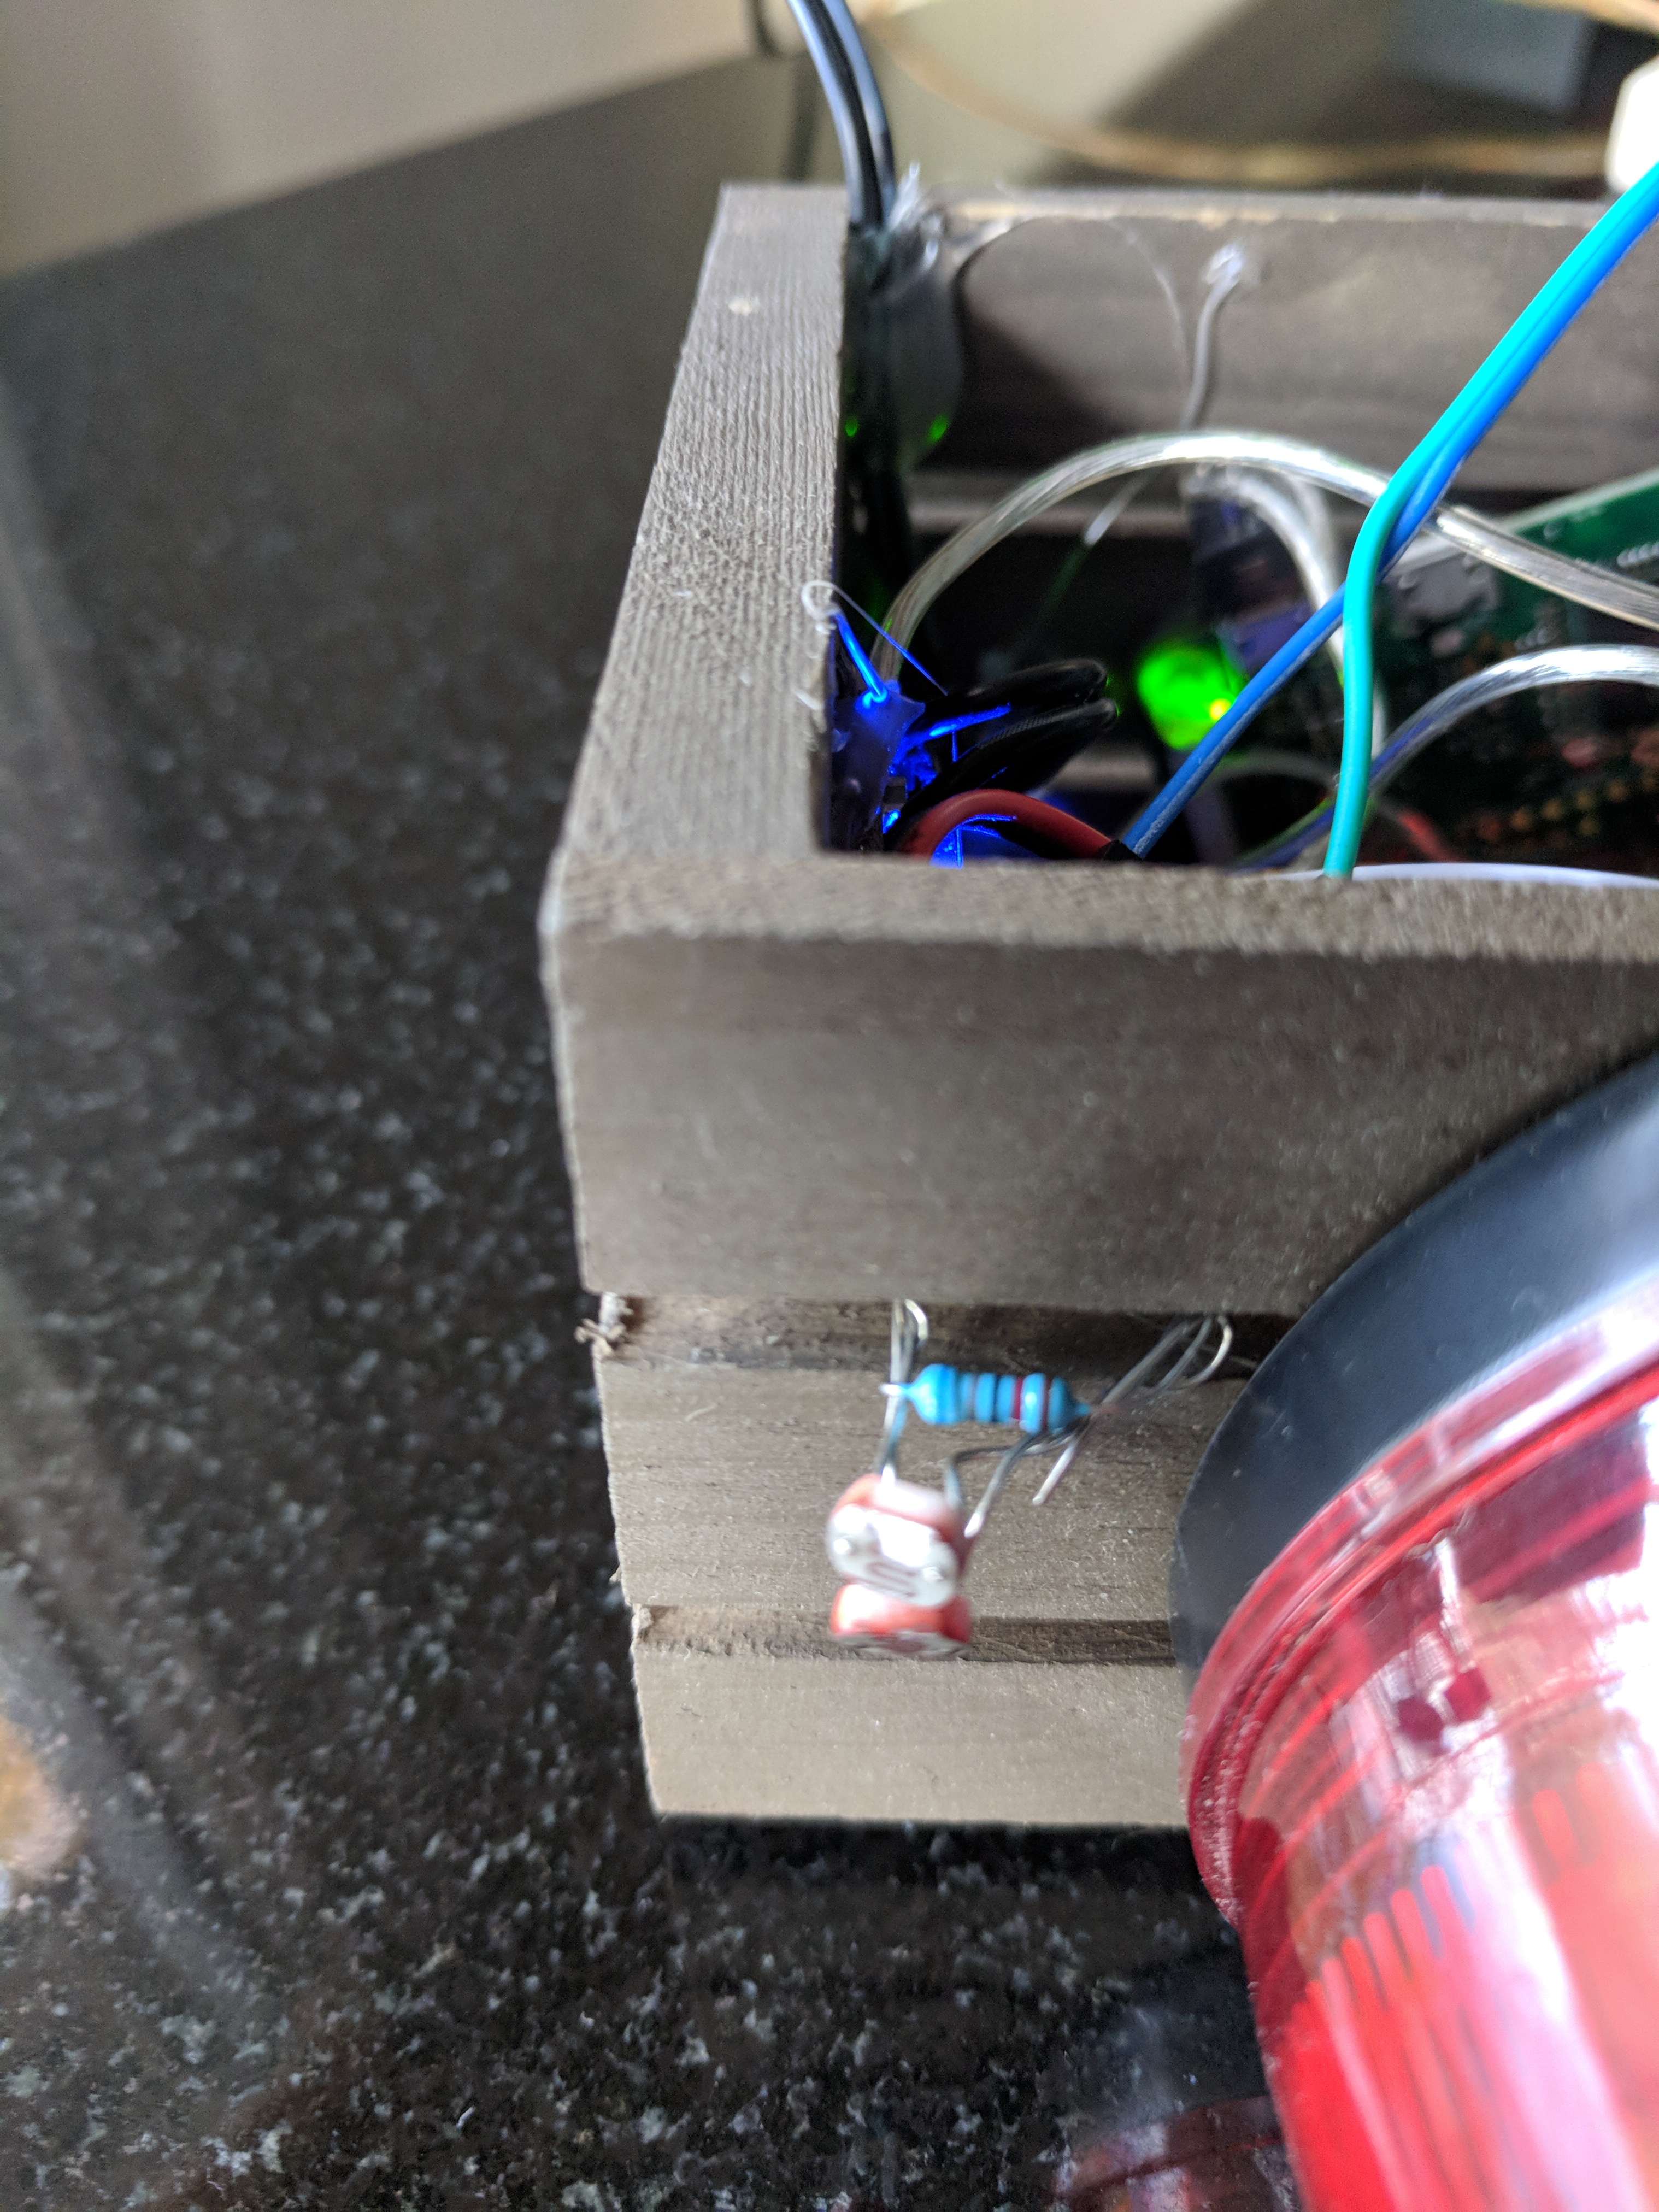
- Assemble Light
- The wiring for the light is to run 12 + to the light.
- Run negative from the light through one of the transistors.
- The emmetter of the transistor goes to ground.
- The collector of the transistor goes to the Raspberry Pi.
- Assemble sound
- Run right or left sound from PI to the amp
- Run +5V to the amp
- Run amp ground to the 2nd transistor.
- Run the emmetter of the 2nd transisitor to ground
- Run collector of the transistor to the Raspberry Pi
- Assemble wiring to the PI
- This is the pinout instructions for the PI (some of these are configurable via the JSON)
- LCD
- 3 - SDA
- 5 - SCL
- 5 - VCC (+5)
- AMP 8 (GPIO 14)
- Light 10 (GPIO15)
- Sound Right - GPIO 18
- LCD
Step 3: Operating System Software Setup
- Prepare the Raspberry Pi W
- The rasberry pi must be running a recent version of Raspbian (or other Debian).
- Recommended to follow these instructions: https://hackernoon.com/raspberry-pi-headless-inst...
- Be sure to include wifi wpa_supplicant file.
- Put ssh file on the sdcard to allow ssh access.
- Prepare the 3rd party software:
- I've automated this process to pull all needed 3rd party tools, but feel free to run these manually, and review to make sure no steps fail.
- Download and run the following script:
https://github.com/wga22/nodejs/blob/master/nhl/mi...
Here is a breakdown of what the installation script for setting up the operating system does. It is best to run these lines manually, so you can watch for errors.
Script Header:
#!/bin/sh -e
#can be called via
#curl -sL  https://raw.githubusercontent.com/wga22/nodejs/ma... | sudo -E bash -
# TODO: automate this script with something like: curl -sL  https://raw.githubusercontent.com/wga22/nodejs/ma... | sudo -E bash -
# TODO: setup wifi
# TODO: setup passwd and authorized keys
# notes:  https://raw.githubusercontent.com/wga22/nodejs/ma...
Update software at the OS level:
#apt-get stuff
(apt-get update && apt-get -y upgrade) > /dev/null
apt-get dist-upgrade -y
#General Dev
apt-get install -y git build-essential python-dev python-pip python-smbus libasound2-dev nodejs
# GPIO
apt-get install -y raspi-gpio python-imaging python-smbus libasound2-dev
#networking
apt-get install -y bridge-utils hostapd dnsmasq
apt-get clean -y
Networking setup. Part of the goal here was to allow system to be configured via an access point, to connect to your own wifi, but this has not been fully tested as of yet. Currently recommended to use the wpa_supplicant method for setting up wifi.
#networking setup
echo nhllight > /etc/hostname
#TODO: fix the /etc/hosts
#TODO: setup br0
mkdir /etc/hostapd/
# note: other setup is done via the config files and shell pulled down as a part of the update
Update Node and node libraries
#update node
cd /tmp export nodeversion=8.9.0 #wget https://nodejs.org/dist/v7.4.0/node-v7.4.0-linux-... #wget https://nodejs.org/dist/v7.4.0/node-v7.4.0-linux-... wget https://nodejs.org/dist/v7.4.0/node-v7.4.0-linux-... tar -xvf node-v${nodeversion}-linux-armv6l.tar.xz cd node-v${nodeversion}-linux-armv6l rm -f *.md rm -f LICENSE cp -R * /usr/local/ rm -R /tmp/node-v${nodeversion}-linux-armv6l rm /tmp/node-v${nodeversion}-linux-armv6l.tar.xz #TODO: make sym link for node binary? apt-get remove -y --purge npm node nodejs#Node setup
mkdir /opt/nhl mkdir /opt/nhl/logs mkdir /opt/nhl/horns mkdir /opt/nhl/node_modules/#update Node #install node dependencies into the nhl directory export NODE_PATH=/usr/local/lib/node_modules
#HACK - TODO - fix that lame wont install globally cd /opt/nhl npm install lame # lame, is lame, wont install globally cp -R /opt/nhl/node_modules/lame $NODE_PATH npm install speaker #wont install globally cp -R /opt/nhl/node_modules/speaker $NODE_PATH npm install i2c-bus #wont install globally cp -R /opt/nhl/node_modules/i2c-bus $NODE_PATH npm install oled-i2c-bus #wont install globally cp -R /opt/nhl/node_modules/oled-i2c-bus $NODE_PATH npm install lcd #wont install globally cp -R /opt/nhl/node_modules/lcd $NODE_PATH npm install lcdi2c #wont install globally cp -R /opt/nhl/node_modules/lcdi2c $NODE_PATH
npm install oled-font-5x7 #wont install globally cp -R /opt/nhl/node_modules/oled-font-5x7 $NODE_PATH
npm install onoff #wont install globally cp -R /opt/nhl/node_modules/onoff $NODE_PATH
#npm install pm2 #wont install globally #cp -R /opt/nhl/node_modules/pm2 $NODE_PATH #npm install express #wont install globally #cp -R /opt/nhl/node_modules/express $NODE_PATH
# any global modules npm install express body-parser child_process pm2 -g
Pull latest code:
#pull git code
cd /opt/nhl
#JSON is one time creation
wget  --no-cache -O /opt/nhl/nhl_config.json  https://raw.githubusercontent.com/wga22/nodejs/ma...
#wget -O /opt/nhl/NHL_work.js  https://raw.githubusercontent.com/wga22/nodejs/ma...
#call automated script to install everything else for NHL
curl -sL  https://raw.githubusercontent.com/wga22/nodejs/ma... | sudo -E bash -
Download the horns!
#pull horns
cd /opt/nhl/horns
curl -sL  https://raw.githubusercontent.com/wga22/nodejs/ma... | sudo -E bash -
update the Raspberry pi config files - - might need to change for your system
#config file updates
#add sound
cp /boot/config.txt /boot/config.txt.bak
printf '\ndtoverlay=pwm-2chan,pin=18,func=2,pin2=13,func2=4' >> /boot/config.txt
#turn on i2c
printf '\n\ndtparam=i2c1=on\n' >> /boot/config.txt
printf '\n\ndtparam=i2c_arm=on\n' >> /boot/config.txt#TODO: is this needed?
cp /etc/modules /etc/modules.bak
printf '\ni2c-dev\ni2c-bcm2708\n' >> /etc/modulesamixer cset numid=1
#TODO: set volume, 60%?
Automate the automation, such as bootup and code updates:
# update rc.local
# NOTE: moving the file, because standard one includes an "exit" in last line, so cannot simply append
mv /etc/rc.local /etc/rc.local.bak
touch /etc/rc.local
chmod u+x /etc/rc.local
printf '#!/bin/sh'> /etc/rc.local
printf '\n /etc/bootup_nhl.sh > /tmp/rclocal.log' >> /etc/rc.local
printf '\n exit 0' >> /etc/rc.local#TODO: need to add something to do the regular software updates weekly like this
# Maybe just copy this file directly down to the rc.weekly folder?
rm /etc/cron.weekly/nhl_updater
printf '#!/bin/sh\ncurl -sL  https://raw.githubusercontent.com/wga22/nodejs/ma... | sudo -E bash -' > /etc/cron.weekly/nhl_updater
chmod u+x /etc/cron.weekly/nhl_updater
Misc stuff, like setting timezone:
ln -sf /usr/share/zoneinfo/America/New_York /etc/localtime
# update environment variable with node_path cp /etc/environment /etc/environment.bak printf '\nexport NODE_PATH=/usr/local/lib/node_modules\n' >> /etc/environment #TODO: define this for node self.ipaddress = process.env.NODEJS_IP; #TODO: self.port = process.env.NODEJS_PORT || 80;
Utilize PM2 for node server setup:
#TODO: test setup PM2
cd /tmp/
npm install -g pm2
pm2 startup
cd /opt/nhl
pm2 start NHL_work.js --node-args="--max_old_space_size=100 expose-gc"
pm2 start webserver.js --node-args="--max_old_space_size 100M"
pm2 save
pm2 startup
exit 0
Step 4: Update the JSON Configuration
Setup your JSON configuration file for the team you prefer, etc.
This file is located in /opt/nhl GO CAPITALS! config JSON file
The software uses a JSON file to configure the hardware and team you're following. The team can be set through the webserver that will be running, but hardware setup needs to be set manually:
{	"myteam": "WSH",
	"debug":"1" ,
	"output":  "lcd",
	"light": {"type":"multiled", "gpio":["10","13"] },
	"amp": {"gpio":"14"},
	"lcdaddress" : "0x3F",
	"lightid" : "22"
}
Here is an explanation of each possible value:
- myteam: this is the 3 letter code of the team you wish to follow
- debug: Possible values are 1 (true) or 0 (false), and will control how much logging is written out.
- output: this is the method by which scores/details are to be shown. Possible values are:
- lcd: this is the 2004 lcd
- console: this will write only to the terminal (for running command line)
- oled: support for SSD6404 oled display
- light: there are two types of lights supported
- alarm:this will drive a single GPIO for turning on/off a transistor
- multi-led:supports a multicolor, or multiple leds
- none: no light attached
- amp: this is the GPIO that drives the transistor for the amp