My Own Simon Says

For our final project of Arduino we made a personal version of Simon Says electronic game. We made it because we wanted to give this product a new and improved version.
Supplies


.jpg)
.jpg)
.jpg)
.jpg)
.jpg)

.jpg)
For this project we used:
1x Arduino Mega: https://store.arduino.cc/products/arduino-mega-2560-rev3
7m of wire: https://diotronic.com/hilos-unipolares/2494-25m-cable-flex-0-5mm-negro
1x Servo Motor: https://diotronic.com/accesorios/15066-servo-motor-360
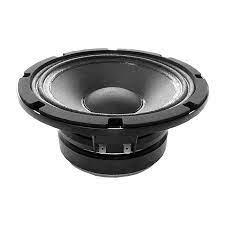
8 ohms speaker: https://www.amazon.es/Altavoces-port%C3%A1tiles-Raspberry-proyectos-electr%C3%B3nicos/dp/B09JVVWVLJ/ref=sr_1_1_sspa?adgrpid=55906438253&gclid=Cj0KCQiA-qGNBhD3ARIsAO_o7yn44bqLNXOspElGza1RfGEROyR4V0sLlbYrCXgReaYpHa5ZLSybpxwaAgRcEALw_wcB&hvadid=275453961036&hvdev=c&hvlocphy=1005424&hvnetw=g&hvqmt=e&hvrand=10906630600238907879&hvtargid=kwd-327897141017&hydadcr=25970_1897213&keywords=altavoces+8+ohmios&qid=1638440148&sr=8-1-spons&psc=1&spLa=ZW5jcnlwdGVkUXVhbGlmaWVyPUFJVU1LWlZSNTU3SUImZW5jcnlwdGVkSWQ9QTEwMzAyNDIxRk5MV045UlVDU0Q4JmVuY3J5cHRlZEFkSWQ9QTA5NTc0ODMxSVJPVjZJVTRJTDVDJndpZGdldE5hbWU9c3BfYXRmJmFjdGlvbj1jbGlja1JlZGlyZWN0JmRvTm90TG9nQ2xpY2s9dHJ1ZQ==
1 plate to weld by lines: https://es.farnell.com/roth-elektronik/re520-hp/pcb-prototyp-fr2-rayas-2-54-mm/dp/1172154?gclid=Cj0KCQiA-qGNBhD3ARIsAO_o7ykd6dR1kXRBQdZ584aa3lscB6QQbzi1XSHvqtZSYjV1immTywLUGY0aAhr_EALw_wcB&mckv=sASlkq24e_dc|pcrid|490629289660|plid||kword||match||slid||product|1172154|pgrid|120390866291|ptaid|pla-303028116718&CMP=KNC-GES-GEN-SHOPPING-SMEC-Whoops-High-Desktop-Title-Changes-10-Aug-21&gross_price=true
LED's: https://diotronic.com/leds/17456-led-cuadrado-verde-5x5-mm
Buttons: https://www.mouser.es/ProductDetail/Schurter/1301931424?qs=GIi83qBHgilkrMwKiiKACQ%3D%3D&mgh=1&vip=1&gclid=Cj0KCQiA-qGNBhD3ARIsAO_o7ynoxghvgYdfOfdL0wYjPc0Zq8vxqLEZ9pd-L48L2jK6KI48inImnJoaArO0EALw_wcB
Soldering Tin: https://diotronic.com/esta%C3%B1o/6548-hilo-estano-sac305-1mm-100gr
Wood: https://serveiestacio.com/es/bricolaje/maquetismo-y-modelismo/materiales/plancha-de-contrachapado-nautico.html
Hinge: https://serveiestacio.com/es/materiales/metacrilato/accesorios-de-metacrilato/bisagra-de-metacrilato-transparente.html
Resistors: https://diotronic.com/inductancias-de-filtro/11381-bobina-choque-220uh-0-6a-r-3mm
The Code
Here is the code we used for the project. Just download the file, open it and upload to your Arduino. If you want more information about what is the code saying just read the complementary lines of it. The code C is the complete program while the B and A are the codes for the diferent melodies related to the speakers.
How It Works

To understand better how the code works. We made this flow diagram to help you if you dont know how to program a code.
Hardware
To make the hardware we made a CAD to cut it in laser. As you can see we divide it in two parts for make it easier.
Downloads
Weld the Components

On the sketch you have here you can see how the components should go in the assembly. When you have all the components welded glue all the walls and put the components in the correct space.