My Music App
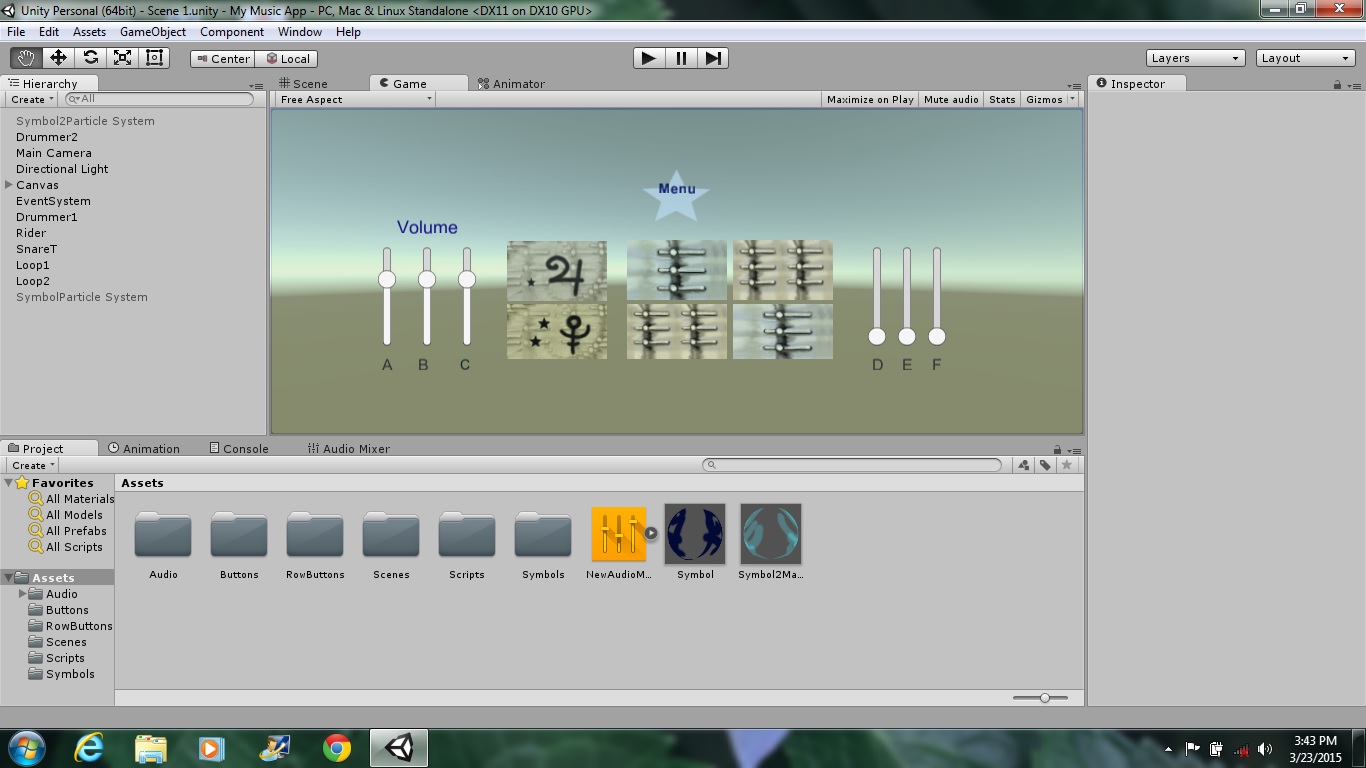
I wanted to make a fun and simple music app, a drum pad with two looper buttons that toggle on and off. Press a button to play a random sound. I added volume sliders so that the volume can be adjusted as well as delay and decay sliders to play a wet echo or a dry sound.
I hope this instructable inspires you to make your own app that could be developed into an interactive album.
Software needed to make your music app:
Audacity
http://audacity.sourceforge.net/
LMMS (or your favorite DAW)
Unity 5.0 (Personal version)
Here is my youtube video:
1. Generating a Sound in Audacity
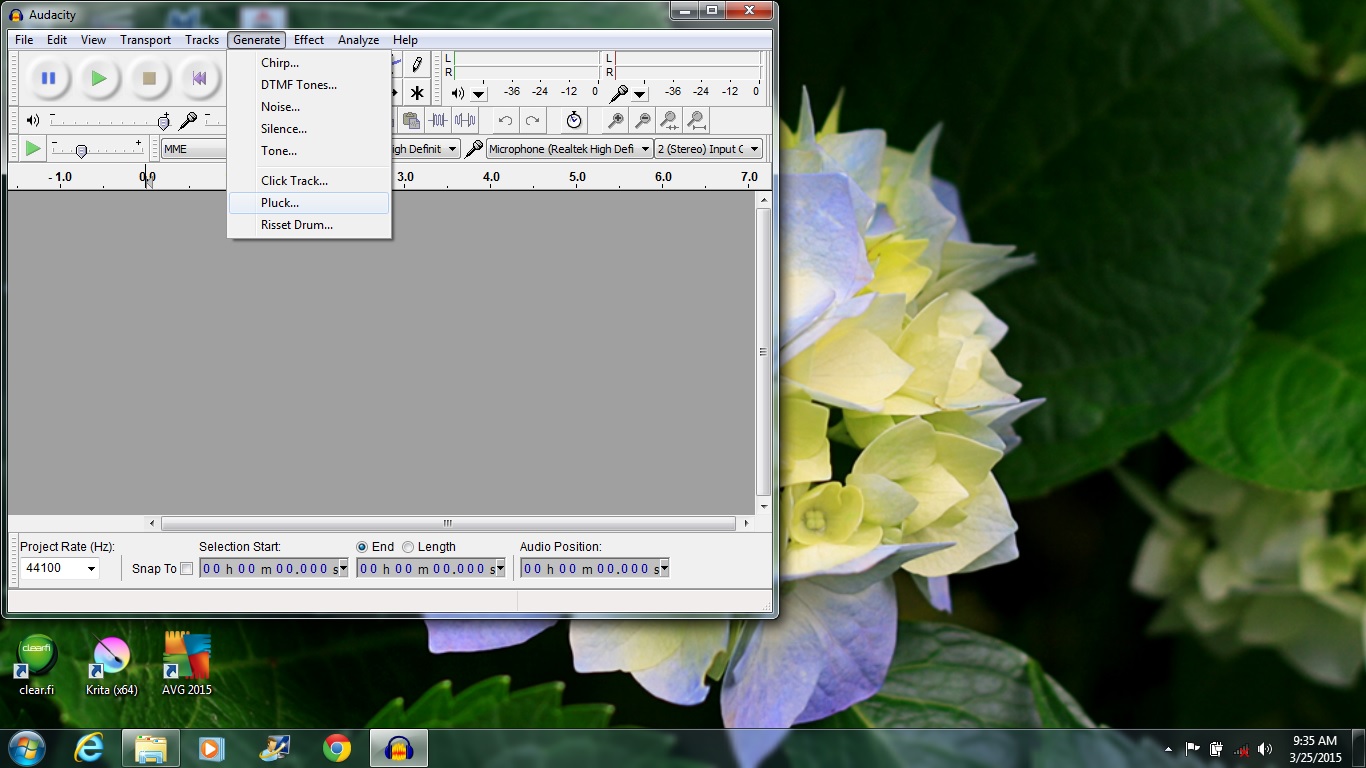
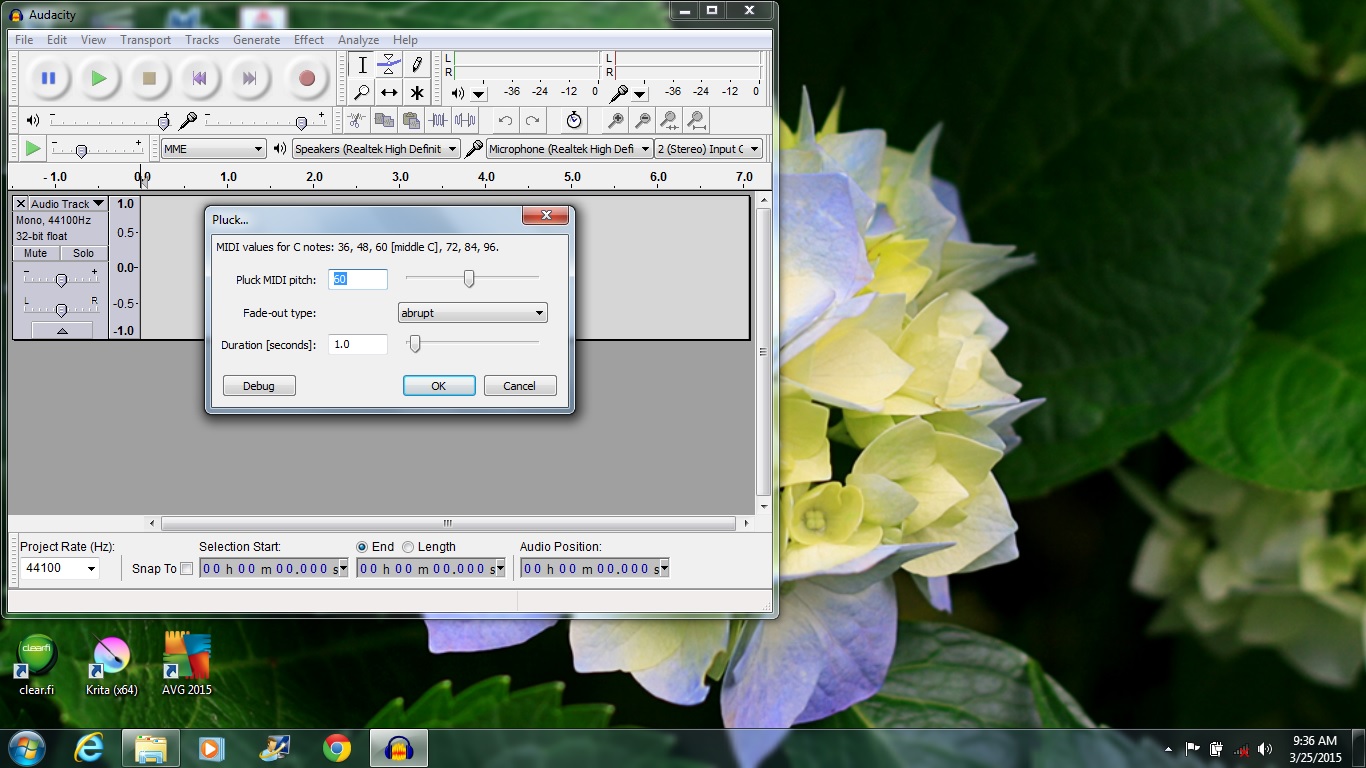
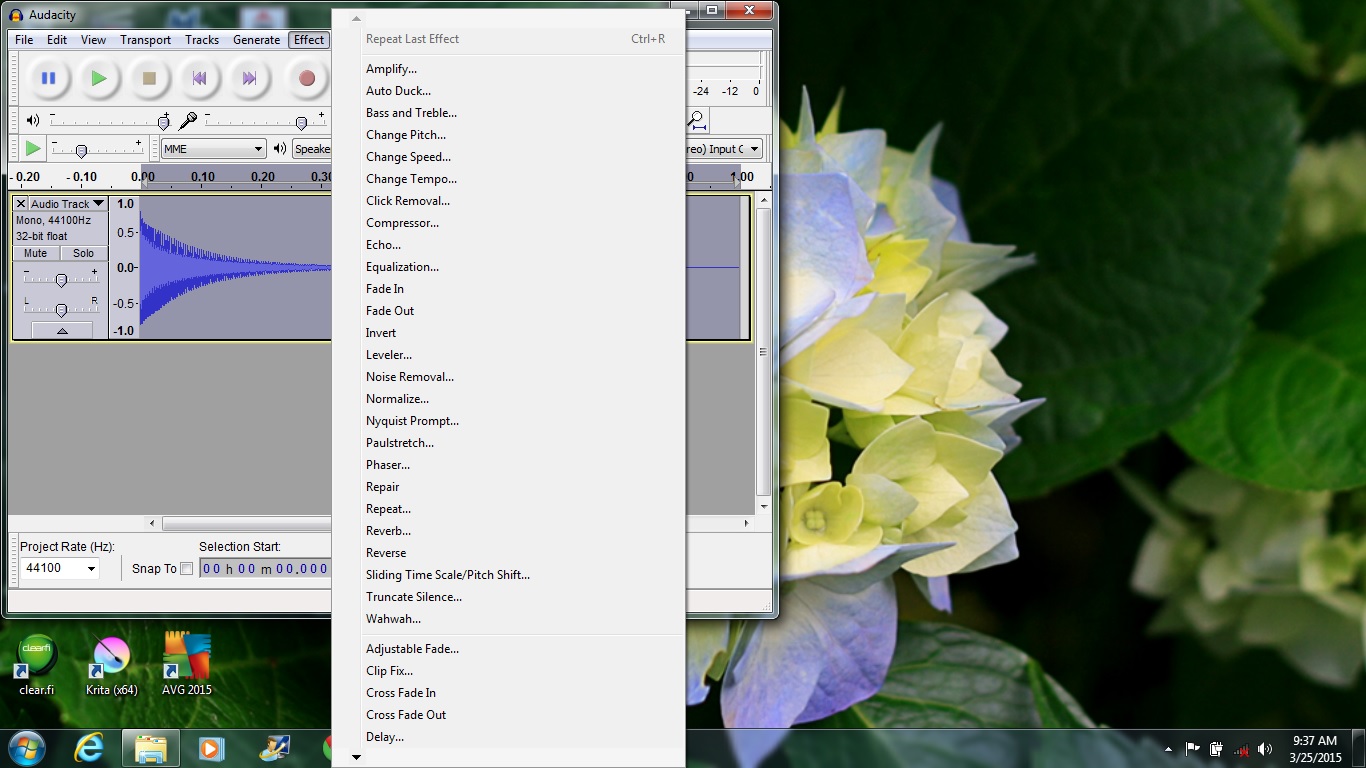
With Audacity you can generate a sound sample risset drum or pluck of a guitar. Right click to open this software. Look at the top heading click on Generate, then choose pluck. A window pops up with default settings for this sound. Click OK. A waveform is generated and if you press play you can play this sound. Click on Effects and you can choose filters that amplify, add Reverb, Wah or PaulStretch. I like the PaulStretch filter because it lengthens the sound as well as giving it an otherworldly quality. Audacity also has a red button to allow for a live recording from your computer's microphone or you could plug in an interface.
The next step is to export your sound file. I want to import pluck sound into LMMS's samples folder, so I need to export my file in Ogg format. Click File, Export, in the pop up window choose Ogg format, name it and save it.
2. Making a Melody
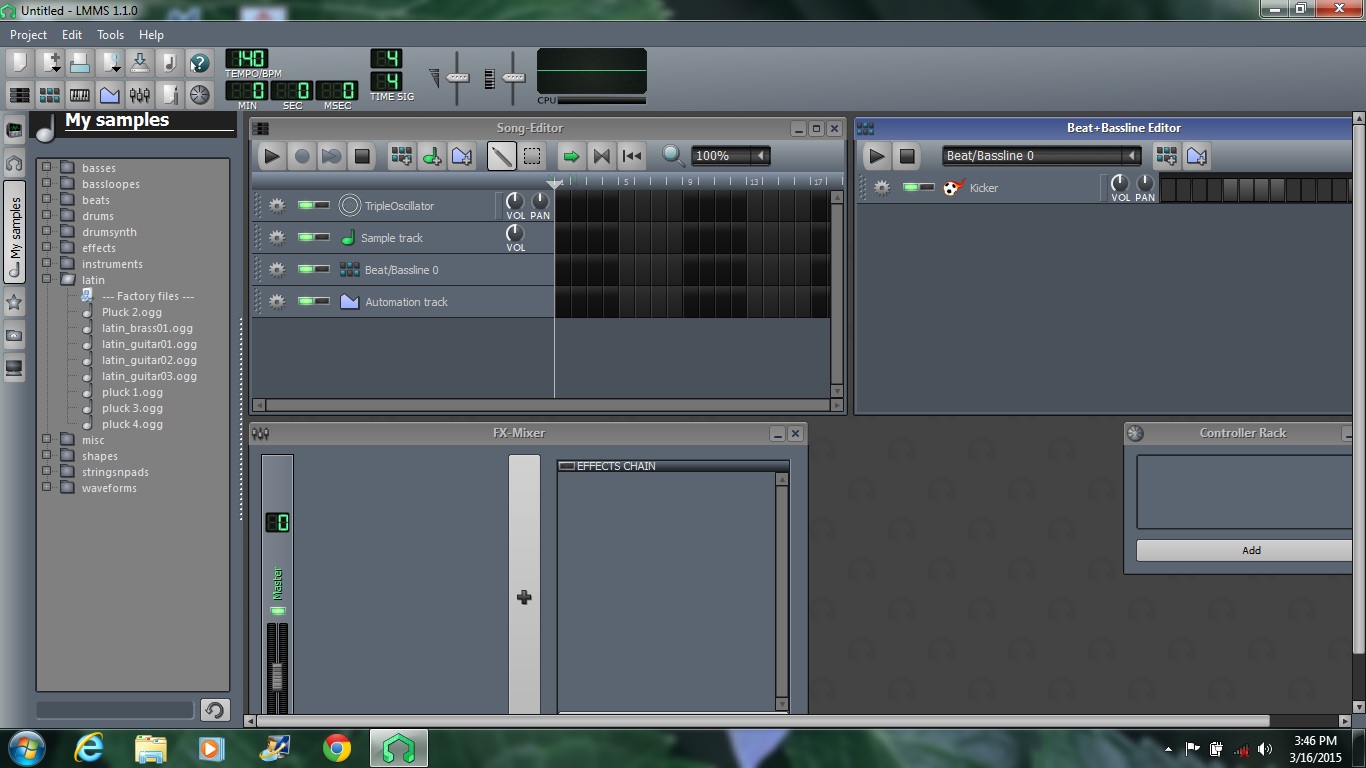
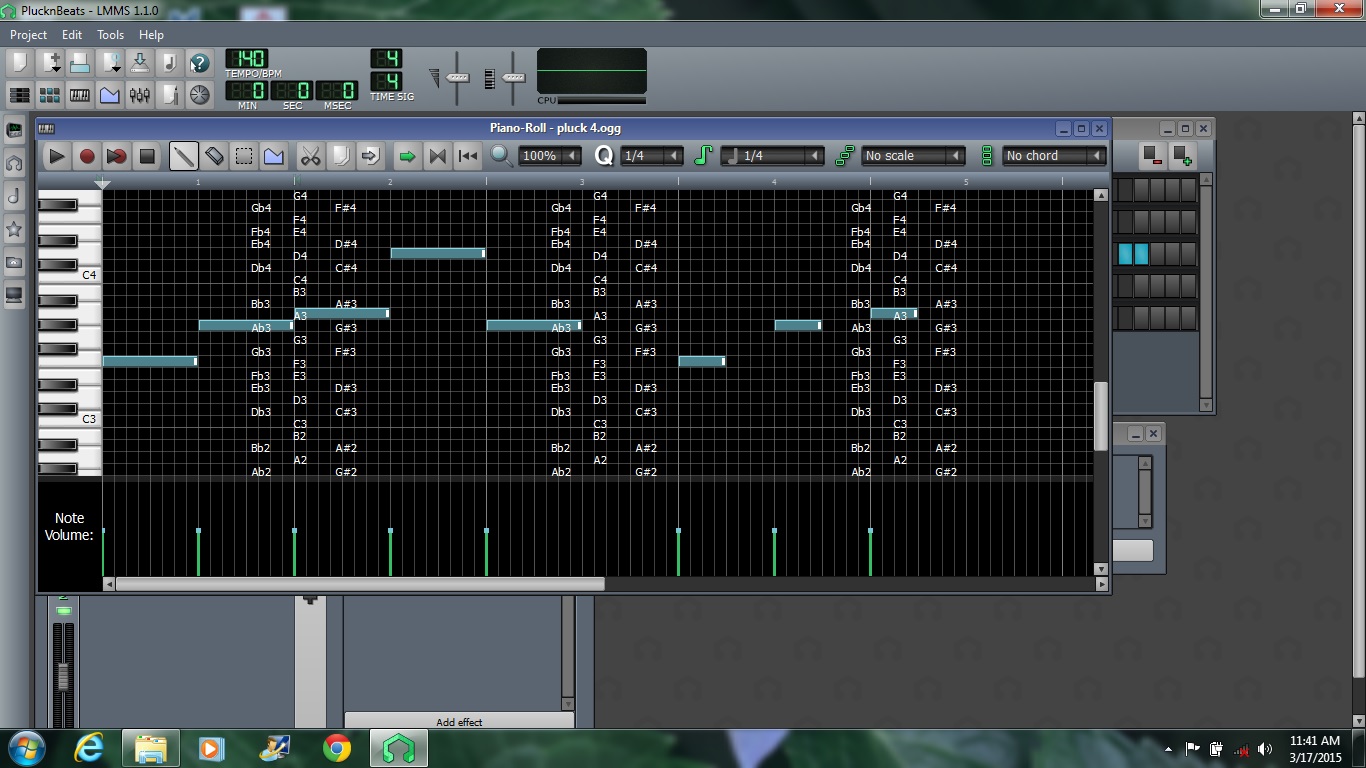
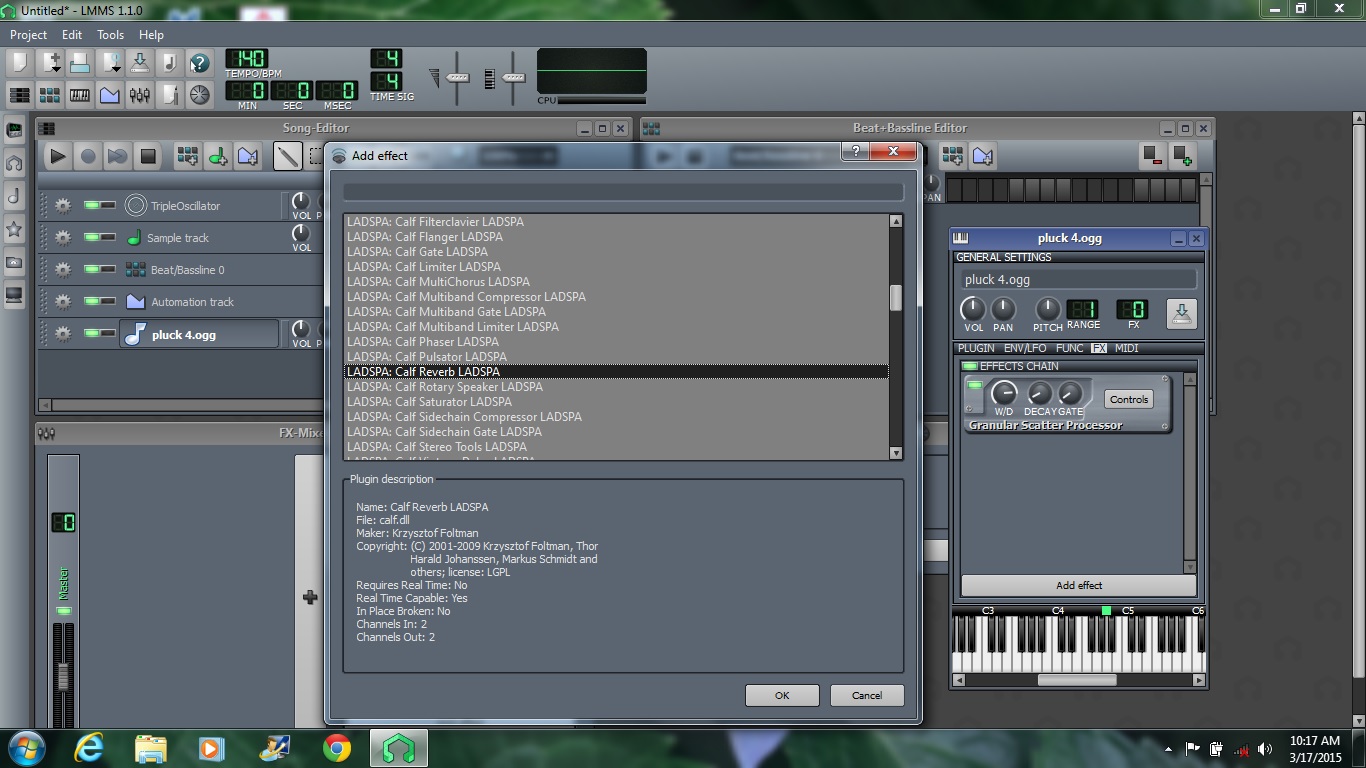
I opened LMMS software and clicked on My Samples tab then clicked and dragged pluck into the song editor under the automation track. I clicked on the black box to open the piano roll. In the piano roll I choose the length of my notes and added my notes. With LMMS you can add notes with you computer keyboard or you midi keyboard. You can press the play button to listen to your composition. I closed the piano roll and clicked on the pluck word and the plug in popped up. You can strike those tiny keys. I clicked on FX then clicked to add effects. I added a Reverb.
I worked on numerous compositions. I wanted to make about 6 short song samples for each looper button and drum samples for each drum pad button. I exported by clicking on Project then Export. Each file was in wav format.
3. Beginning You App
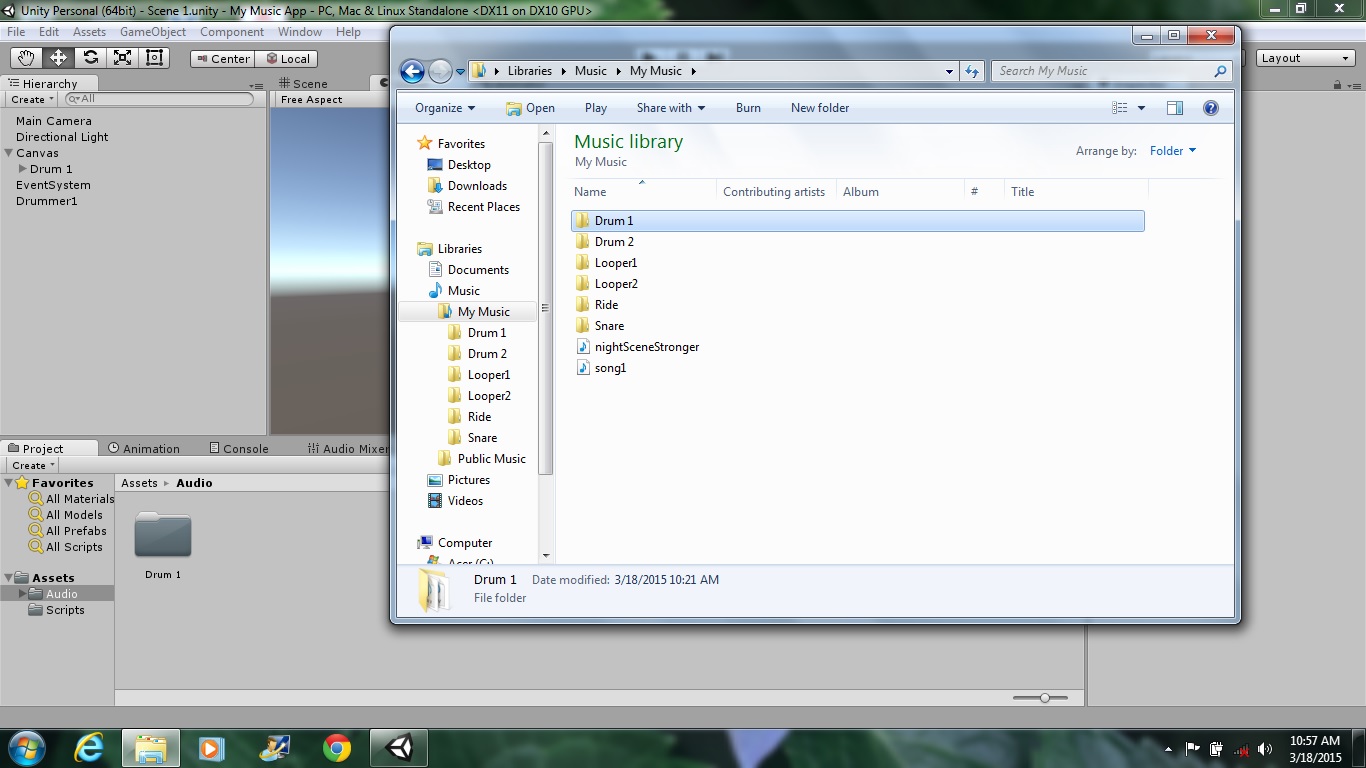
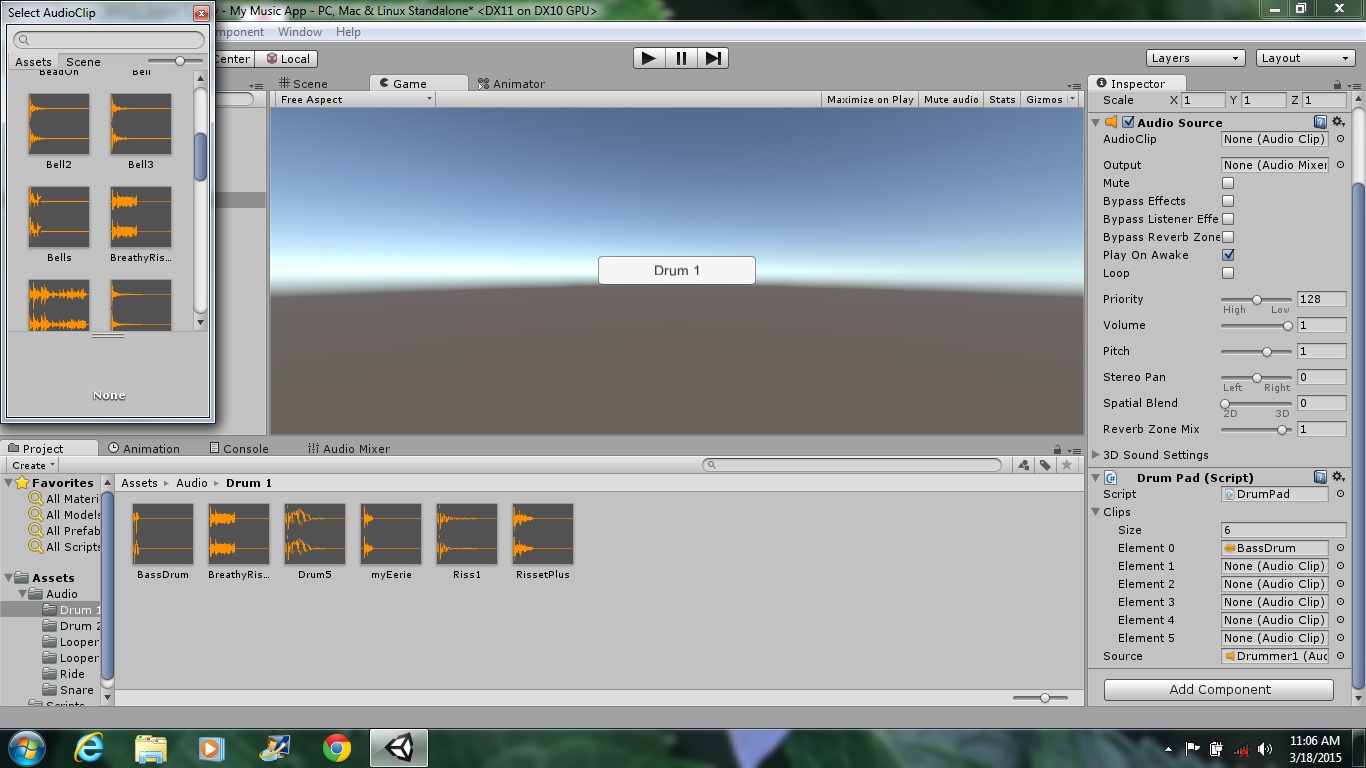
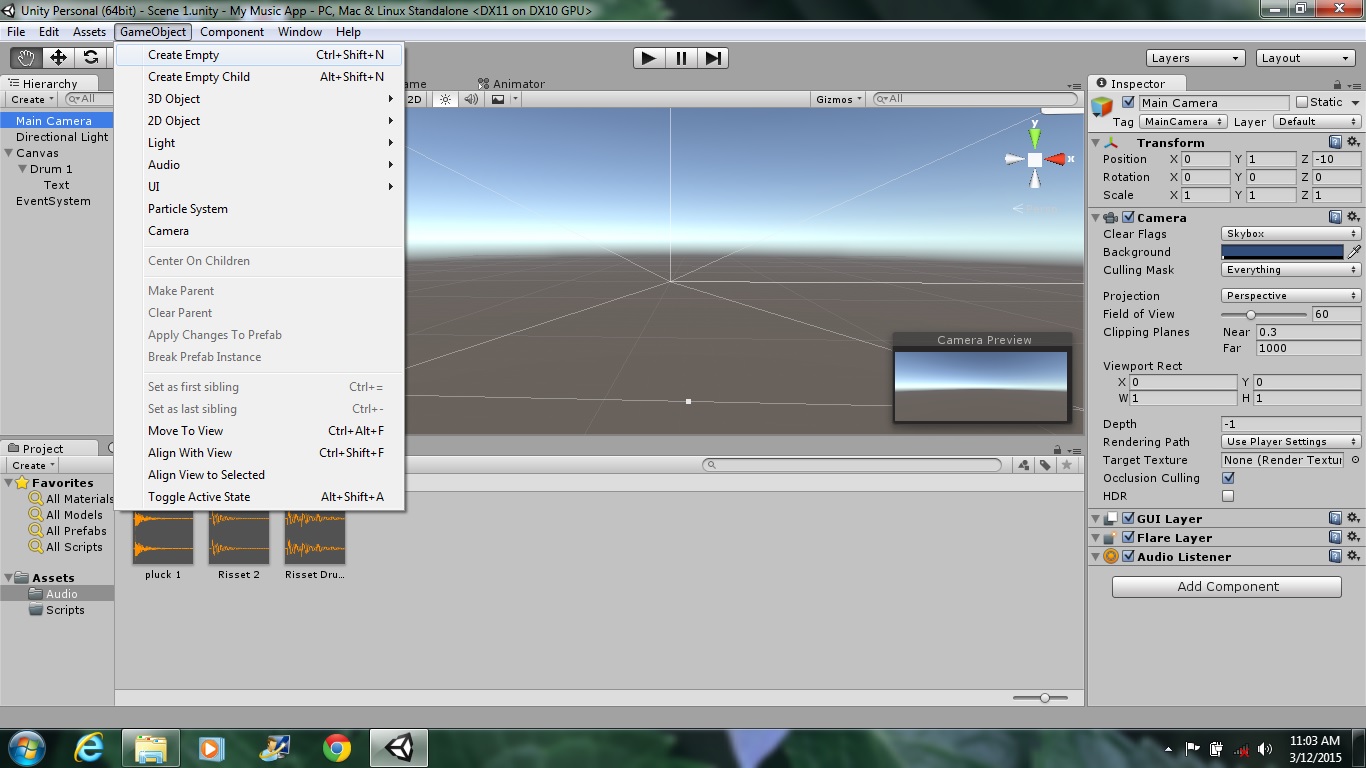
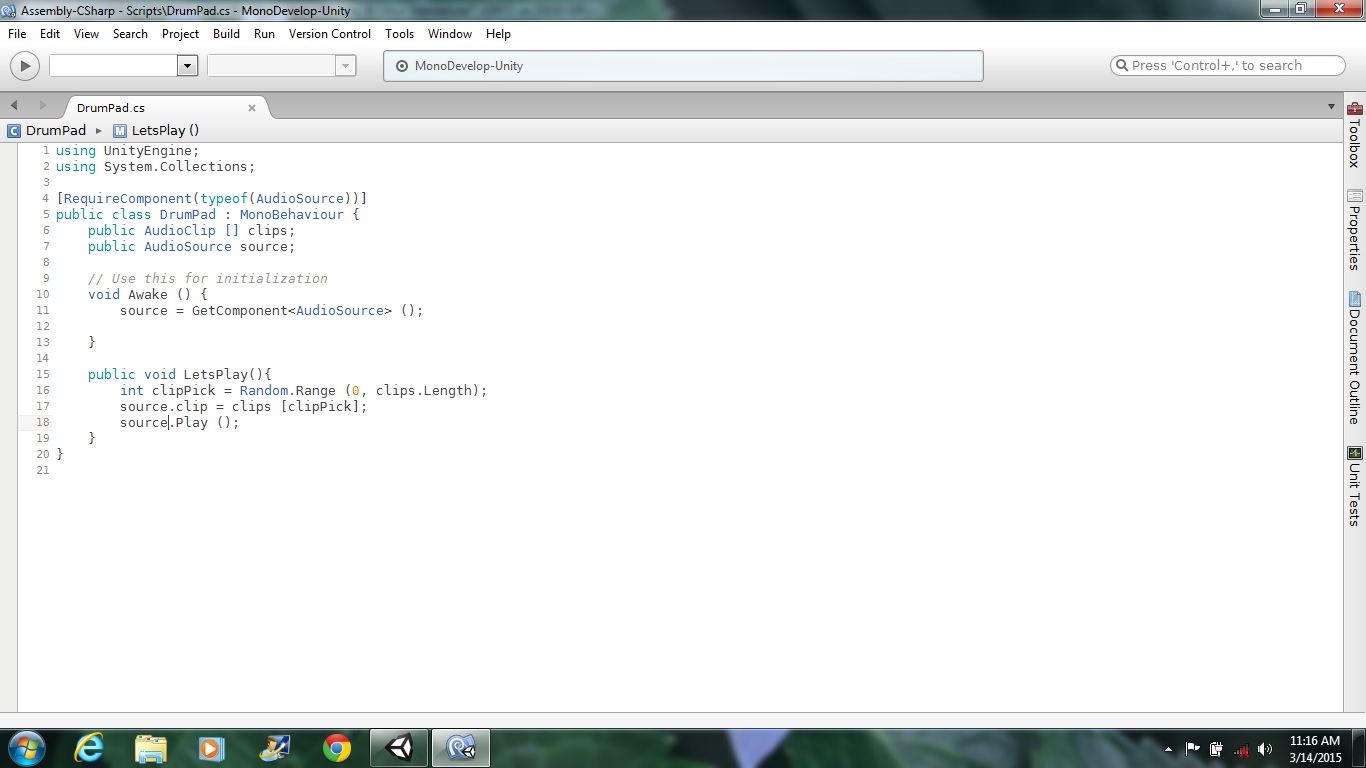
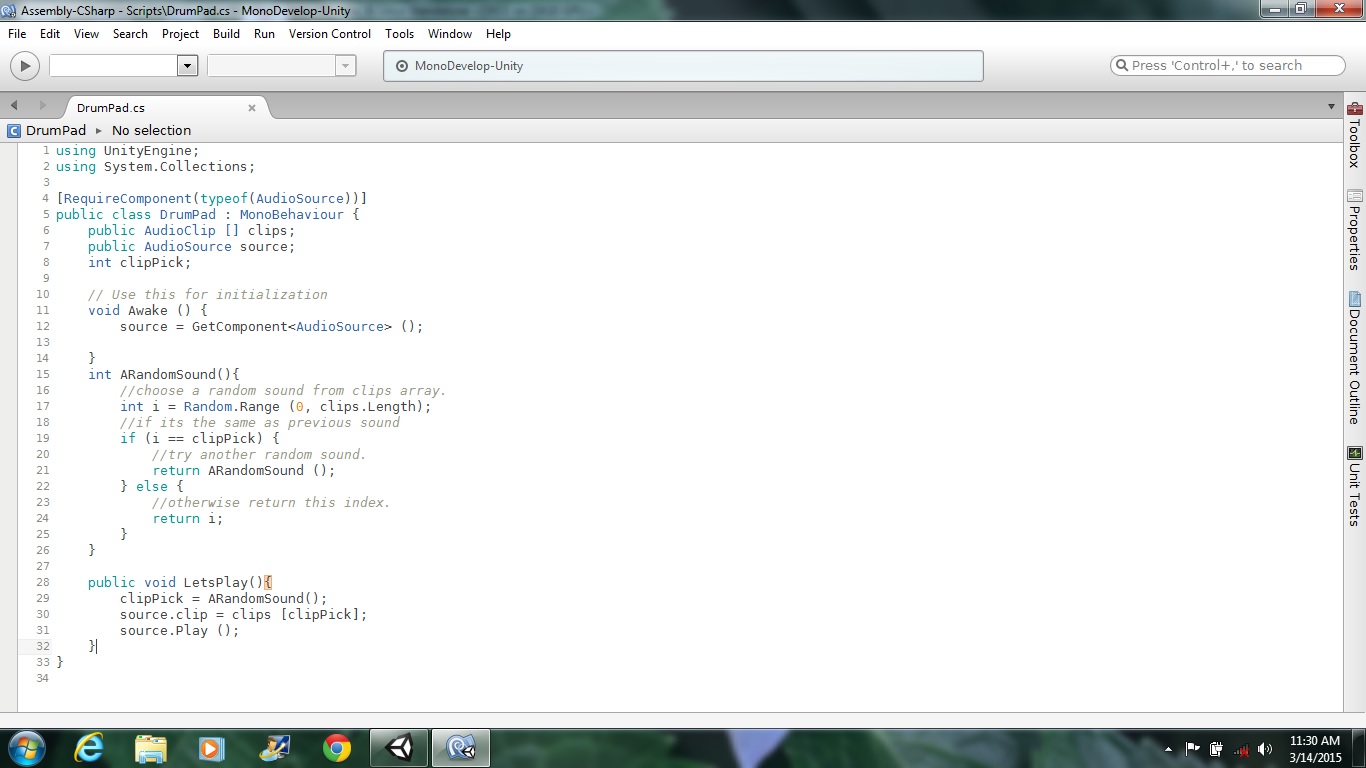
Plan how you want your audience to experience your music app. How many audio samples do you need?
I planned on 6 samples per button.
Beginning your app
Download Unity 5.0 from its site. For this instructable I am using the free version Personal edition. Depending on your internet speed this download could take about half a day to complete. After you finish downloading and you open this software you will need to register it online.
Creating a new Project
Right Click on the Unity icon on your desktop to open it. In the project window click New Project, name it, keep the default of 3D setting, click Create Project. The window closes and a few seconds later the Unity Editor opens with a view of the Heirarchy on the left, Assets view/Audio Mixmaster on the bottom, Scene view/Game view in the middle and Inspector on the right side. The Heirarchy displays a list of all game objects on the scene. Right now the scene only holds the main camera and a light source. The Inspector shows the selected game object's attributes like position, rotation, if has components like scripts or audio source.
Creating A Folder
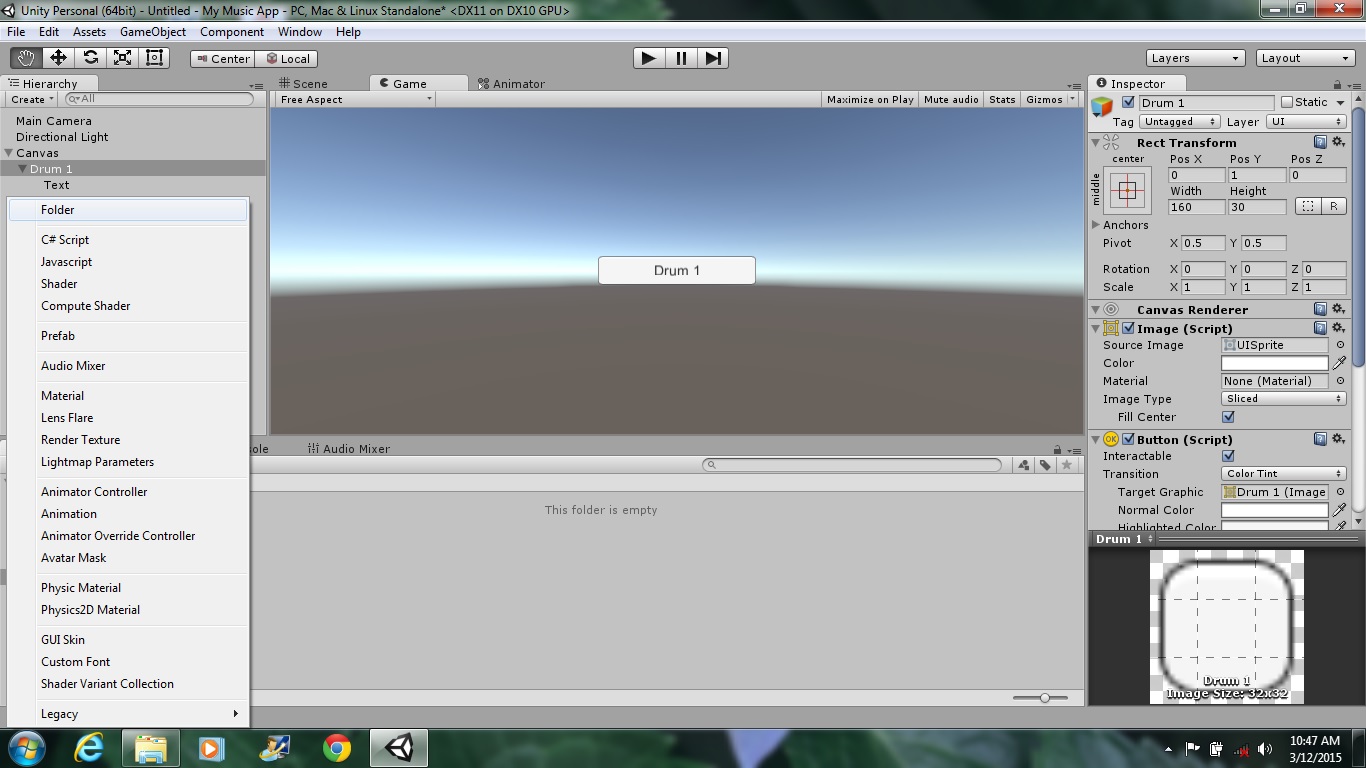
Near the Project tab Click on the word Create. A drop down menu appears. From here you can create a C# script, material, AudioMixer or a folder. Click Folder. Rename it Audio. Open the audio folder. Audio Folder Open the location of your music files. Click and drag them to the Audio folder.
Adding A Button to your App
At the top header Click GameObject. A drop down menu appears. Select UI, Click on Button. A Button appears on the scene along with its parent the Canvas. Don't worry if you can't find your button just change its position in the Inspector to (0, 0, 0). Switch to Game view and the Button should be centered on your scene. In the Heirarchy, Right Click on Button to change its name to Drum1. Click on arrow next to to Button in the Heirarchy and word Text pops below. Button has its own child. Select its text and change the word Button to Drum1. Click File Save Scene. First time you save your scene you have to name it.
Adding an Empty to play your sounds
At the top header Click on GameObject, choose Create Empty. In the scene view a sheer blue cube appears. It is a game object that has a transform. Right Click on it in the Heirarchy and Rename it Drummer1. In the inspector position it to (0,0,0) so that its sound is close to the the audio listener, the camera. Click on Add Component in the inspector and Click on Audio, choose Audio Source.
Adding A C# Script
The script will randomly select audio clips. Click Create, choose C # Script. Name the script DrumPad. Click in the Inspector to open the script. Follow script according to my screencapture. Note I have post 2 versions of this script because the first one plays a random sound, but it can repeat when pressed the second time, while the other has an added function that keeps it from repeating when pressed second time but the sound can be repeated on the third press. Click file Save in MonoDevelop.
Adding Script to Drummer1
In the Hierarchy click to select Drummer1, in the Inspector Click Add Component, scripts, choose DrumPad, it has a C# icon.
Add Audio Clips to Drummer1
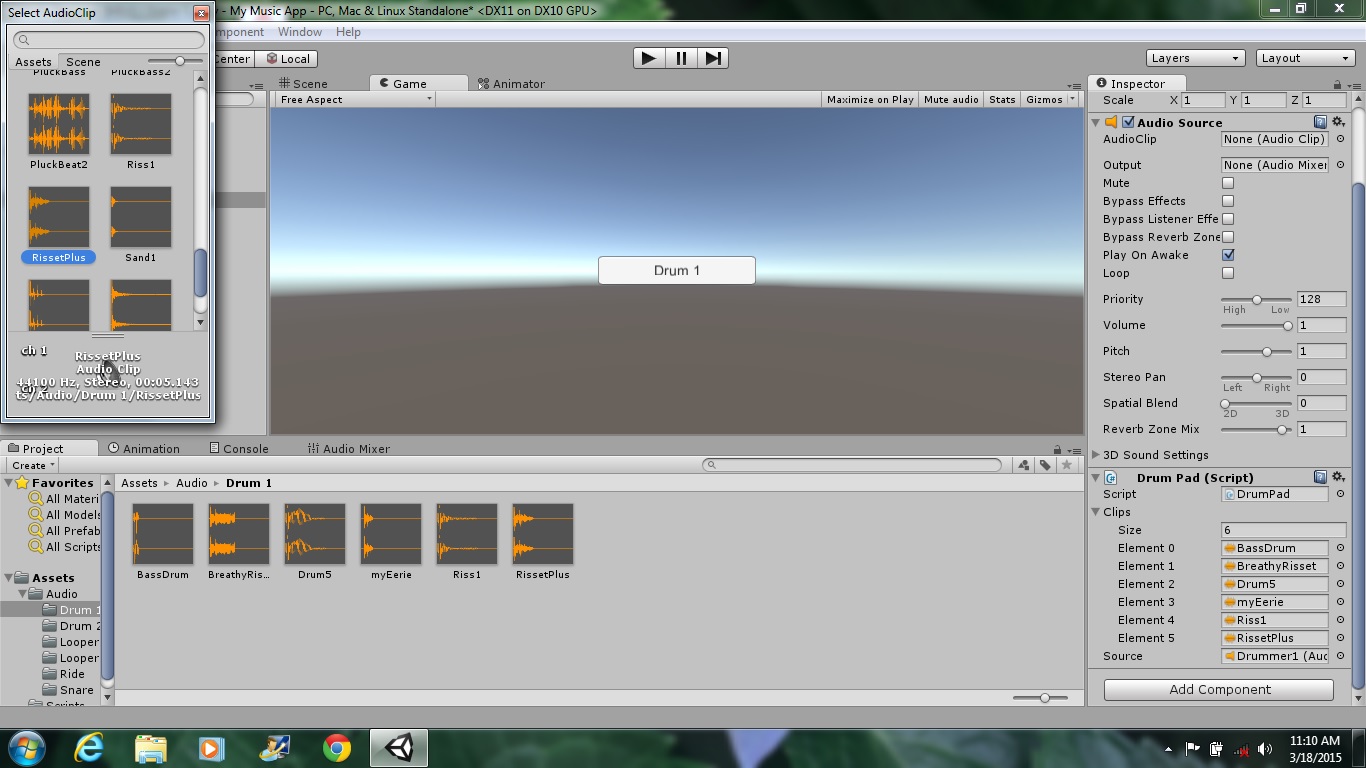
The script includes an array of audio clips. How many clips do you have for this Drummer1? I began with 3, but later added 3 more clips. In the Inspector in the DrumPad area you see the word clips and size 0. I changed it to 3. Then I Clicked on the tiny circle with a dot in it to select my audio clip. Close the window, and repeat to add more audio. I need to select an Audio Source, and I choose Drummer1, so that Drummer 1 can play its own audio clips.
Adding A Function to Drum1 Button
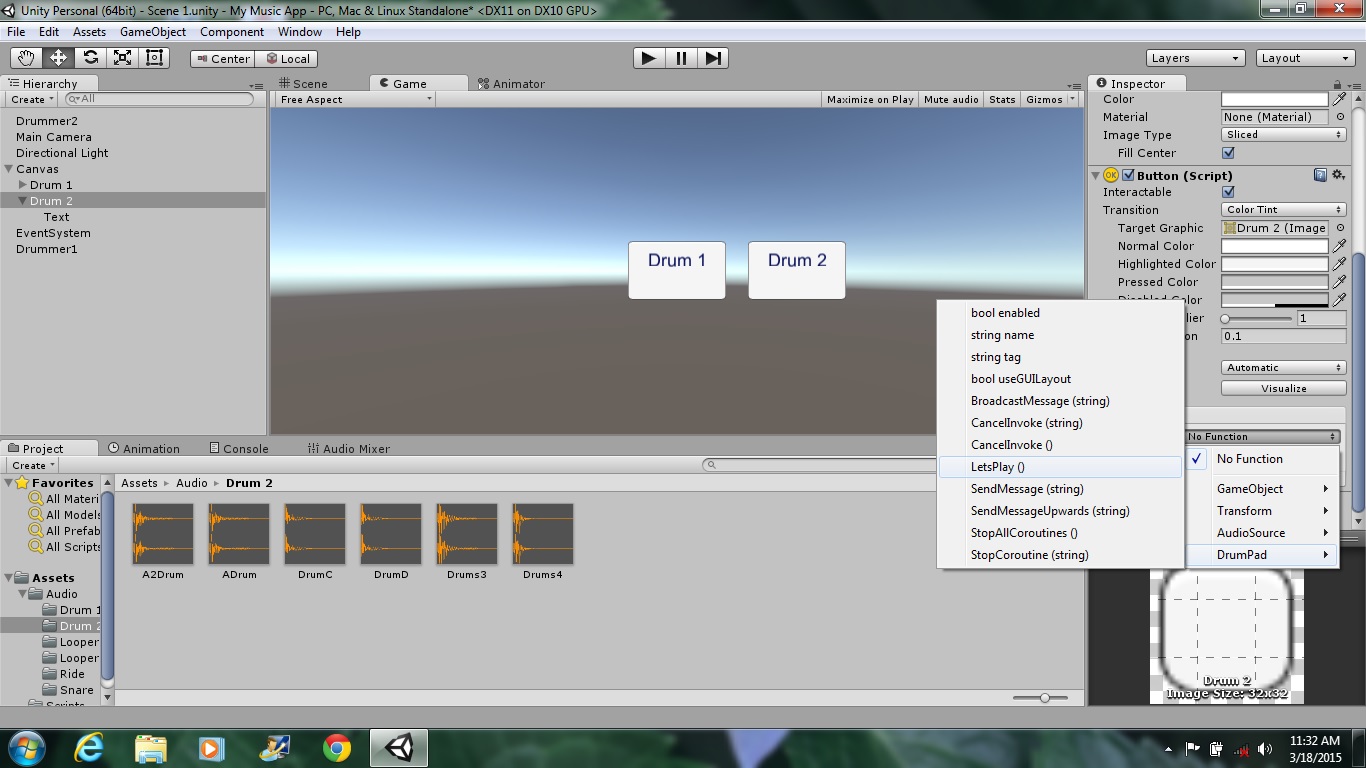
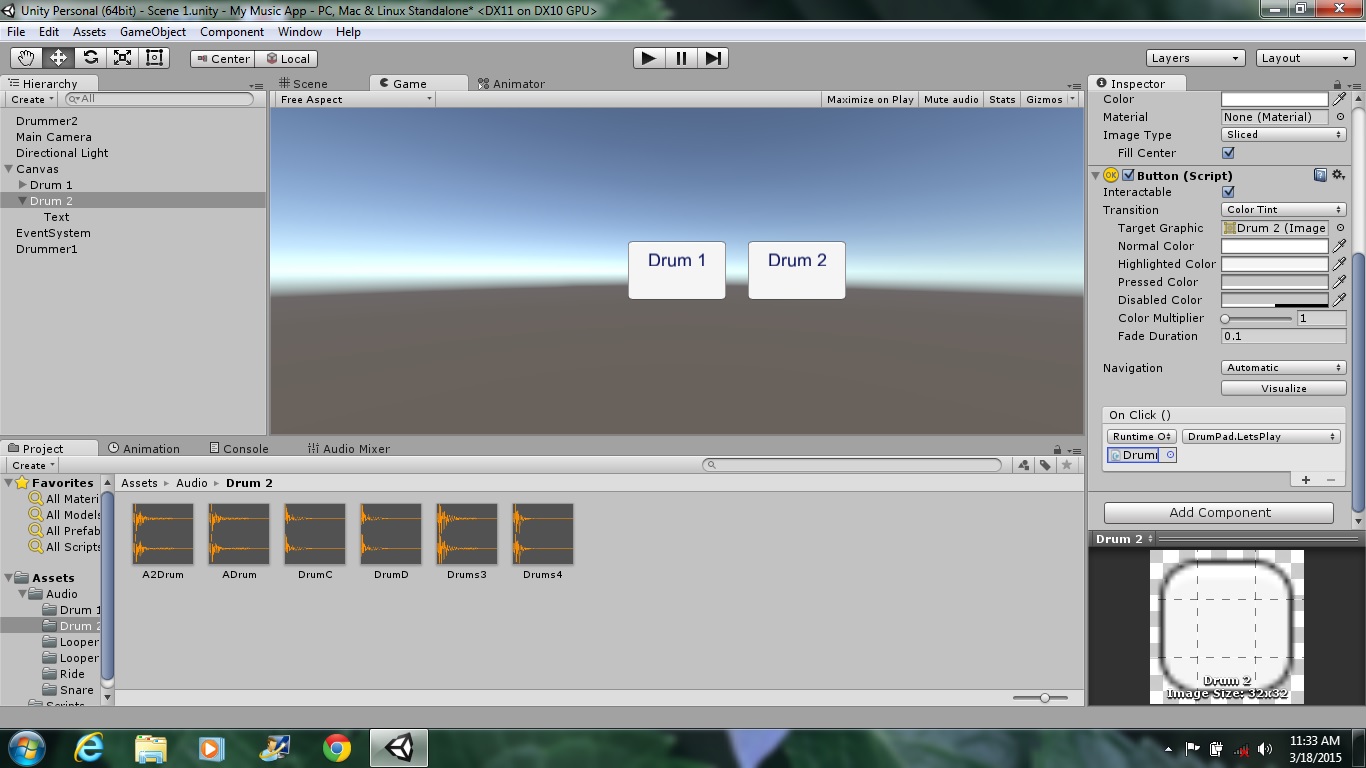
Select Drum1 button from the Heirarchy. In the Inspector scroll down and look for the On Click() . Click it and select Drummer1. A drop down menu appears, select DrumPad (C# script), choose LetsPlay function. The On Click() now shows DrumPad.LetsPlay. Test It Near the Game view Press the Play button. After the play button glows, Press your Button, Drum1 and Listen. Press it again and Listen.
Adding More Buttons
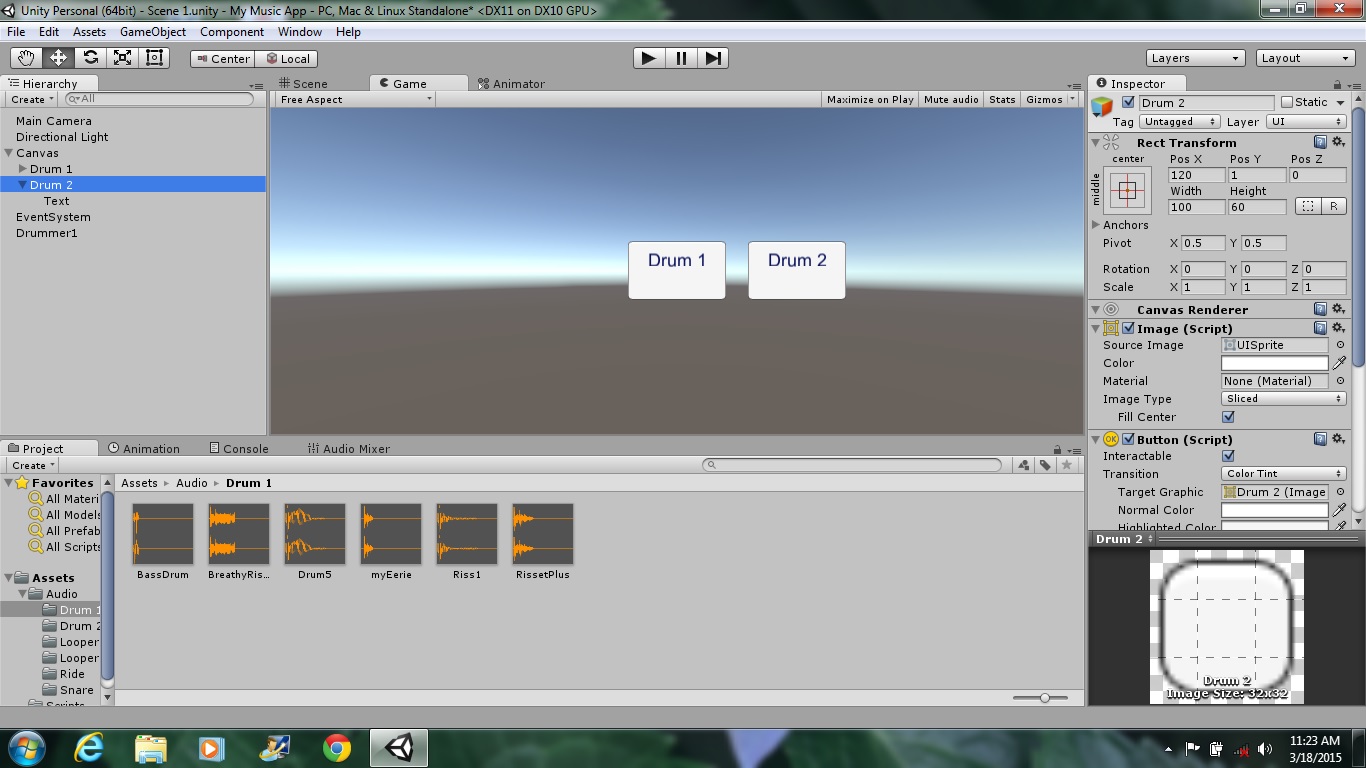
Add 3 buttons and name them Drum2, Ride and Snare. Or you could duplicate the buttons and rename them. If you have duplicated the Drummer1 button then you need to change the function object to its corresponding name. Drum2 uses Drummer2's script DrumPad. Create 3 empties, Click Game Object, choose Empty. Name them Drummer2, SnareT and Rider. Or you can duplicate Drummer1 and just change the clip references and source references.
4. Adding Looper Buttons
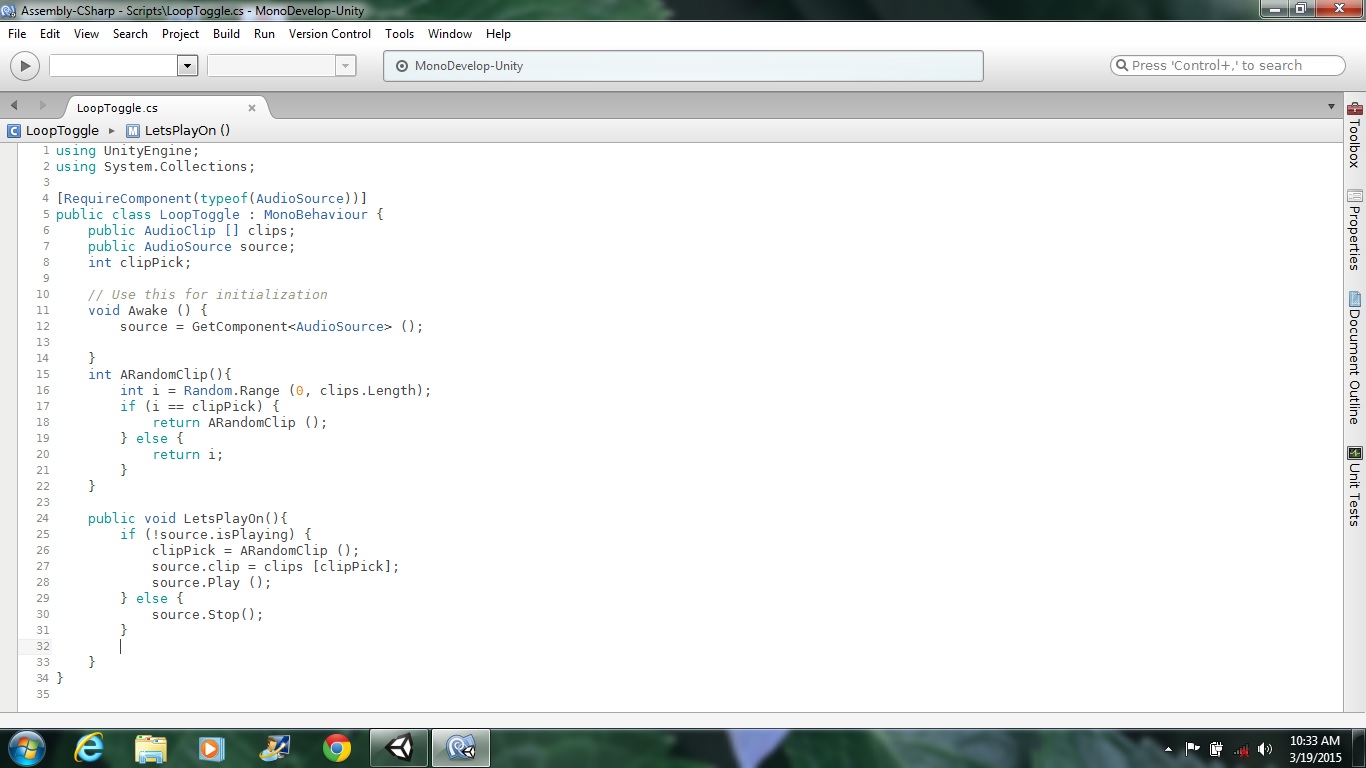
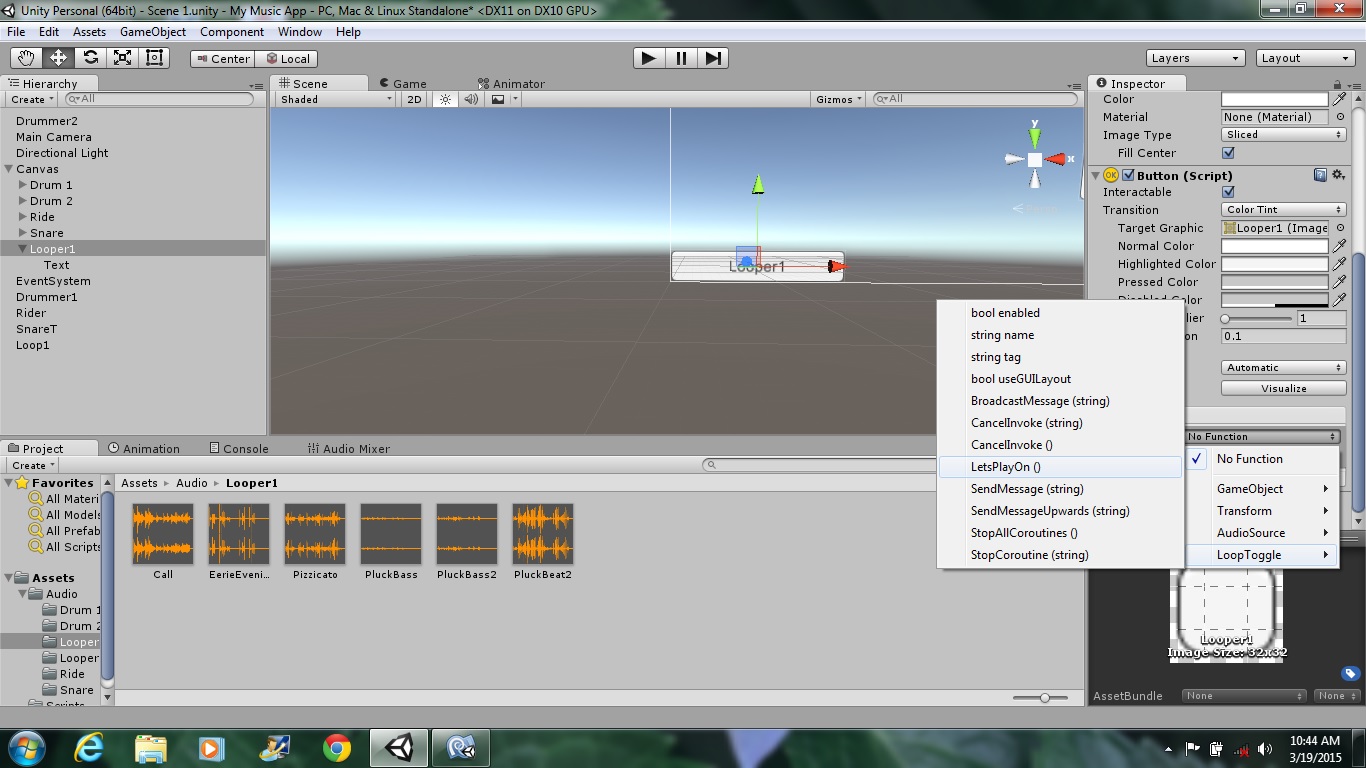
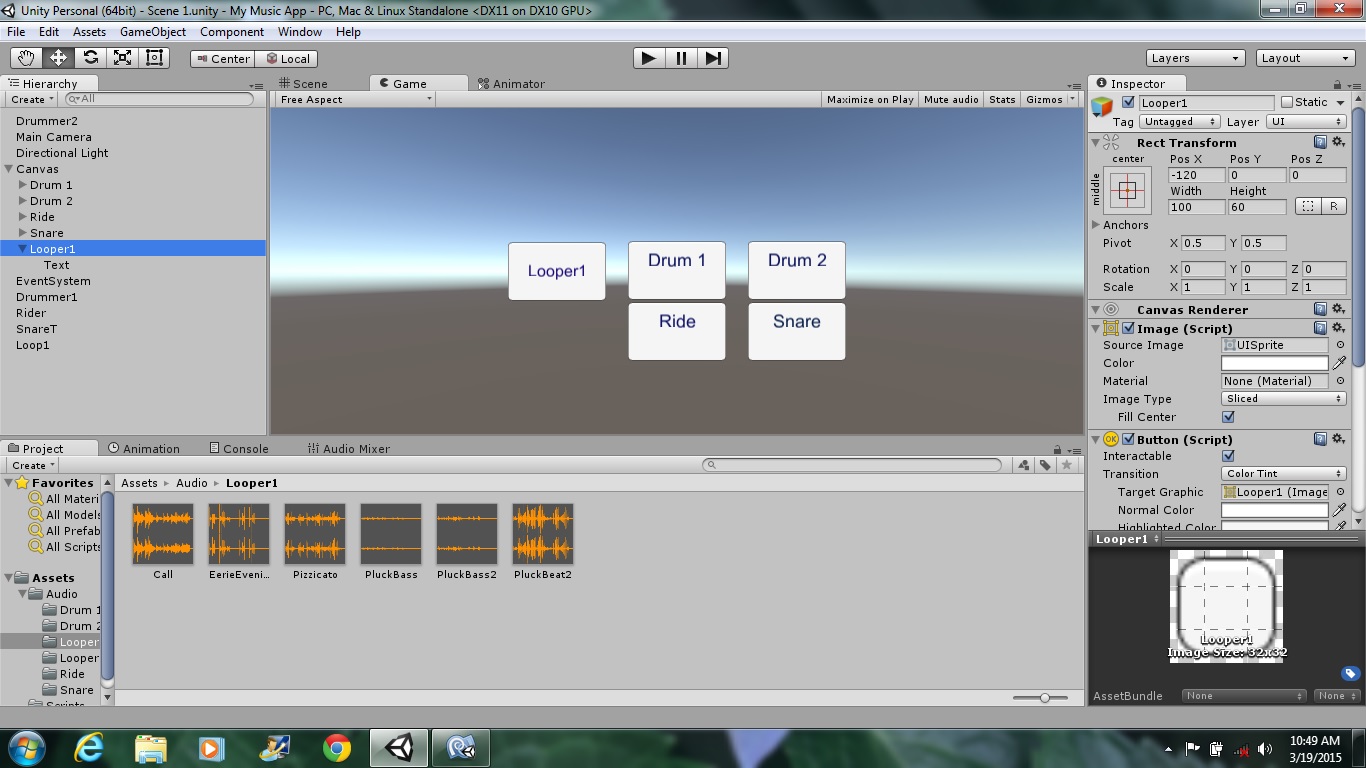
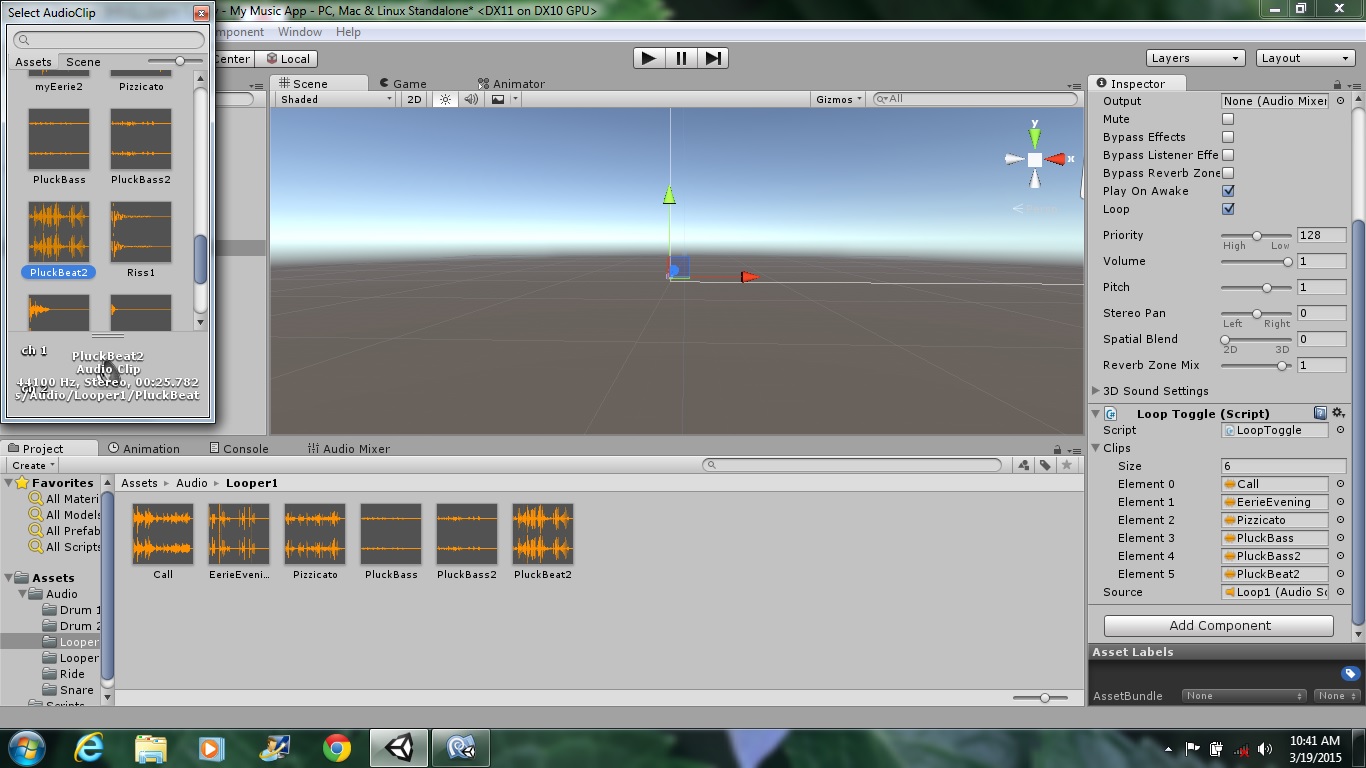
Next I want 2 buttons to play short samples of audio compositions in Loop. We write a new C# script. Click Create, choose C# script. Name it LooperToggle. Open the script. Follow my screenshot. Click file save.
Click Game Object, choose Empty and name it Loop1. Add component Audio Source. In the Audio Source panel, Check the Play on Loop box. Add Component select LoopToggle script. In the LoopToggle panel change the number of clips to how many you have and click the tiny circle and add your clip. Click tiny circle select Audio Source, select its own. Click Game Object, Click UI, choose Button and name it Looper1. On Click() choose Loop1, select LoopToggle script and choose its LetsPlayOn function.
Add a Looper2 button, Loop2 empty with Audio Source and Toggle script. Add function to Looper2 button.
5. Adding Volume Control
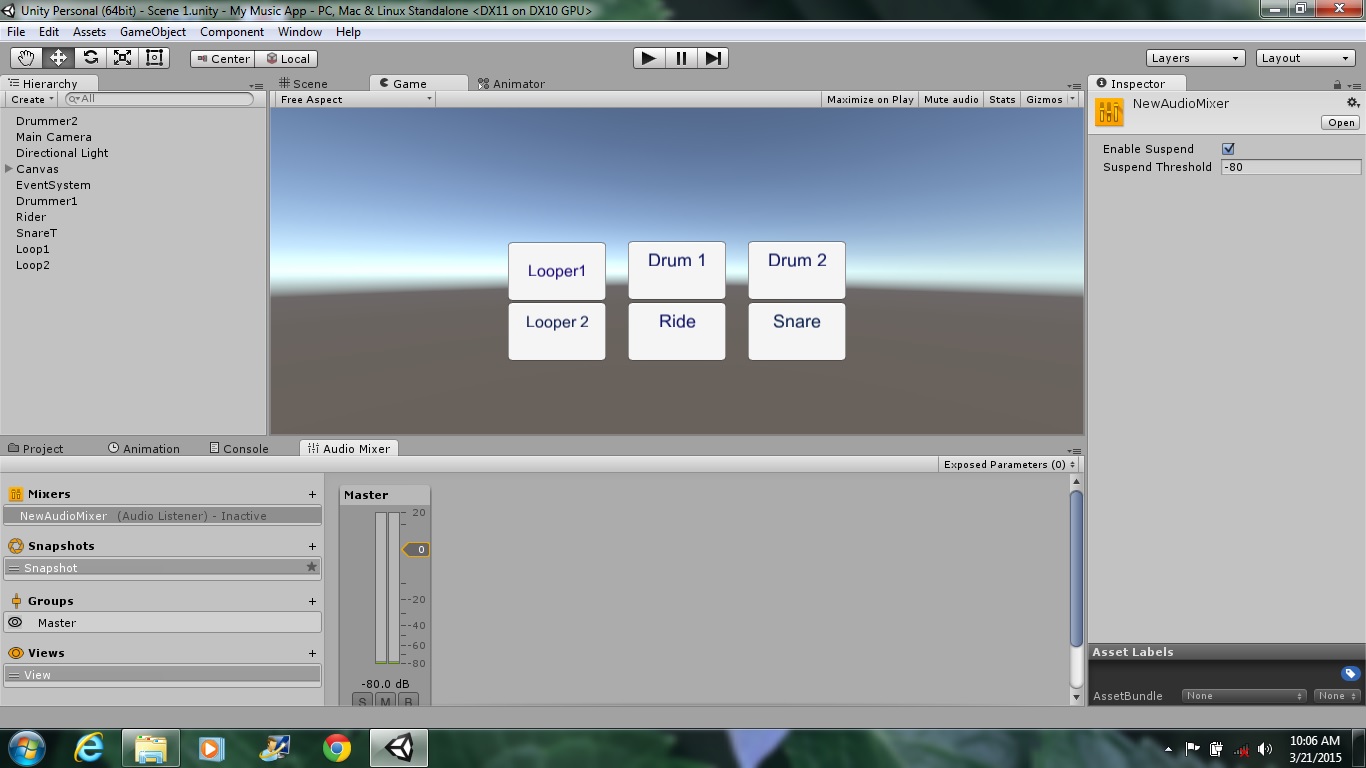
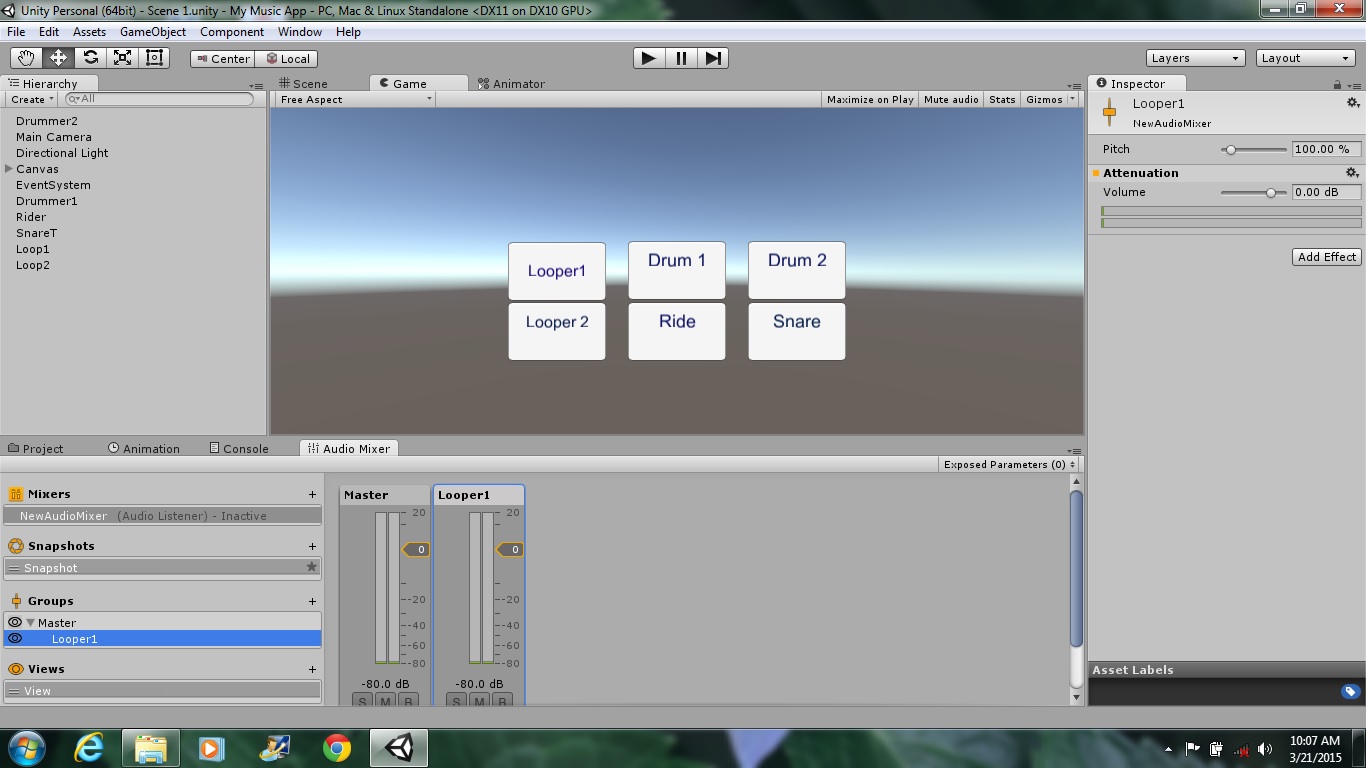
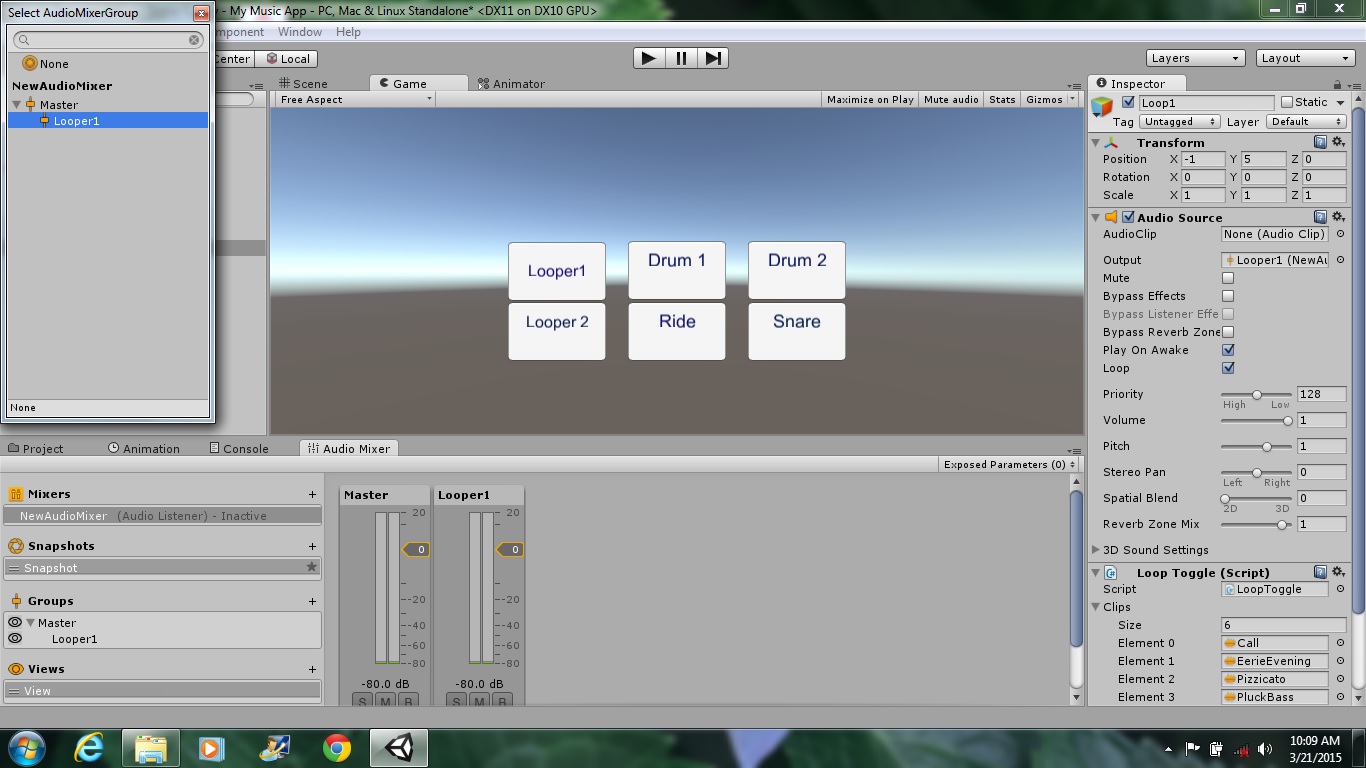
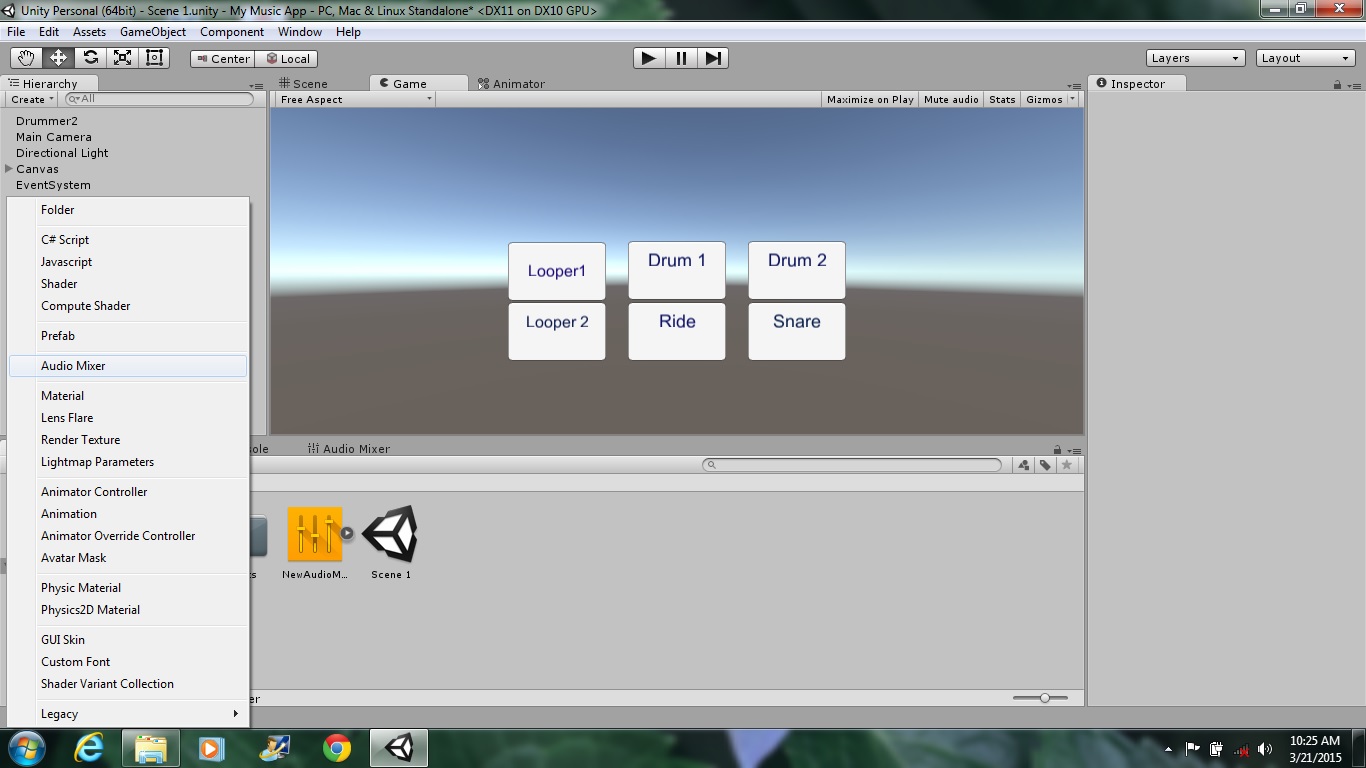
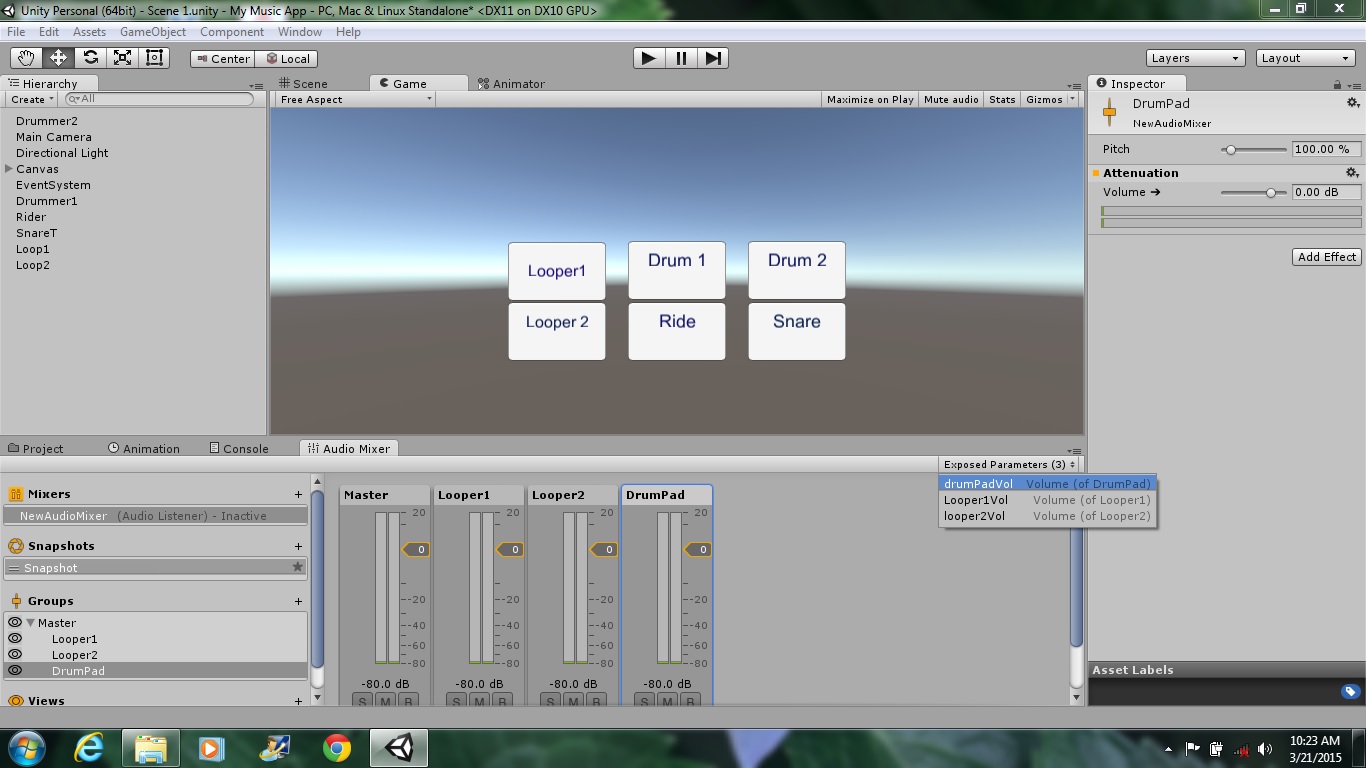
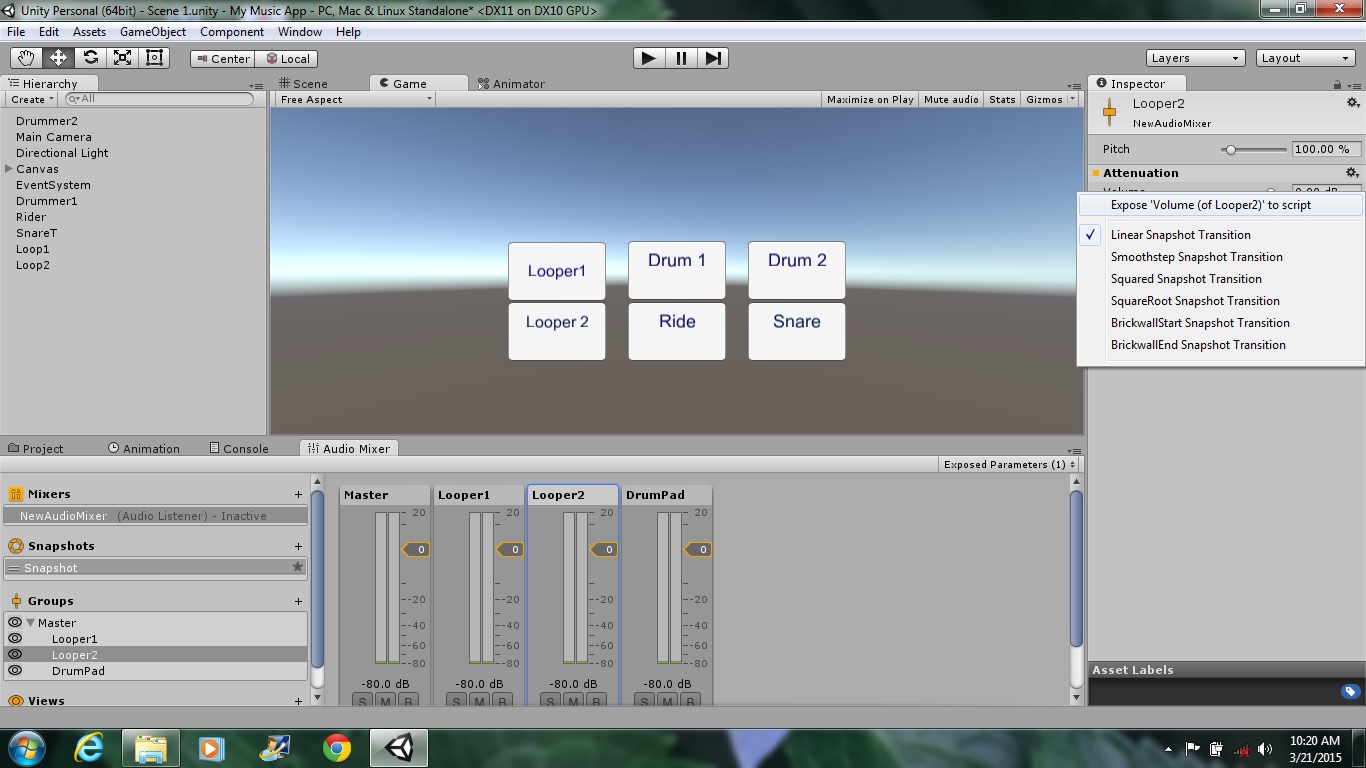
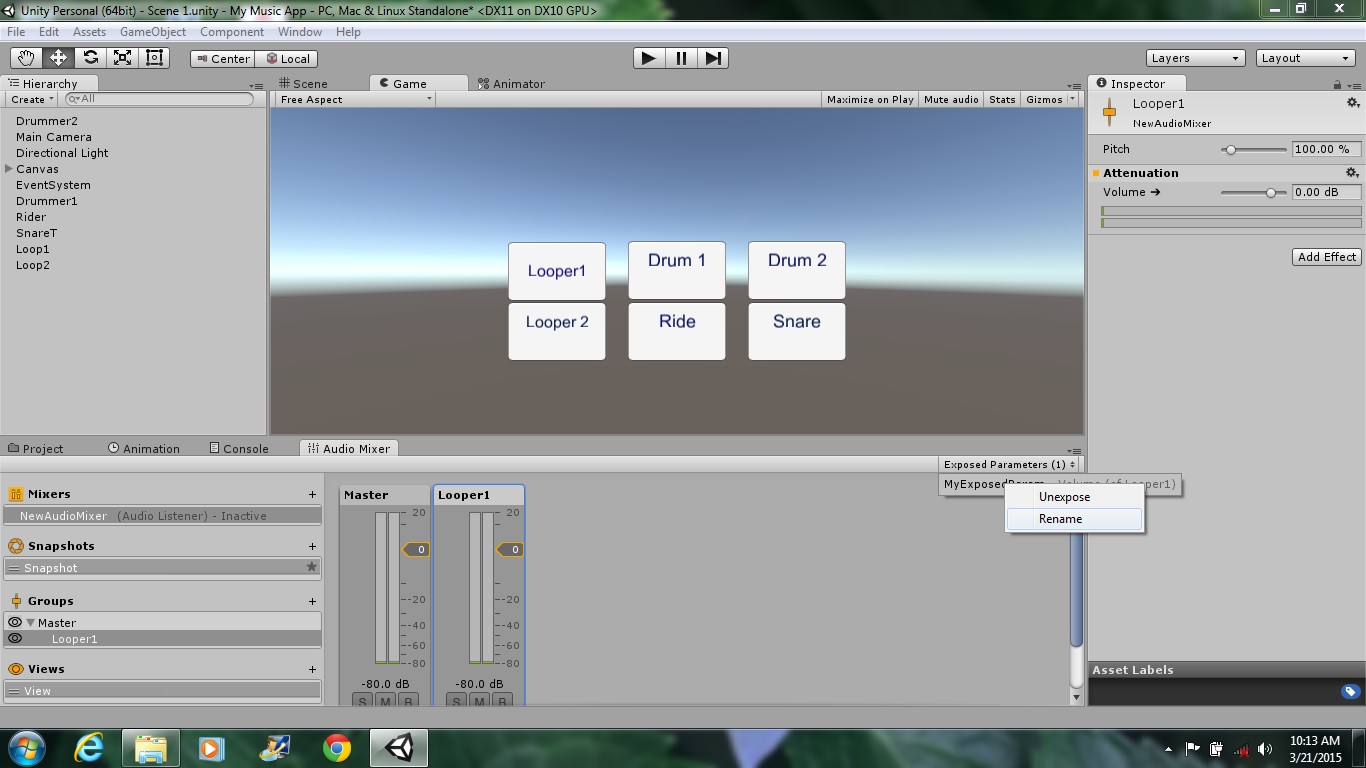
Meet the mix Master. Click Create select Audio Mix. Right click to open it. The first Mixer is the Master and parent of future Groups that you will add. Click on the plus icon in Group to add a new mixer and name it Looper1. Select Loop1 in the Heirarchy and in the Inspector in Audio Source panel Click Output and select Looper1. Click on Looper1 mixer. In the Inspector under Attenuation Right Click Volume and in the pop up window choose Expose Parameter to Script. In the Mixer Area it shows 1 Parameter Exposed. Click on it. The default name is MyExposedParameter. Rename it as Looper1Vol.
Click plus icon in Group and name the new mixer Looper2. In the Heirarchy select Loop2 and in the Inspector in the Audio Source panel Click Output and select Loop2. Select Looper2 mixer and Right click to Expose volume parameter. Rename the parameter looper2vol.
Click on Group plus icon and name the group DrumPad. This mixer will control volume of Drummer1, Drummer2, SnareT and Rider. In Heirarchy select Drummer1, then in the Inspector in the Audio Source panel click Output and choose Drumpad. Repeat for Drummer2, Rider and SnareT. Select DrumPad mixer and Expose the volume parameter. Rename the parameter drumPadVol.
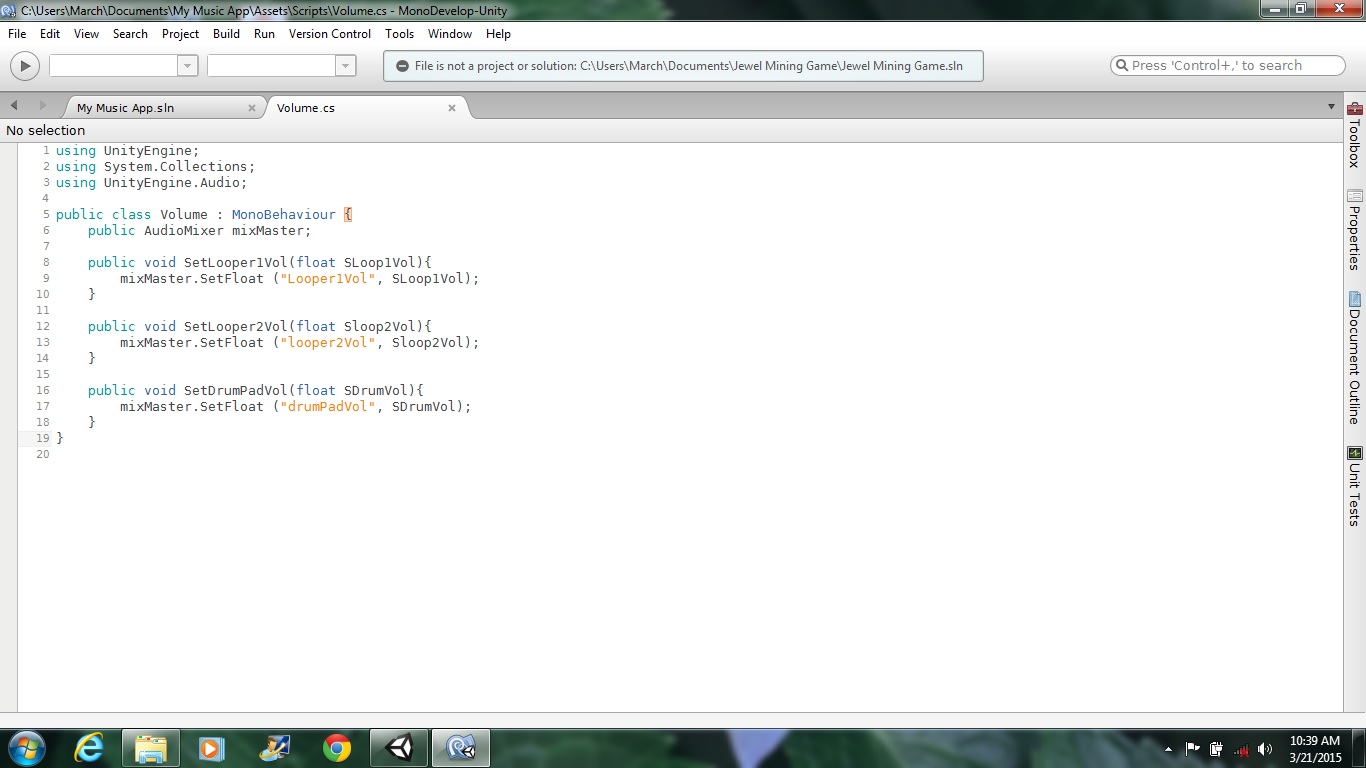
Write a Volume control script. Click Create, C# Script. Name it Volume. Follow my screencast. When you finish writing the script click File then save.
Caveat be careful to spell you parameters in the script in the quotations same as your exposed parameters with exact capitalization.
In the Heirarchy Click on Canvas, in the Inspector Click Add Component, click on script, choose Volume script.
Create volume sliders.
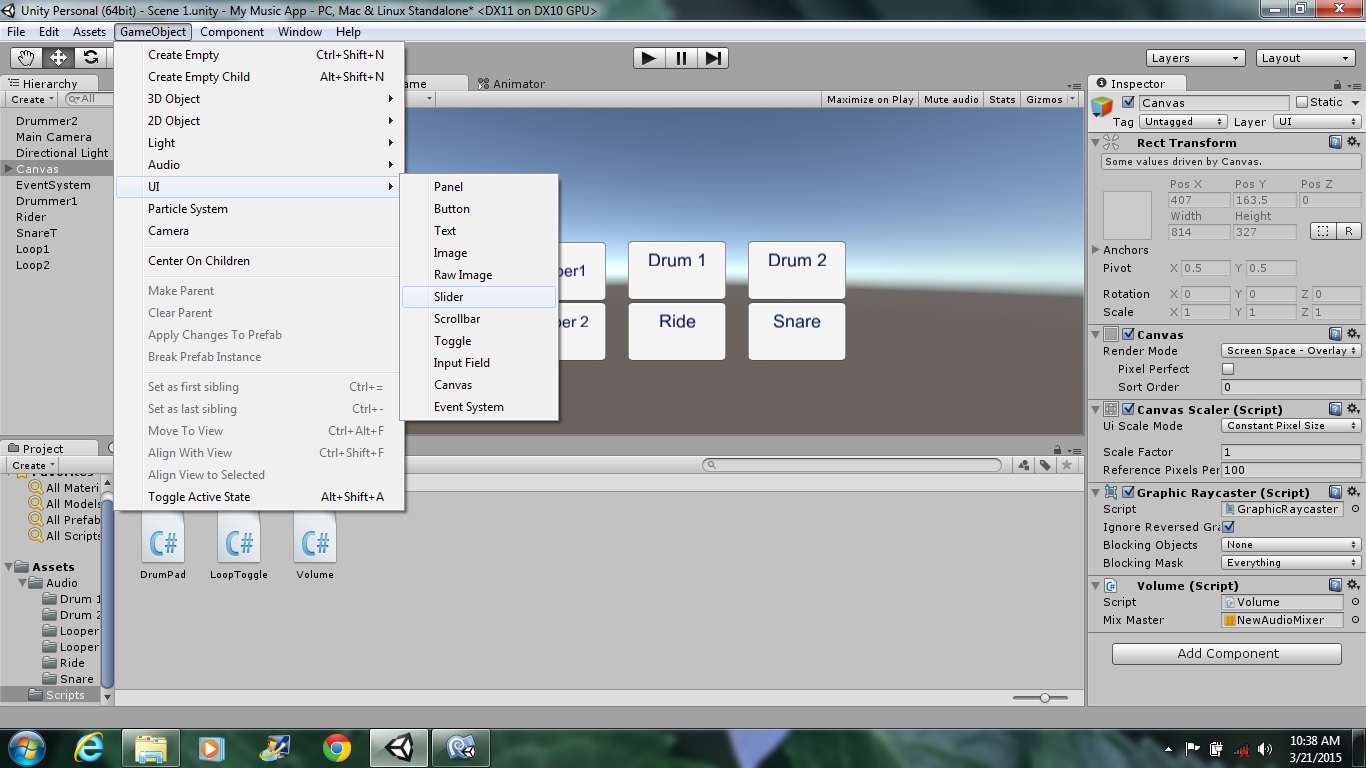
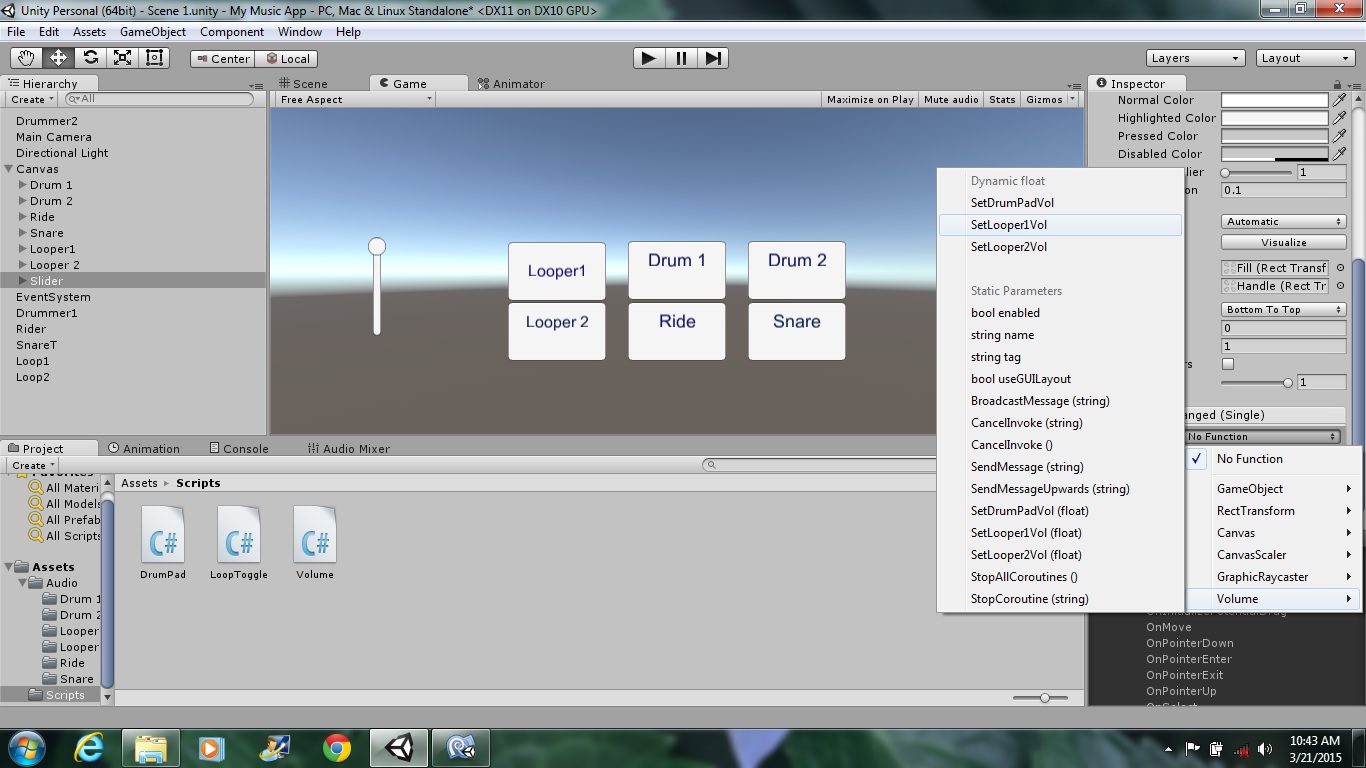
Click on Game Object, UI then click on Slider. Change the position of the slider. Right click in Heirarchy to rename slider Looper1Vol. In the Inspector scroll down in On Value Changed click on it to select Canvas. Then select Volume script the choose SetLooper1Vol under the word Dynamic Float. In the inspector make the minimun value of the slider -19 and the max 9.
Create a slider for Looper2. In the Inspector in the On Value Changed click it and click on Canvas the select Volume script then choose SetLooper2Vol. Adjust slider levels to minimum of -19 and 9 max.
Create a slider for DrumPad. In the Inspector click on On Value Changed, click on Canvas and click on SetDrumPadVol. Adjust the sliders levels of minimum and maximum.
Adding Delay and Decay Sliders
Adding an Effect to Drumpad
Click on DrumPad mixer. Click on Add Component. Click Audio, choose Echo. Press play, then tap Drum1 or Rider. You should hear the sound repeat itself.
I want the drums to begin with a dry sound and allow the person who would play with this app to adjust the delay level to make an echo. Click on DrumPad mixer to reduce delay to 6. Reduce decay to 14 percent. Click on delay to expose this parameter. Click on decay to expose this parameter. Rename the delay parameter toDPDelay. Rename decay parameter to DPDecay.
Click on Looper1 mixer. In the Inspector Click Add Component, click Audio choose Echo. Reduce delay to 6. Reduce delay to 14 percent. Click on delay and expose this parameter. Rename the parameter LDelay.
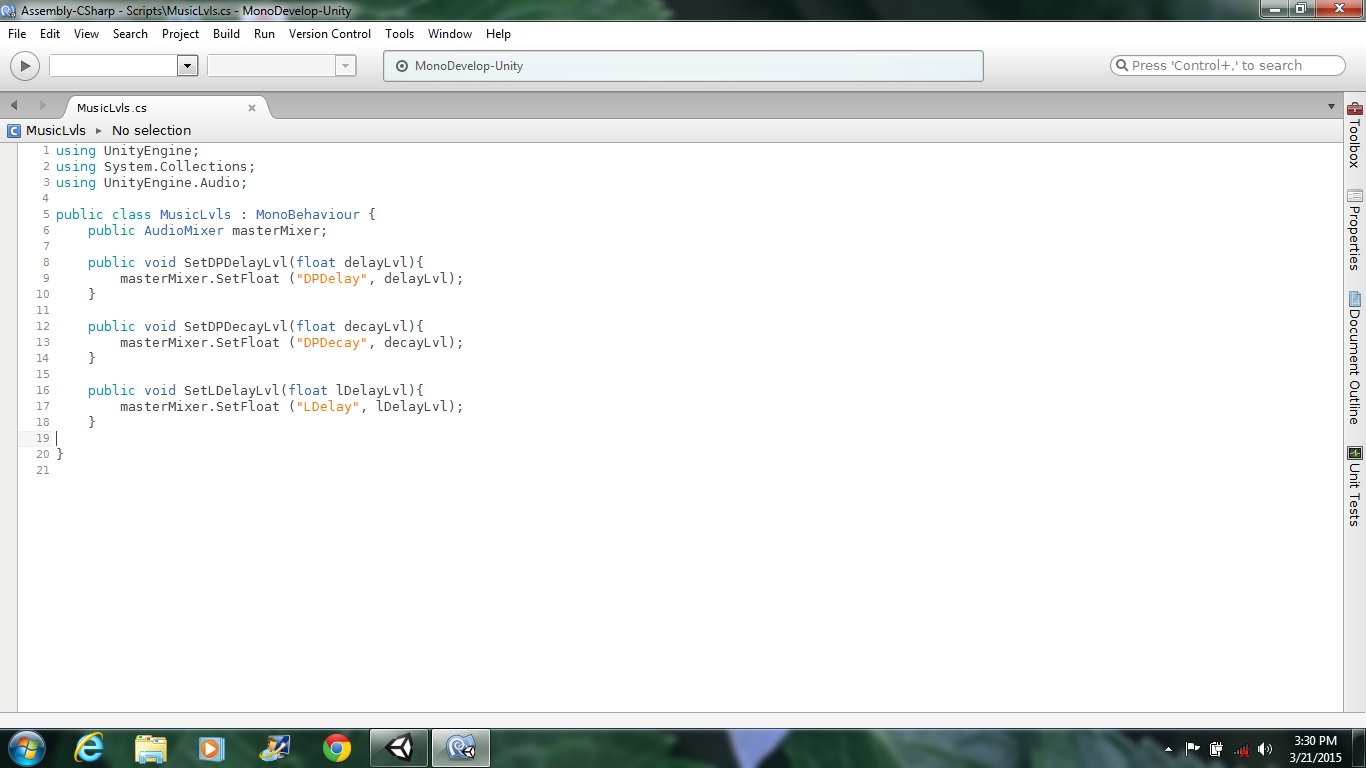
Click Create, C# script. Name it MusicLvls. Open it and follow my screencast. After you finish writing the code click File, then save.
Click on Canvas, in the Inspector click Add Component click script, choose MusicLvls.
Creating A Delay Slider
Create a delay slider for DrumPad. Click Game Object, click UI the Slider. In the inspector change the position. Then in the On Value Changed choose Canvas, then MusicLvls script then SetDPDelayLvl. In the Inspector set minimum value to 6 and max to 1000.
Create a decay slider for DrumPad. In the Inspector On Value Changed click Canvas, MusicLvls script, the choose SetDPDecayLvl. In the inspector set the minimum value to 14 and max to 50.
Create a delay slider for Looper1. In the Inspector On Value Changed click Canvas, MusicLvls, then SetLDelayLvl. In the Inspector set minimum value to 6 and max to 1000.
7. Adding Particles, Scene and Build It!
Adding a Particle System to Looper1 and 2
I want to emit particles when I press Looper1 button and turn it off when I press the same button again. Click Game Object then click Particle System. Voila. A particle system has been added to your scene and the simulation is running.
I drew a symbol using GIMP software with a transparent background and exported it as a .png file. I uploaded my symbol image to Unity. I clicked in the Inspector and changed Texture by clicking on that word and select 2D and UI then clicked apply button. I clicked Create material and named it symbol. I clicked on symbol in the assets folder and changed its material to a Particle Material. I clicked on my Particle system renamed it and in the Inspector clicked on Renderer and clicked on the tiny circle and selected symbol material. Now the particles emit the symbol. I unchecked a box in the Inspector next to the particle system's name. The particle system's name in the Heirarchy became grey and is now not active.
I had a second symbol and created another particle material. In the Heirarchy I duplicated the particle system, renamed it, moved it to a new position.
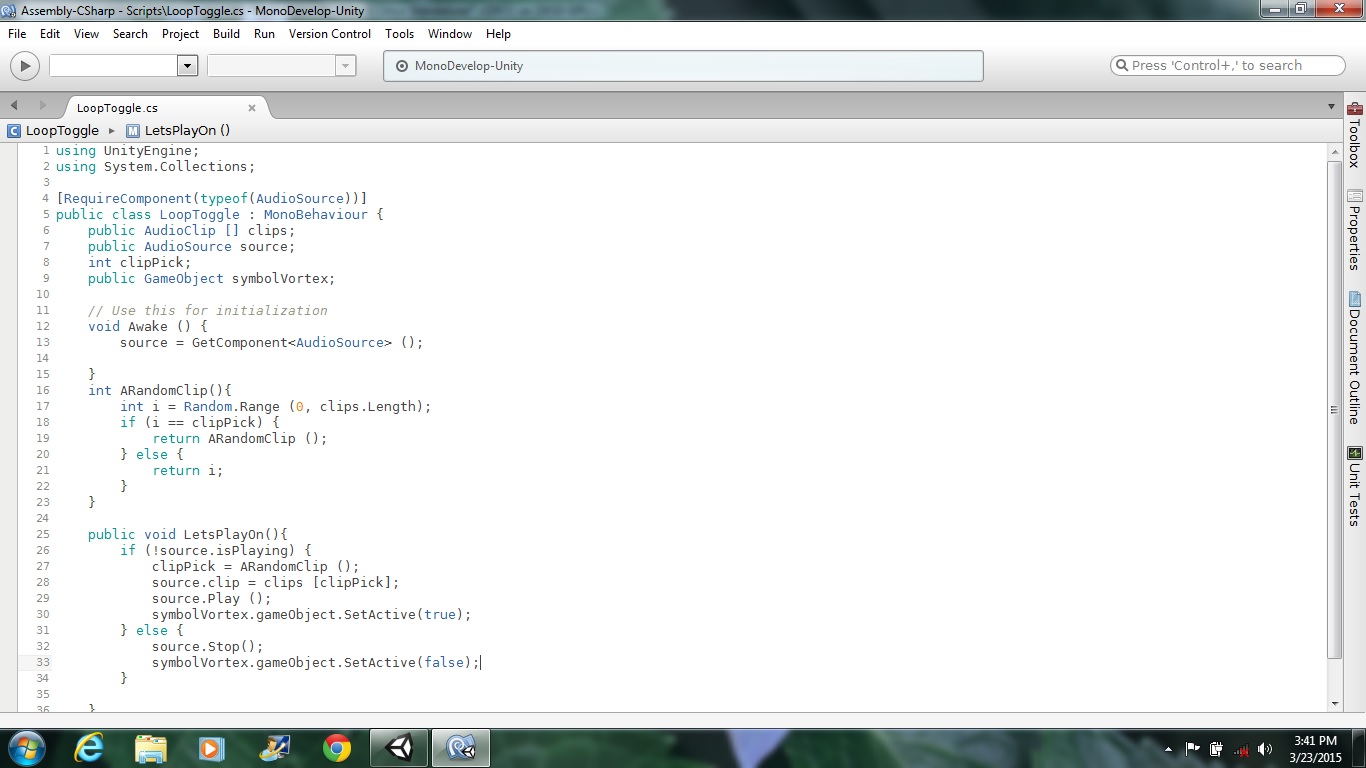
Time to edit LooperToggle script. Look at my screencast and check out the reference to GameObject variable and add it in your script. Remember to add .SetActive(true) in the script .
Test your app. Press the Play button. Press Looper1 and Looper2. Music and particles become active. Press again and they are deactivated.
Custom Button Image
I deleted the Button's text. I uploaded images for my buttons. If I click on an image I see the Inspector shows import settings with a default Texture. In the Inspector I changed the Texture to 2D and UI then I clicked apply. I clicked on a Button in the Heirarchy, and in the Inspector I clicked on tiny circle next to Source Image and chose my uploaded image.
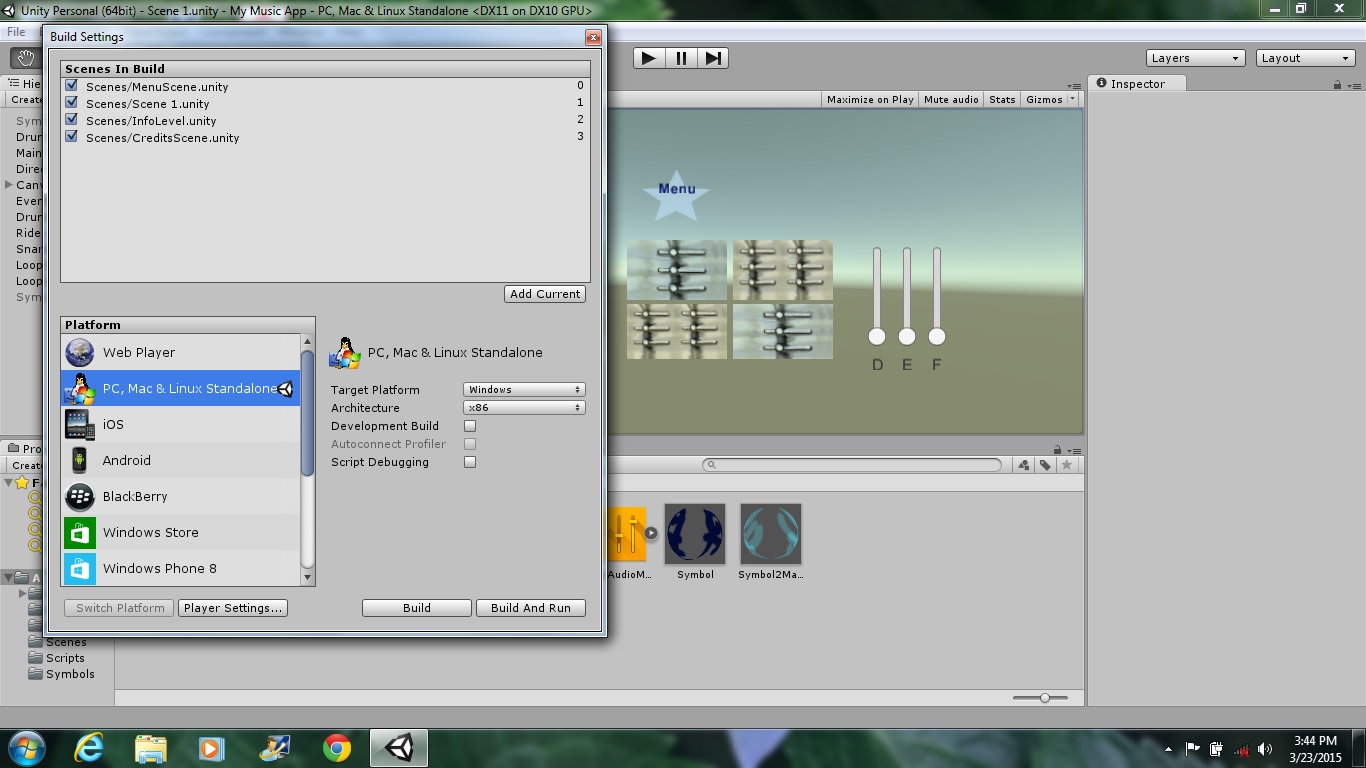
Adding A Menu Button and Menu Page Next we want to make a button to take us to the Menu page, create an info page and a Credits page. Save the scene. Click File, New Scene. Add a Panel for background color, Click Game Object, UI choose Panel. In the Inspector you can change the color and alpha value. Save scene as Menu Scene. Add it to the Build Settings. Click File, Build Settings. In the pop up window click Add Current. The current scene will be added. On the right side the number 0 will appear.
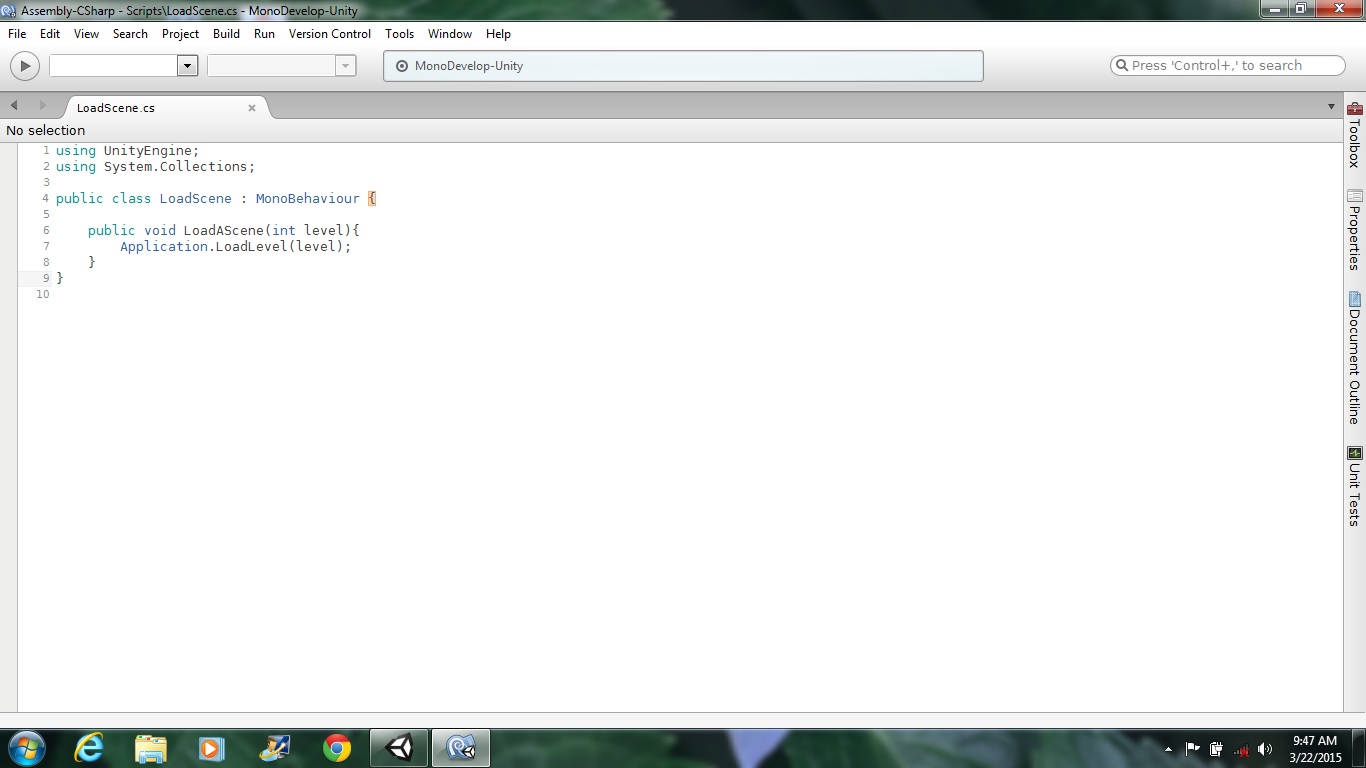
Write a LoadScene C# script. Follow my screencast. After you finished writing the code click File then save.
Click on Canvas in the Heirarchy, then in the Inspector click add component, script, LoadScene script. Add a button to your scene and change its text to LetsPlay. In the Inspector on the On Click() click it, then click on Canvas, select LoadScene script then select LoadAscene function. Change the zero next to it into the number one. Clicking on this button will take us to main app page. But don't try it yet, because we haven't added that scene to our Build settings. Click file then save Scene.
Open the previous scene and add it to Build Settings. Now it should display 1 next to the latest scene. Add LoadScene script to Canvas. Add a Menu Button. In the inspector On Click() click it, click on Canvas, click on LoadScene script add LoadScene. Don't change the 0, this button will take you to the menu scene. Save scene.
Click File, new Scene. To add instructions how to play, Click Game Object, UI, choose Text. You can type info in the inspector. Save the scene as Info. Add LoadScene script to Canvas. Add this scene to the build settings. Add a menu button. Save scene.
Click on File, then new scene. This is the Credits page. A page to thank people who contributed to your music app. Add LoadScene script to Canvas. Add a menu button. Save scene as CreditScene. Add this scene to the build settings. Save this scene. Open Menu scene and add two buttons, one for Info page and the other Credits. Save this scene. Build It! Click on file, then choose Build. The default is to build for pc. If you need to build for Android then you need to install its sdk and its files.