Musical Toothbrush
by forwattpadandstuff040 in Circuits > Arduino
599 Views, 0 Favorites, 0 Comments
Musical Toothbrush
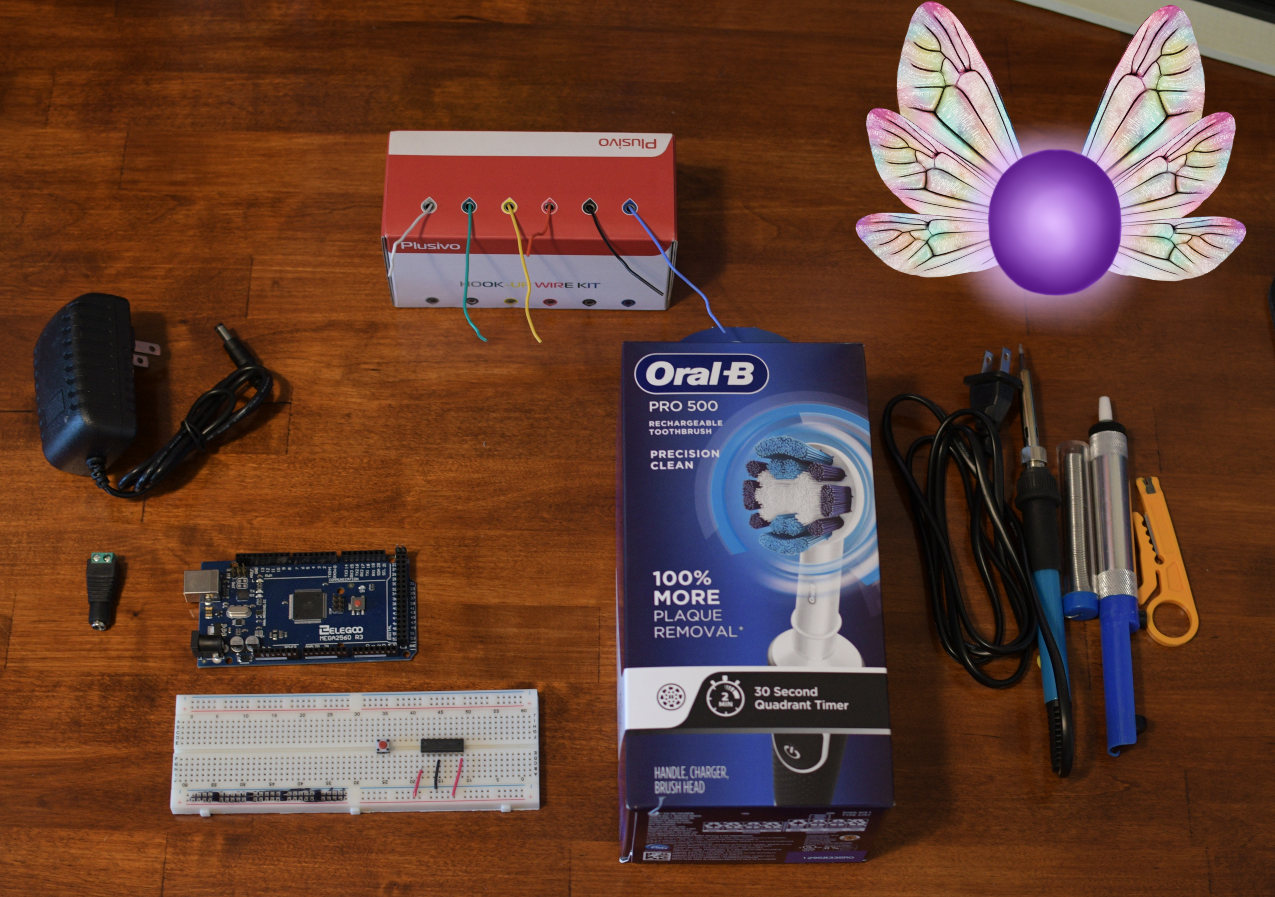
Hi! My name is Tina the tooth fairy and I am here to show you how to create your own musical toothbrush! I will show you step by step how to take a non-musical tooth brush and take it to the next level! As a hint in this tutorial, all purple glow around parts in pictures are important for the step. Now continue on and make your own magical musical tooth brush!
This toothbrush design should take about an hour and a half to complete. To upgrade for an extra challenge, try to attach a buzzer to the circuit to amplify the sound.
Disclaimer
This toothbrush design is intended for display and demonstration purposes only and should NOT be used in a human's mouth. It should also not be placed under water under any circumstances. Tina and the tooth fairy community does not fall liable for any injuries or illnesses that occur with the misuse of our product. Tina also recommends that if you have no experience with a soldering gun, you should consult an adult for supervision to prevent injury.
Supplies
The list below is all the materials you need to complete your own toothbrush. Part numbers and store to the exact materials used are provided in the list as well.
- Motor Driver from Mouser, LM293NE
- Oral-B Pro 500 from Wal-Mart
- Arduino Mega 2560 from Amazon, EL-CB-003
- Soldering and Wire Kit from Amazon, EAN0721248989376
- Push Button from Mouser, 612-LL3301NF065QG
- Breadboard from Mouser, 424-240-131
- 5V Power Supply from Amazon, AL5V3ABK
- Solid 22AWG Wire Kit from Amazon, EAN0721248989765
Place Your First Wires
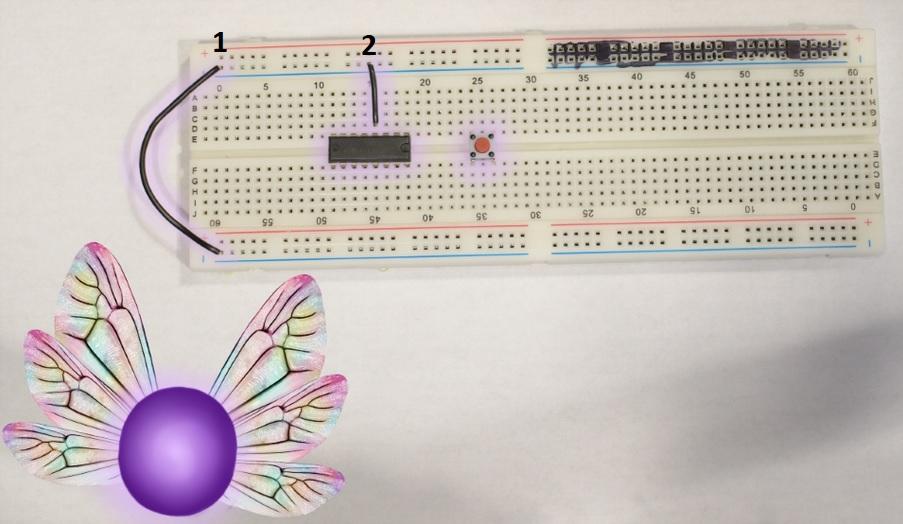
Start by putting motor driver IC and pushbutton across the middle dip in the breadboard as shown. Ensure the little dot on the IC is to the right. Additionally make 2 black wires for 1 and 2 labeled in the picture. Tina reminds you that the location of the wires are VERY important and if it is not followed exactly, the circuit could malfunction. The final circuit should look like the second picture.
Begin to Expand Wiring
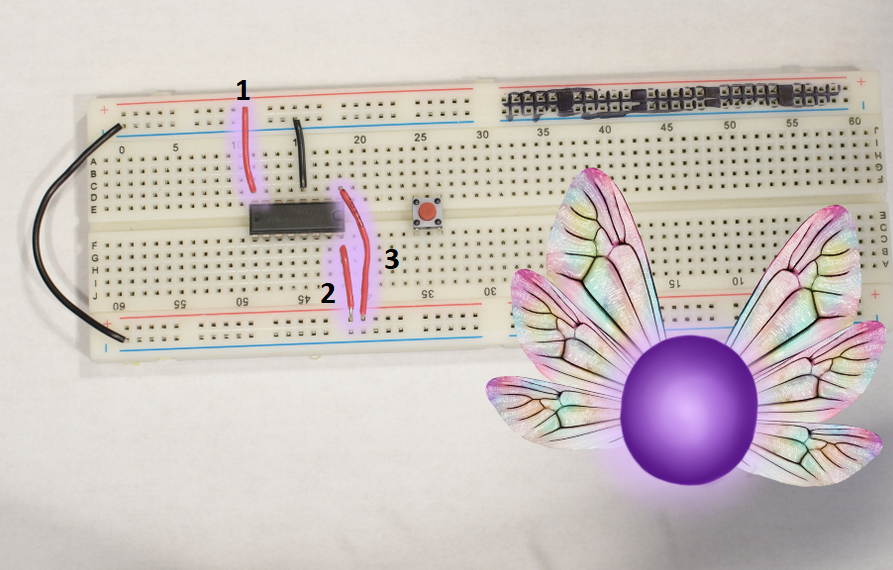
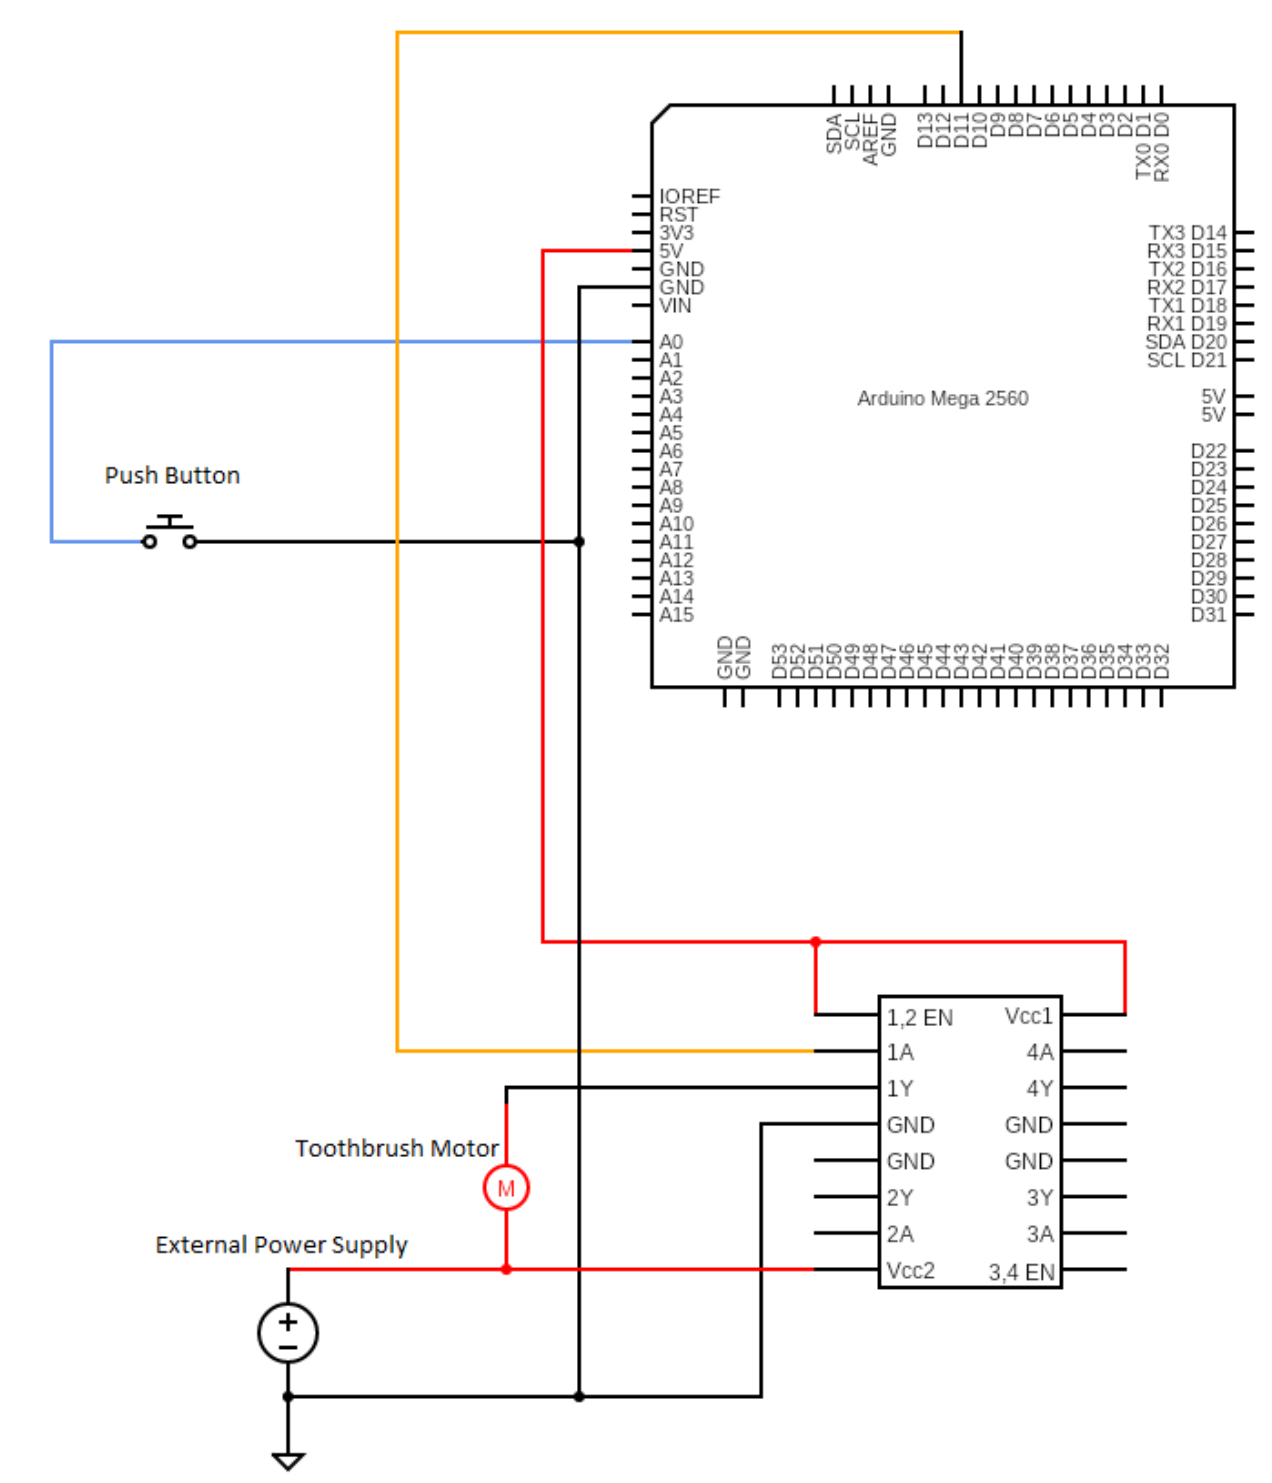
Cut, strip, and bend 3 pieces of wire as shown for wires 1, 2, and 3. Wires 2 and 3 will be 5V coming from the Arduino, where wire 1 will be 5V coming from the power supply to drive the motor.
Pushbutton Wiring
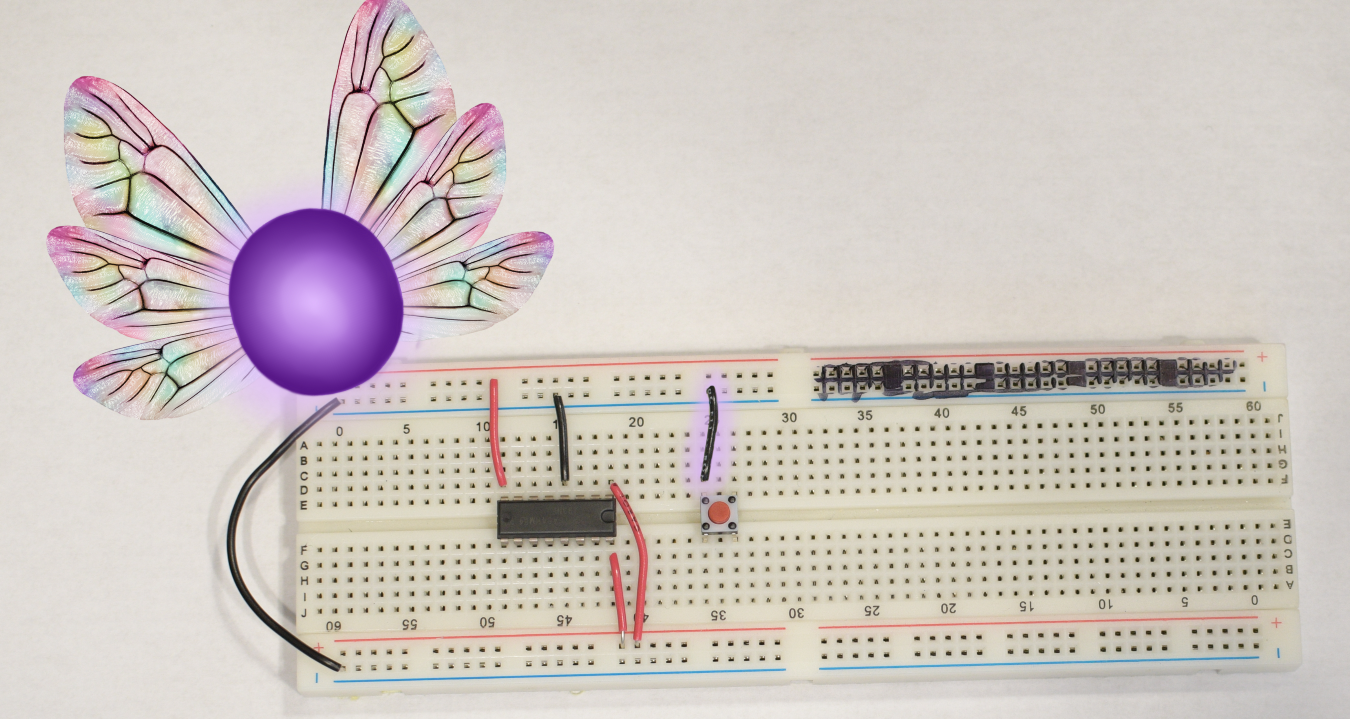
Add another wire for the pushbutton ground. Tina always tests her push buttons by pressing it before wiring, to ensure once wired you can press down without issue.
Start to Power the Circuit
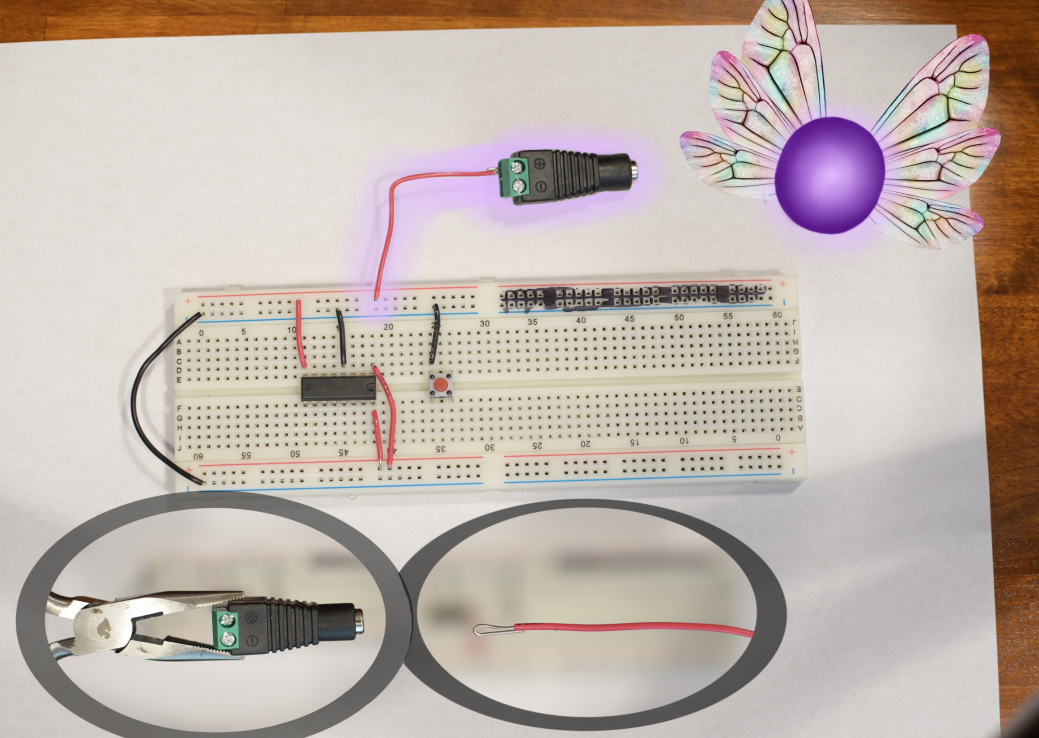
Next, we will wire the connector for the power supply. For the end that gets screwed into the housing, loop the back on itself as shown in the picture. Connected the red wire to the terminal with the ‘+’ on it. Tina is careful when she puts negative and positive wires, Mixing them up could lead to a reverse circuit, which is not good!
Continue to Power the Circuit
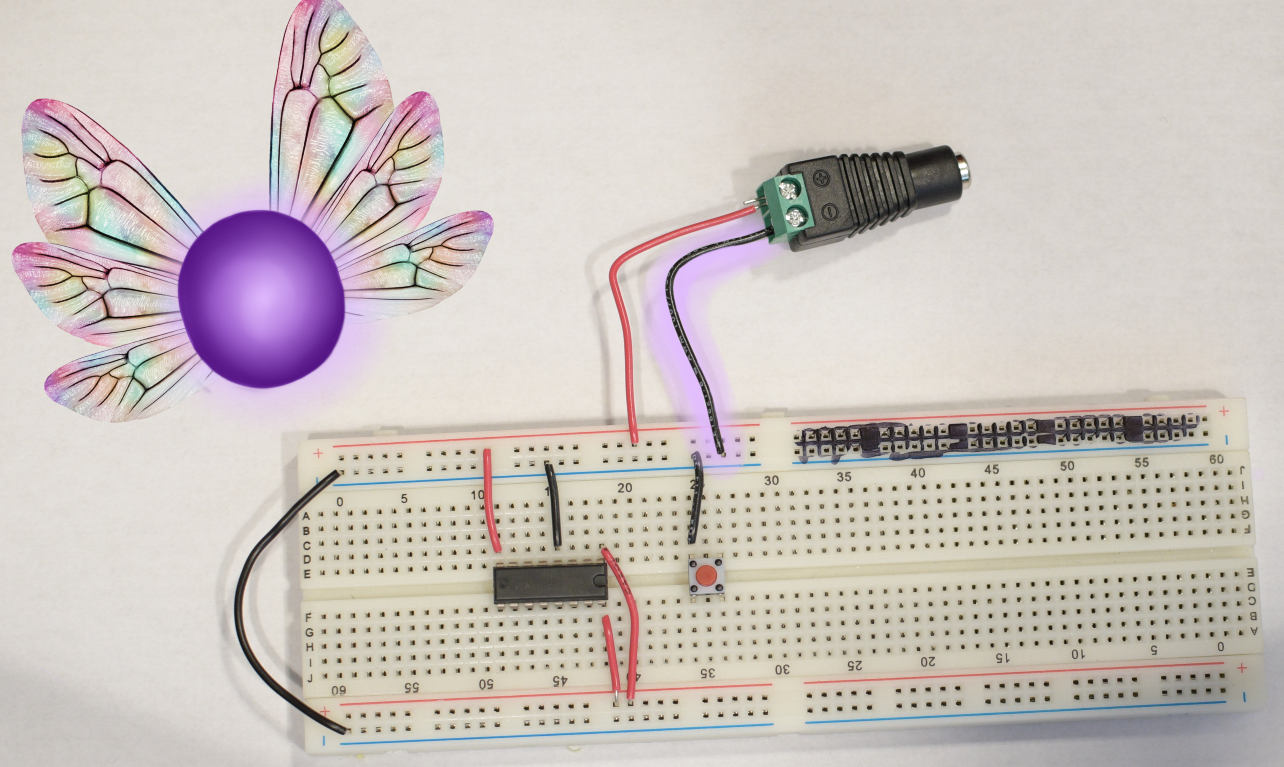
Repeat the previous step for the black wire.
Power Warning
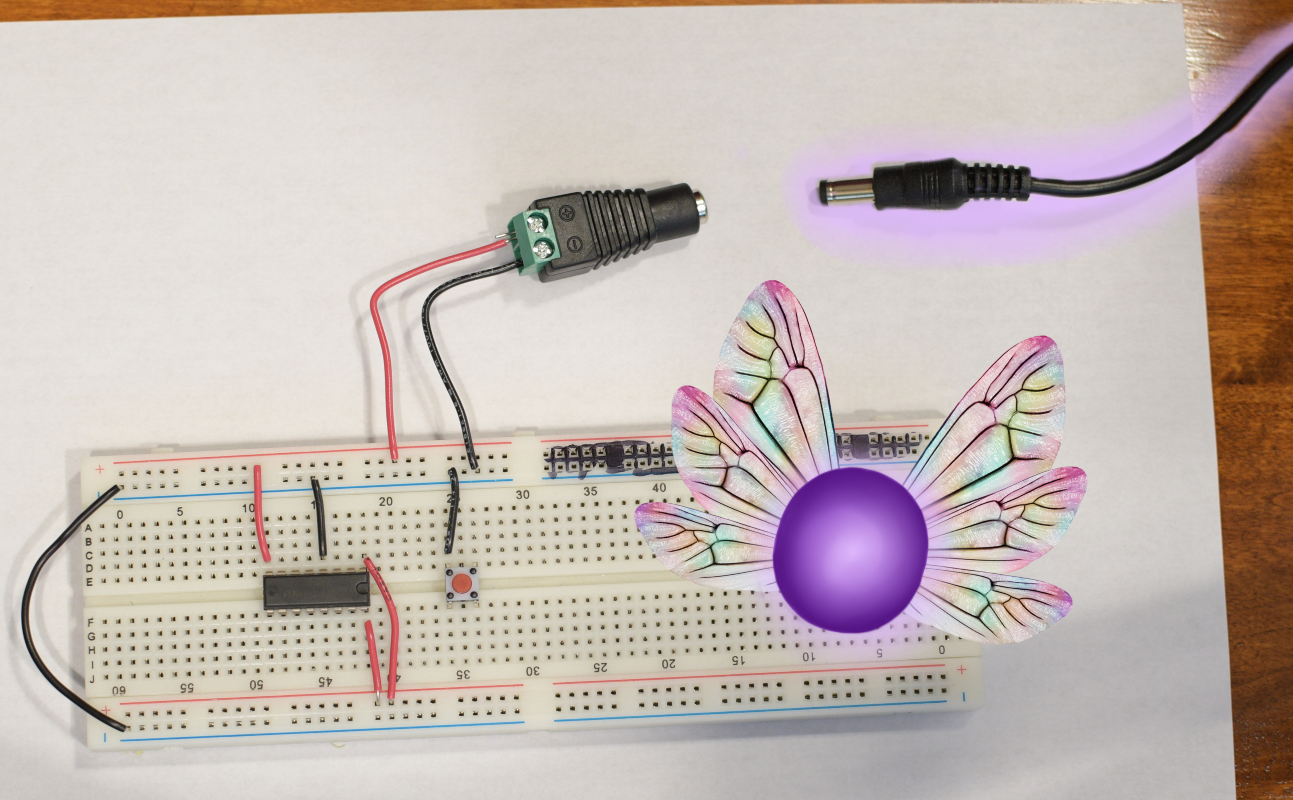
The toothbrush will be powered by plugging this in. As we will still be working on the circuit, do not plug it in yet otherwise there is a risk of electric shock. Tina keeps that cord away from the circuit until you want to power the toothbrush, to avoid any shocking results.
Connect the Arduino
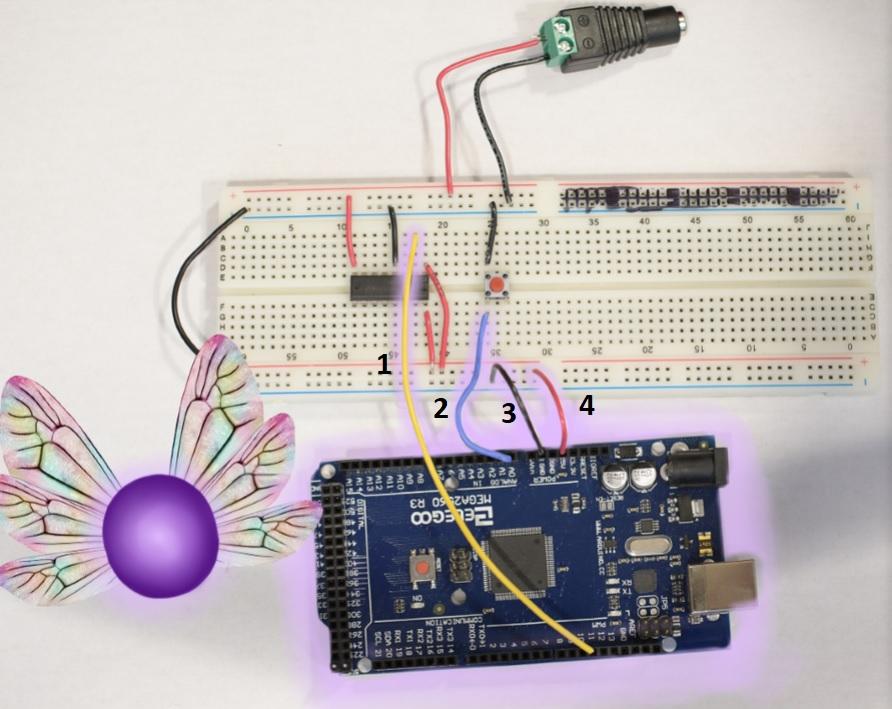
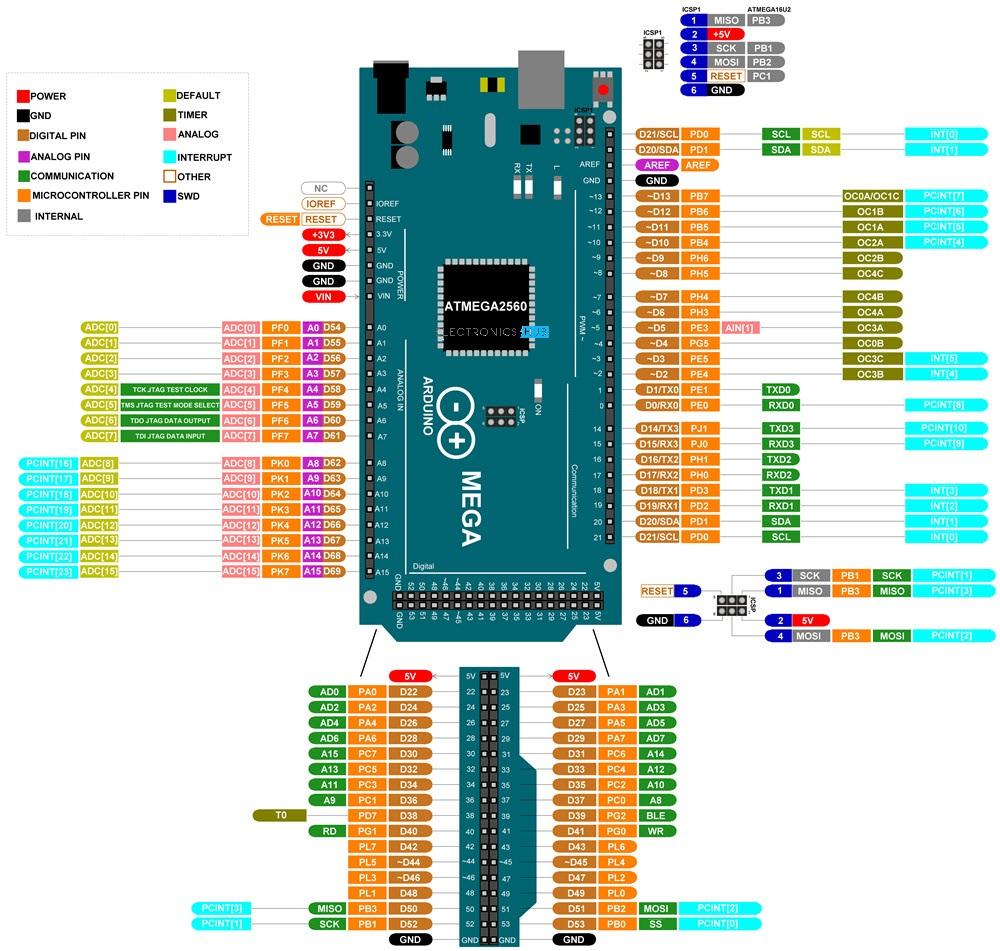
Next connect pin 11 from the Arduino to the motor driver as shown with wire 1. Connect the pushbutton to A0 of the Arduino as shown with wire 2. Finally, connect wire 3 and 4 to provide 5V and ground to the breadboard. Tina uses the pin out sheet provided to make sure she connects the wires correctly to the Arduino Mega 2560.
Begin to Edit the Toothbrush
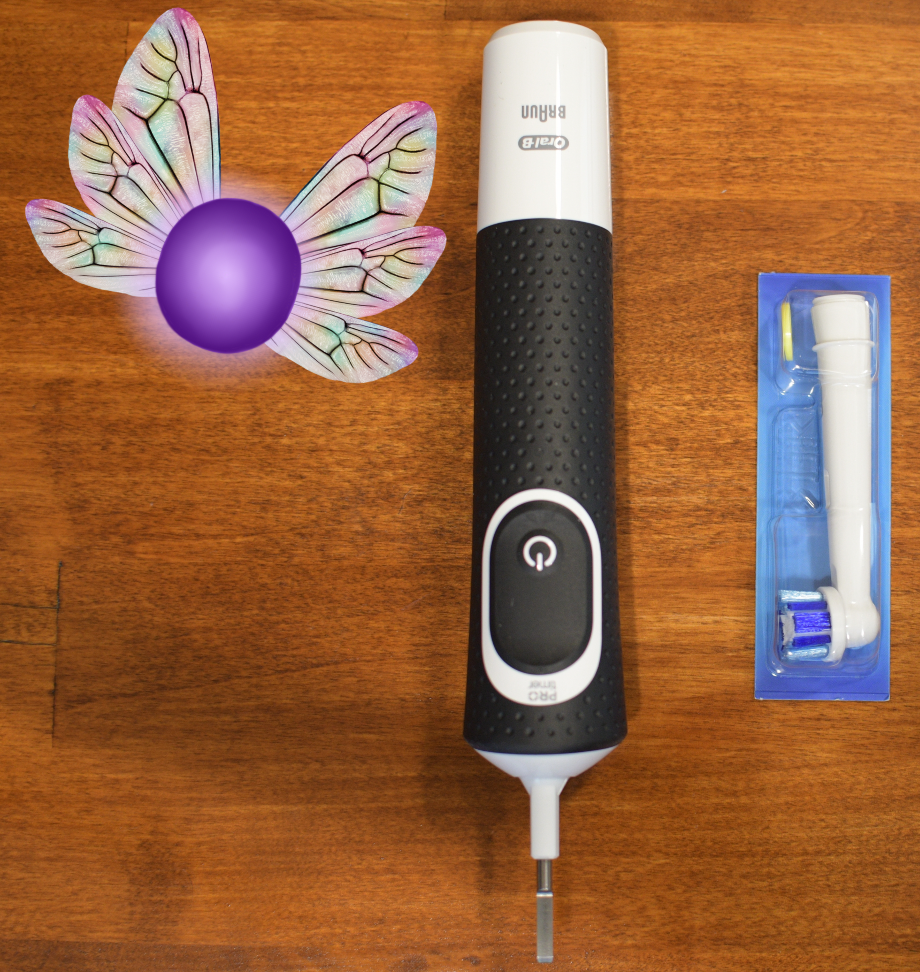
Moving the breadboard aside, get out the toothbrush. Tina had a rather hard time opening the box, so if need be use a small knife to open the package. If you are unfamiliar with how to use a knife safely, allow an adult to open your toothbrush box.
Begin to Disassemble
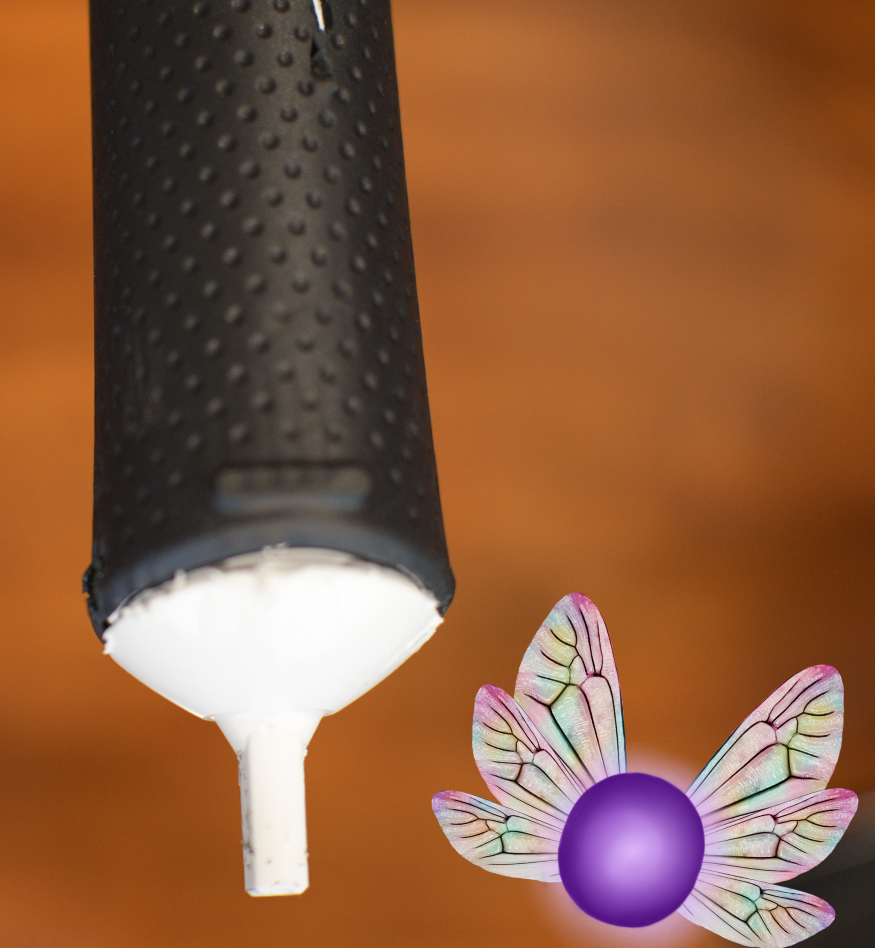
This step is a little tricky so be careful! Get a small flat head screwdriver and gently pry up the plastic around the top of the toothbrush head. Once you’ve gotten it loosened up, pull the plastic piece around the metal shaft towards the front of the toothbrush. The cap should now come off.
Innerworkings of the Toothbrush
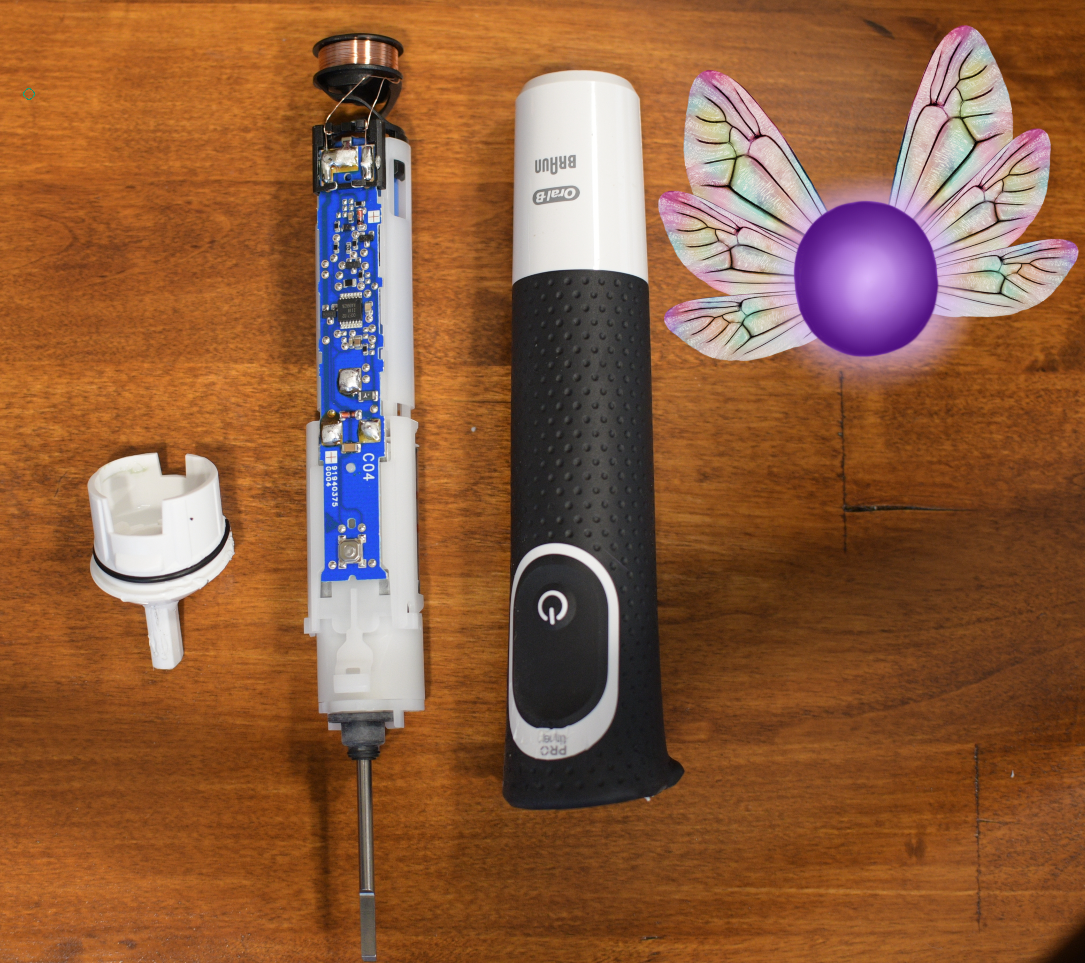
Shown are the three main components to the toothbrush. The cap, the circuit board and motor assembly, and the housing. Tina makes sure she has all the correct parts from the toothbrush before continuing. If your toothbrush does not look like this, or something breaks, you have to get a new toothbrush! Tina does not want her tooth followers like you to get harmed by a wild electric toothbrush.
Gathering Soldering Materials
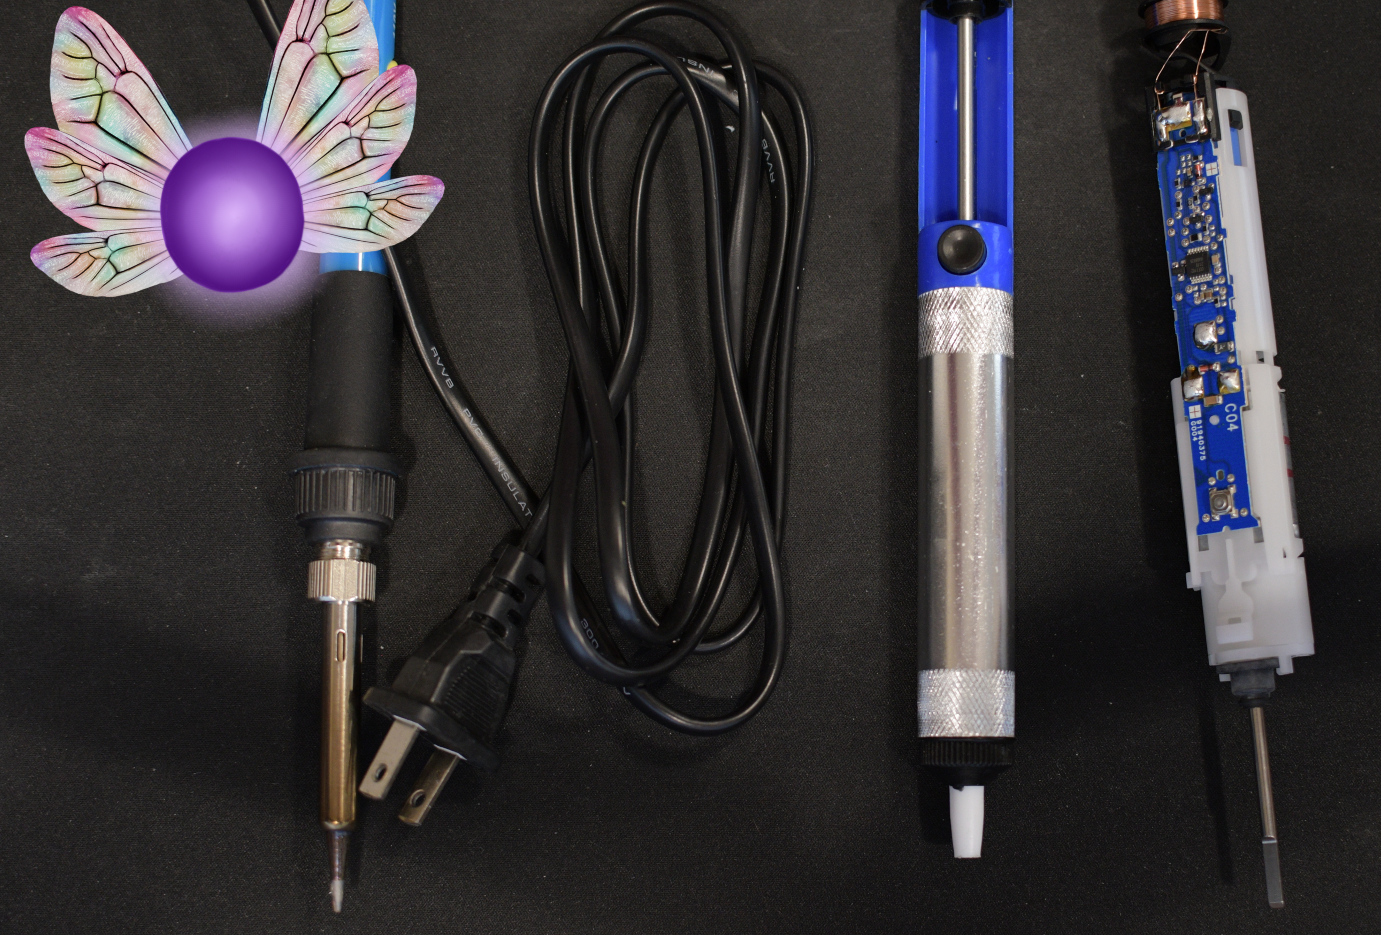
Next up is some soldering, locate the soldering iron from the kit, along with the sliver and blue tube called a ‘solder suck’, along with the circuit board.
Heat Up the Soldering Iron
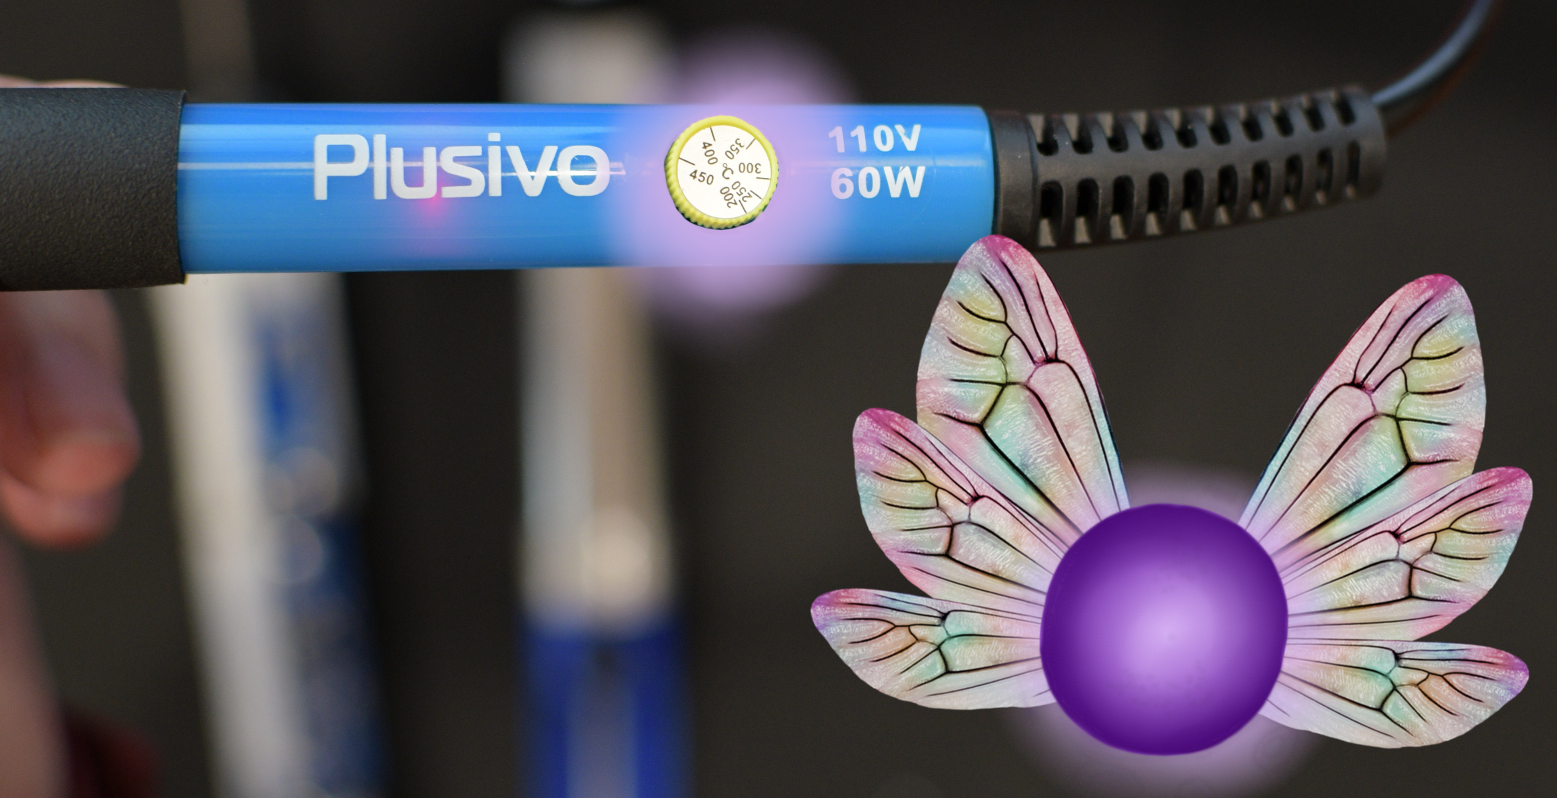
Now that your circuit is open to use, take your soldering gun and turn it to a comfortable heat. This is the setting used on the gun from the materials list, but if using a personal soldering gun, the temperature settings may differ. Tina reminds you not to touch the metal part of the soldering gun, as it can cause major burns. If you do touch this part, let an adult know immediately!
Soldering Stabilization
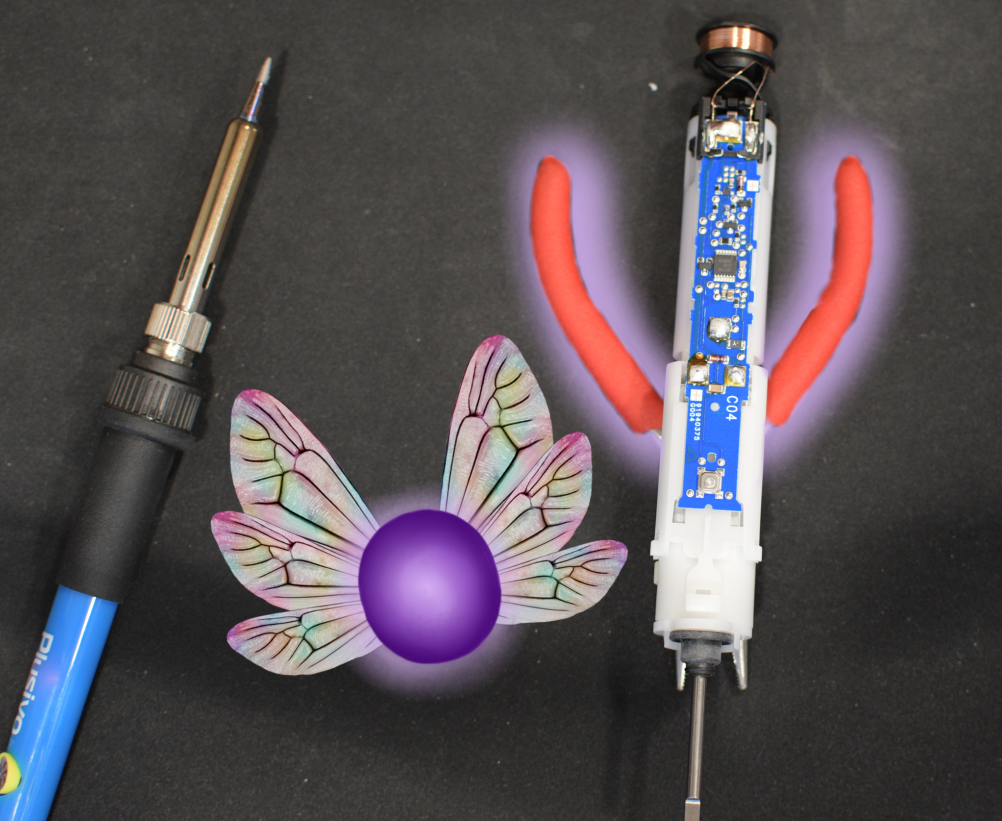
To provide more support with soldering, you can place the circuit in the middle of a pair of household plyers. This is optional, but recommended for those with little soldering experience. Tina prefers to provide support when she solders, to prevent any from slipping and sliding around the circuit and her tiny tooth fairy hands.
Desoldering
Now you can begin to remove the solder already present on the tooth brush circuit. Watch one of Tina's helpful fairy's complete this in the video.
Downloads
Soldering Results
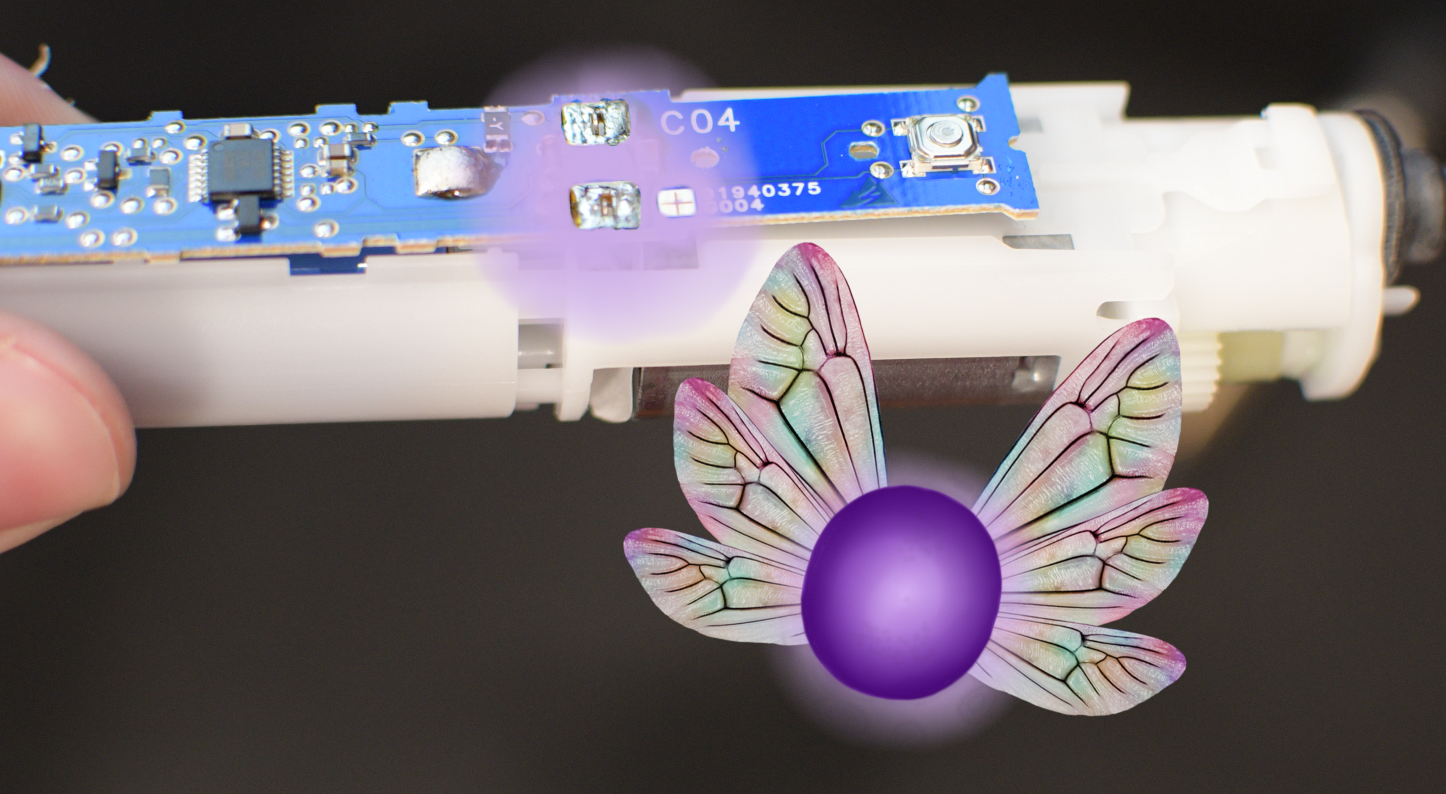
If the video is followed correctly, the circuit should now look like this! There should be no solder left on the pads and the plus symbol should be visible.
Remove Circuit Housing P1
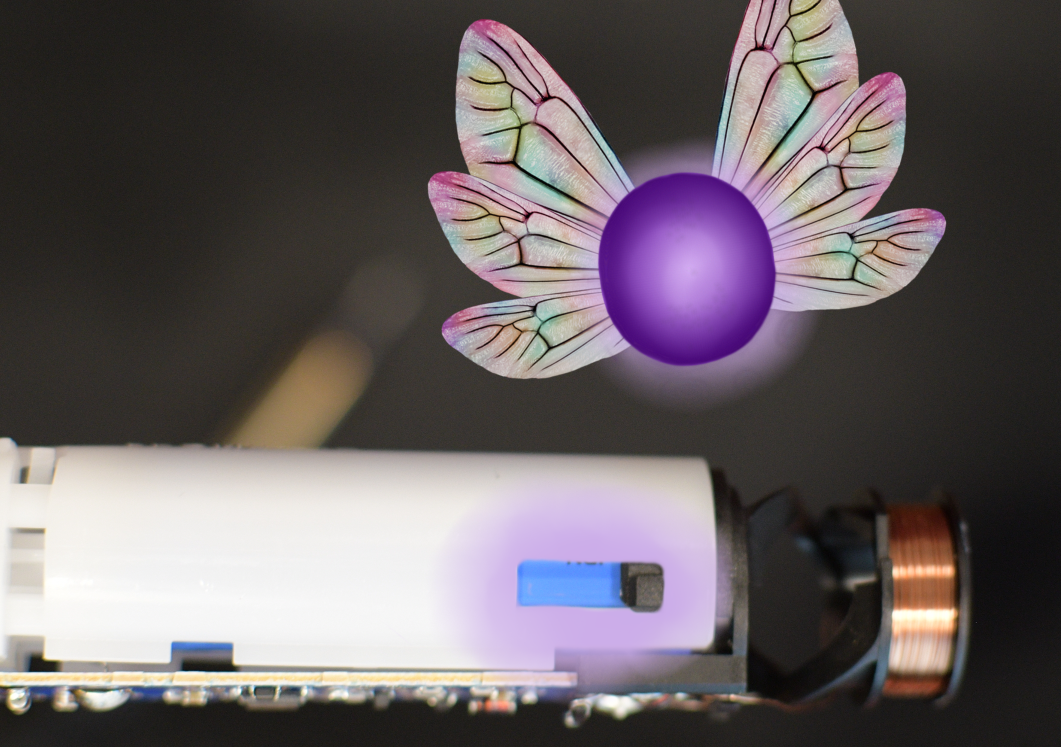
You will now begin to remove the housing attached to the circuitry. To begin, press the small black button on the side of the circuit housing.
Remove Circuit Housing P2
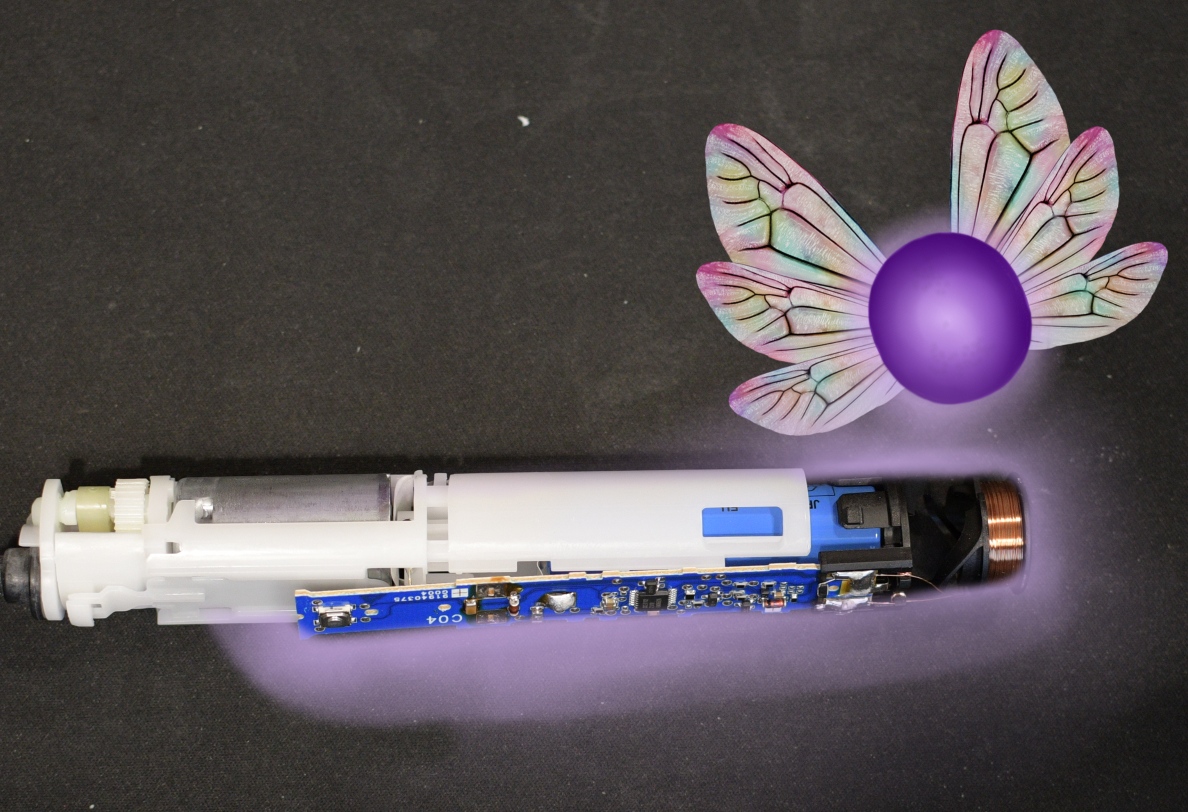
Press the button in an upward motion until you feel the circuit slide away from the circuit housing.
Remove Circuit Housing P3
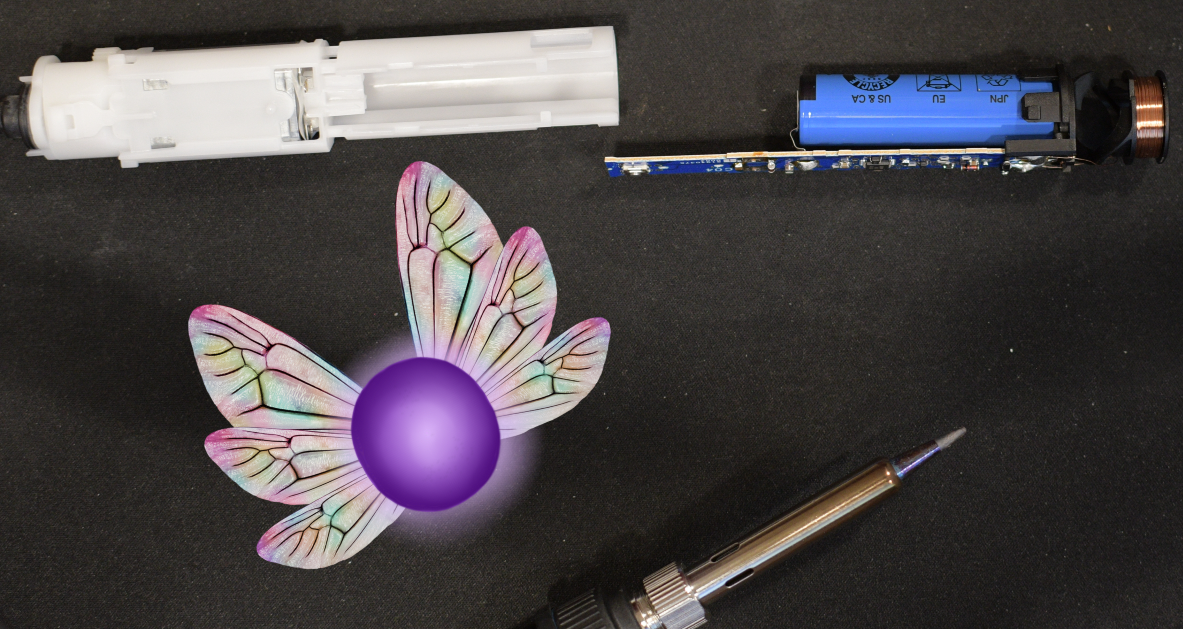
Once the circuit board and battery has been removed from the motor housing, set them aside as you will not need it for the next steps. Tina likes to keep all her unused parts close together, to make sure she keeps track of all her materials.
Gather Solder and Wiring
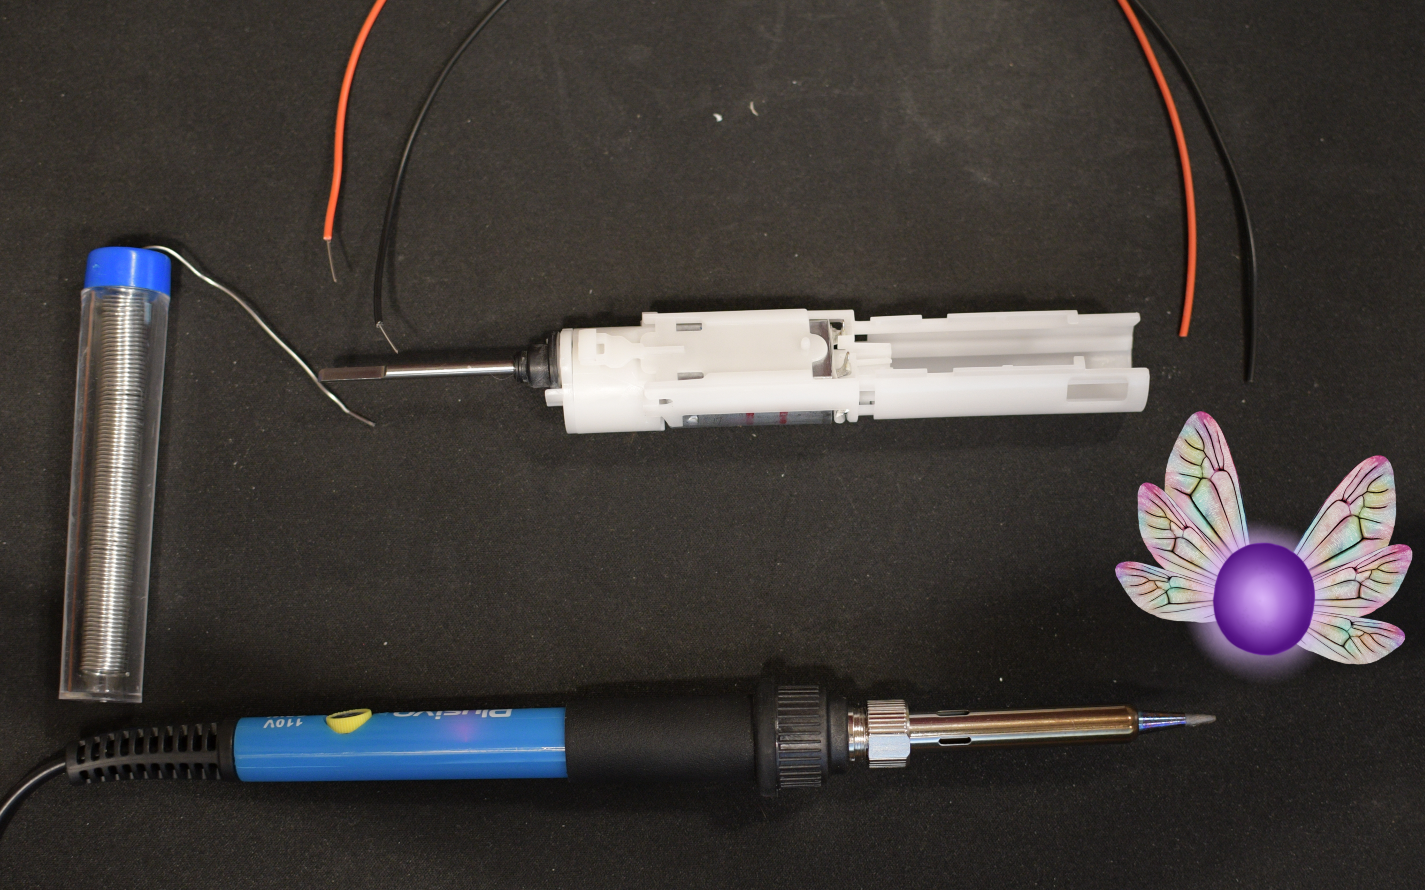
For the next step you will need the spool of solder from the kit, and 2 wires 12-16 inches long.
Soldering
After removing the housing from the circuit, solder on a red wire, positive, and black wire, negative, to the pads you originally desoldered from. The video above shows how this is done. Do not forget to thank Tina's helper for the soldering help!
Downloads
Place Wires in Housing
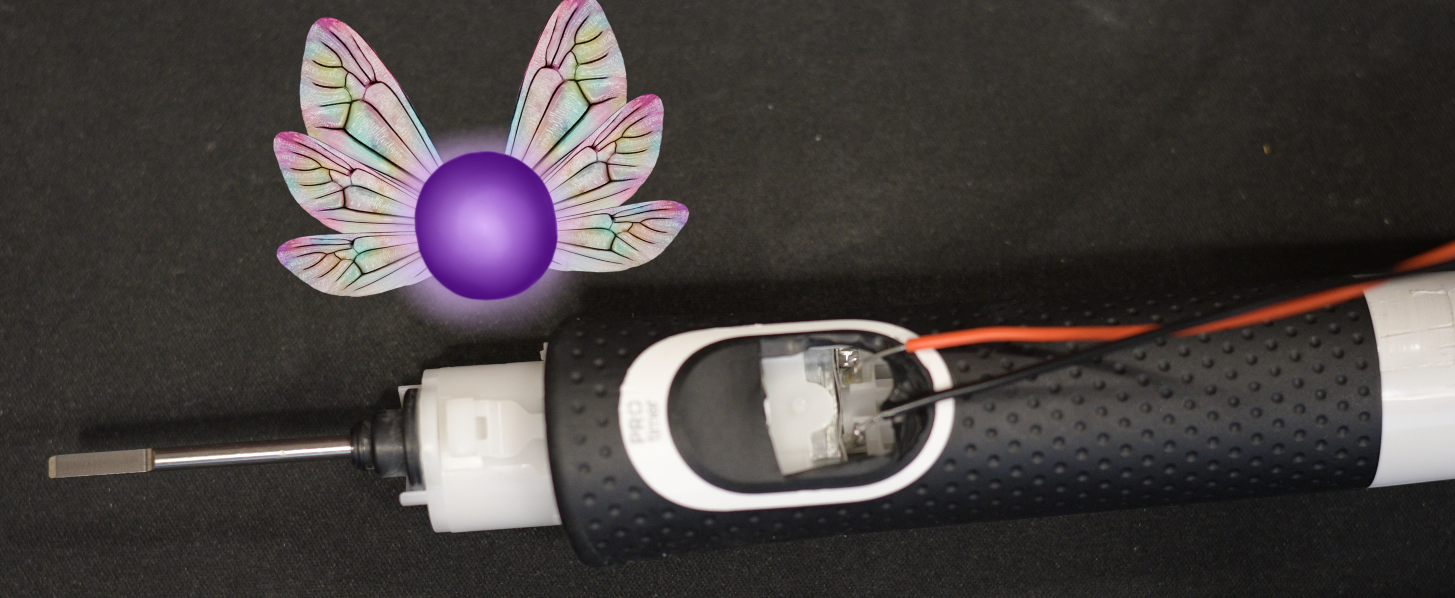
After the wires are soldered on, cut the power button on the toothbrush from the motor housing. Place the circuit housing and motor housing on, making sure the red and black wire come out of the hole created in the motor housing.
Download Code
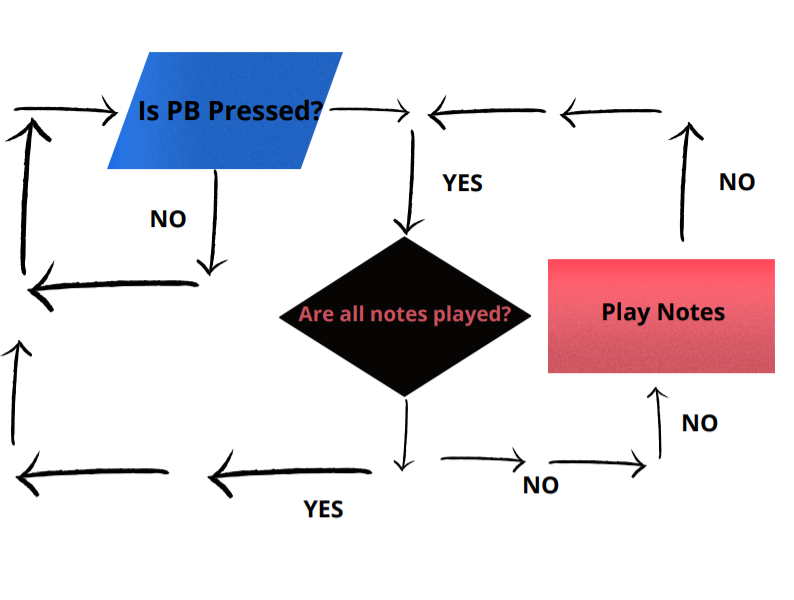
Connect the Arduino to a computer with the Arduino cable and download the code provided. Tina wrote the code and is happy to share it! (If you want an extra challenge, Tina encourages you to change the music notes for your own song)
Downloads
Code Analysis
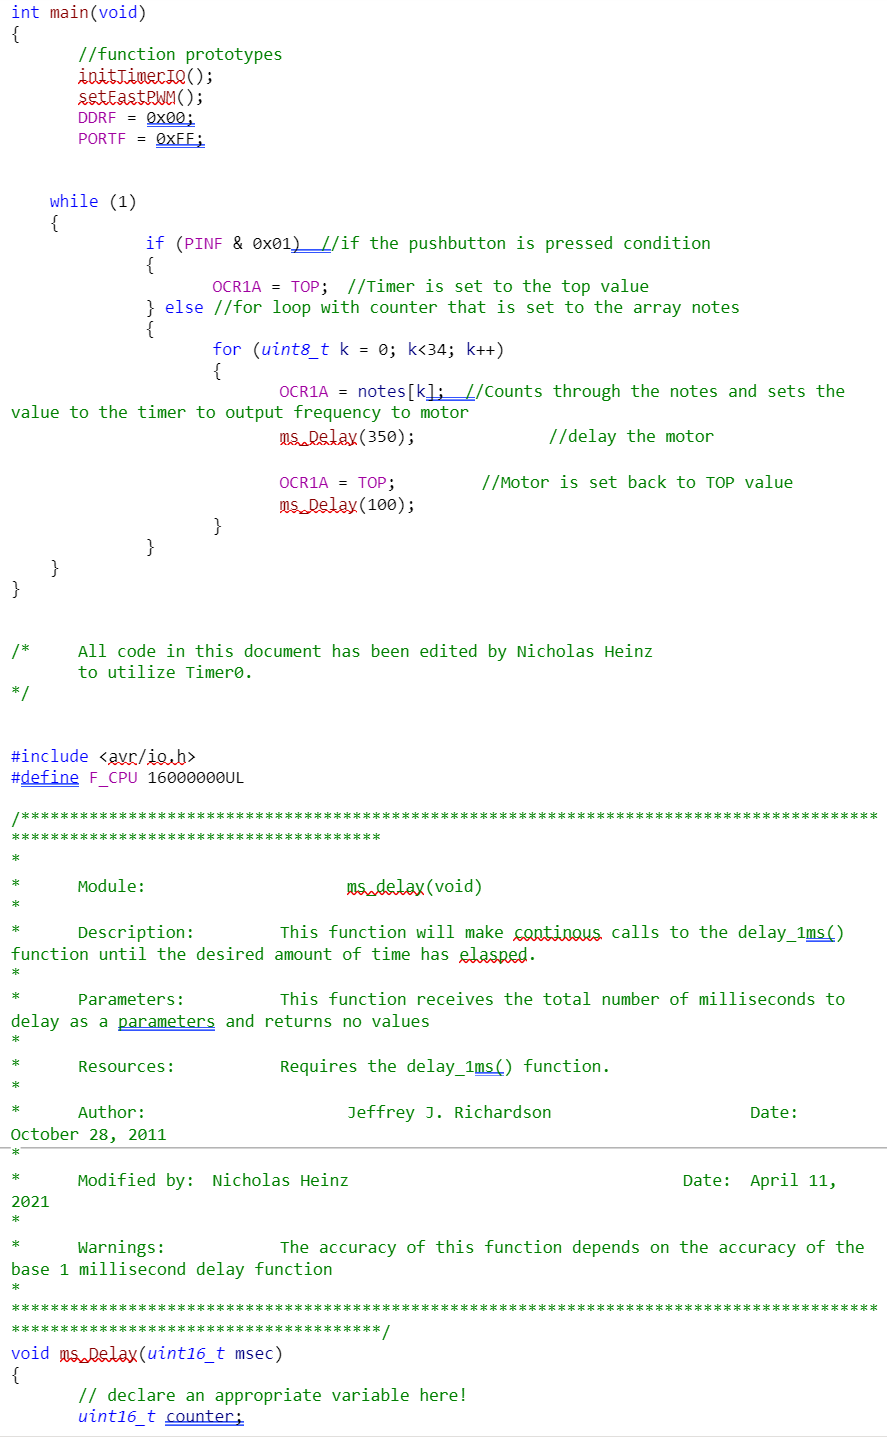
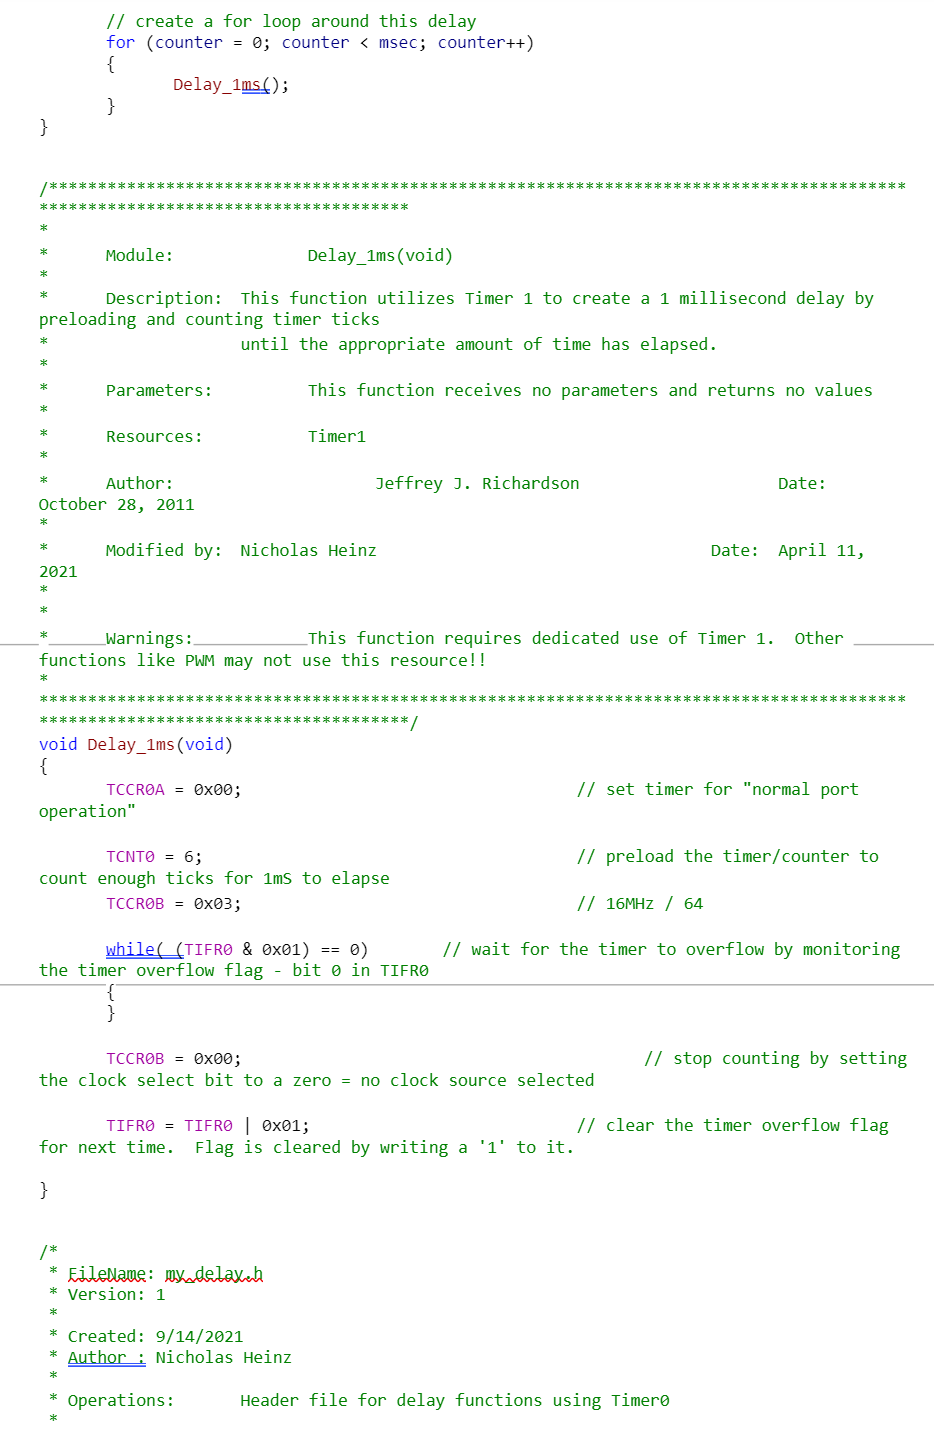
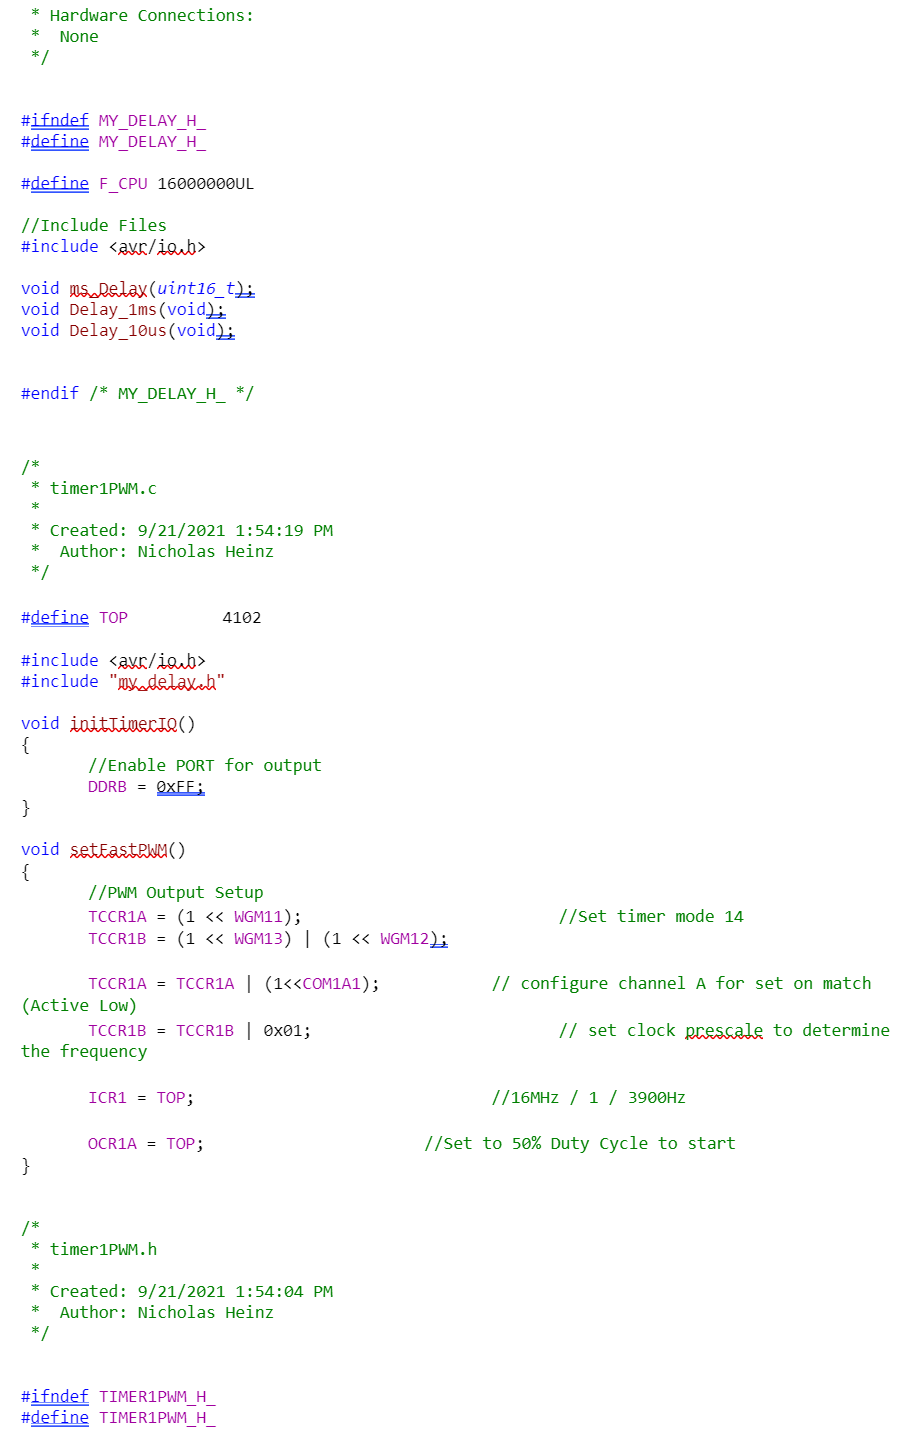
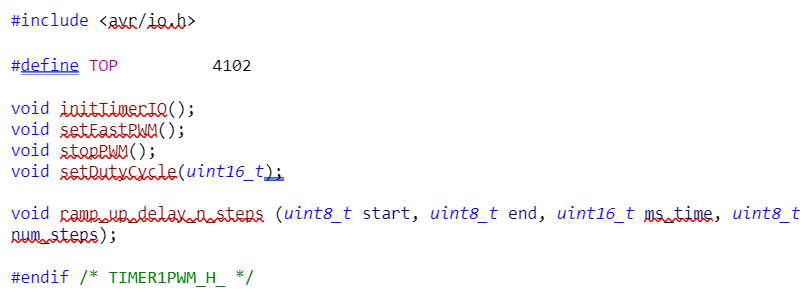
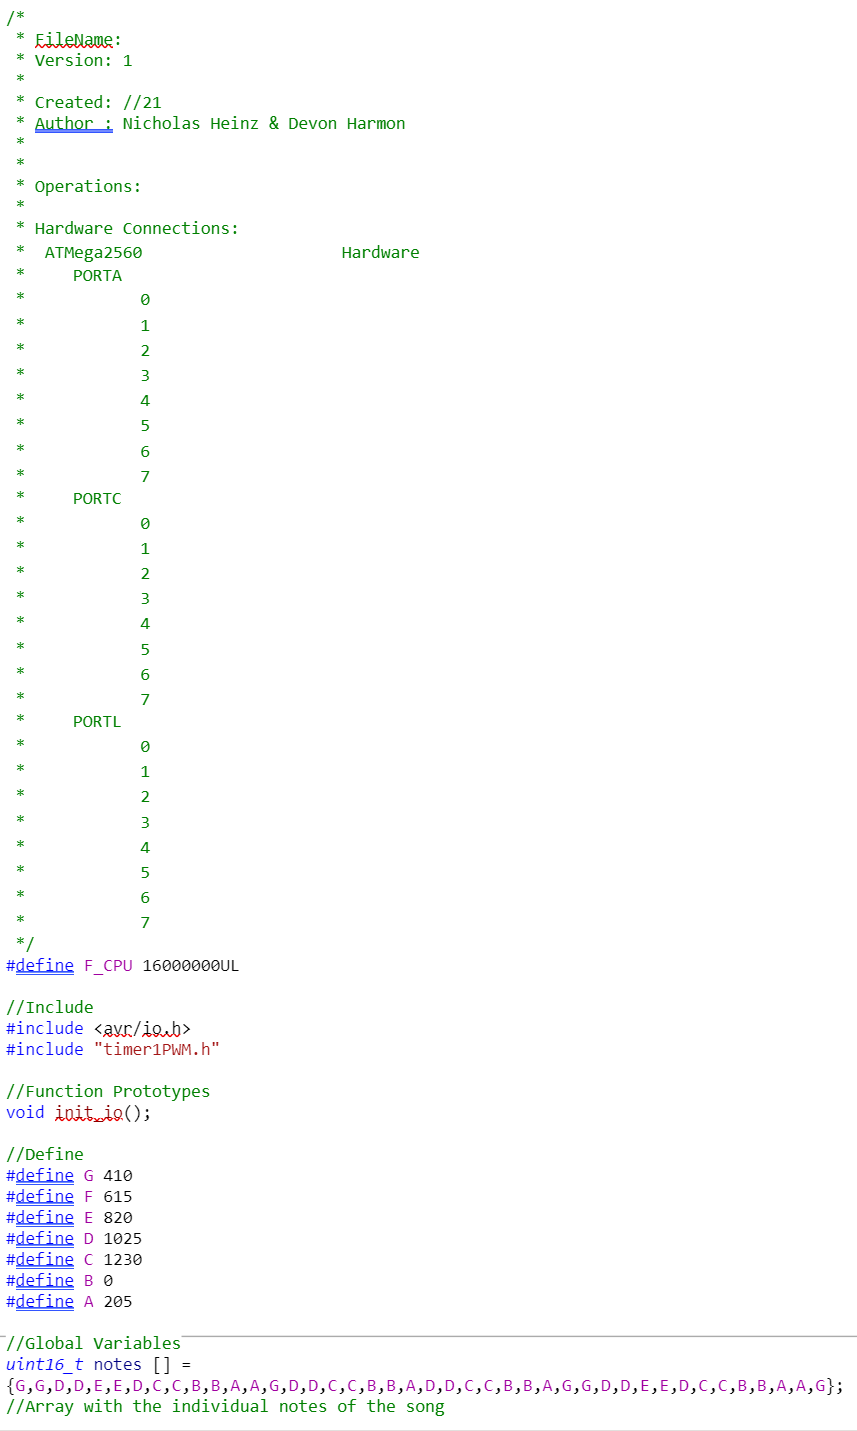
Tina wanted to provide an explination to the code and how it works while it downloads to your computer! Comments, which are in green, explain what lines perform what actions in the code.
Connect Toothbrush to Breadboard
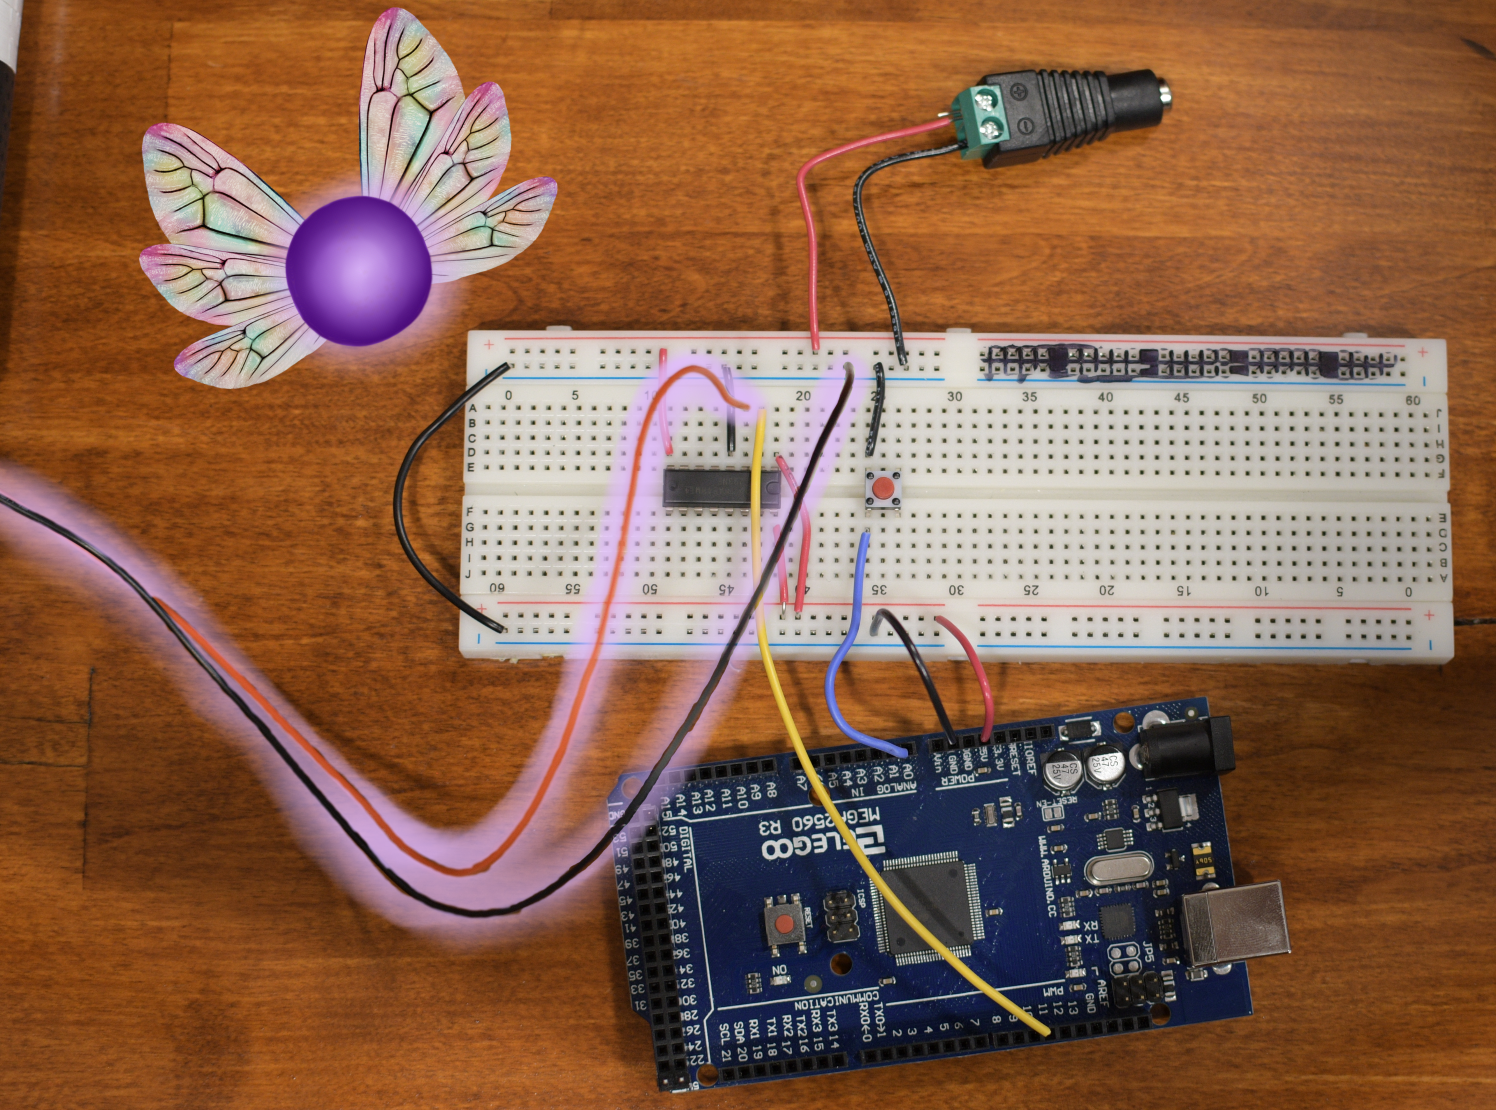
To make the connection between the toothbrush and the Arduino, connect the red wire to in between the black and yellow wire, and the black wire to the negative terminal of the breadboard.
Finishing the Toothbrush
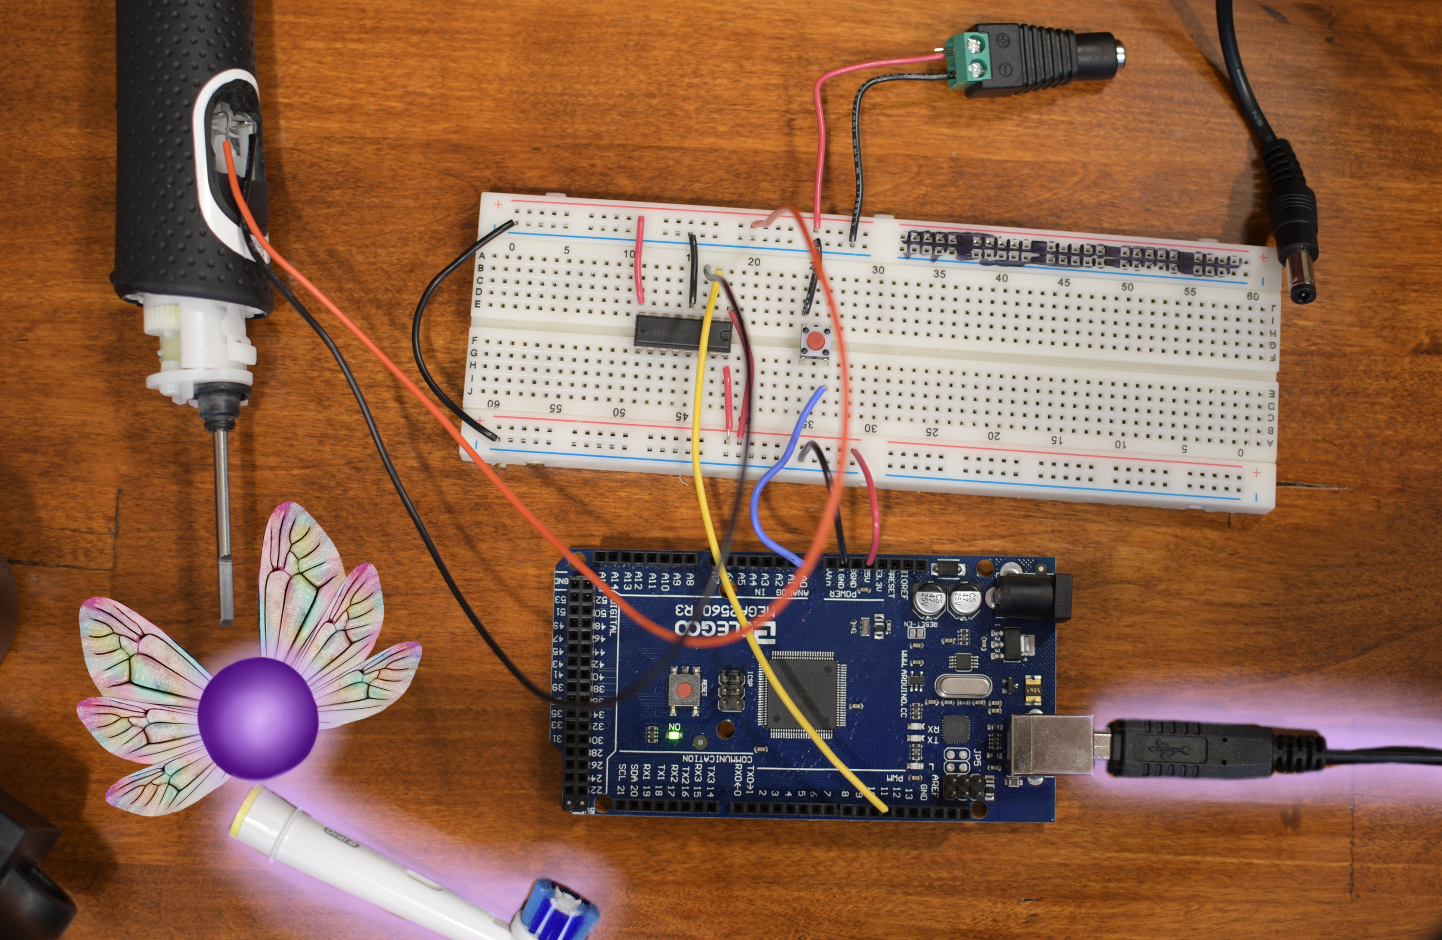
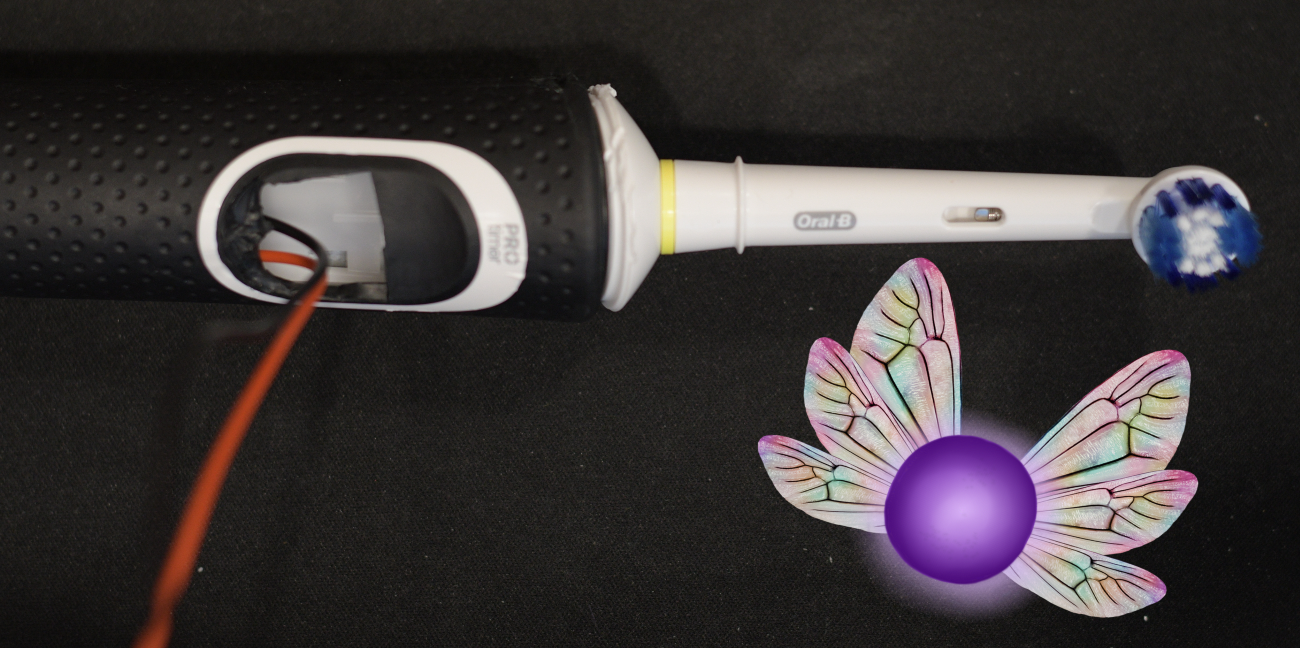
The top cap can then be put back on, followed by the toothbrush head. Make sure the Arduino is plugged into the computer before running the toothbrush. Once the toothbrush head and cap are connected to the toothbrush, connect the 5V power supply to the power supply connector and then press the push button on the breadboard to enable the power.
Congratulations!
If you followed all the steps, your toothbrush should sing in joy! Tina congratulates you on making tooth brushing even more fun than it already is. Now go and impress your friends with your homemade musical dental tool! As a reminder do not put this in your mouth or near water for your safety. Tina likes healthy teeth from her living friends!