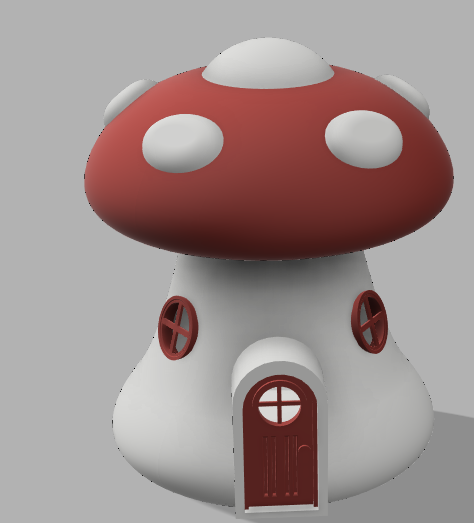
Mushroom Lantern House
by gartmakesthings in Workshop > 3D Printing
1384 Views, 25 Favorites, 0 Comments
Mushroom Lantern House
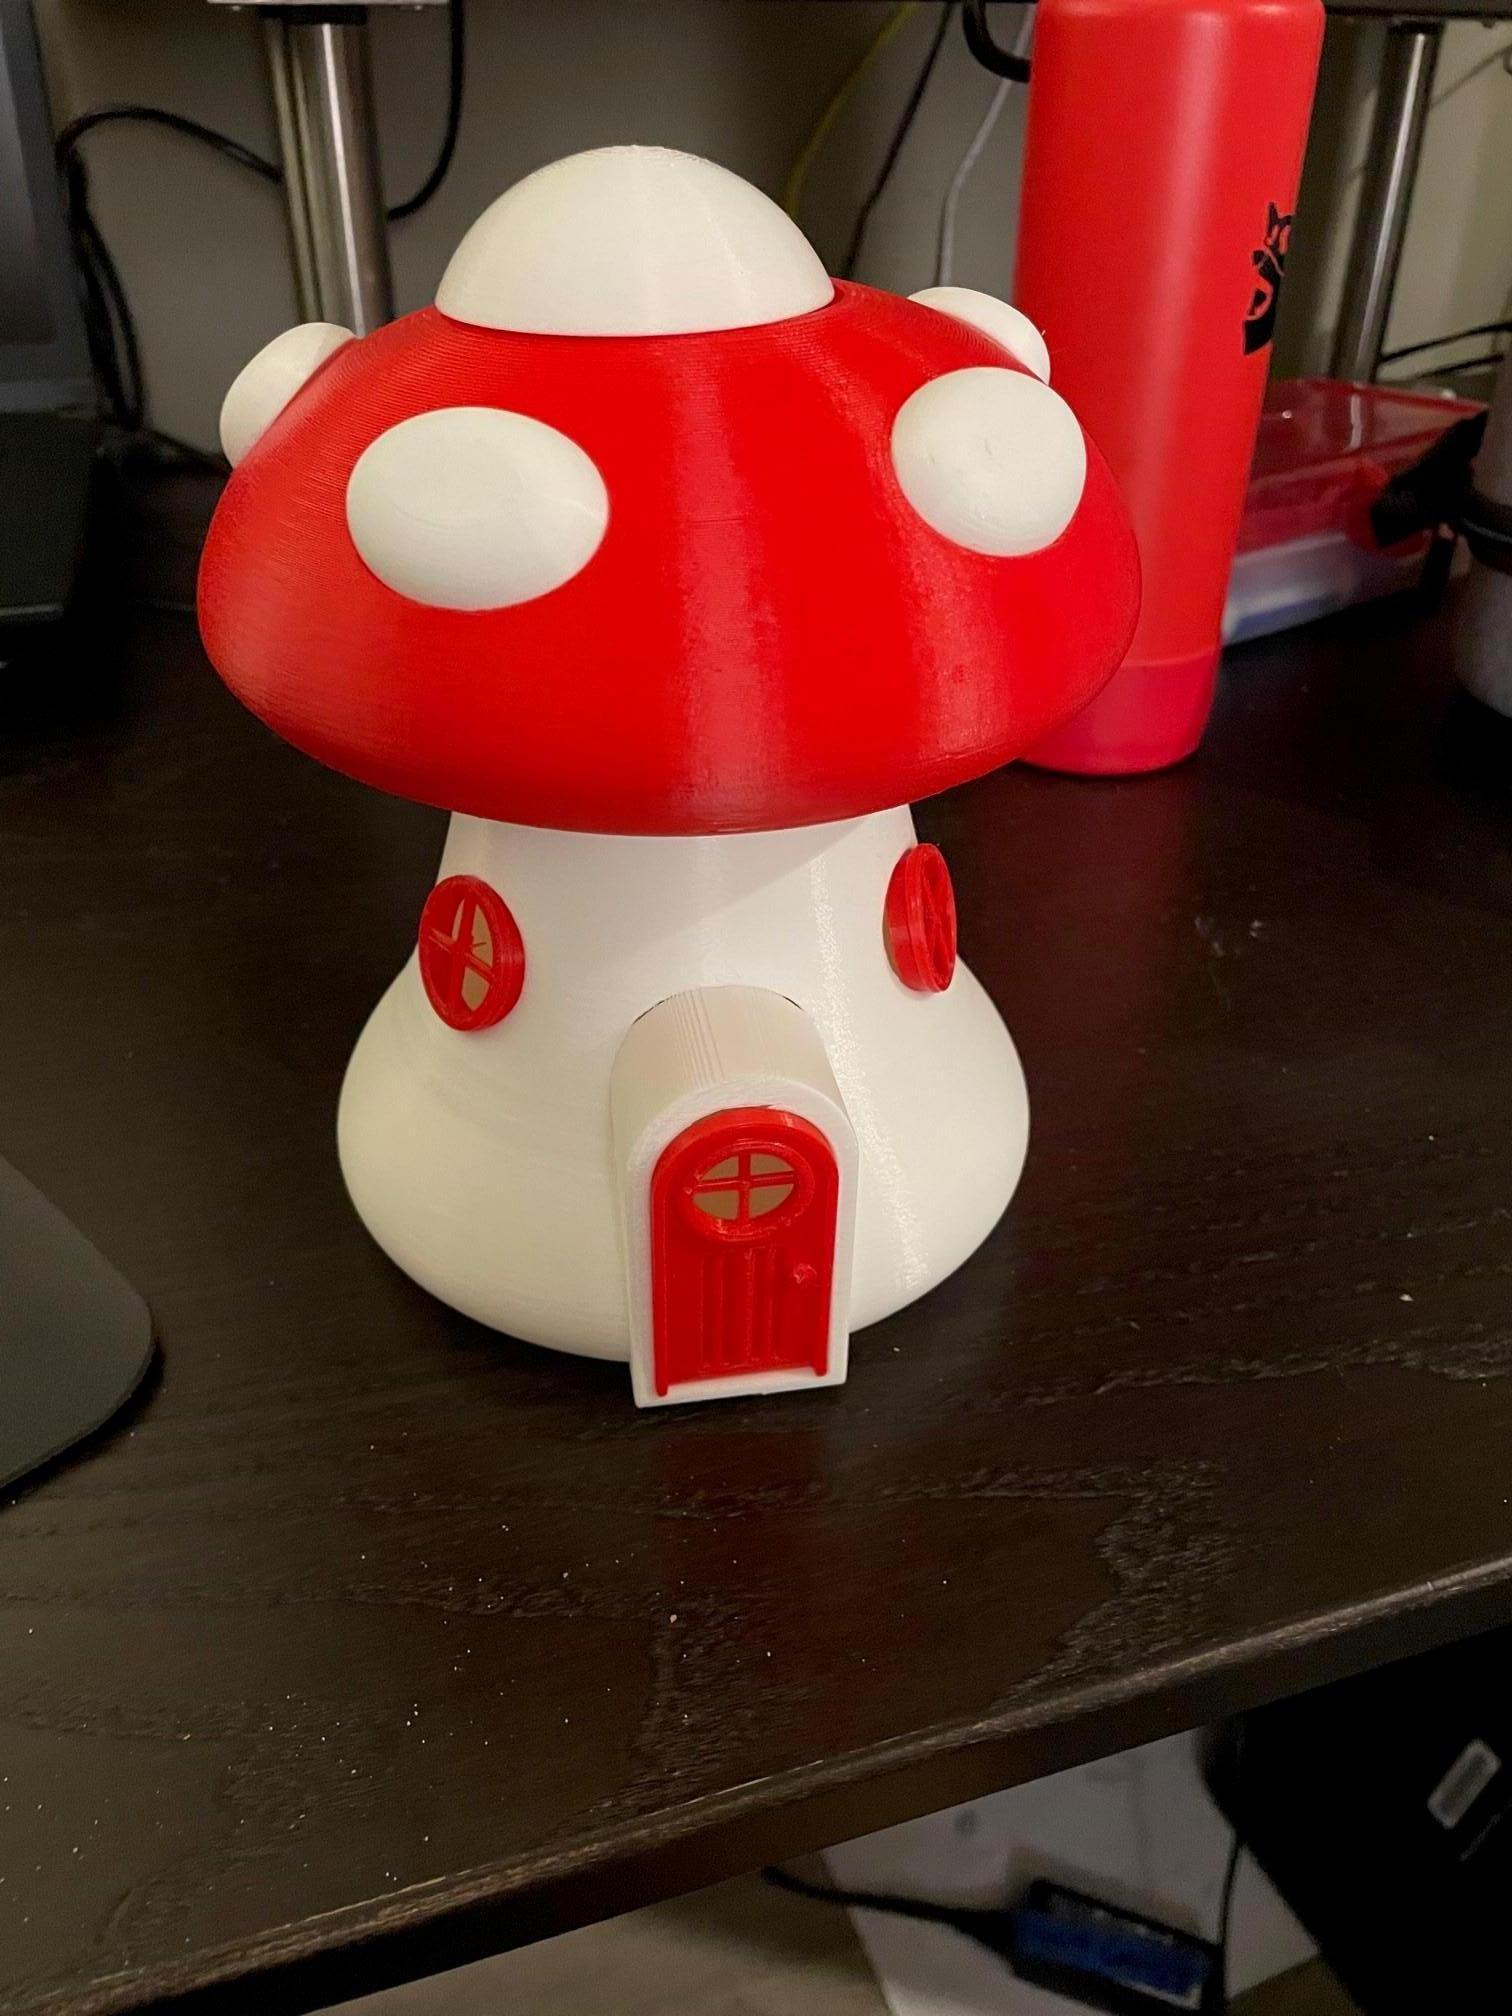
Welcome to my Instructable, where I show you how to make a 3d printed mushroom lantern house. My name is Garret, and I am an attendee at Eastlake High School. I will go through the steps I took to make this little mushroom house, so that you can make one for yourself too! I hope you enjoy my Instructable as much as I did making it :)
Supplies
--------------------
Supplies Used in printing/ assembly:
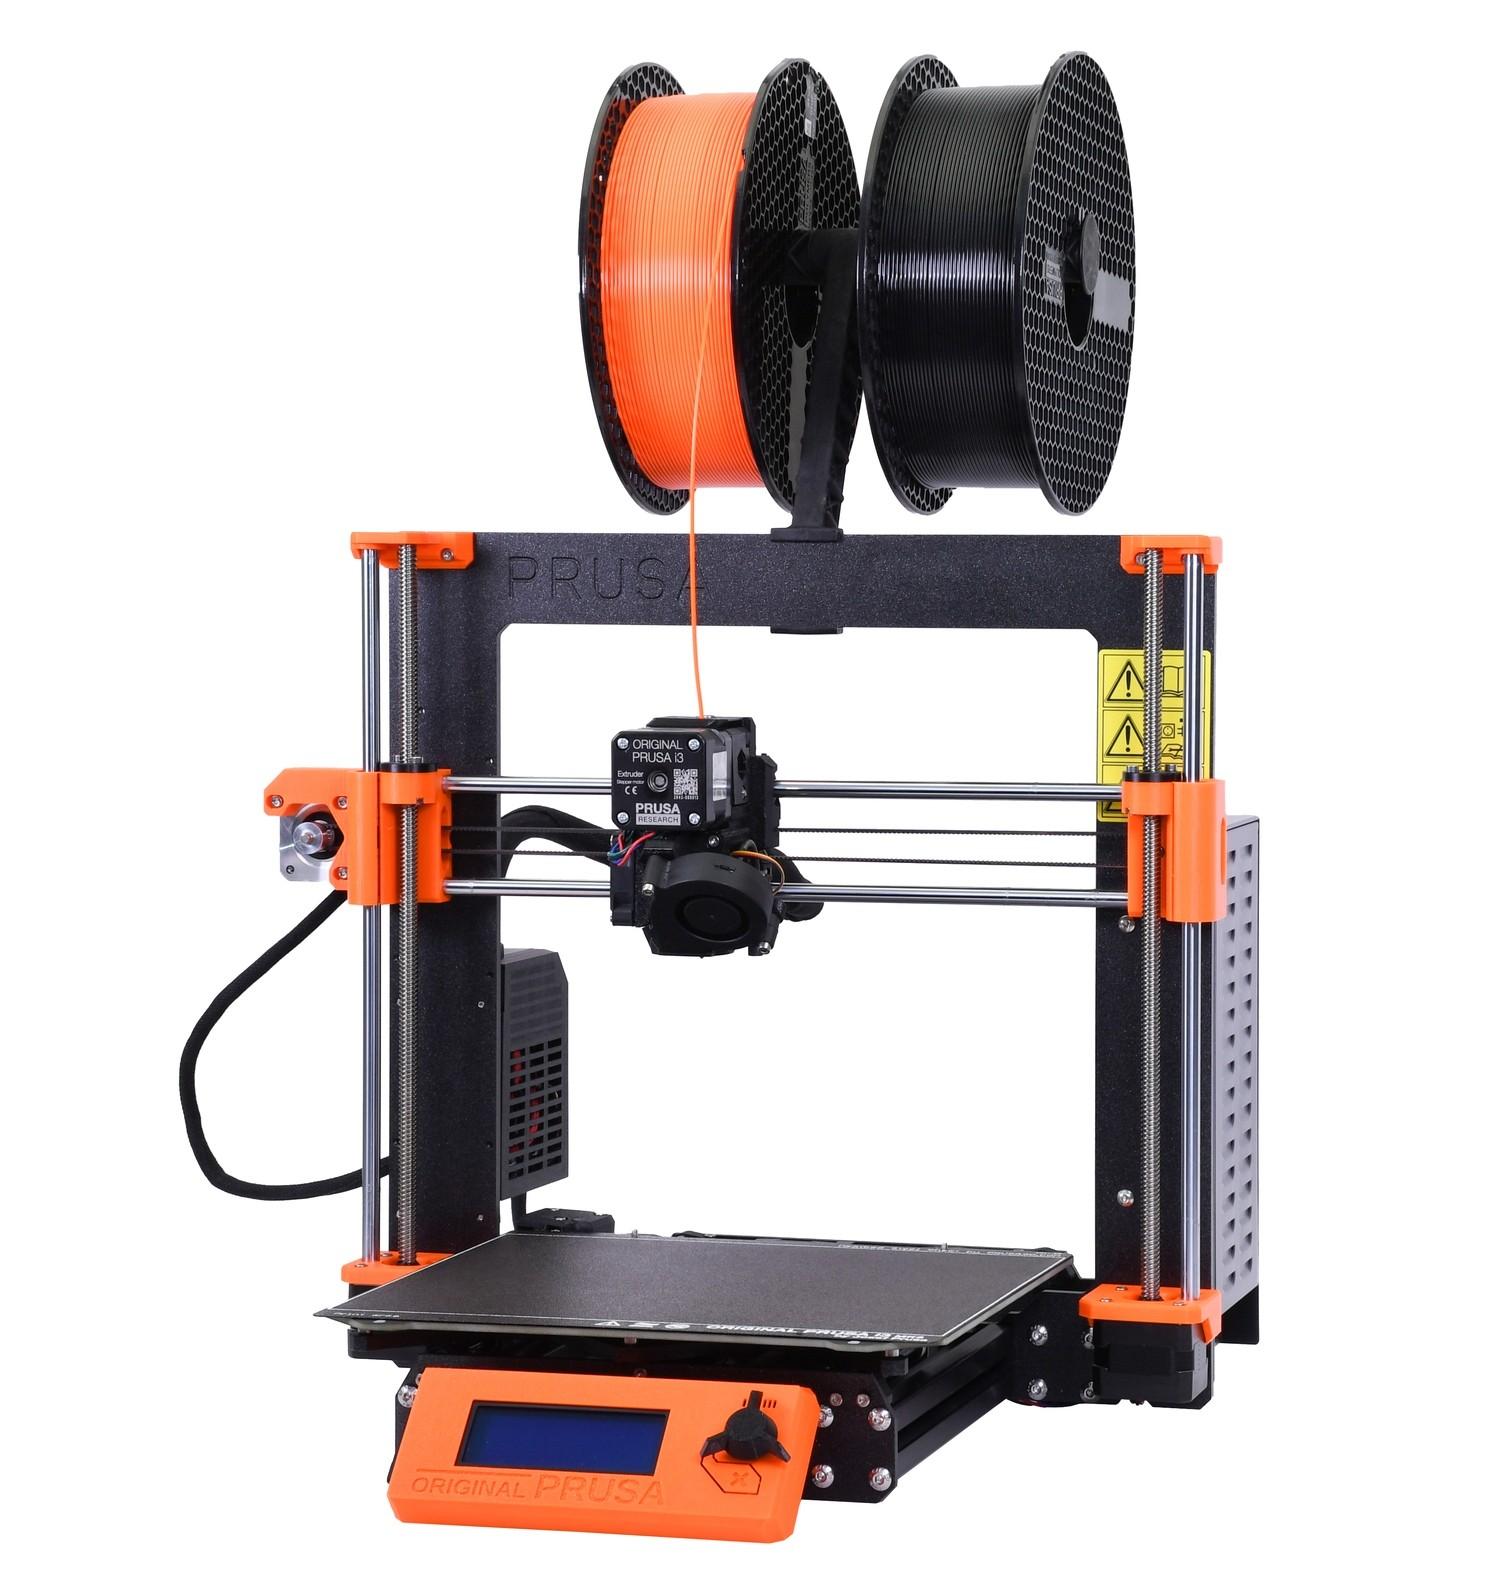
-A 3d Printer. I used a Prusa I3 Mk3s+, but any other FDM printer should work. The largest piece in the STLS included is 6.5x6.5inches at the base, and just under 4.5 inches tall.
-2 (or more) colors of filament. I personally chose red and white to resemble a fly agaric mushroom. I bought rolls of Polymaker PLA off of amazon for around $22 each.
-Gorilla Glue or similar alternative: For gluing in the white spots to the top of the mushroom roof.
-Sandpaper: Always helpful to help fit pieces into holes
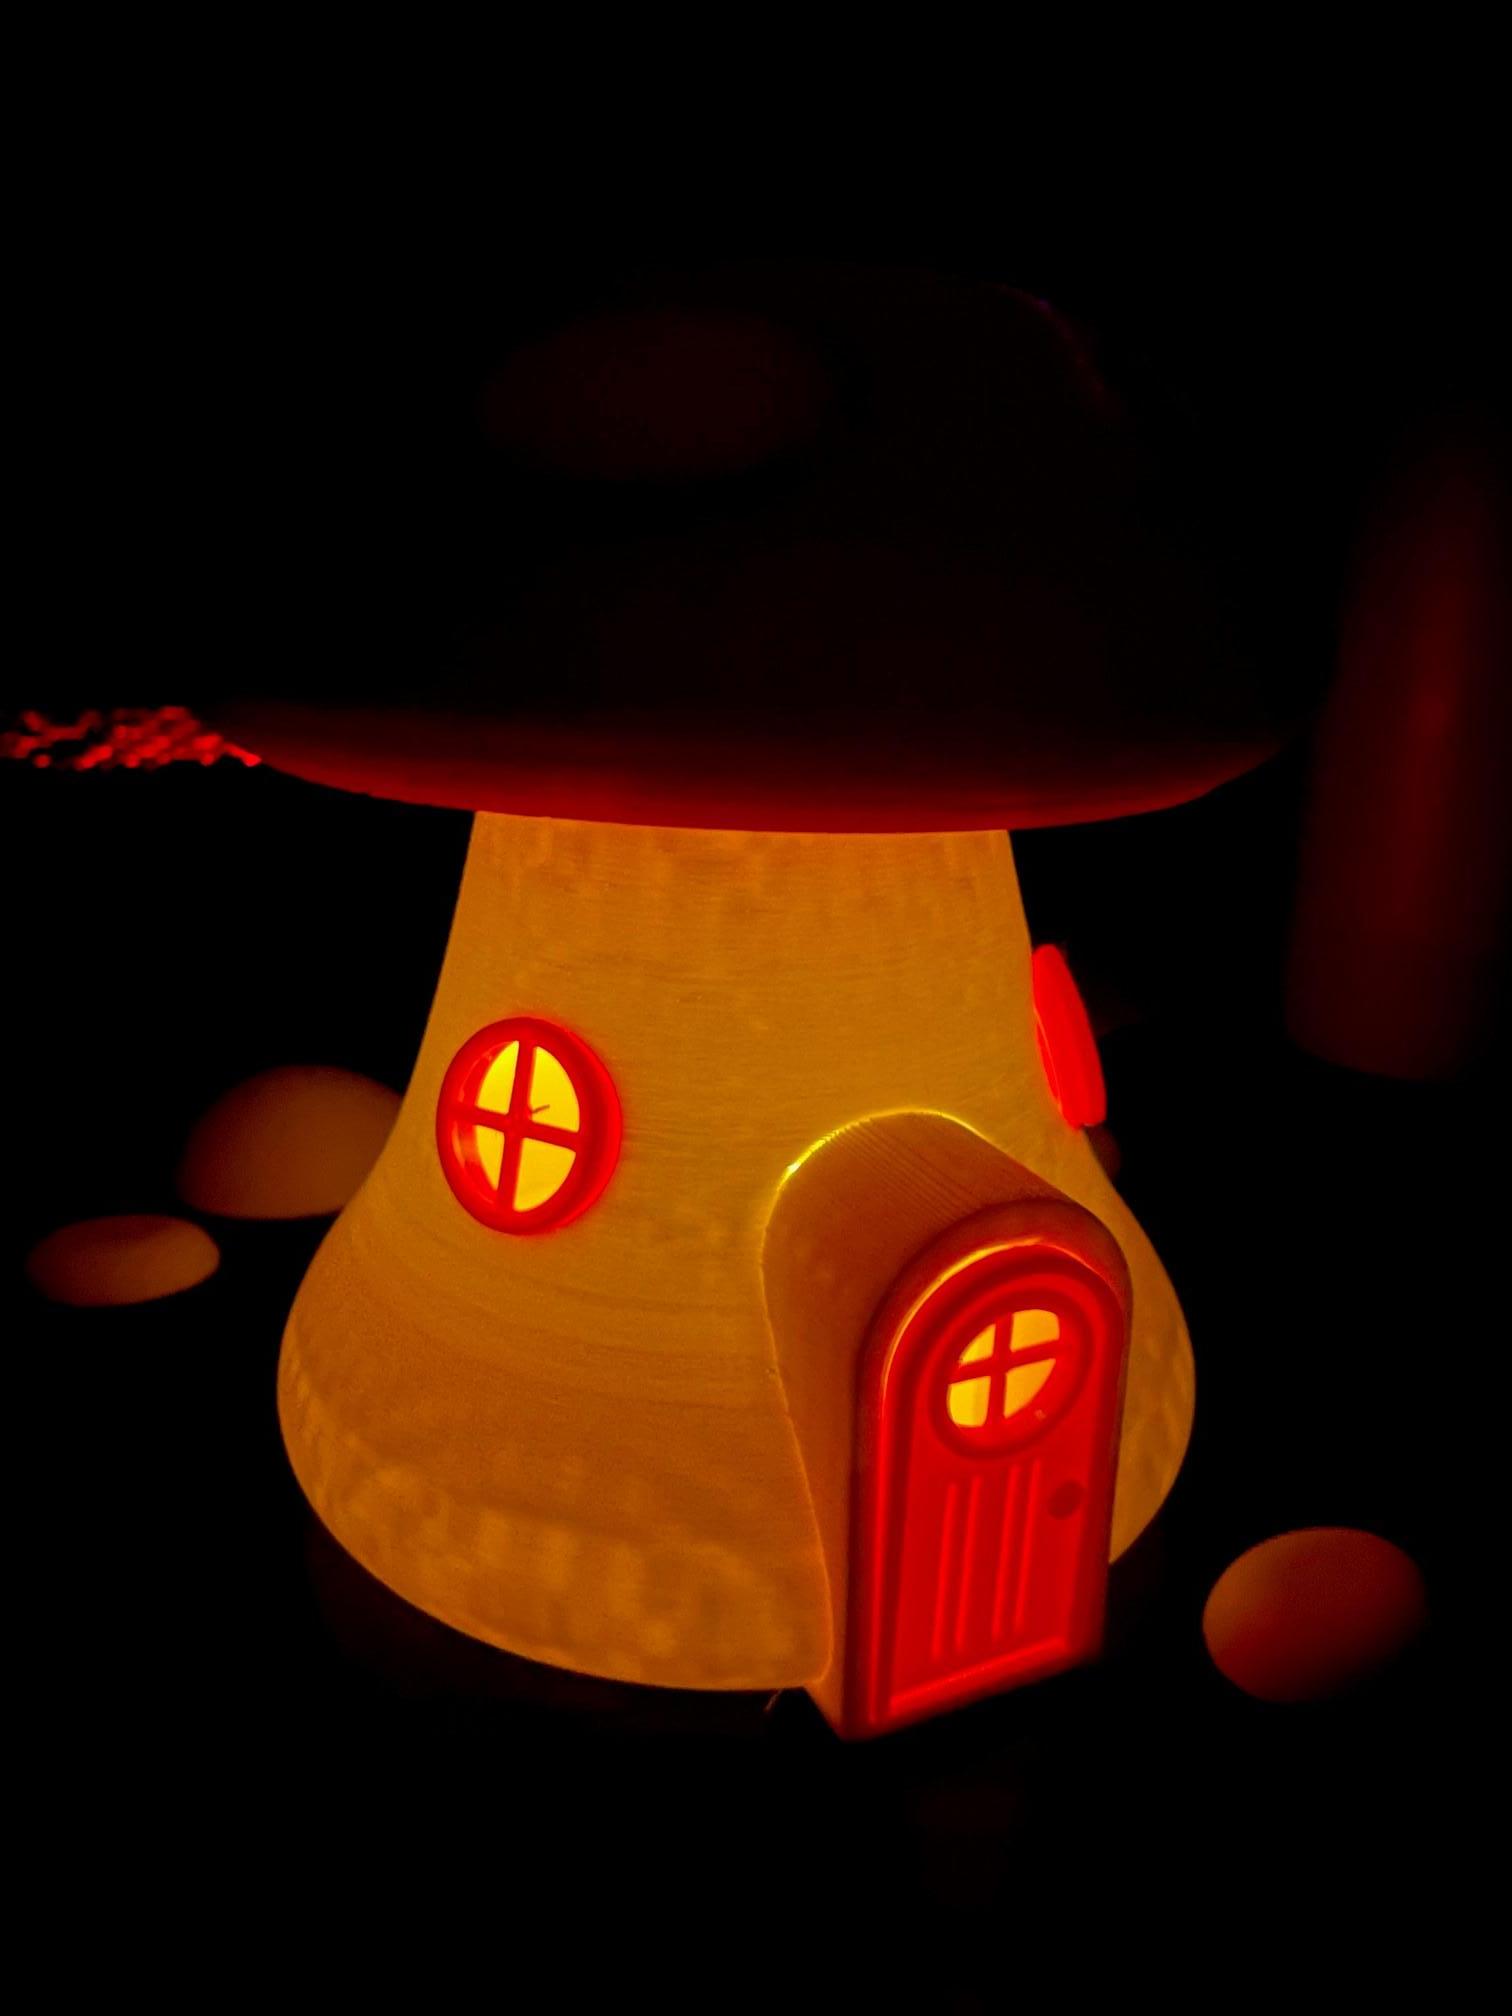
-small tea light (battery operated)
----------------------
Supplies used for Designing
-Computer with Fusion 360
-Slicing software: I used PrusaSlicer, but other slicers should work to get the STL to gcode.
Generate Concepts
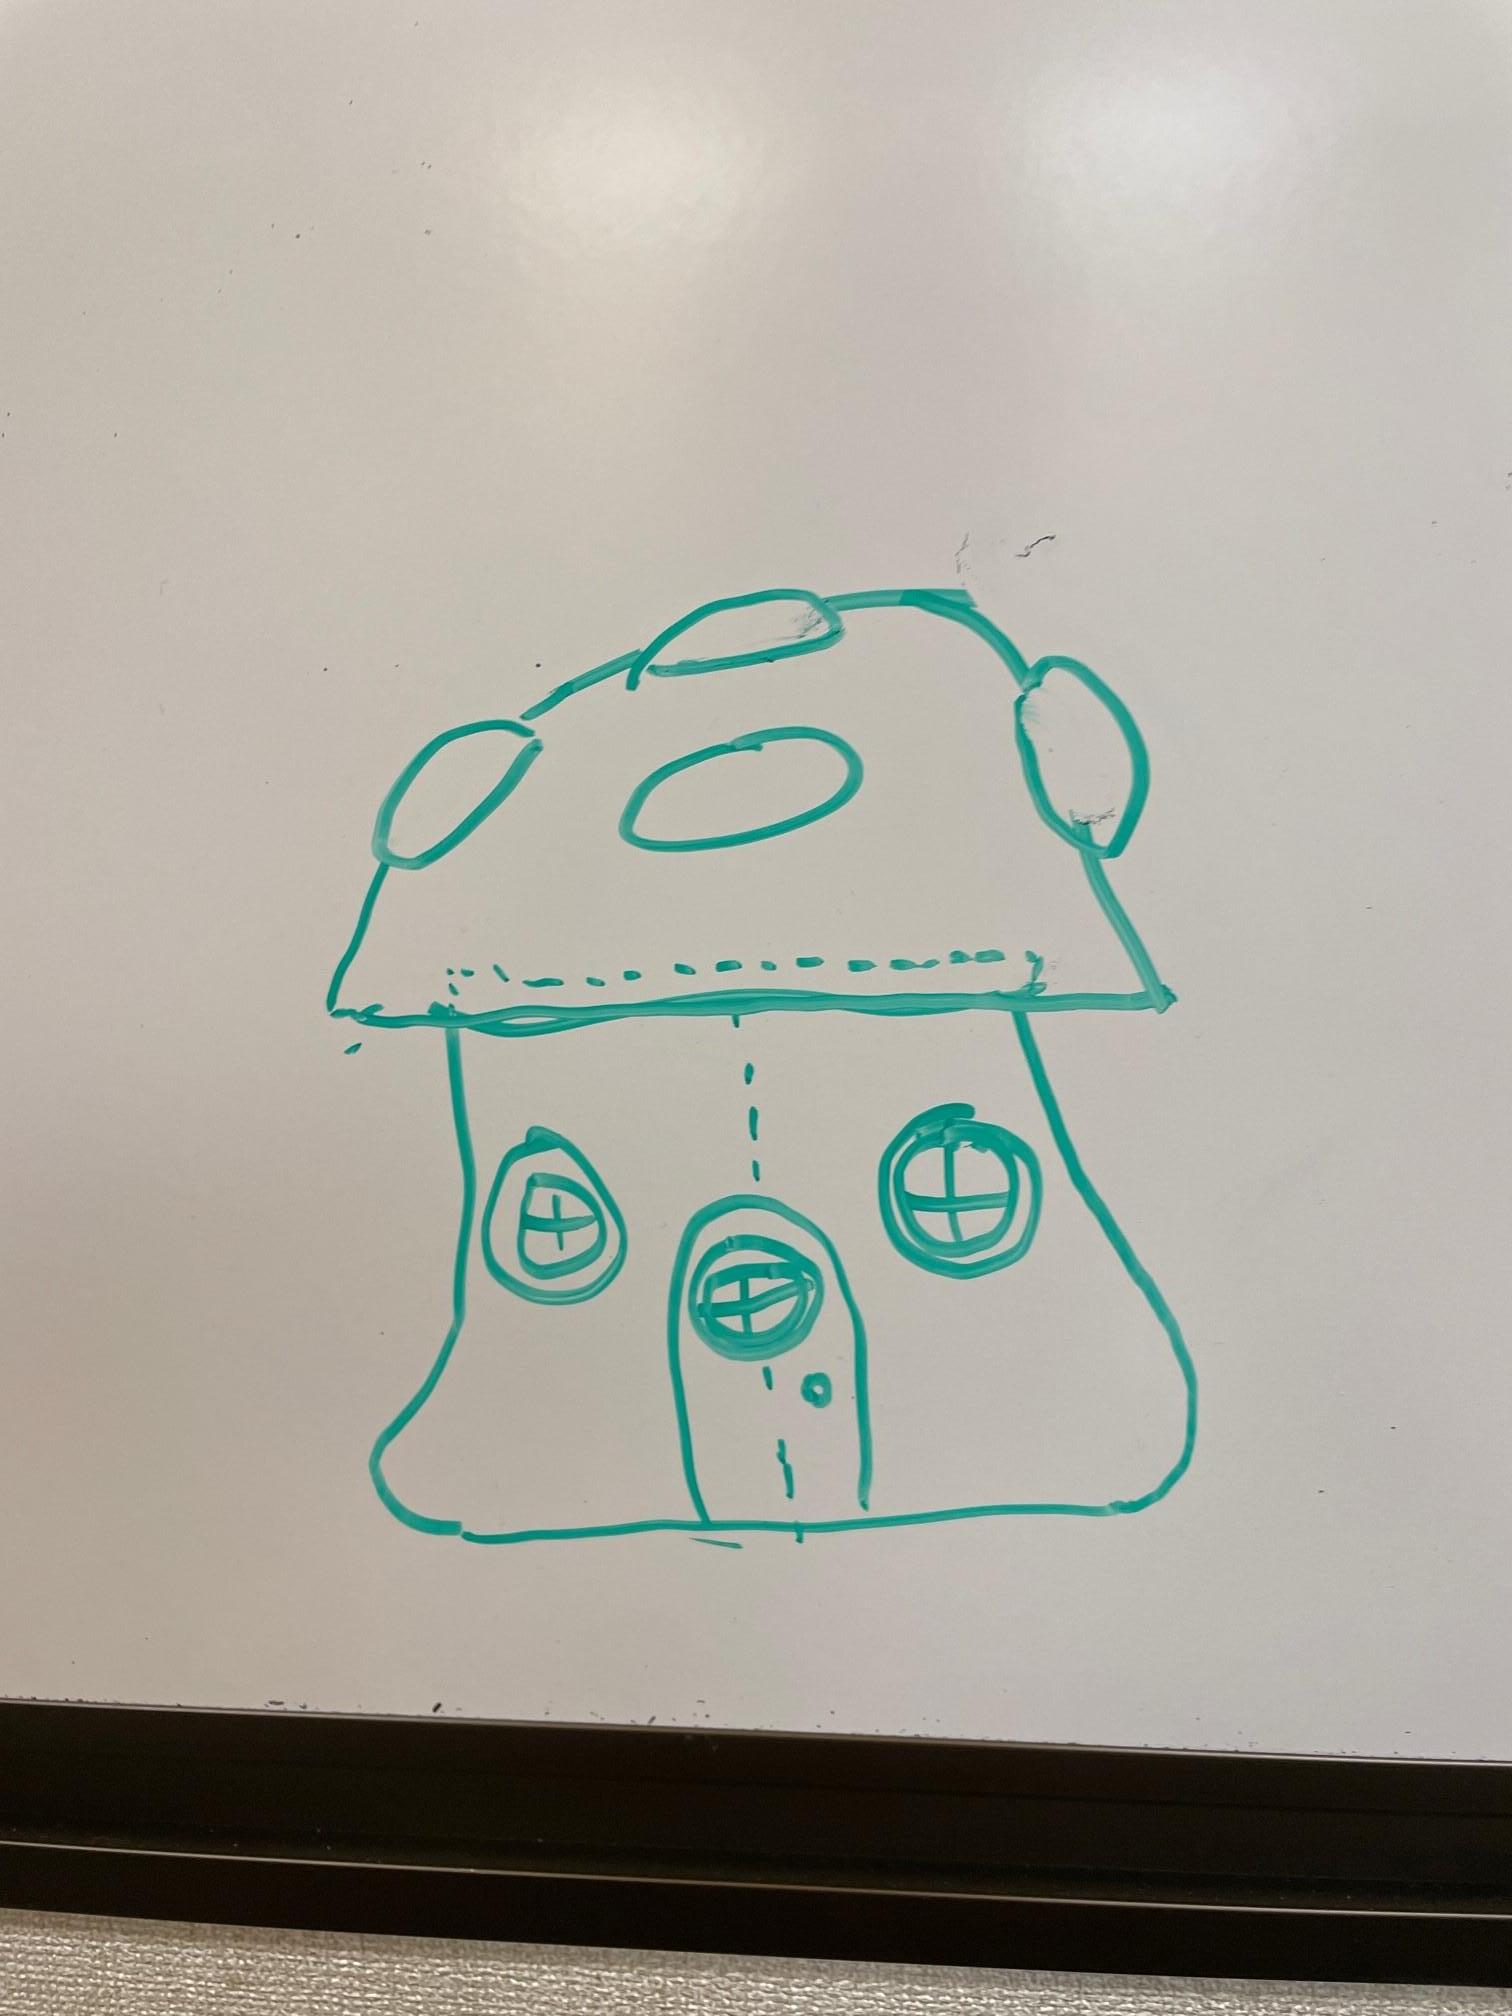
I started out searching the web for fantasy mushroom houses and found a common theme of small cottages with circle windows, and overall a squatty look. So I made a rough sketch of what it could look like, and where the center vertical line would be, which would be very important for designing in CAD later.
Know What Parts You Need
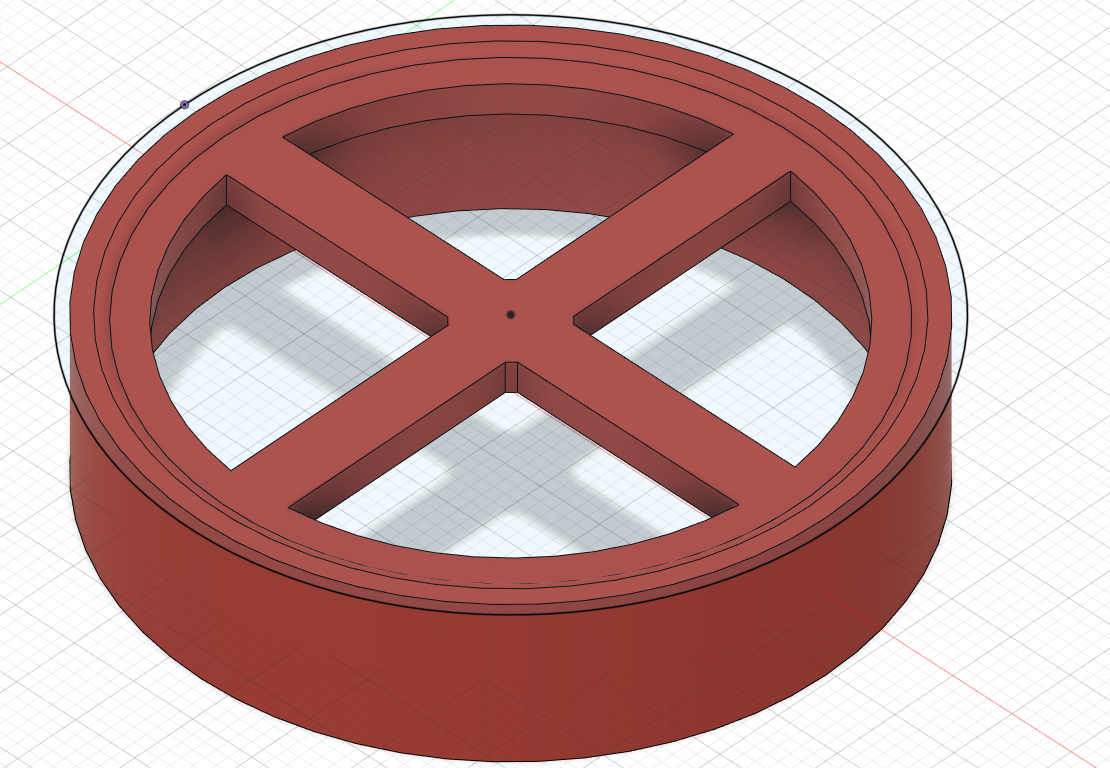
I wanted to keep the design as simple as possible for myself, so the final product will be assembled as various parts, and not one giant print. So I separated the parts I would need to design into 2 color groups
---
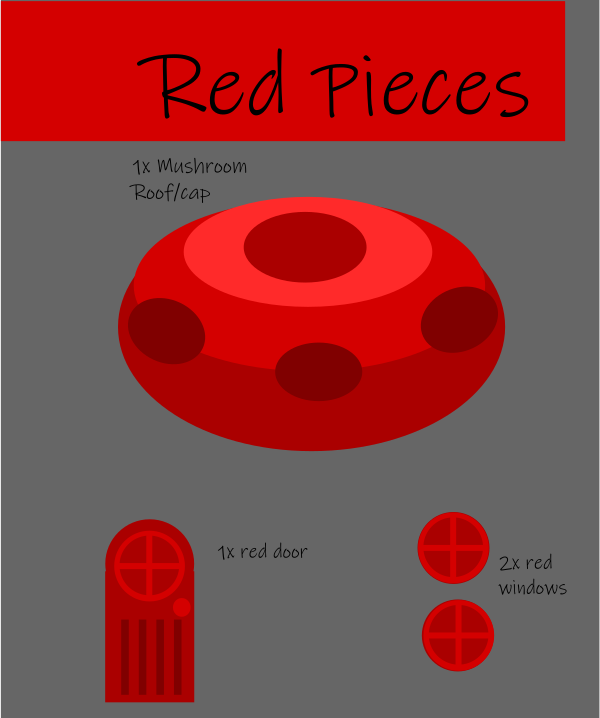
Red:
-Large red roof/cap of the mushroom
-2x windows
-1x Door
---
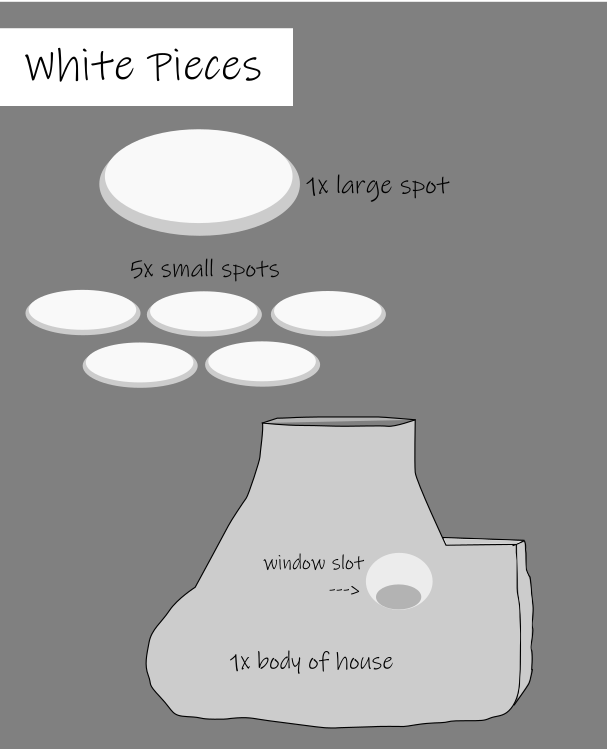
White:
-The main stem/base of the mushroom
-5x small white spots to put on the roof
-1x large white center spot to put on the roof
---
I wanted to keep my design simple, yet elegant. If you wanted to add more details, such as a third window, or even a second room in the house, go for it! This Instructable just covers the basic mushroom house I made.
Once you know what pieces you need to make, and what color each piece needs to be, it is now time to delve into the CAD.
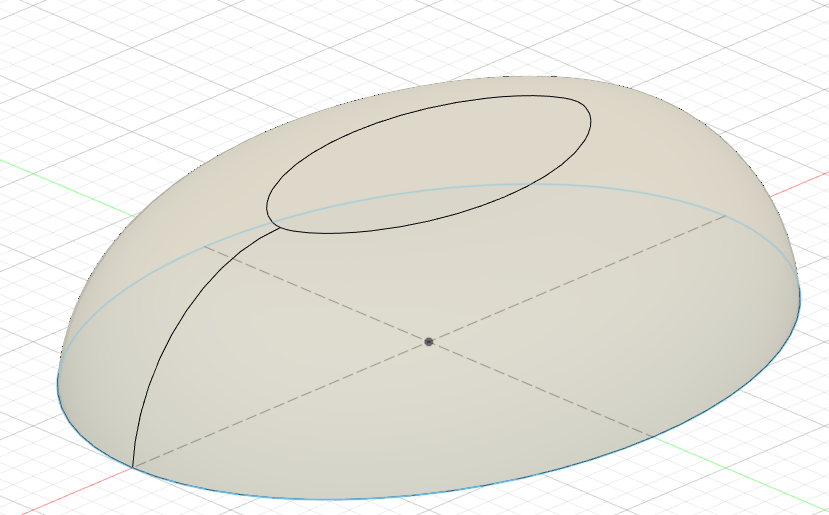
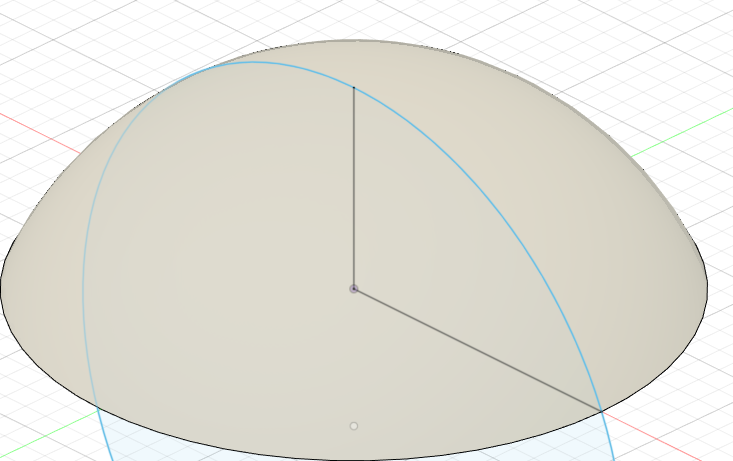
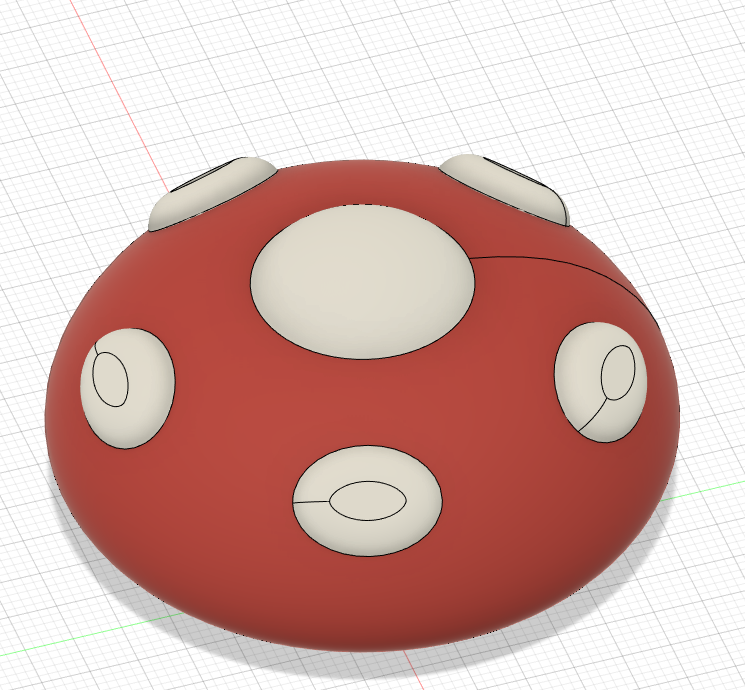
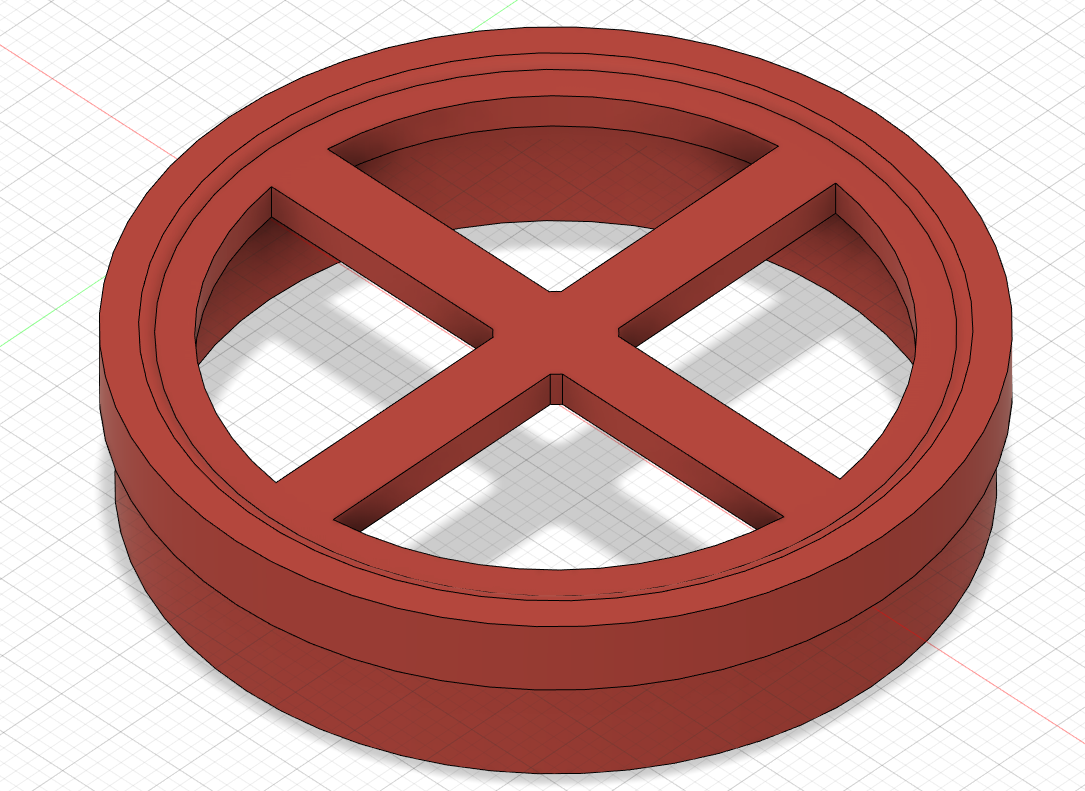
CAD:Mushroom Roof Base

The first part we are going to start with is the mushroom roof, including the main red roof, and the little dots on top.
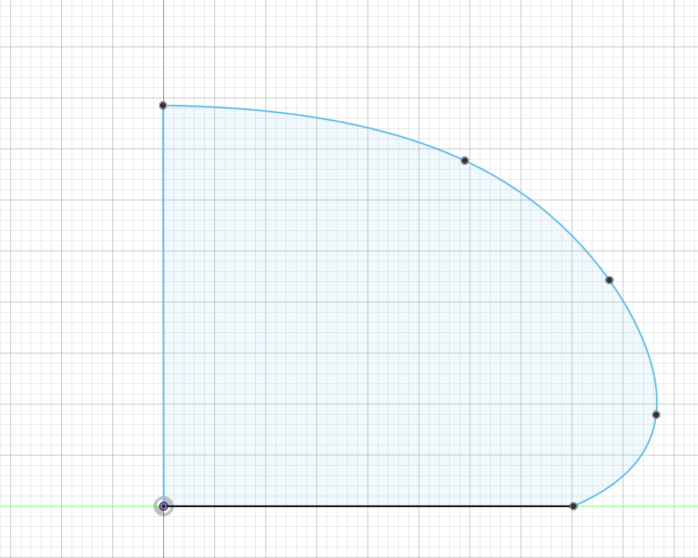
Start by sketching half of what you want the side view of the top to look like. This is important because we will be revolving this piece 360 degrees around the vertical axis.
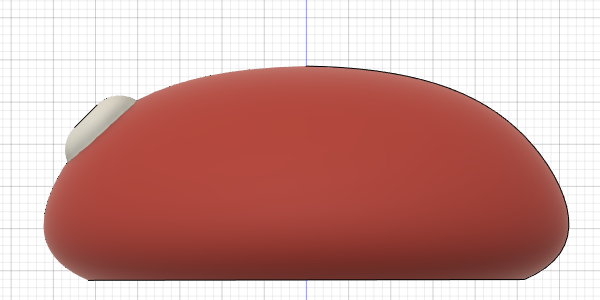
Then, using the Revolve tool, revolve the sketch 360 degrees so the roof is formed. I changed the material of mine to keep it distinct on what color I will print it in.
We now should have the base to our roof, but holes need to be made for the spots to fit in. My personal favorite way is to create the shape, and subtract it from the main body. So we will come back to this file later.
Getting Spotty in Here

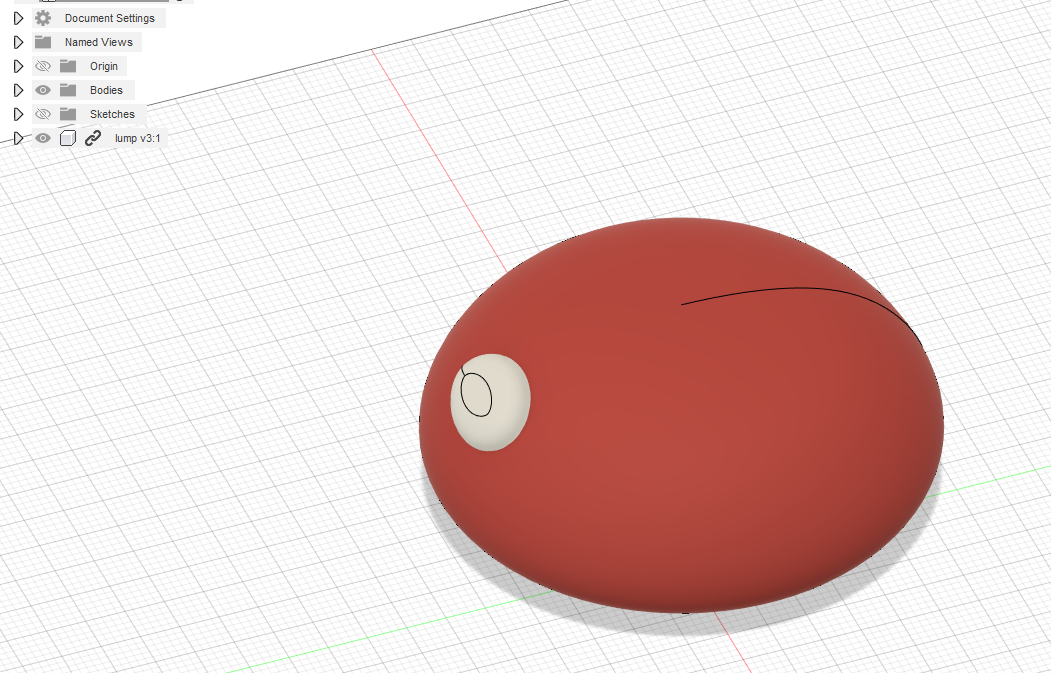
Start with an ellipse sketch, extrude to roughly 1/4 the length of the long side, and then use the fillet tool to make it curve nicely. This will be the size of the small spots.
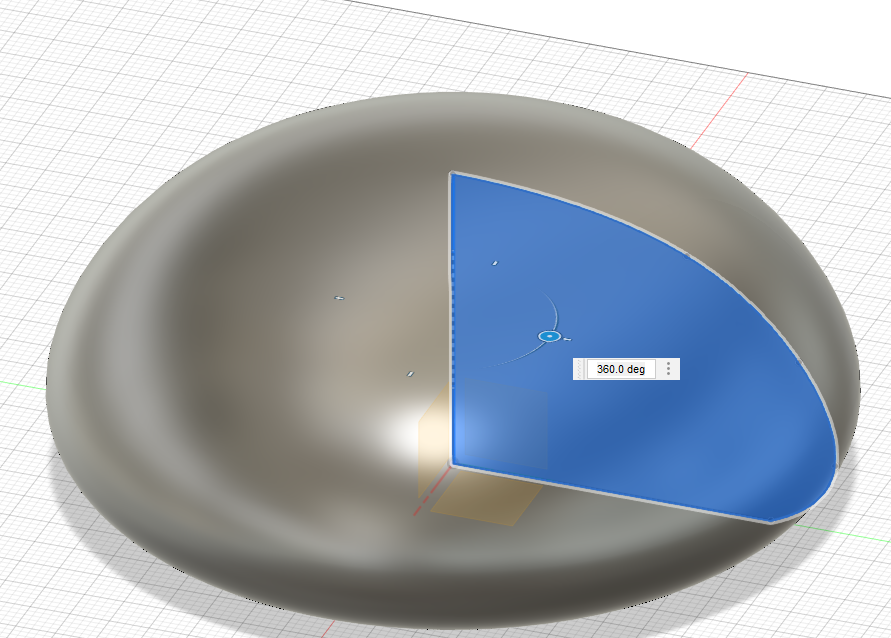
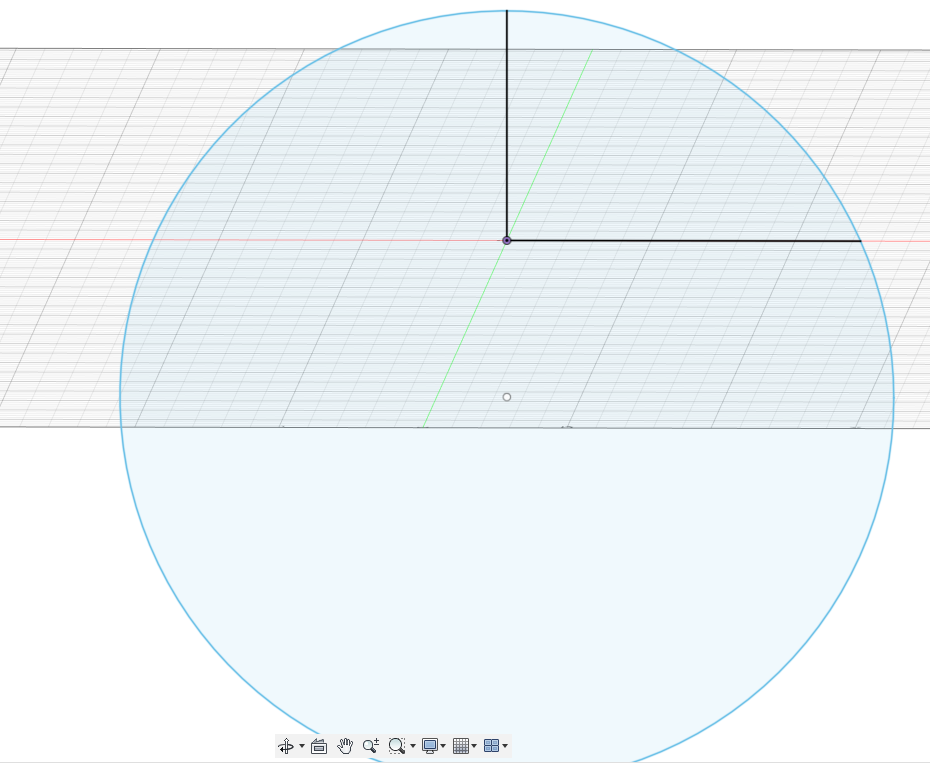
For the large spots, make a circle via a sketch, and at the highest point, draw a line straight down with how tall you want your big spot to be. Then just like the mushroom roof, revolve the section of a circle around 360 degrees.
Back to the MushRoof
----
Setting the small spots:
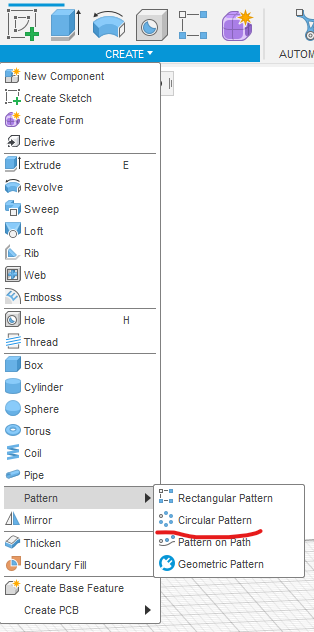
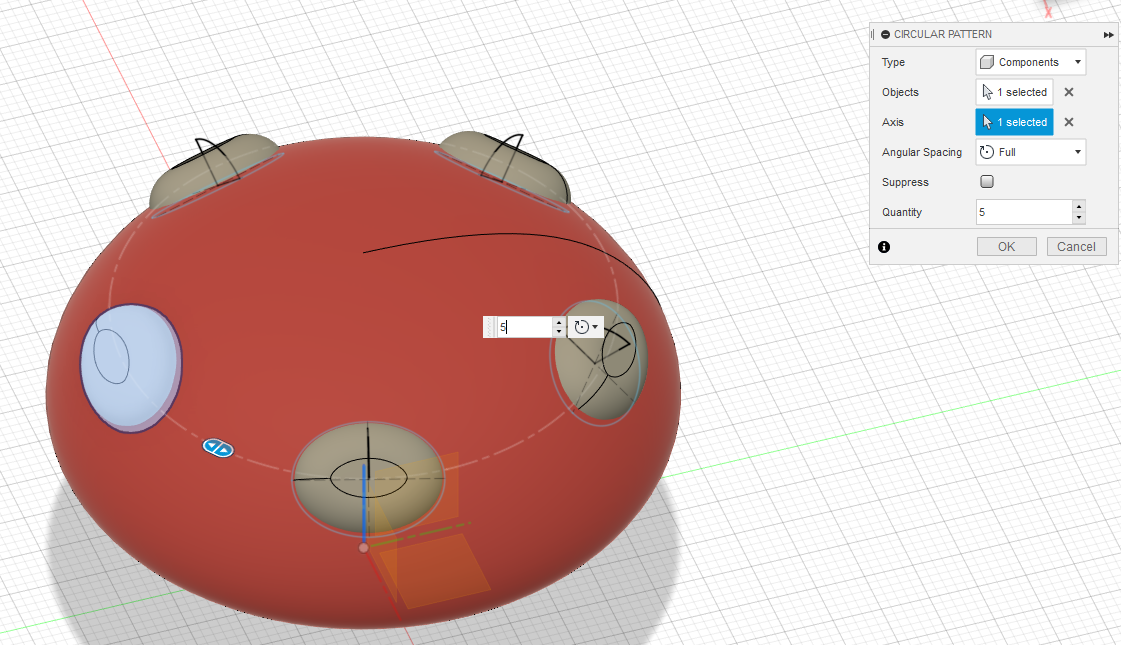
Import your small spot file into the mushroom roof file, and position it like so on the mushroom. Resize as necessary, and fit it where you would like the small dots to be located. Now we need to use another one of Fusion 360's tools, in the create folder, go to pattern, and then to circular pattern. Set the type to components, select the small spot for object, and the vertical axis as the axis. Hit ok, and then you will have 5 small spots equally around the big mushroom cap.
----
Placing the big spot:
Import the large spot, and place it at the top, slightly clipping into the big mushroom cap.
----
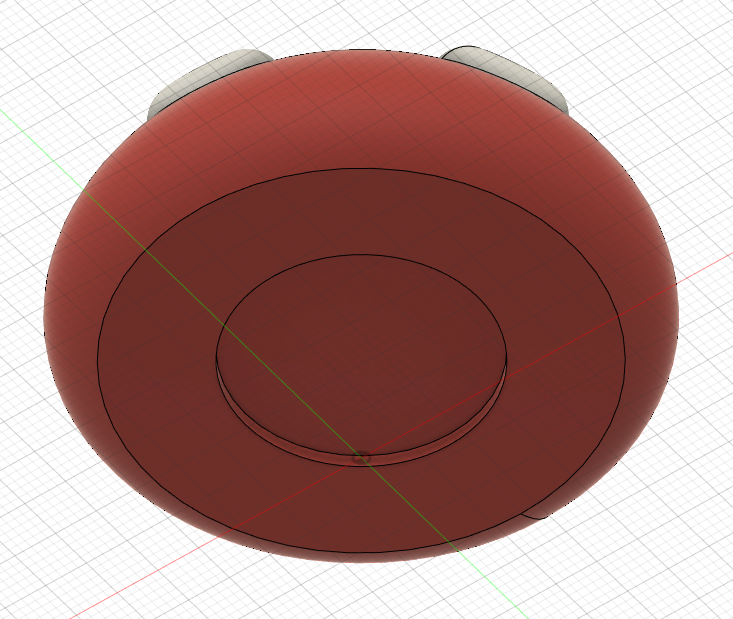
Making a slot:
The last thing to do before the mushroom roof is finished is to make a small slot that the main body of the mushroom can fit into. Make it equal to the diameter you want the top of the main body, so that all pieces can fit snugly.
----
Attached is my file i used in Fusion 360, so you can refer to it if you are having any trouble
Downloads
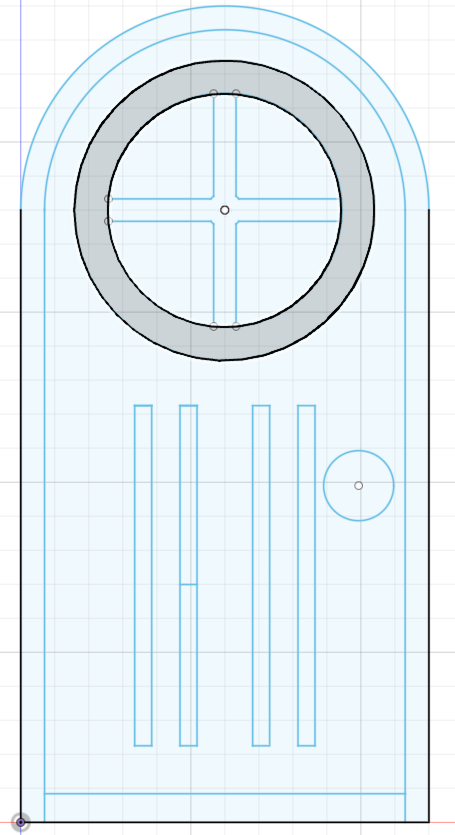
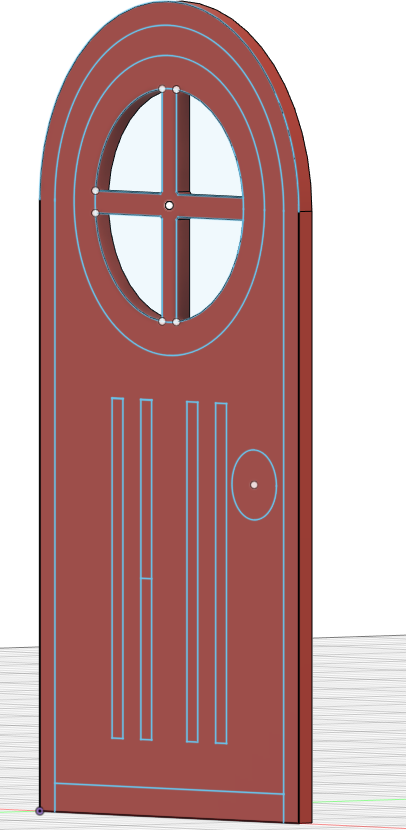
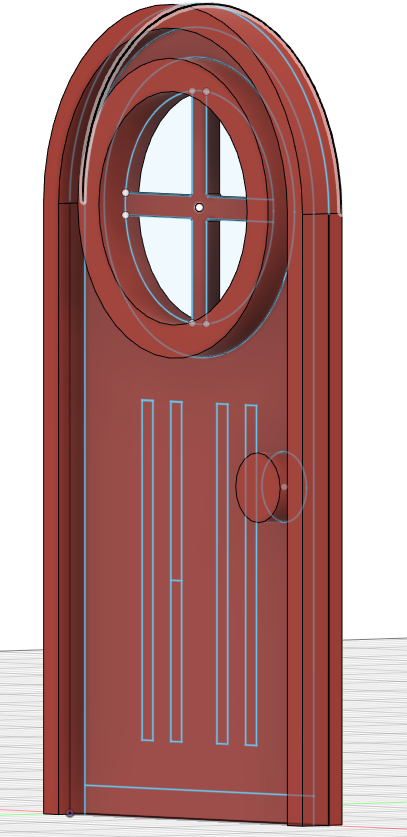
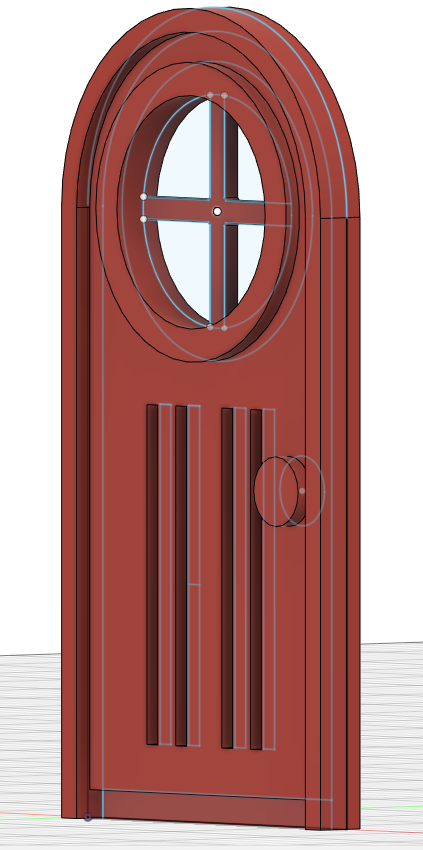
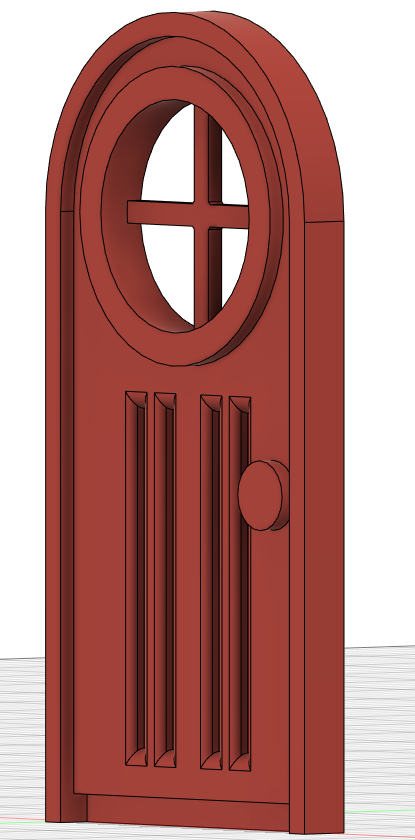
CAD That Door!
----
Sketching:
I wanted to make my door rustic and similar to how my windows would look. I drew a circle for the arch of the door, and then a rectangle merged with it to make a semicircle. Then I added more shapes, and then made a window in the center of the top of the door.
----
Extruding:
I First extruded the back piece, followed by the edges of the window and doorframe, as well as the handle. I Wrapped up the finishing details by filleting the 4 dents in the door for some extra details. Adding different thicknesses really adds to the details, since we cant do a whole lot with just one color for the door.
----
Attached is my door for reference. Only 2 more parts to design!
Downloads
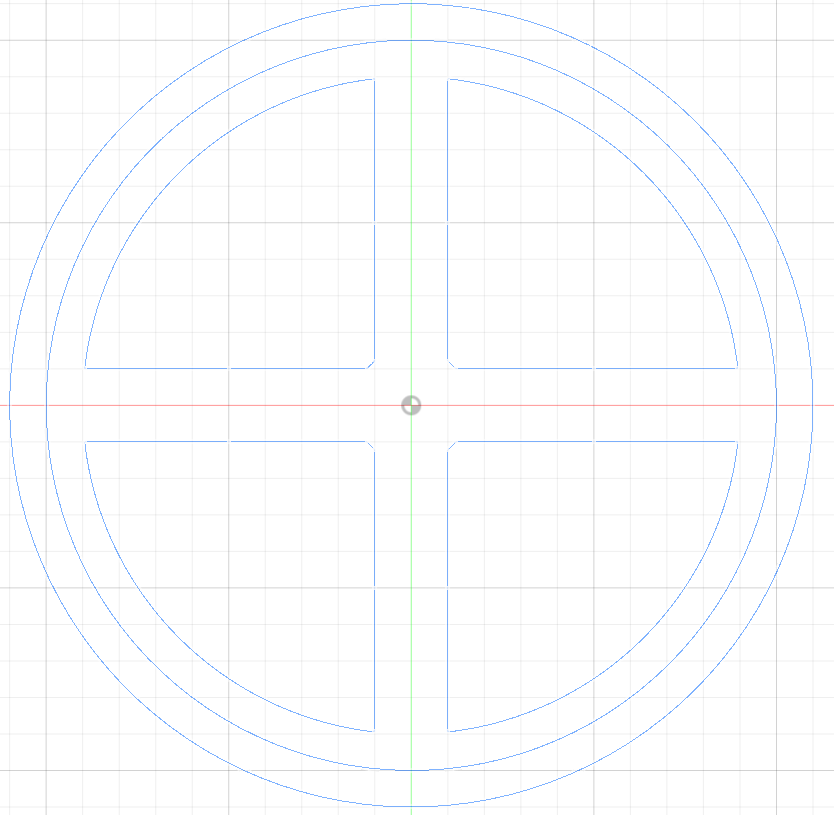
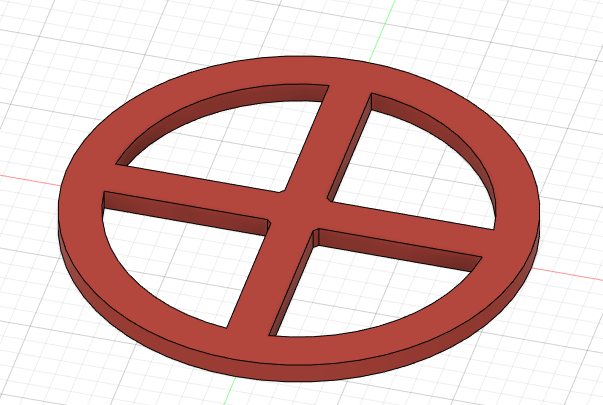
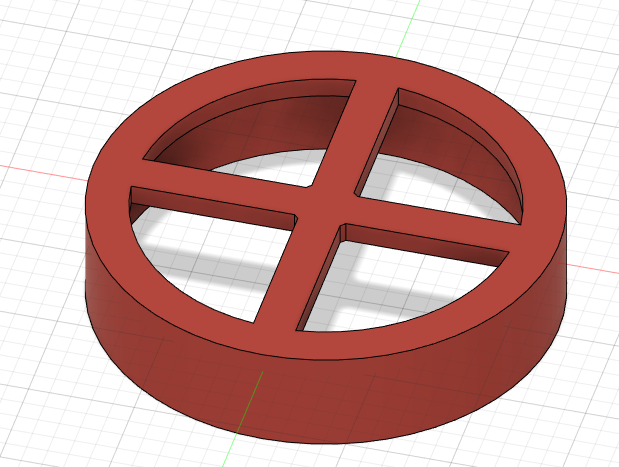
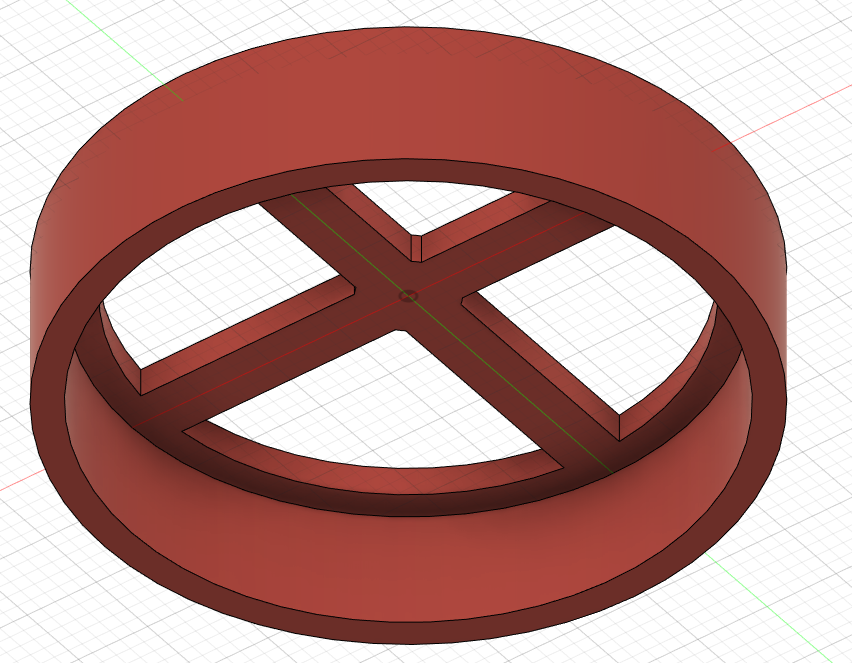
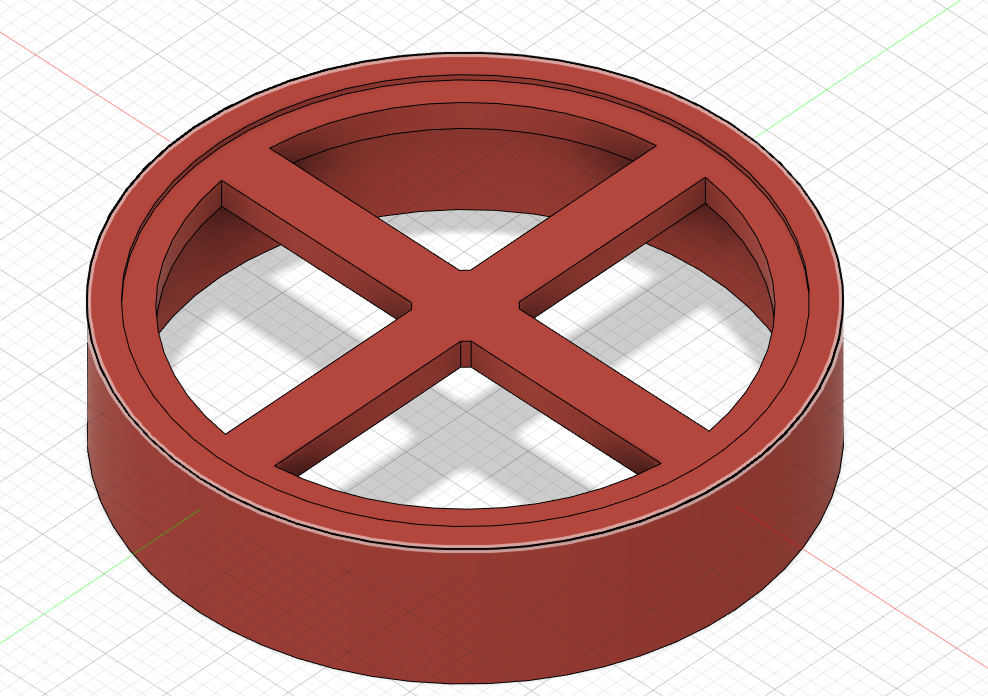
CAD Up Those Windows Too!
---
Sketching:
Start with a circle, draw in 2 crossing perpendicular rectangles at the center, and cut off the edges so that you have 4 quarters of a circle all split apart from each other. Then draw a larger coccentric circle engulfing everything. This will be your windowframe.
---
Extruding:
Extrude a small amount, this will be how thick the crossbars on the window will be. Then, keeping the sketch visible, extrude off the back further, as this will be how the window clicks into the main body of the house.
---
Additional Detailing:
Make a new sketch on the window face, and add three coccentric circles to the edge, with the most outer one being the largest. Extrude the inner layer slightly upwards to add detail, and the outer edge to make a lip the window rests on the main body with.
---
If you need additional reference, the fusion 360 file is included below.
Downloads
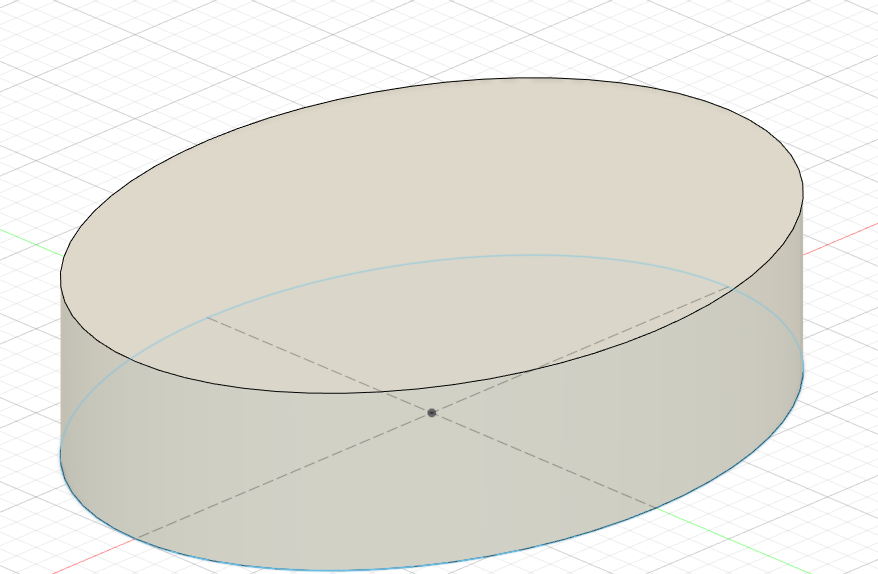
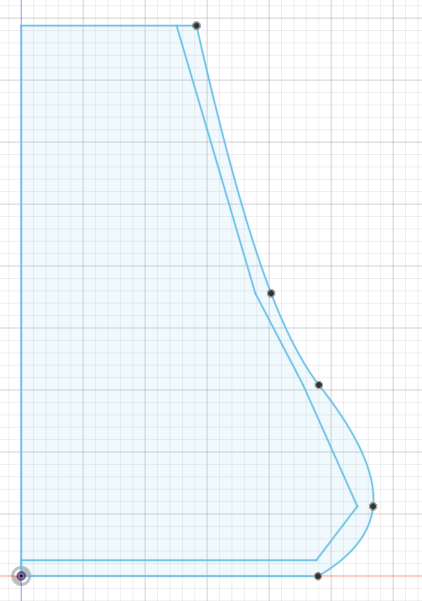
CAD the Main Stem: Part 1

----
Sketching:
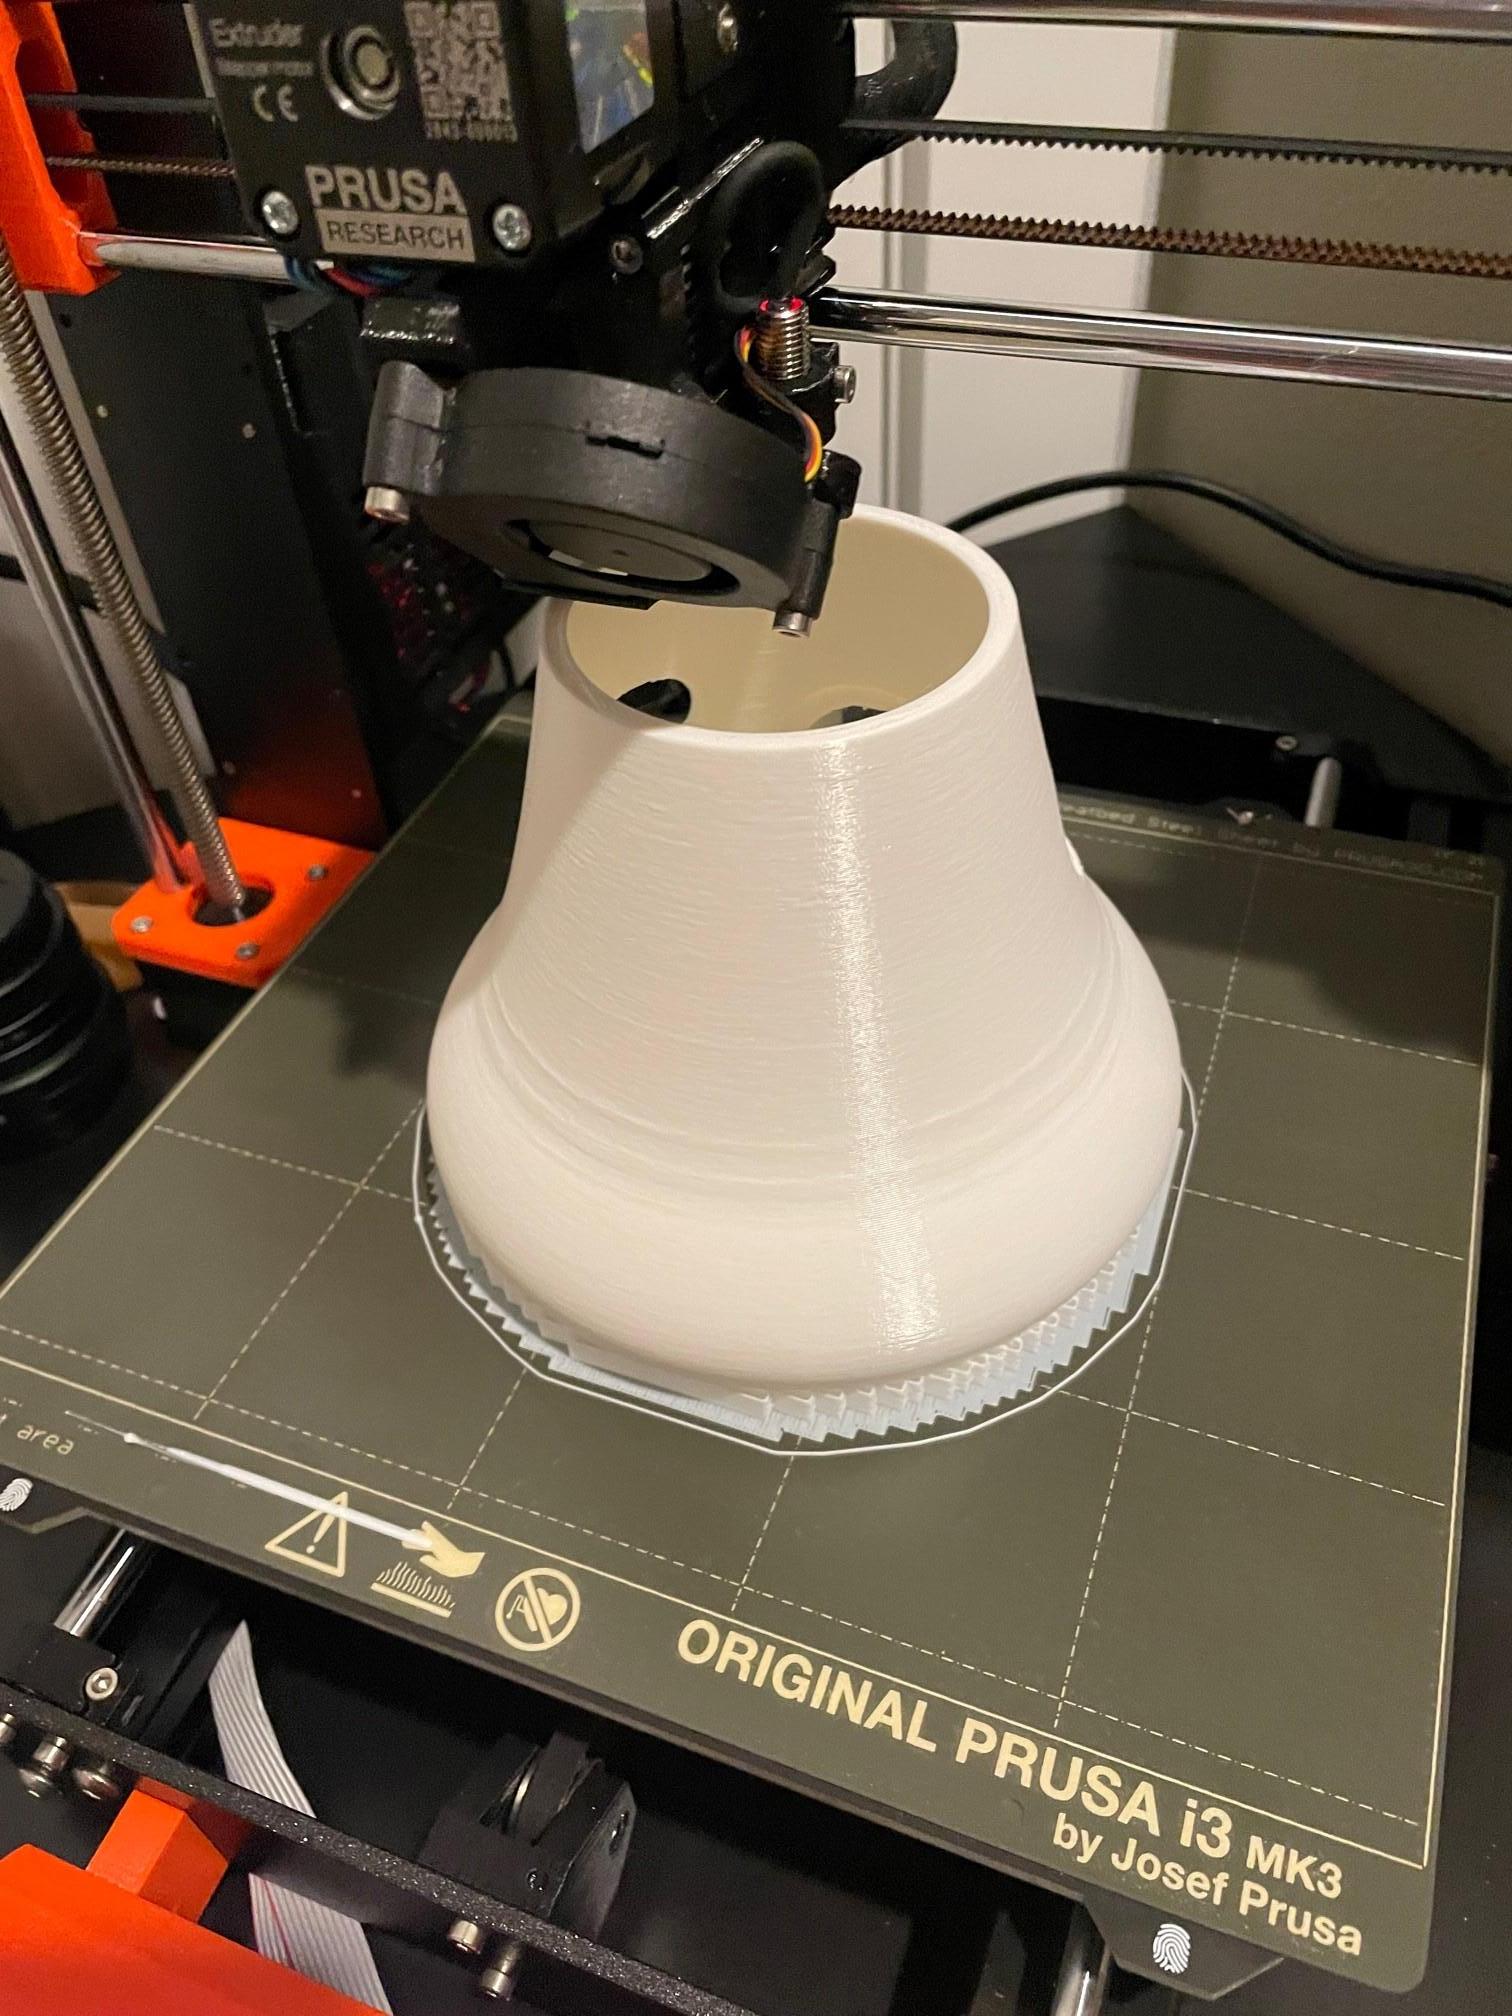
Create a sketch that will represent the inside of the main body of the mushroom house. Remember to make the top part of the sketch equal to 1/2 the diameter of the hole put in the bottom of the roof, since when this is revolved it will be 2x as wide, hence equal to the diameter. Be sure to make an inner and outer layer so that when we revolve it, it will make the interior hollow. It's ok if the walls look a little thin, when revolved it tends to thicken up a little.
----
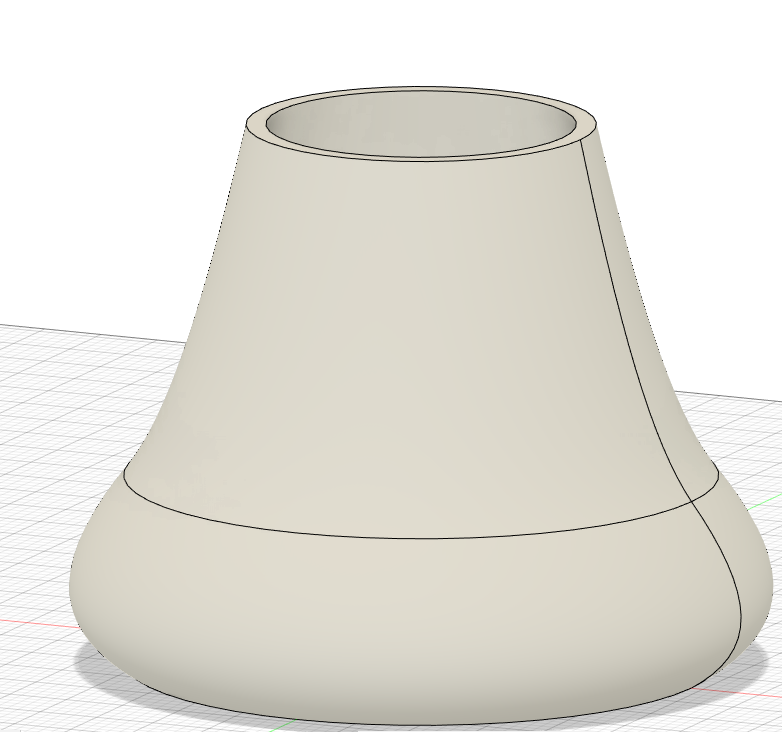
Revolving:
Select the outer edges to revolve, not the interior. Revolve a full 360 degrees and we have the loose shape of what our main body is.
----
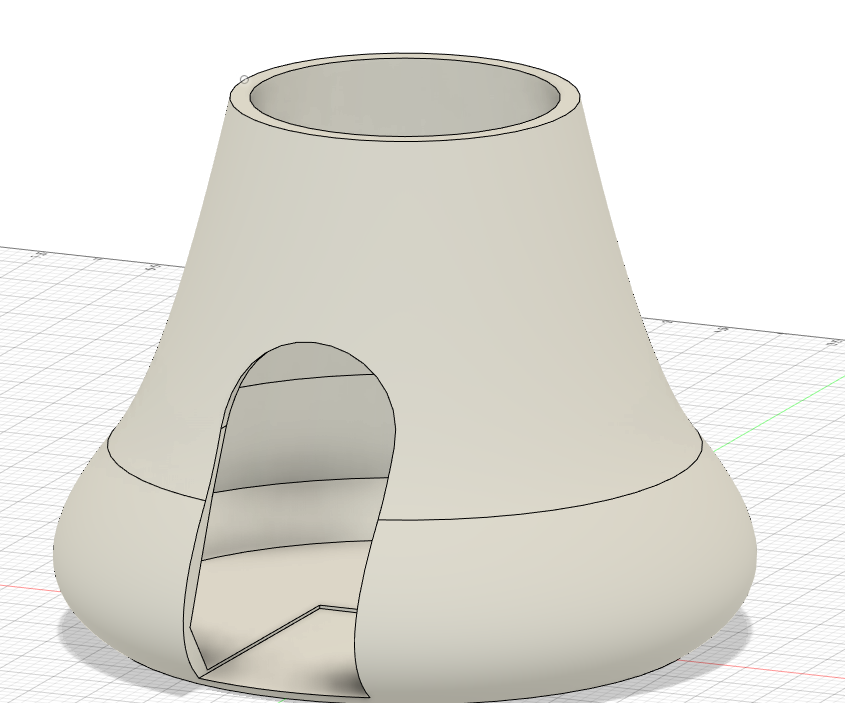
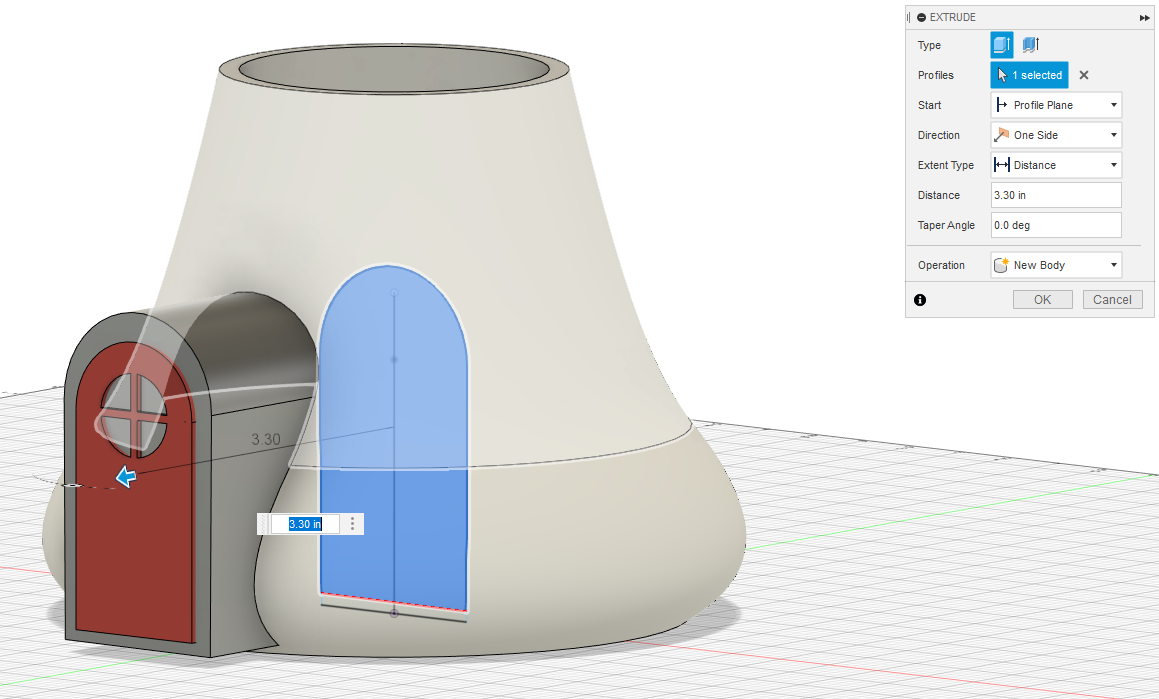
Adding a Doorframe:
Draw a new sketch with a similar shape to the door made in step 6, but a little larger than the door. It may help to import the door model to refer where you want your door to be, and line it up that way. Extrude this new sketch through one of the walls and select cut to cut this shape out from the main body. But we are not quite done yet.
Extrude the same sketch of the shape out through where it was once cut, and make it a new body. Then extrude the other side of the sketch that is inside the base, to the edge of the door, to clear some extra room inside. Import the door model and line it up to where you want the door to go. Extrude the face of the door through the model, stopping once a clear line of sight can be seen through the doorframe, to the back of the mushroom base but not through it. Extrude cut any remaining floaty bits not cut by the door.
You now have a doorframe!
----
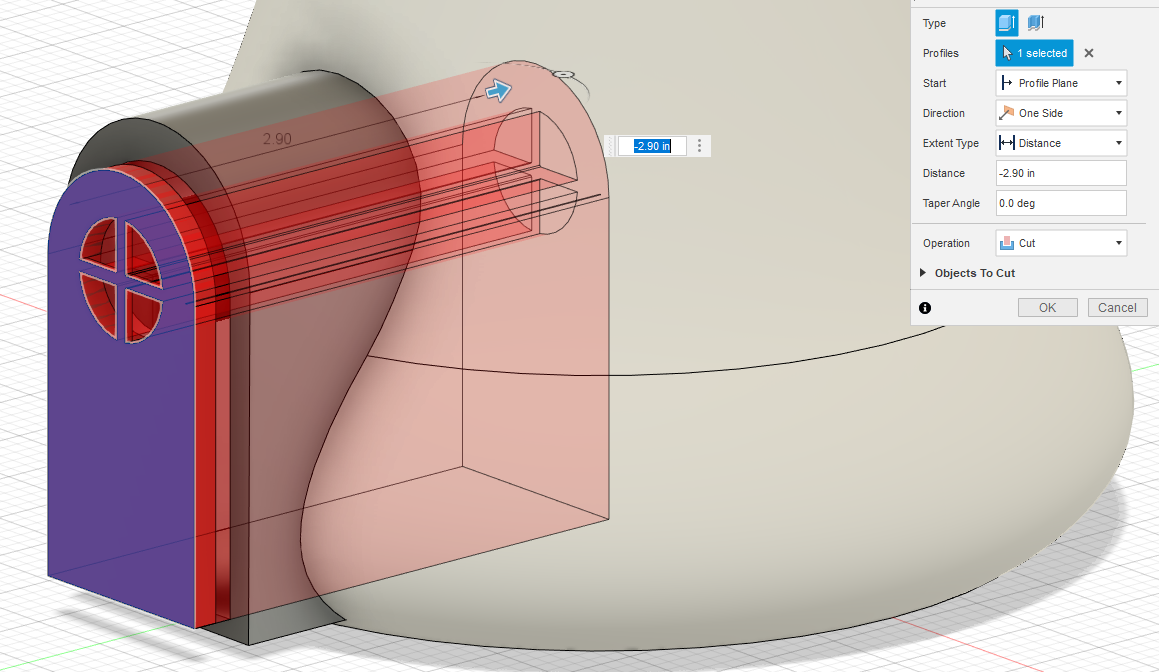
CAD the Main Stem: Part 2
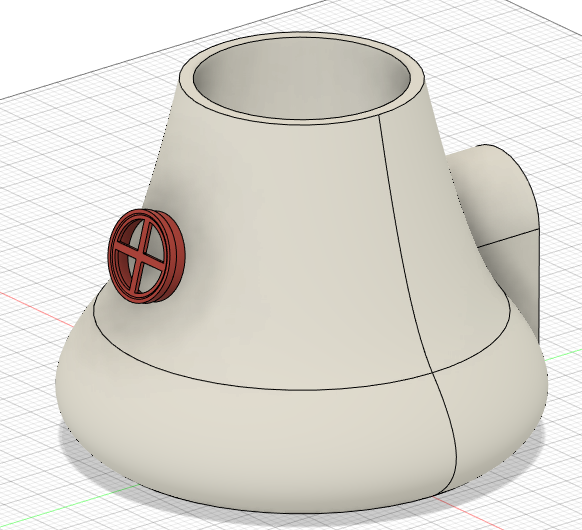
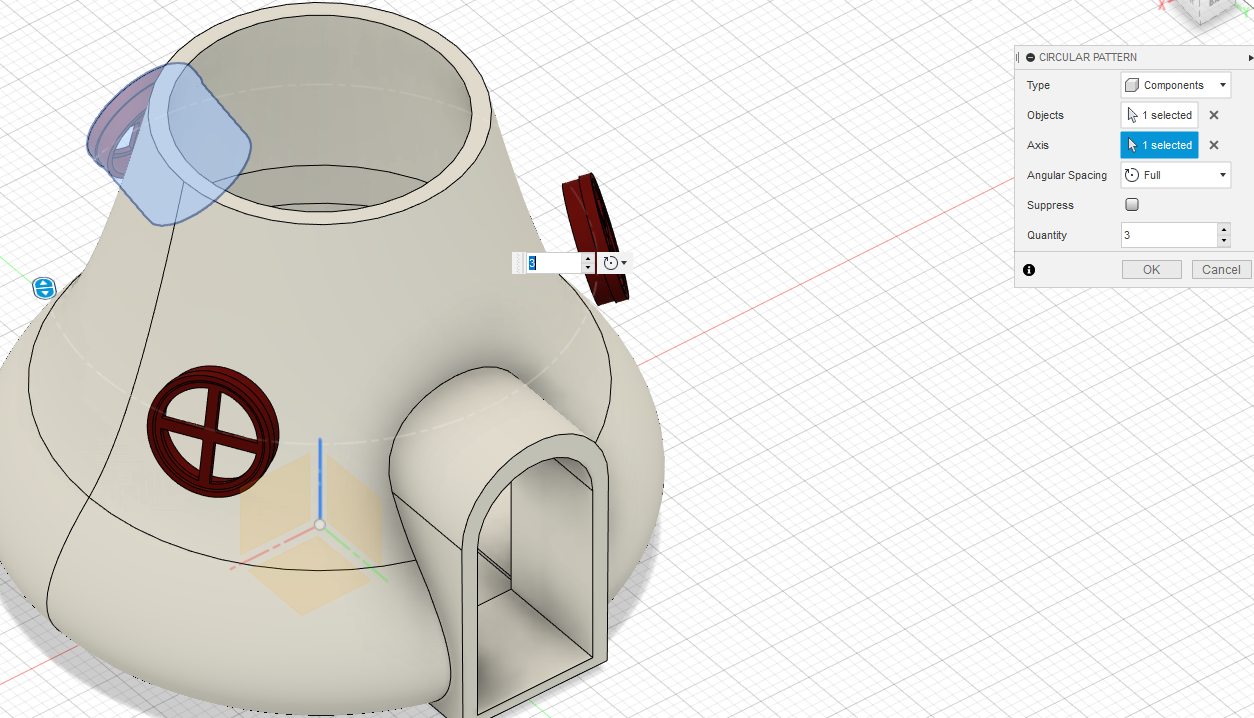
The last thing we need to do is add holes for the windows to fit into. Do this by importing the window file, and moving it so it is aligned at the back of the mushroom house, at the preferred angle you want for your windows. You may be asking, "I don't want a back window, I wanted two front ones!", but once again our old friend Fusion 360 comes to save us with the circular pattern tool. Set the type to components, select the window as the object, and the vertical axis as the axis, and set the pattern number up to 3, so there are 3 windows, with 2 of them exactly where we want them to be. Finally, same as the door and doorframe, extrude the 2 front windows through the walls of the mushroom base. IMPORTANT: Extrude using the back side of the window, not the wide side. We need the ridge to hold the window in place, and if we use that side the hole in the wall will be too big.
If you need additional reference, the Fusion 360 file is below.
Downloads
Exporting and Slicing
Export all files as a .STL, and save to a folder somewhere accessible.
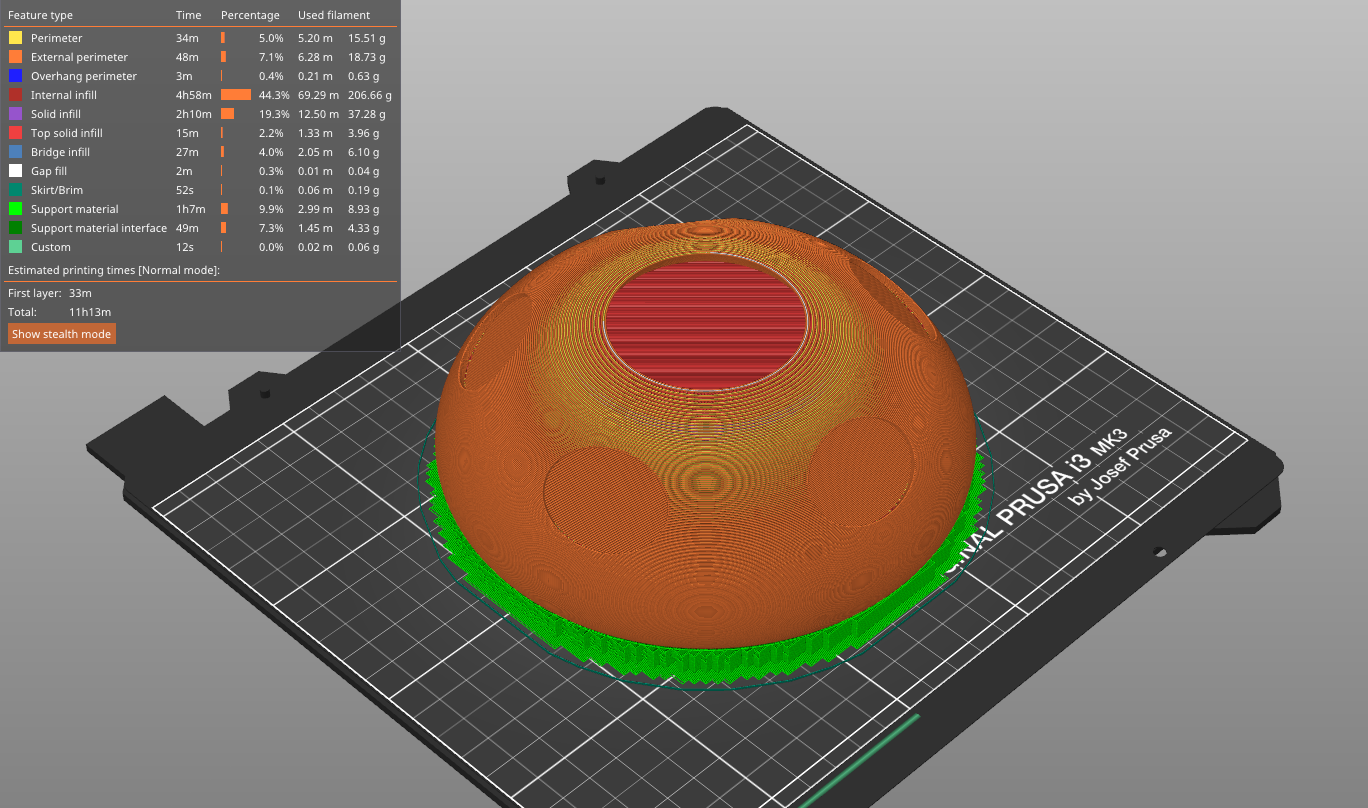
Here is a complete list of how I printed my STLs
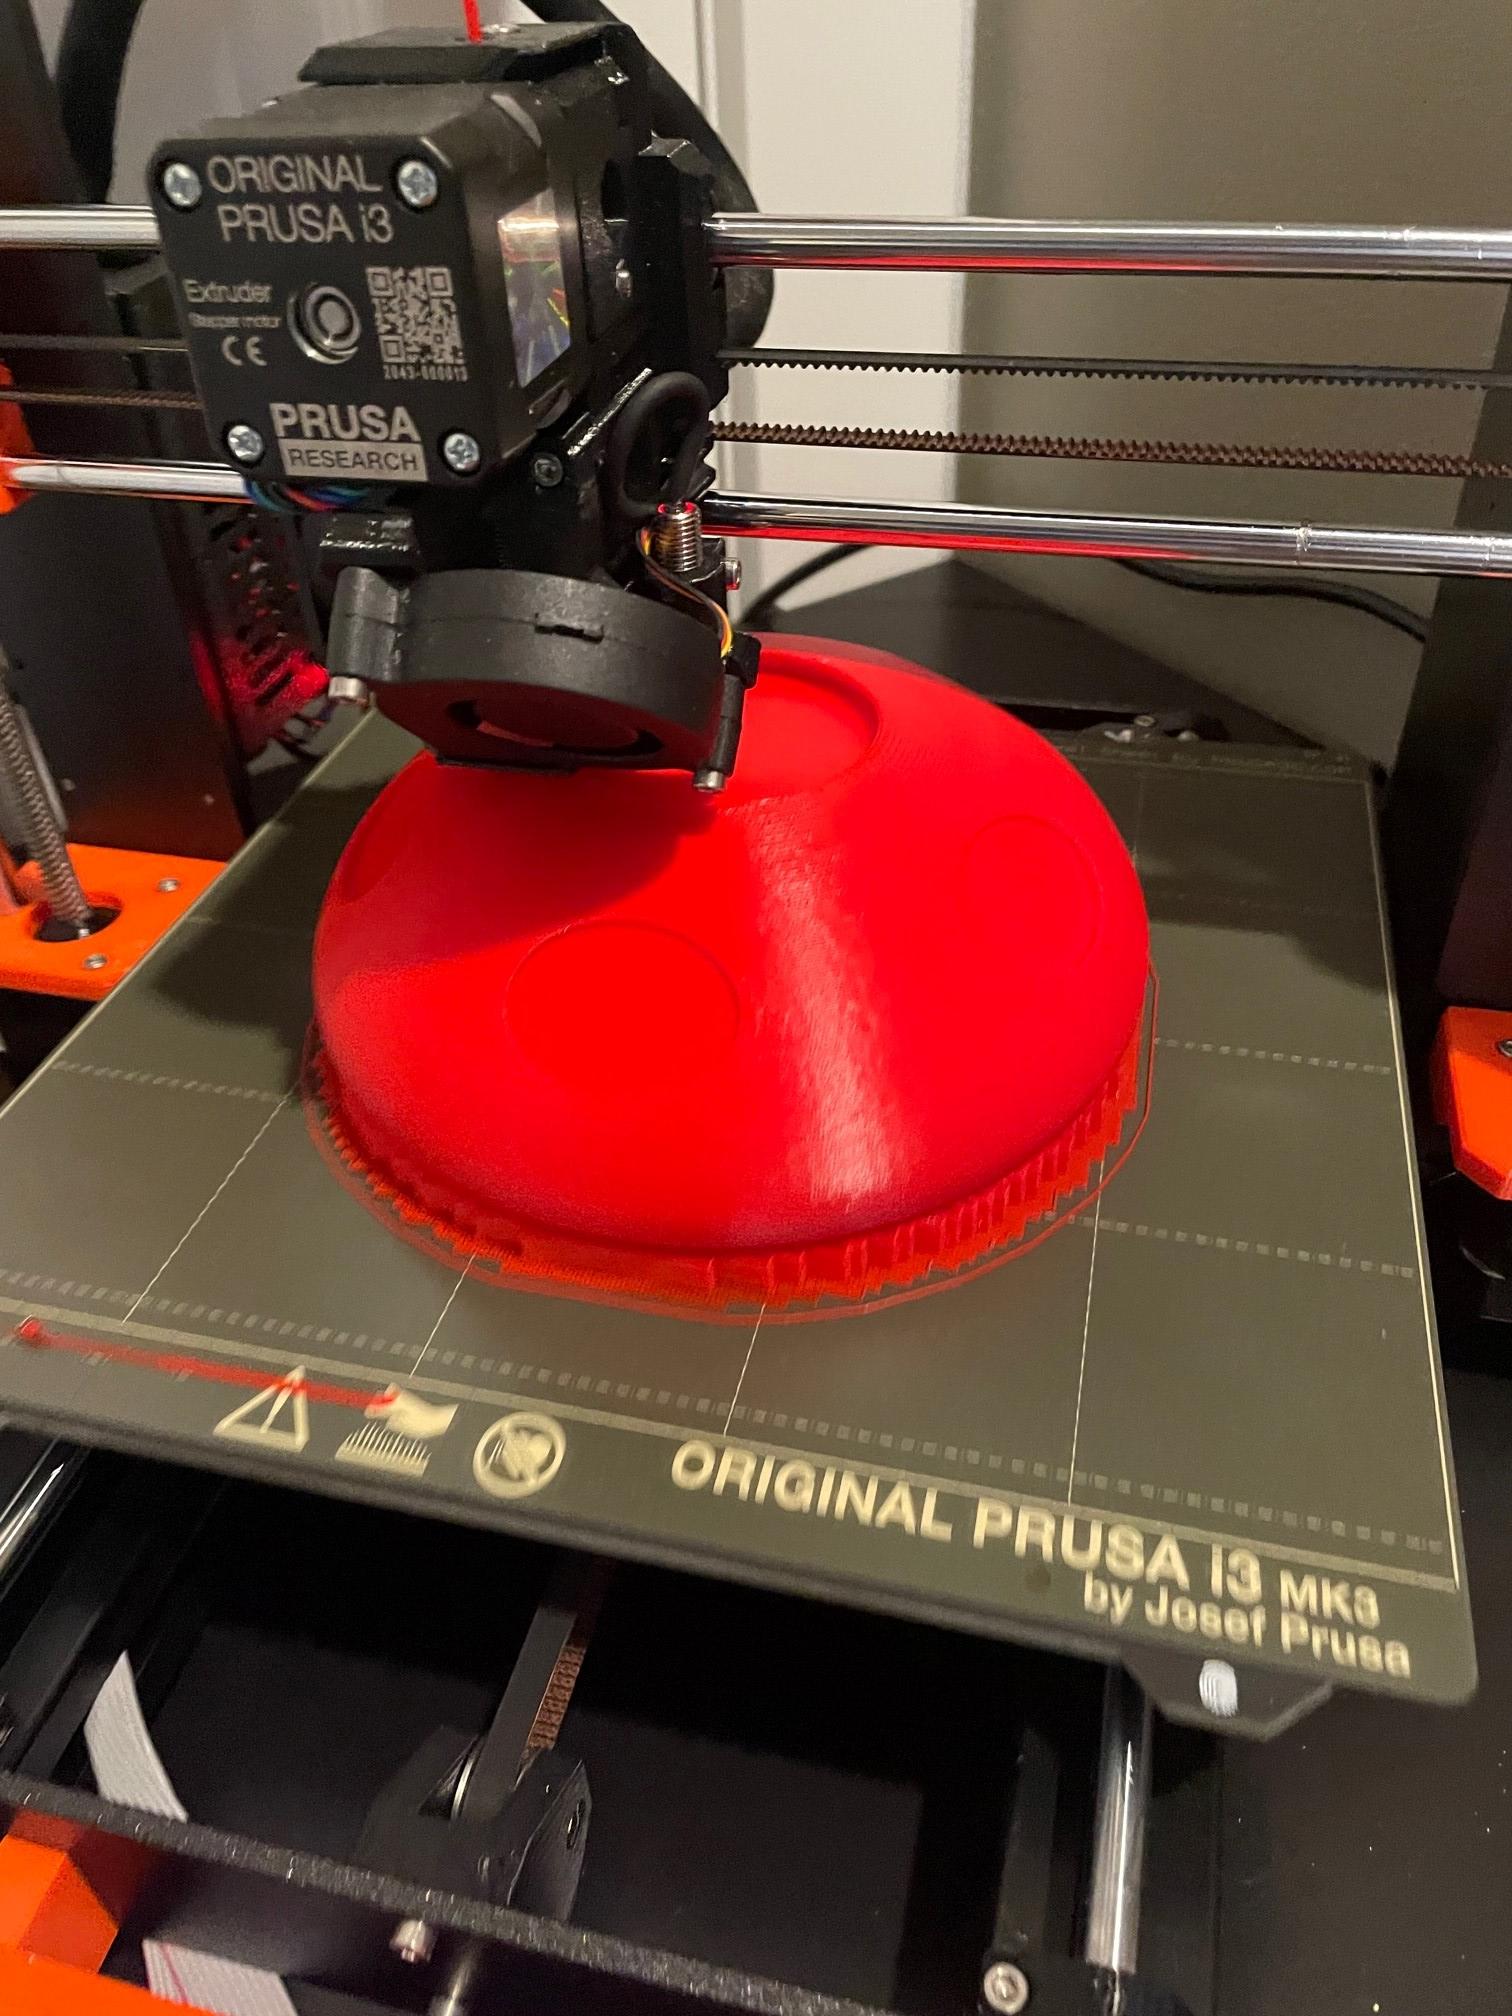
Name: Filament Layer height duration filament length used Supports?
Door: PolyTera PLA Red 0.15mm 17min 1.75m no
Window*2 PolyTera PLA Red 0.15mm 20min * 2 0.73m * 2 yes
Mushroom Roof/top Polytera PLA Red 0.30mm 11hr 13 min 101.40m yes
Small spots*5 Polytera PLA White 0.15mm 24min * 5 1.15m *5 no
Large Spot Polytera PLA White 0.30mm 50min 5.84m no
Mushroom Stem Polytera PLA White 0.30mm 9hr 28 min 57.92m no
Attached are my STL files if you want to print my model for yourself.
Printing
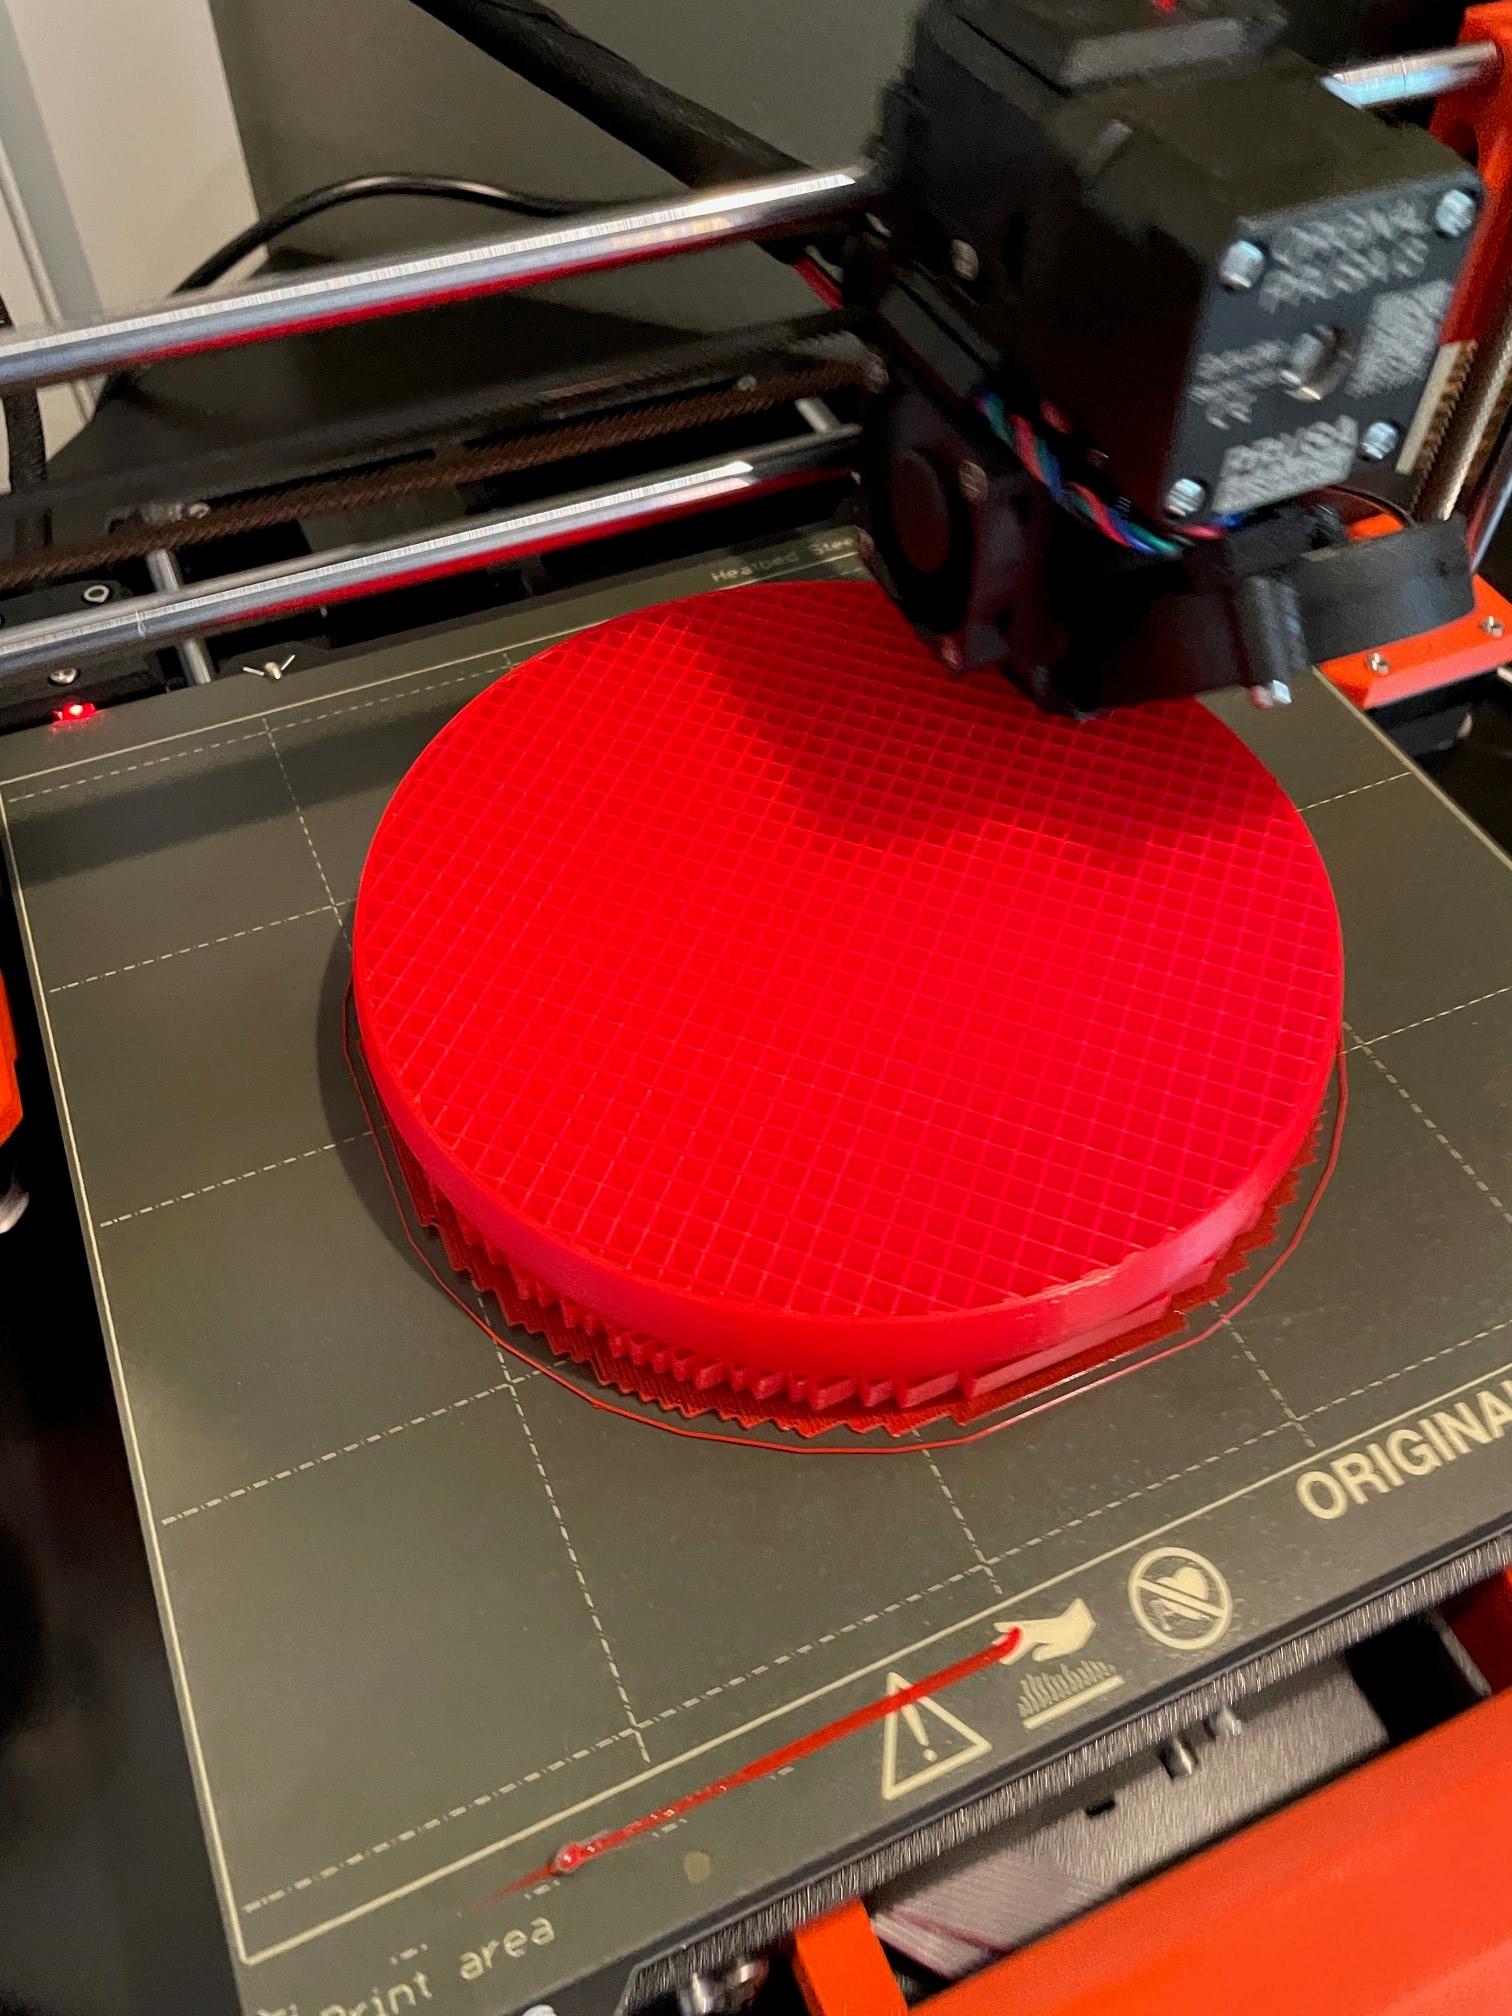
Export the sliced Gcode to your printer, hit start and you are nearly done! I would recommend printing all of the parts of the same color before switching colors, just to ensure no mismatch colored parts come out.
Assembly
----
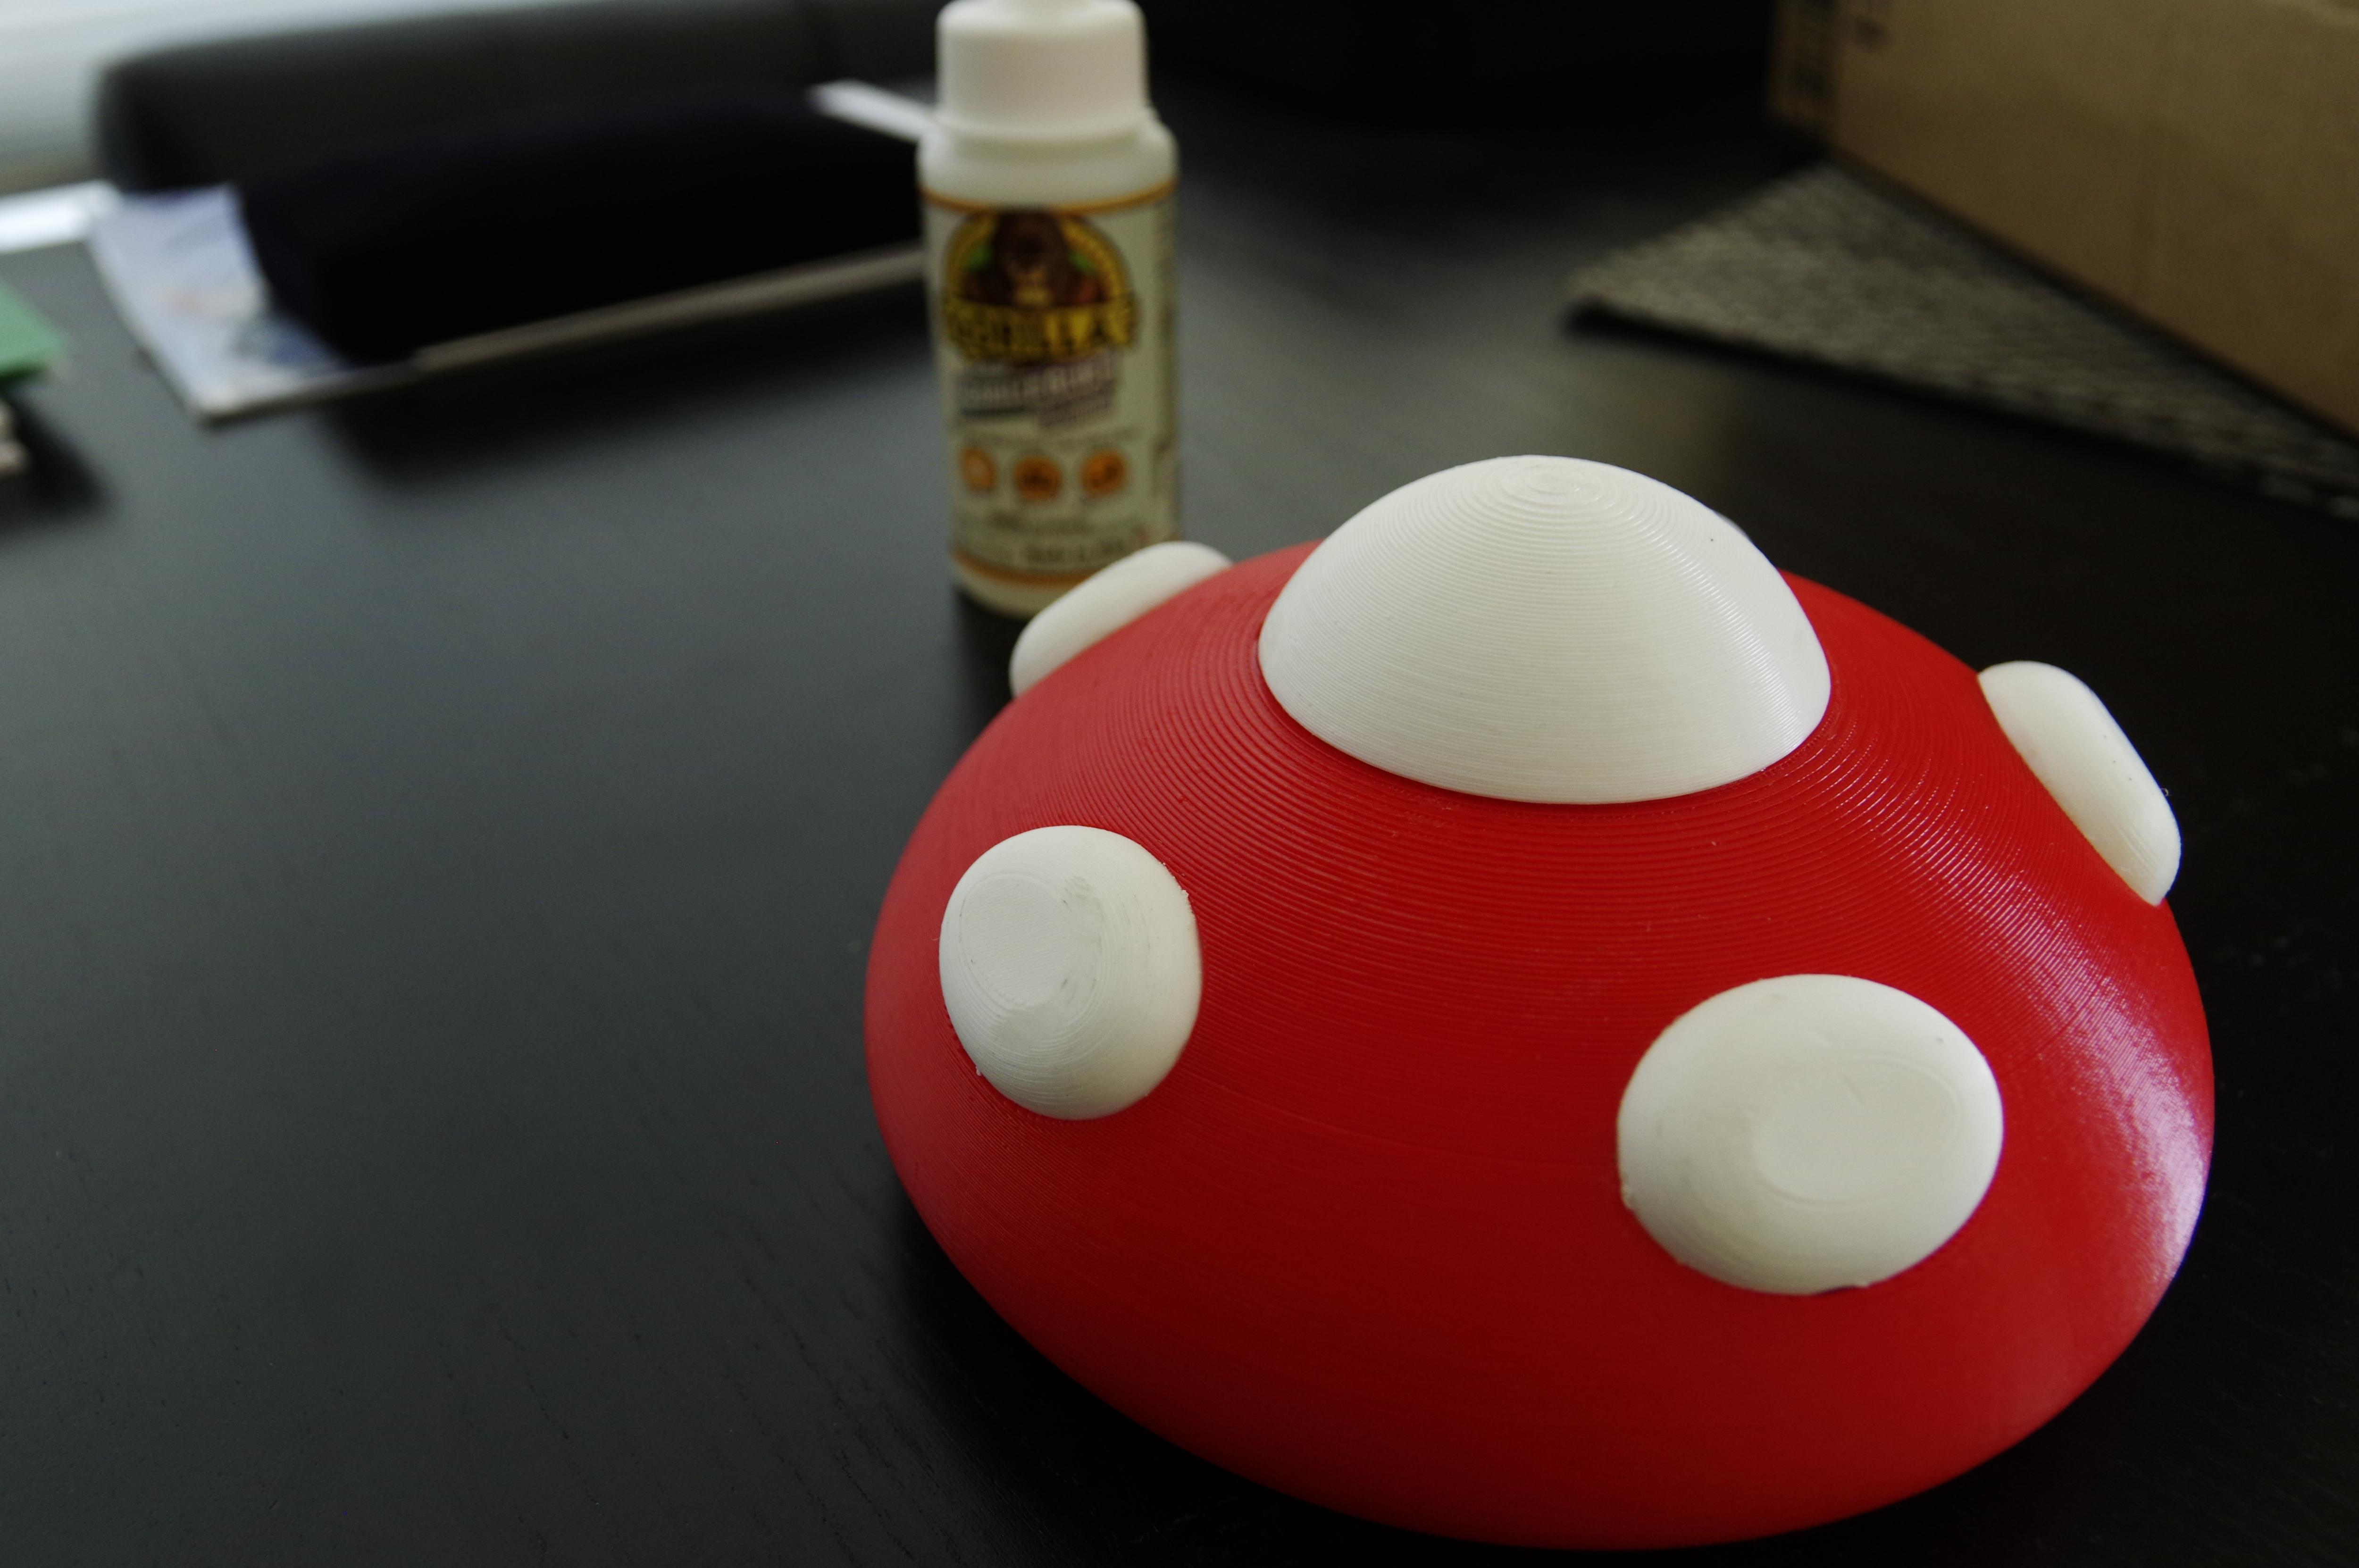
Gluing the spots:
Get some gorilla glue and sandpaper out, and try to fit the small white spots into the holes. If they dont fit, use a little sandpaper to sand gently along the edge of the spots. Once the dot fits in, use a little gorilla glue to seal the deal, and put each of the 5 small spots into place. A little glue goes a long way! The final dot glue the edges and place on top. Wait to dry for about 1-2 hours to be safe, and the top should be all done.
----
Finishing touches:
Push the windows and doors into the respective holes, sand if needed.
Finished!
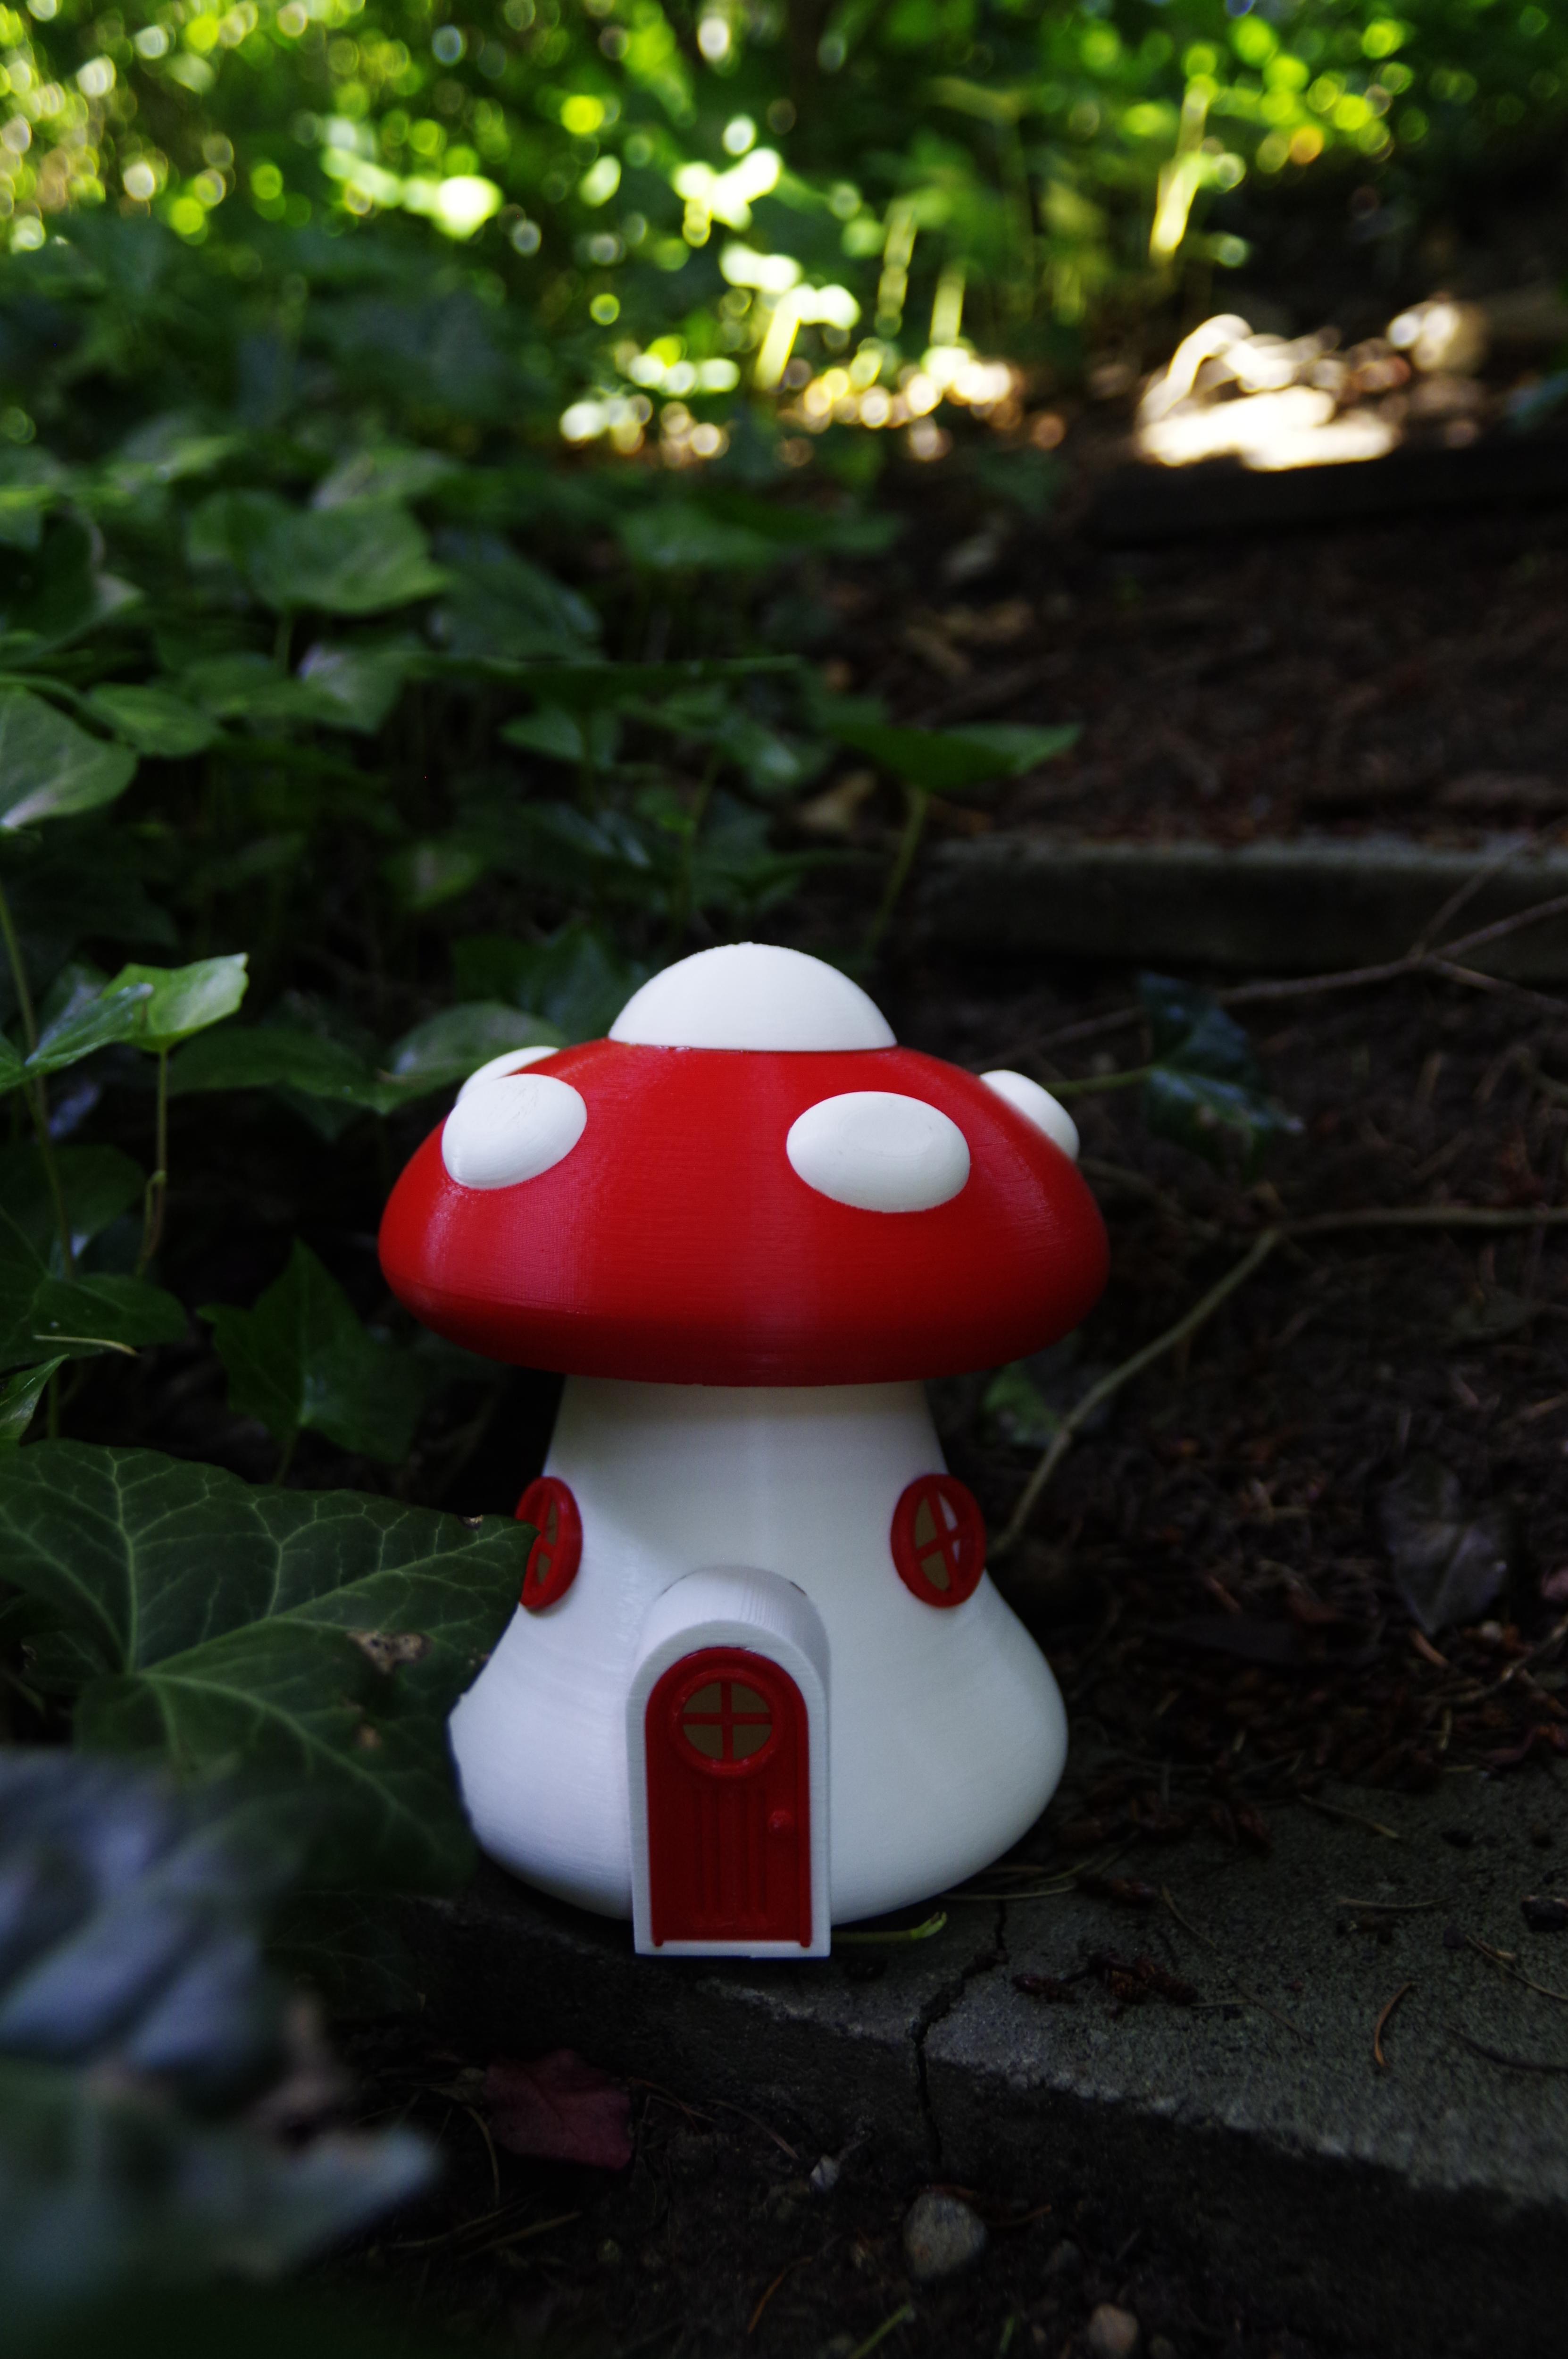
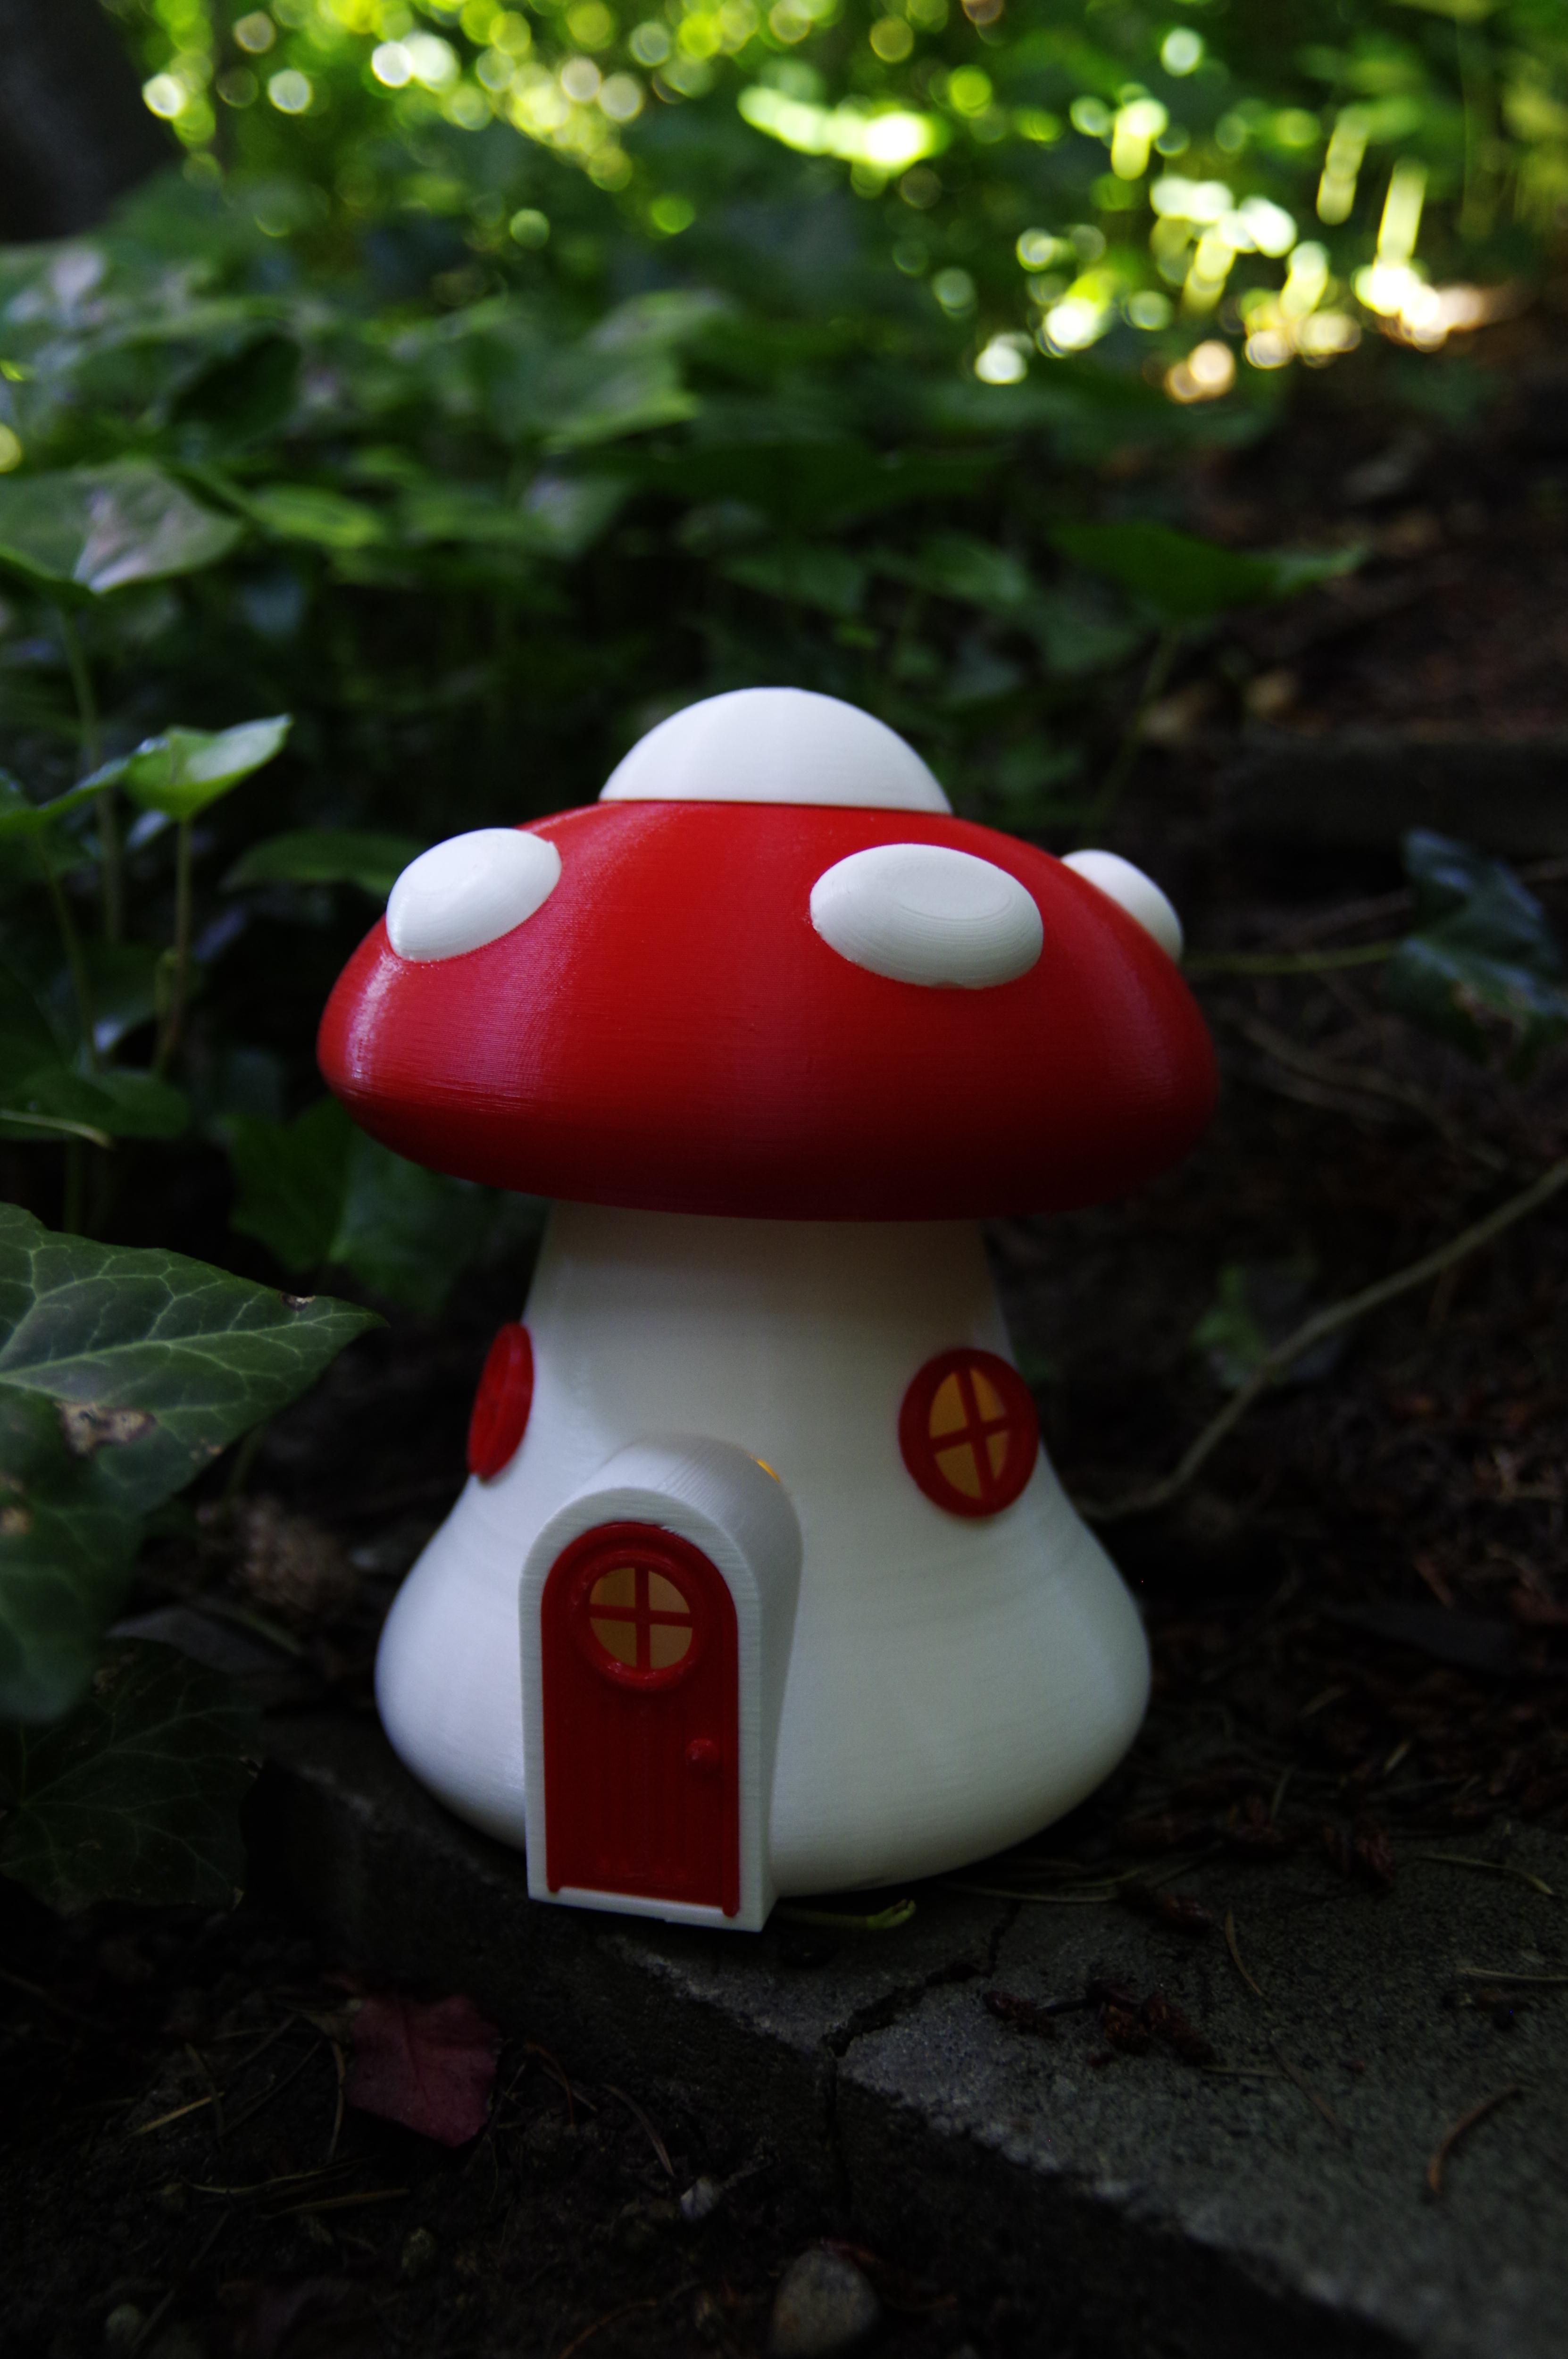
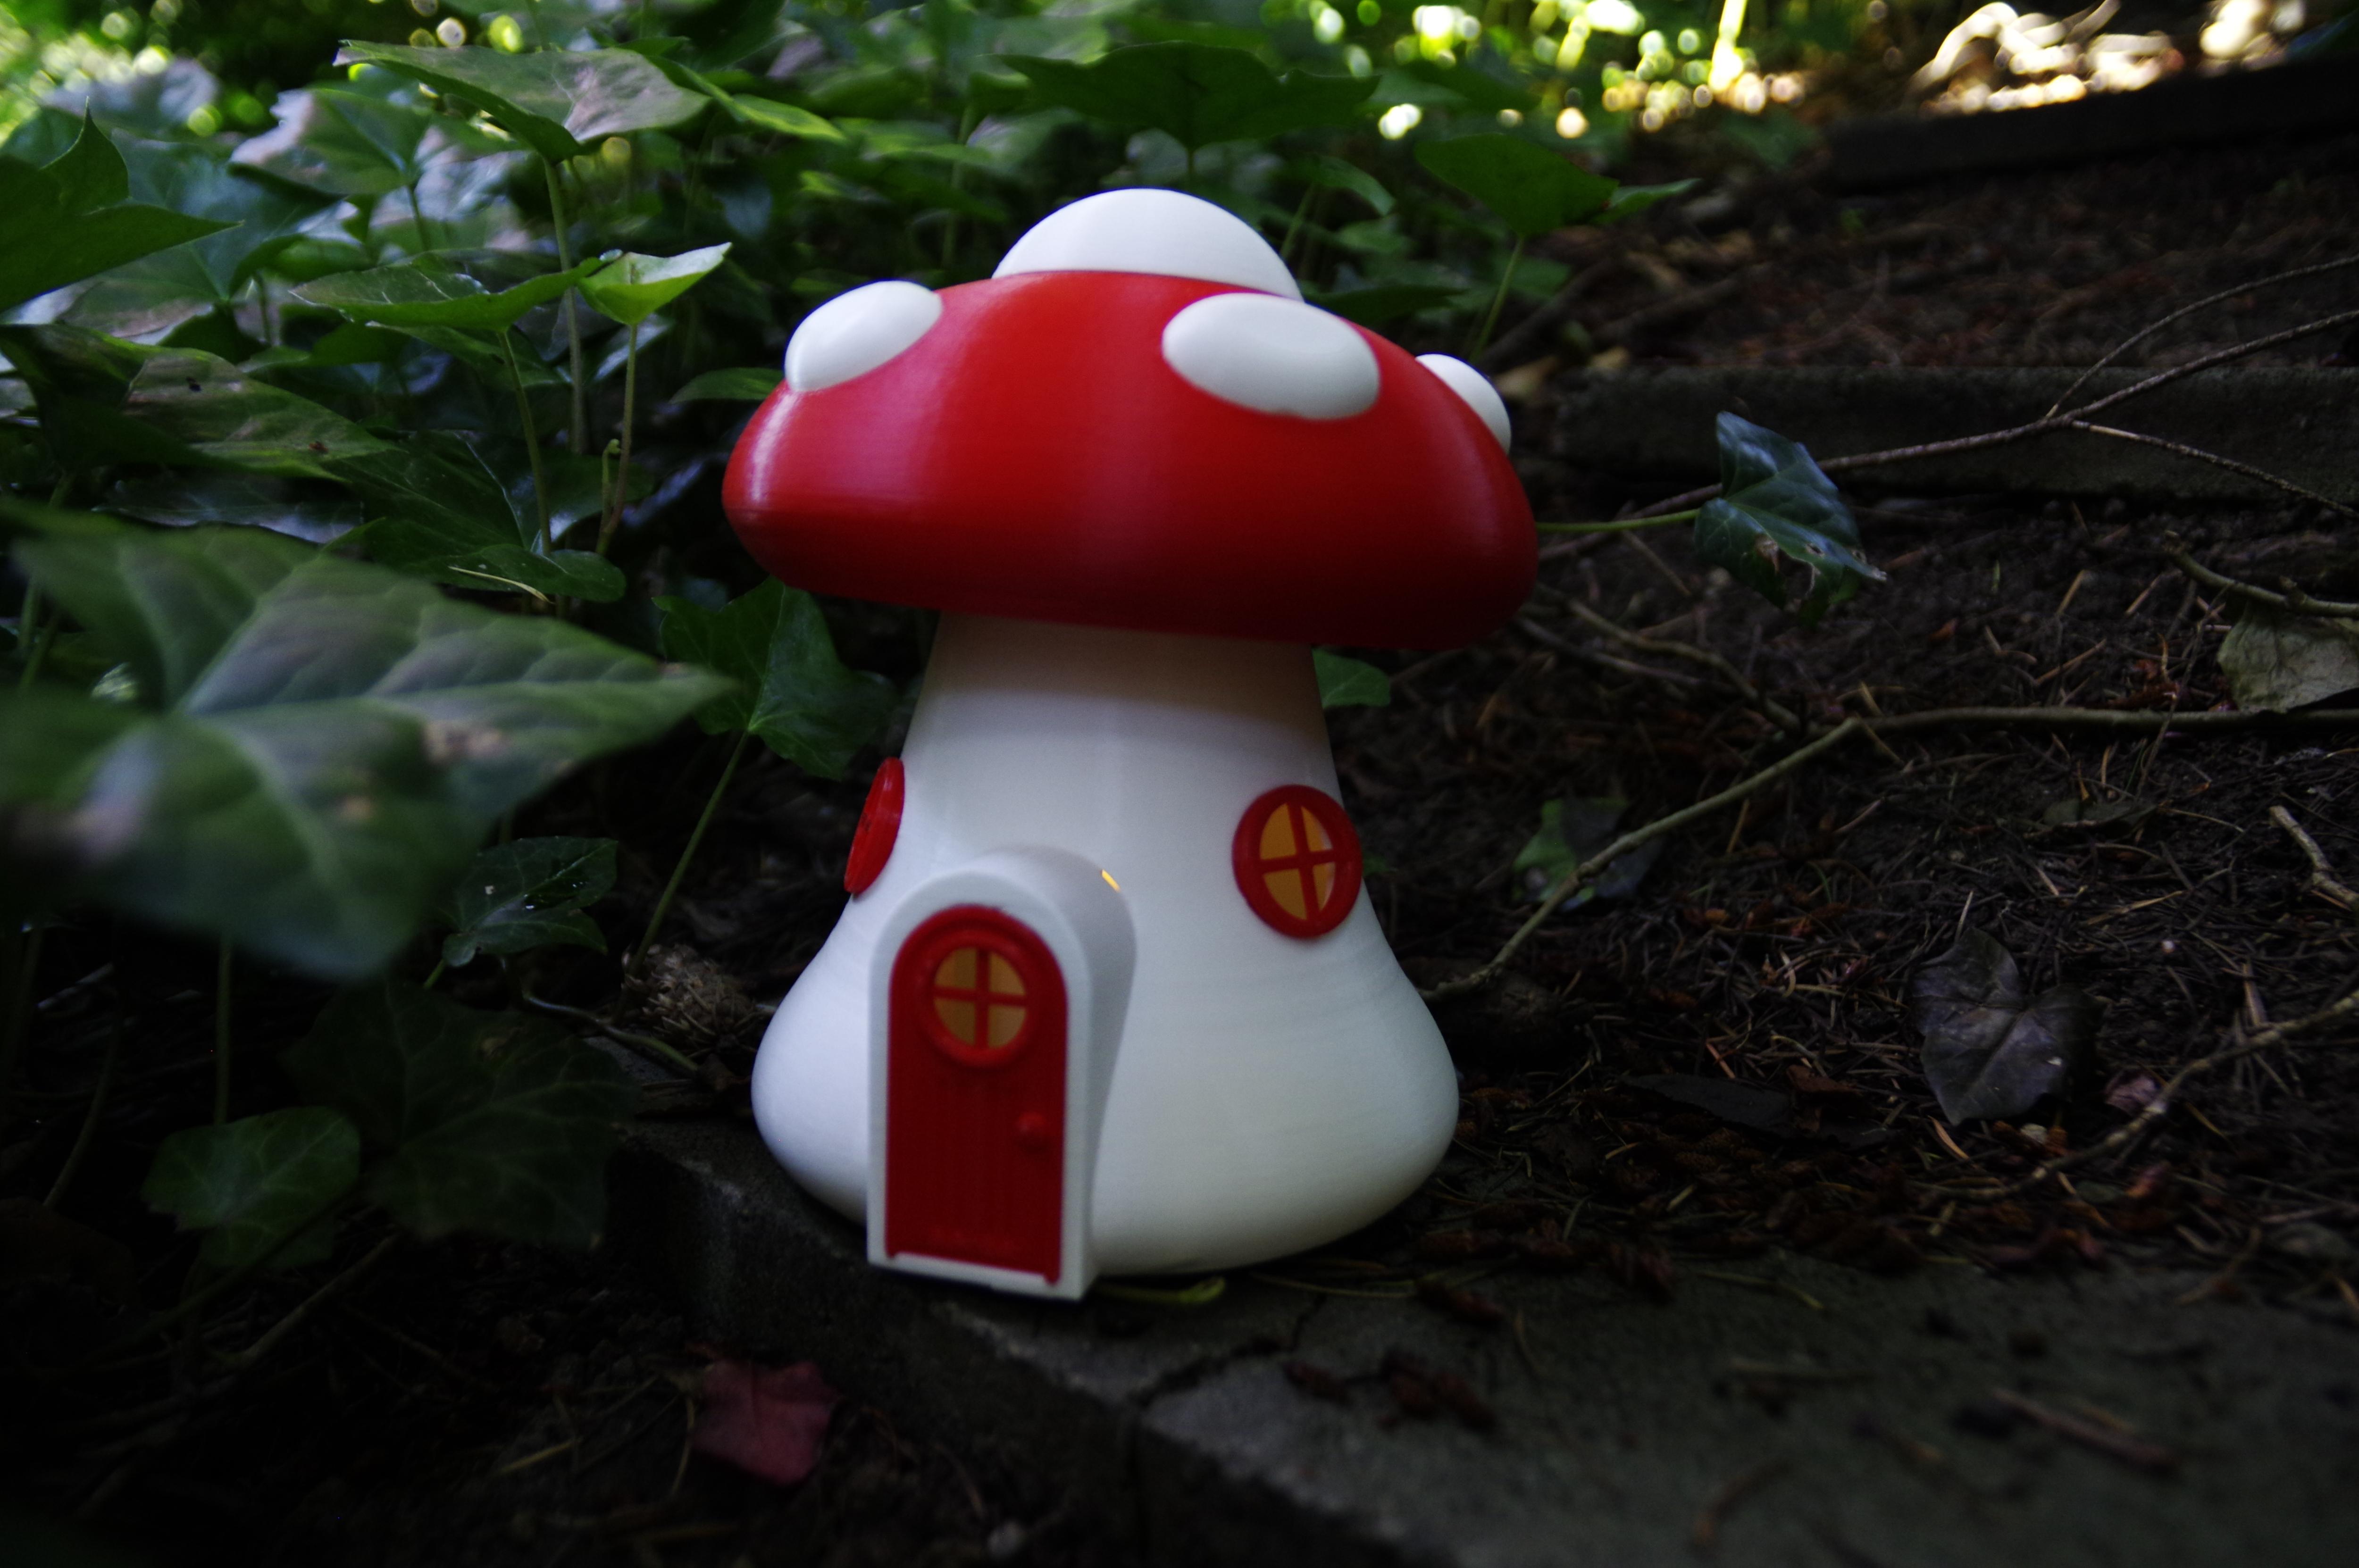
Congrats! And thank you for reaching the end of my Instructable. You should now have a finished mushroom lantern house. Put a tea light inside overnight and it looks like a small fairy has settled in! Depending on filament used (ASA or PETG) you can even use it outdoors, or it can sit on a countertop like where mine will be at my grandmother's house.