MosquitoKiller - Change Your Mosquito Zapper Into the Game!
by Adrian Siemieniak in Living > Toys & Games
418 Views, 0 Favorites, 0 Comments
MosquitoKiller - Change Your Mosquito Zapper Into the Game!


It's a modification of existing hand mosquito zapping devices so it will make more fun to do it - if it's not enough already :)
It introduces:
- kill counter,
- combo counter,
- high score
- and sound effects for all of this
How does it work?
- MosquitoKiller is powered from zap racket battery, and it's turn on with racket - starts with welcome sound
- when you press racket zap button (to charge high voltage) - you will hear encourage sound to fight :), score is counted from 0 (new player)
- it counts every discharge as kill, unless it happens faster then 0,7 second in a row (usually it's the same mosquito then ;) )
- if kills are less, then 1,5 second apart - it counts it in for combo, and start to play combo sound (every level - different sound - up to 6)
- during killing ehm... playing ;) - from time to time, you will have random kill sound
- when you release zap button, you will see your score vs highscore, if you haven't made a highscore you will have negative sound
- if you hit high score, it will be saved
- short button press cycles through sound volume, long press turns sound on/off
- when you leave MosquitoKiller on, but not used - you will hear some encouraging quotes sporadically
Supplies
- Arduino Nano (any Arduino will work, this one I had at hand and it's small)
- OLED display 128x32 (called OLED-091)
- ADS1015 board
- DFPlayer Mini with SD card and speaker (I've used old laptop speakers - they are quite powerful for their size)
- Step-Up/Boost DC-DC converter board (to have stabilized 5V output), 1A output is enough (I've used MT3608)
- NPN transistor (I've used 2SC828A - but only because I've pick this one from the box)
- some 10k and 1,8K resistors, one ~32k resistor, some capacitors (470uF) switch and wires
Assembly


- You should assemble everything as on diagram above.
- Format your micro SD card and copy content of 'sdcard' folder - on it. Check if the button, OLED display and audio are working (there will be welcome sound on start).
- Dismantle the mosquito racket and lead the wires like on the picture. Solder (black) BAT- directly from battery. The positive (BAT+ - red wire) should be connected to place, that is powered only when sliding button is on upper or lower position. So the MosquitoKiller addon will be powered only when racket is enabled. You can find solder places close to the sliding switch or as in my case, on one side of the zap button (check with multimeter connecting GND/BAT- and one side of the zap button - if there is voltage, without pressing button - this is the place).
- Connect "zap button" wire (blue) to the side of the button, that is powered only when pressed (and when the high voltage capacitor is charging).
- Unsolder one side of one bleed resistor - choose one, where it will be easy to add additional resistor, without closing to other components. Add resistor and solder wires to it (green and yellow) - explanation below.
- Voltage divider - we can measure up to 5,3V with ADS1015 and Arduino Nano (5v+threshold). The mosquito zapper uses somewhere around 2000V - so no luck with direct measurement (I don't even have multimeter that will allow this voltage levels). Easiest solution (for me) was to use voltage divider. Definitely not the best, since we have potentially high voltage (spark etc) close to micro controller. But I failed to find something better. Perhaps some capacitor coupling (as I've found suggestion on Internet) - but I've failed to implement it. Anyway since the high voltage part is also "behind" the transformer it does not have common ground - so I've used ADS1015 in differential mode (not comparing to ground) (some other Atmega controllers also have this features - AT328 - doesn't have). 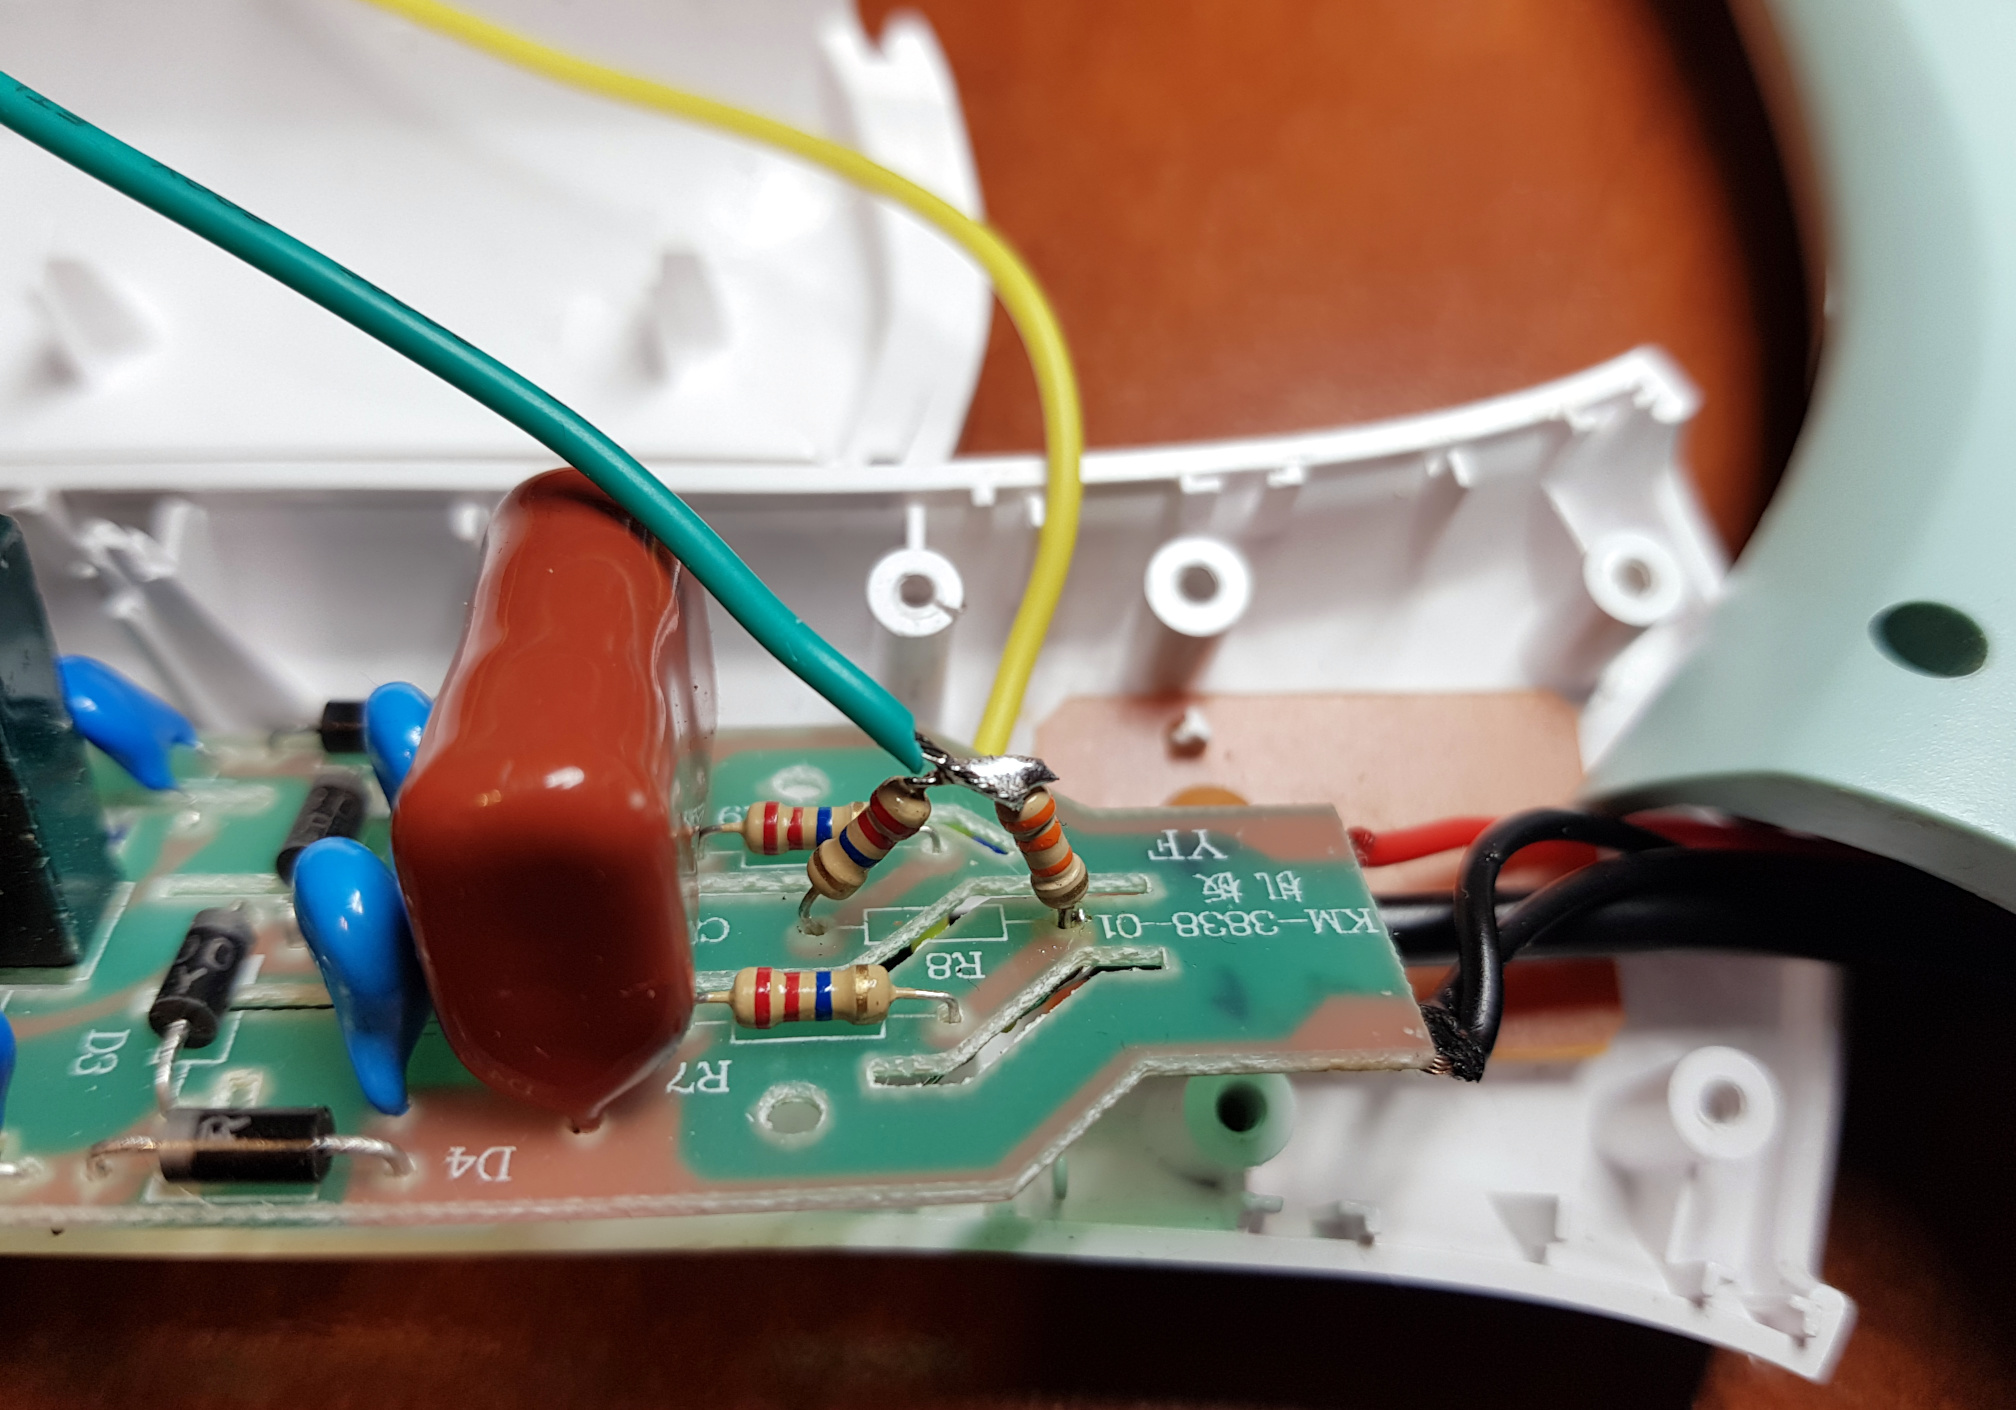 Since my racket had 3 bleeding resistor in series (they are used to discharge capacitor - if you don't use it) - all, according to color coding, 22MOhm (which gives 66MOhm in total). So to have voltage <3V (I wanted to be ready for other controllers - and there is no need for precision) it should be ok to introduce additional resistor with value 100kOhm. But this produced voltage close to 5V - so check with multimeter first!! So I've settled with 32kOhm and I'm having max voltage close to 3V. I'm not sure if the voltage on capacitor is higher or the resistors where out of spec (my multimeter reads more like 18MOhms - but it did it hardly - so I don't believe it either). So please check it how it works for you, before connecting it to Arduino. Currently in the code, on ADS1015, voltage threshold is setup to 3V max (it can go up to 5,3V - if you change it). Anyway, don't bend resistors to the PCB - let them stay like on the picture, so there couldn't be any uncontrolled discharge.
- Connect step-up board to black/red wires, switch on the racket and with multimeter measure output - set it up to 5V exactly. I recommend to add some biffy capacitor on output (470uF or more), and perhaps on input also (I don't have it - but there where times, when hitting extra combo - board hanged. First sign of power starve is distorted sound).
- Connect step-up board output to Arduino GND and 5V pin (not VIN), to ADS1015 and to DFPlayer (preferably add separate capacitor for DFPlayer only)
- Have a fun!
- I've also add additional LED on top of the racket, so I could easier see when it's activated (sometimes, when pressed not exactly in the middle of the button, it tends not to work) - so I've lead double wire from the green LED to the top of the device.
The code, and probably more up2date manual you can find on Github page: https://github.com/Saur0o0n/MosquitoKiller