A Giant Ammontilus: Creating Spiral Stairs With Mosaics
by doing2much in Outside > Backyard
8051 Views, 128 Favorites, 0 Comments
A Giant Ammontilus: Creating Spiral Stairs With Mosaics
.jpg)
.jpg)
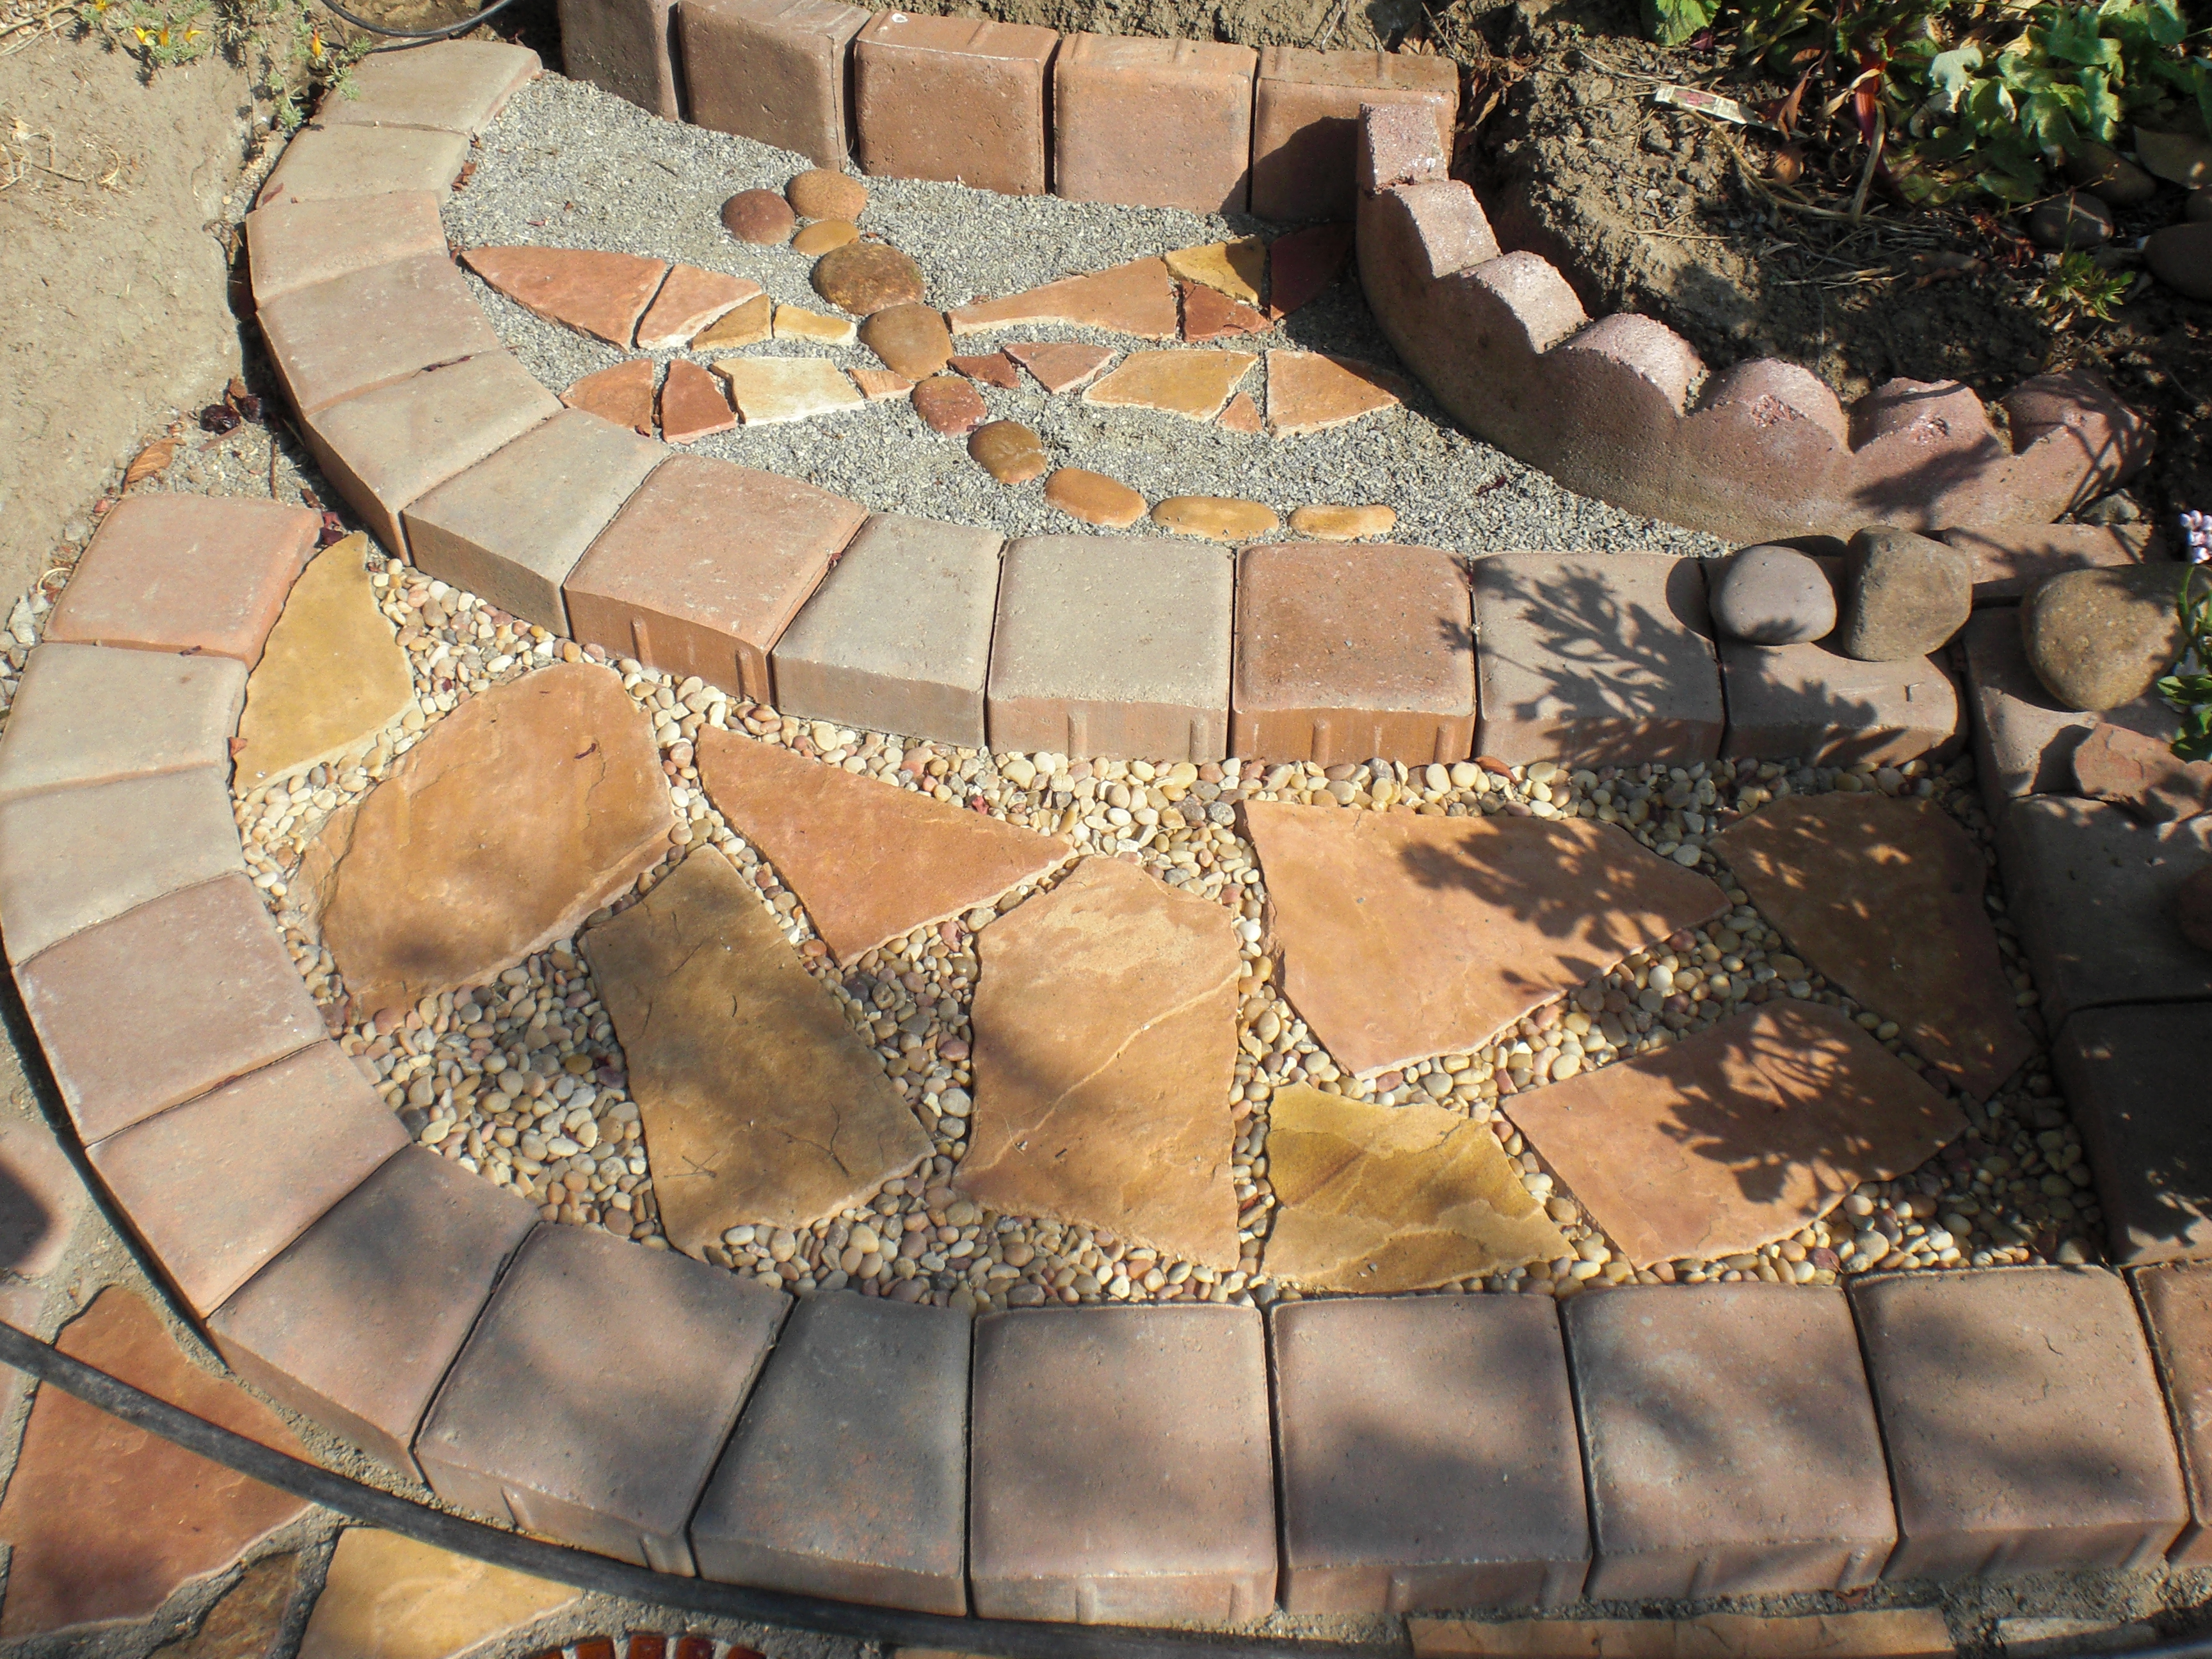
The motivation for this project was due in large part, to a score of flagstone/slate from freecycle. Some shameless canvasing upfront... If you like this instructable, please vote for me in any or all of the Epilog IX, Pro Tips, and Thrash to Treasure categories.:)
Pro Tip # 1 - Freecycle: Keep your eye out for a prize! You can often win ‘bigly,’ if you are patient. But be careful not to go after everything that is being given away or you’ll be drowning in stuff before you know it. I was targeting landscaping material and once I made my killing, I decided to stay away from freecycle - at least for a while...
These stairs are really a take-two project in that the first set of stairs, in which I had used regular patio pavers, were destroyed by tree cutters before I had a chance to concrete them in place! It was professional tree cutters this time, not hubby & Co... The guys found my stairs very convenient and dragged some humongous branches right over them. So they very efficiently took down not only the tree but the stairs as well!
And this project - like most of my other projects - involved PLENTY of trial and error with a little more error than I care to admit... so with any luck, this might save you some trouble, and the time I wasted both doing things wrong and changing my mind about how I really wanted it to look!
Pro Tip # 2- Stay on Target: Be aware of ‘scope creep,’ something I am often guilty of, including on this project...This happens when I decide to change some feature of the project midway through, which calls for revisiting work that was already complete. On the plus side, I’m not a plus size anymore - I lost more than 5 lbs!
Pro Tip # 3 - Follow the 80/20 Rule: For me, this is easier said than done. In the more than 20 years that we’ve been married, my husband has been trying to impress this rule upon me - I’m 80% there...
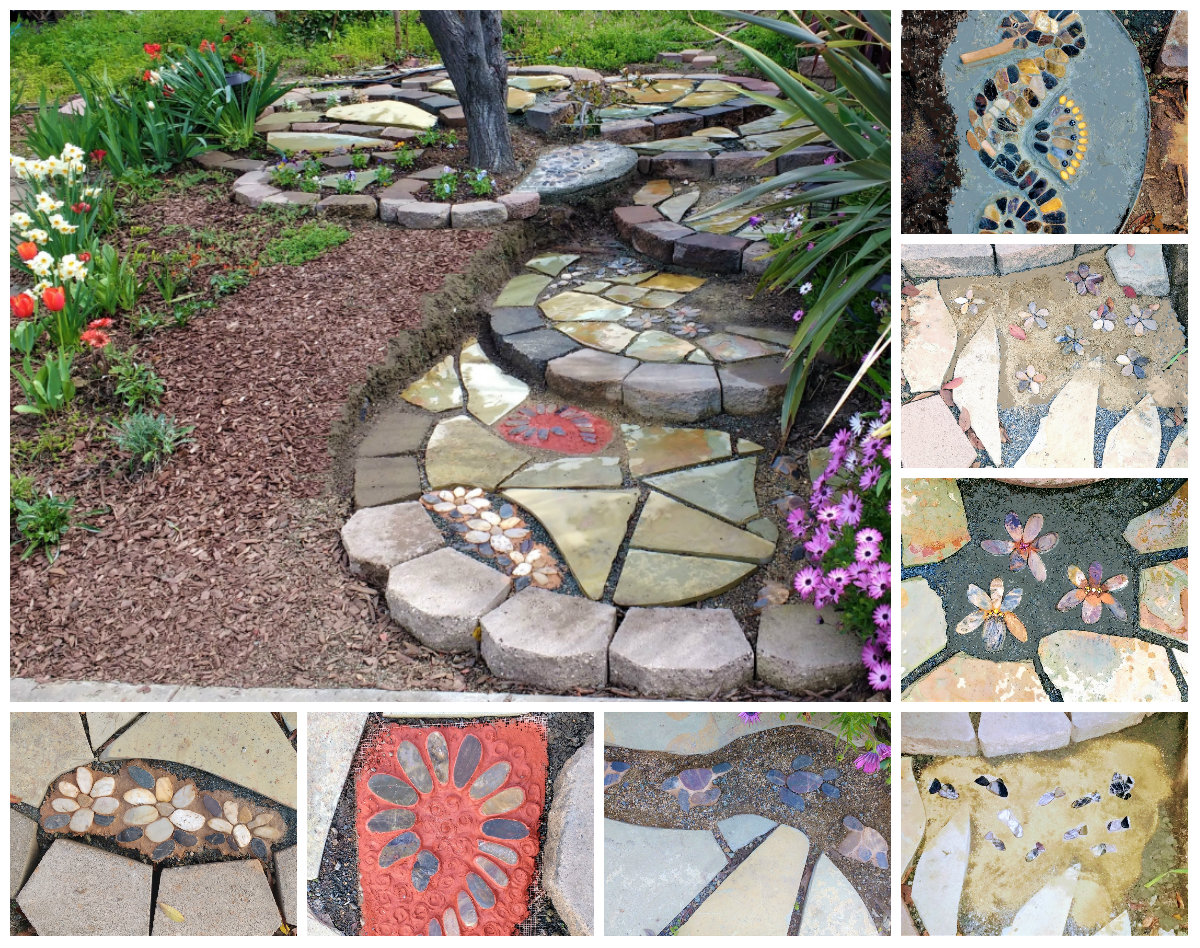
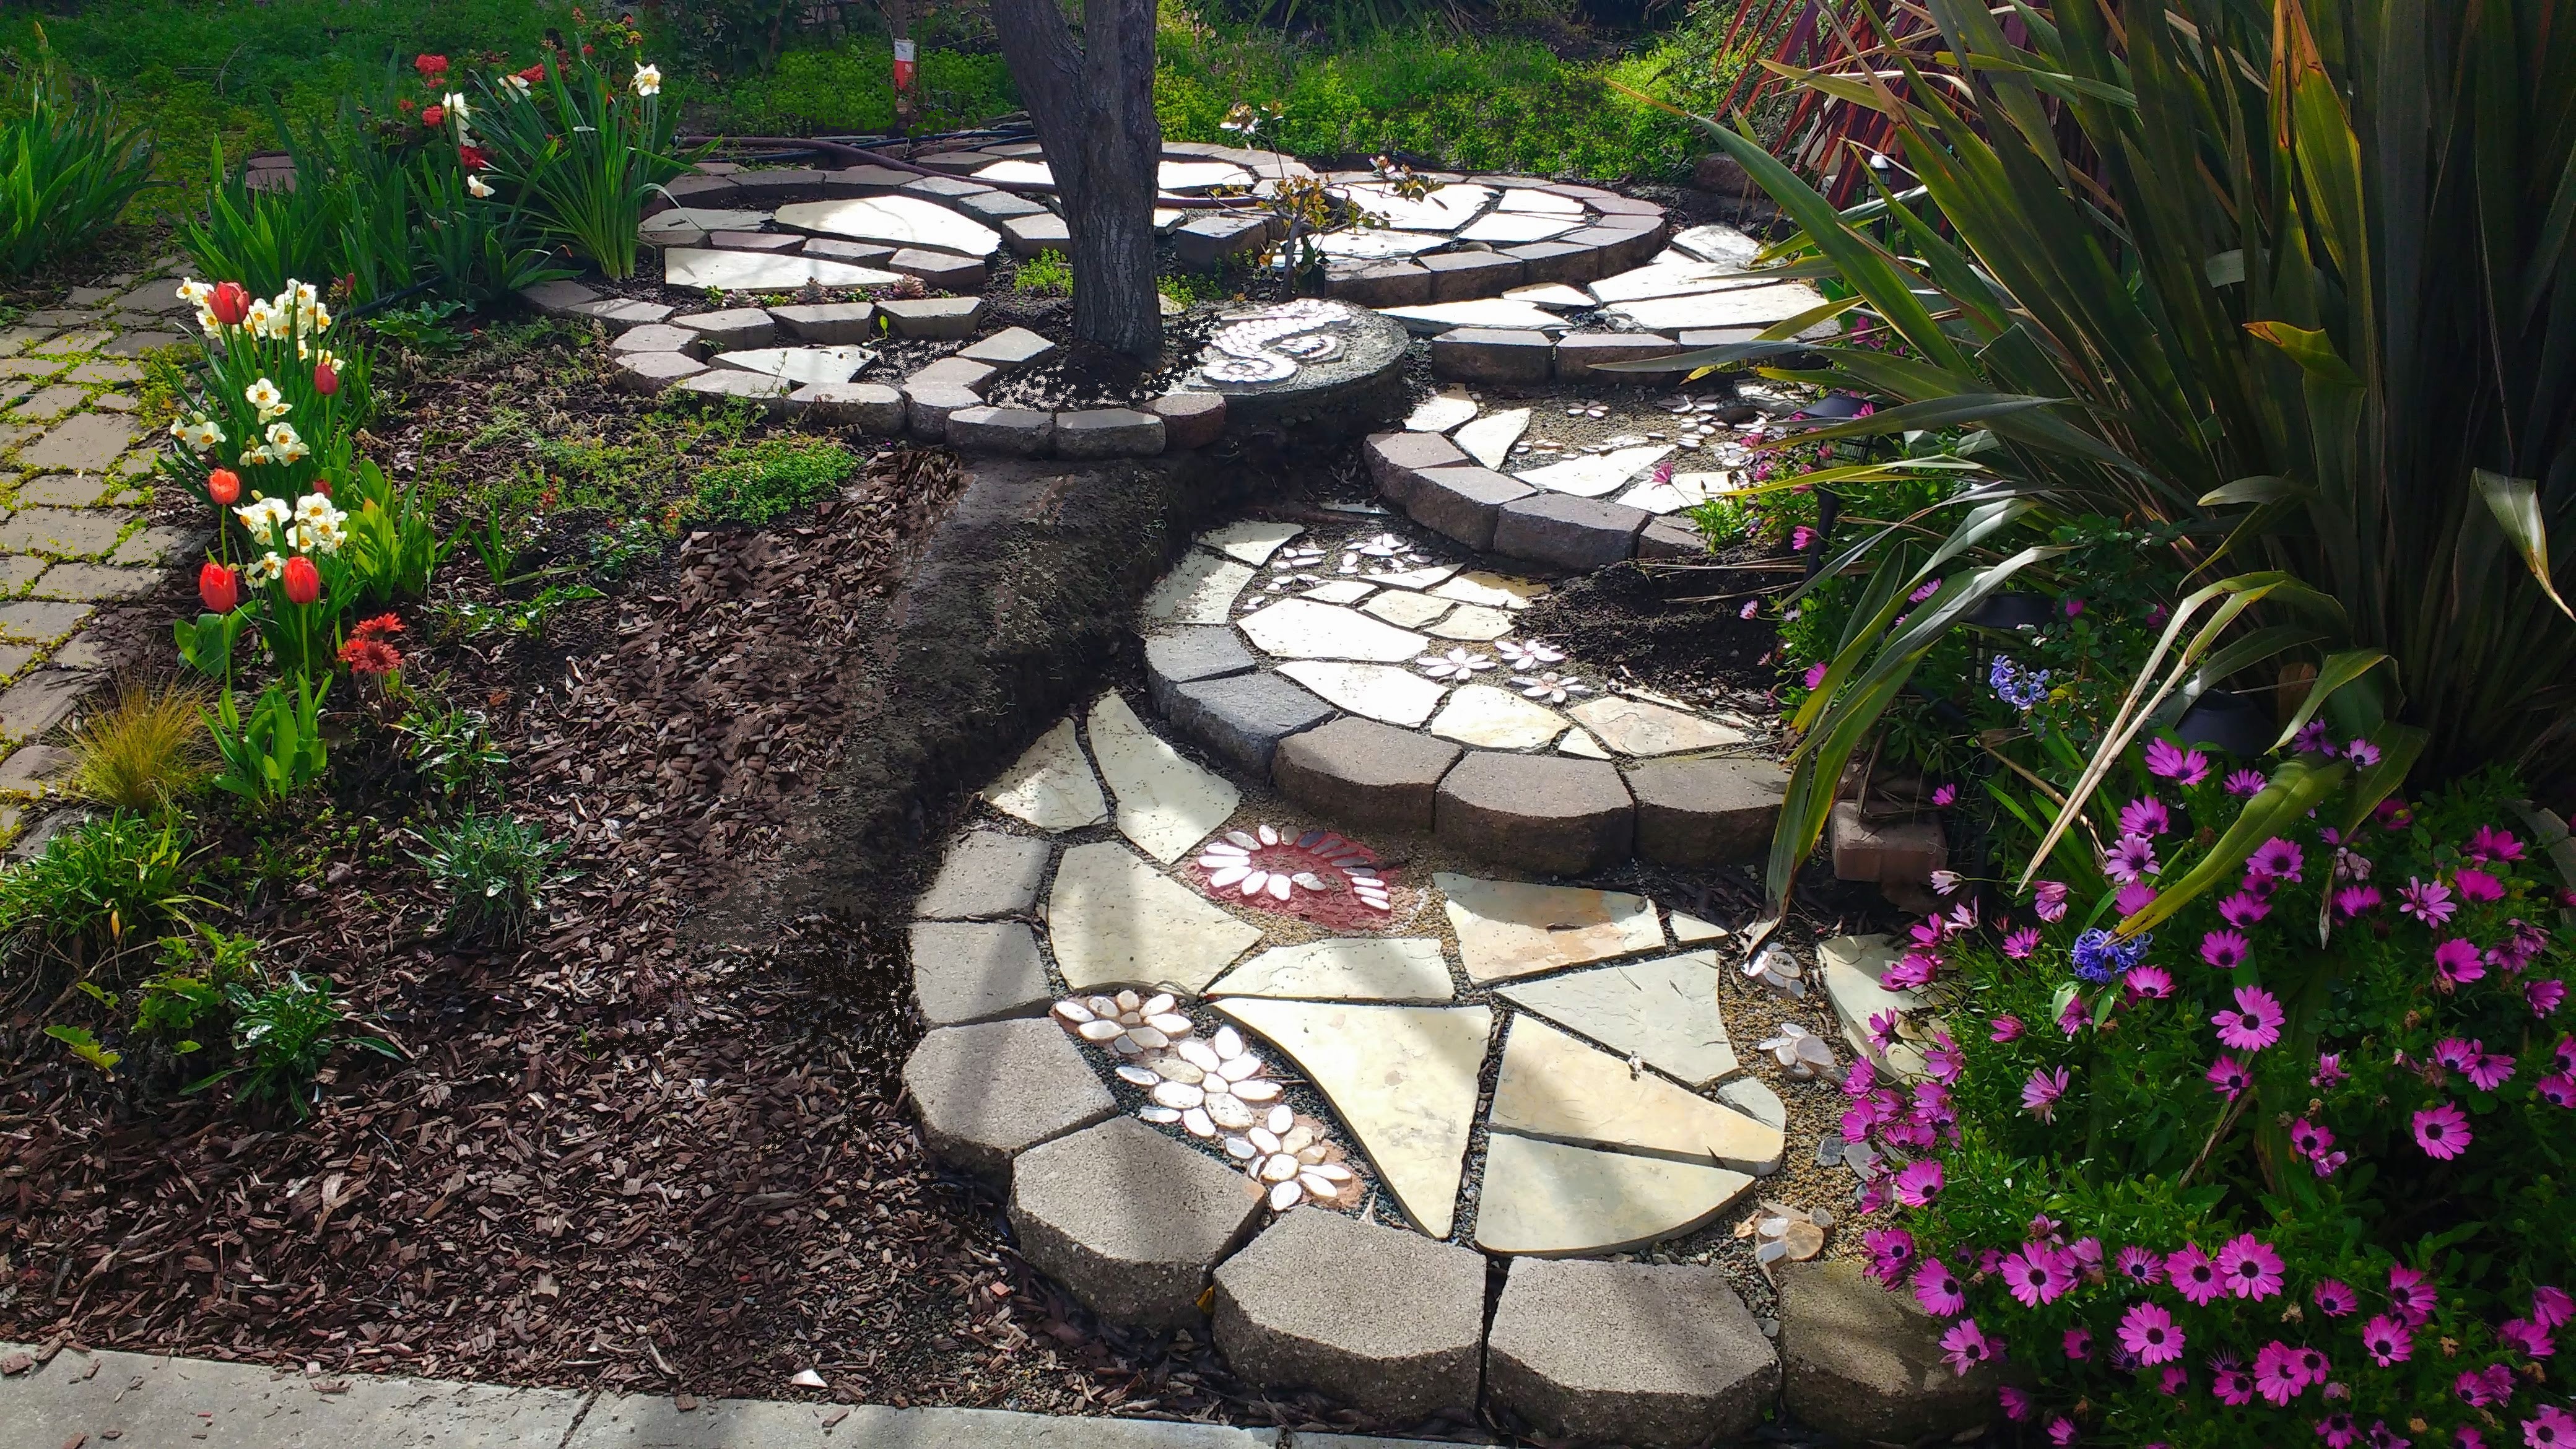
My current creation is a set of spiral stairs which I’ve named My Giant Ammontilus, since it is a cross between an ammonite and a nautilus. Ammonites have convex (outward curving) septa. Just like the edges of my stairs/scallops. However, an ammonite would also be more circular on the whole, with tighter coils and a greater amount of them - which mine is not. My ‘ammontilus’ starts out with an almost straight run in the first few stairs and begins coiling around the 4th stair, more like a Nautilus - which should have concave (inward curving) septa... but who’s checking?
I will deal with this project in two major parts -
Part (A) The construction of the stairs and
Part (B) The creation of the mosaics
Terminology & Building Codes for Part (A)
Terminology:
Stairs or Steps? So as not to create any confusion between procedural steps and physical/structural ones, in this ible I will refer to what would usually be called steps (since they are outdoors) as stairs. For anyone interested, here is a little FYI on Stairs vs Steps.
The Risin’ Sun - Oops! Rise n Run: When referring to slopes, Rise is the vertical distance/length while Run is the horizontal distance/length.
Riser and Tread: In a staircase, Riser is what raises or elevates the stair - equivalent to the Rise in a slope, while Tread is what you tread (step) on. It corresponds to the ‘Run’ of a slope.
Landing is just a very large tread. It is what you land on after climbing up or down a significant number of stairs.
Pro Tip # 4 - Follow Building Codes:
Riser (Rise): While most building codes dictate that steps should have a riser of not more than 7 1/2’’ to 7 3/4’’ most retainer blocks come in 6’’ which is a preferred height anyway. Many codes call for a lower limit of not less than 4’’ for risers. Why? It would have to be because anything less than 4’’ might not be noticed as a step and become a tripping hazard!
Tread (Run): The tread of your stairs should not be less than 10’’ or 11’’ depending on where you live. If the tread of a stair is going to be close to this limit, then the run should be pretty much level. But if the steps are relatively far from each other (longer run/tread) then a slope of not more than 1’’ drop/rise per every 4’ is the standard. This is the basic rule that applies to any landings along an outdoor flight of stairs. The width of your stairs should be no less than 3’ to 4’ and again, this depends on where you live.
Pro Tip # 5 - You Might Need a Permit: If your structure calls for a retaining wall higher than 2’ you typically need a permit - check with your local city/county on regulations. I did not link to any gov. sites since they are different from city to city - forget about from state to state or country to country! But this site Inspectapedia could help answer any questions one might have. And I am sure you would find this article from finehomebuilding.com on 2 Rules for Comfortable Stairs interesting, if not very useful.
Part (A) - Materials, Tools & Gear
For all aspects of this project:
- Your Noodle! It’s the sharpest one in the box - the more you use it, the sharper it gets but I often forget to use mine so it’s not as sharp as it ought to be…
For Protection
- Safety glasses
- Leather gloves
For removing dirt and leveling
- Square shovel
- Pointed shovel/spade
- Pickaxe
For packing the base rock
- Tamper (or flat piece of wood attached to the cross end of a 2x4)
For minor adjustments of block height, nudging them into place, changing their angle after placing them etc.
- Block of wood
- Sledgehammer Note: Don’t use this directly in the blocks (yes, even though they are made of concrete) or you’ll get two for the price of one!
For those inevitable roots:
- Pruner/loppers - &/OR
- Jig-saw- OR
- Chainsaw - if you feel comfortable using one
For making sure the treads of your stairs are level or at the correct angle for drainage:
- Old fashioned trigonometry and a cheapo sprit level - OR
- Cheat and use the internet to get the angle, then use a nifty and free app - OR
- A fancy spirit level that costs more but takes the thinking out of the job for you
For marking the outline of your stairs
- Chalk powder OR
- Landscaping spray paint
Materials:
For stabilizing the area and forming a firm base under the stairs
- Base rock
- Concrete sand
- Gold fines
For the main surface of the stair treads
- Flagstone/slate - I got mine for free from Freecycle
- Mosaic materials - details in Part B
For defining stairs and scallops - Retainer blocks:
- Large Trapezoid: 11.5 in. Marine from Home Depot
- 12-in Red/Charcoal, Gray blend, Tan/brown and Terracotta from Lowes.
- Large Curved: 12 in. Tan Charcoal, 11.5 in.Red Charcoal
- 10’ trapezoid blocks in Pecan, red, buff from Home Depot.
Pro Tip # 6 - You Might Have to Special Order Some Colors of pavers: Here is an interesting fact for any other color freaks like myself. I discovered this after calling up HD to inquire about how/where I could buy some of the other colored blocks displayed on their website. Even though the site shows a bunch of lovely colors, you can only get one (or two) of those depending upon where you live because they try to match them with the local rock available in your region. For instance, in addition to the generic red/charcoal and tan/charcoal, our local stores in California only carry Sierra blend and Marine from the nicer colors, on a regular basis. If you want the ‘exotic’ colors, you have to special order - an entire pallet - and pay through your nose for shipping! Sometimes you randomly find a few pieces of the other colors - possibly special order returns...
Part (A) - Plotting & Planning the Spiral
Plotting:
1) Choose an area on a sloped part of your yard, where you’d like to construct your spiral stairs.
2) If you do not already have some sort of focal point in the desired location, that can serve as the center of your spiral, then plan on creating one. I used an ornamental plum which happened to be in the right place.
Pro Tip # 7: Call Your Utilities!
This would be a good time to call 811 - or create a web ticket - so your utility members can come out and mark the location of their utilities on your property.
Planning: This one is a “Do as I say, not as I did” piece of advice since mine kept evolving as I went along…The idea of creating a spiral only struck me when I was halfway up the slope - probably around the 4th original stair! That meant I had to go back and pretty much start from scratch with more digging, leveling and compacting since my new plan called for wider stairs towards the base.
You choose how you want to plan your spiral:
- Manually with paper and pencil, or directly on the dirt
- Computer-aided using Sketchup, Autodesk or some other form of CAD.
I will only be addressing manual methods here.
Decide on the following:
A) Where, relative to your focal point, you want the (innermost corner of) your lowest stair to be positioned.
- Since we are starting from the base, we will label this as the 1st stair.
- This will also be the largest stair in the spiral.
- This distance represents the largest (outermost) radius of the spiral.
B) How deep you want this lowest stair to be. Remember that the treads should be no less than 10’’ to 11’’ deep
C) How wide you want this stair to be. Remember also that stairs should be not much less than 3’ to 4’ wide. Since the stairs will be getting successively smaller, it is better to make this one considerably wider than 4’, if you have the space to do so. Mine is implied because it blends into the landscaping.
D) How deep you want the smallest scallop (these are not really stairs) of the spiral to be. This distance represents the smallest (innermost) radius of the spiral when designing via the Fibonacci method.
Part (A) - Designing the Spiral
The measurements from your planning step will be used to design the spiral. There are several ways that one could generate the spiral depending on whether you have an existing/fixed focal point or its location is flexible. As mentioned in the previous step, this can be done on paper, directly on the ground, or using some form of CAD that you are familiar with. However, I am only addressing two of the main manual methods here.
Pro Tip # 8 - Make it Pleasing to the Human Eye: If you would like to ensure that your spiral will be pleasing to most everyone’s eye, then plan on a Golden/Fibonacci Spiral. To be technical, these two spirals originate from separate but related concepts which are best explained here by Dr. Math for anyone who might be interested: Golden Ratio vs Fibonacci Sequence. For all practical purposes, we will treat them as one and the same or at least on par with one another.
The main functional difference between the two methods is the following:
- If you already have a pre-existing focal point for the center of your spiral stair structure, then you may want to use the Fibonacci method of creating the spiral.
- If the exact location of your focal point is flexible, then you might want to use the Golden Rectangle method
The main practical difference between the methods of generating the two is the following:
- To use the Fibonacci Sequence method, you start with one small square near the focal point and keep expanding by adding more squares in a spiral fashion
- To use the Golden Rectangle method, you start with one gigantic rectangle that incorporates the focal point and keep dividing it up into squares and rectangles.
Yet another method uses different values of radii from the focal point. These are square roots of consecutive numbers starting with a unit length (Square Root Spiral). This method generates not just a spiral but the stairs as well. We will not be addressing this method here since it results in a lot more stairs than one would probably want/need in a landscape. It could, however, be used for stairs leading down a deck.
Part (A) - Fibonacci Spiral
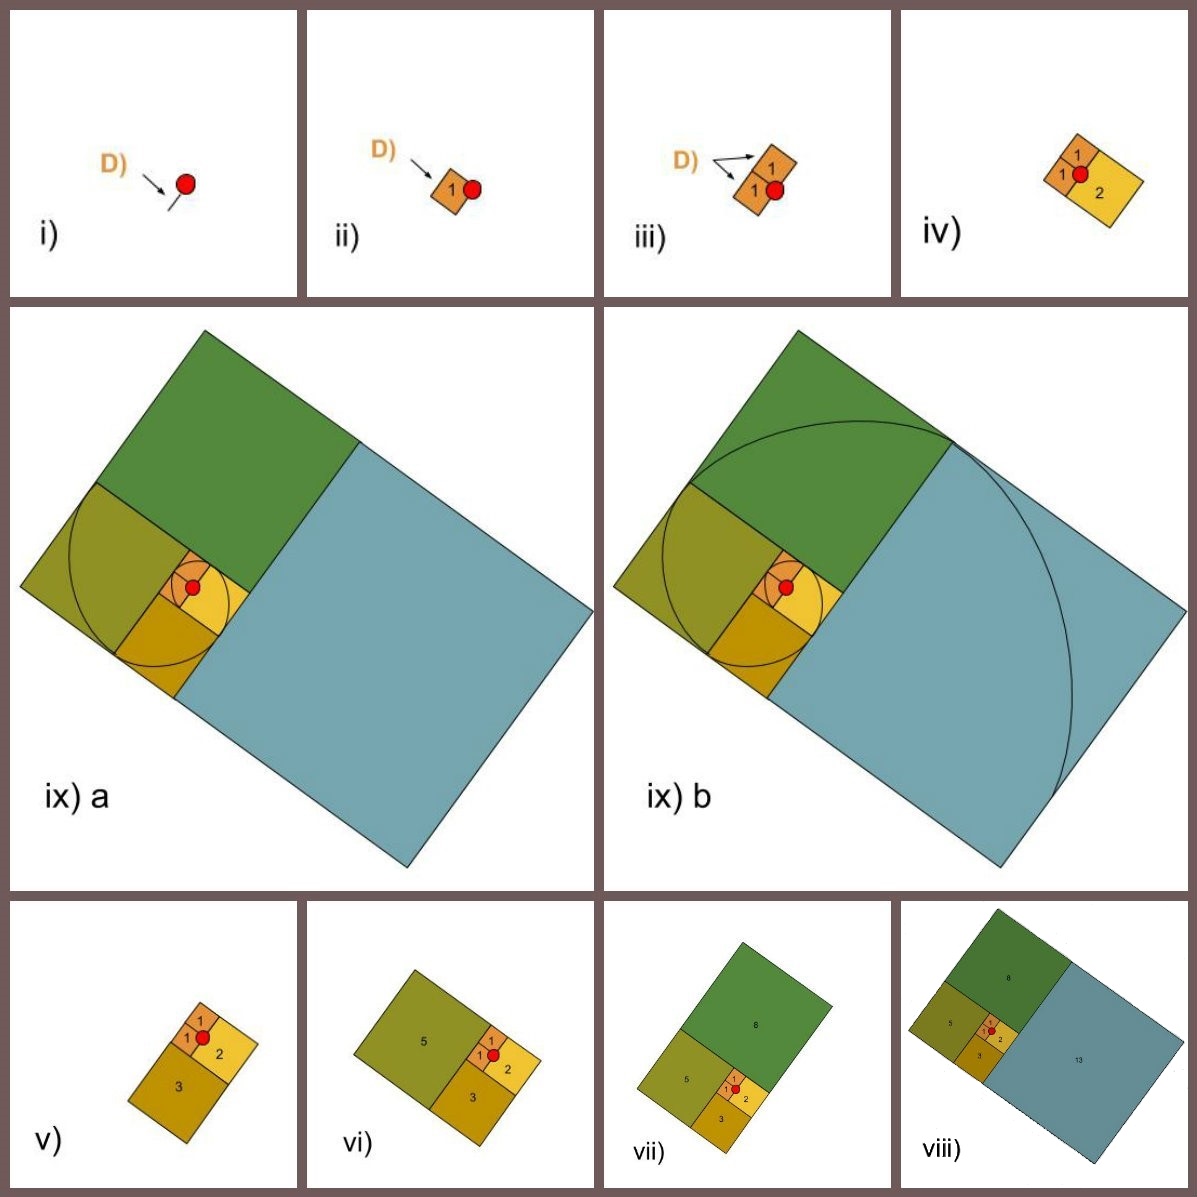
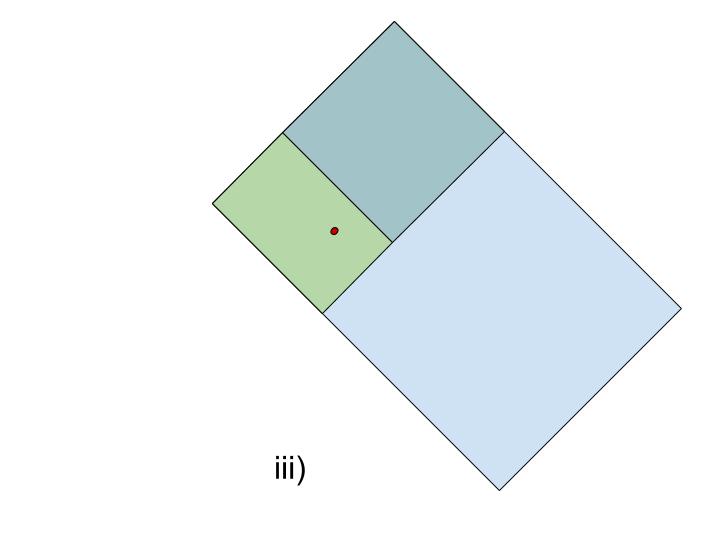
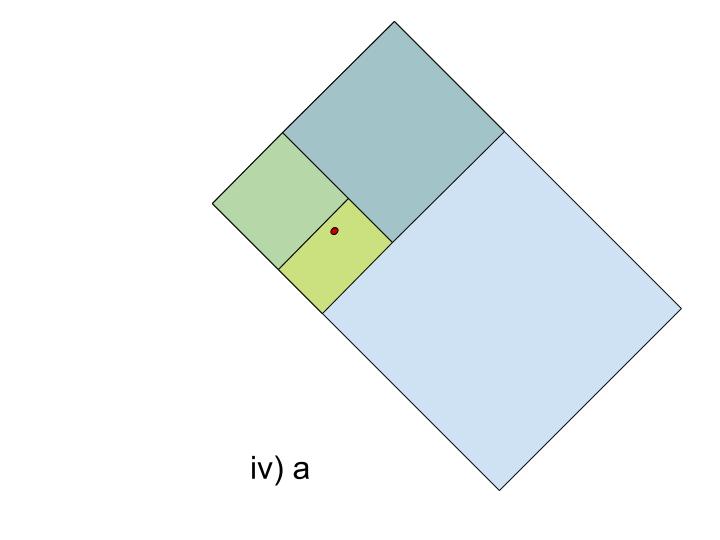
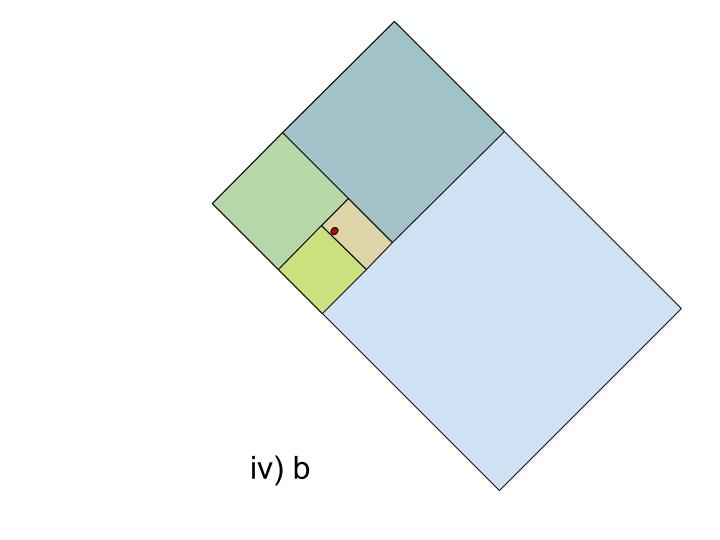
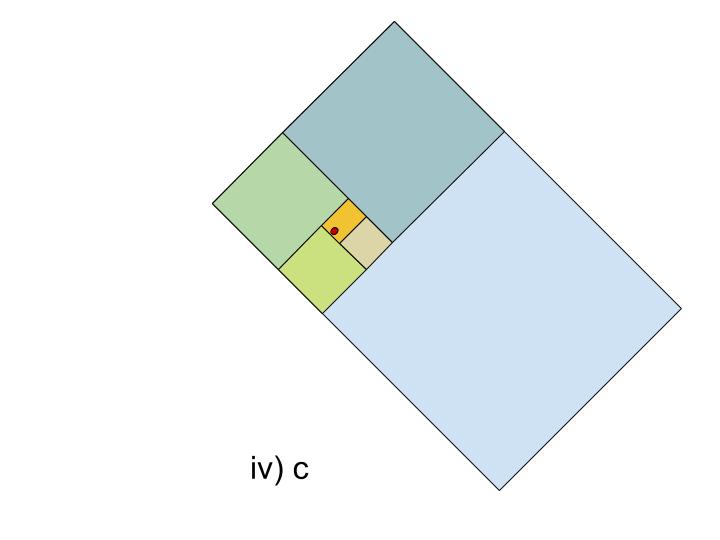
The Fibonacci Spiral is best used if you have an existing focal point. You could use either the Fibonacci Spiral_e version or the Fibonacci Spiral_on graph paper to make your plan. Alternatively, you could use my version, which is pretty much the same thing but directly on location. For this, you would do the following (refer to corresponding labeled diagrams):
i) Use measurement D) from planning (above) to do the following:
- Assume (or imagine) that you are standing on a horizontal line along the curb, walkway or street at the bottom of the slope, looking up towards your focal point
- Mark the length D) from the center of your focal point (may have to partially estimate, if it is a tree) such that it makes an angle to the horizontal line that you are standing on
- Anything between 45 deg and 60 deg should be good
- Mark this entire length in the dirt as a continuous line, on your desired side of the focal point
- You can inscribe it with some sharp instrument, or by using chalk powder or landscaping paint
ii) With the line of length D) that you just drew serving as one of the sides, generate a square on the dirt. The numbers on the squares represent the Fibonacci series.
iii) Repeat step ii) with another identical square adjacent to the previous one, directly above it.
iv) Now draw a square with side = D) x 2 and sitting adjacent to the two smaller squares of measure D)
v) Next, draw another square with side = D) x 3. This sits adjacent to one of the two smaller squares as well as to the bigger square from the previous step
vi) Your next square (labeled number 5) will be aligned with the two smallest squares (from the first step) as well as the biggest square (from the previous step).
vii) Are you starting to get the hang of this yet? Your sixth square (labeled number 8) will be aligned with one of the two smallest squares, flanked by the second sized square and the now biggest square from the previous step.
viii) You keep adding squares in a spiral manner until you cover the area that you desire and (one corner of) your last square is directed downwards.
ix) Draw your spiral. To reduce visual clutter, I’ve removed the numbers representing the Fibonacci sequence from all squares.
You now have the outer edge of your spiral. Draw the inner edge based on how wide you want or need your steps to be. Remember that they should be 3’ at a minimum. Since the stairs will be getting successively smaller, it is better to make this one a bit wider than 4’, if you have the space to do so. Mine is implied because it blends into the landscaping.
Part (A) - Golden Rectangle Spiral
.jpg)
.jpg)
.jpg)
a.jpg)
b.jpg)
c.jpg)
a.jpg)
b.jpg)
c.jpg)
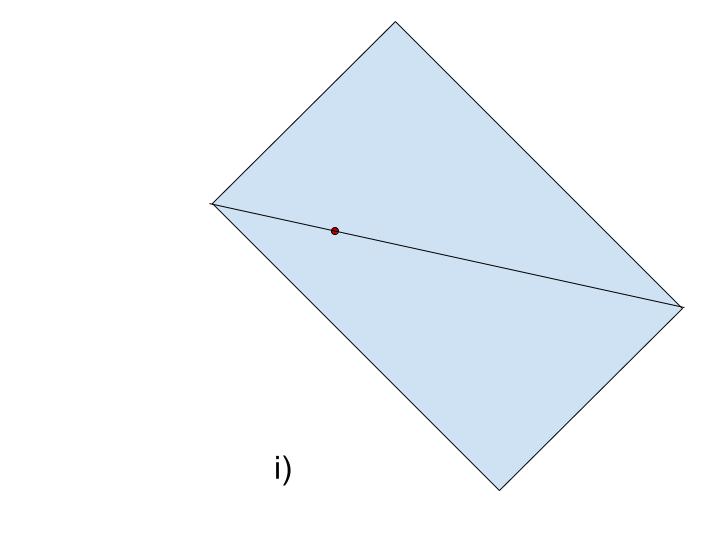
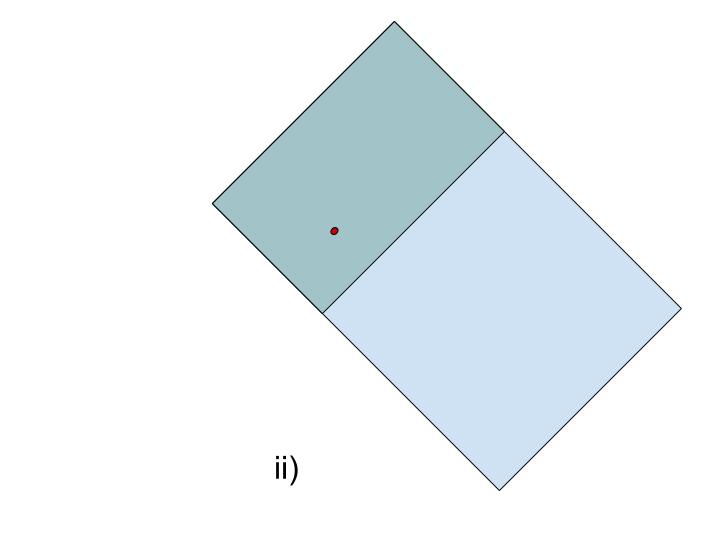
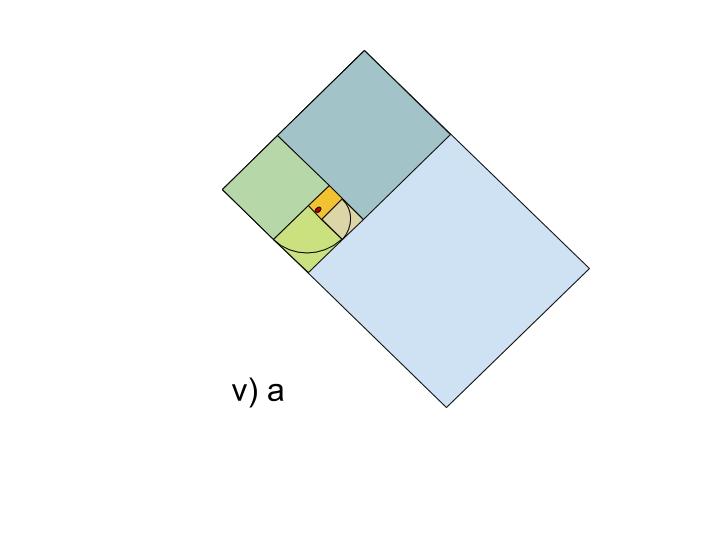
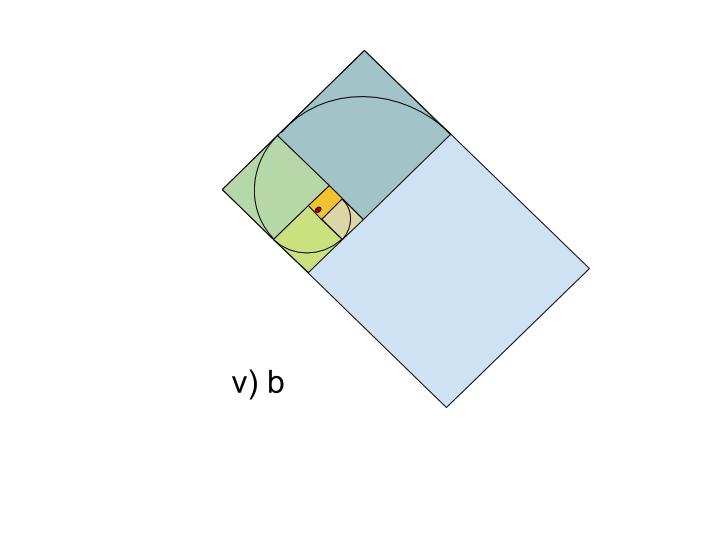
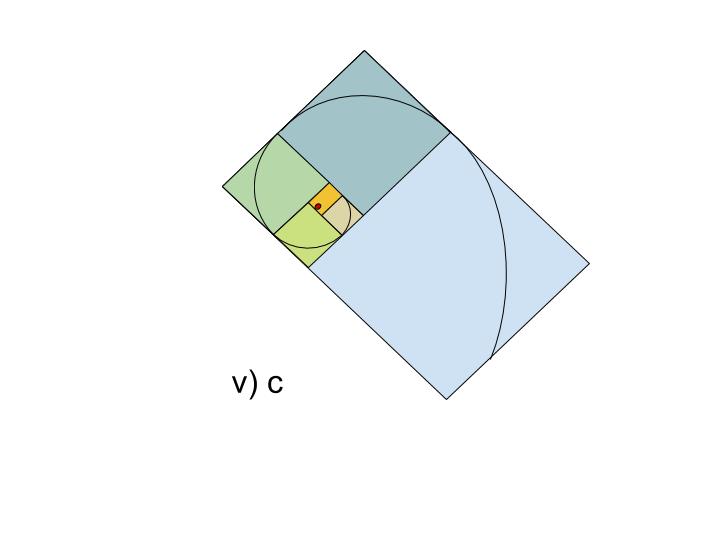
If the location of your focal point is somewhat flexible but the position of your largest stair is fixed, then you’ll probably want to use this method: It results in what is technically a Golden Spiral since we will be starting with a Golden Rectangle. You can get as fussy about the dimensions as you choose to but for our purposes, it will suffice if the sides of your rectangle are in a 1: 1.6 ratio.
i) Start by inscribing a very large rectangle in a 1: 1.6 ratio, over the entire area of your project. Your rectangle should be a 45 deg angle to the curb with one diagonal intersecting the general area of your focal point.
ii) Draw a line across this rectangle to divide it into a square and a smaller rectangle such that the smaller rectangle is towards your focal point.
iii) Next, divide this smaller rectangle into another smaller square and an even smaller rectangle such that this smaller rectangle is towards your focal point.
iv) Keep dividing the subsequent rectangles that form, into increasingly smaller squares and rectangles. Remember - the new square will always be towards the outside with the new rectangle towards the inside.
v) When you think you have enough ‘coils’ of squares and rectangles, you can draw your spiral just as we did in the previous case (using the Fibonacci method), by connecting the corners of the squares via curved lines.
Part (A) - Ground Work for My Giant Ammontilus
Pro Tip # 9 - Getting Started: Start from the lowest level of stairs and move up the incline
Pro Tip # 10 - on Excavation: When removing dirt, it is better to remove less than you think you need to and then do another round, if necessary. Why? If you remove too much then you will not only have to put it back, but you’ll have to compact it as well!.
This is how I created my Ammontilus. As mentioned earlier, I had not planned on this particular form - it just kinda evolved. (Seeing as you’ve read this far, I am assuming you also plan on properly designing your spiral.before actually starting the build.)
The leading edges on the first couple of stairs are pretty much parallel to each other with the spiral truly manifesting only around the 3rd/4th stair. Once I reached the 3rd stair, which was reasonably close to my focal point (the tree), I started creating the spiral using the following method:
- First I measured the ‘radius’ from my focal point (the tree) outwards to the inner edge of the 3rd stair.
- Then I laid down a scrap piece of plumbing pipe to define the radius (a dowel or scrap piece of wood could also have worked)
- Keep in mind that the focal point will always appear slightly off-center at any angle from which it is viewed because we are dealing with a spiral. That means the radius itself keeps getting progressively smaller.
- From here on, I kept reducing the radius by about 1’’ for each successive stair. Remember that the depth and width of the stairs is also shrinking. I didn’t use any formula for this part, I just eyeballed the position of the stairs and kept adjusting the blocks until I felt it looked right to me.
- Since the treads on all these stairs were much greater than 11’’ (more like landings), they needed to be sloped at the angle referred to under building codes.
Laying Down of Base Materials:
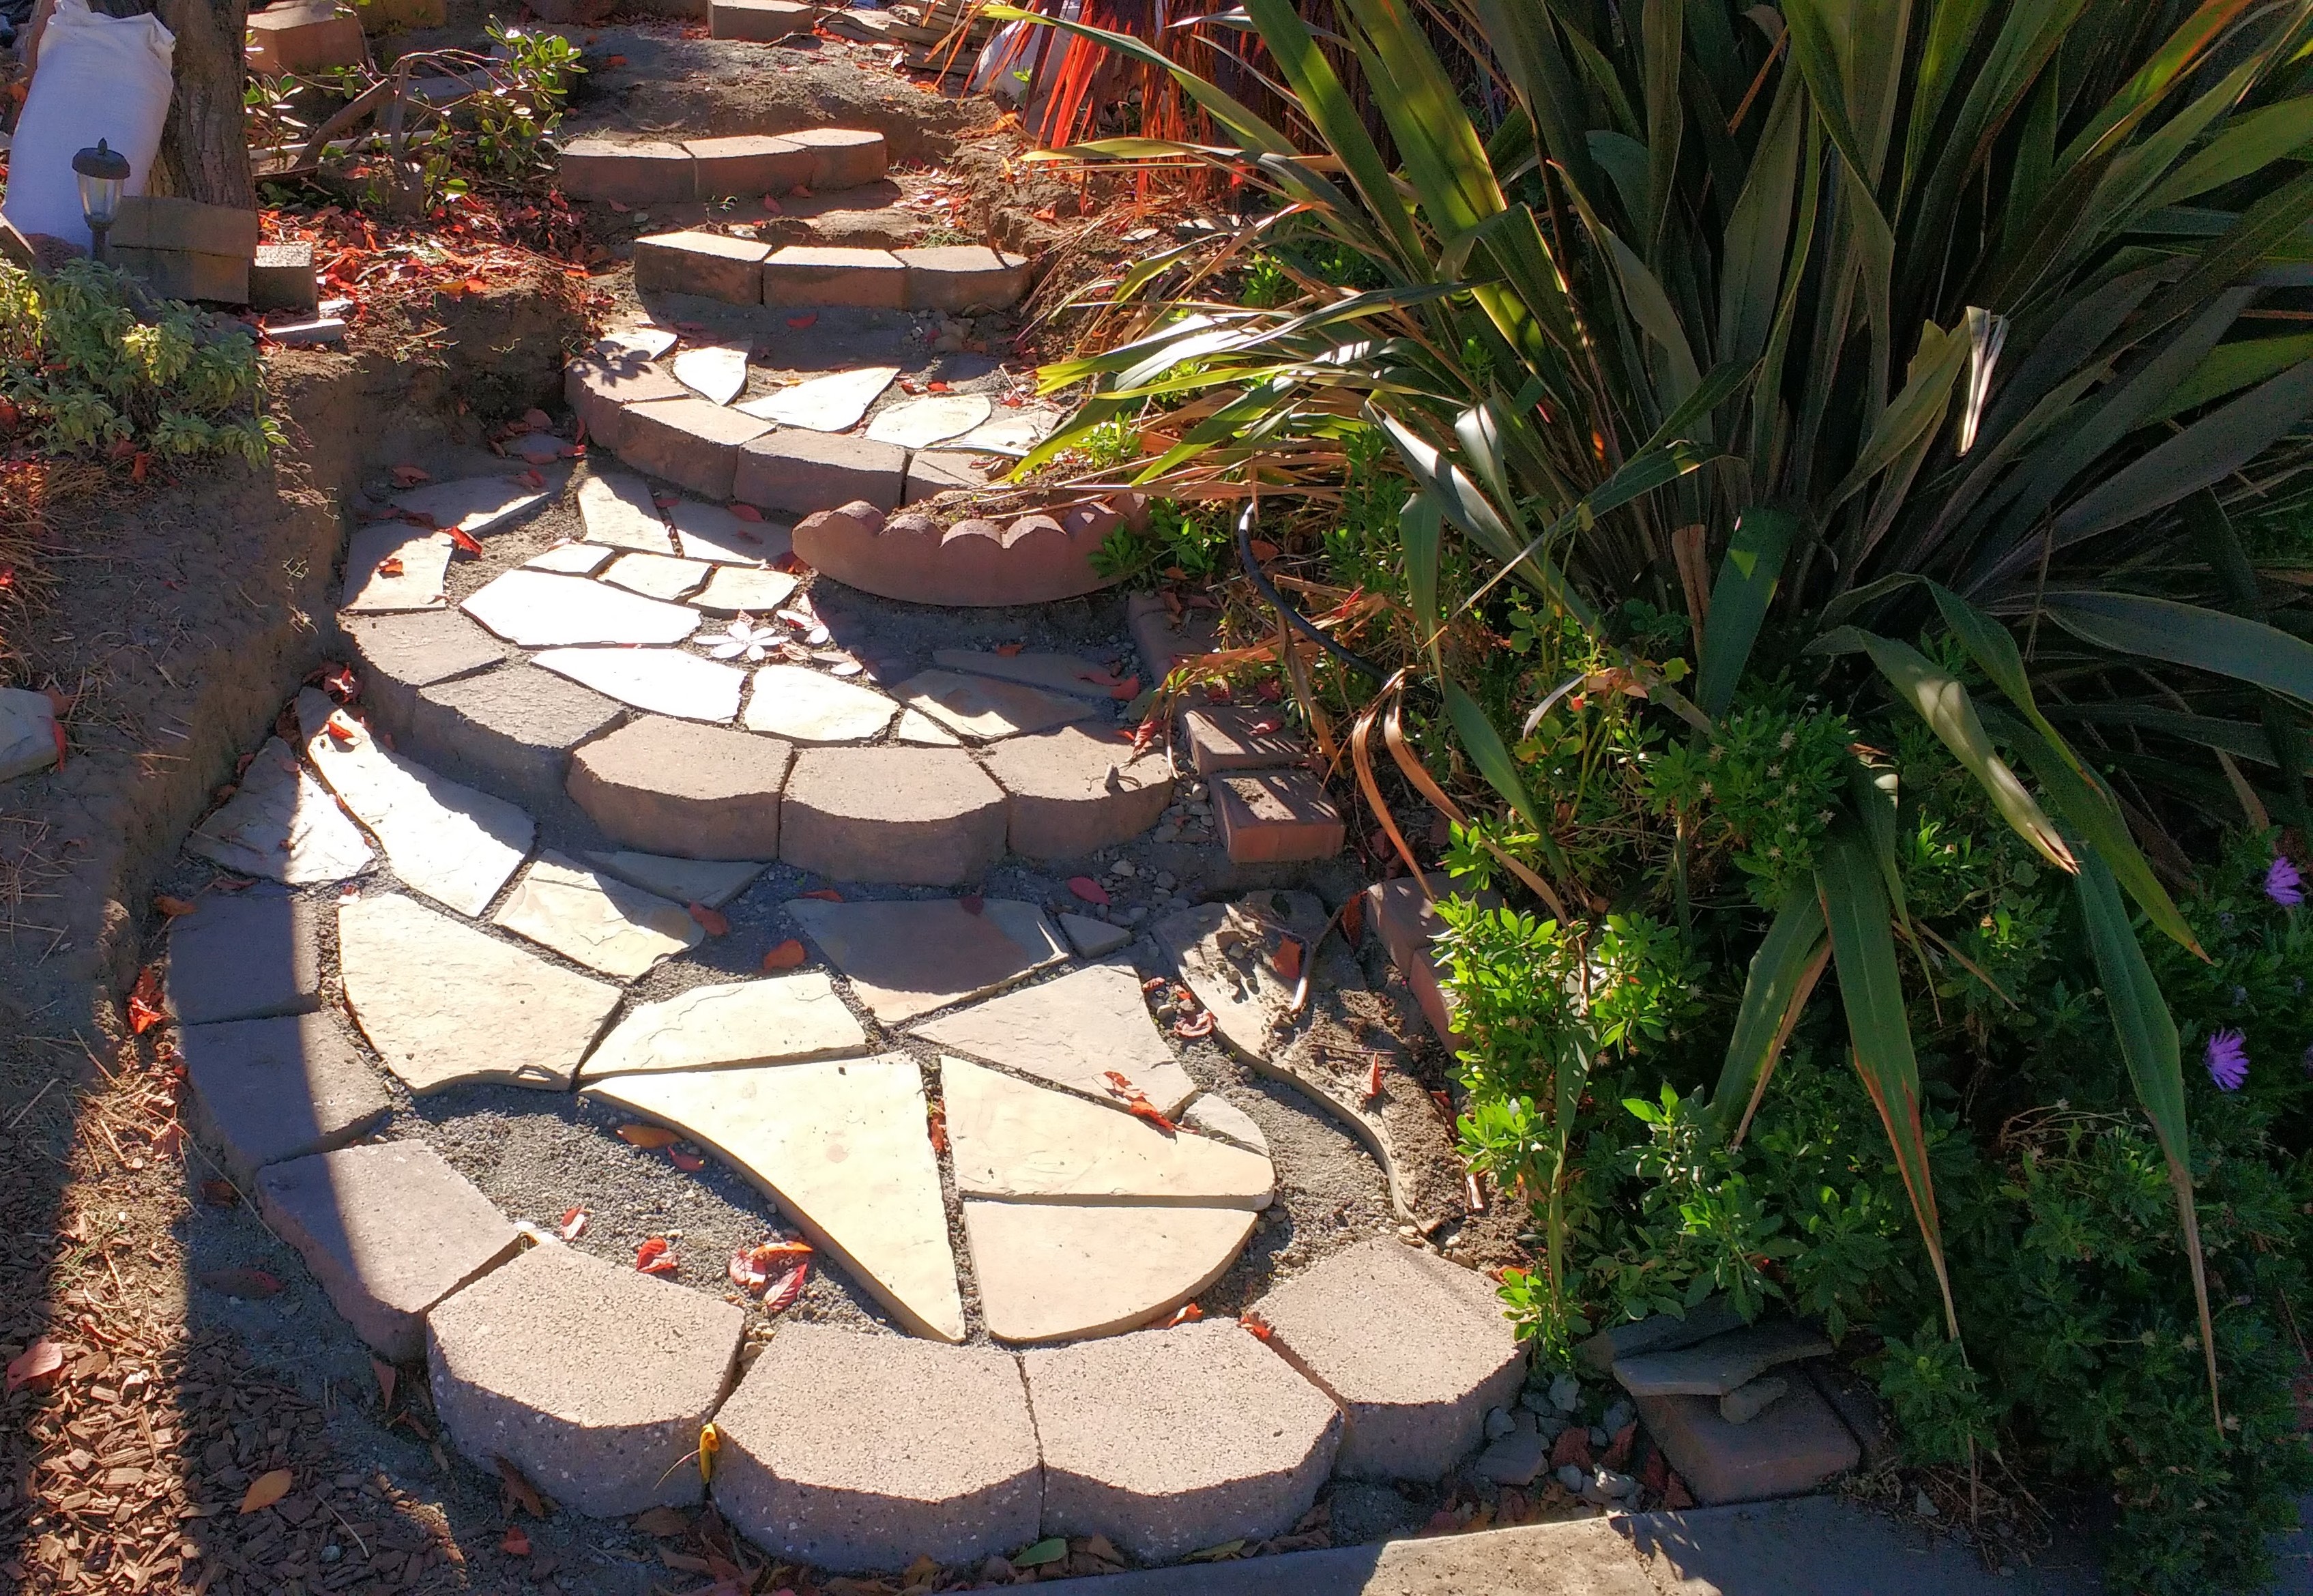
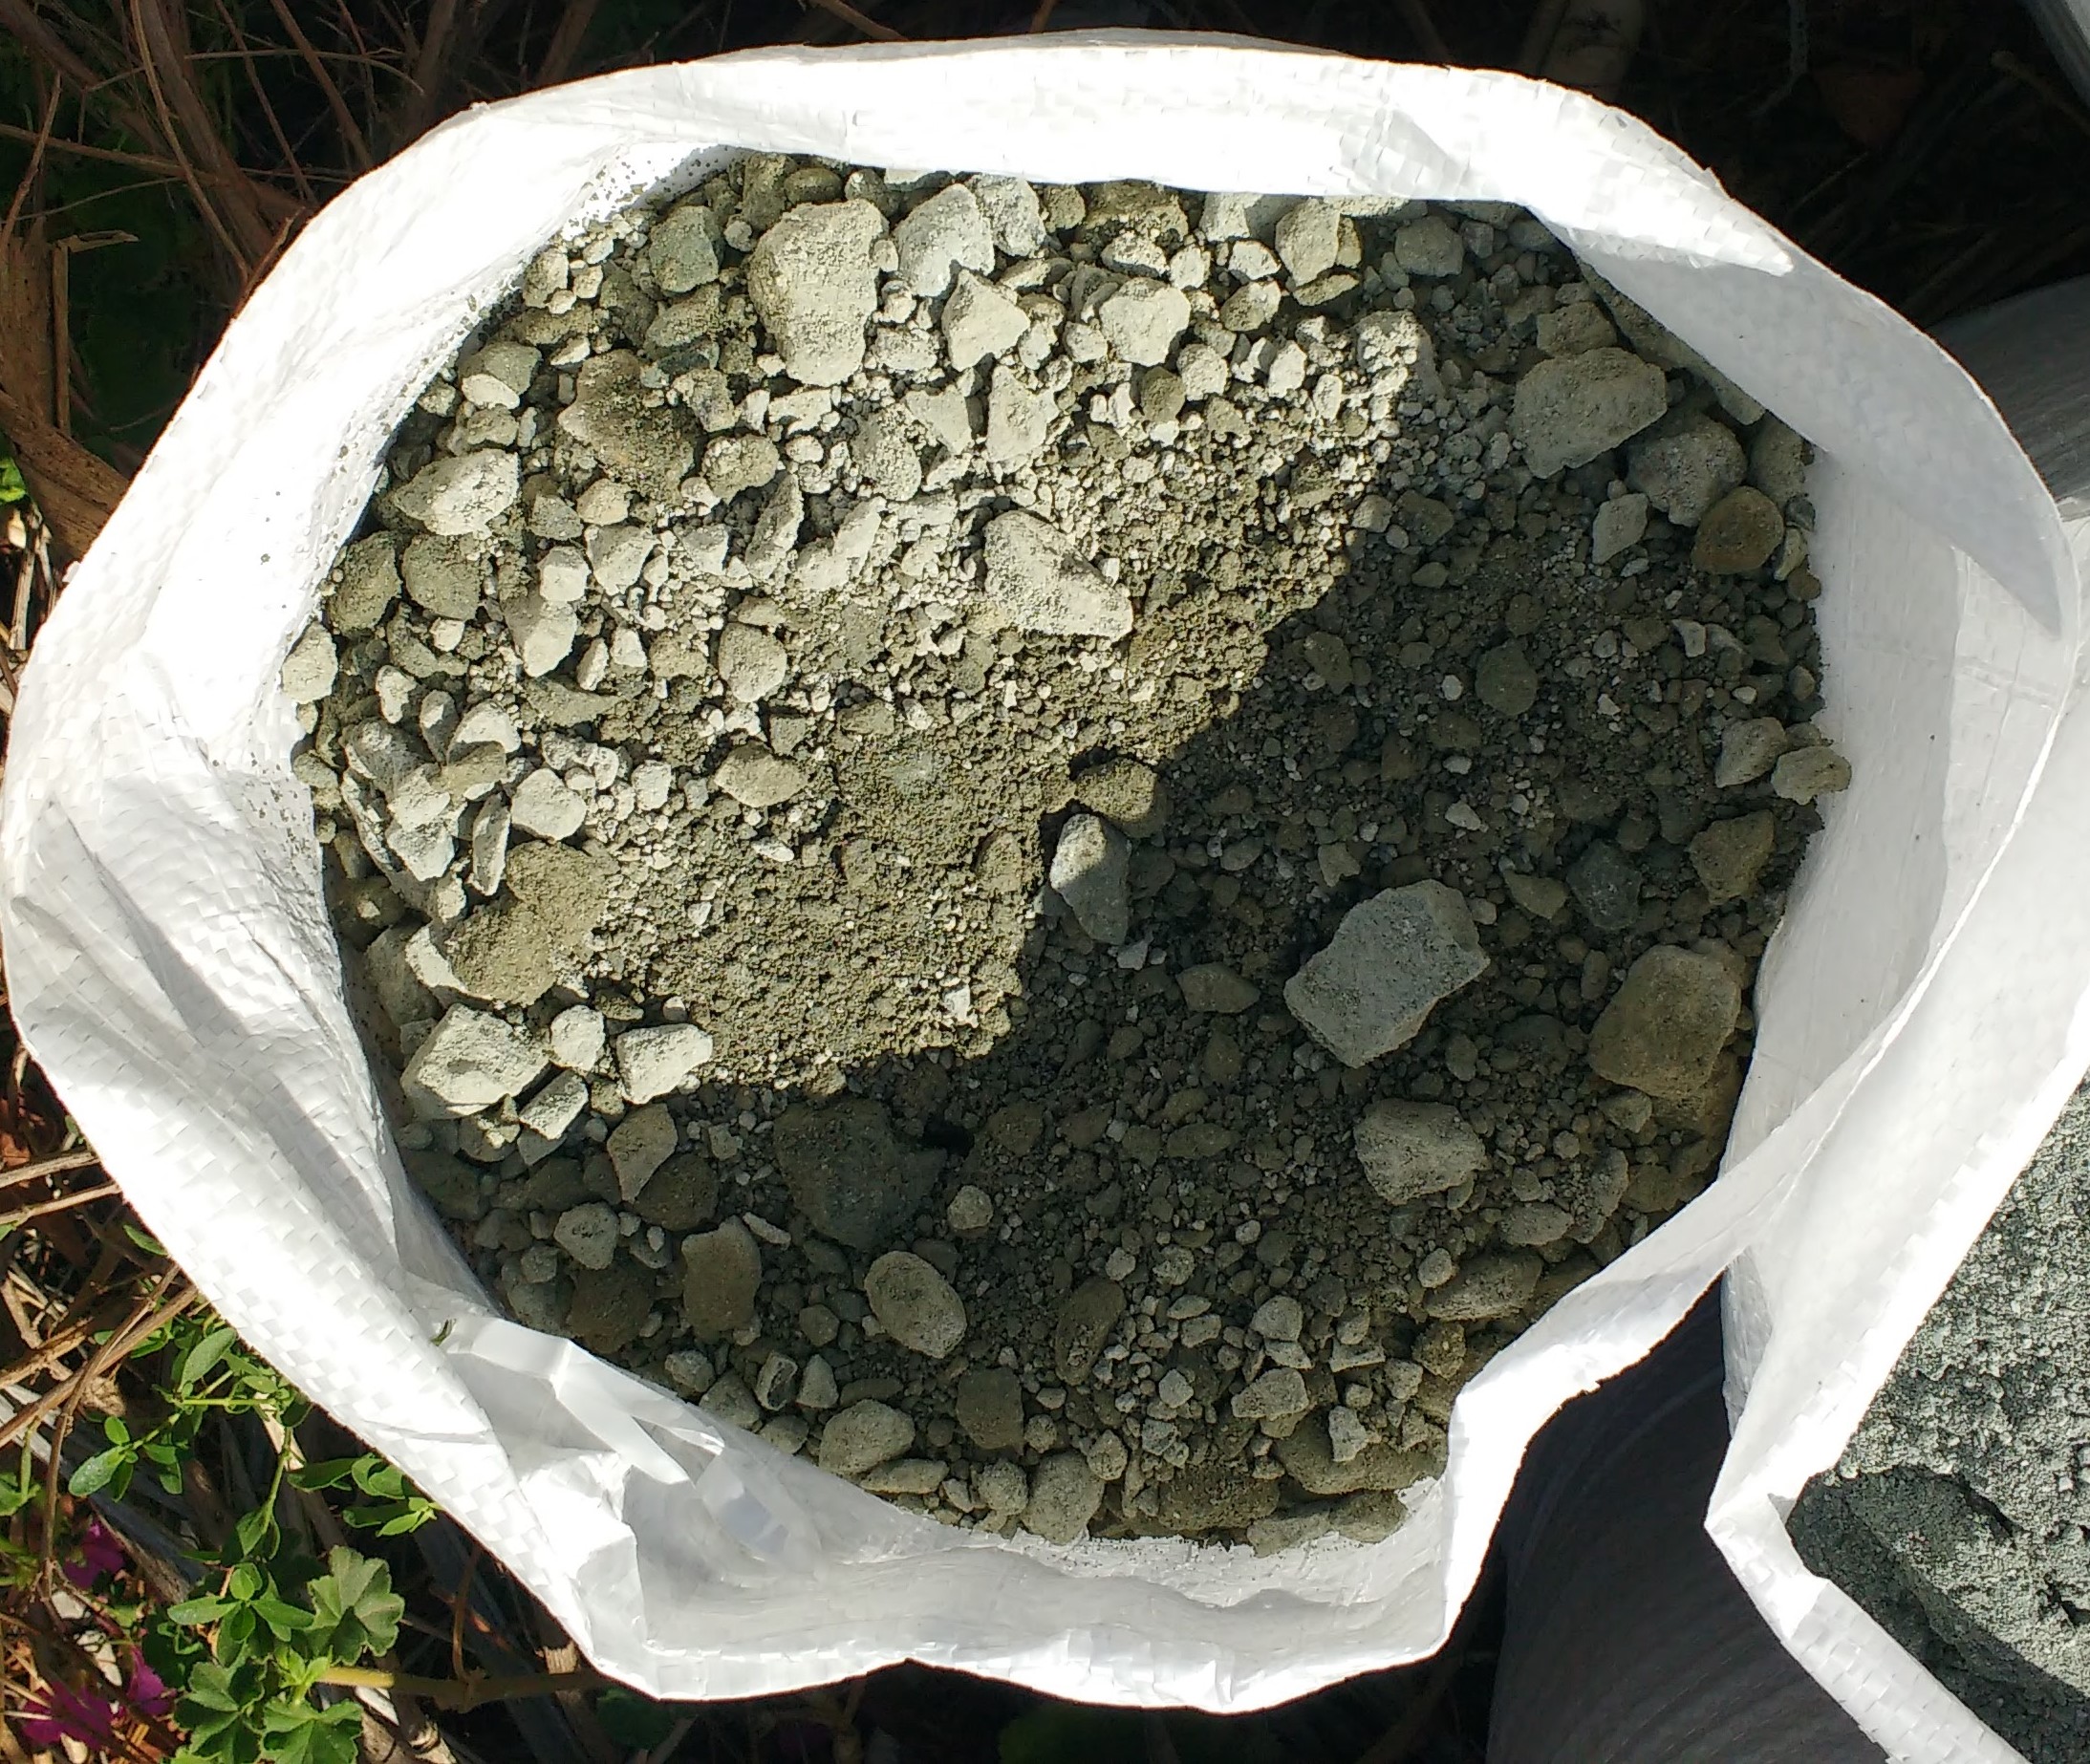
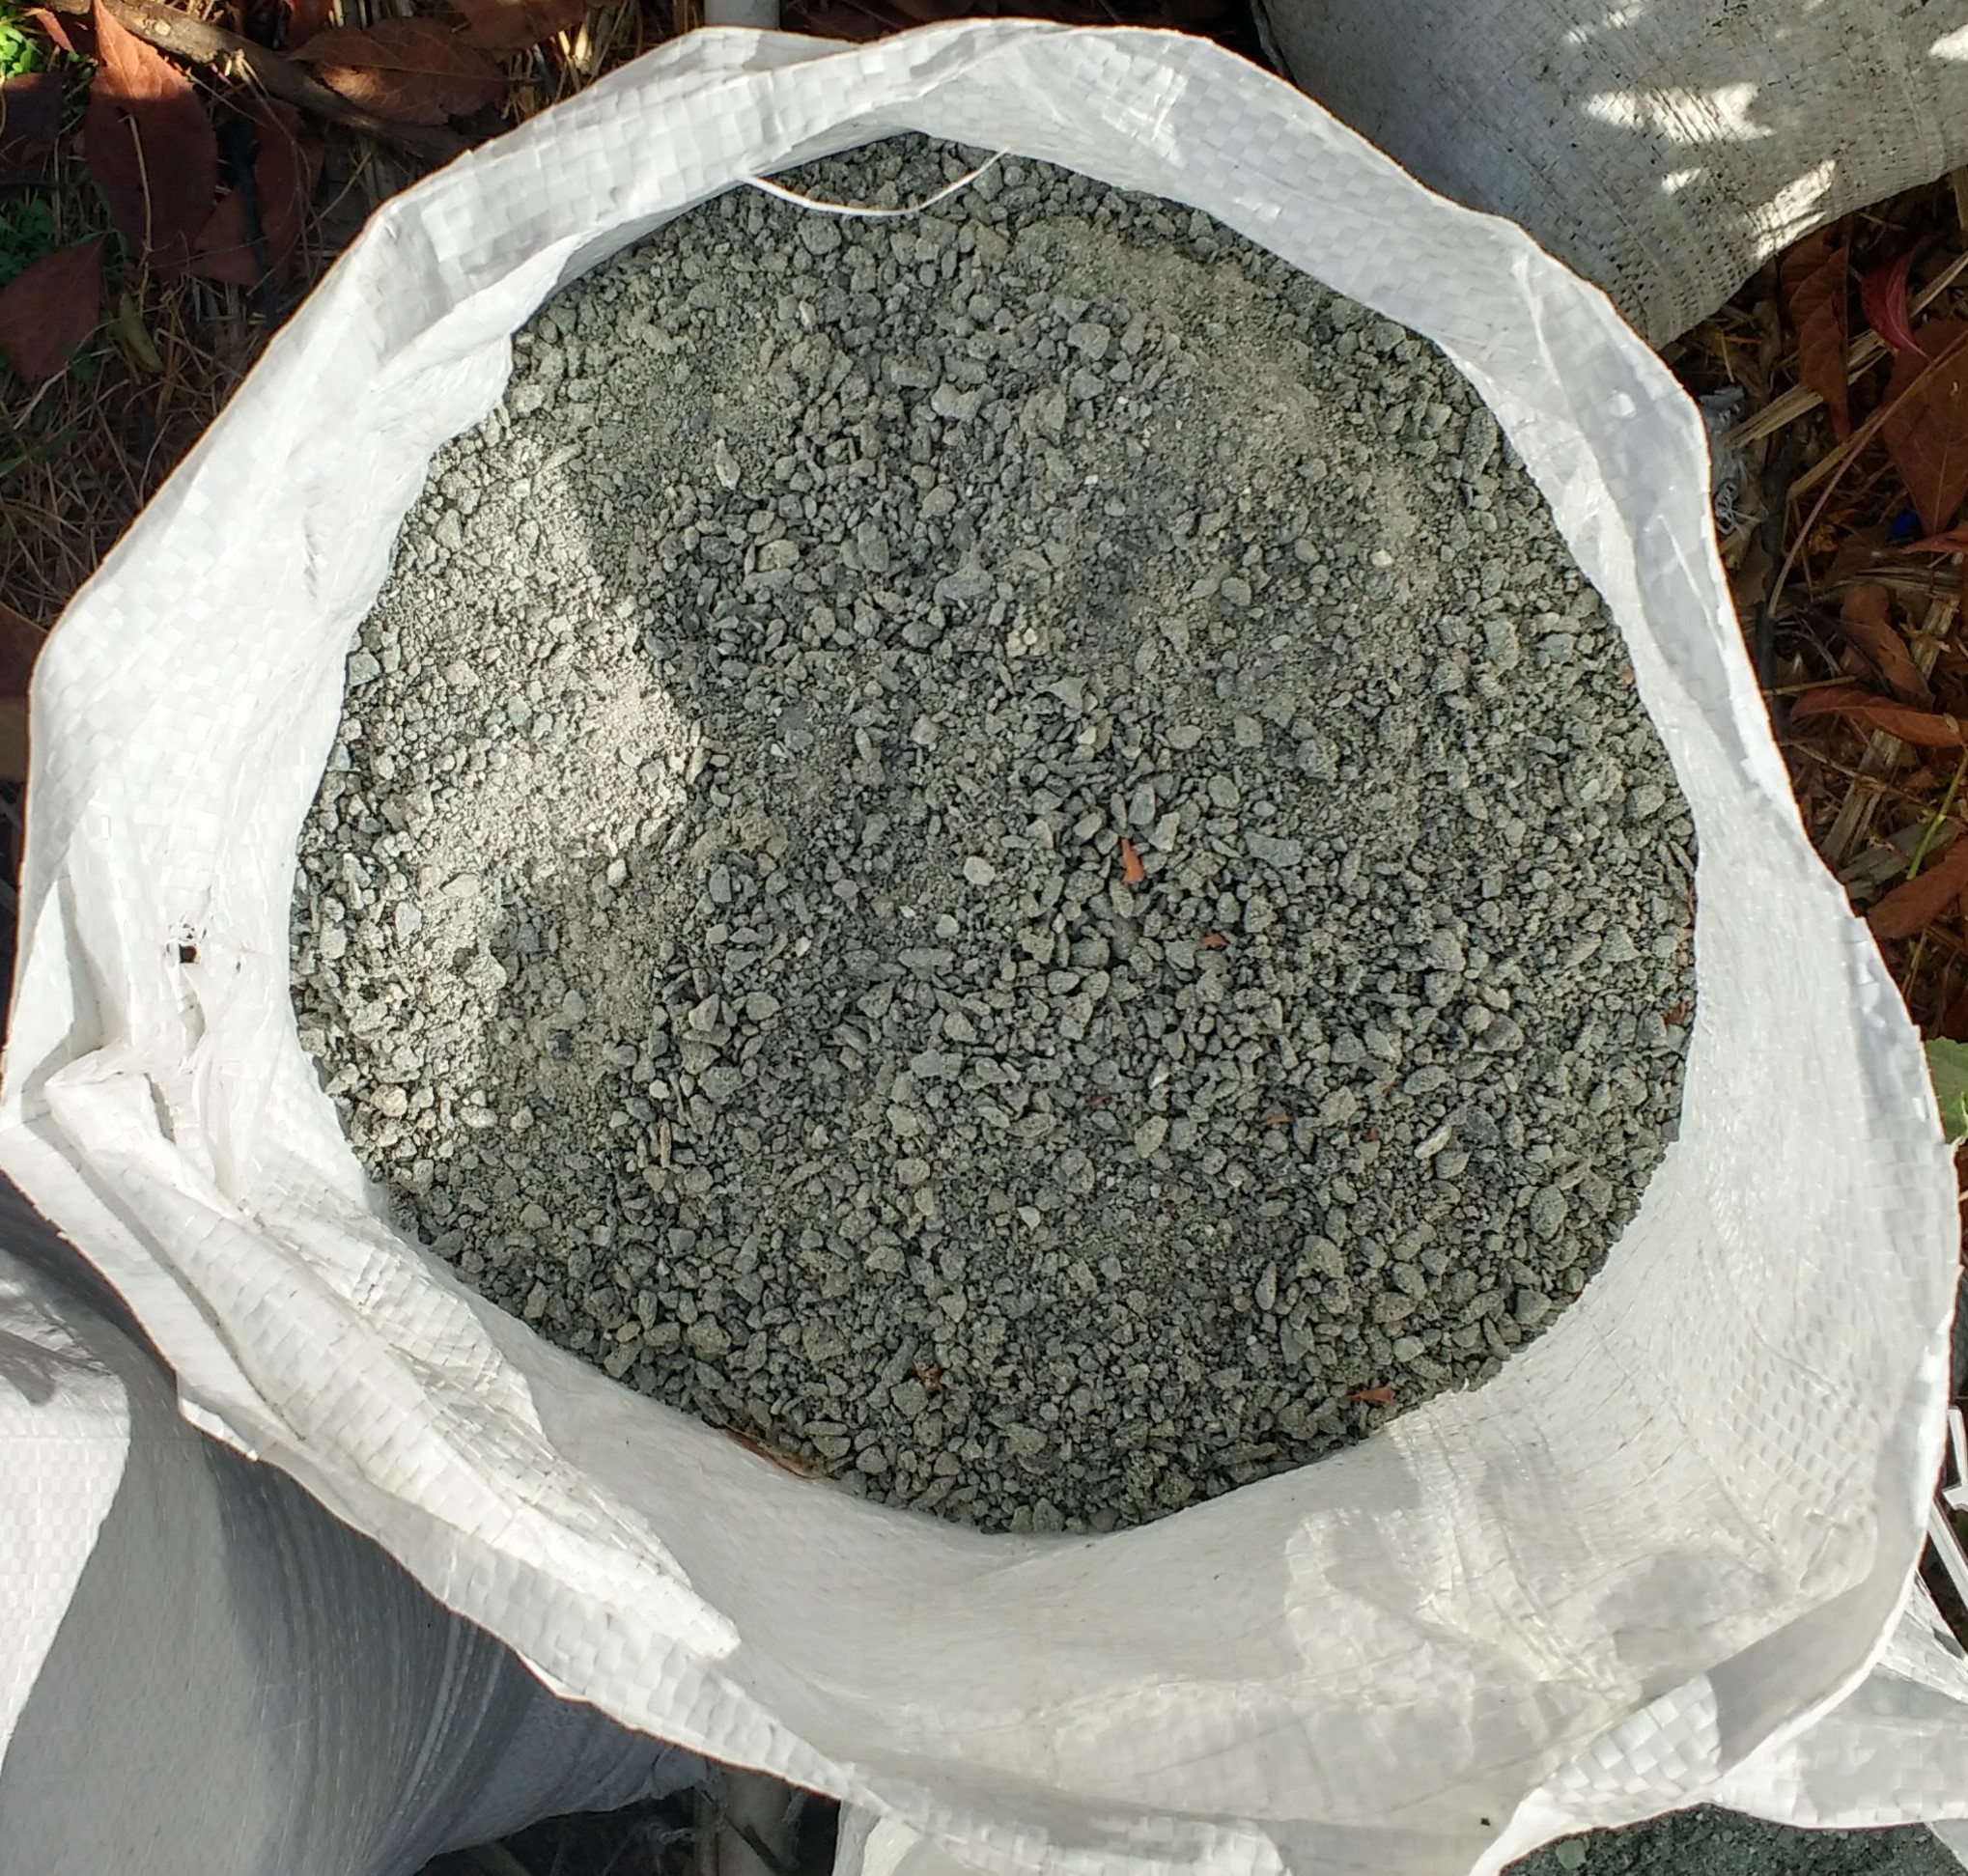
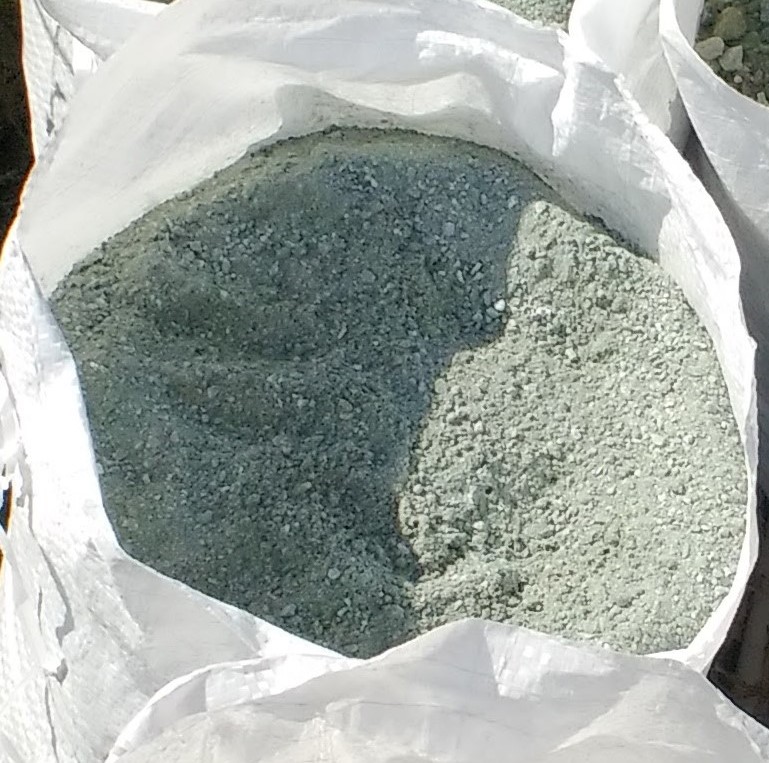
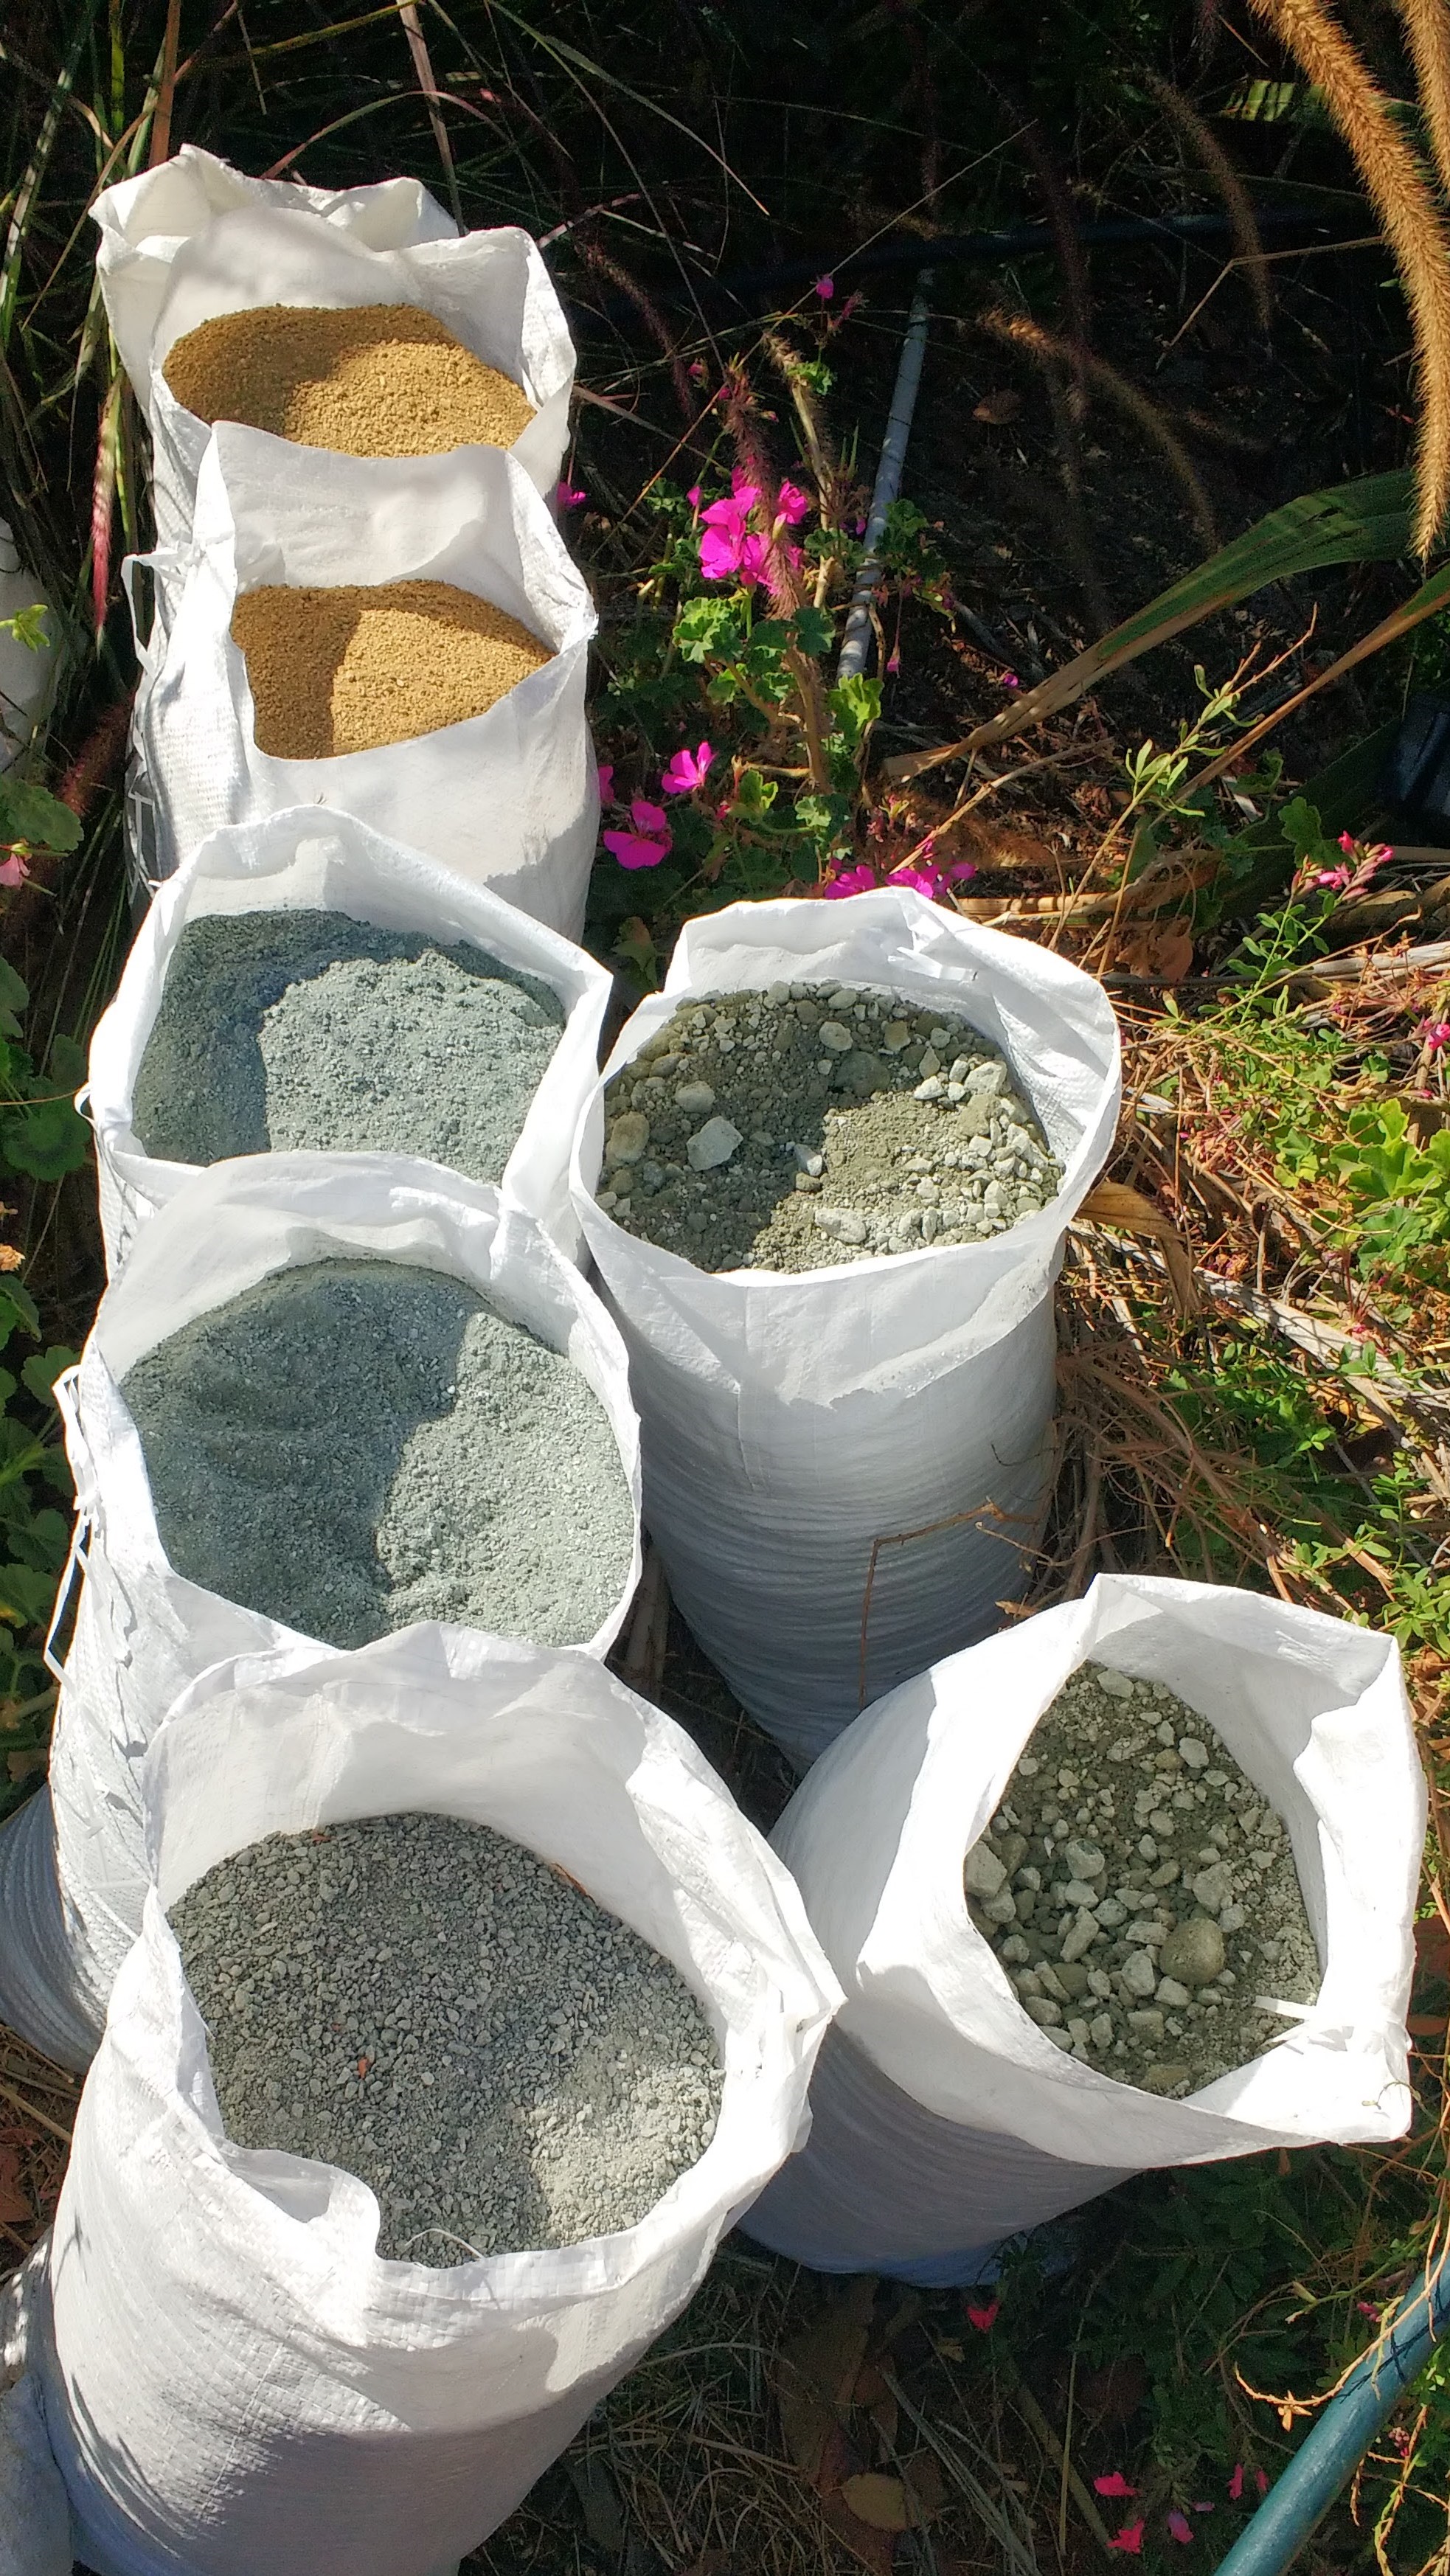
1) Once the excavation was complete, I put down a 2'' layer of Base Rock which was moistened and tamped down
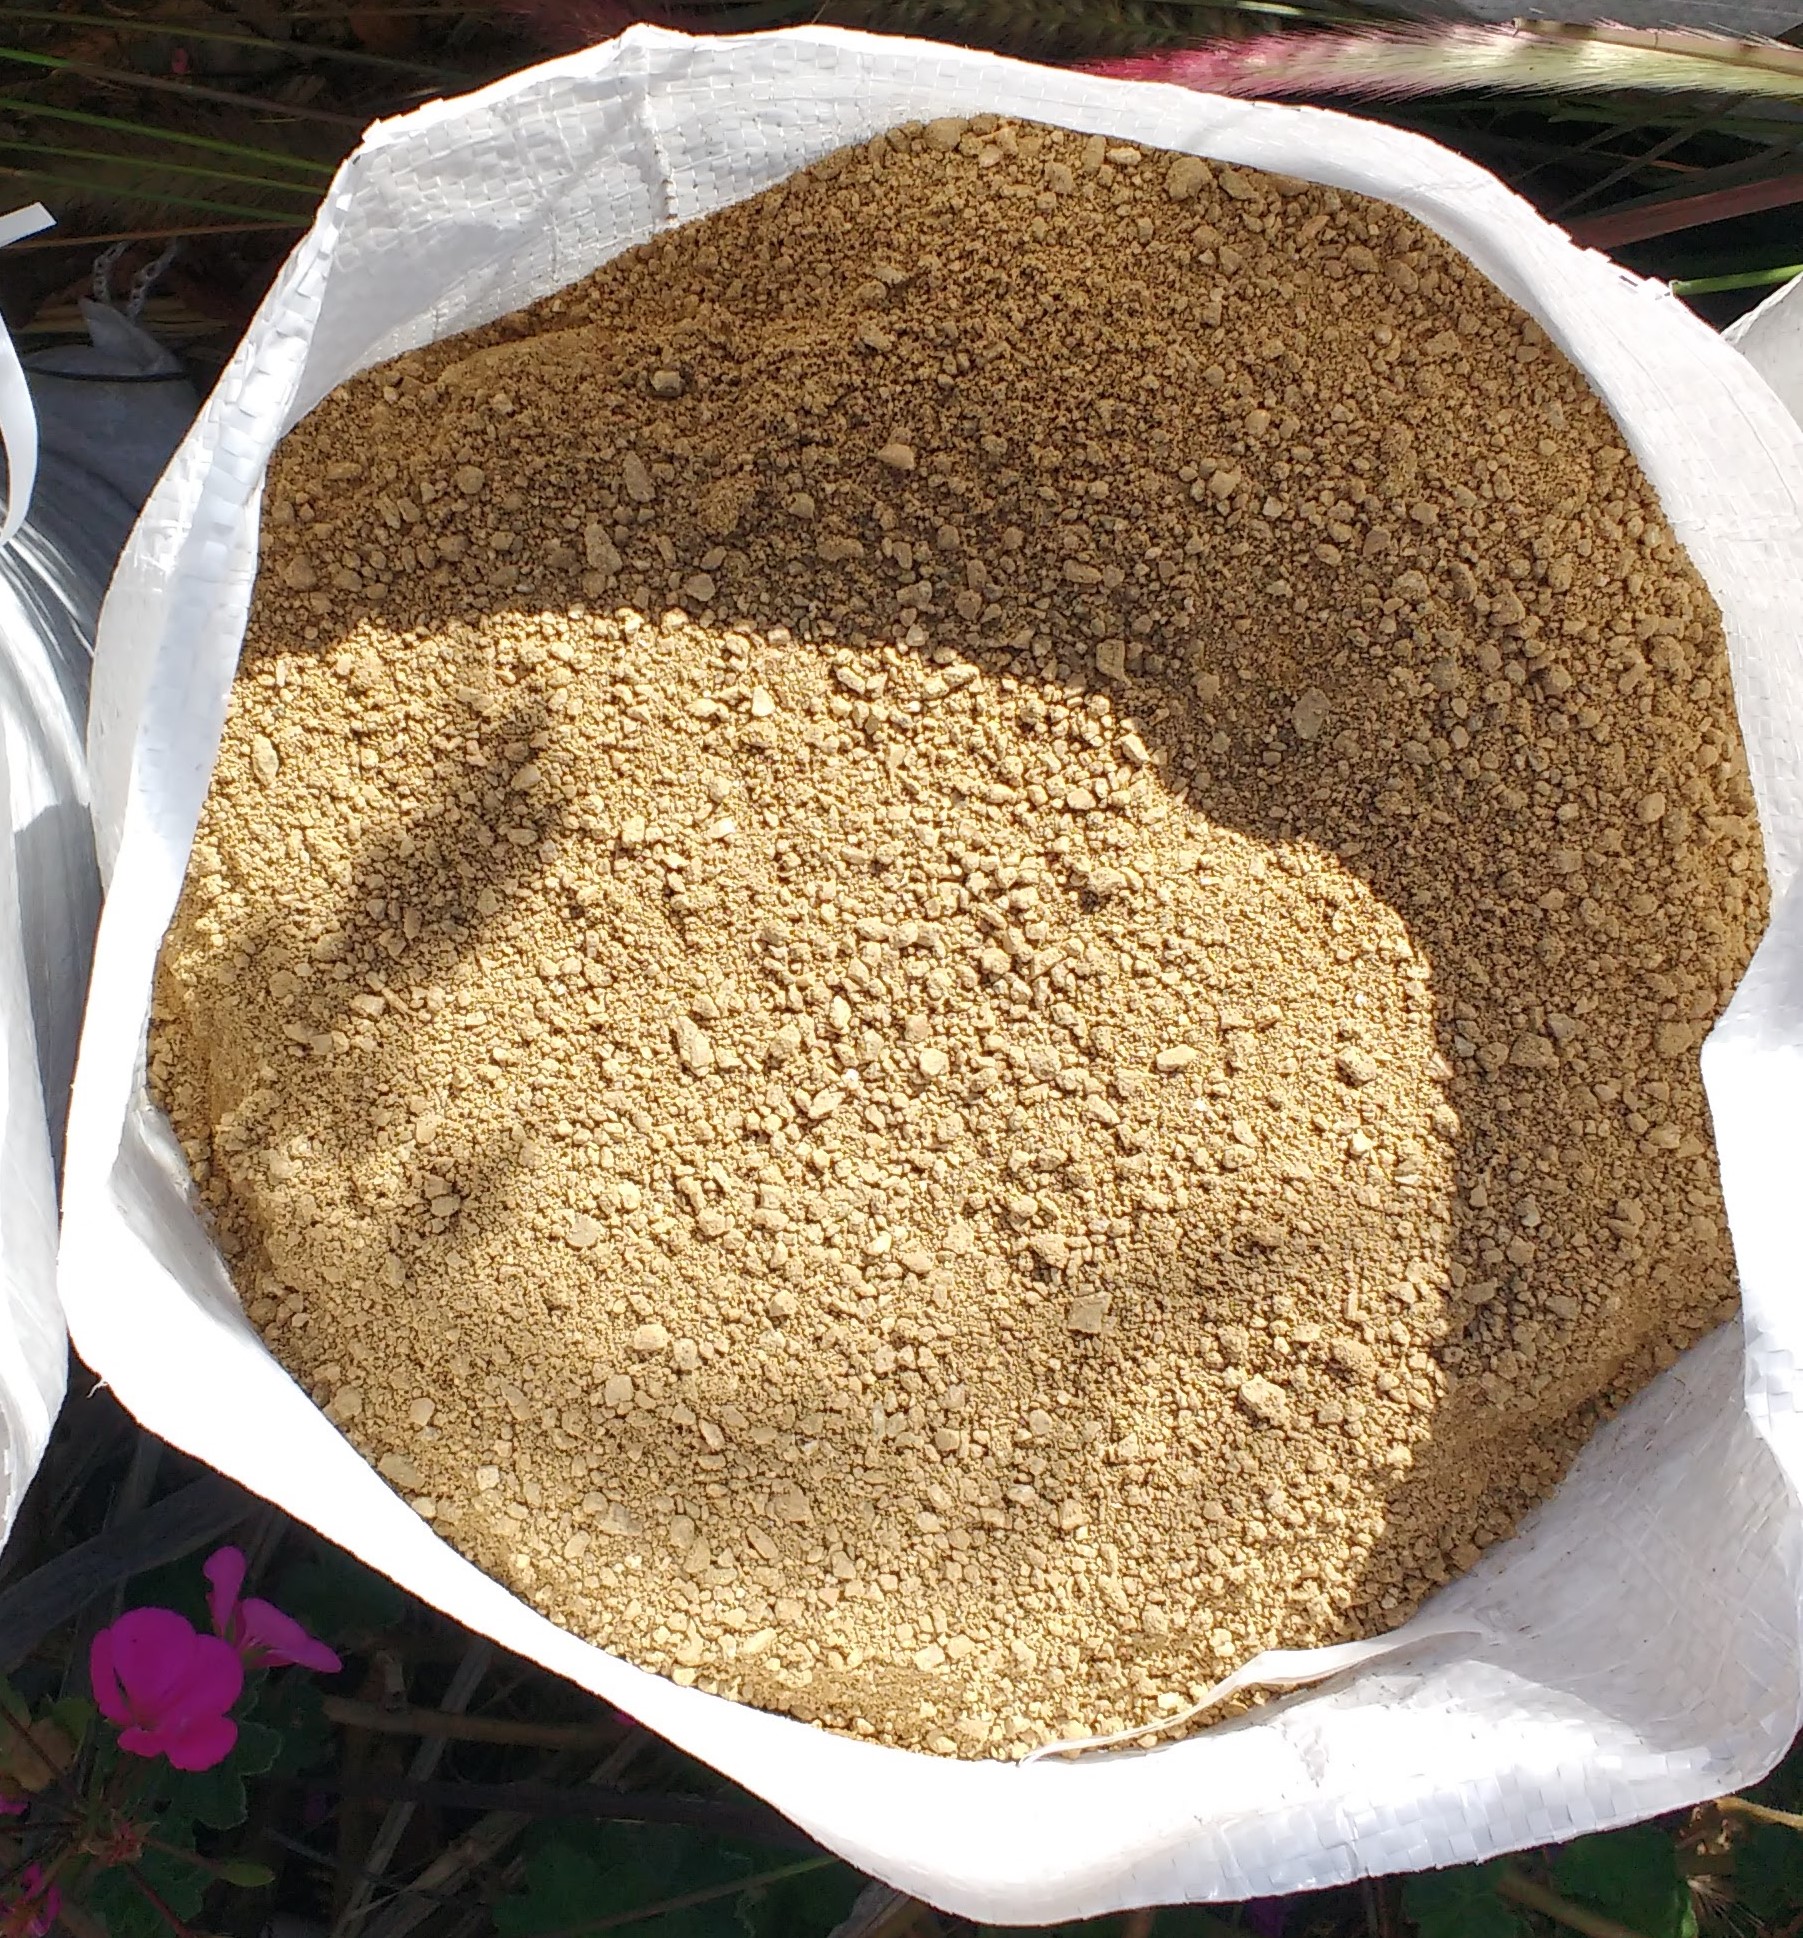
2) This was followed by 1'' of Concrete Sand
3) The last base layer was about a 1/2'' of Fine Sand, which was also used to fine-tune the leveling
4) The Retainer Blocks were placed on top of the sand
Part (A) - Layout and Construction of My Giant Ammontilus
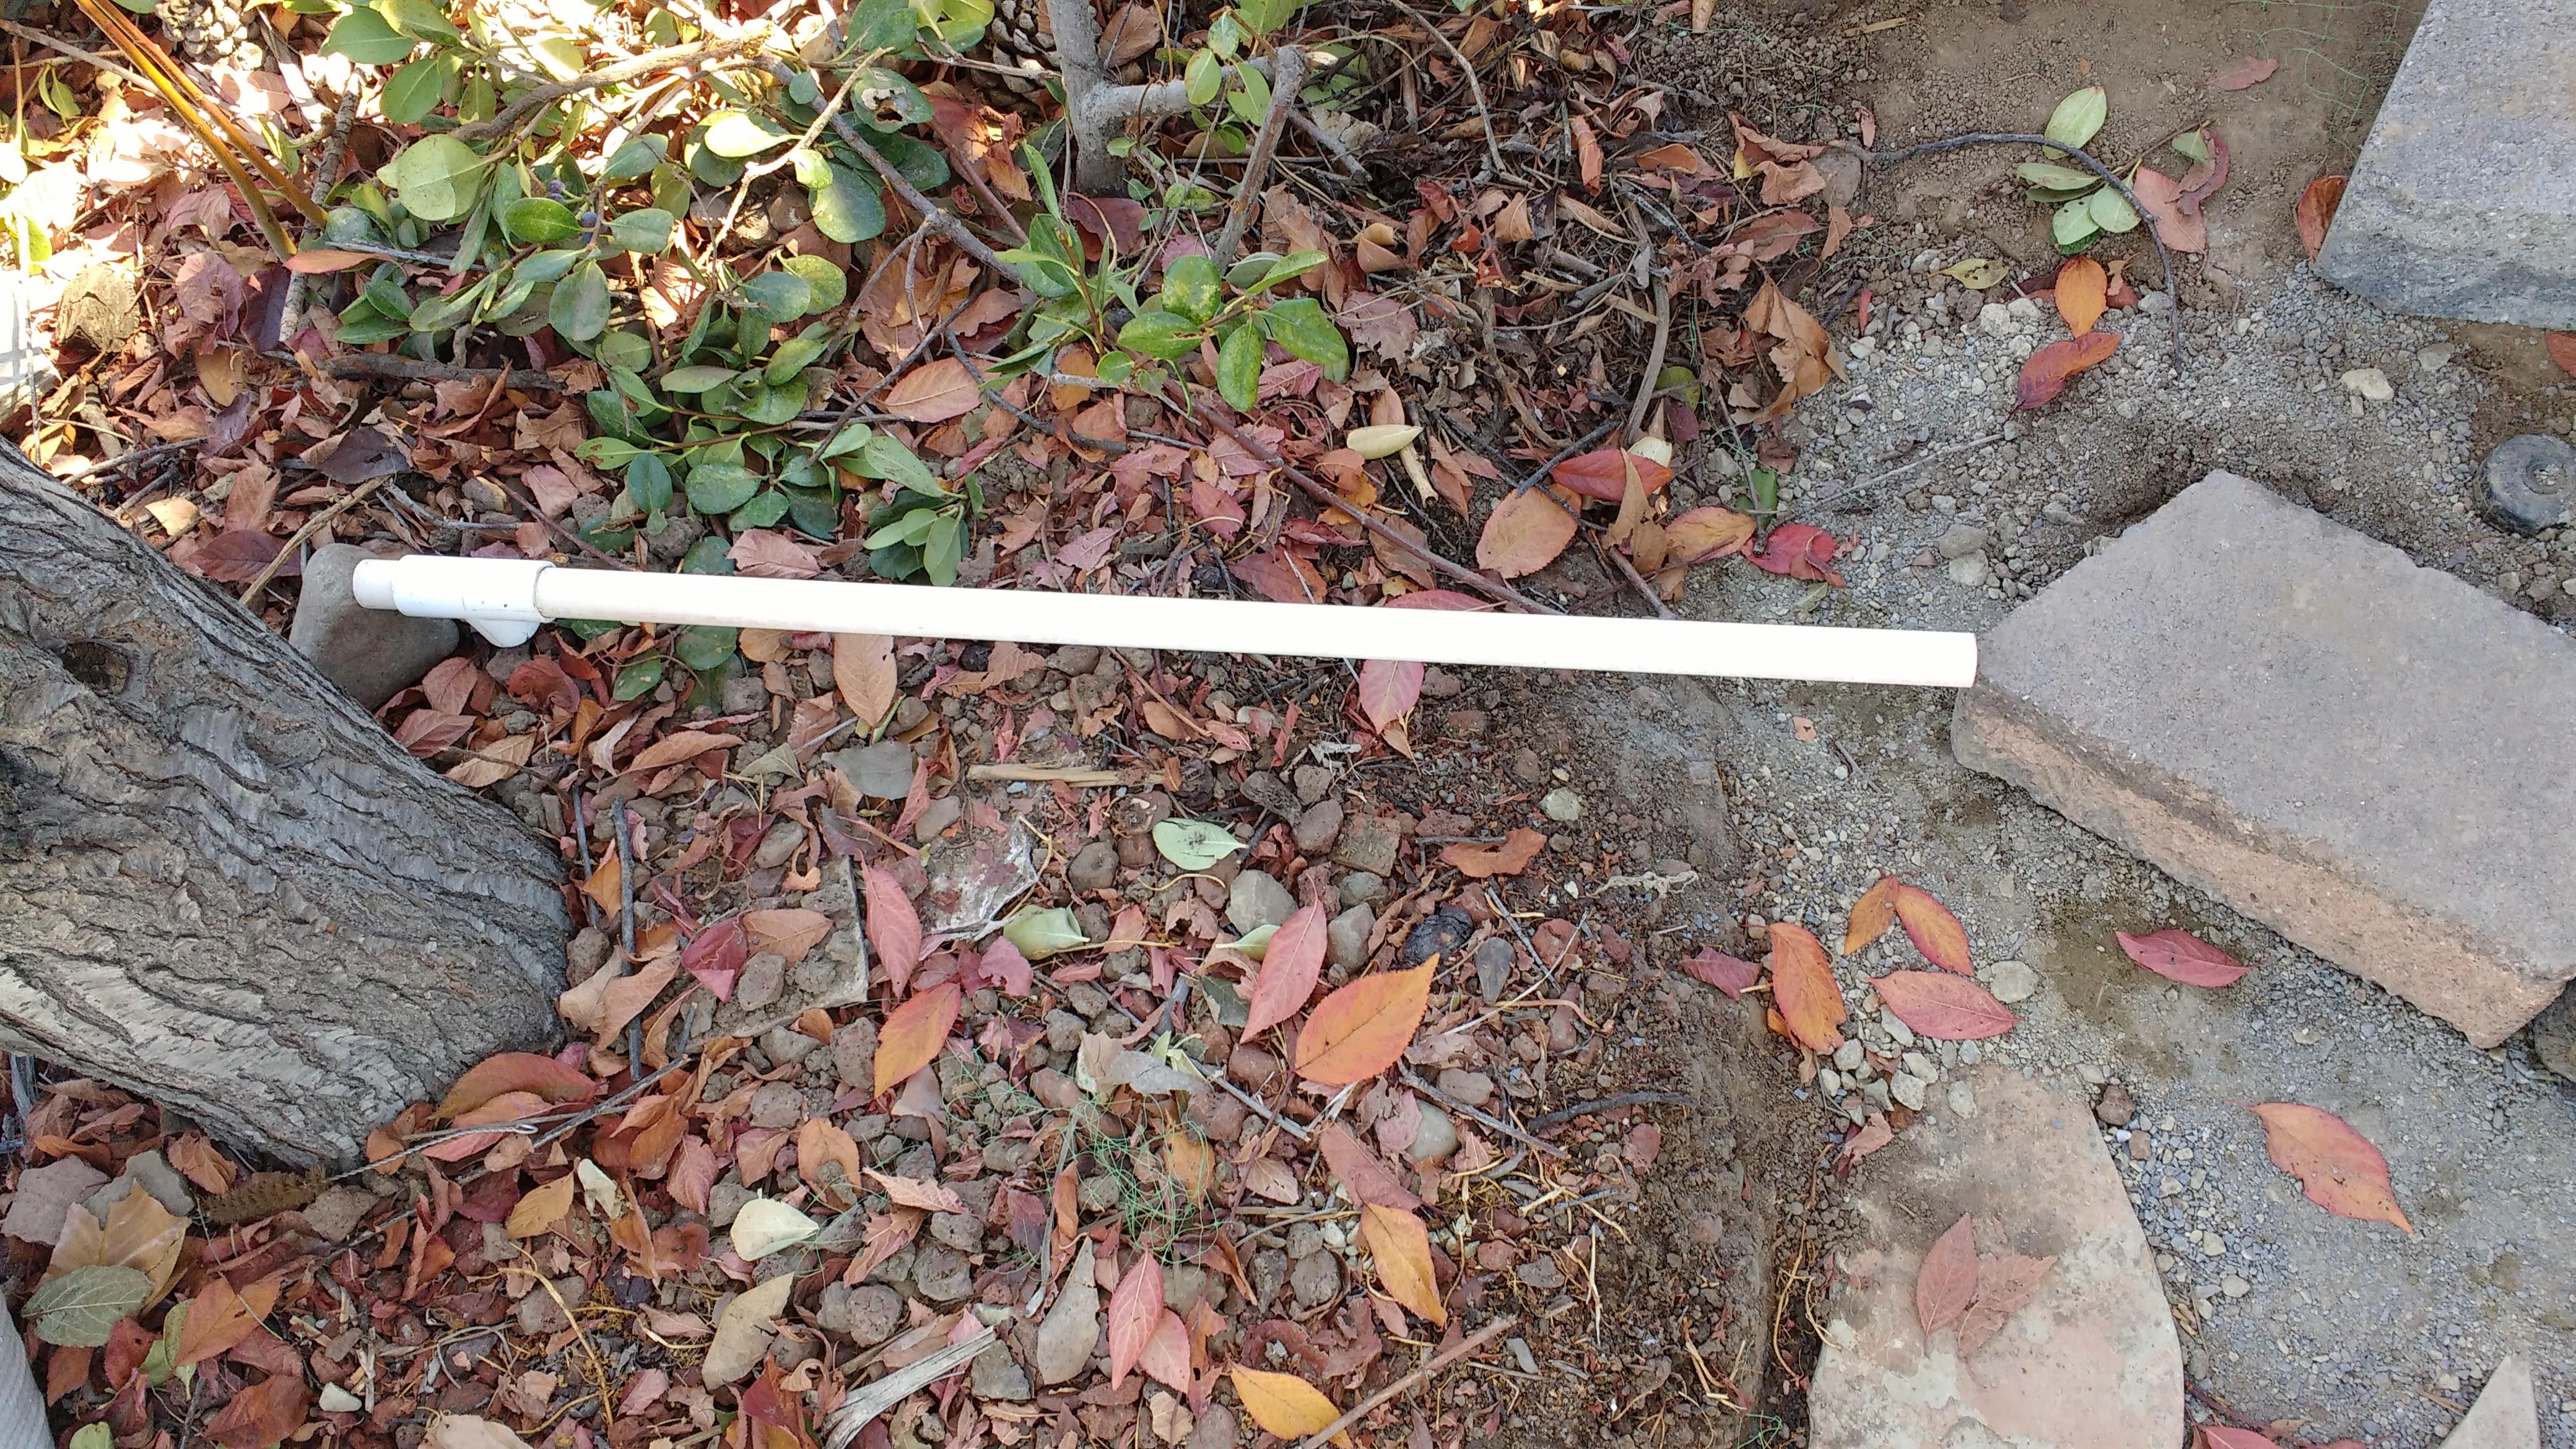
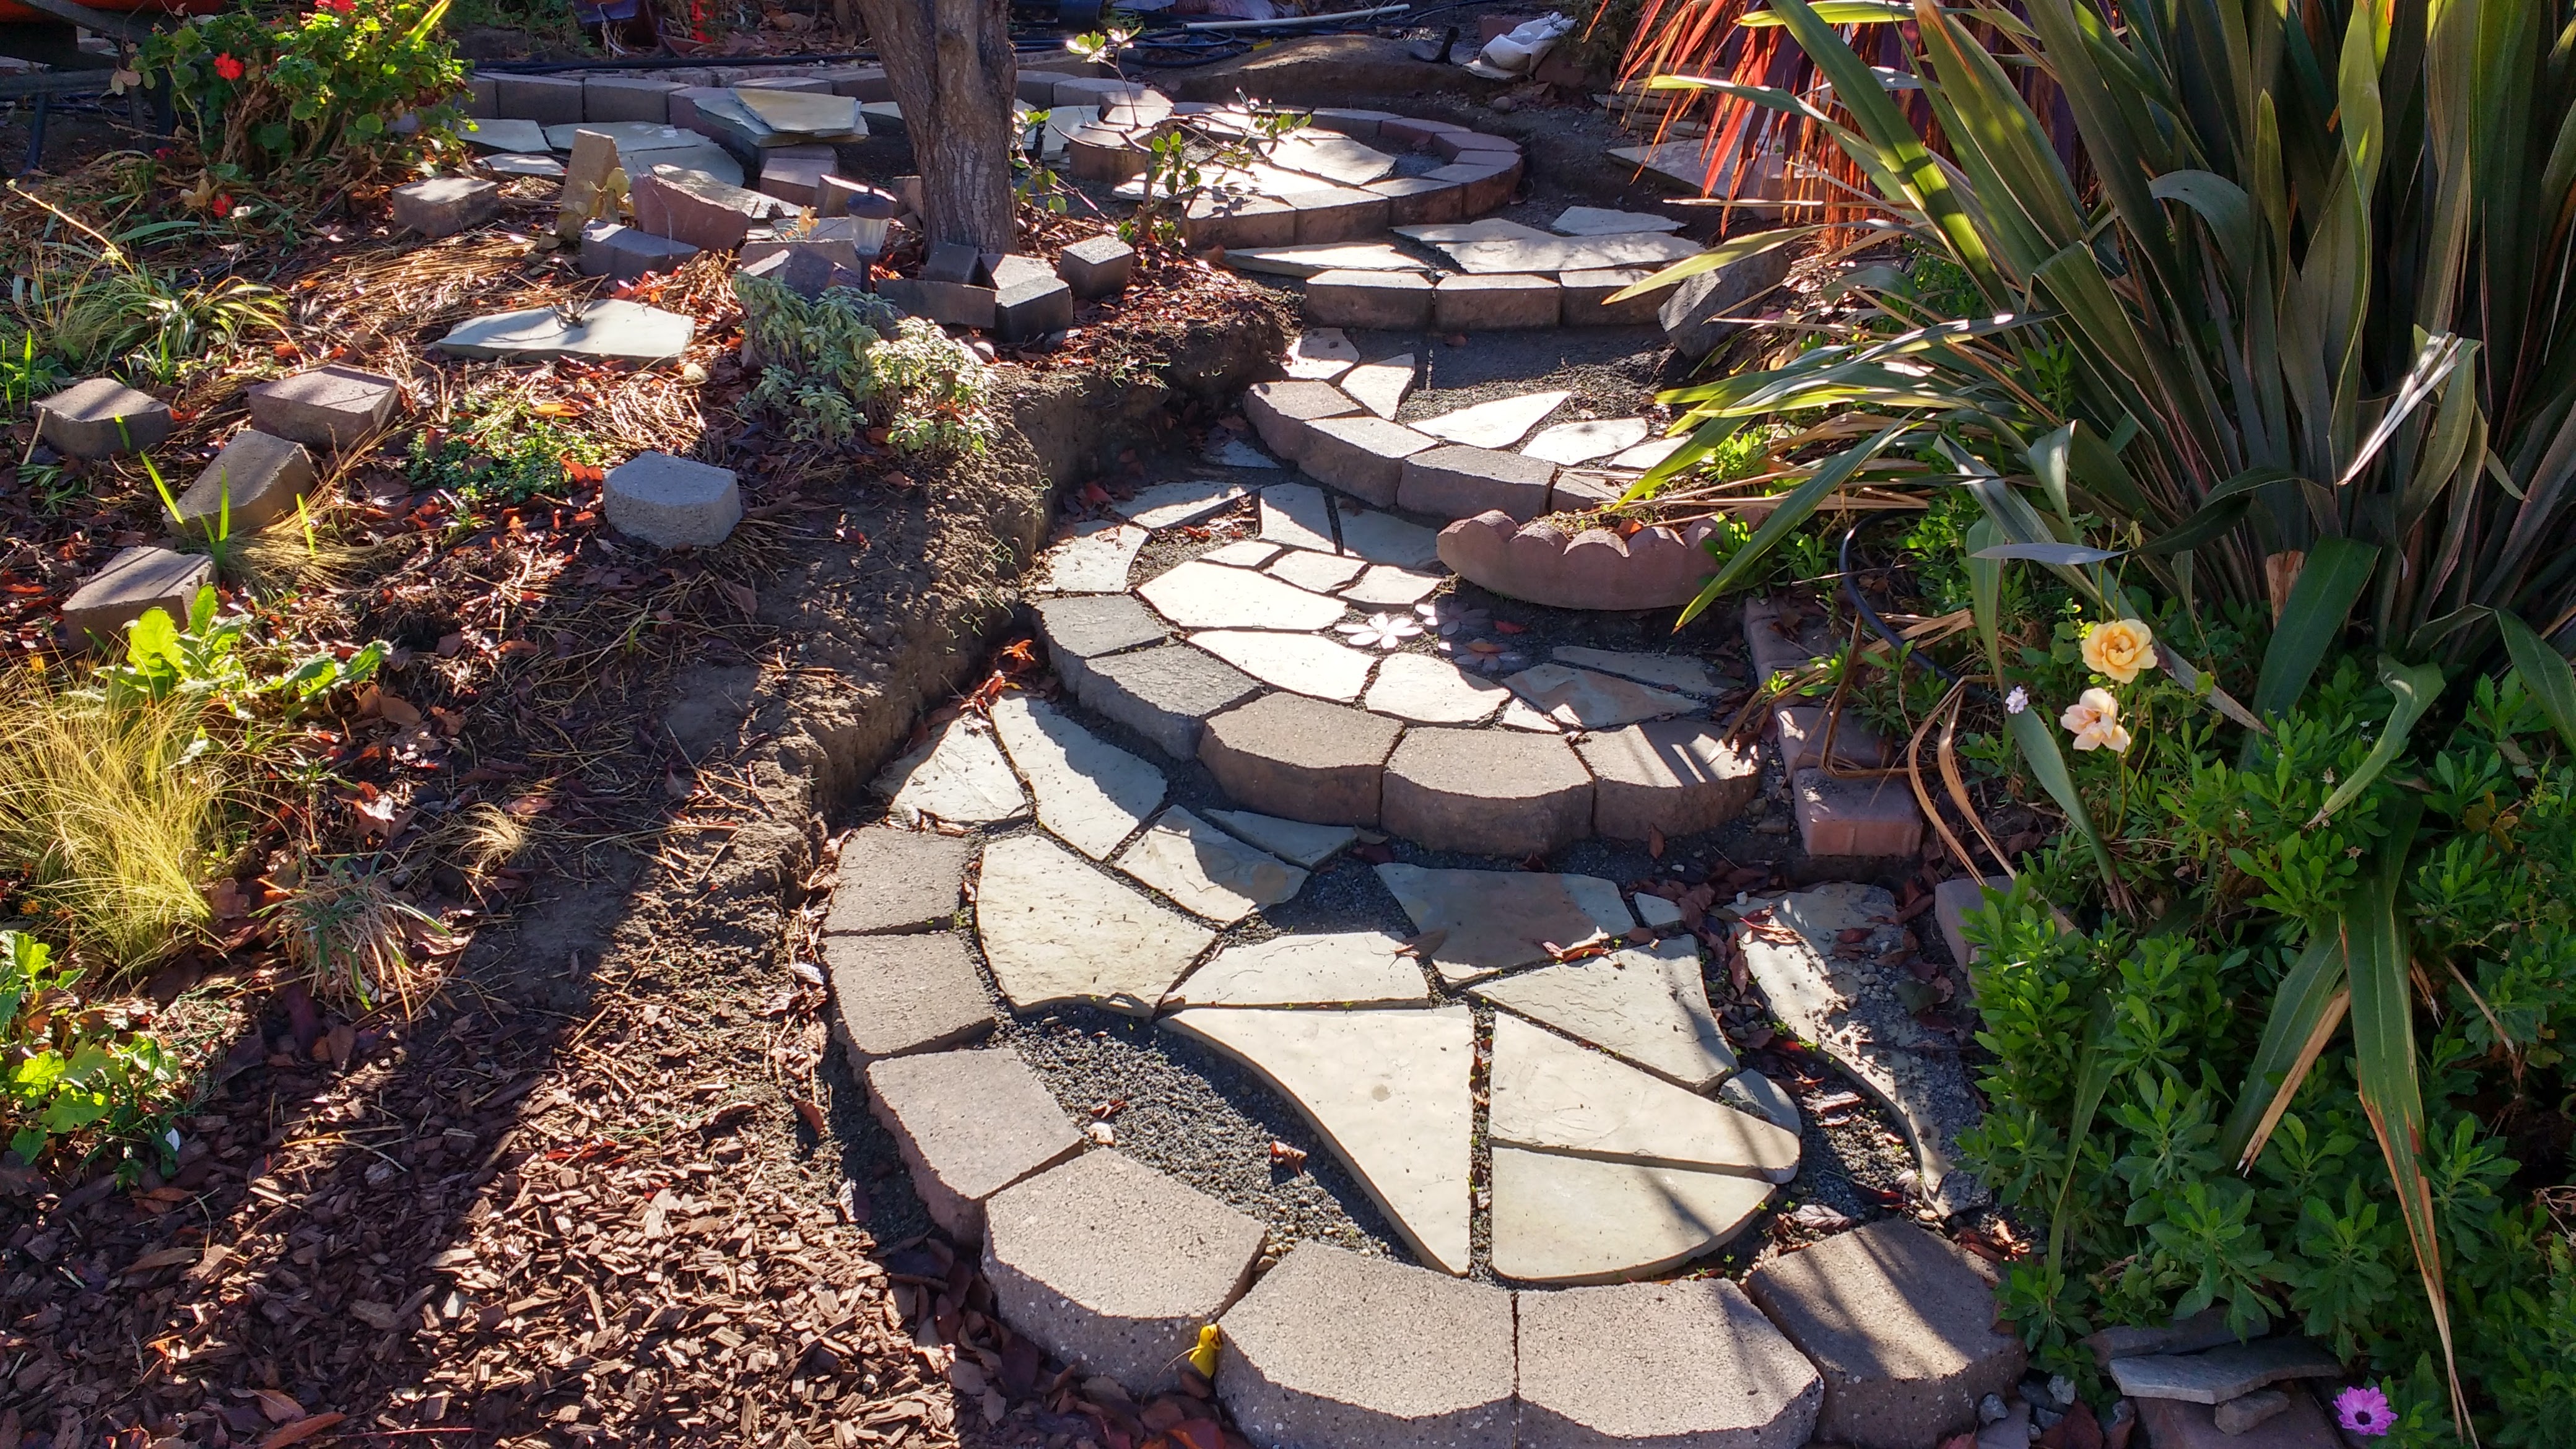
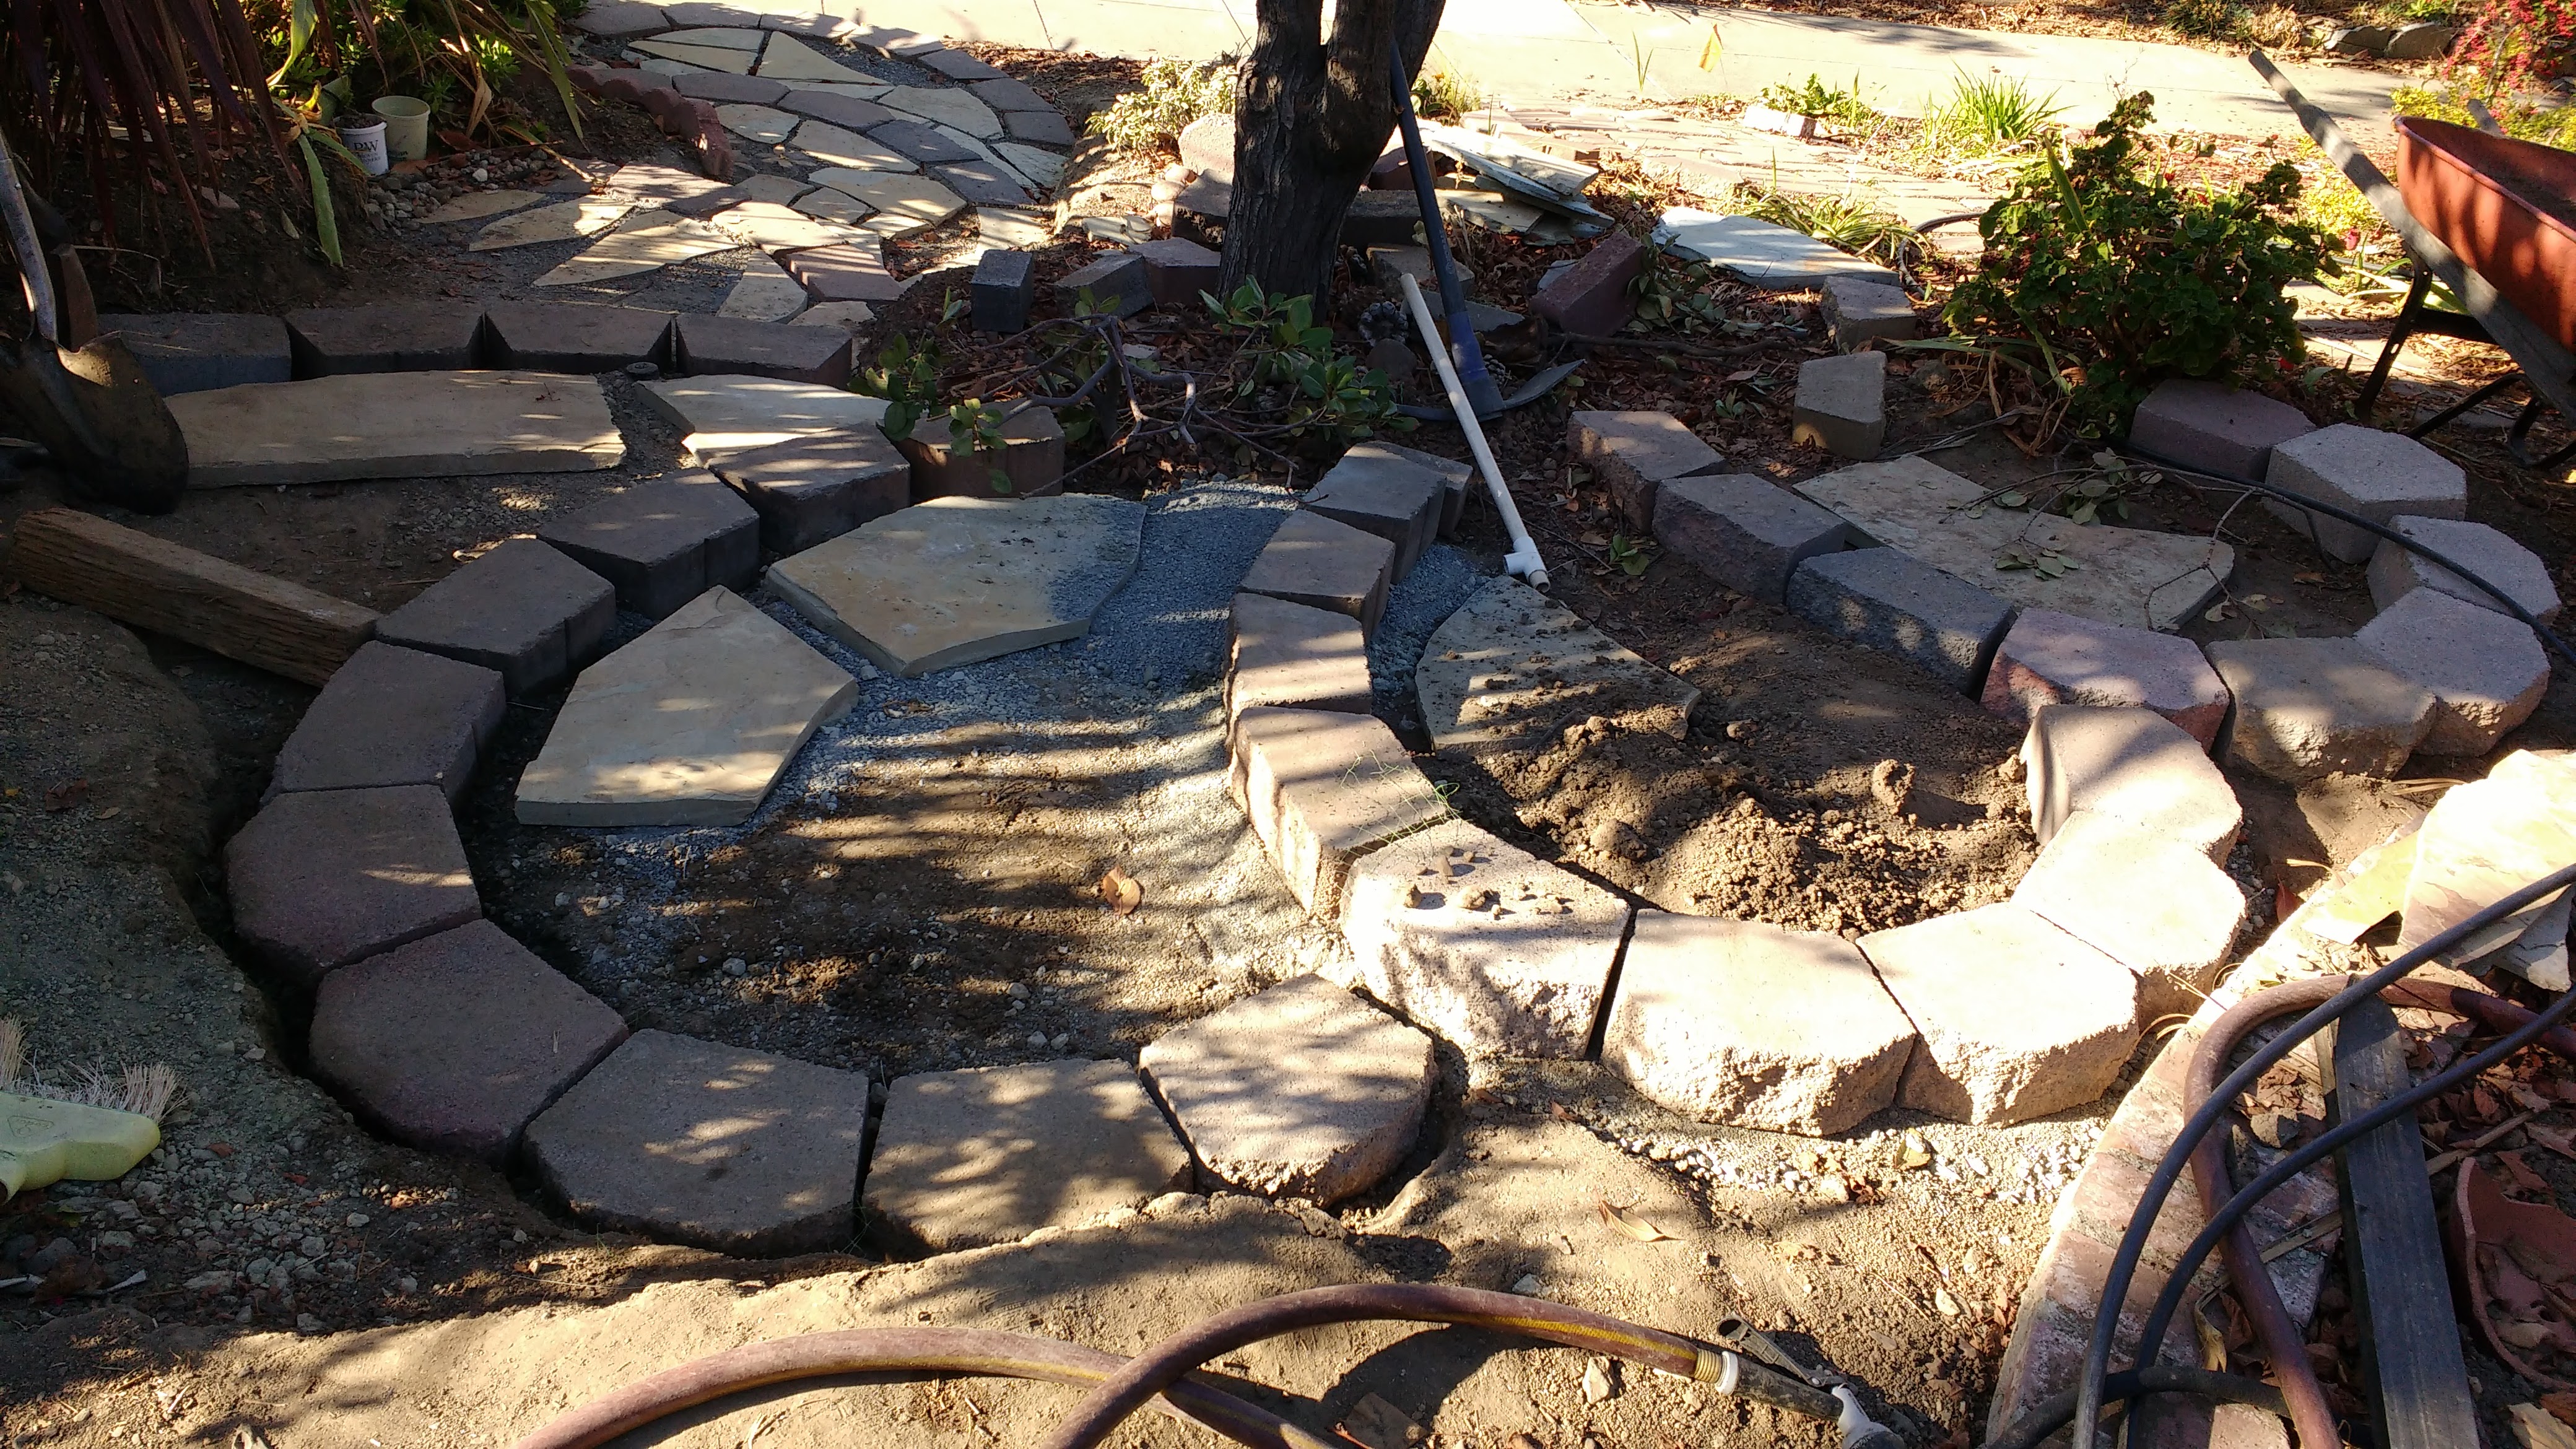
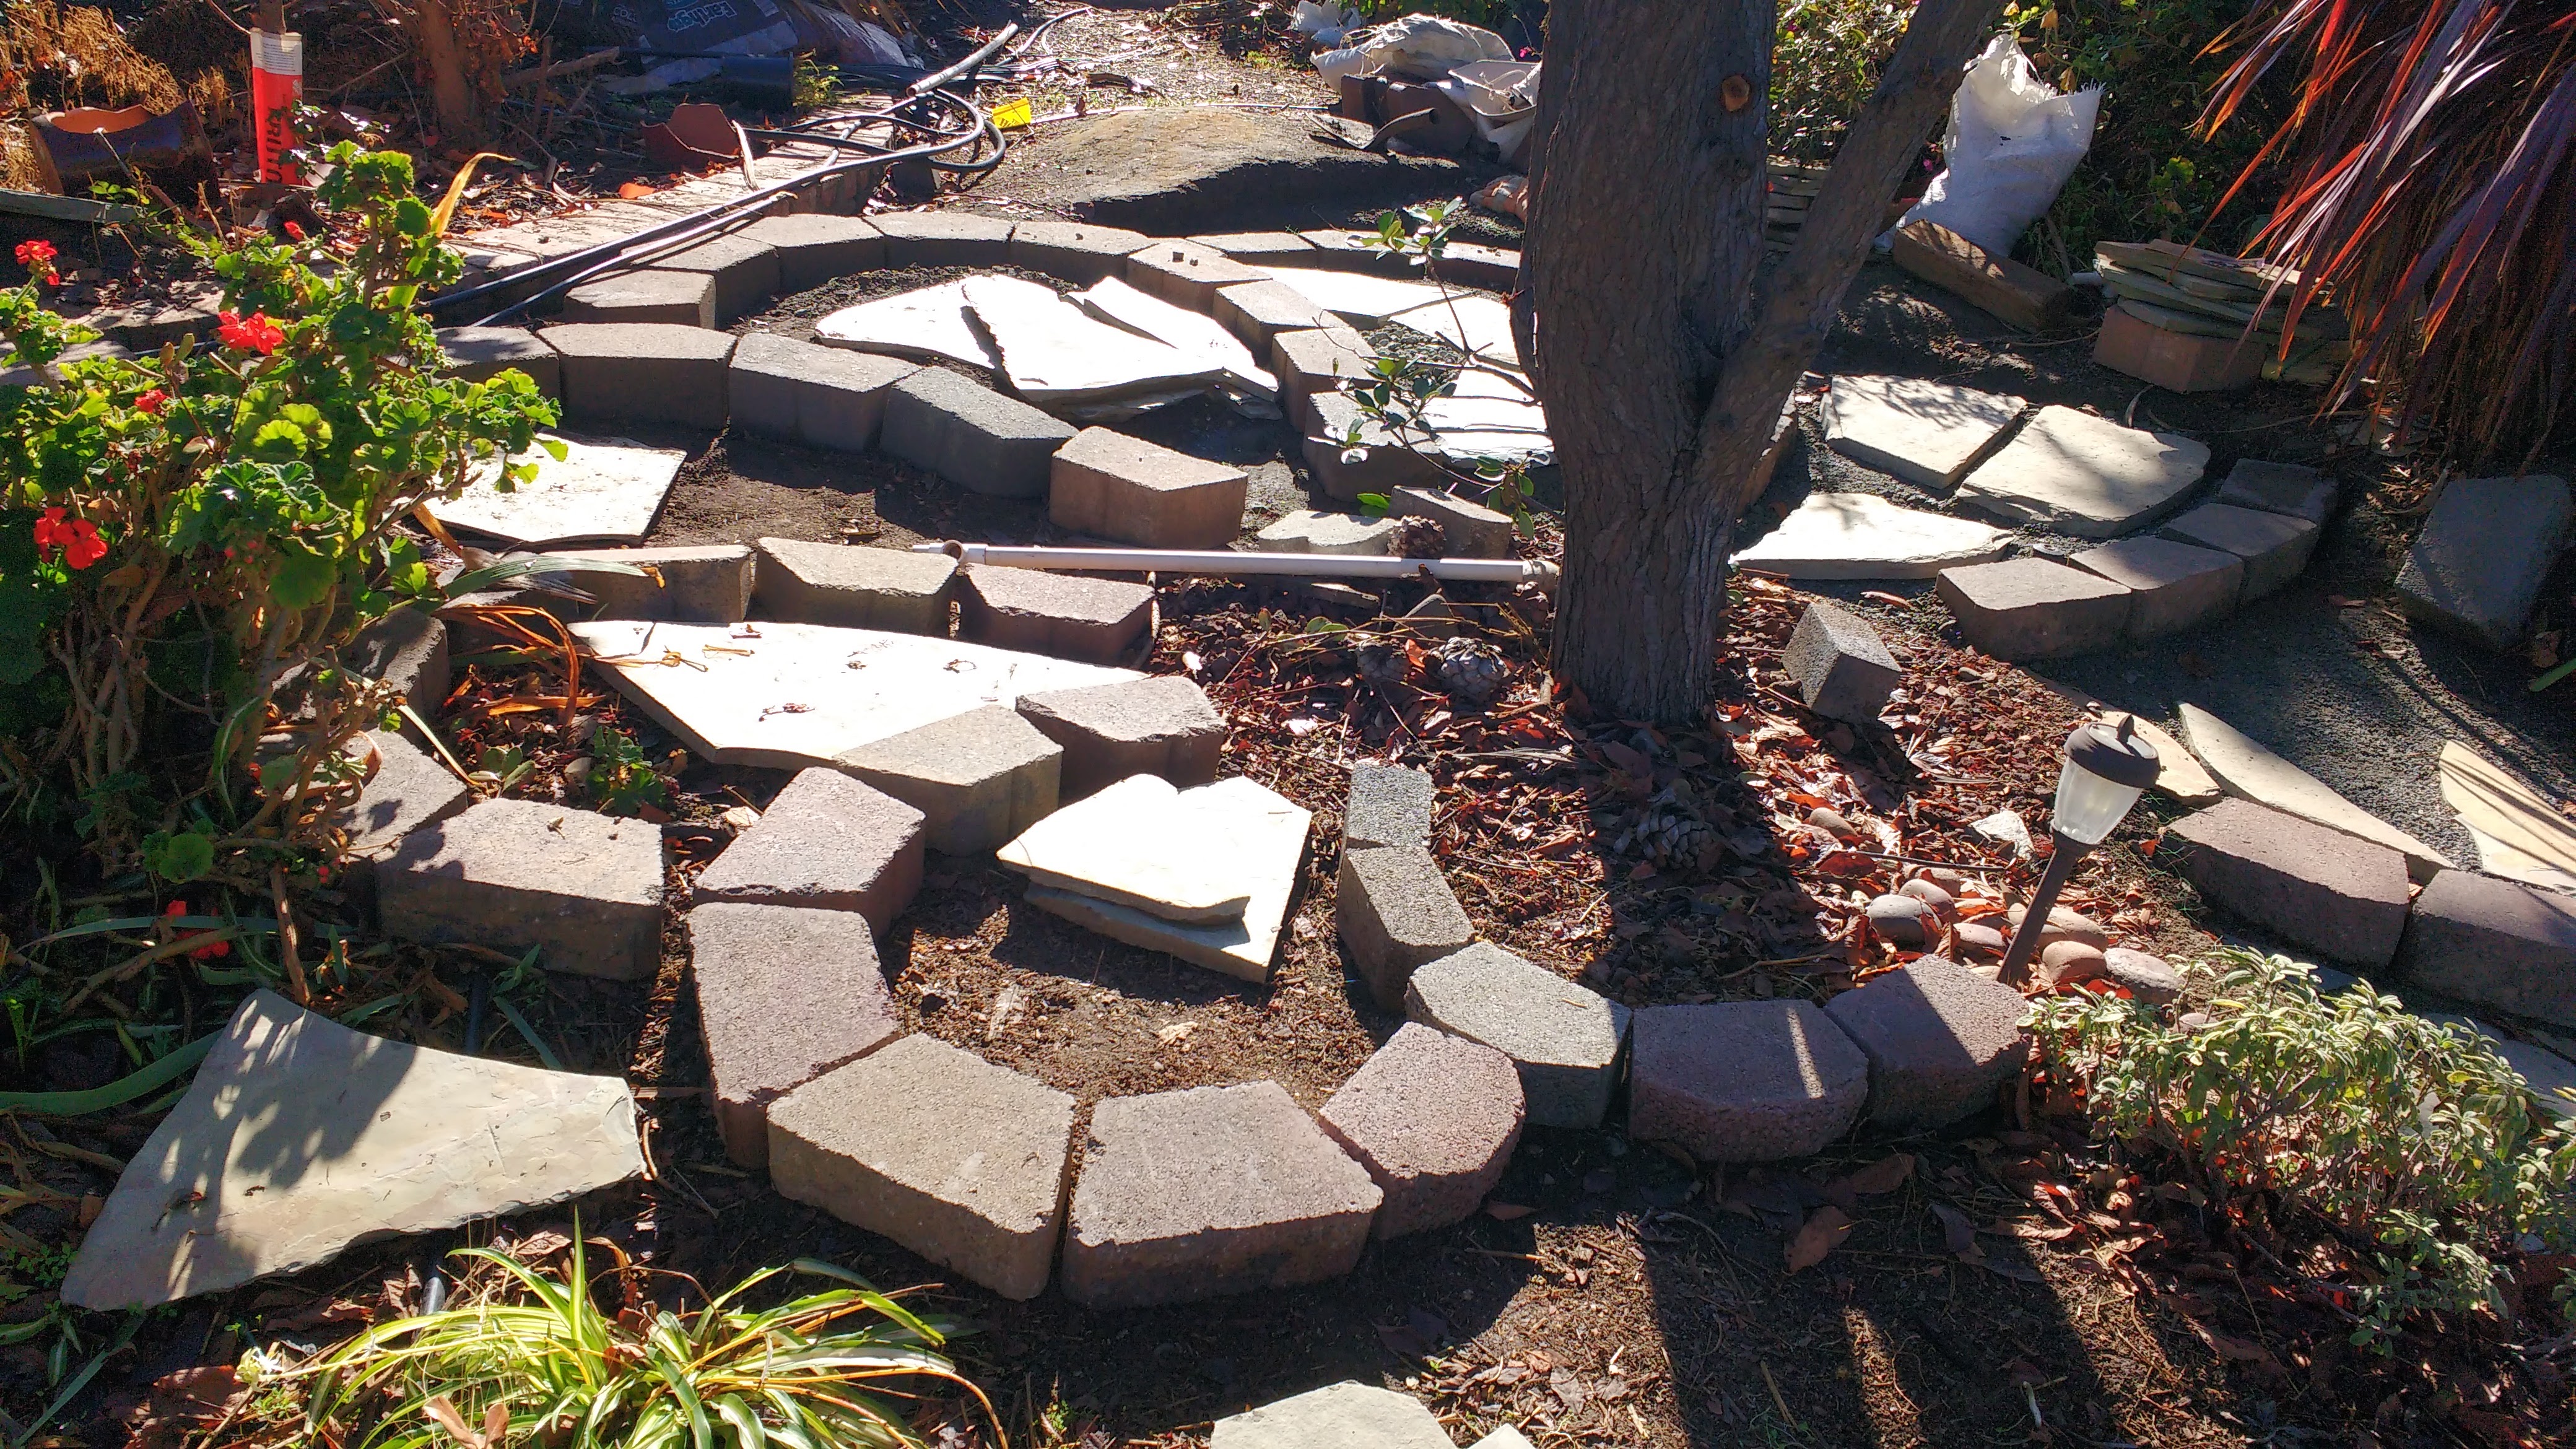
Retaining Wall Blocks were used to both define the risers as well as outline the shape of the scallop stair as follows:
The 1st through 7th stairs used a combination of the following retainer blocks:
1st stair (largest) - open scallop: 2 large trapezoid + 5 large curved (blends into landscaping)
2nd stair - open scallop: 2 large trapezoid + 3 large curved (blends into landscaping)
3rd stair - open scallop: 3 large trapezoid + 2 large curved (blends into landscaping)
4th stair - open scallop: 5 large trapezoid + 2 large curved (blends into landscaping)
5th stair closed scallop: 5 large trapezoid + 5 large curved
6th stair closed scallop: 4 large trapezoid + 5 large curved
7th stair closed scallop: 3 large trapezoid + 4 large curved
The 8th, 9th, and 19th scallops consisted of the small trapezoid blocks, some corners of which were rounded off with a hammer and chisel 8th stair closed scallop: 8 small trapezoid 9th stair closed scallop: 7 small trapezoid 10th stair closed scallop: 6 small trapezoid
How is the 5th stair smaller than the 4th while using more blocks? The blocks on the lower stairs are placed with the inner edges splayed apart, making for a wider curve, while those on the higher stairs are being placed more tightly along the edges so the radius of curvature becomes smaller. In addition, at least in my yard, you do not see the entire lower stairs (1st through 4th) because they blend into the landscaping. If more of the stairs will be visible in your yard then you will have to adjust the number blocks accordingly.
Some potentially helpful pages from the Concrete Network:
Troubleshooting: Stair Treads and Slopes
Hoisting the Flagstone
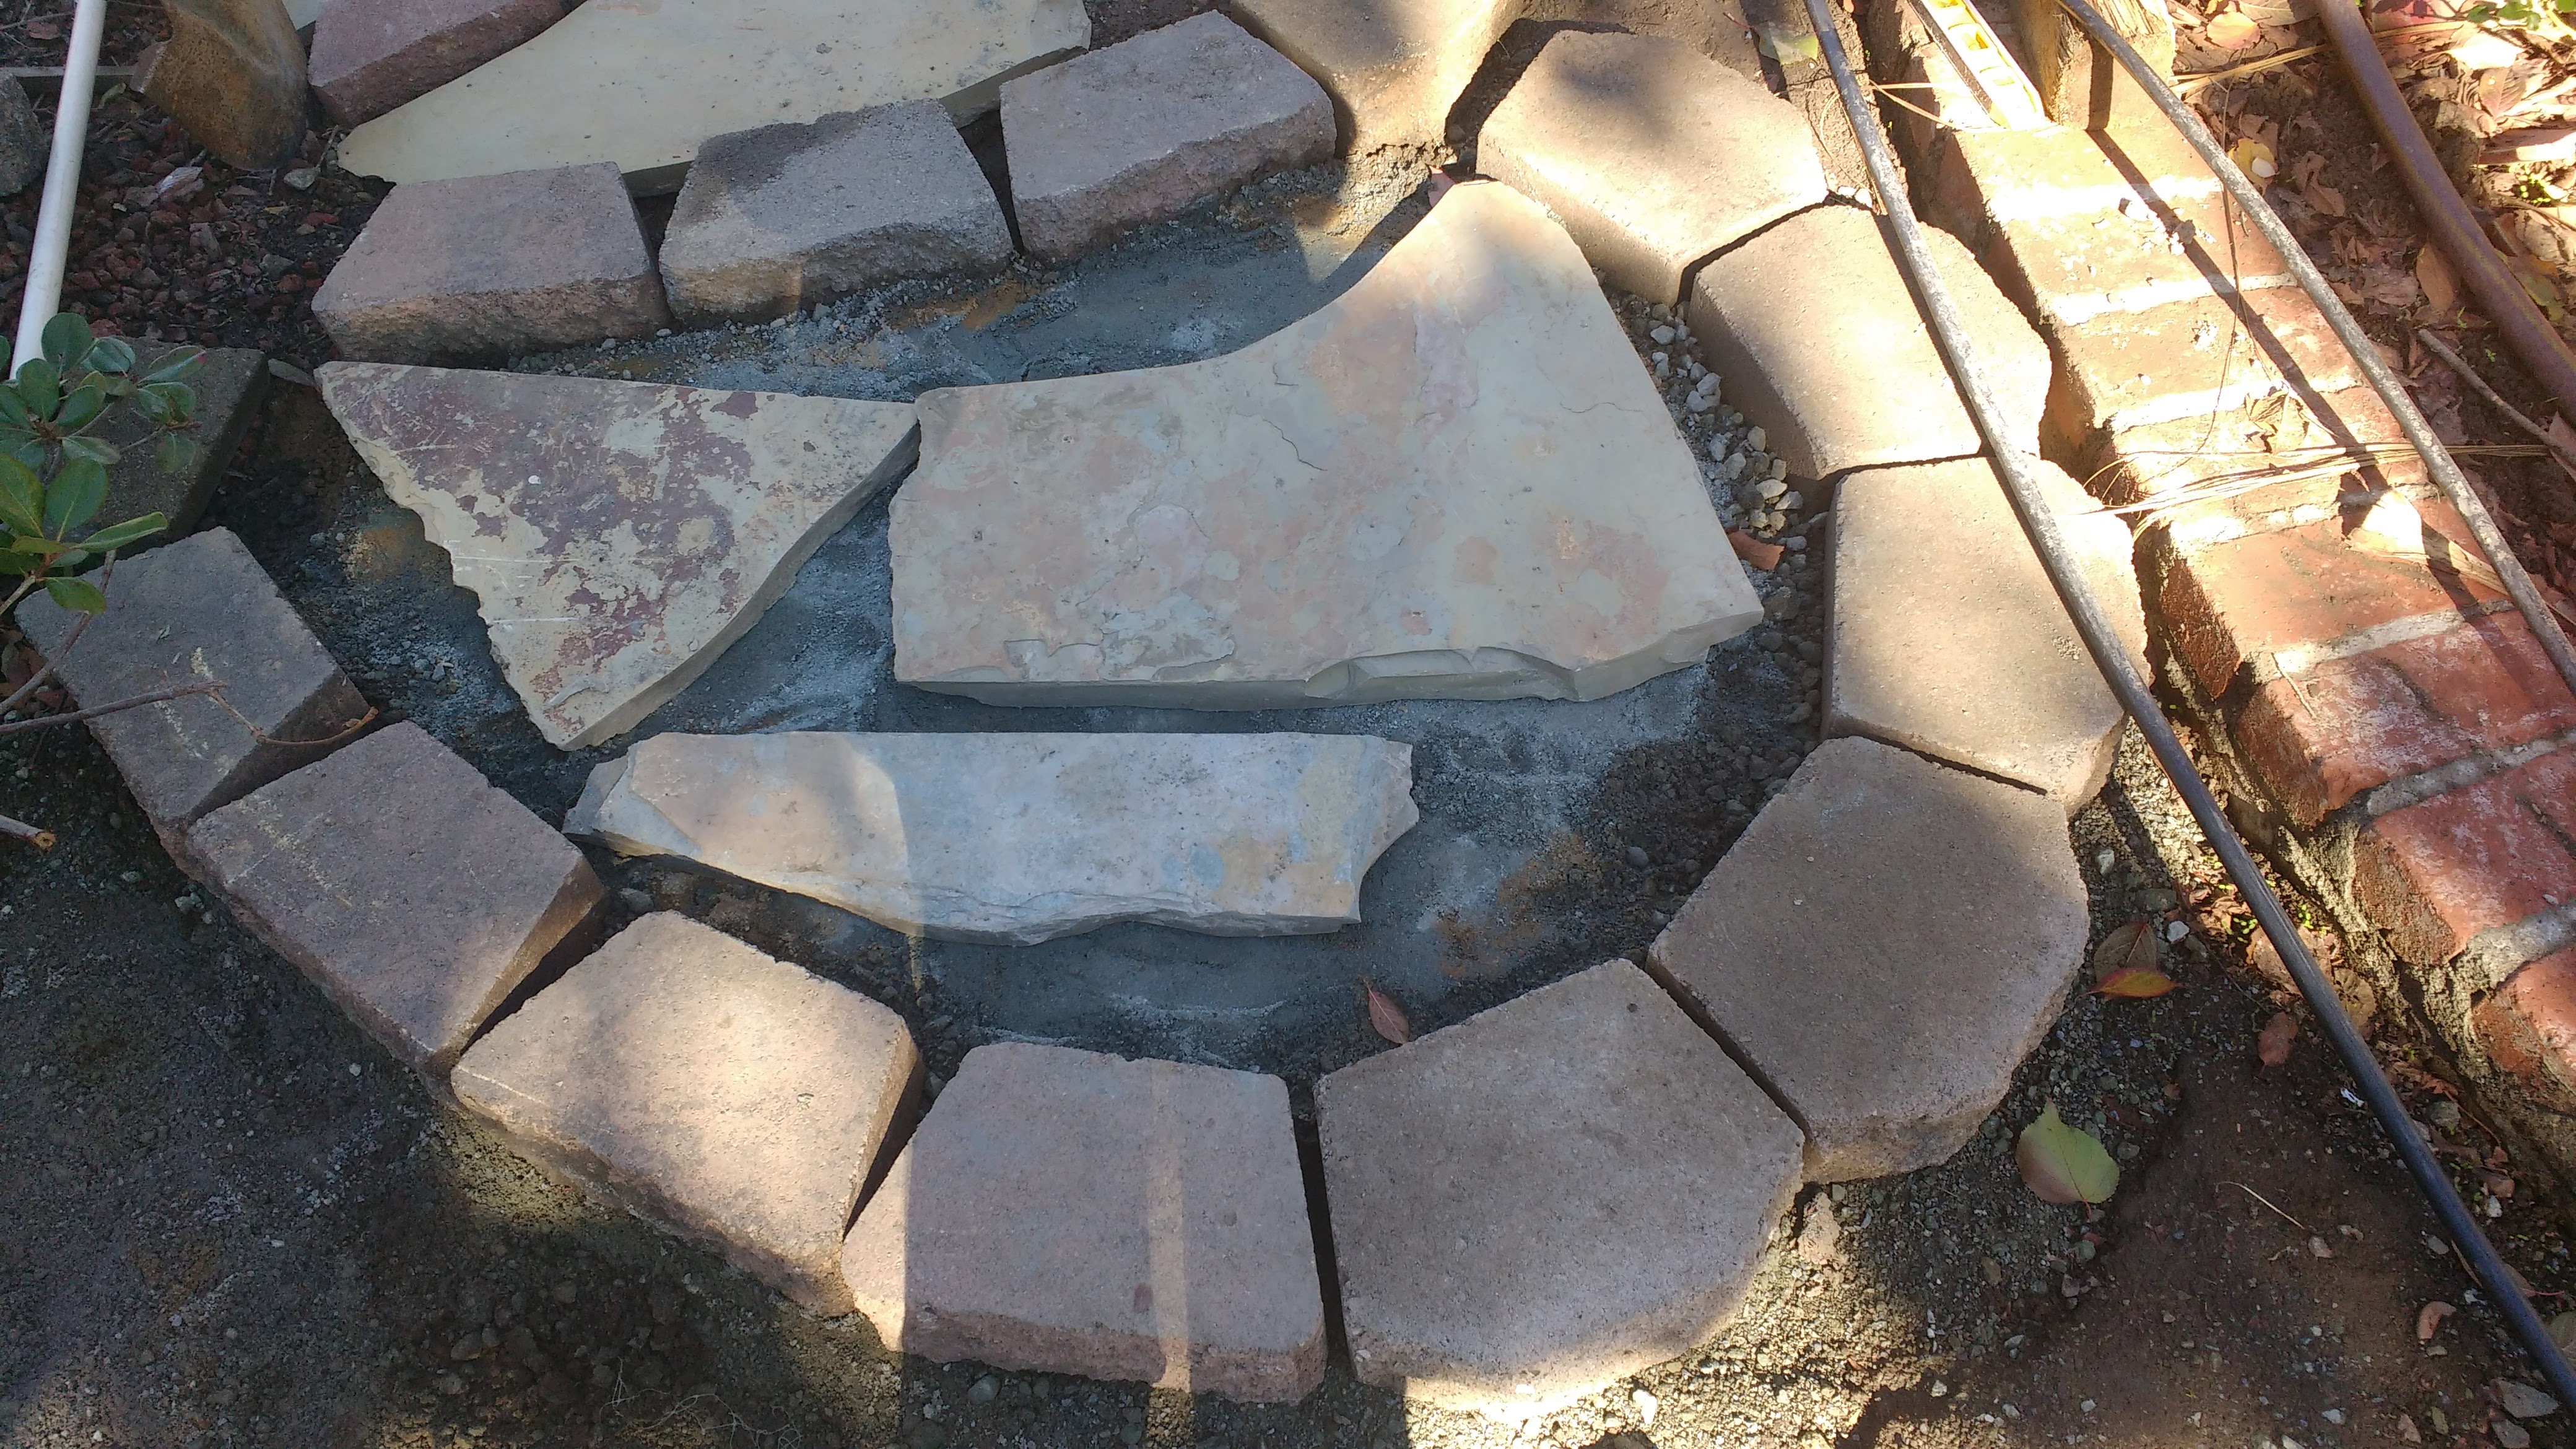
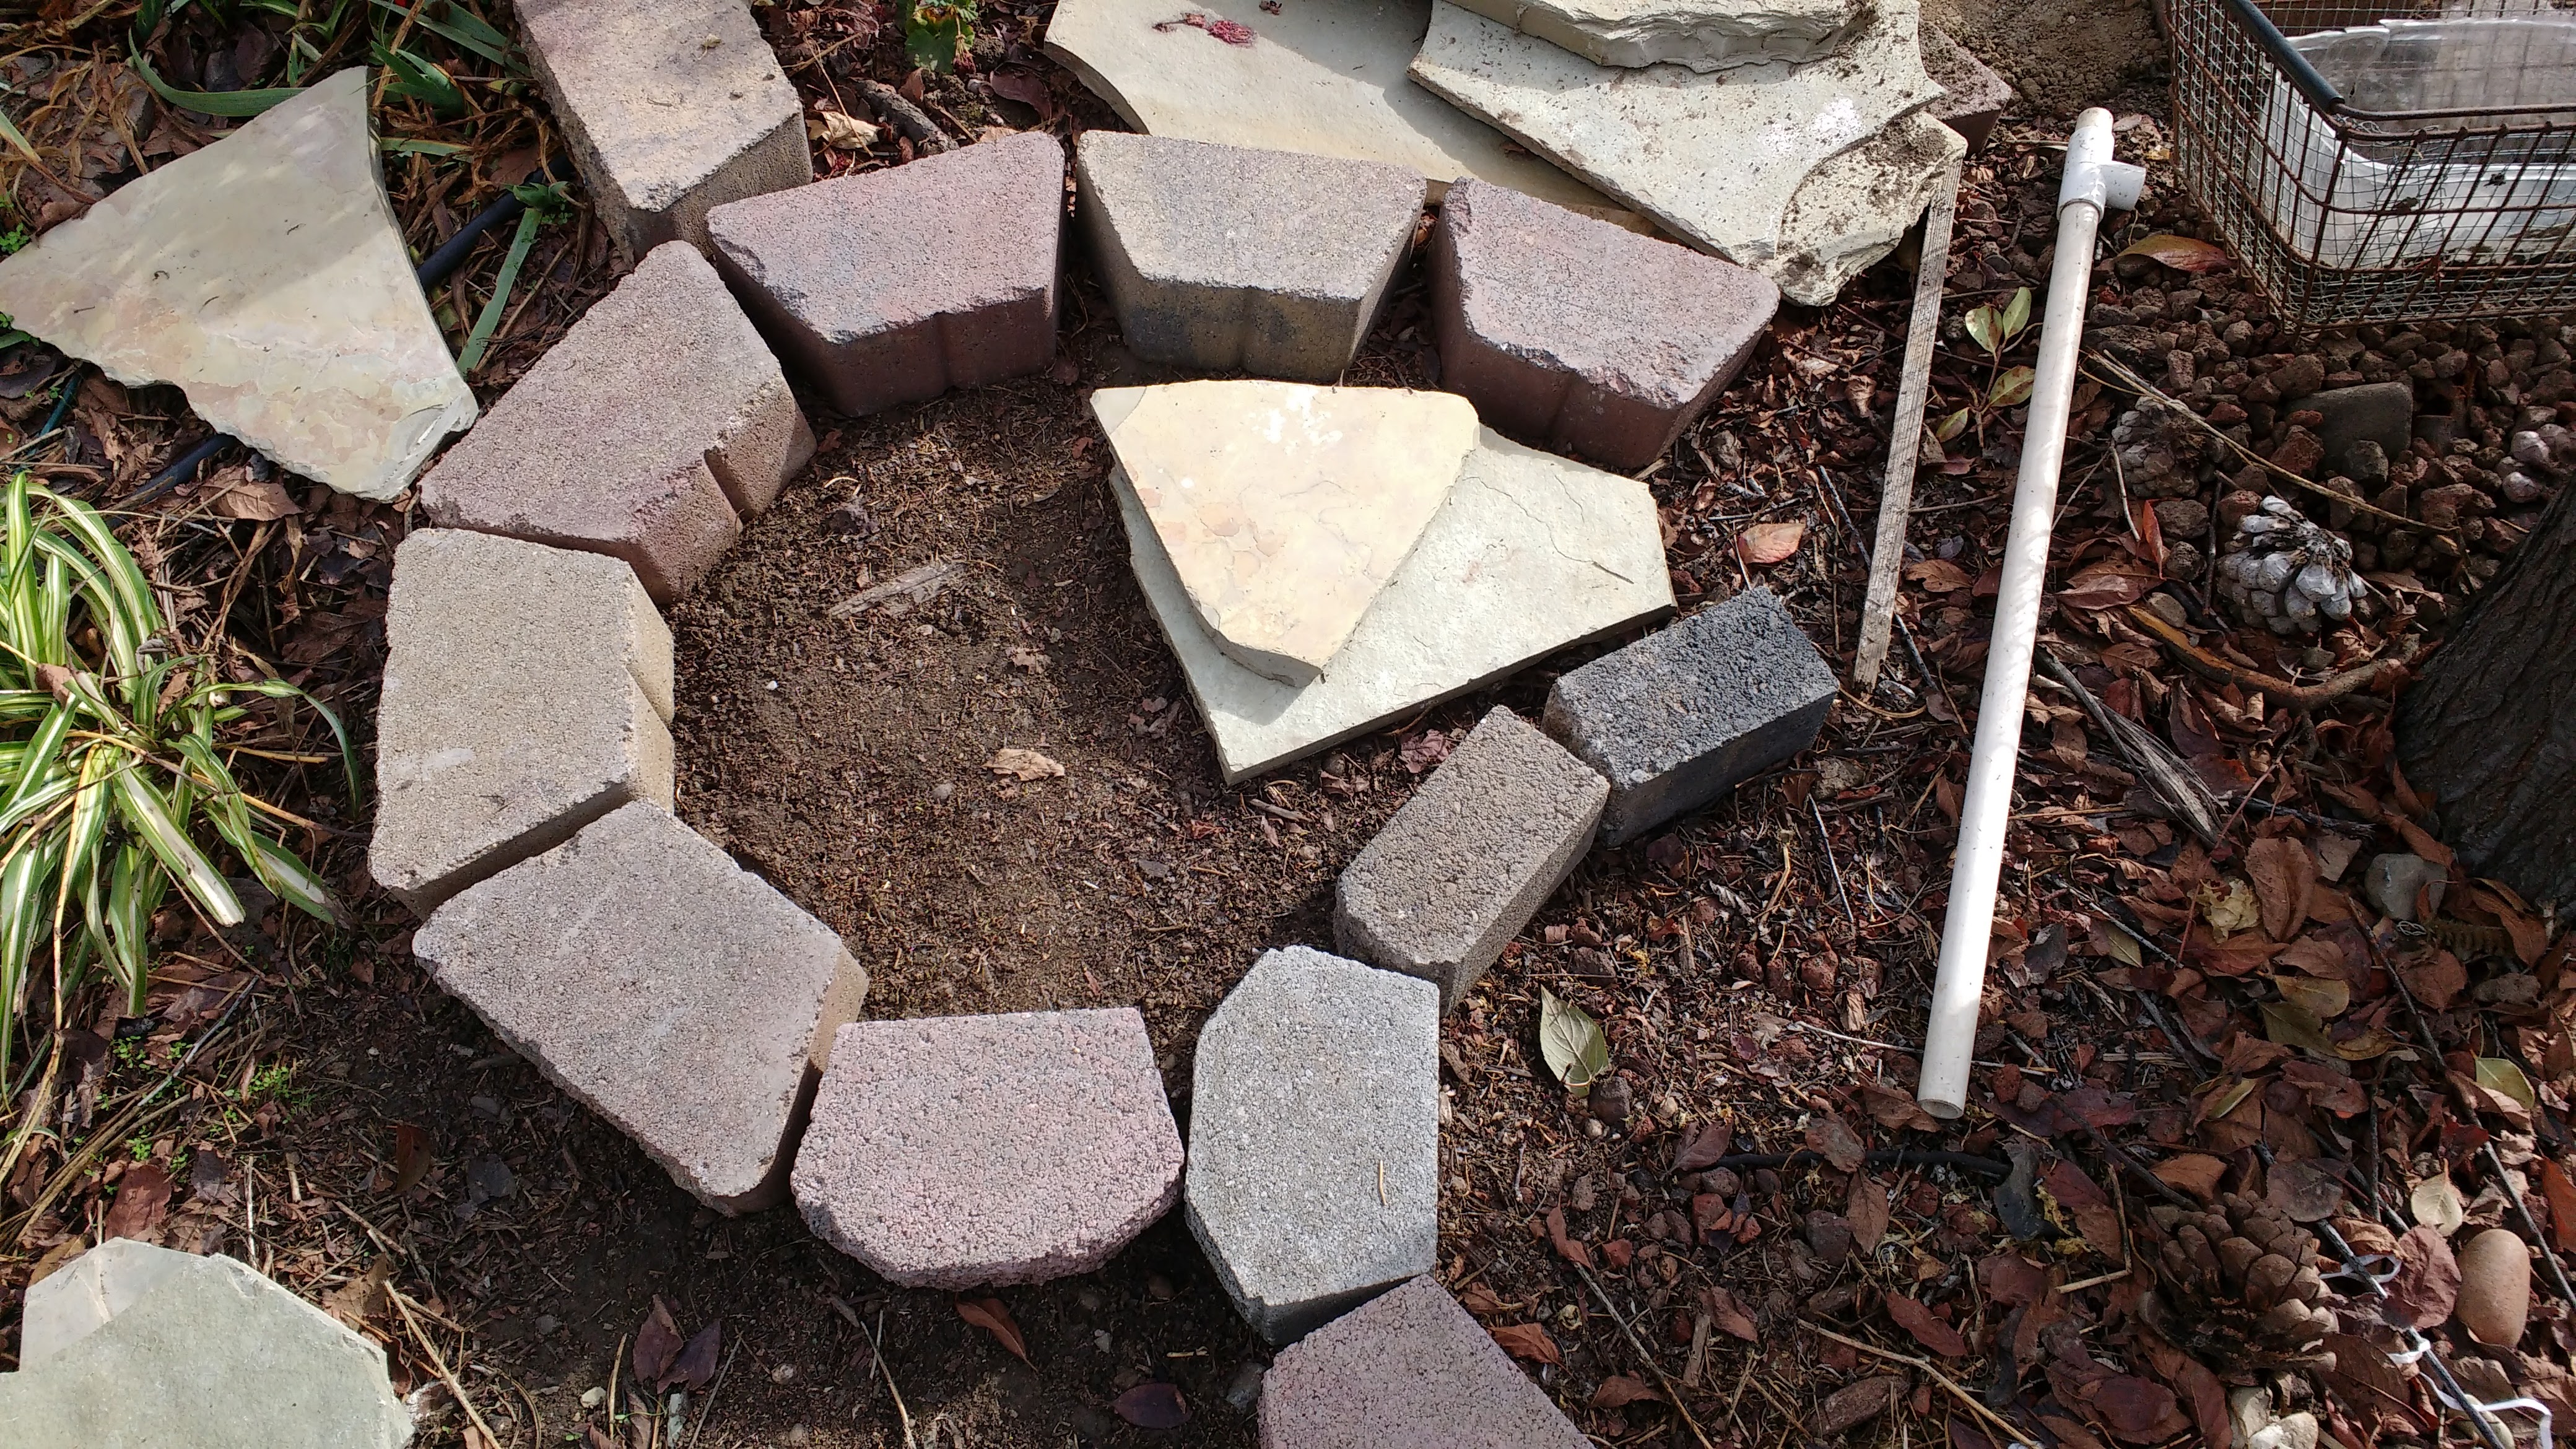
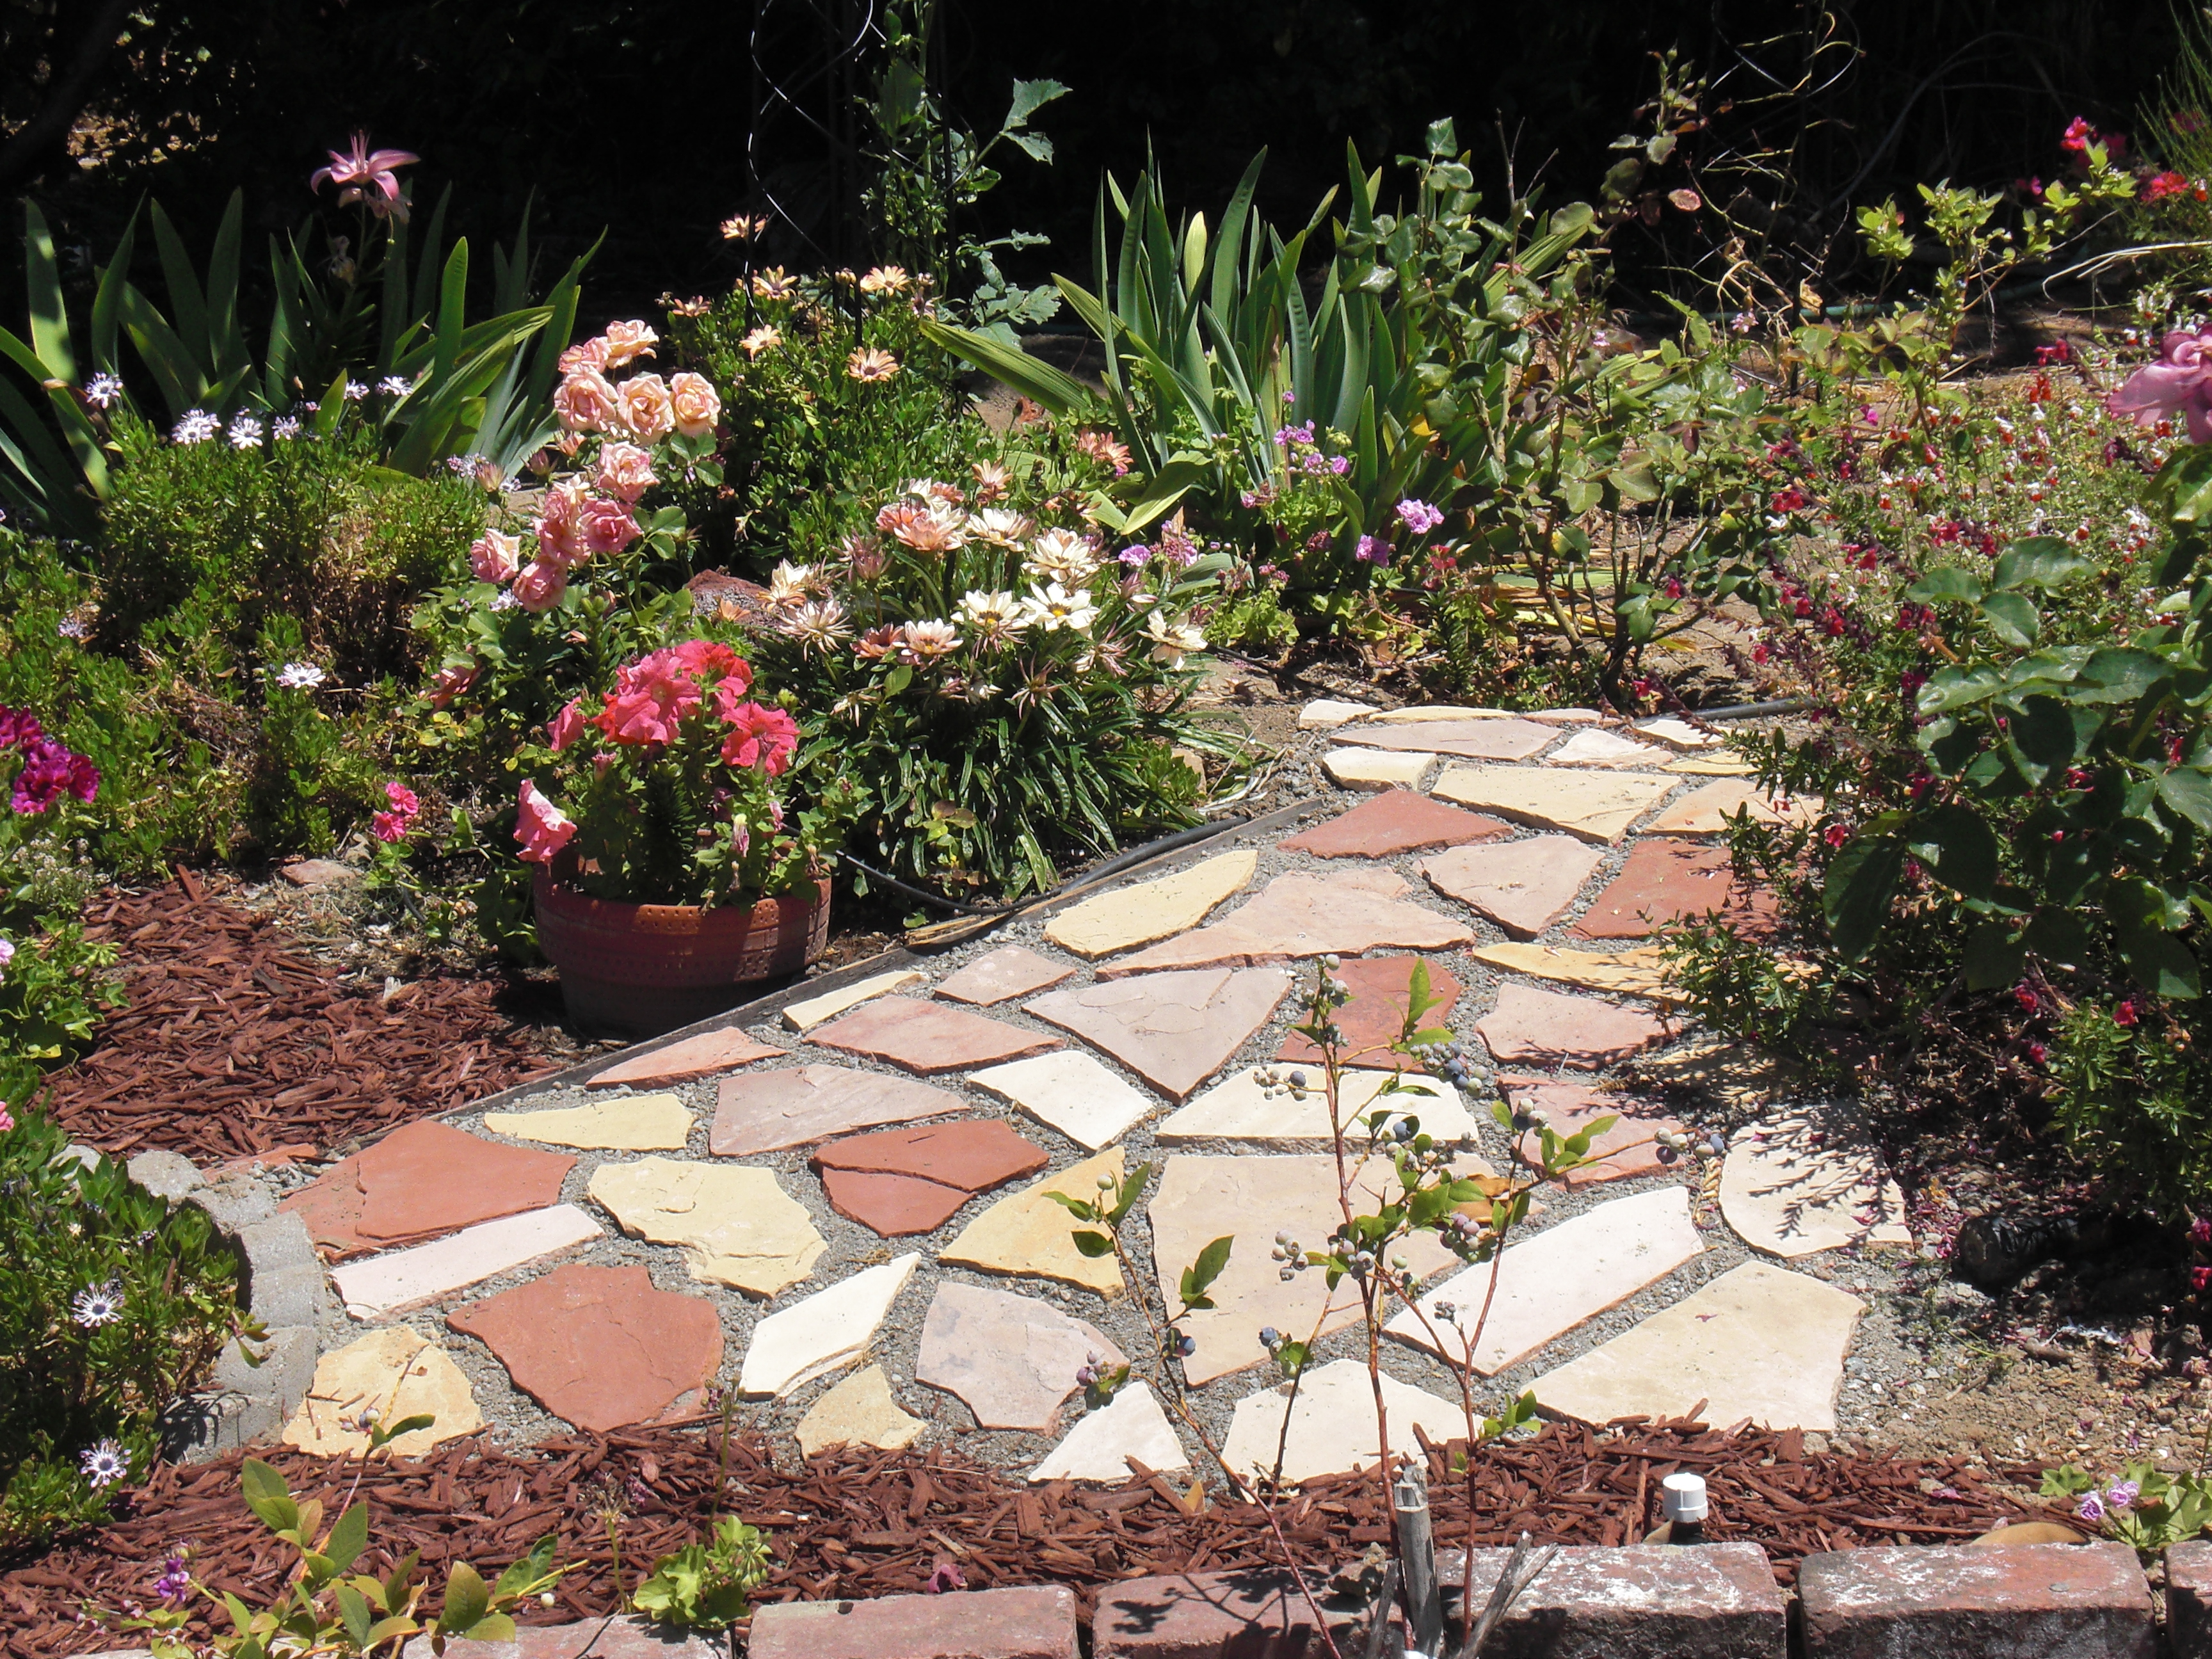
As I mentioned earlier, the flagstone was a windfall! But since the pieces were leftovers from someone else's construction, I had to be creative with the odd shapes and assorted sizes that they came in... Some had chipped, irregular edges while others were neatly cut. Of those that were cut, there were straight as well as curved edges - both concave and convex. Several of them had a mix of chipped, straight and curved edges on a single piece! And then, they were all not of the same thickness.
Working with the material was going to be a bit of a challenge but then I love a good challenge! I treated this part of the project like a massive jigsaw puzzle and I have to admit, it was a bit of fun - save for the fact that many of the pieces were very, very heavy! Since I wanted to be sure I had the best fit, I needed to be able to compare the various iterations of combinations. With some of them being so difficult to handle, I could not keep going back and forth, trying to decide which looked best. Enter my phone/camera!
Pro Tip # 11 - Take Pictures: The best way to compare various iterations is to take pictures of them so you can compare them side by side rather than trying to do so from memory. It saves time and is easier on your back. Keep taking pictures of the entire project from various angles, periodically. It is much easier to spot things that need to be changed - or fixed - from a photo than it is when looking at the actual structure. The pictures also serve as a good motivator to get the project done when you are able to see how far you’ve come! And of course, should you choose to write an instructable, they might just come in handy!
Part B) Creating the Mosaics
.jpg)
.jpg)
.jpg)
.jpg)
Materials for Mosaics:
- Flagstone/slate - I got mine for free from Freecycle
- Concrete glue - I used Strong Stik but you could use anything that holds your pebble mosaic on the mesh long enough to position it on wet concrete and leave it to set. A word of caution - Strong Stik does not hold up in moist conditions so you cannot use it as a permanent glue for outdoor mosaics
- Cement
- Concrete
- Concrete pigments
- Cement Backerboard
- Sliced pebbles
- Nylon meshing
- Clear contact paper
- Pea gravel or pea pebbles
- Copper/stainless steel wire
Items 5. and 6. are typically sold together in the form of Pebble Mosaics. These are random mosaics that come on a mesh. Unfortunately, I have not yet found a source of bulk sliced - unattached - pebbles. I guess they are too fragile to be sold/mailed that way. There are several places where you can buy loose polished whole pebbles. I found one place that sells tumbled/sliced but they looked more tumbled than sliced to me… If anyone knows of a source, please let me/us know!
Tools and Gear:
- Safety glasses (full face shield if using angle grinder)
- Leather gloves
- Dremel tool with disc attachment
- Mini angle grinder like Merlin 2
Prep Steps for Pebble Mosaics:
Step 1: Separate the pebbles from the backing mesh - a finger-breaking job! Save the mesh, it will be used later.
Step 2: Sort the pebbles in the following order of priority:
a) Shape, then Color, then Size and have a separate category for exotic, one-of-a-kind pieces b) Further sort each color by texture: Striped, Mottled, Graded etc.
Pro Tip # 12 - Study Your Subject: Before attempting to create a mosaic of something specific from nature, try studying the real thing, which in most instances means doing a search of that object’s images. Make a collection of these images in a doc and find a way to sort them. While figuring out categories to place all your images into, you will notice subtle things about the images that you hadn’t noticed before - things that suddenly make your mosaic look like what you intended it to.
Specific Mosaics
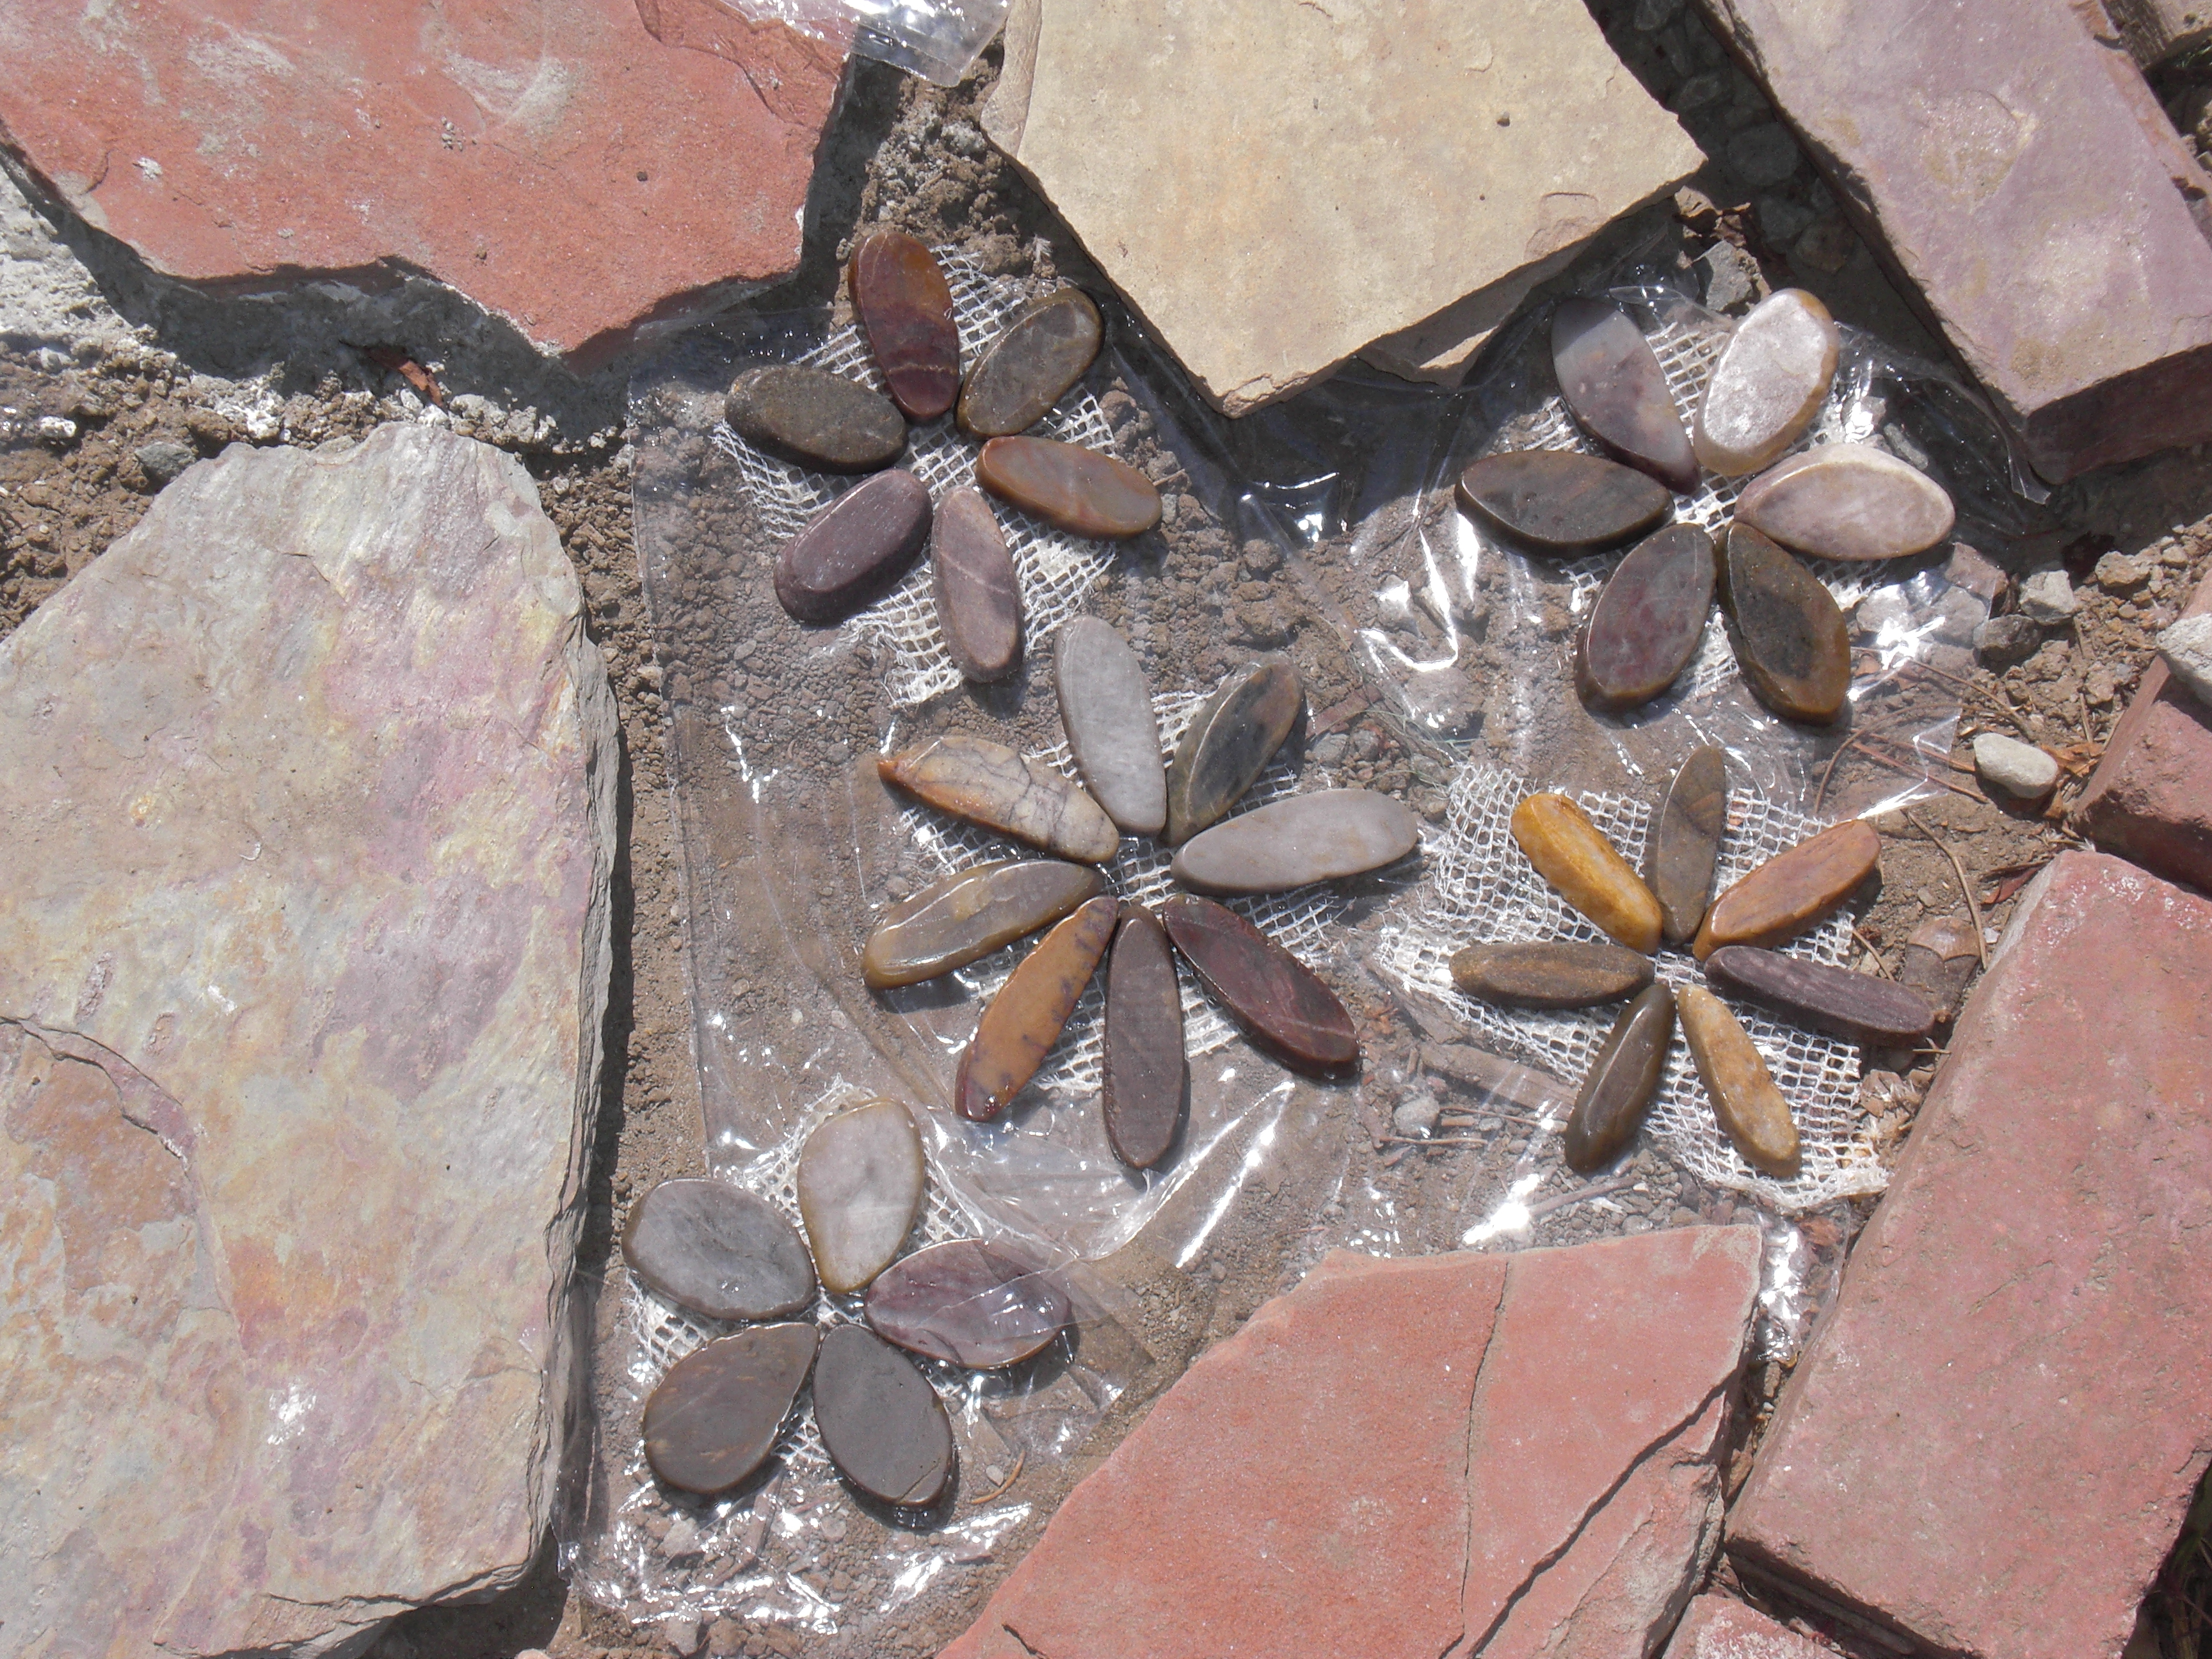
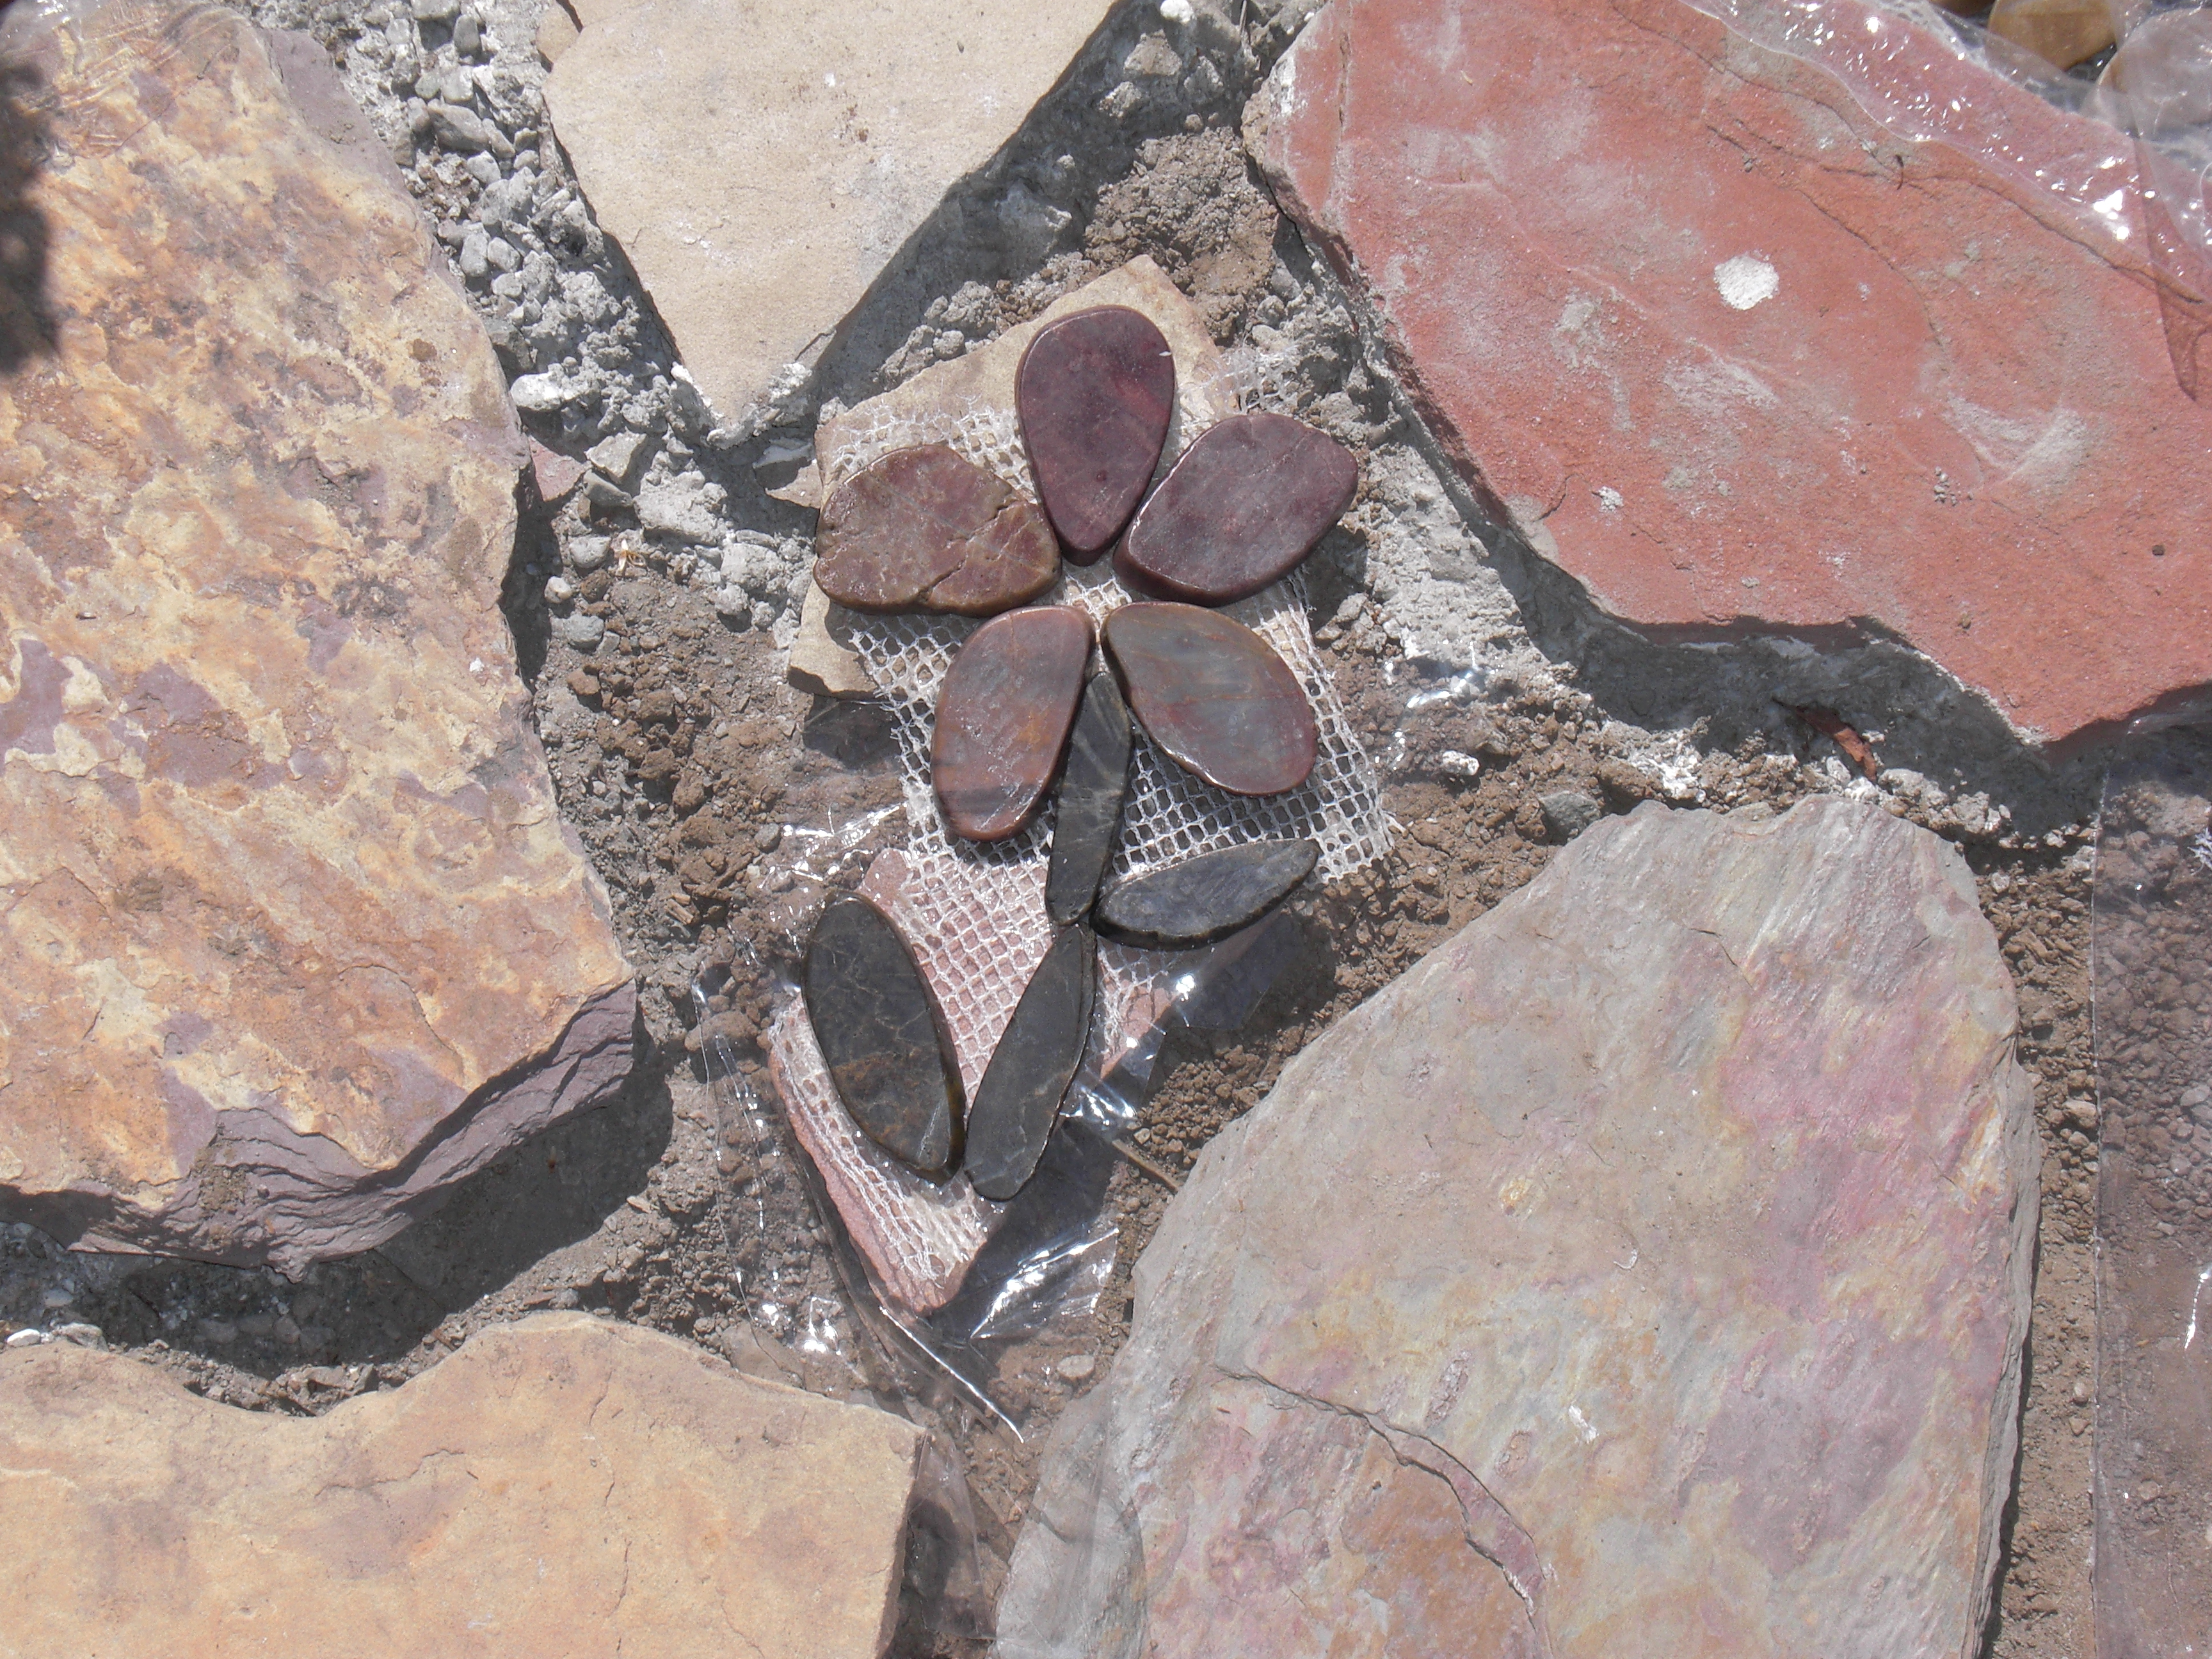
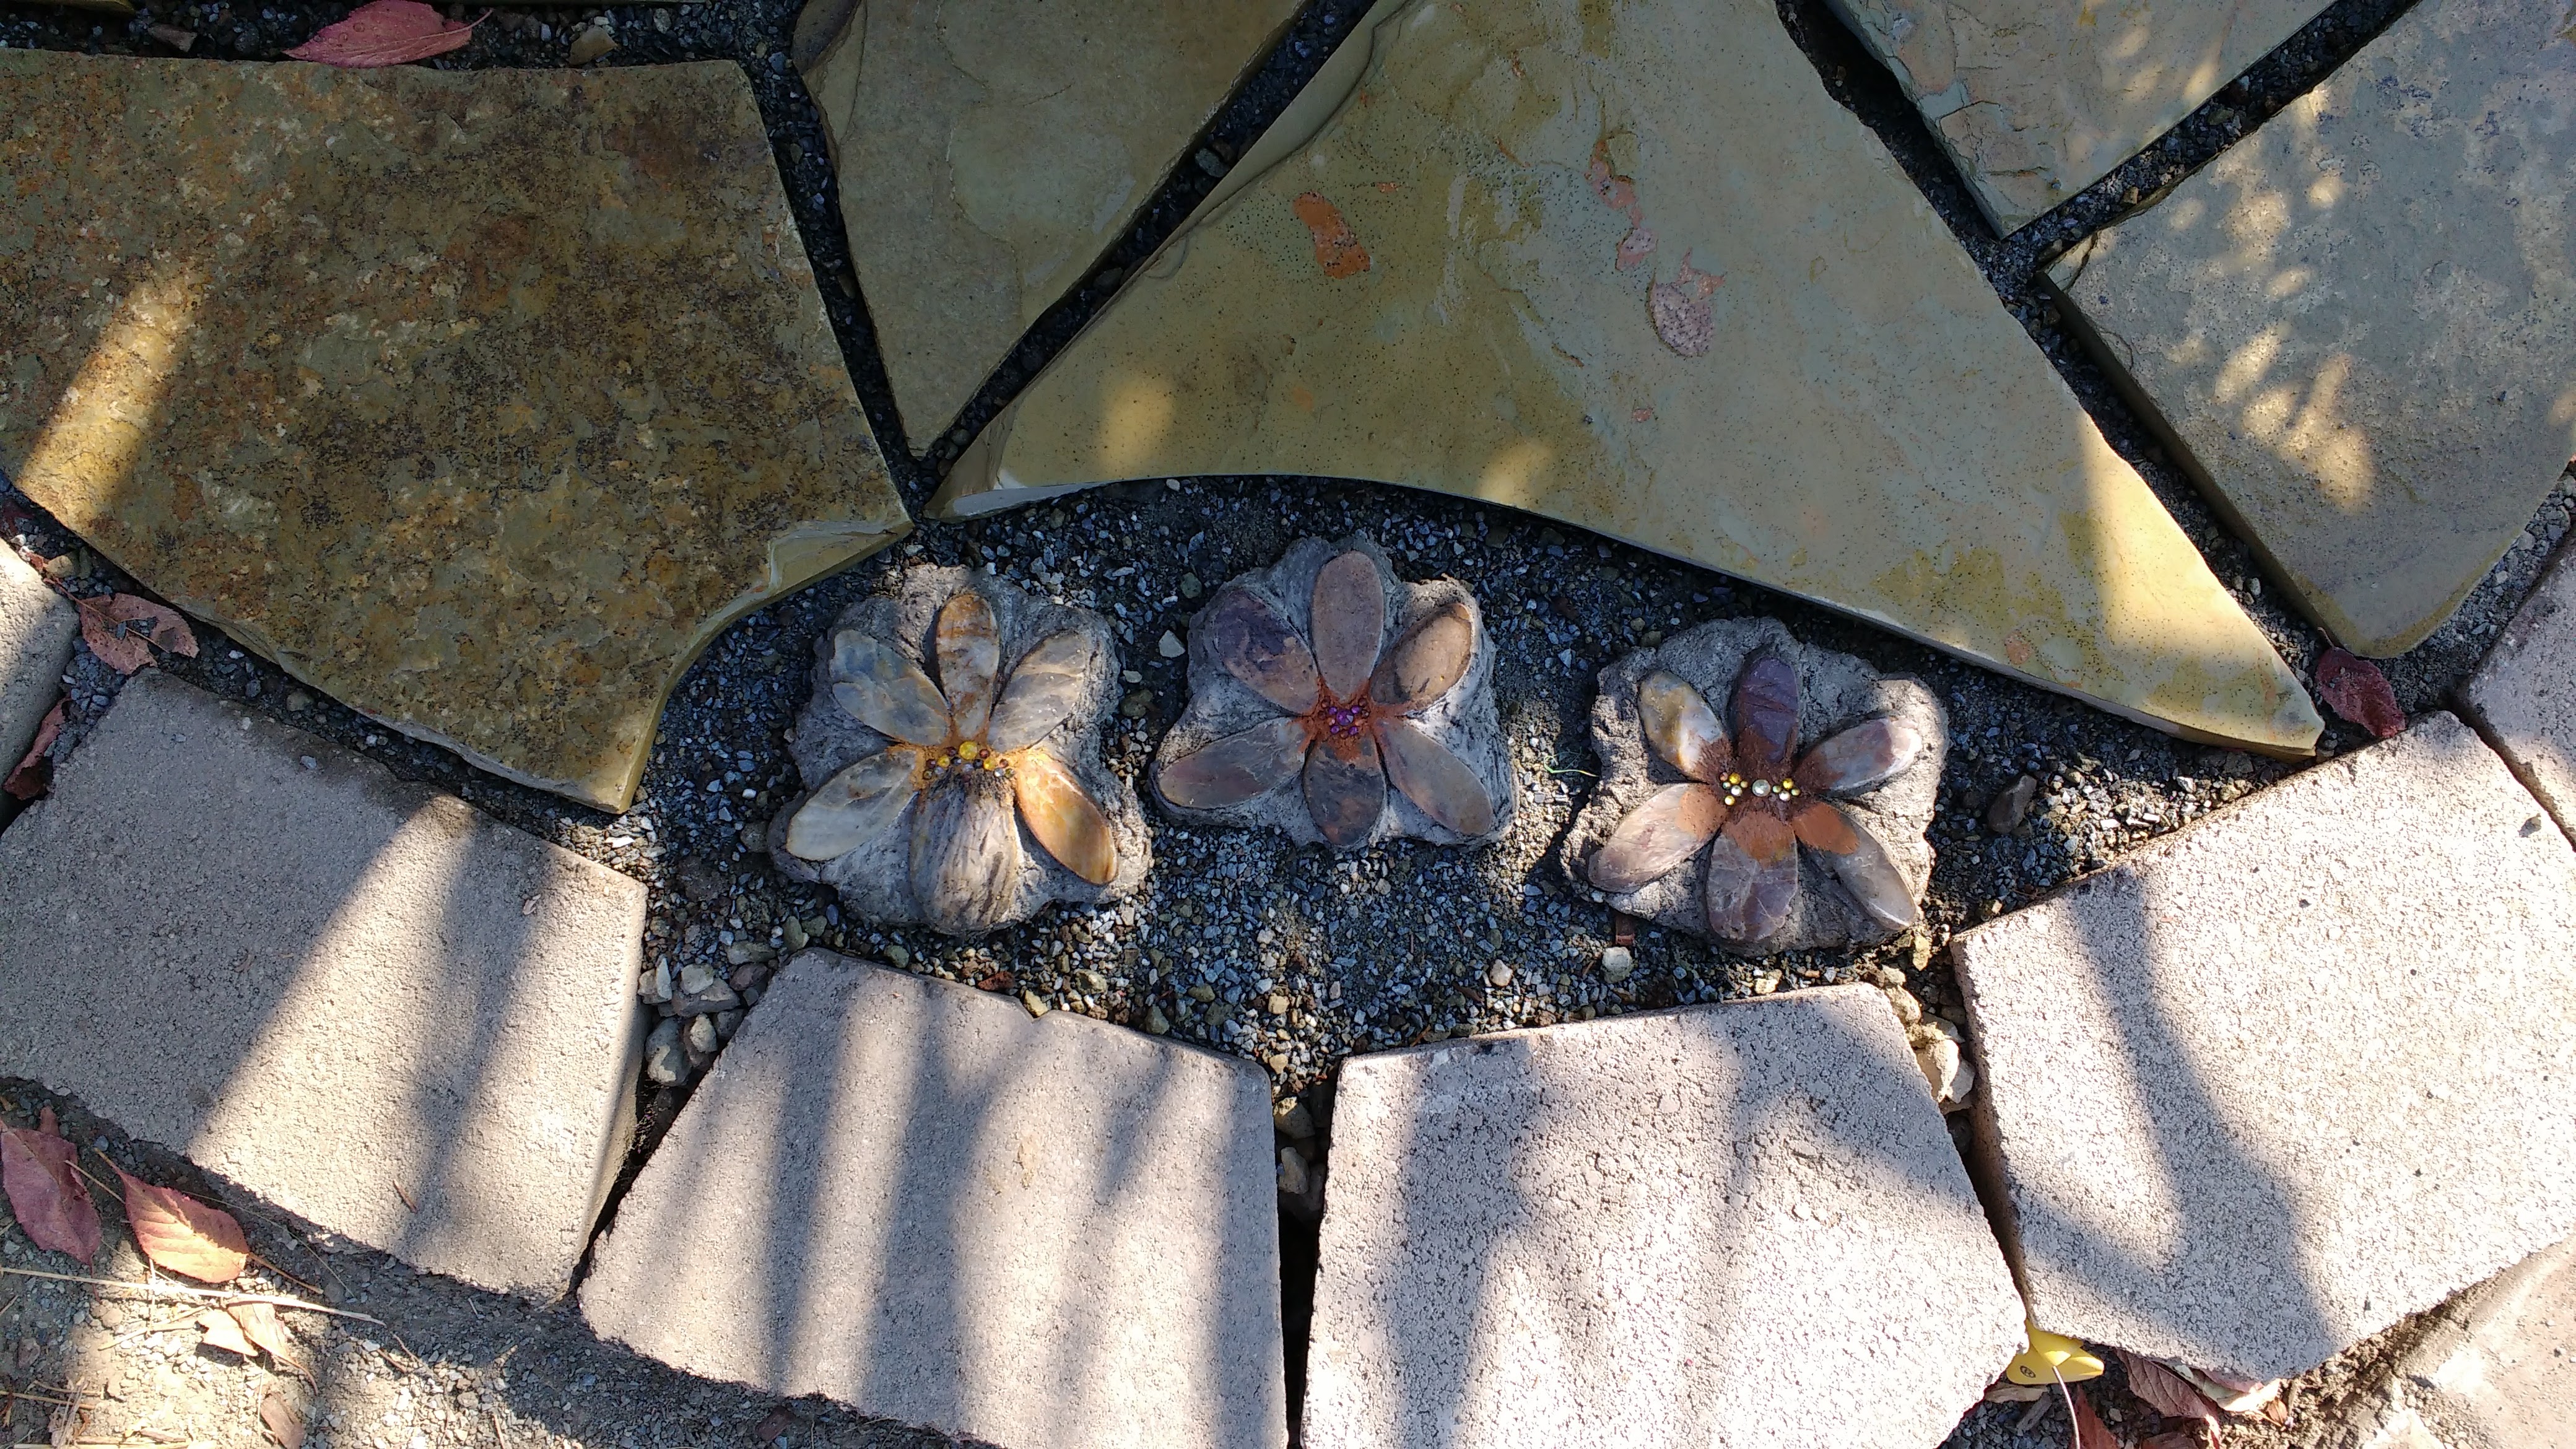
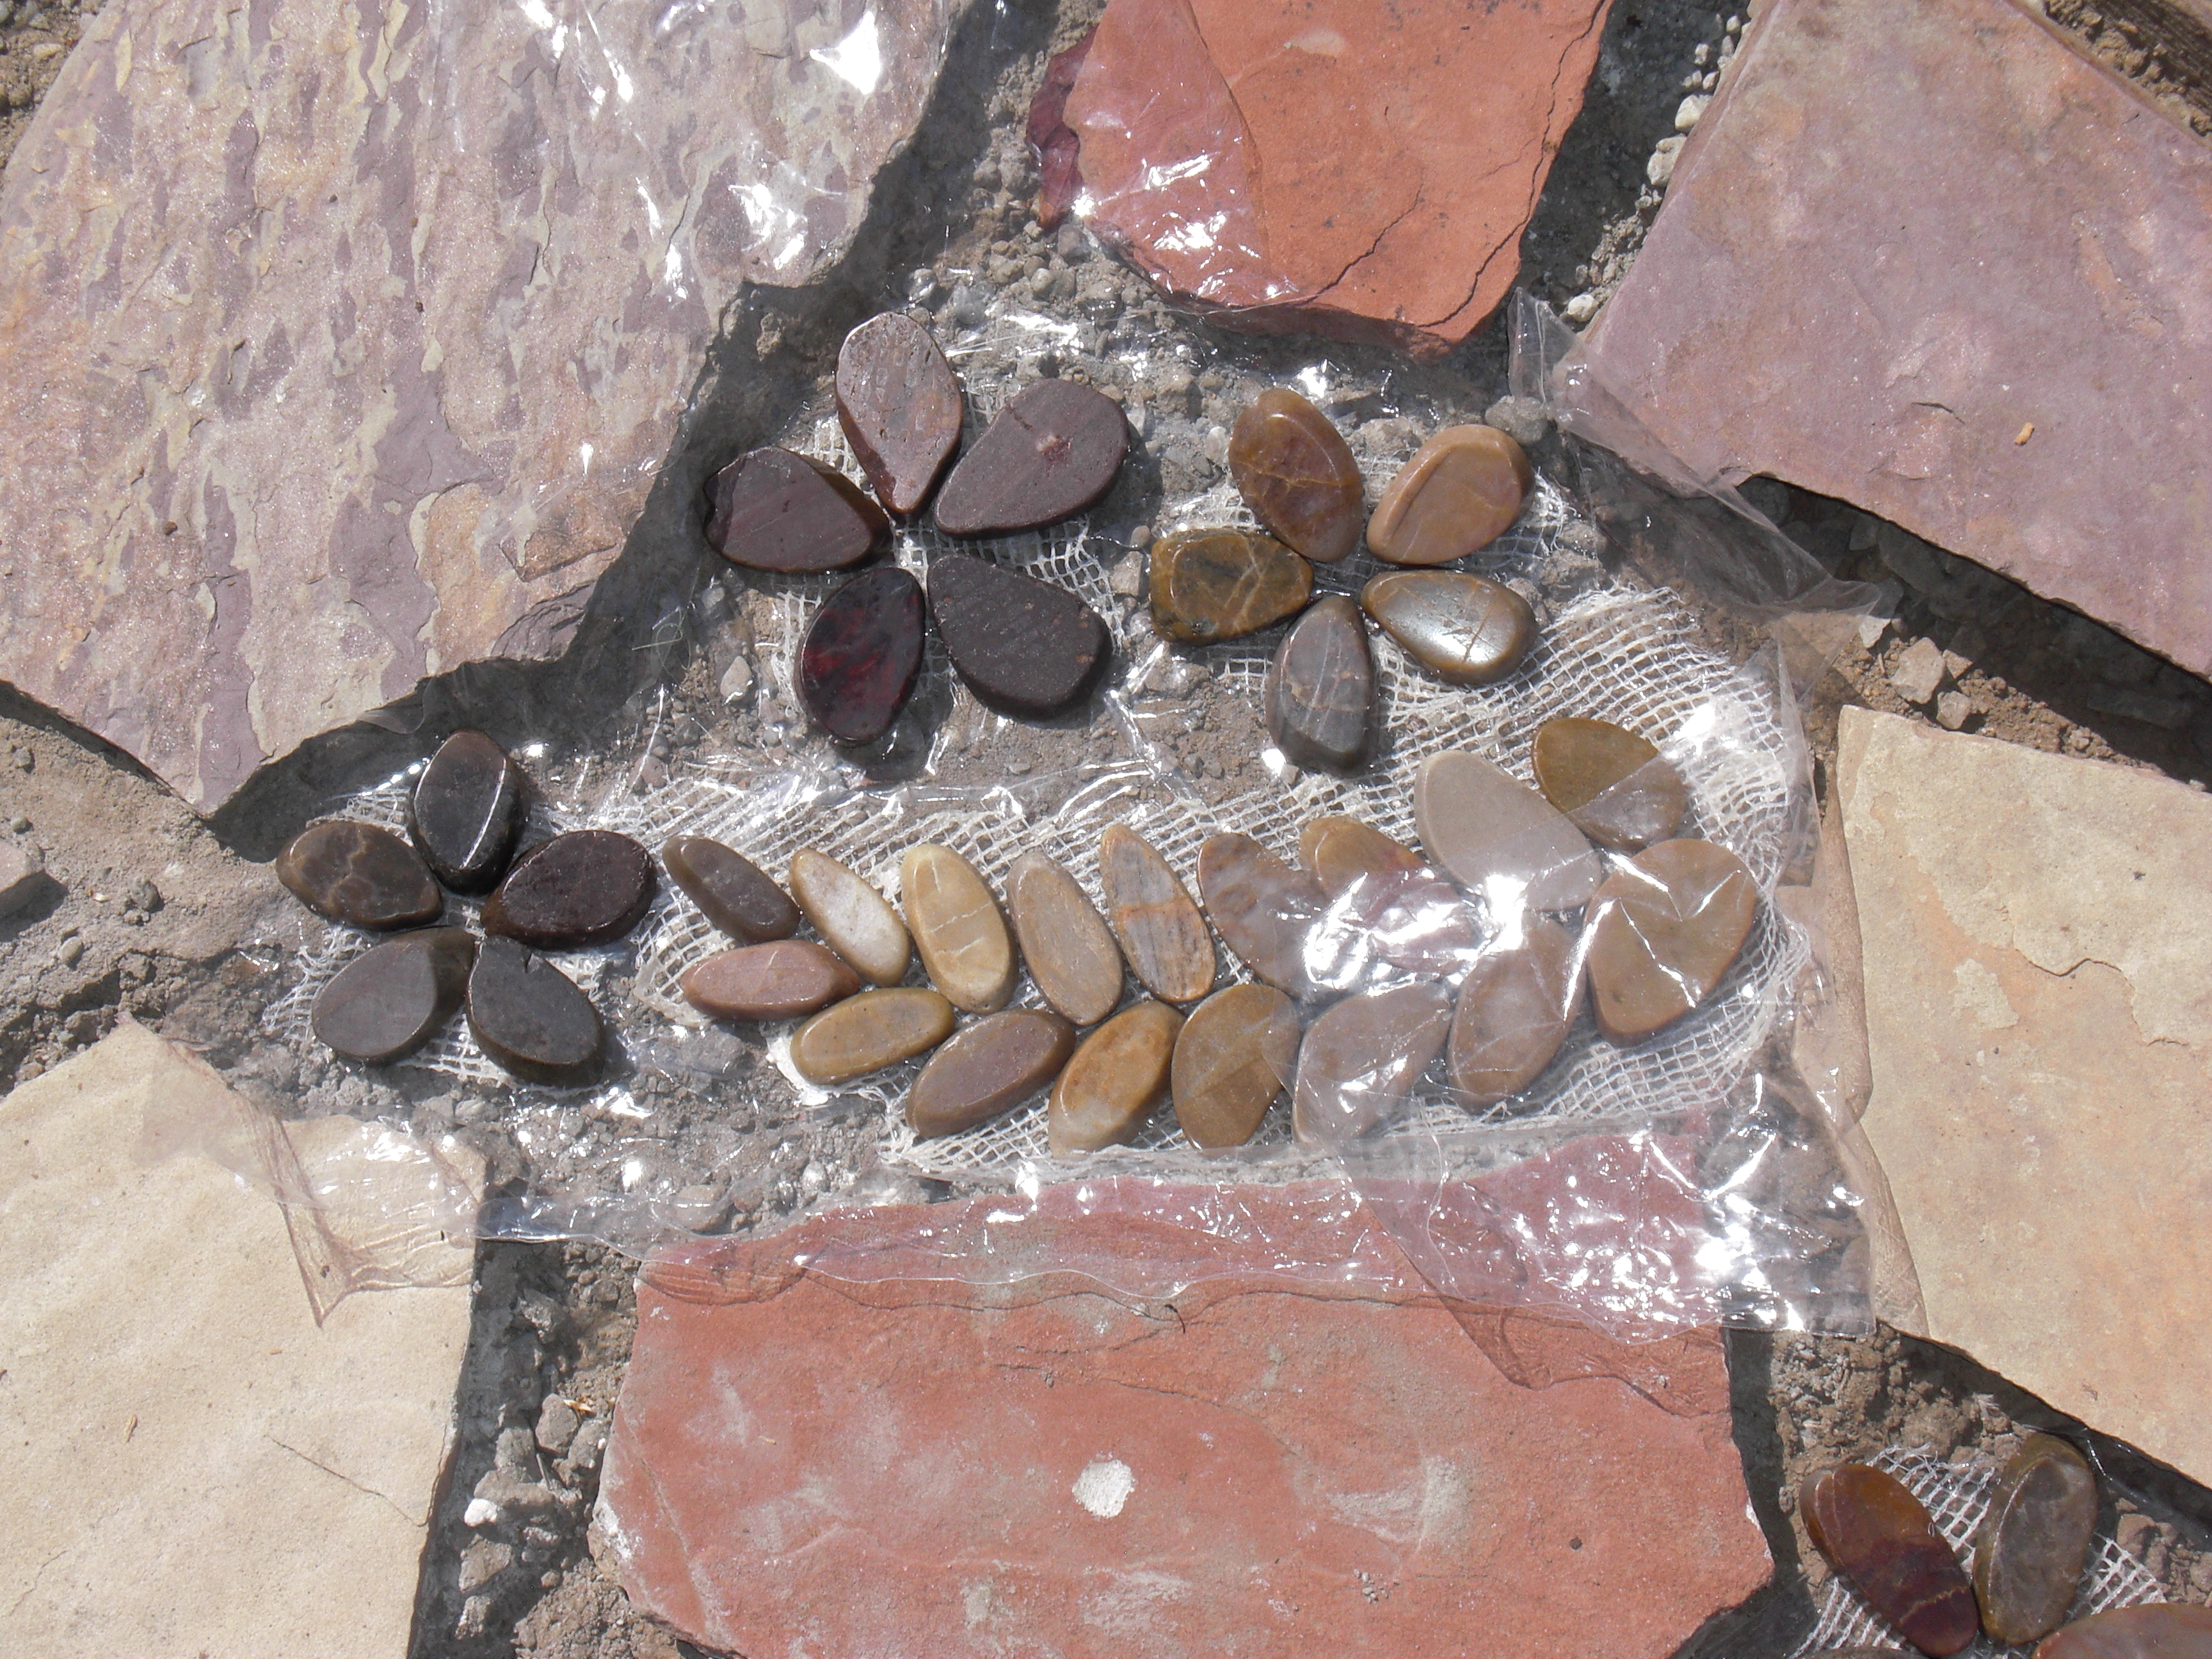
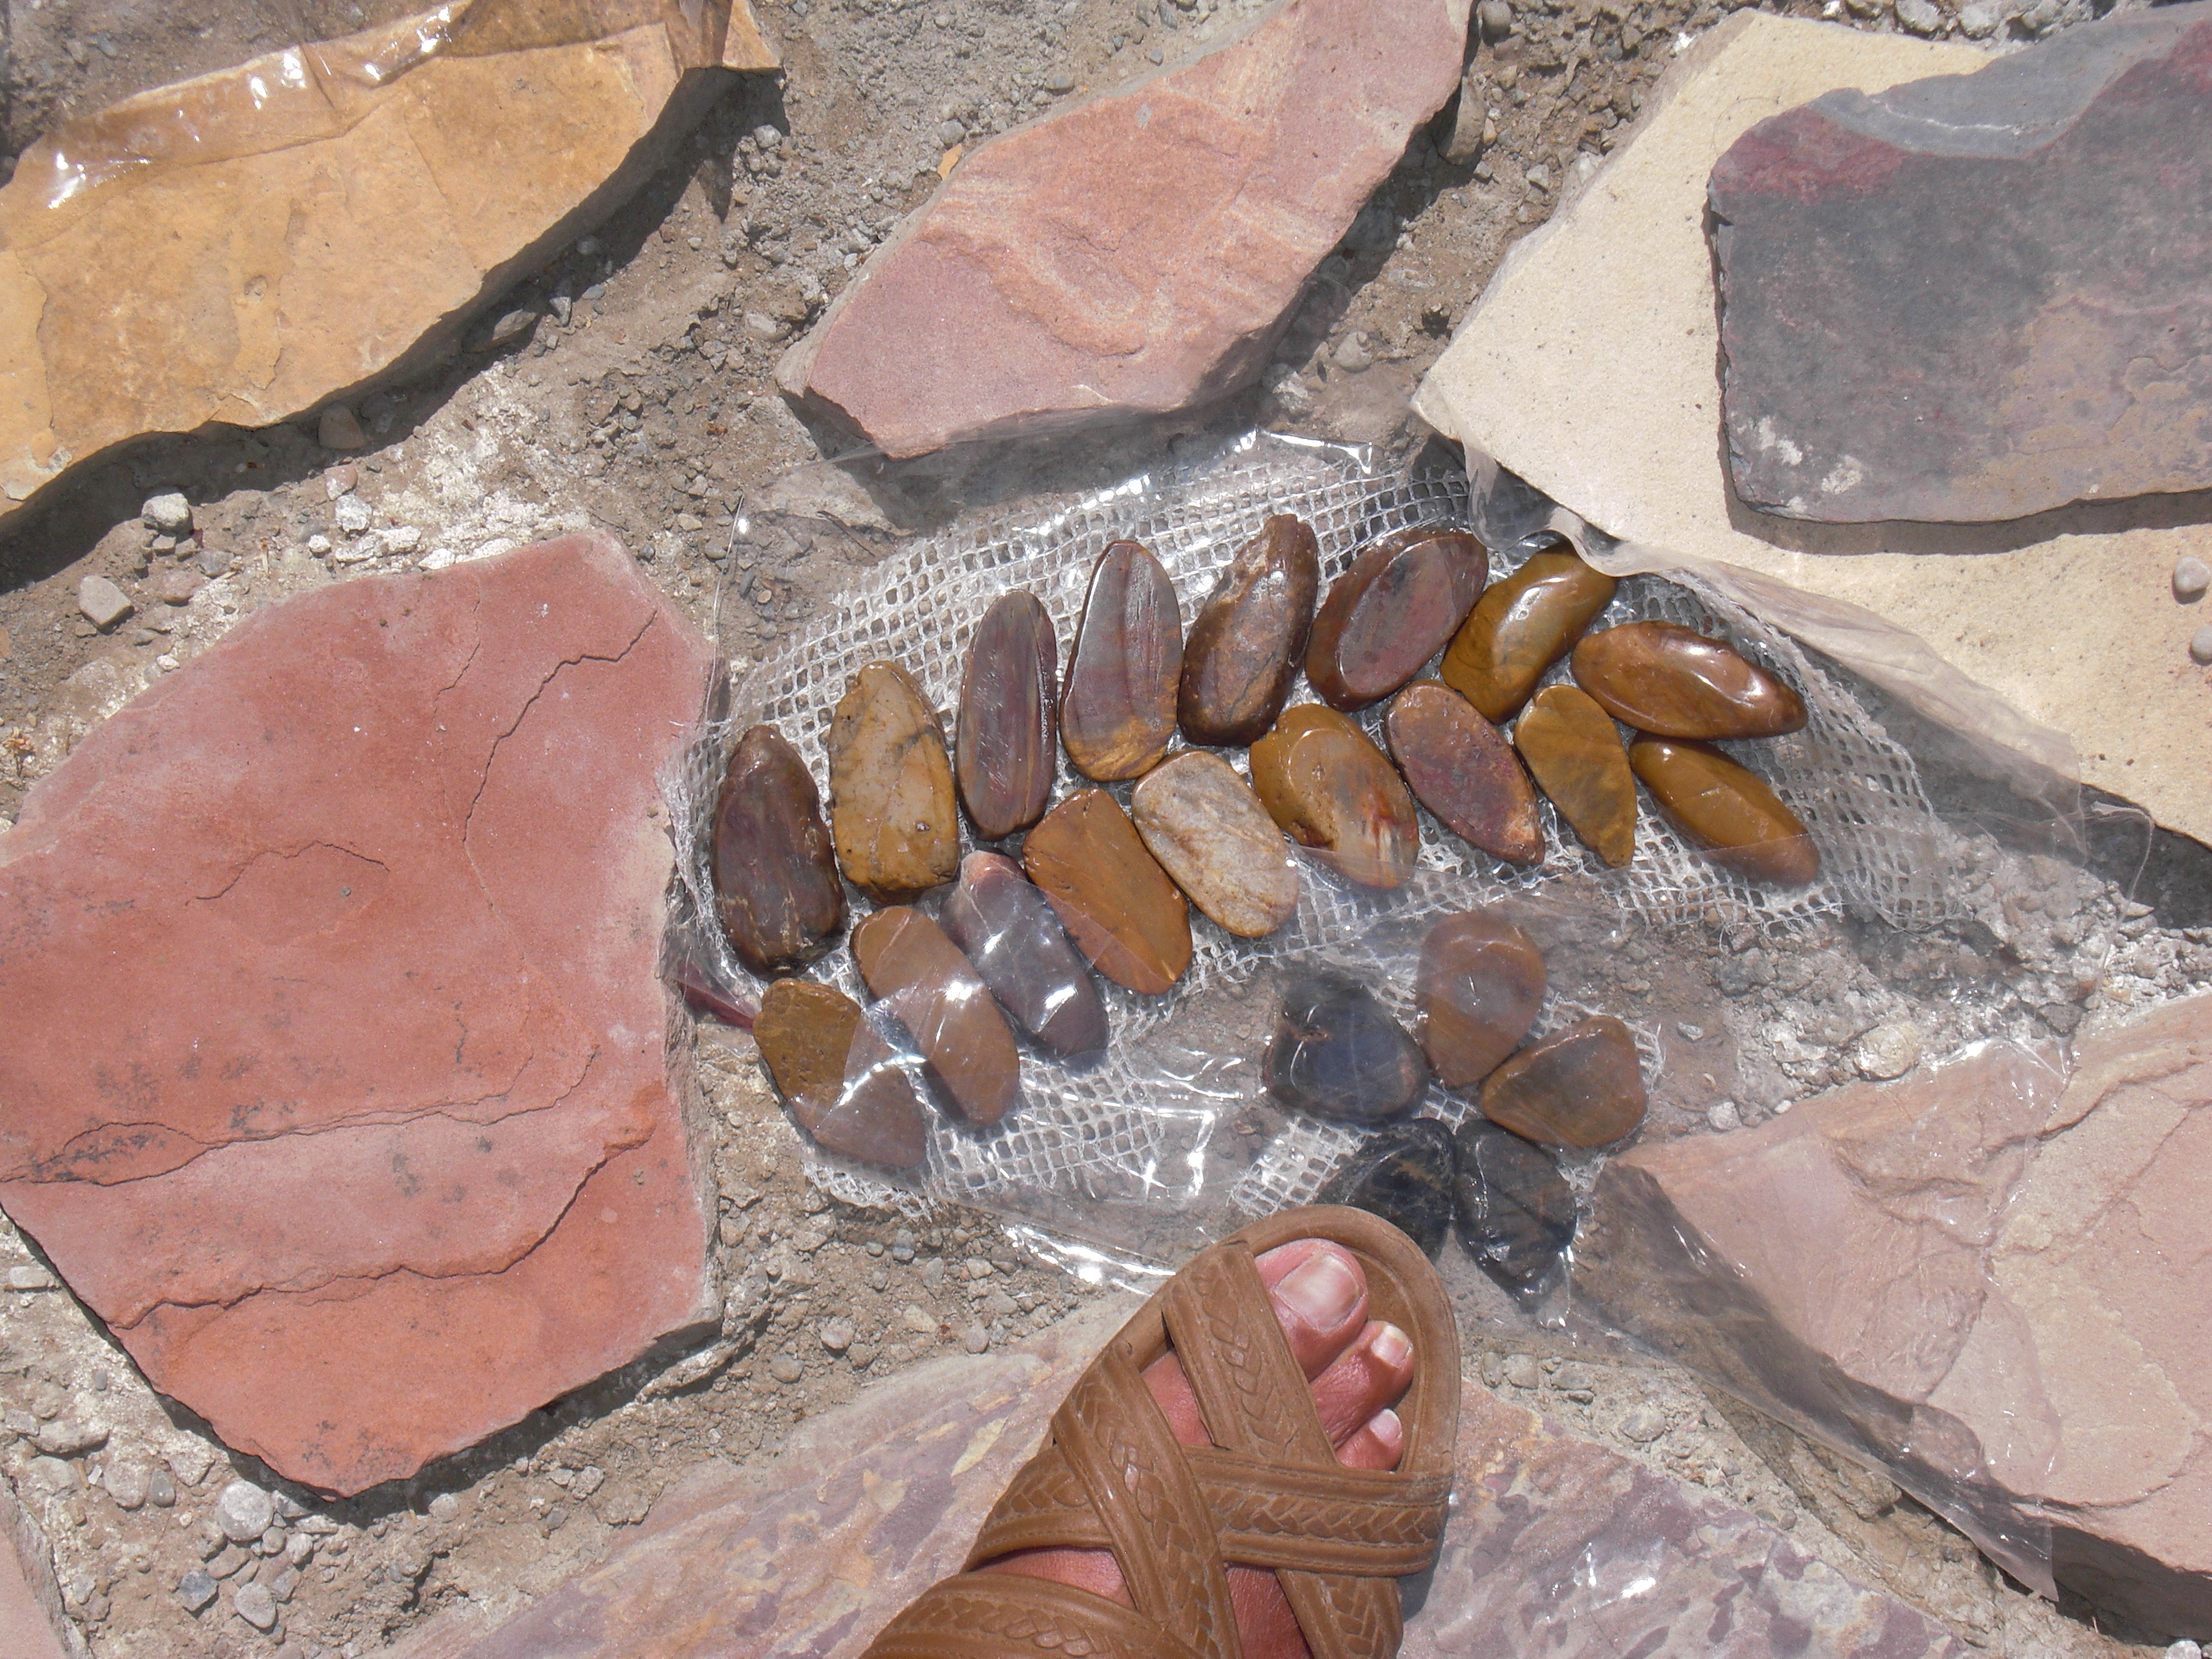
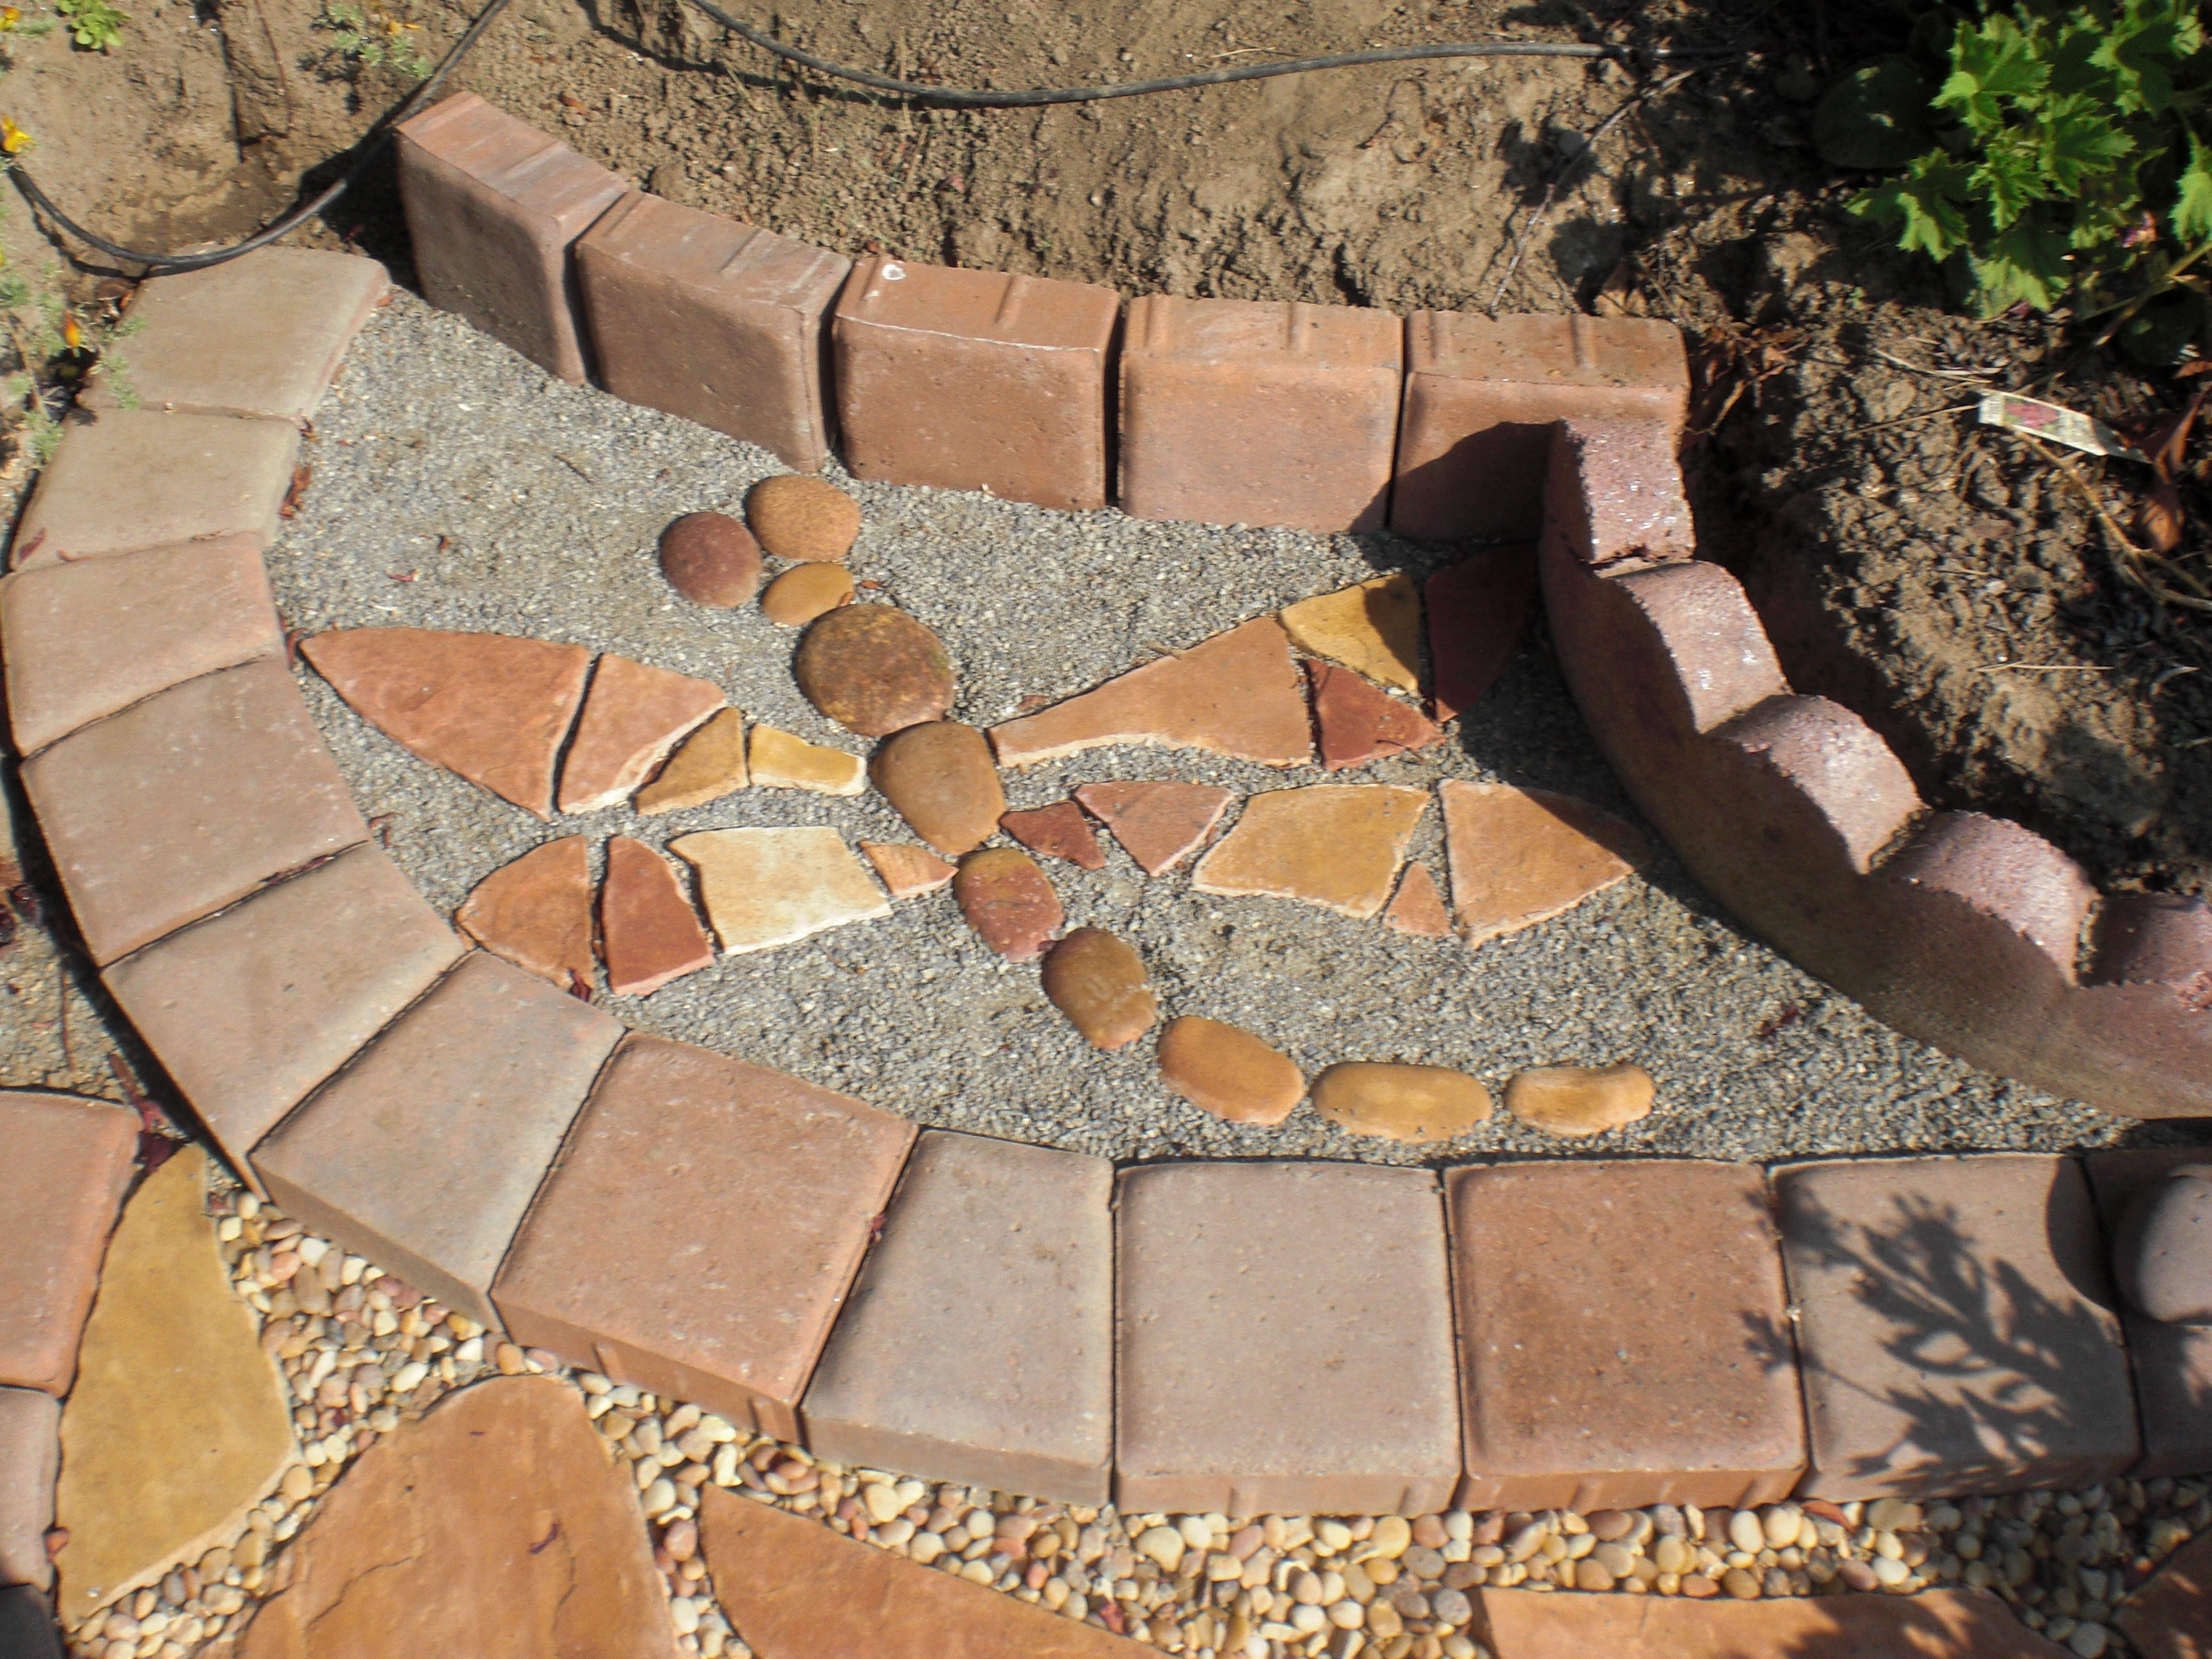
Flowers and Leaf Mosaics:
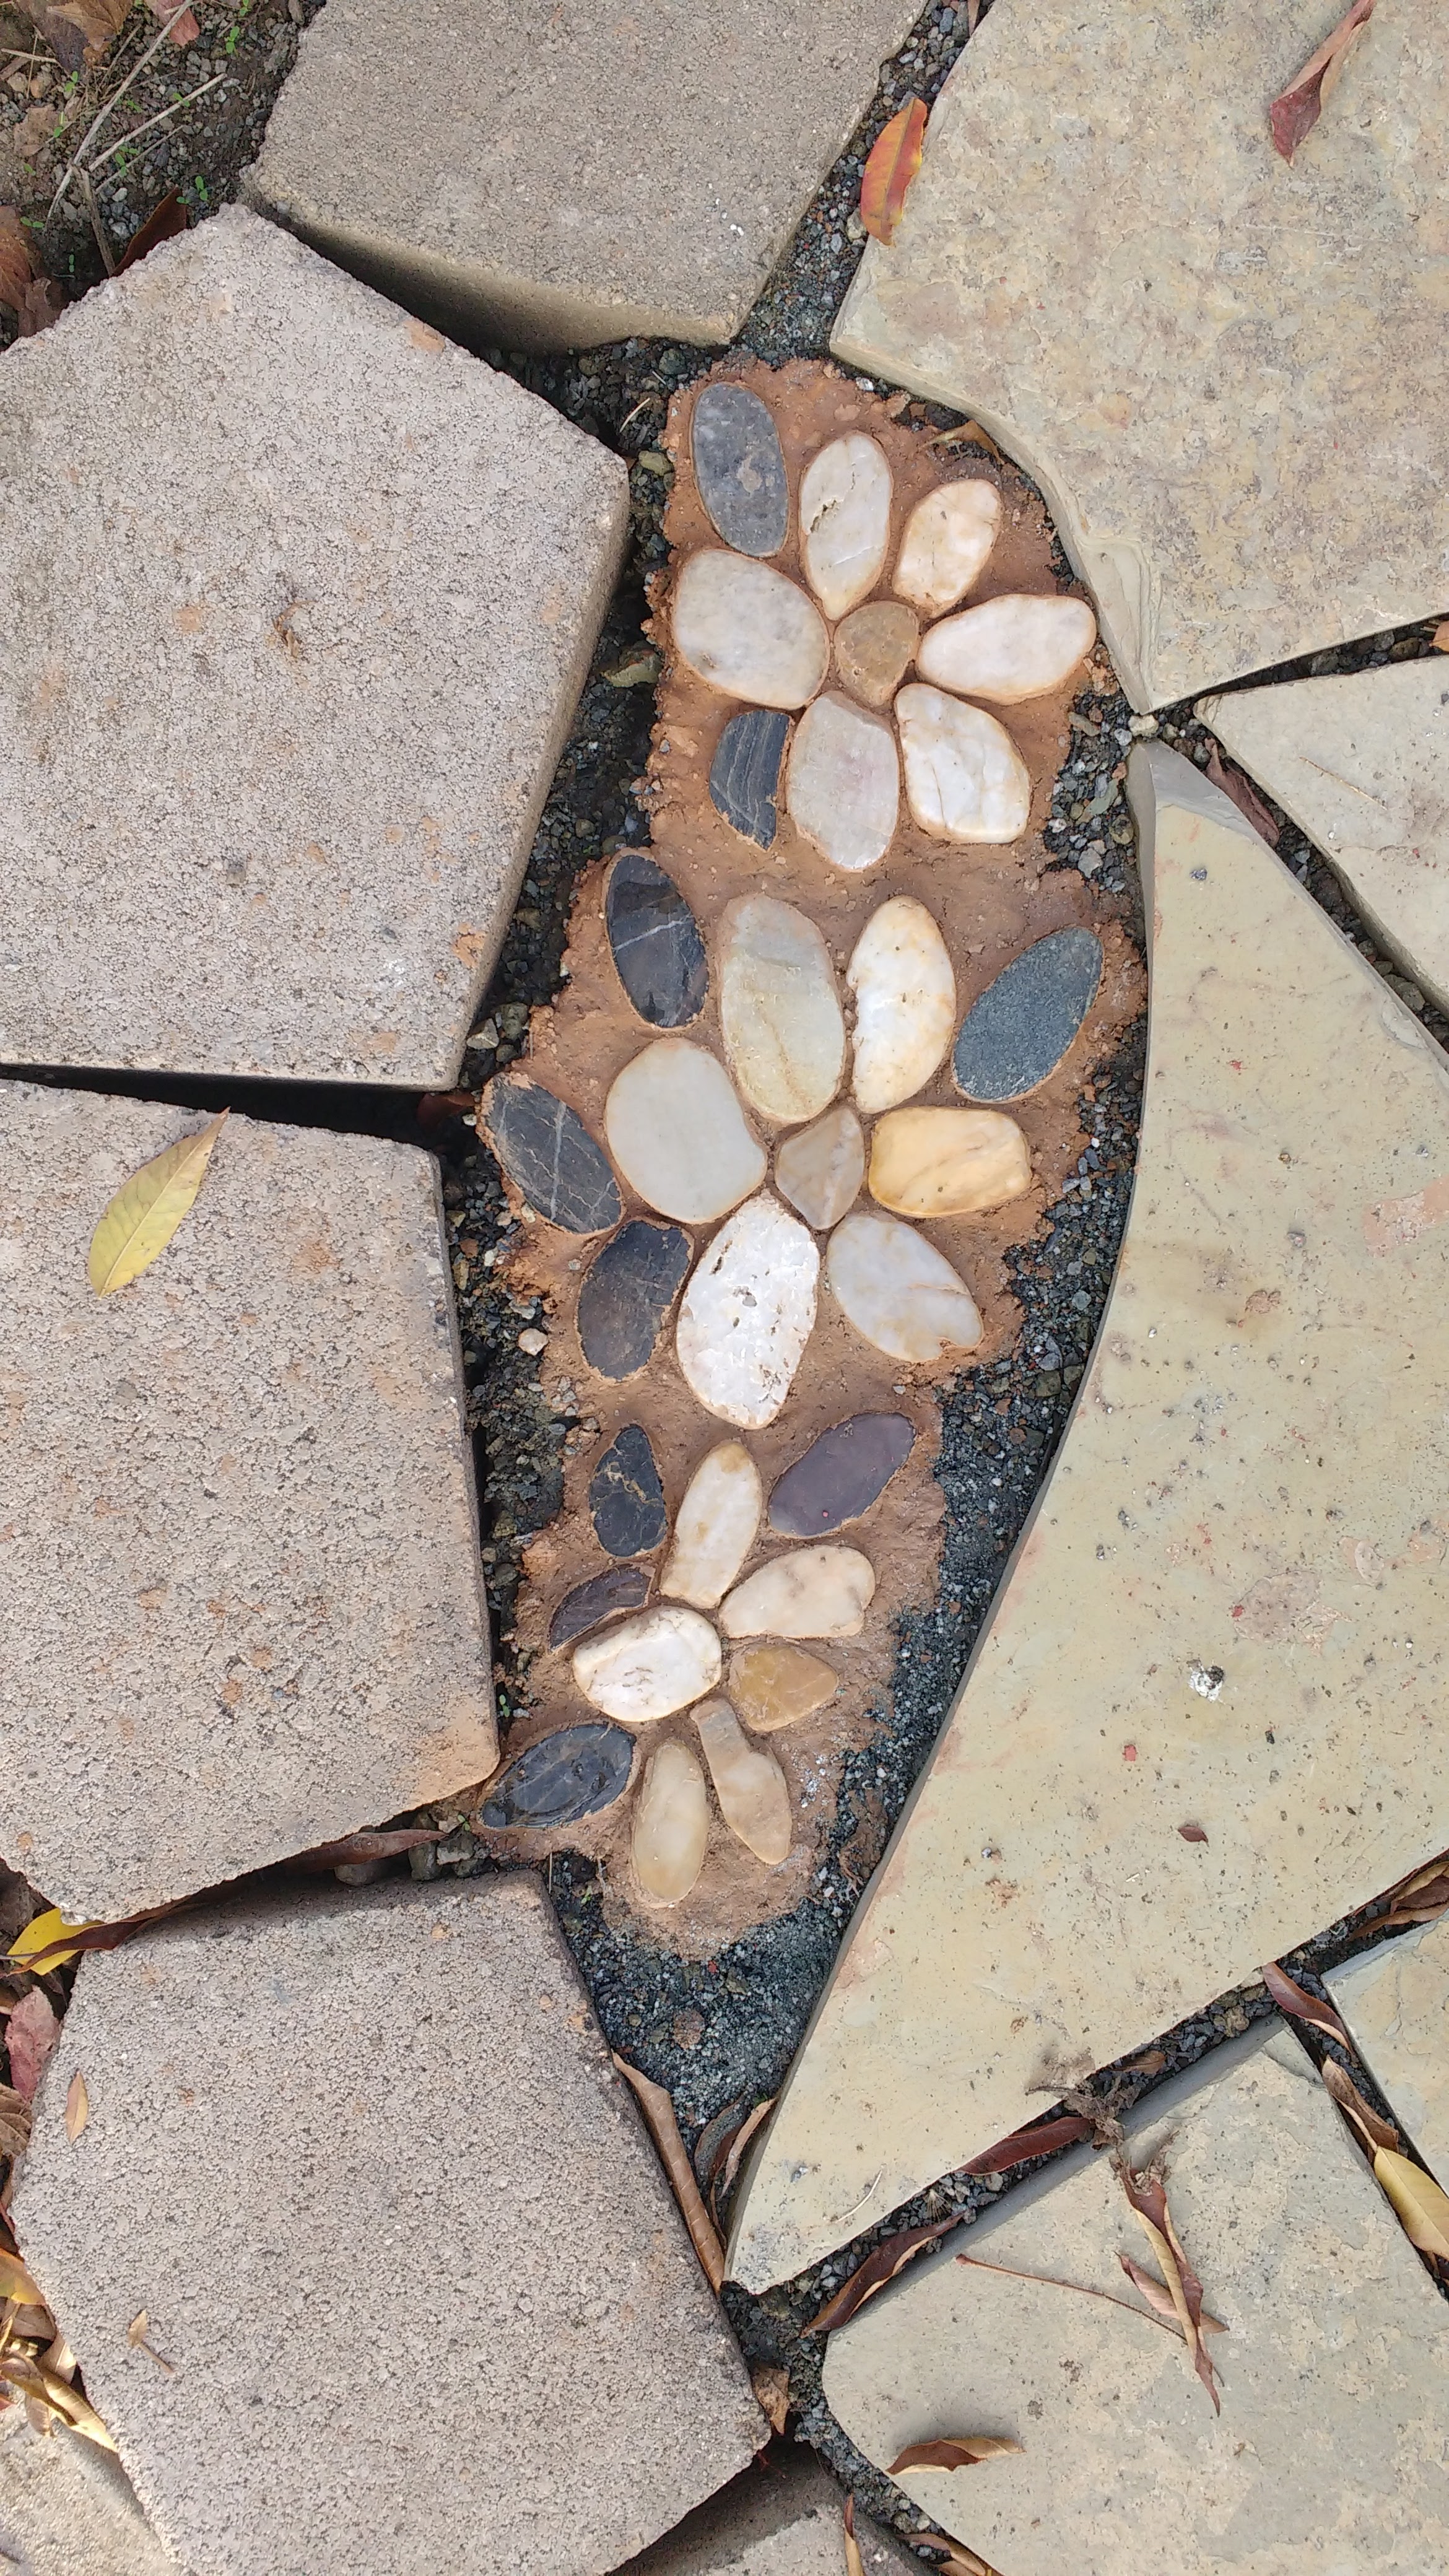
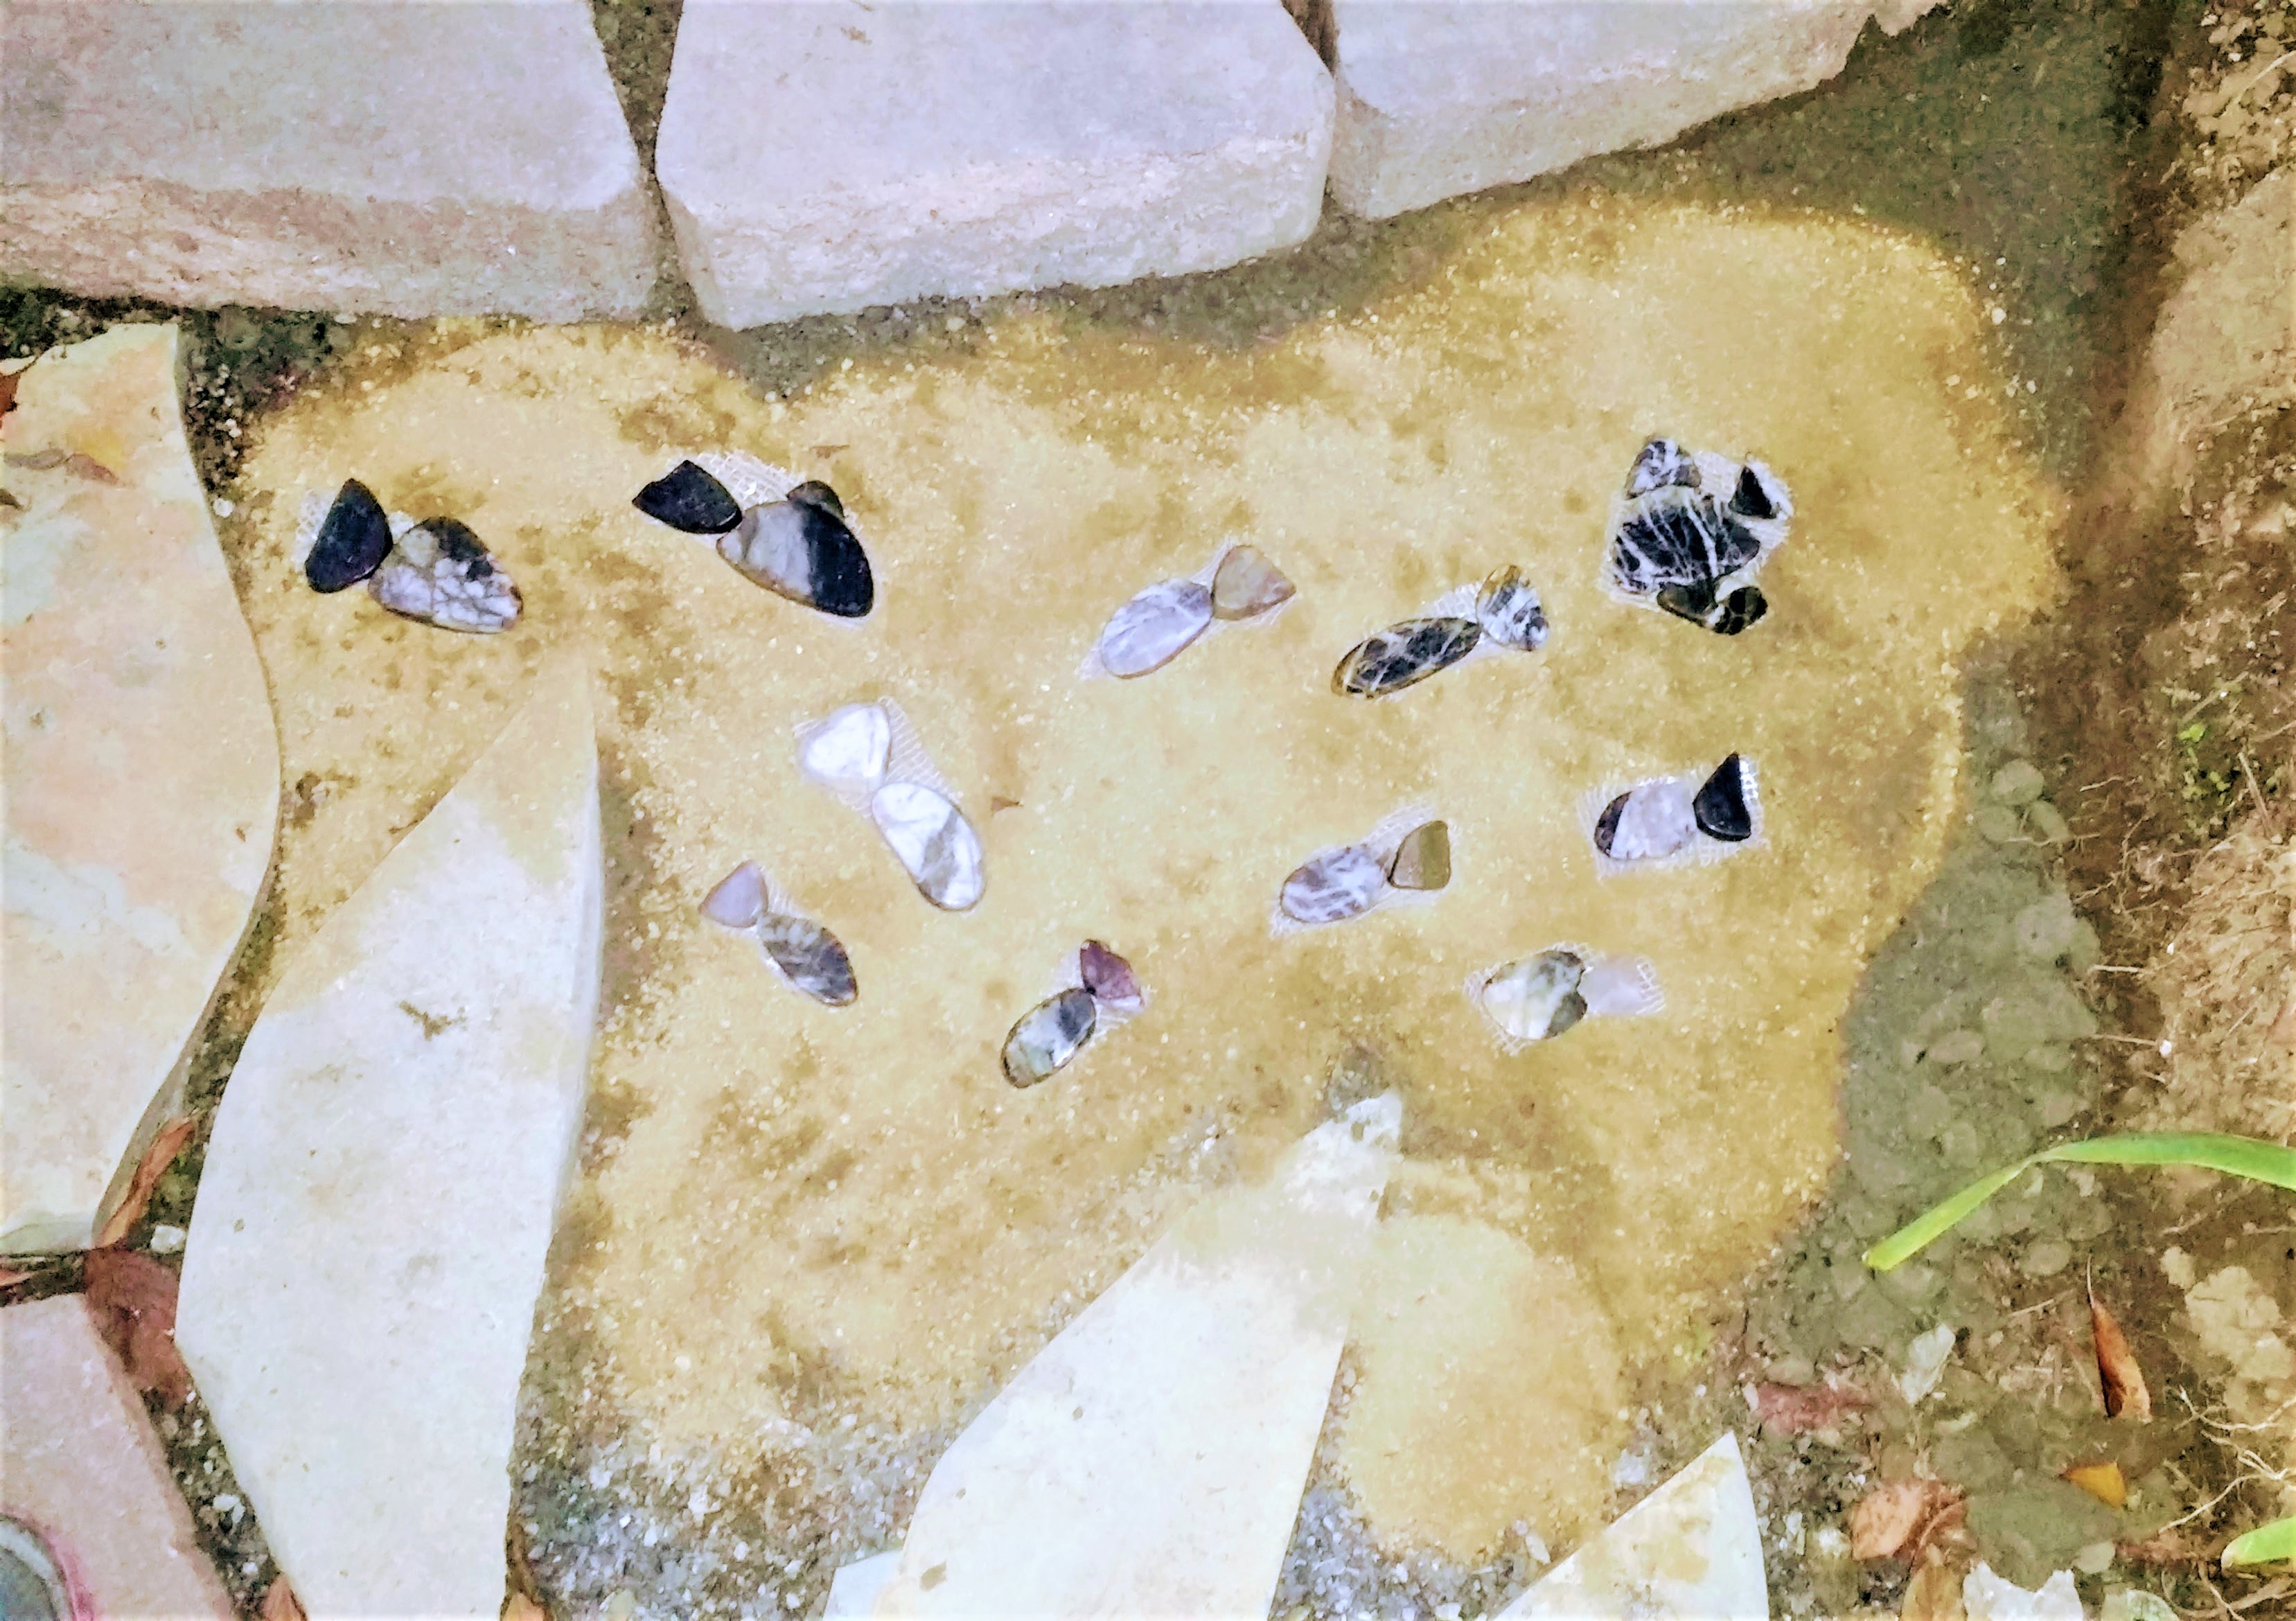
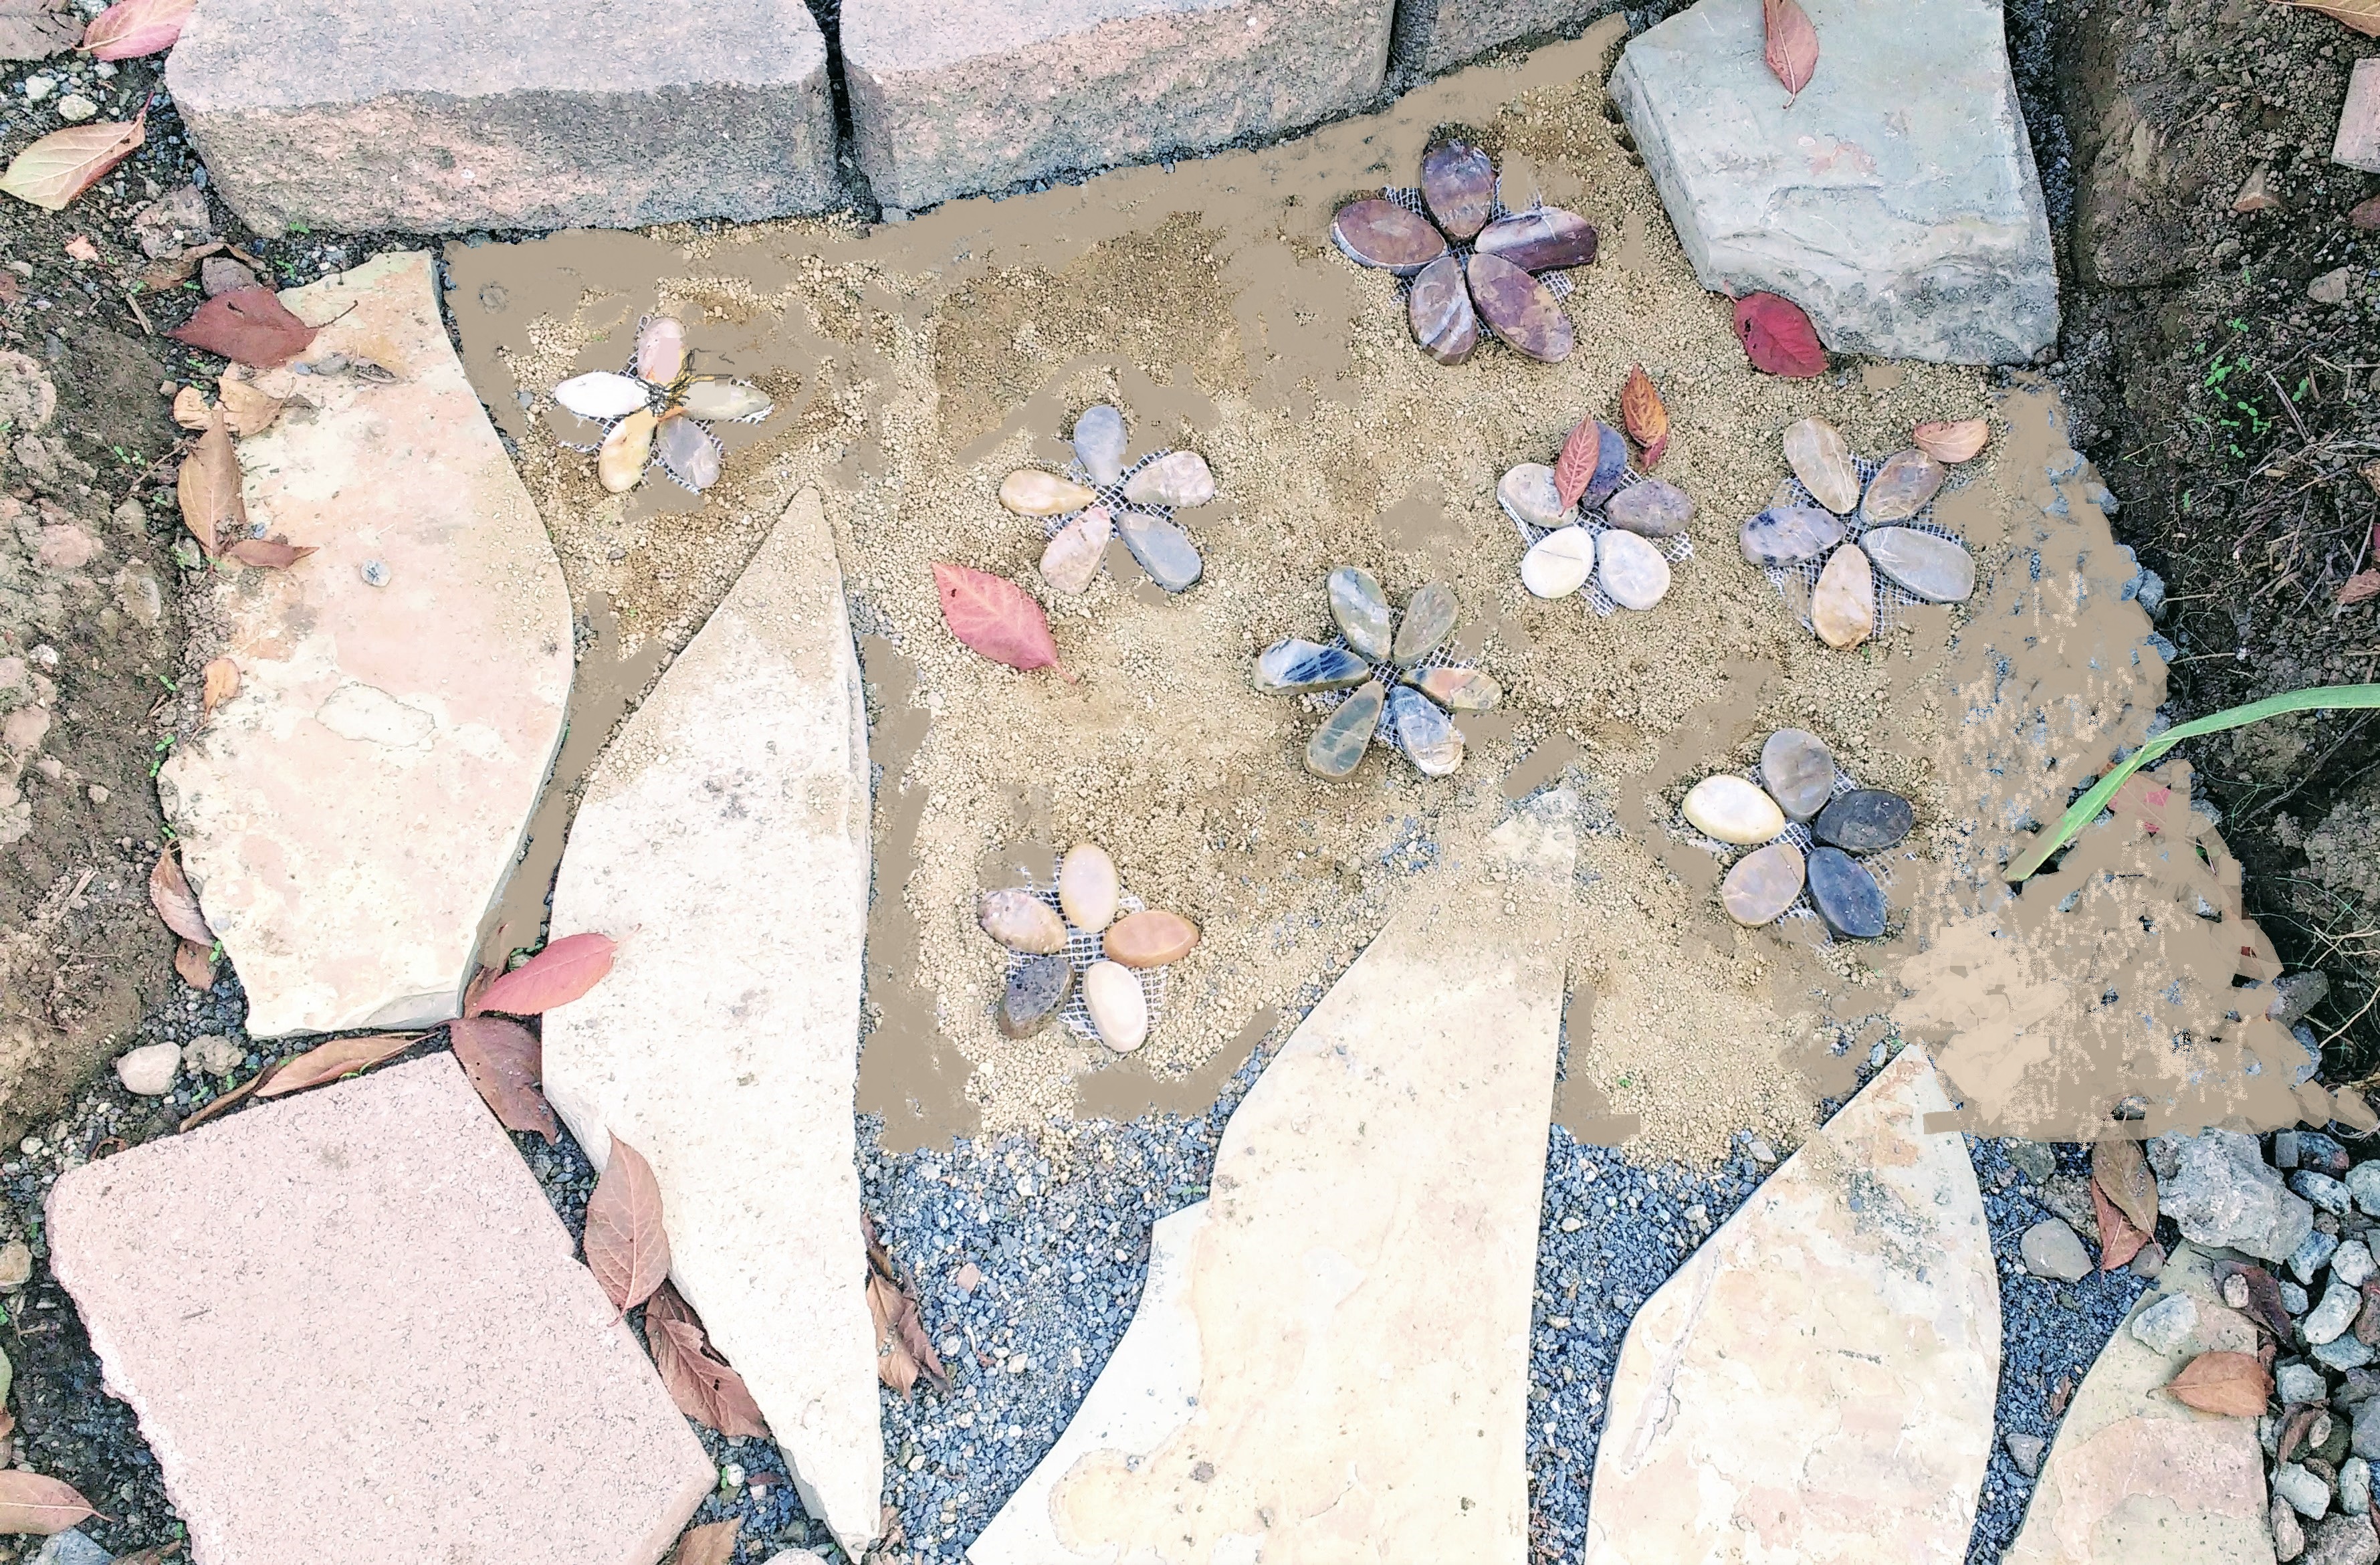
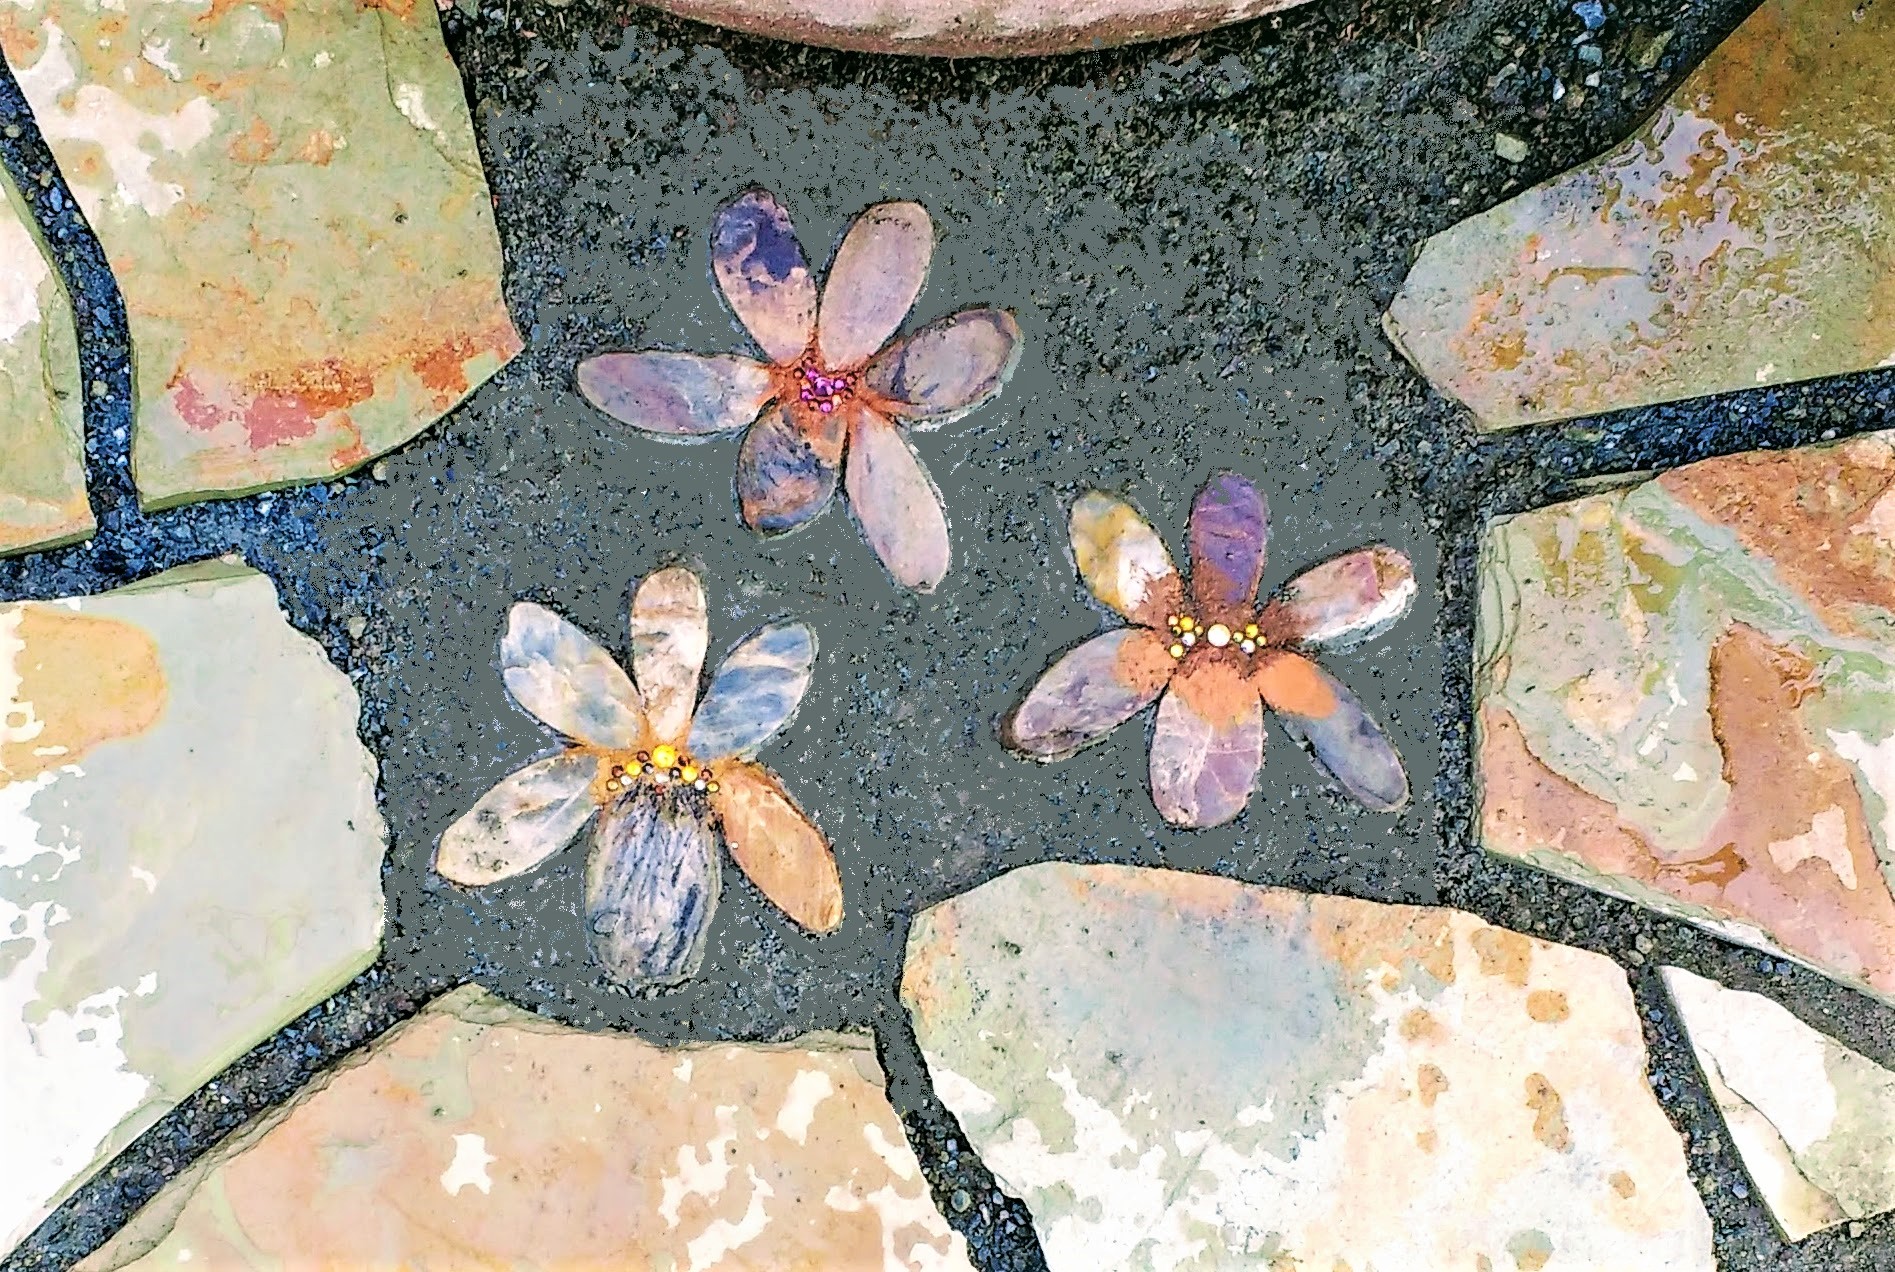
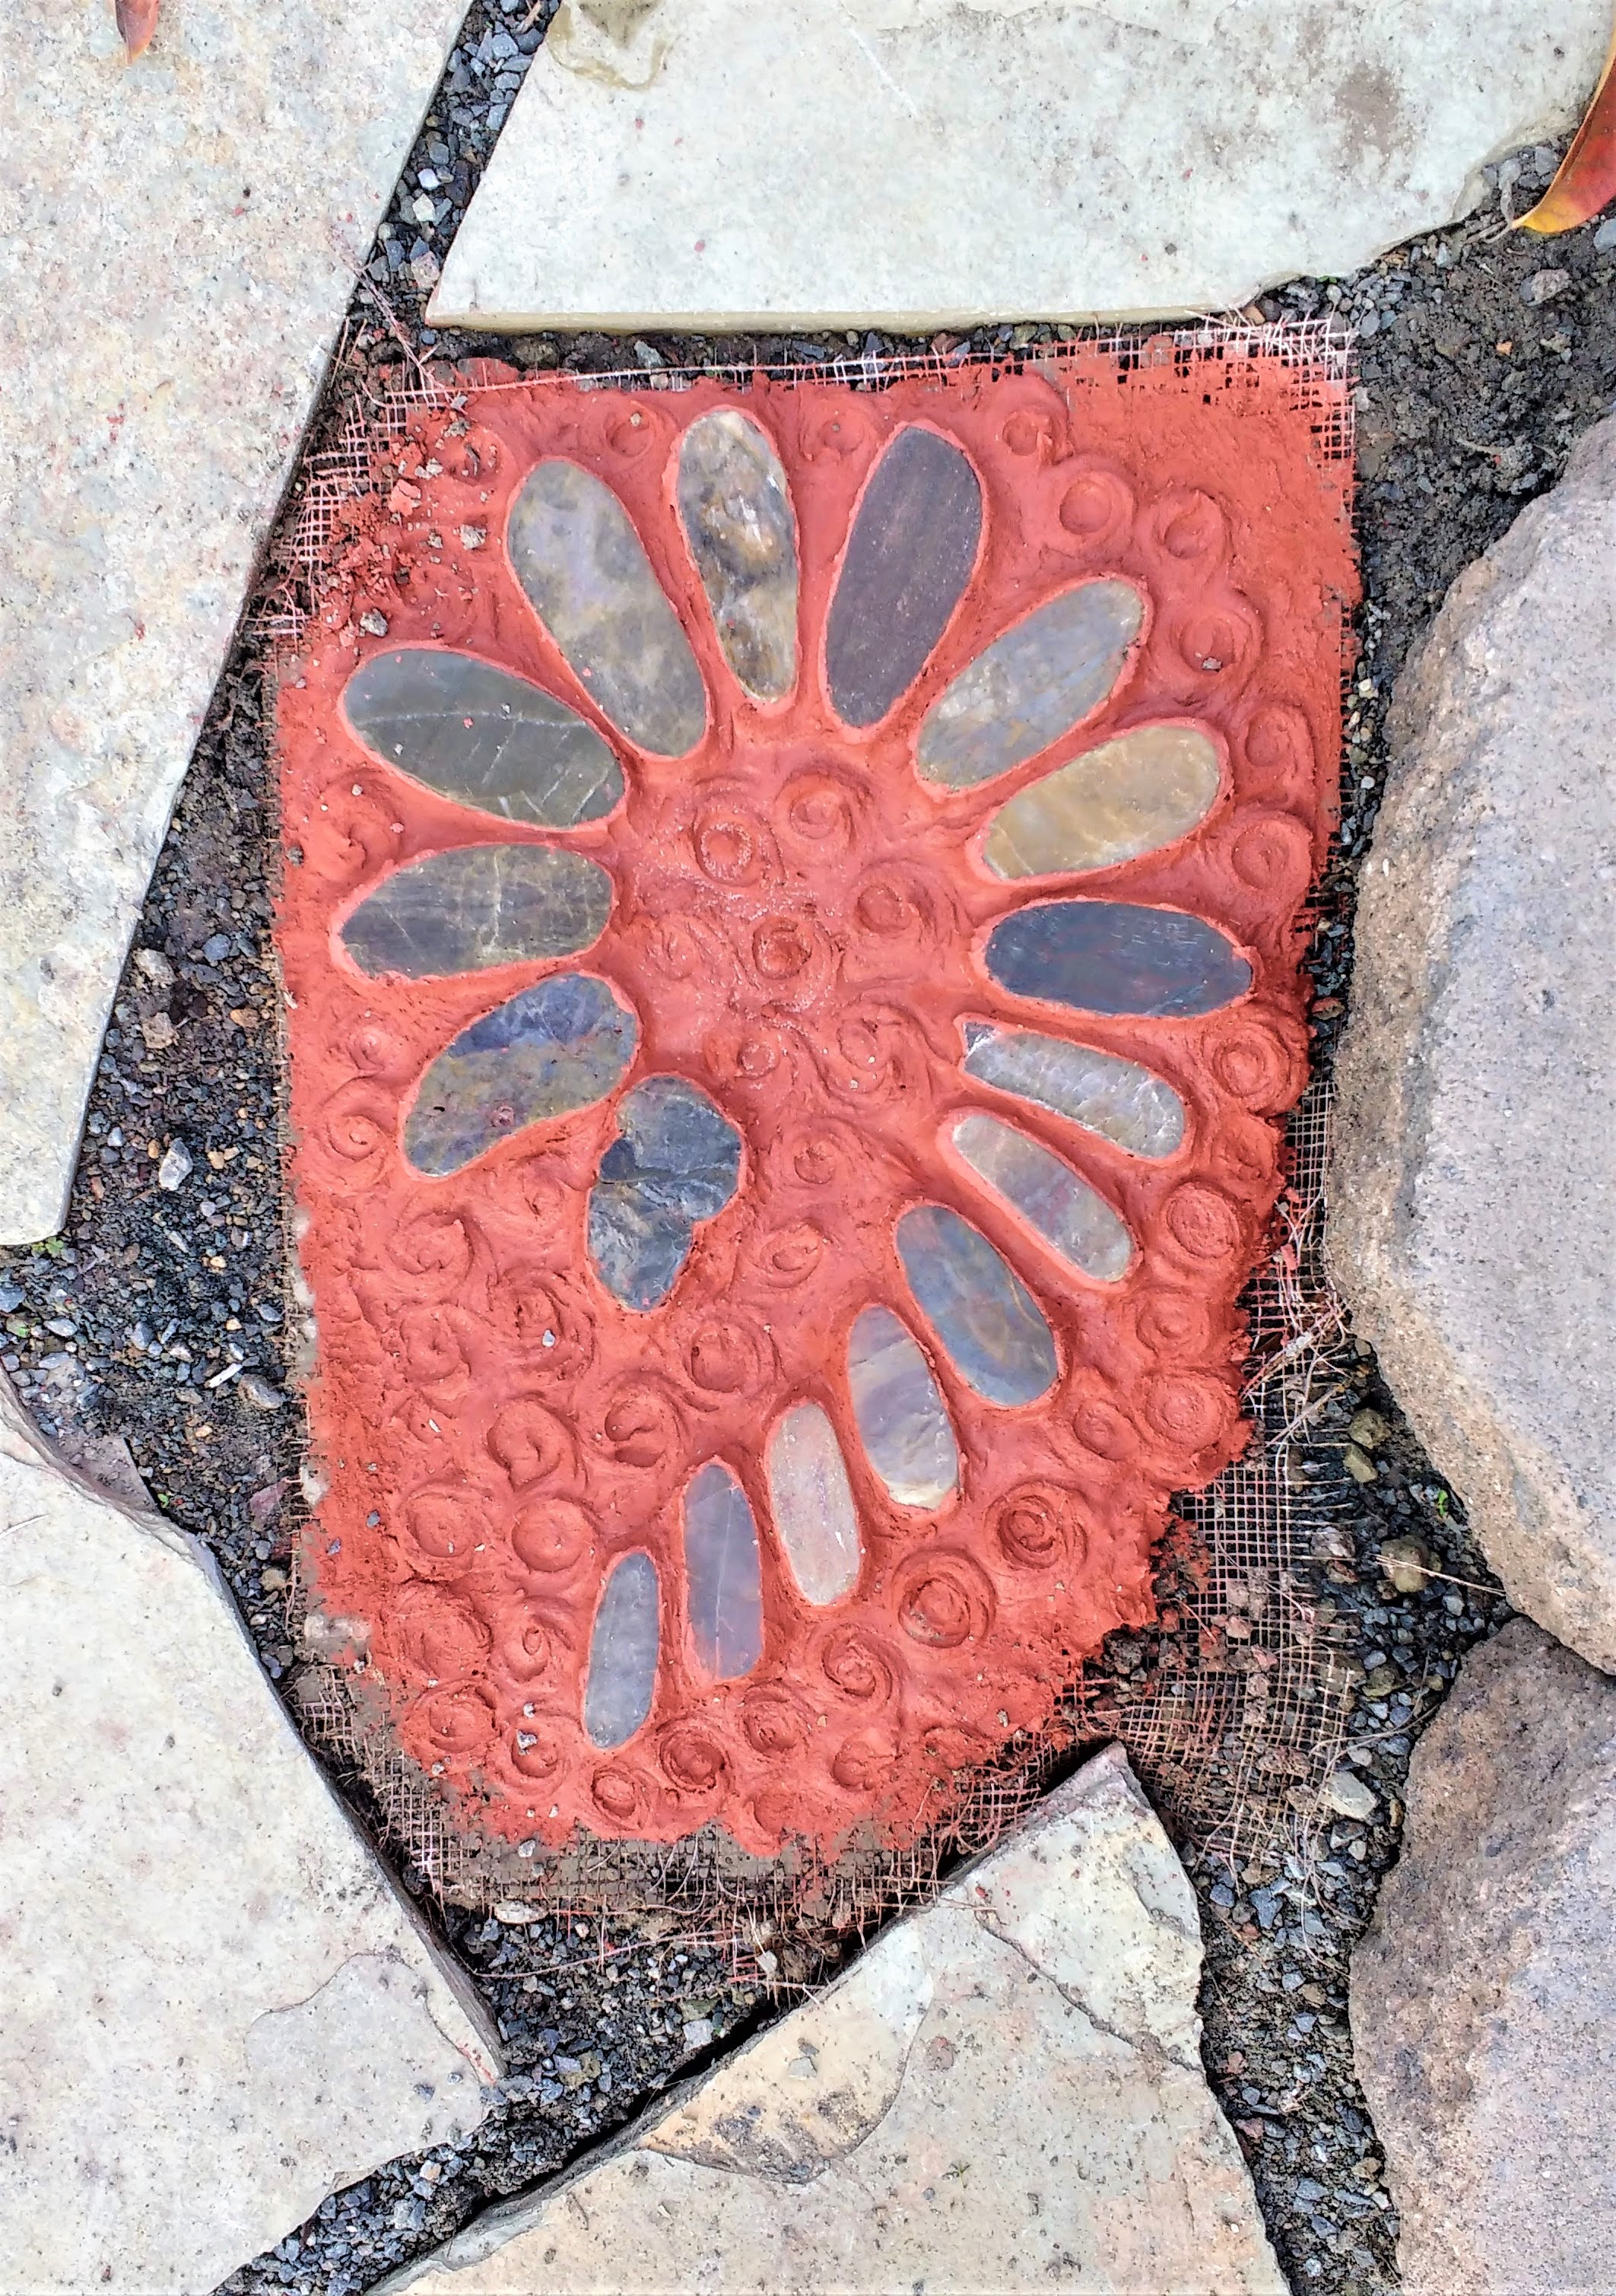
For good aesthetics, each flower should have at least five petals. Here we will focus on five-petaled (Daisy, Hibiscus) and six petaled (Iris, Orchid) types of flowers. These flowers are created in three views - A) Top/square/aerial view - with distinct whole petals, B) Mostly top view - with overlapping petals, and C) Slanted/horizontal view - with flowers in perspective:
A) Top View Flowers with Distinct/Whole Petals:
1) Long petaled/Daisy-like: Focus on the shape. Use slender, almost parallel edged pieces, with the nicer end facing outwards. You can blend/mix up the colors or you can grade them from dark to light and back to dark. If grading, don’t have the darkest right next to the lightest.
2) Hibiscus/Geranium like Flowers: Use the wider, typical petal shaped pieces for these somewhat generic five-petaled flowers. You could place the pointed end inwards on some and outwards on others.
3) Iris/Orchid-like: Use six petals in two ‘whorls’ of three petals. Each whorl/set is distinct from the other in terms of size and shape (narrow or wide). Of the wider petals, it looks more authentic if you have one larger than the rest. This ‘fall’ petal will be the middle piece of its group and will be placed towards the base of the flower.
B) Flowers with Overlapping petals: Here you get to use all those odd shaped ‘imperfect’ pebbles. Use pebbles that appear to be cut off or gouged out. Place the cut or gouged out edge against a complementing edge of another pebble to make it look like part of the first petal is hidden or being overlapped by the second. This works best with Iris/Orchid or Hibiscus/Geranium type of flowers.
C) Flowers with Perspective (Slanted view): Use a large, stout, tongue-shaped pebble for the foremost petal. Use similar shaped but smaller pebbles for the furthermost petals. The petals on either side will be made up of extra long pebbles. You could also incorporate overlapping petals here, as I have done with the Magnolia flowers.
Fern (Compound Leaf) Mosaics: Use mostly narrow, long pebbles for the leaflets. These can include curved, tapering and irregularly shaped pieces.
1) You will need shorter, almost triangular pieces for the leaflets at the base of the compound leaf.
2) Keep adding narrow, progressively longer pebbles on either side of an imaginary curved midrib.
3) Be sure to add the pebbles alternately on the left and right sides.
4) When you get to about half the desired length of your leaf, start adding progressively smaller pebbles
5) End with one central short pebble that could be wider than those immediately before it
Animal Life Mosaics:
Dragonfly Mosaic: Use large whole pebbles for eyes and body. Wings are made out of flagstone.
Squid Mosaics: Use long pebbles that are narrow/tapering at one end and broader/rounded at the other for the body. Use oval shaped pea gravel or pea pebbles for the eyes and flattened copper wire for the tentacles.
Fish Mosaics: There are two main types -
1) Plain: Consisting of a somewhat elongated body + a fan-shaped tail
2) Fancy: Consisting of a somewhat rounded body with a curved back and flatter belly + fins (dorsal & pectoral) + a varied shaped tail
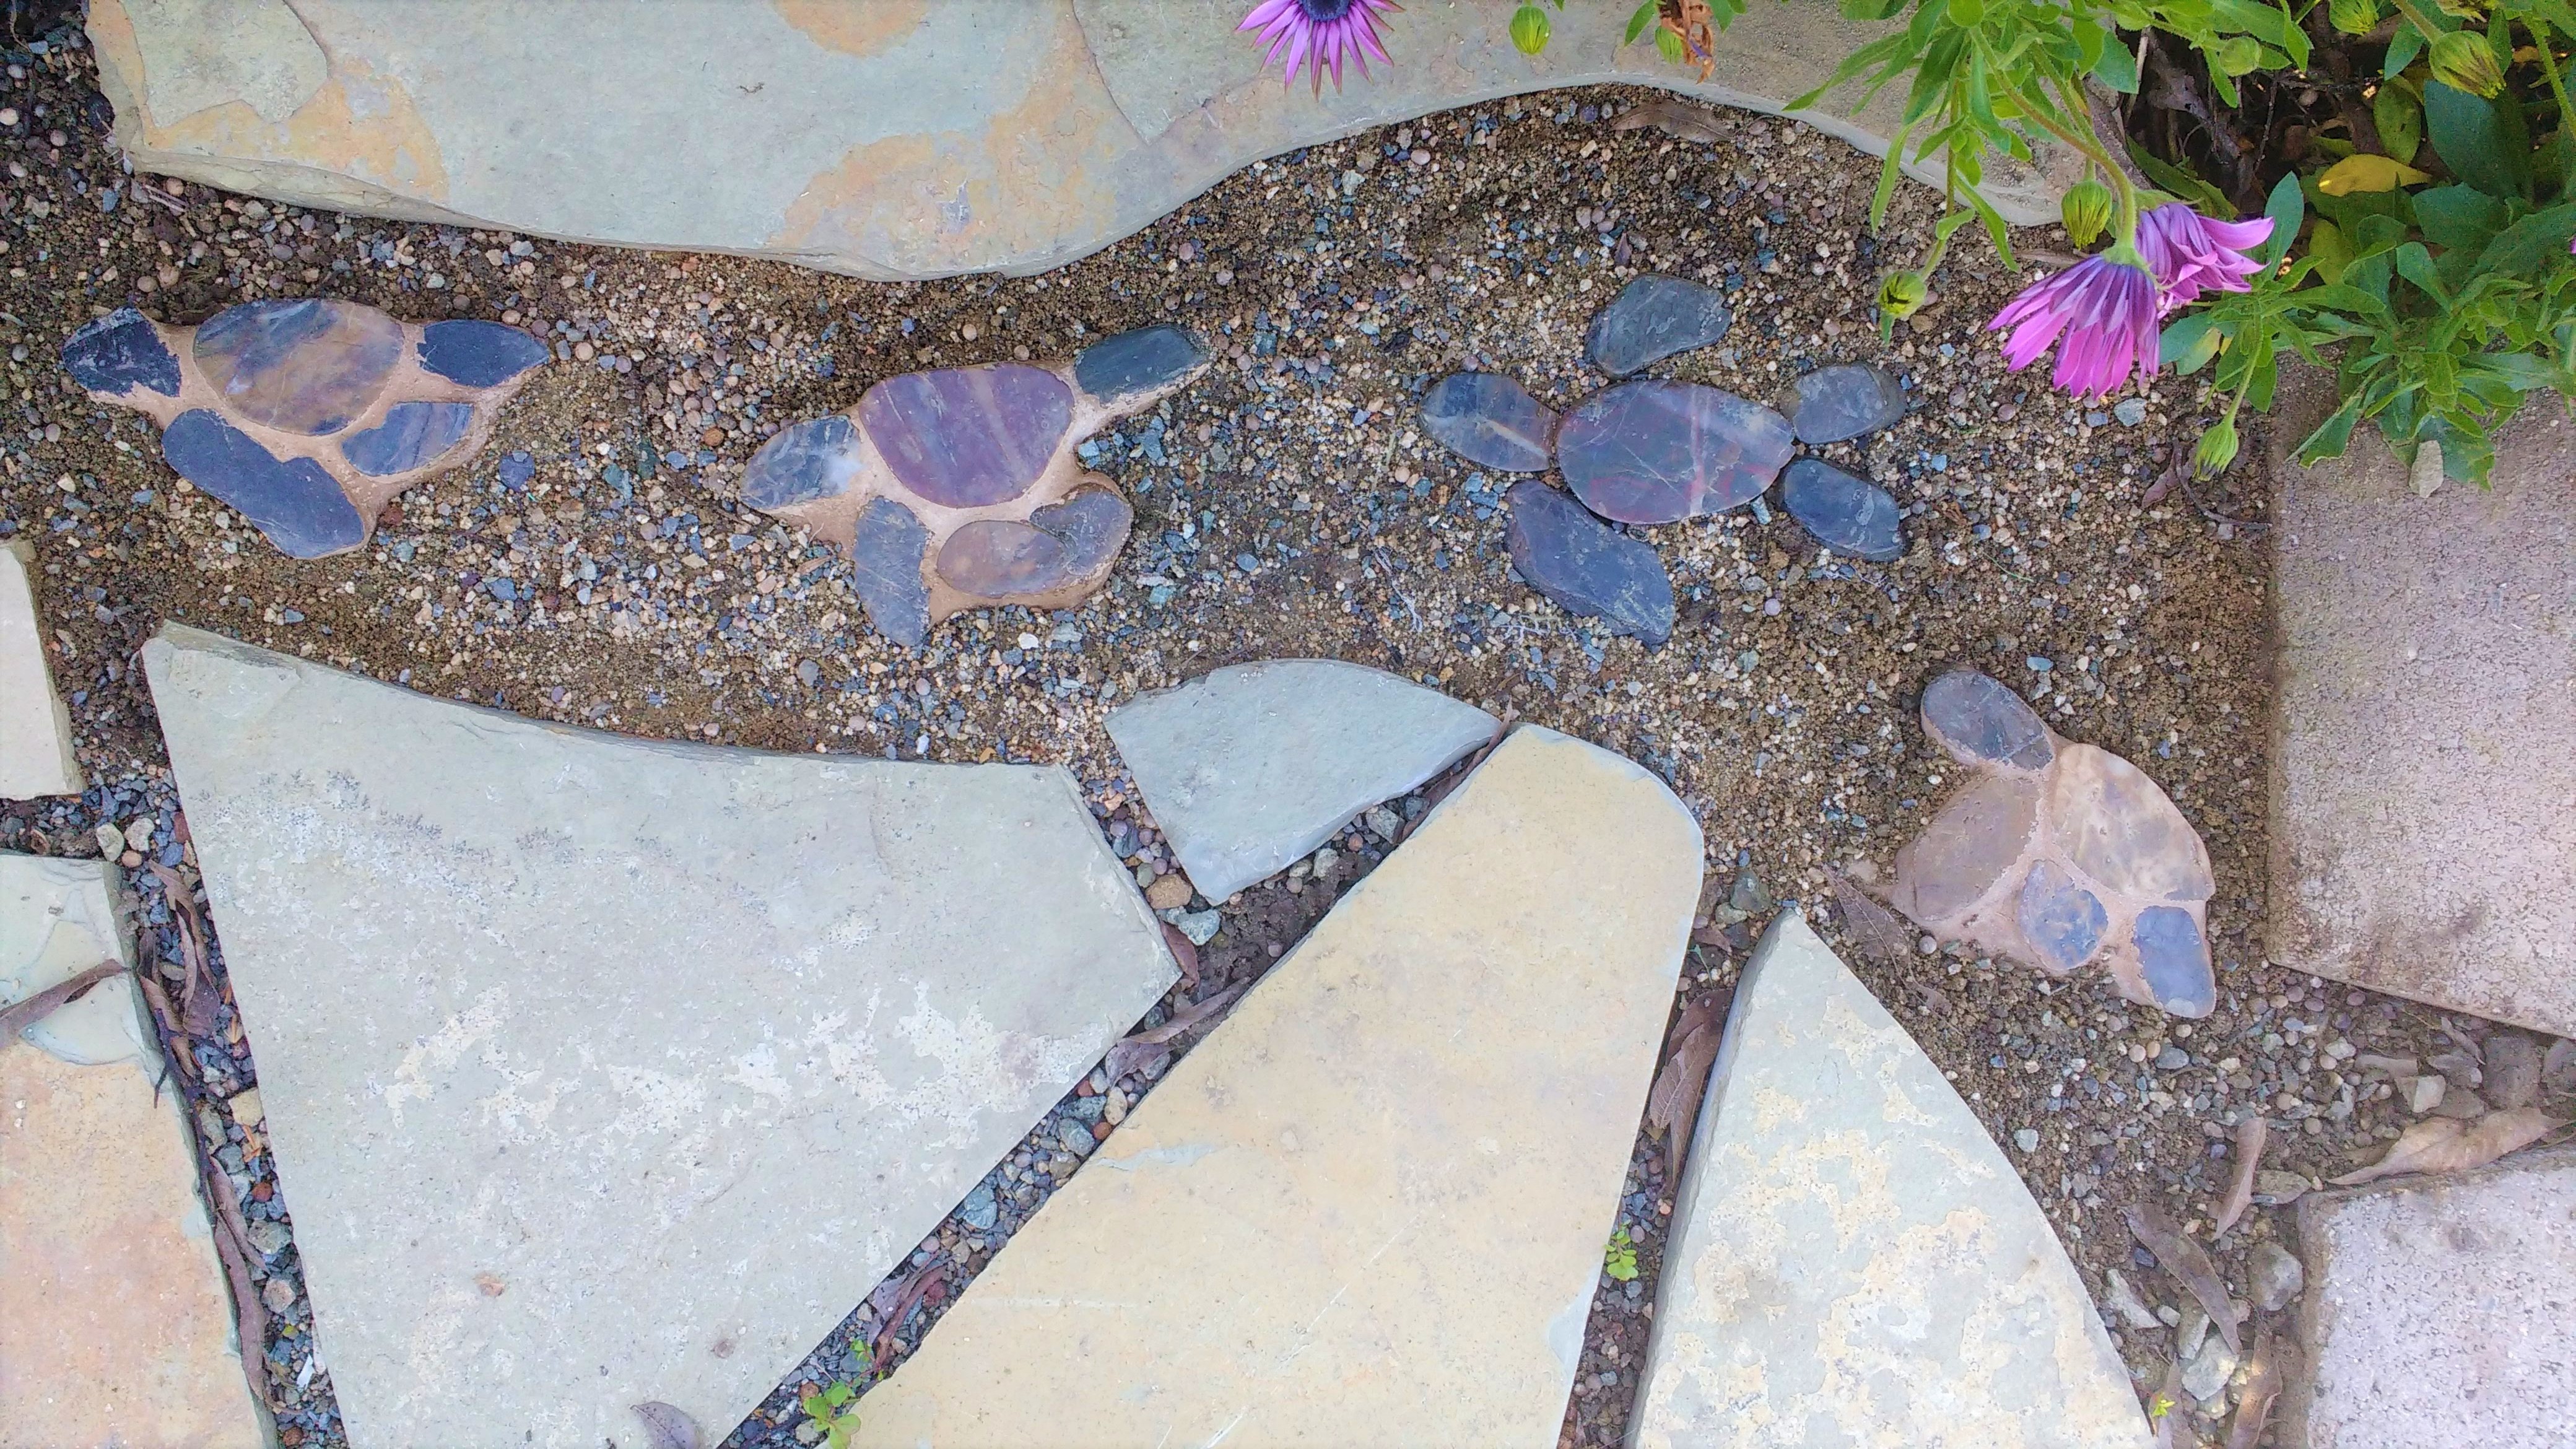
Turtle Mosaics: There are two main views -
1) Top View: Consisting of a fairly round shell with two large front flippers, two small back flippers, and a tiny tail 2) Side View:
Consisting of a slightly tapered half-moon shaped pebble to represent the shell. Position this piece with the flat side up with one large front flipper closer to the viewer, one stump-like piece to represent the other front flipper visible from the viewing side, and one more tapered piece that represents both extended back flippers. You can get away with this single piece because the back flippers kinda blend together while they are swimming.and their tails are so tiny that they can be ignored in this view. You could even forget about the other (stump) front flipper in a full side view. Use a Dremel tool to make the hexagonal markings on the carapace (shell) of the turtles as well as for details on de tails and fins... A Merlin2 mini angle grinder would be much faster but just as dangerous!!!
Pro Tip # 13 - SAFETY: Do NOT use this tool without properly securing the material that you are working on, and equally important - wear correct safety gear, which includes a Full Face Shield. Don’t take this lightly!
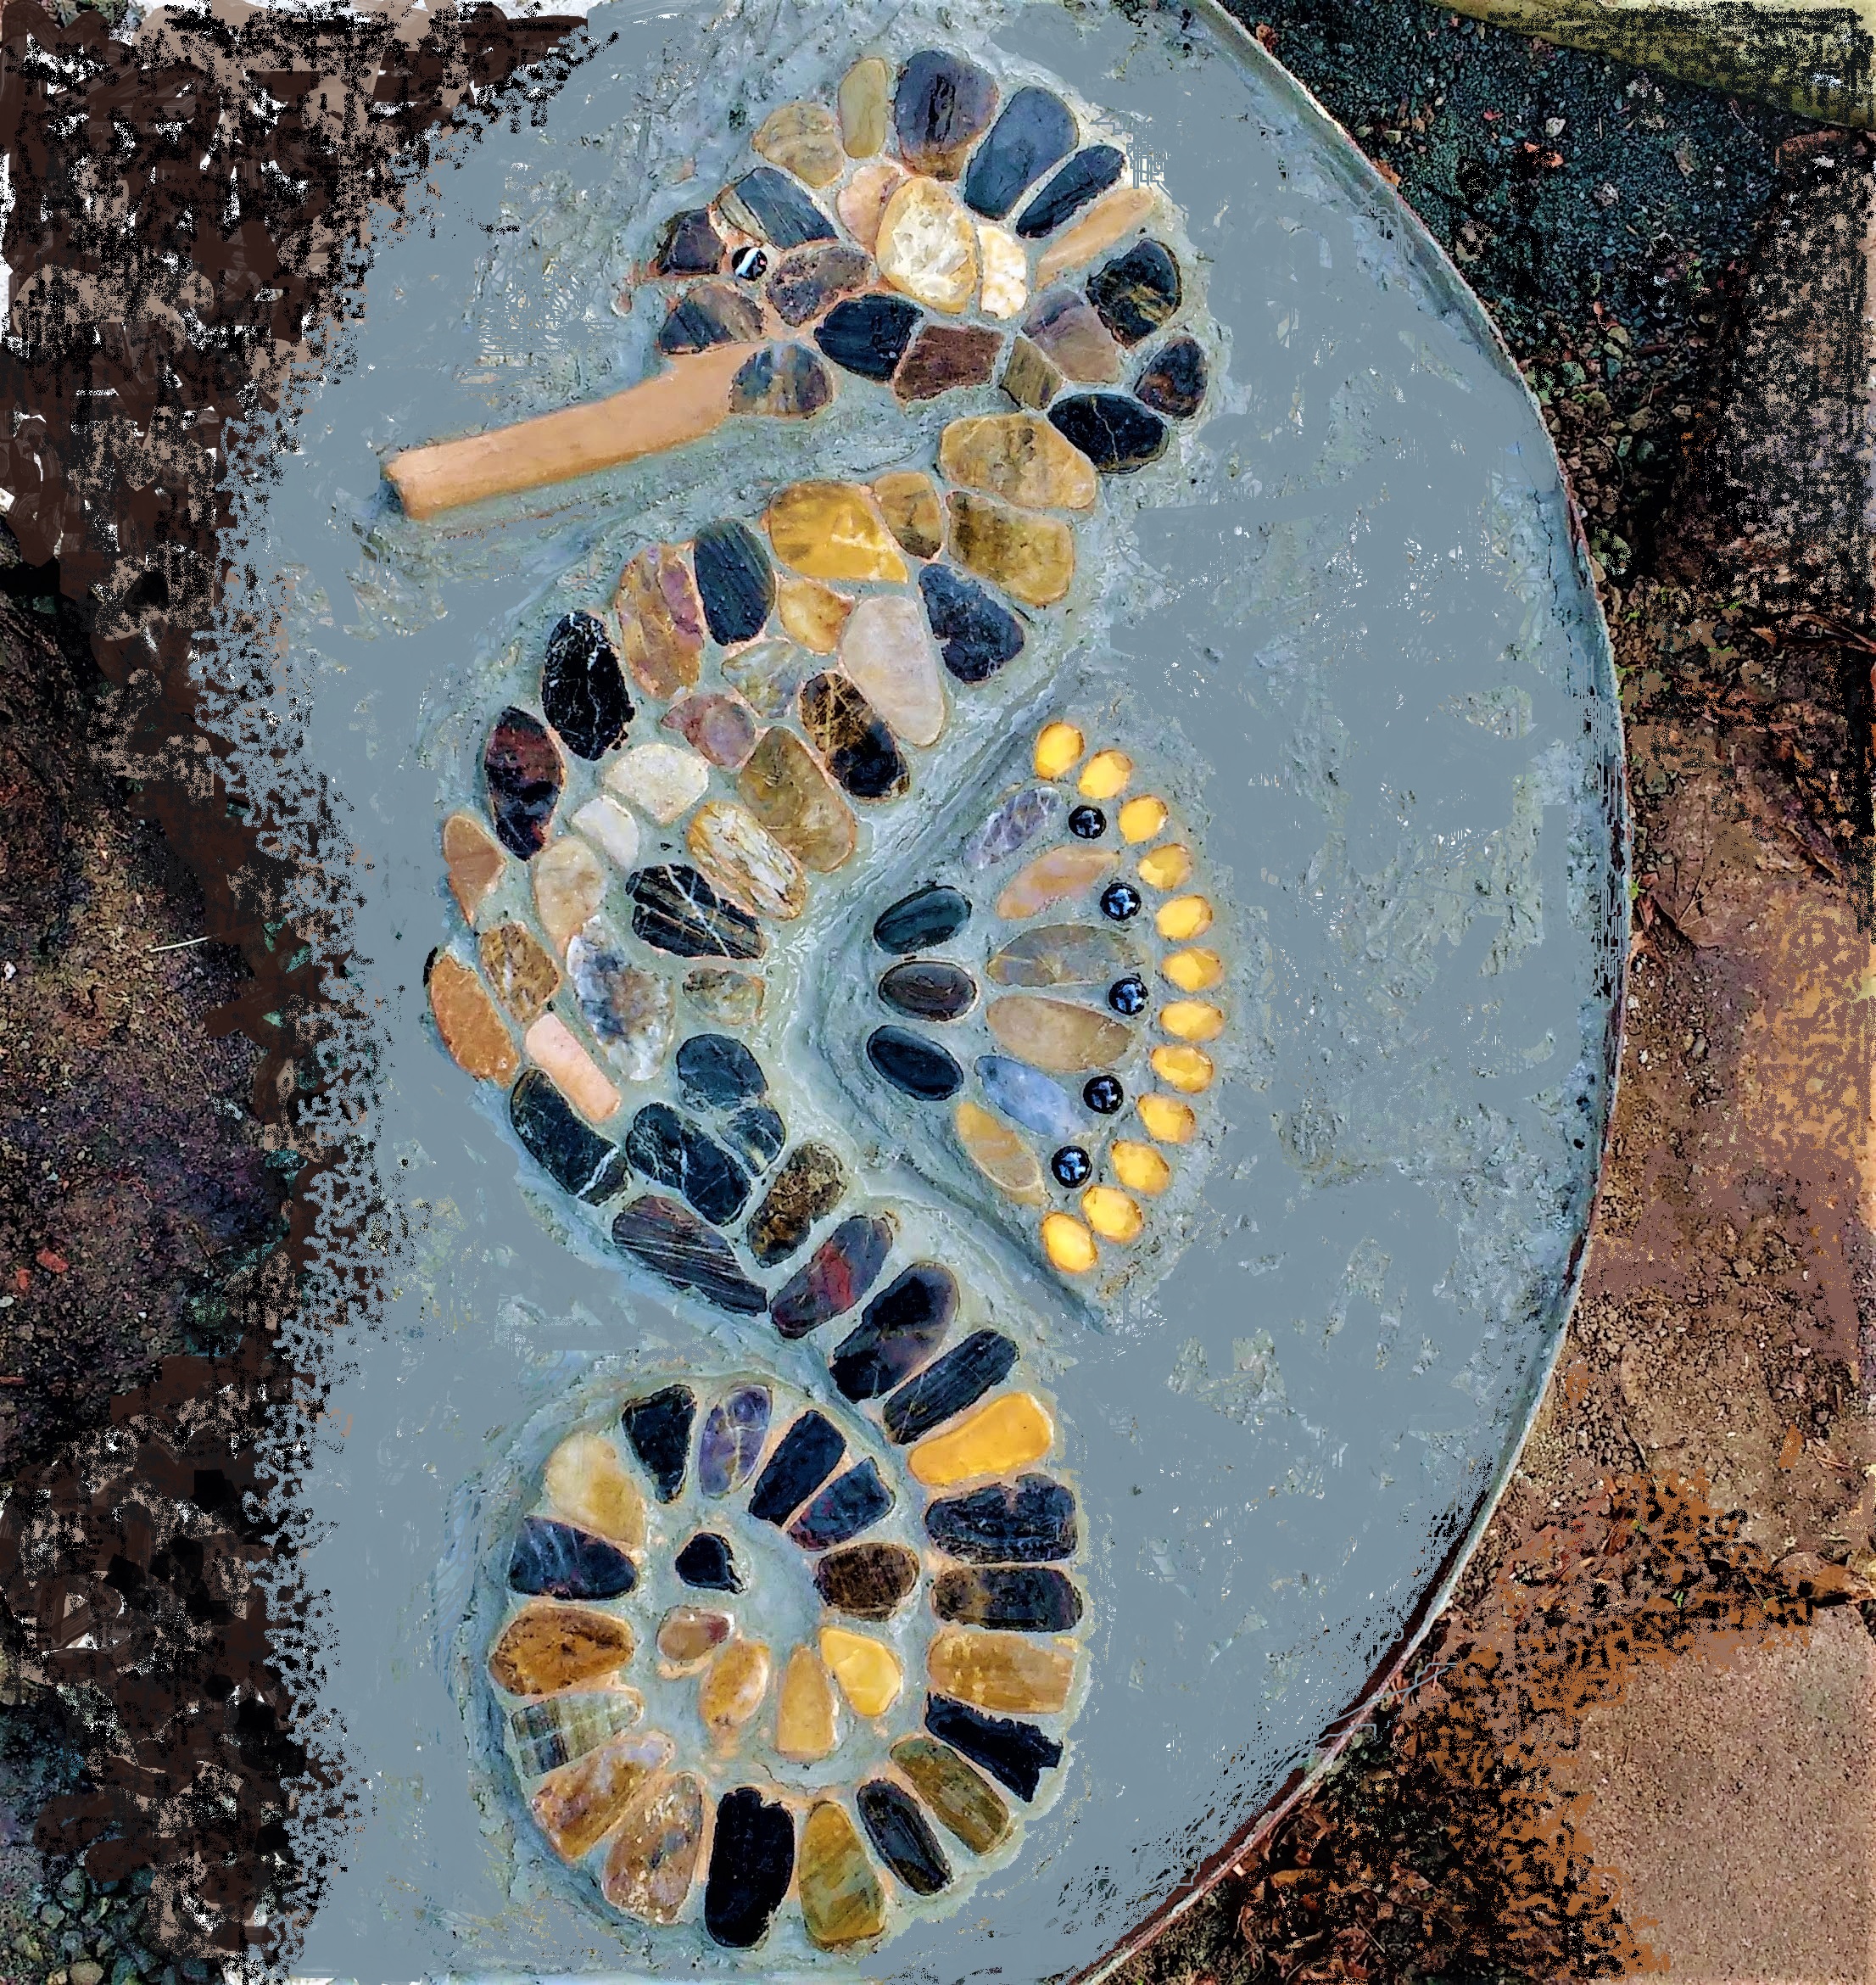
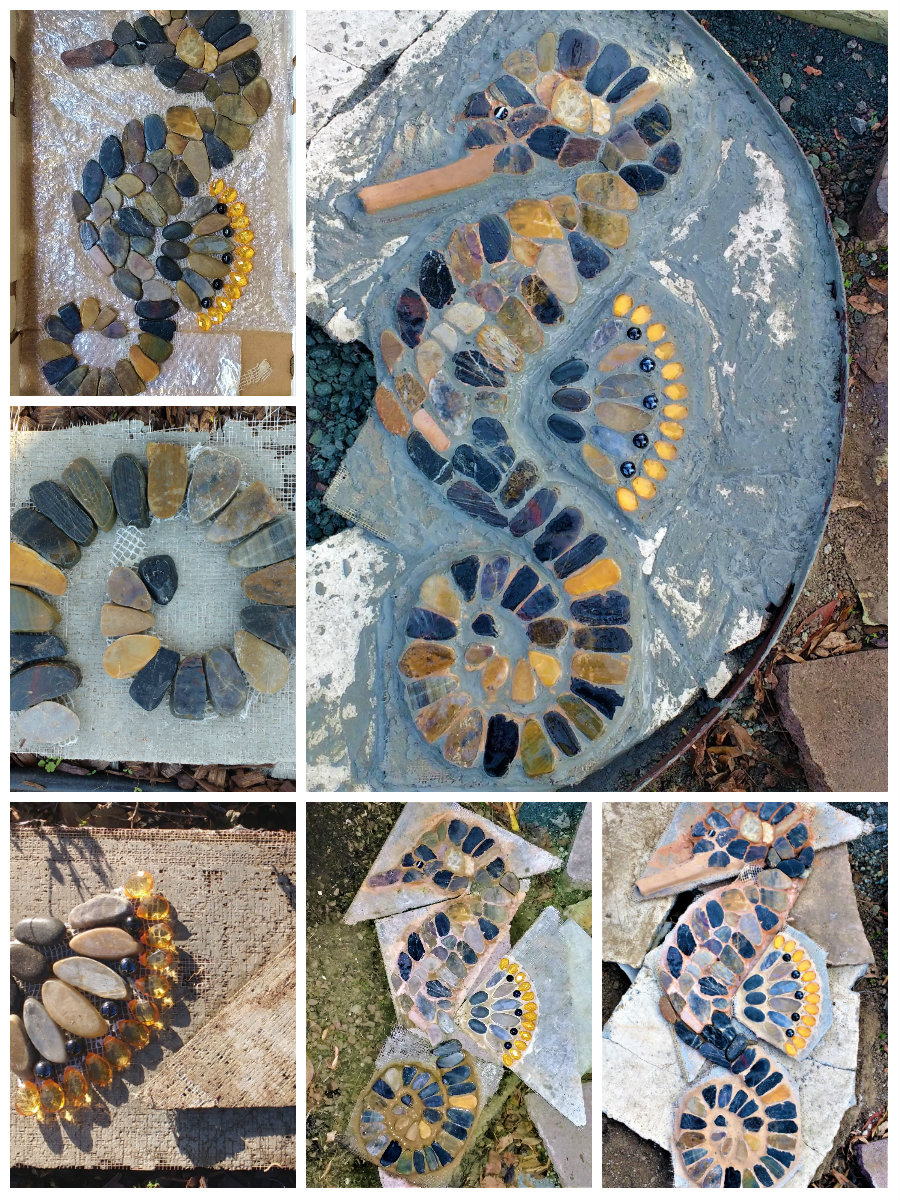
'Merquin': This is the seahorse that sits on the last scallop, near the focal point. I went through several iterations with this not-so-little guy! I'll devote an entire step to replicating him:
Making Merquin
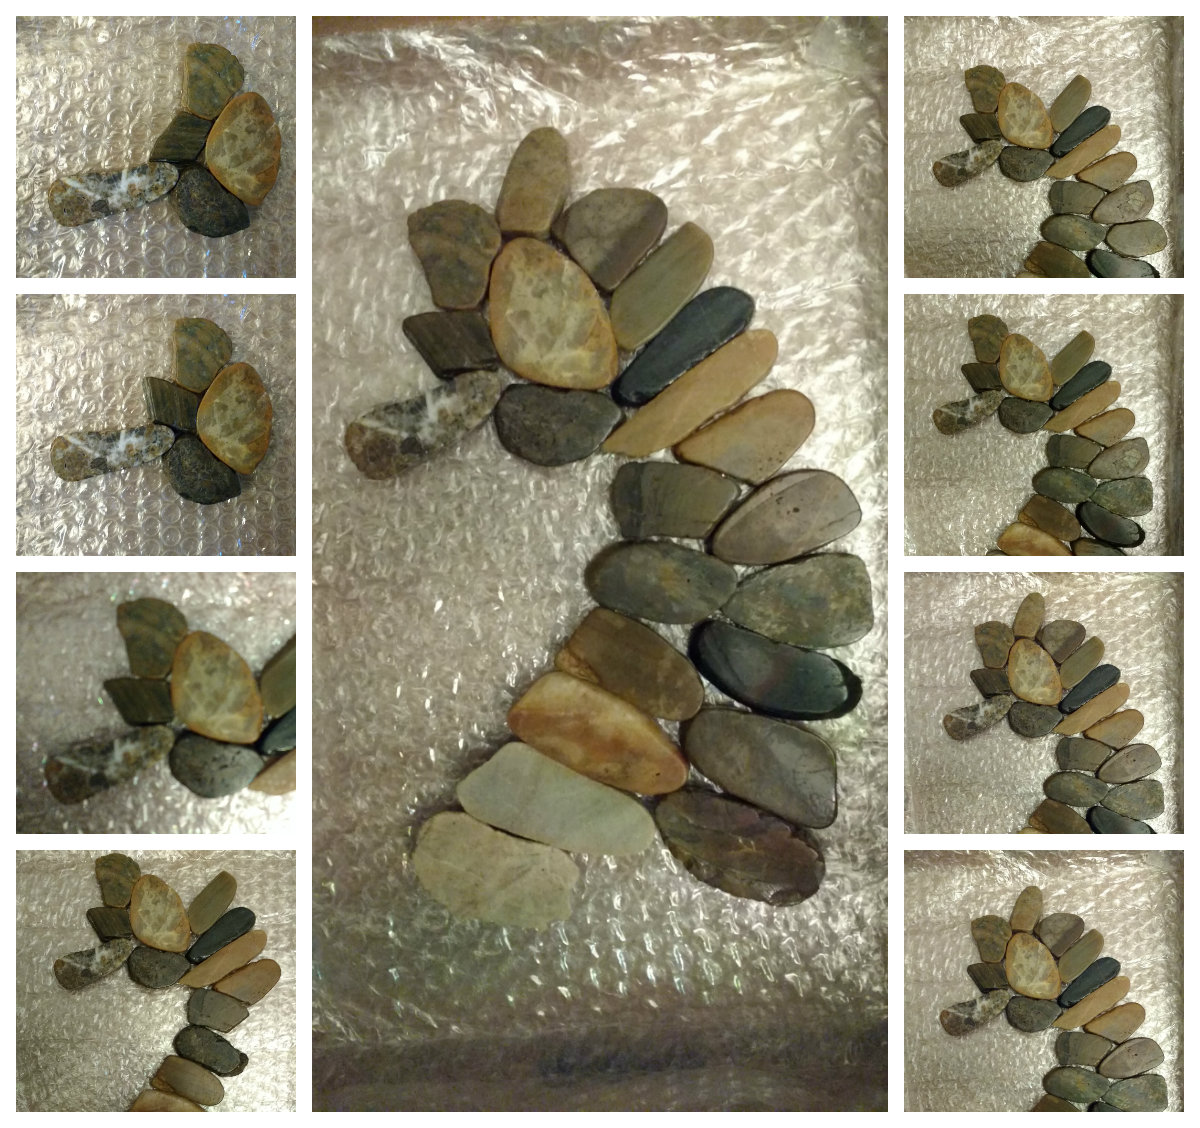
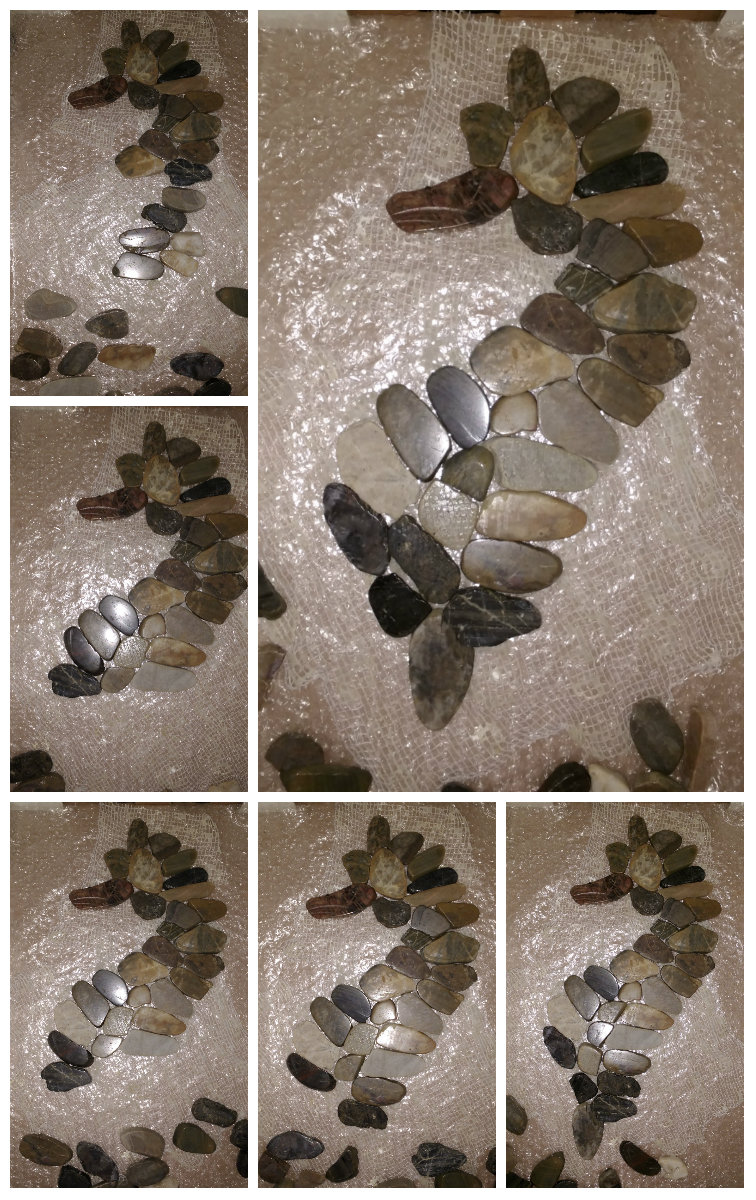
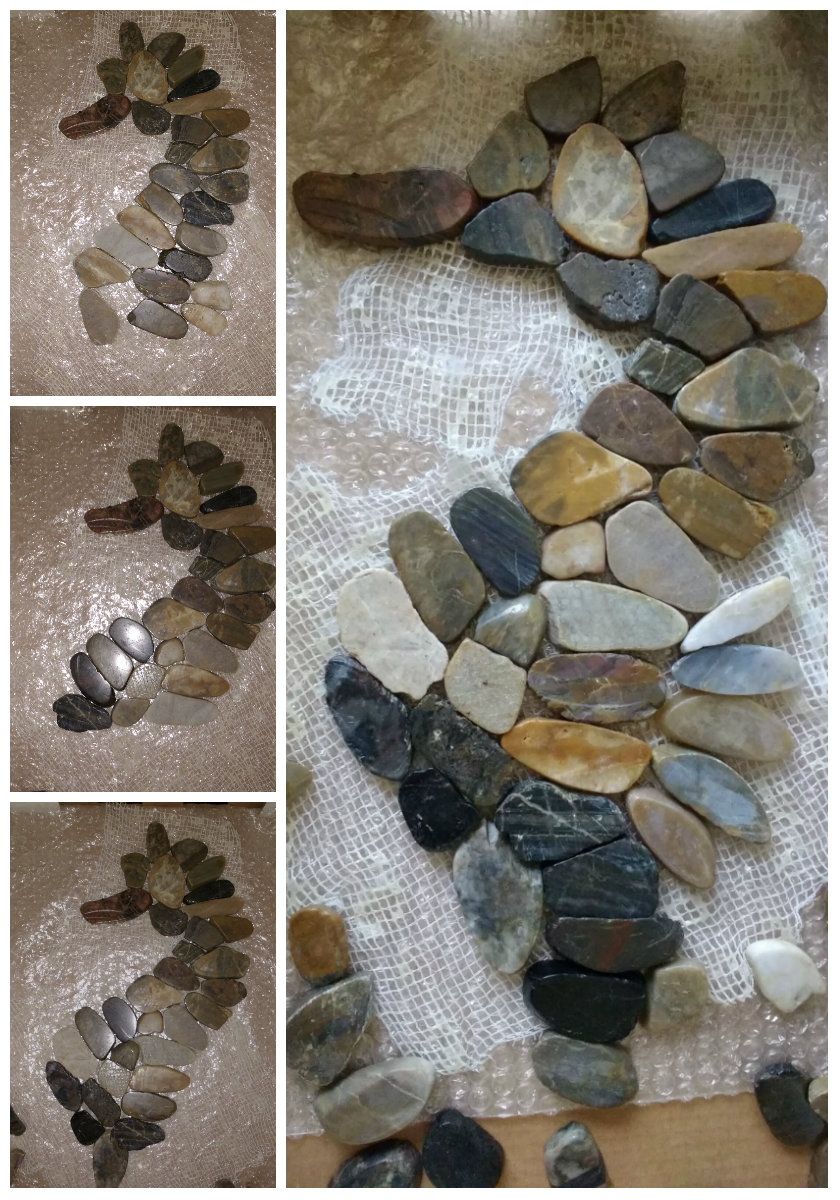
1) Create an outline of the seahorse in the desired size of your mosaic, and place it under clear contact paper. You could also print, trace or draw by hand, directly on the contact paper but it needs to be on the wrong side of the actual paper - not the backing as it will be removed while working.
2) Start with the head
- Place pebbles - finished side down - within the outline on the sticky side of your contact paper.
- Fit them in as tightly as you can.
- If you want a more authentic looking creature, study a seahorse head and try to make your mosaic as similar to the real thing as possible.
- For this reason, I actually free-handed the mosaic while looking at my saved images of seahorses.
- The images show the order in which I built Merquin’s head You will notice a prominent ear-like flap, near the eye, which makes it look a bit like a mouse.
- And then there is the very long snout which I fashioned out of cement as I could not find a pebble that was long and narrow enough
3) You could create it as one huge mosaic or in three parts as I did. If creating the mosaic piece-meal, then somewhere along the neck, decide to create a break. Cut the paper to make the head an independent mosaic.
4) Place the head back in position and continue the same method for filling in the body. Just as with the head, study the body. You will notice ridges running down the back. Try, with the choice and placement of your pebbles, to suggest those as well.
5) Where the body meets the tail, make another break and cut the paper.
6) Continue working on the tail, using narrow, elongated and somewhat triangular pieces that keep getting progressively smaller.
Mix up a batch of thinset to the consistency of peanut butter, and apply it to the surface of your cement backer board piece. Then place your mosaic (still attached to the contact paper), pebble side down onto the thinset.
Pro Tip # 14 - Invisible Joints: To ensure that the breaks are not visible, and that the pebbles meeting at the breaks fit together like pieces of a jigsaw puzzle, keep a few of the overlapping pebbles loose. In other words, do not attach them to their main piece (head, body, tail and dorsal fin). This gives you a little wiggle-room when joining these main pieces to each other, by using those pebbles as 'bridges.' If you look carefully at the last two pictures (bottom-right) of the collage, you should be able to see what I mean.