Monitor Your House From Your Cell Phone
by gduchaine in Circuits > Sensors
1348 Views, 25 Favorites, 0 Comments
Monitor Your House From Your Cell Phone
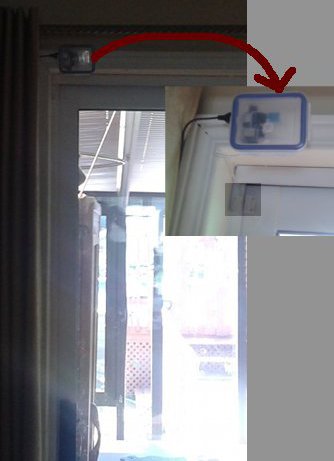
Here is how I made a system to monitor the back door to the swimming pool, and monitor the kitchen at the same time.
I needed a way to know when kids are opening the door to swimming pool. Since I had to put the box above the door, at the same time I added sensors to monitor the temperature and humidity in the house, and to know when someone is in the kitchen (using a Proximity Infra Red sensor). The system record and let me know if the light is left on at night.
I have access to the sensors from my cell phone, anywhere I travel. An I get emails when there is an alarm.
Materials Required
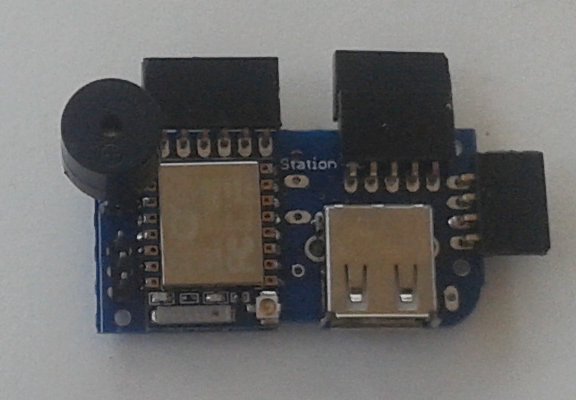
- Wi Fi Smart IOT monitor, with the 3 pack sensors (DHT11 temperature and Humidity, PIR proximity InfraRed, LDR photo resistor) and Buzzer here.
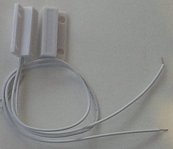
- A Door or window magnet sensor. I had one left from a previous Arduino project.
- Standard USB, 5V charger.
- A case. For this project I just bought a transparent plastic container at the local dollar store.
- A cell phone or a PC with Wi Fi. The first time you power the IOT monitor, you need to tell it the details of you router, so it can connect to the internet.
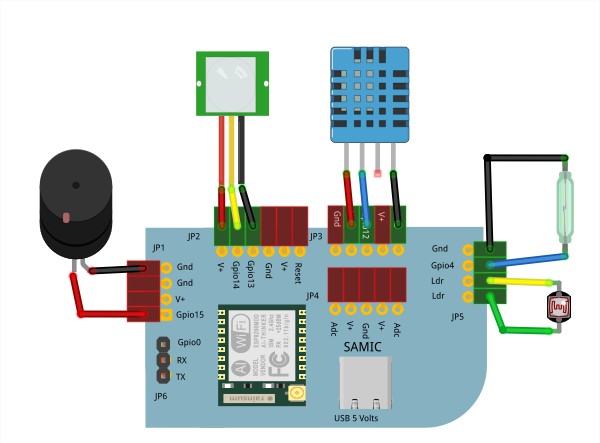
The Fritzing diagram at the top show where to connect the sensors to the monitor board. The magnet sensor is the glass tube on the top right. The Buzzer is on the left. This is the type of buzzer used on other Arduino and Rasberry PI project, it is pretty loud.
Assembly
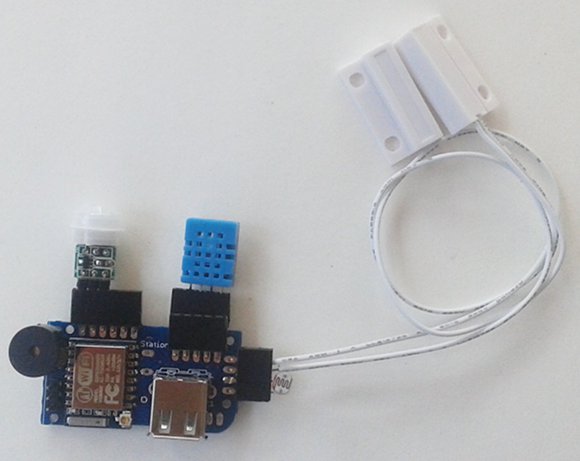
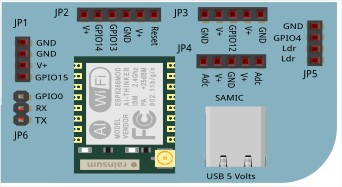
Here are the details of the connections (see the Fritzing diagram a the top of this article, for the final view)
- Buzzer:
- One pin to JP1-Gpio15
- The other to JP1-Gnd; basically just plug the buzzer in the connector.
- PIR, Infra red motion sensor
- The pins on the PIR are marked V, O, and G. V (volt-power) goes to JP2-V+ on the SAMIC.
- pin O (output) goes to the next pin, JP2-Gpio14.
- pin G (ground) goes to the next pin JP2-Gpio13.
- DHT11, temperature and Humidity sensor
- The 4 pins of the DHT align with the connector, just like the PIR, but uses the 4 pins to the left. DHT's pin 1, Vcc goes to the first V+ on JP3.
- DHT's pin 2, data goes to the next pin on JP2, JP@-Gpio12.
- DHT's pin 3 is not connected.
- DHT's pin 4, Gnd goes to JP2-Gnd
- Door/window sensor
- One wire goes to JP5-Gnd
- The other to JP5-Gpio4
- LDR photo resistor
- One wire goes to JP5-Ldr
- The other to the other JP5-Ldr
- Plug the USB 5v charger in the USB connector.
Configuration
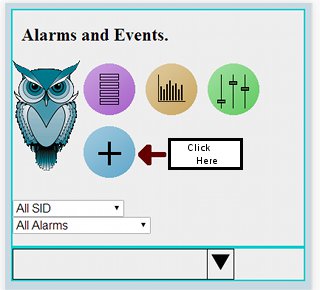
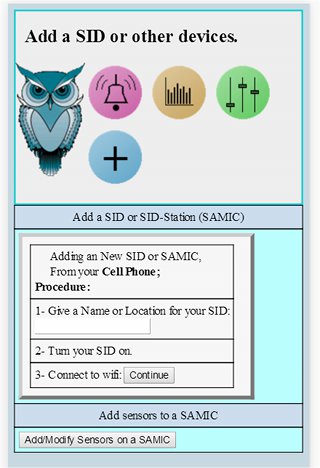
Once everything is assembled and powered up, using your cell phone or a PC with Wi Fi connection, go to smartioteck.net.
- Click the 'Register New Account' near the bottom of the page.
- After you finish registering login and you will see the dashboard.
- Click the Blue (+) plus icon to add your SID station (SAMIC) into the system.
- Follow the instructions in the first section.
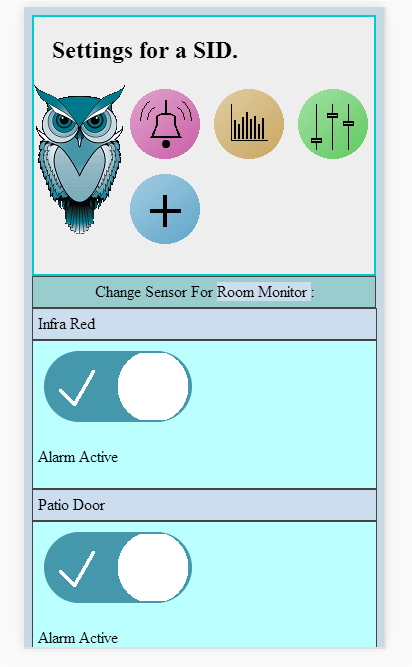
In my case I called my IOT monitor 'Room Monitor' . then I pressed 'continue' and followed the instructions.
Once your system is set-up, then you come back to this page and click the button in the second section to add sensors. The monitor is programmed to handle over 12 different sensors. You basically select in 4 boxes with sensor you have plugged in, and you are ready to go.
On the dashboard, the green button-icon let you make changes to the range to your profile, i.e., the two emails to send alarm to. and changes to the alarm range of the sensor, for example at what temperature you want red or yellow alarm.
Note: The same set-up could be used to monitor a humidor, since the SAMIC itself is less than the size of 2 quarters, it would take little room. This set-up can monitor the humidity, temperature, light and detect when the door is open or close in a box instead of a room:).
My brother uses the same set-up to monitor his wine cooler.