Monitor Temperature and Humidity Value From Your Website (Internet of Things Consept)
by Bay Yolal in Design > Websites
5124 Views, 23 Favorites, 0 Comments
Monitor Temperature and Humidity Value From Your Website (Internet of Things Consept)

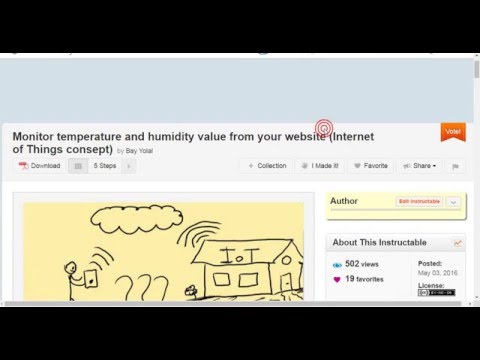
Today, I am going to show you how to plot DHT11's reading temperature and humidity values to put graph produced on your website. If you have got wireless modem, I mean WiFi hotspot point anyway which allows you to connect internet wireless, I am using ESP8266 ESP-01 module to connect wireless internet, to program ESP, I am using Arduino UNO board, with DHT11 sensor.
Subtitle: How to plot temperature and humidity value in Internet of Things consept
Are you curious about your the temperature and humidity value in home? Let's make this instructable!
The need list:
1. Arduino UNO with usb cable (USB type B male pin to type A male pin cable)
2. DHT11 temperature and humidity sensor
3. Tiny breadboard
4. Tiny cables for breadboard
5. ESP8266 - ESP01 module
6. Your computer
Used Technologies:
1. Thingspeak.com to get datas from ESP8266
2. Your website's FTP option - File Transfer Protocol (Learn how to open a website today on my early instructable !)
3. Arduino IDE and its serial monitor
Hardware Setup
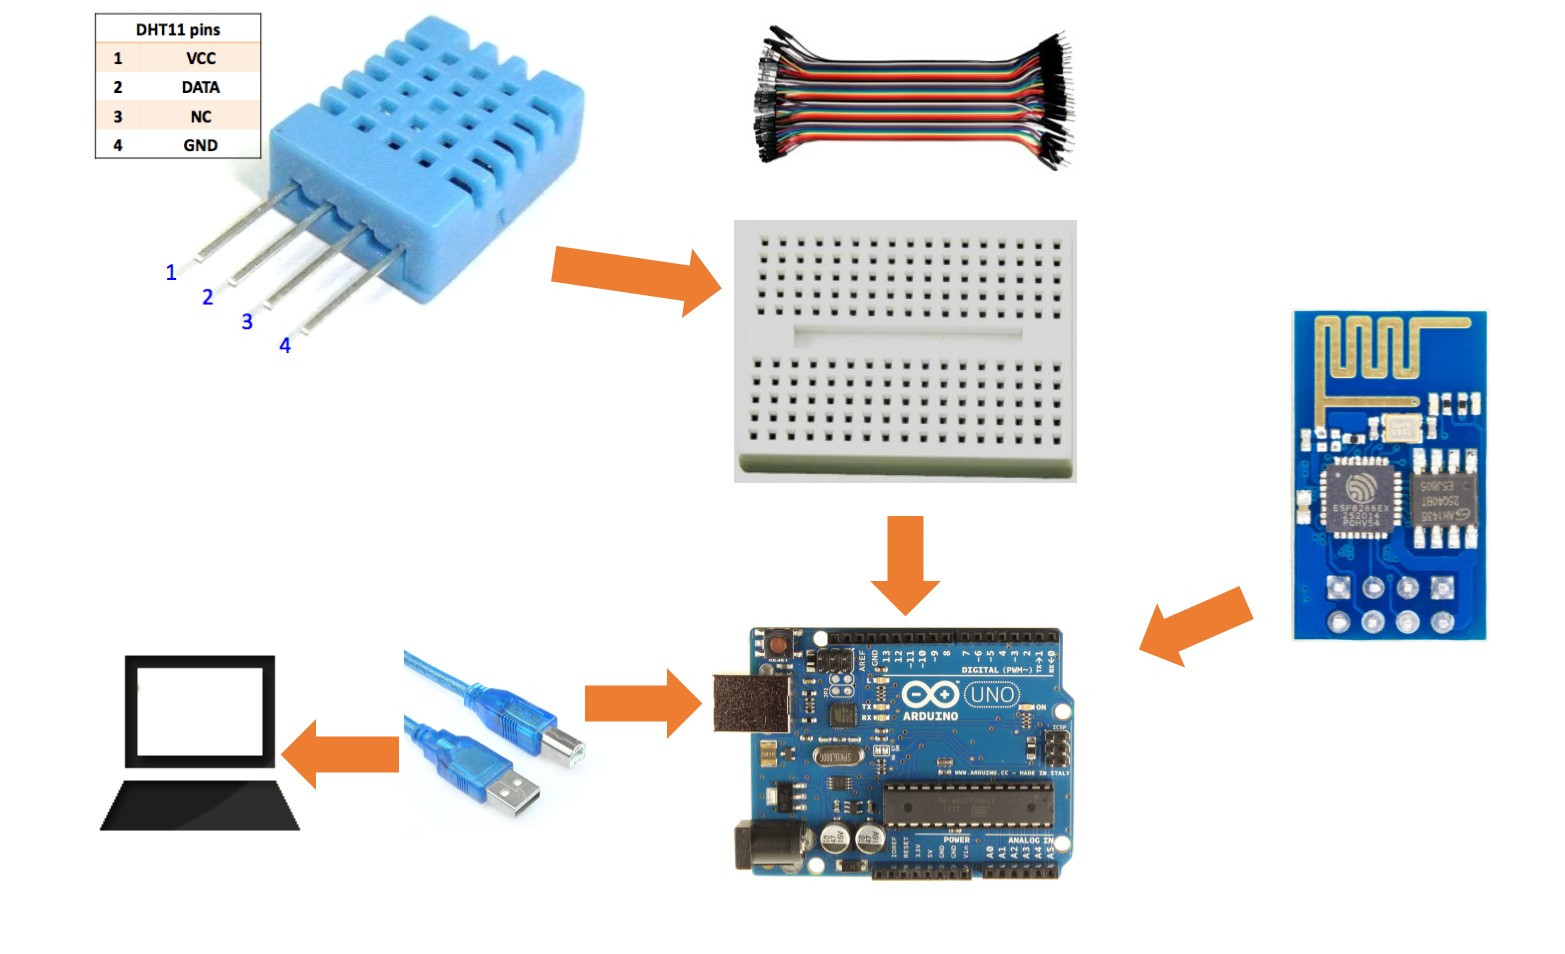
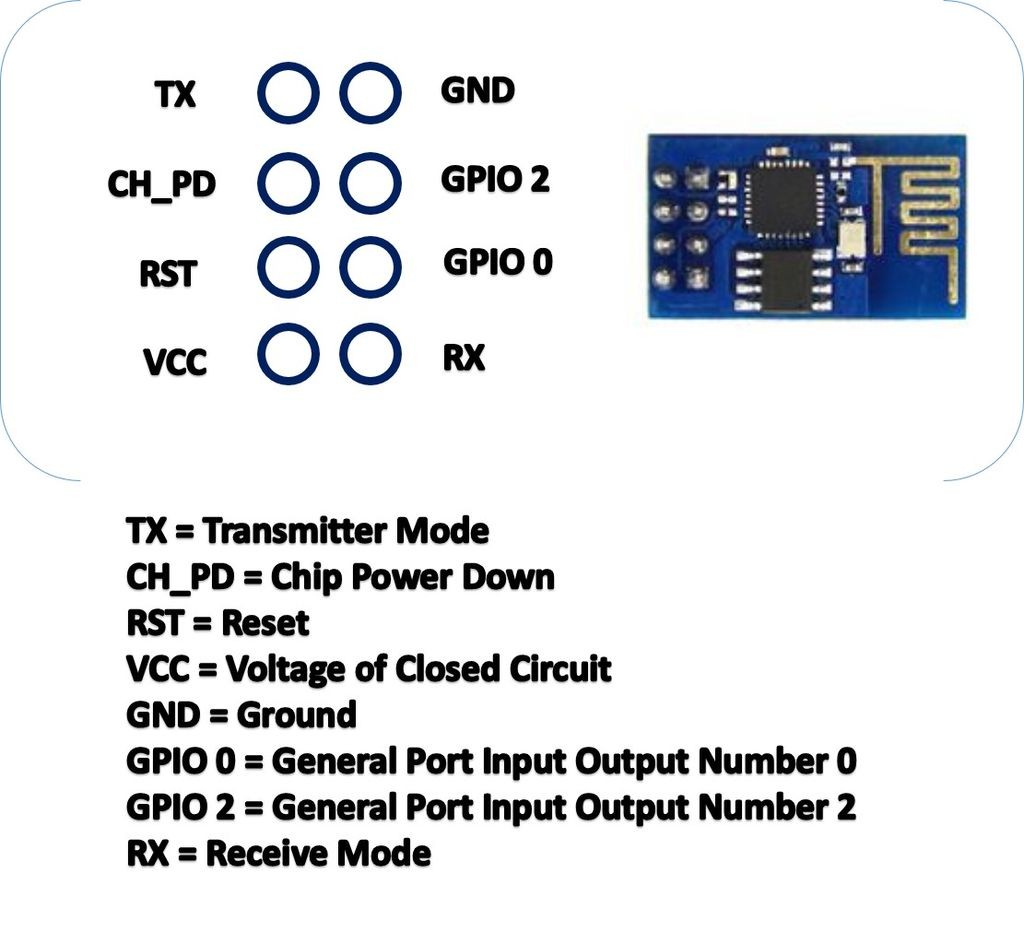
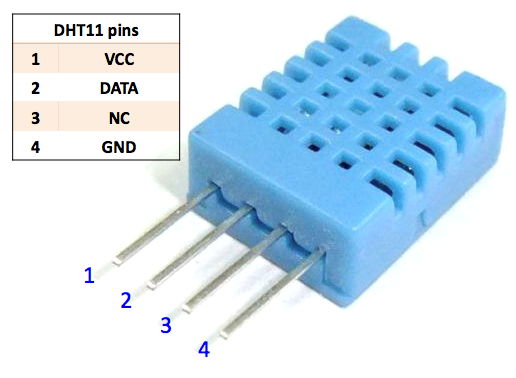
Between Arduino UNO and DHT11 use tiny bread board as helper and use tiny breadboard cables to make connections as:
DHT VCC - 5V Arduino
DHT Data - Pin 2 of dijital side Arduino
DHT Pin3 - Leave blank & empty
DHT GND - GND Arduino
.
Between Arduino UNO and ESP8266, make connections as:
ESP8266 TX - Pin 10 of digital side Arduino
ESP8266 CH_PD - 3.3V Arduino
ESP8266 RST - 3.3V Arduino
ESP8266 VCC- 3.3V Arduino
ESP8266 GND - GND Arduino
ESP8266 GPIO 2 - Leave blank & empty
ESP8266 GPIO 0 - Leave blank & empty
ESP8266 RX - Pin 11 of digital side Arduino
Software Setup
I attached modified Arduino IDE codes on here. You need to change three things in there:
const String wifiAdi = "CHANGE HERE WITH YOUR WIFI SSID";
const String wifiSifresi = "CHANGE HERE WITH YOUR WIFI PASSWORD";
istek = "POST /update HTTP/1.0\r\nConnection: close\r\nHost: api.thingspeak.com\r\nX-THINGSPEAKAPIKEY: XXXXCHANGEHEREXX\r\nContent-Type: application/x-www-form-urlencoded\r\nContent-Length: "+String(veriler.length())+ "\r\n\r\n";
.
This code is from the book written by Hasbi Sevinç. Very special thanks to him to write a good book. Get the book today from Dikeyeksen. There are a lot of projects in. On this instructable, I only modified with usage of DHT11 and Thingspeak.
Downloads
Test Your ESP8266 Module (optional)
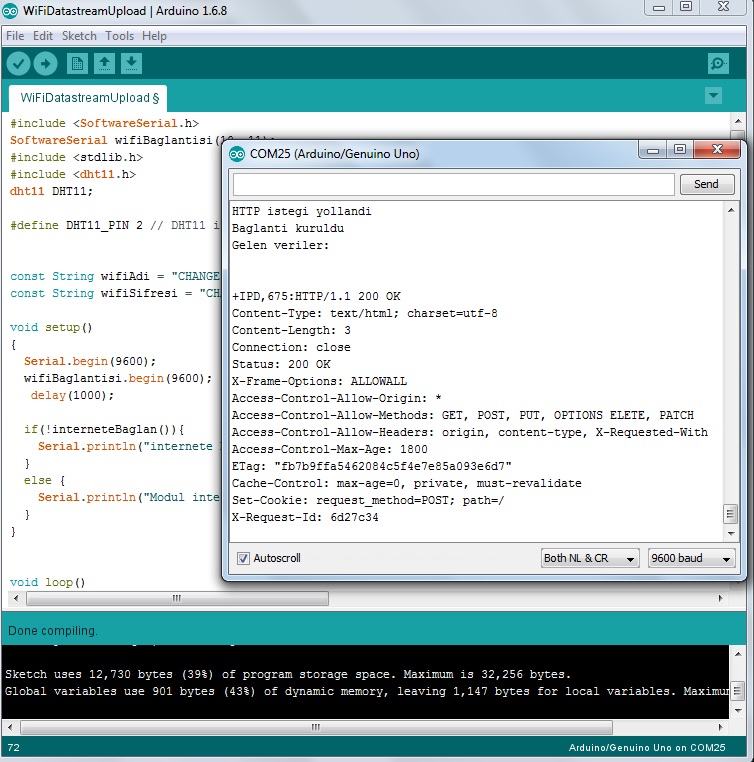
Before you upload code to Arduino UNO, connect ESP8266 module as mentioned on Arduino IDE with step 2's connections. We need to test EP8266.
1. Make connections
2. Open Arduino IDE
3. Tools >> Port >> select Arduino UNO's COM port
4. Open serial terminal
5. Send these codes:
This code is for enable ESP8266 to connect to internet
AT+CWMODE=1
This code is for connecting ESP8266 with SSID and password
AT+CWJAP="SSID","PASSWORD"
This code is for PING to a website if we really do the true connection test
AT+CIPSTART="TCP","www.google.com",80
This code is PING's byte definition
AT+CIPSEND=48
This is final code for PING
GET / HTTP/1.1\r\nHost: google.com:\r\n\r\n
NOTE: Watch Serial Monitor's reponse on each code entering.
Thingspeak Settings


Thingspeak is used for holding and plotting graphics from your datas. So, you can monitorize and get what the value is over-the-air - OTA.
1. Goto https://thingspeak.com/ and sign up with new account if you haven't got.
2. Channels >> My Channels >> New Channel >> fill Name and Description >> Field 1 is temperature, Field 2 is humidity >> Select Make Public >> Save Channel
3. Go to API Keys >> "Write API Keys" is your needed API key. copy it >> paste to your Arduino code on Arduino IDE.
4. Go to Public View >> There are two graphic you see >> On each graphics, on the top right side >> click on the first icon to get IFRAME on each graphic. >> Copy these both two IFRAME from two graphics and paste them to your website HTML pages' inside.
5. If you haven't got a website yet, you can use inhouse method to test this. On your desktop >> right click on your desktop >> create a new notepad >> write an HTML code basicly, check the picture is attached >> save and modify the file extention as index.html >> open this file with your default browser.
To Sum Up

I test this instructable on my website. In early my instructables, I told you how to get data from DHT11's temperature to your website. We did this in Xively way. On here, we did Thingspeak way.
Thingspeak is user friendly, also Xively it is but Xively is a bit hard interface has.
Thingspeak also let you use IFRAME html tags. Xively let's you JSON file.
Now, If you are just visiting my instructable, visit my website to see what's going on on my home about temperature and humidity.
This is Internet of things consept because I am taking temperature and humidity value from my home to anywhere that I can follow :D
.
That's all !
BONUS: Reading This Instructable
)
NOTE: This instructable's step is aimed for visually impaired people to hear the sentences to learn what's going on here. Watch the video, it explains all steps.