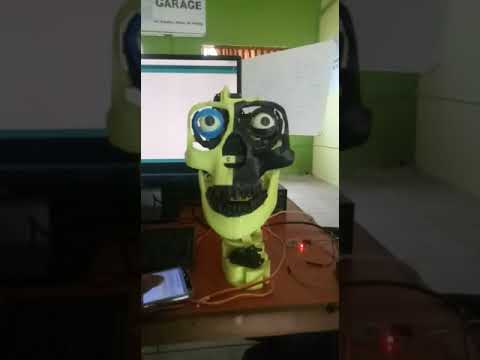
Mona, My Personal Assistant Animatronic Robot
by BhaskarP6 in Circuits > Raspberry Pi
1121 Views, 6 Favorites, 0 Comments
Mona, My Personal Assistant Animatronic Robot

Mona, it is an AI Robot which uses watson Ai in background, when i started this project it looks much complicated than i thought but as i started working on it, ibm cognitive classes (enroll here) helped me alot, if you want you can take the class now, or else just continue with this instructables
i need my bot to respond for the following things
1. when i speak
2. when it wants to speak
3.when i want to control the movements of eyes/ jaw...etc.
so, when i speak it should convert my speech in to text, then it should check in the data base (entities / events /) then it needs to speak out the reply like text to speech.
so u require the below things
before using the below services, kindly creat IBM Bluemix account
Preparing Your Things

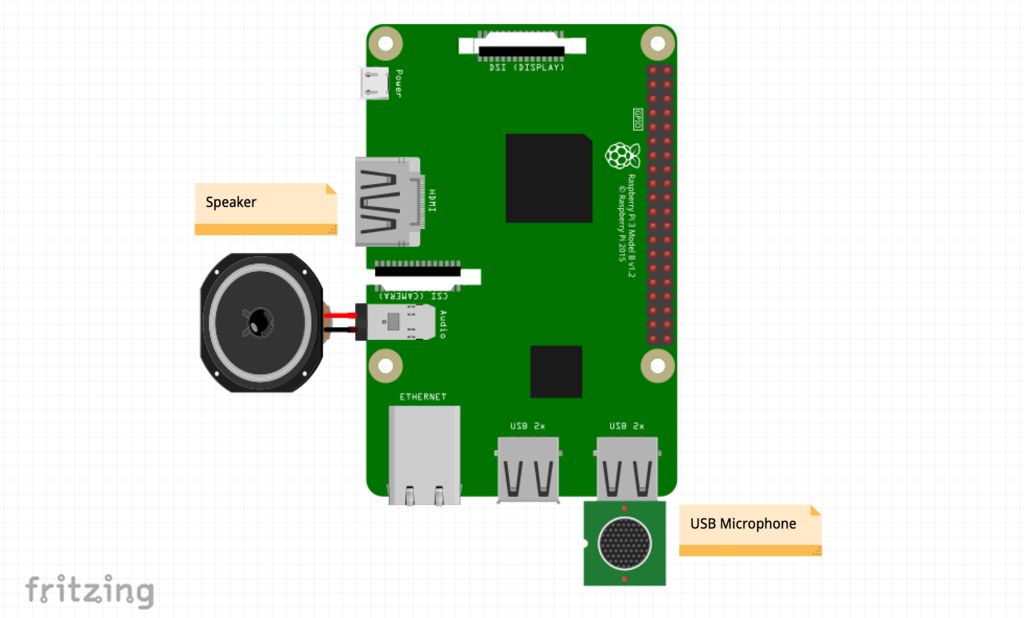
1.Raspberry Pi.
2.Mic
3.Speaker
Skull (3d printed):
3D Printing files you can find it here:
click here
and above all you should have a proper internet connection............
Now i'm going to use raspberry pi to process the all.
If you have used Raspberry Pi before, install Node.js and go to the next step.
Otherwise, follow the instructions below to set up your Pi:
Getting Started with Your Pi Raspberry Pi is similar to a full computer, which means you need a monitor, mouse, and keyboard for it. If you have a TV around, you can connect your Pi to your TV via a HDMI cable. In most of the Pi kits, the SD card is already preloaded with an image of the Raspberry Pi Operating System. You need to put the SD card in the Pi, turn the Pi ON and follow the instructions on screen to complete the installation of the operating system. If you have problems setting up your Pi, you can troubleshoot here.
Install Packages Open a terminal application on the Pi and execute the following commands to install the latest version of Node.js and npm (Node Package Manager).
You need these packages later to run your code.
curl -sL <a href="http://ibm.biz/tjbot-bootstrap"> http://ibm.biz/tjbot-bootstrap </a> | sudo sh
Plug in your USB microphone and the speaker.
Depending on which audio output source you are using with your Pi (HDMI, 3.5mm audio jack, Bluetooth, USB speaker), you may need to set the audio config.
HDMI/ 3.5mm Audio Jack
If you use HDMI or 3.5mm audio jack, you may need to set the audio config. To do this, go to the terminal and open up raspi-config.
sudo raspi-config
This will open up the Raspberry Pi configuration screen.
Select "Advanced Options" and press Enter, then select "Audio" and press Enter. Choose the correct channel for the output audio. If you have connected an external speaker to the audio jack, you should select 3.5mm jack.
USB Speaker :
If you have a USB audio, you need to update your /usr/share/alsa/alsa.config to set the USB audio as the default device. Begin with running the following command to make sure your USB is connected and listed there.
lsusb
Next is to detect the card number of your USB audio.<br>aplay -l
Take a note of the card number associated with your USB Audio.
Then go to the alsa.config file to set it as default.
sudo nano /usr/share/alsa/alsa.conf
Look for
defaults.ctl.card 0
defaults.pcm.card 0
and update the card number (0 here) to the card number of your USB audio.
Different versions of Raspberry Pi OS may need a different setup. If you have problem with your USB setup, check out this guide to troubleshoot.
Git-hub Code
The source code is available at github. Download or clone the code and execute the following commands from a terminal to install its dependencies.. Here are the instructions for how to clone a repository from github if you have not done that before.
git clone <a href="https://github.com/prasadnoolu/mona.git">https://github.com/prasadnoolu/mona.git</a>
cd mona/recipes/conversation
npm install
Pro tip: if you get an error for npm install that says npm not found, you should first install npm on your machine. This is the command line to install npm
sudo apt-get install npm
In this step, we help you get API access to three conversation services:
(1) Speech to Text,
(2) Watson Assistant,
(3) Text to Speech.
You need to copy your credentials for all these services.
Create instances of the Watson Assistant, Speech to Text, and Text to Speech services and note the authentication credentials.
Import the workspace-sample.json
file into the Watson Assistant service and note the workspace ID.
Make a copy the default configuration file and update it with the Watson service credentials and the conversation workspace ID.
$ sudo cp config.default.js config.js
$ sudo nano config.js
Run the Code
Now, you are ready to talk to your TJBot!
Open a terminal and execute the following command:
sudo node conversation.js
Watson conversation uses intents to label the purpose of a sentence.
For example when you ask Mona "Please introduce yourself", the intent is to make an introduction.
You can add your own new intents in the Conversation editor, but for now, we have started you off with a few intents: Introduction.
You can say phrases such as "Watson, please introduce yourself", "Watson, who are you", and "Watson, can you introduce yourself"Joke.
You can ask "Watson, please tell me a joke" or "Watson, I would like to hear a joke".
For a complete list, check the content of workspace-sample.json
An attention word is used so Mona knows you are talking to him.
The default attention word is 'Watson', but you can change it in config.js as follows.
Update the configuration file to change the robot name in tjConfig section: // set up TJBot's configuration
exports.tjConfig = { log: { level: 'verbose' }, robot: { name: 'tee jay bot' } };
You can change the 'name' to whatever you would like to call your "Mona" In addition, if you change the gender to 'female', TJBot will use a female voice to speak to you! Enjoy!
there is a good chance that one of these two things has happened: (1) The audio output is directed to a wrong channel (you can fix it from raspi-config), (2) your sound modules are blocked.
In that case, go to /etc/modprobe.d/ and remove blacklist-rgb-led.conf Then run the following command:
sudo update-initramfs -u
Reboot and confirm the "snd" modules are running by executing the command "lsmod".
This should solve the problem. lsmod