Modular Desk Organization System
by darman12 in Workshop > Organizing
4468 Views, 20 Favorites, 0 Comments
Modular Desk Organization System
![IMG_1467[1].PNG](/proxy/?url=https://content.instructables.com/FBO/DRA7/HKBFBOIP/FBODRA7HKBFBOIP.png&filename=IMG_1467[1].PNG)
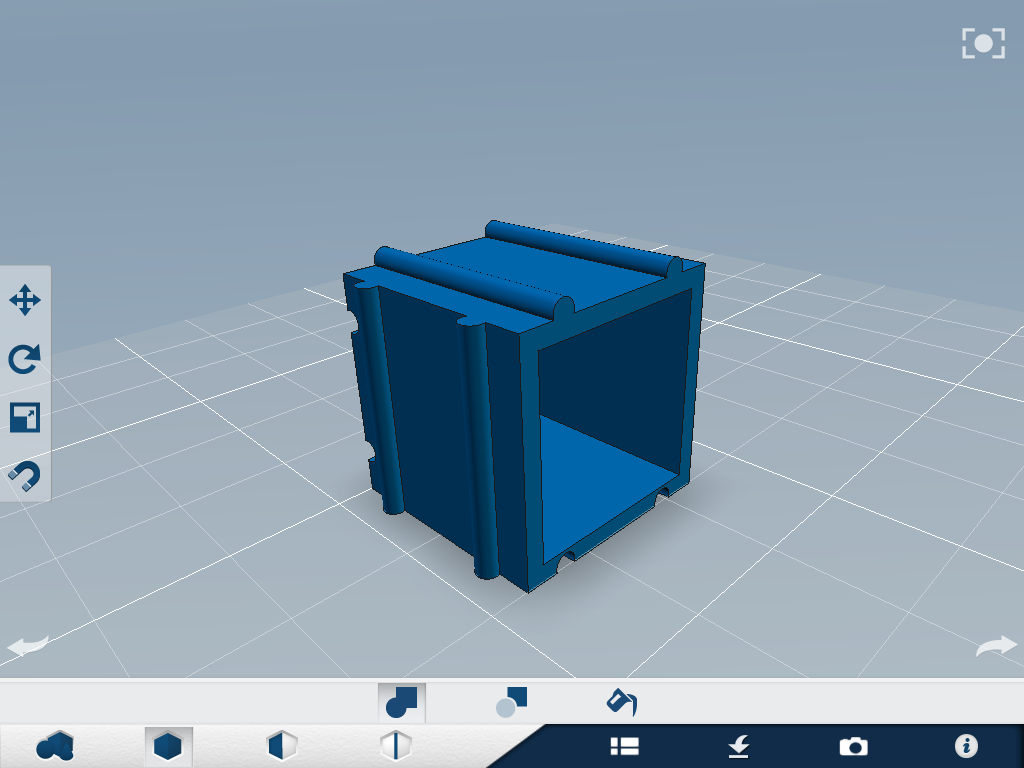
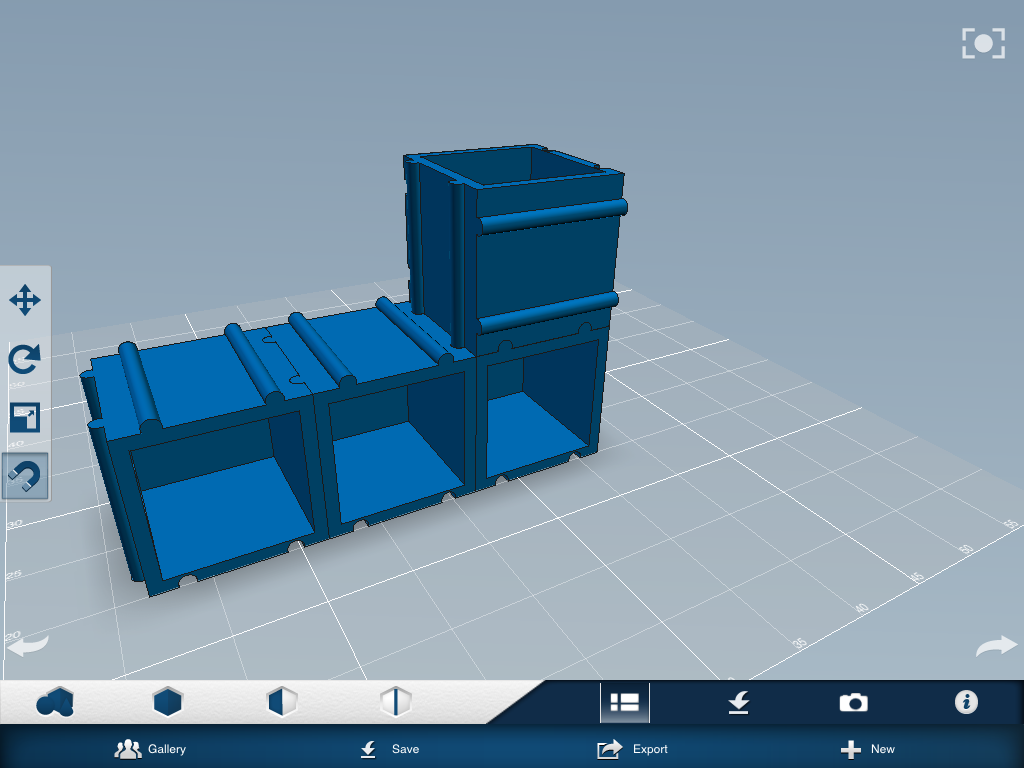
Greetings 'iblers! I have created a new organization container system to keep your desk organized, while staying organized itself. The containers can be moved around and connected together to create a unique storage configuration. This replaces all those cups and containers strewn across your desk.
I created this system using the 123D Design app for iPad, which is free. Follow these instructions to design it yourself!
I created this system using the 123D Design app for iPad, which is free. Follow these instructions to design it yourself!
Quick Tips - README
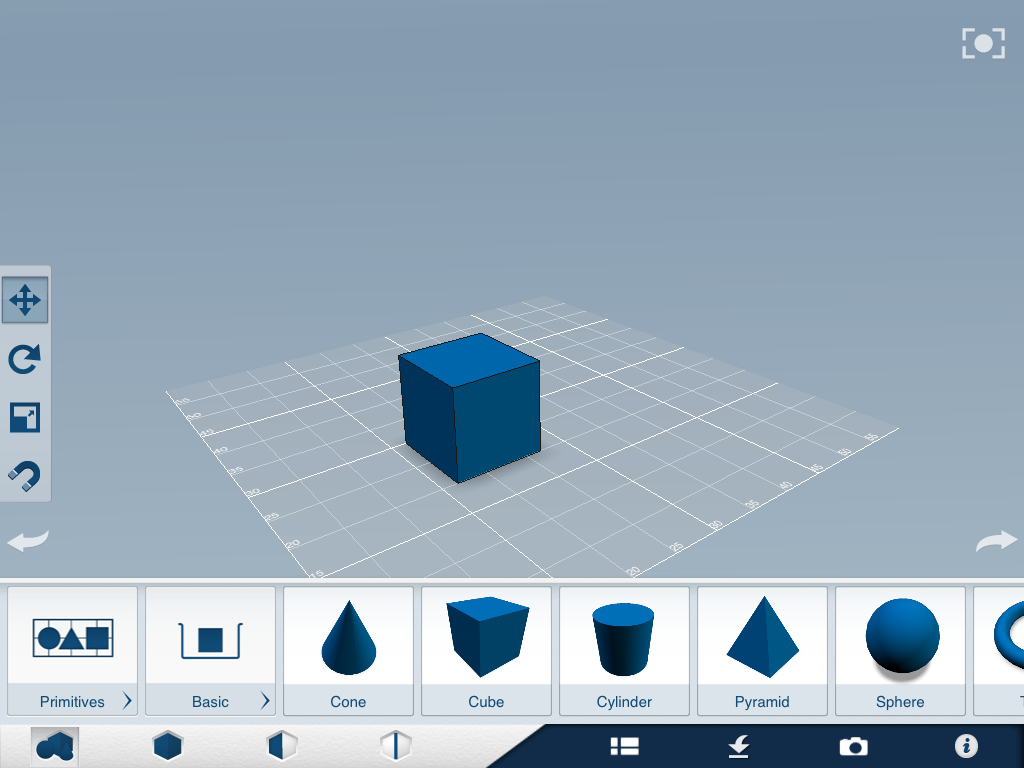
These quick tips will make your experience with the 123D Design app much smoother. Don't worry if you are not familiar with the things I am talking about here because it is out of context, it will make more sense in the following steps.
1) When you want to select an object to manipulate with a tool, select the tool first
2) When you select an object, make sure you don't have any others selected already! Tap a couple times on an empty space.
3) When you manipulate your perspective on an object, use slow movements so it doesn't fly all over the screen; you will get super disoriented.
4) When you insert objects or duplicate them, space them apart so you don't accidentally tap on the wrong object. This will make it so you don't constantly have to deselect objects.
5) When you use the snap tool to make two objects come together, select the object you want to move first then the object you want to remain stationary.
6) When you tap an arrow to move an object, a positive value will move the object in the direction the arrow is pointing, a negative (-) value will move it in the opposite direction that the arrow is pointing.
7) To quickly orient the camera to the object, tap the "home" button
8) Keep your extra cylinders in one place spaced away from the box to keep a point of reference. This will help you know how you are oriented. In my pictures, my extra cylinders are to the right of the box. It would be good for you to do the same, it would make the pictures that much more helpful to you.
Remember, if you make a mistake, just hit the undo button near the bottom left. If you want to undo an undo O.o, hit the redo button near the bottom right.
The Box

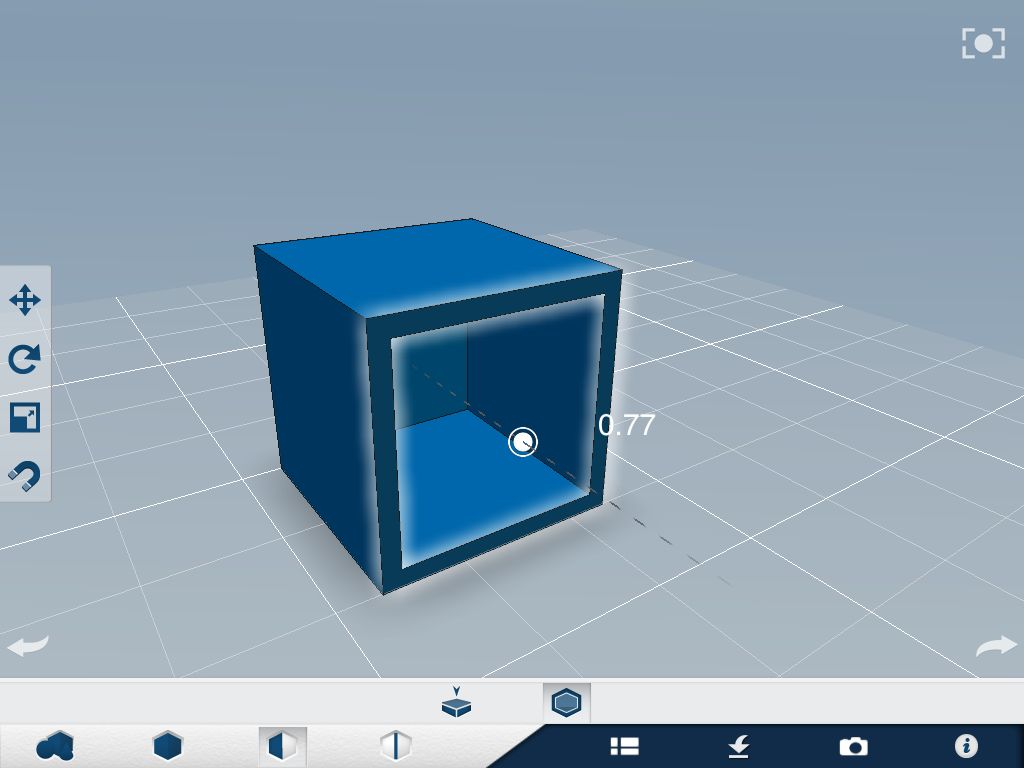
The first step is to create the basic box shape of the container.
1) Drag and drop a cube onto the grid button on far left>primitives>basic>cube
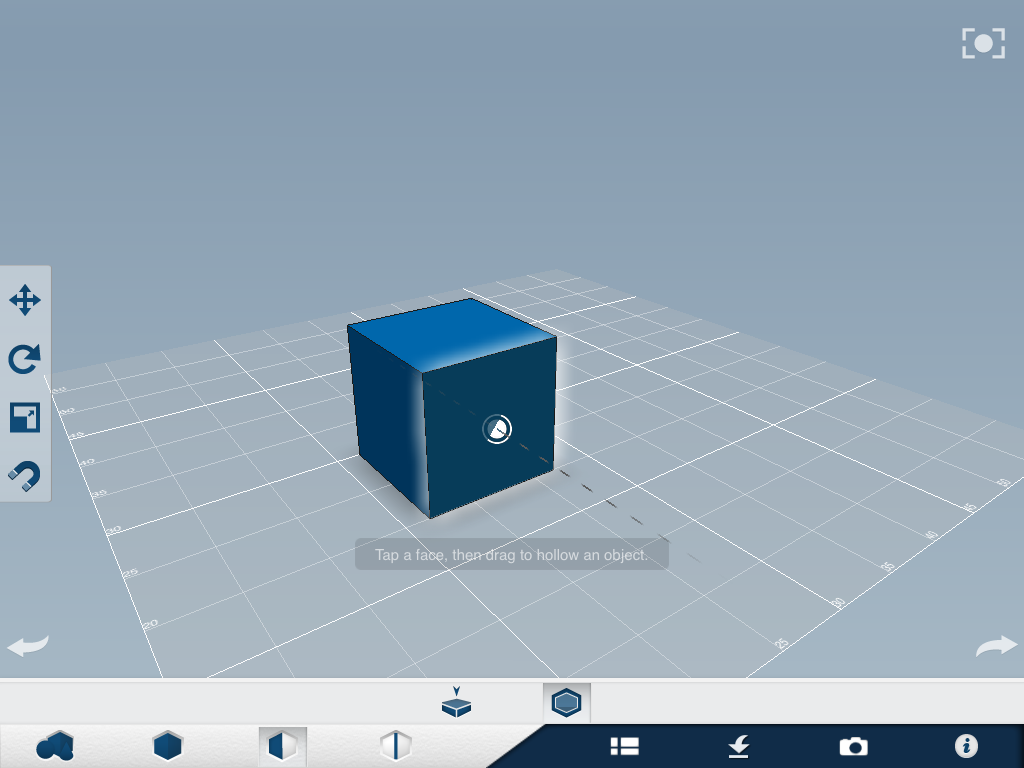
2) Select the "hallow" tool 3rd button>then the hexagon button
3) Tap the face selected in the second picture. Tap and hold, then drag your finger away from the dot until you see a value between .70 and .80 I chose .77 *you can also just tap the dot, and enter a value.
4) When you release the dot, or enter the value, the cube will be hallowed out like you see in the third picture (that was right before I released the dot)
You have completed the container shape which will make up the final model. The "hallow" tool is very useful, keep it in mind for future models!
Now on to the next step
The Cylinder
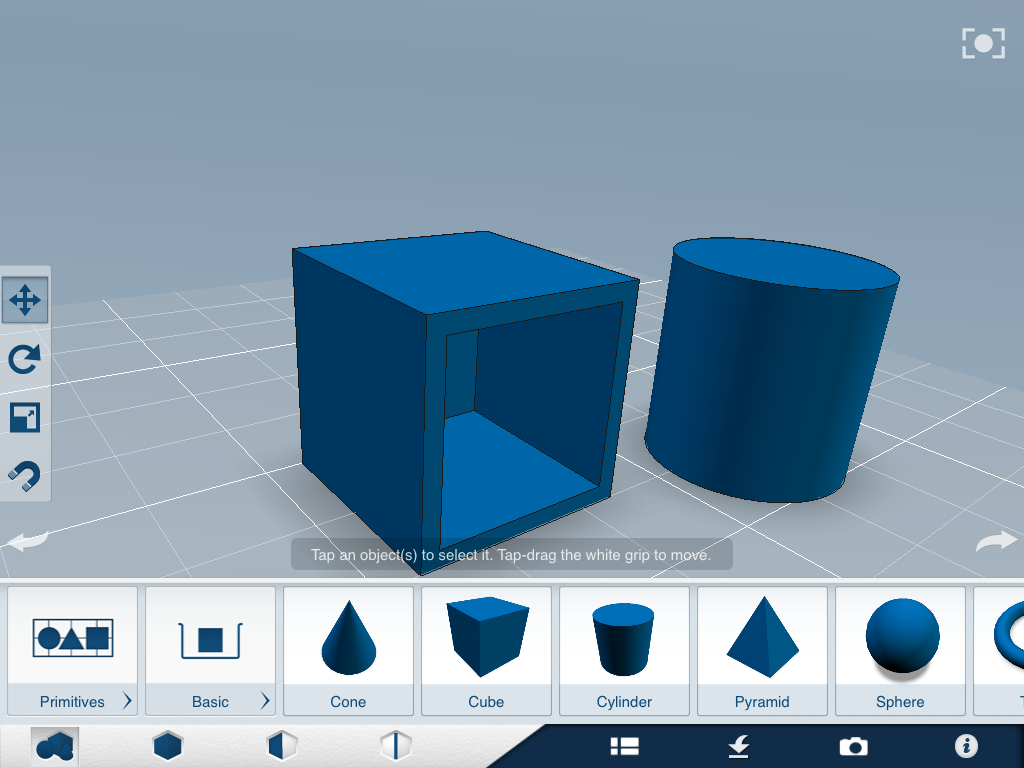
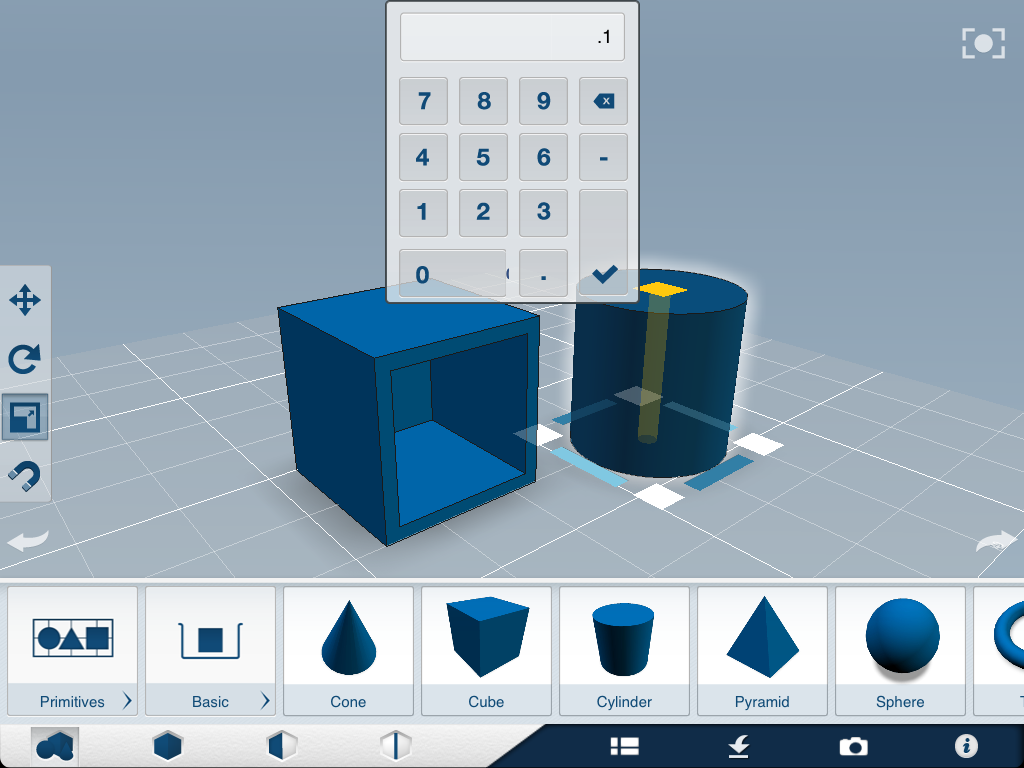
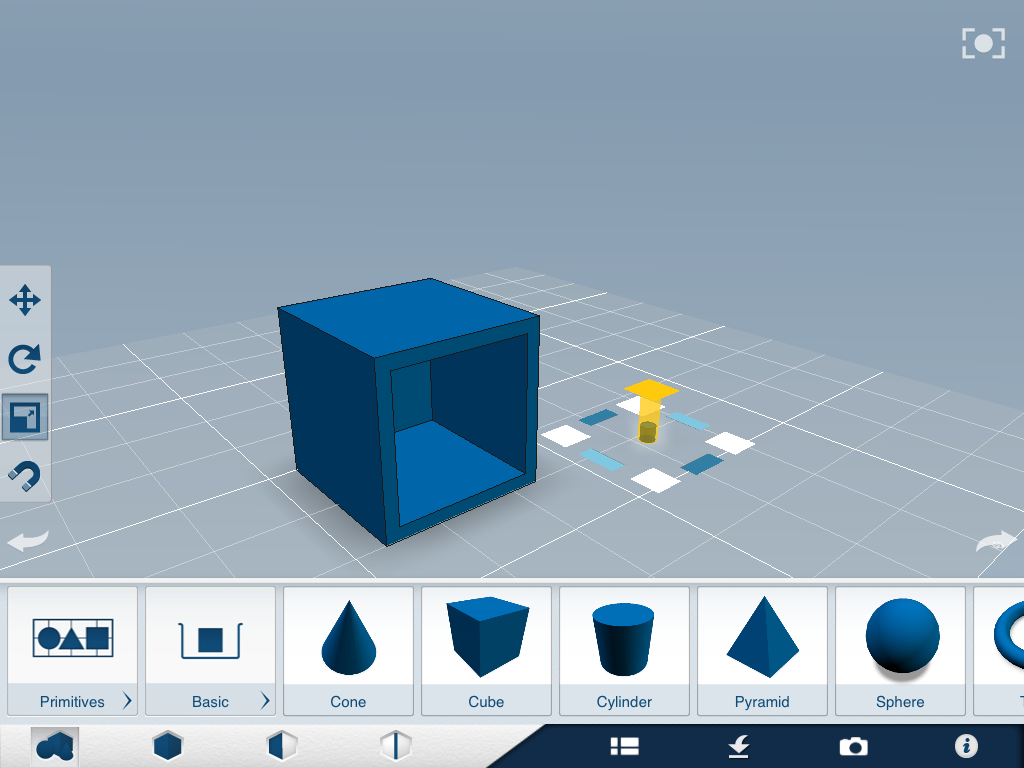
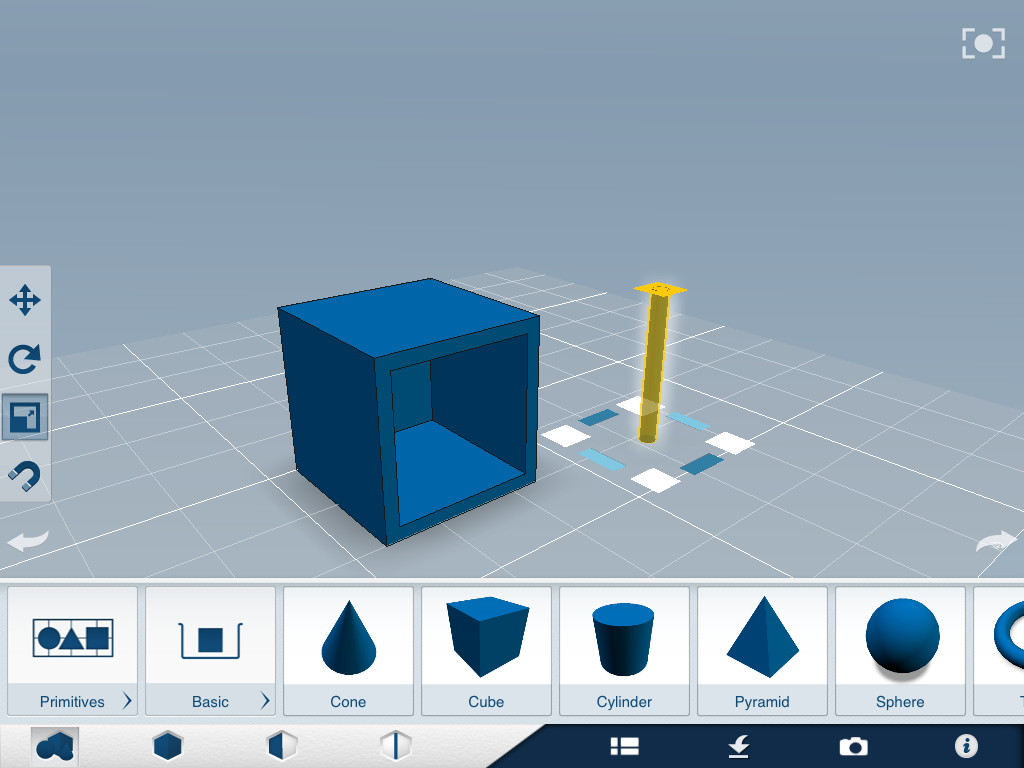
In the following steps, we will be creating parts that will allow multiple containers to be attached. In the steps, these attachments will be separate parts, but in the end will just be part of the whole container like you see in the first picture.
In this step, we will be making the cylinder which will be used throughout.
1) Drag and drop a cylinder onto the grid button on far left>primitives>basic>cylinder
2) Tap the scaling tool located on the toolbar to the left. Tap the cylinder.
3) Tap one of the white square corners of the cylinder, enter the value .1 *
4) Tap the yellow square on top of the cylinder, enter the value 10**
You have now created the cylinder we will use for the rest of the project. Always have at least one extra cylinder so you can duplicate more if you need to.
*The units in this app are somewhat strange. The units are relative to the object you have selected. So, when you enter .1 as a unit, that is 1/10 of the size of the original cylinder. **So, when you enter 10 for the height in the next step, it is not 10 of any particular unit, it is just 10 "heights" of the current cylinder. In other words, you are making the cylinder 10 times taller.
Attachments 1
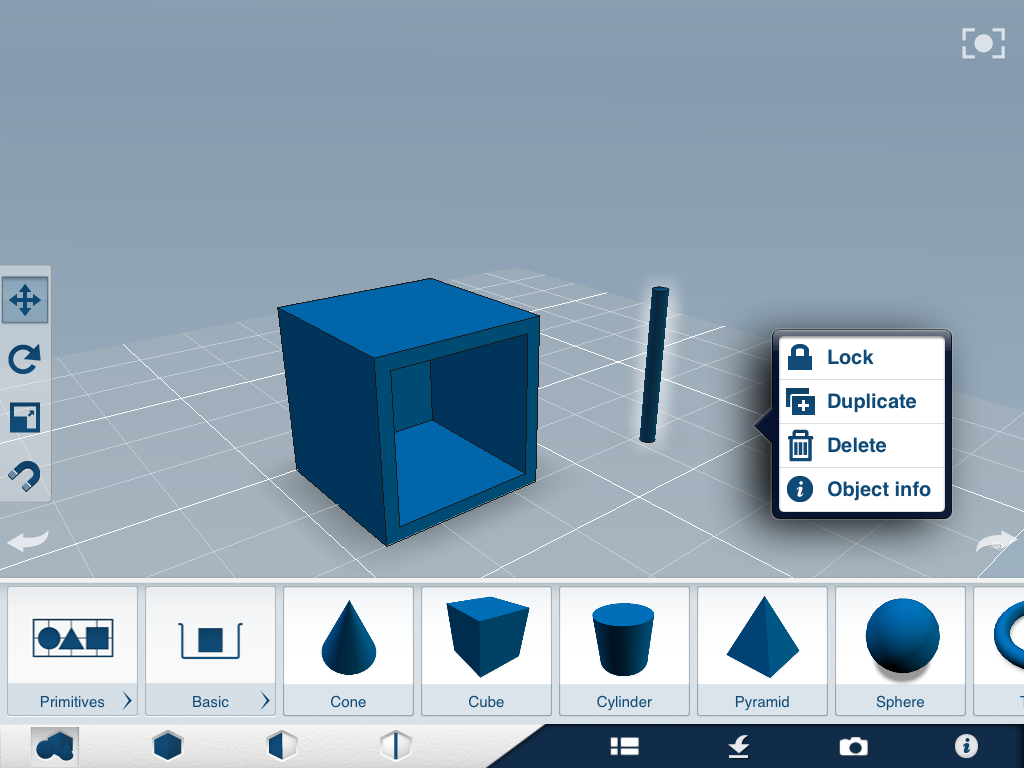
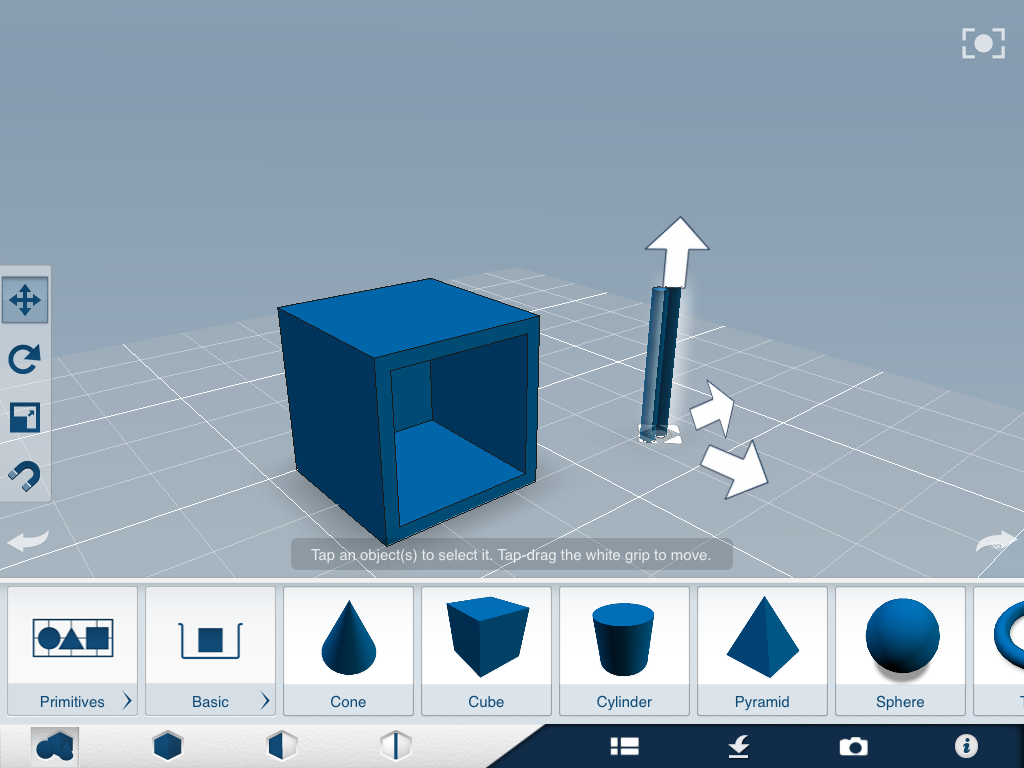
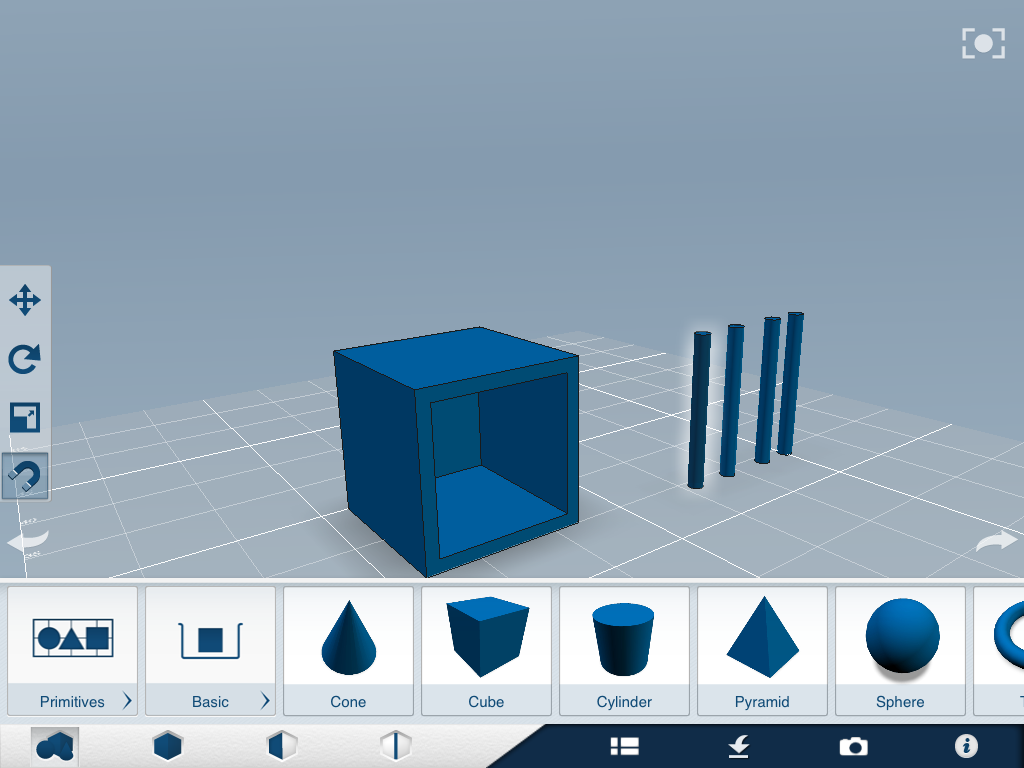
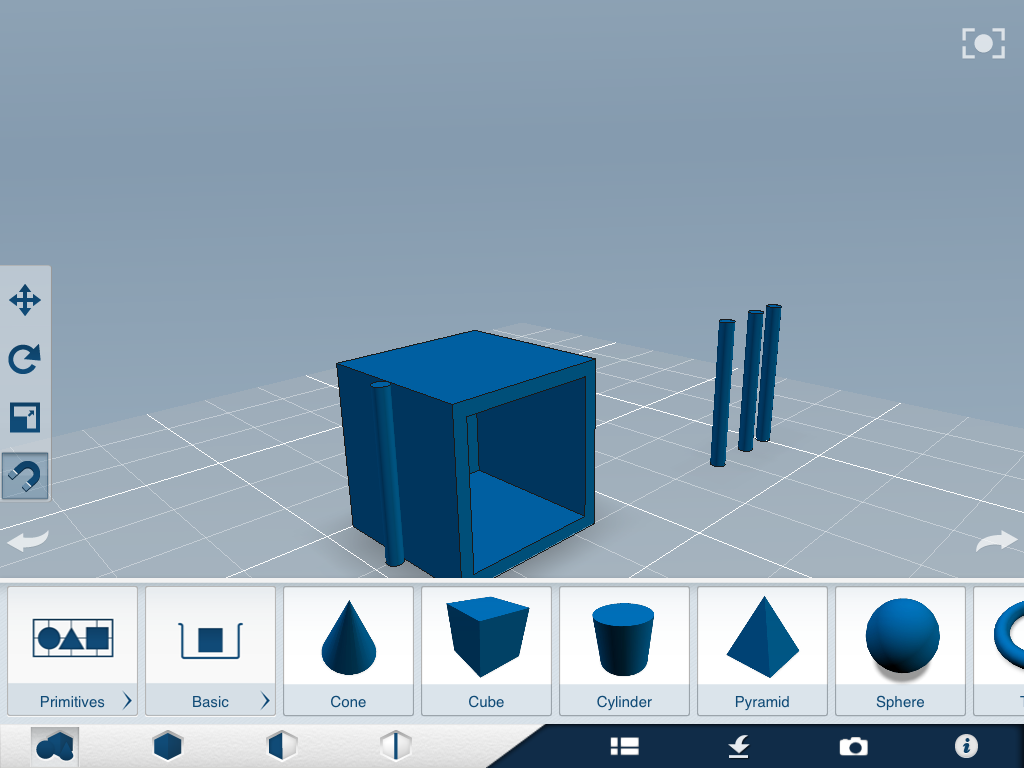
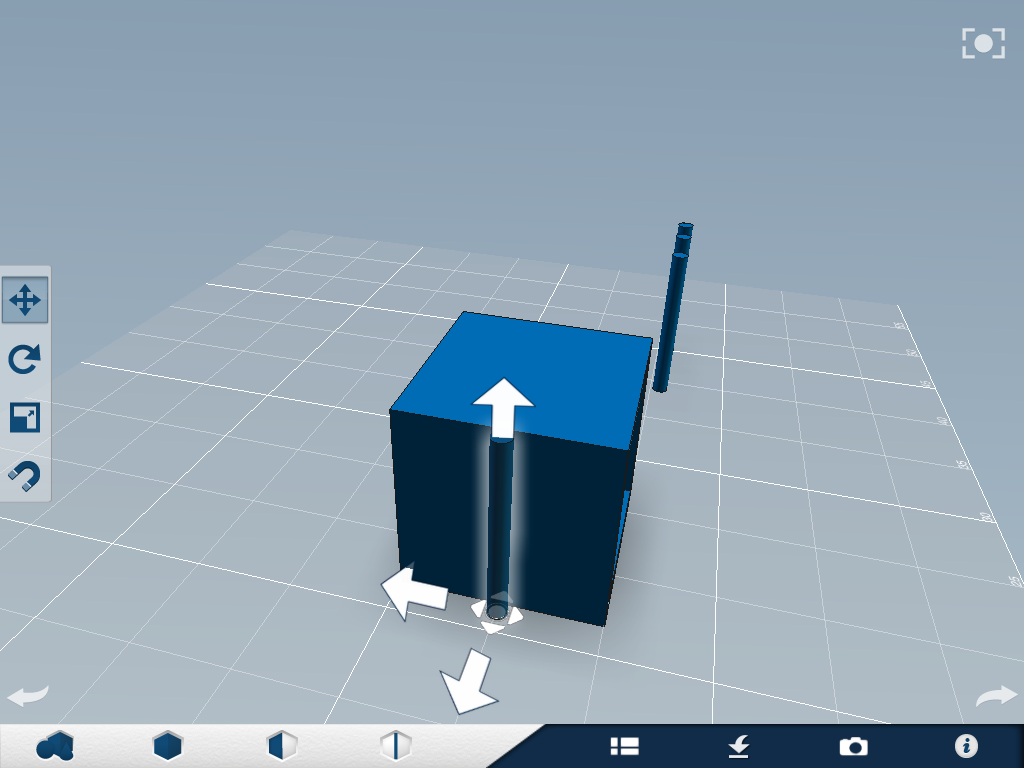
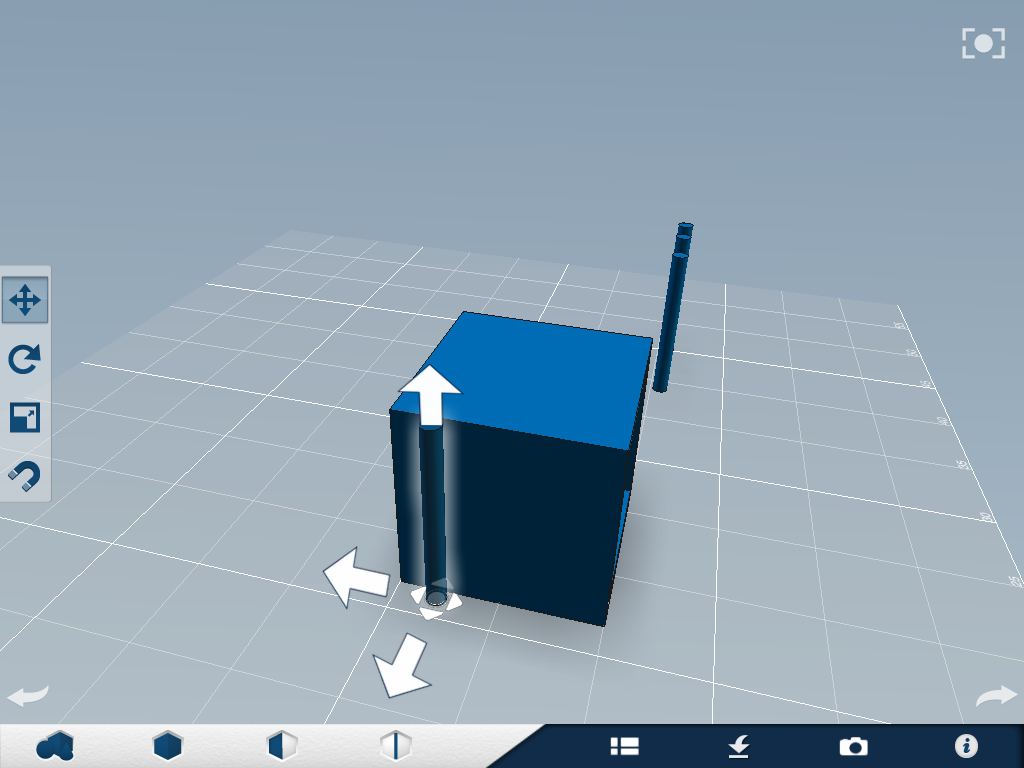
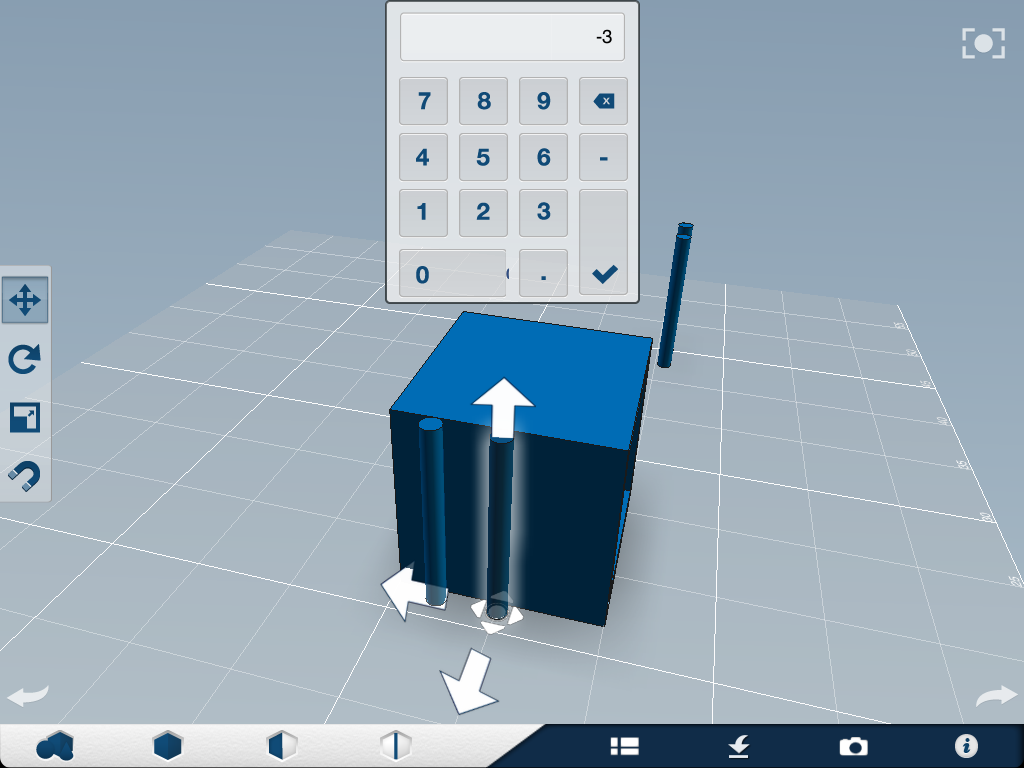
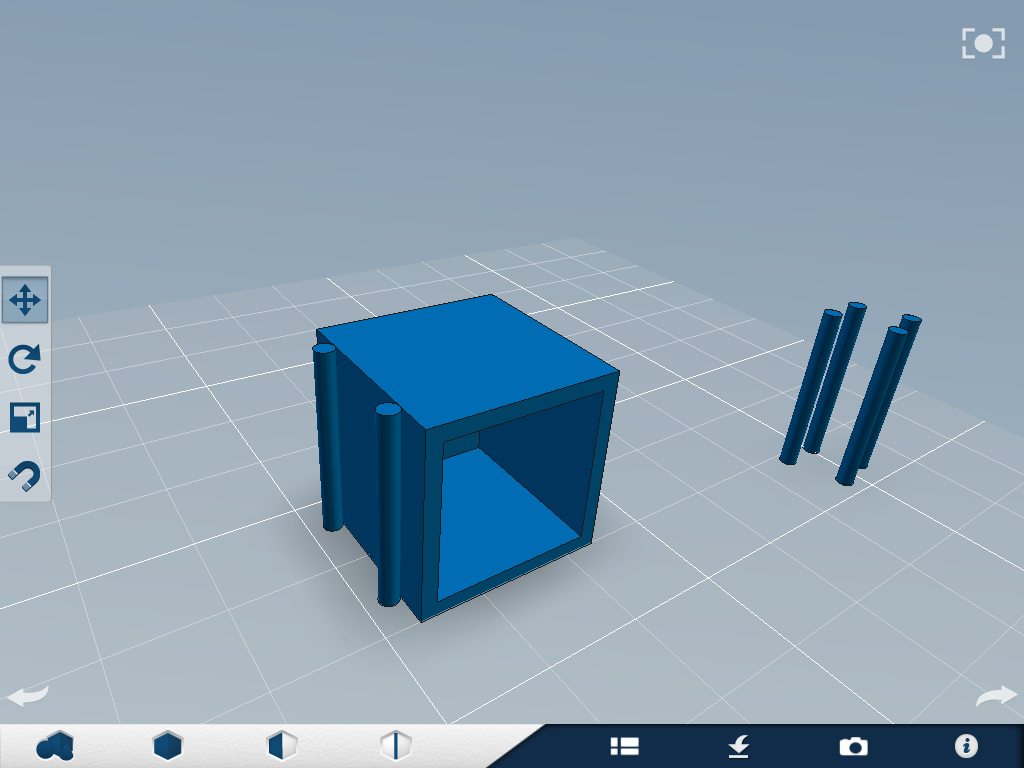
We are going to start implementing the attachment devices.
1) Make 3 duplicates of your extra cylinder long press on the cylinder>duplicate
2) Space the cylinders to make them easier to deal with
3) Select the snap tool from the toolbar. Tap one of the cylinders, then the left face of the box fig 4. This will put the cylinder in the center of the selected face, very convenient!
4) Select the move tool in the toolbar. Tap the cylinder we just snapped to the box. You will now see arrows around the cylinder fig 5. Tap the arrow pointing toward the back of the box (the end opposite the hole).
5) Enter the value 3. This value will move the cylinder three "widths" of the cylinder. Again, weird units.
6) Snap another one of the cylinders to the same face of the box. Again, it will put the cylinder in the center of the face.
7) Select the move tool. Tap the cylinder. Tap the arrow pointing toward the back of the box. Enter the value -3. This will move the cylinder the opposite direction of the last. See fig 8
Move onto the next step, we will come back to these later.
Attachments 2
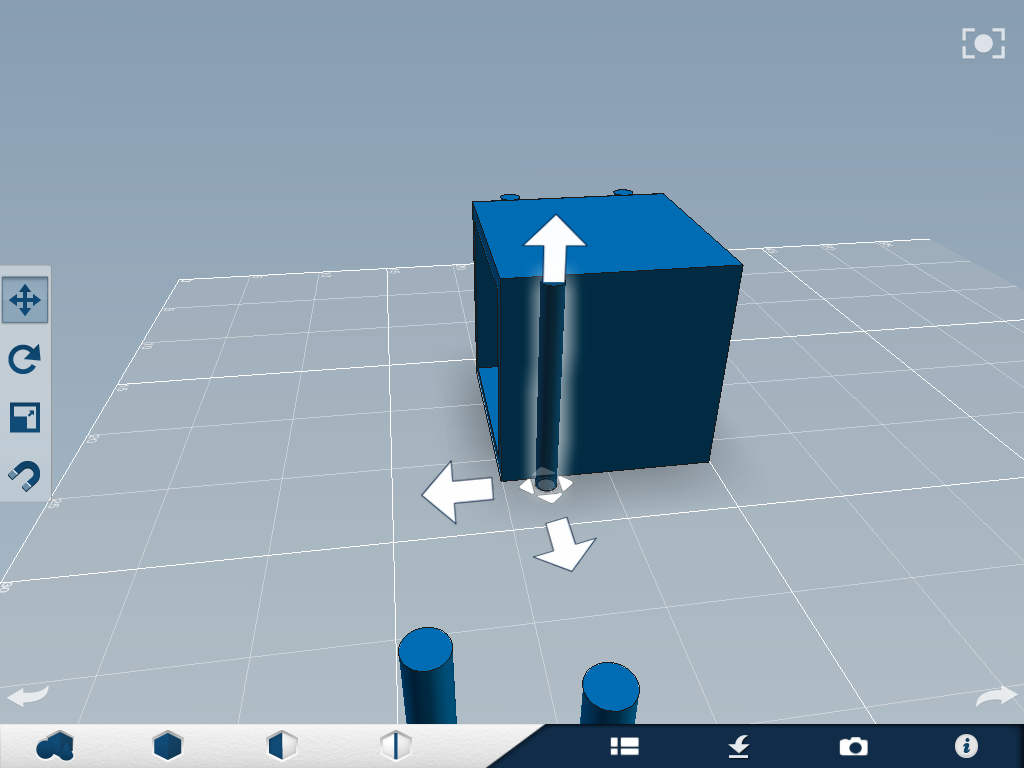
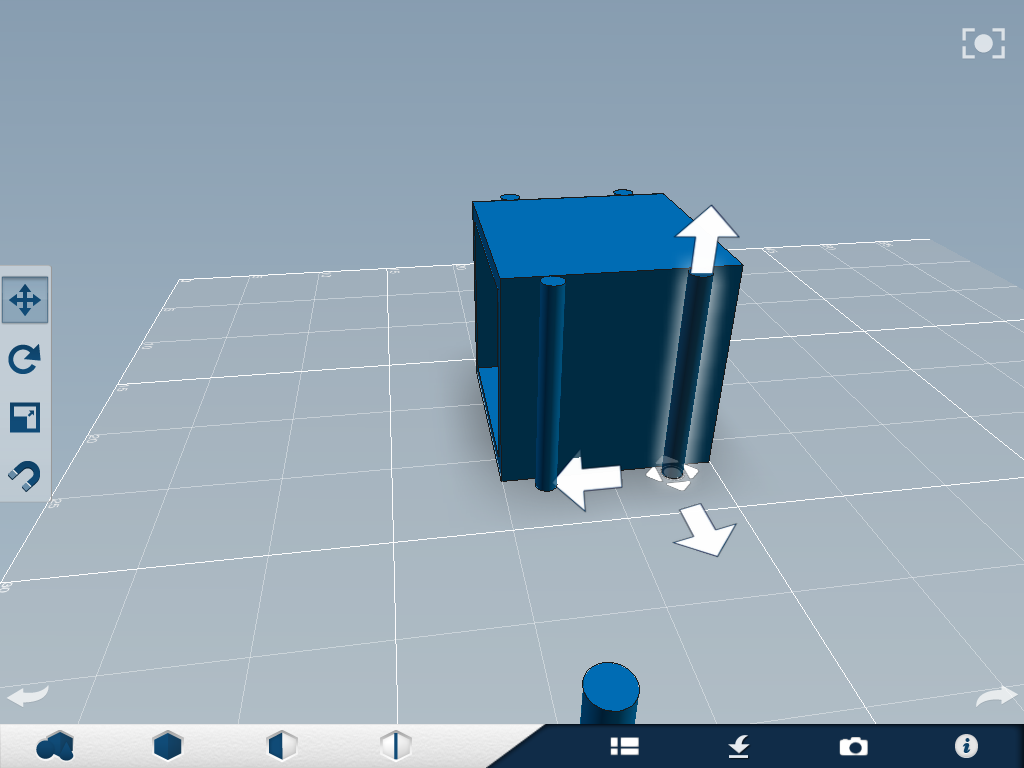
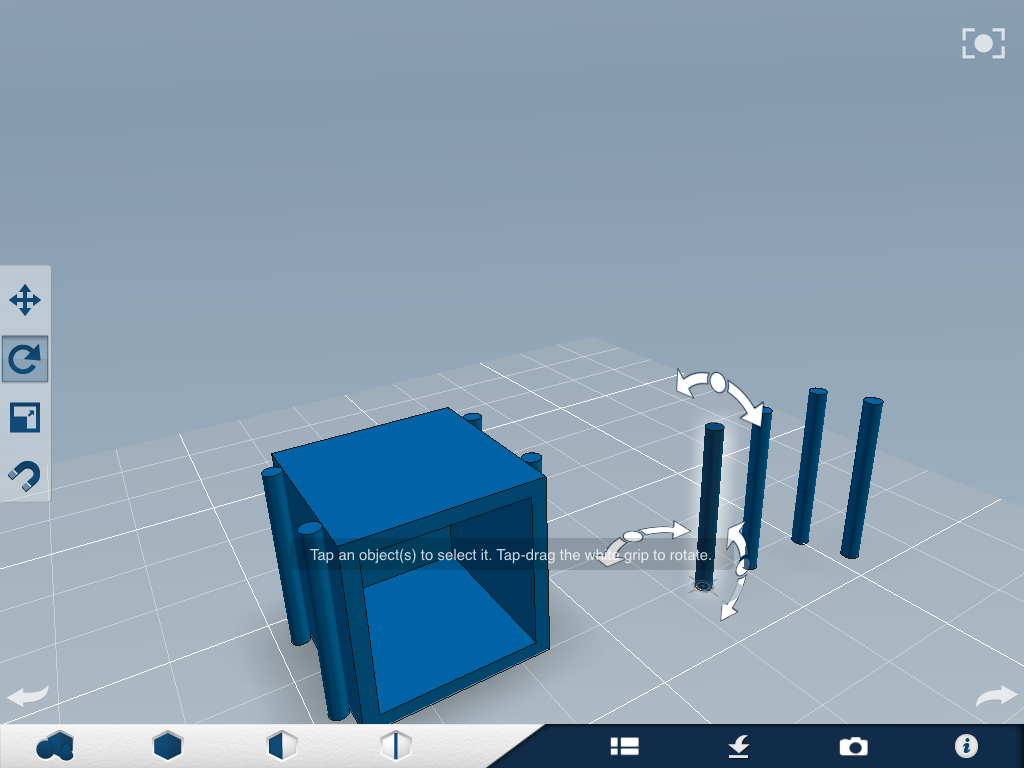
1) Orient your perspective so you are now looking at the opposite face.
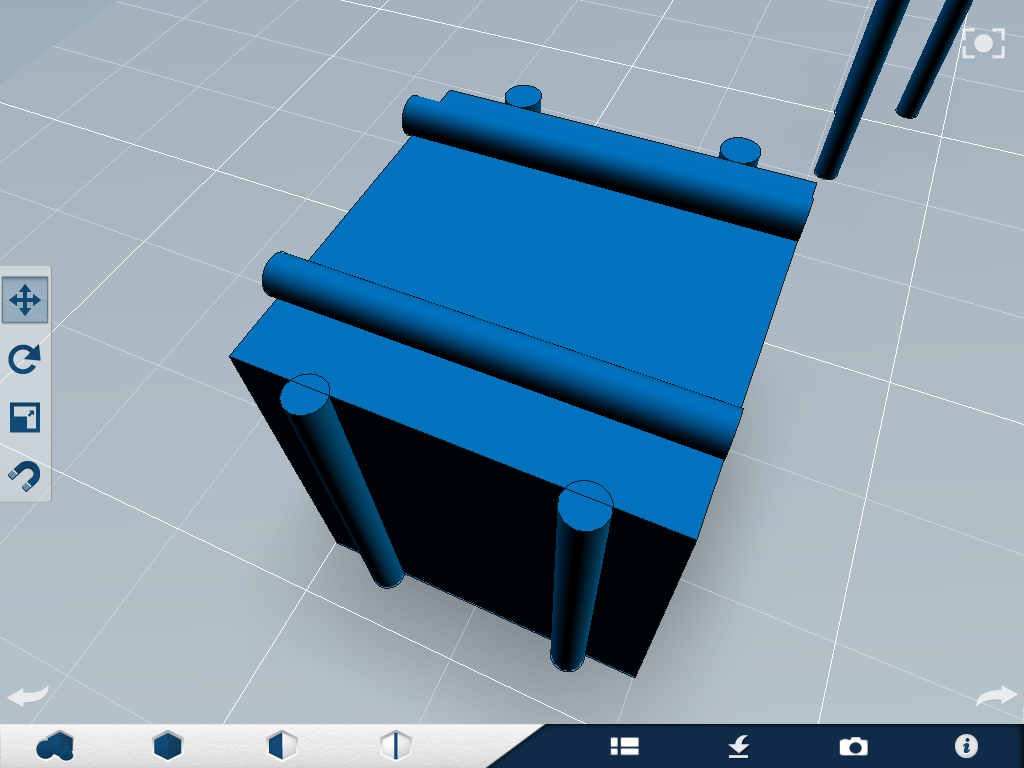
2) Follow the same steps you did for the other face. It should look like fig 2
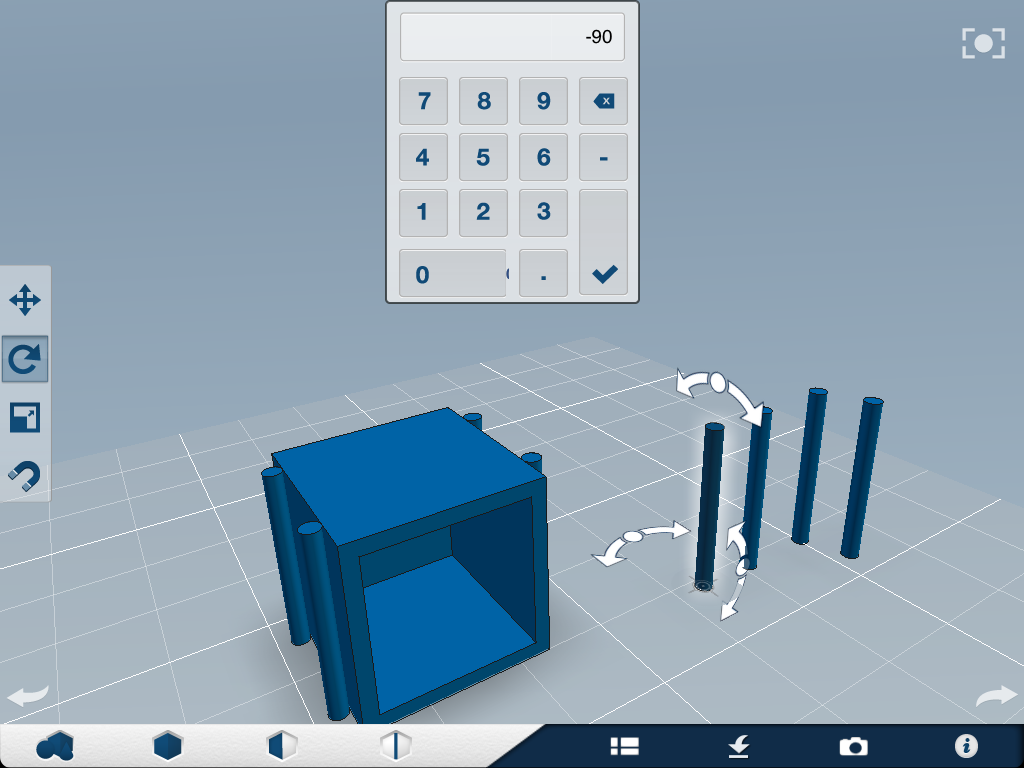
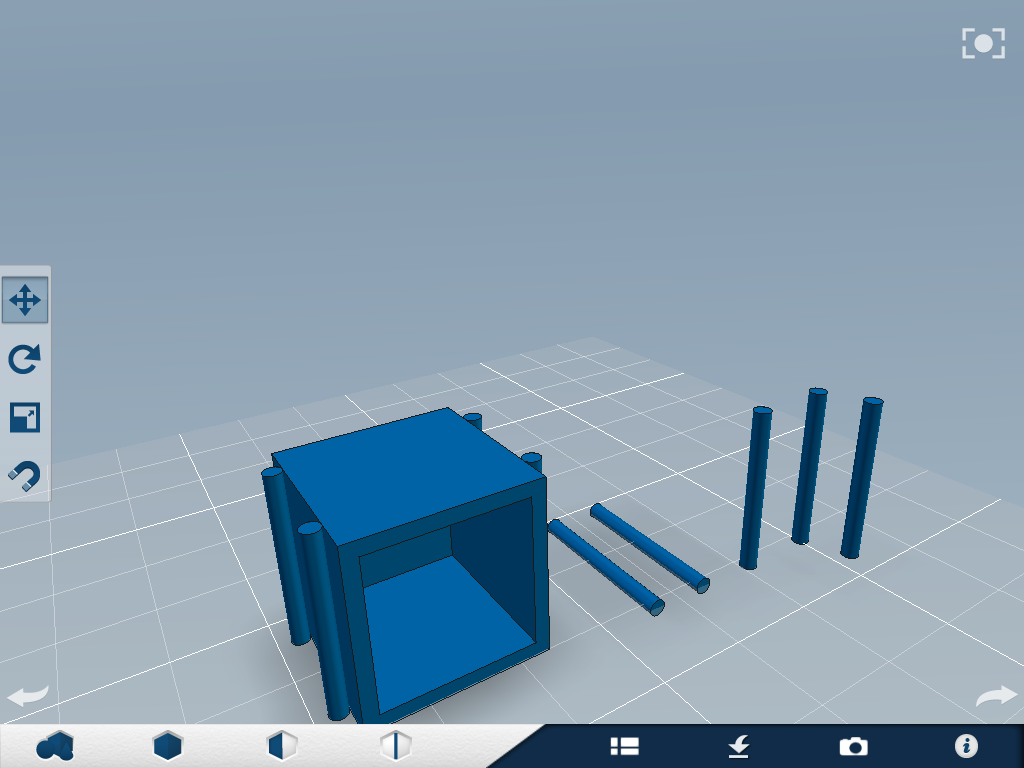
3) Select the rotate tool from the toolbar. Tap on one of your extra cylinders. Tap the rotate arrows at the top of the cylinder, enter -90 as the value. It must be oriented like in fig 5
4) Once you've rotated the cylinder, duplicate it.
5) Snap one of the cylinders to the top of the box, then move them like we did in the previous step. Use the same values. This takes some critical thinking, don't necessarily hit the arrow pointing back, hit the arrows that will put the cylinder in the appropriate place.
Attachments 3

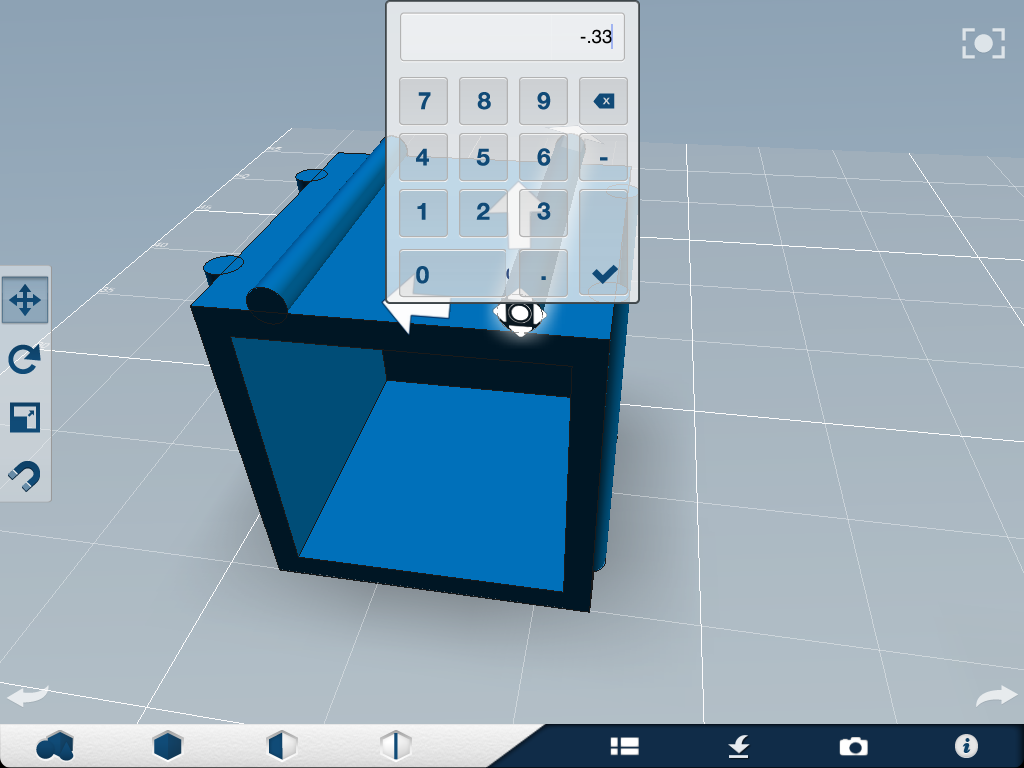
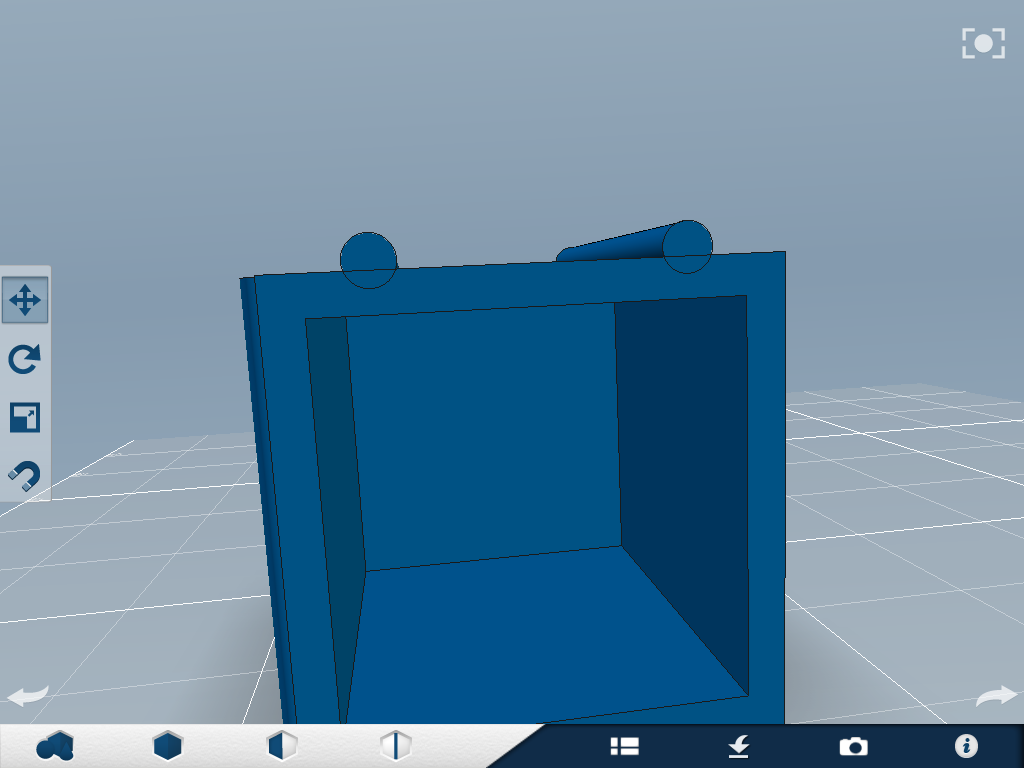
Now we are going to move the cylinders a little bit into the box. Trust me, there is a method to my madness.
1) Orient your view so you are looking at the original face we worked with, like in fig 1.
2) Select the move tool. Tap one of the cylinders. Tap the arrow pointing away from the box. Enter the value -.33 This should move the cylinder into the box a little bit, if it moves it away, undo, and enter .33 instead.
3) Repeat with the second cylinder.
4) Orient your view so you are addressing the cylinders on top of the box. Select the move tool and tap one of the cylinders.
5) Tap the arrow pointing up, enter the value .33 Again, this should move the cylinder down into the box.
6) Orient the view so you are addressing the right face.
6) Repeat with these cylinders. Follow the same steps, but this time you want the cylinders to move into the box .66 Again, use critical thinking to figure out - or + movement. You want the cylinder to move into the box, not away.
When you are done moving the cylinders into the box, you should see little lines going through them where they meet cross the edge of the box. See fig 3.
Attachments 4
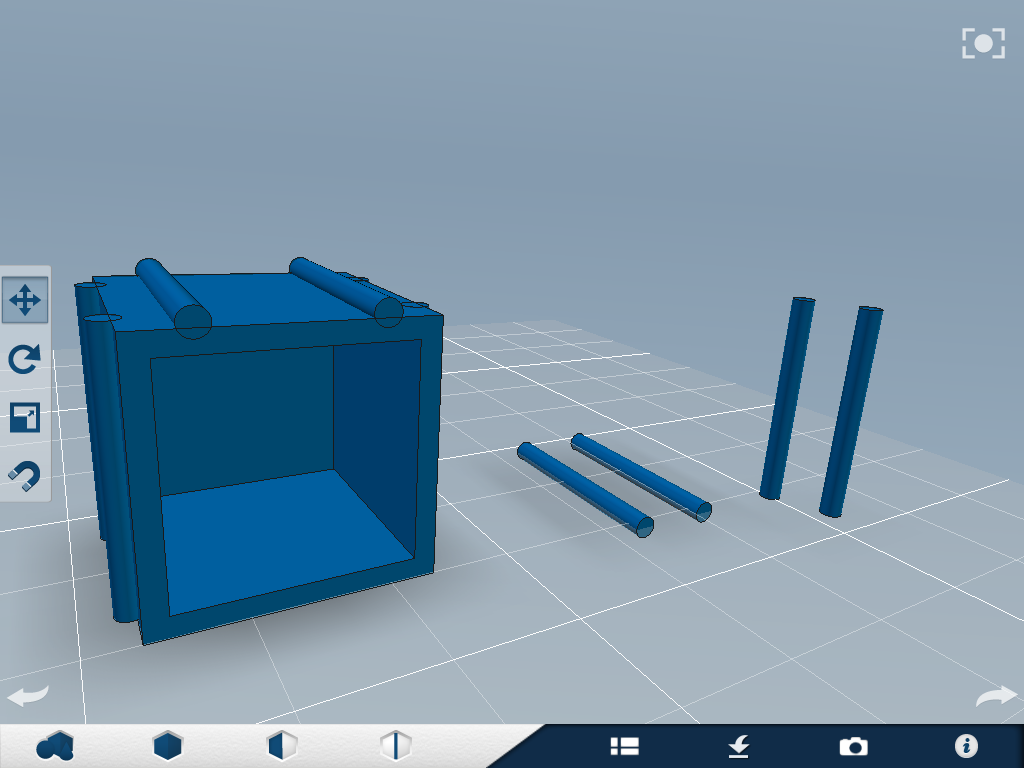
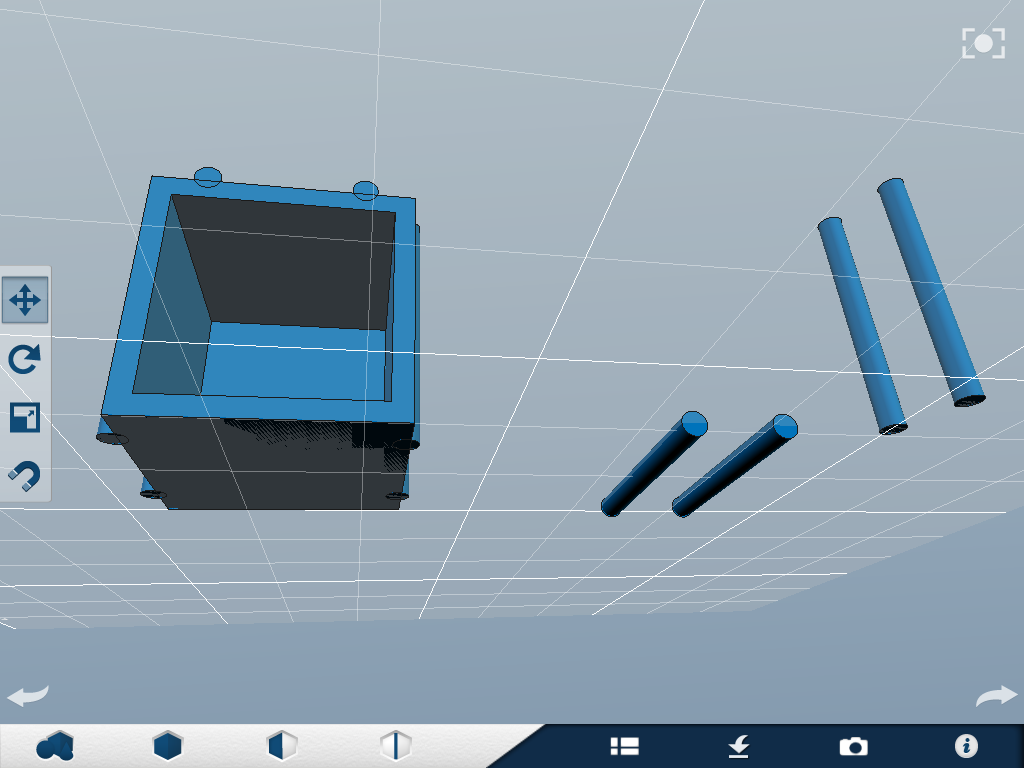
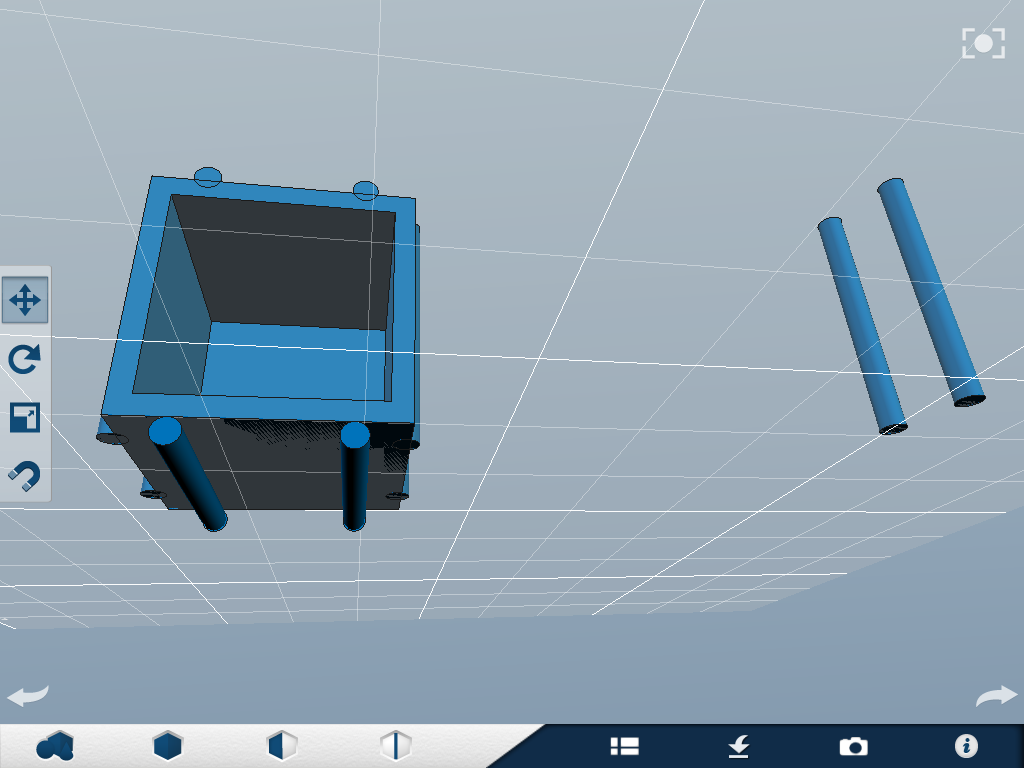
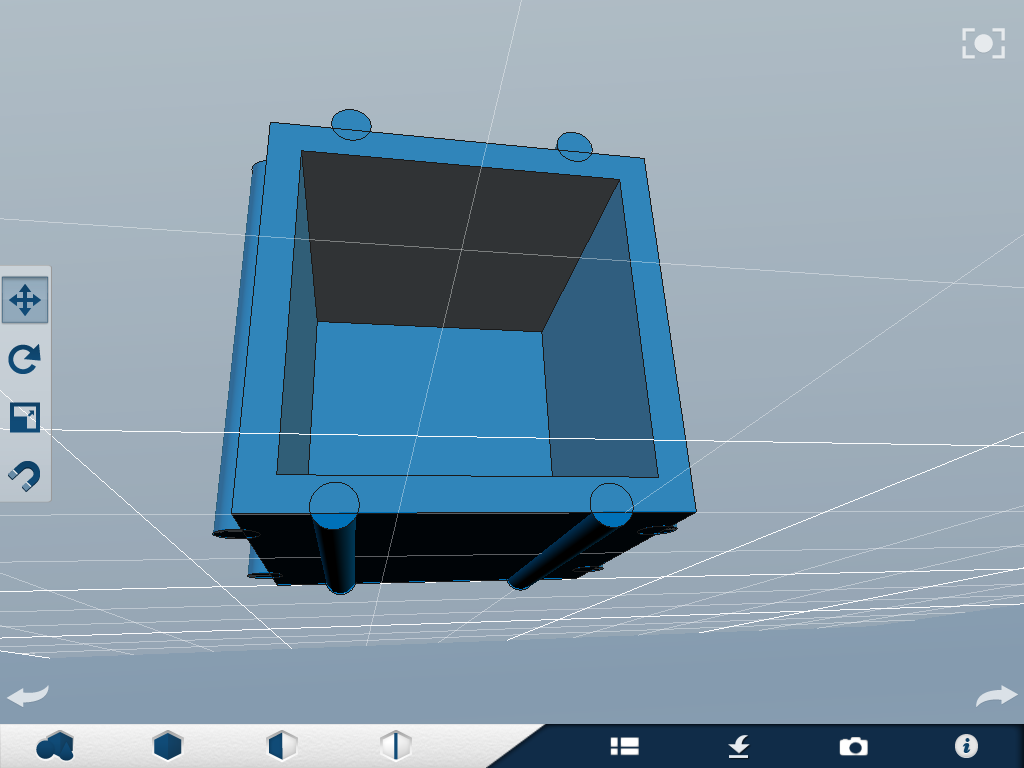
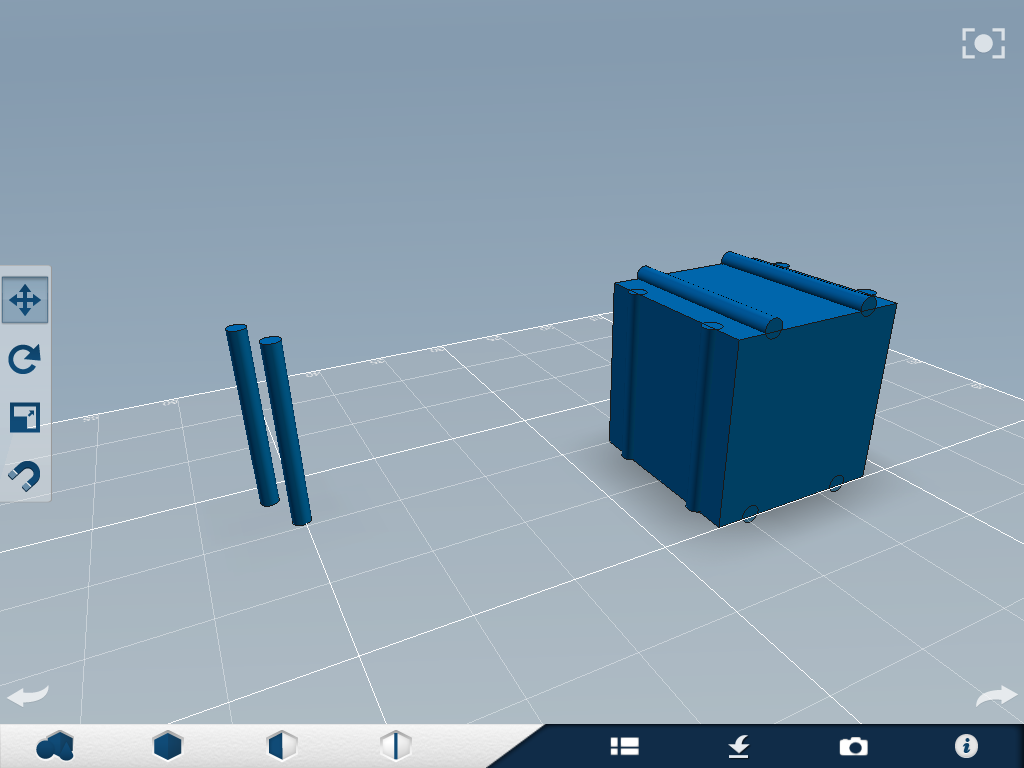
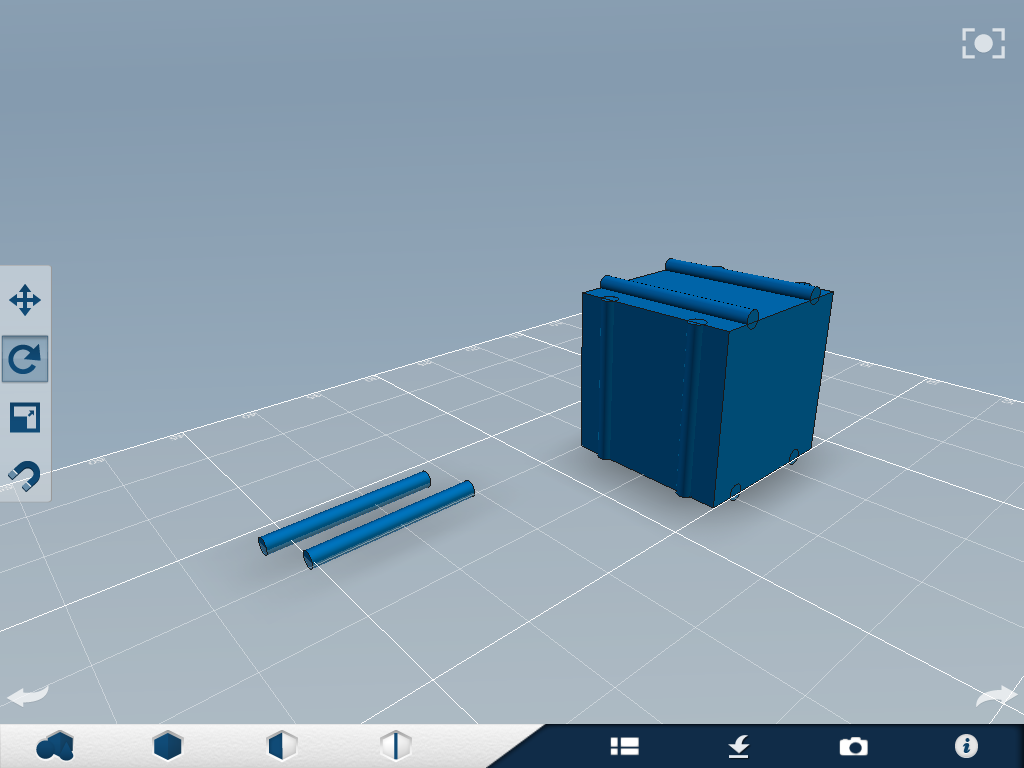
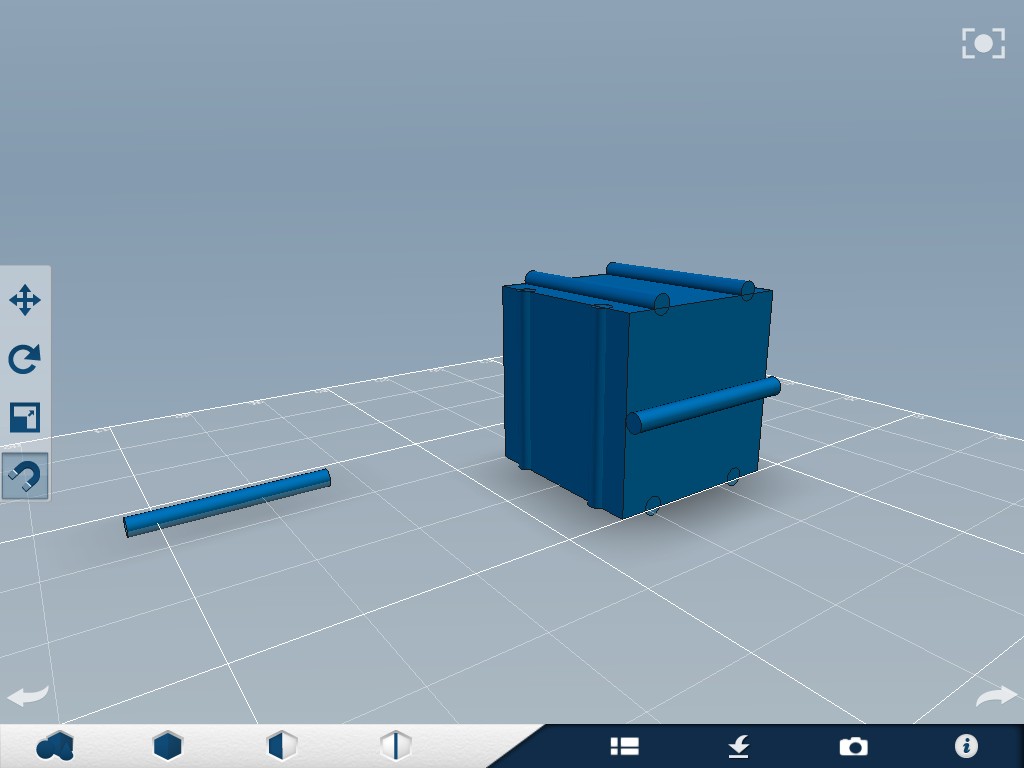
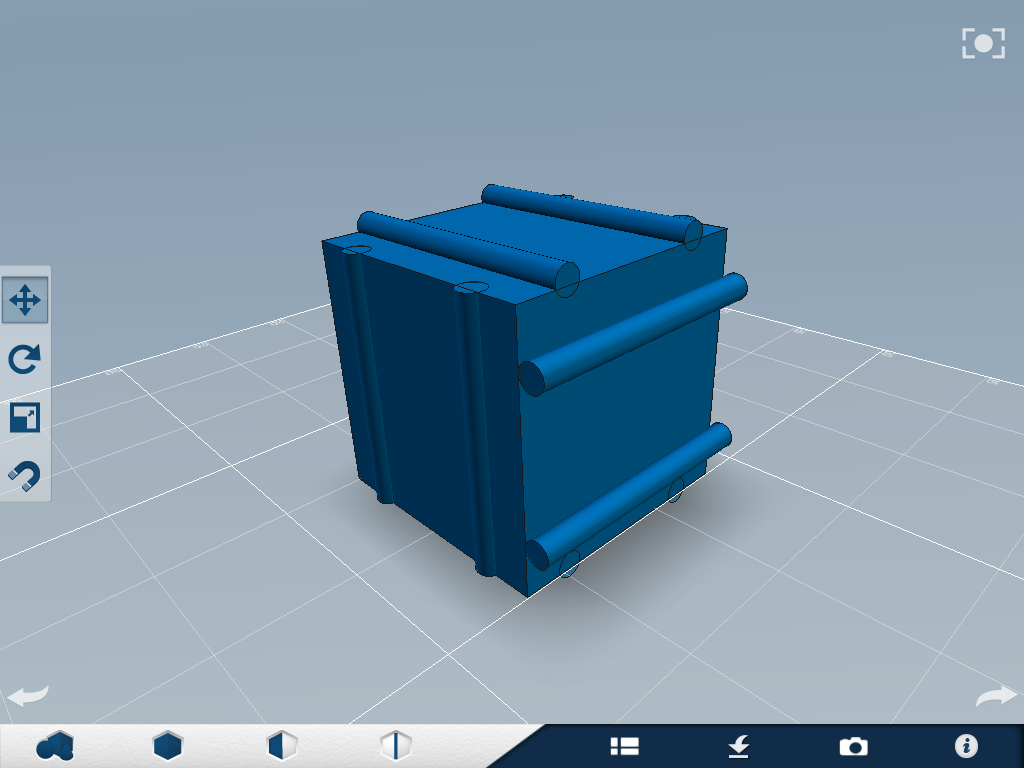
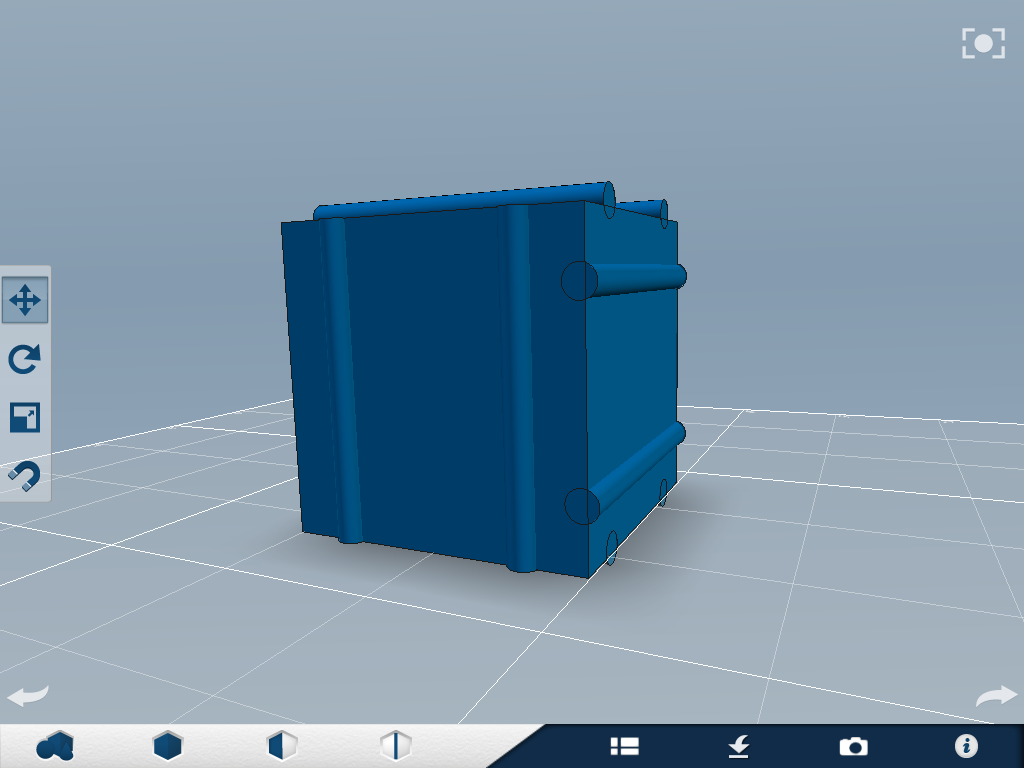
1) Rotate two cylinders so they are laying down like fig 1. Remember, duplicate more cylinders as needed so you have extra.
2) Orient your view so you are addressing the bottom of the box.
3) Snap the cylinders to the bottom (one at a time), and move them like in the previous steps. See fig 3.
4) Move the cylinders into the box .66 They should look like fig 4.
5) Orient your view so you are addressing the back of the box.
6) Rotate two cylinders so they are laying down. They should be in the direction shown in fig 6
7) Snap one of the cylinders to the back face of the box. Move it down 3.
8) Snap the other cylinder to the back face of the box. Move it up 3.
9) Move both cylinders .66 into the box. It should look like fig 9
Attachments 5
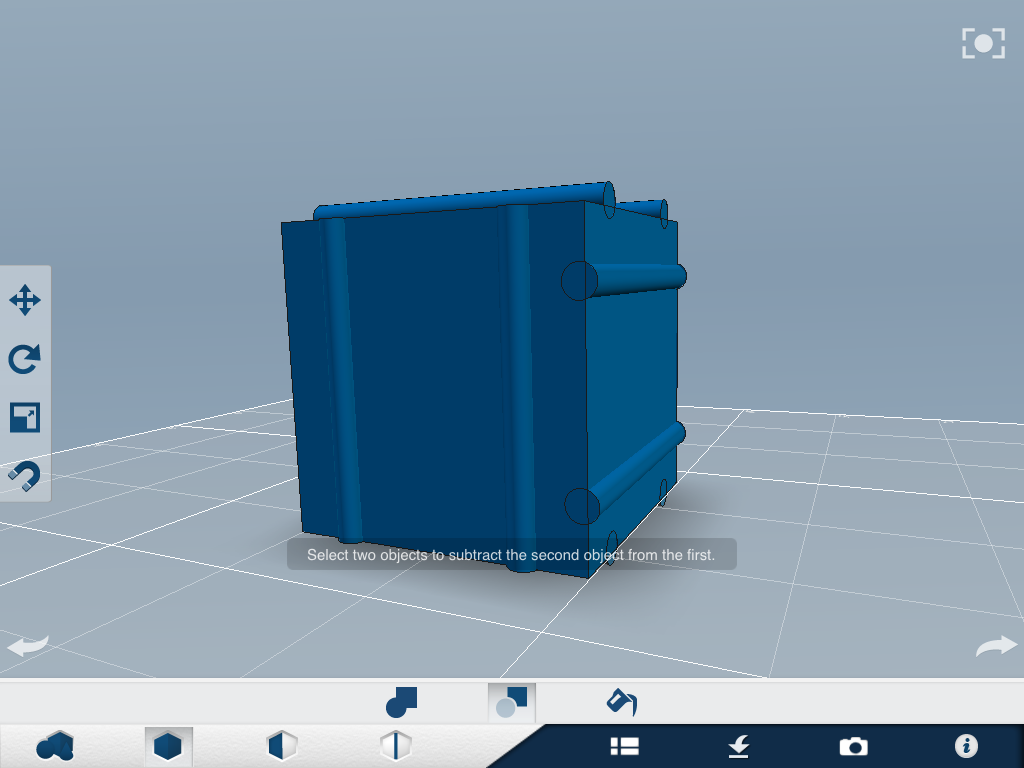
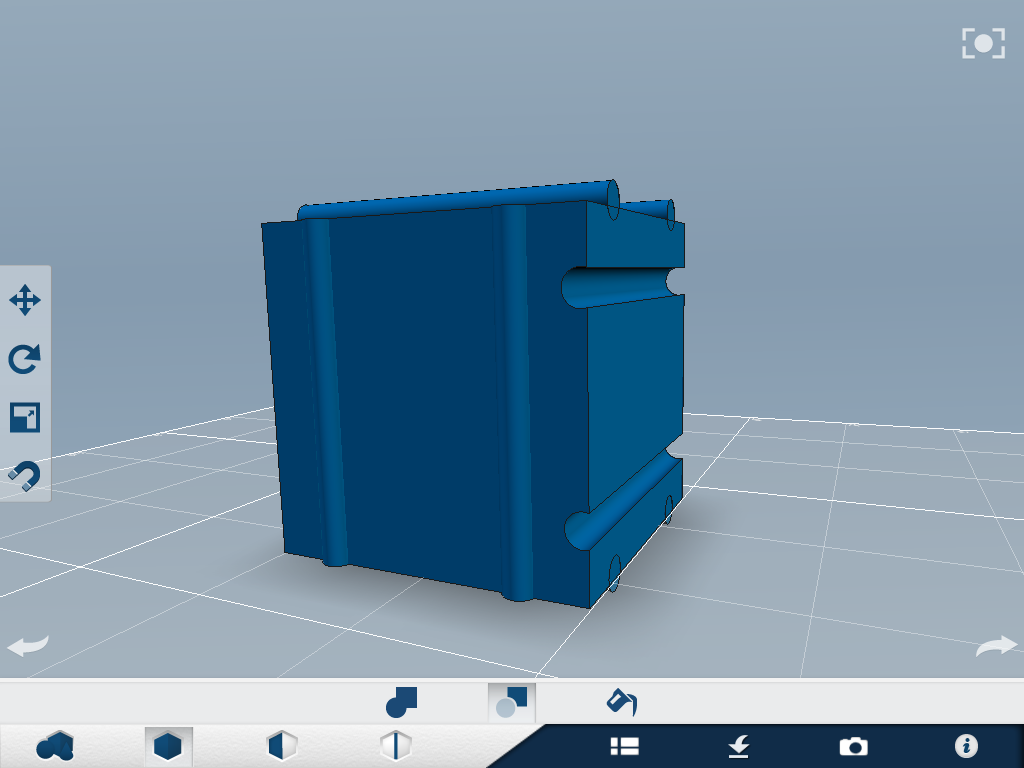
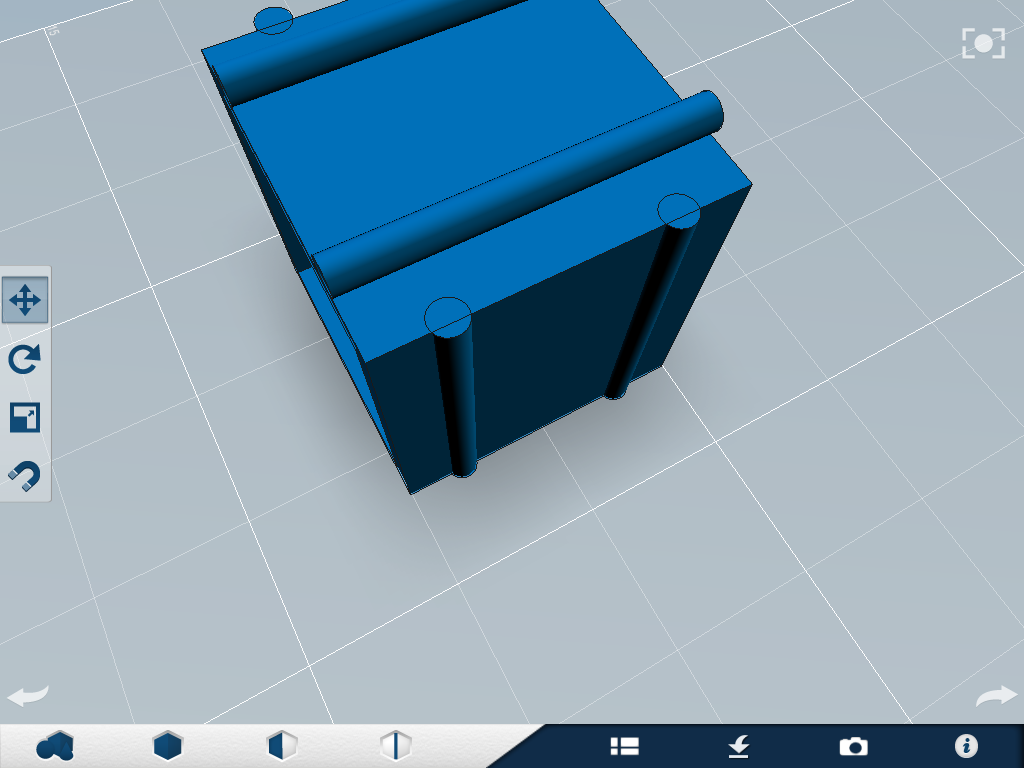
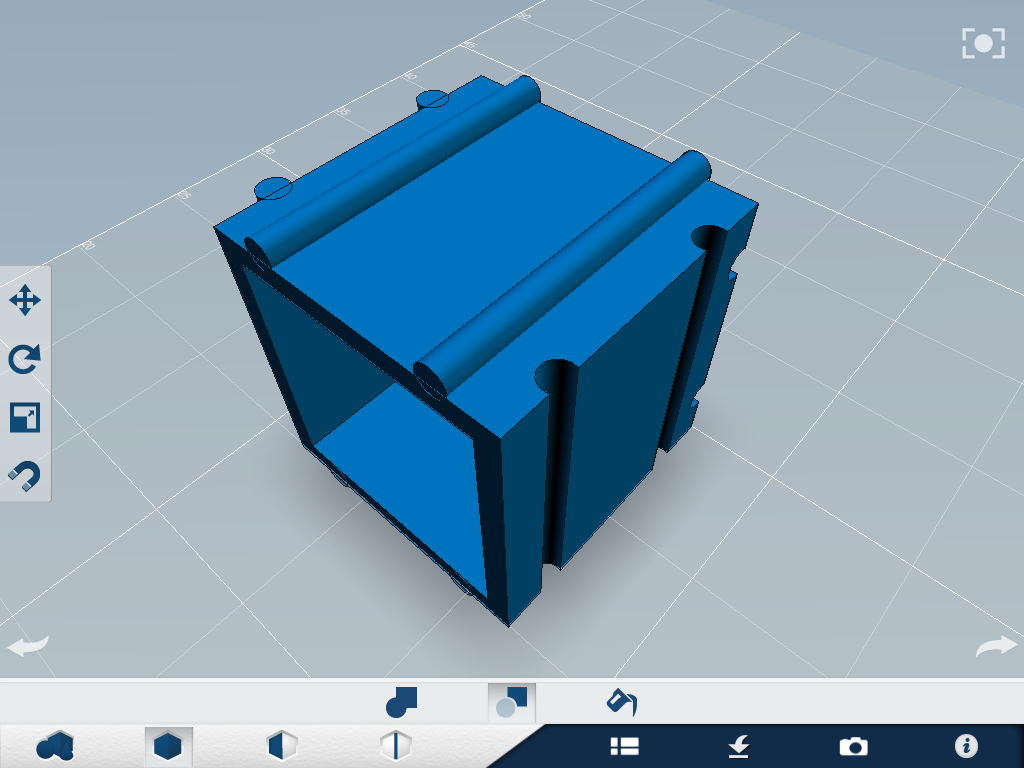

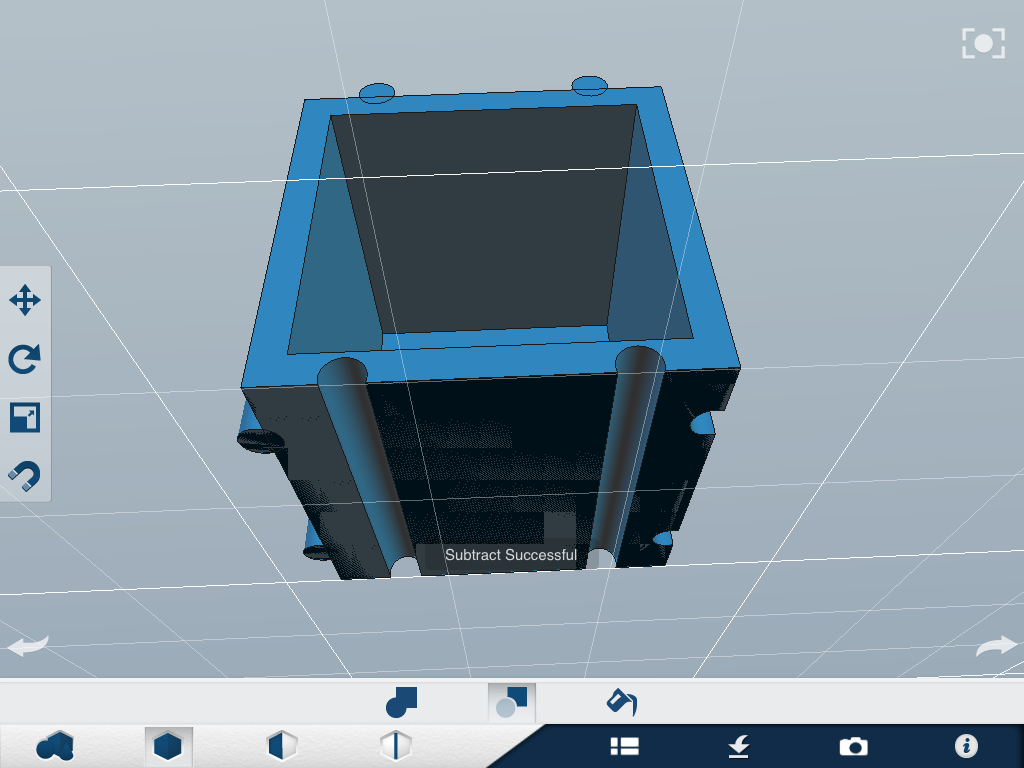
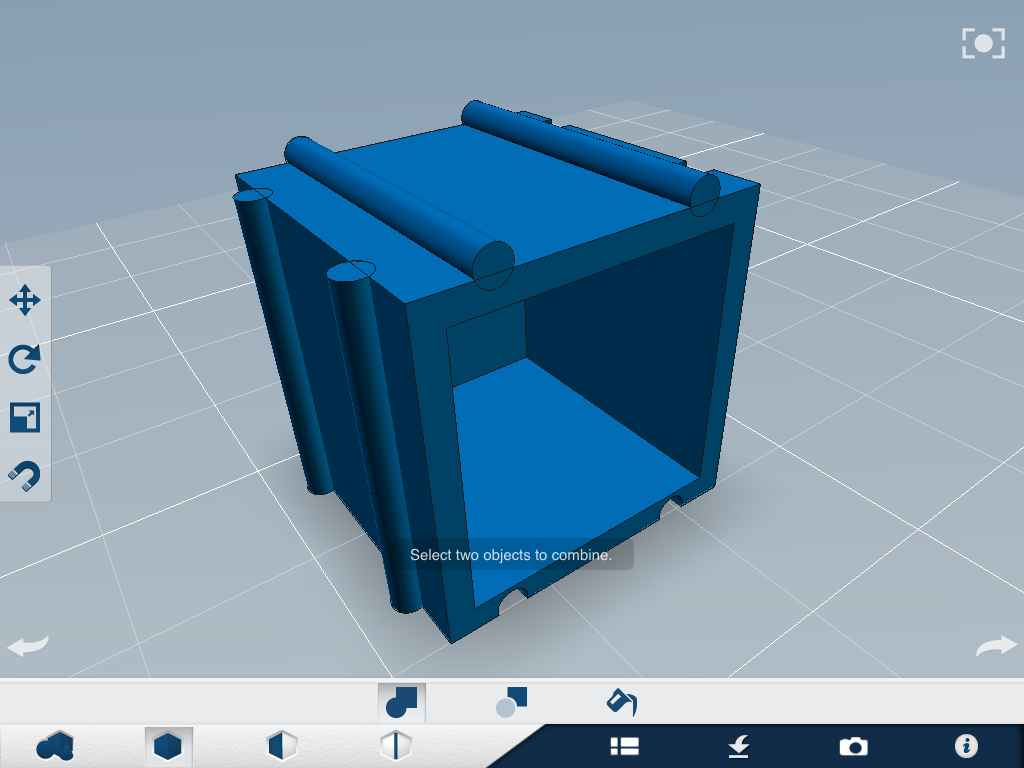
Now, we will be "subtracting" all of the cylinders we moved .66 into the box. This is a really cool feature of 123D Design. I will explain why we are doing this in a later.
1) Stay in the same orientation so you are still looking at the back. See fig 1
2) Navigate to the "subtraction" button second button from bottom>second button again (the subtraction button)
**Now, this is very important. You want to remove the two cylinders from the back of the box. When you use the subtraction tool, the second object you tap is removed**
3) So, tap any spot on the box (be sure NOT to hit a cylinder). Try to tap one of the big open areas. Then, tap one of the cylinders. You may need to zoom in to make sure you hit the cylinder.
4) Tap the box again, then the other cylinder. The box should look like fig 2
5) Orient your view so you are looking at the right face (face on right side of hole) fig 3
6) Remove these two cylinders. Should look like fig 4
7) Orient your view so you are looking at the bottom of the box fig 5
8) Remove the two cylinders from the bottom. Should look like fig 6
You have now finished creating the attachment devices. But, as you can see, we still have those little lines through the remaining cylinders. See fig 7 This means that the box and the attachment devices are still separate objects. We want it to be one solid object like it would be in the real world. We'll resolve this in the next step.
Cleaning Up


We are now going to make the attachment devices and the box one object.
1) Tap the "combine" button second button>first button (combine tool)
2) Tap the a cylinder then the box. It doesn't matter which you tap first, though. The lines should disappear from that cylinder. Repeat with all the cylinders. It should look like fig 2
1) Tap the "combine" button second button>first button (combine tool)
2) Tap the a cylinder then the box. It doesn't matter which you tap first, though. The lines should disappear from that cylinder. Repeat with all the cylinders. It should look like fig 2
Complete
![IMG_1467[1].PNG](/proxy/?url=https://content.instructables.com/FBO/DRA7/HKBFBOIP/FBODRA7HKBFBOIP.png&filename=IMG_1467[1].PNG)

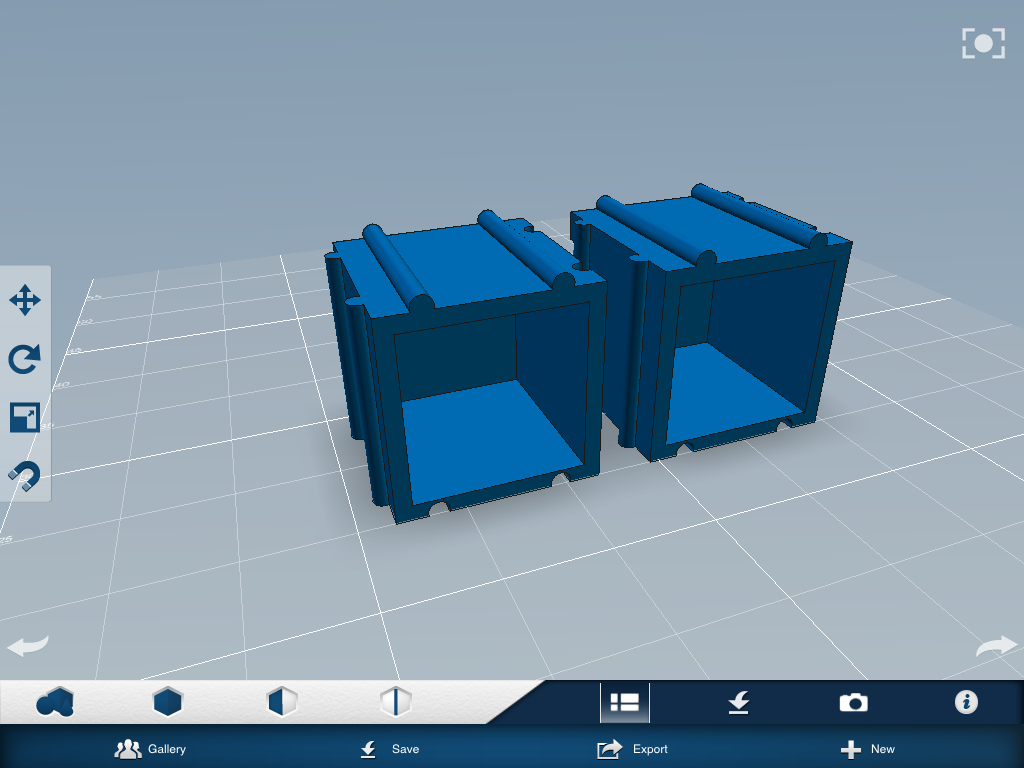
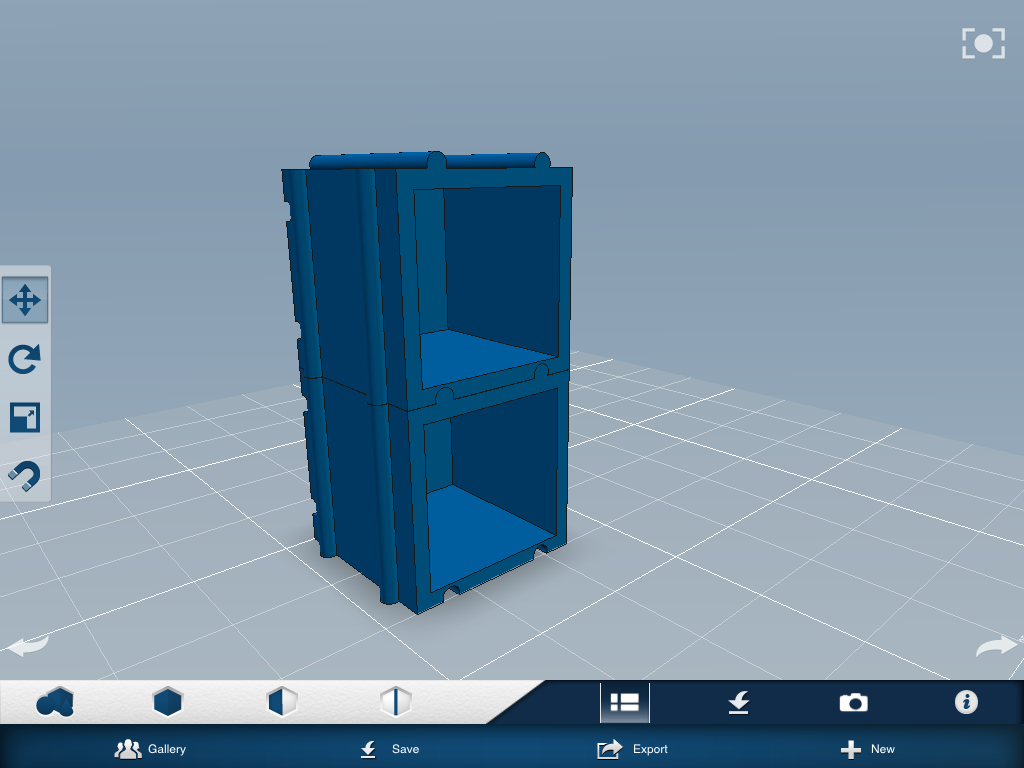
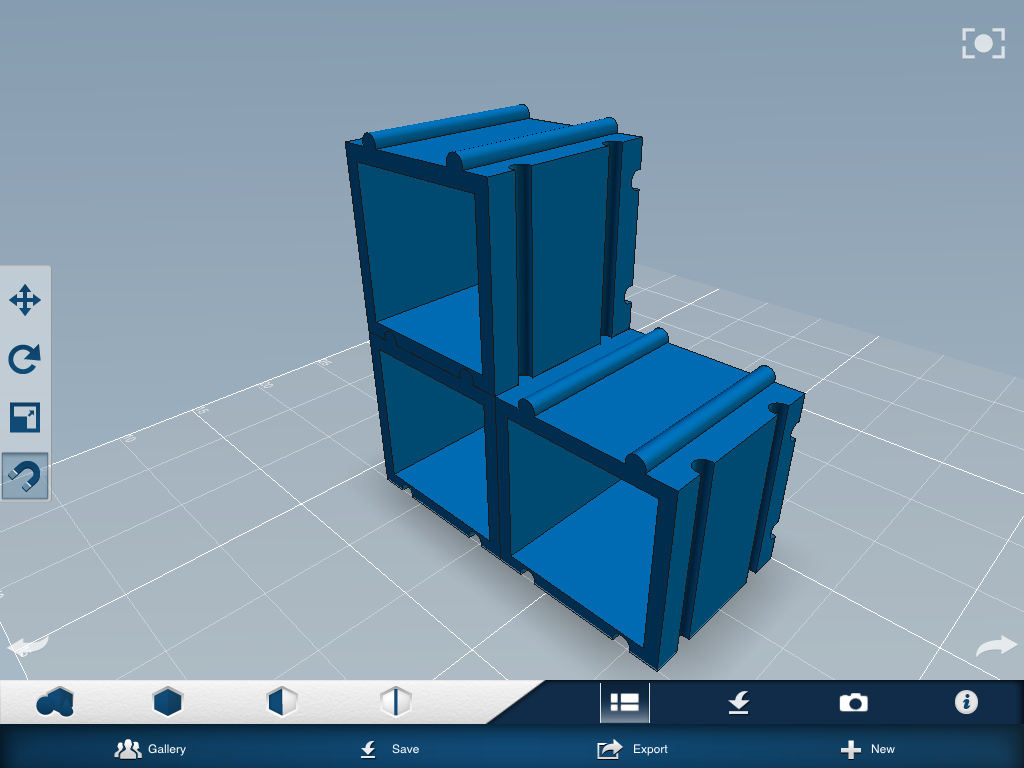
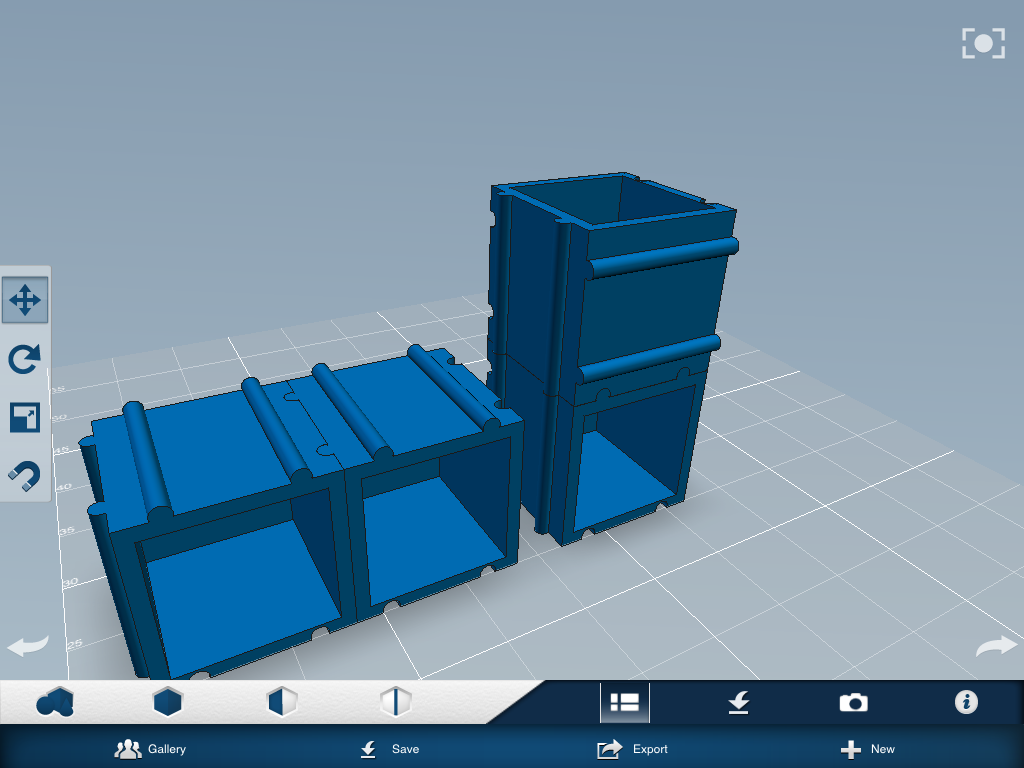

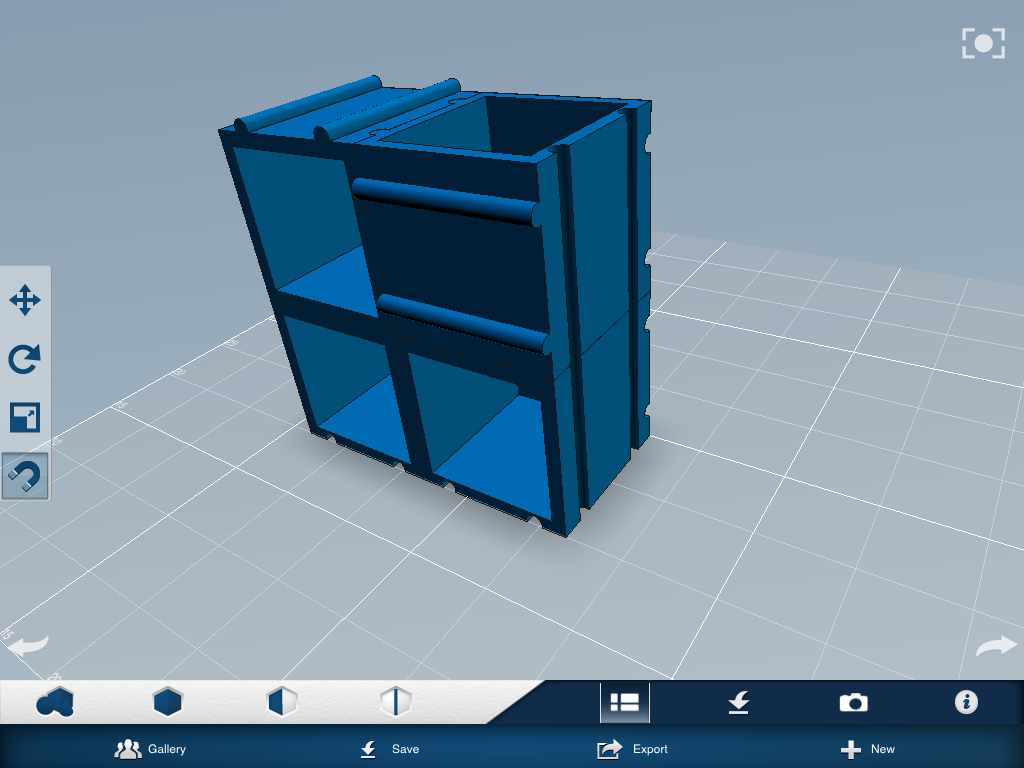
You have now completed the container!
Attachments explanation A greater half of the circle is now subtracted from the box on some faces, and added on others. .66 of the circle is poking out because we put .33 of it into the edge of the box. Now, the .66 sticking out will slide into the .66 that was removed from some edges. The attachment system will hold them in place, even if you lift it up. I know this is a terrible explanation, it is hard to put it into words. I am sure some engineer on Instructables could explain it in technical terms.
You can duplicate the containers and use the snap tool to put them together. I suggest snapping the flat faces. You will have to do some fancy rotating to get this to work. It is way easier to do in real life! I have included the .stl file in case some of you are too lazy to create this yourself. You can also 3D print the model you made, or the one I have included. Naturally, you need to print at least two in order to actually use the attachments.
Edit the .stl to make it whatever size you want.
I hope you enjoyed this Instructable, received satisfaction for your hard work, and can actually print it! If you don't have access to your own through school, work, or friends, you could always pay to have them printed.
***Please vote for this in the Autodesk 123D Design Challenge if you feel I created a worthy Instructable and met the competition requiremnts :) ***
Cheers,
Darman
Downloads
Possible Uses
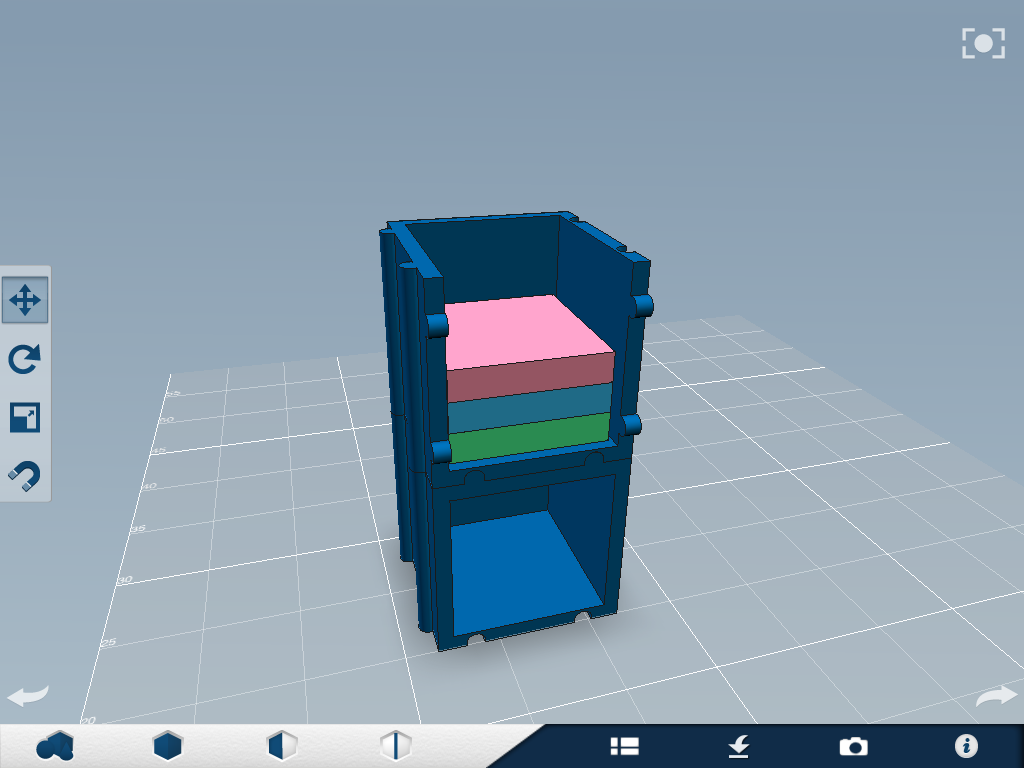
This is a list of uses for the organization system. I will continue adding more.
- organize office supplies
- parts/bits organizer
- place to put parts while tearing down electronics
- knickknack shelving
- Lego bricks organizer (for small pieces such as studs)
- candy holder (so your kids can sneak candy from your desk)
- emergency water source (just in case your documents spontaneously combust)
- sticky notes dispenser (you can even remove part of a wall to make them easier to grab)
- holder for small tools such as mini screwdrivers, Alan wrenches, pliers, etc
- paintbrush/paint holder
- flash drive holder
- place to put keys
- change "jar"
- and others that you can think of
Keep in mind, because of the way I have designed this system, it can be used for multiple uses at once. Even at the same time!