Modify a Mini-B USB Cable to Power an Enclosed GoPro Hero3 (With Skeleton Back Door)
by zplus in Circuits > Cameras
258494 Views, 213 Favorites, 0 Comments
Modify a Mini-B USB Cable to Power an Enclosed GoPro Hero3 (With Skeleton Back Door)
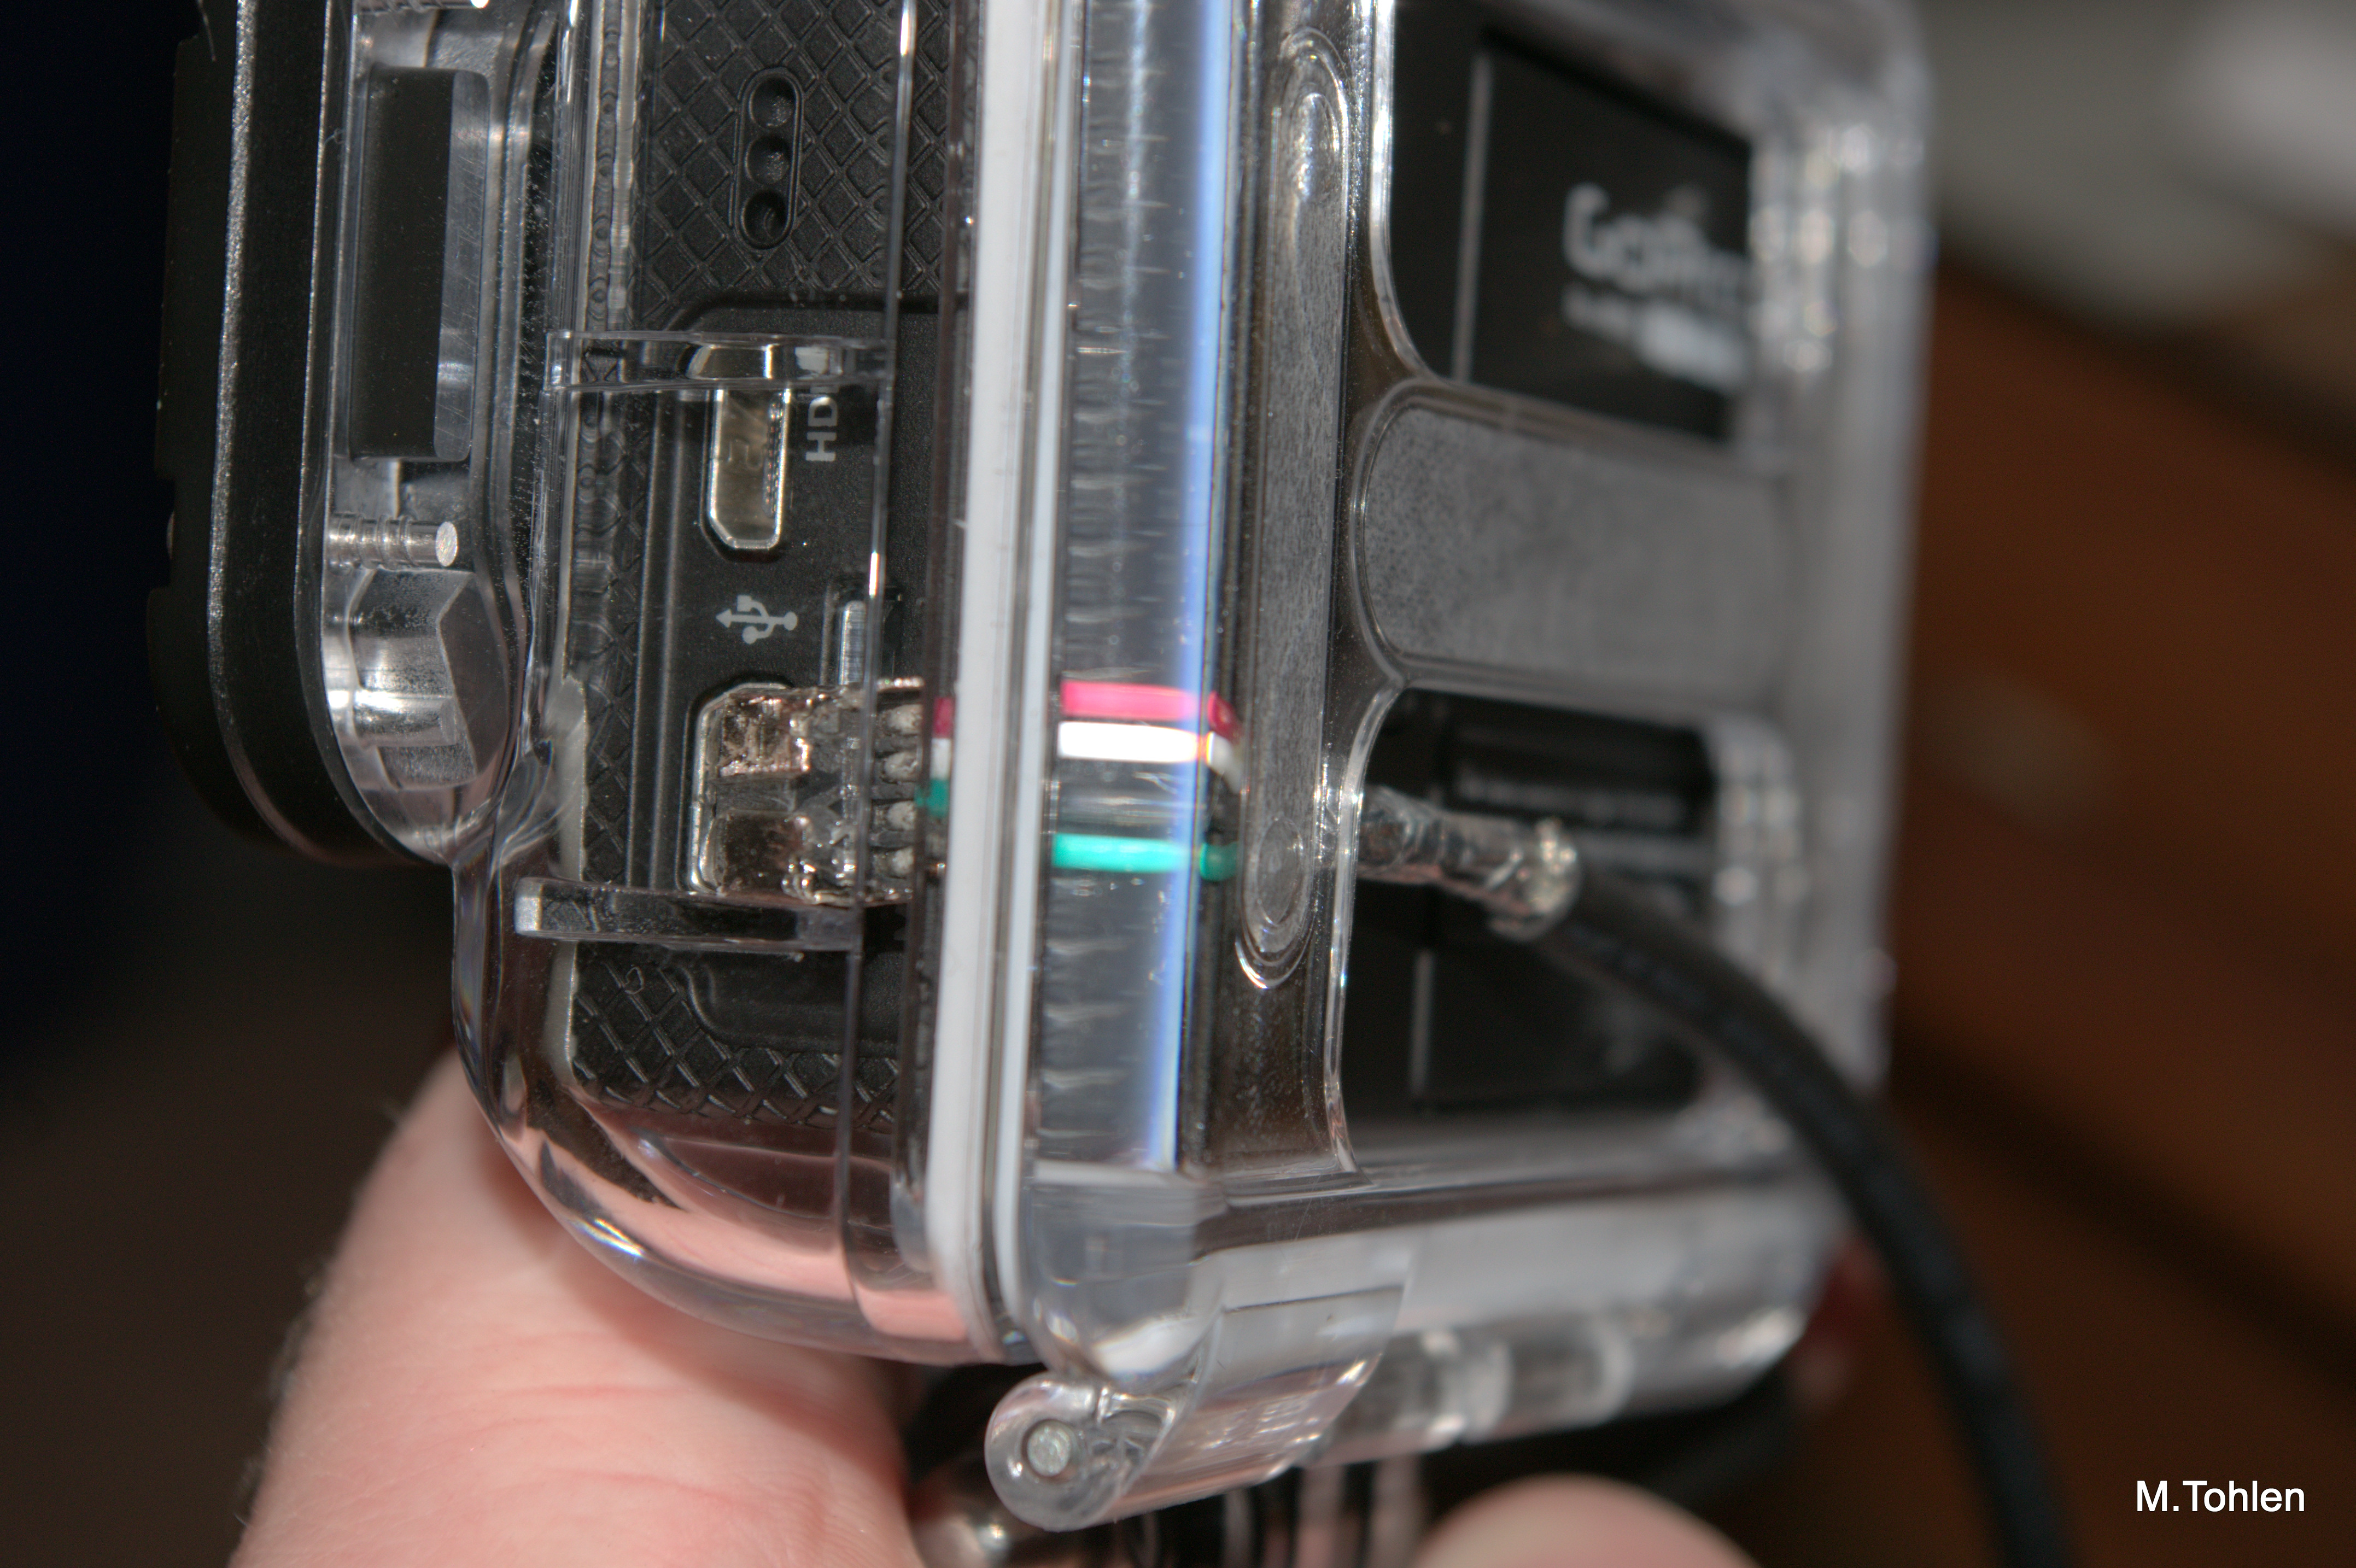
I got my GoPro Hero3 for Christmas, it is a fantastic camera. However, the battery life leaves something to be desired. Sure, you can buy a bunch of spare batteries and change them out periodically, but if you are taking a time lapse - you really do not want to move the camera.
Enter: The Frame
This is GoPro's answer to this problem. Now you can shoot while being connected to an external power source. But, wait, $40 for a piece of flimsy plastic (to be fair, TWO pieces of plastic!) with a few holes in the side? No Thanks.
I really wanted this capability, but didn't want to spend a lot of money or sacrifice the poly case by drilling a hole in the side.
Enter: Modify a Mini-B USB Cable to Power an Enclosed GoPro Hero3 (With Skeleton Back Door) (This Instructable)
Disclaimer: Perform this at your own risk, I take no responsibility for your actions and assume you have some competency. With that being said, this instructable is merely a cable modification, I do not modify the camera or case.
Parts/Tools
You will need:
Parts-
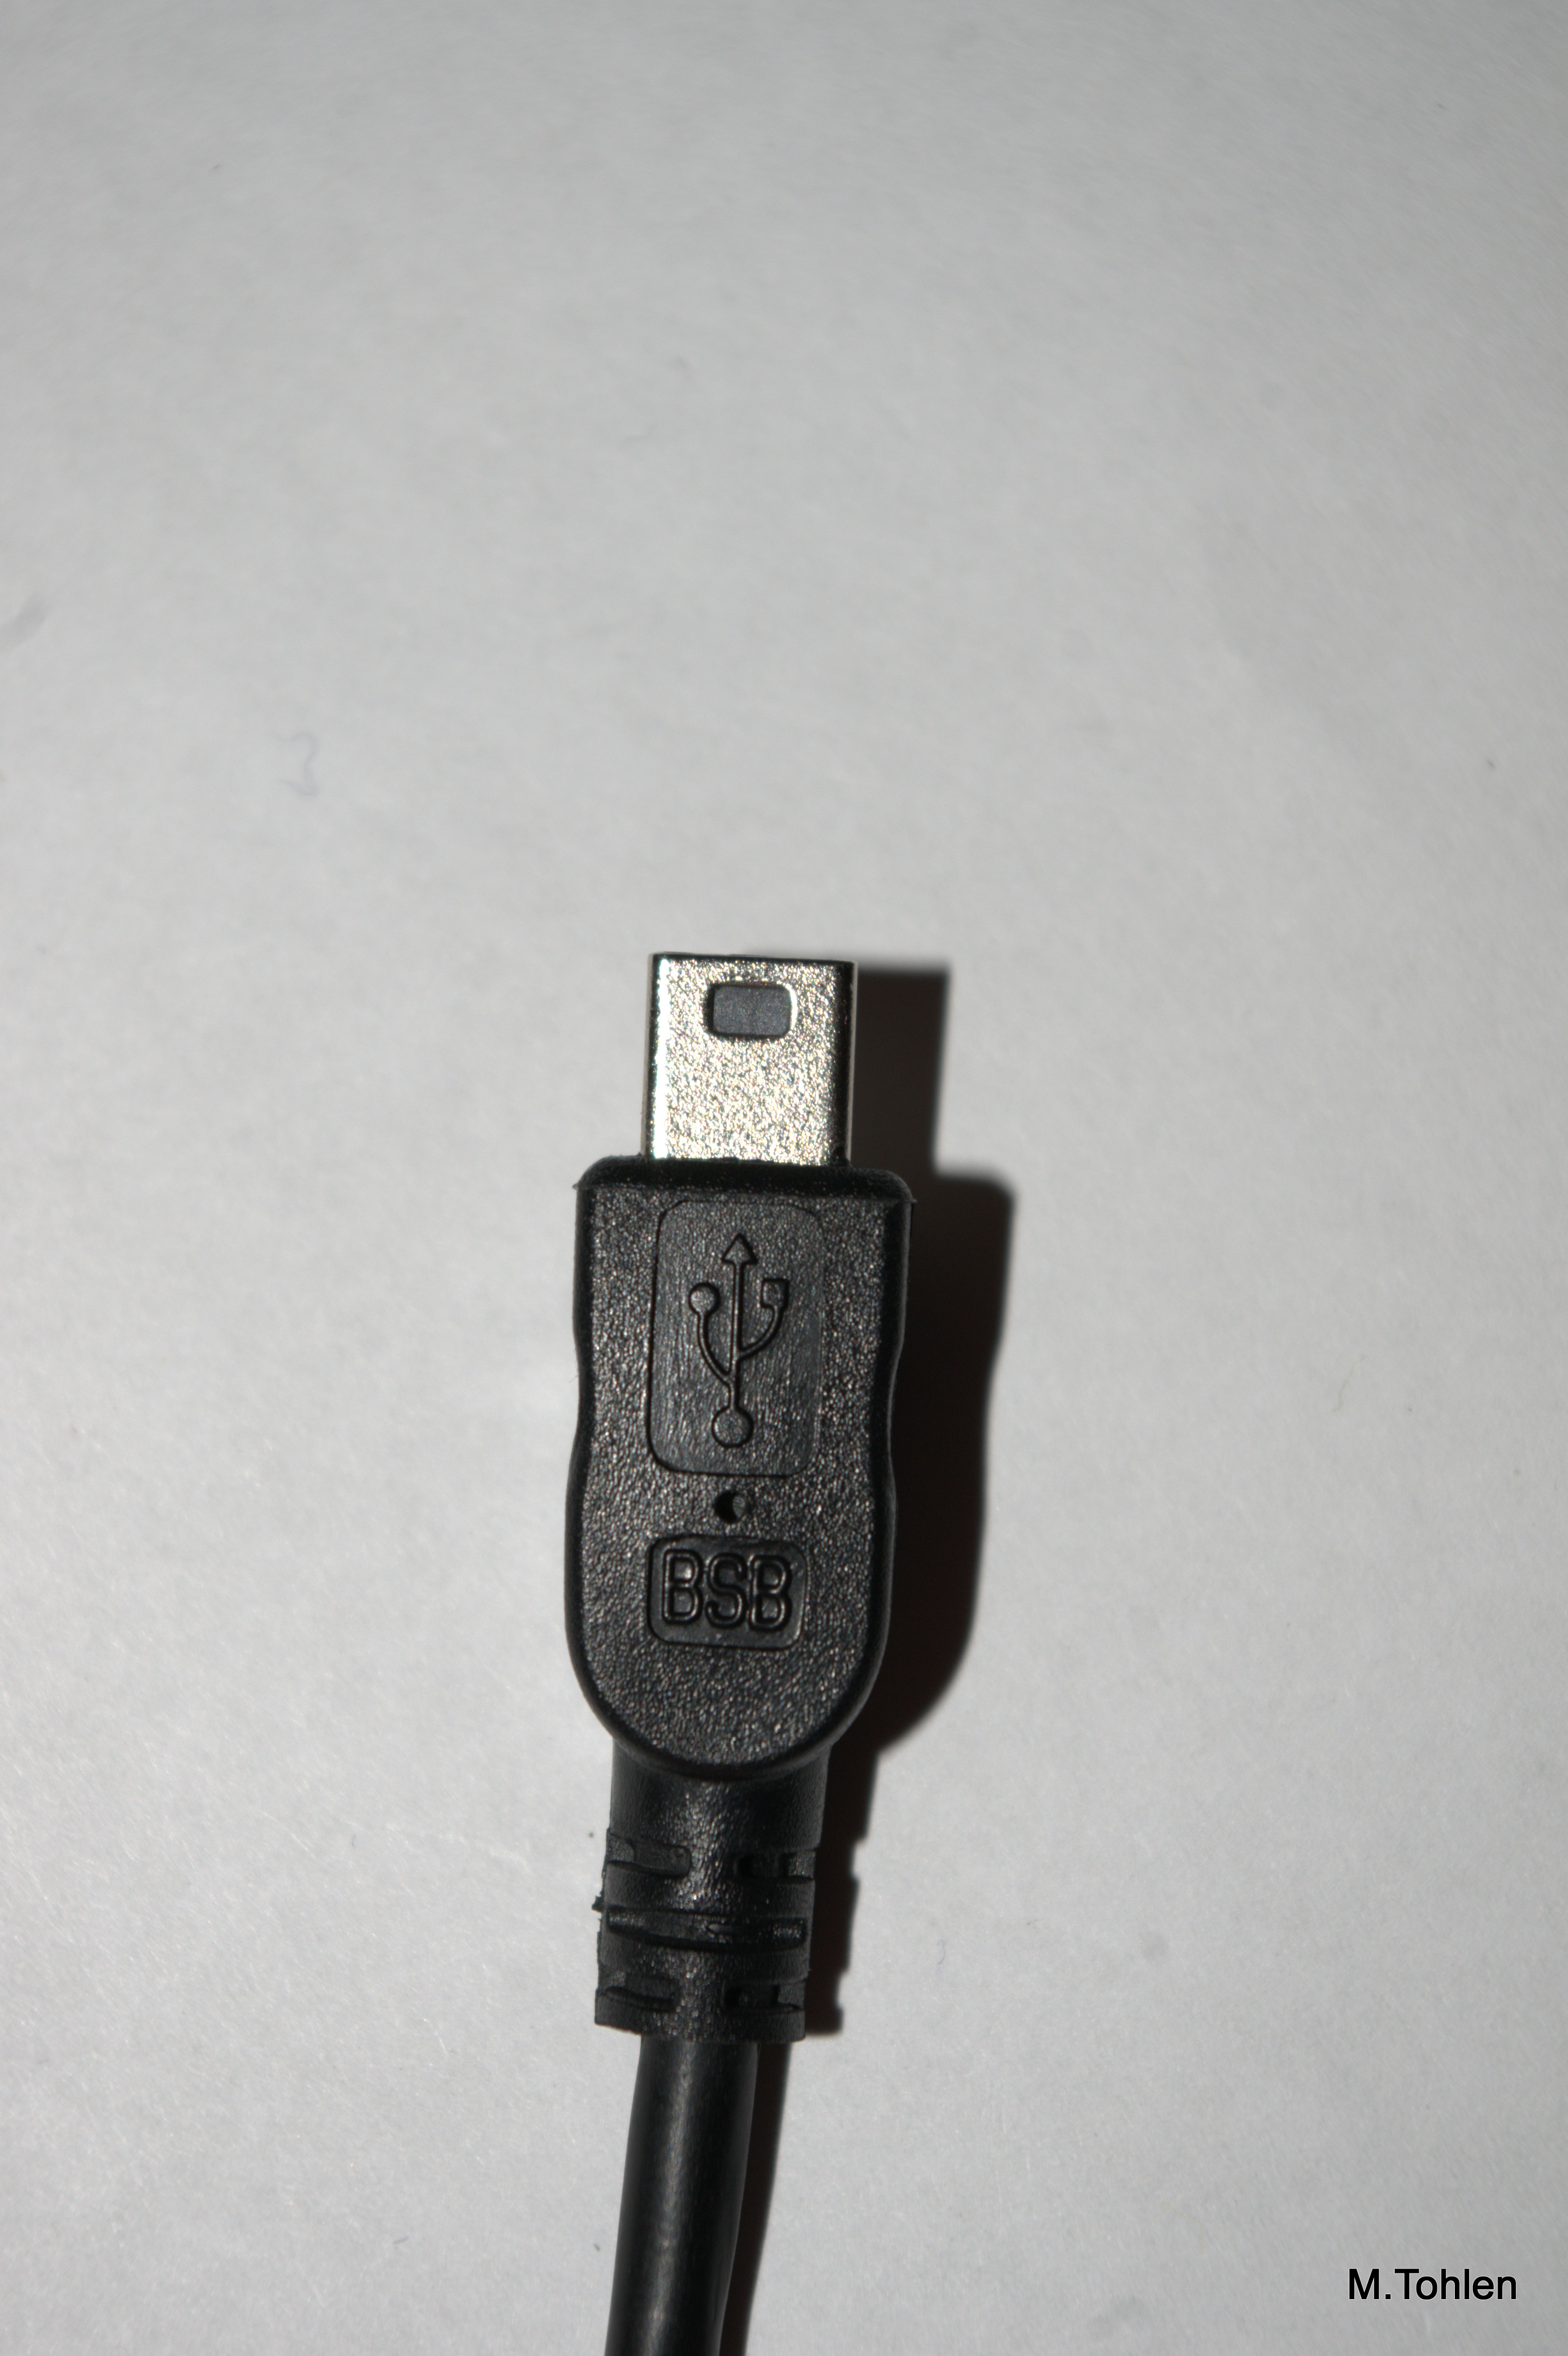
-A Mini-B USB cable of your desired length. I found an old 3-footer in my spare cables tub. I might suggest not using the one included with your GoPro (just in case...). Note: I have a Hero3 Black Edition which uses a Mini-B. I do not know what the Hero2 (or whatever) uses. Also, of course, your cable design may be slightly different.
-Glue...? I used some, it may not be needed though...
Tools-
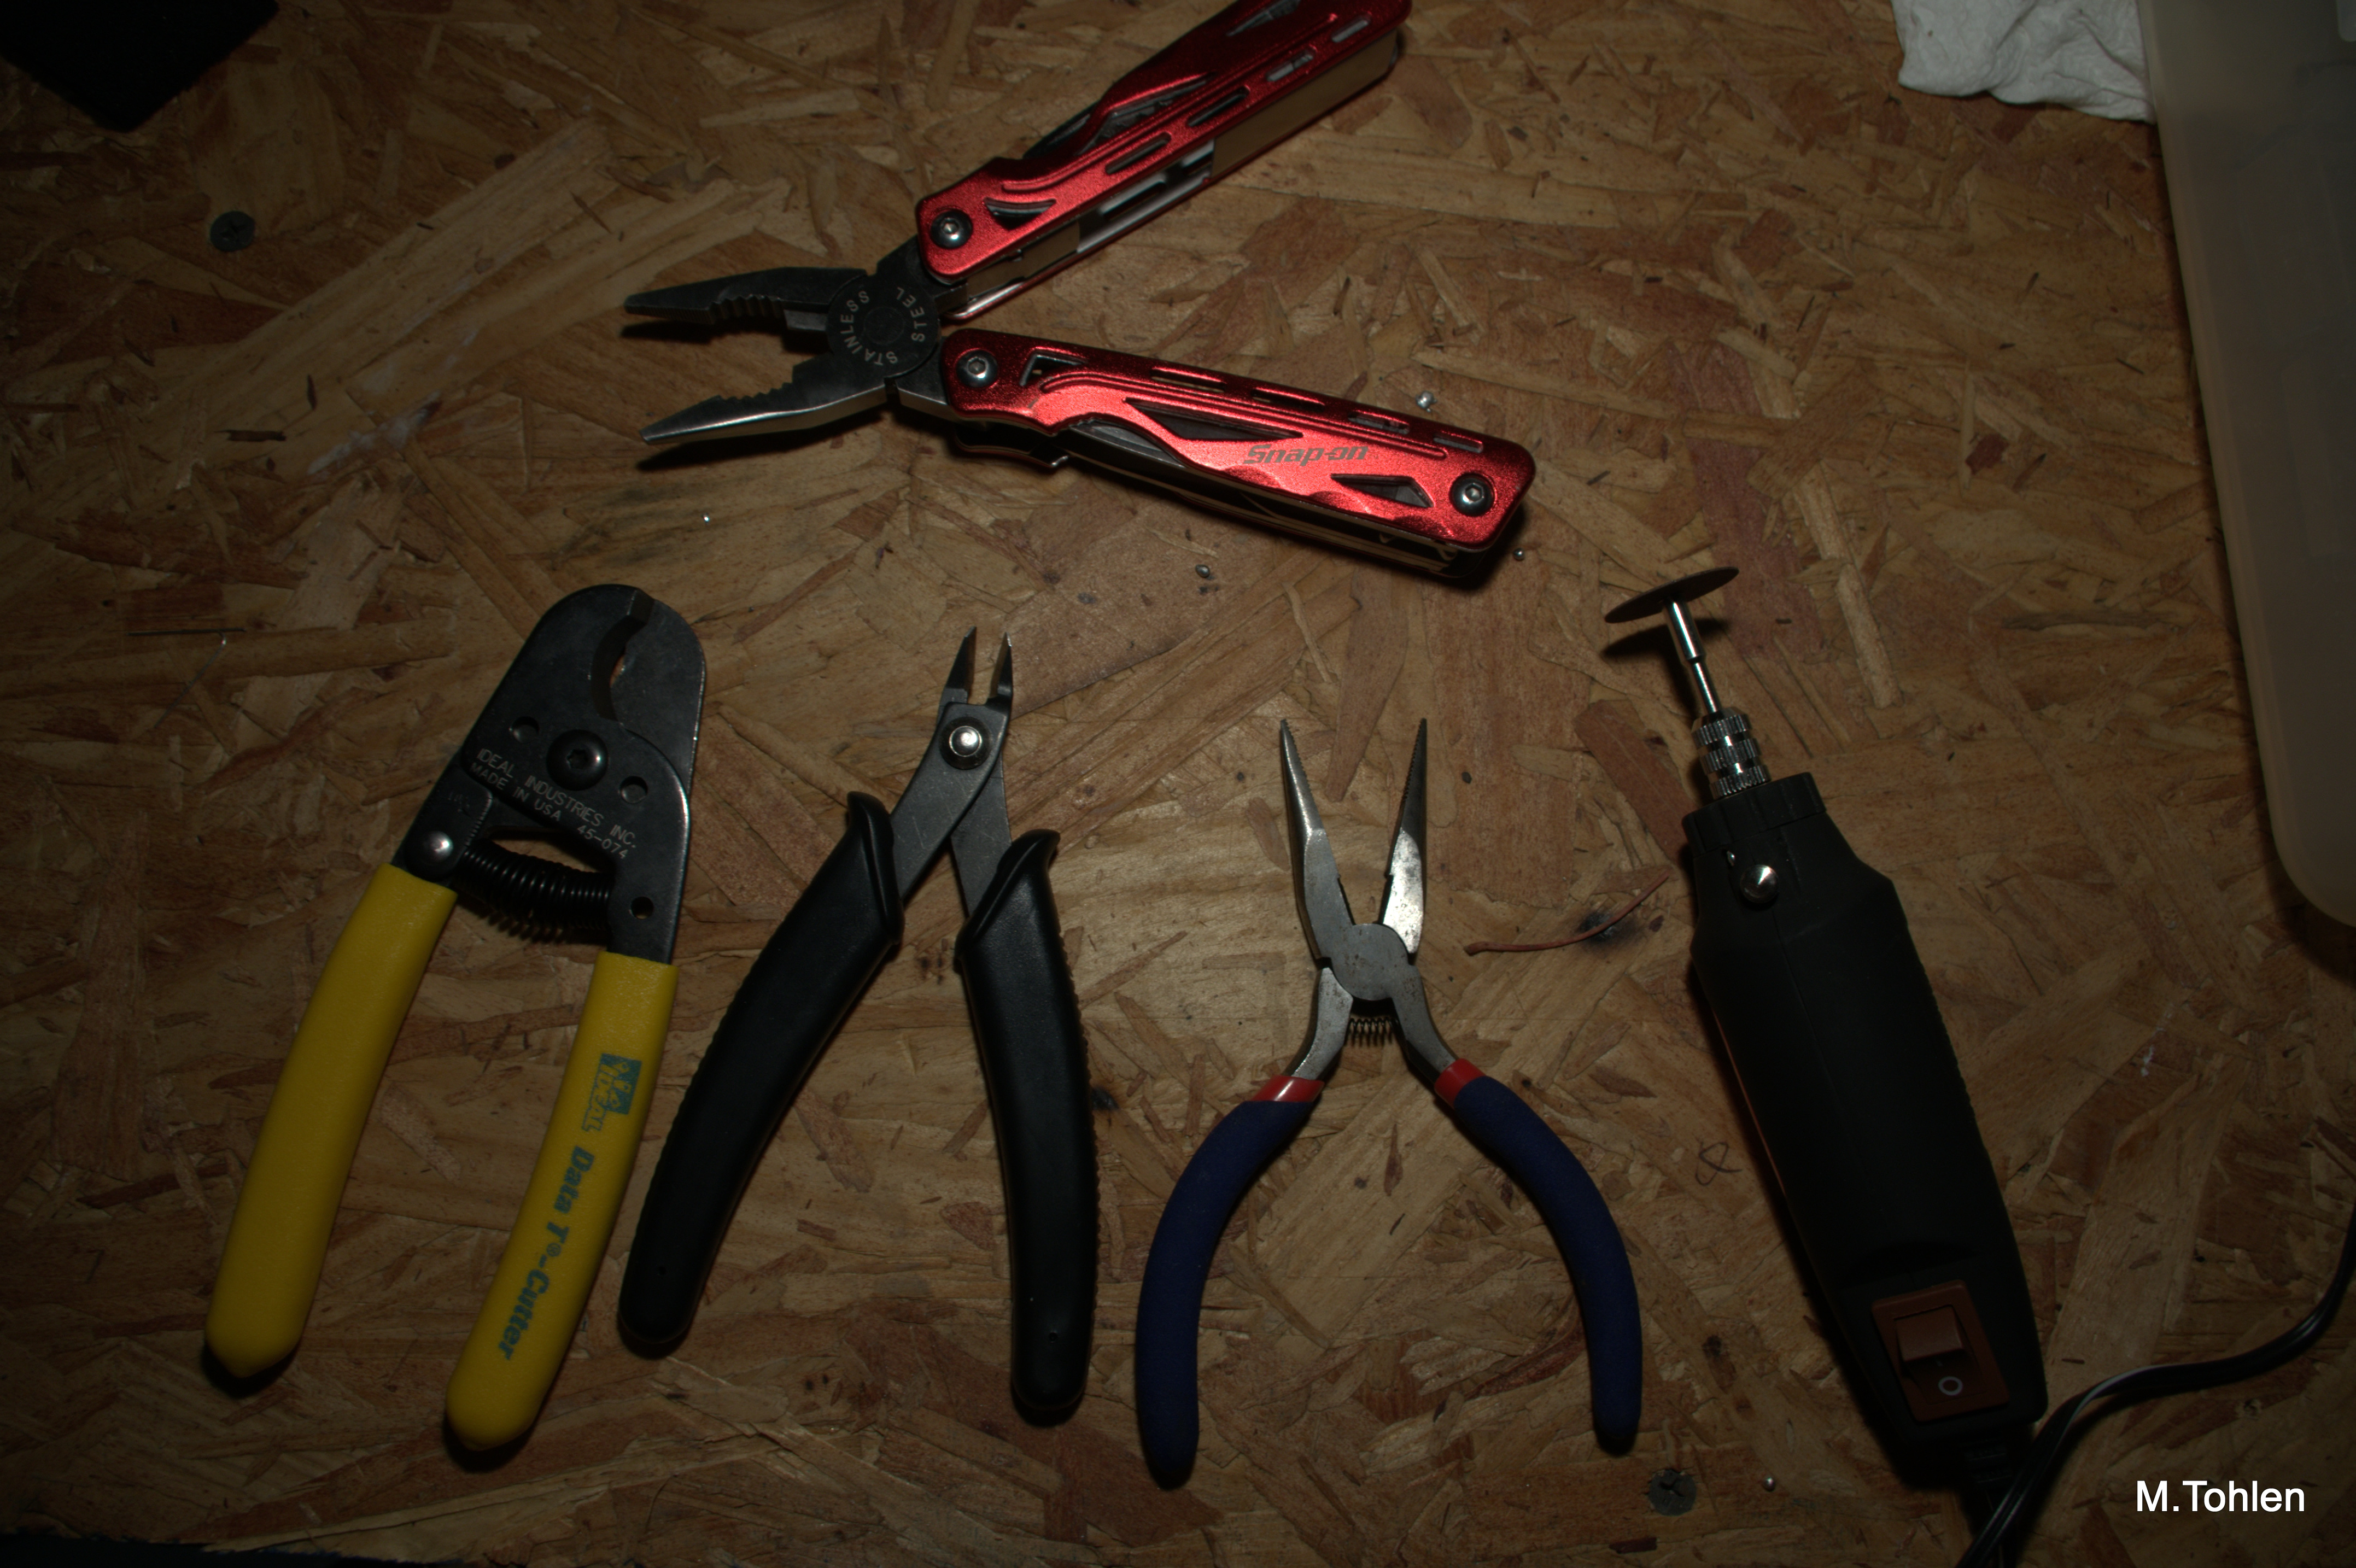
-Wire Strippers/Cutters. Not that you will be stripping wires explicitly - but you will need to cut off the black plastic molding around the connector and trim back the cable sheath.
-Long Nose Pliers. For general dismantlement and metal bendage.
-Small Rotary Cutting Tool. I use a really cheap one from Harbor Freight. Yes, it is cheaply made and doesn't have a lot of power, but hey its like $10 on sale.
Destruction.

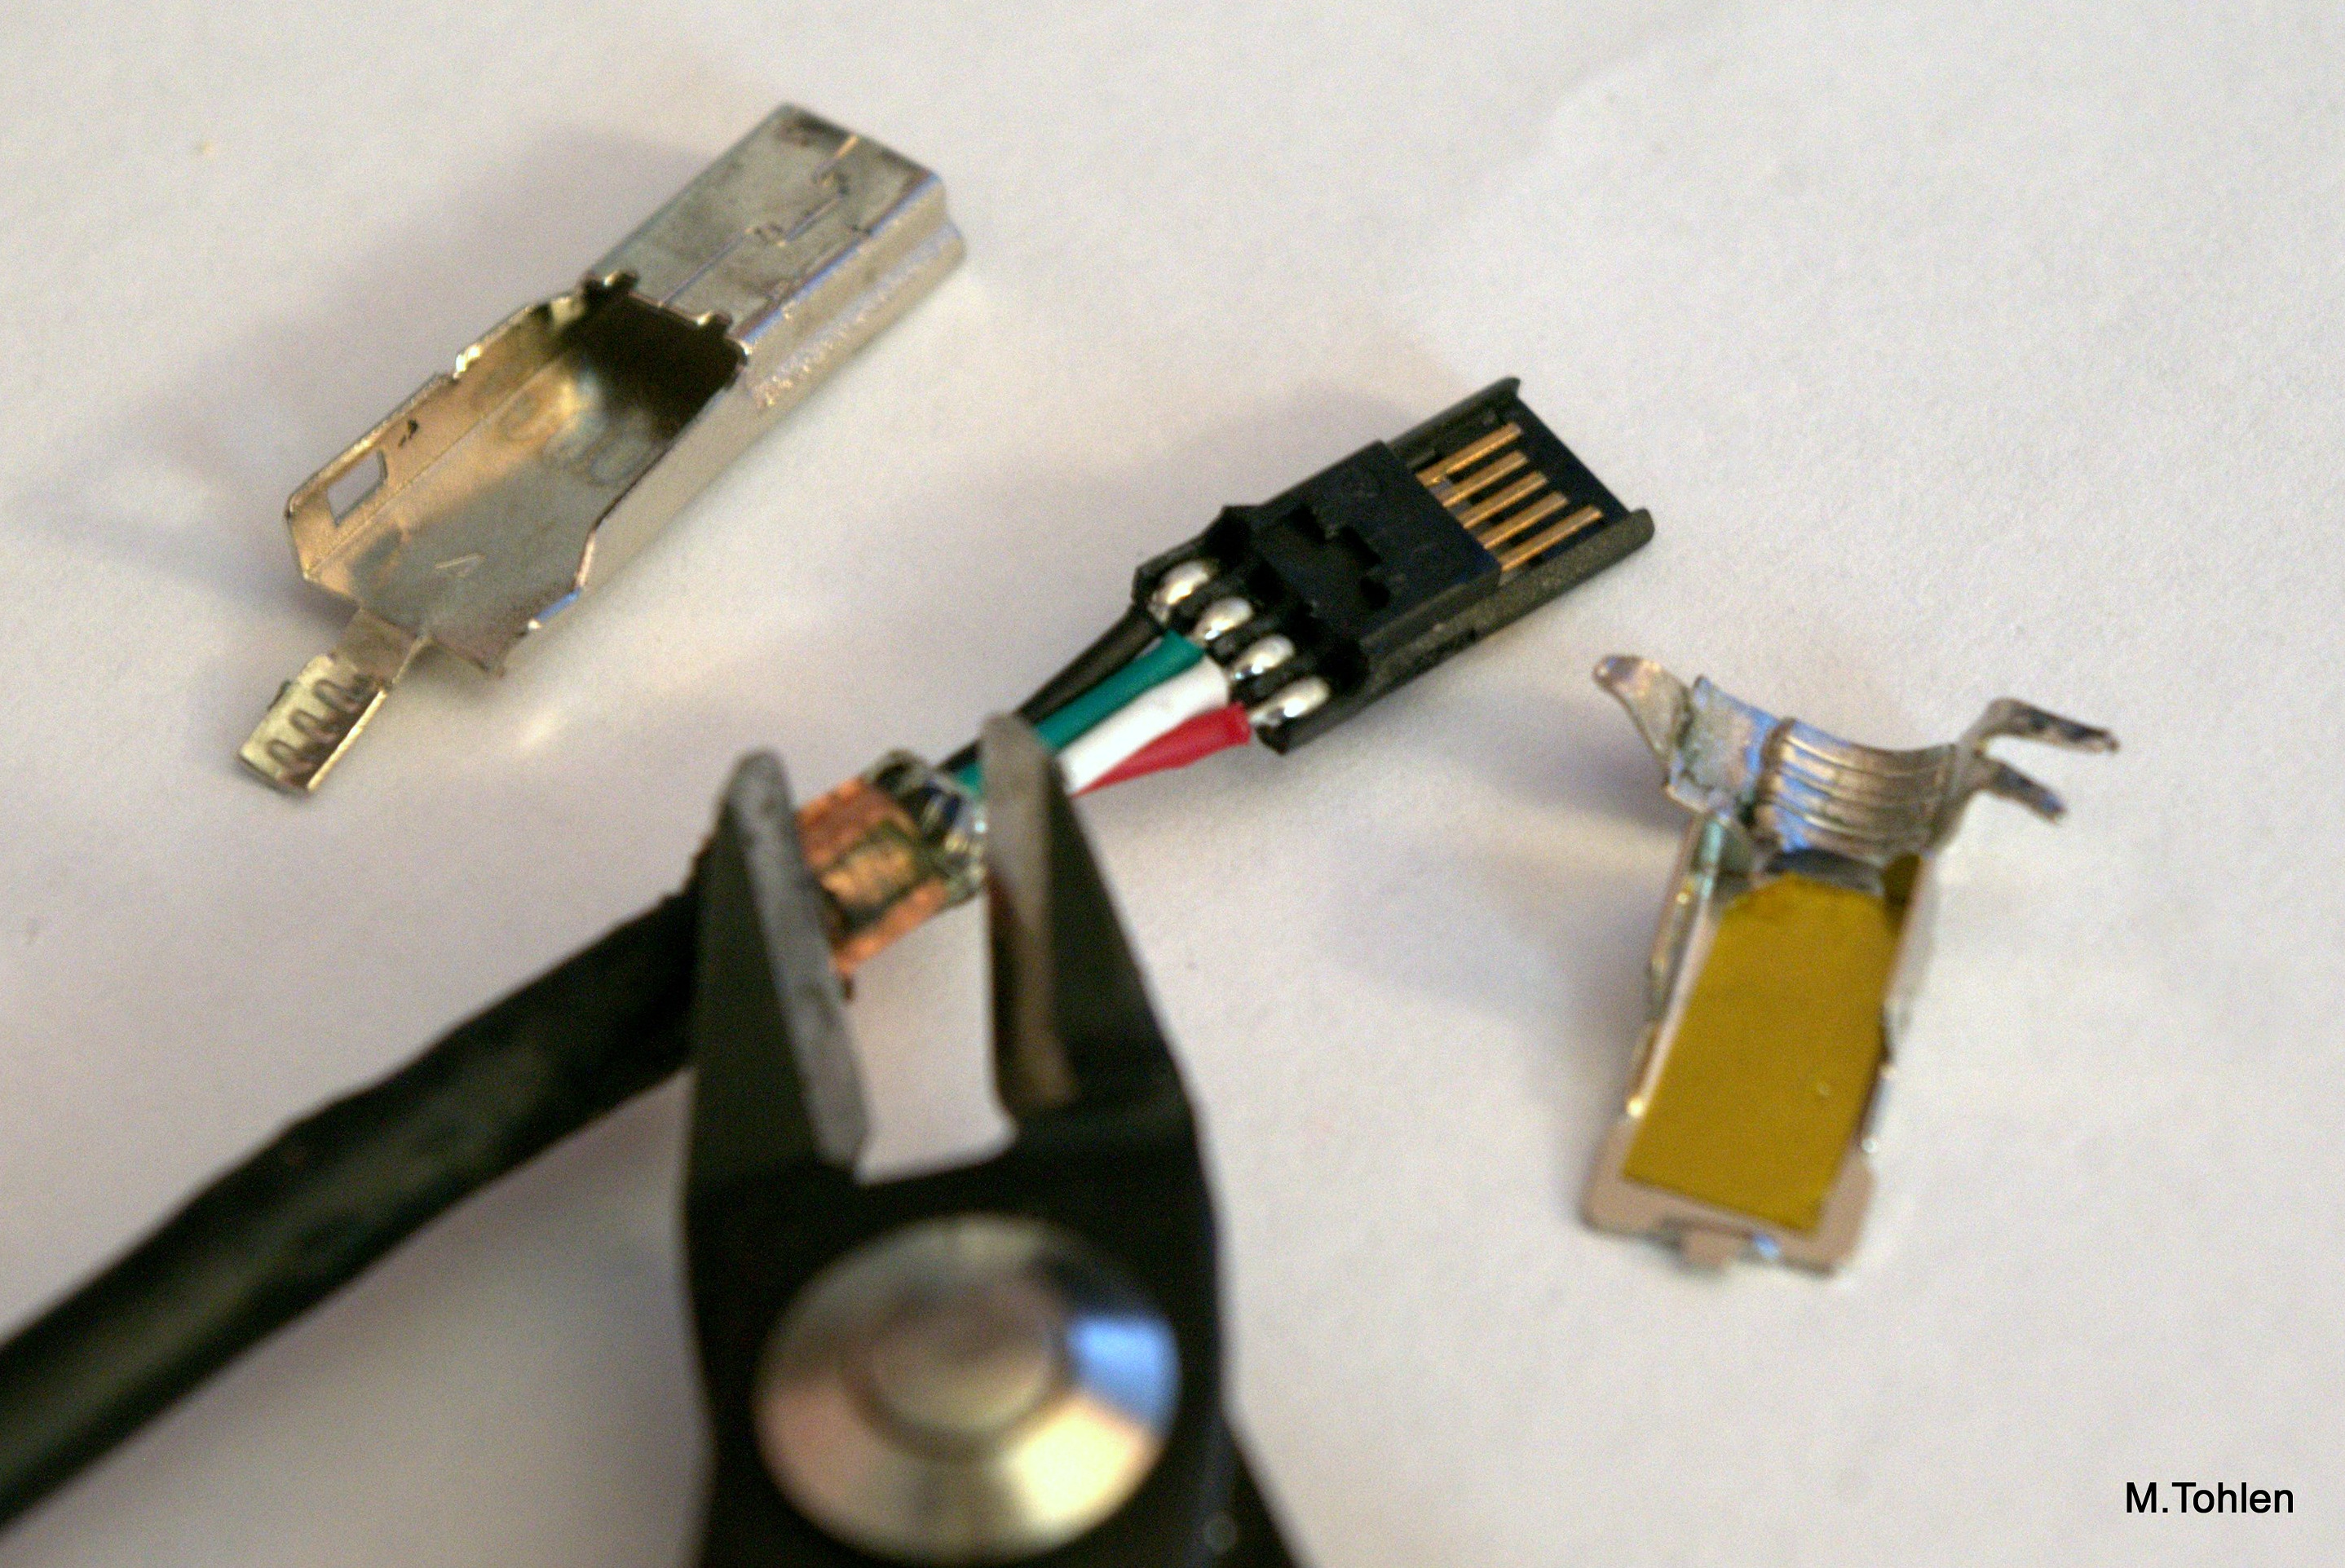
-Cut off the plastic molding around the Mini-B end of your USB cable. Take care not to cut through the wires within. I just cut it and trimmed it away until it separated from the metal casing. Depending on your cable design, you may have to cut off some plastic strain relief as well.
-Disassemble the metal casing. For my cable, I bent away the strain relief tabs and then separated the main casing. Sorry, I do not have a better photo of this step!
-Disassemble the metal casing. For my cable, I bent away the strain relief tabs and then separated the main casing. Sorry, I do not have a better photo of this step!
Modification.
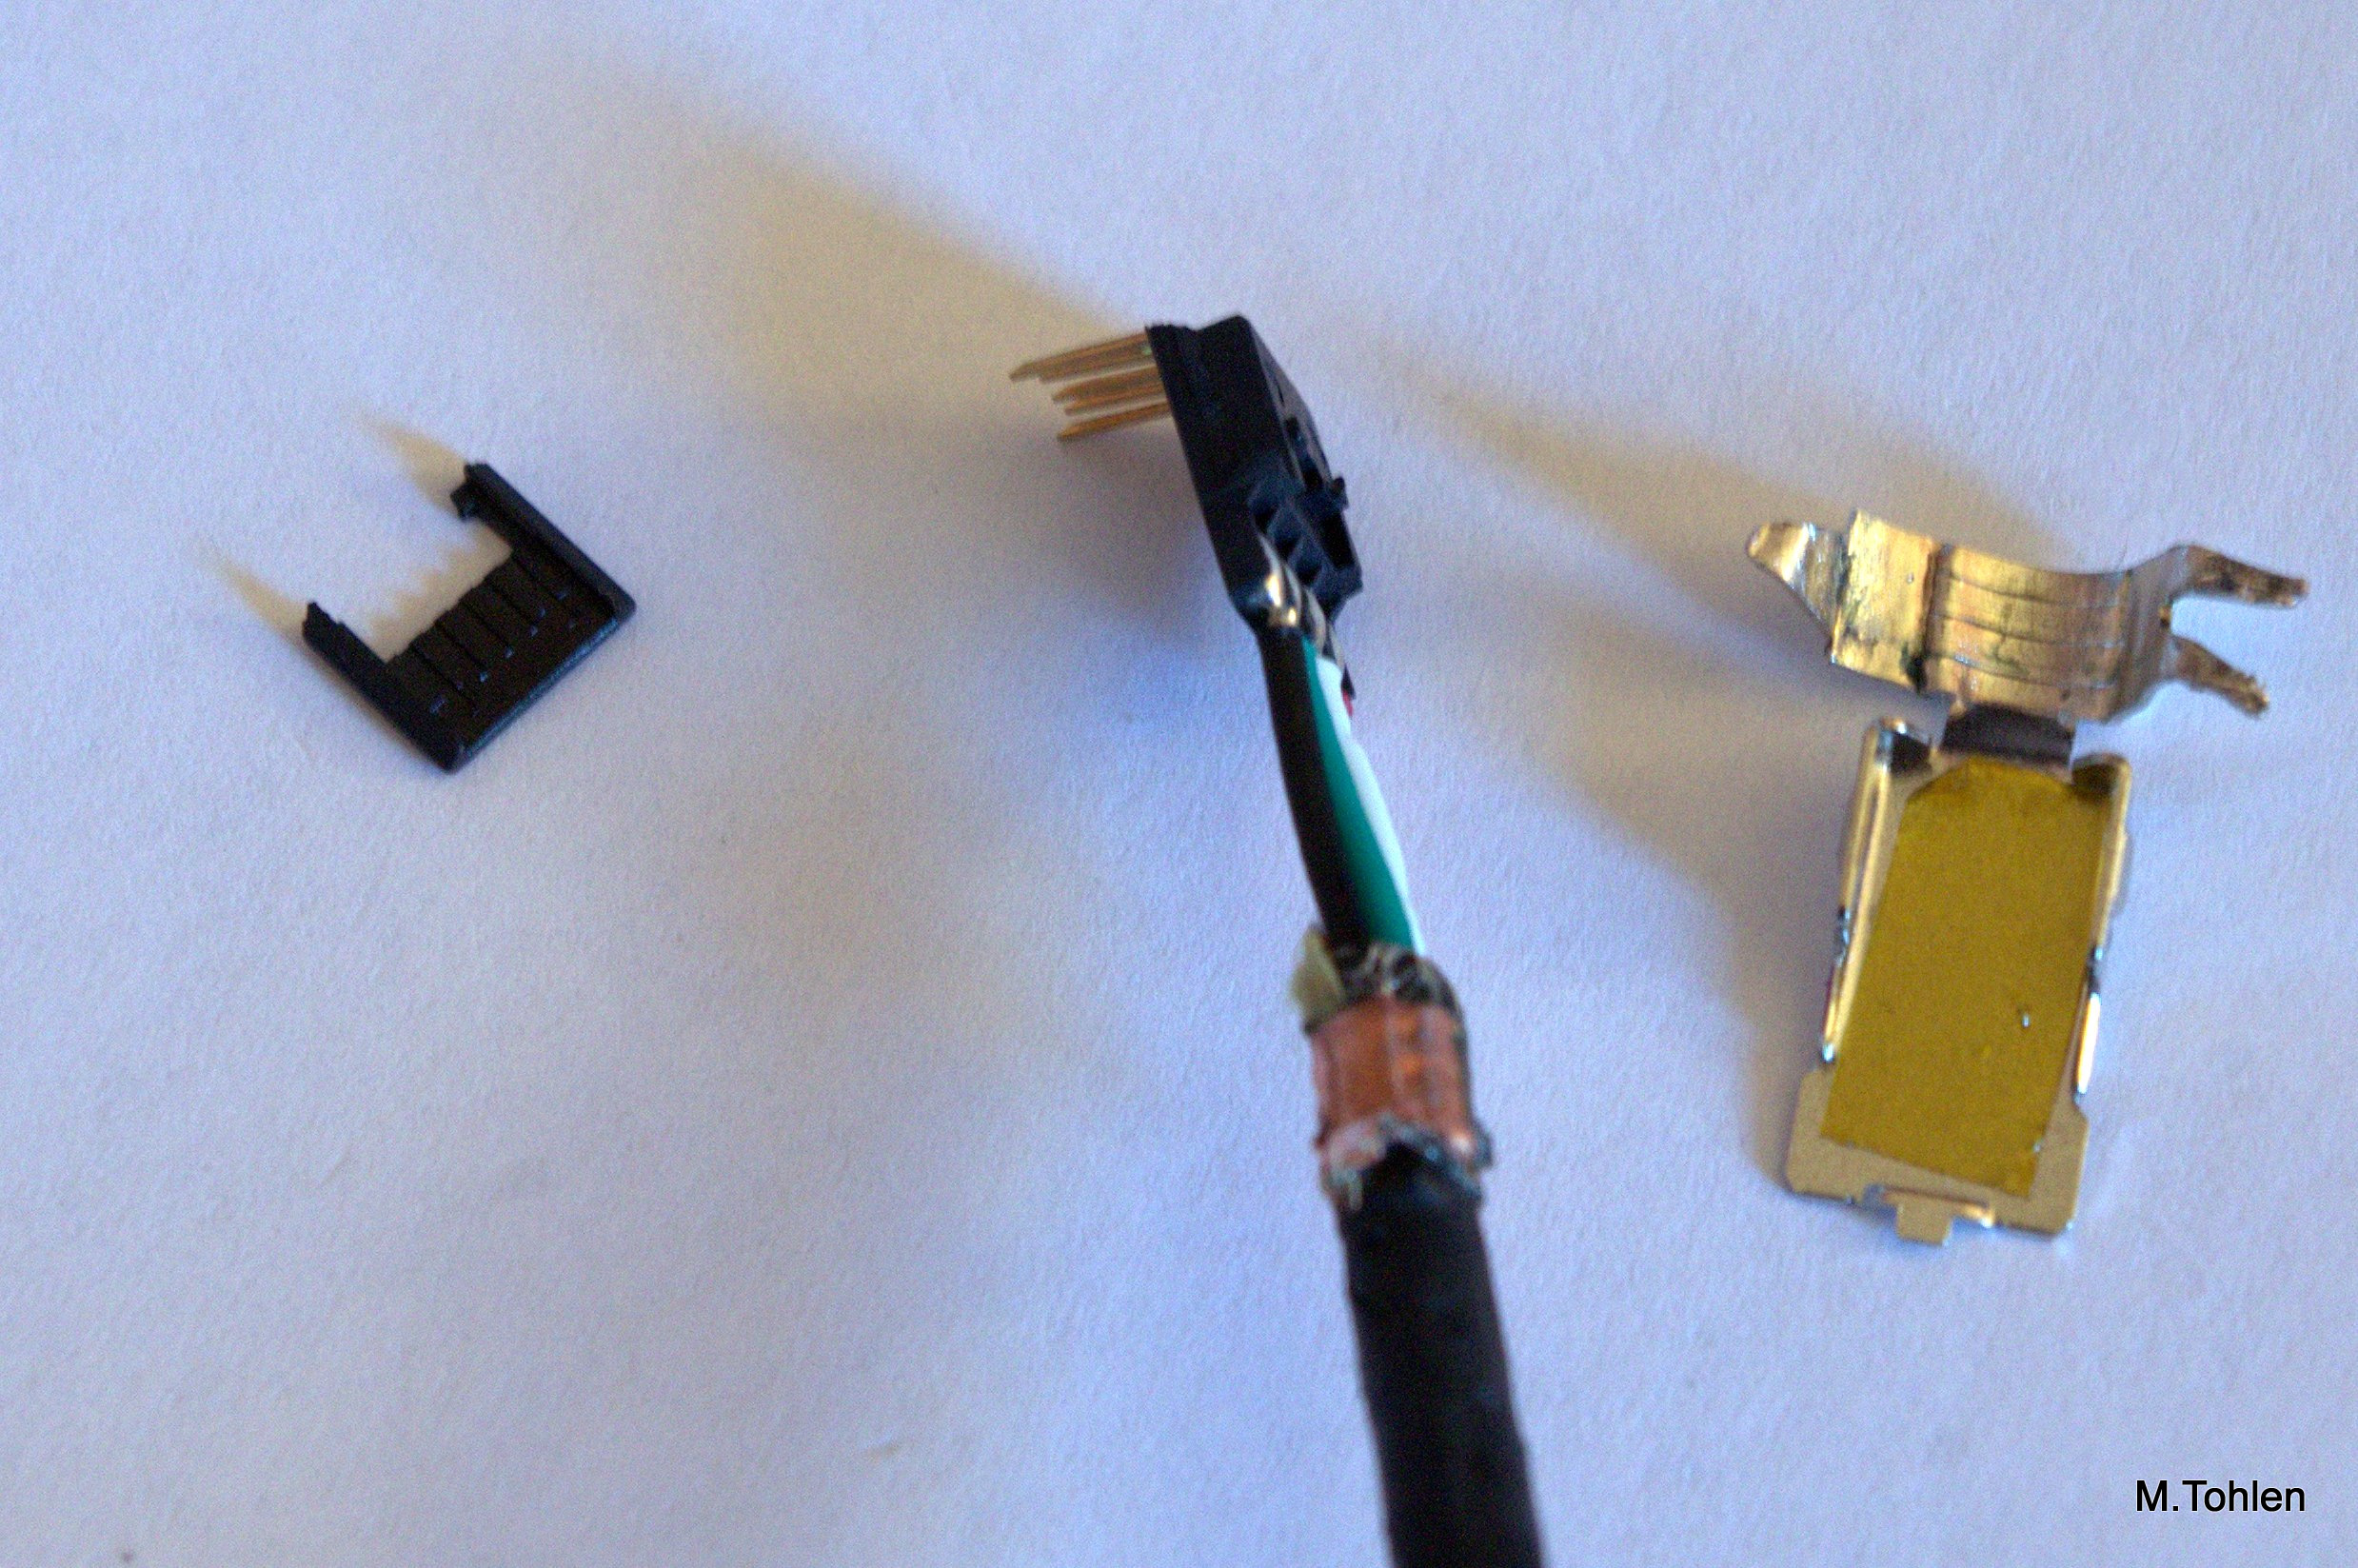
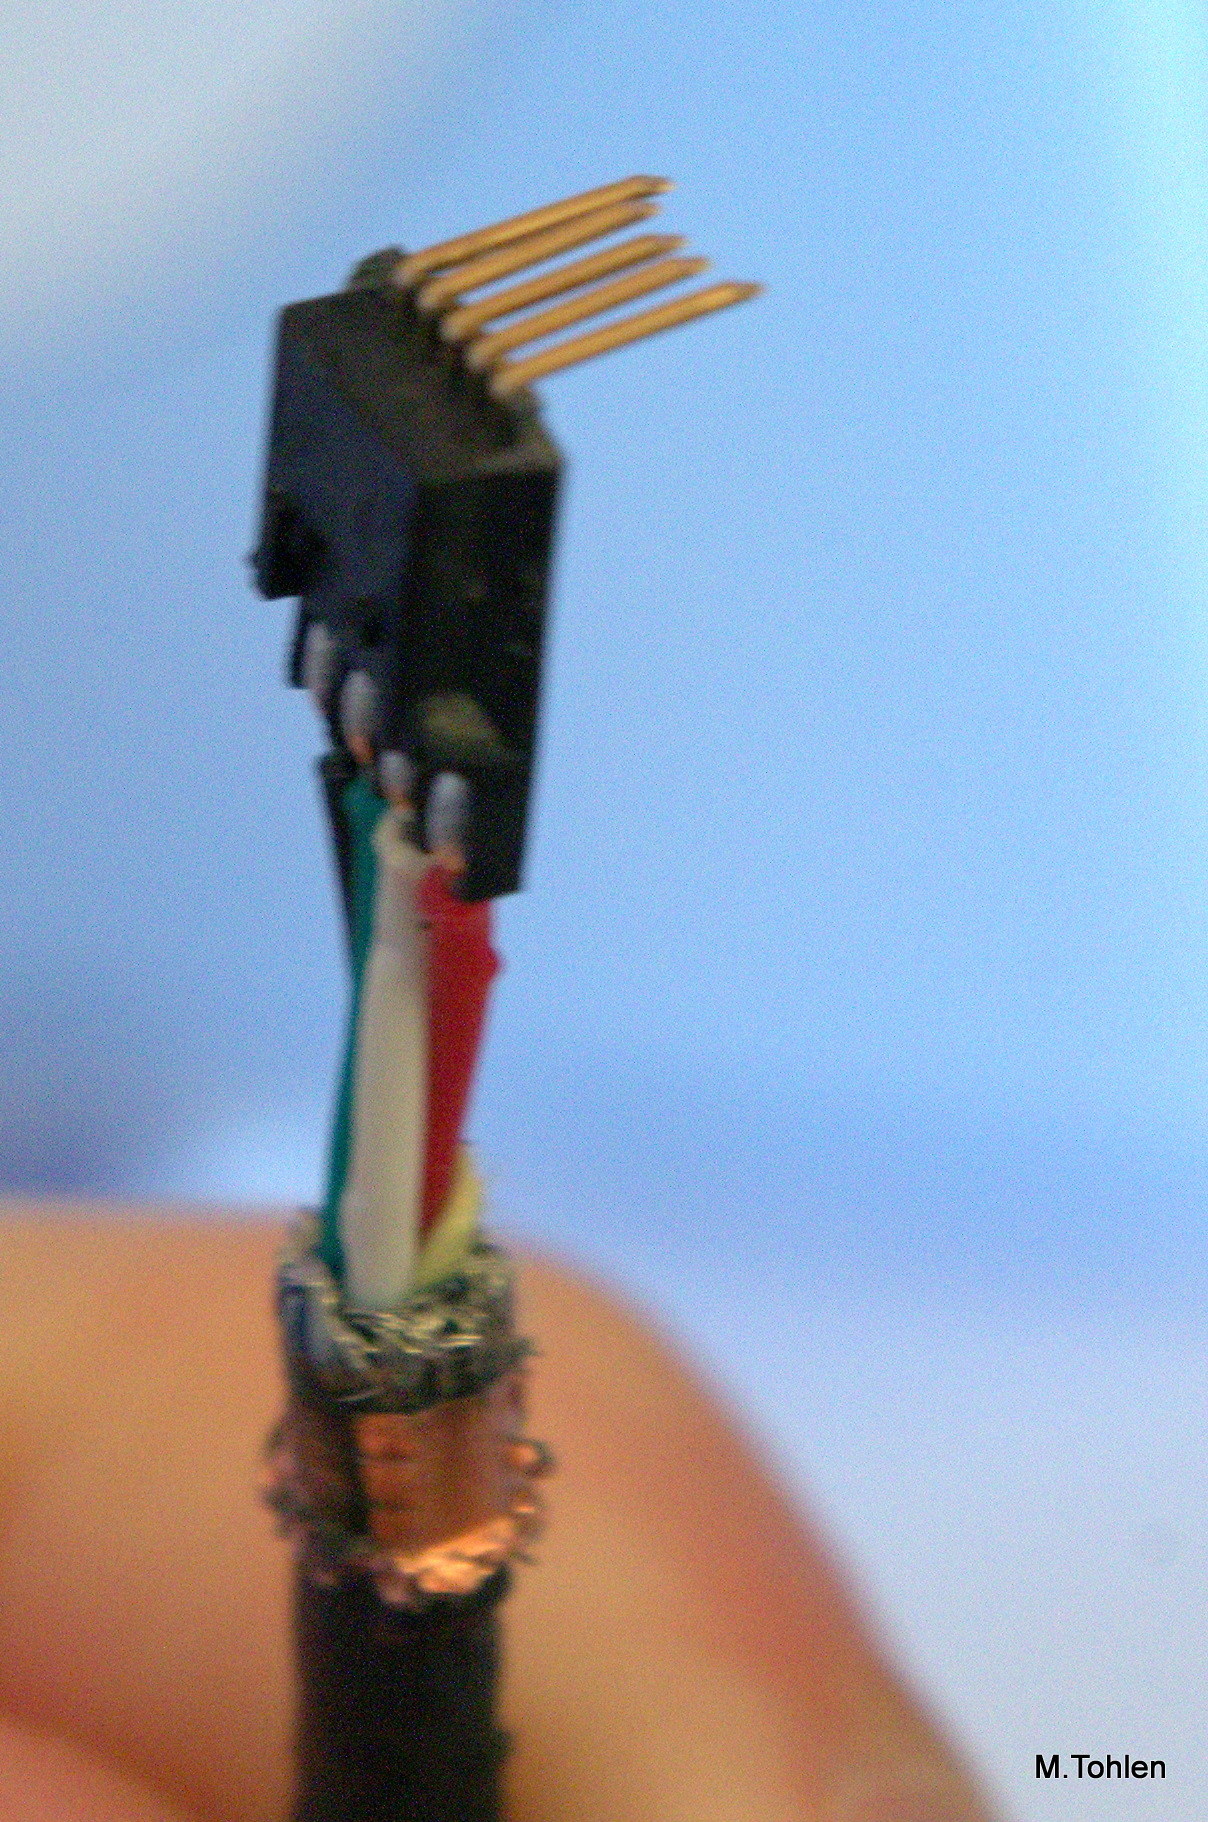
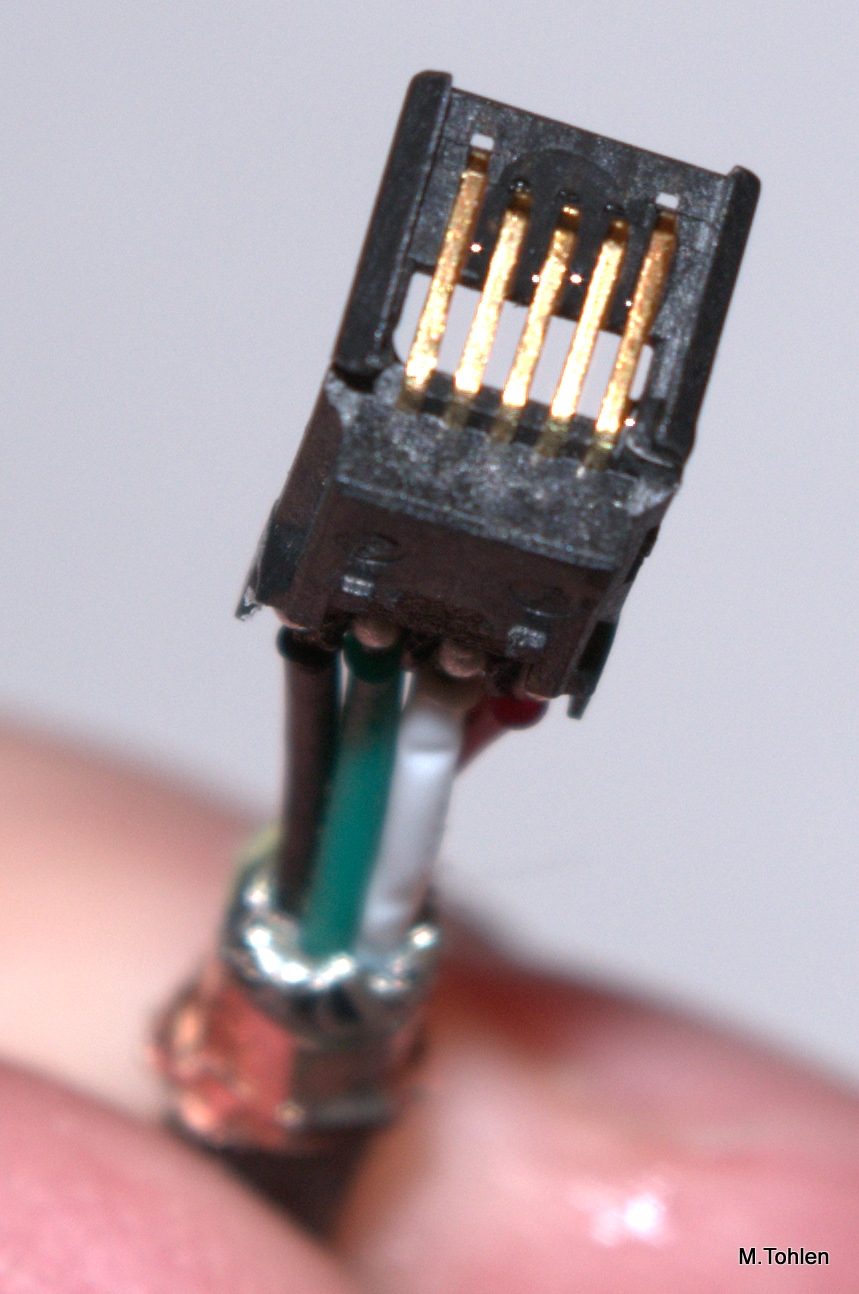
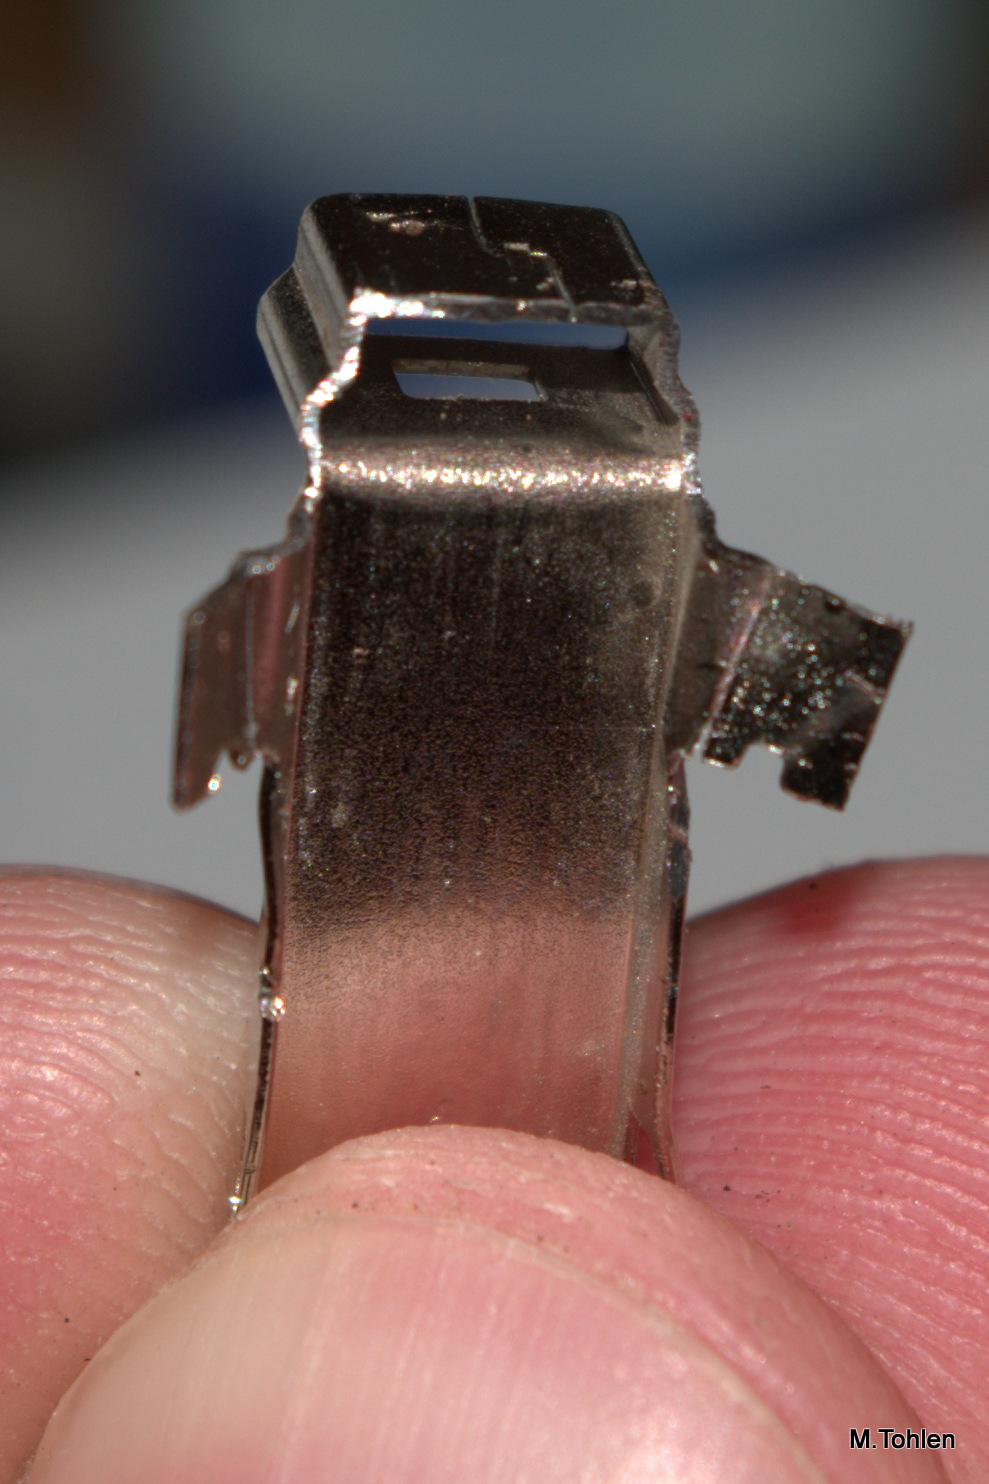
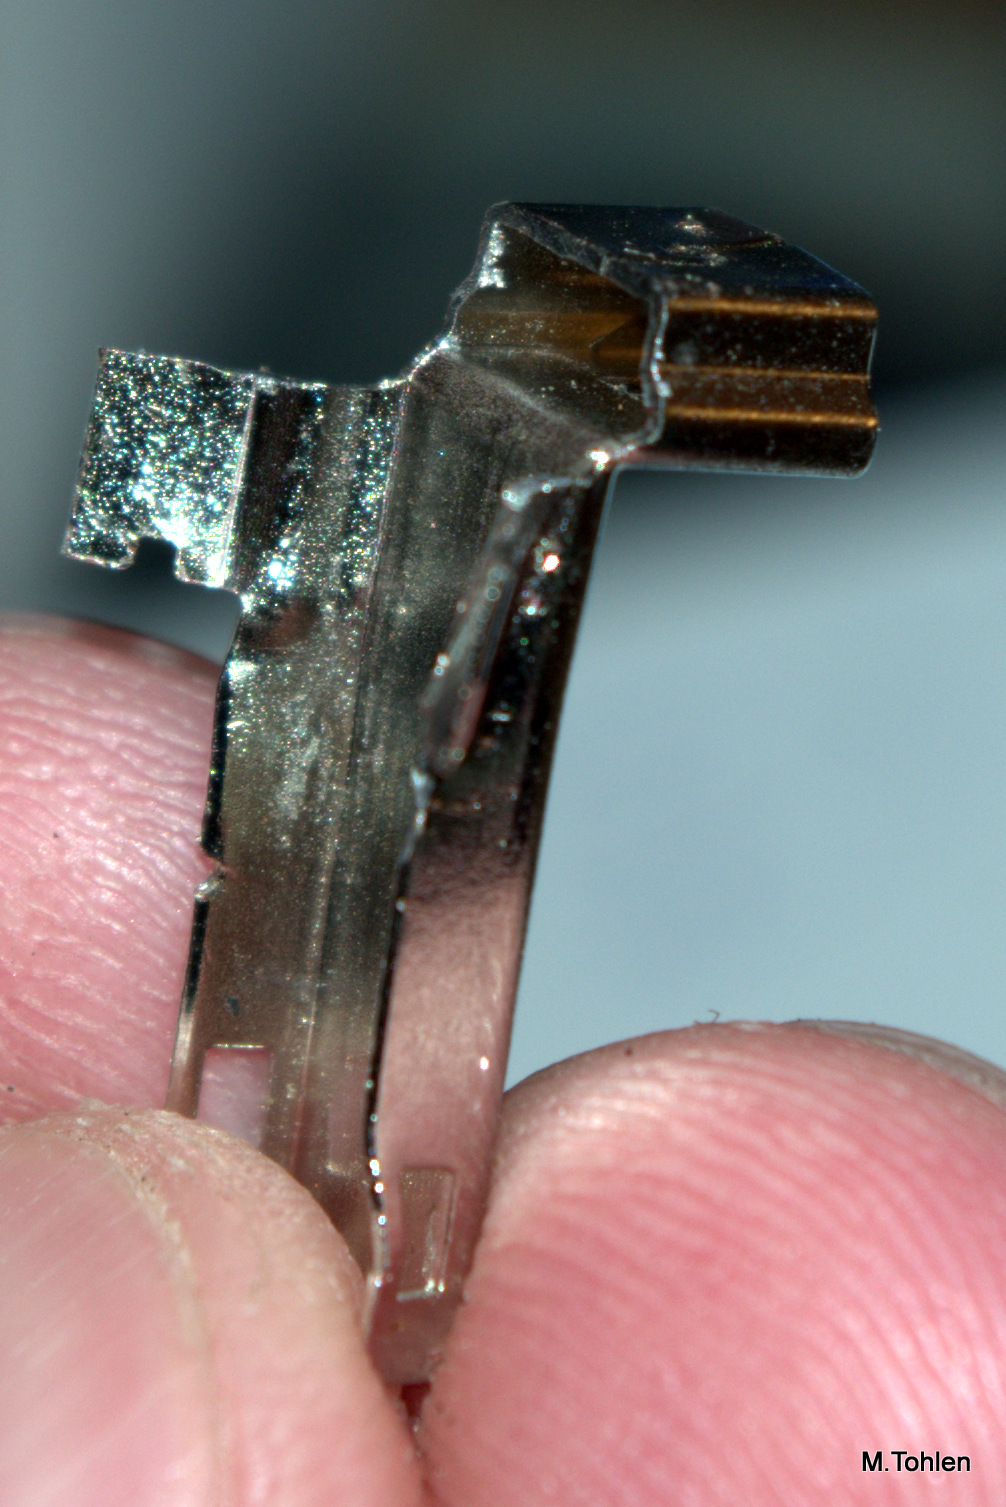
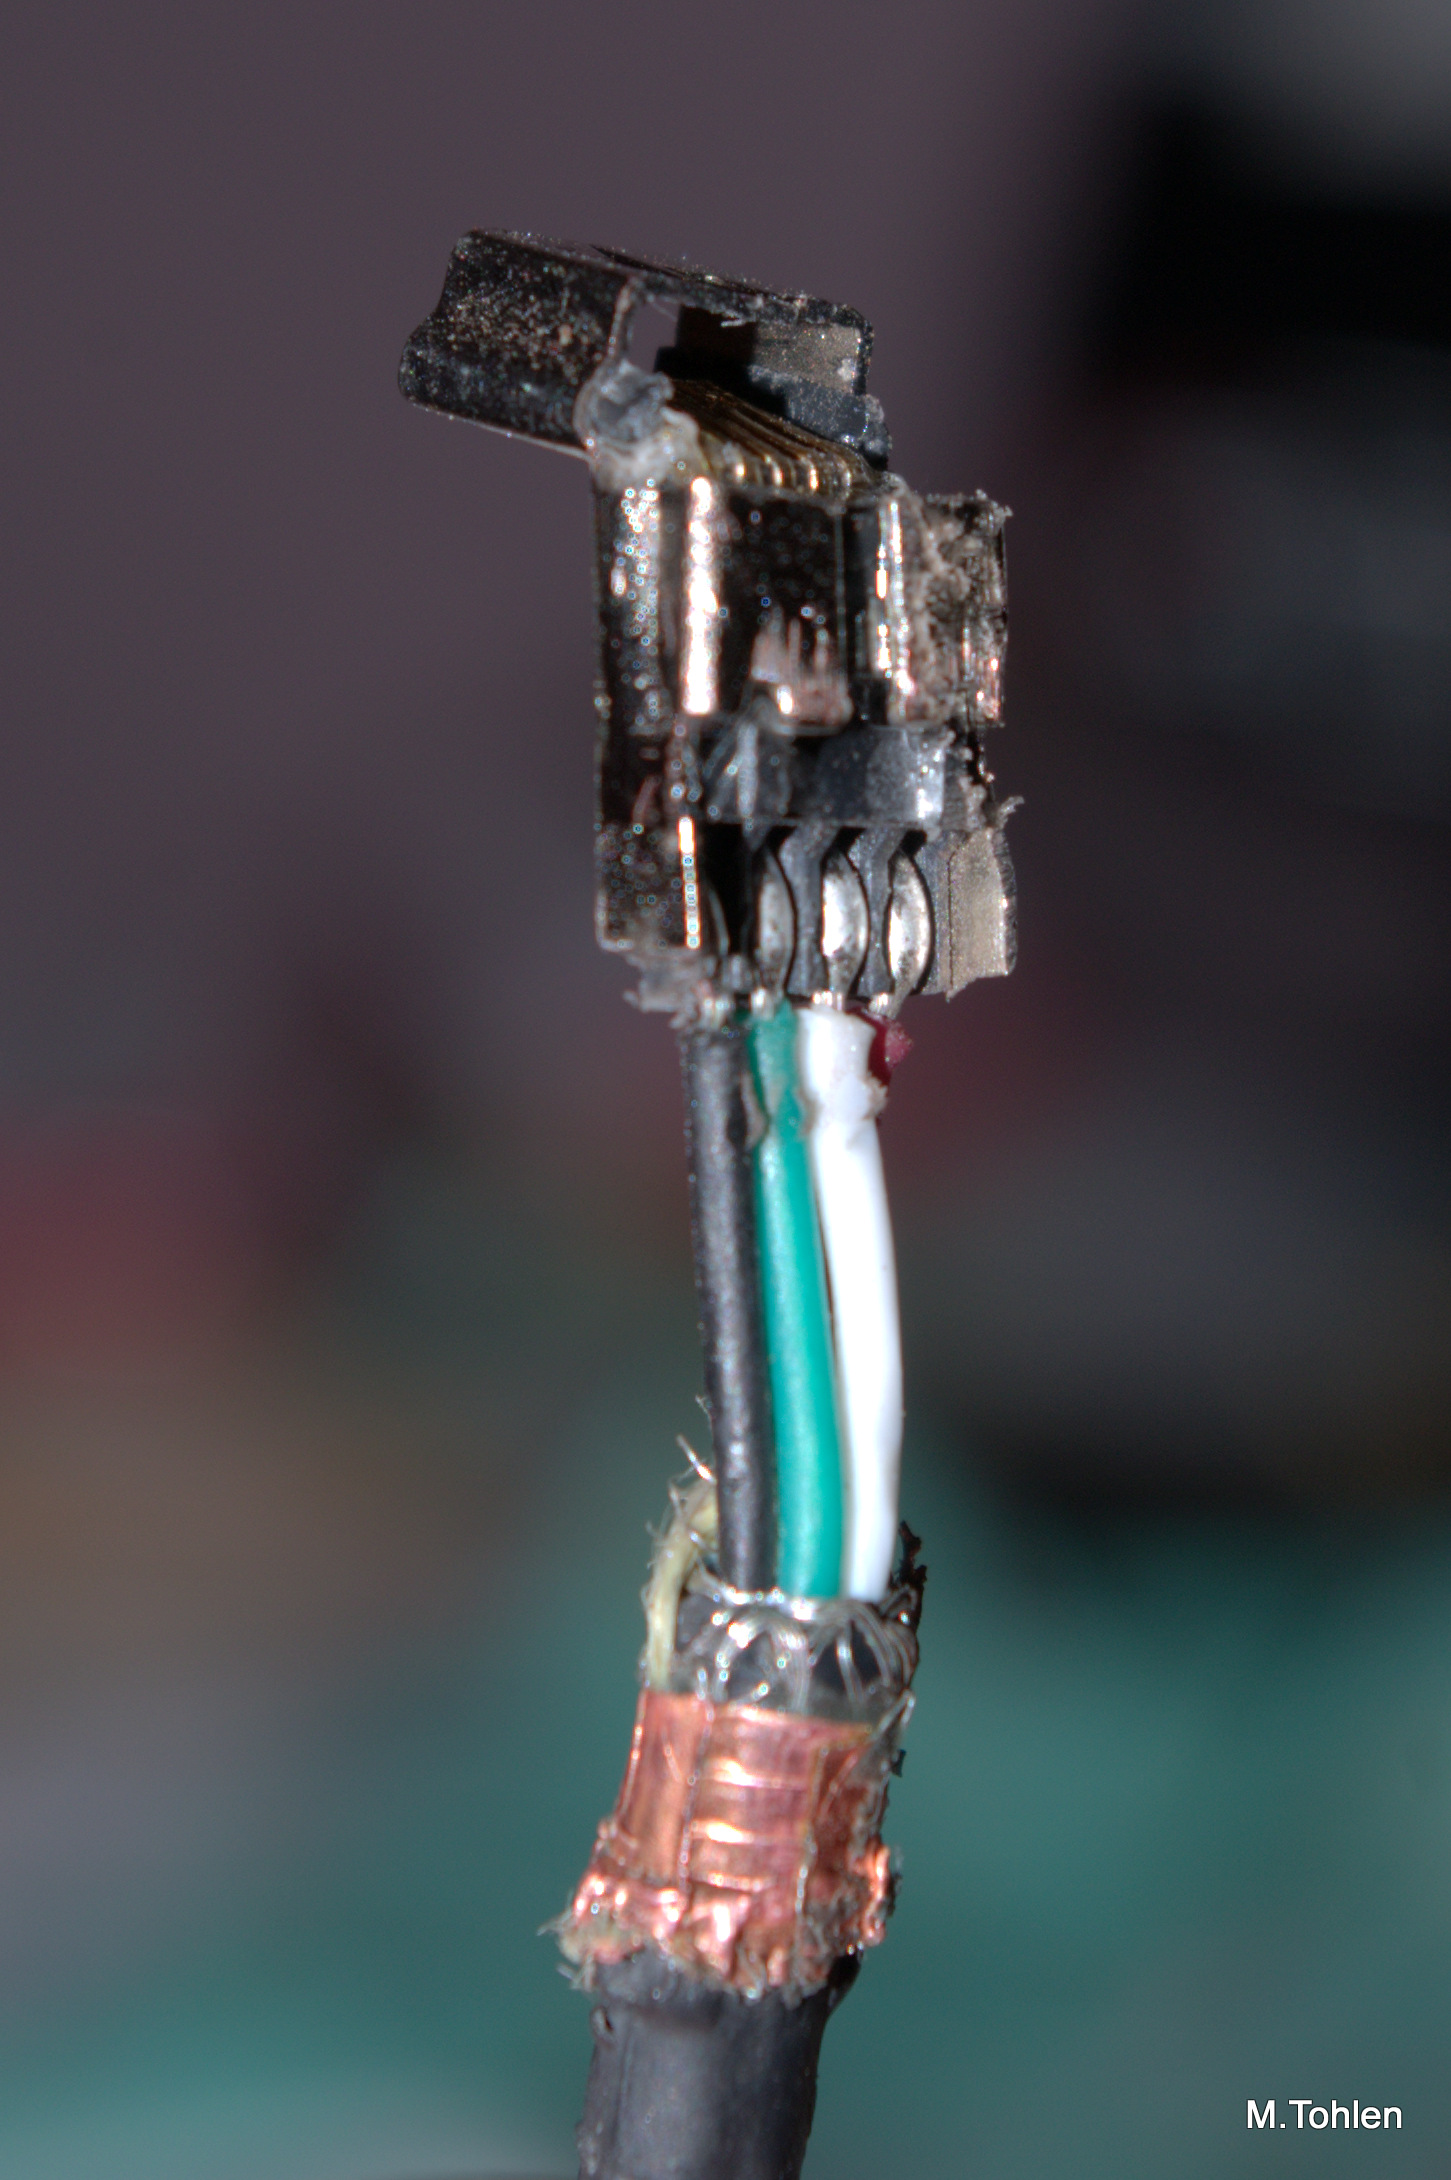
-Bend the pins into approximately a right angle as shown. My plastic tab broke, this is where the glue comes in.
-Glue the plastic tab back onto the connector. It doesn't have to be a super glue job, as long as it stays attached, it is not exactly a structural part of the connector. Note: try not to get glue on the power pins (outer, black & red).
-Use your rotary cutter to cut down the side walls of the main connector body as well as a horizontal cut on top of the connector. Bend it down into about the same angle as your pins to form the new body of the connector. Also bend and flare the newly created tabs out (see photo).
Test.
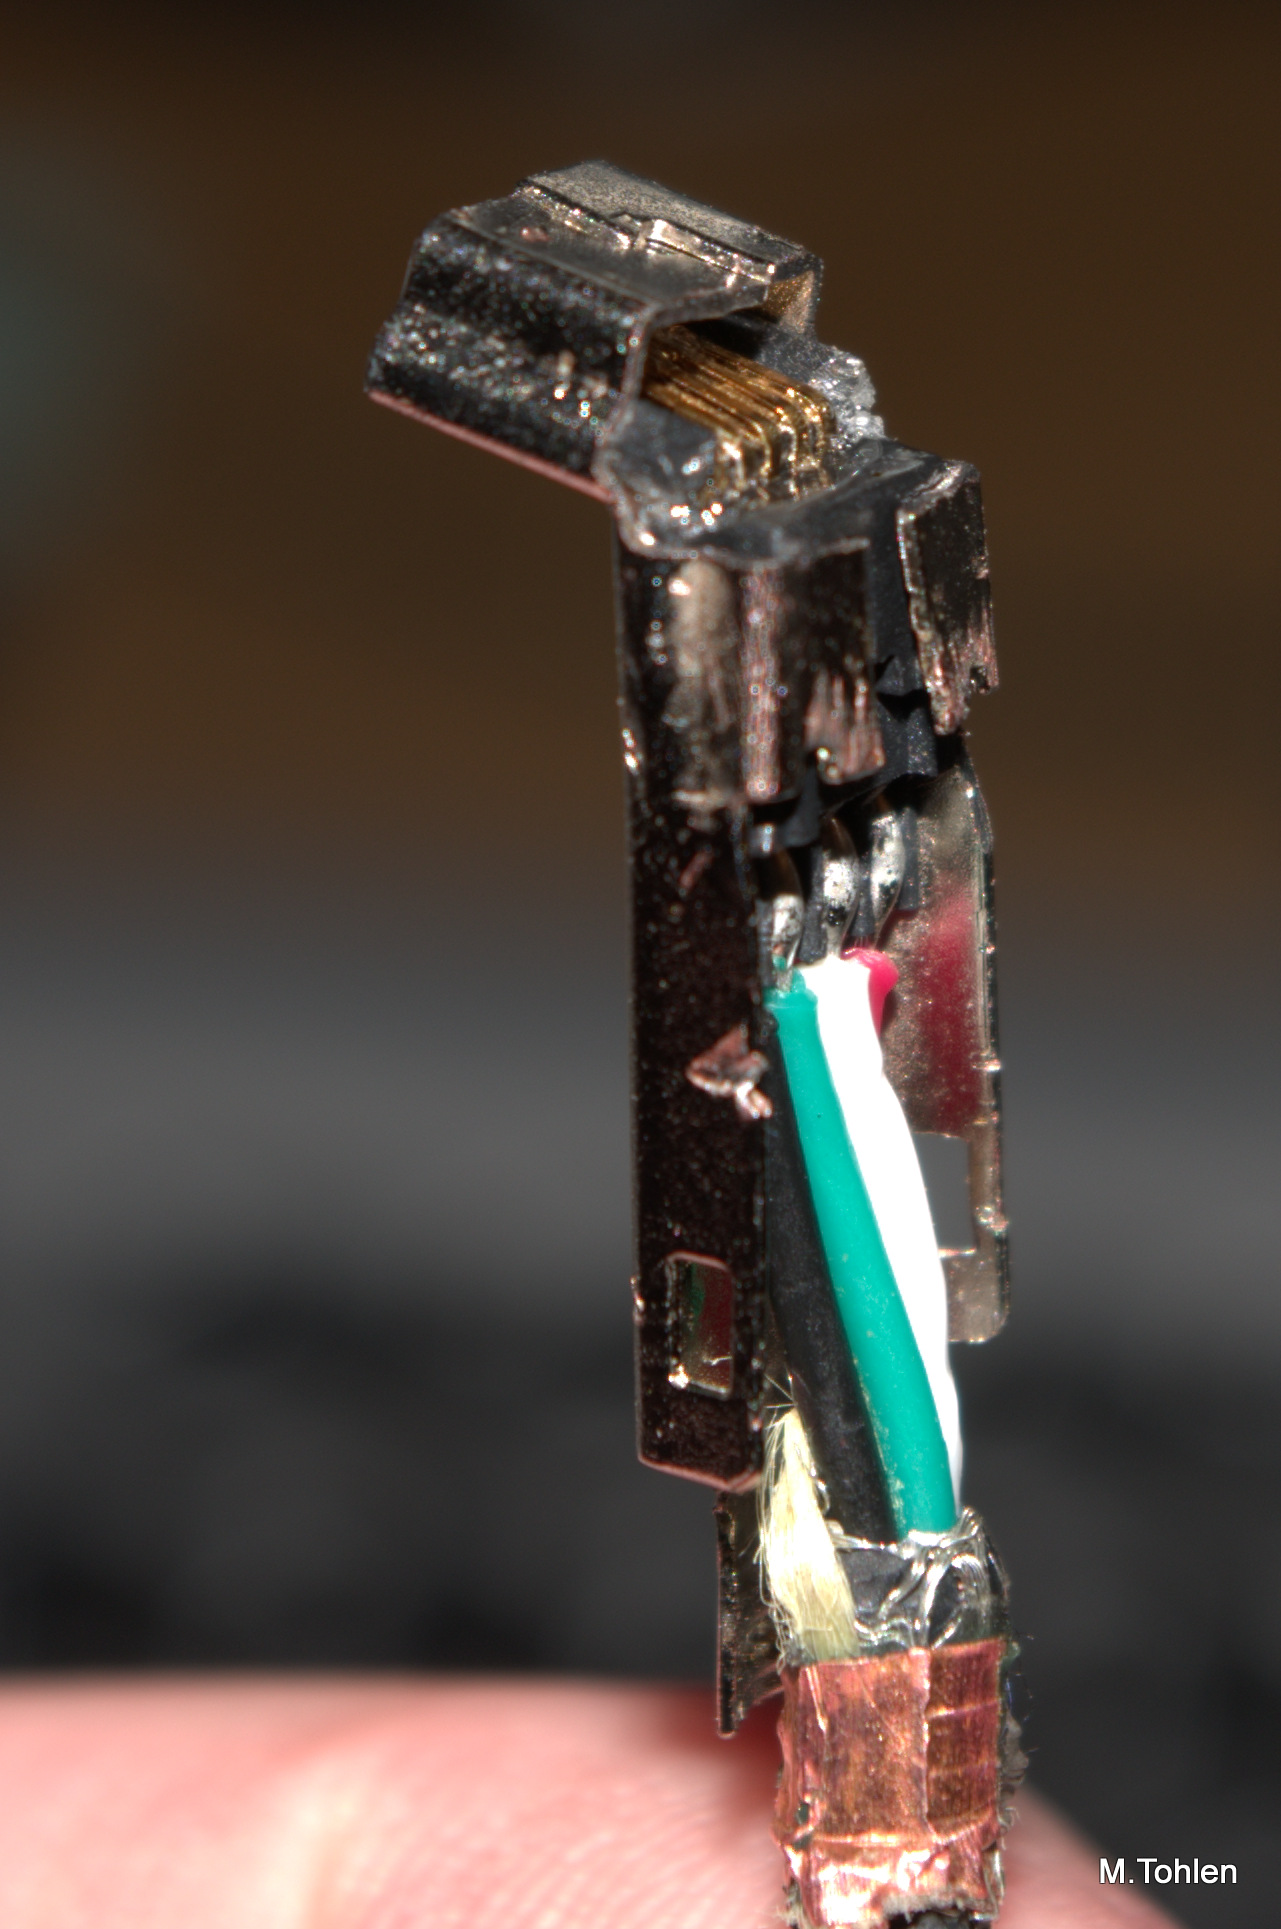
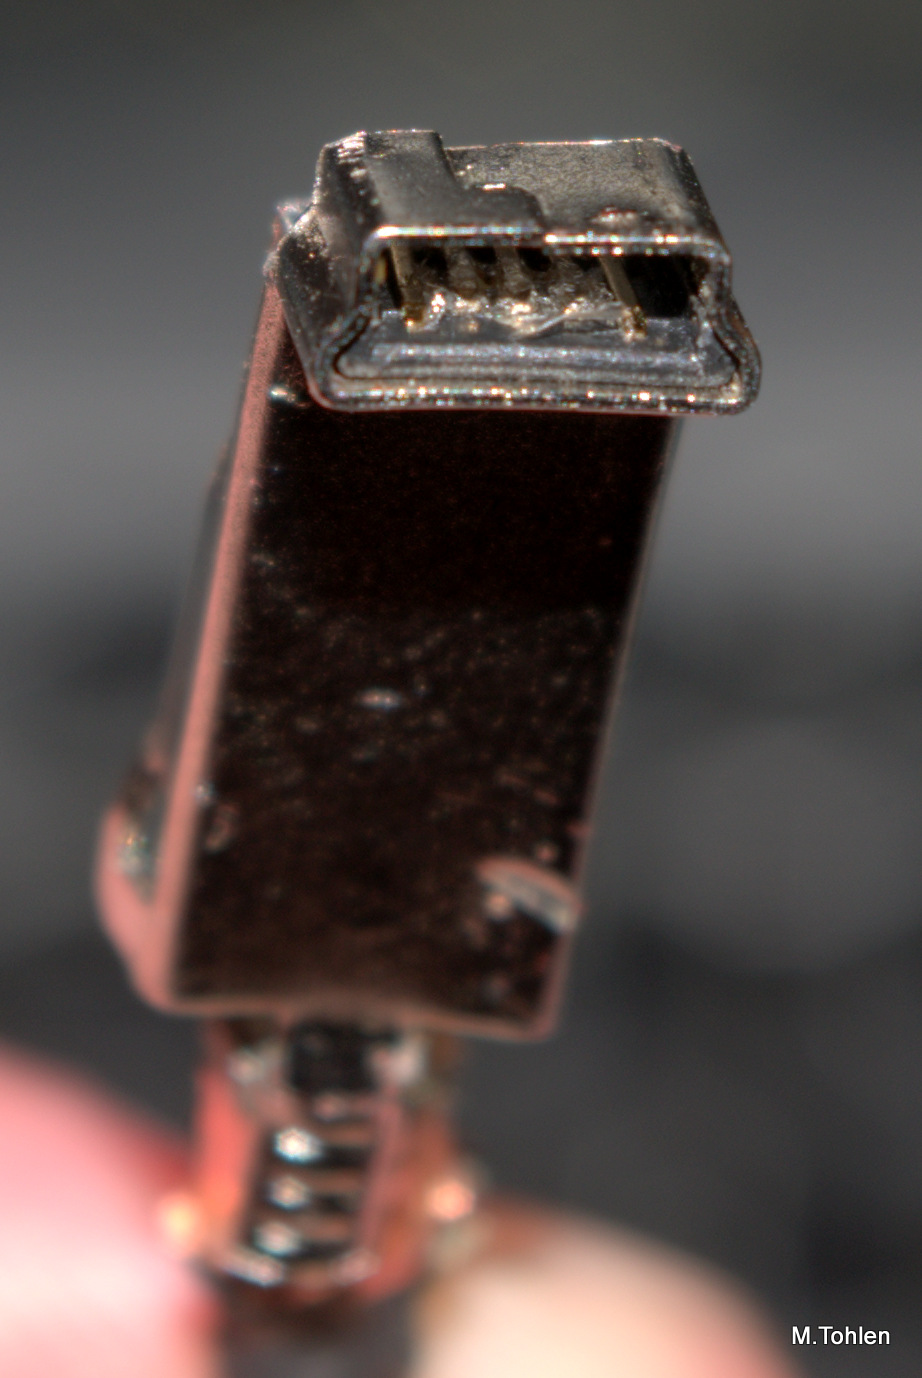
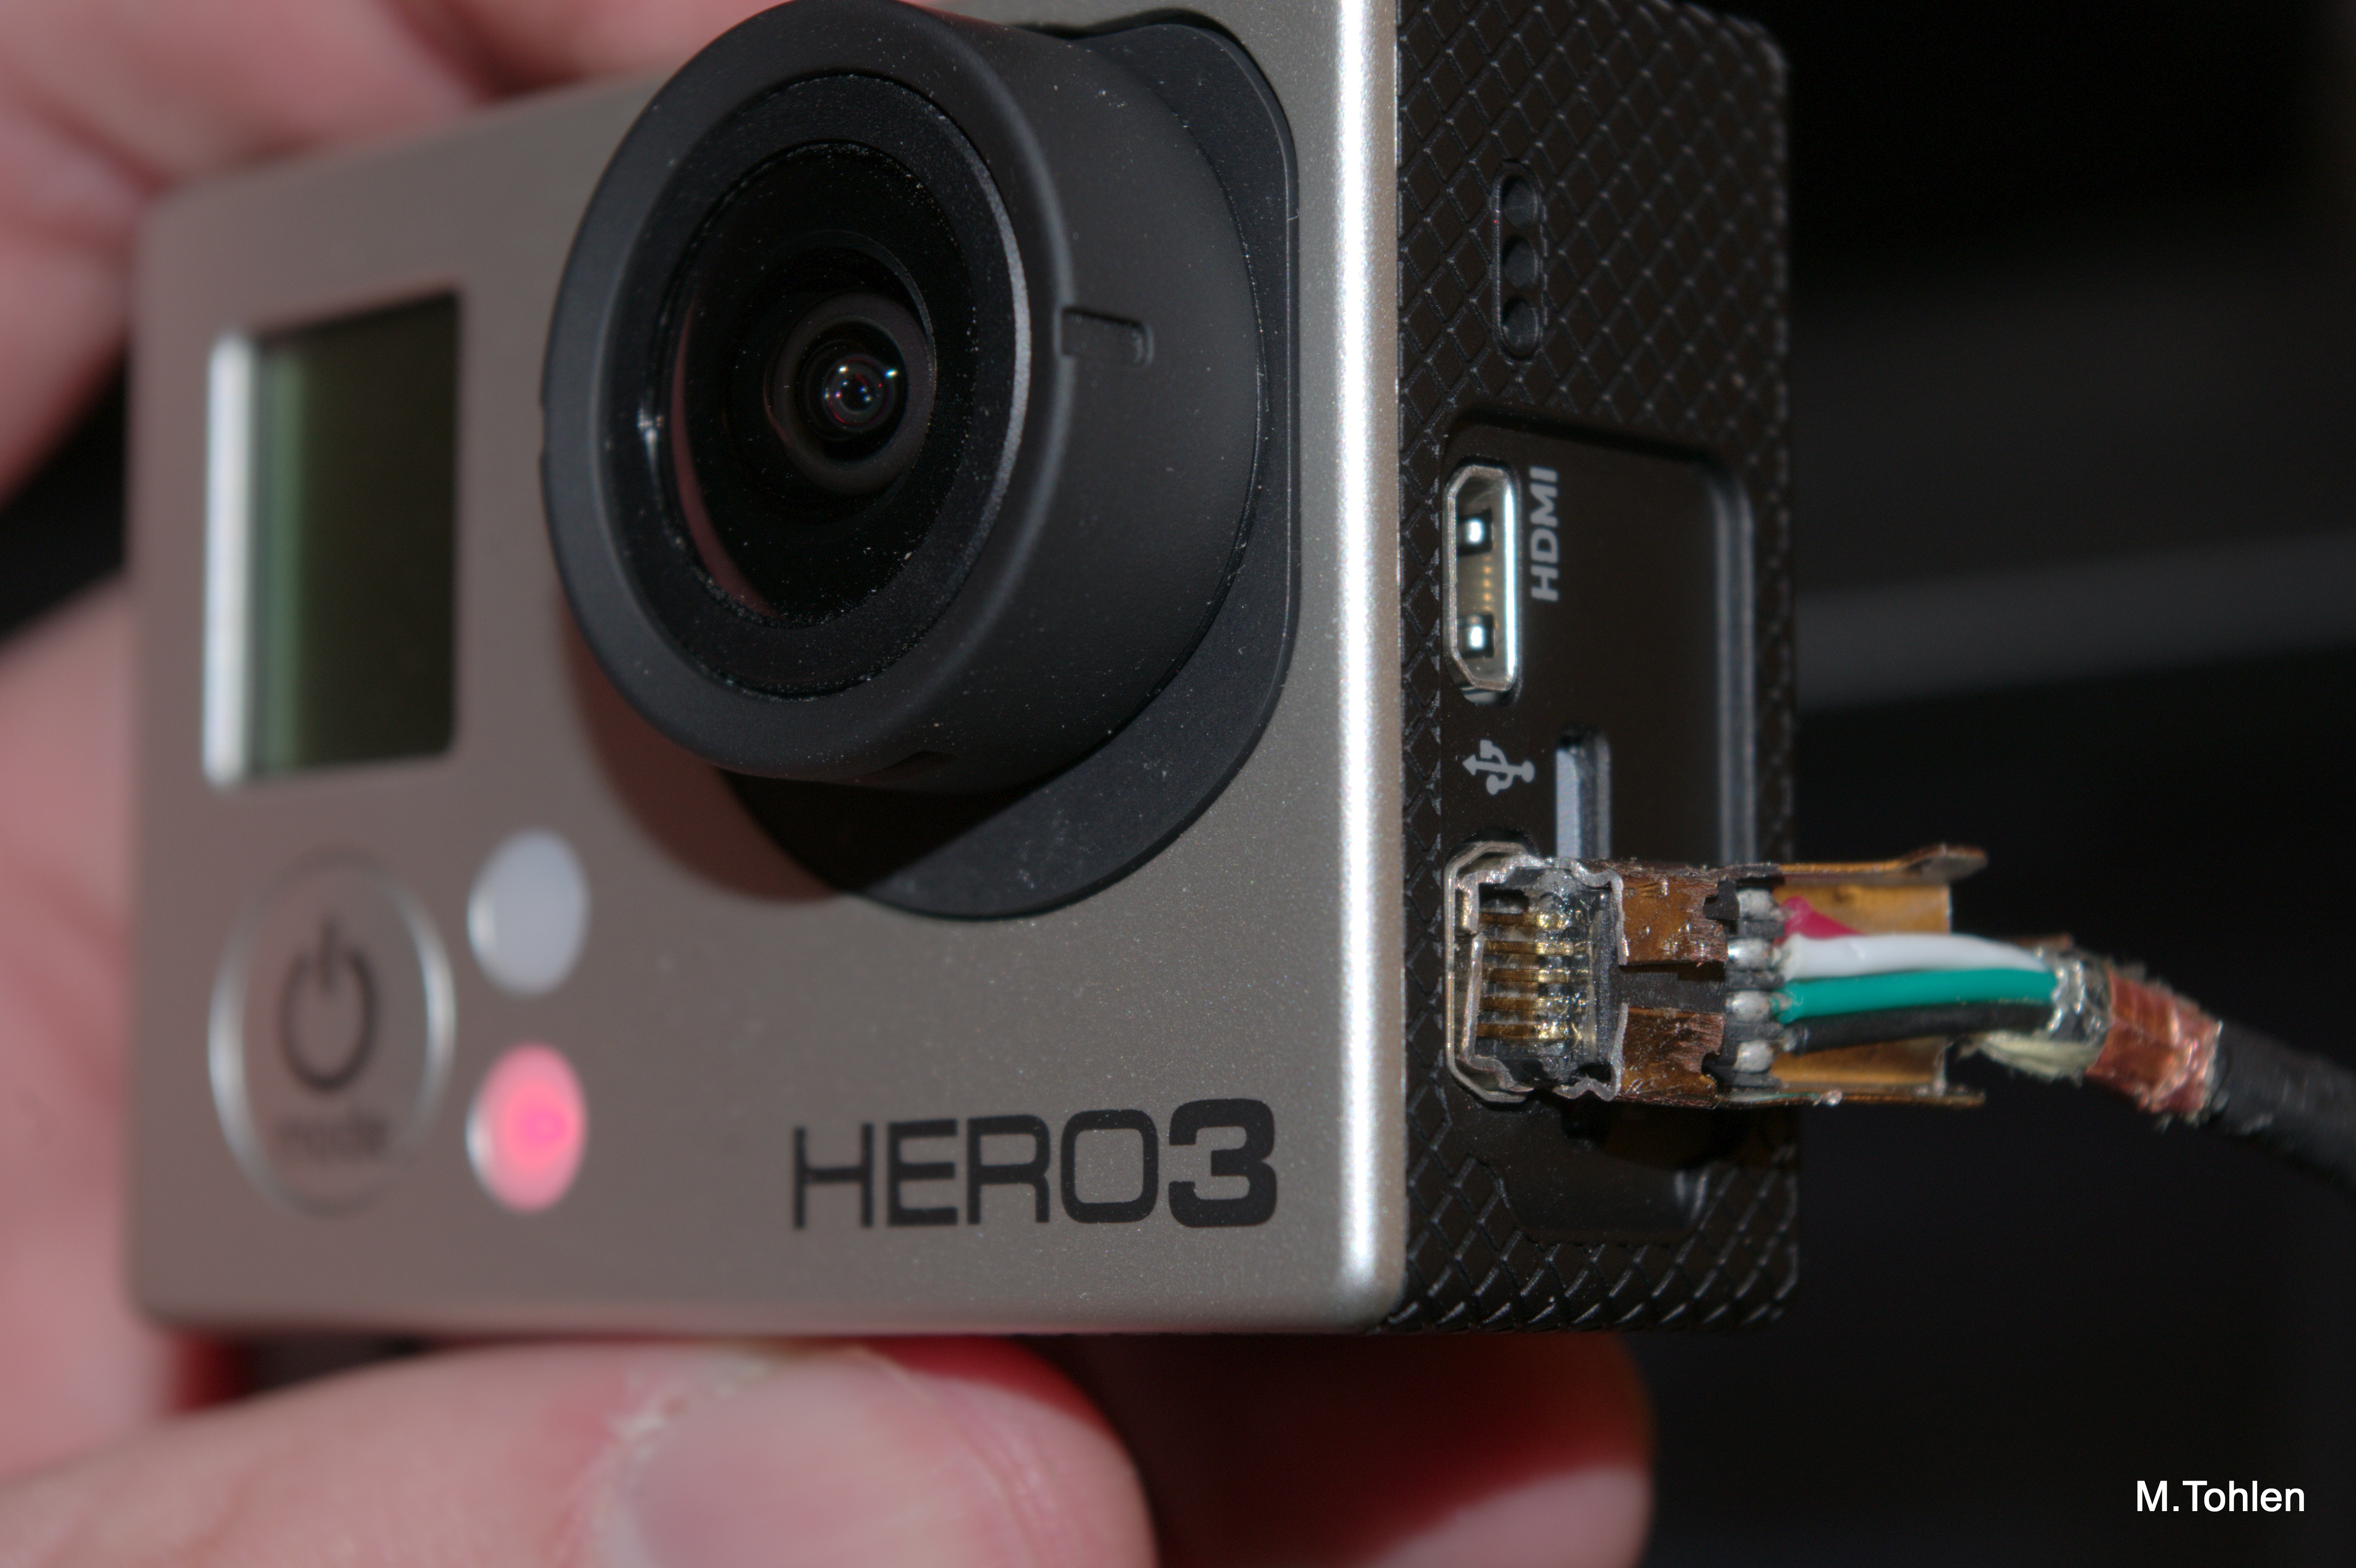
-Do a test fit. Make sure your pins are flat against the inside of the connector and not lifted up some (this could be bad when you connect it!)
-Bend the newly created tabs against the connector and make sure they hold it down.
-Plug it into your GoPro Hero3 and make sure it powers it. You may have to adjust the position of your pins slightly, or scrape off some glue from the top of them.
-Look for any adjustments you need to make. The metal tail of my connector body was too long, it needed to be cut off.
Adjustments.

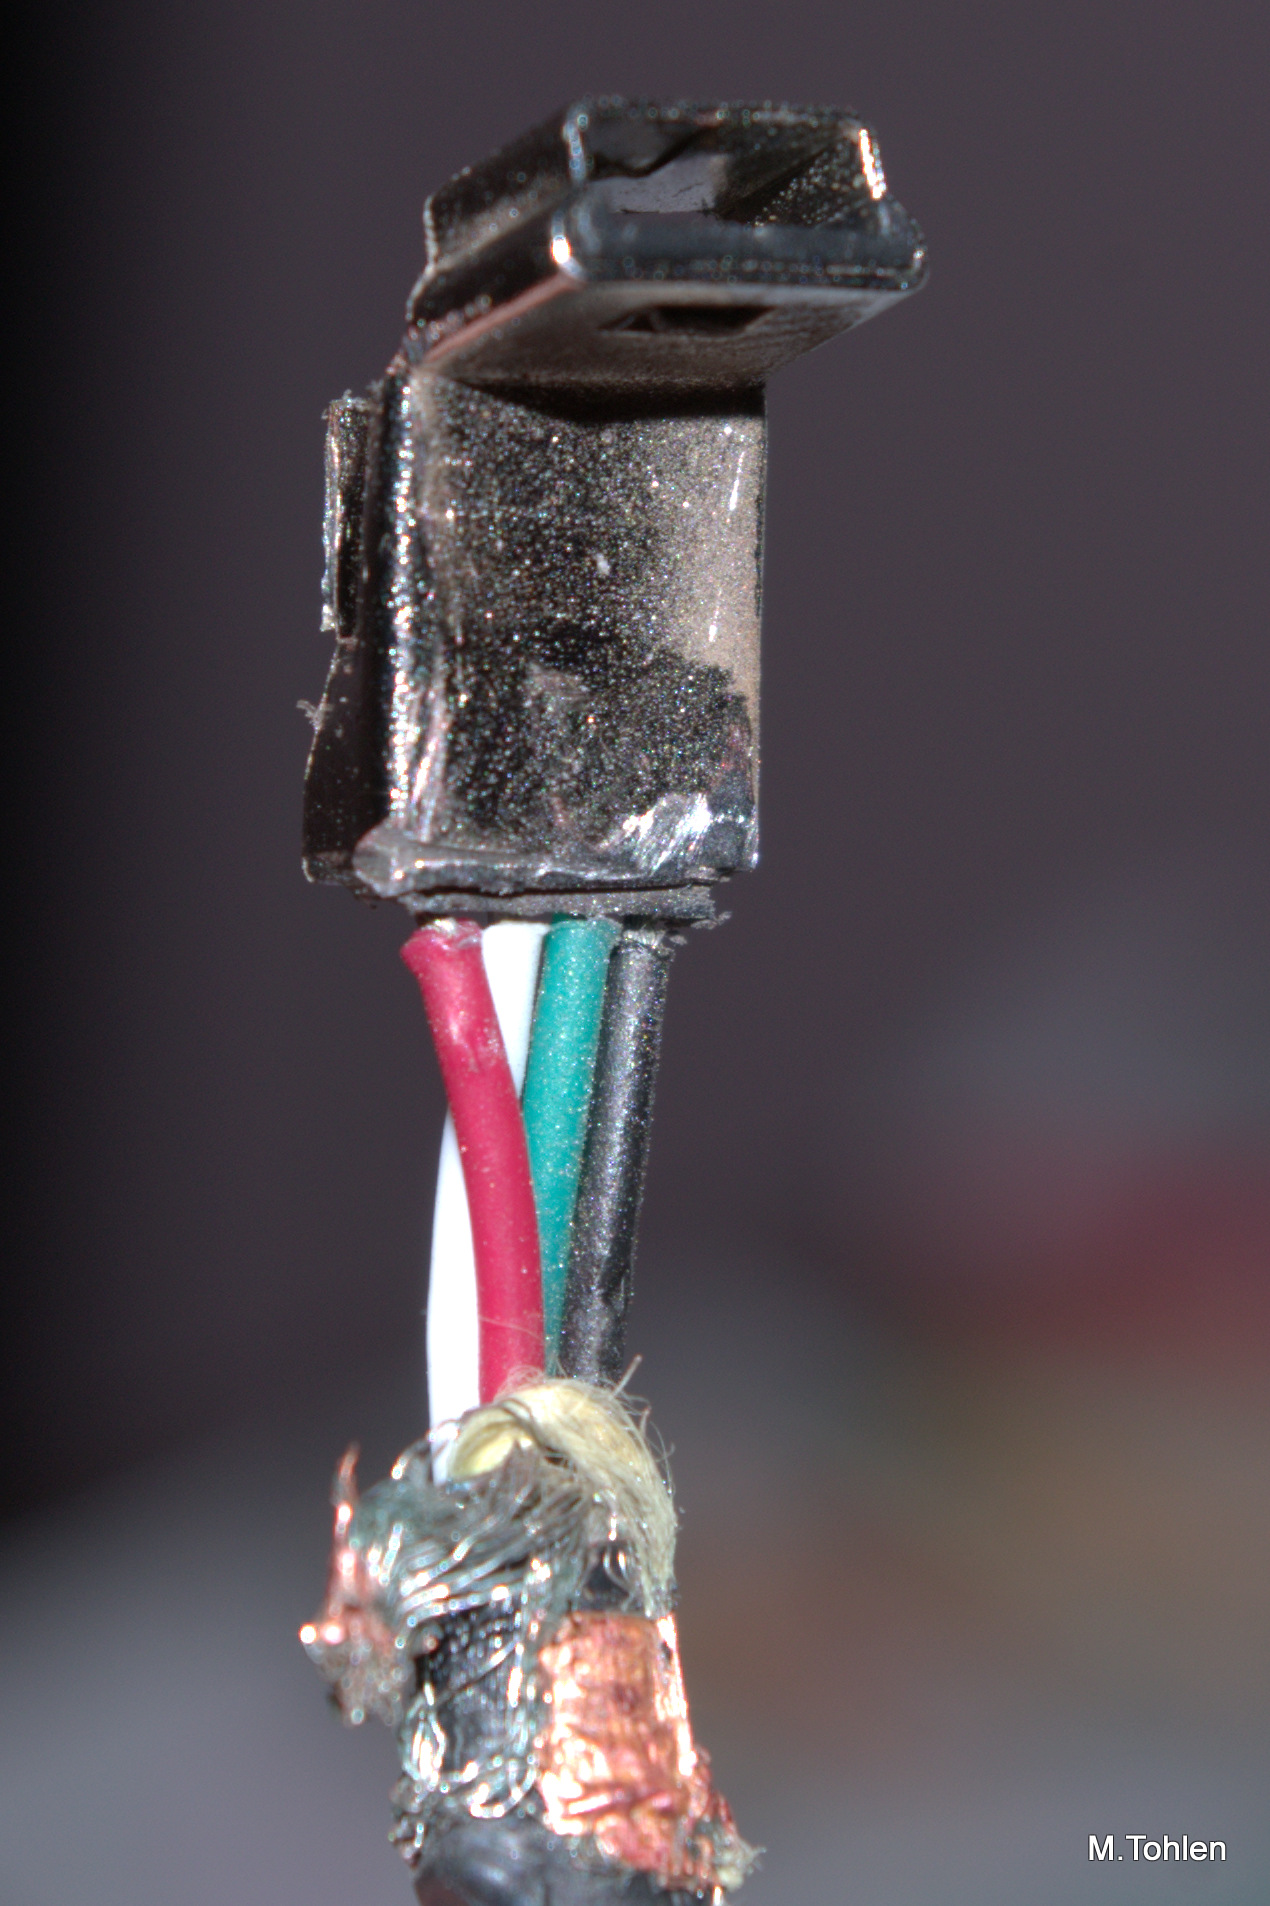
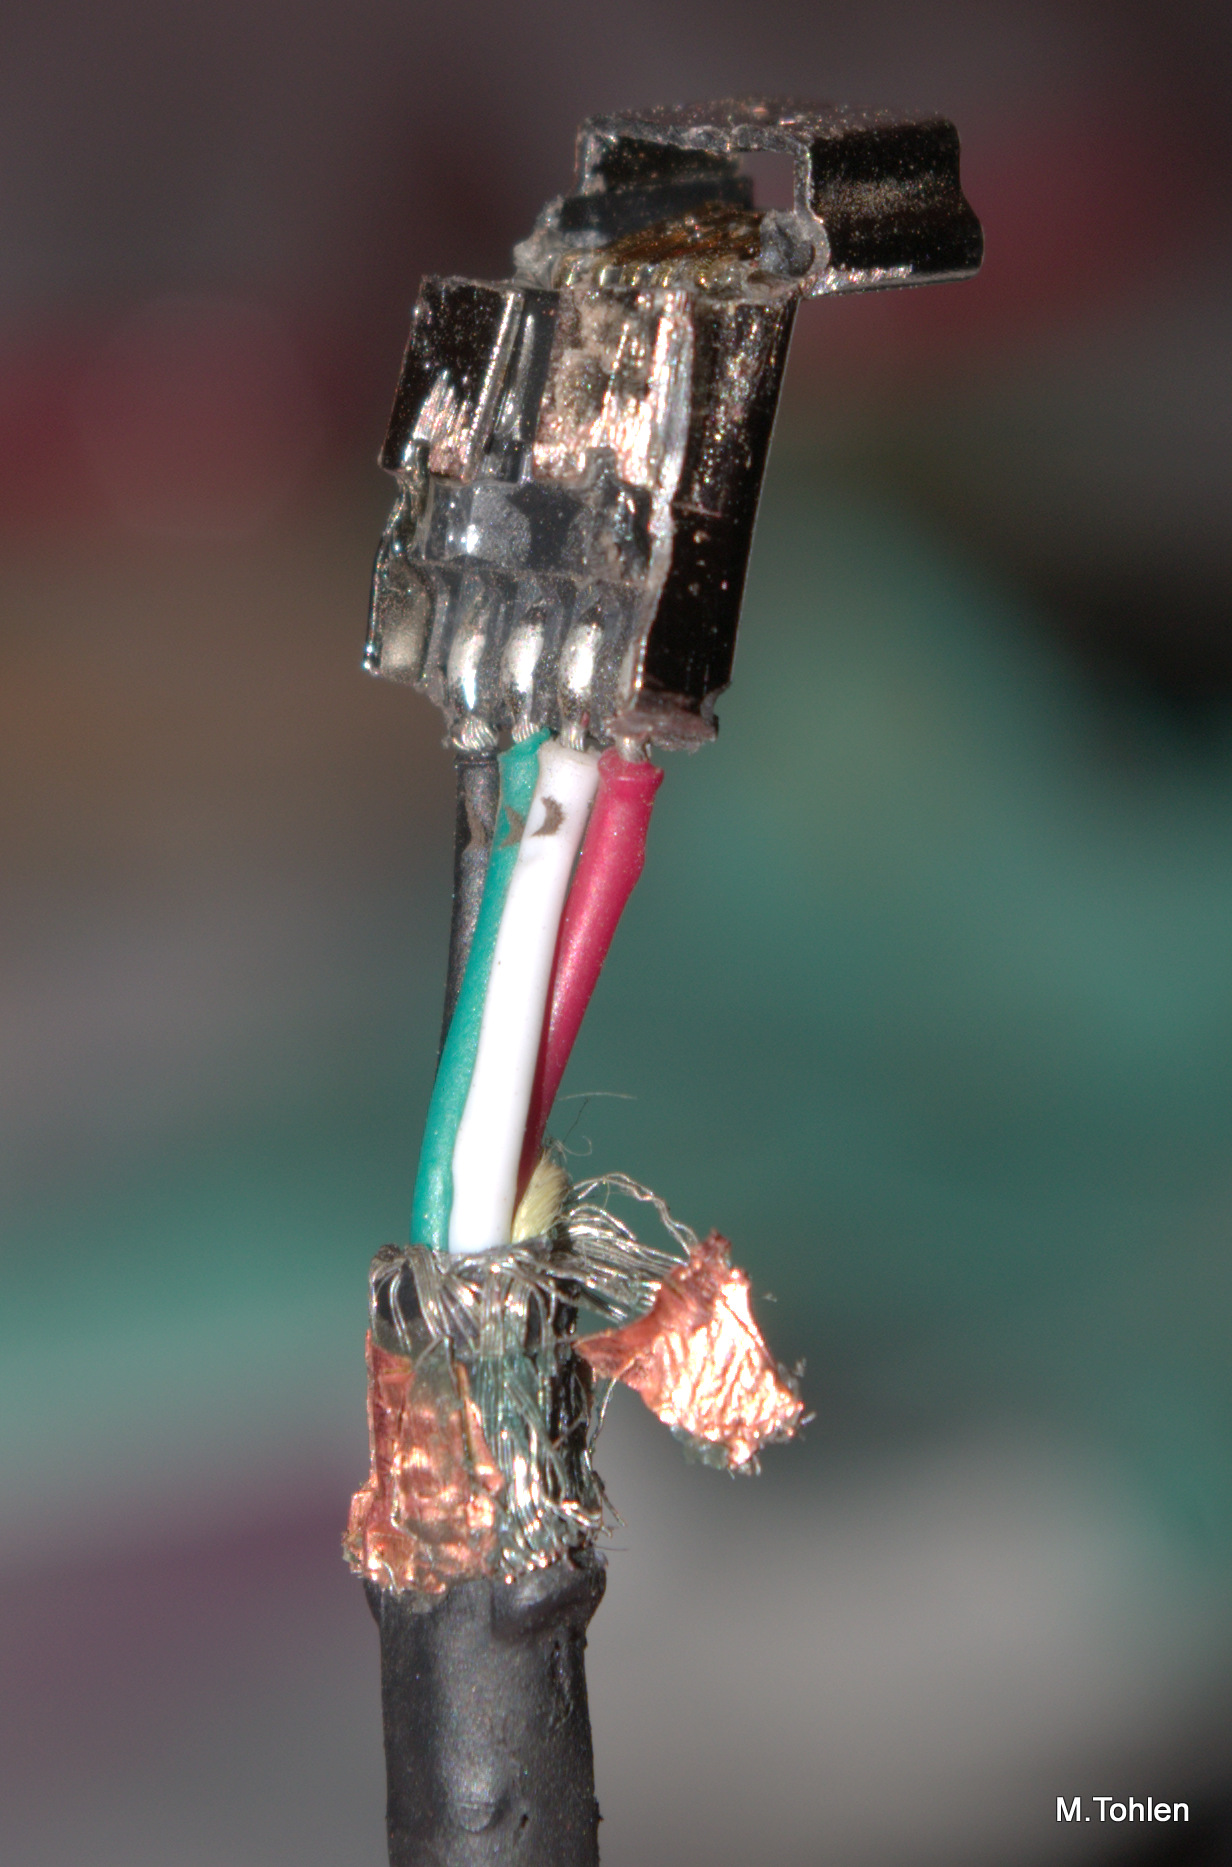
-With your rotary cutting tool, trim off the metal tail so that it will fit within the GoPro Case
-Add some more glue to seal the deal.
-I also trimmed off more cable sheath, you may or may not need to.
-Add some more glue to seal the deal.
-I also trimmed off more cable sheath, you may or may not need to.
Record.
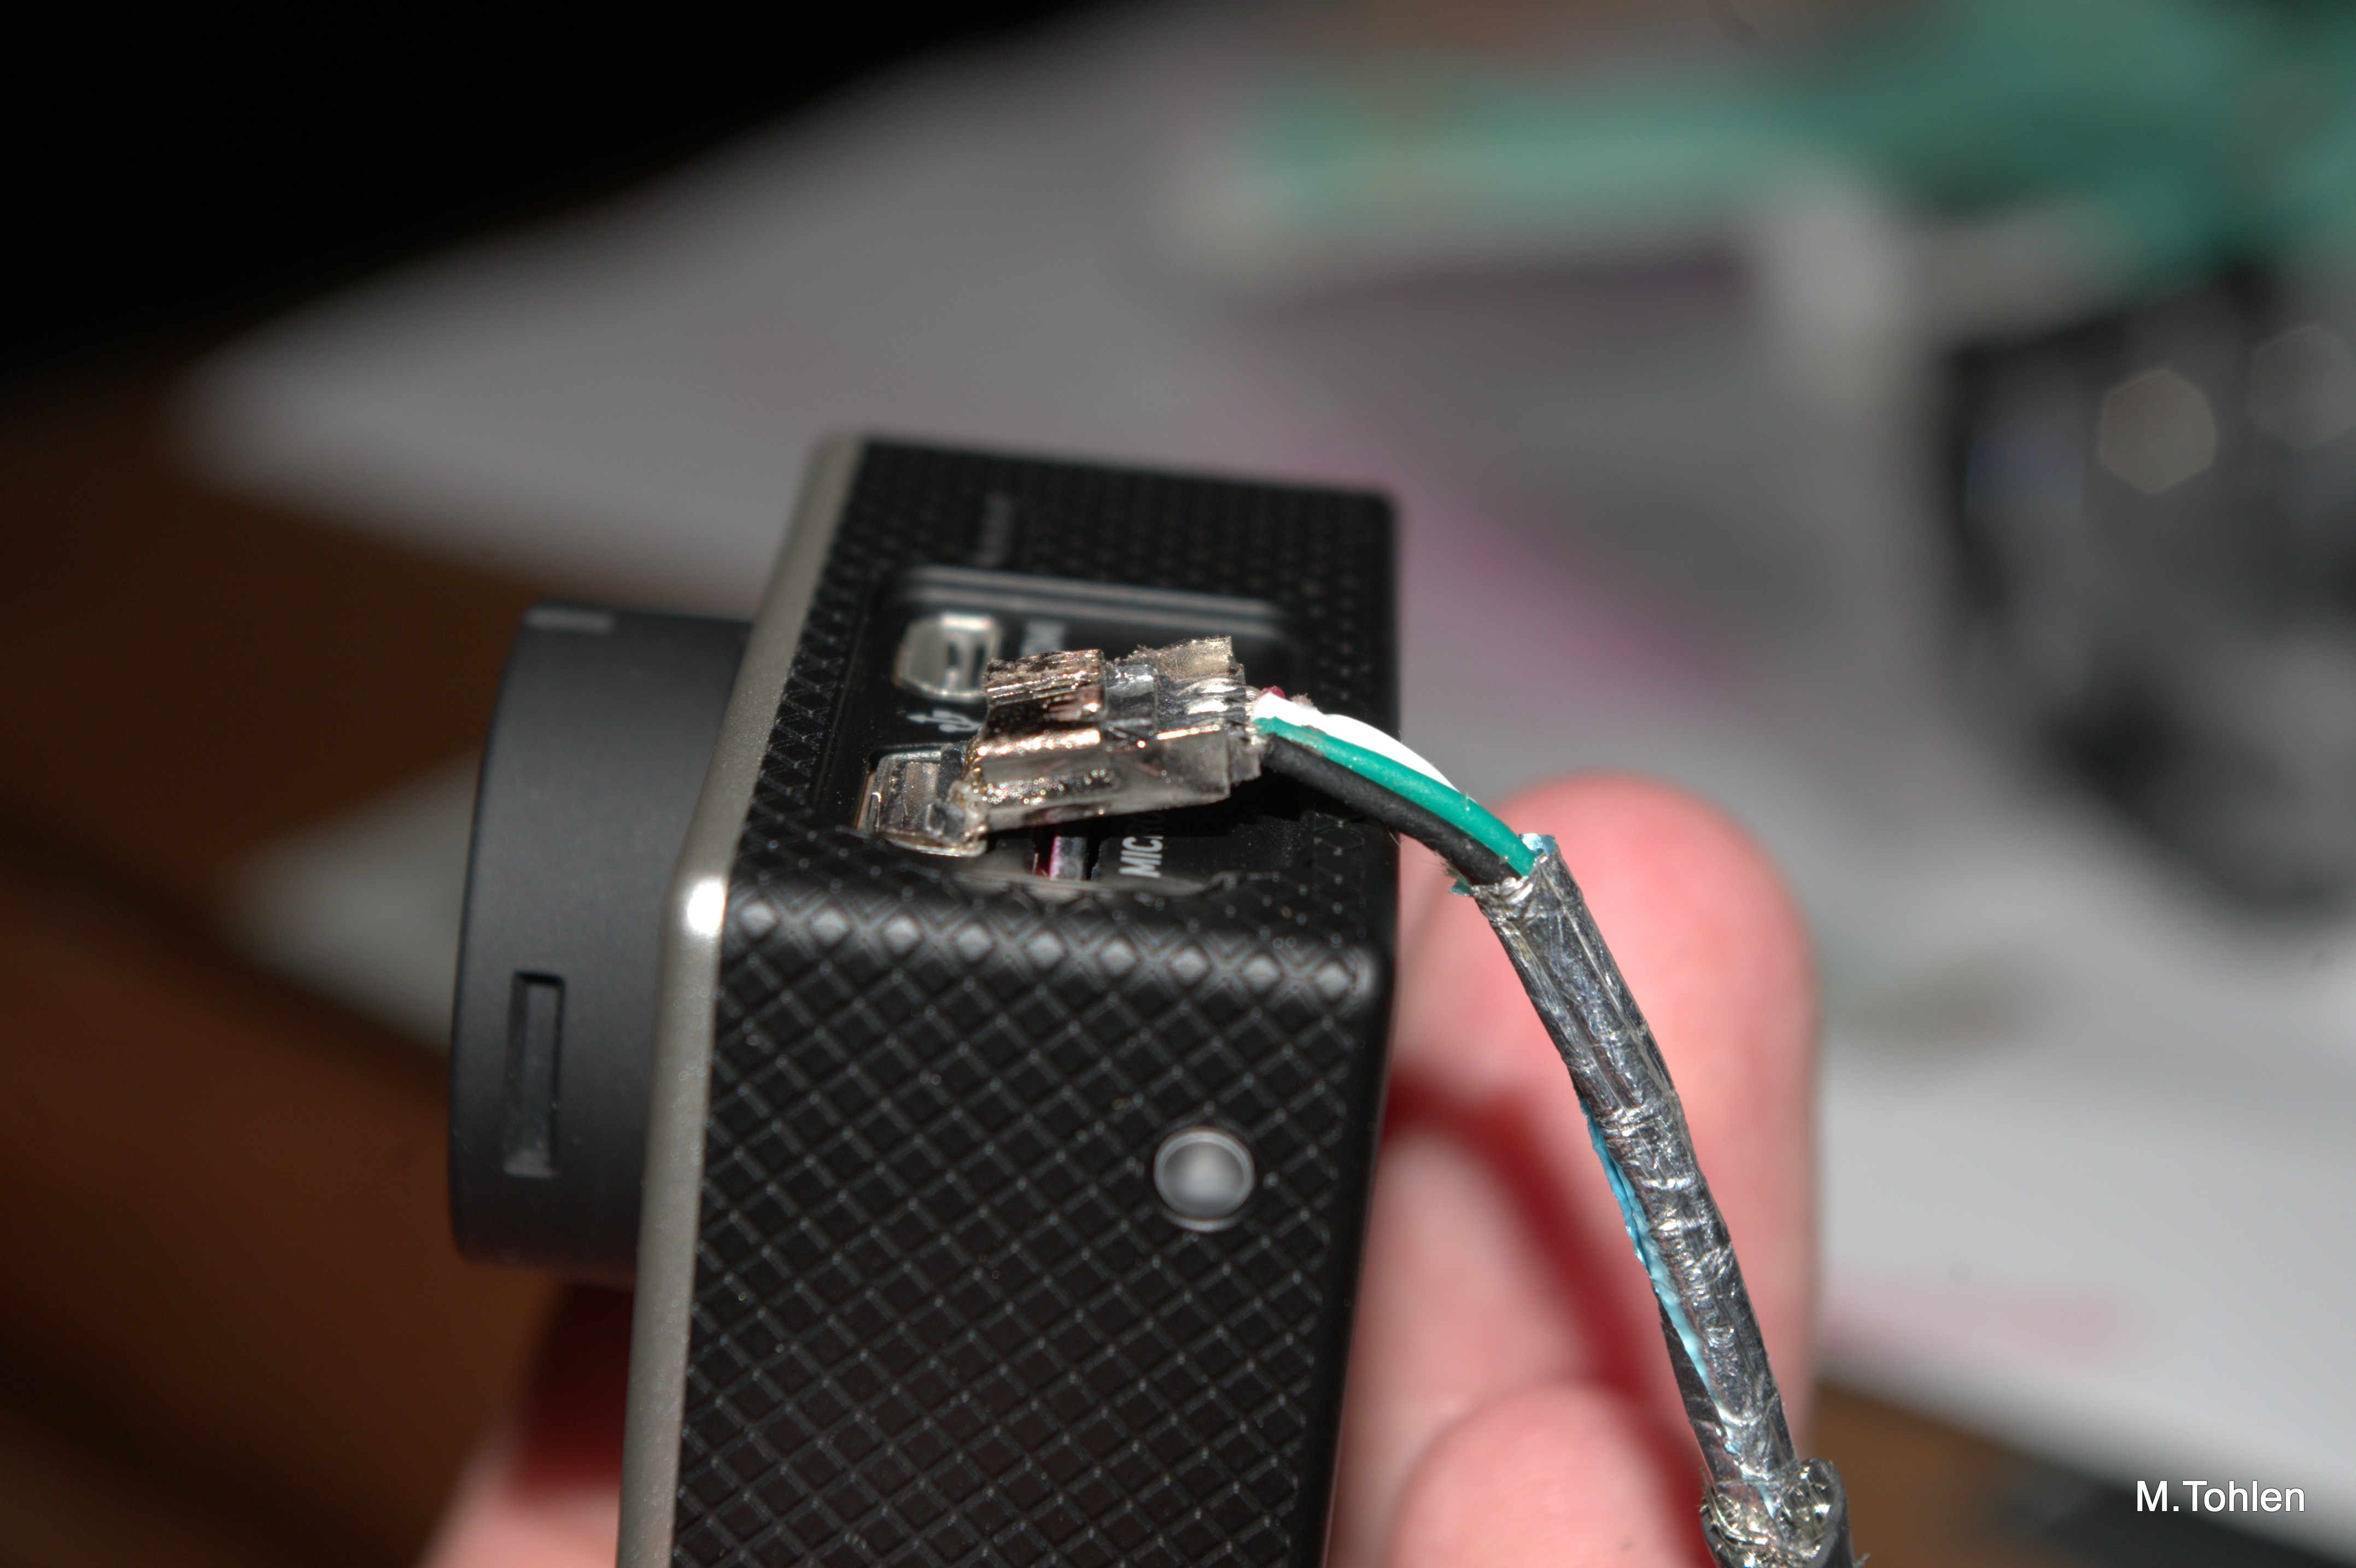
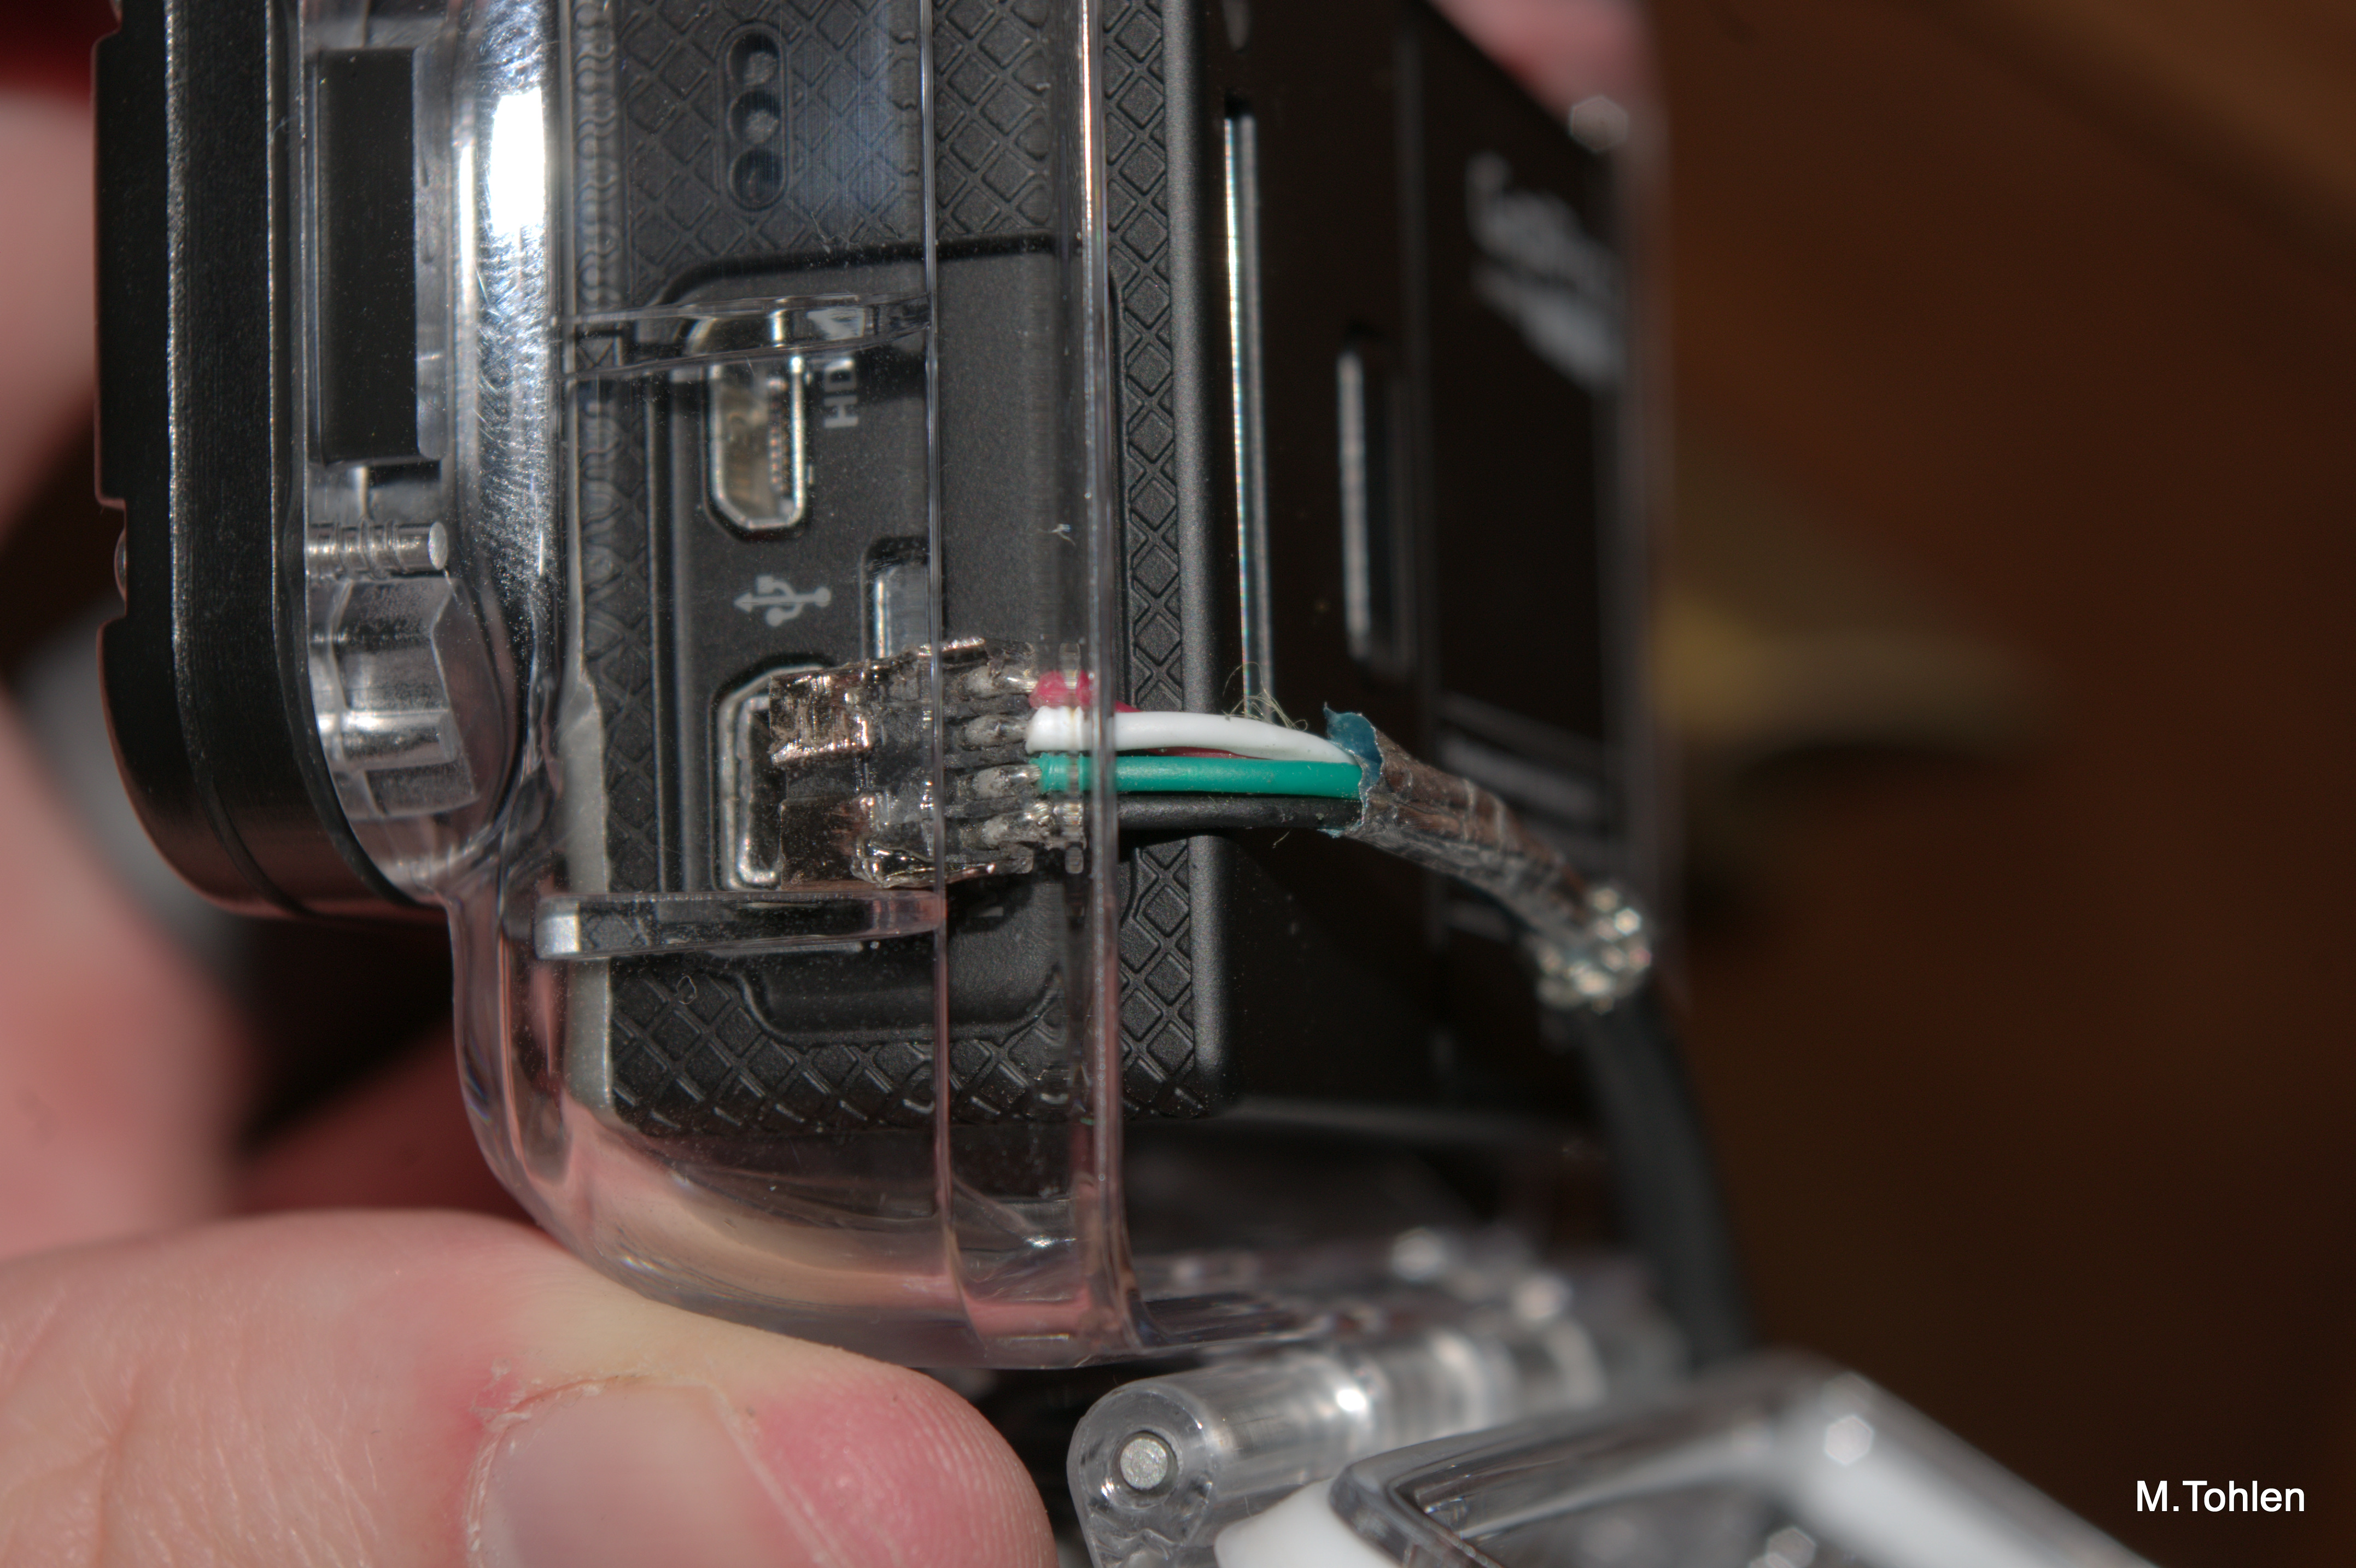

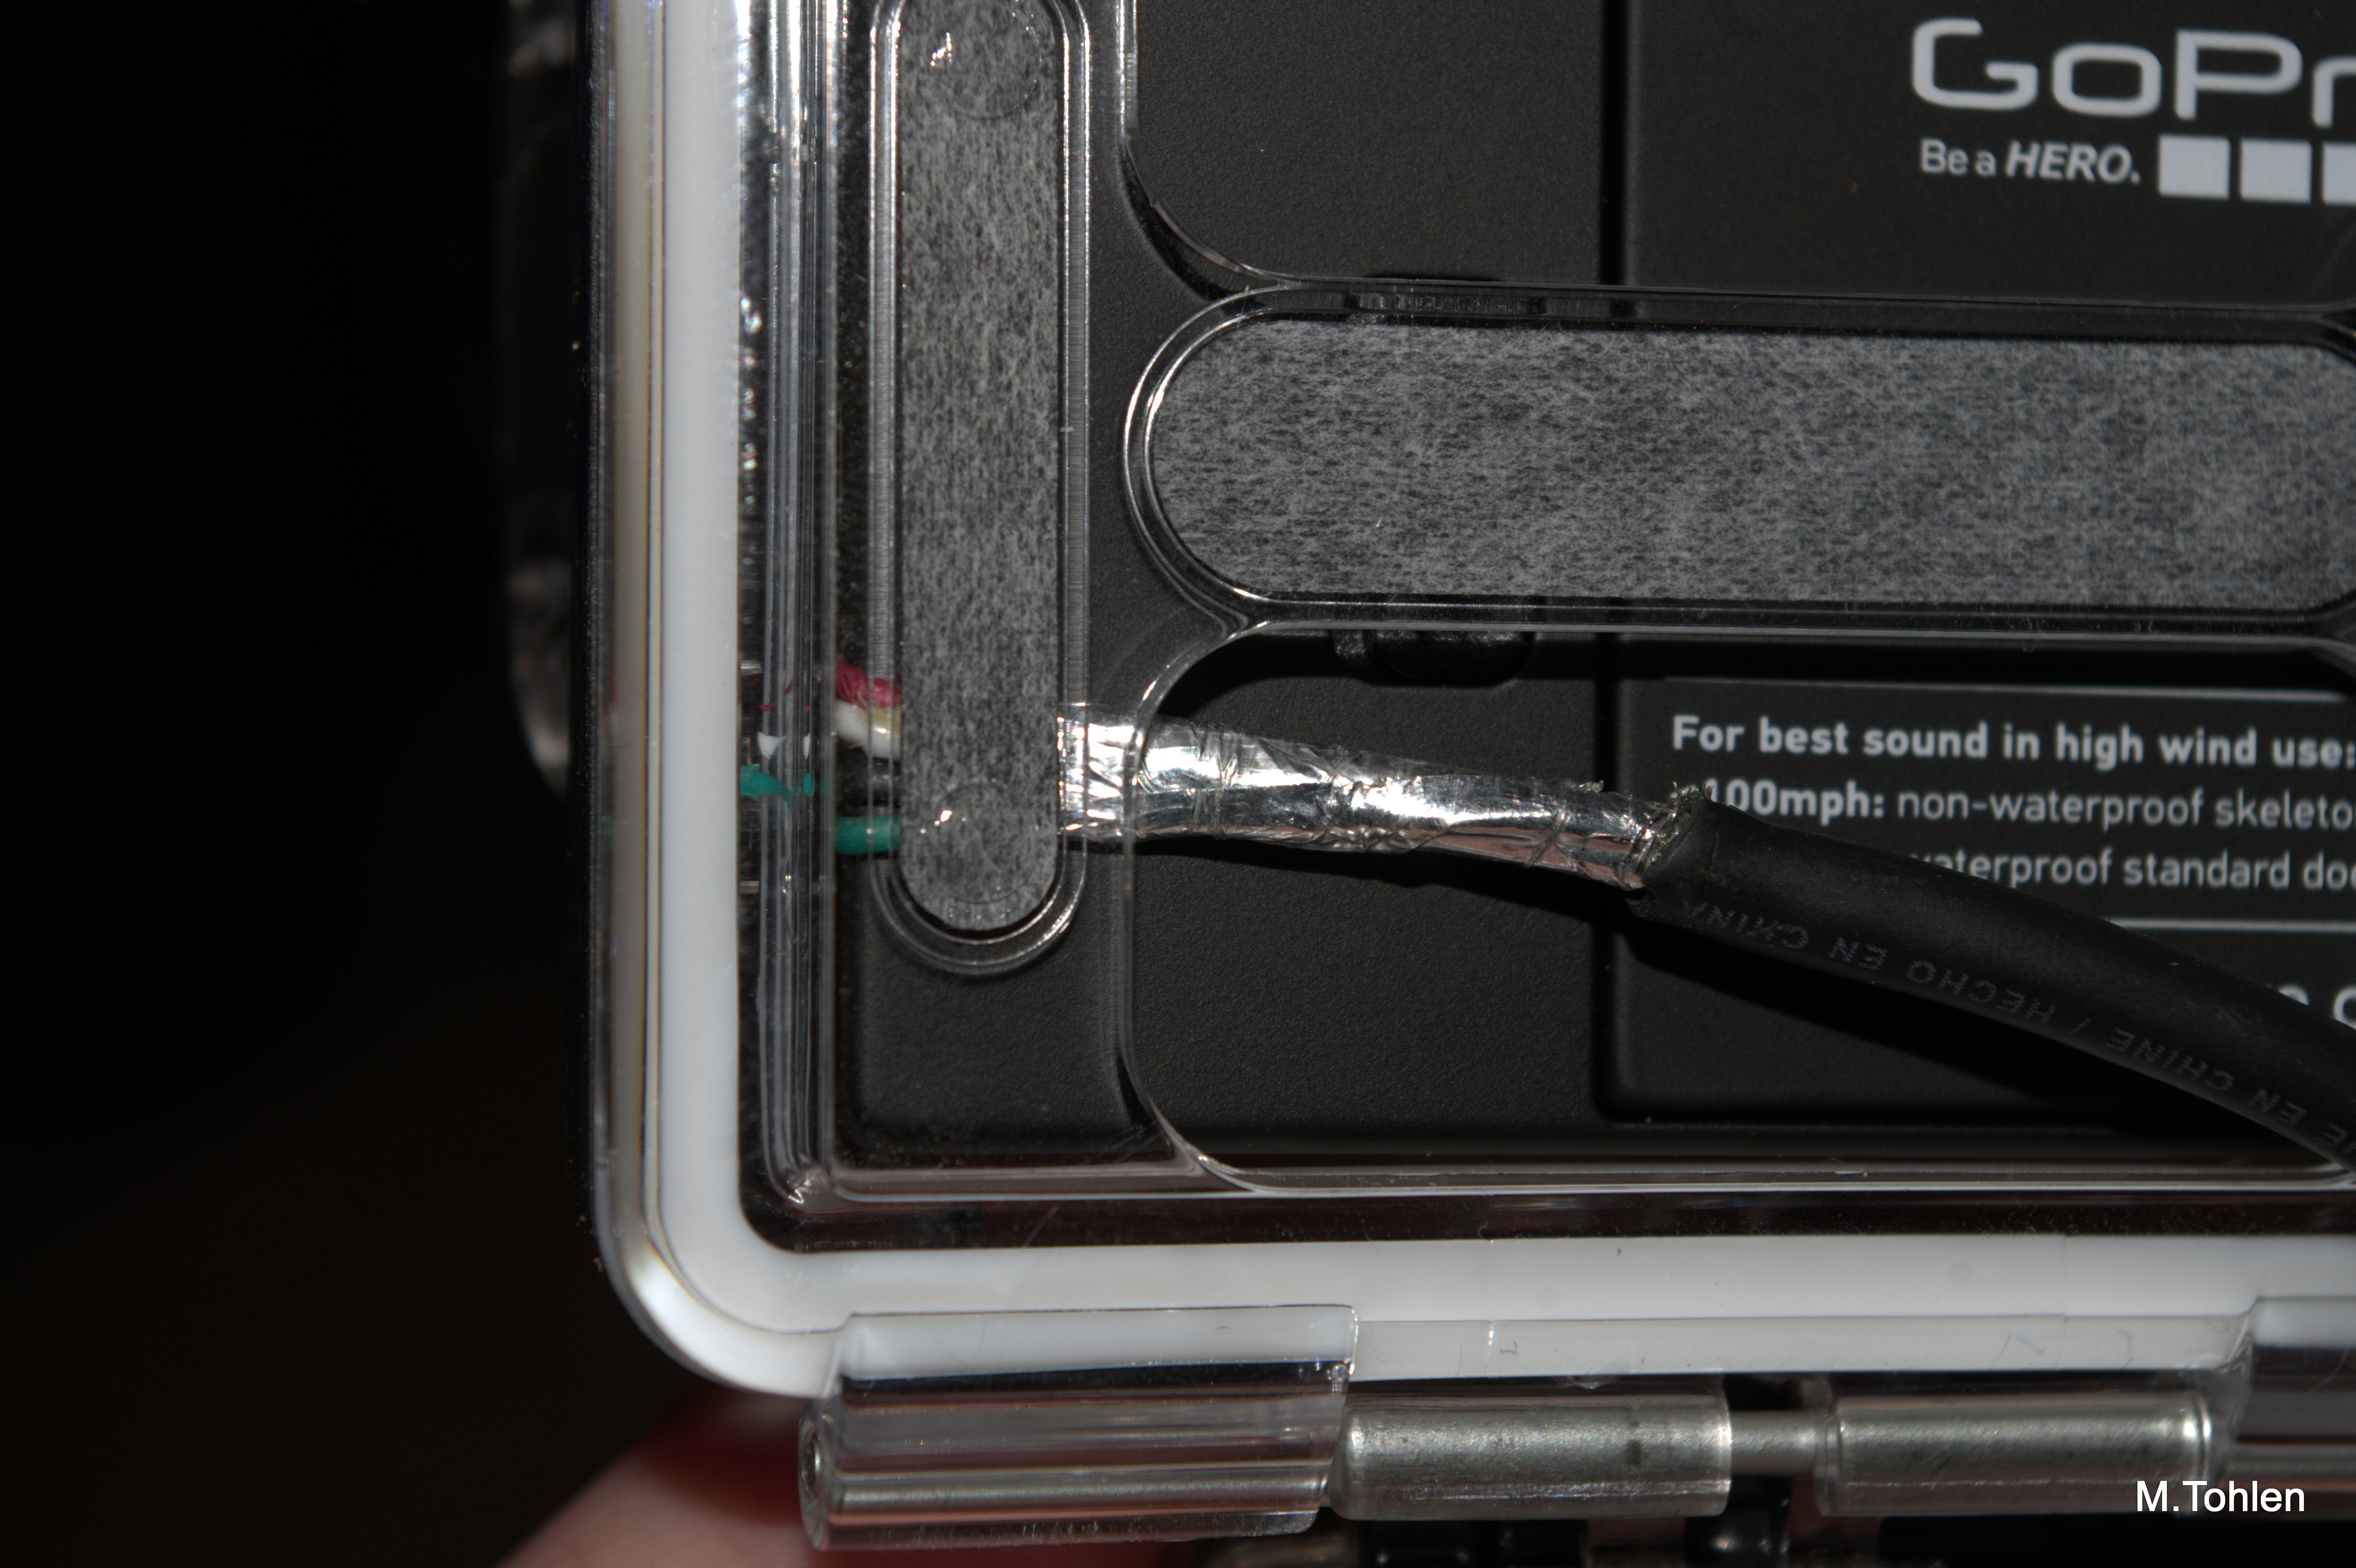
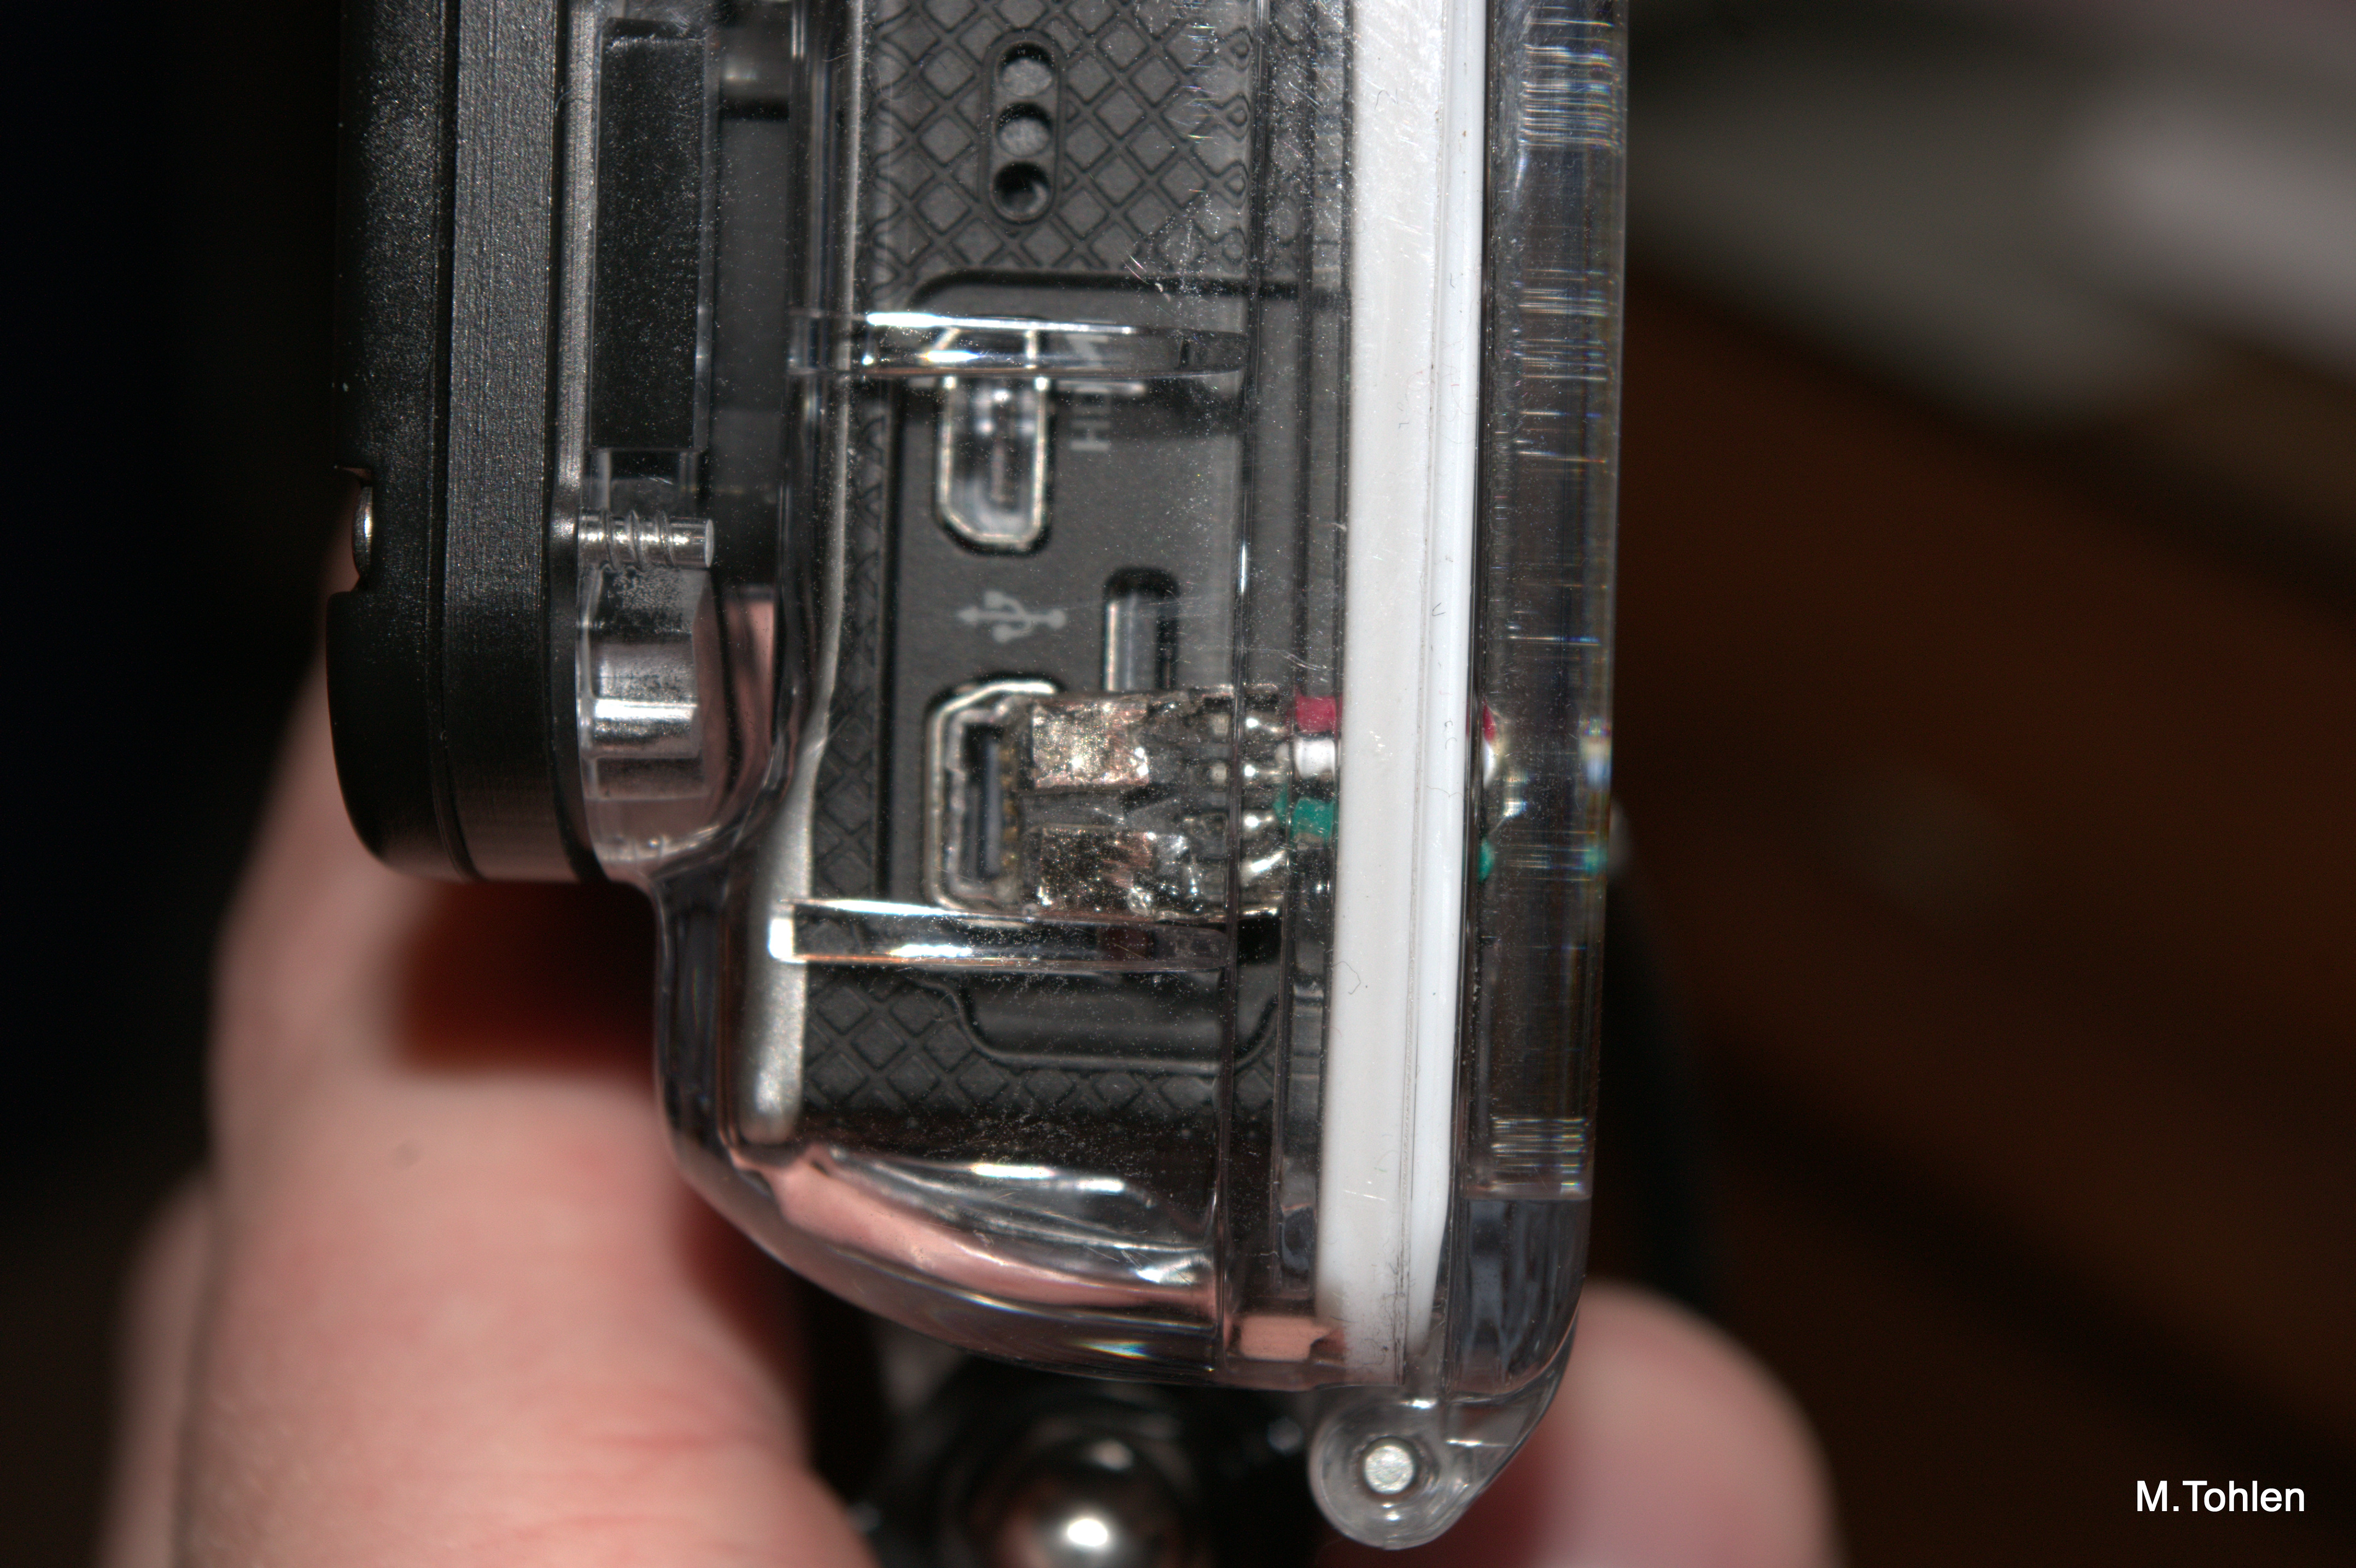
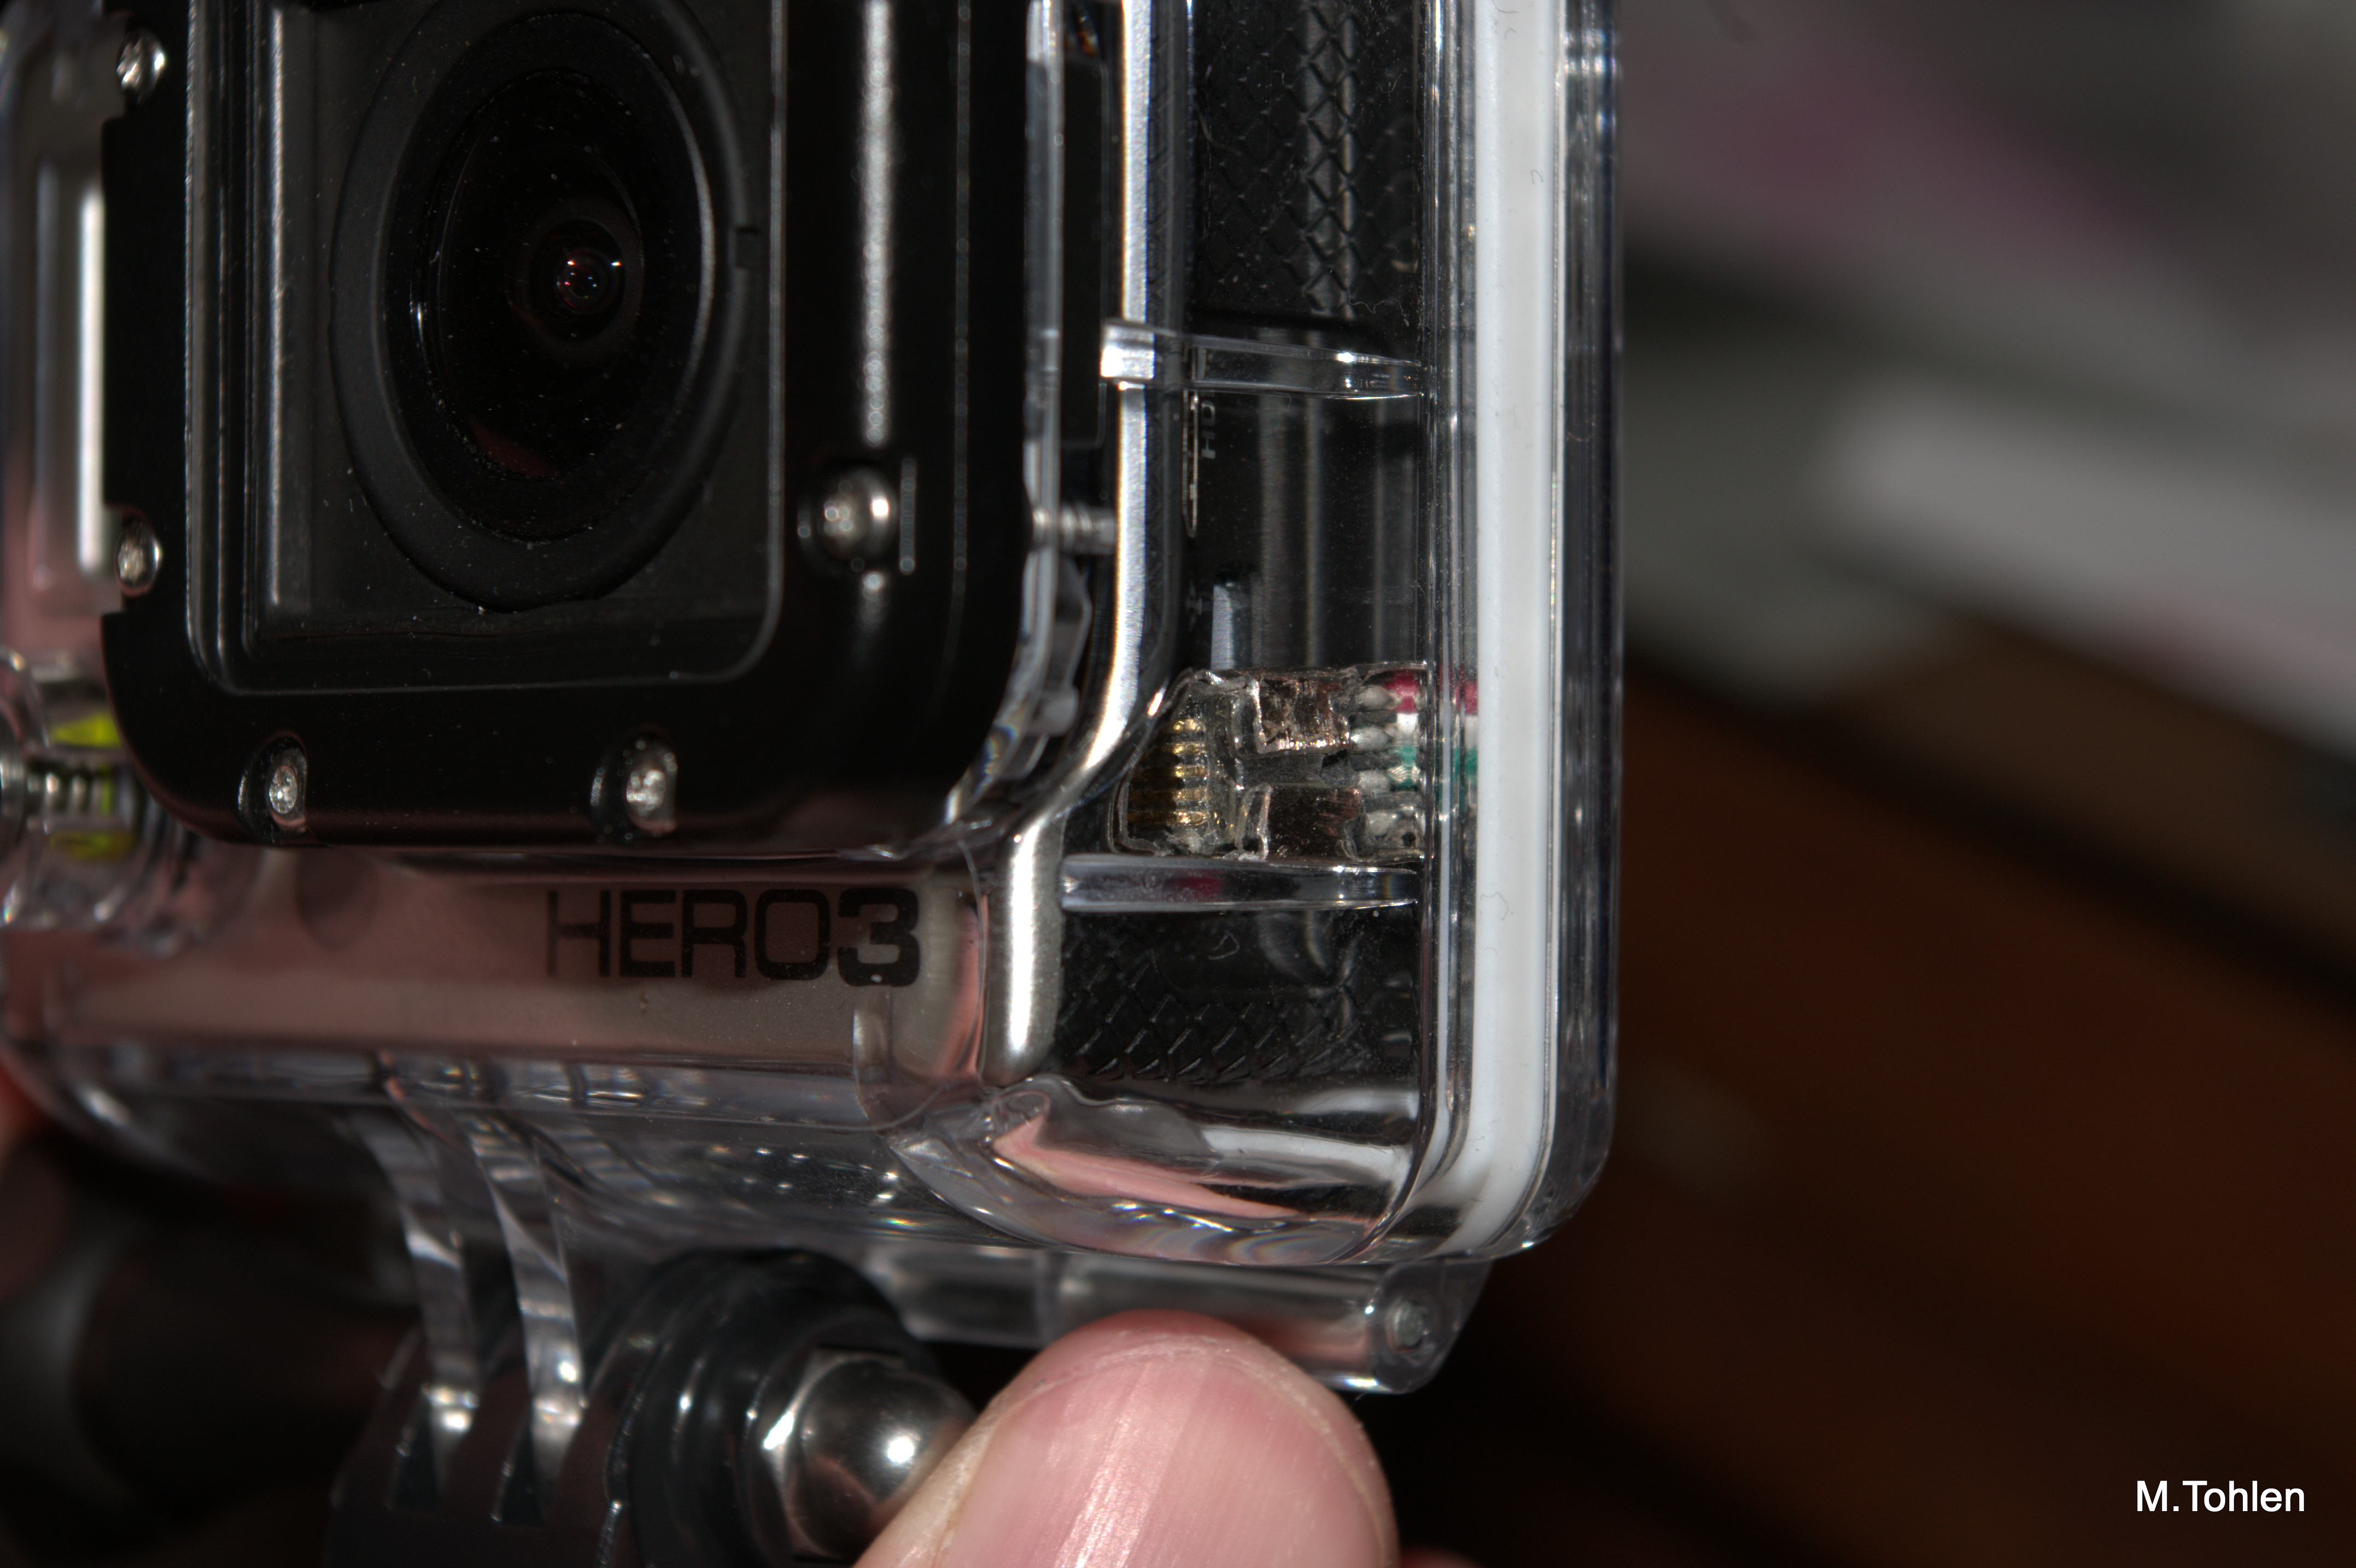
-Assemble your GoPro into the case with your new cable attached. Take care, there are a few tight clearance spots noted in the photos. These are mostly where there are ribs/ridges in the case itself. I believe these could easily be modified to allow a looser fit of the cable, however do this at your own risk, I did not feel the need to.
I have not done any long term testing with mine yet, but it is definitely nice to know that I have the option, if I need it!
Let me know if you have questions! Thanks!
I have not done any long term testing with mine yet, but it is definitely nice to know that I have the option, if I need it!
Let me know if you have questions! Thanks!