Model a Logo in Blender 3D
by ParikshitS in Circuits > Software
23234 Views, 11 Favorites, 0 Comments
Model a Logo in Blender 3D
We will model a logo in Blender
Run "Blender" and Click Anywhere in the Window
Start Blender and click anywhere inside the blender window to close the splash screen.
Note :- Splash screen differs from version.
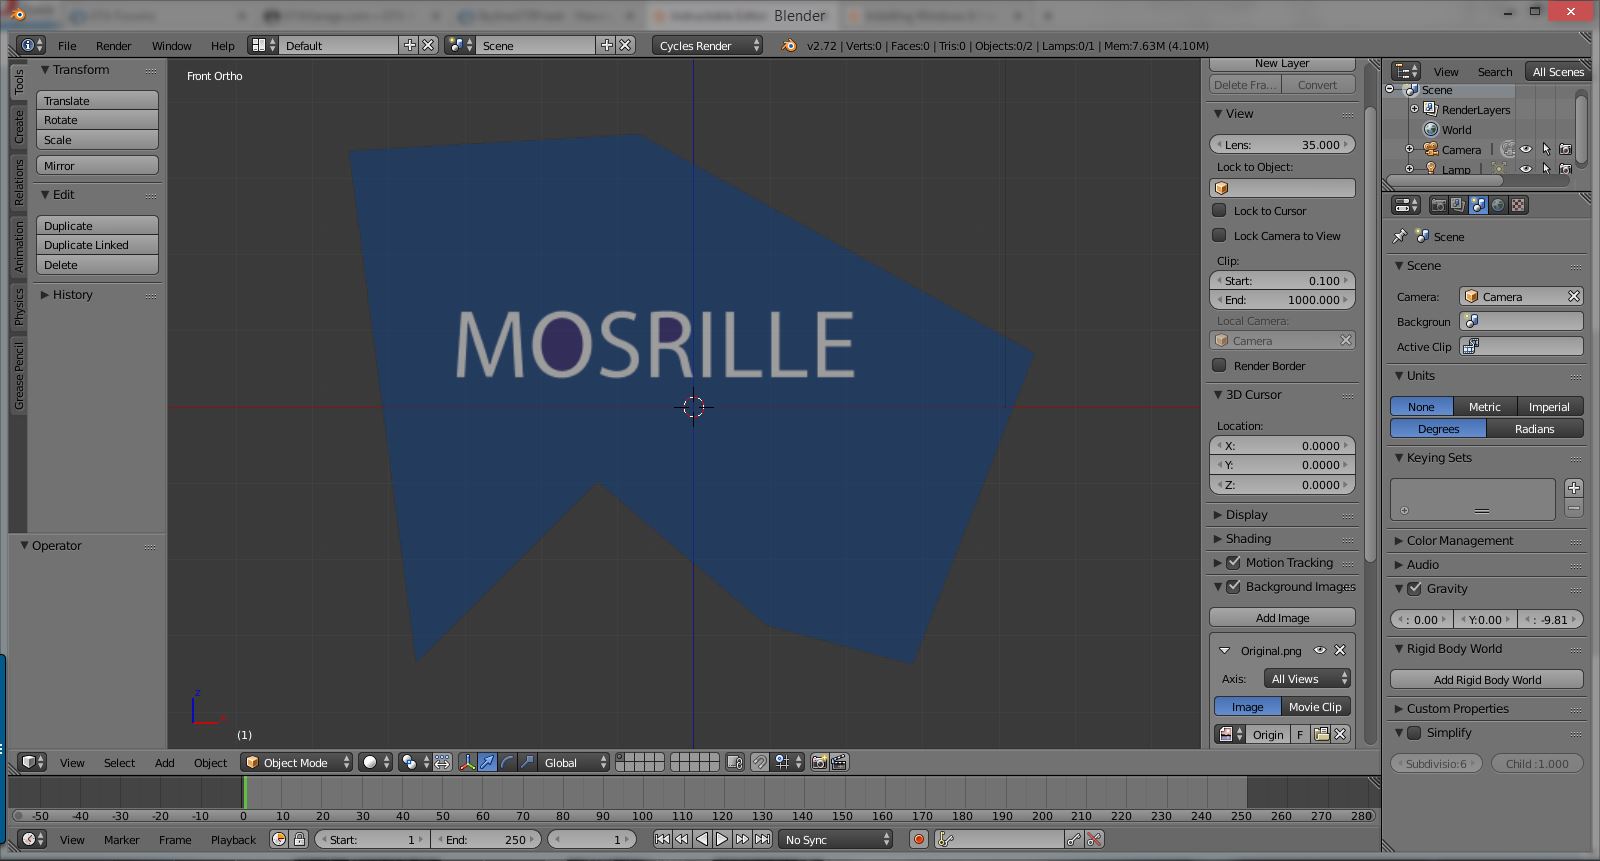
Find an Image of Your Logo , Drag and Drop It Into Blender

Find an Image of your logo , drag and drop it into blender.
Go to Orthographic View by Pressing Numpad 5
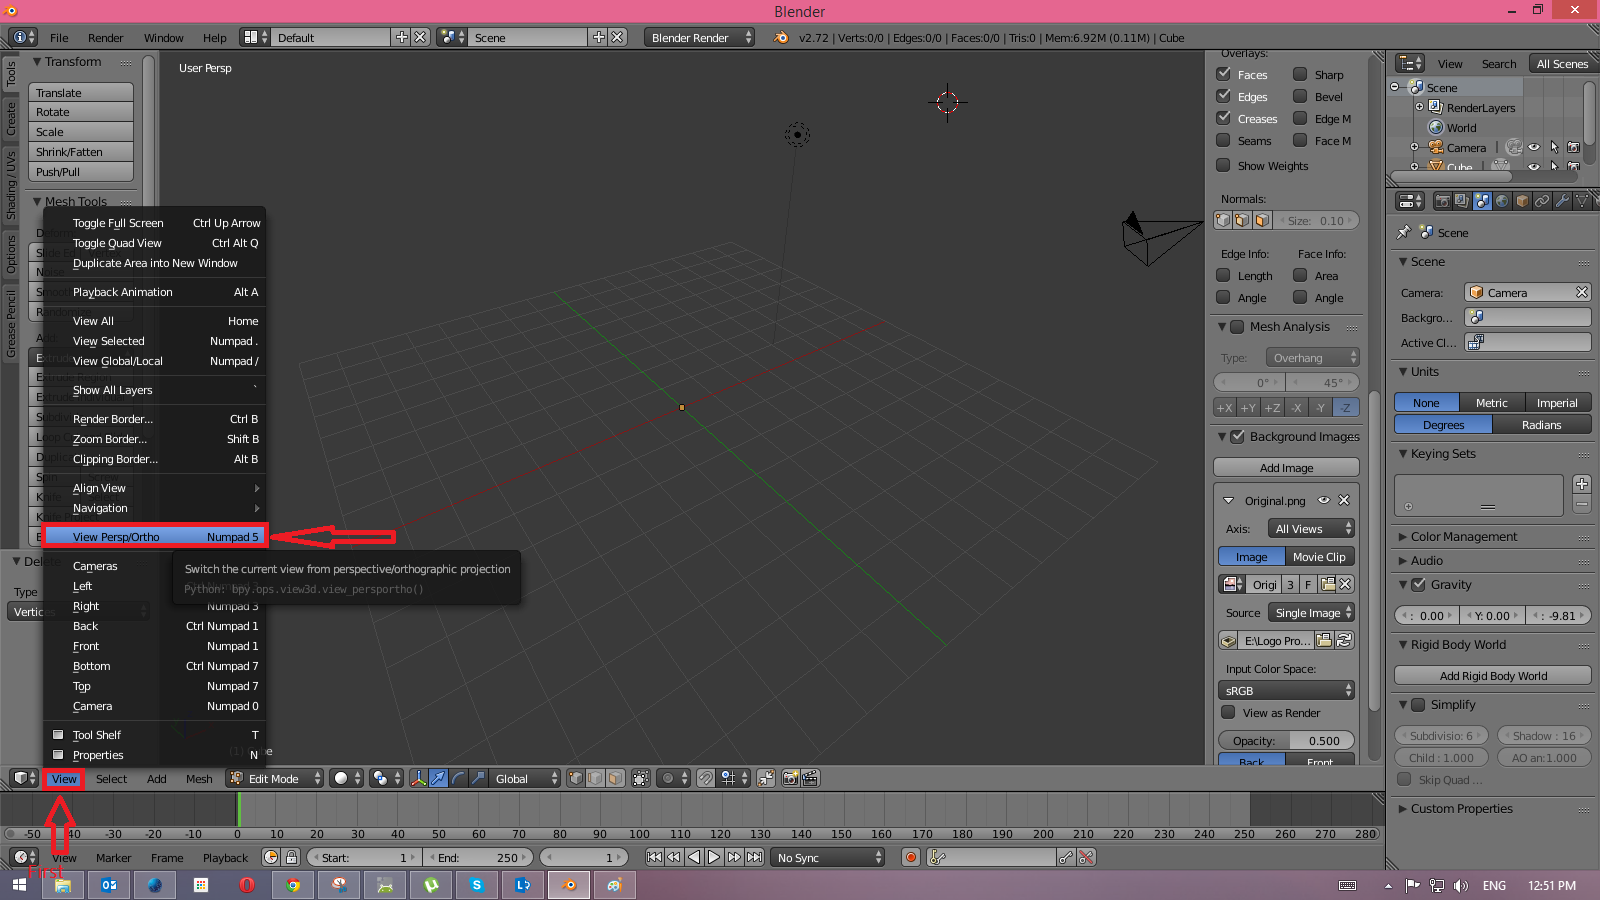
Go to Orthographic View by pressing Numpad 5.
Note. :- If you don't have a Numpad in your keyboard then go to View then View Persp/Ortho
Go to Front View by Pressing Numberpad 1
Go to Front View by Pressing Numberpad 1
Note :- If you don't have Numpad then go to View > Front
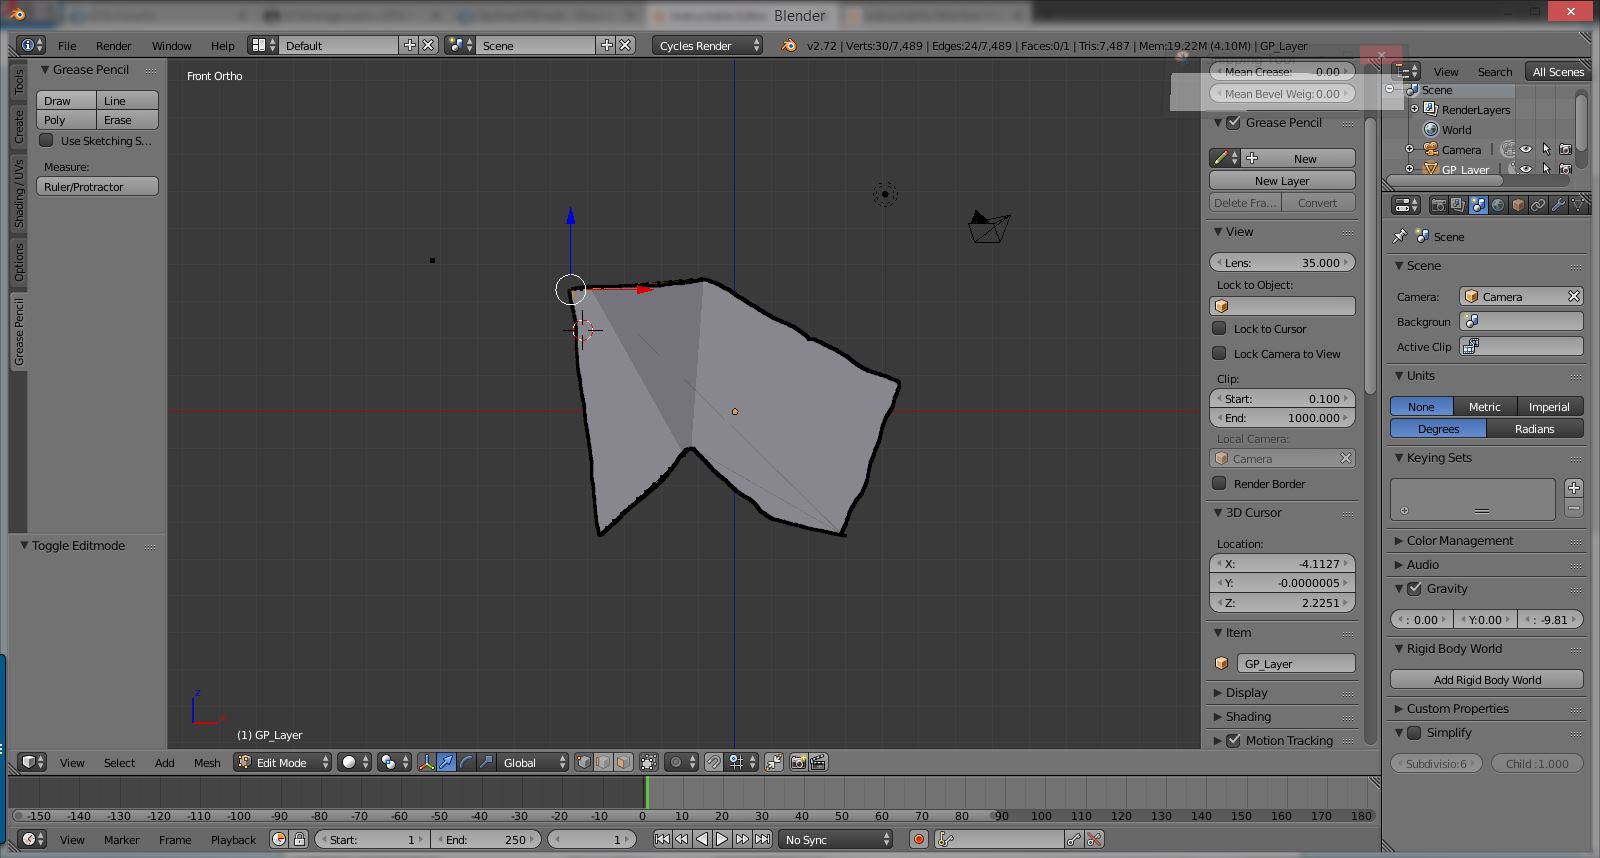
From the Tool Shelf , Select "Grease Pencil and Then "Draw"
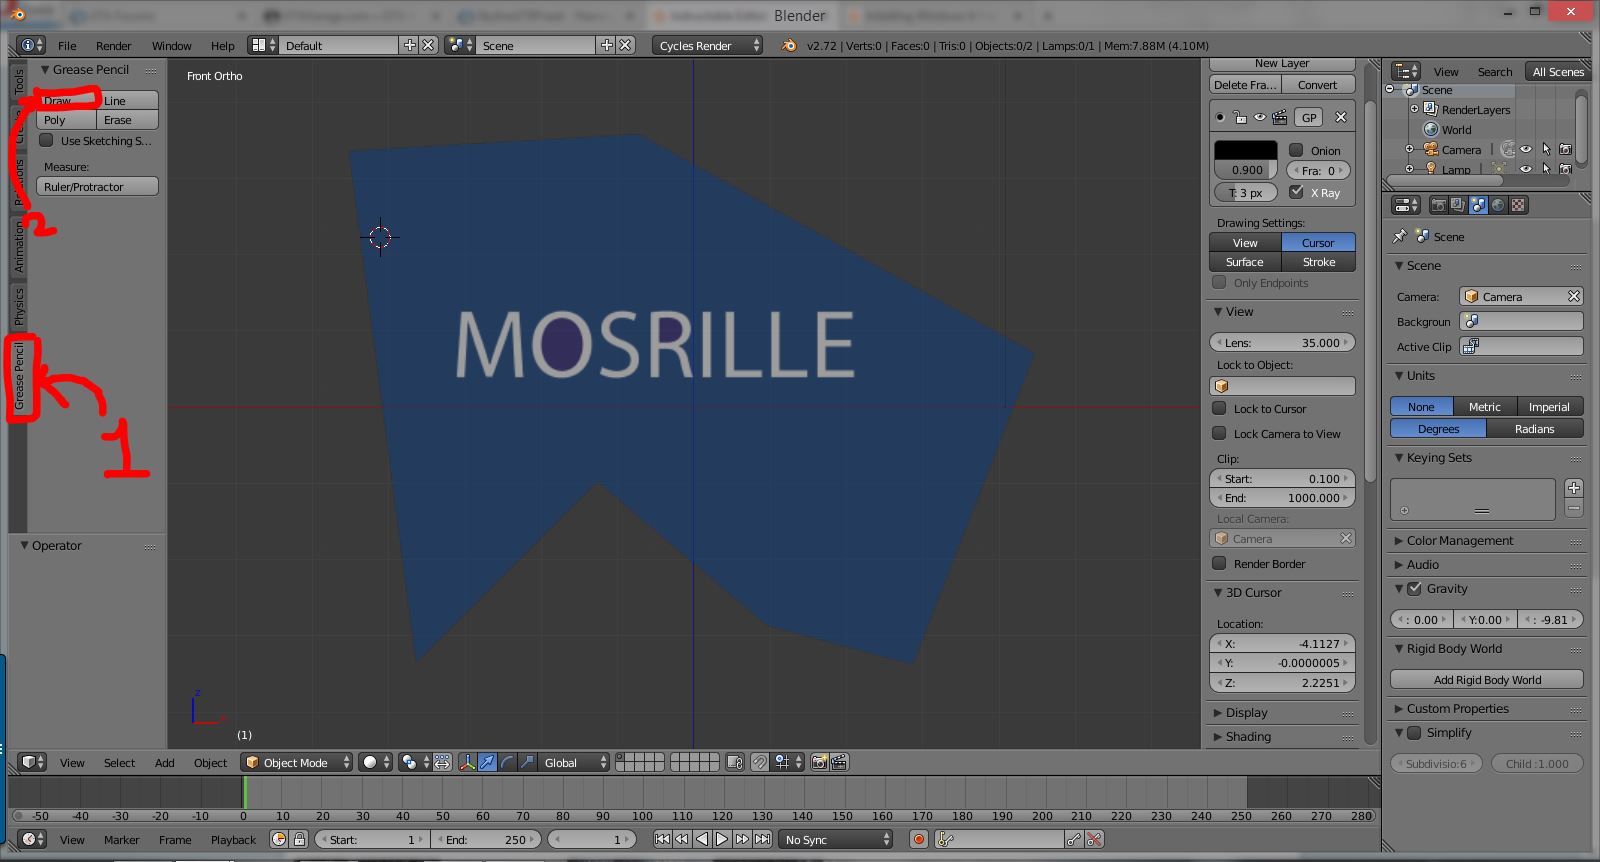
We will now outline the logo. Interesting step. Clock the Grease Pencil Tab from the Tool Shelf and Then click Draw. If there are no tabs in the Tool Shelf , just find the Draw option somewhere in the tool Shelf or just upgrade to the latest version.
Now Outline the Logo
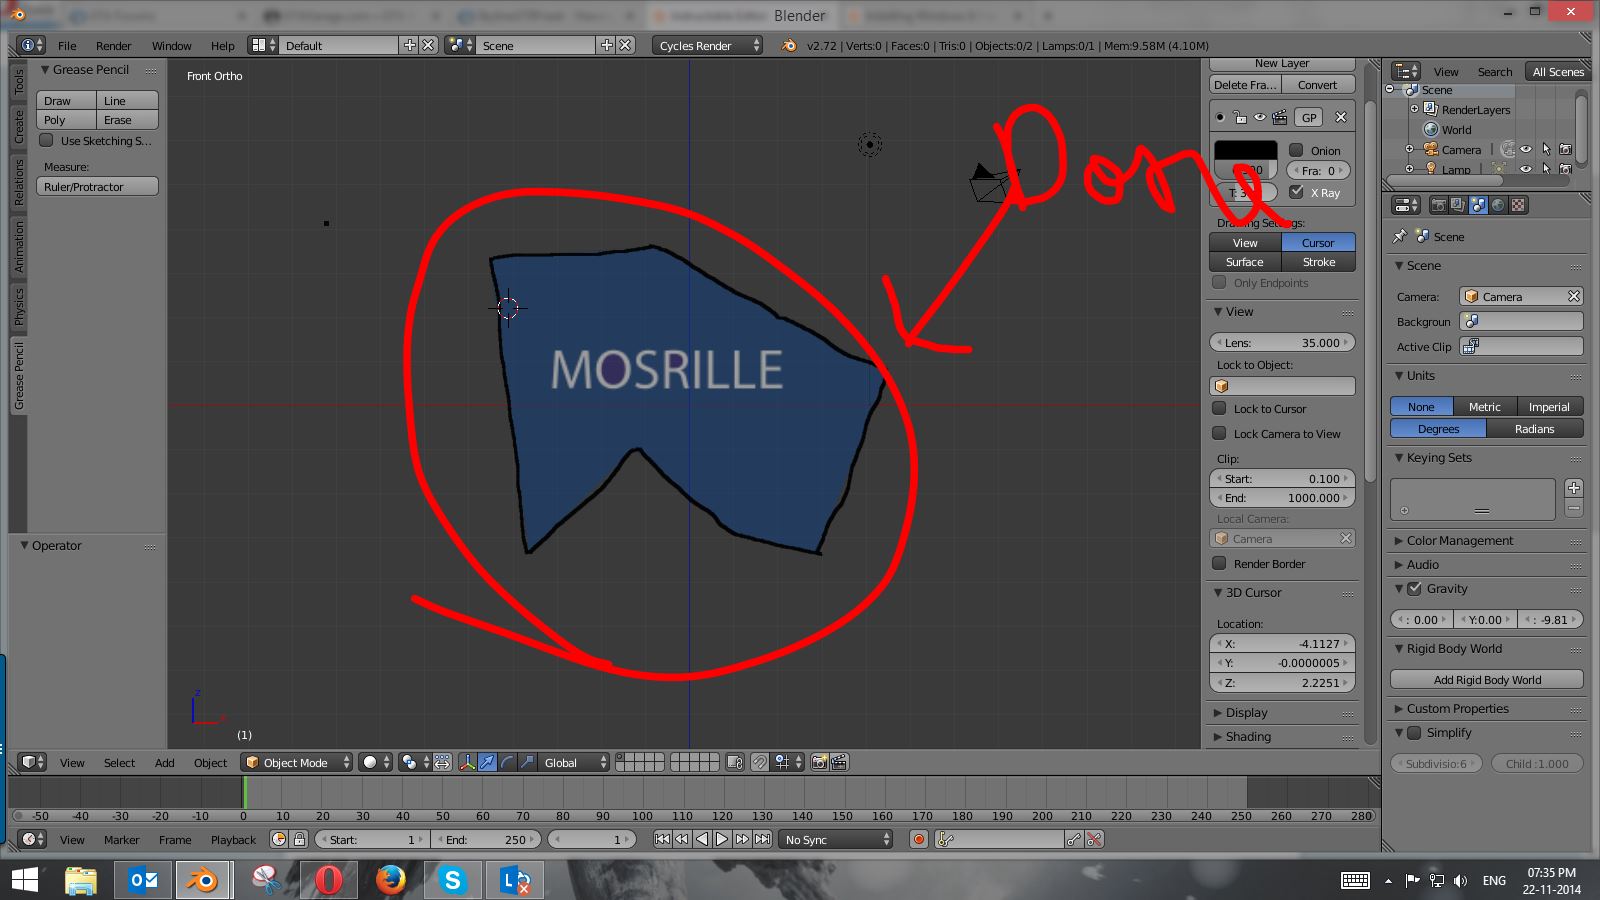
Outline the logo in the similar way as you create a drawing in MS Paint.
Now Press N Once or Twice to Bring the Properties Panel.
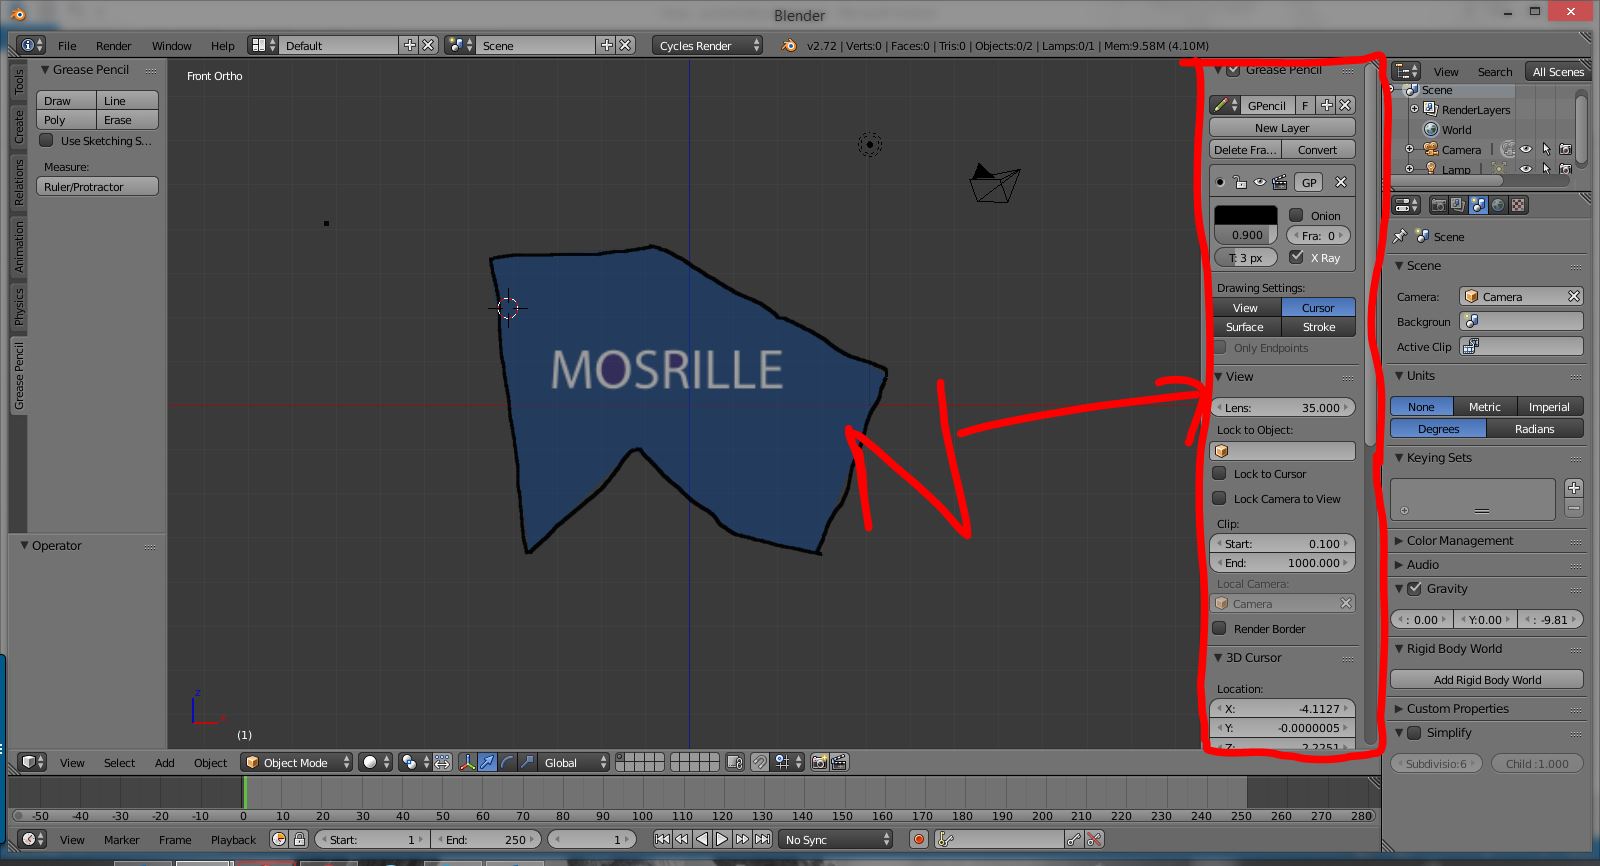
We have not done yet. We will convert it to a curve. To do that we have to bring the "N Menu or Properties Shelf".
Click Convert in the Grease Pencil Tab and Then Bazier Curve.

Just click Convert in the Grease Pencil tab and then Bazier Curve.
Select the GP_Layer Added in the Outliner and Press Alt+C and Then Mesh From Curve/Text
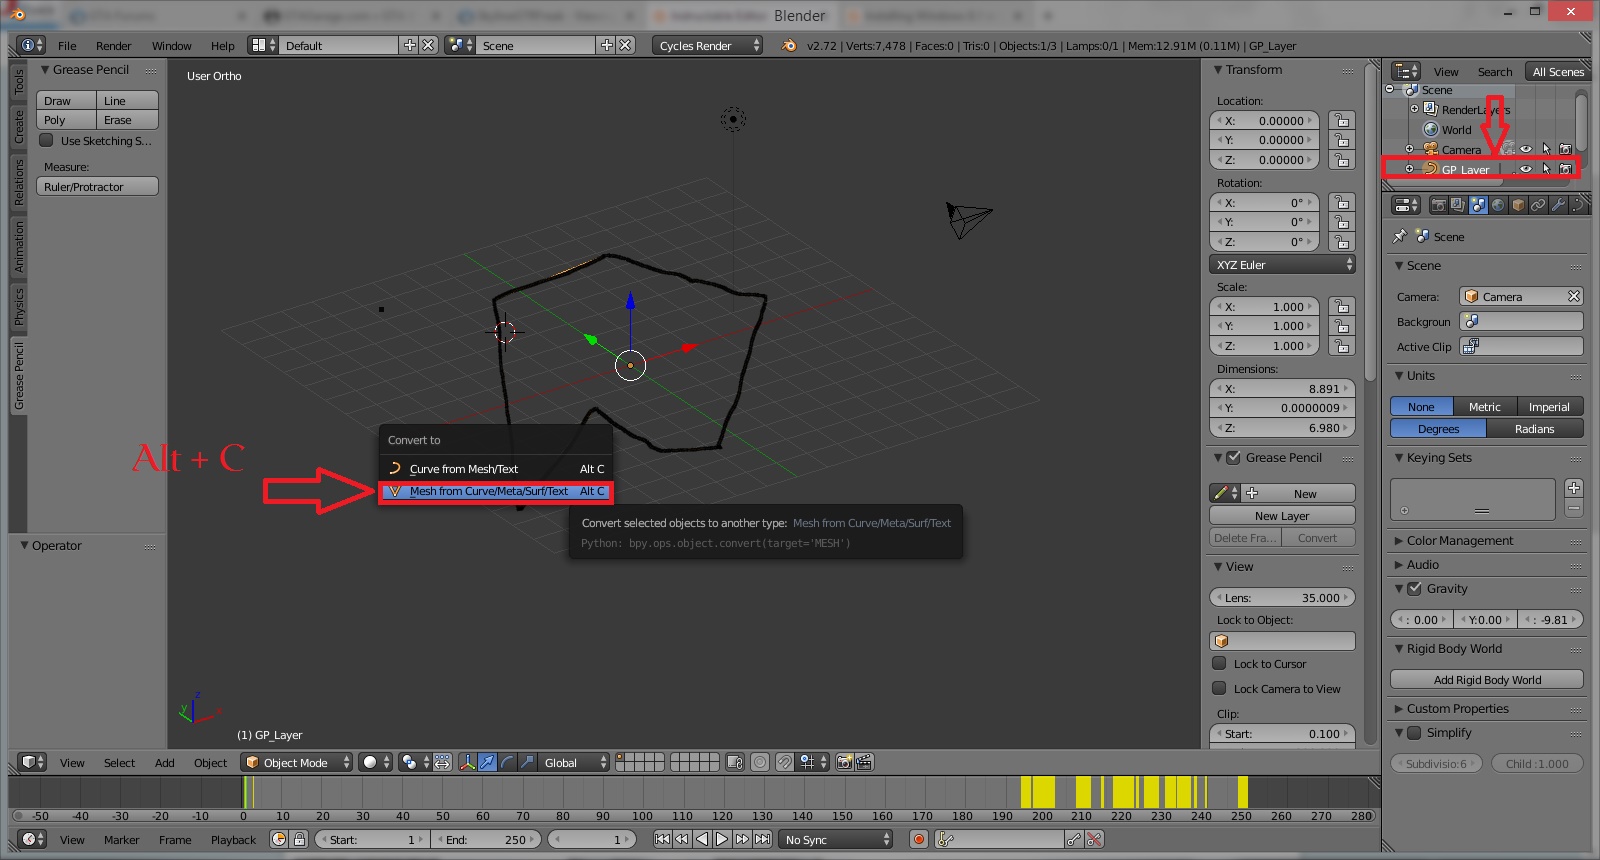
We have to convert the curve to Mesh so that we can fill it. Select the GP_Layer added in the Outliner and press Alt+C and then Mesh from Curve/Text
Press Tab and Then "F"

Go to the Tab Mod or Edit Mod by Pressing Tab and then press F to fill it. If you don't see any difference , press A and try again.