Minimalistic Initial Necklace Charms Using TINKERCAD
by andimadethings in Craft > Jewelry
972 Views, 5 Favorites, 0 Comments
Minimalistic Initial Necklace Charms Using TINKERCAD
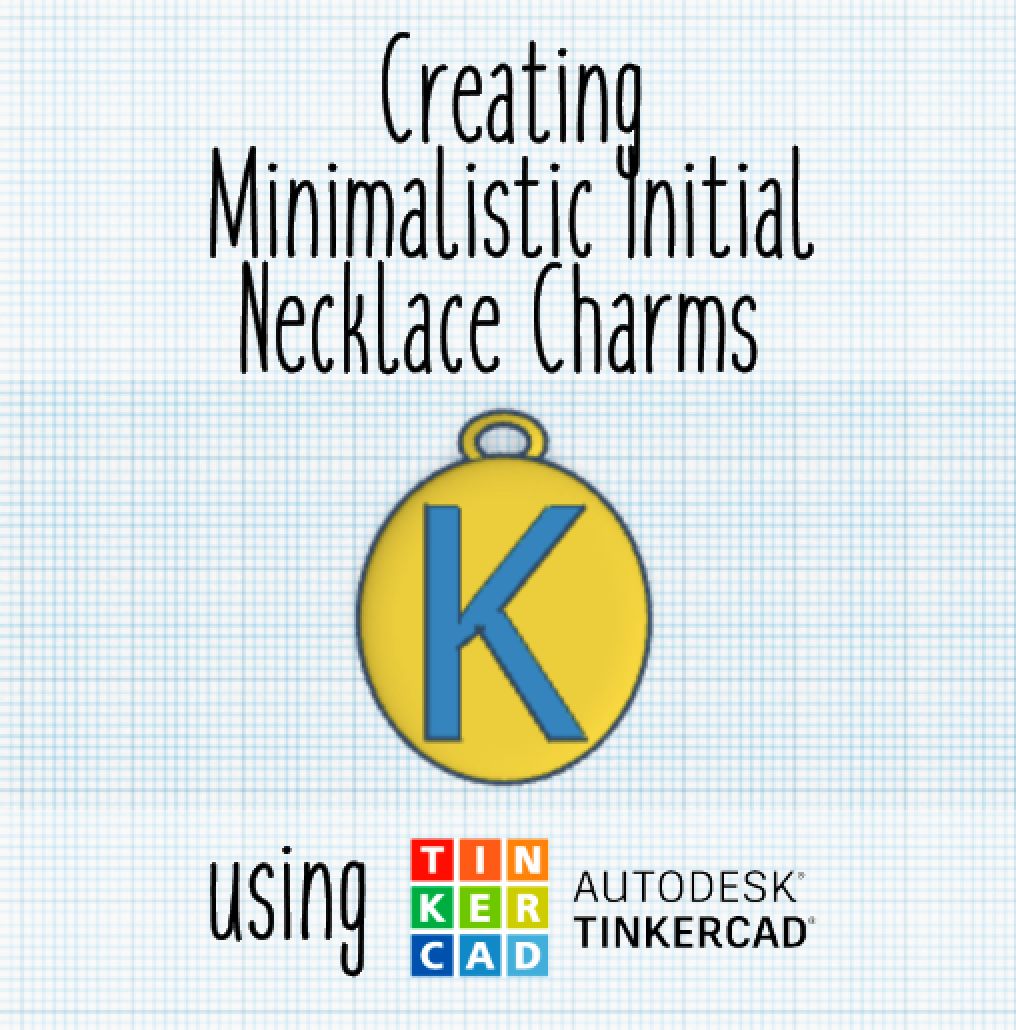
Making a minimalistic initial necklace charm is simple and classy! This is a great beginner project using TINKERCAD.
New to TINKERCAD? Set up an account and let's get started!
Constructing the Charm Base
Our charm is simple and will consist of just three pieces: a cylinder, a torus and a letter.
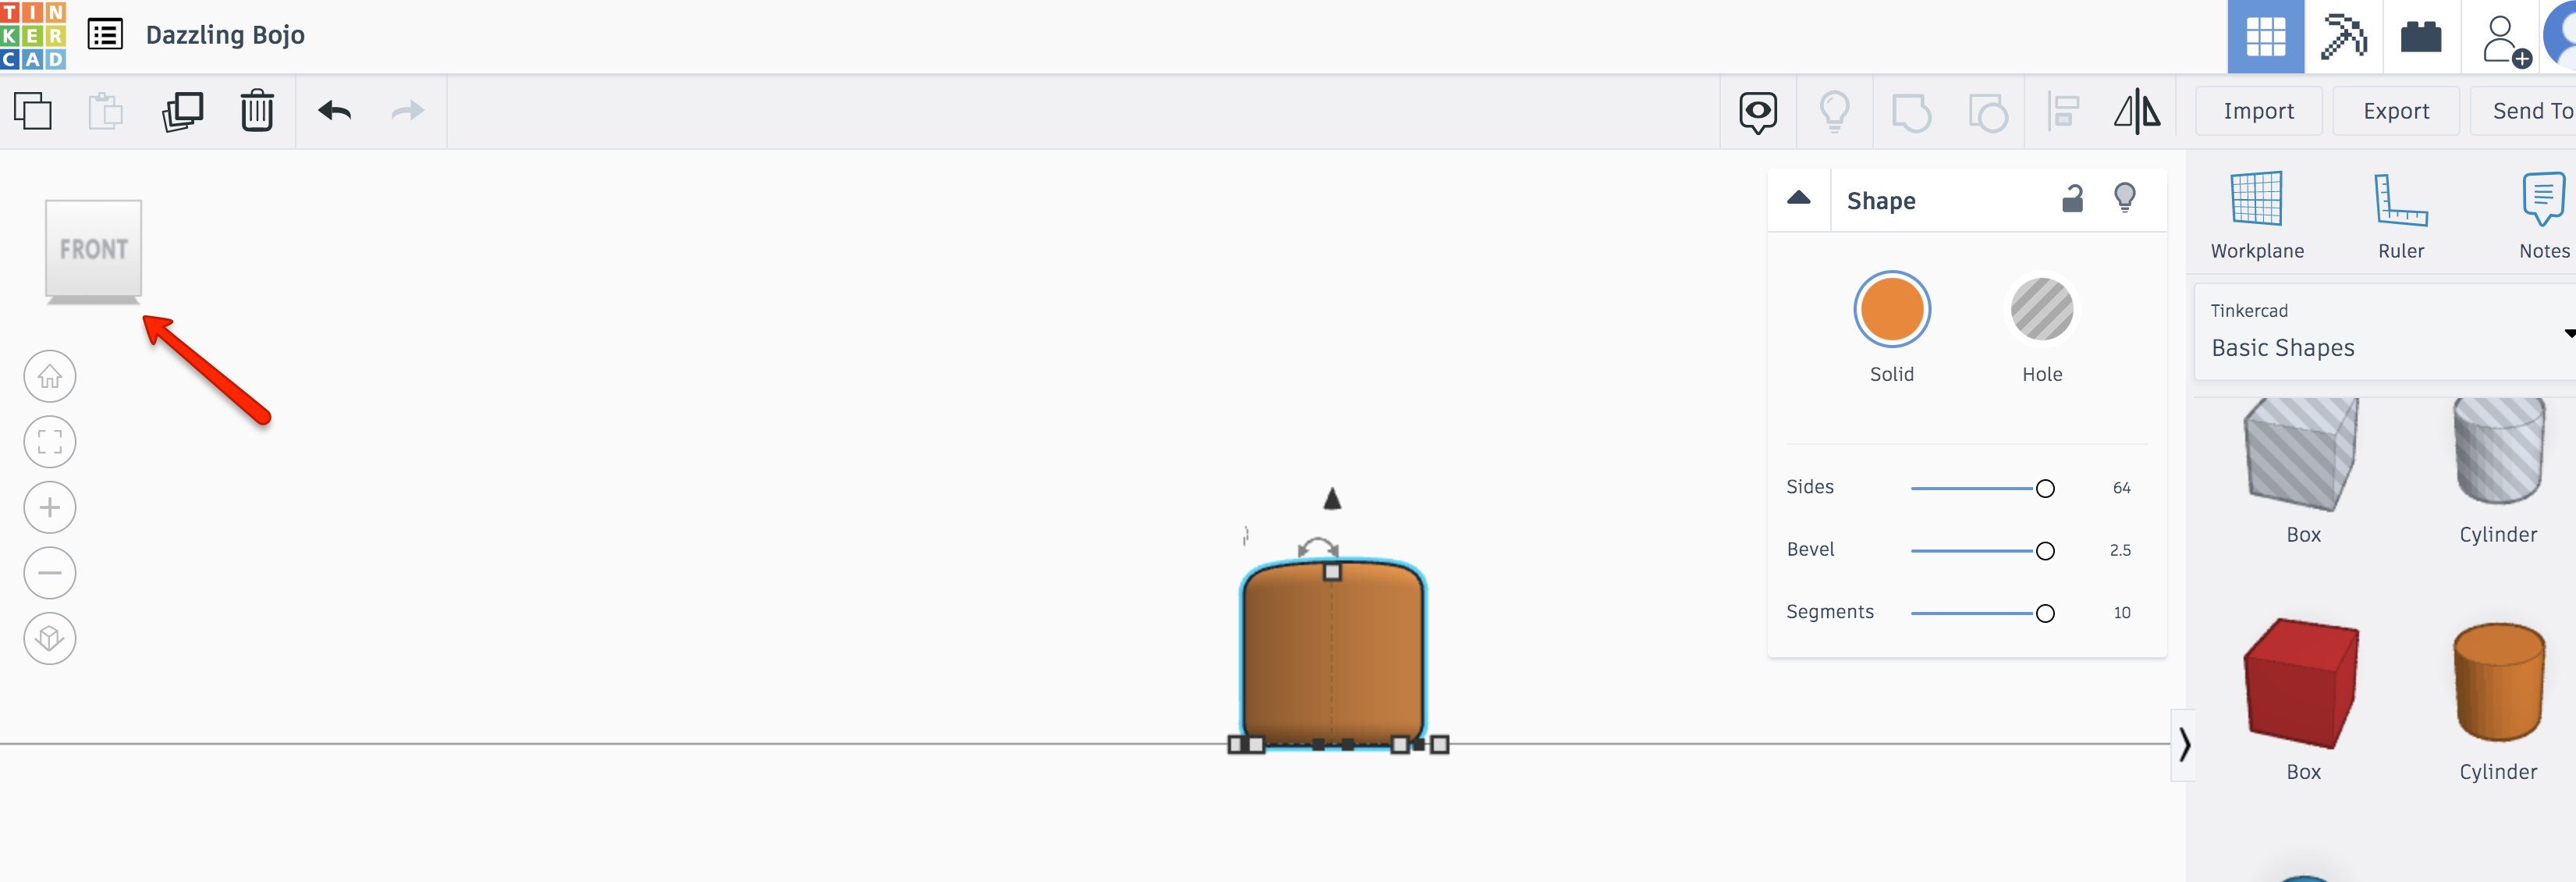
Let's start with the base for our charm and add a cylinder to our project. Click on cylinder from the right hand menu, then click on the middle of the mat to drop the cylinder shape on the mat.
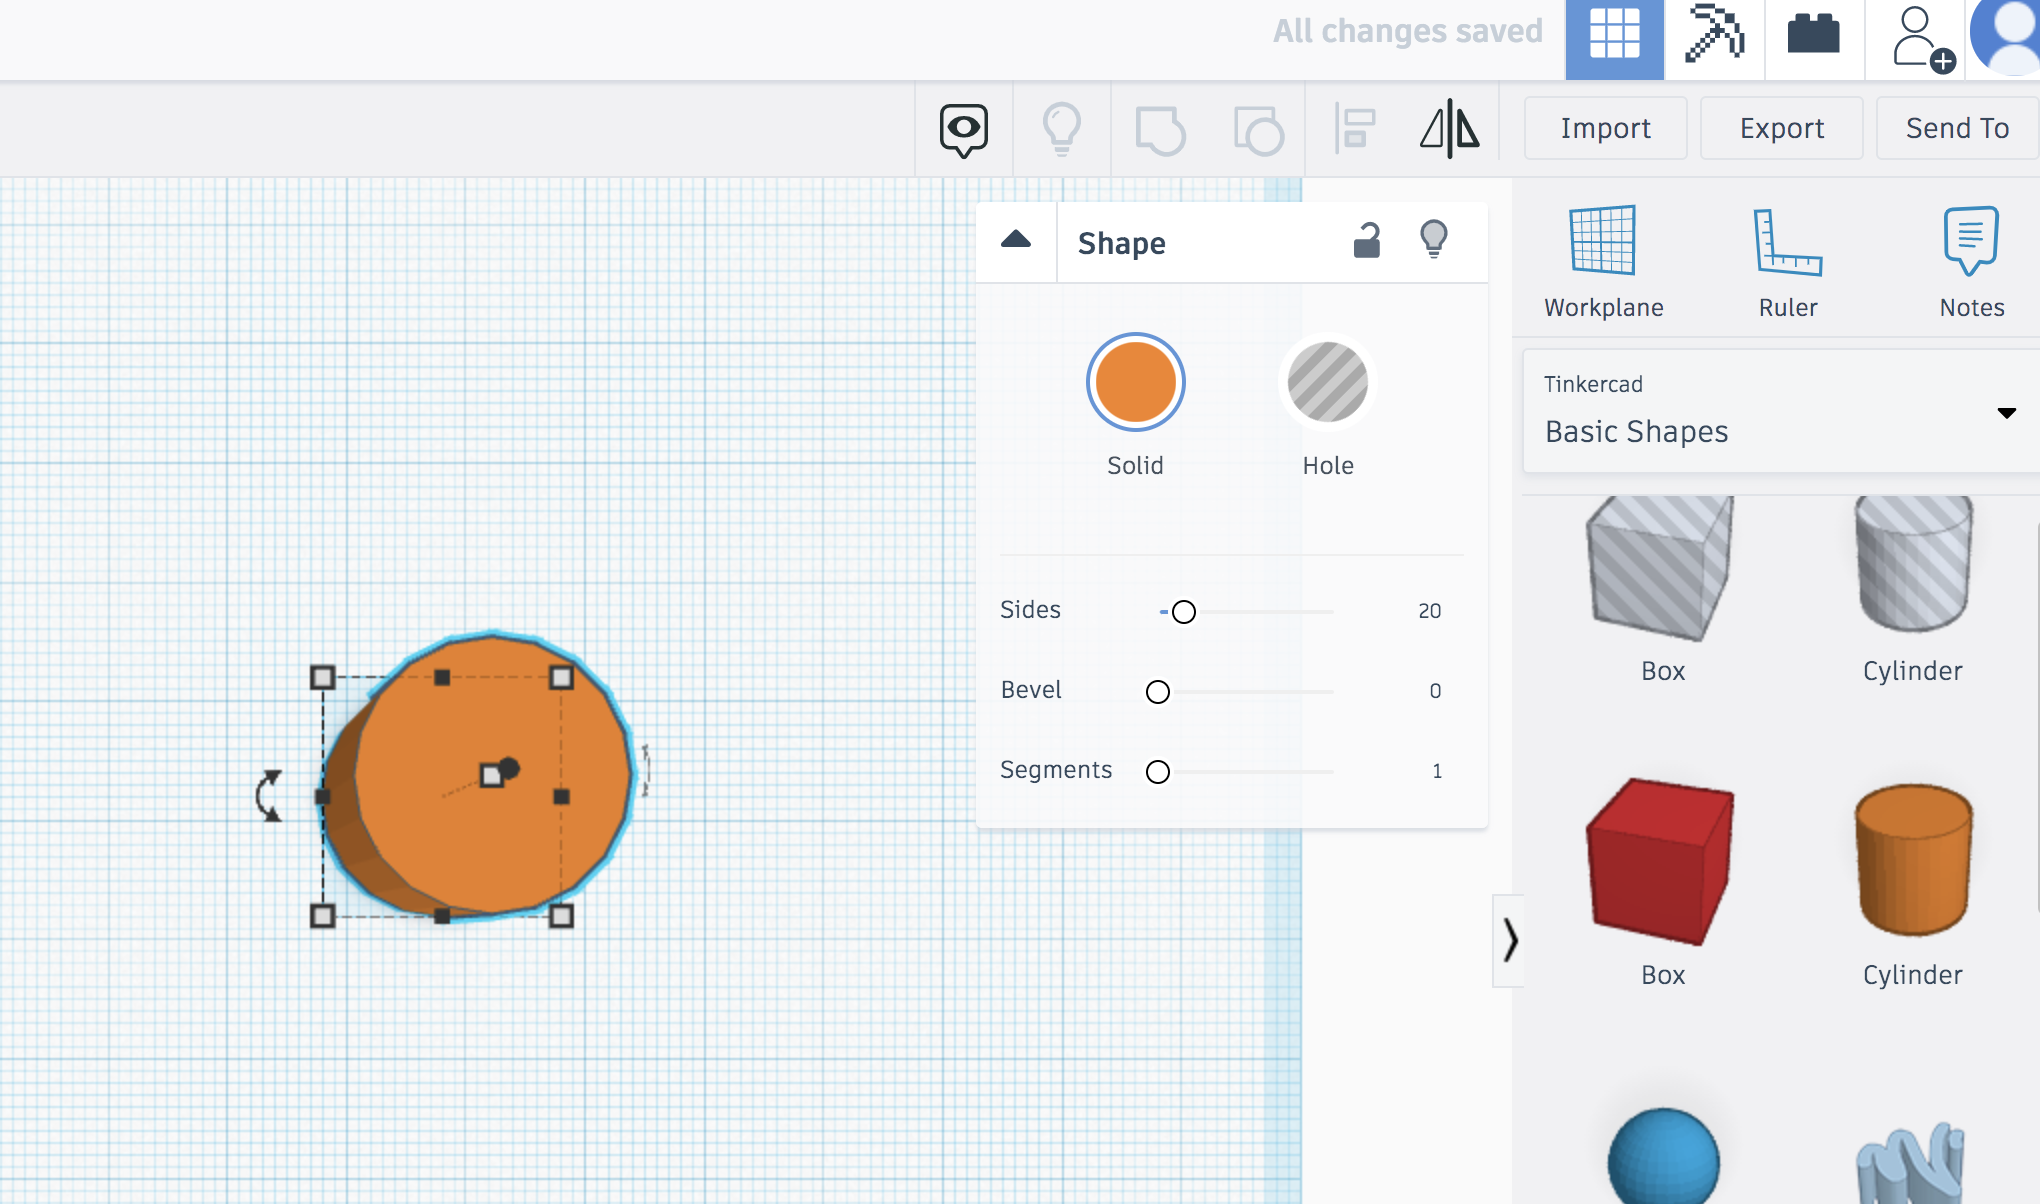
Adjust Cylinder Settings
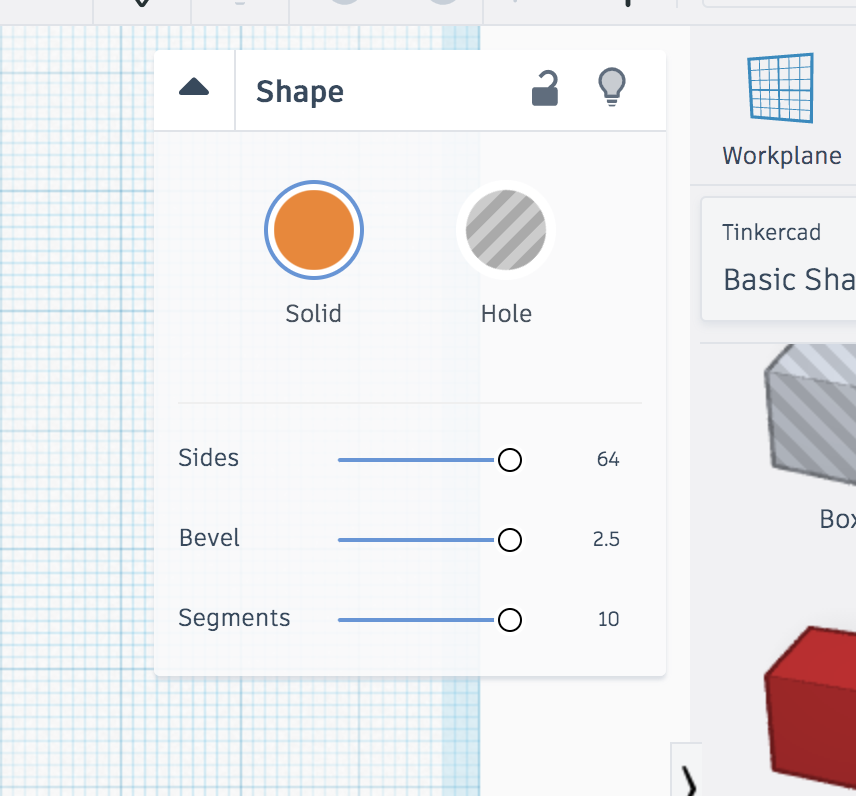
Default cylinders need a little polishing up to turn them into a charm suitable for a necklace.
To fine tune the cylinder, adjust the settings to make the shape nice and round. Click on the cylinder, then adjust the settings by dragging the sliders in the shape window all the way to the right. This will round out the edges of your charm!
Size Down Your Charm
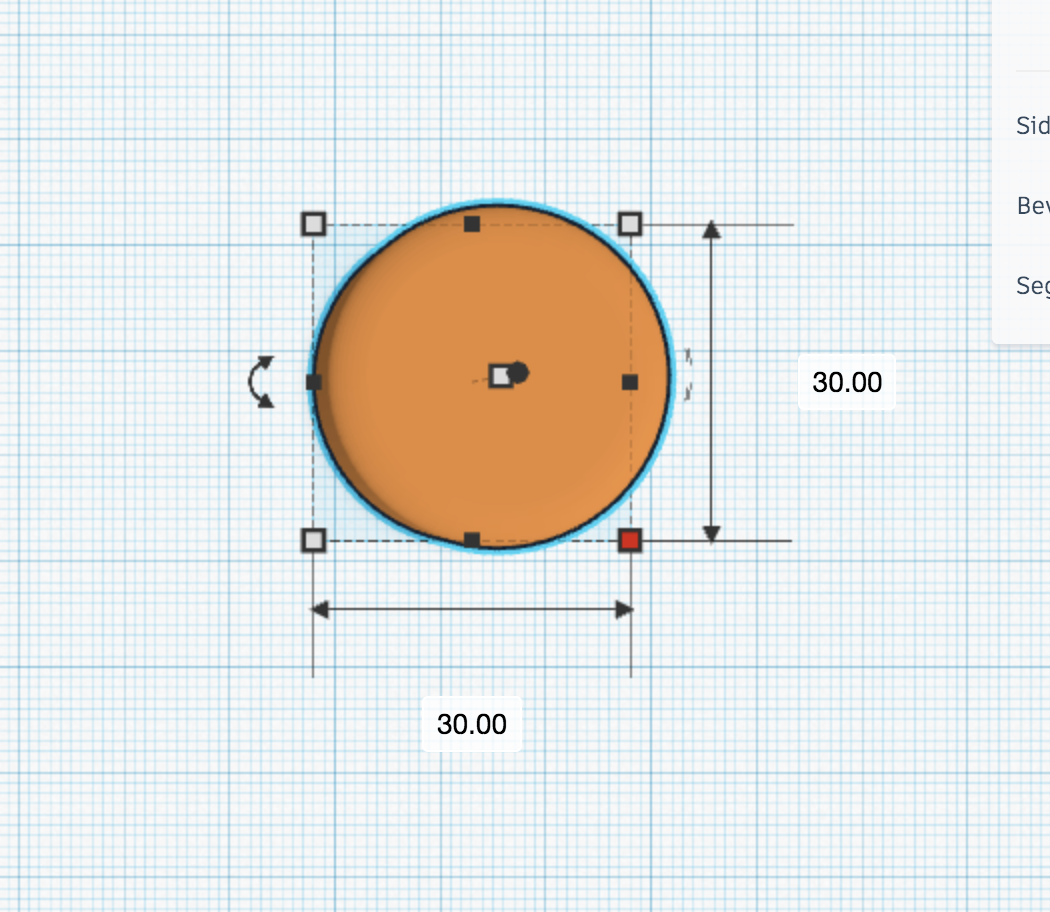
Next, let's adjust the size of our charm. To adjust the size of the shape, click on it which will bring up a bounding box. The bounding box will show you the dimensions of your shape. To make the shape larger or smaller, click and drag one of the the squares around the shape. Clicking and dragging an edge box will make your circle into an oval. Clicking and dragging a corner box will adjust both width and length of the shape.
TIP: Hold the shift key while dragging the bounding box corner to keep your height and width of your circle consistent. If you don't hold the shift key, you'll distort your shape.
Change the Cylinder Height

When you add the cylinder to your mat, TINKERCAD will automatically make a rather tall cylinder, which isn't ideal for a charm so we'll want to squish it down a little. To really get a good view of how tall your shape is, you'll want to familiarize yourself with the view box in the upper left hand corner. Click on the arrows around the view box to change your view of your project. You're looking to see a nice side view of your project. When you have the right view, you can see how tall the cylinder actually is.
From this view, you can now squish down your cylinder to make a better charm height. I liked the height of 9, but you can make your charm thinner or thicker if you'd like!
Add a Built in Jump Ring!
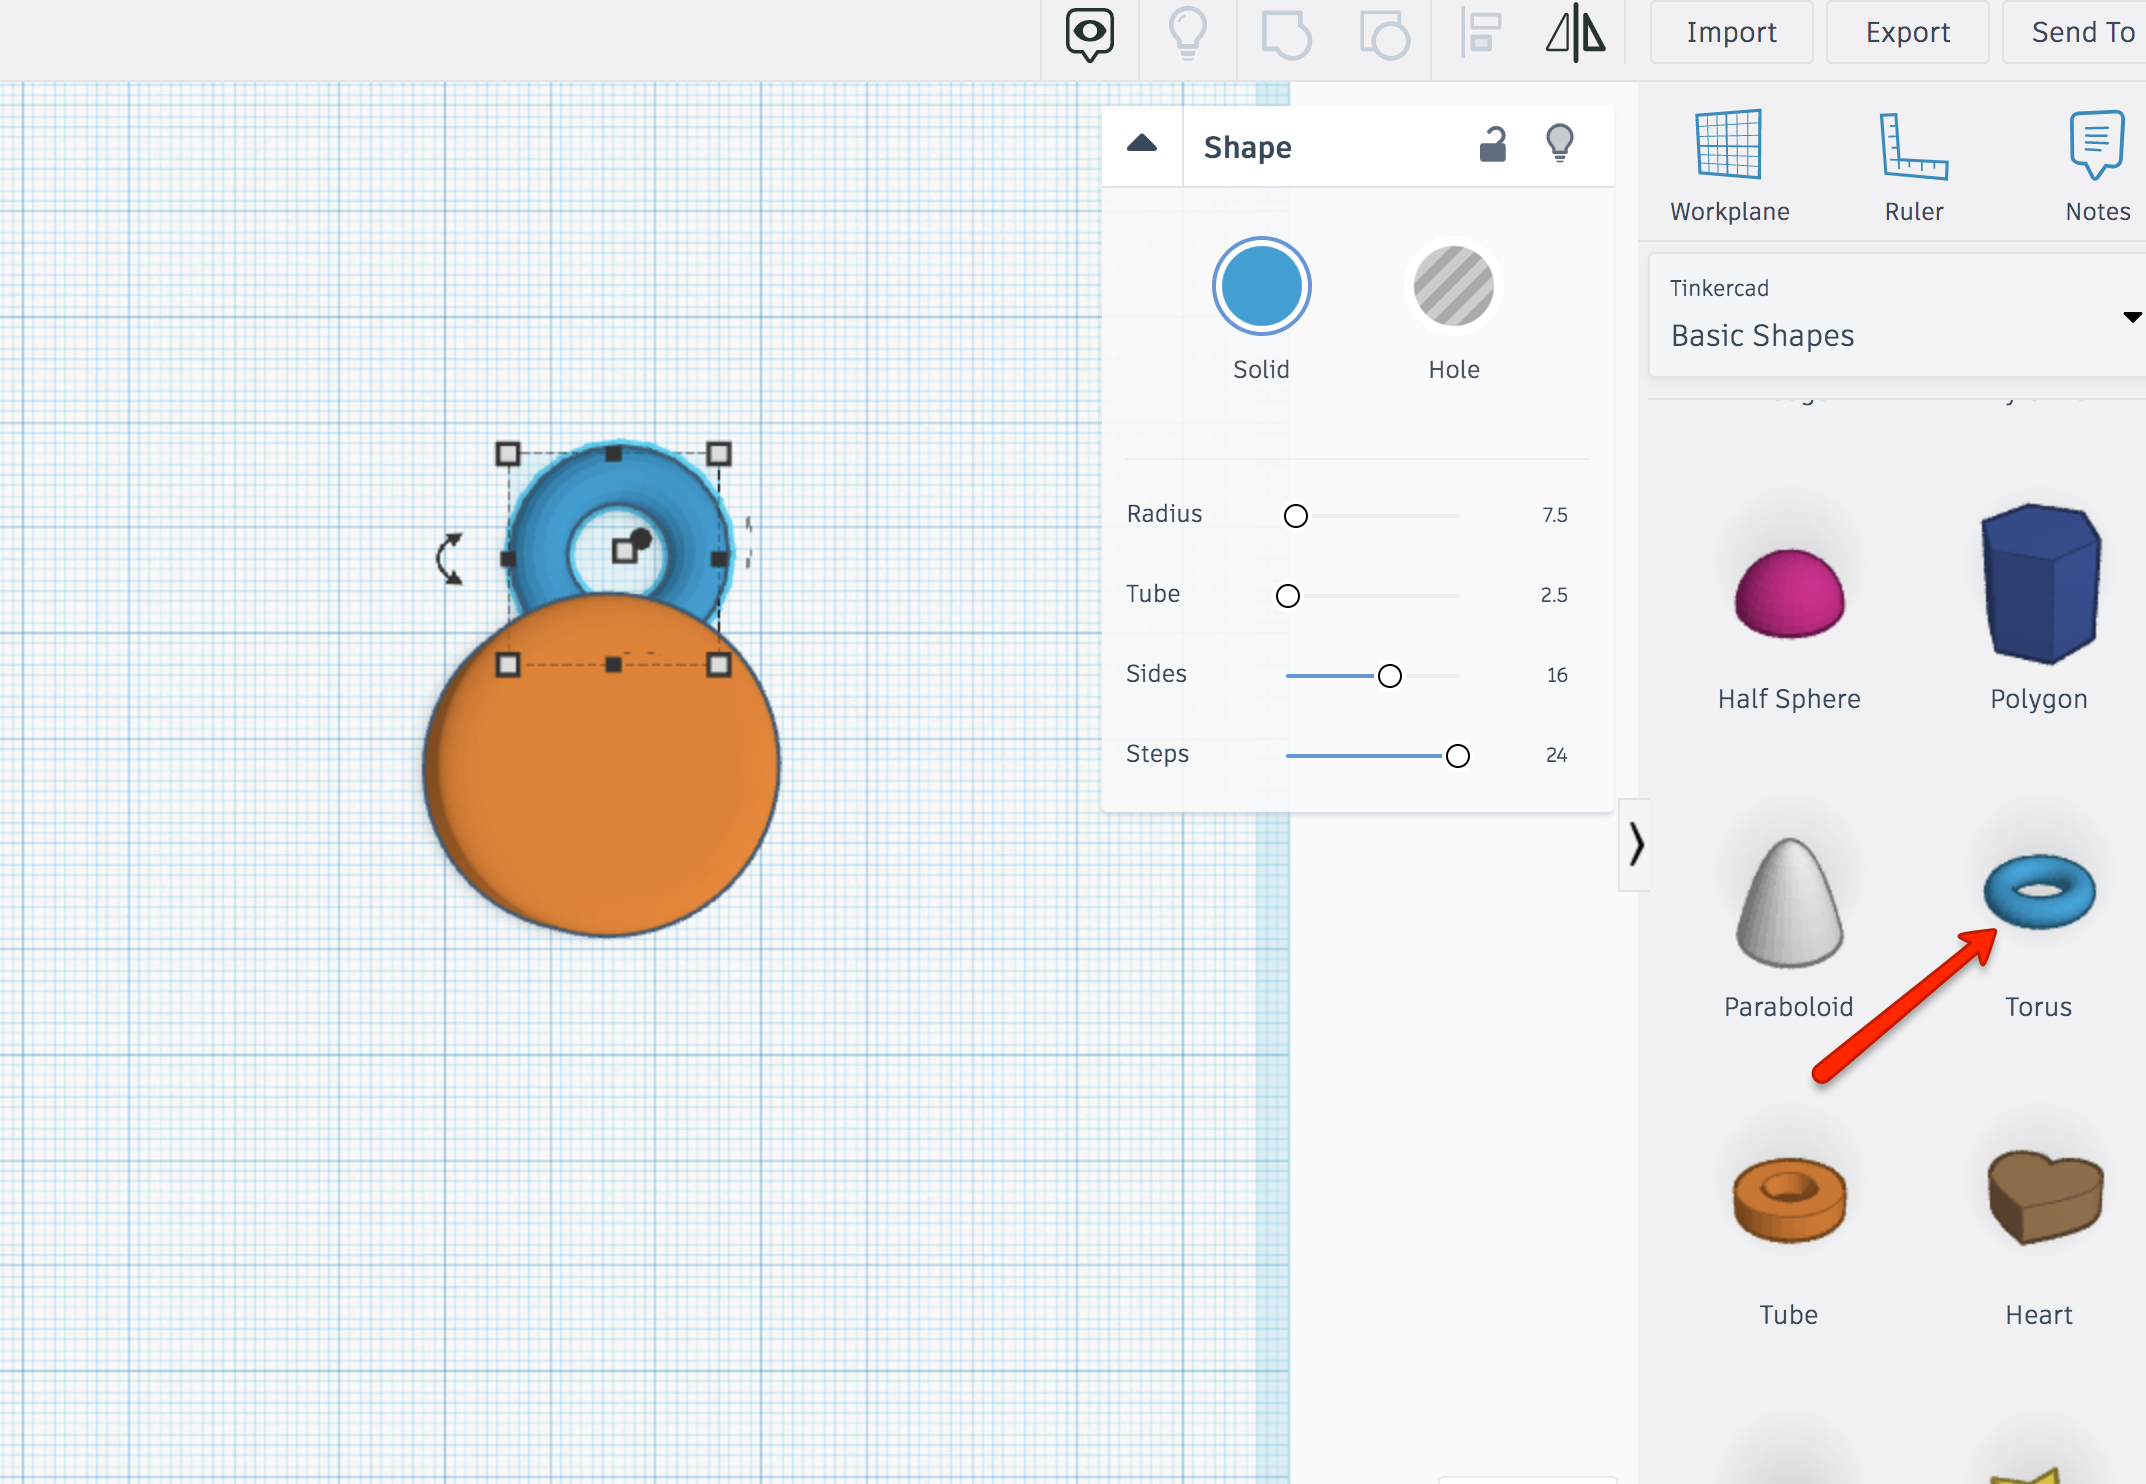
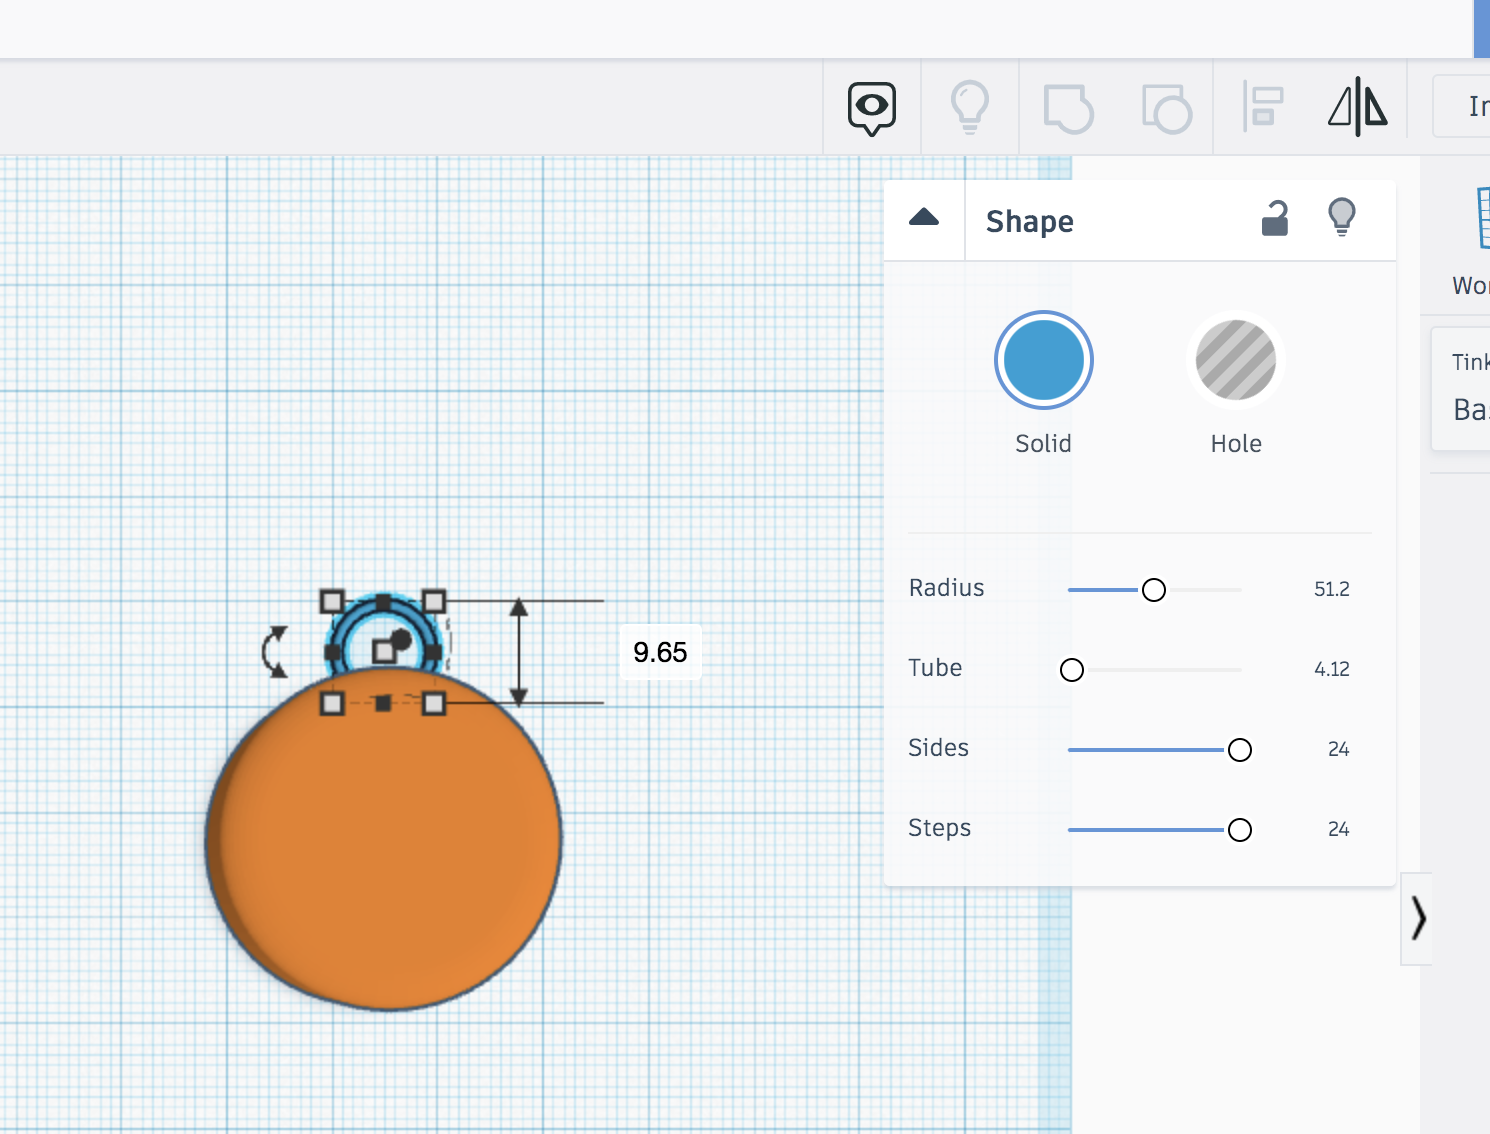
Next, let's add a way to attach the charm to a necklace. First, adjust your view so you're viewing the top of your project again. Next, click on Torus from the right hand menu, you may need to scroll down to find the button. Move the torus so it's overlapping your cylinder about half way. Adjust the torus settings to make the shape thinner. I liked the look of:
Radius: 51.2
Tube: 4.12
Sides: 24
Steps: 24
Making the radius really big, but the tube really small will give you a nice jump ring size with thin edges.
Center the Torus
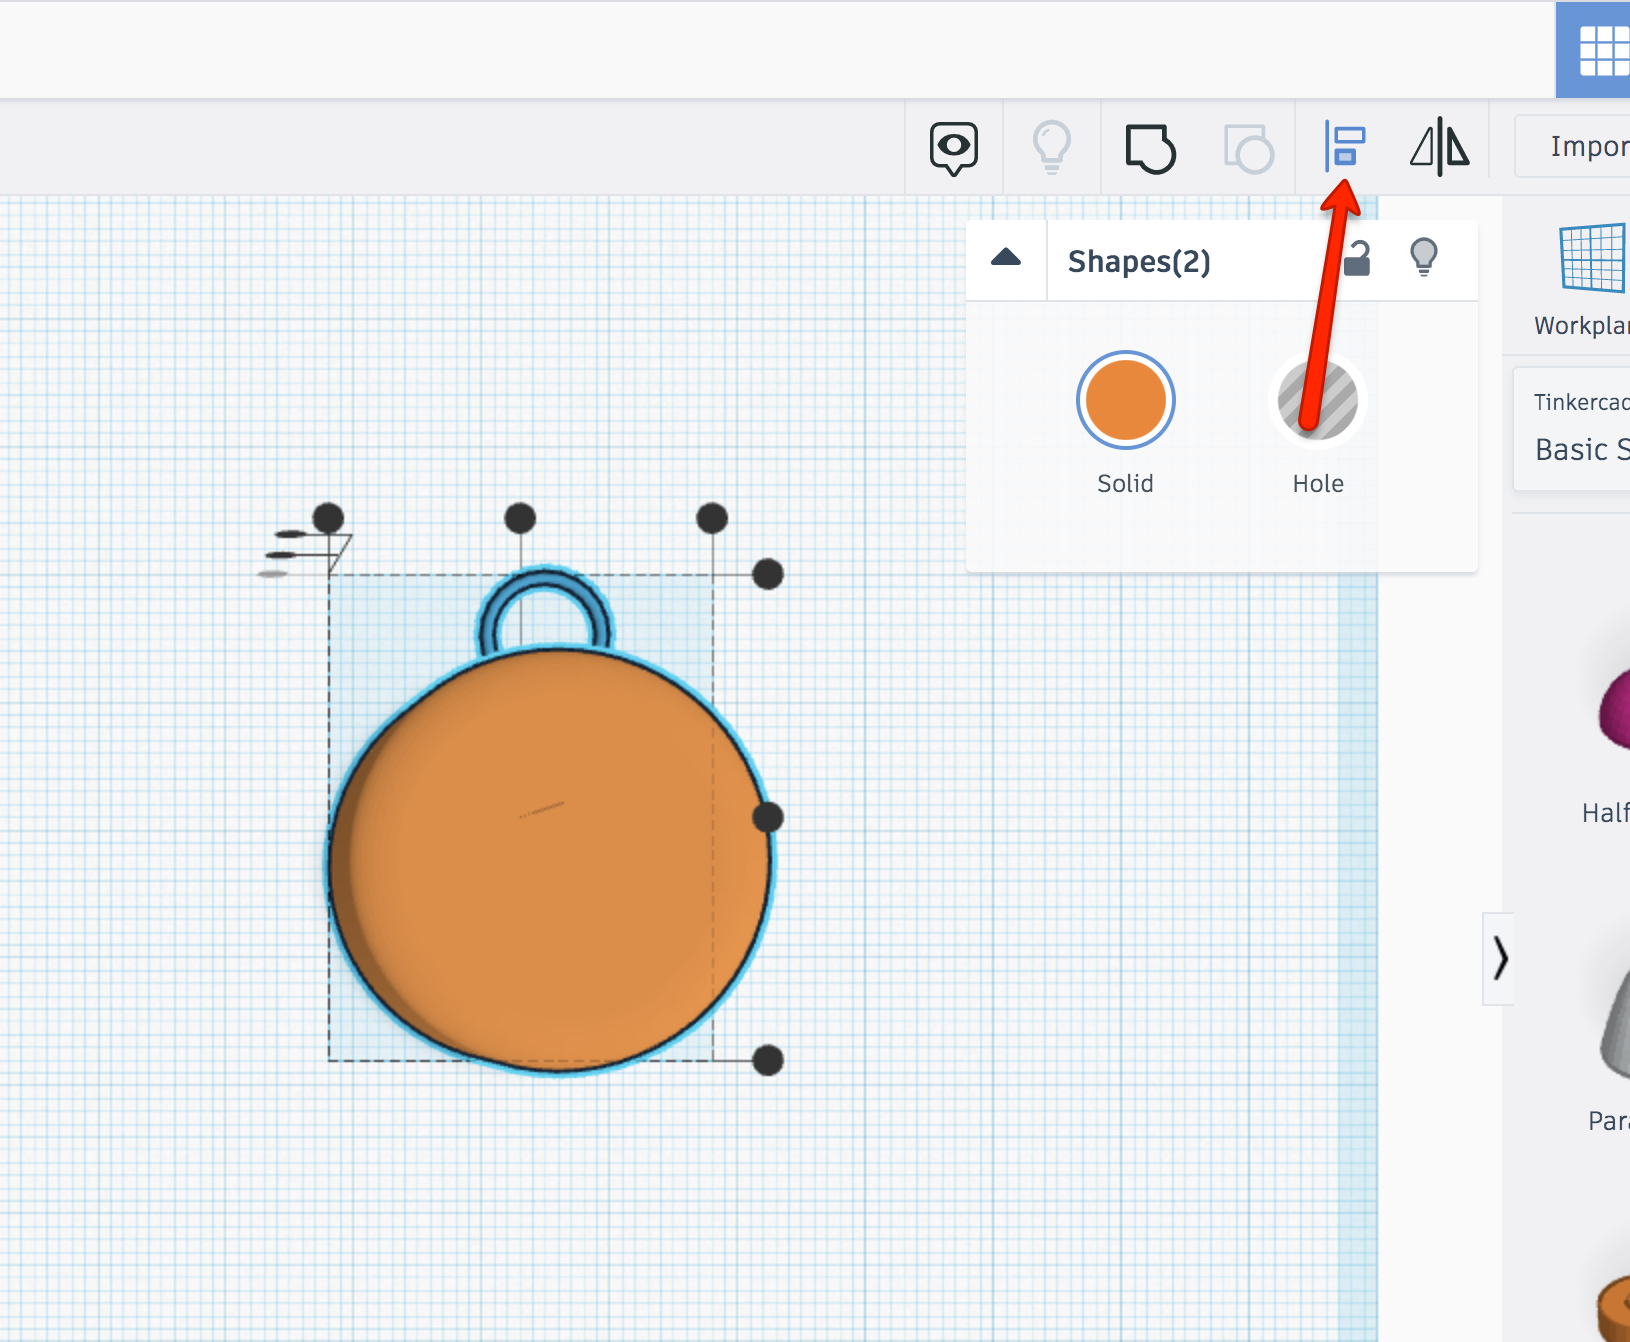
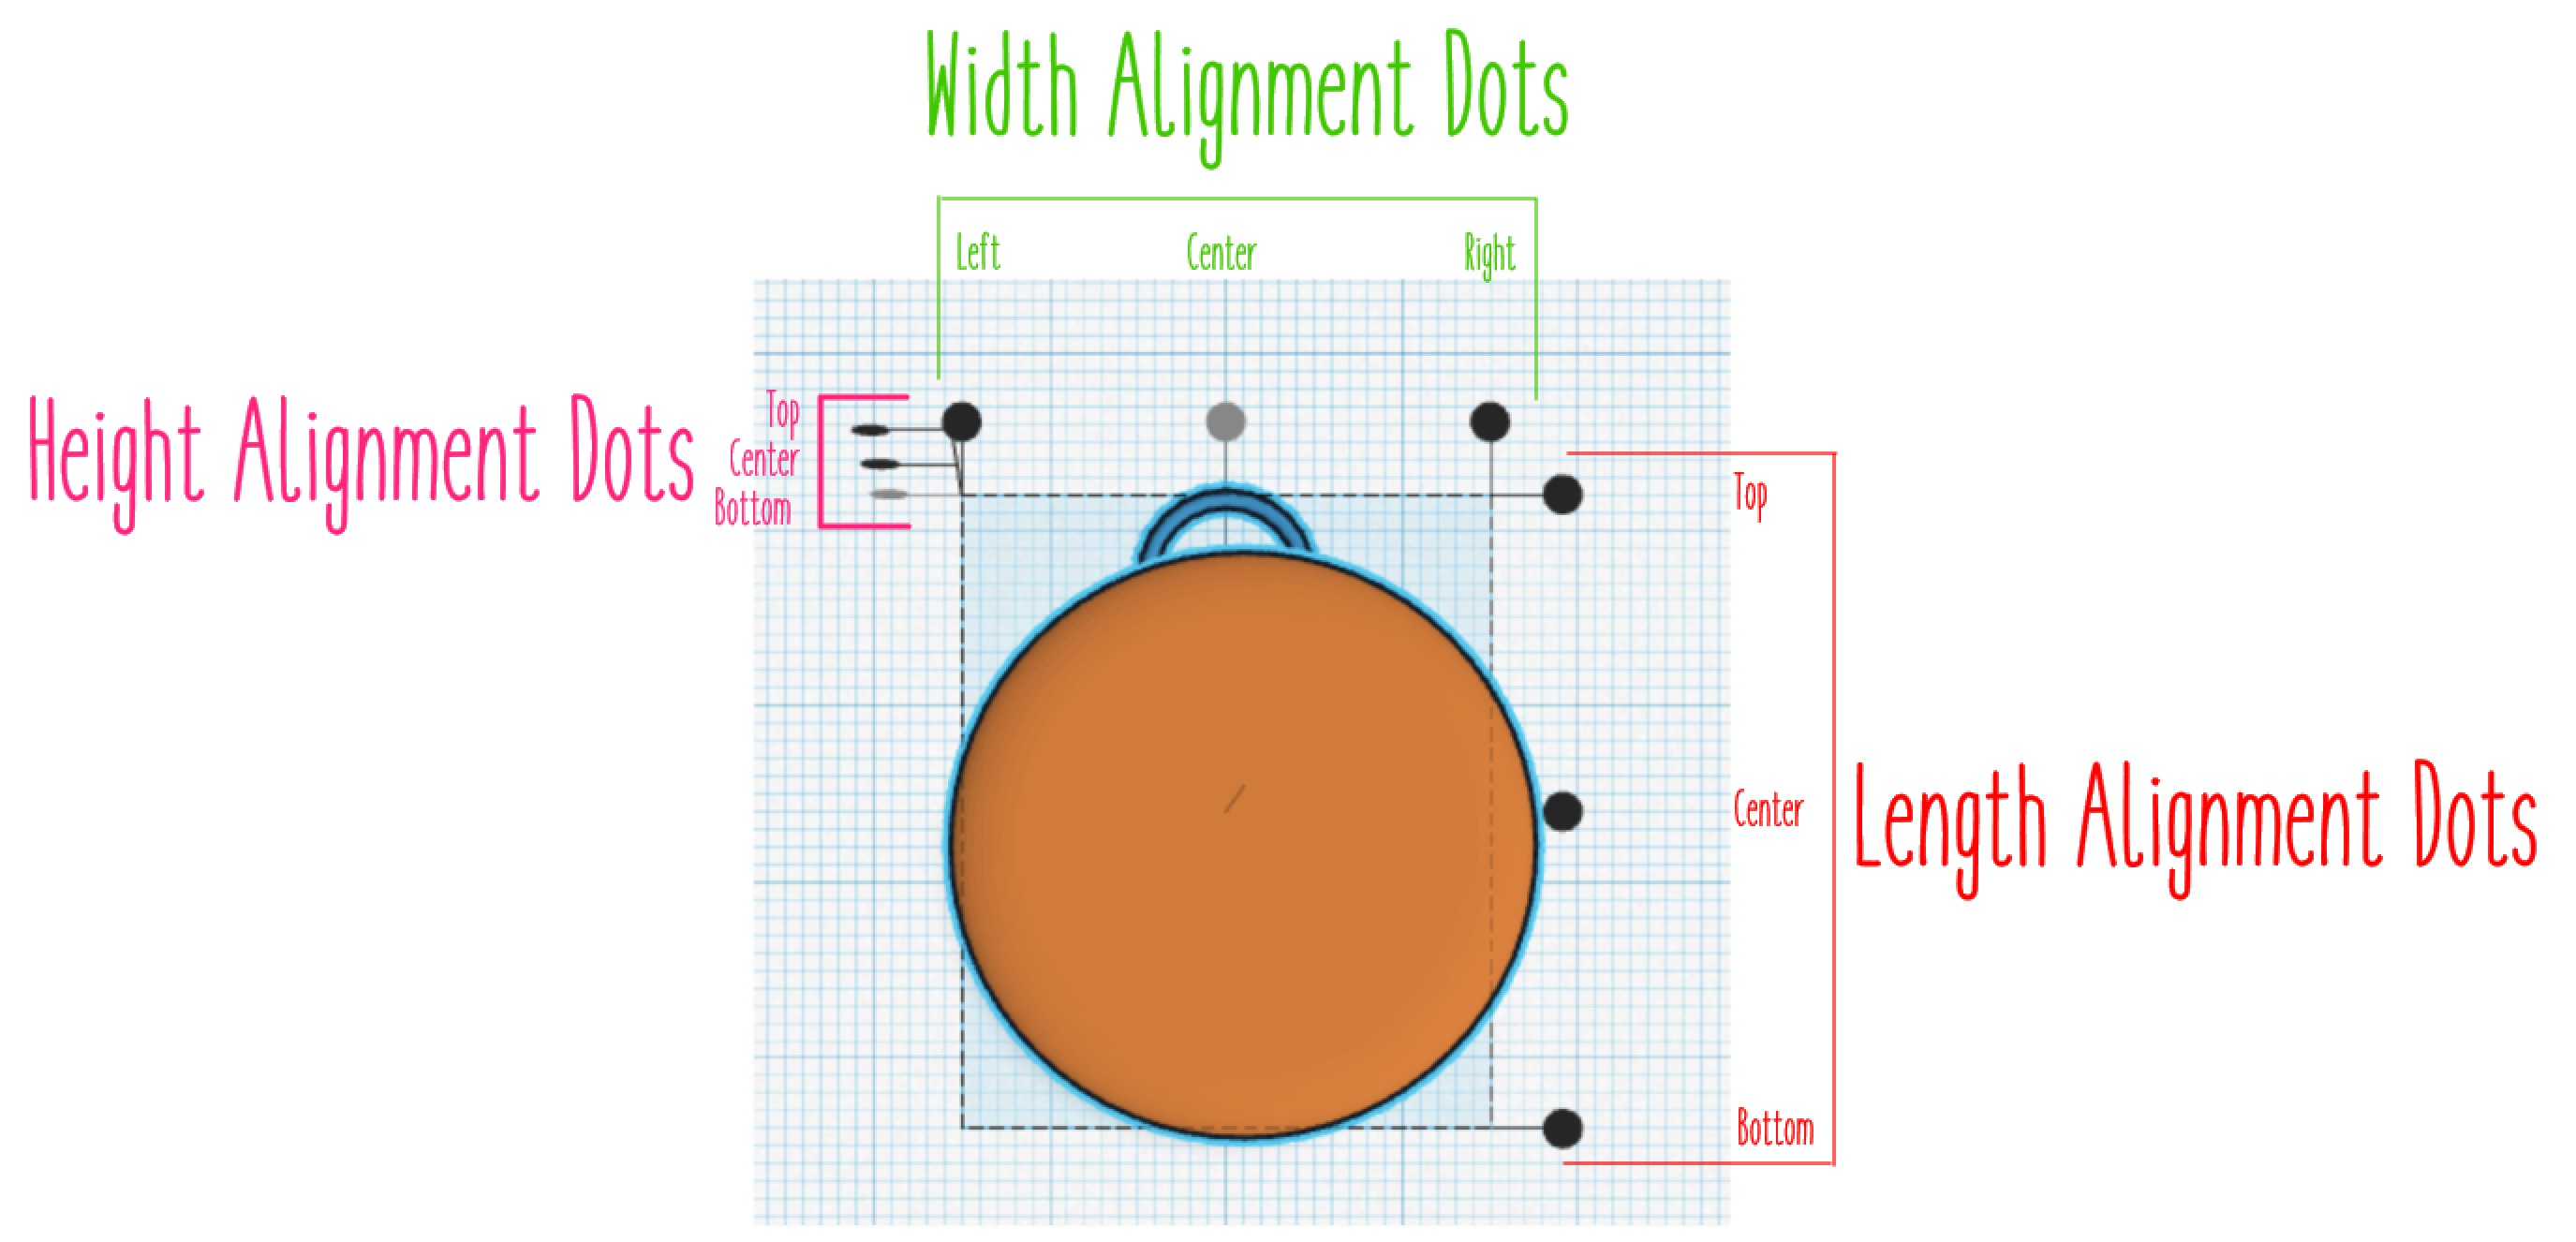
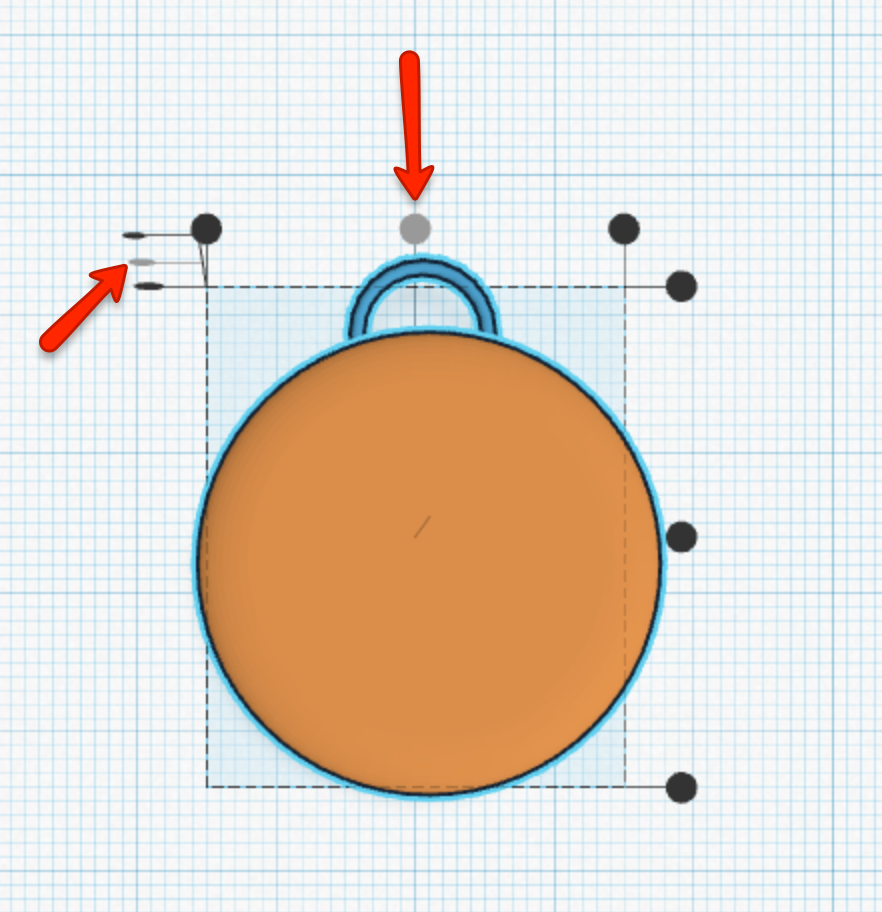
Now, let's line up the torus on the cylinder. We want to center the torus not only in the middle of the top of the cylinder but the middle of the side of the cylinder as well. You could eyeball it, or you can use the handy built in alignment tools!
Select both the shapes at the same time by clicking and dragging your mouse. Then click on the alignment button at the top right of the screen.
Once you click on the alignment tool, you'll see a bounding box appear with several sets of dots. Three width alignment dots along the top, three length dots along the right hand edge and three height alignment dots over in the upper left hand corner. These dots help you decide where you want to center your objects relative to each other. Click the center dots on the top width alignment dots and the height alignment dots to center the torus on the cylinder.
Weld the Shapes
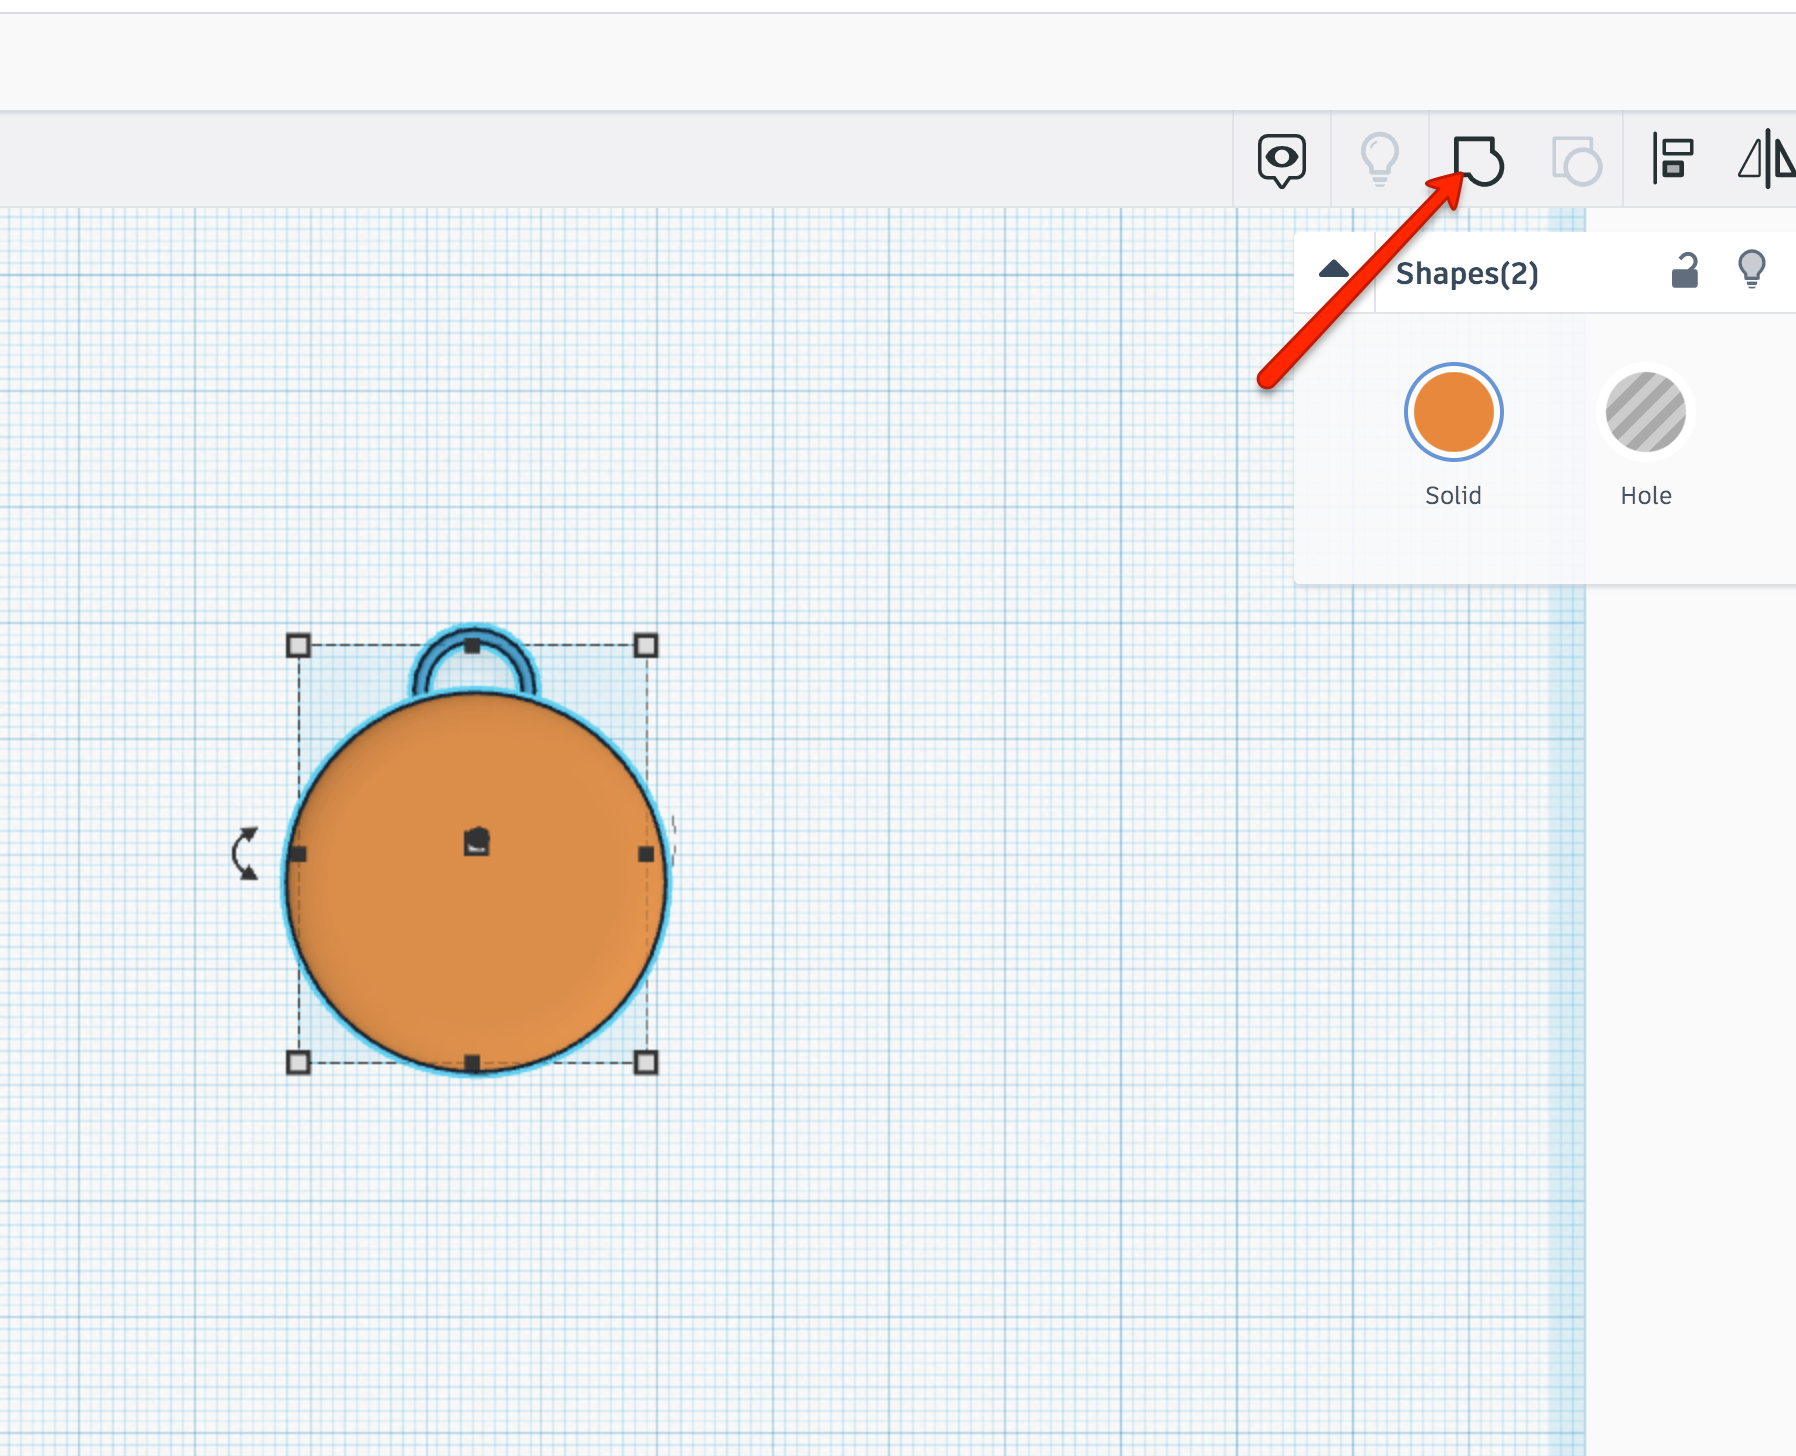
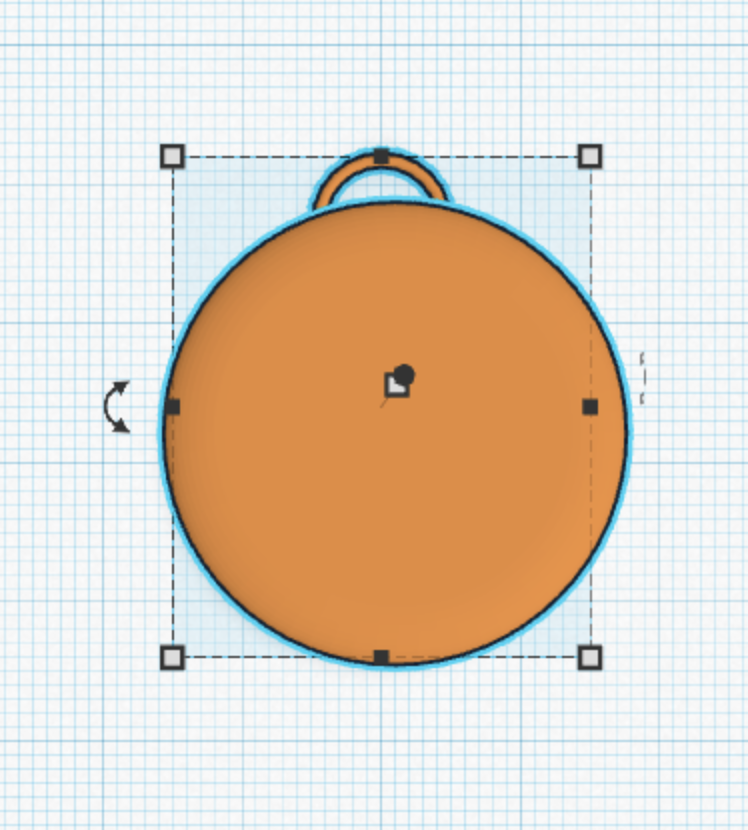
Now that your torus is nice and centered on your cylinder, let's make them one piece to turn it into a charm. Select both pieces and then click the weld button in the upper right hand corner. The weld button looks like a square and a circle combined. When you click this button, you'll see the two shapes turn into the same color showing that they have been welded together.
Add an Initial!


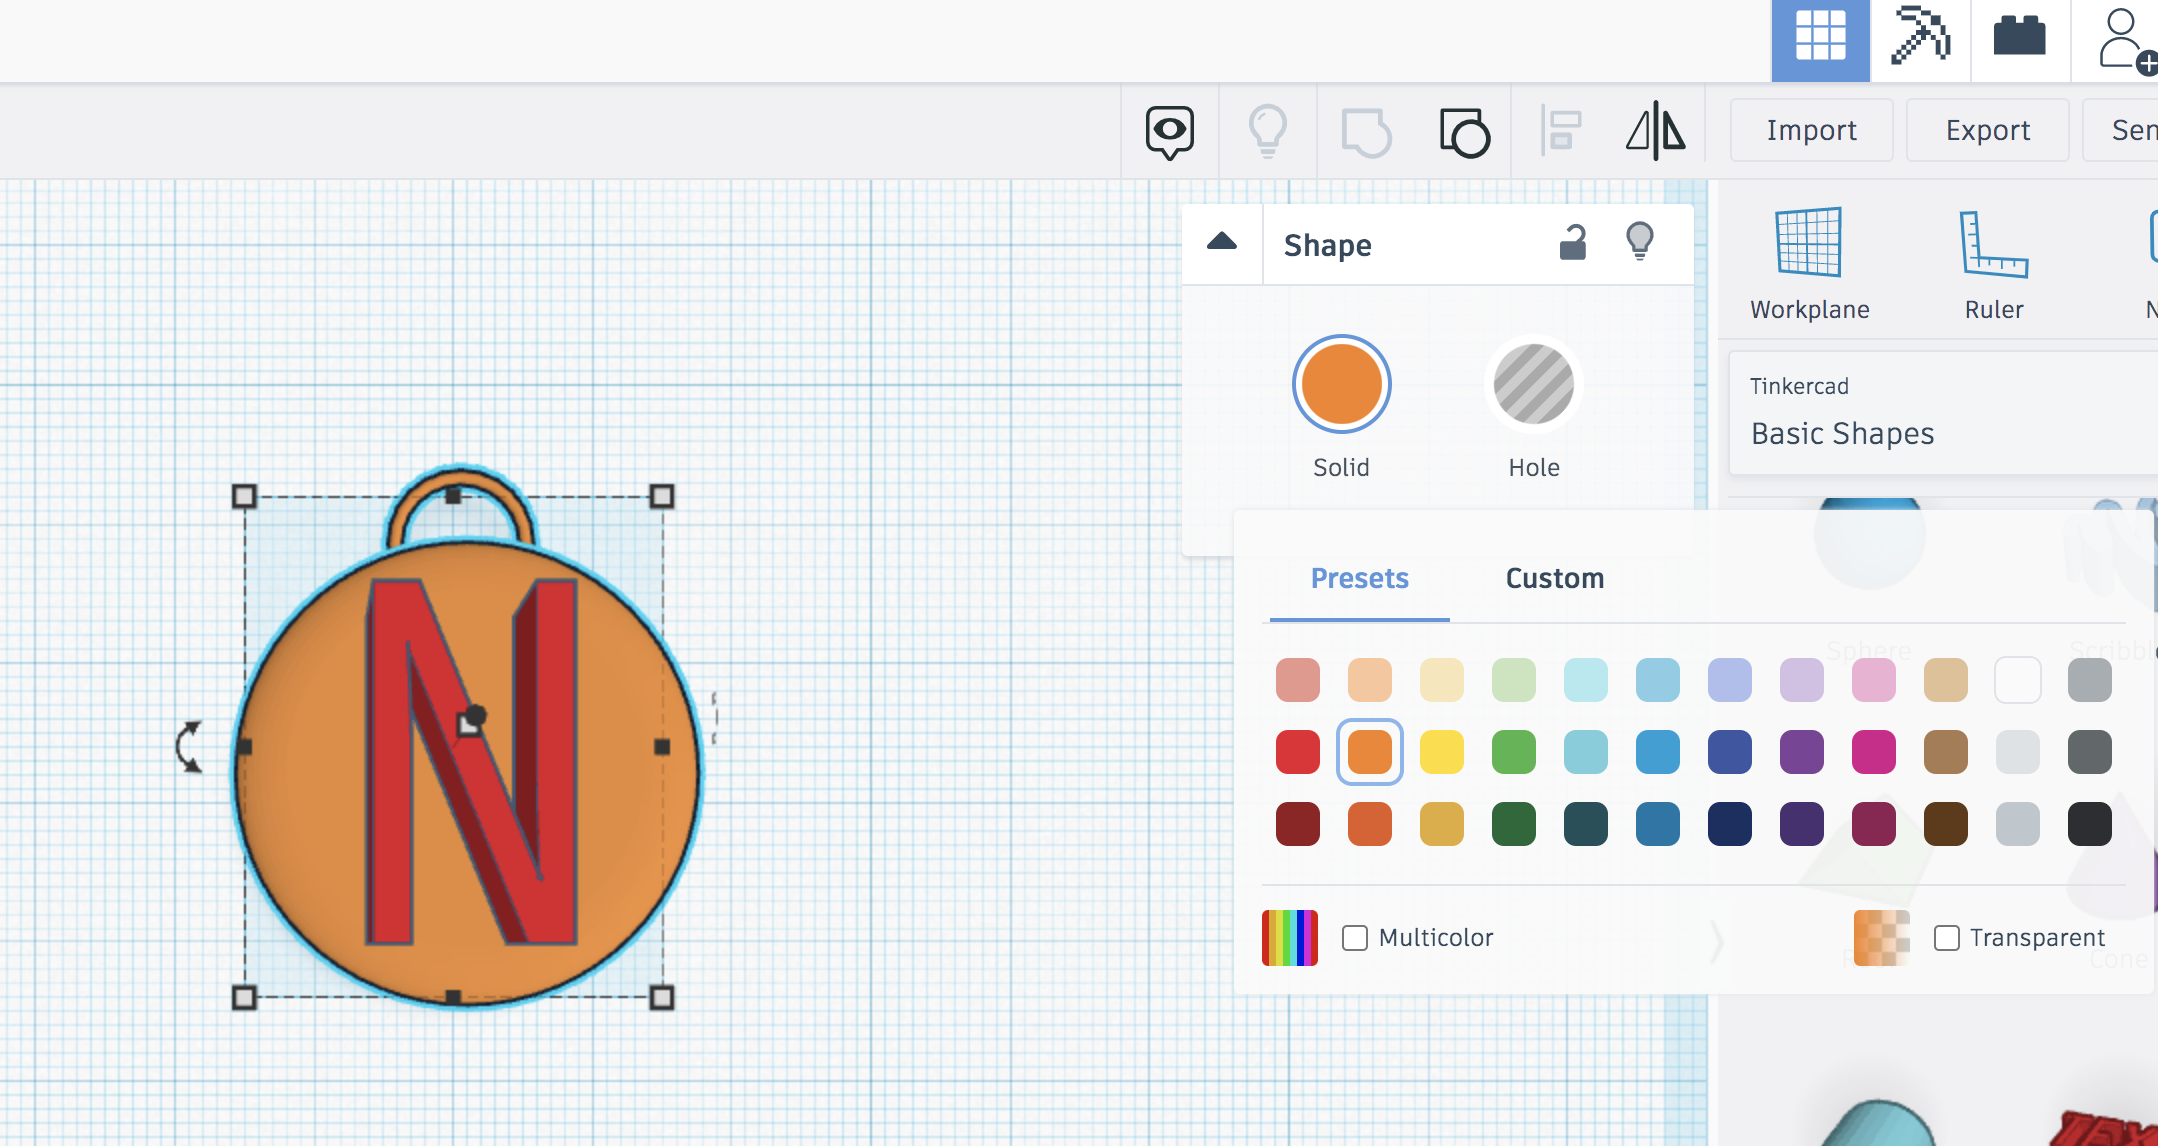
To finish up and personalize our charm, let's add an initial! To add in text, click on the text tool on the right hand side. Replace the word "TEXT" with your chosen letter. You can also select which font you like most from the drop down menu. I went with Sans Mono for a simpler, minimalistic look.
If you'd like to personalize your charm at this point, you can click on the charm or the letter and change the colors to customize to your liking!
Play around with the software and get to know it a little more! There are endless possibilities!