Minimalist DVD Packaging
by mikecraghead in Workshop > Home Theater
6540 Views, 14 Favorites, 0 Comments
Minimalist DVD Packaging
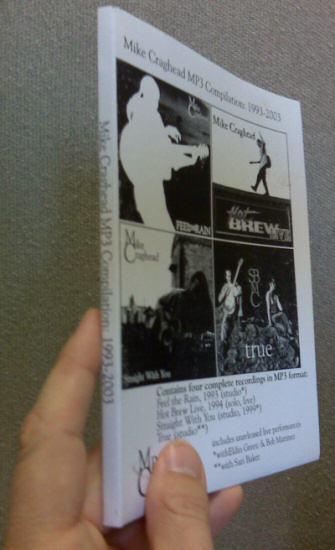
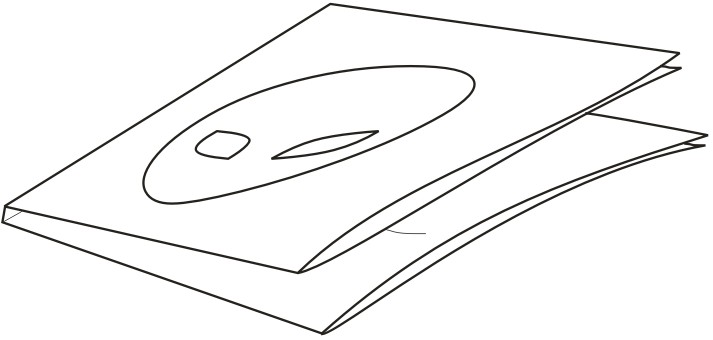
0% plastic, 100% biodegradable, quick and easy to design, reproduce and deploy!
Especially for the more home-brewed productions, the point is the DVD itself and the packaging is not important.
But folks still want a DVD-case-shaped thing if they're getting a DVD: they want those irrational and distinctly non-CD-shaped dimensions.
So, what to do? Buy the plastic DVD cases ("slimline" or otherwise), then design, reproduce, trim, fold & insert the... er... inserts? Of course, if you're putting together a DVD for your friend's wedding, or you're being paid exorbitant fees for your professional services. But what if you're doing this as a fundraiser for a school or some such?
In a case like that, the extra time you would spend on "conventional" packaging doesn't significantly enhance the product. So: spend that extra time on editing the video, keep some plastic out of the landfill, and use this instructable for your next production!
Materials
-11"x17" cardstock: Sometimes called "cover stock." Recycled if possible. It's not easy being green...
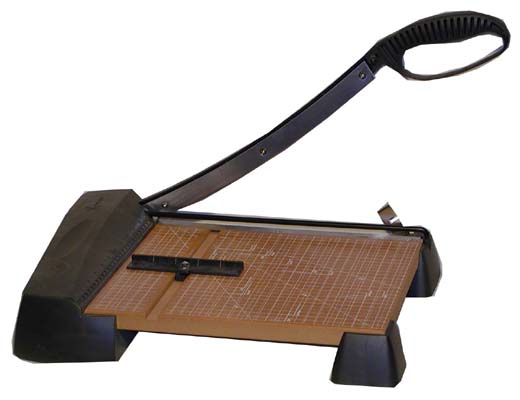
-Paper cutter: You'll need one of those deadly guillotine-like paper cutters, or a reasonable facsimile thereof. They have one at the place you'll be visiting to make your copies.
-razor knife, sharp pocket knife, (chisel?): for cutting slots in paper.
-Any graphics or word processing application.
-your favorite snack item.
Design
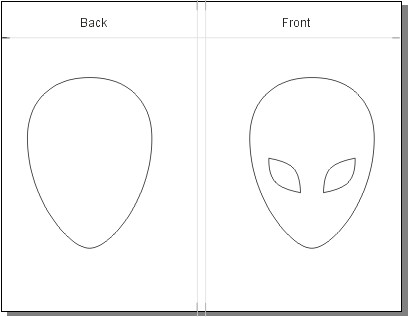
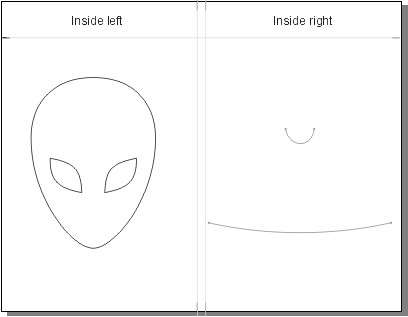
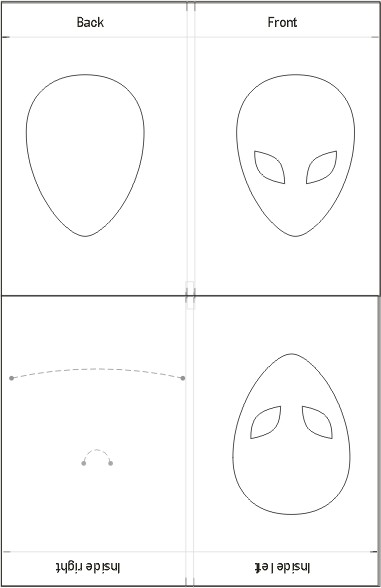
You'll need a two-page, landscape-oriented document with two "half-sheets" of content on each page.
Page one will be the front and back of your DVD packaging.
Page Two will be the left and right of the inside of the packaging, where the DVD lives.
Place a Brilliant Title in the middle of page one, centered vertically between the front and back.
Leave the top inch blank on both pages.
You have four "pages" of area to cover with important stuff.
Be sure to place something in the area that will be covered by the DVD: a built-in surprise that shows up when the disc is removed!
Unless you have access to a printer that can handle 11"x17", you'll want to send a digital file to your local print shop, just rotate pages two and position it underneath page one so that their bottom edges are touching.
Or, just print out both pages on 8-1/2" x 11" and drop them on the copy machine.
Make your copies.
Have a snack.
Trim & Slice
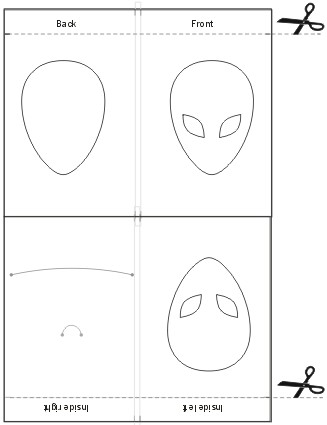


Using the scary guillotine-style paper cutter, hack off the top and bottom one inch of your cardstock. Save the resulting strips of paper for use as bookmarks, mobius strips, paper people, or paper skis for paper people.
So, I ain't no mathematician, but after this step, your paper will be 11"x15".
With a razor or pocket knife, cut the CD slots out. Put a piece of wood or cardboard underneath, and do only one at a time. Remember: No Spill Blood!!
These cuts can be modified in a number of ways, but the basic idea is, cut a slot a little wider than a DVD somewhere near the equator, and a little flap up at the north pole to keep the disc from spiraling into space.
This step is the most time-consuming and most likely to cause profanity. To avoid losing time or your temper, keep a steady hand and a cool head, and consider making a jig or using other sneaky tools to make these cuts (for the tab, a good chisel, or a metal 3/4" pipe cut away and sharpened to form a U-shaped blade, would be a light hammer-blow away from a perfect tab).
First Fold
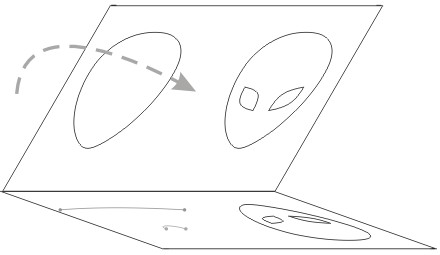
Fold your page in half, with the printed parts facing out.
Crease this fold really well, so that it is sharp and deadly.
Count your fingers. If you still have the correct number, move on to the next step.
Crease this fold really well, so that it is sharp and deadly.
Count your fingers. If you still have the correct number, move on to the next step.
Second Fold
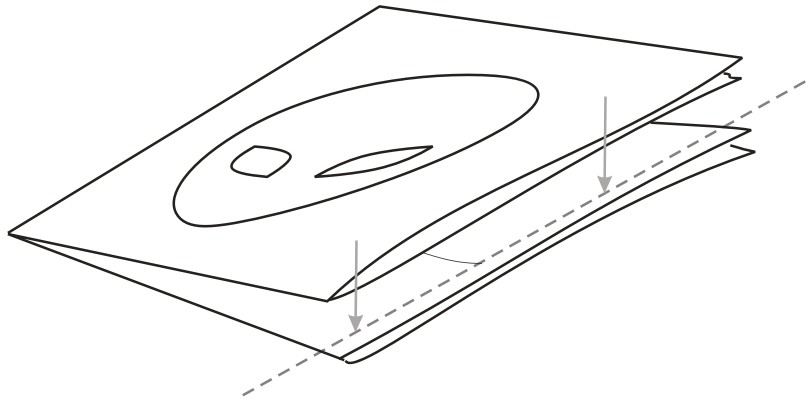
Curl the paper in half so you can line up the right edge of the "front cover" just short of the
the right edge of the inside; leaving 1/8" or so, see illustration.
Crease well.
the right edge of the inside; leaving 1/8" or so, see illustration.
Crease well.
Third Fold
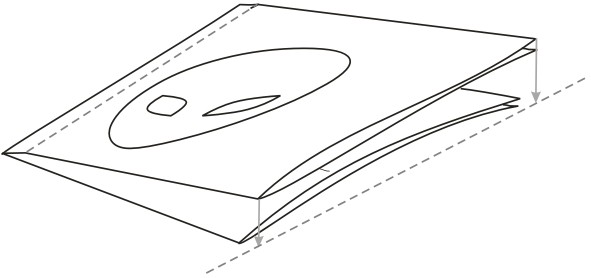

Fold just like you did in the previous step, but this time overshoot the opposite edge by 1/8".
Crease so that you have a nice, squared-off "spine," which proudly displays the Brilliant Title of your production.
Crease so that you have a nice, squared-off "spine," which proudly displays the Brilliant Title of your production.
Insert Disc
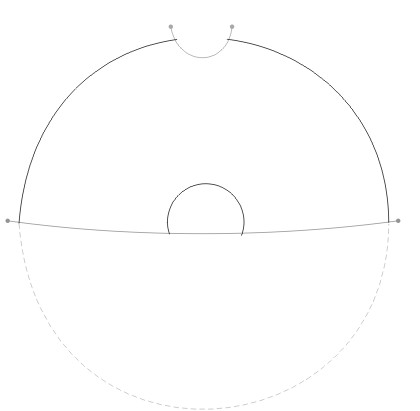


You now have a finished DVD package, sans DVD.
So, add the DVD.
You'll notice that the disc is protected well, will not fall out no matter what, and will even be a good citizen of a DVD collection when added to a shelf filled with its plastic-housed brethren.
Intentionally not built to last for all eternity: ideal for certain applications, adequate for others, and only rarely utterly inappropriate.
Enjoy!
Mike