Miniatures Build for Newcomers
by james.grulke.20 in Workshop > 3D Design
321 Views, 0 Favorites, 0 Comments
Miniatures Build for Newcomers
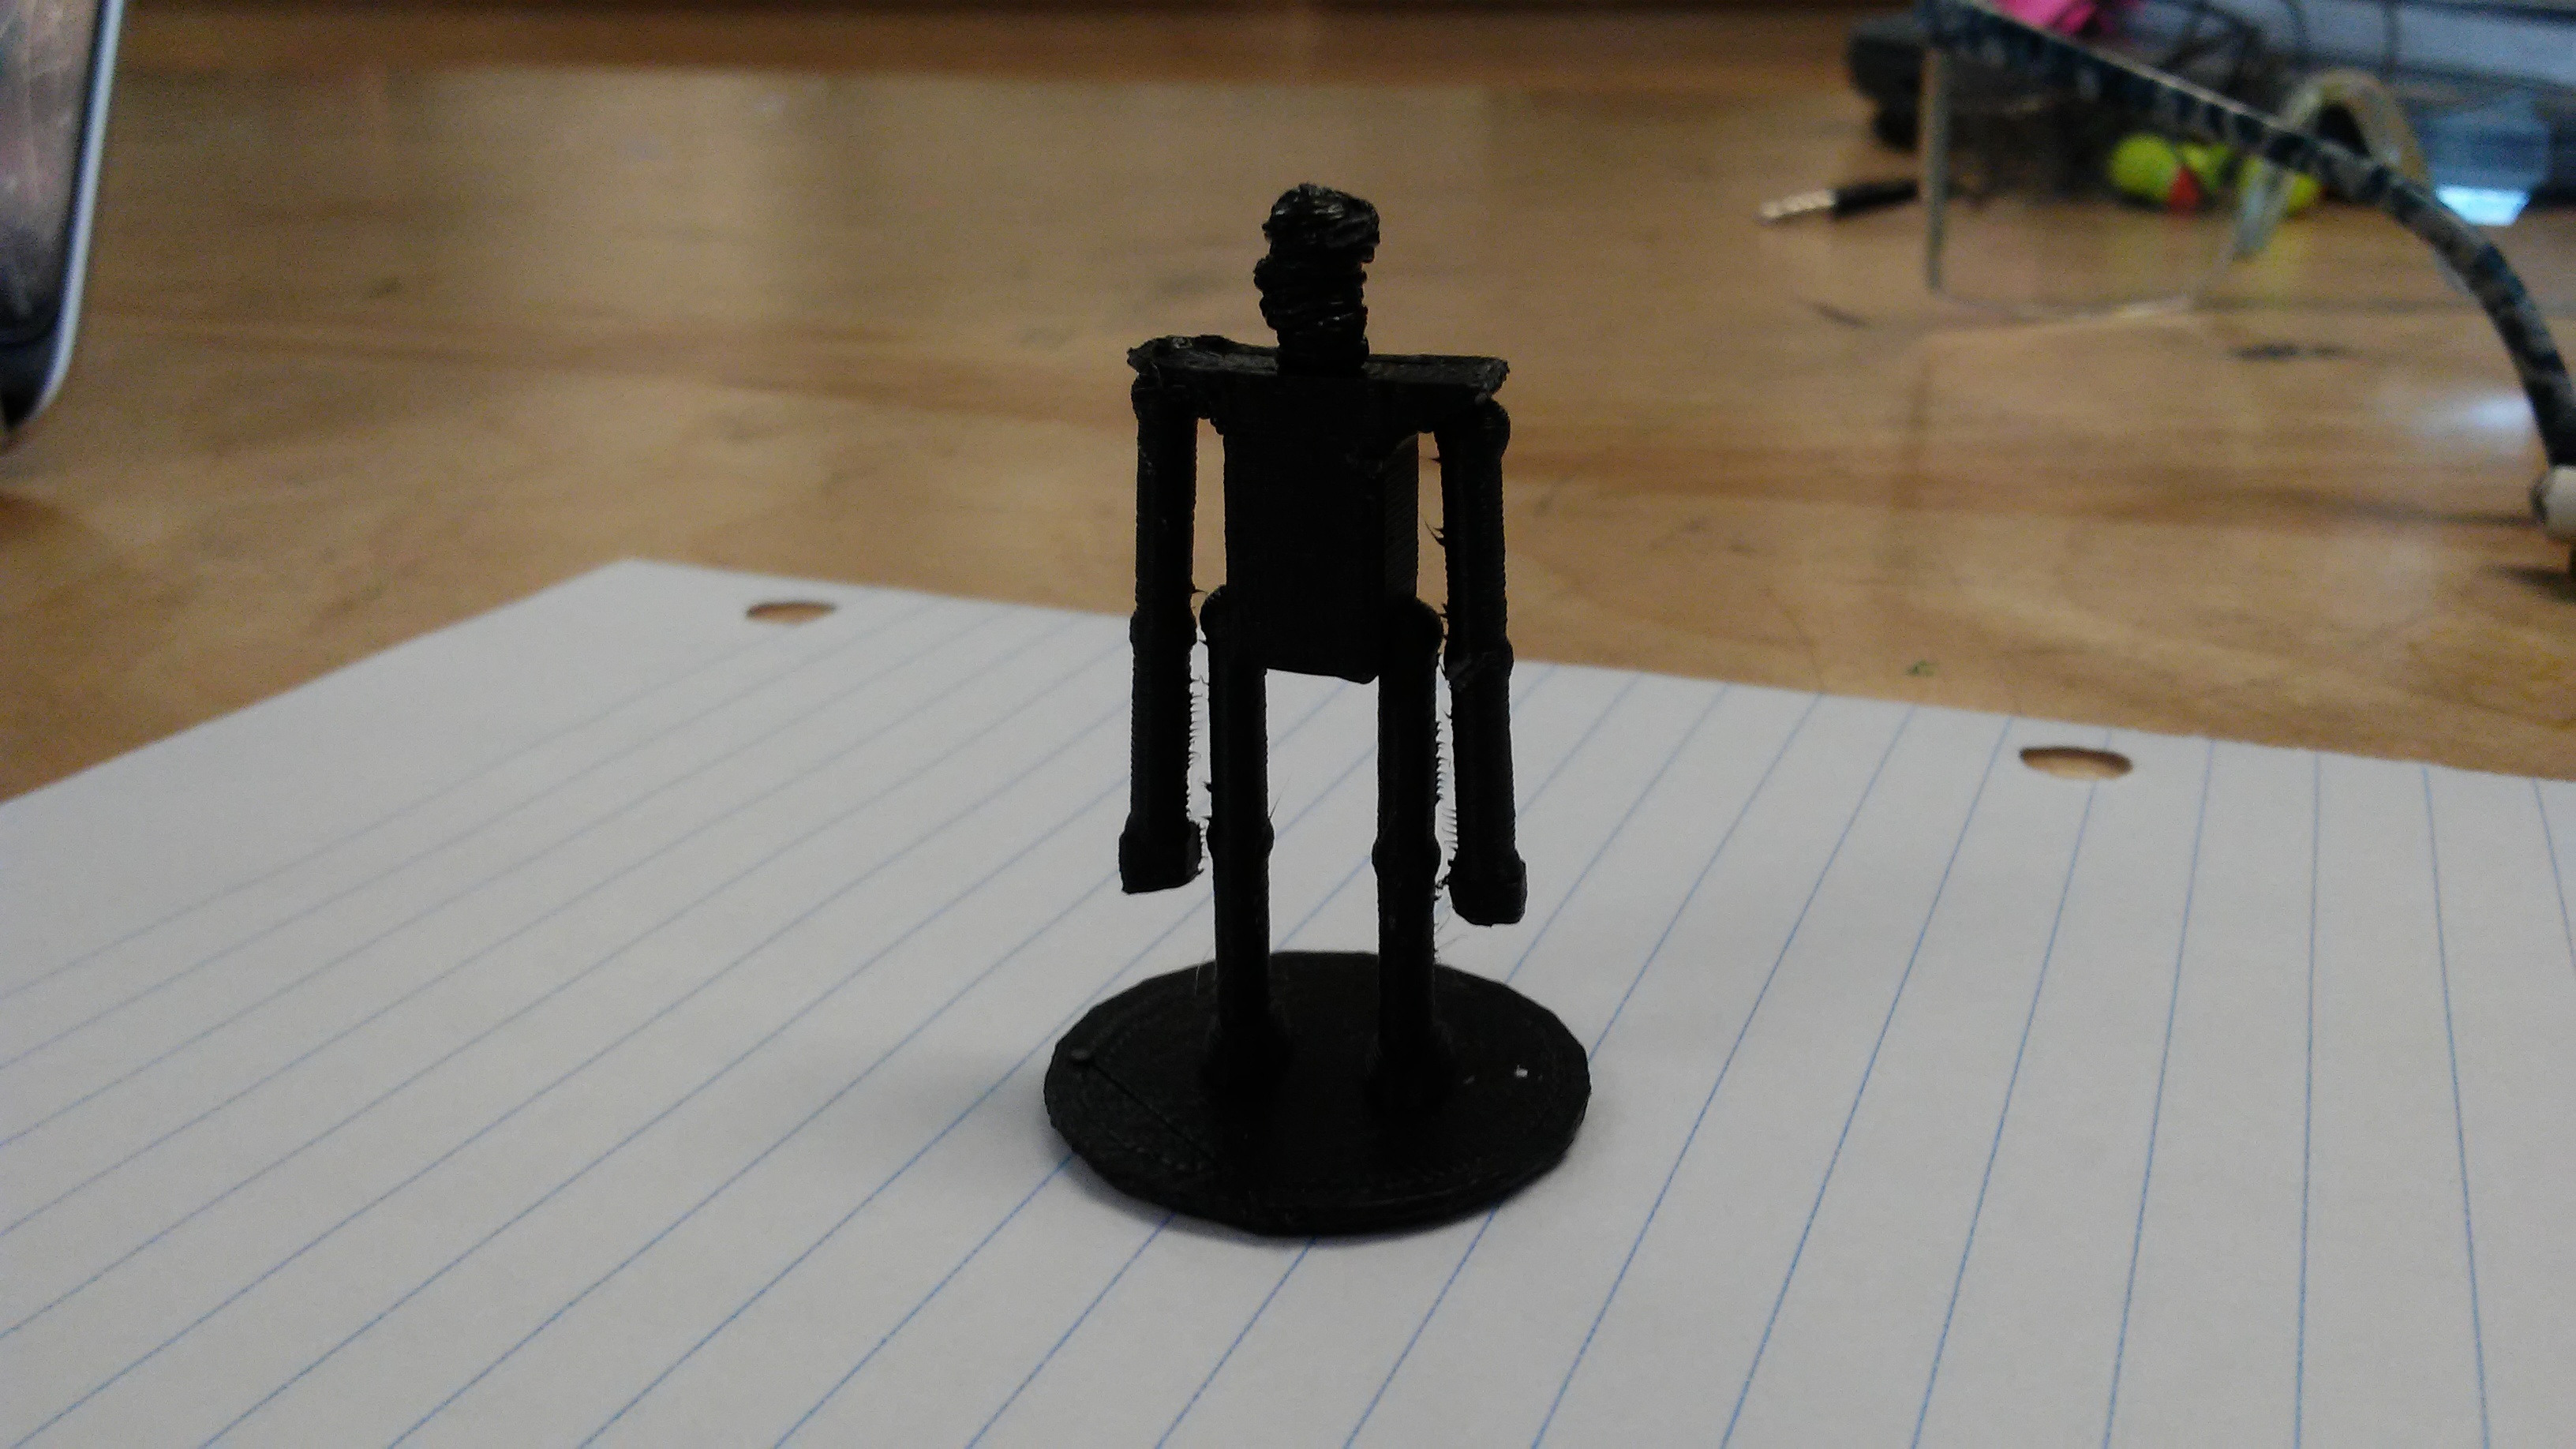
I will show you how to make your own miniatures in a simple way and what measurements you can use to make one. This will also let you know how to position the body as well as adding other simple designs to it.
I will also show you what types of printers that you will need and in order for you to properly use them.
Dremel Printer
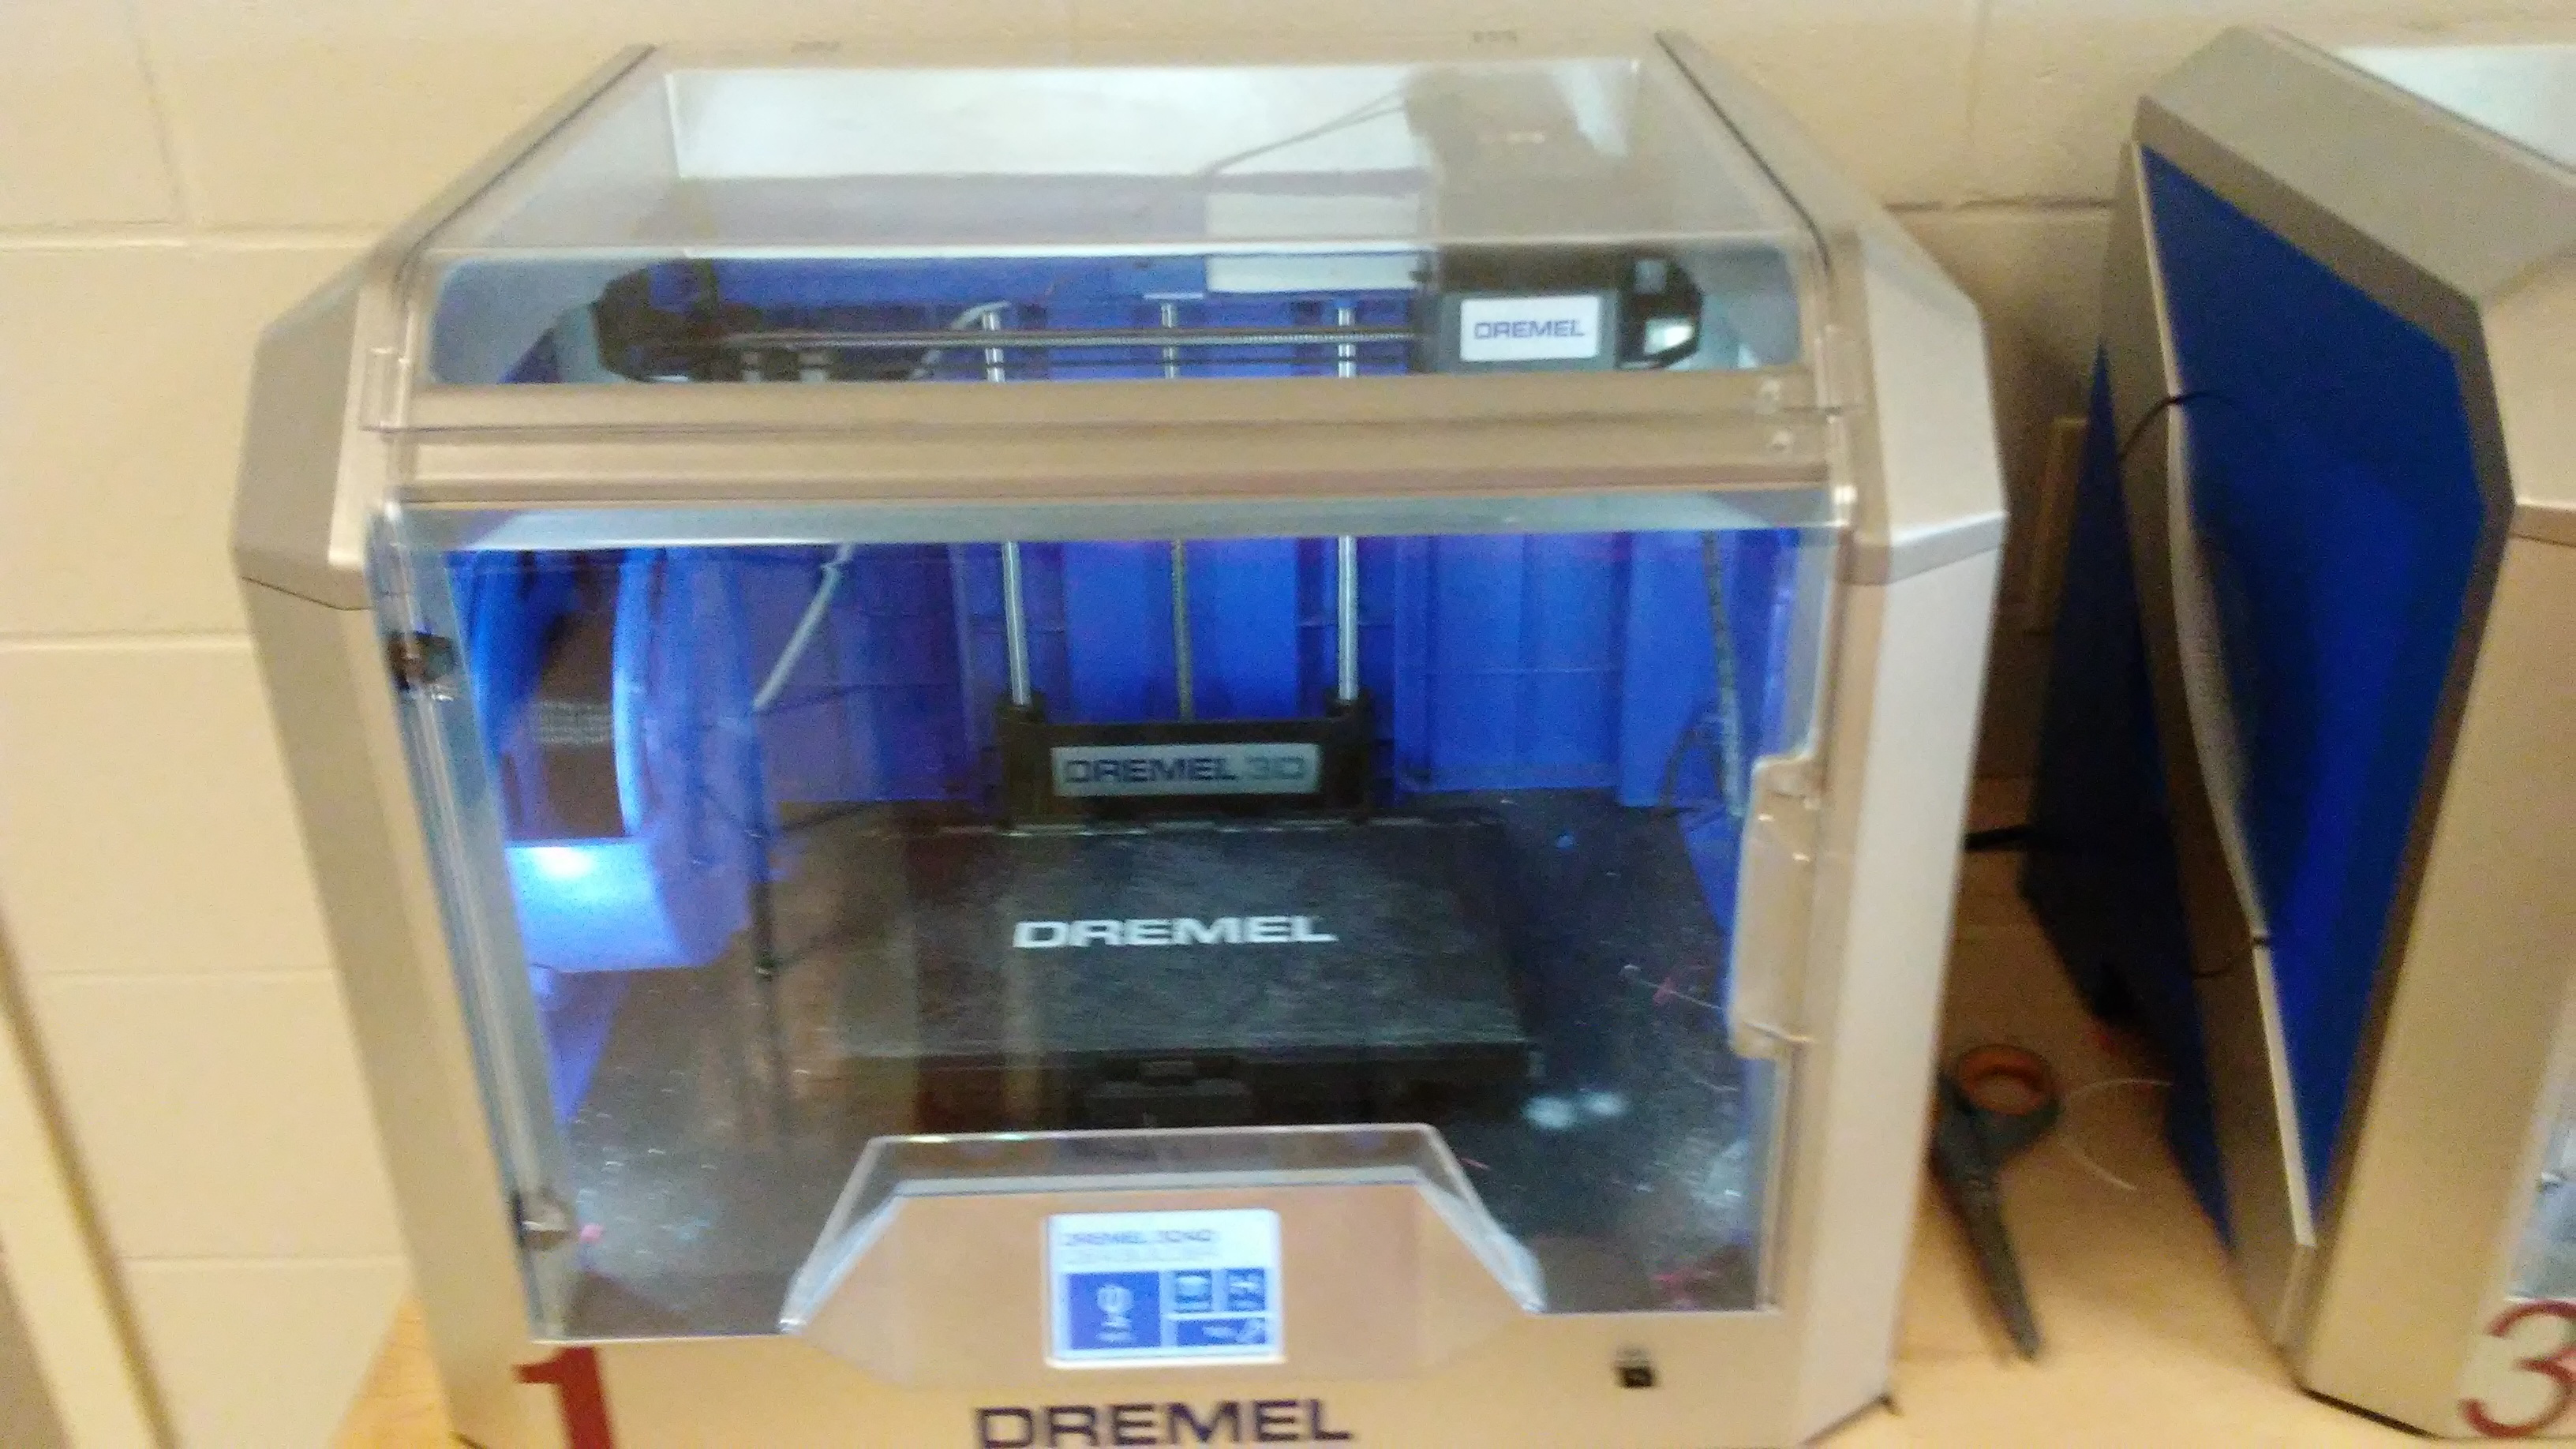
This is one of the two printers that you can use for this project in order for you to use a dremel printer you will need “Print Studio”.
If you need to know how to use “Print Studio” I will provide a video on how to use it.
https://youtu.be/4wbPXUjP5nY
Ender 3 Printer
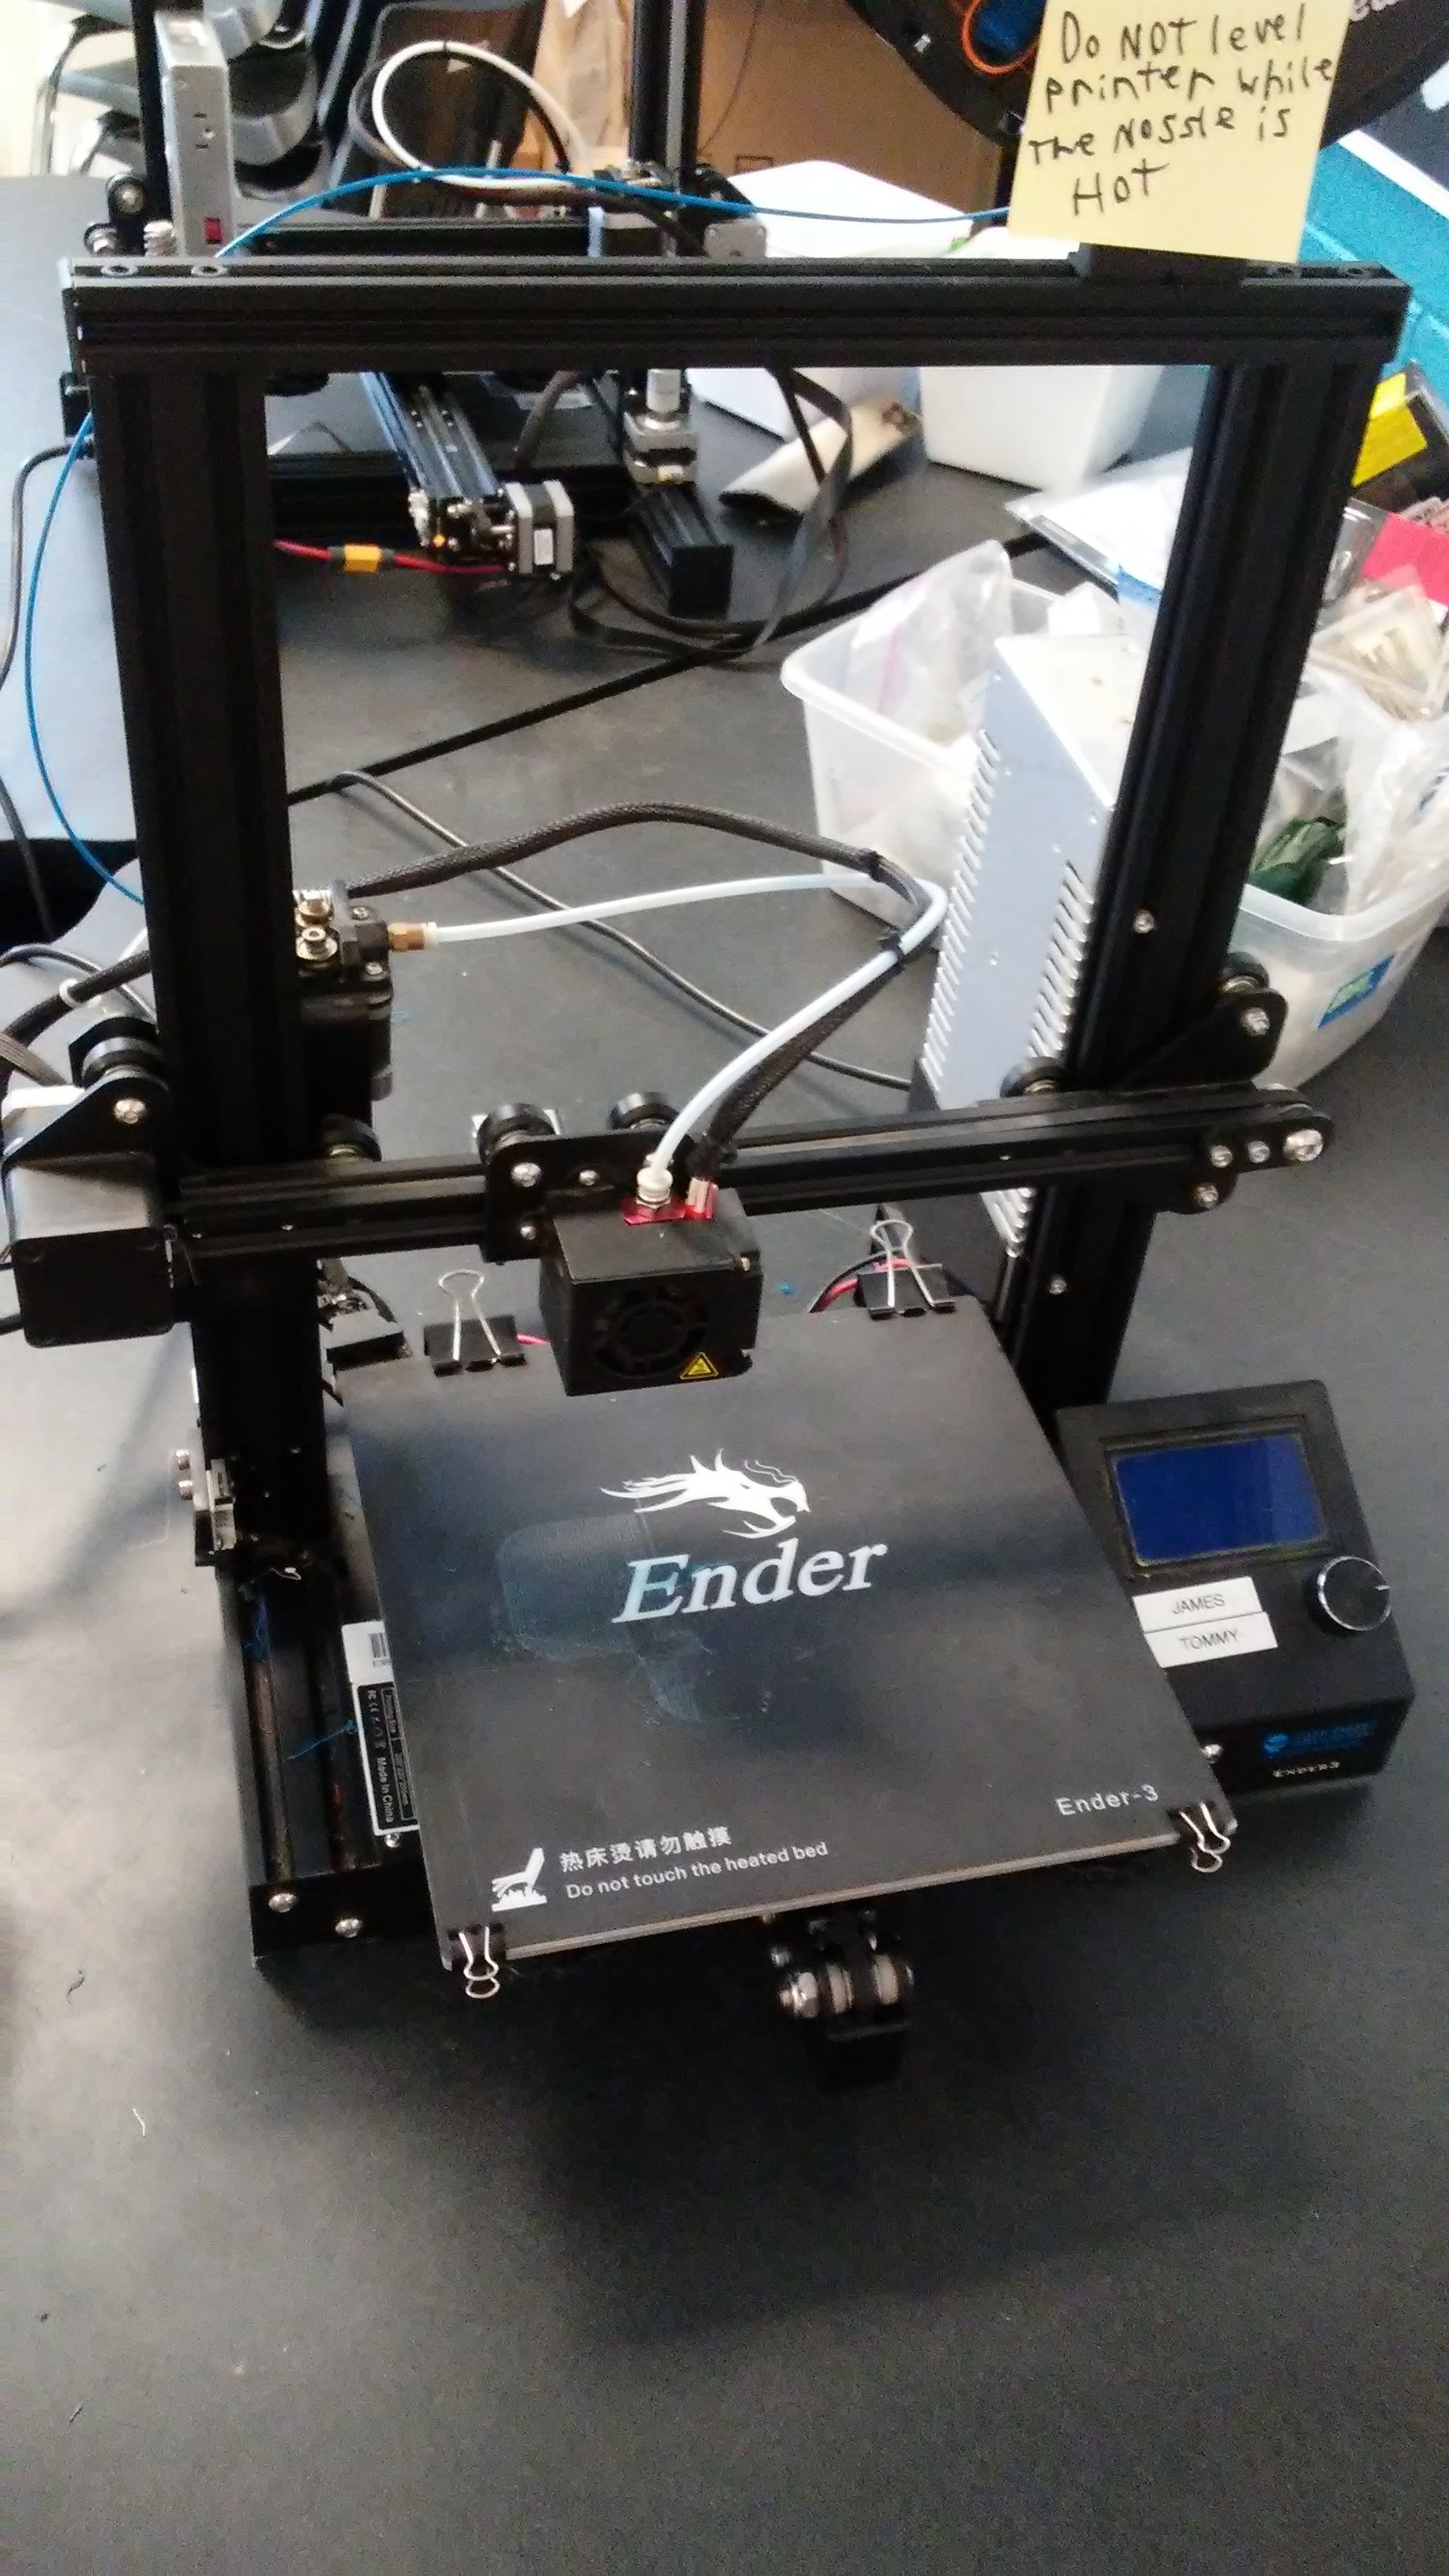
This is the second printer that you can use and it differs than that of a Dremel. The Ender 3 printer is capable of using two different types of filament “ABS and PLA filament”, has a heatable bed, and needs “Cura” in order for you to use it.
I have also provided a video if you don’t know how to use “Cura”. https://youtu.be/RX2_e7RqUH0
What Not to Do With a Dremel/Ender 3
Touch extruder while it is hot, will cause severe burns on hands and/or fingers.
No proper leveling on printer base, will cause the final print to not turn out as good as you wanted.
Less density on final print, will make the print is less durable and will break more easily when pressure is applied.
Material and Tools
Material
- PLA Filament.
https://www.amazon.com/HATCHBOX-Printer-Filament-D...
- ABS Filament.
https://www.amazon.com/HATCHBOX-3D-ABS-1KG1-75-BLU...
Tools:
- Print studio.
- Cura.
https://ultimaker.com/software/ultimaker-cura
- Computer that supports either Print Studio and Cura.
- Dremel Printer.
https://www.amazon.com/Dremel-Digilab-3D40-3D-Prin...
- Ender 3 Printer.
https://www.amazon.com/Official-Creality-3D-Printe...
- Tinkercad.
Procedure
Our task begins with the miniature’s build and what proper you may need in order for you to do it correctly.
For you to get to building you will first need to get on a computer and go to “Tinkercad” and if you need to i have provided a website for you to use below.
Measurements
The body segments and scales.
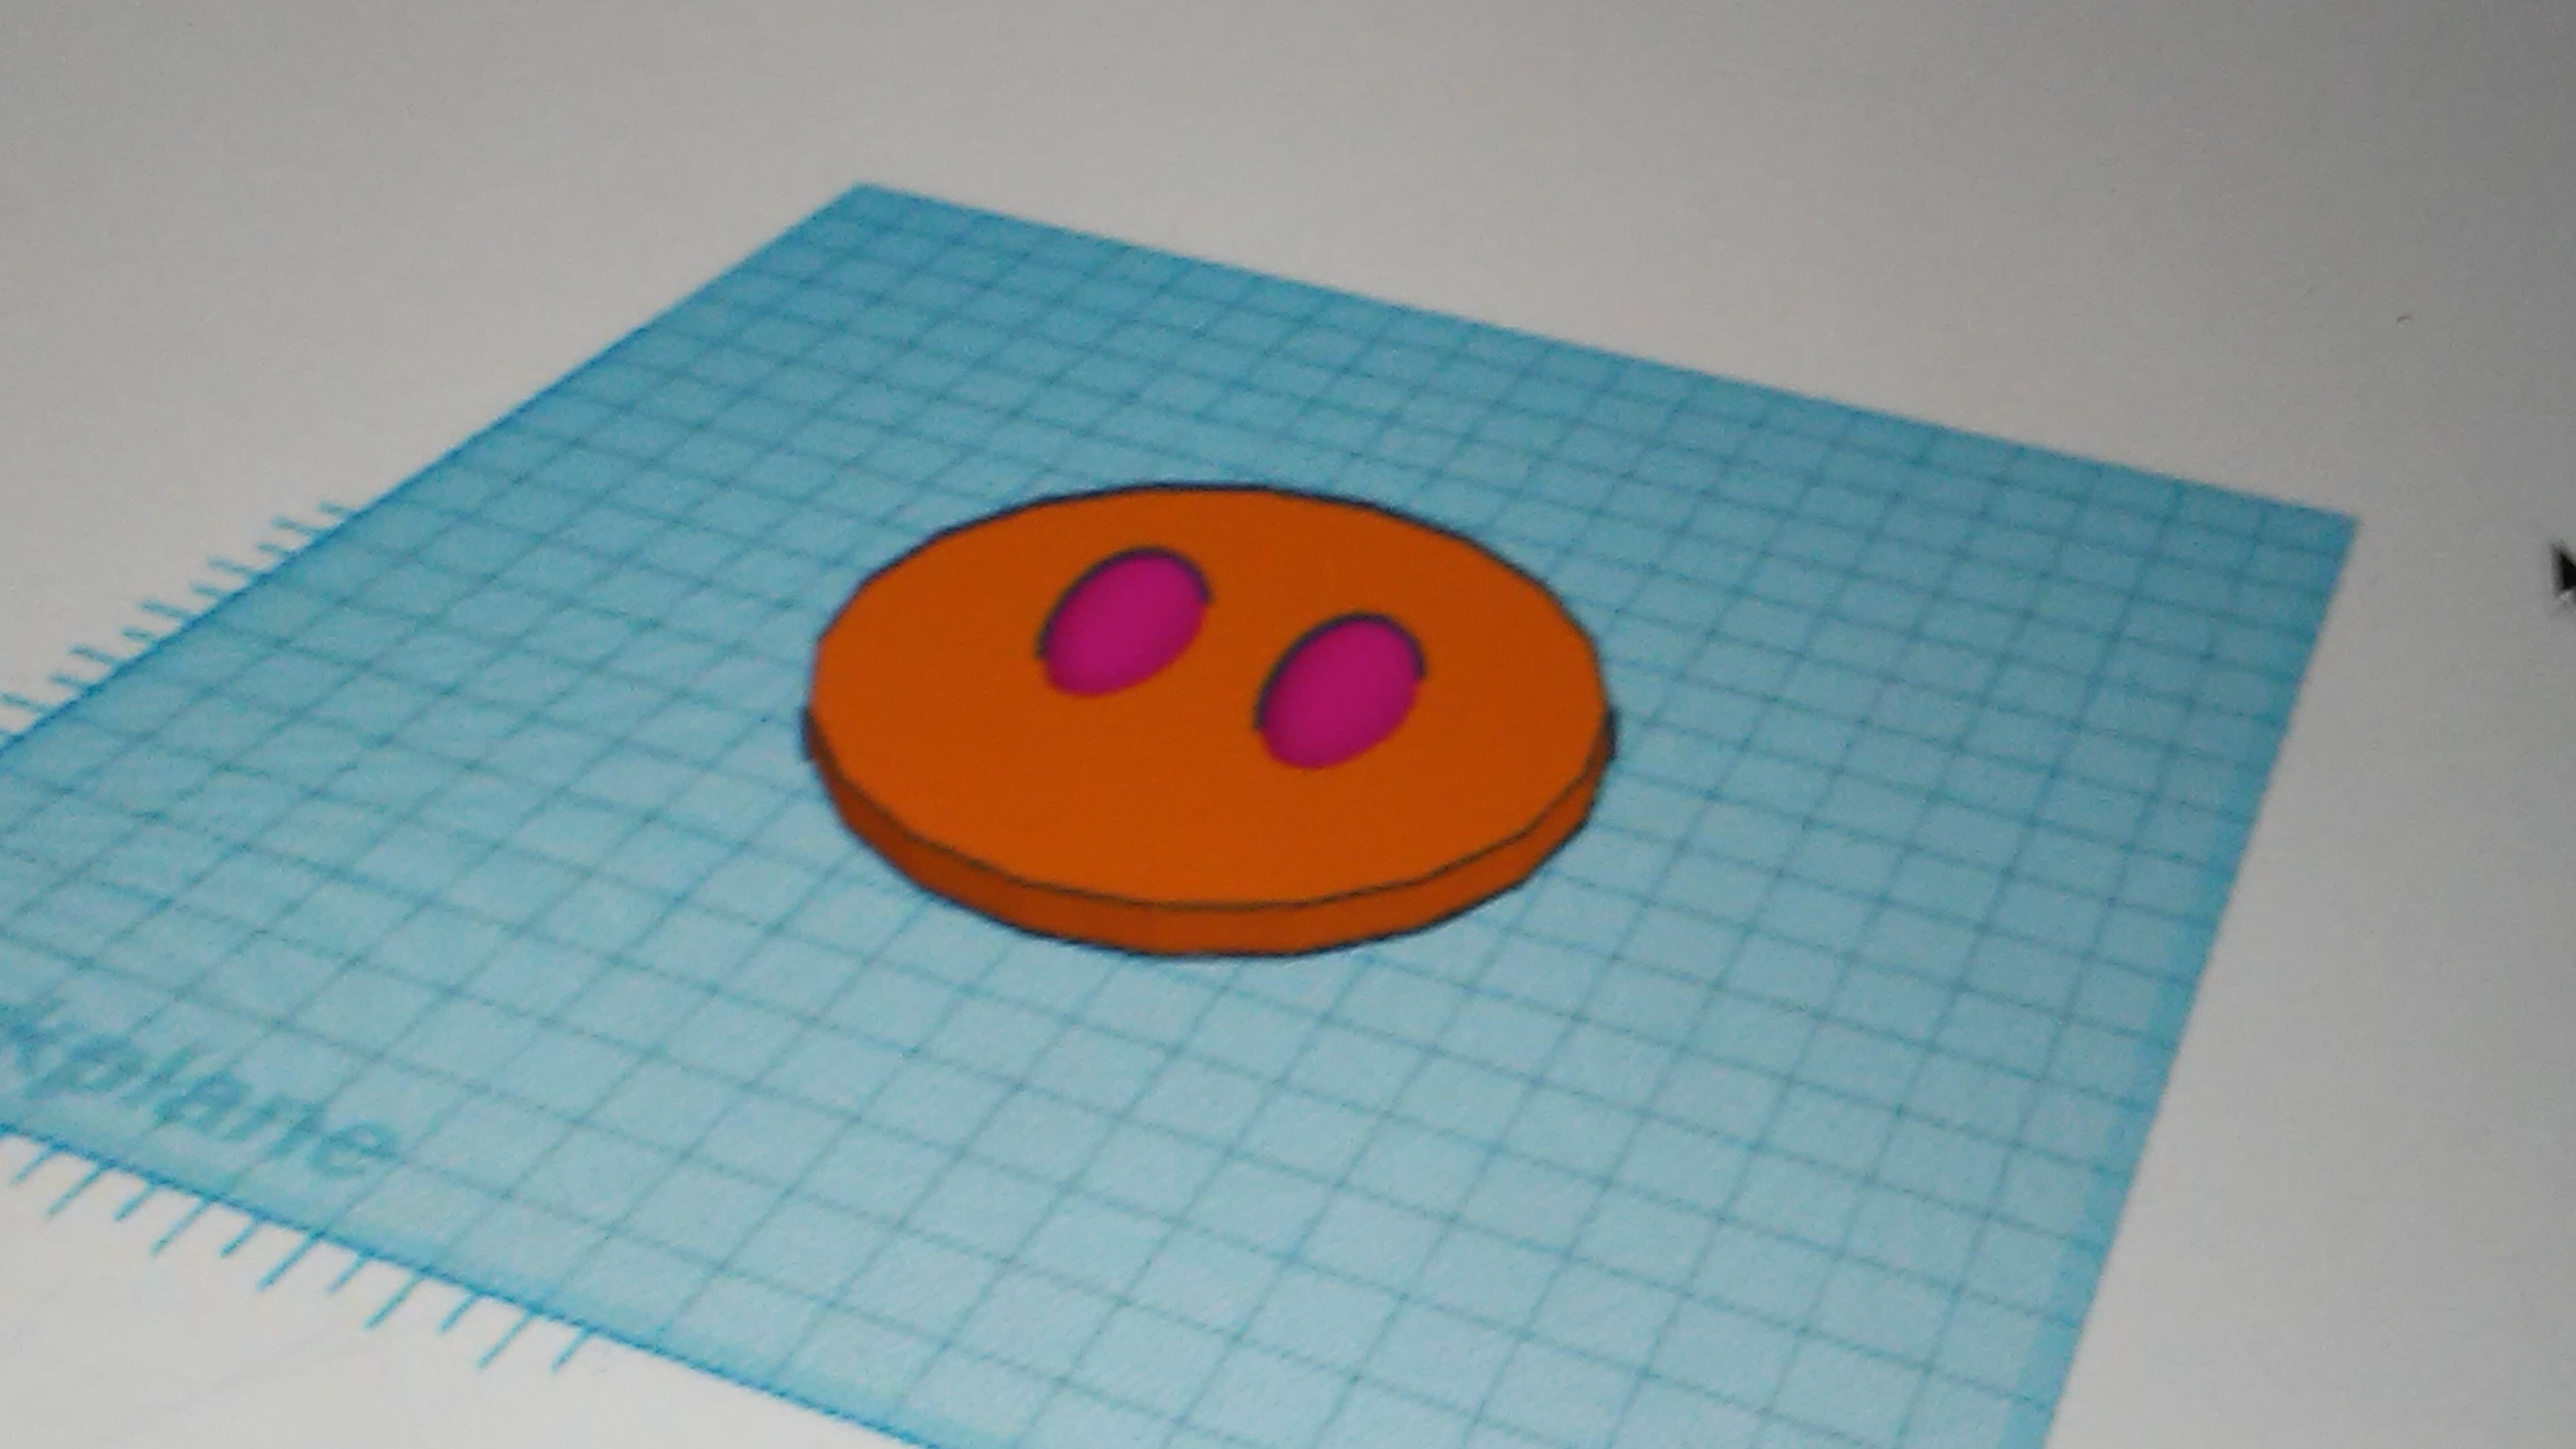
Base: Cylinder X- 80 Y- 80 Z- 5
Segment’s: Cylinder X- 8 Y- 10 Z- 30
Joints: Sphere X- 10 Y- 10 Z- 10
Feet: Half Sphere X- 13 Y- 25 Z- 7
Torso: Box X- 25 Y- 20 Z- 40
Shoulders: Wedge X- 20 Y- 20 Z- 14
Head: Half Cylinder X- 17 Y- 18 Z- 13
Round roof X- 17 Y- 18 Z- 13
Hands: Box X- 10 Y- 10 Z- 12
Base Area
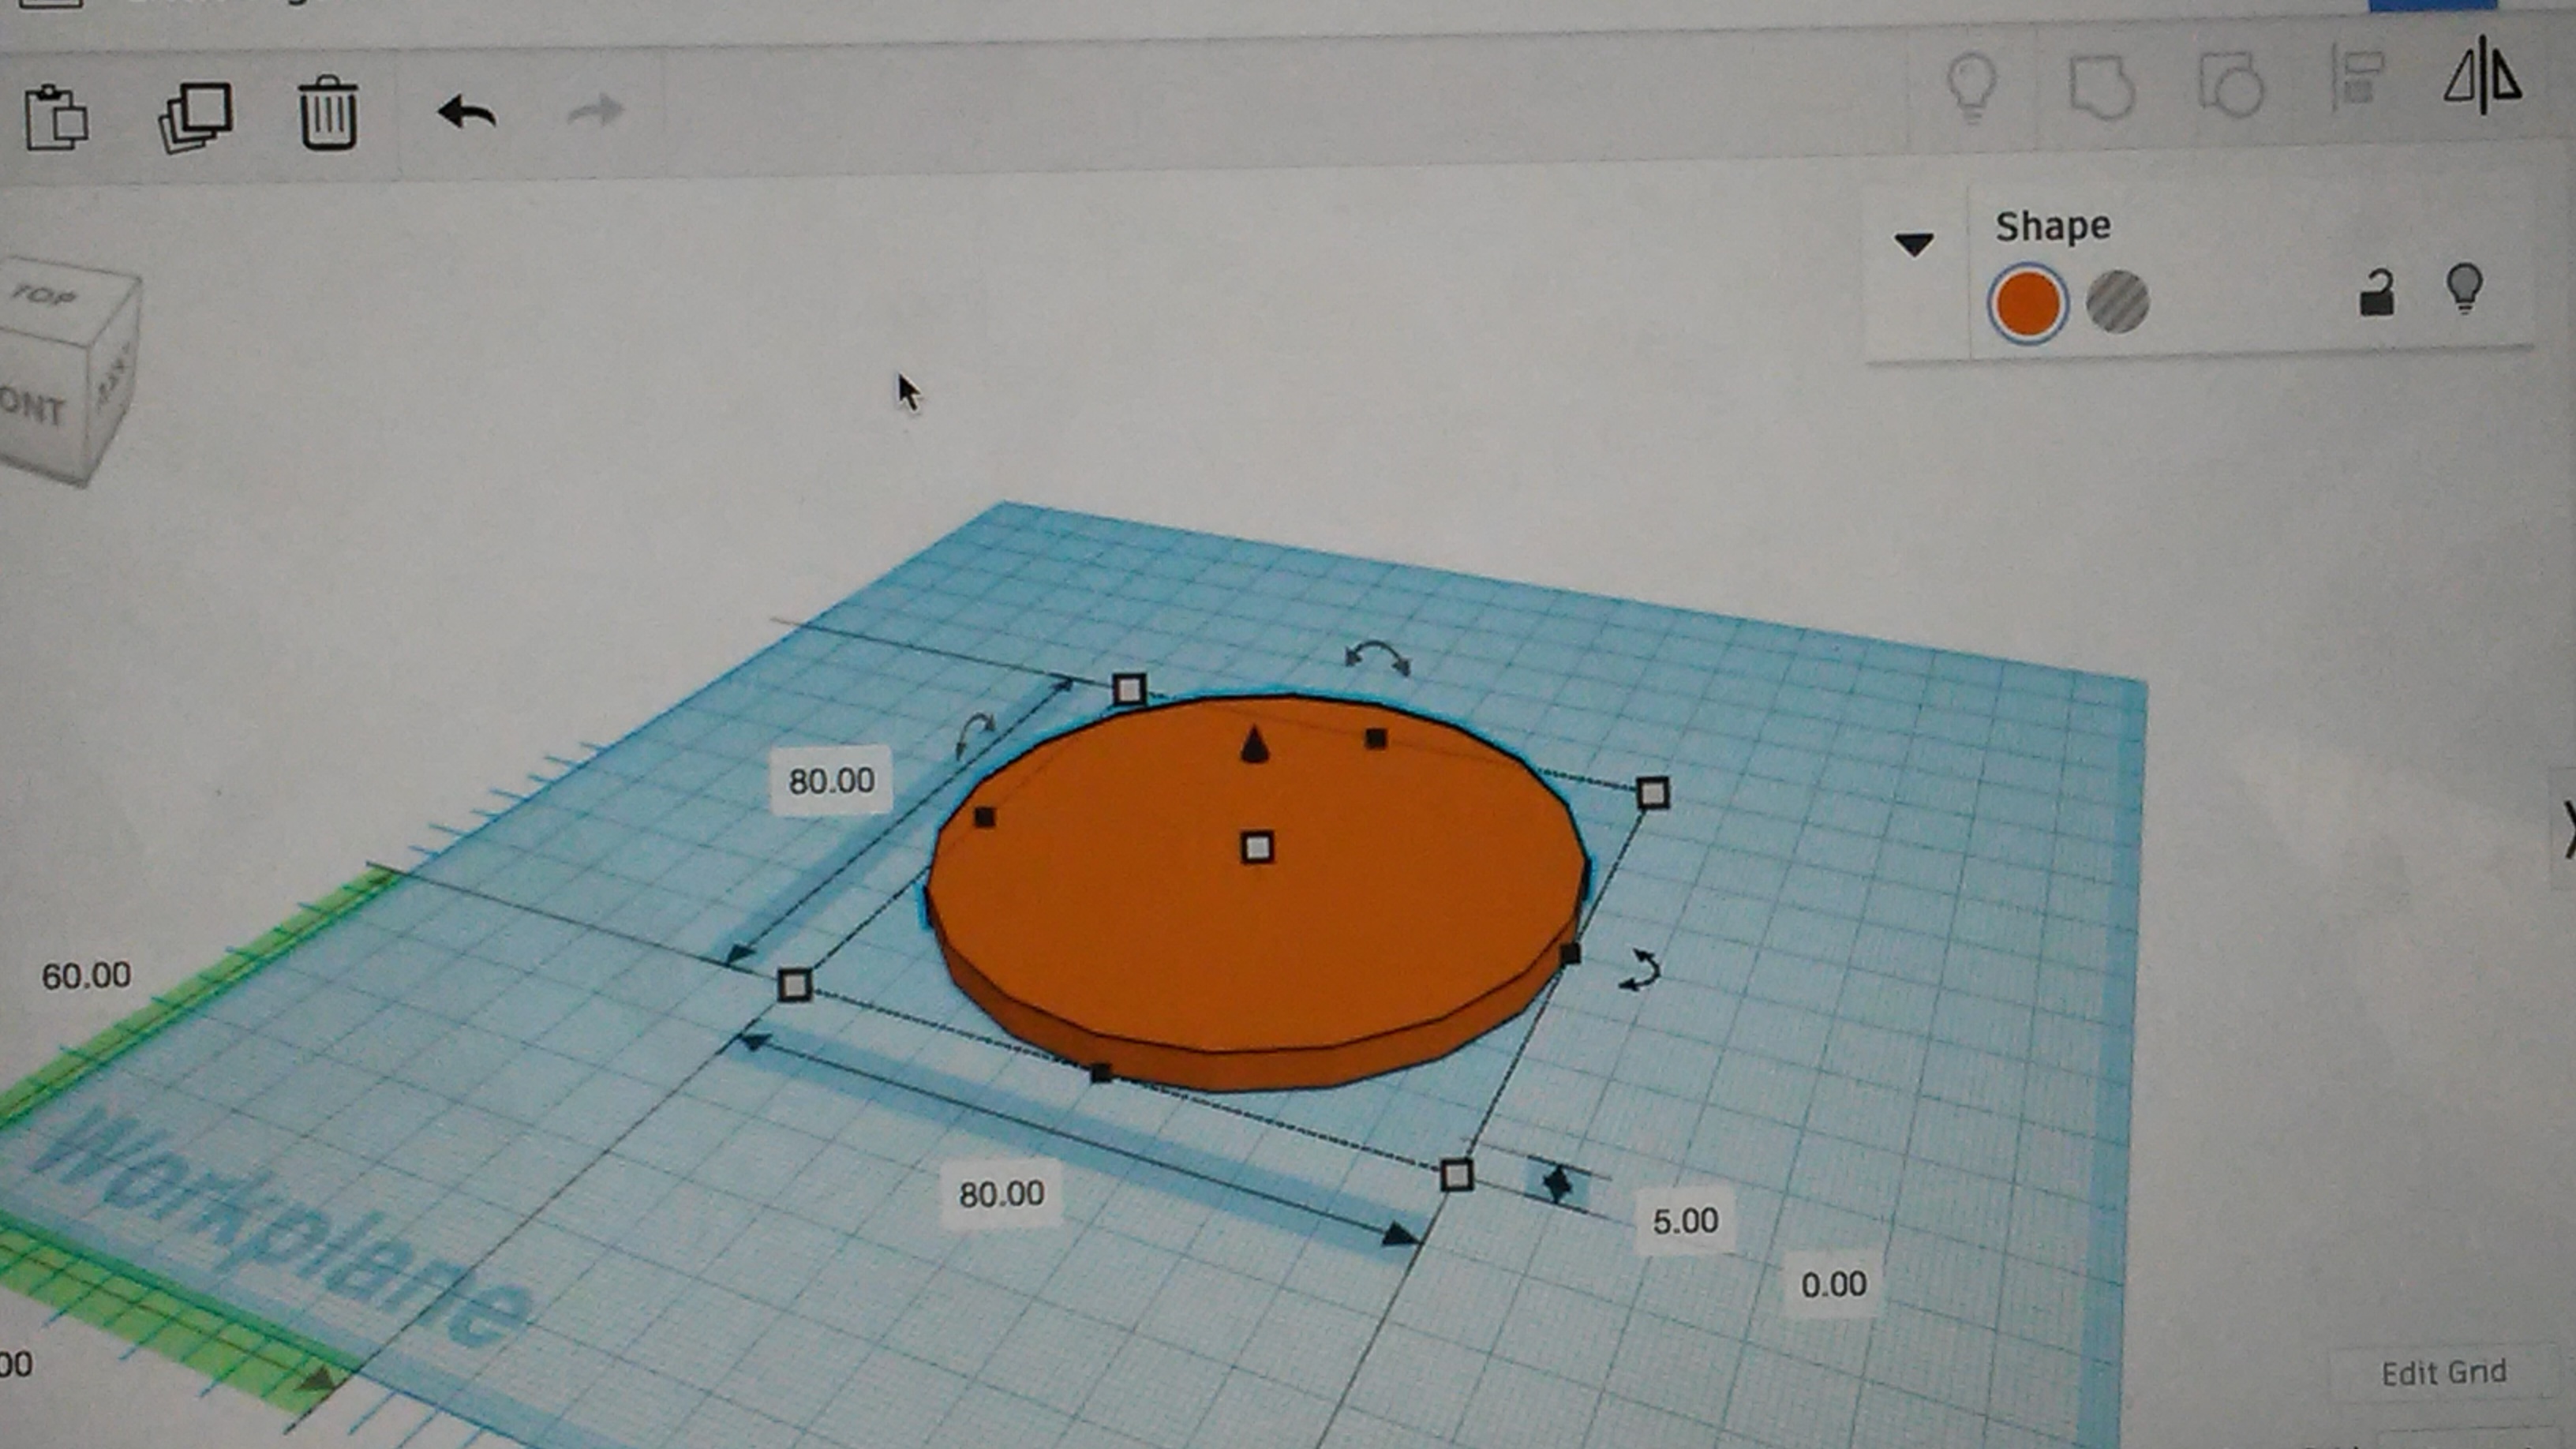
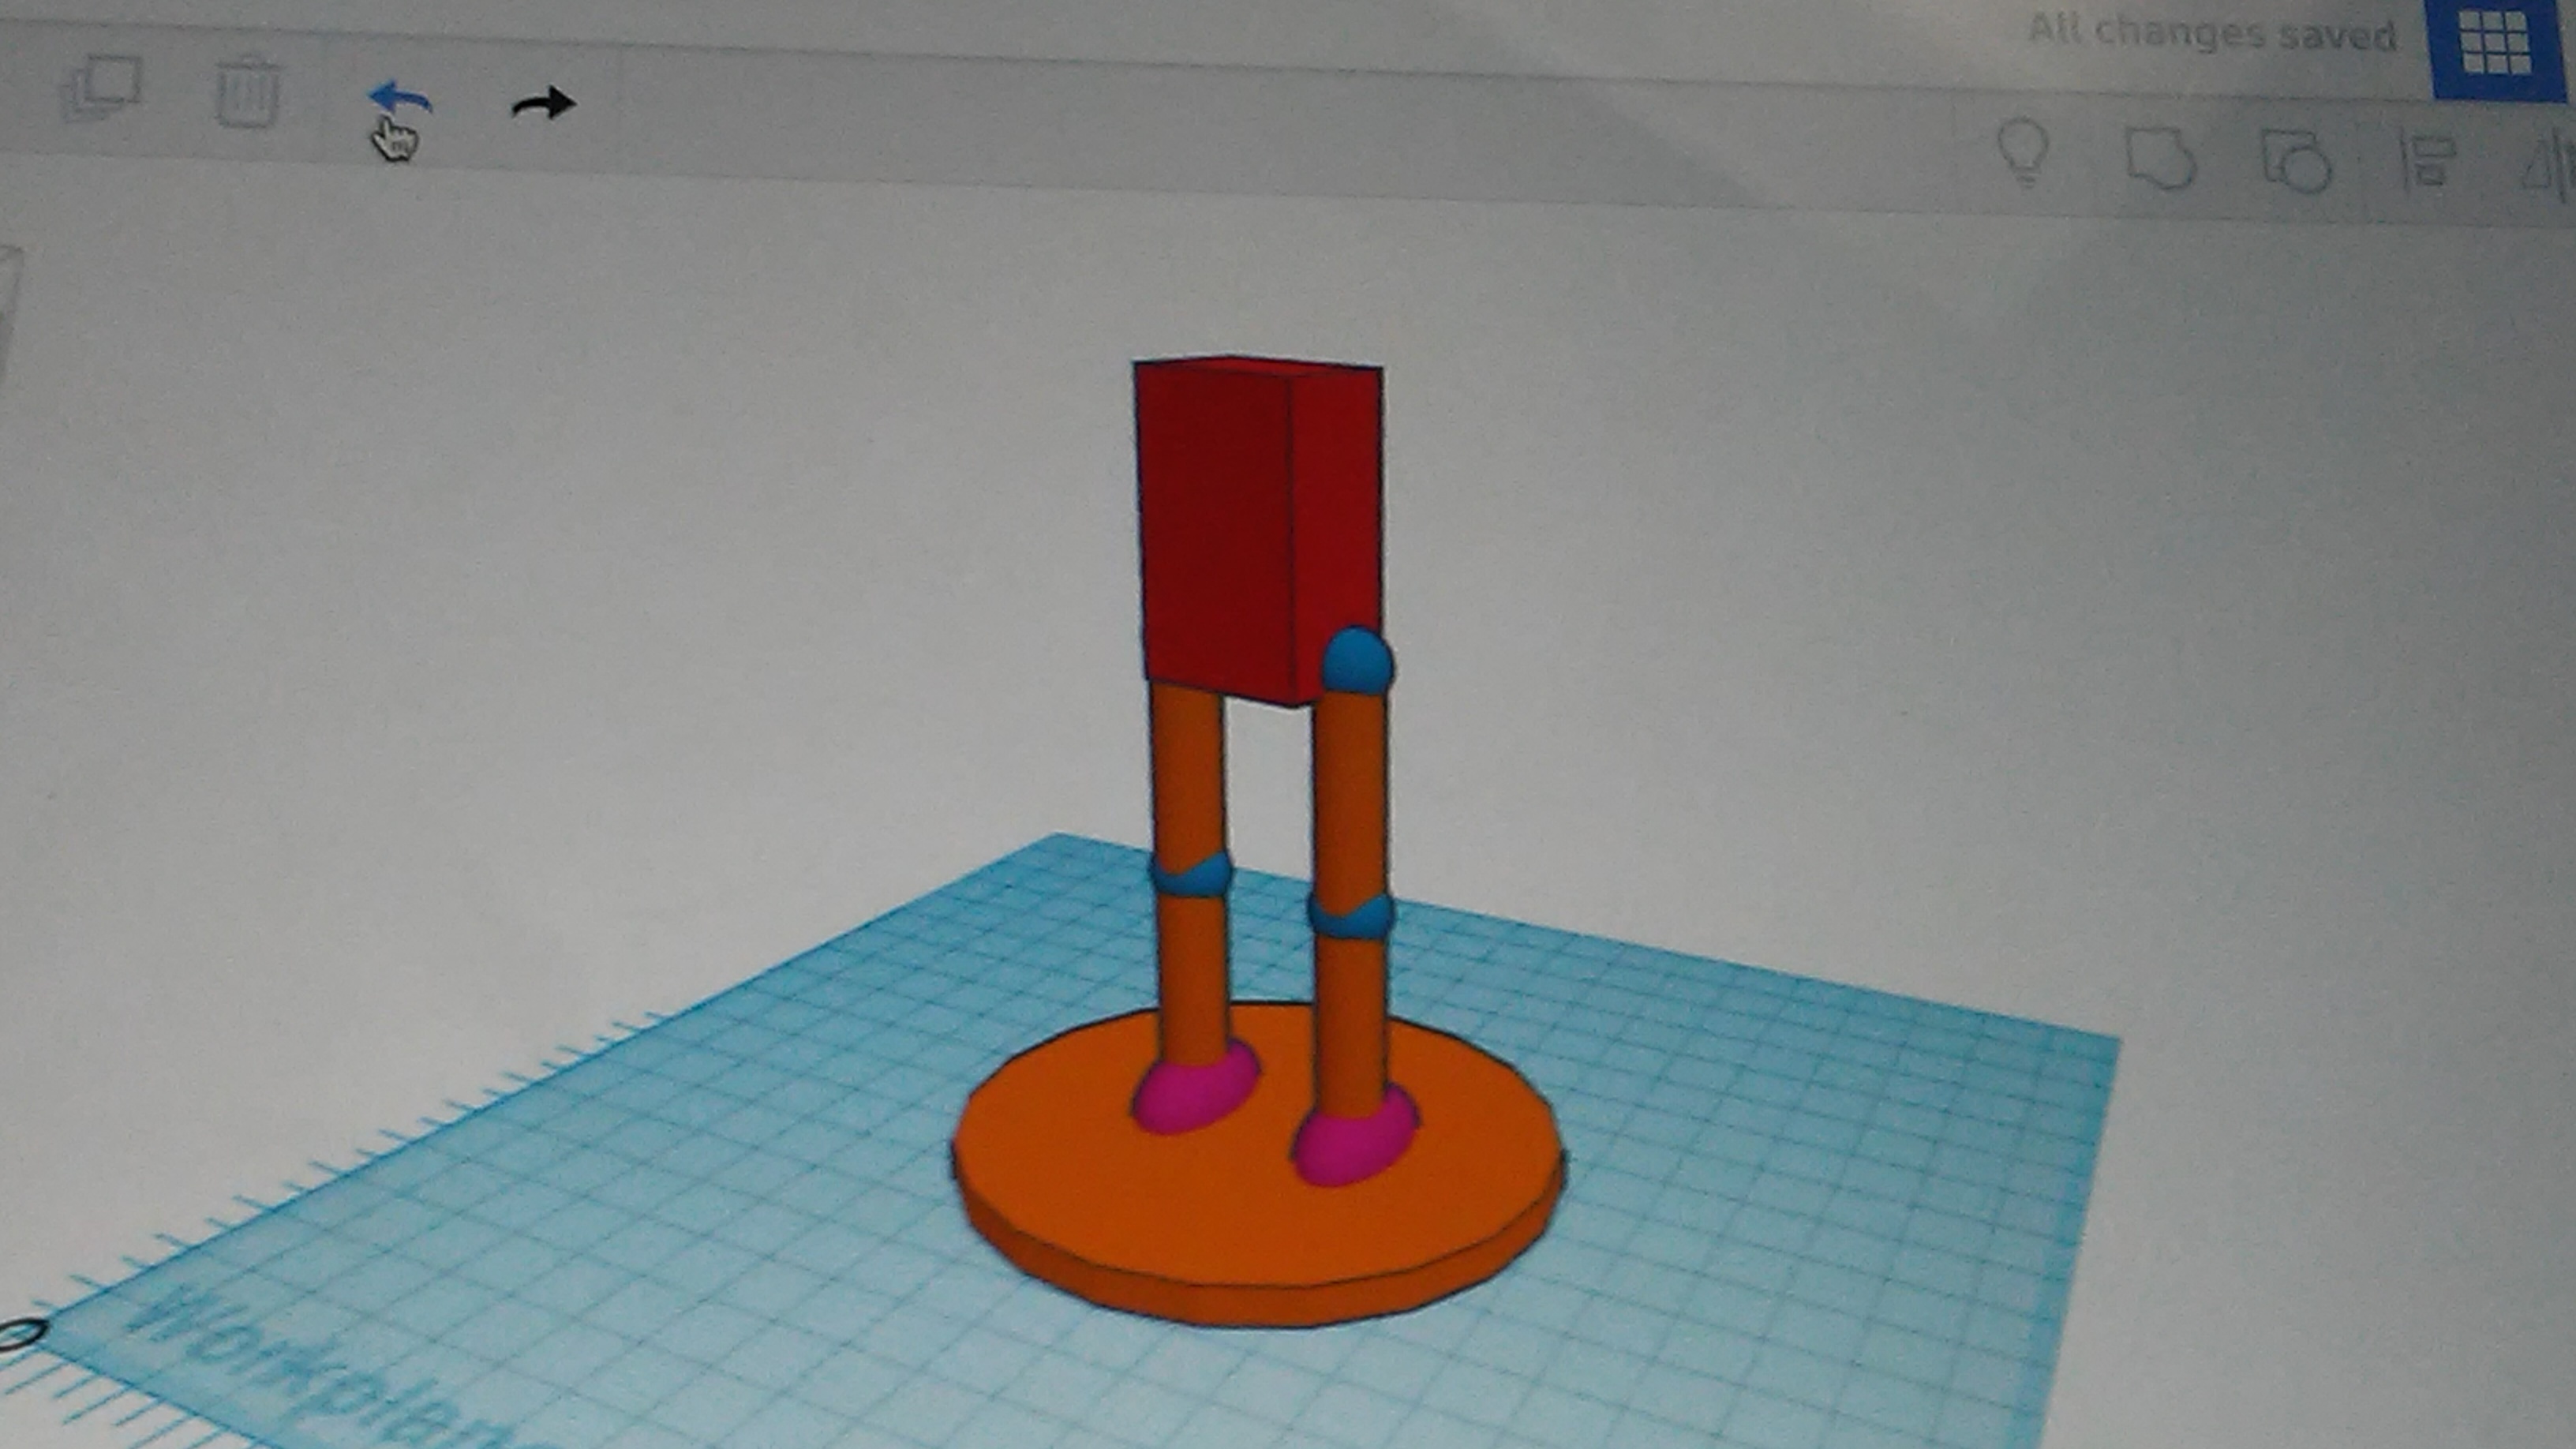
The first thing you do is to make your Base and place it in the center of the grid area.
Feet
You will then need to place 2 Half Spheres (or Feet) on top of the base that you made.
Legs
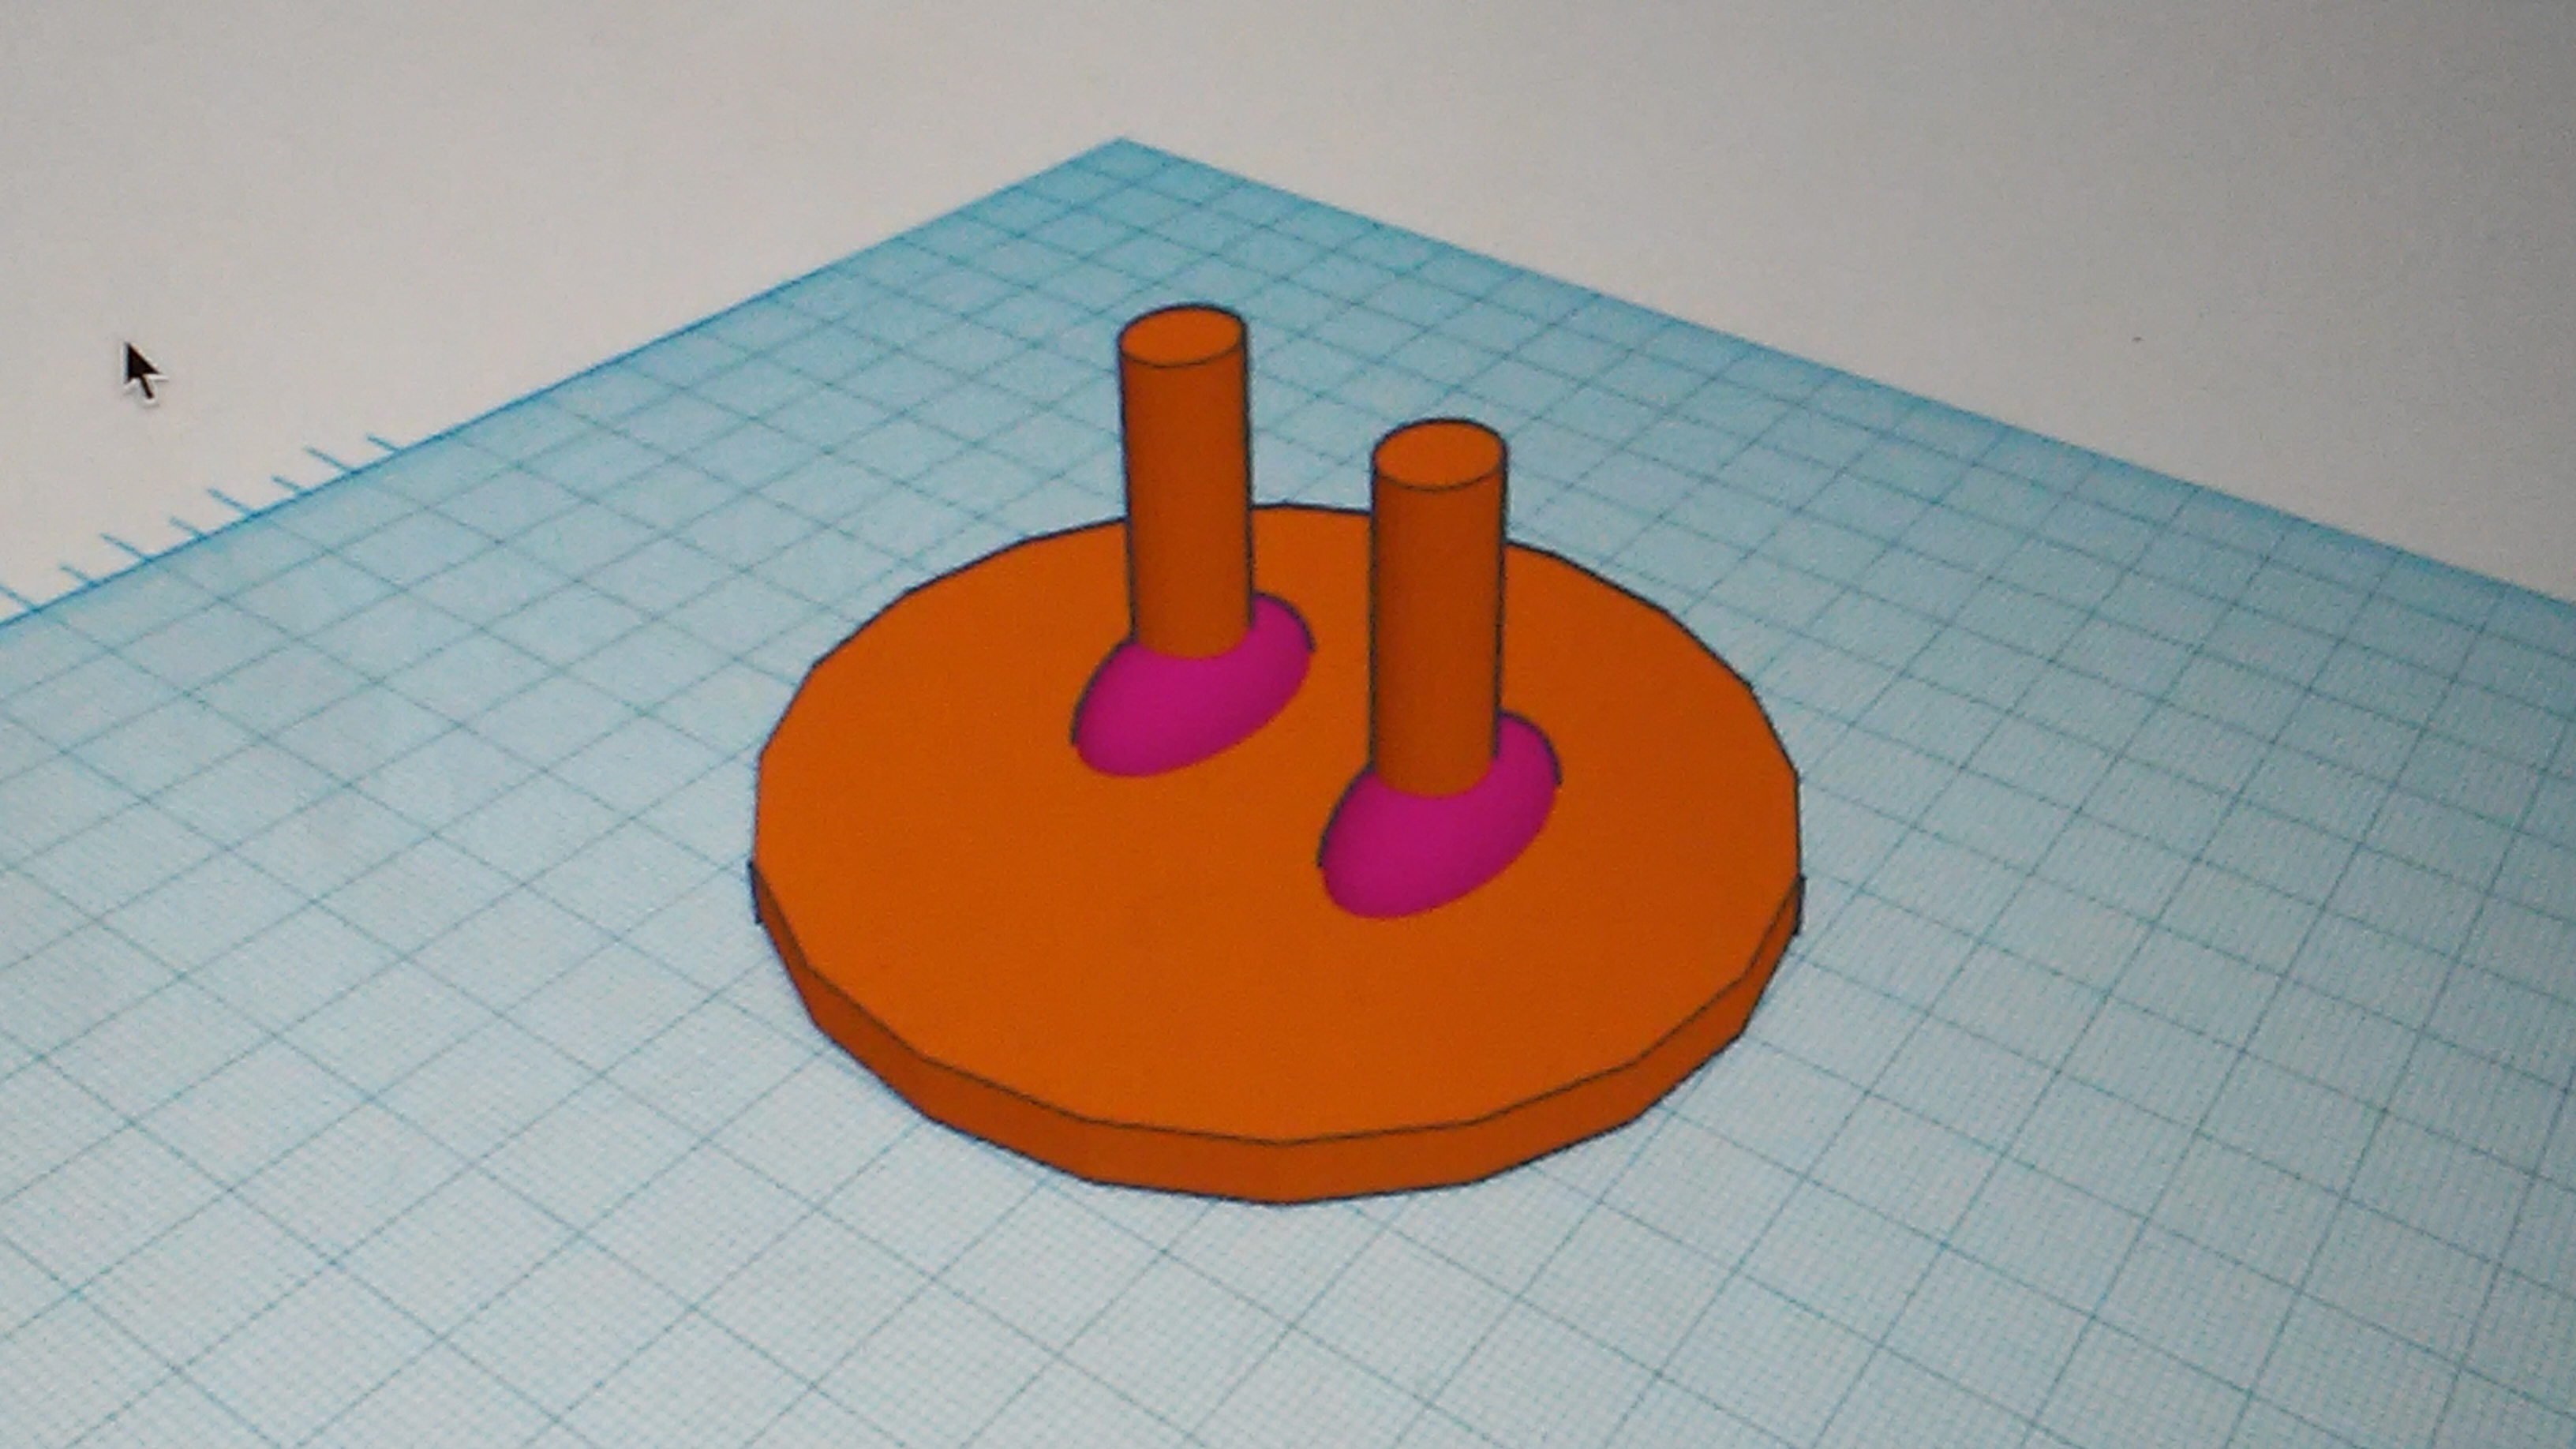
You will now need to place one Segment piece on top of each foot as needed.
Knees
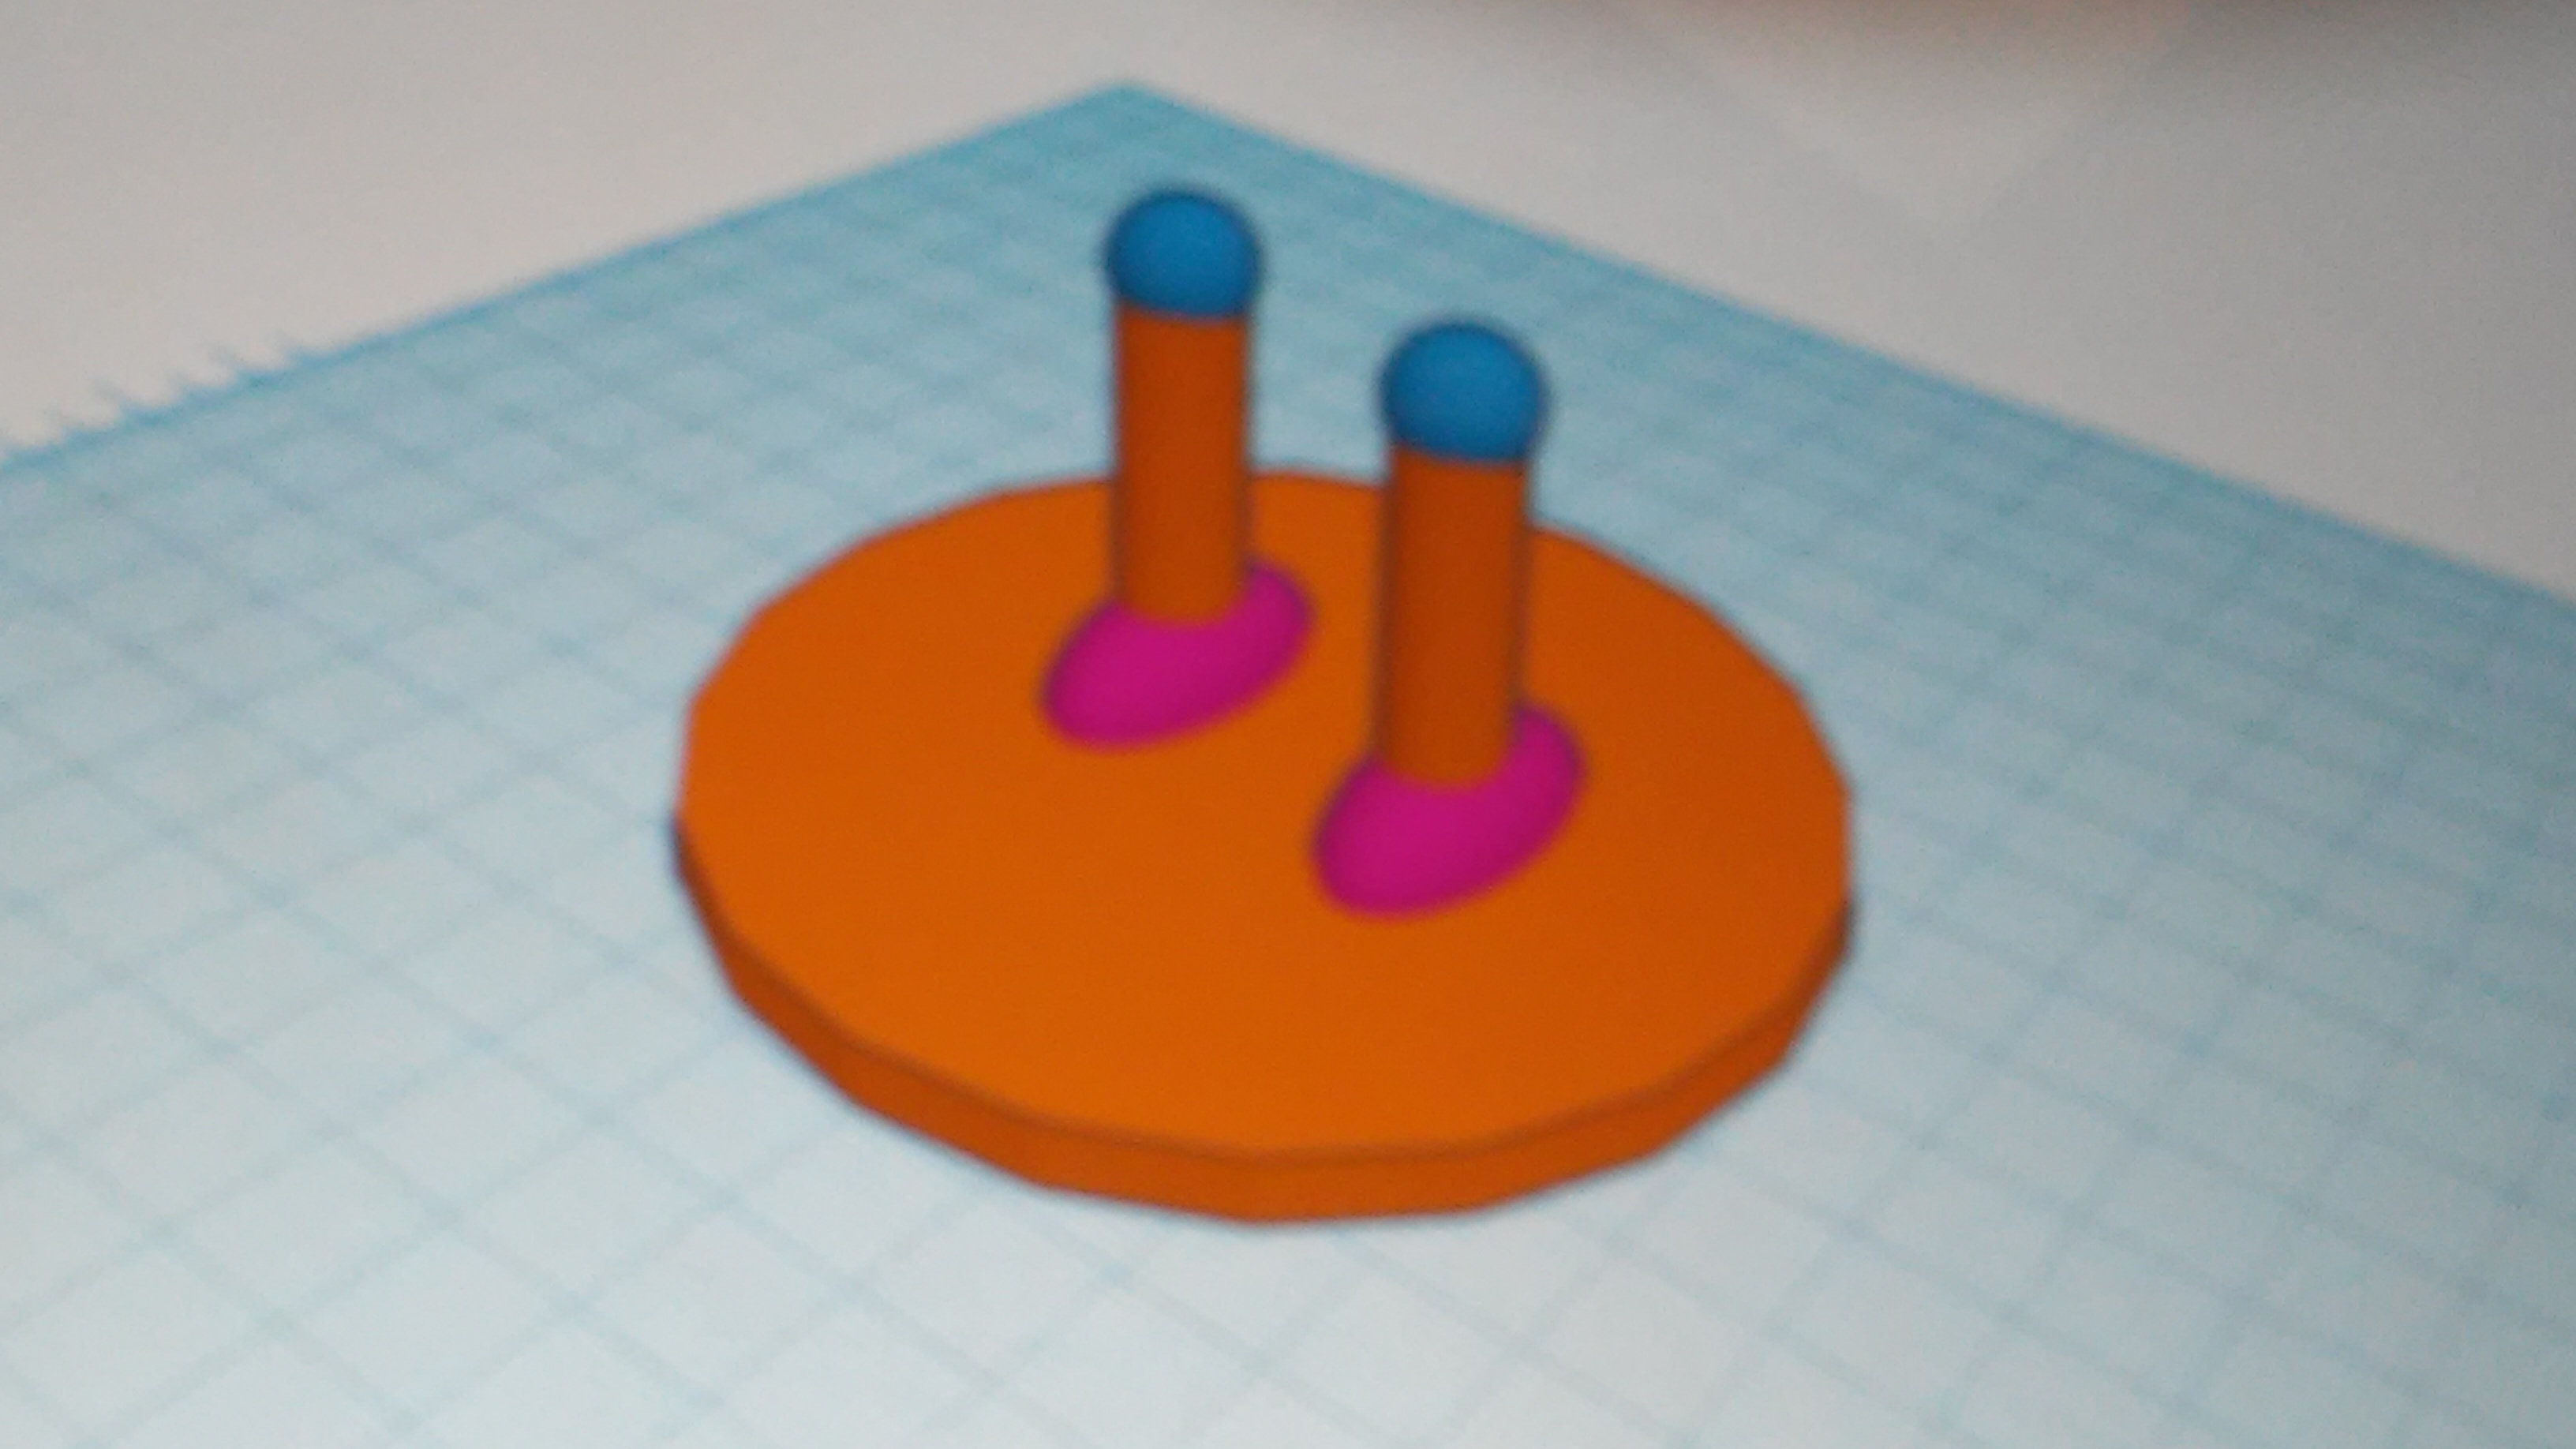
On top of each joint you will need to place one Joint piece on each Segment as shown.
Thighs
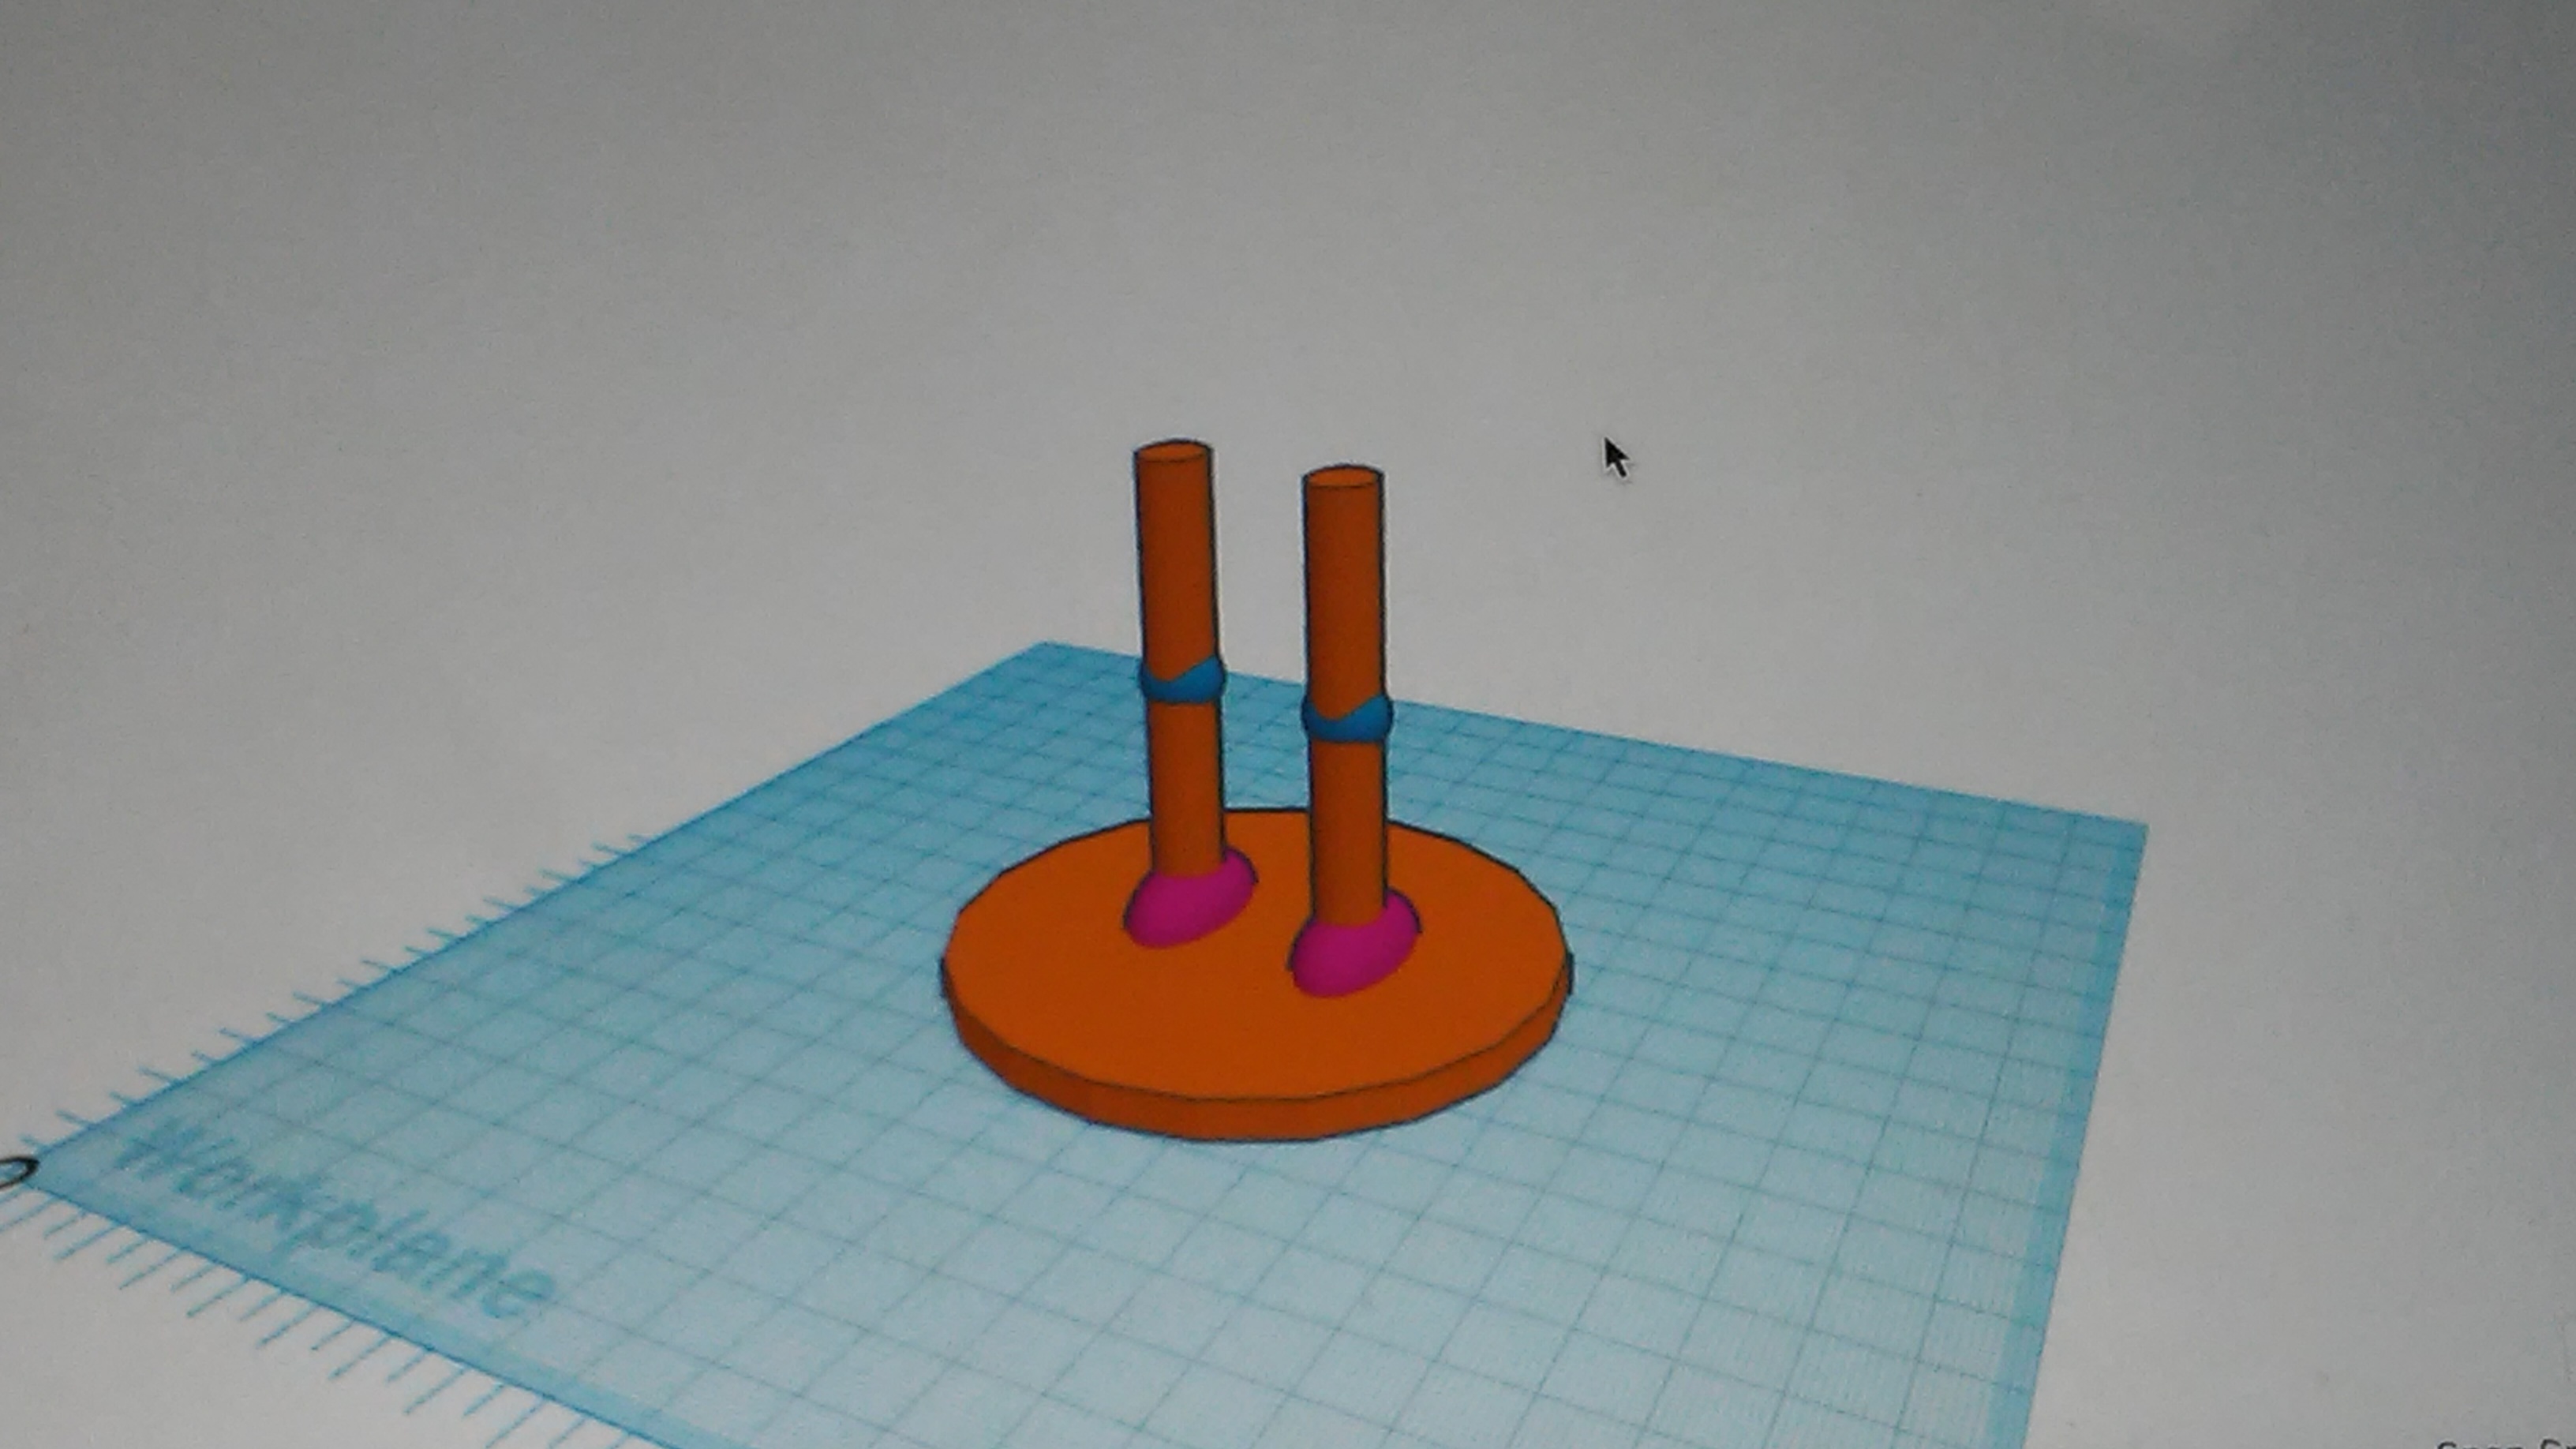
Repeat step 3, the only thing you will need to change is that you will place the Segment pieces on top of the joint pieces.
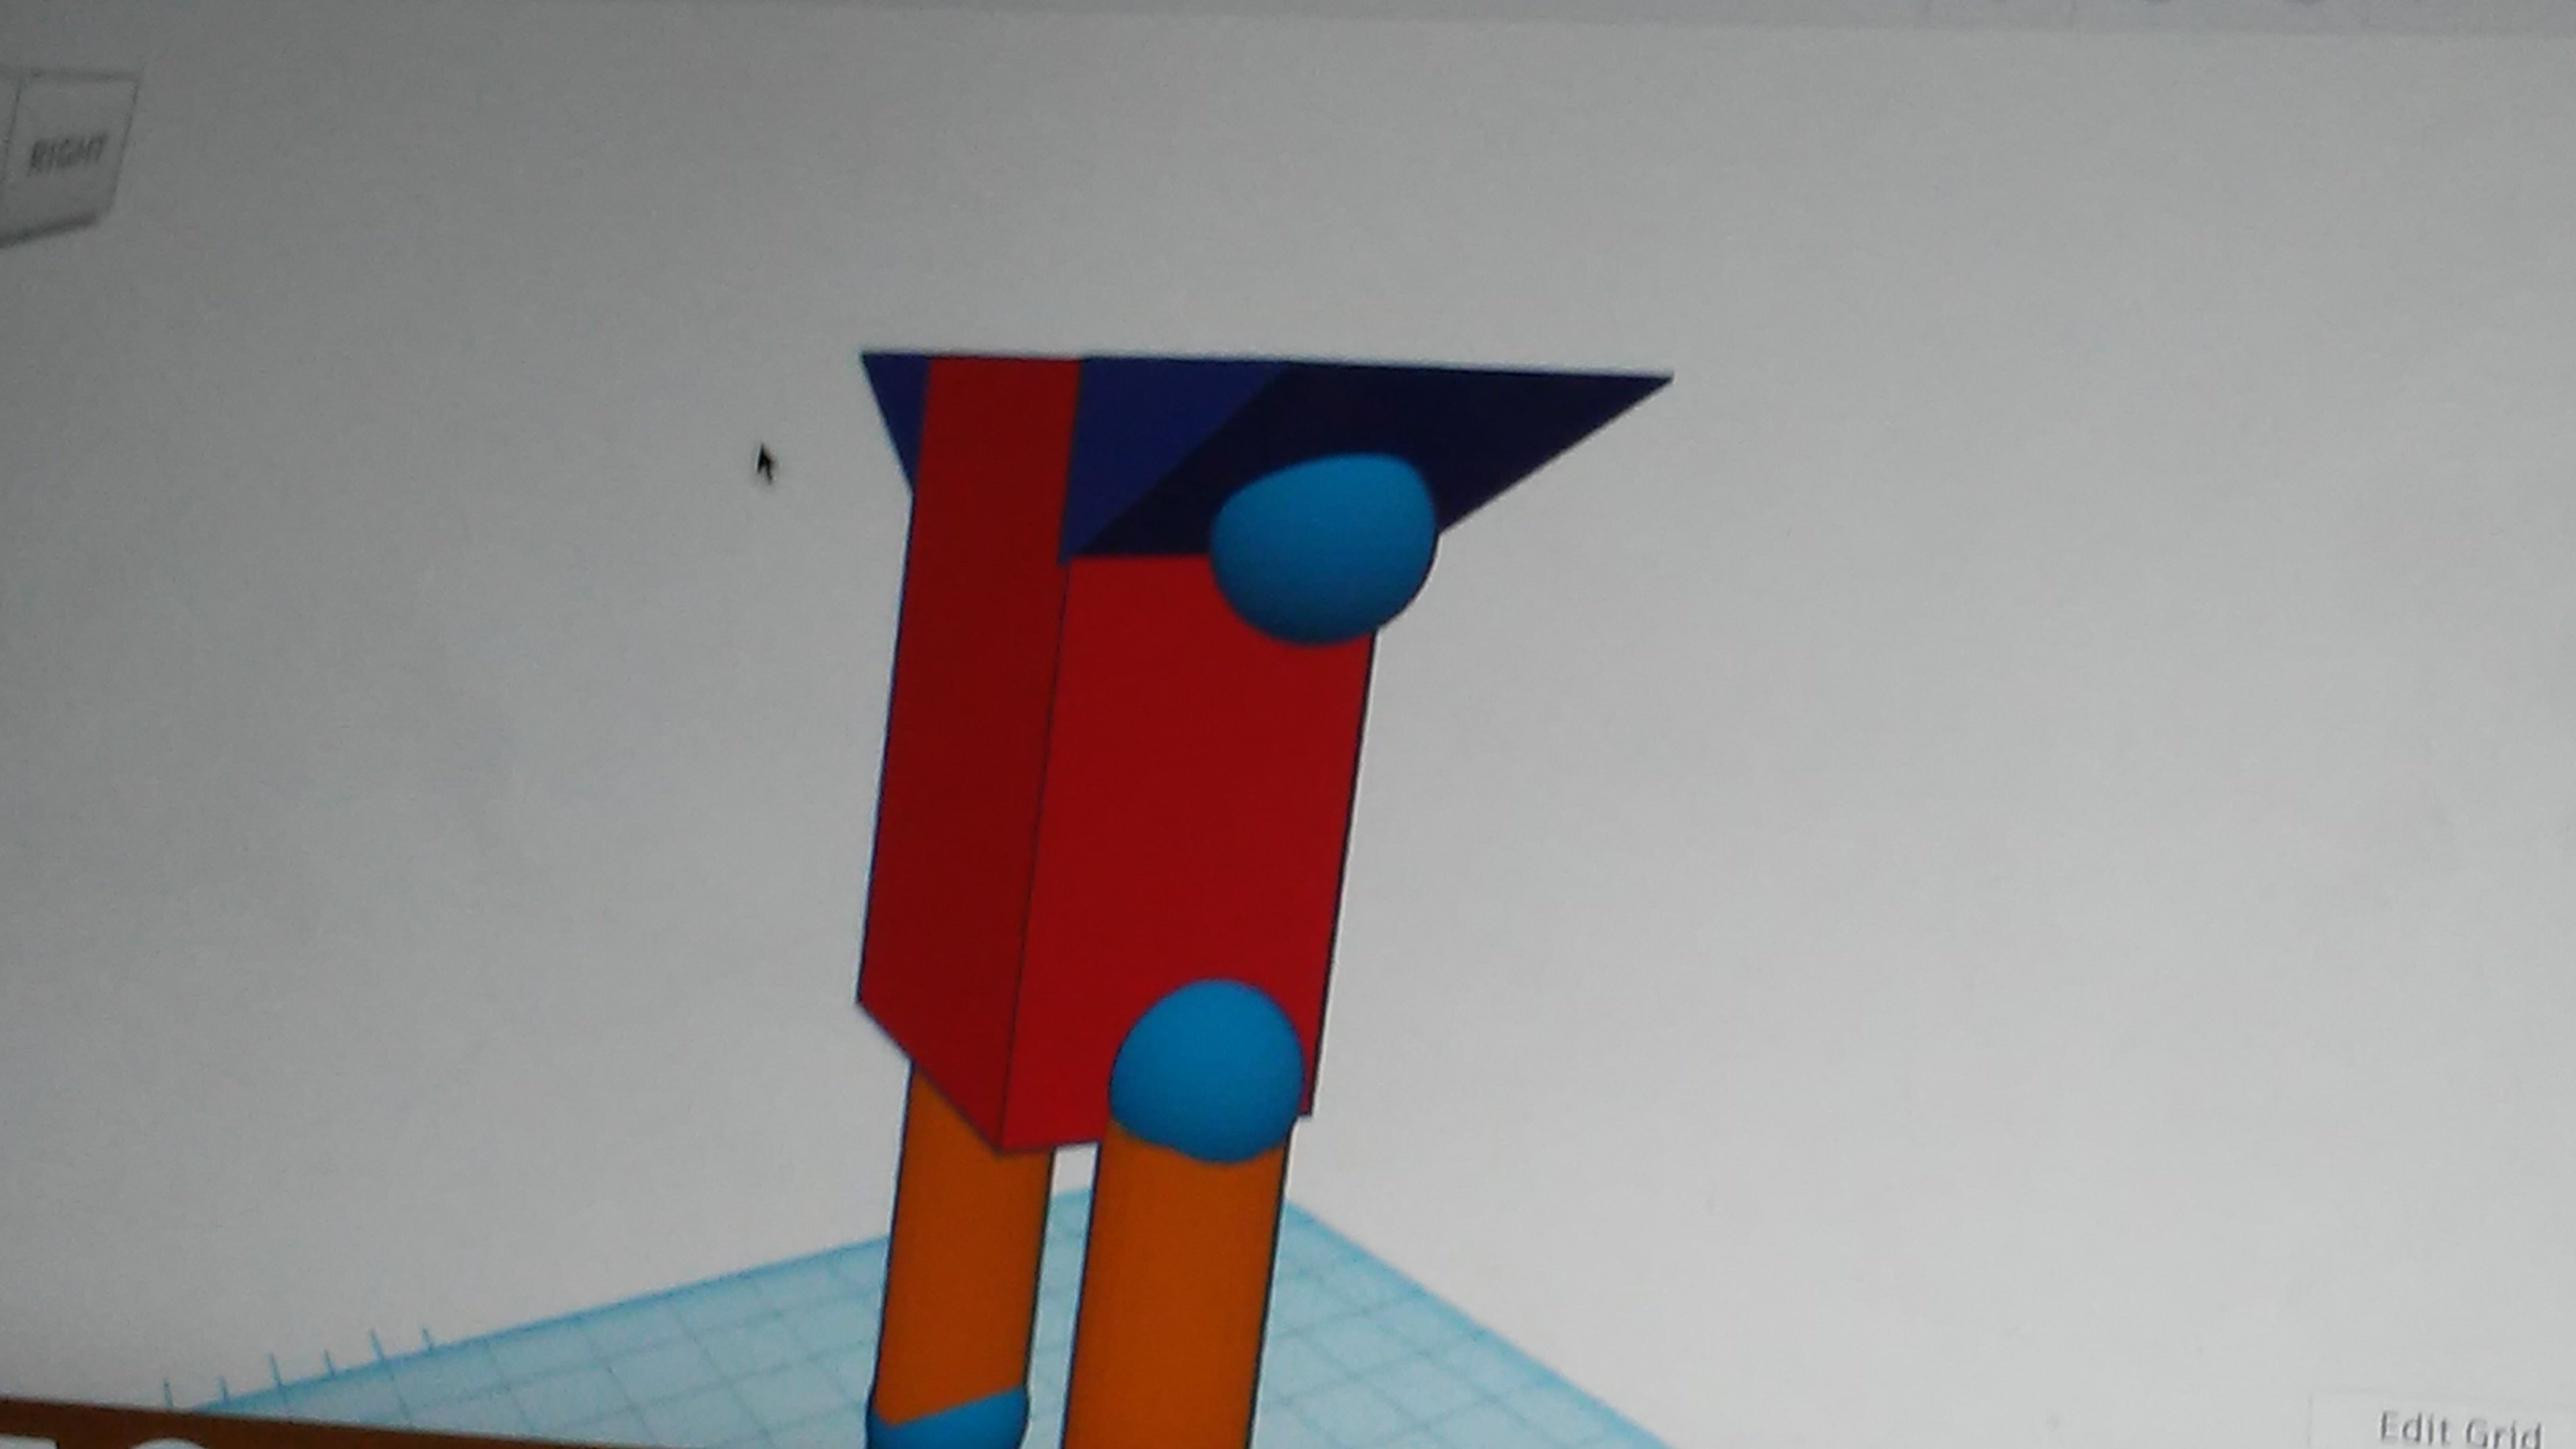
Torso
Add one more Joint piece and then place the Torso part on top of those joint pieces as shown.
Shoulders
Now you will need to make the shoulder pieces and flip them in order to get them on the top sides of the body as shown and place the joint’s as shown.
Arms
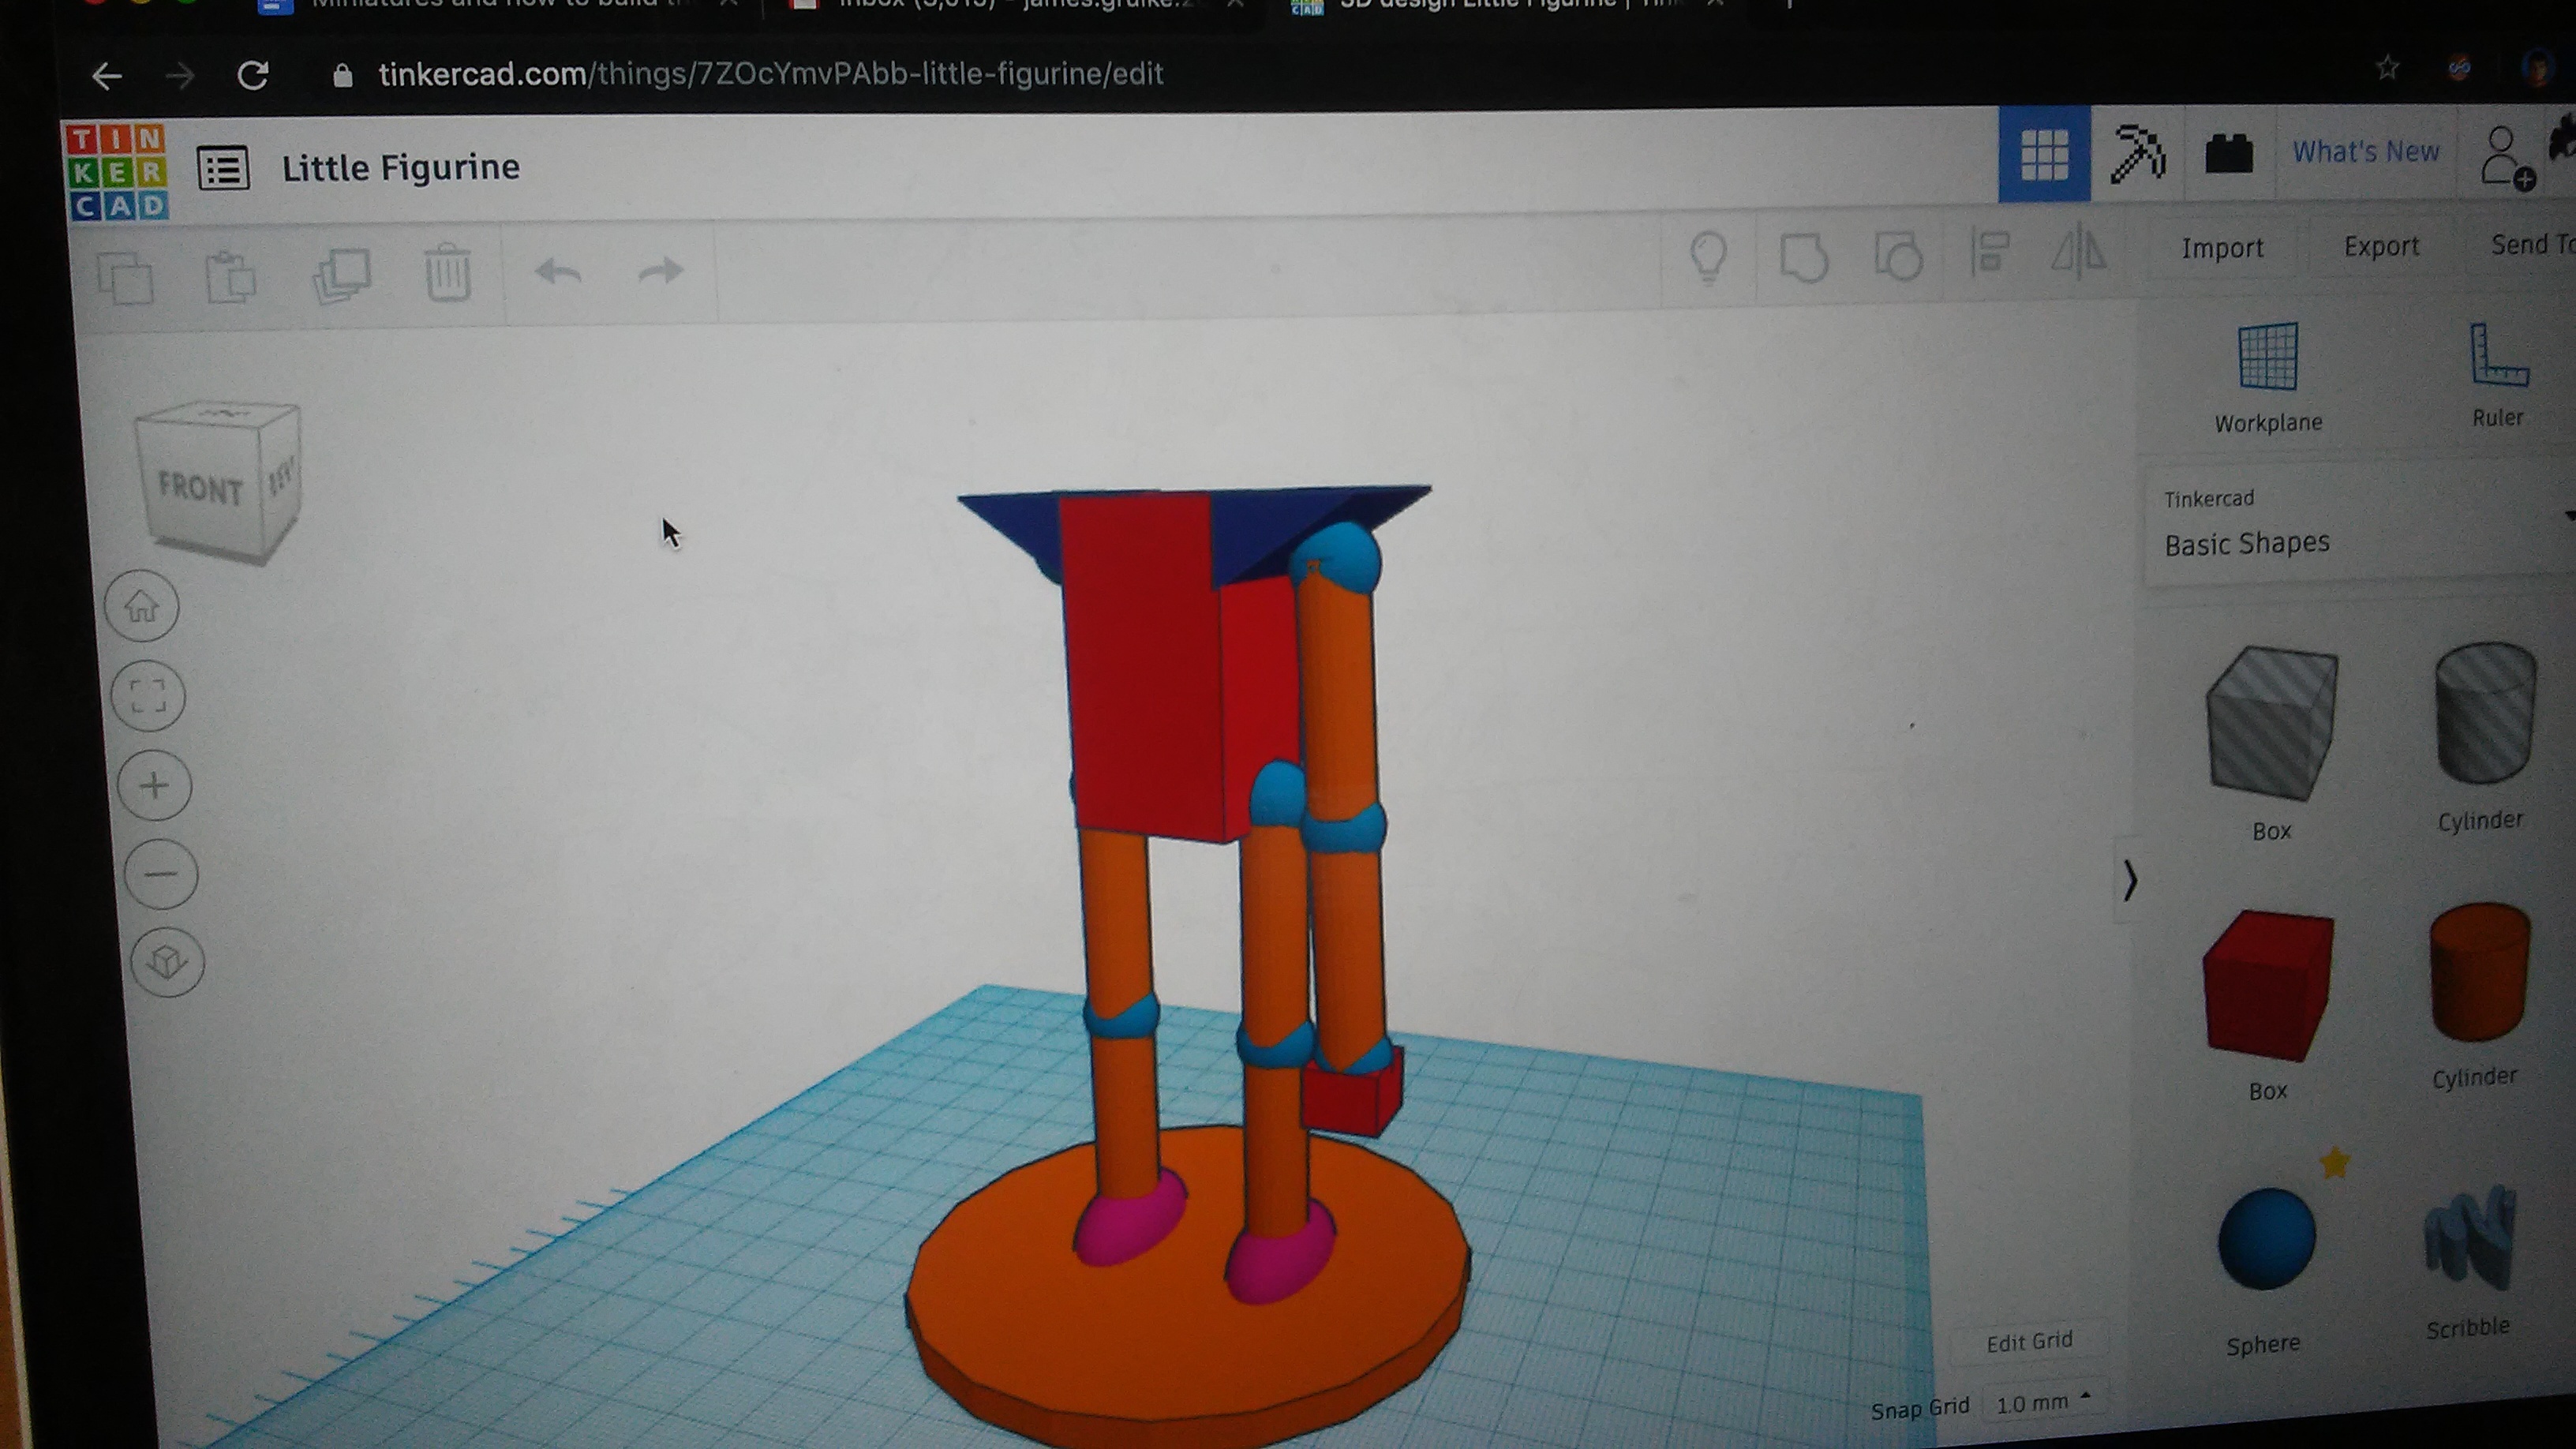
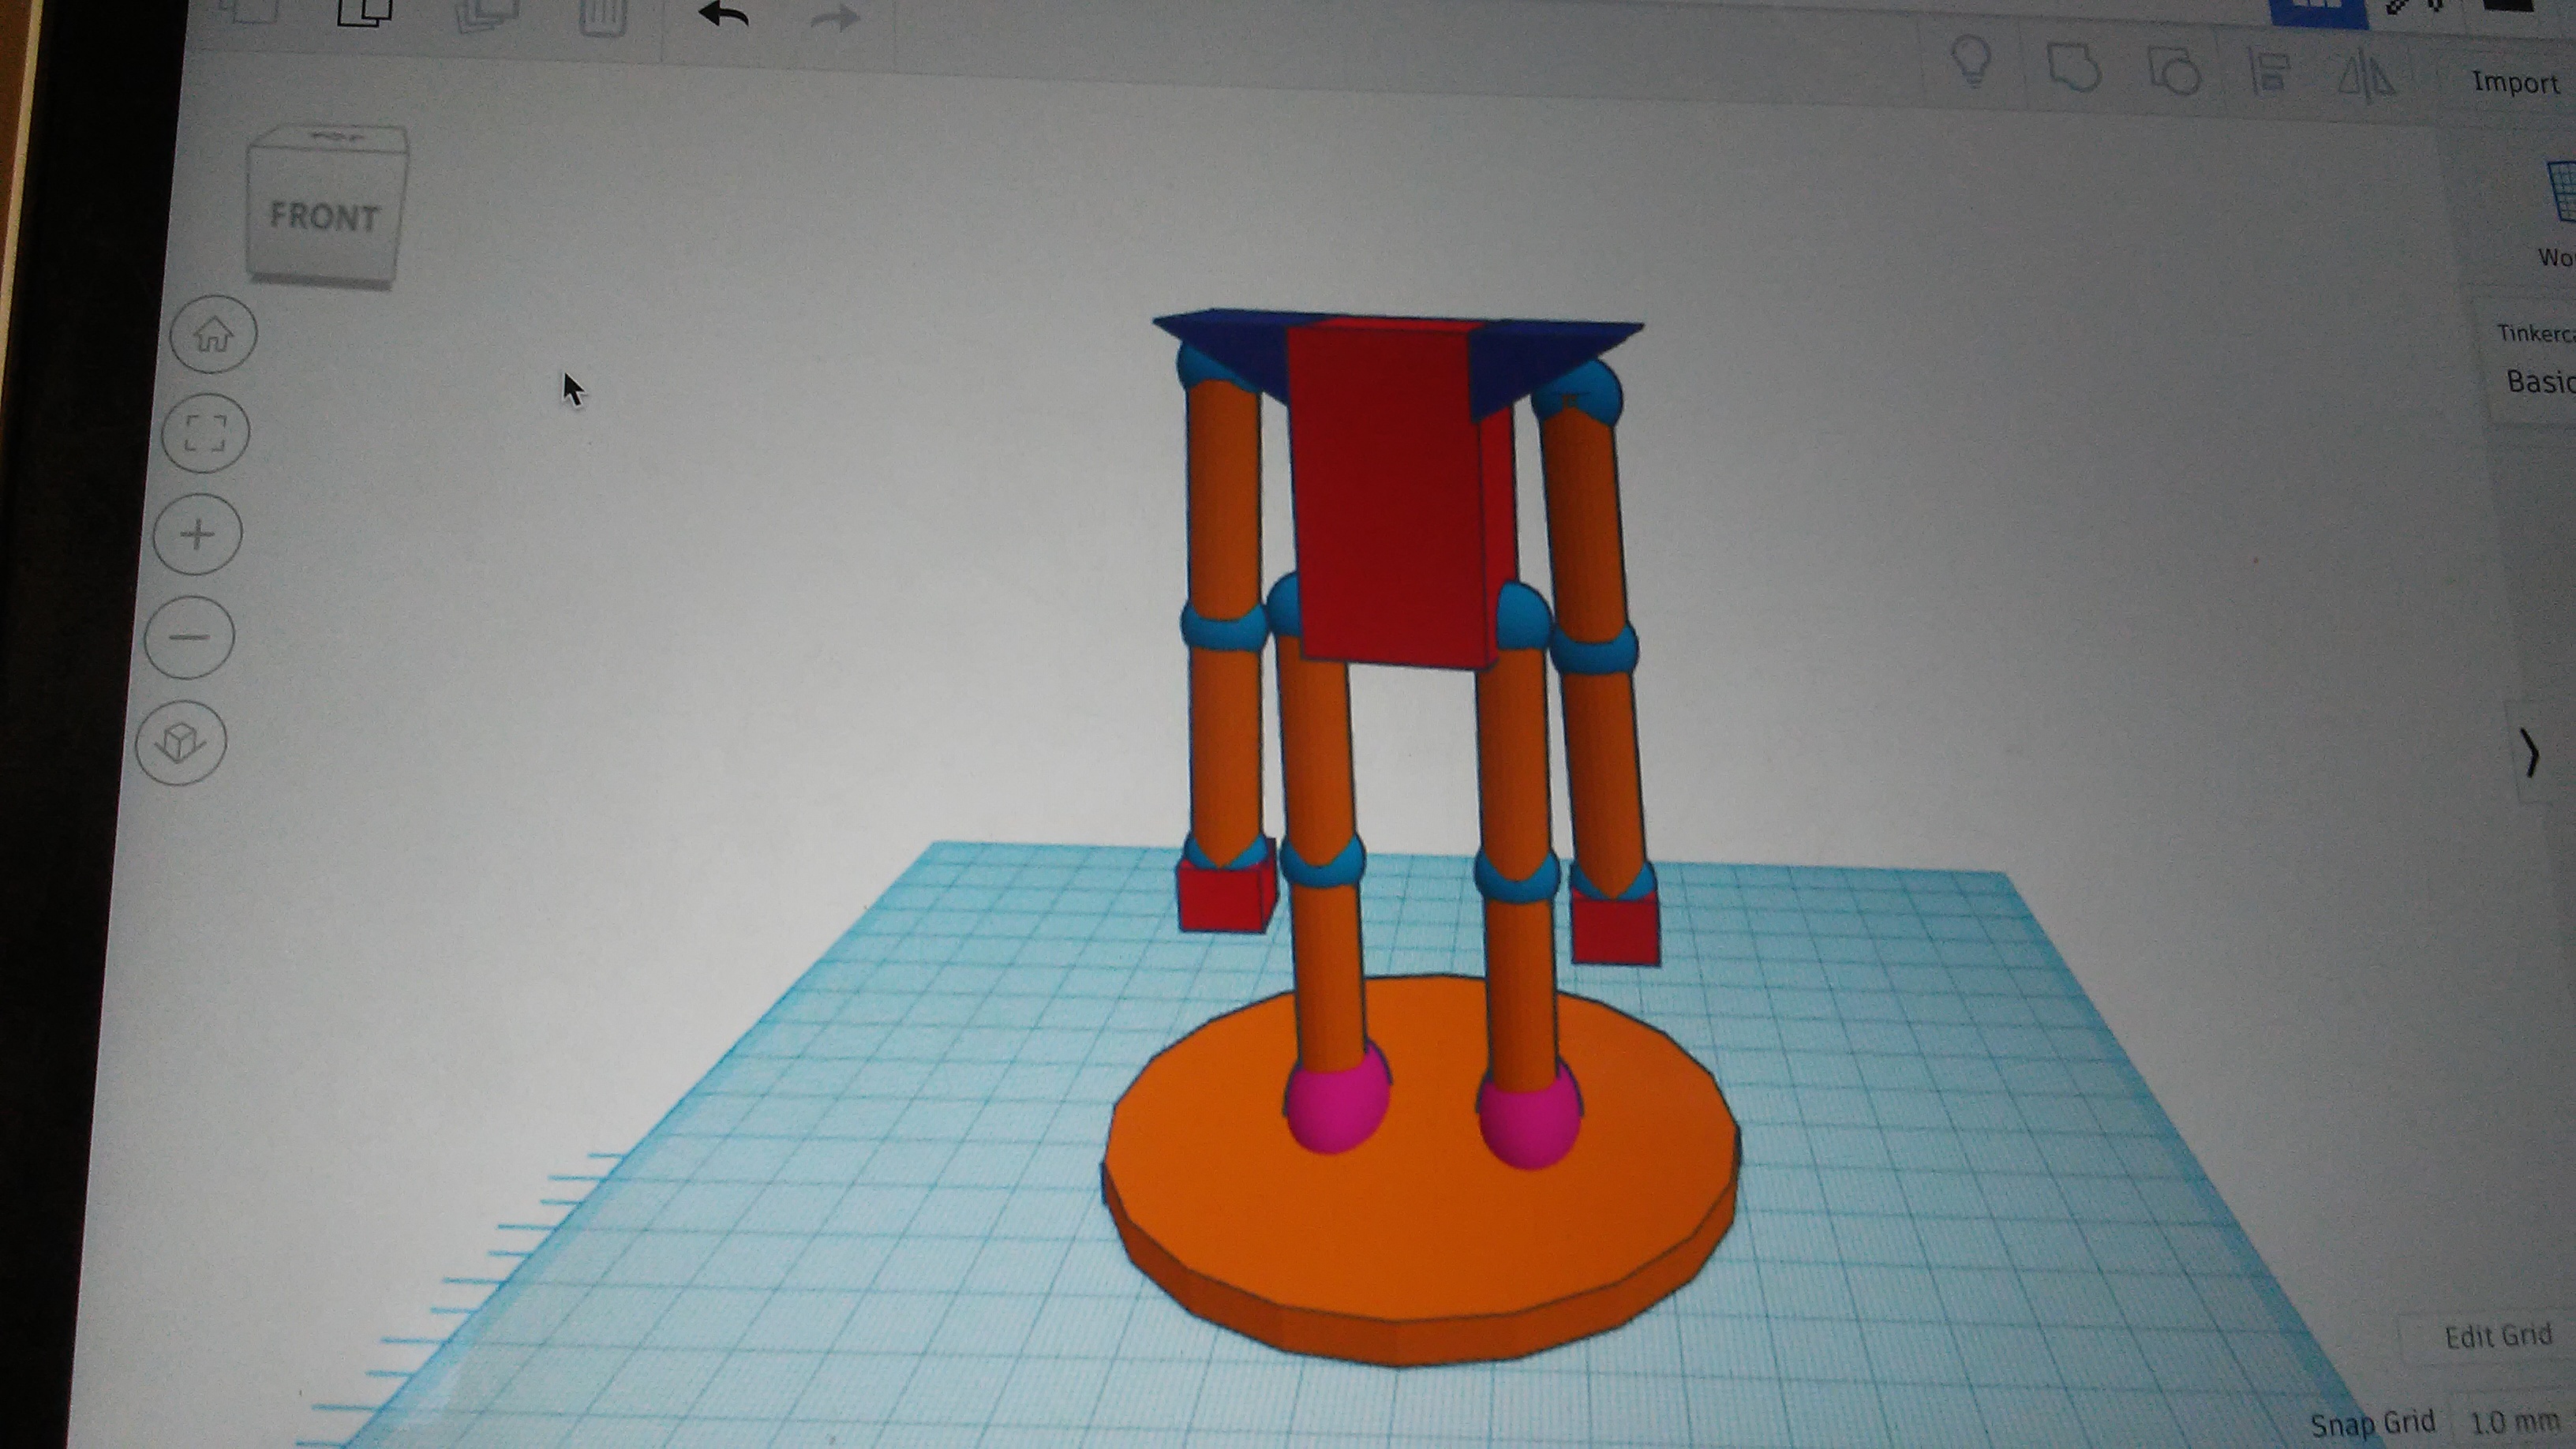
The next thing you will need to do is to repeat steps 3 to 5, however you will place that part on the shoulder’s joint piece. And after you finish that one make another for the other side as shown below and at the end of each arm add a hand piece.
The Head
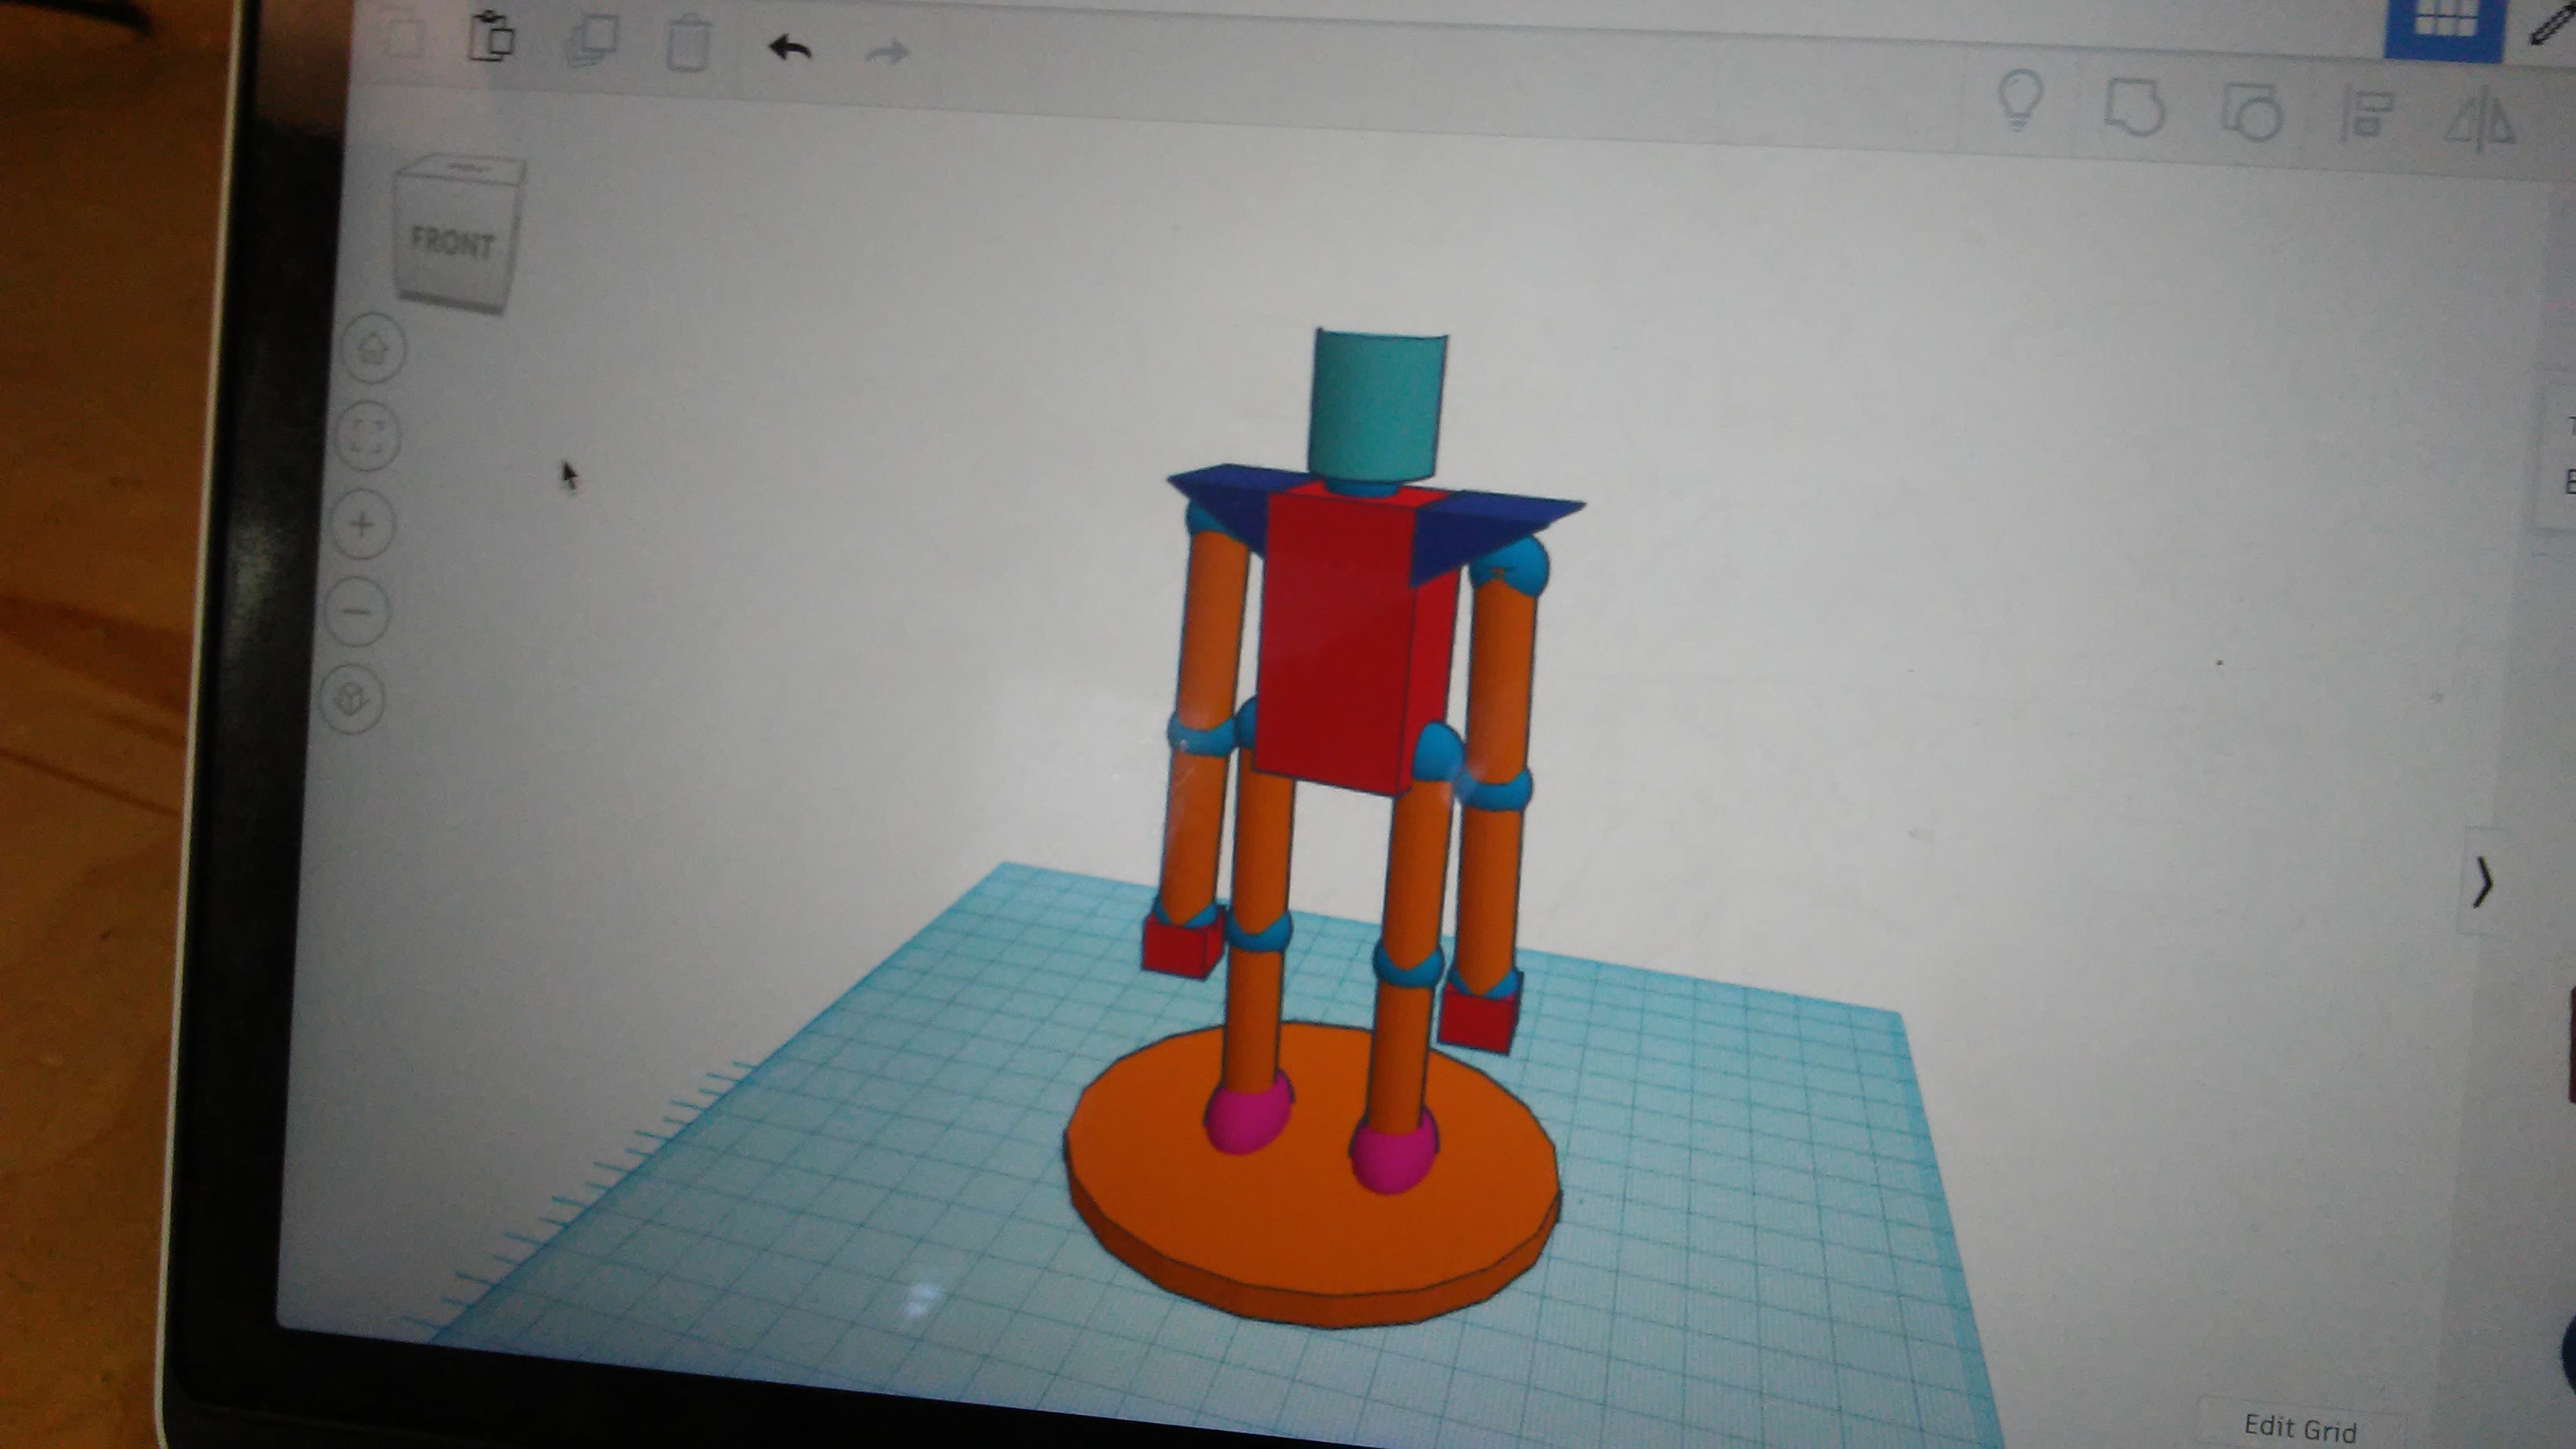
The second to last thing that you need to do is place a joint piece on top of the torso and place the head on top of the joint and you are done with that part.
Grouping
The last thing you will need to do is to select all of the parts and group them together by pressing the button that looks like a square and a circle have merged together (the final product would be that the whole thing will be of the same color).
How to Print Using Print Studio
How to use Print Studio:
Print studio is one of the more simplest way for the process to print and if you haven’t watched the video yet, you may want to watch to get a better understanding on how to use this application. For you to insert a file into print studio you first need to export the file in tinkercad and then go to print studio and go to import file and select the file you want to use. After you do that you can mess with the size of the build, tamper with its infill density, supports, and then you can see how long the print will take and then you can export the file to your usb drive and go on from there.
How to Print Using Cura
How to use Cura:
However if you want to do more you can use Cura as the main use for people today and for all other printers and if you want to install Cura onto your computer here is a website and a video on how to do so. https://ultimaker.com/software/ultimaker-cura
It also provides a tutorial on how to use Cura in case you don’t understand my instructions on how to use it.
One of the first things that you do is you will need to export the file into Cura by selecting the file and dragging it onto the base of the software platform.
Another thing that you will need to choose what type of 3d printer you are using either choose a Dremel printer or choose Ender3 from the selected printers you get to choose from.
The other thing that you will be given is where on the base platform where you want to put it at, how big is it going to be, what's the infill density, does it need a raft, does it need any support’s (caution, they can be a pain to get off and can lead to breaking the print itself).
All that there is to do is to export the final product into the sd card (or usb porter) and plug it into the printer and you should be set.
For Those That Don’t Know How to Calibrate the Printers
For the Dremel Printers one of the things that you are needing to do is to level it out so that the print has a less likelihood of a chance of it messing up.
For the Ender 3 Printer you will need to know what temperature you will need for both the filament and for the bed temp for the filament.
- PLA: 180-210 degrees celsius filament (70 degrees celsius bed)
- ABS: 210-250 (235 preferable) degrees celsius filament (110 degrees celsius bed)
Trouble Shooting

If you experience any trouble with the final print like.
- The top of the piece being melted into looking like a blob: You will need to make the print bigger so you have a less like hood of a chance of that happening again.
- If it falls over in the middle of printing: You may be experiencing that the print may have to much density so the print may get to where the torso is that so it will lead to it breaking when under pressure or it not being able to mold out properly.
- The print just down right doesn't look right to you: You can tinker the product so that it looks better to your liking such as moving the arms to make expressions, add gear onto him, or you can even change some of the parts with other types of shapes.
What to Do From Here...
Now that you have finished your very first miniature you can now paint it to what ever colors you desire. I would best recommend using acrylic paint as i have used it myself and it has worked very well.
I hope that you have enjoyed doing this and have a good day.