Mini Toy Food Set

I love working with young kids; their creativity and excitement about the world is truly amazing. One of the children I sometimes care for adores playing with food sets, so when I saw a contest opportunity for making things mini, I figured she might enjoy having a "travel set" of mini food toys!
Make Fake Knife
Before we even get to the food, what better way to make this more adorable than by adding a tiny knife so the kids can pretend to cook?
Note: If, when you print this, it becomes sharp because of some of the small angles, please make sure to file or sand it down before giving it to a child
Use the steps below to make the knife:
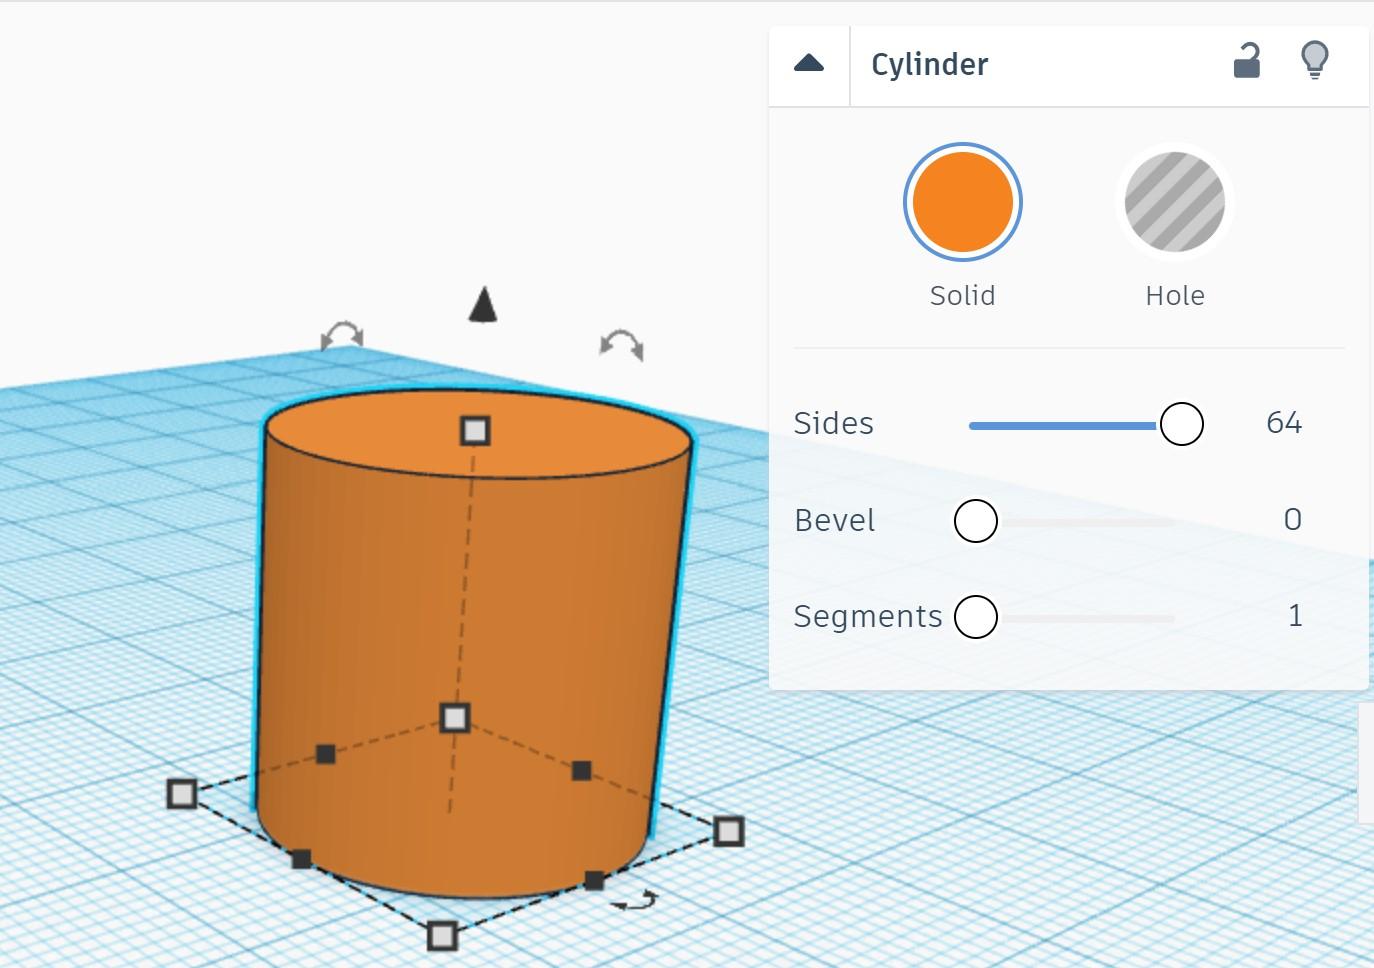
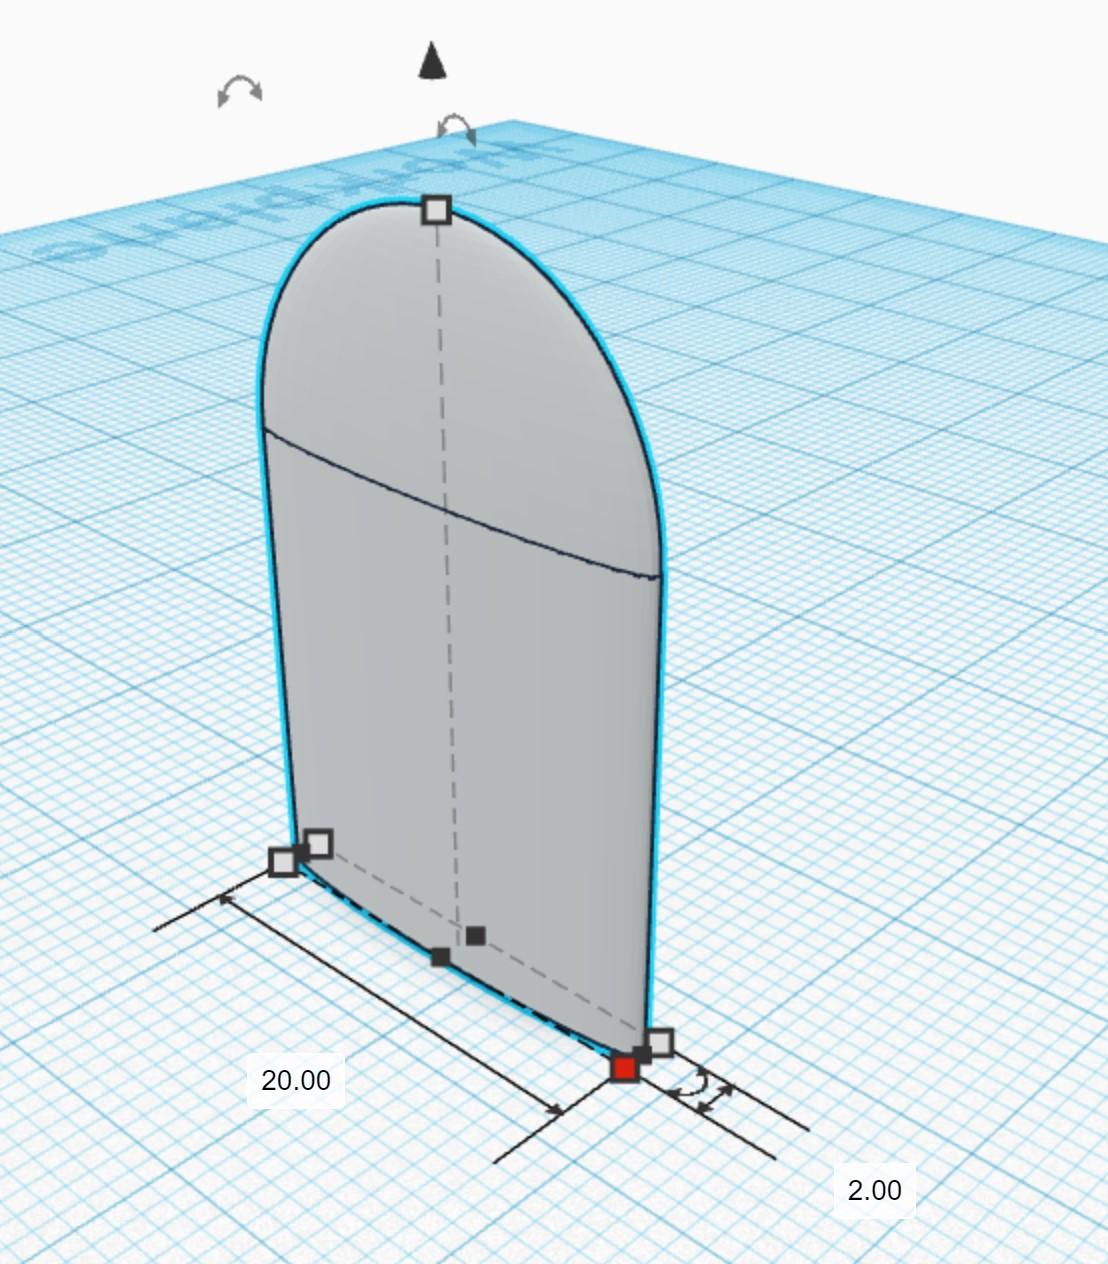
- Import a "cylinder" from the "Basic Shapes" menu and change its "sides" to 64 (to give it a smoother look), as shown above
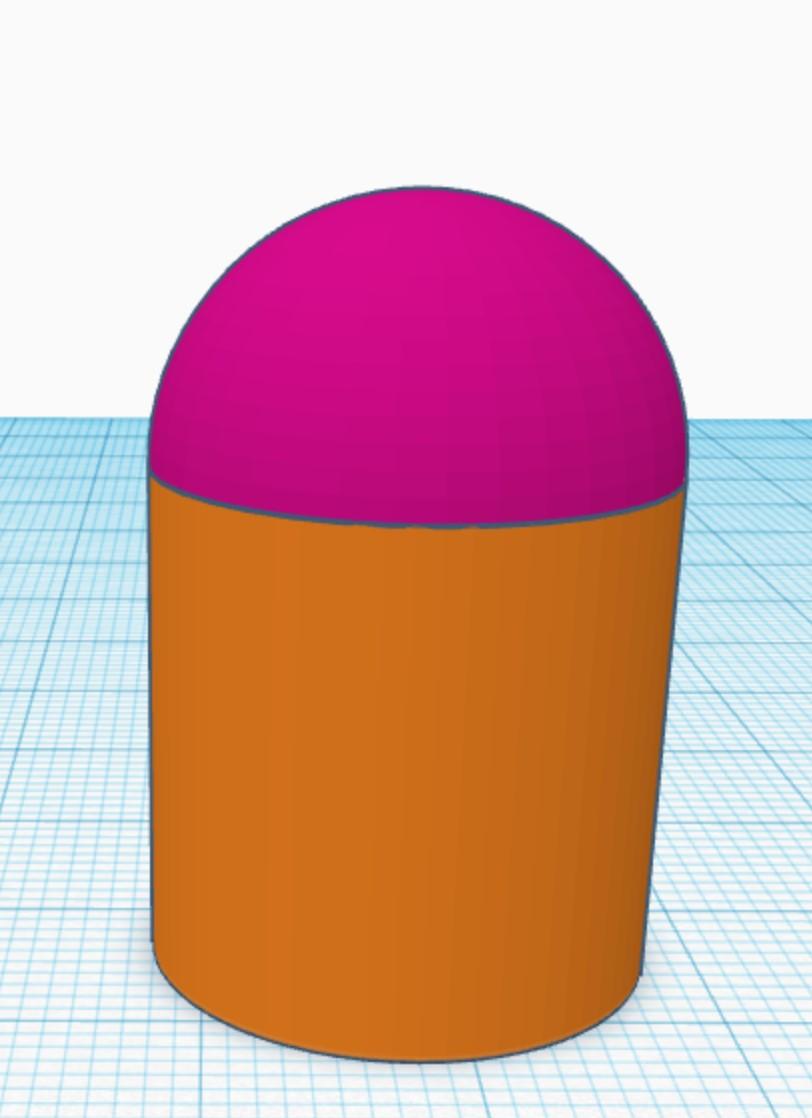
- Import a "half sphere" from the same menu and center it with the cylinder using the menu at the top right of the screen (it appears once you select both objects) then move it up so that it lies flat on the cylinder's top. Make sure there isn't any space between the cylinder and seim-sphere!
- "Group" the two objects by selecting them both and using the menu at the top right. I changed the new shape's color to gray to make it more realistic
- Change its width to 2 mm, as shown in the picture above
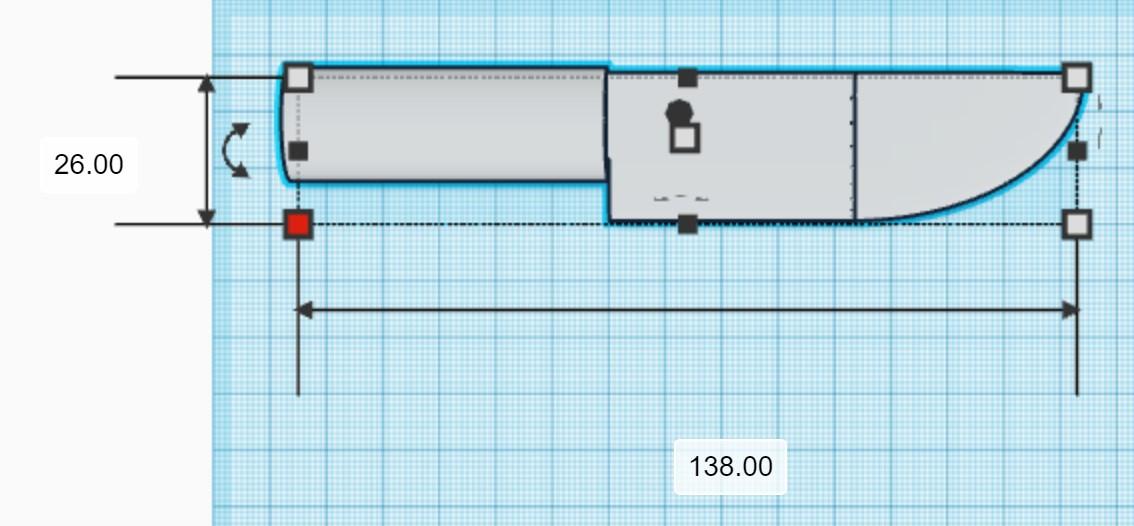
- Rotate it by 90 degrees and, while having it selected, hit the "d" key to make it lie flat on the build-plate
- Change its length to 70 mm
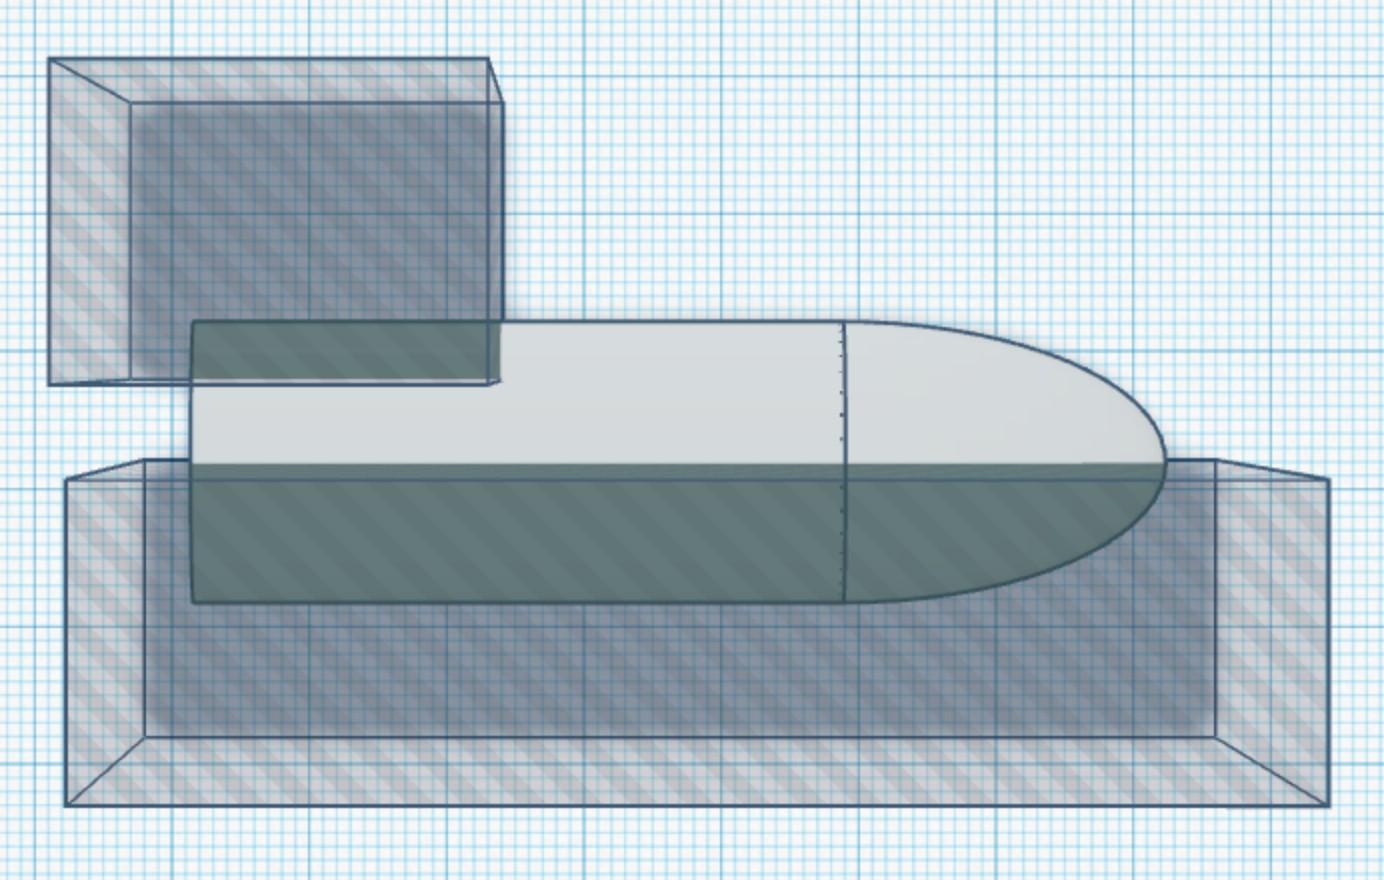
- Drag a "box" to the build-plate from the menu and make it a hole
- Cover half of the design with the box -- you may have to reshape the box to do so
- Add another "box" and have it cover about 4 mm from the opposite end of the other box on the non-rounded side, as shown above
- Merge the three pieces. It already looks awesome!
- To make this nifty little knife look even more realistic, let's add a handle to make it easily-grip-able
- Import another cylinder and, again, make sure it has 64 sides
- Turn it sideways so that it's no longer "standing" on the spherical part
- Also rotate the knife by 90 degrees
- Center the "blade" part of the knife with the cylinder and resize both items to fit the person you're designing for. Here, I designed for the 50th percentile of kids' hands (it's supposed to be tiny, but I want to make sure they can hold it), but if you're making this for an adult or toddler, the size might have to change.
- Once you're satisfied with its size, group the "blade" & handle to make the knife easier to work with in the CAD software and rotate it 90 degrees then hit "d" to make it easier to print
Make Base Shape
The toys will be able to be "sliced" with the fake knife, so they have to be made in segments. Any circular foods (watermelon, orange, etc.) will be made using the same base shape then customized with paint later.
To make the base shape, go through the following steps on TinkerCAD:
- Drag a "half-sphere" (found in the "Basic Shapes" menu) onto the build-plate
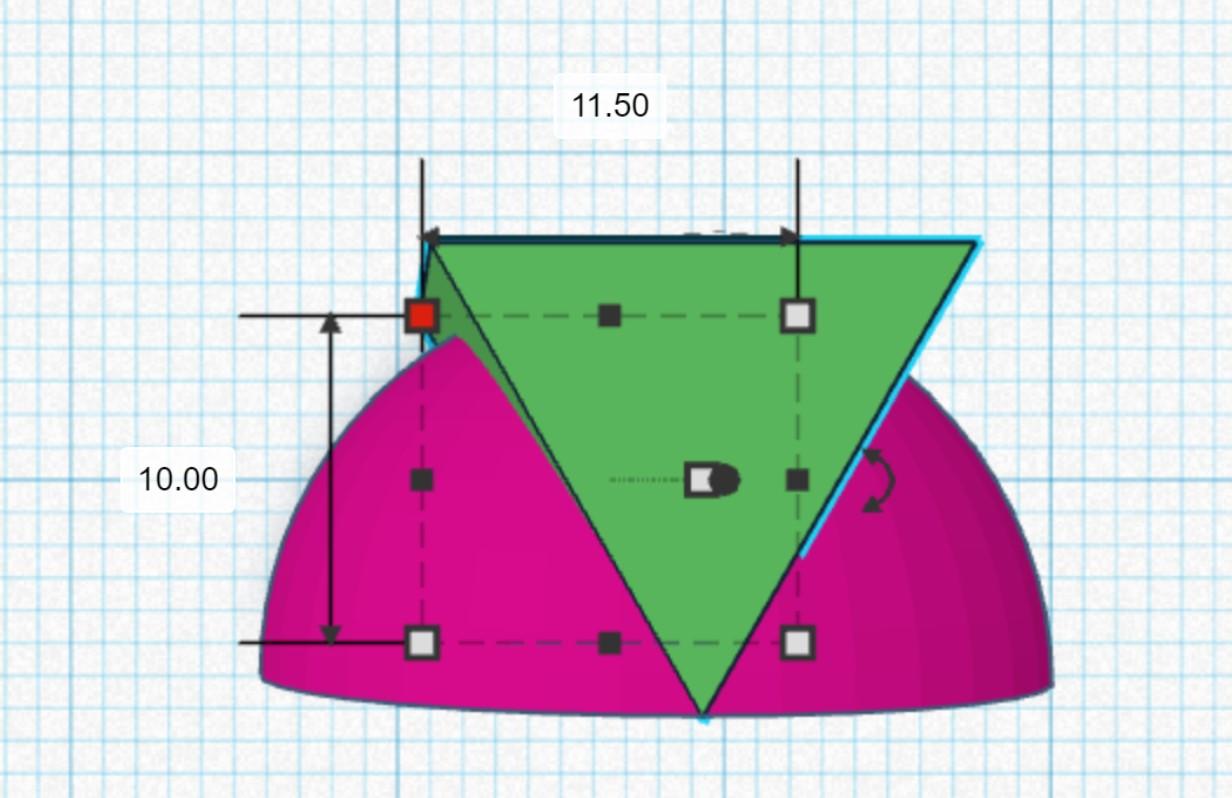
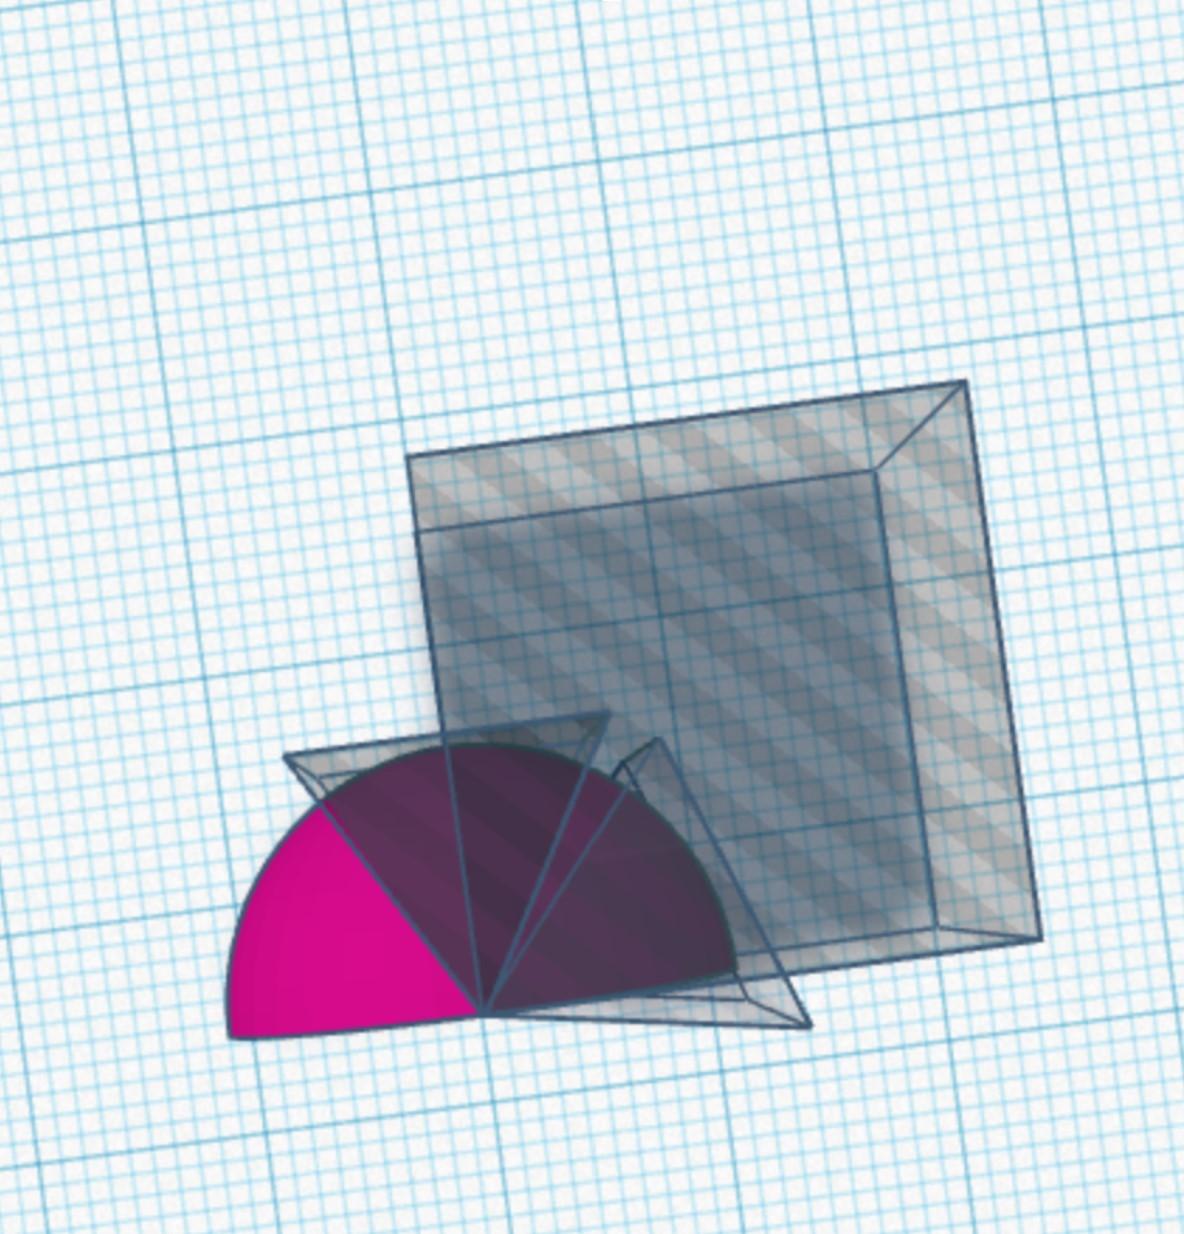
- Drag a "roof" shape to the build-plate
- Turn the roof so that it "stands" the smaller triangle and size to 10 mm x 11.5 mm -- the roof's height does not matter as long as it is the same height or taller then the entire sphere
- Center it with the semi-circle, as shown in the image above
- Turn the roof into a hole using the top right menu seen once you select the shape
- Add a square to the design, as shown above, so that it only leaves a third of the semi-sphere visible (I was testing different ways of designing it and have a second roof in my image -- this second roof is not necessary as long as you have the one in the middle)
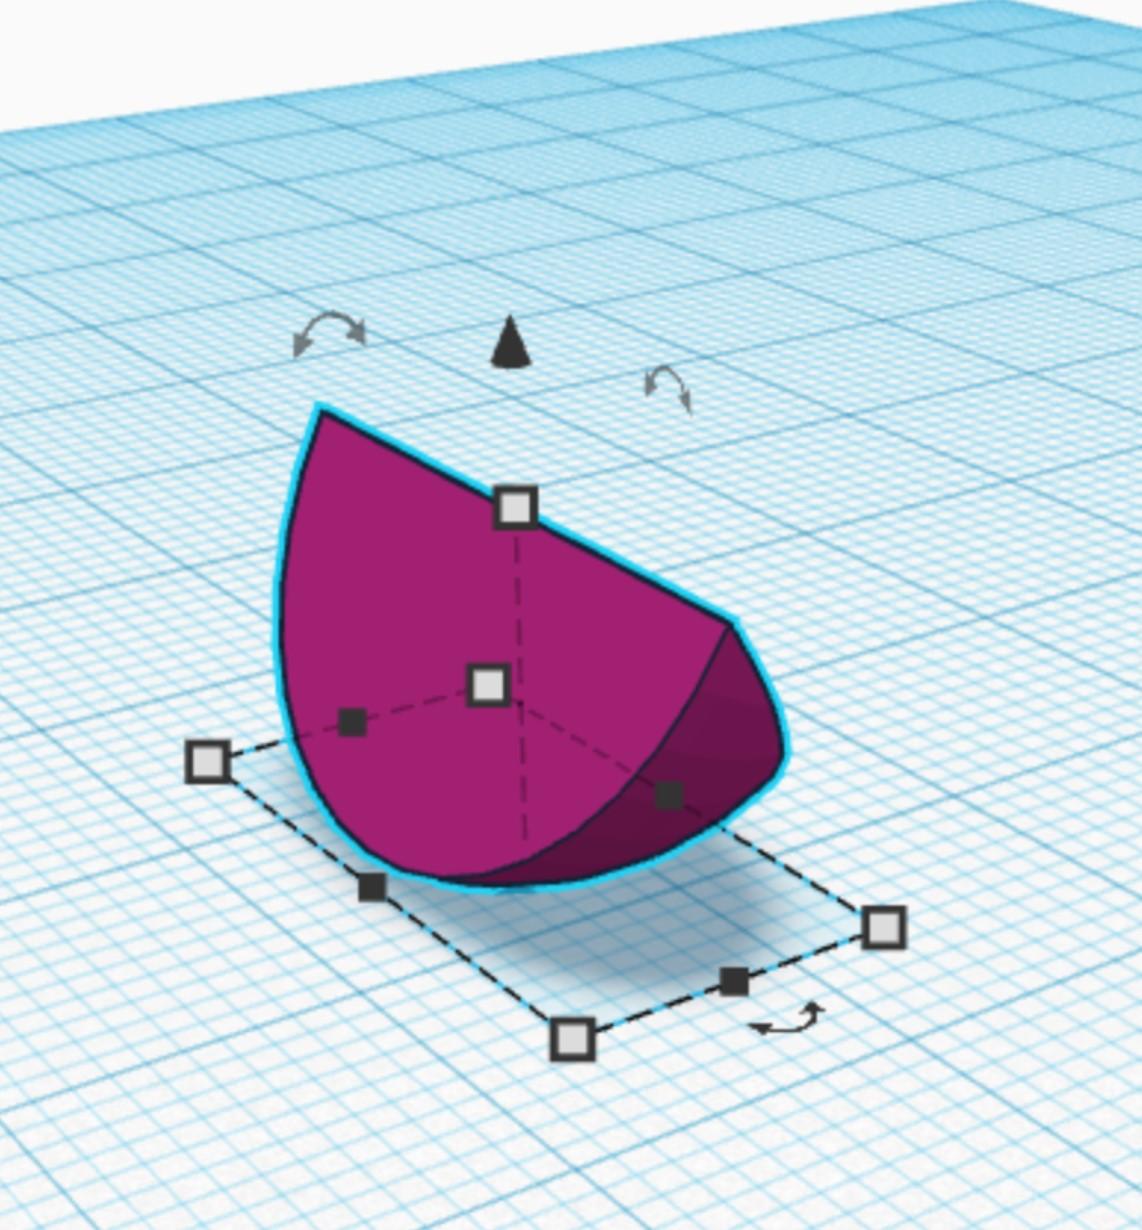
- Select all the shapes in your design and merge them using the menu on the top right -- you should end up with something similar to the third image above
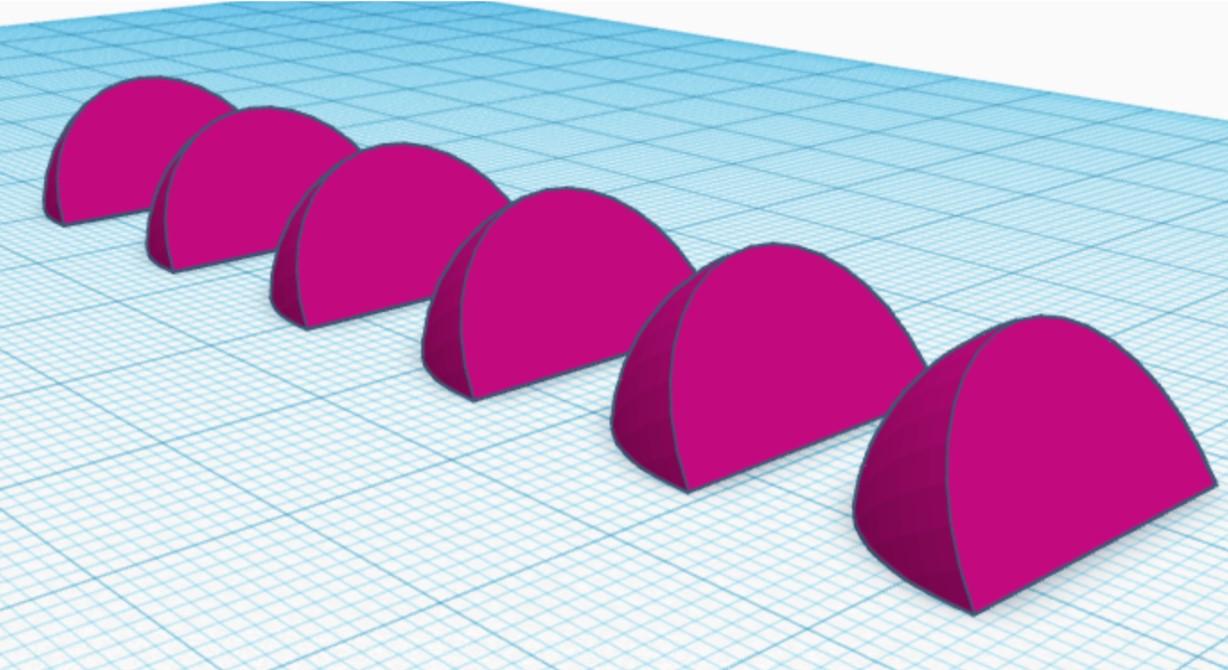
- Turn it so that it lies on one of its flat sides and duplicate it until you have 6 individual shapes, as shown above
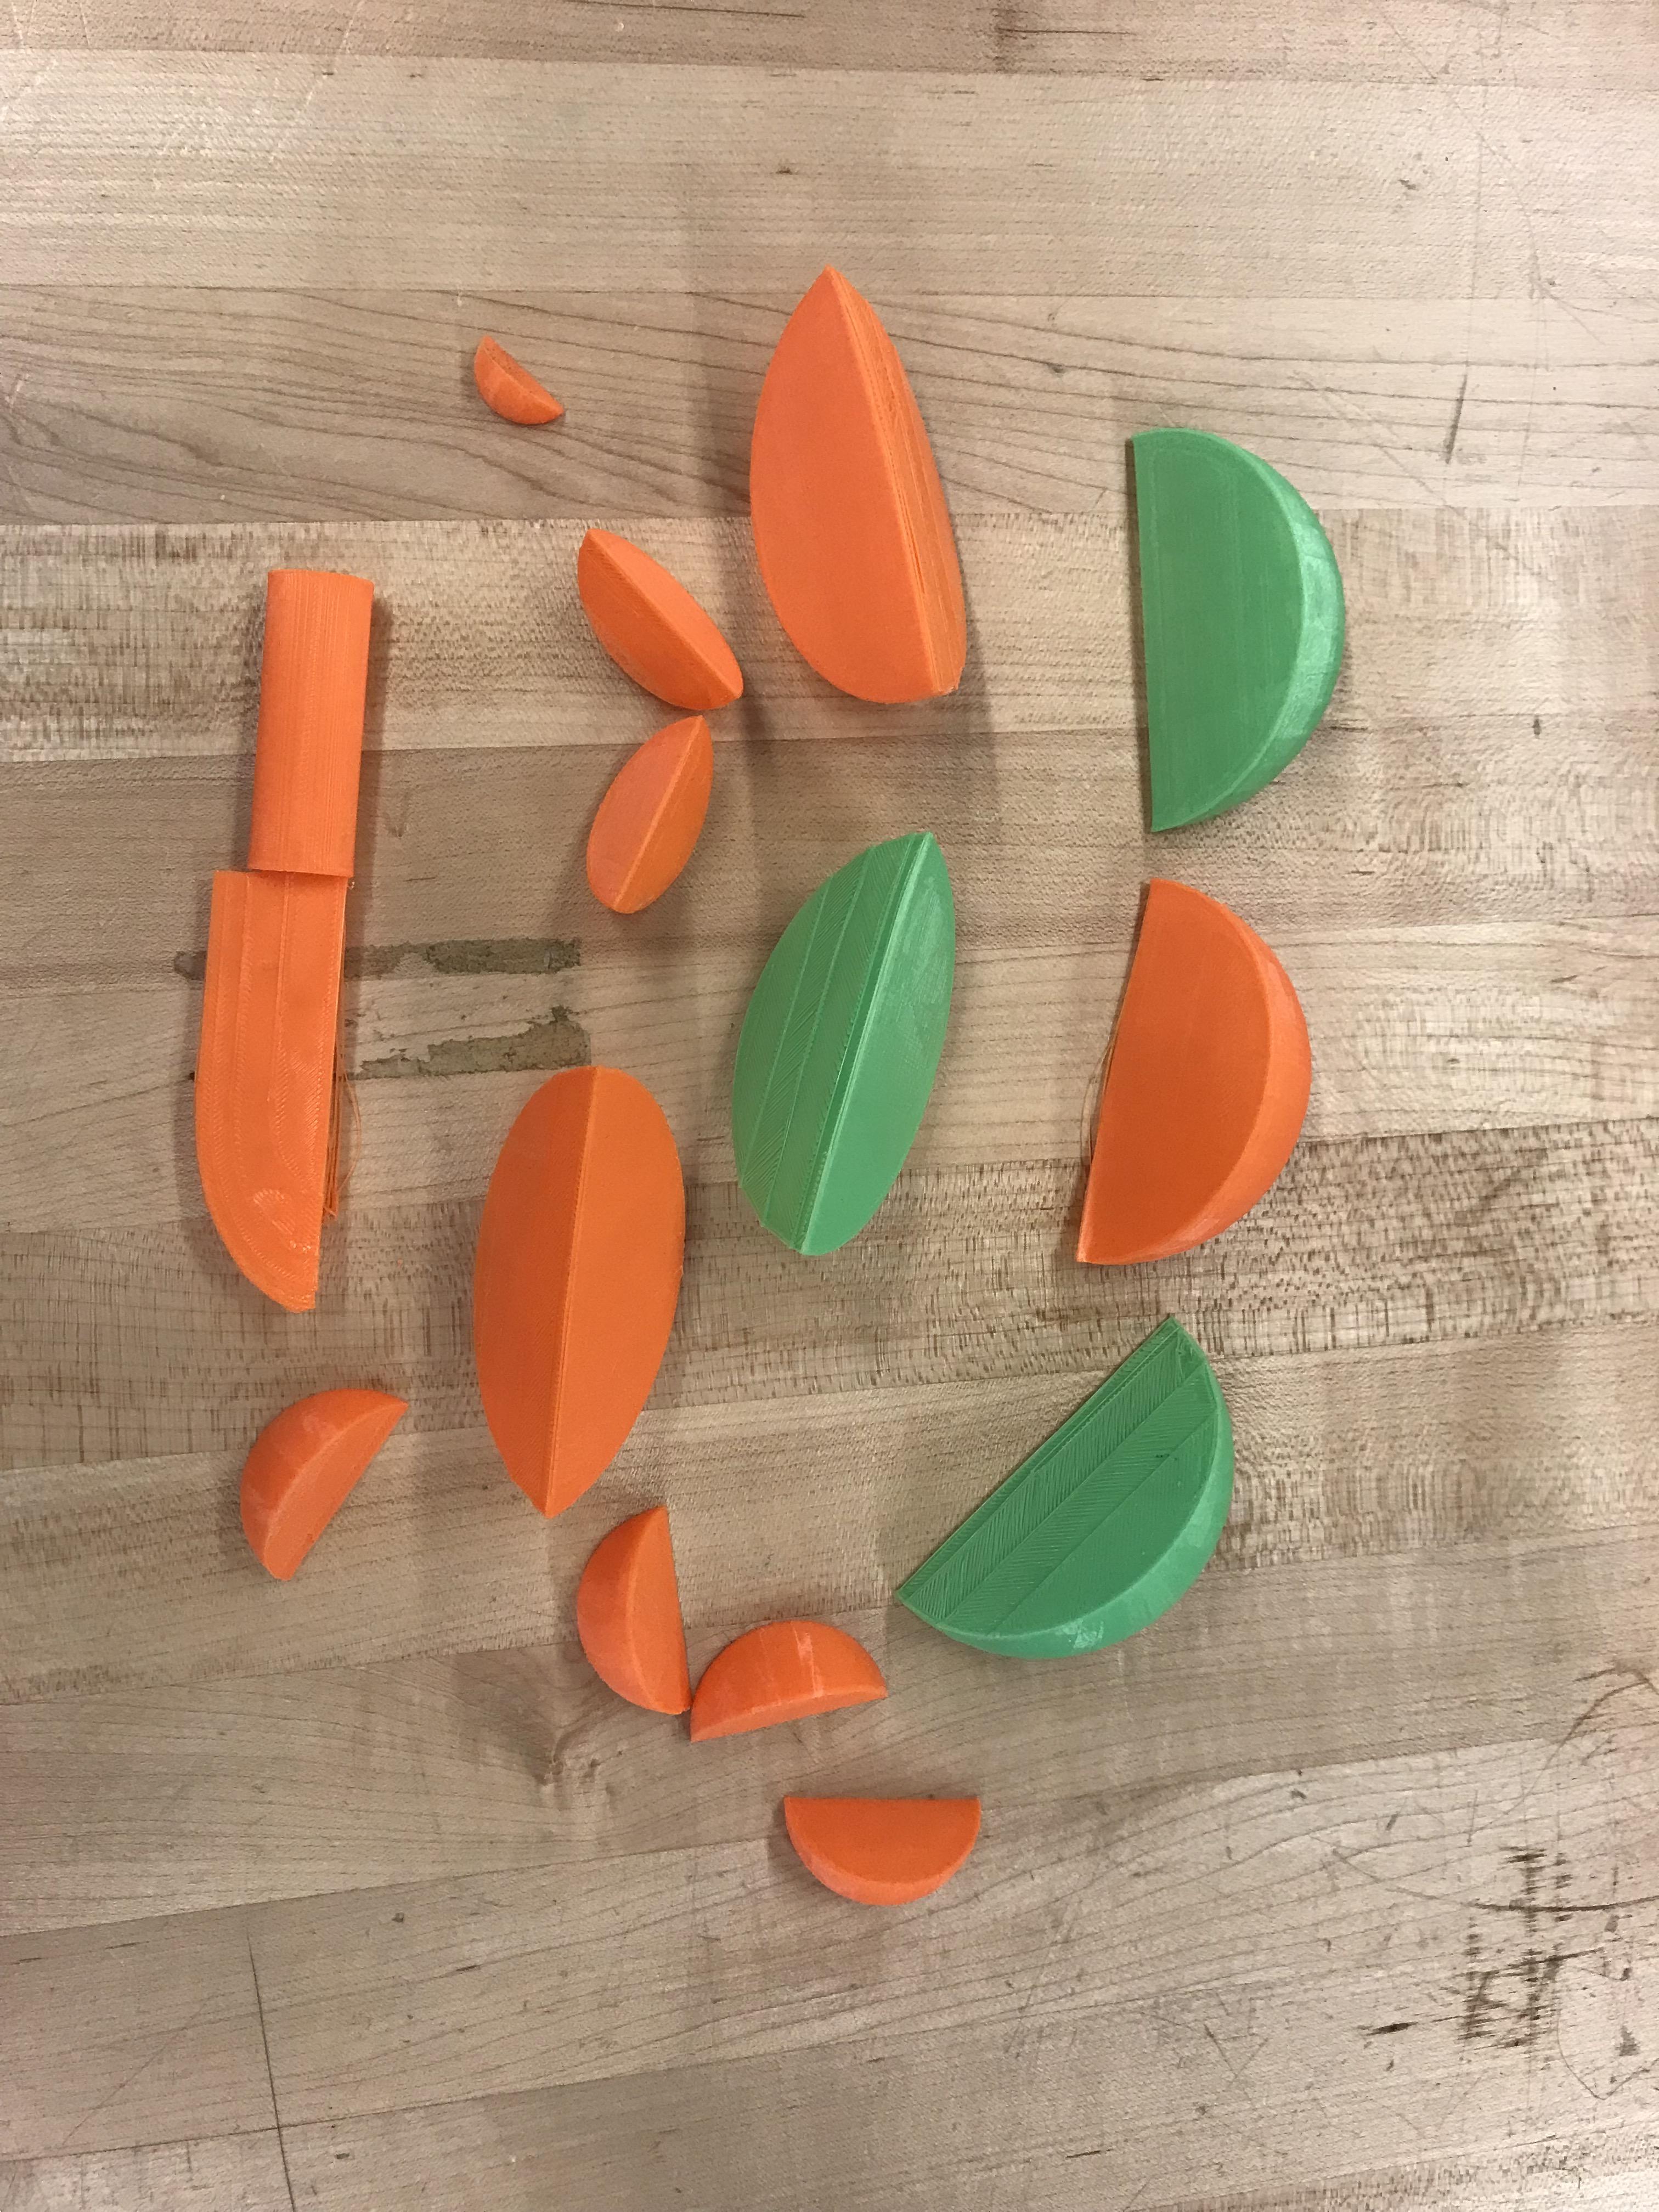
Make an Orange
You're off to a great start! Now that you have your base shapes done, this will be easy. Hopefully.
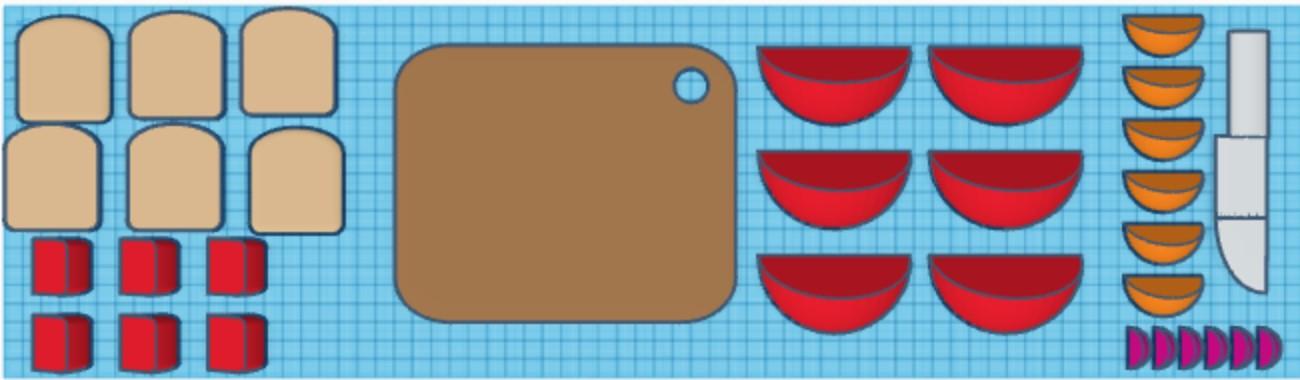
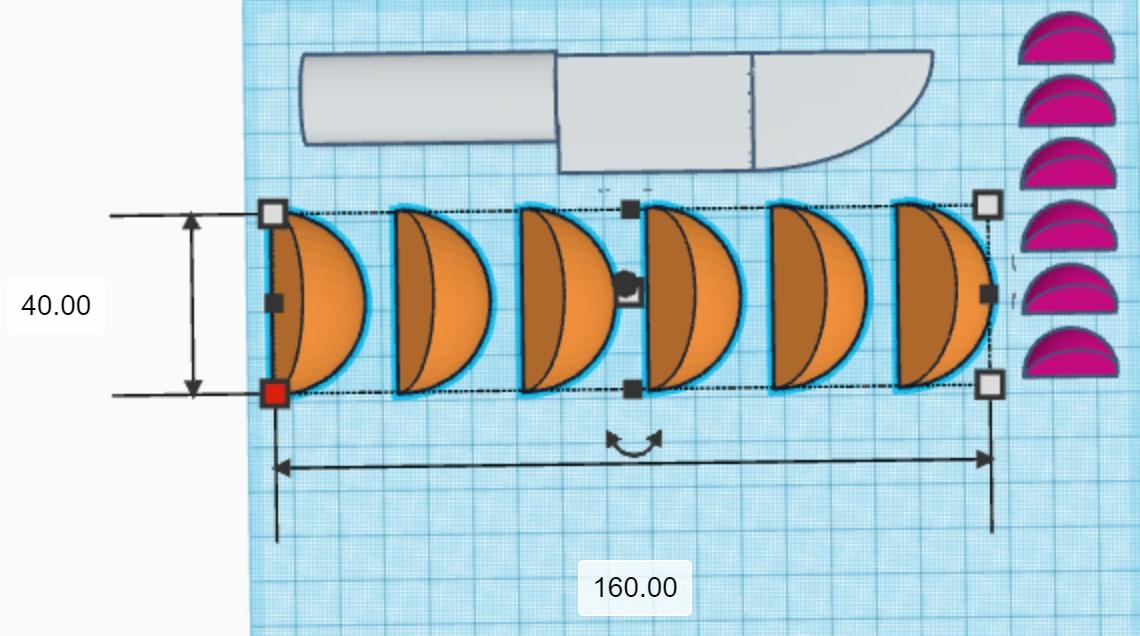
Select all of the base shapes and duplicate them (I use the keyboard shortcut control+d or command+d to do this faster). Move them away from the first set so you can see what you're doing and resize them to make them a more reasonably-sized orange. I selected all of the pieces and resized them at once, making them 40 mm x 160 mm and 17.52 mm tall. I also made mine orange to help with color coding (coloring them on the software won't make a difference in the long-run unless you color code the 3D printer filament too, but it helps keep track of what's what). Here's what my build-plate looks like as of now!
Make a Watermelon
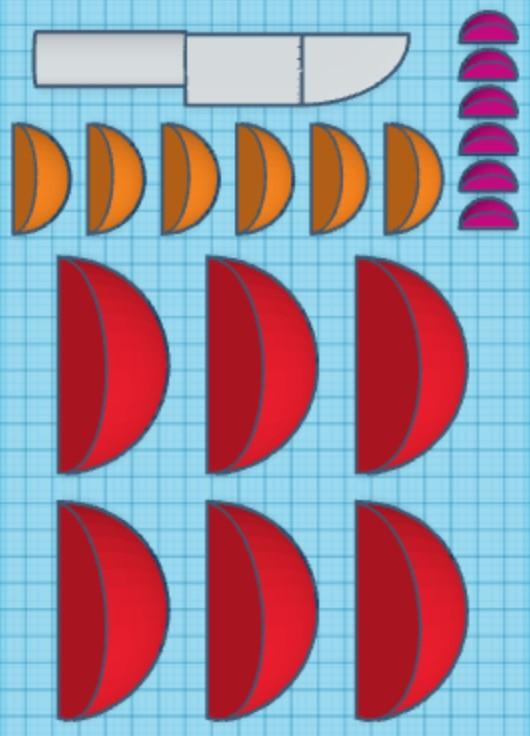
Now, we're going to do the same thing we just did to make a watermelon! Take the orange slices & make a copy of them then duplicate each of the values. I also made mine red so they'd stand out and rearranged them so they'd fit on the build-plate.
Make the Cheese
This might sound cheesy, but you've got to brielieve in yourself! You're doing a really gouda job so far! Okay, I'll stop... but you have to admit that it doesn't get any cheddar than cheese puns.
Let's make some cheese!
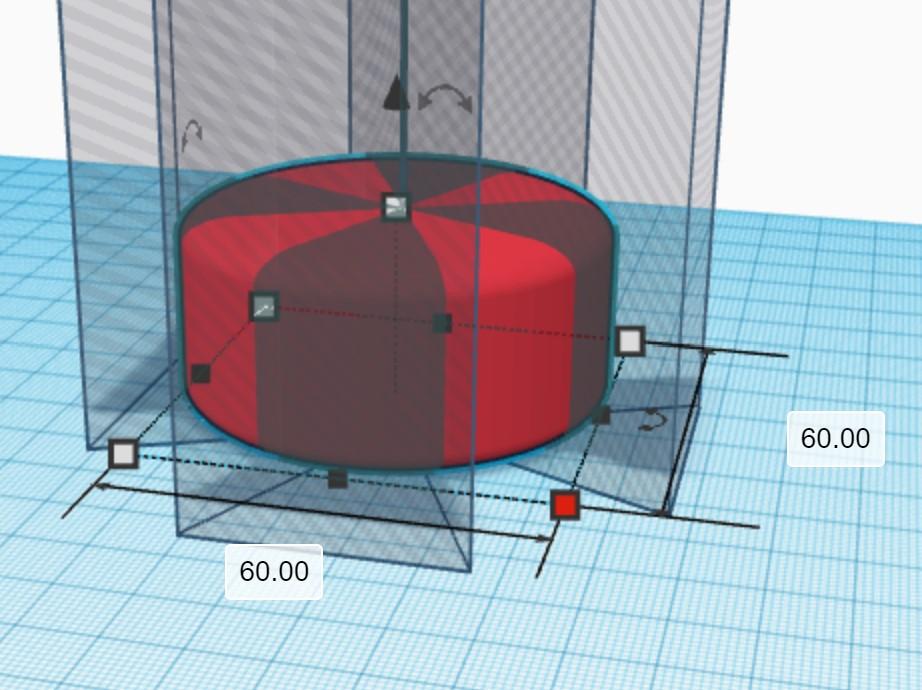
- Import a "cylinder" shape
- Move all of the measurements in the top right menu to their maximum (64 sides, 2.5 bevel, 10 segments)
- Now, make it 60 mm x 60 mm and 28 mm tall
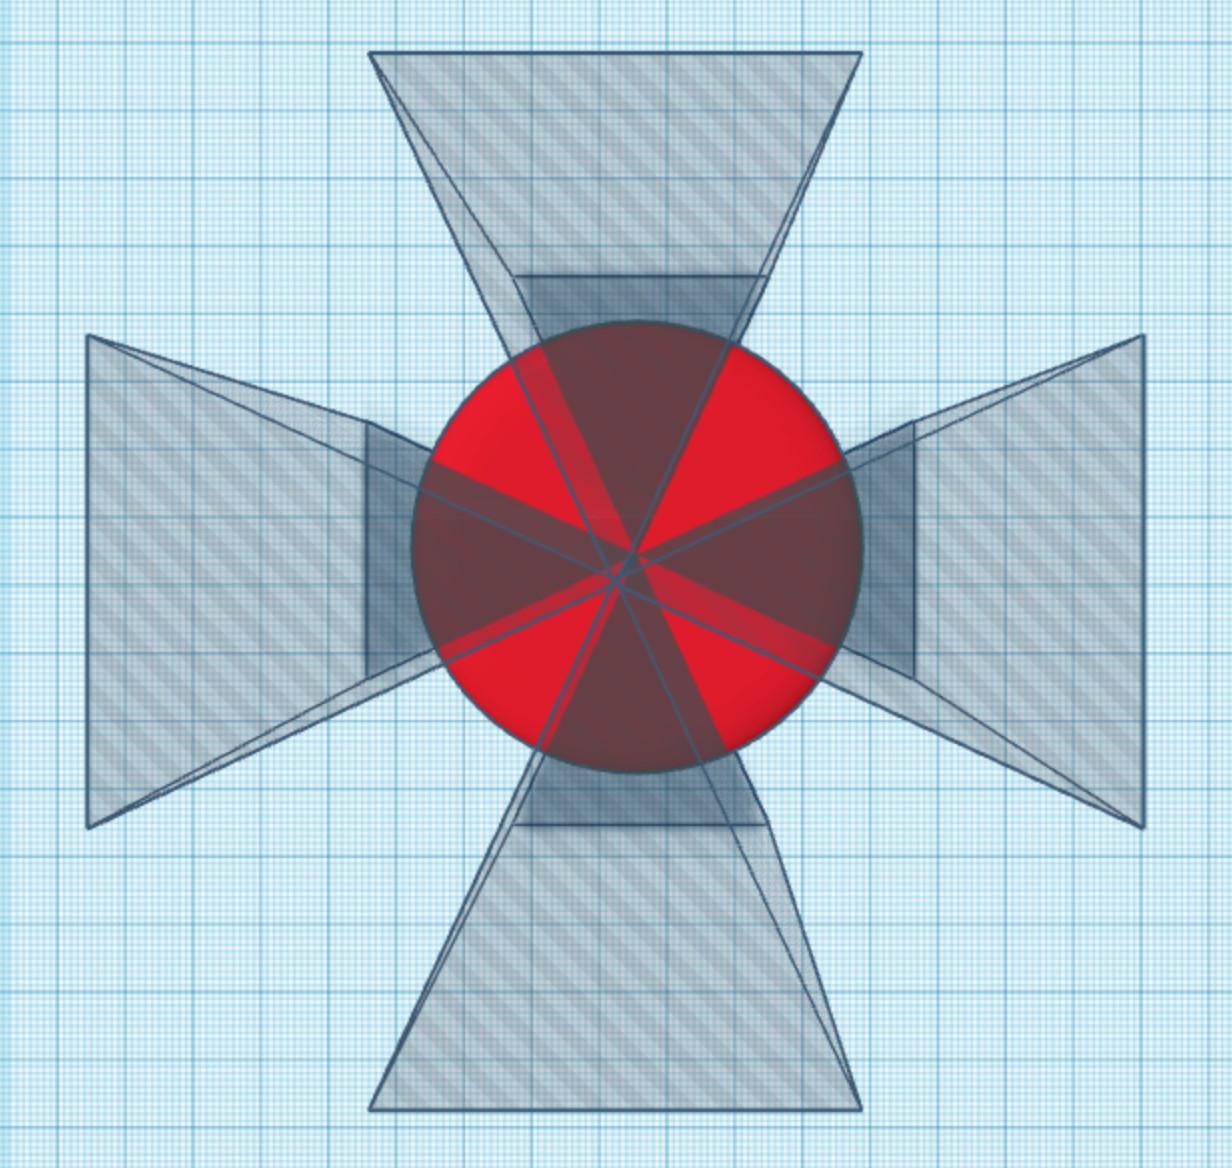
- Import a "roof" shape and make it a "hole"
- Make its width 38 mm and its length 41 mm. The shape's height does not matter, as long as it is taller than the cheese wheel we have created
- Duplicate it and rotate the new shape by 90 degrees, then move it so that the two triangle tips touch each other but do not overlap
- "Group" the two roofs
- Duplicate the group
- Rotate it by 45 degrees, so that they form a triangle-cross over the cheese wheel, as shown above
- "Group" the shapes, so that the triangles cut holes into the cheese wheel
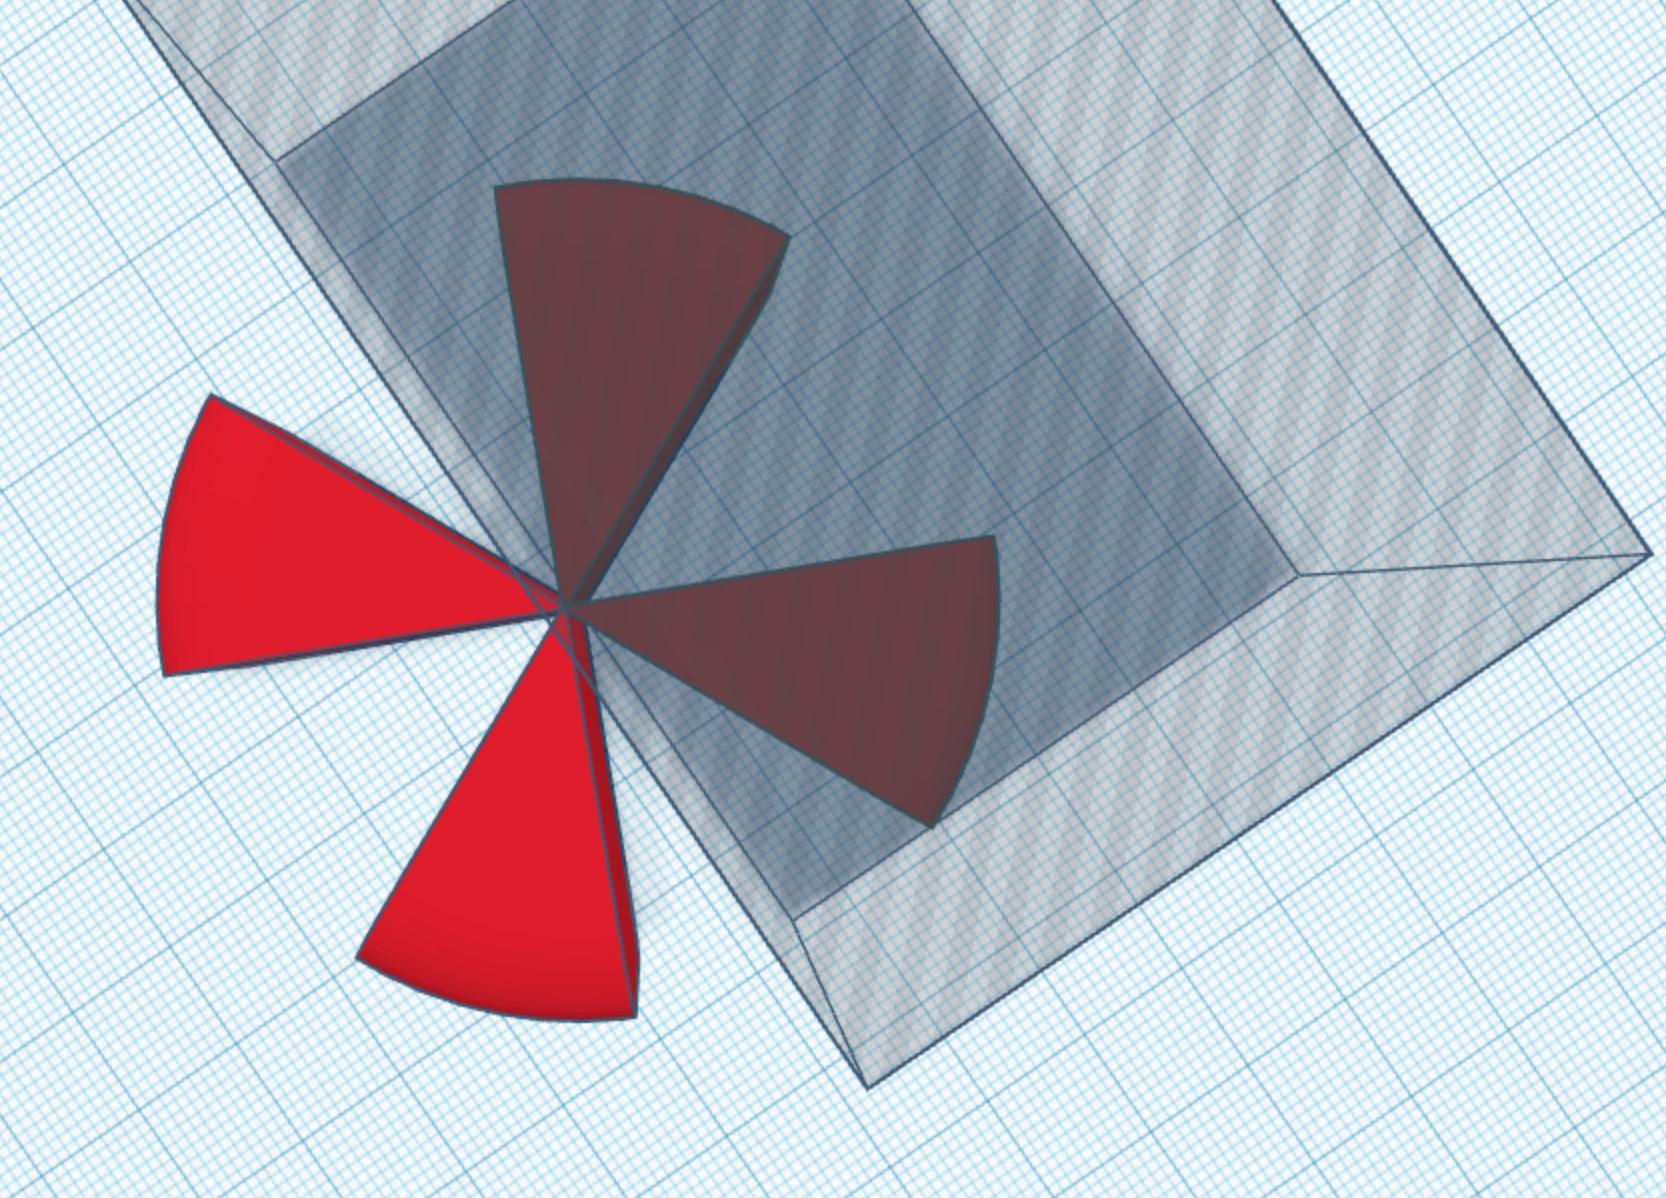
- Add a "square" and make it a "hole"
- Size it so that it covers half of the remaining cheese wheel, as shown above -- the actual dimensions do not matter
- "Group" the objects
- Repeat steps 11 through 13 to cover one of the two remaining "slices"
- Just like with the fruit slices, rotate the cheese slice so that it sits flat on its long side
- Make 6 copies of the slice
Make the Bread

Now that we have tiny cheese, the only possible next step is to make tiny bread, of course, so let's get this bread!
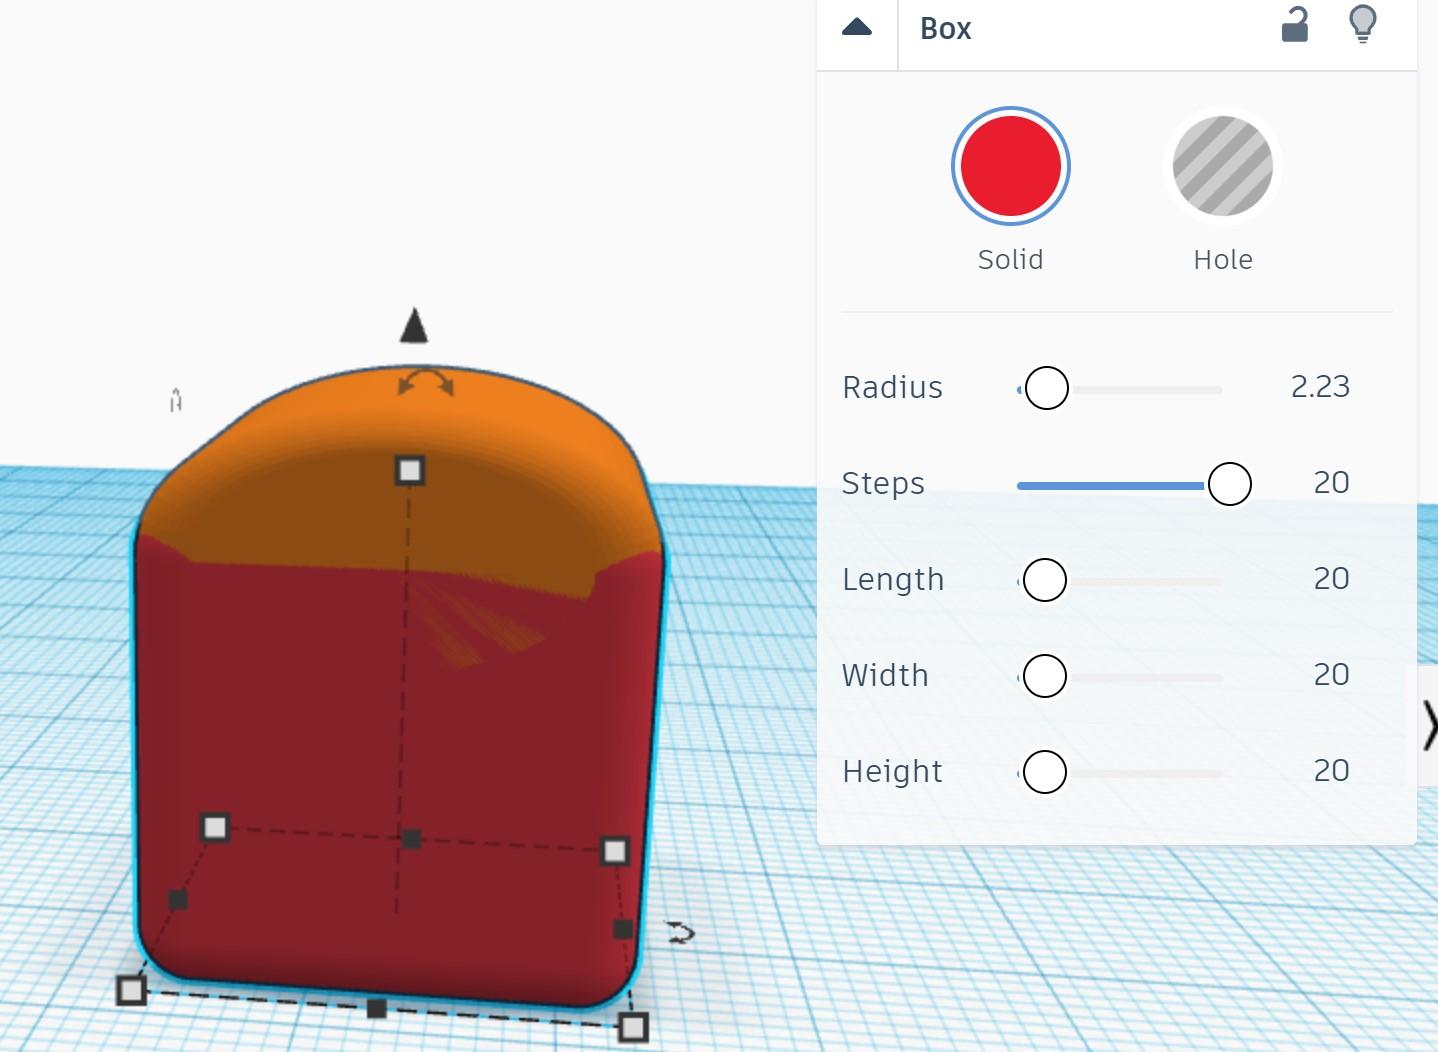
- Drag a cube to the build-plate
- Using the menu at the top right, make its radius 2.23 and increase its "steps" to the maximum value
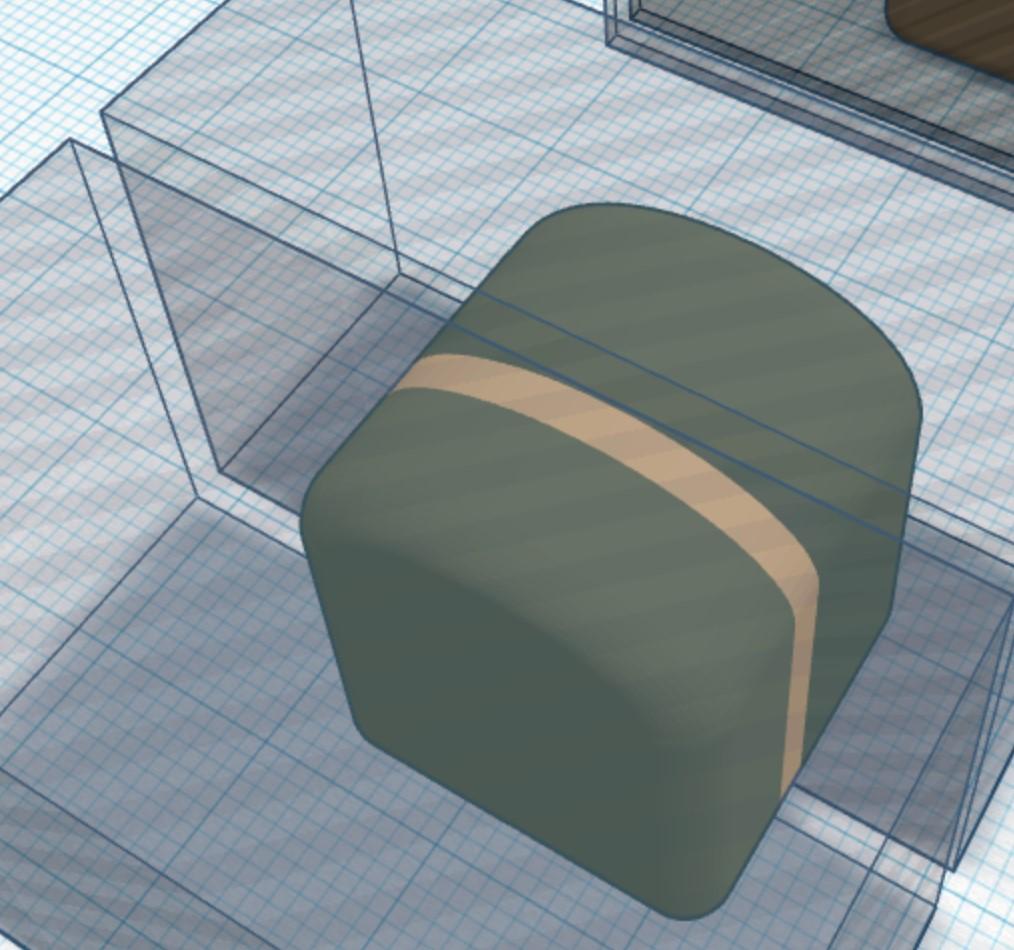
- Add a cylinder to the build-plate and increase its "sides," "bevel," and "segments" to their maximum value
- Rotate it by 90 degrees and make its height 11 mm
- Place it on top of the square (this was 11.5 mm up in my case)
- Group the two objects! I also made mine brown
- Duplicate the loaf and move one aside for later
- Import a "hole" cube and make it 1 mm thick and taller & wider than the loaf (actual dimensions don't matter)
- Duplicate the "hole" cube and move the duplicate 3 mm away from the original
- Select the two "holes" and duplicate then move them aside for later (it might help to group them)
- Now, on the original loaf, make the cubes wider than the bread (actual dimensions don't matter), as shown in the image above
- Group the three shapes. Ta da! You just made a slice!
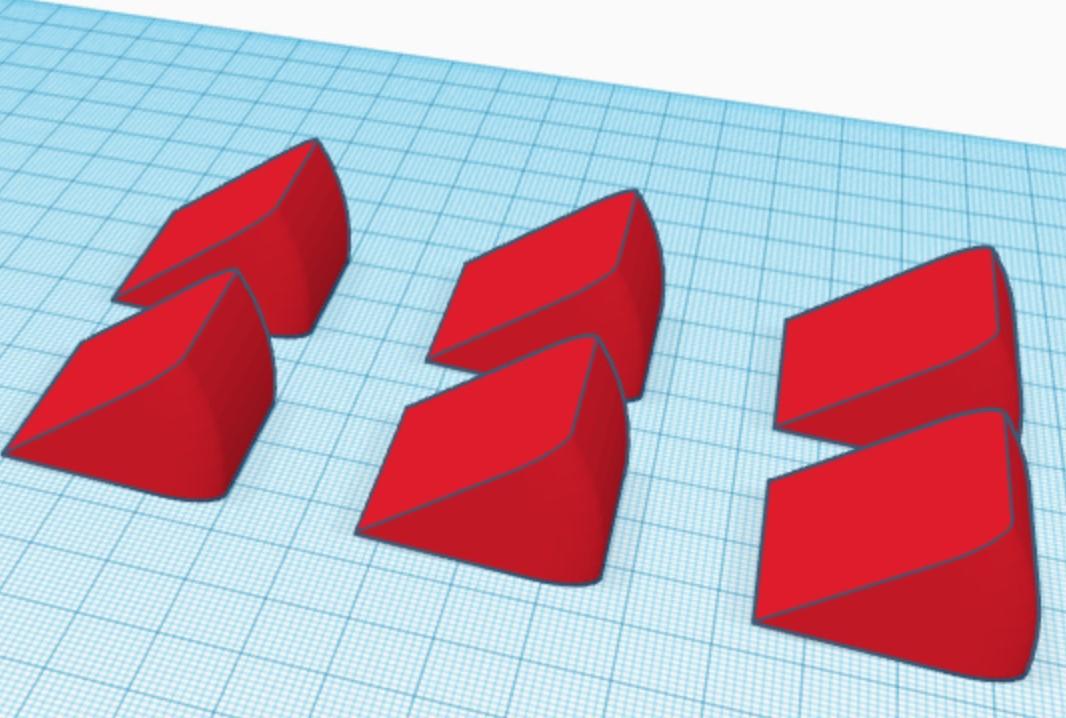
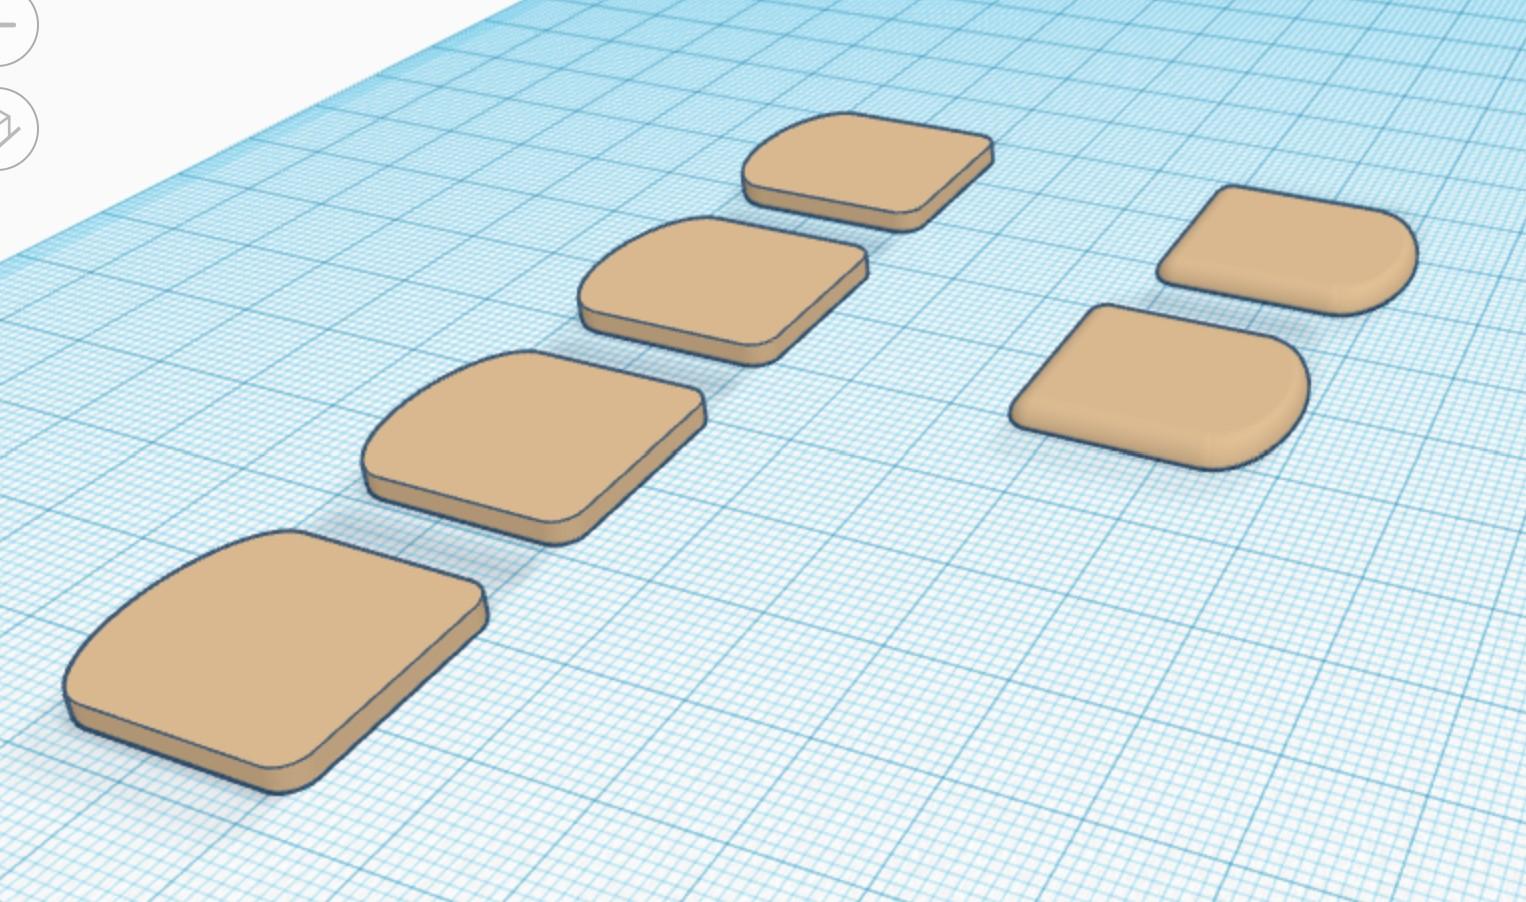
- Duplicate this slice as many times as you'd like -- I did it three times to make a total of four slices (make sure to lay them flat on the build-plate)
- Now, take the two remaining hole-boxes and line them up with the edge of the other loaf to make an edge-slice, as shown above
- Ensure the hole-cubes cover the entire loaf except for that edge and group the shapes (if you grouped the holes earlier, you may have to ungroup them now
- Lay the end piece flat on the build-plate and duplicate it
- Size the bread as you like -- I suggest making it bigger than the cheese
Make the Cutting Board
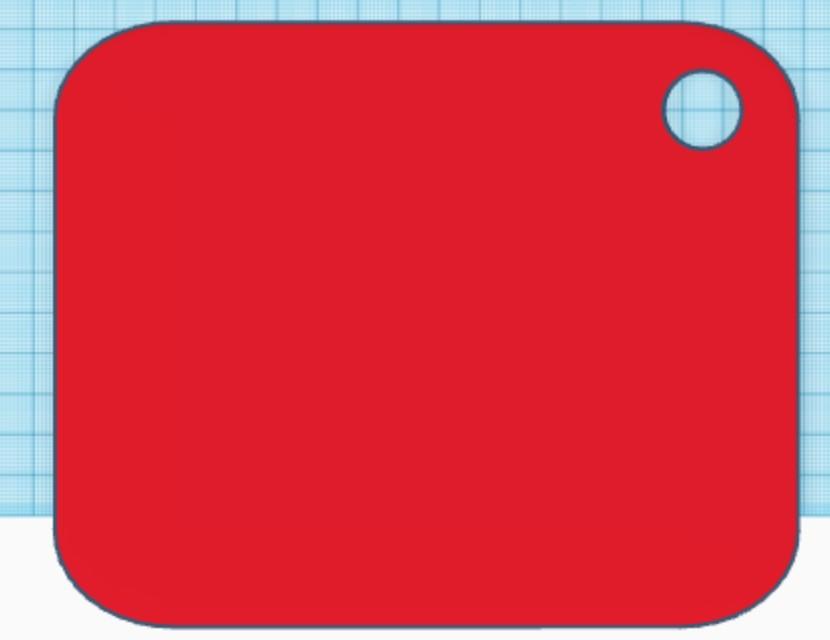
- Drag a cube to the build-plate
- Make its radius 3.14
- Change its height to 4 mm
- Size it as you'd like (I made mine 147 mm x 181 mm in width & length)
- Add a "cylinder hole" to the build-plate and place it in the upper right corner of the cutting board (don't forget to change its "sides" to the max value!)
- Merge the two shapes
Print It!
Follow the steps specific to your printer & software to print the designs.
Attachments
Now that the project is complete (it looks stunning, by the way), you're going to want to attach the pieces in a way that'll make them slice-able. I suggest using either Velcro or magnets to do this! With Velcro, you're going to get a really satisfying slicing sound when you cut through the pieces, making the set even more realistic, and with magnets, you'll be able to click them together. If you're making this for a young kid, I suggest going with the magnets. This way, if one of the small pieces falls, you can wave a magnet over the floor and find it that way.
Velcro Option
Cut small squares or circles of the Velcro for each side of each of the food slices. Use the adhesive on the back of the Velcro or glue to attach one of the sides to the side of the slice, then attach the face of another piece to its face so that they stick. Take off the adhesive covering or put a dollop of glue on the second piece's back then press it against the next slice of the design so they are lined up. Keep repeating this process for each of the slices for each design.
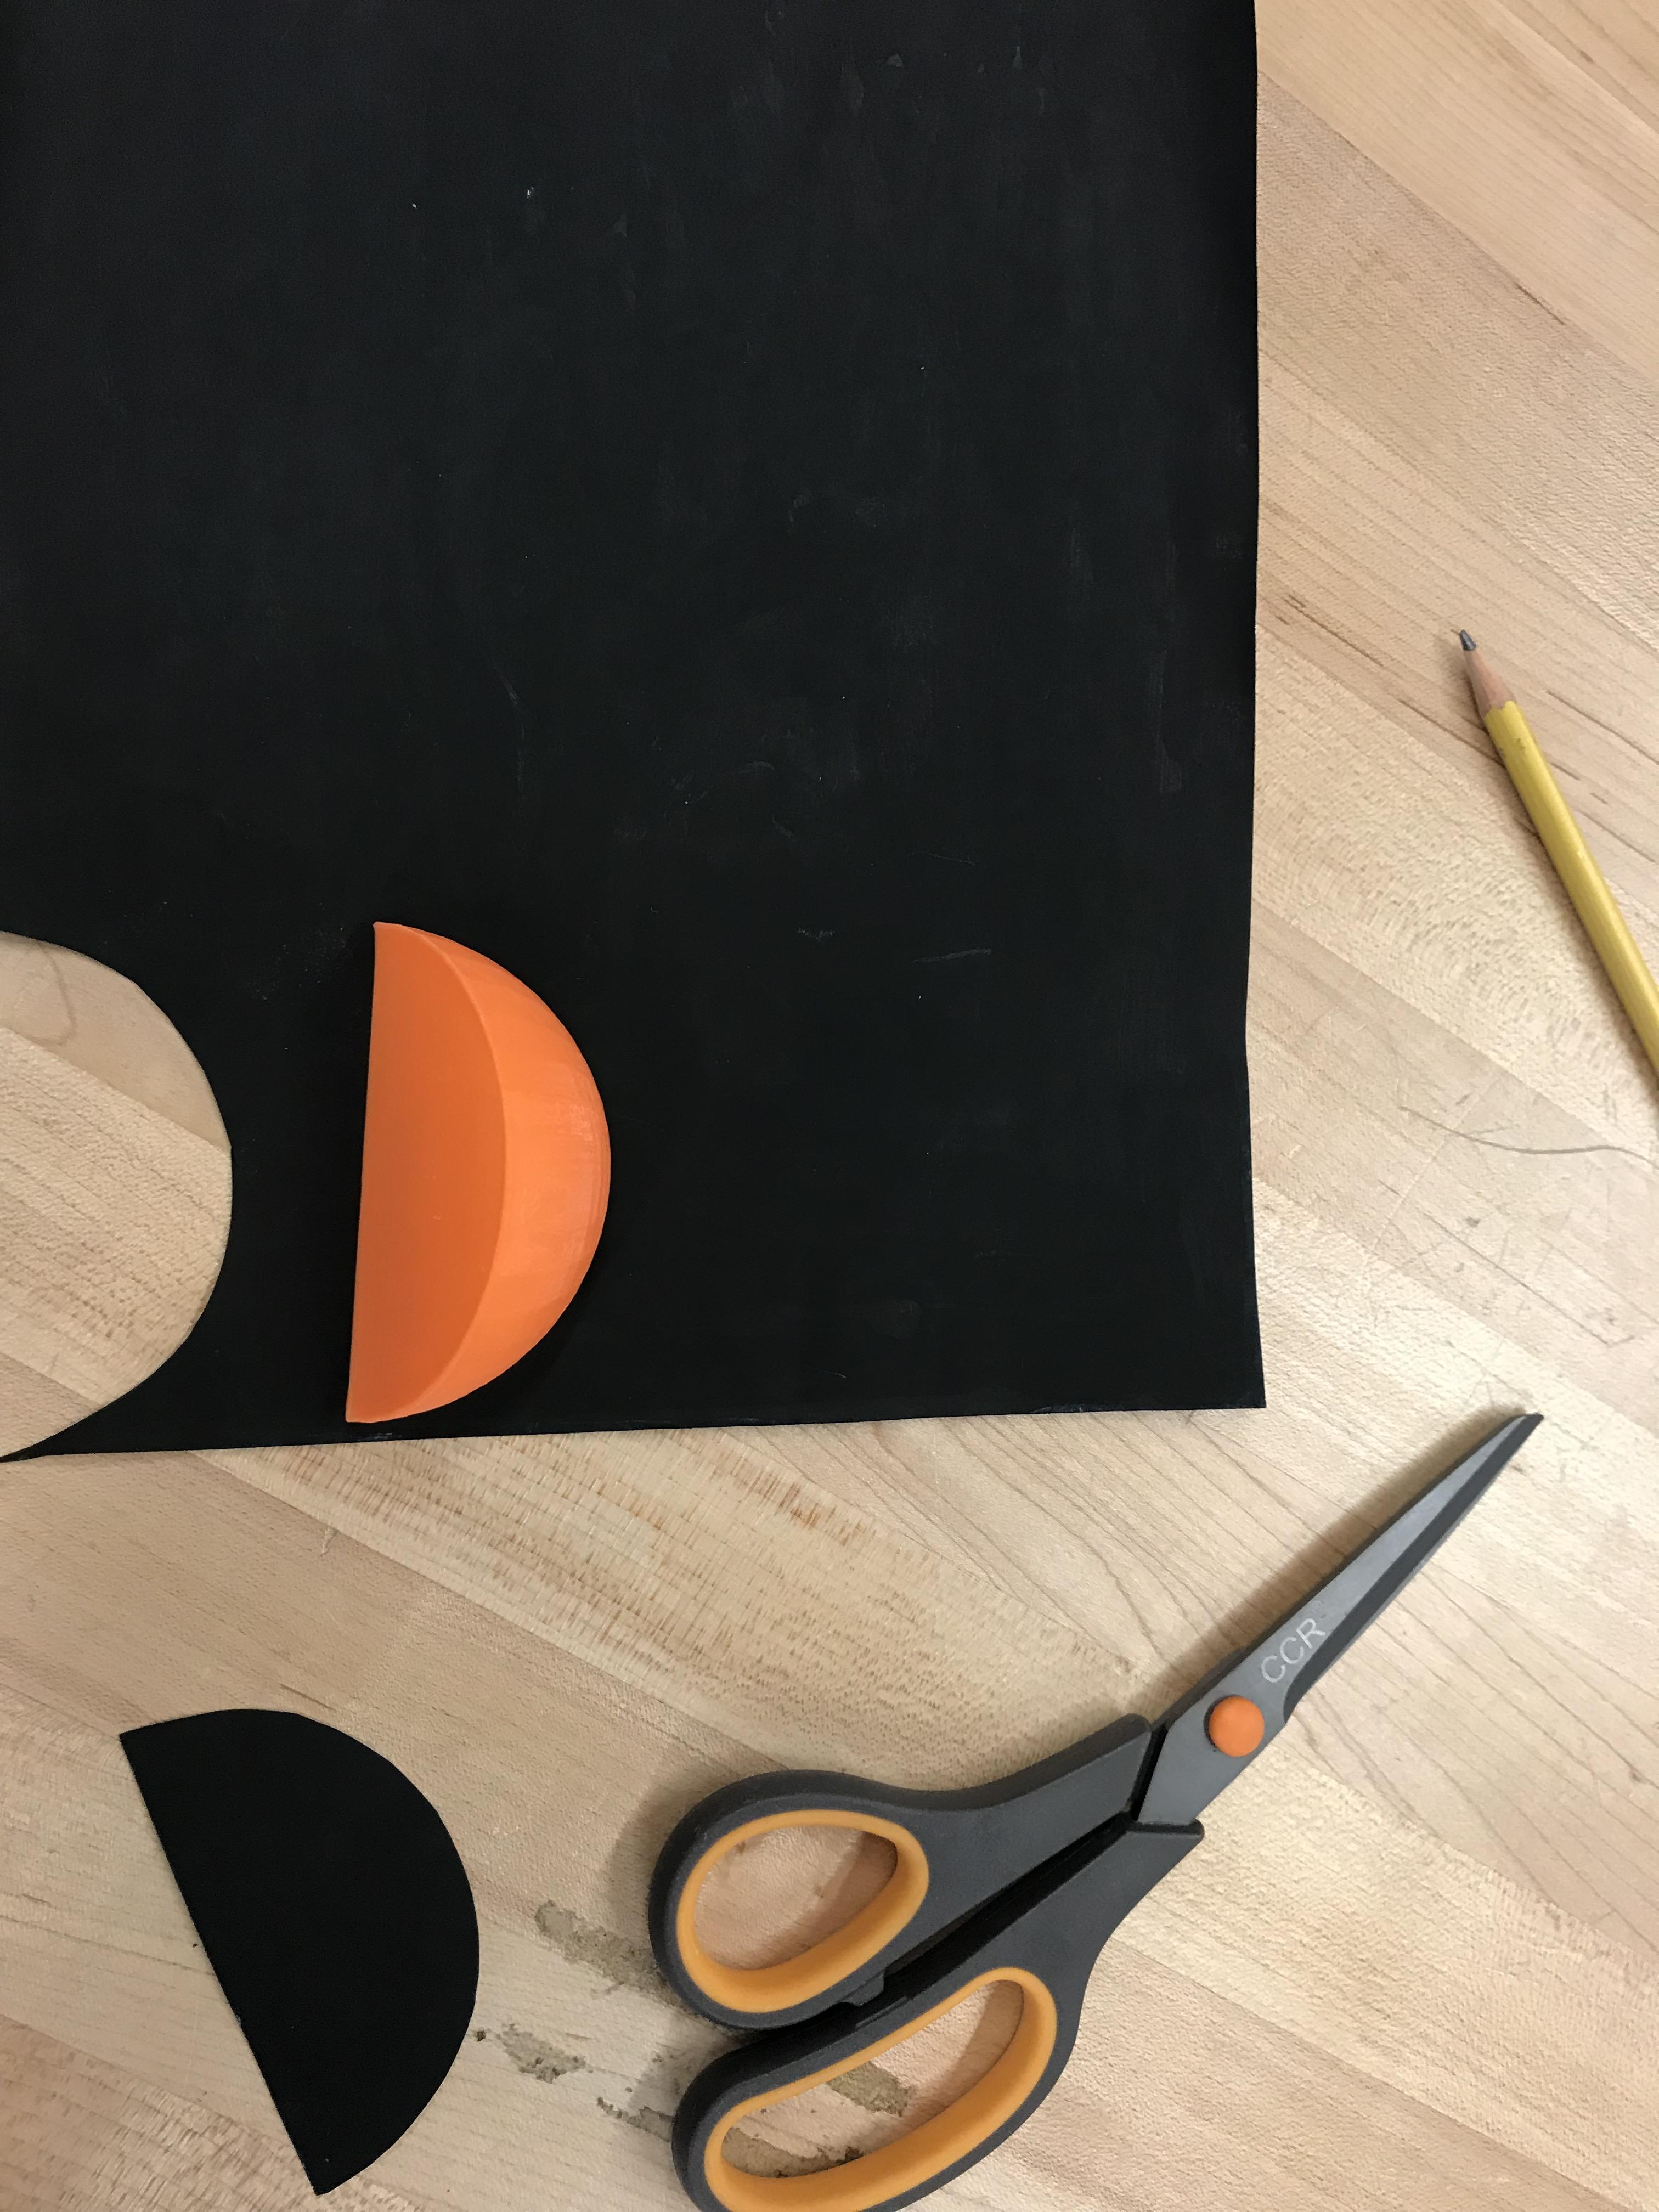
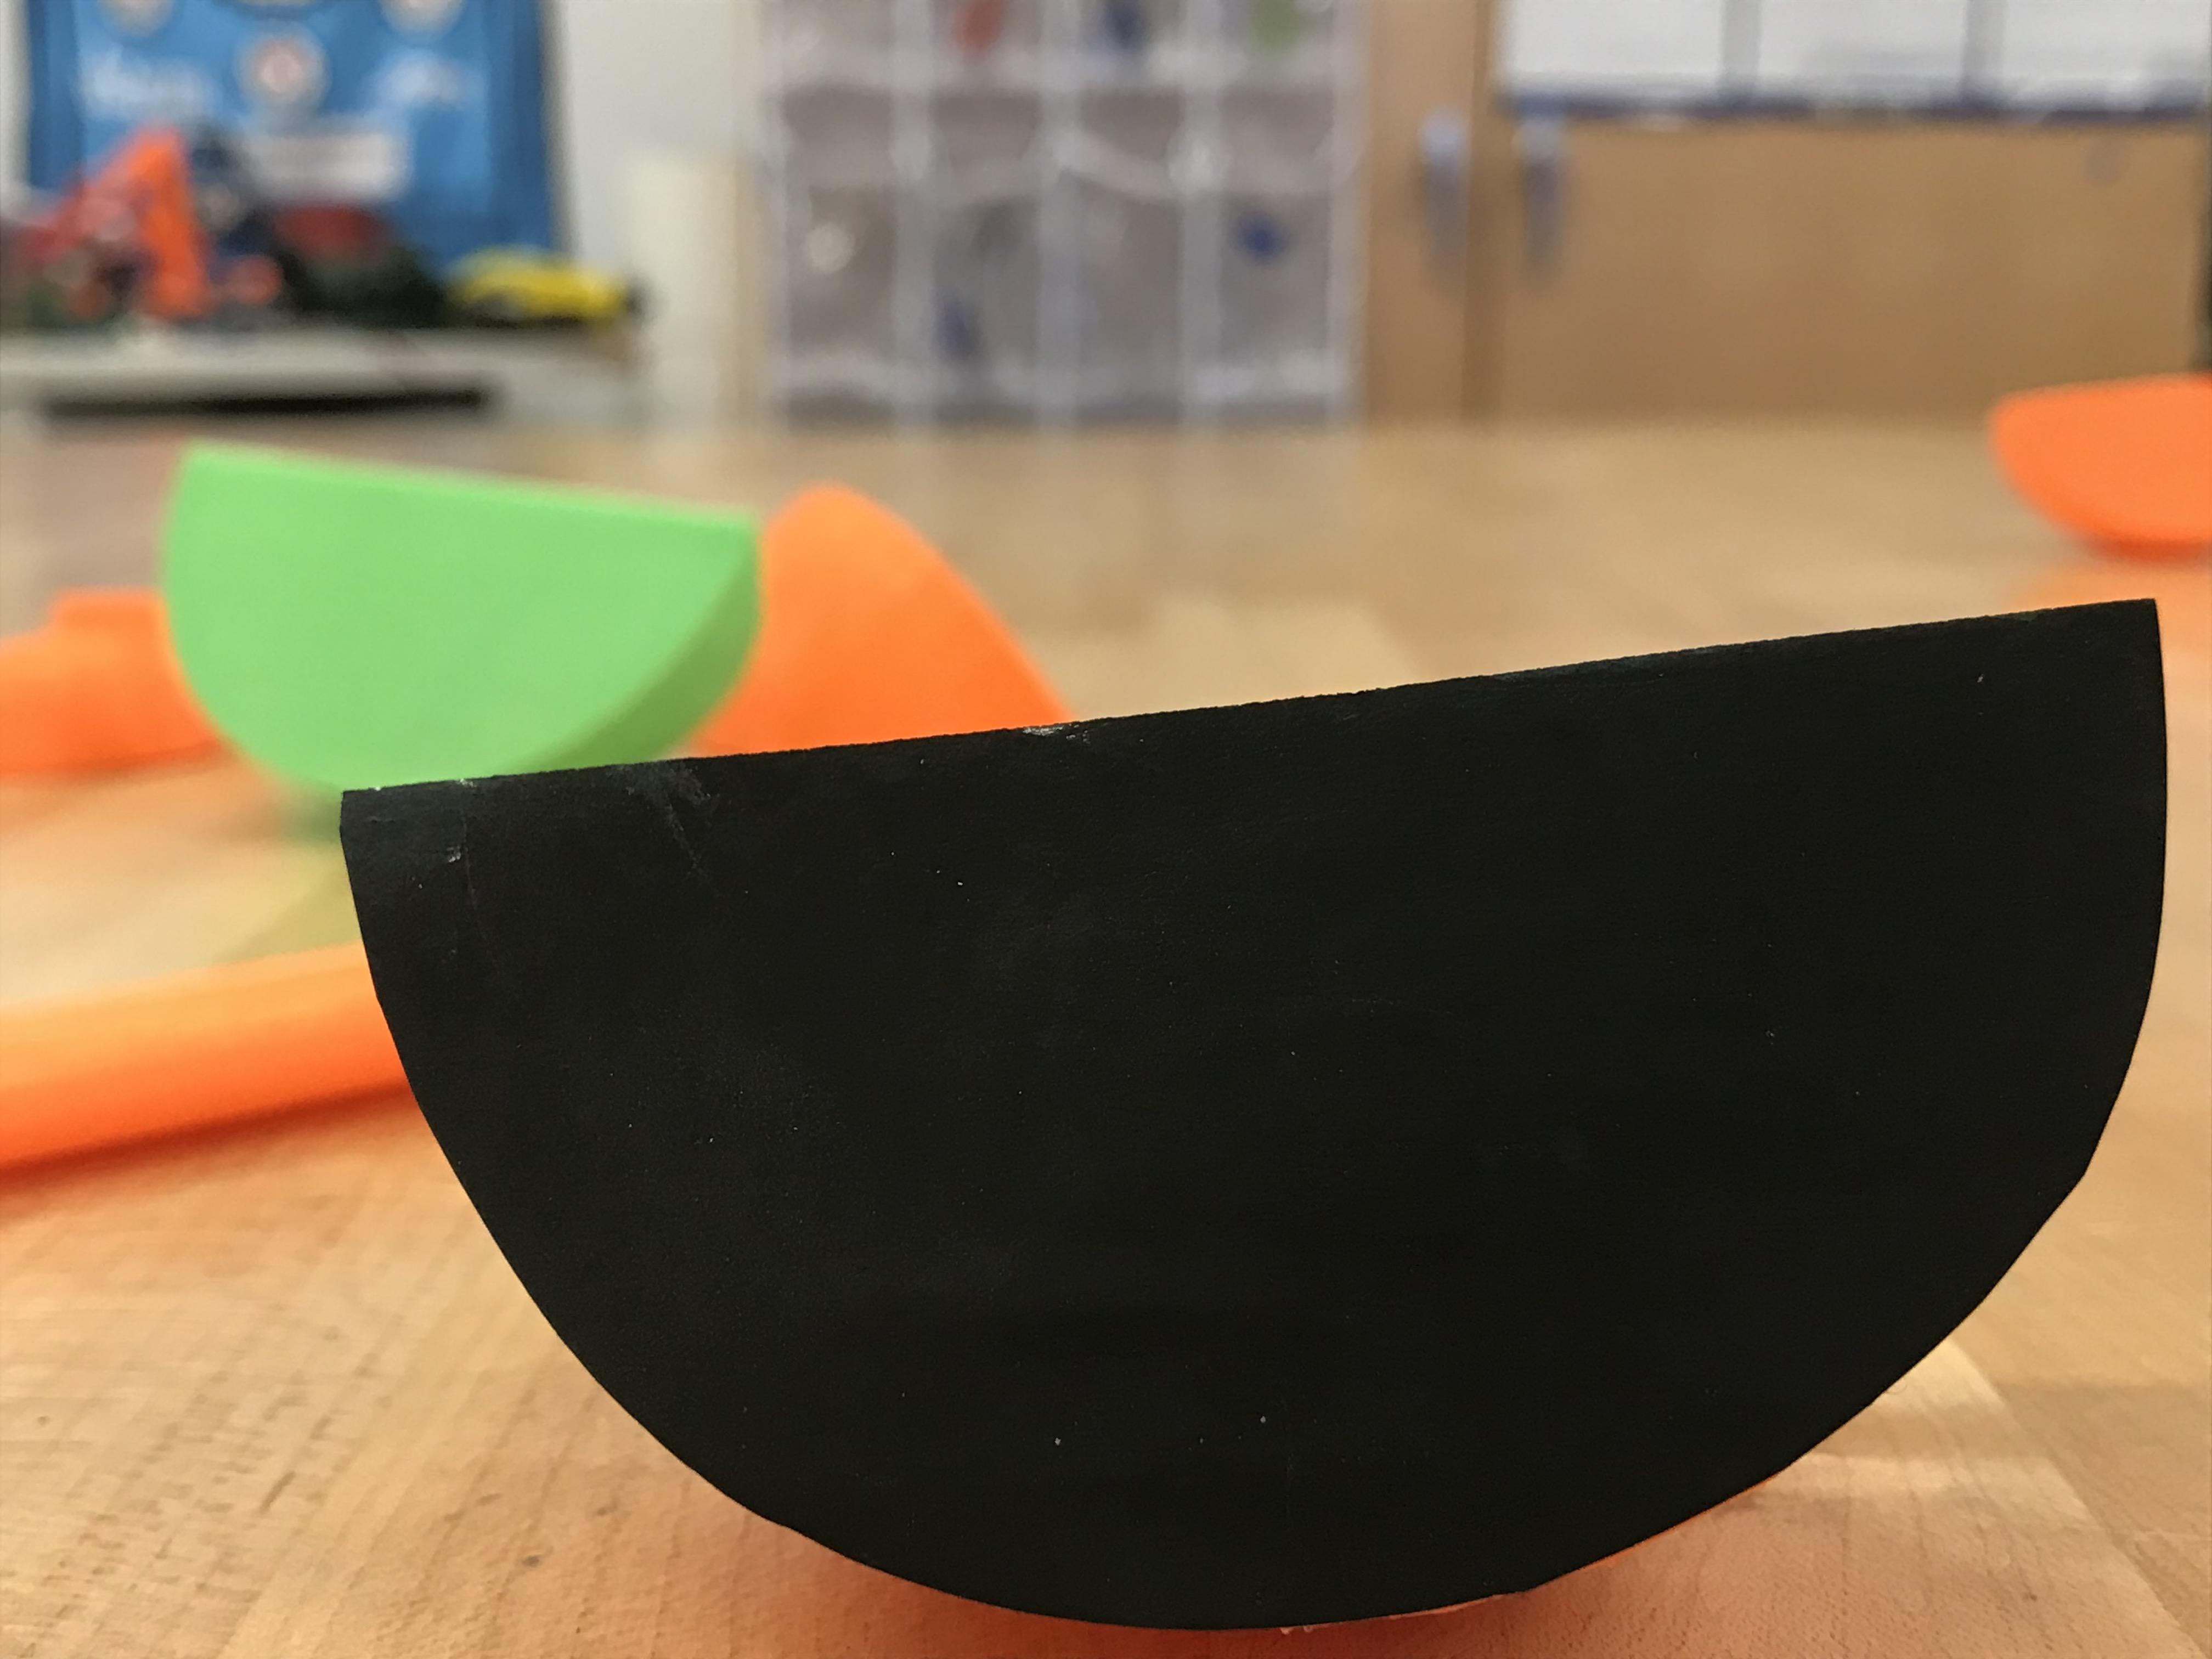
Magnet Option
Take a magnetic sheet and cut equally-sized circles or squares out (or the entire shape, as shown above). Make sure you have enough to be able to hold each of the slices together. Also make a bigger sheet to fit over the cutting board. Similarly to the Velcro option's steps, attach one side of the sheet to one of the fruit/food's sides then match it up with its partnering piece before attaching the second piece. Repeat this process for each food item until they can all magnetically attach. Also press the larger sheet-piece to one side of the cutting board so you can allow for the food to stay put on the board. This is especially helpful if you are making a travel set for a kid, like I am!
I used this option and it came out really well!
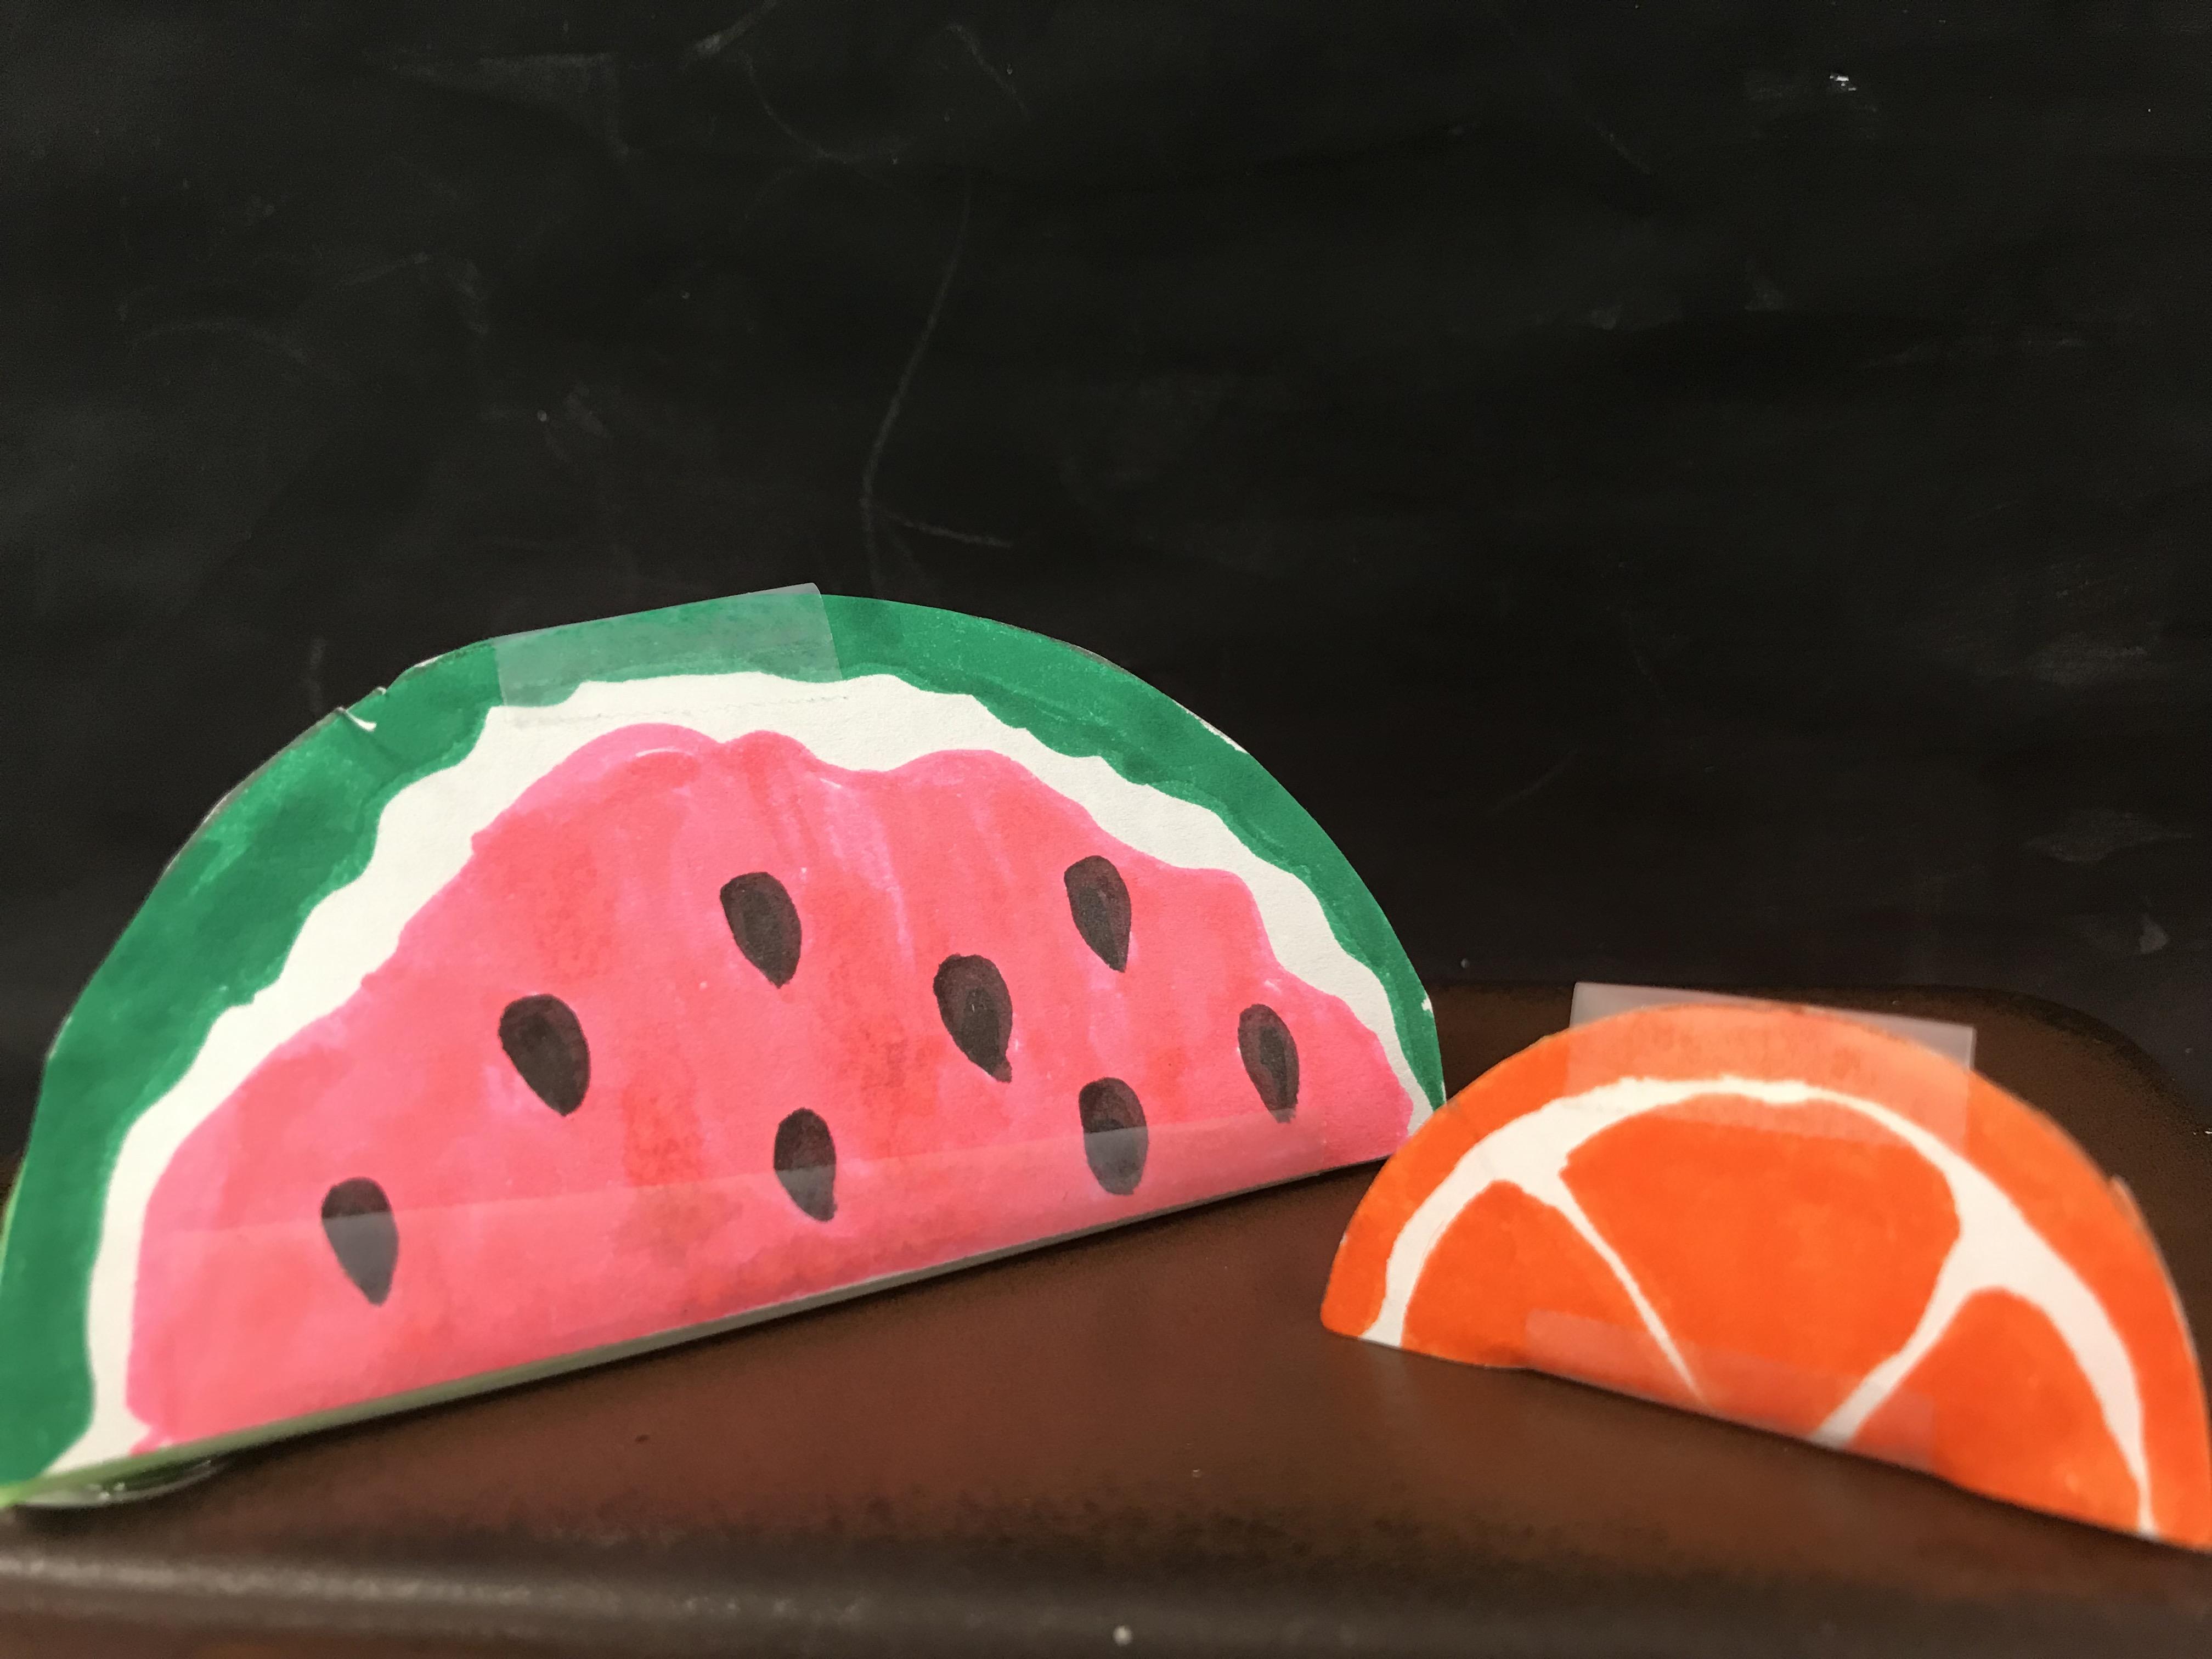
Paint It!
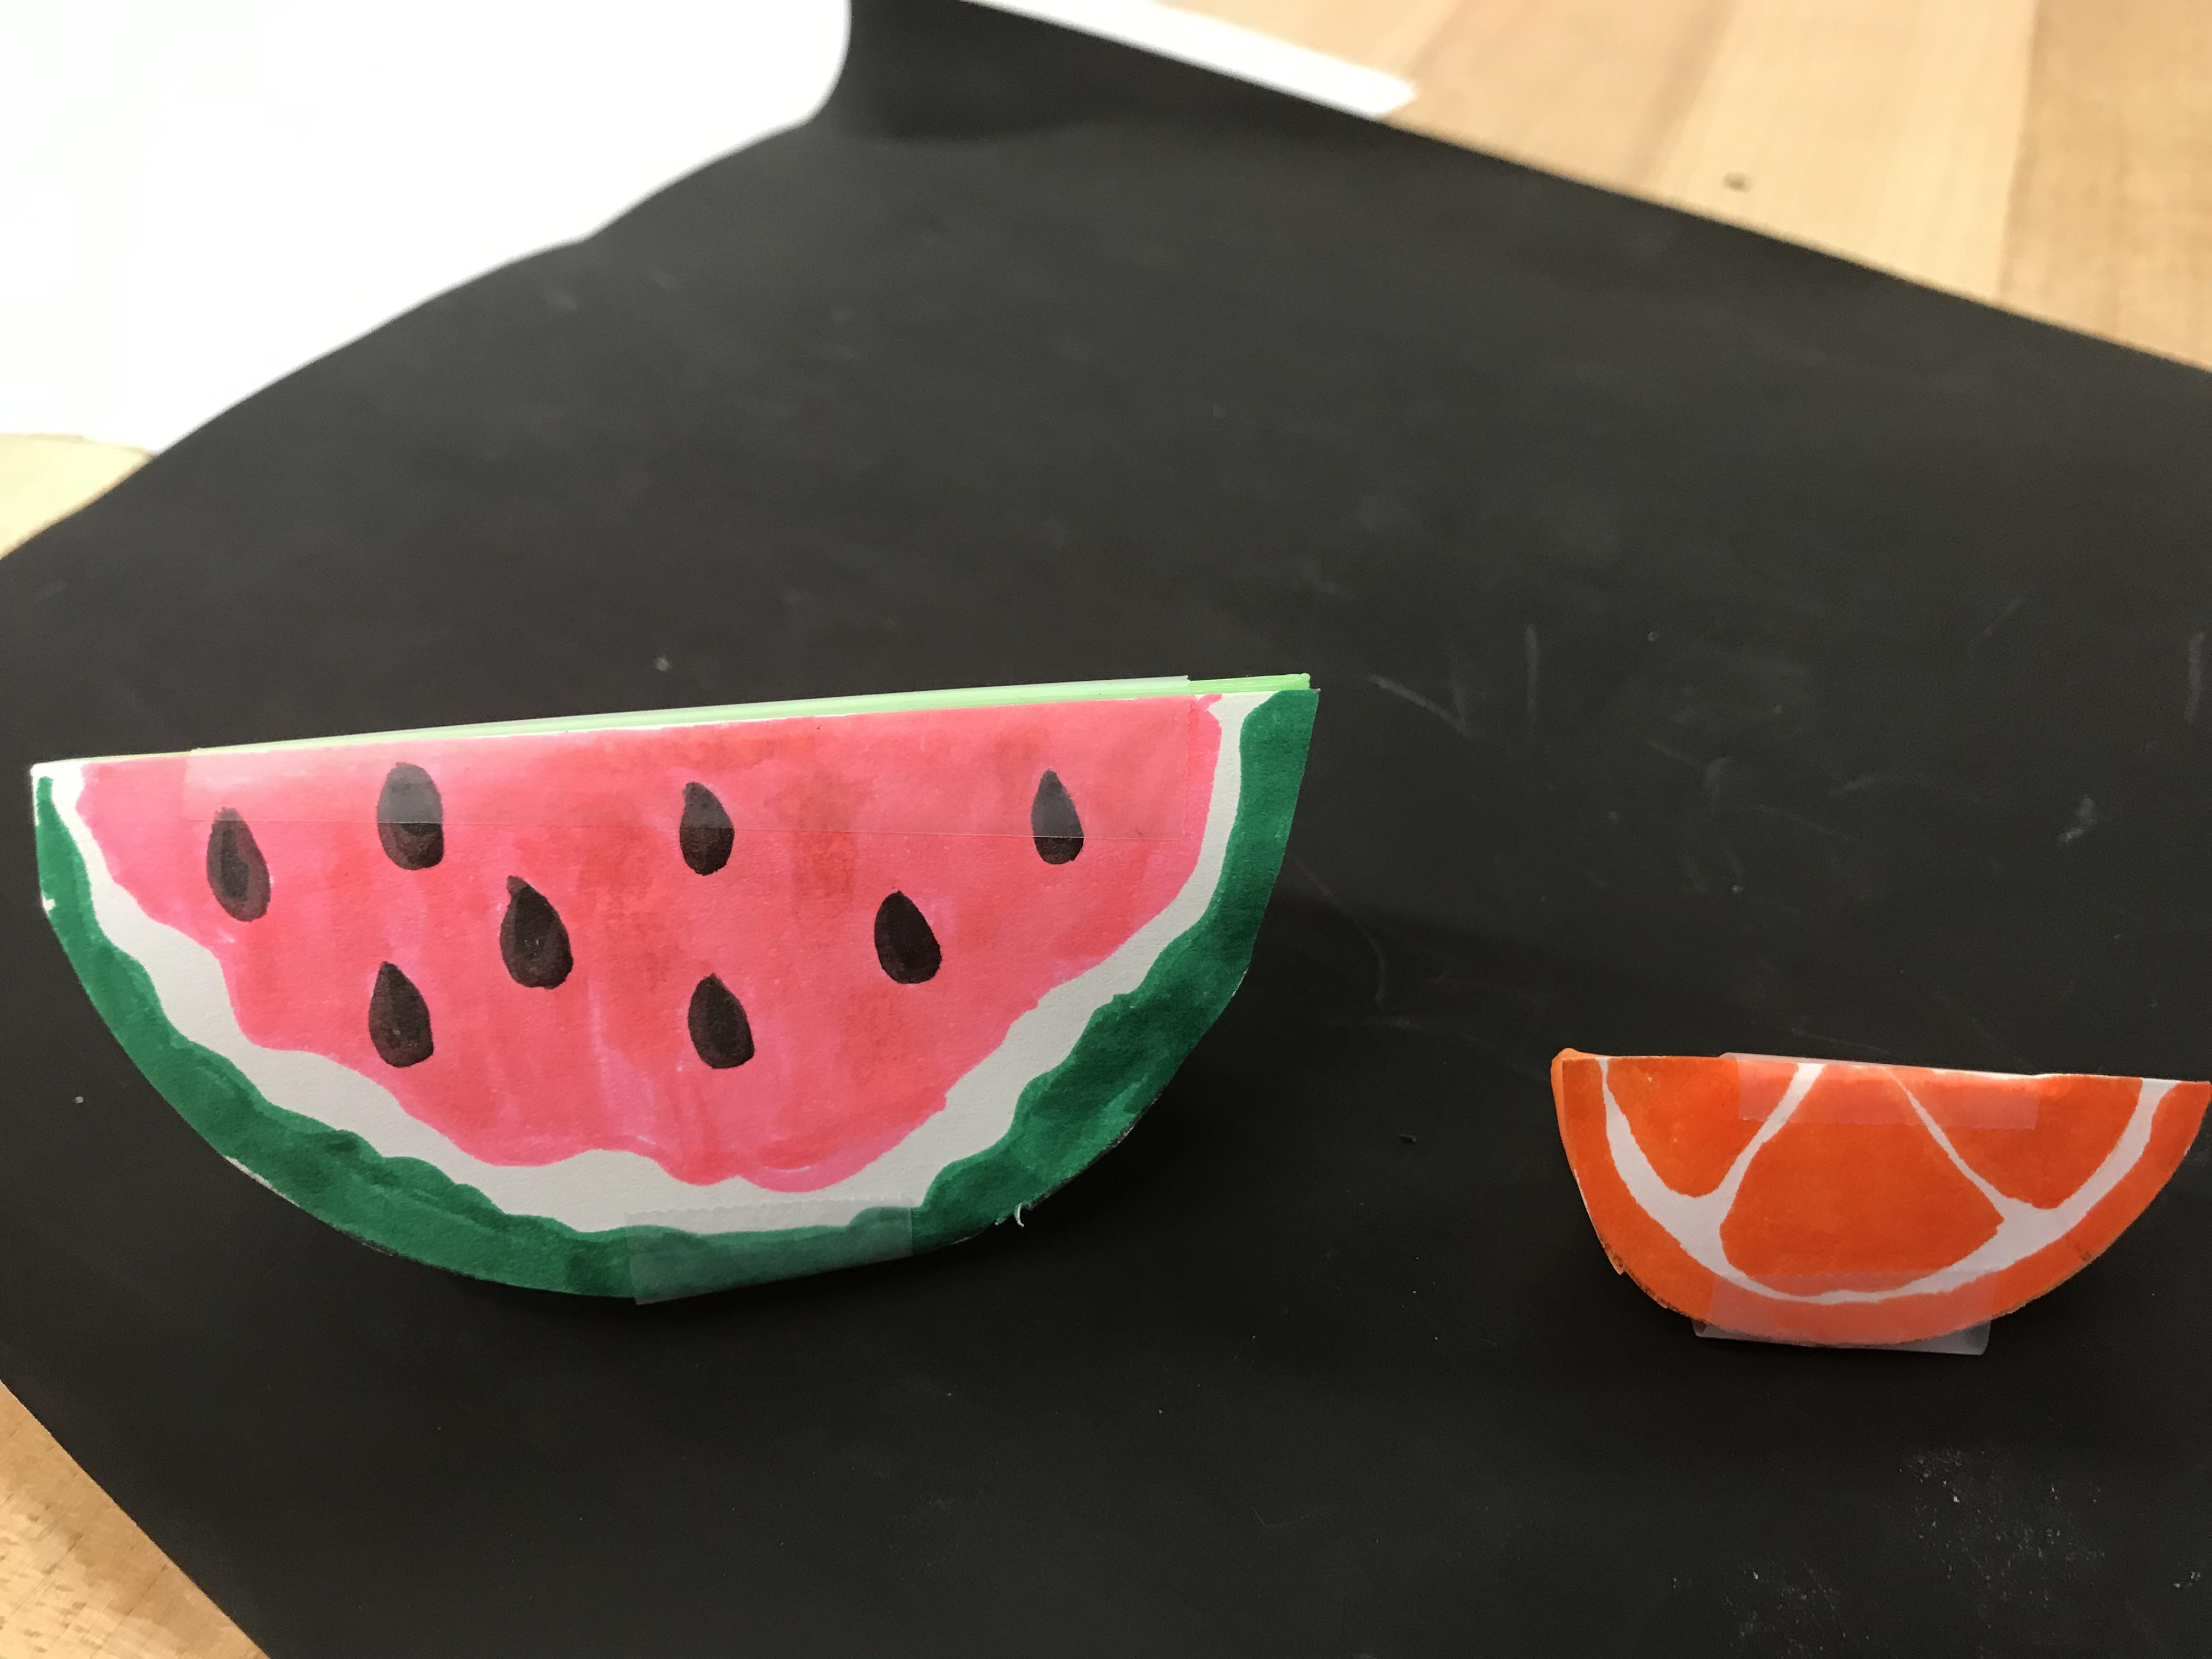
Note: If you are using Velcro to hold the pieces together, please paint your designs before attaching the Velcro.
Paint the toys however you'd like! Here are mine :)