Micro:bit Glowing Halloween Eyes
by Jeff Haas in Circuits > Microcontrollers
942 Views, 3 Favorites, 0 Comments
Micro:bit Glowing Halloween Eyes
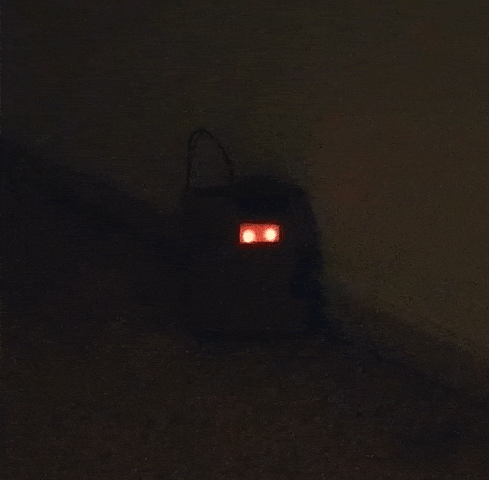
Want to make a small creature with glowing red eyes hiding in the shadows, watching you?
This is a classic Halloween project and the micro:bit makes it easy - you can build it in under an hour. You can just see the holder and wire in the gif, but if you hide this right, people will only see the spooky eyes!
Supplies
Here's what you need:
- micro:bit and battery pack
- White paper
- Pen or pencil
- Scissors
- Hot glue gun
- Cardboard
- Tape
- Hobby knife
Coding
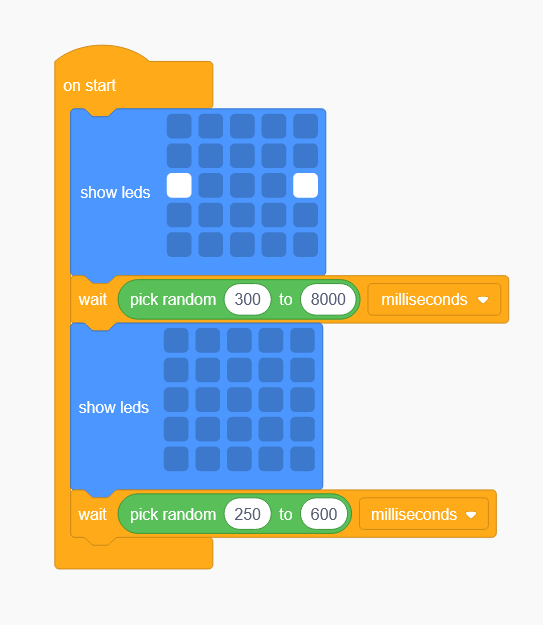
The code is easy! The LEDs on the micro:bit simulate a pair of spooky eyes in the dark. To make them more interesting, I've made them blink randomly.
Take a look at the picture. Here's how the code works:
- Light up two LEDs on the micro:bit.
- Pick a random number of milliseconds to wait (this keeps the eyes "open").
- The LEDs are turned off.
- Then pick another random number of milliseconds to wait (this keeps the eyes "closed").
The code runs in a Forever block, so it will do this over and over. You can experiment with the length of the random numbers to make the eyes blink faster or slower. I've found that a longer time with the eyes open, followed by a shorter blink, works well.
Go to Tinkercad's Circuit Simulator and duplicate the code blocks, then load it onto your micro:bit. This is quick!
Cut the Paper and Mark the LEDs

At this point you could just set up the micro:bit in a dark place, but the bare LEDs don't look that good. We're going to use some hot glue to make "eyeballs" that will diffuse the light coming from the LEDs.
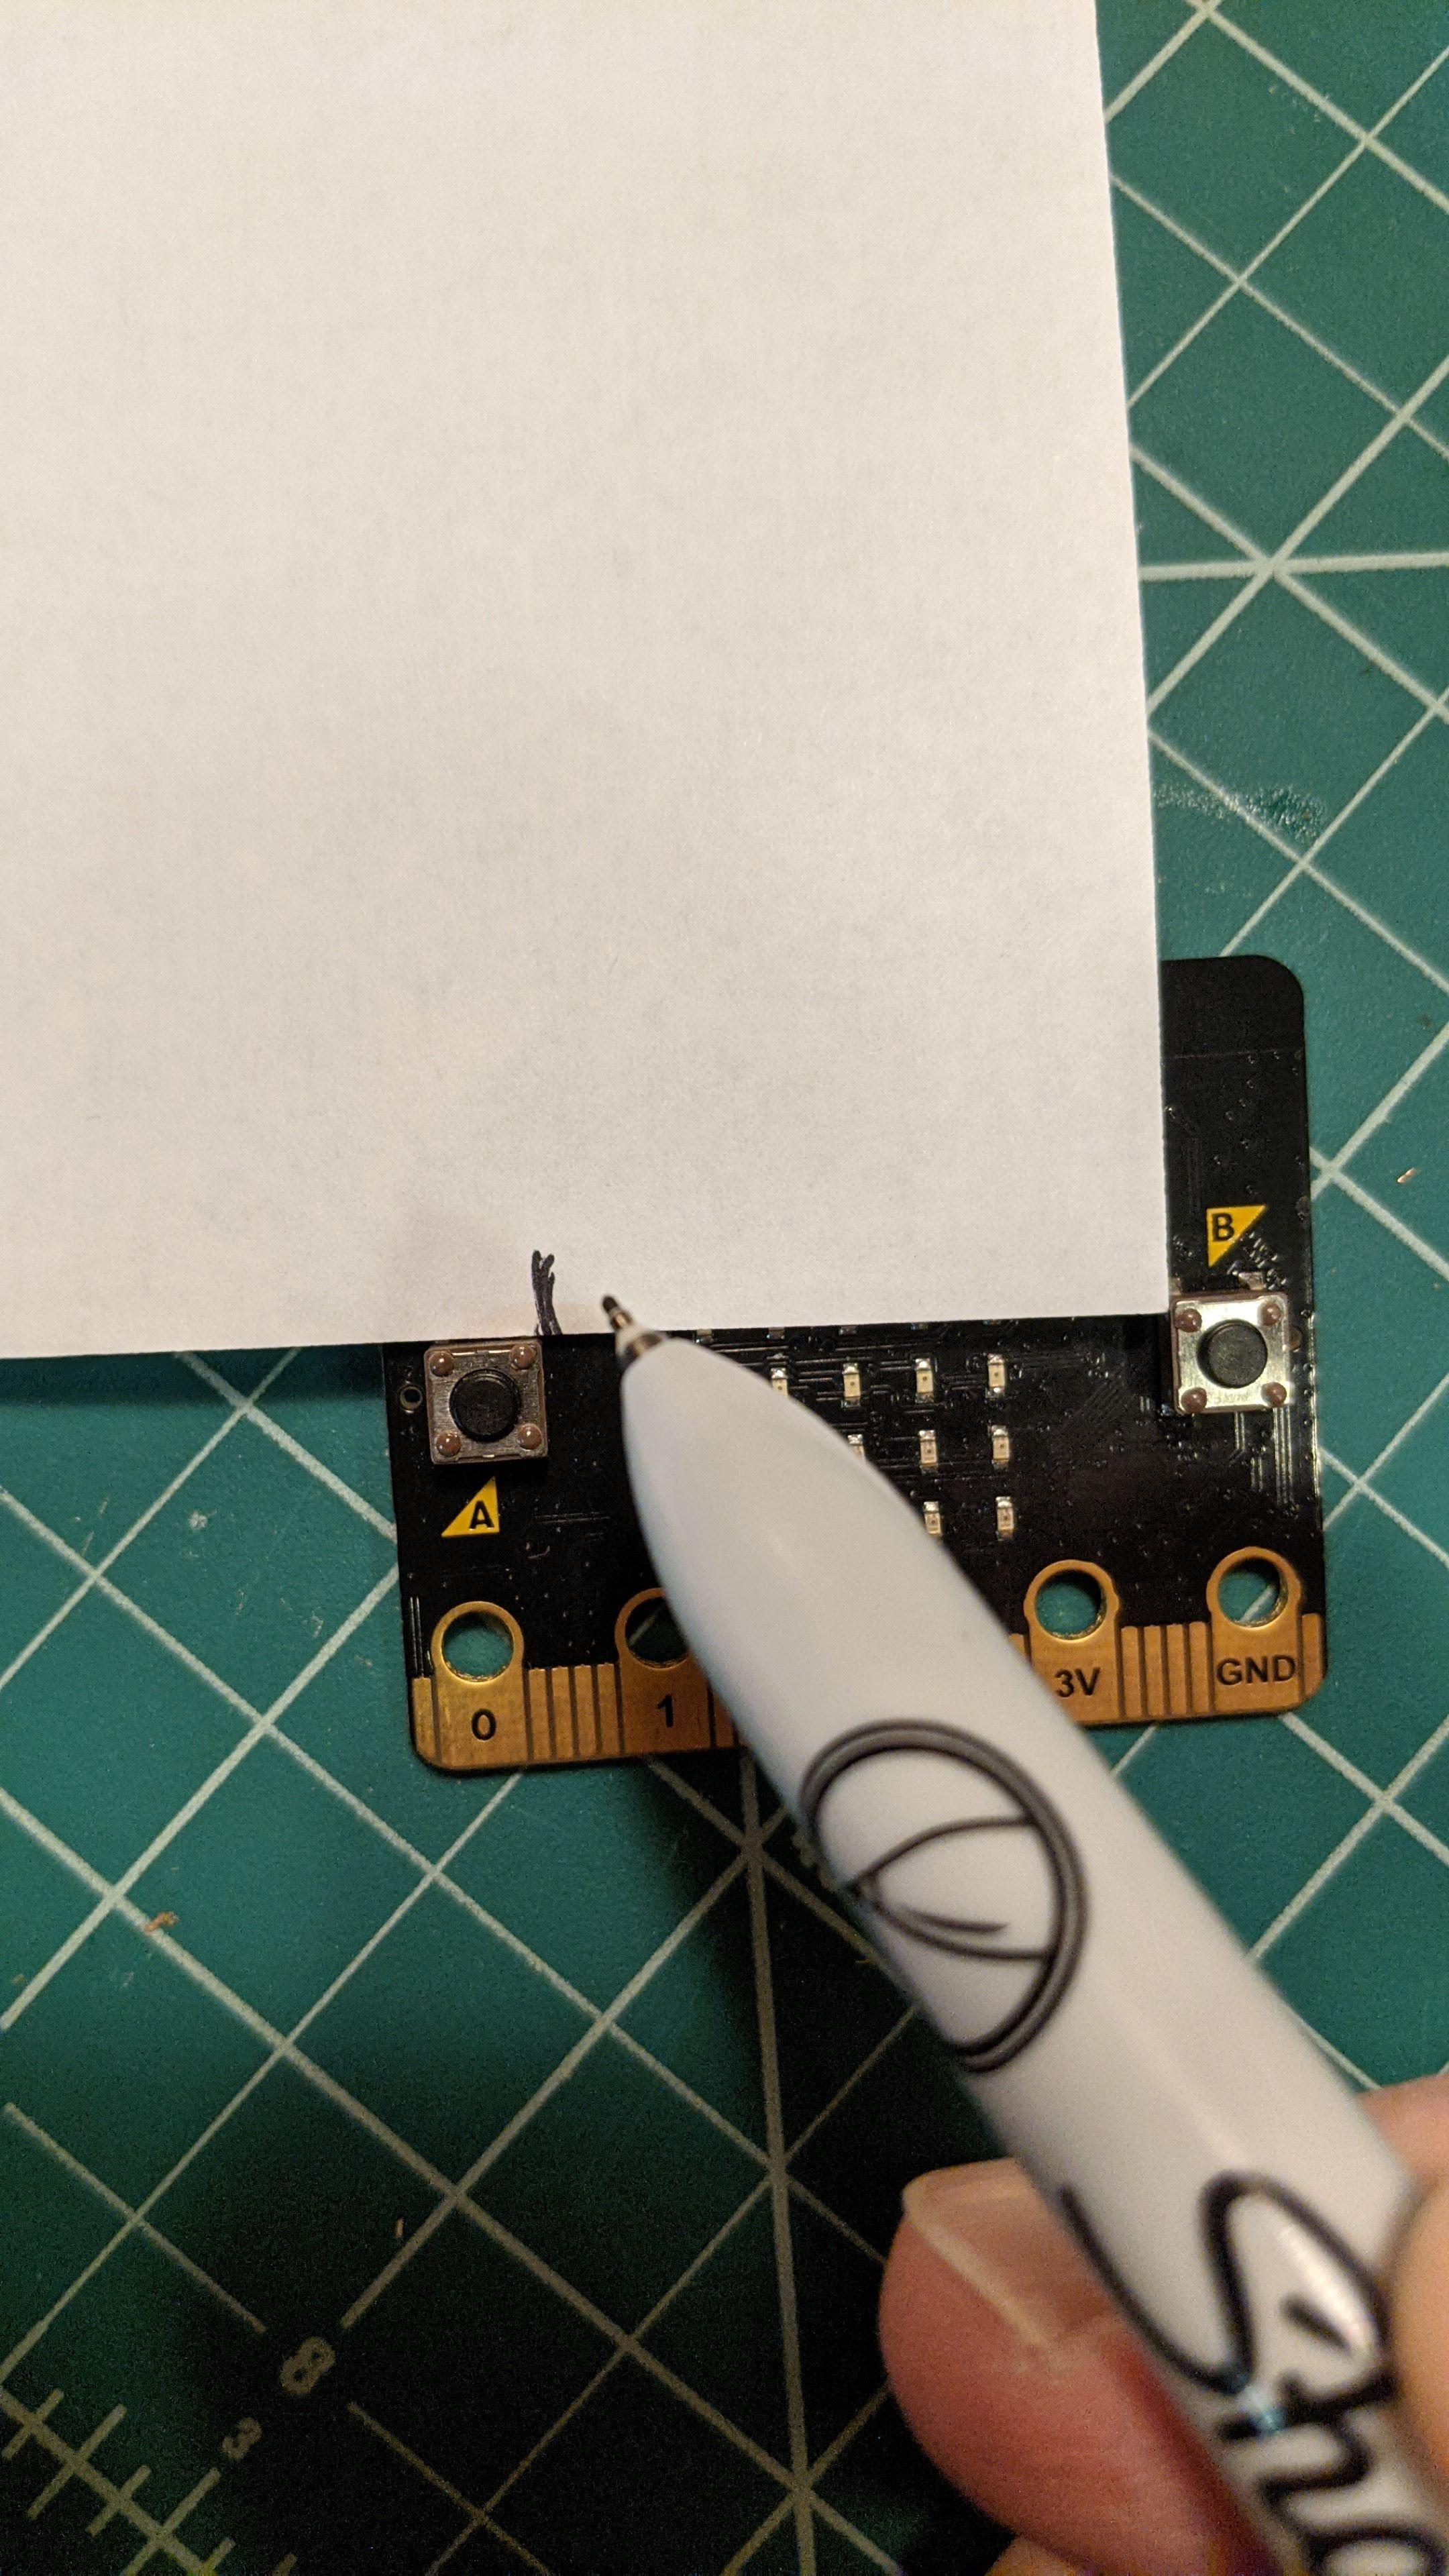
Let's cut a small piece of paper so it will fit between the buttons. Use the pencil to mark how wide the piece needs to be, then cut it out and make a small rectangle of paper.
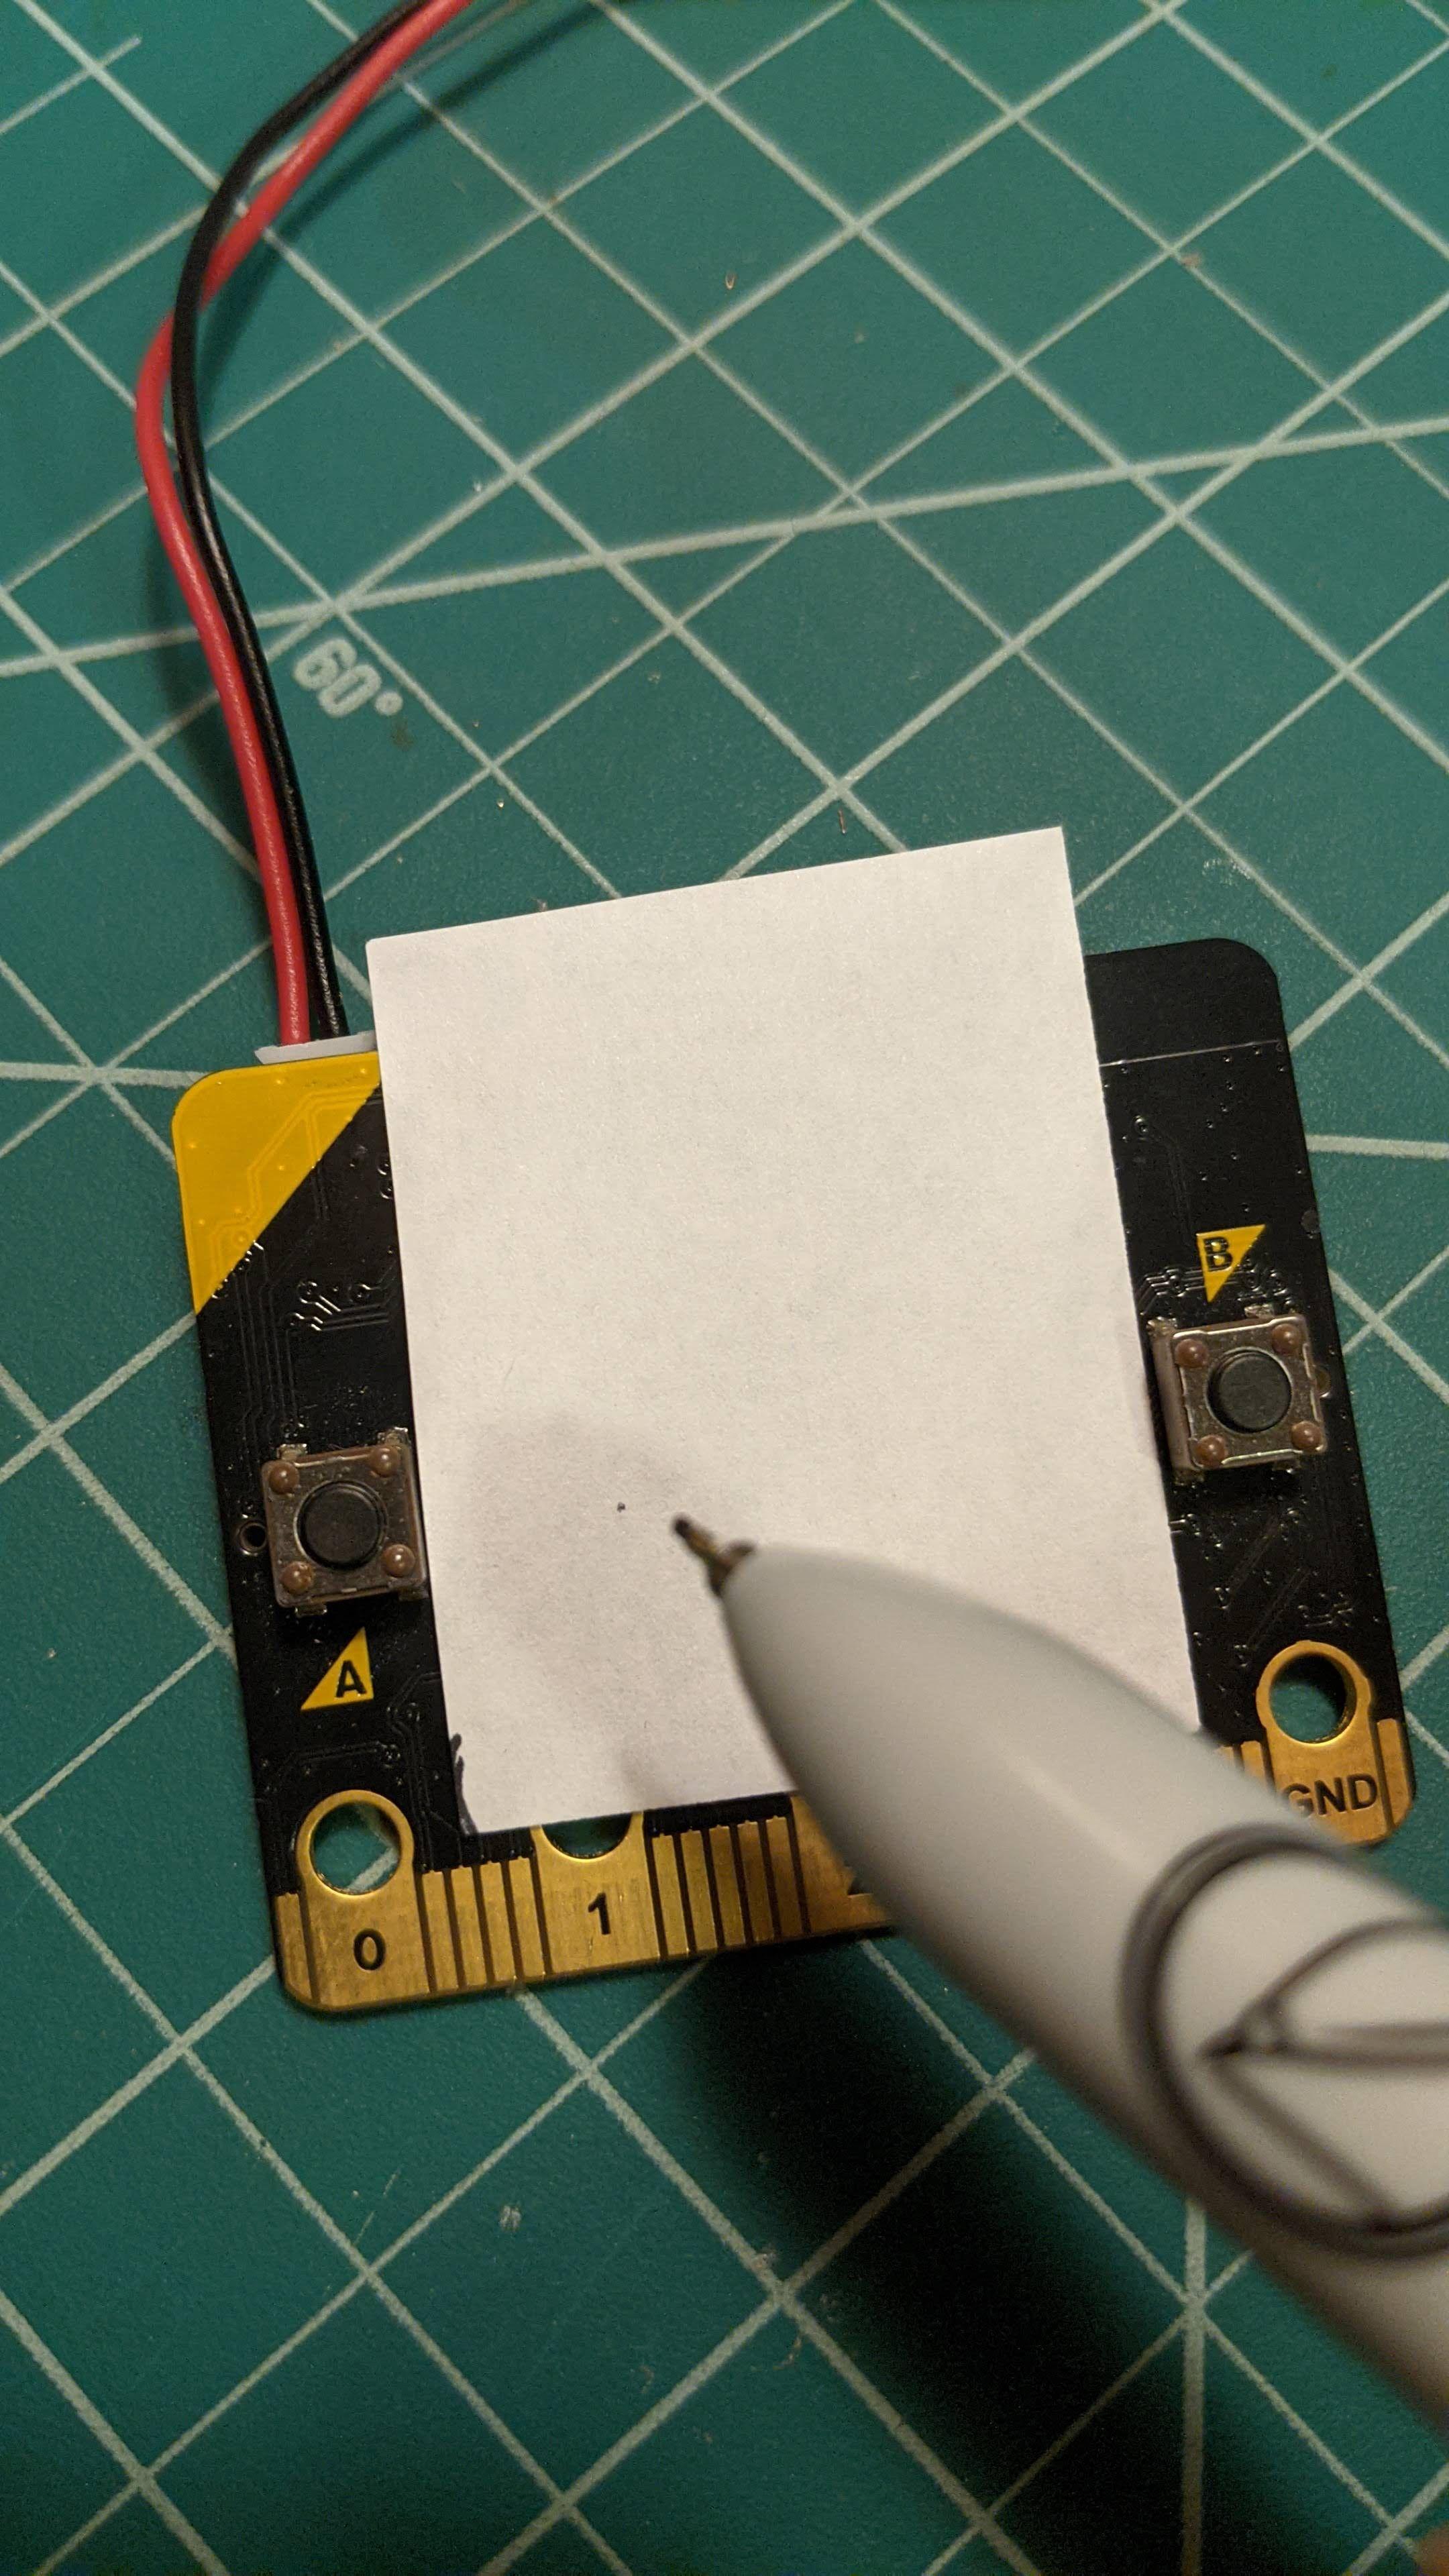
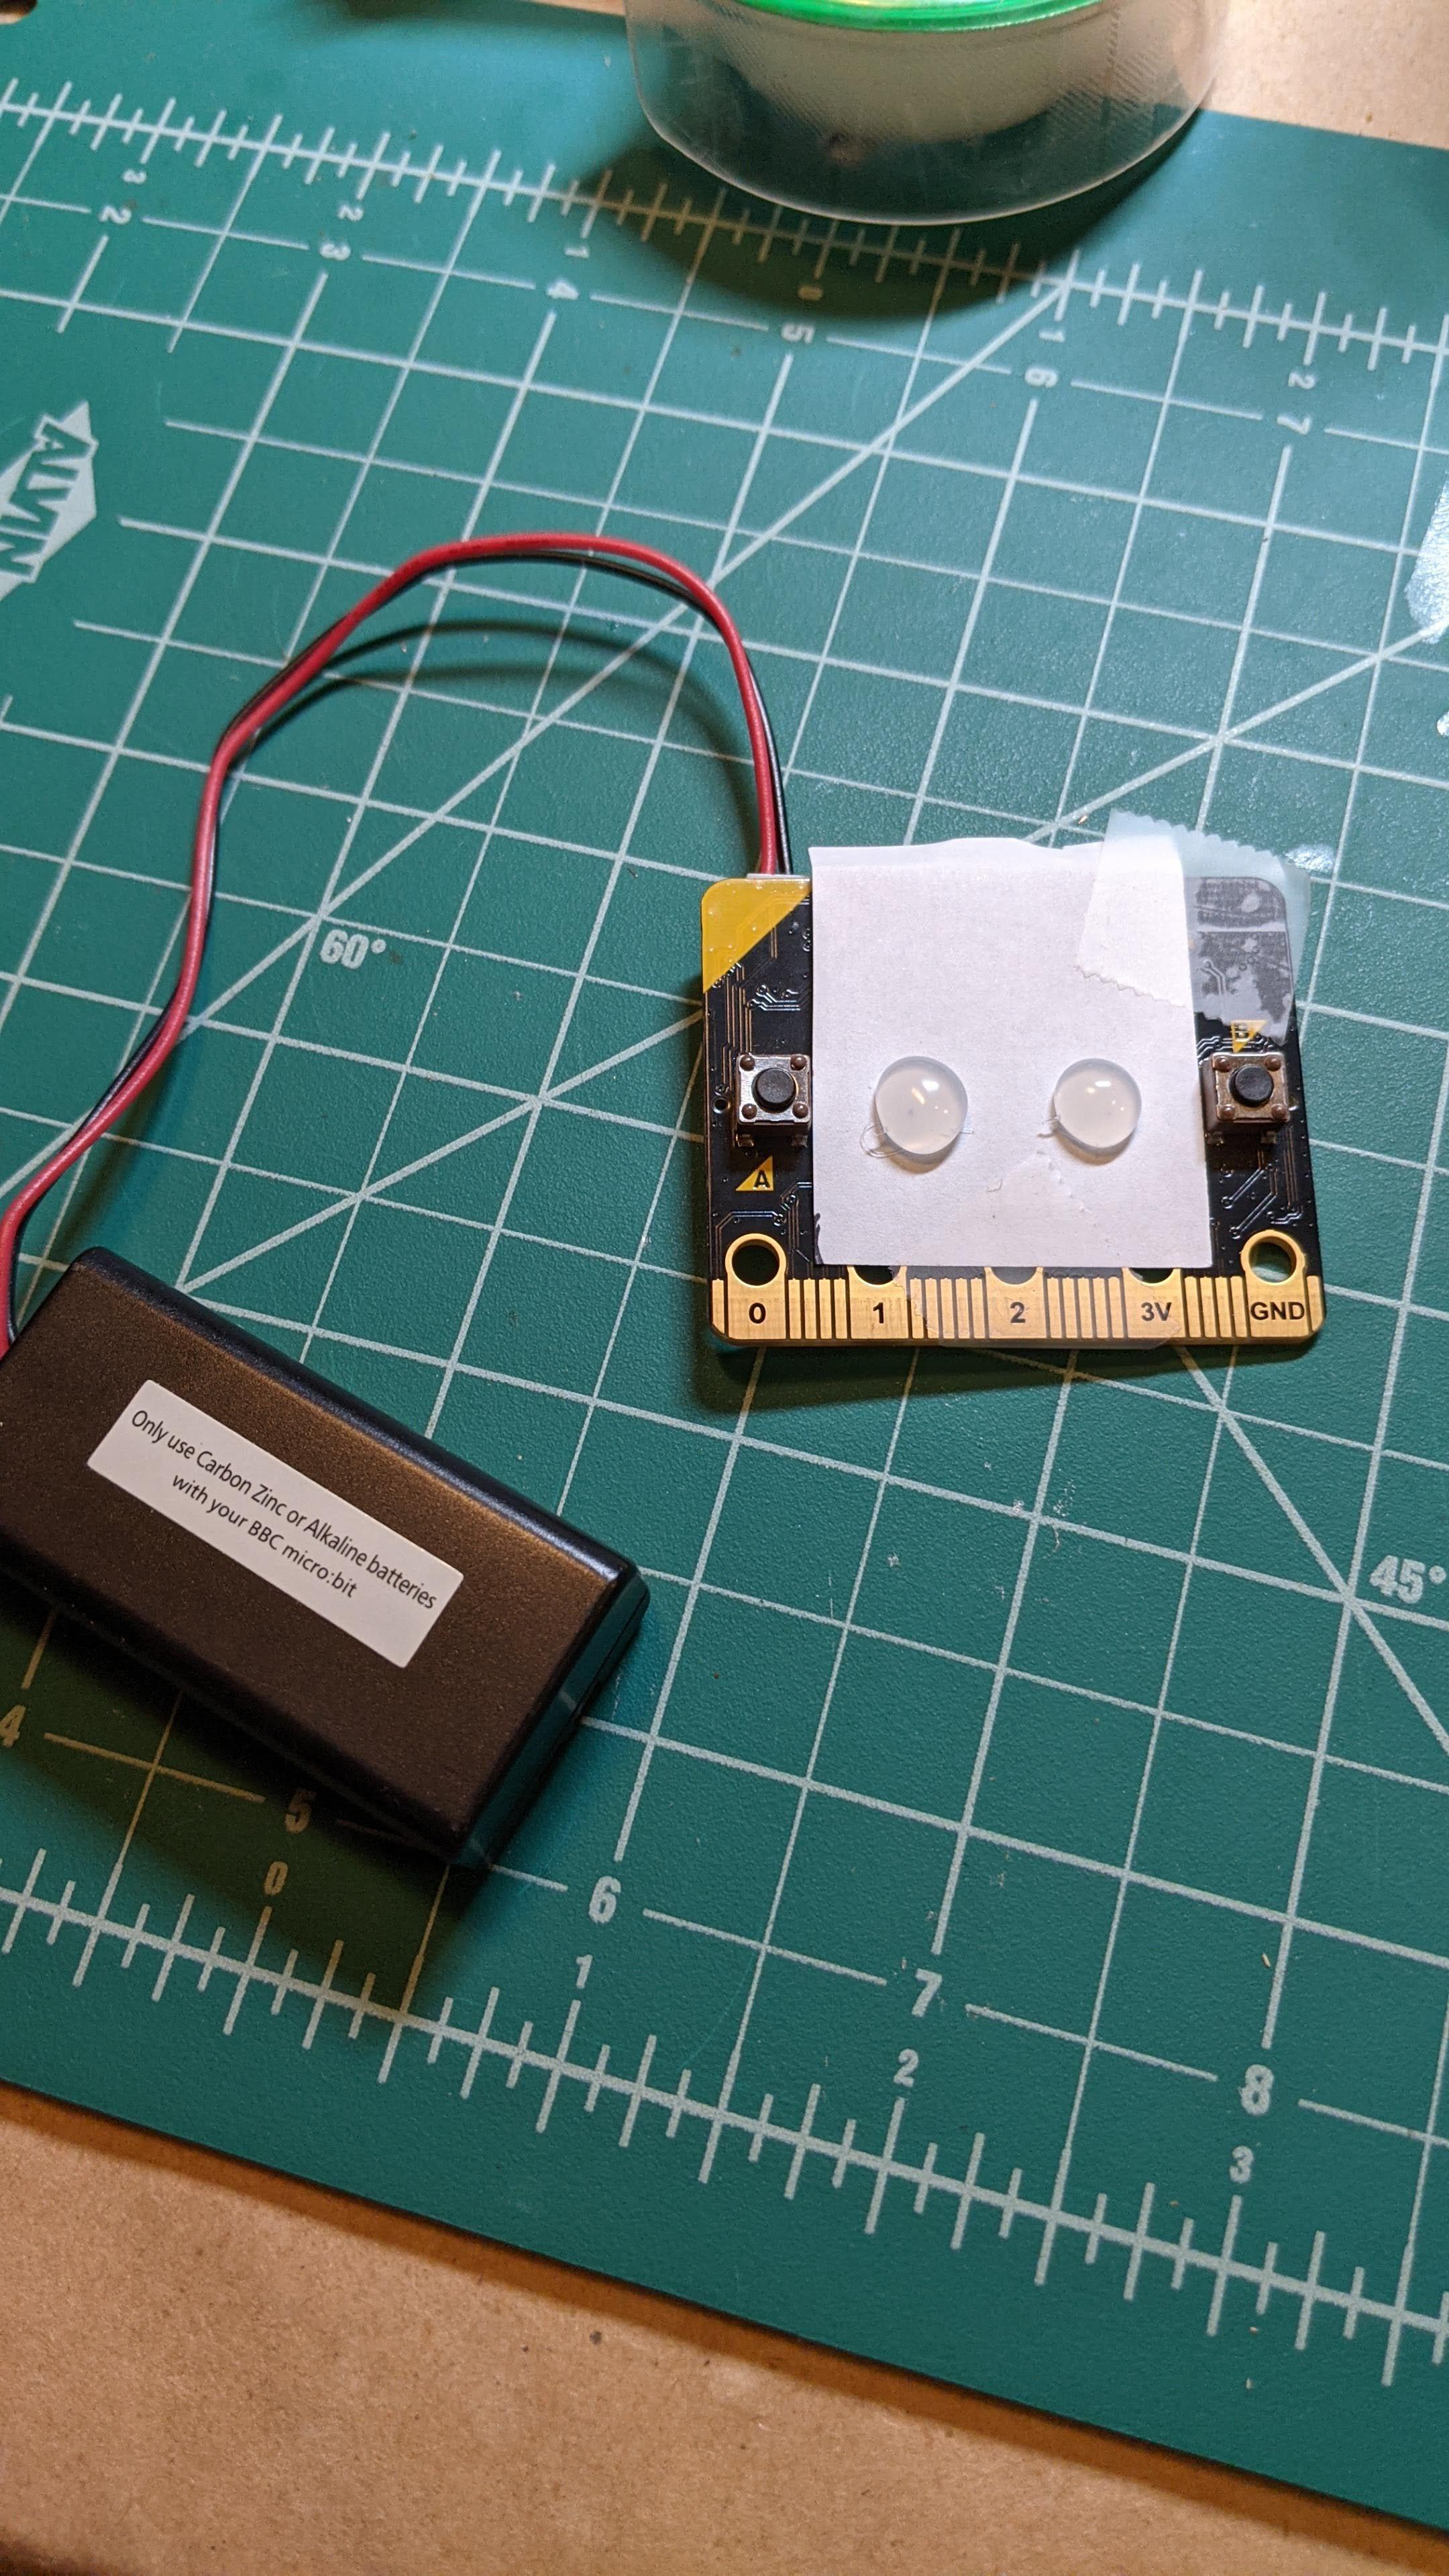
Plug the battery pack into the micro:bit. Put the paper over the LEDs and make a small dot over each of the "eyes" - this is where the hot glue will go!
Make the Eyes
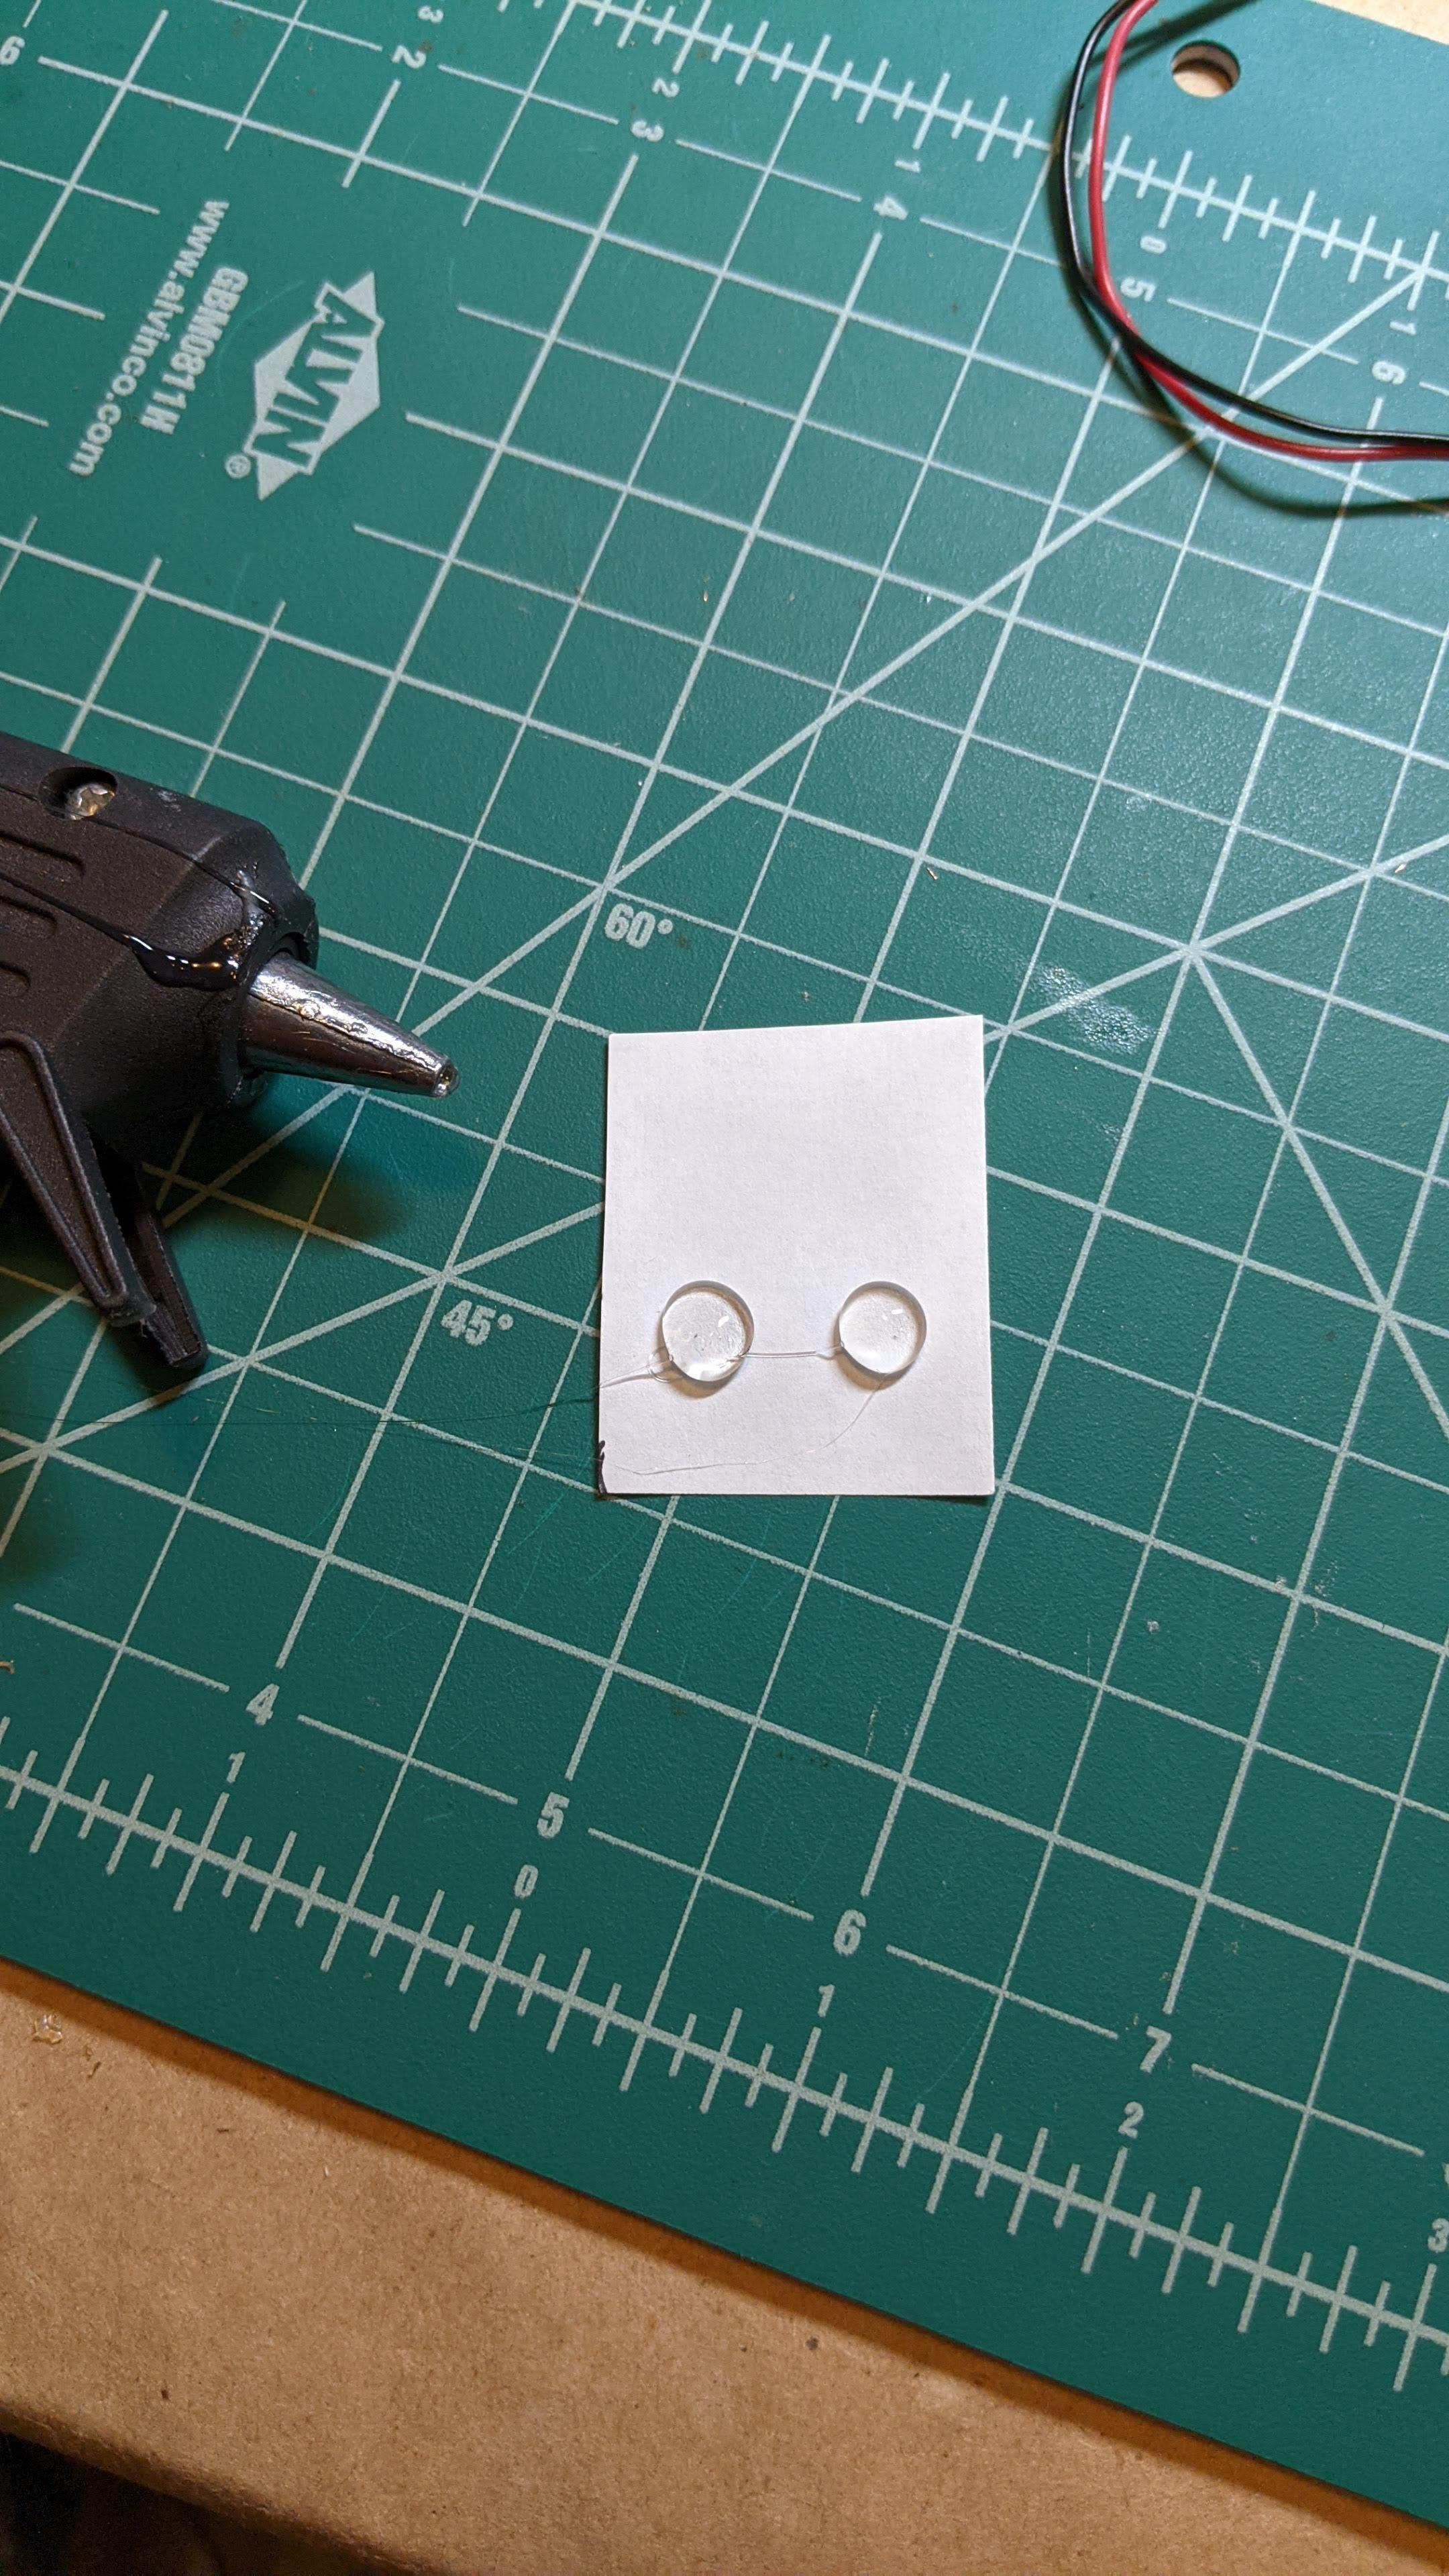
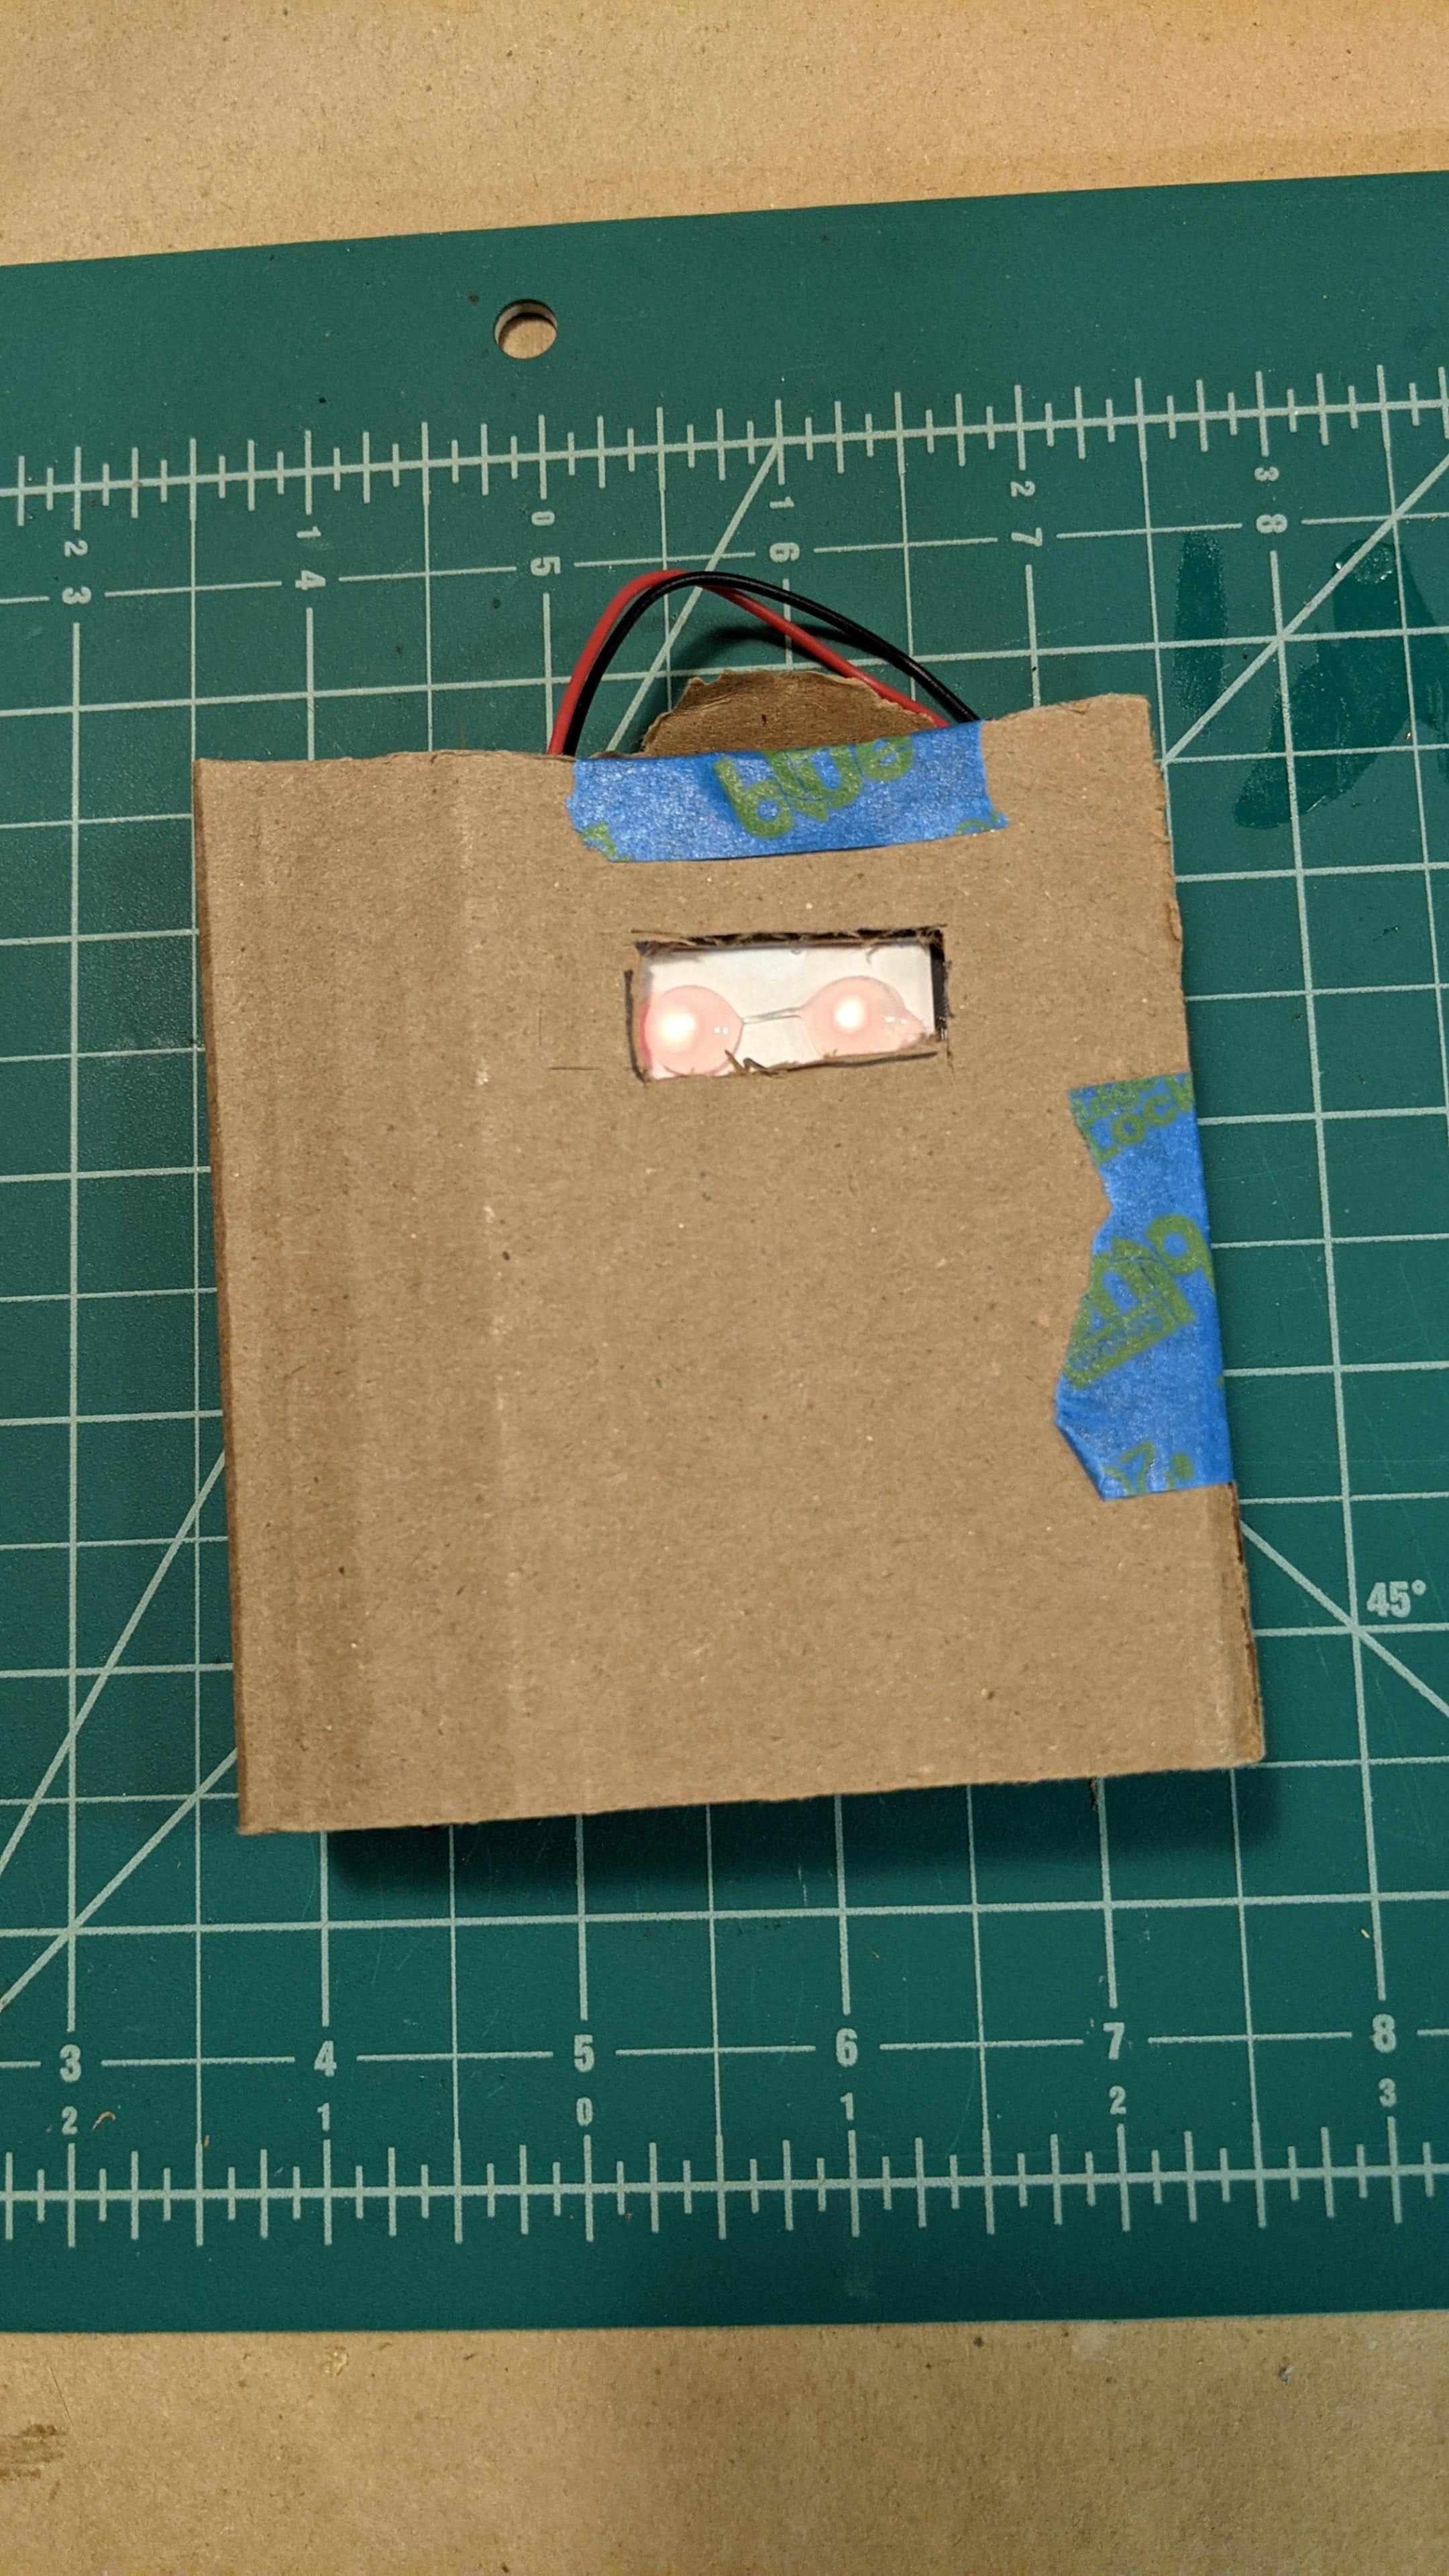
Take the paper off the micro:bit and use the hot glue gun to make a big round blob of hot glue over each dot. Now you have to wait! The blobs of hot glue can take several minutes to dry - don't touch them yet! As they cool they will go from clear to a milky white, which helps diffuse the light and makes the eyes look rounder.
Once they're dry, plug in the battery pack so you can see the eyes light up, and line up the eyeballs. Tape them over the LEDs.
Cardboard Holder
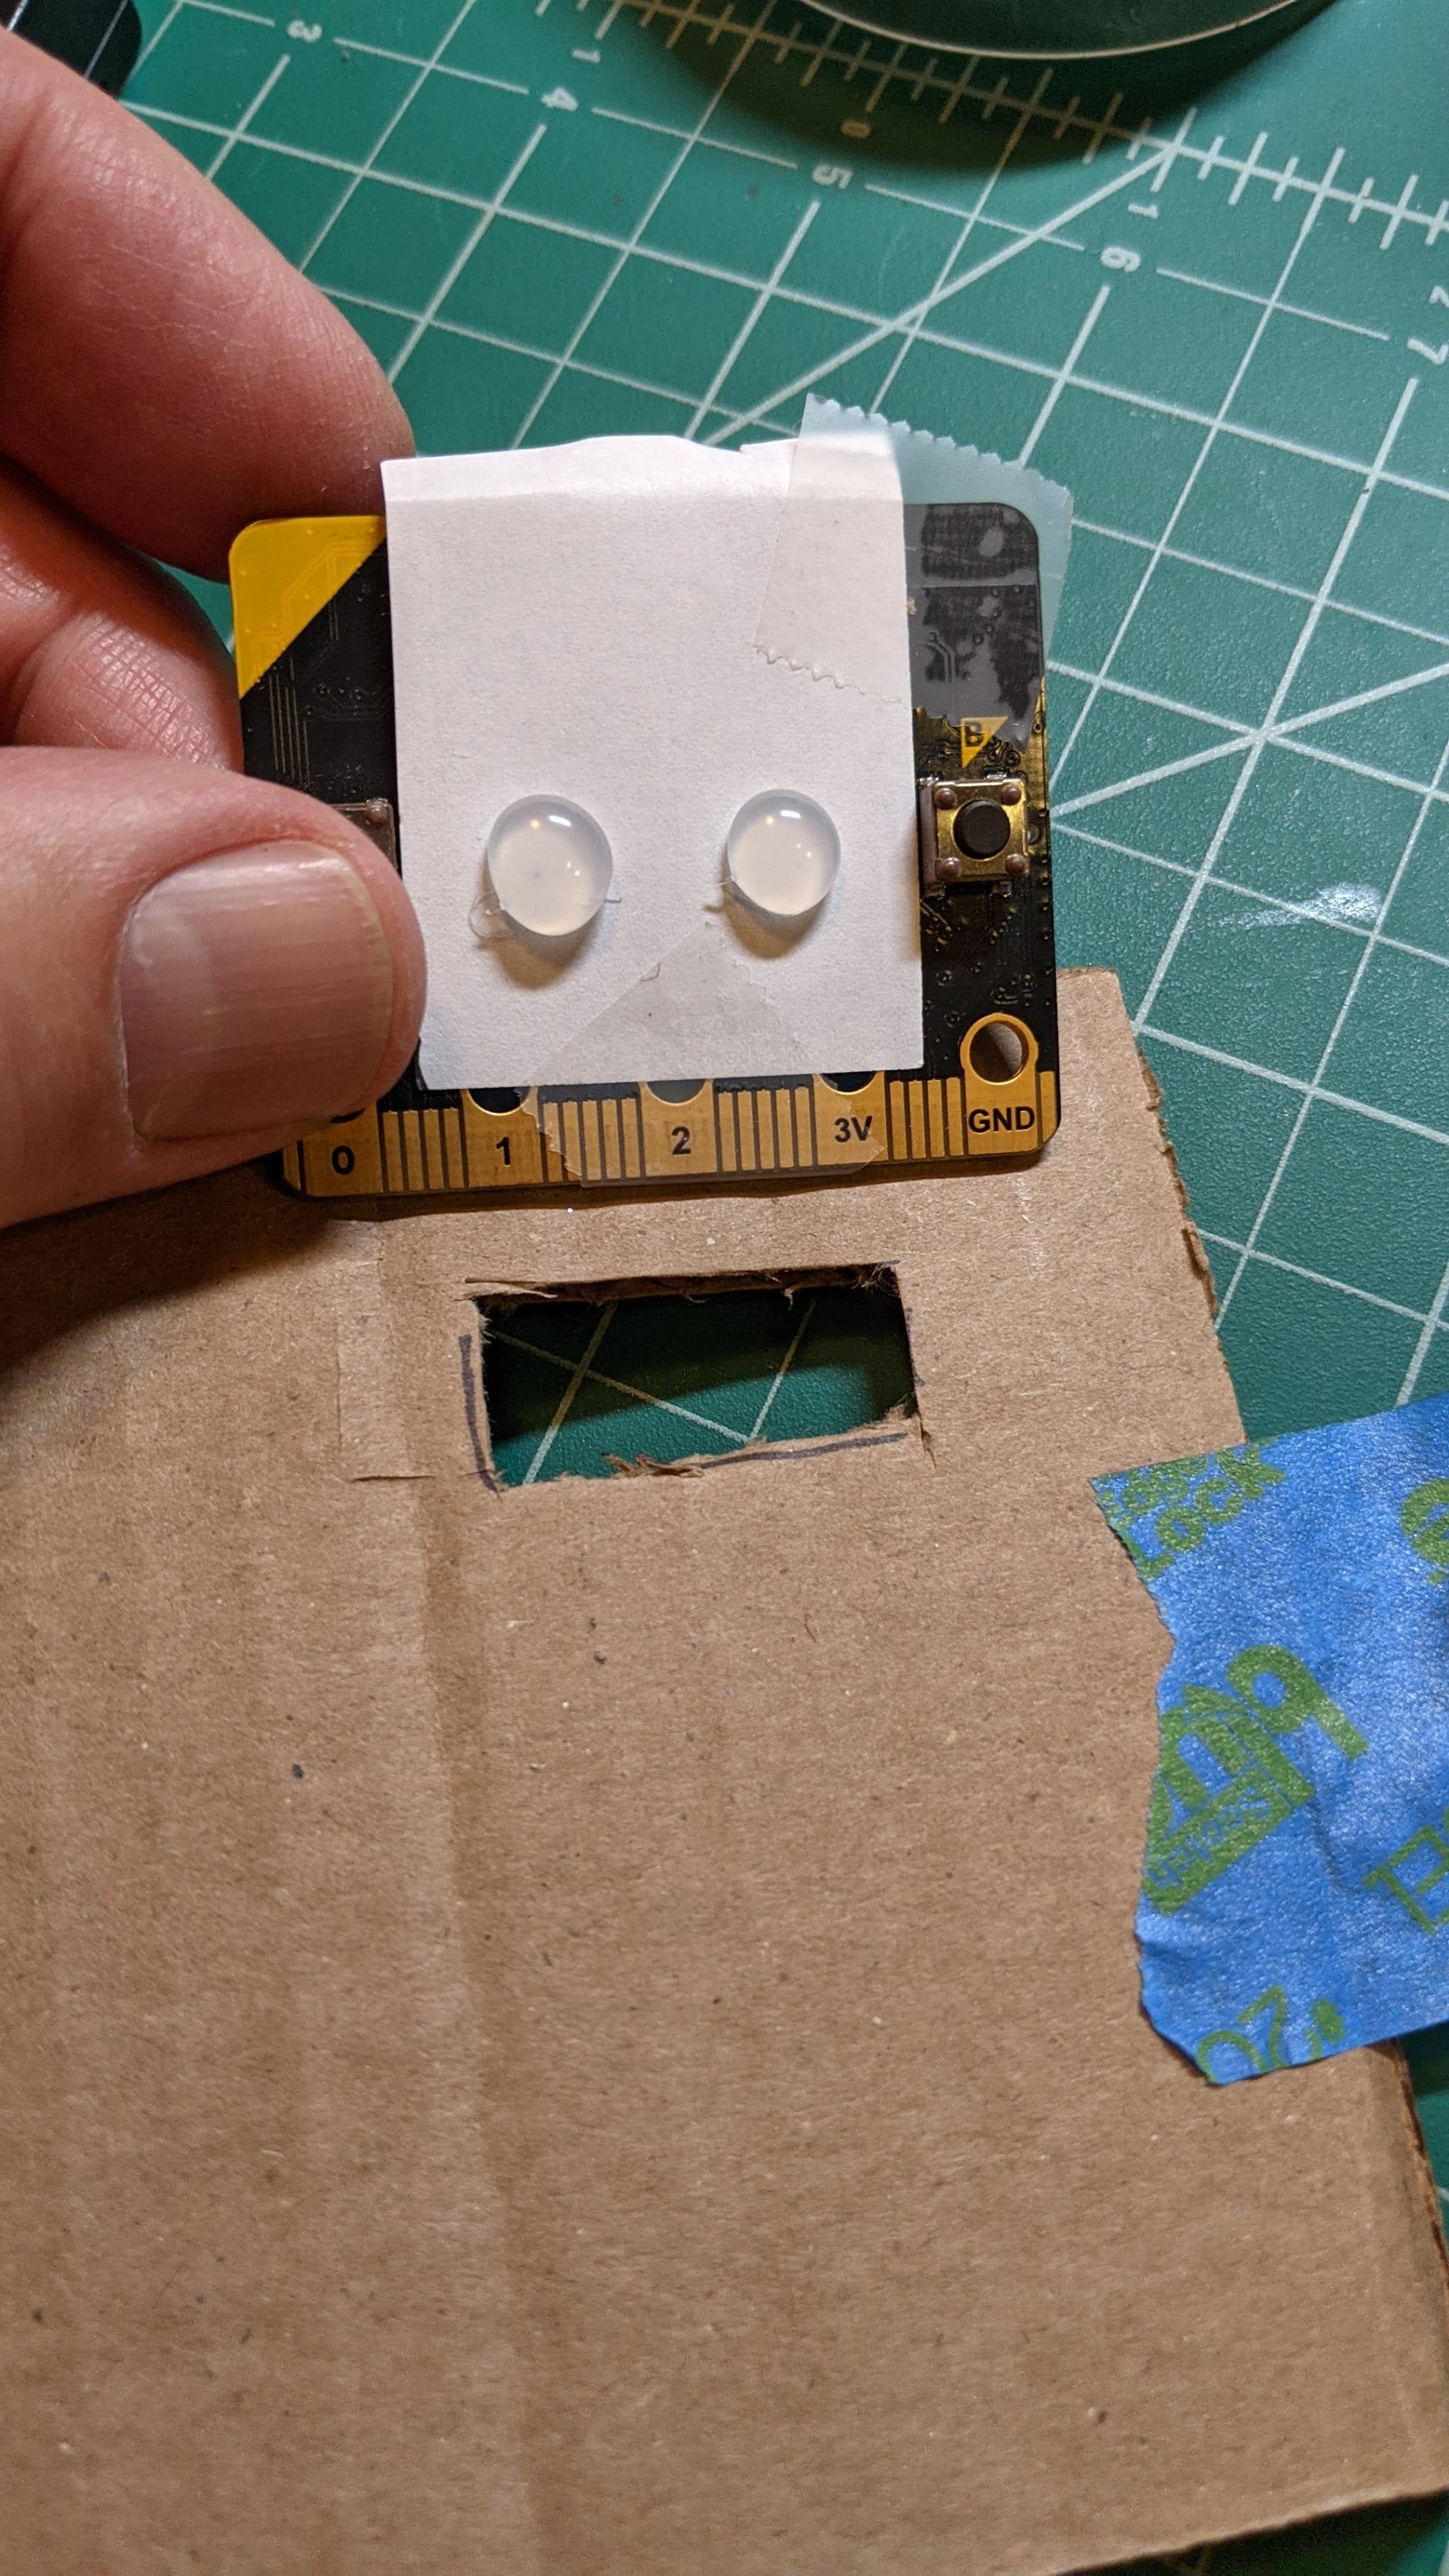
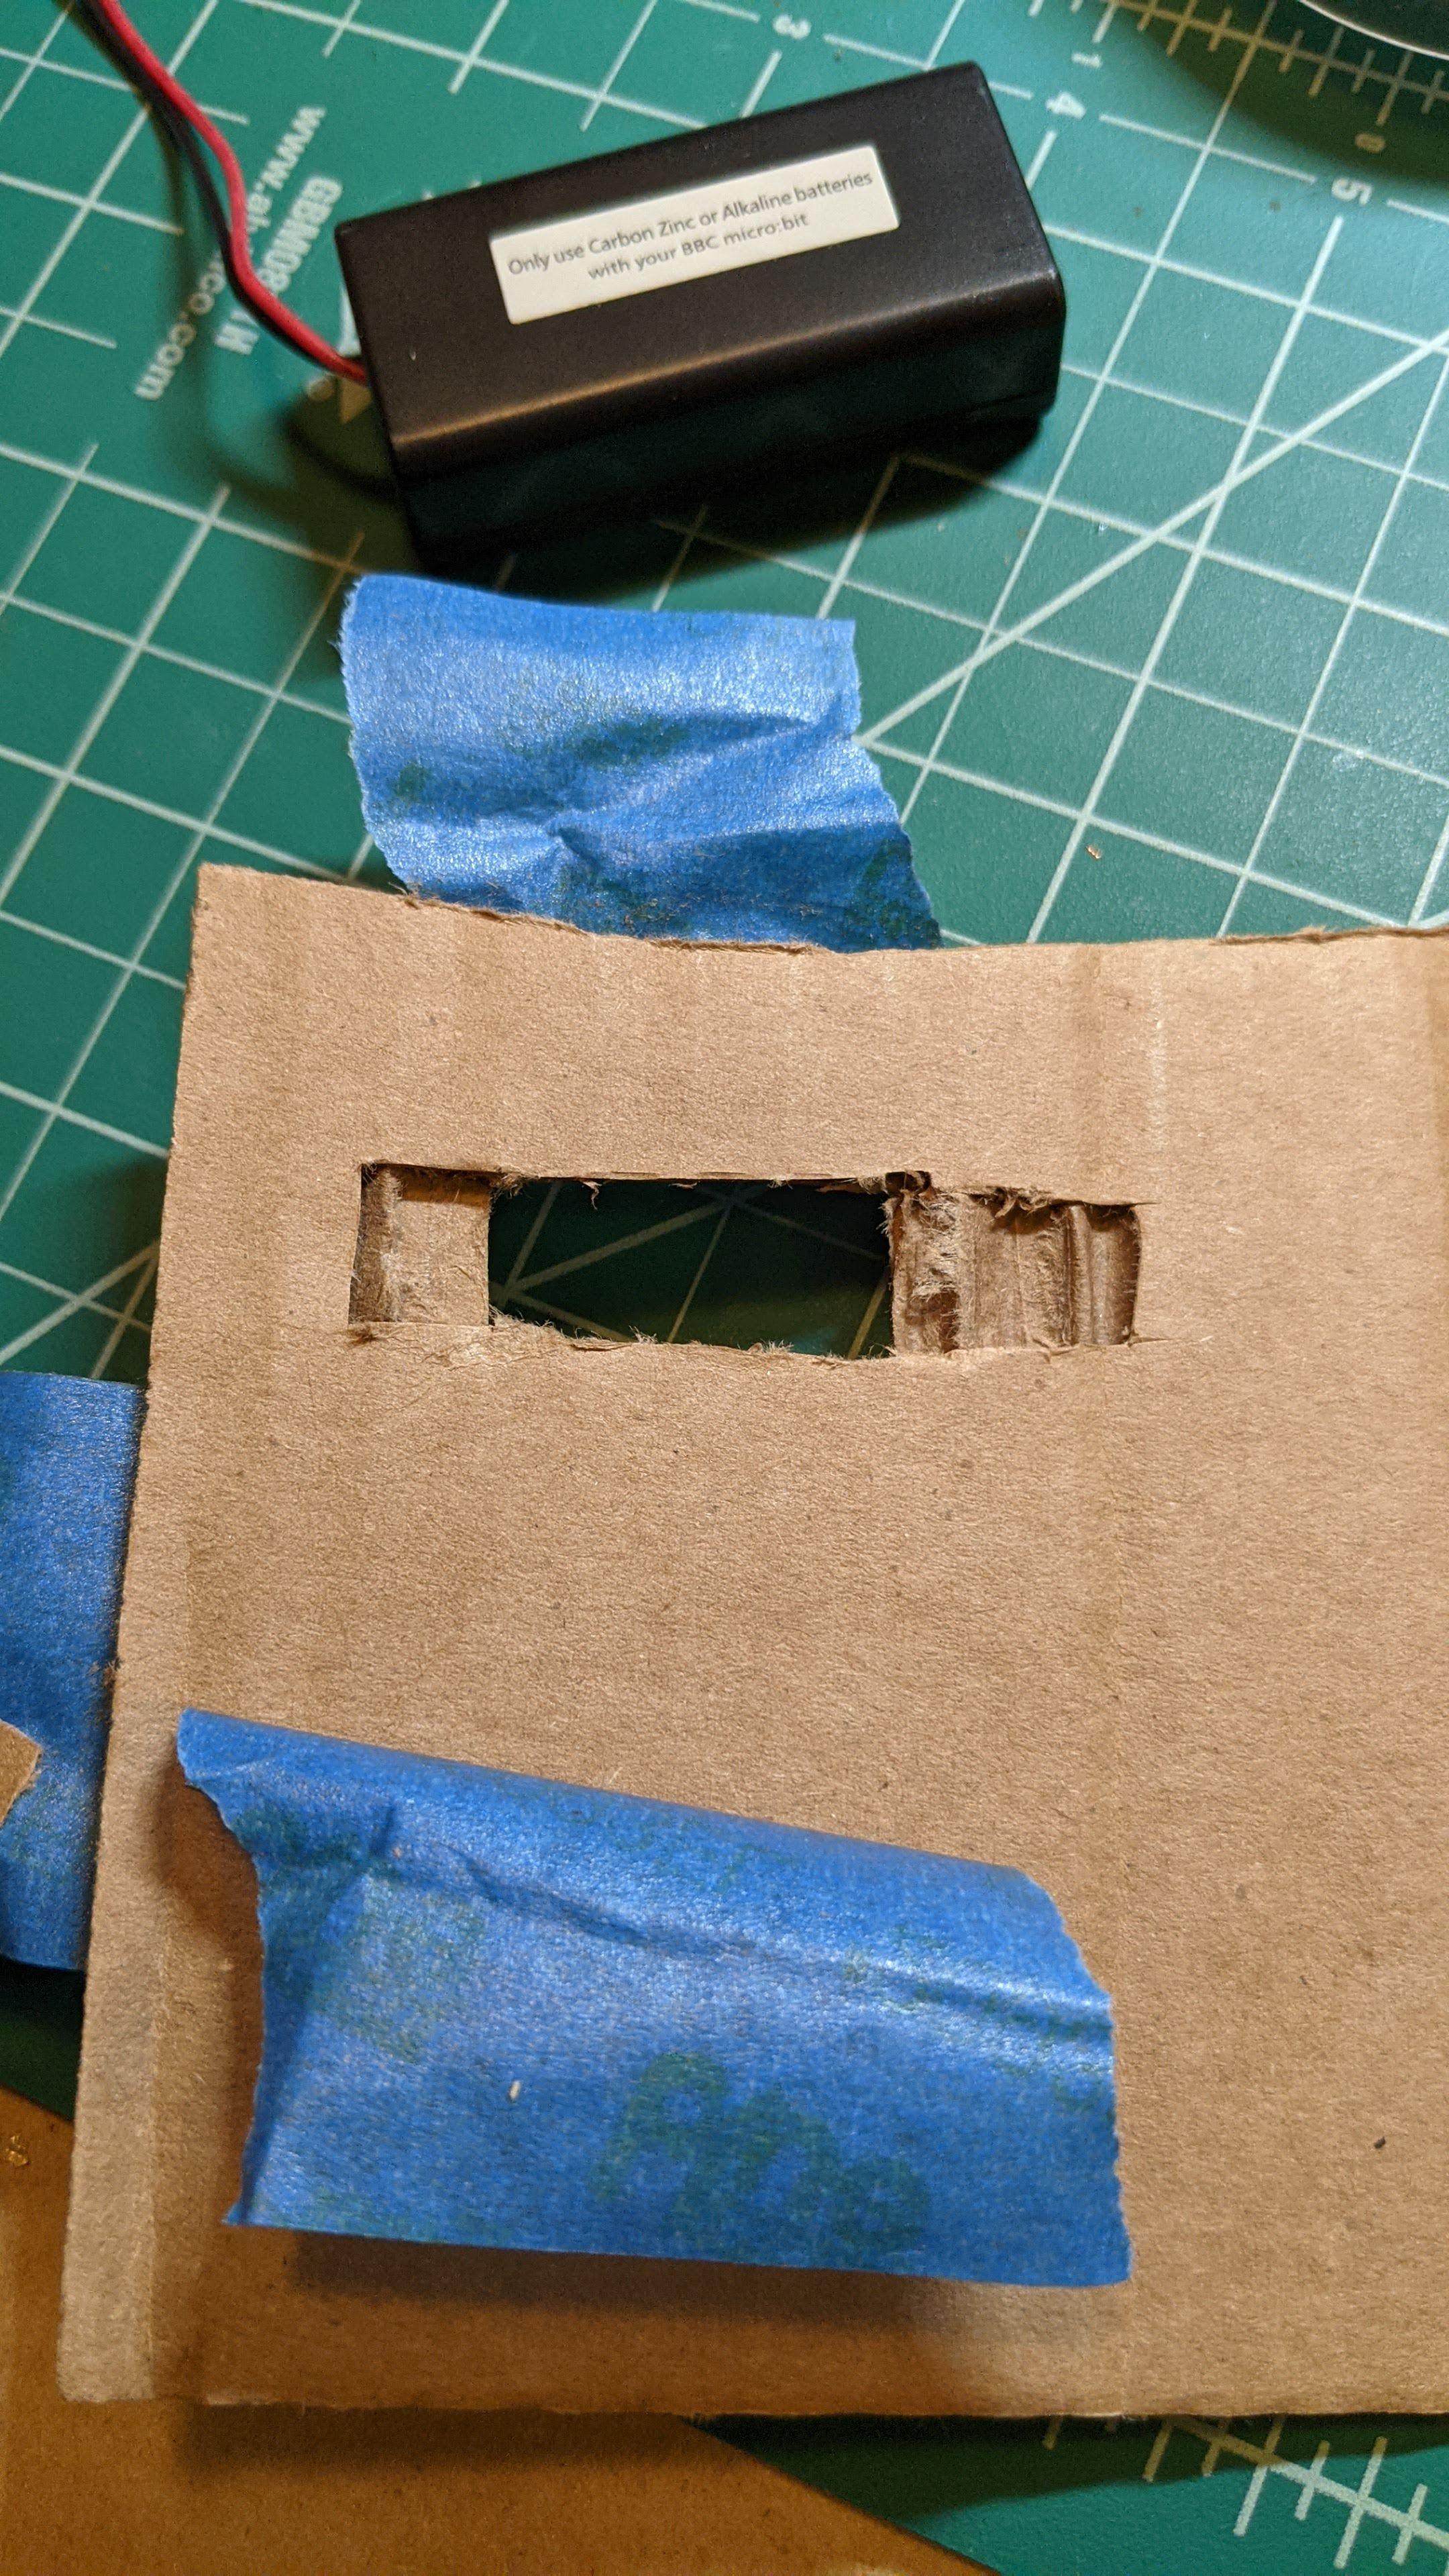
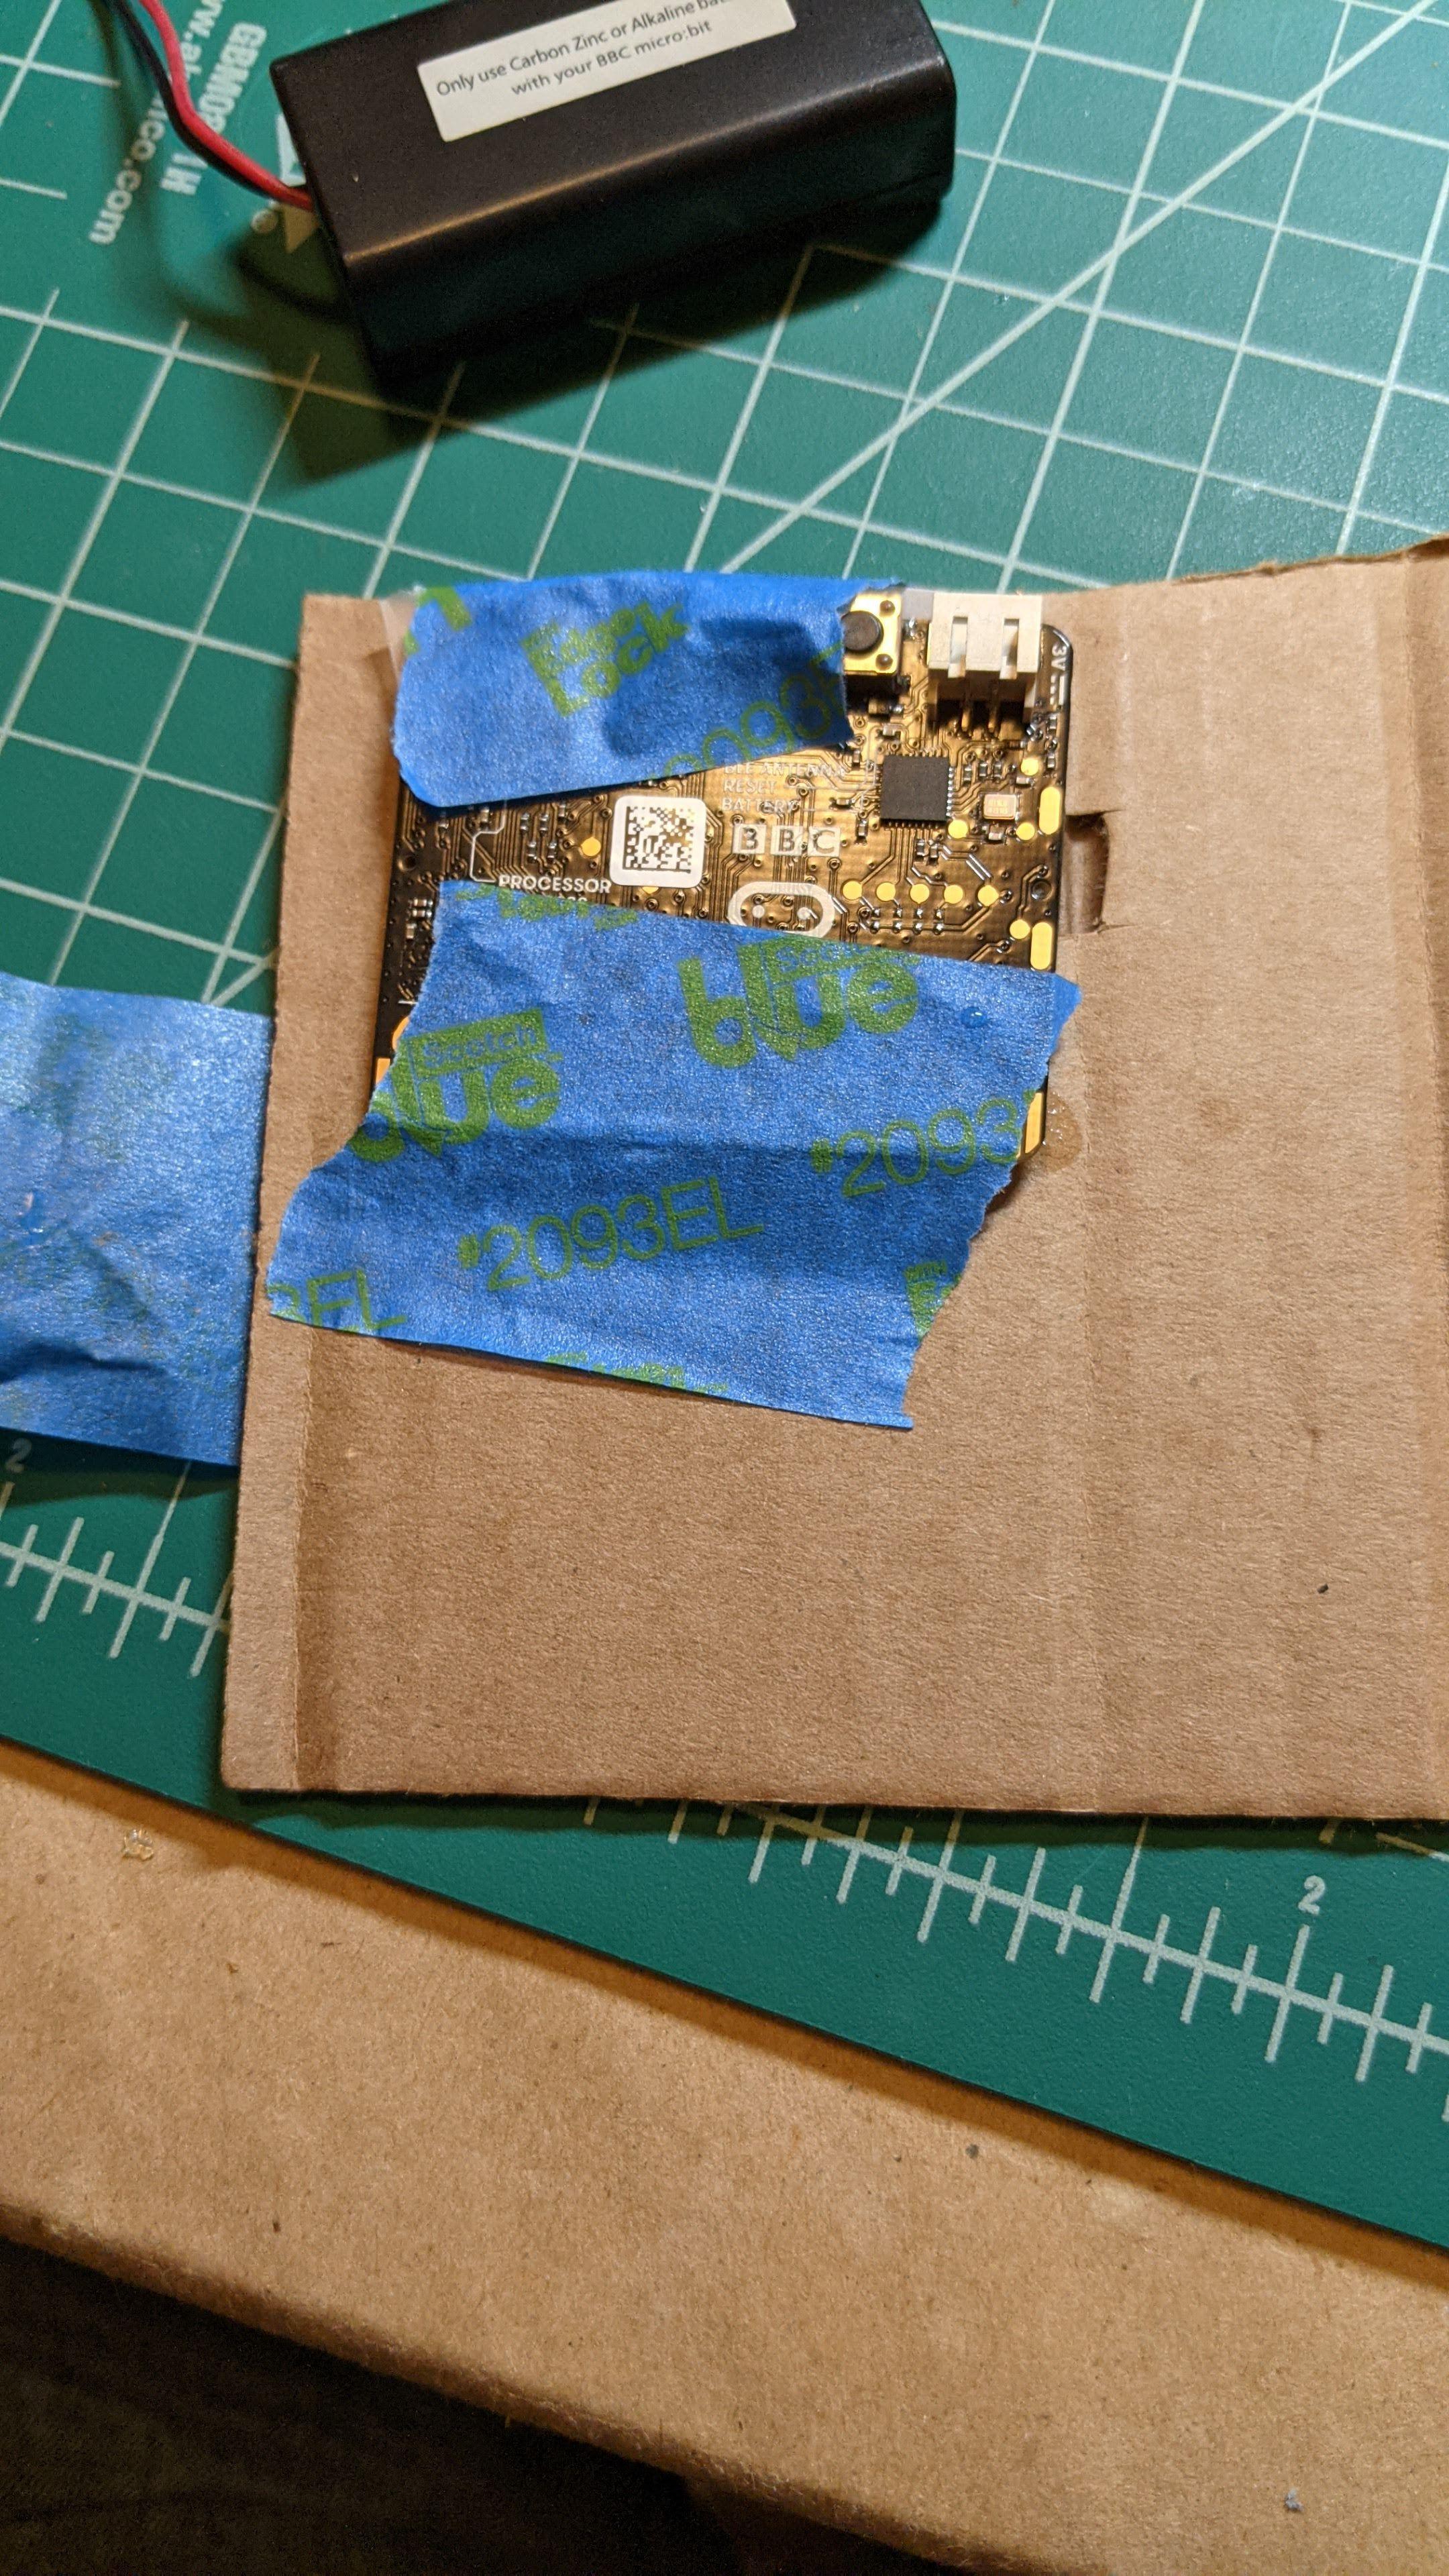
It makes it easier to set up and hide the eyes if they're in a holder. Get a piece of cardboard and cut a slot out that's big enough to let the eyes show through. This also hides the micro:bit and battery pack!
I found that the buttons kept the micro:bit from lying flat against the cardboard, so I cut out a layer of the cardboard to make room.
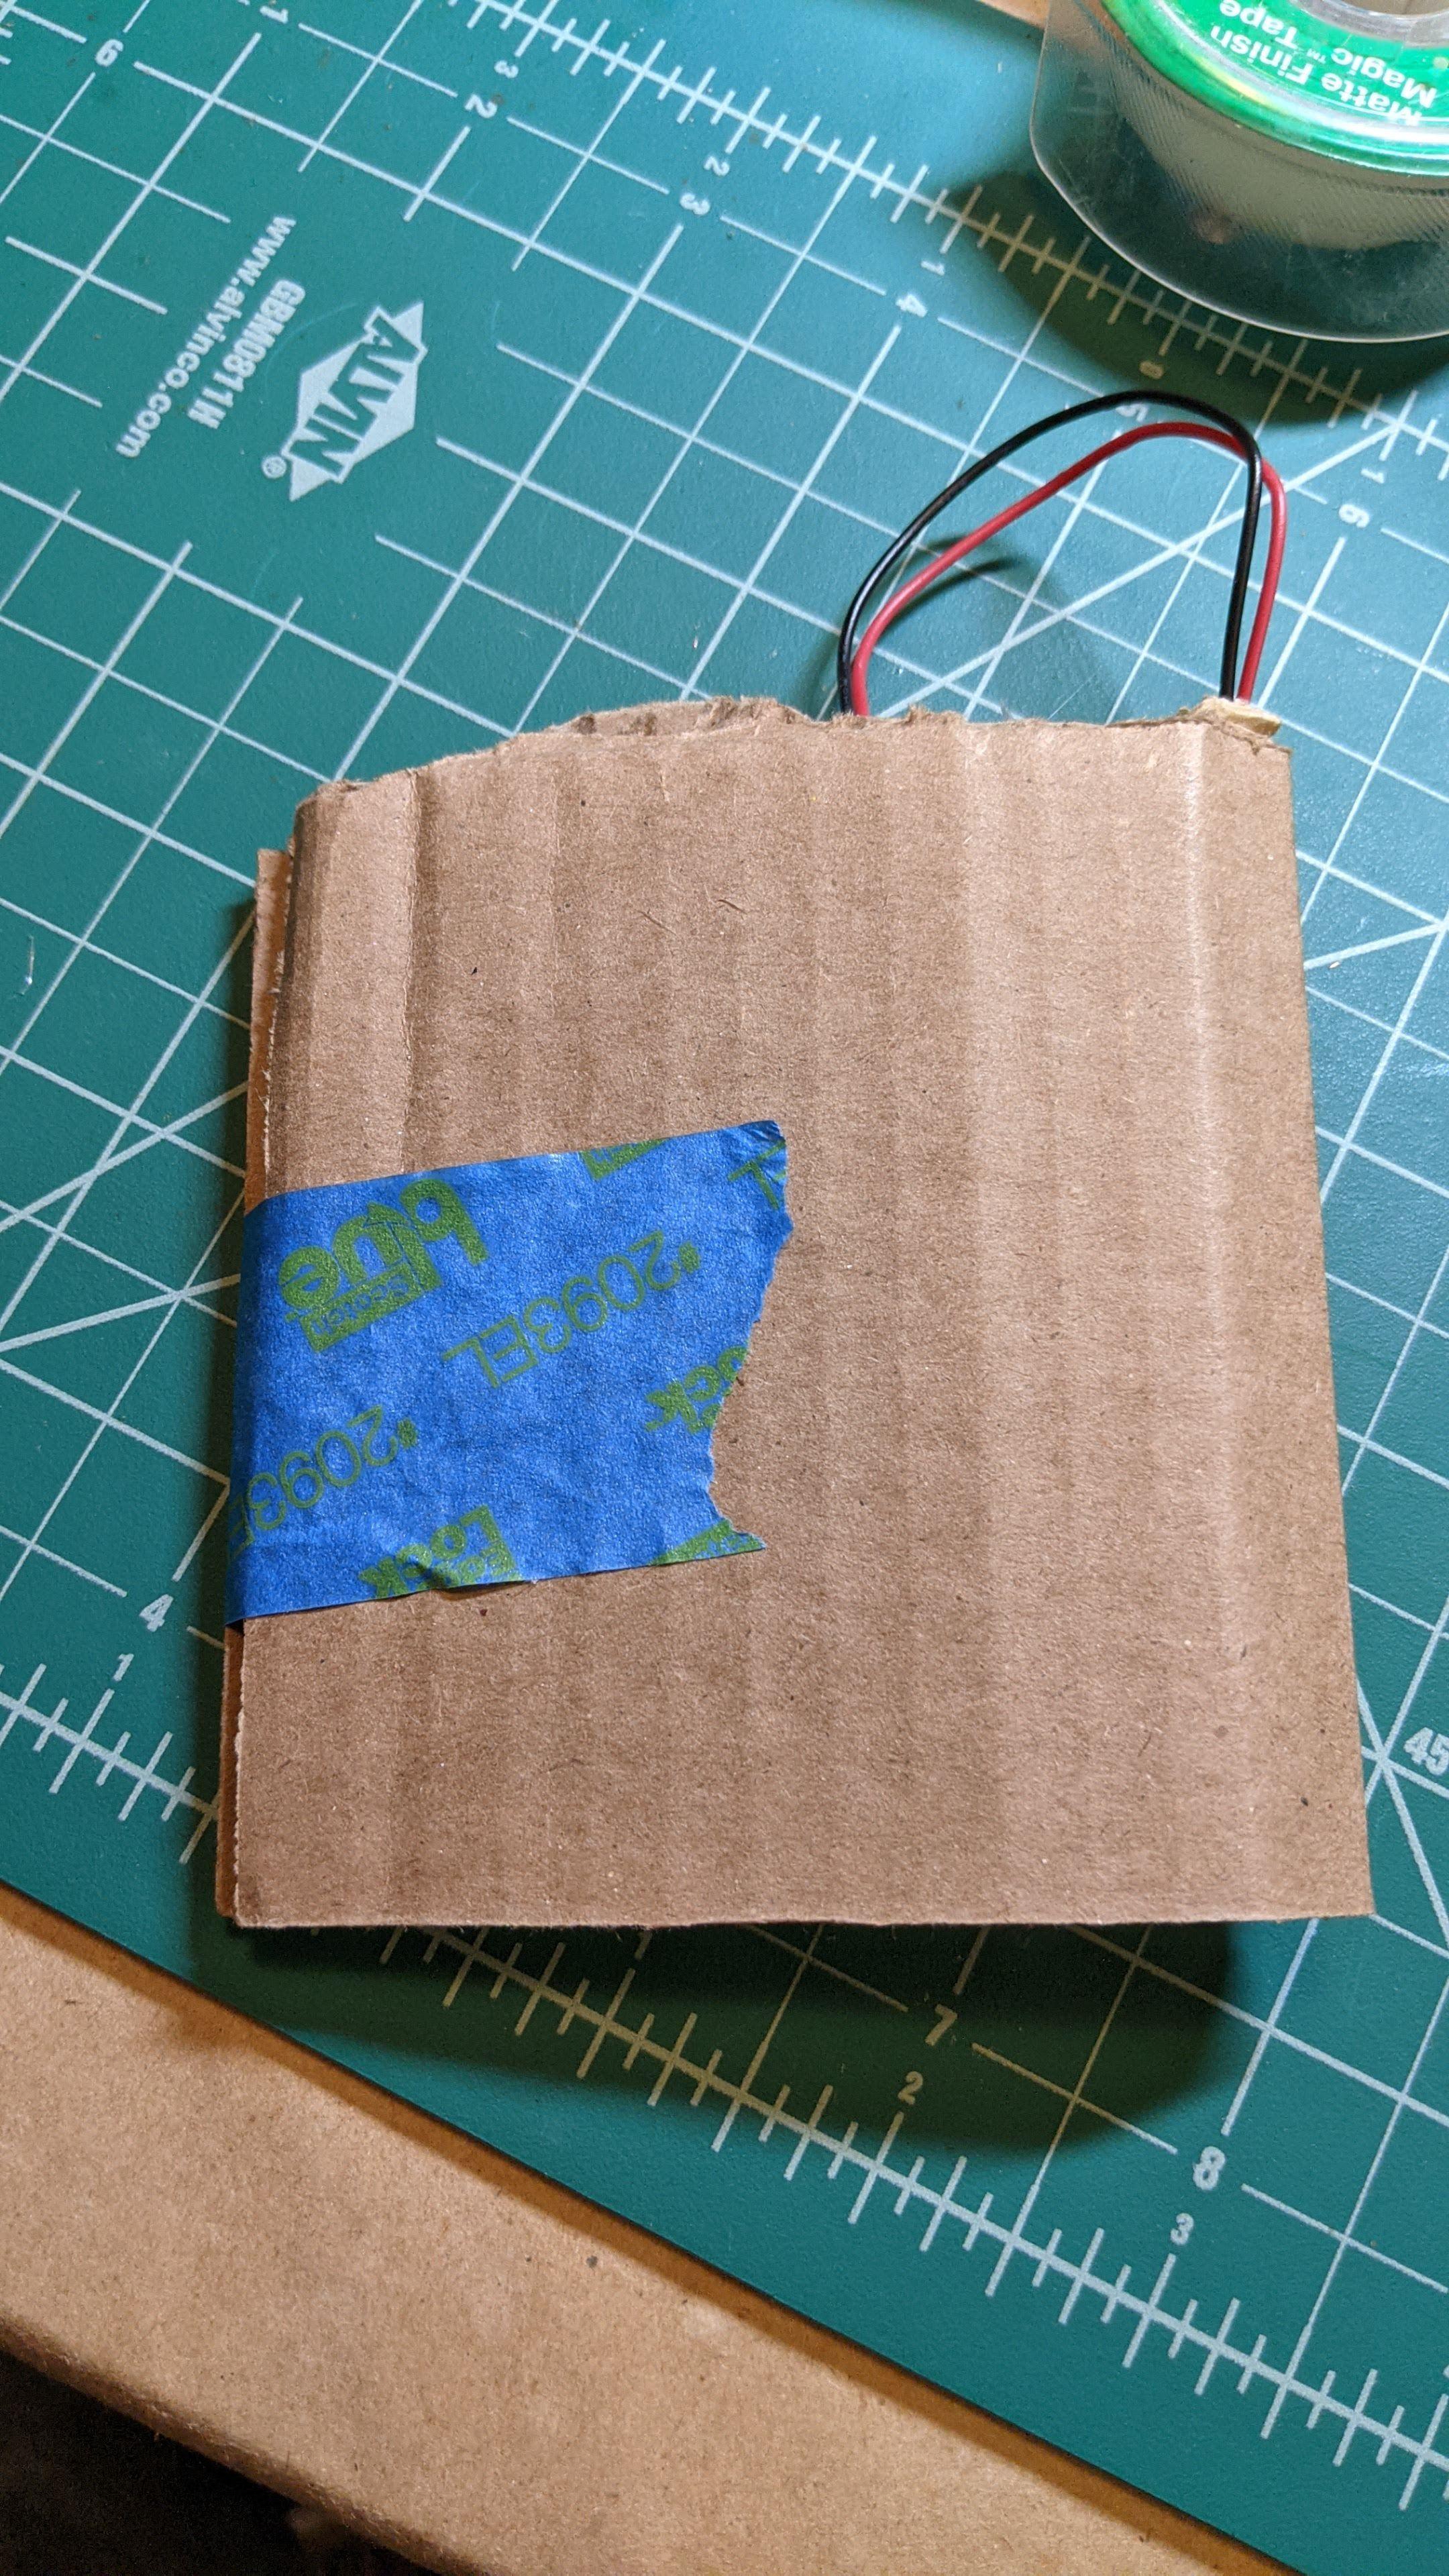
Then line up the eyes with the slot and tape the micro:bit to the cardboard. I folded the cardboard over the battery pack and taped it closed.
From the front, you should see the hot glue eyeballs looking out of the slot. Now find a dark corner or bush to hide it in! Experiment with where you put it, so the holder is concealed in the dark.