Micro:bit Calculator
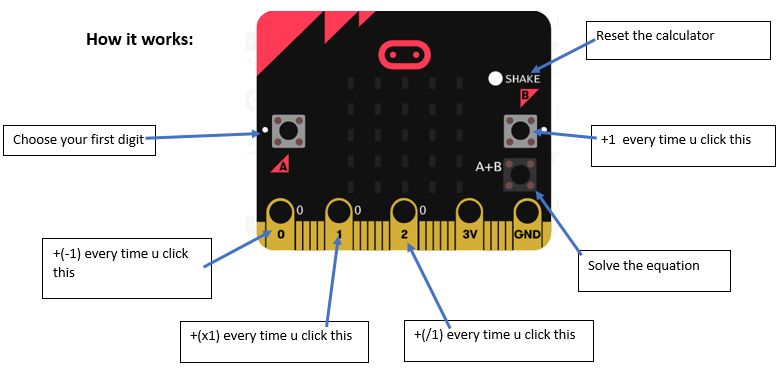
Hello everyone, the program I made is a simple calculator.
U see how it works above.
Supplies
-De micro:bit site of app
-een micro:bit
Make Your Inputs
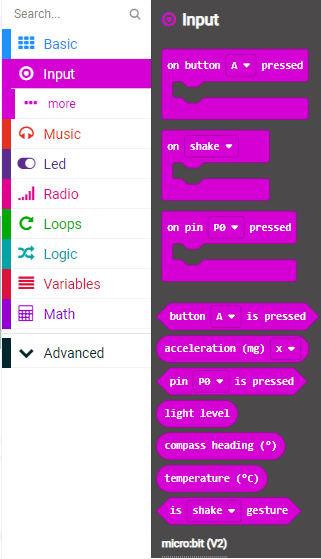
For this calculator you are going to need 1 main input
and 4 option inputs. Let’s start with the main, pick one of the input blocks.
Make Your Inputs 2
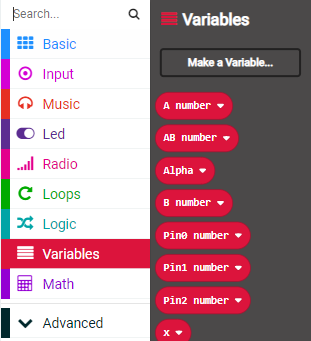
After that you are going to make a variable, the name doesn’t matter but I prefer calling it “A number”.
While you are here make all the variables showed in the screenshot:
- A number
- AB number
- Alpha
- B number
- Pin 0 number
- Pin 1 number
- Pin 2 number
. This is for later usage.
Make Your Inputs 3
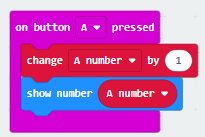
Then you are going to want to make something like this. This basically makes it that if you press button A the variable A is added up by 1. Then the “show number” shows whatever number on the micro:bit u wanted it to show, this is to see where the count is at.
Make Your Inputs 4
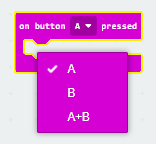
Now we are going to make the other inputs, depending on how many u want for all the equations is 4 the best. Let’s start with button B. Create the “on button A pressed” block again.
If you click on the A u will get a menu which you can pick inputs from. For this pick “B”
Make Your Inputs 5
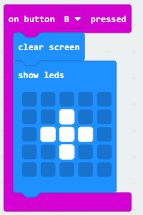
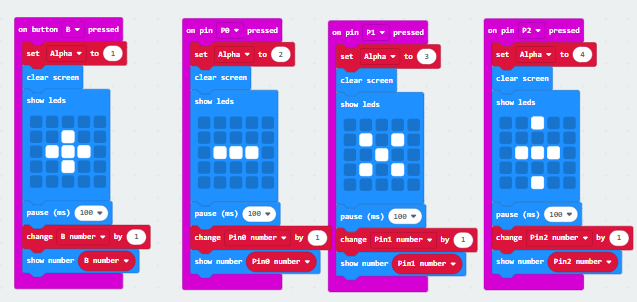
After you have done this you are going to make this, the “clear screen” clears the screen and then the “show LEDs” shows the pattern u choose on the micro:bit LEDs. In this case it’s a plus symbol.
Make Your Inputs 6
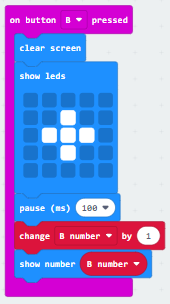
Then you need to add this part. The “pause” just pauses whatever u did for the selected amount of time, then the “change B number” changes the “B number” by +1. This is for the second number in our equation, then at the end you are going to show the “B number” again on the micro:bit screen.
Make Your Inputs 7
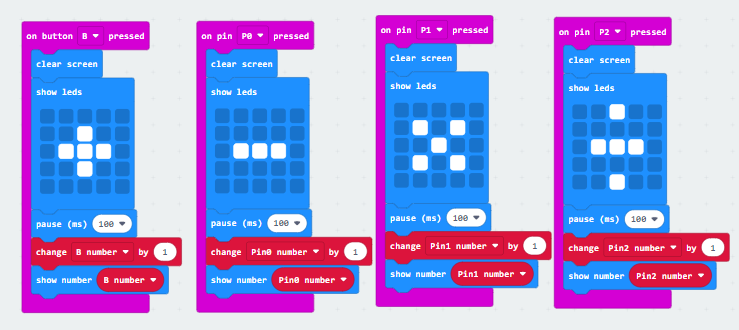
Then u do the same thing for the three other inputs except you use the variables named after the input button.
It should look like above.
Solving the Equation

Make an input block “on button AB”, we will use this input for solving our equation.
Solving the Equation 2
Now we are going to use the “if-else” blocks. But first of all out calculator needs to know what equation it’s going to need to do. So add another “set to” block setting the variable “Alpha” to 1-4 like above.
Solving the Equation 3
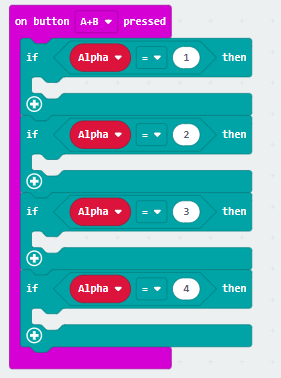
Then make your “if” blocks (found in logic) like this. So now your program knows what equation its going to need to solve. It seems a little hard but its actually really simple.
Solving the Equation 4
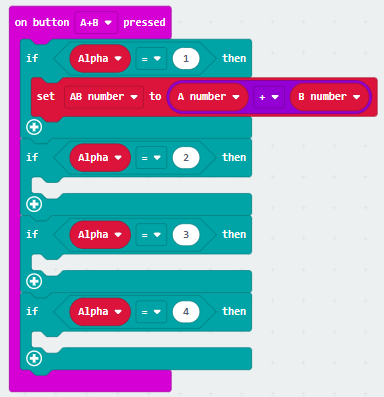
Now make something like this, we will be using the “AB number” to display the end result and so we set it to “A number”+”B number”. So if for example our “A number” would be 2 and our “B number” 4, our “AB number” would be 6.
Then u are going to want to do this for the rest of the “if” blocks too.
Solving the Equation 5
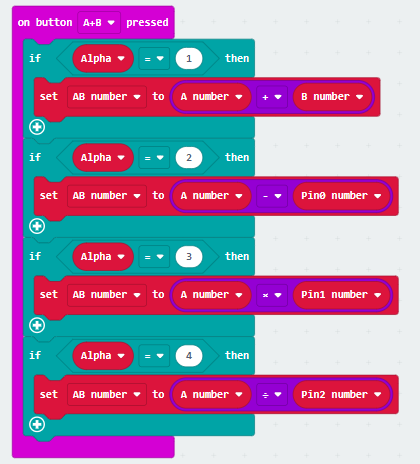

After you have done all of that it should look like this. So now our calculator can actually calculate number and know what equations it has to do, now we only need to display those numbers to the user.
For this I used a “while” block from the “loops” section. It’s something fancy to keep showing the number u want it to show. Put this at the bottom
END RESULT
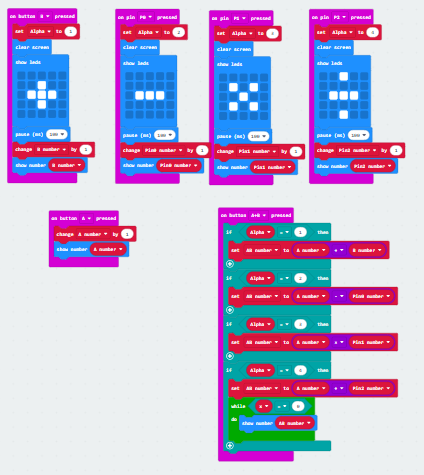
If you did everything correctly u should have this.