MicroBit Concentration Game
by jillianbaker in Circuits > Microcontrollers
4503 Views, 27 Favorites, 0 Comments
MicroBit Concentration Game
This Instructable will show you how to make a concentration game using a MicroBit. This is going to create a metal shape and wand to have a reaction when the wand touches the metal shape. Inspired by carnival games and wanted to challenge my students.
Supplies
Items needed:
MicroBit - any MicroBit will do. I have sets from FiriaLabs that come with everything you need, but you can also get MicroBits from their website or Amazon. (any option should include the battery pack)
Battery Pack - should be included when you buy MicroBit
Speaker (optional)- if you want it to make a sound when touched. I used the one that FiriaLabs puts in the box.
Alligator Clips - (2-4 needed one should be long) I used 39" long set from amazon. If you want a buzzer you will need 4 alligator clips.
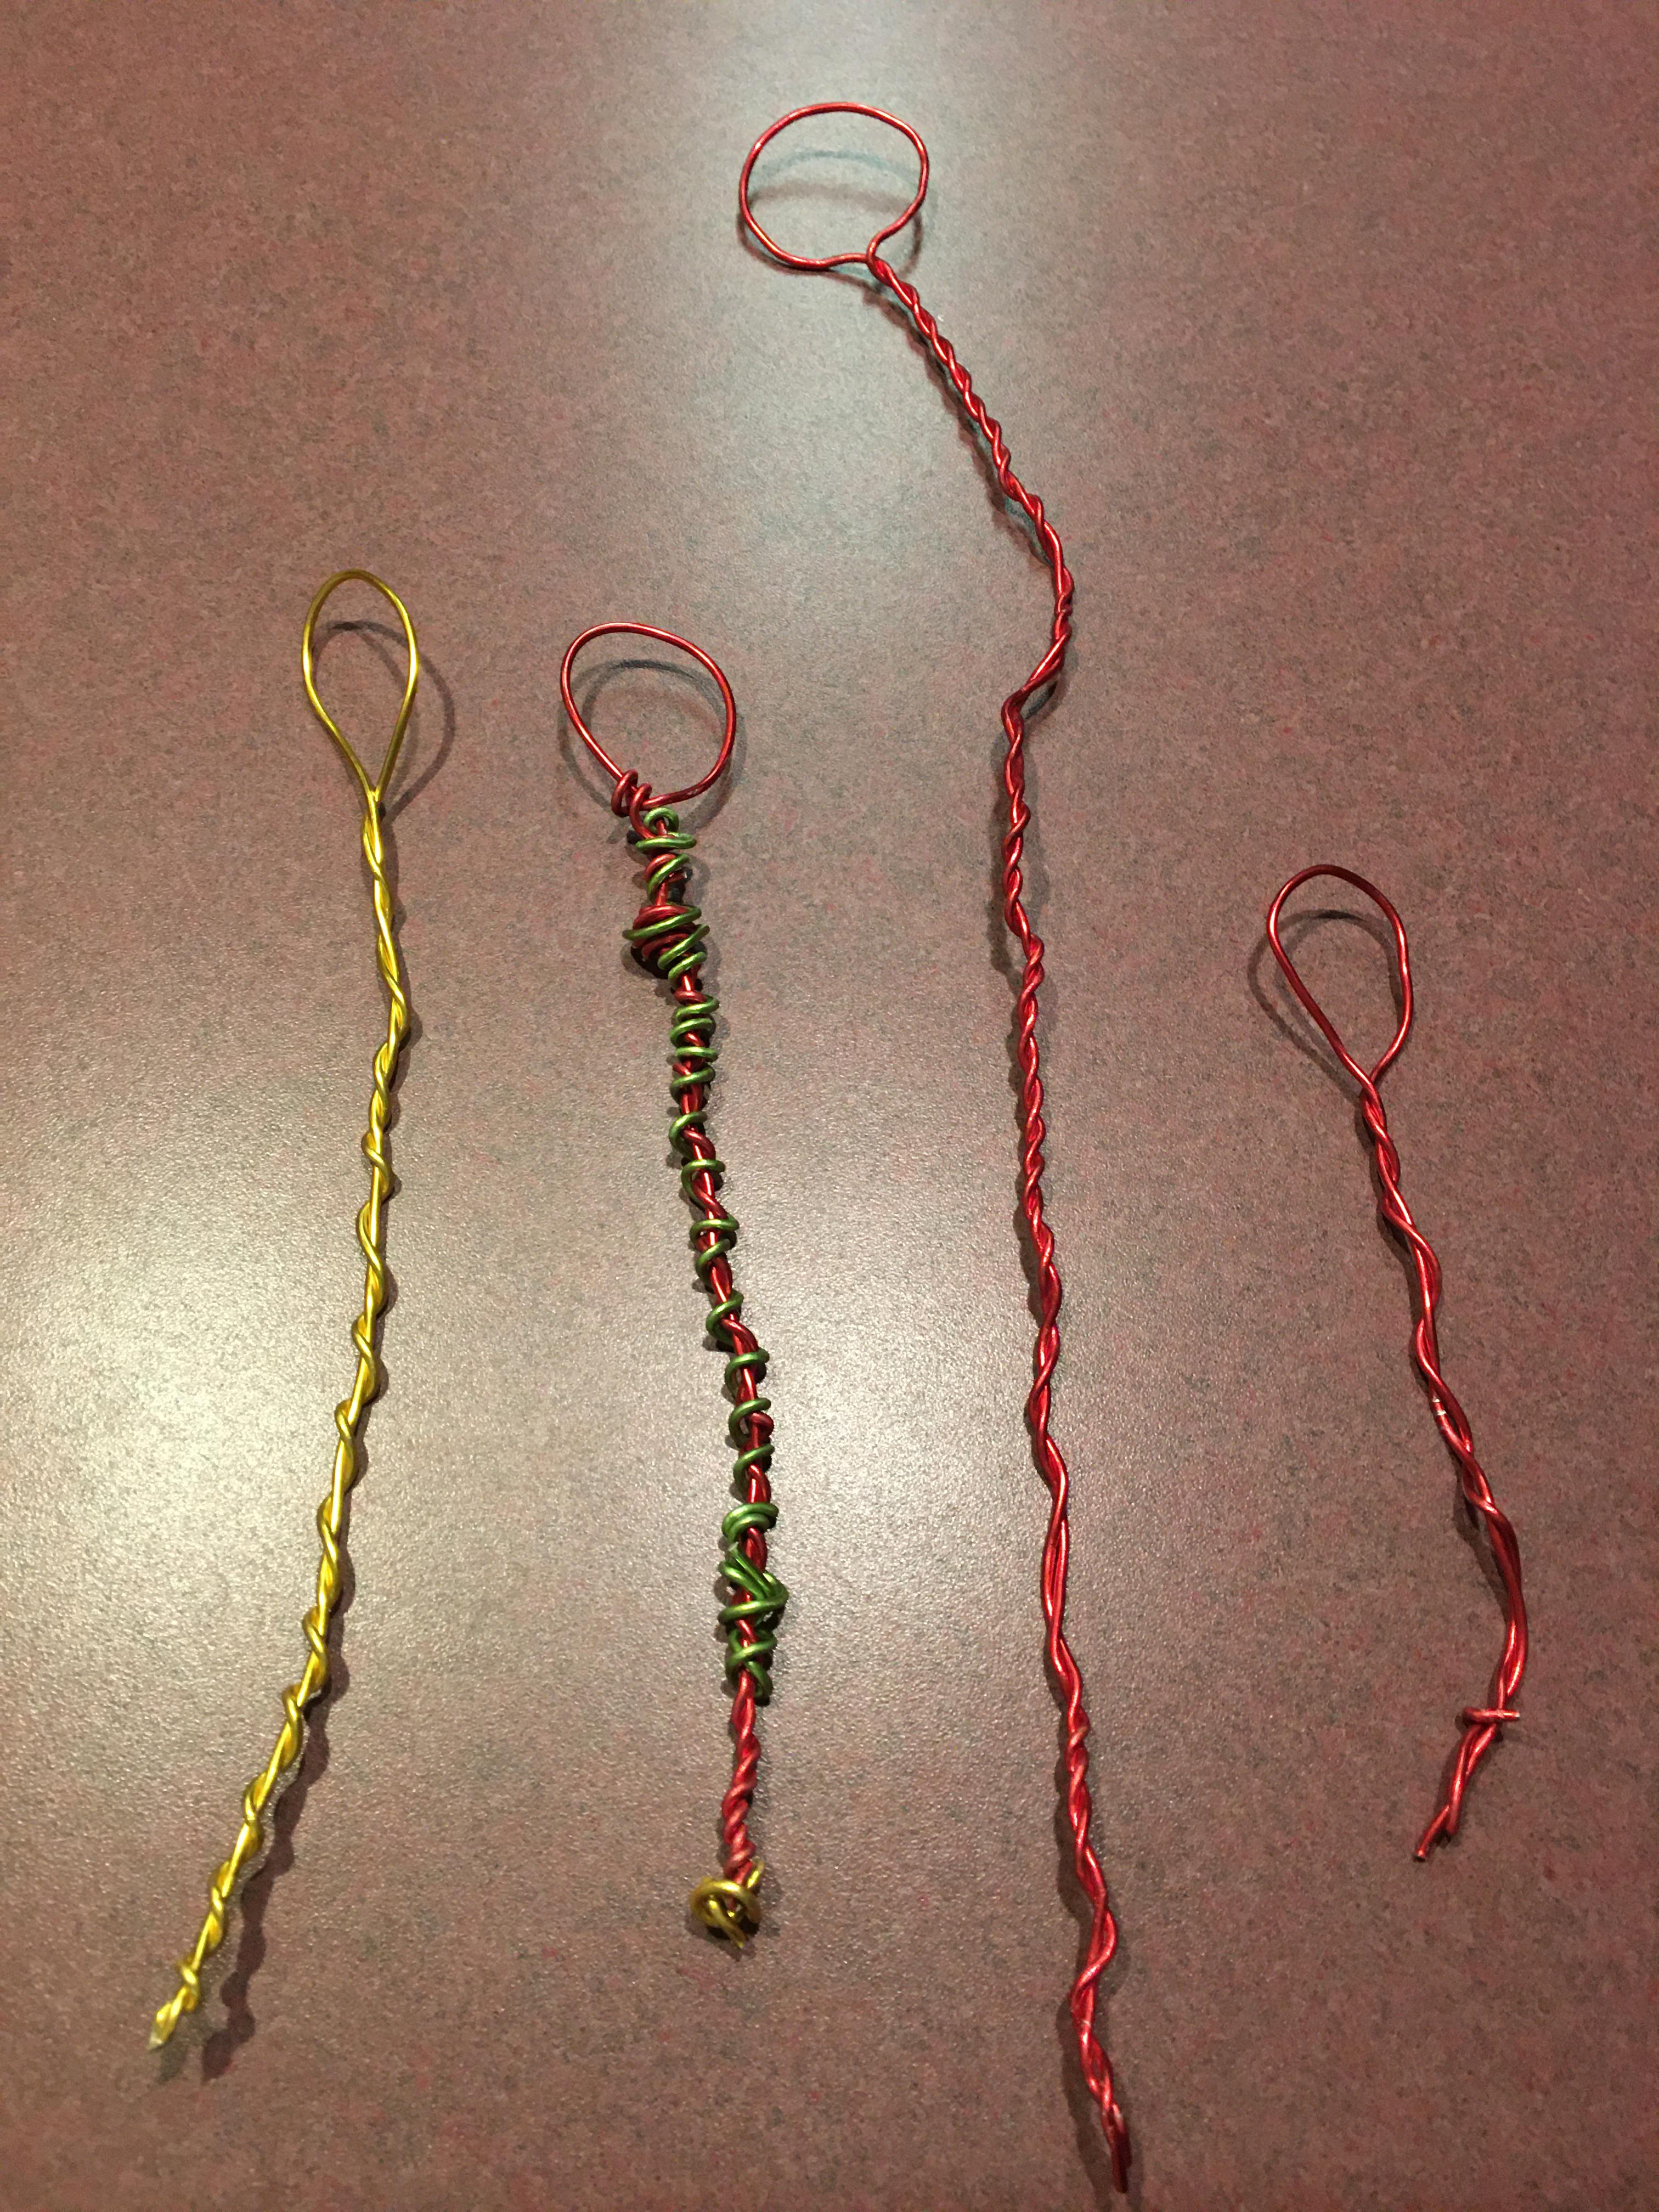
Metal Wire - I used floral wire from the DollarTree any should do, in store you can buy just one for a dollar.
3D printer for base - I made a base to hold all items in TinkerCad and printed on a MakerBot printer.
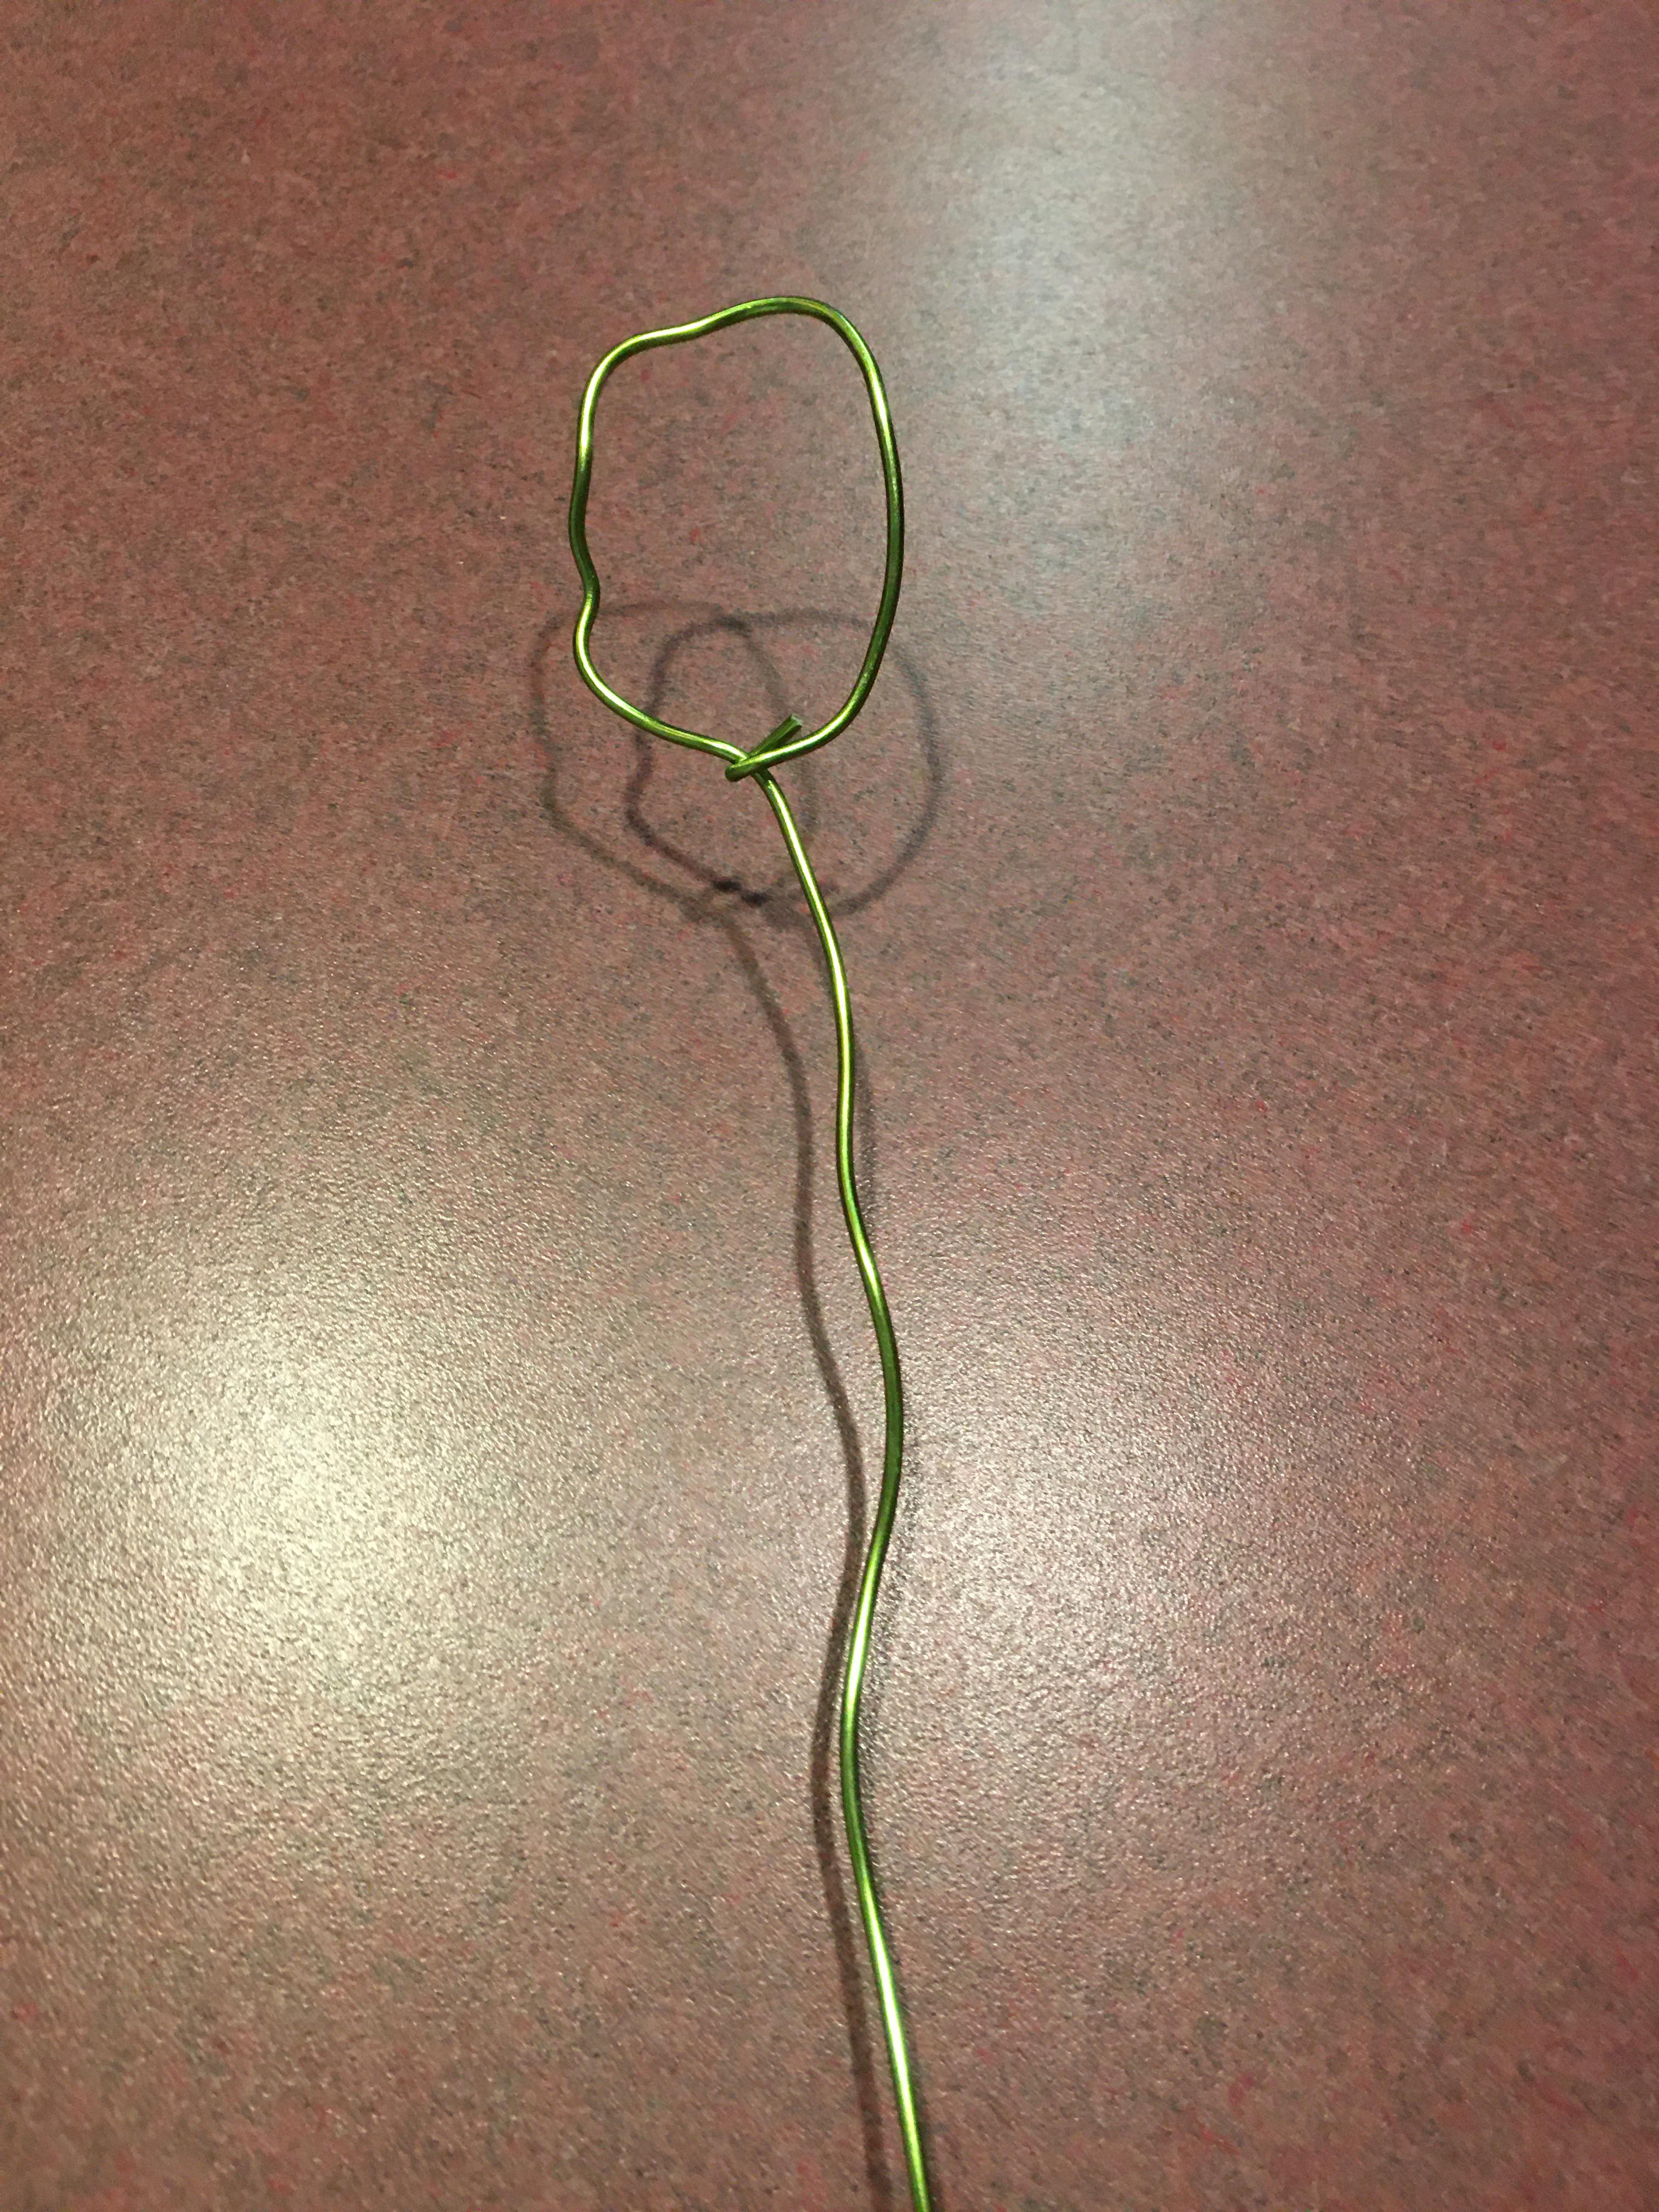
1. Make Your Metal Shape

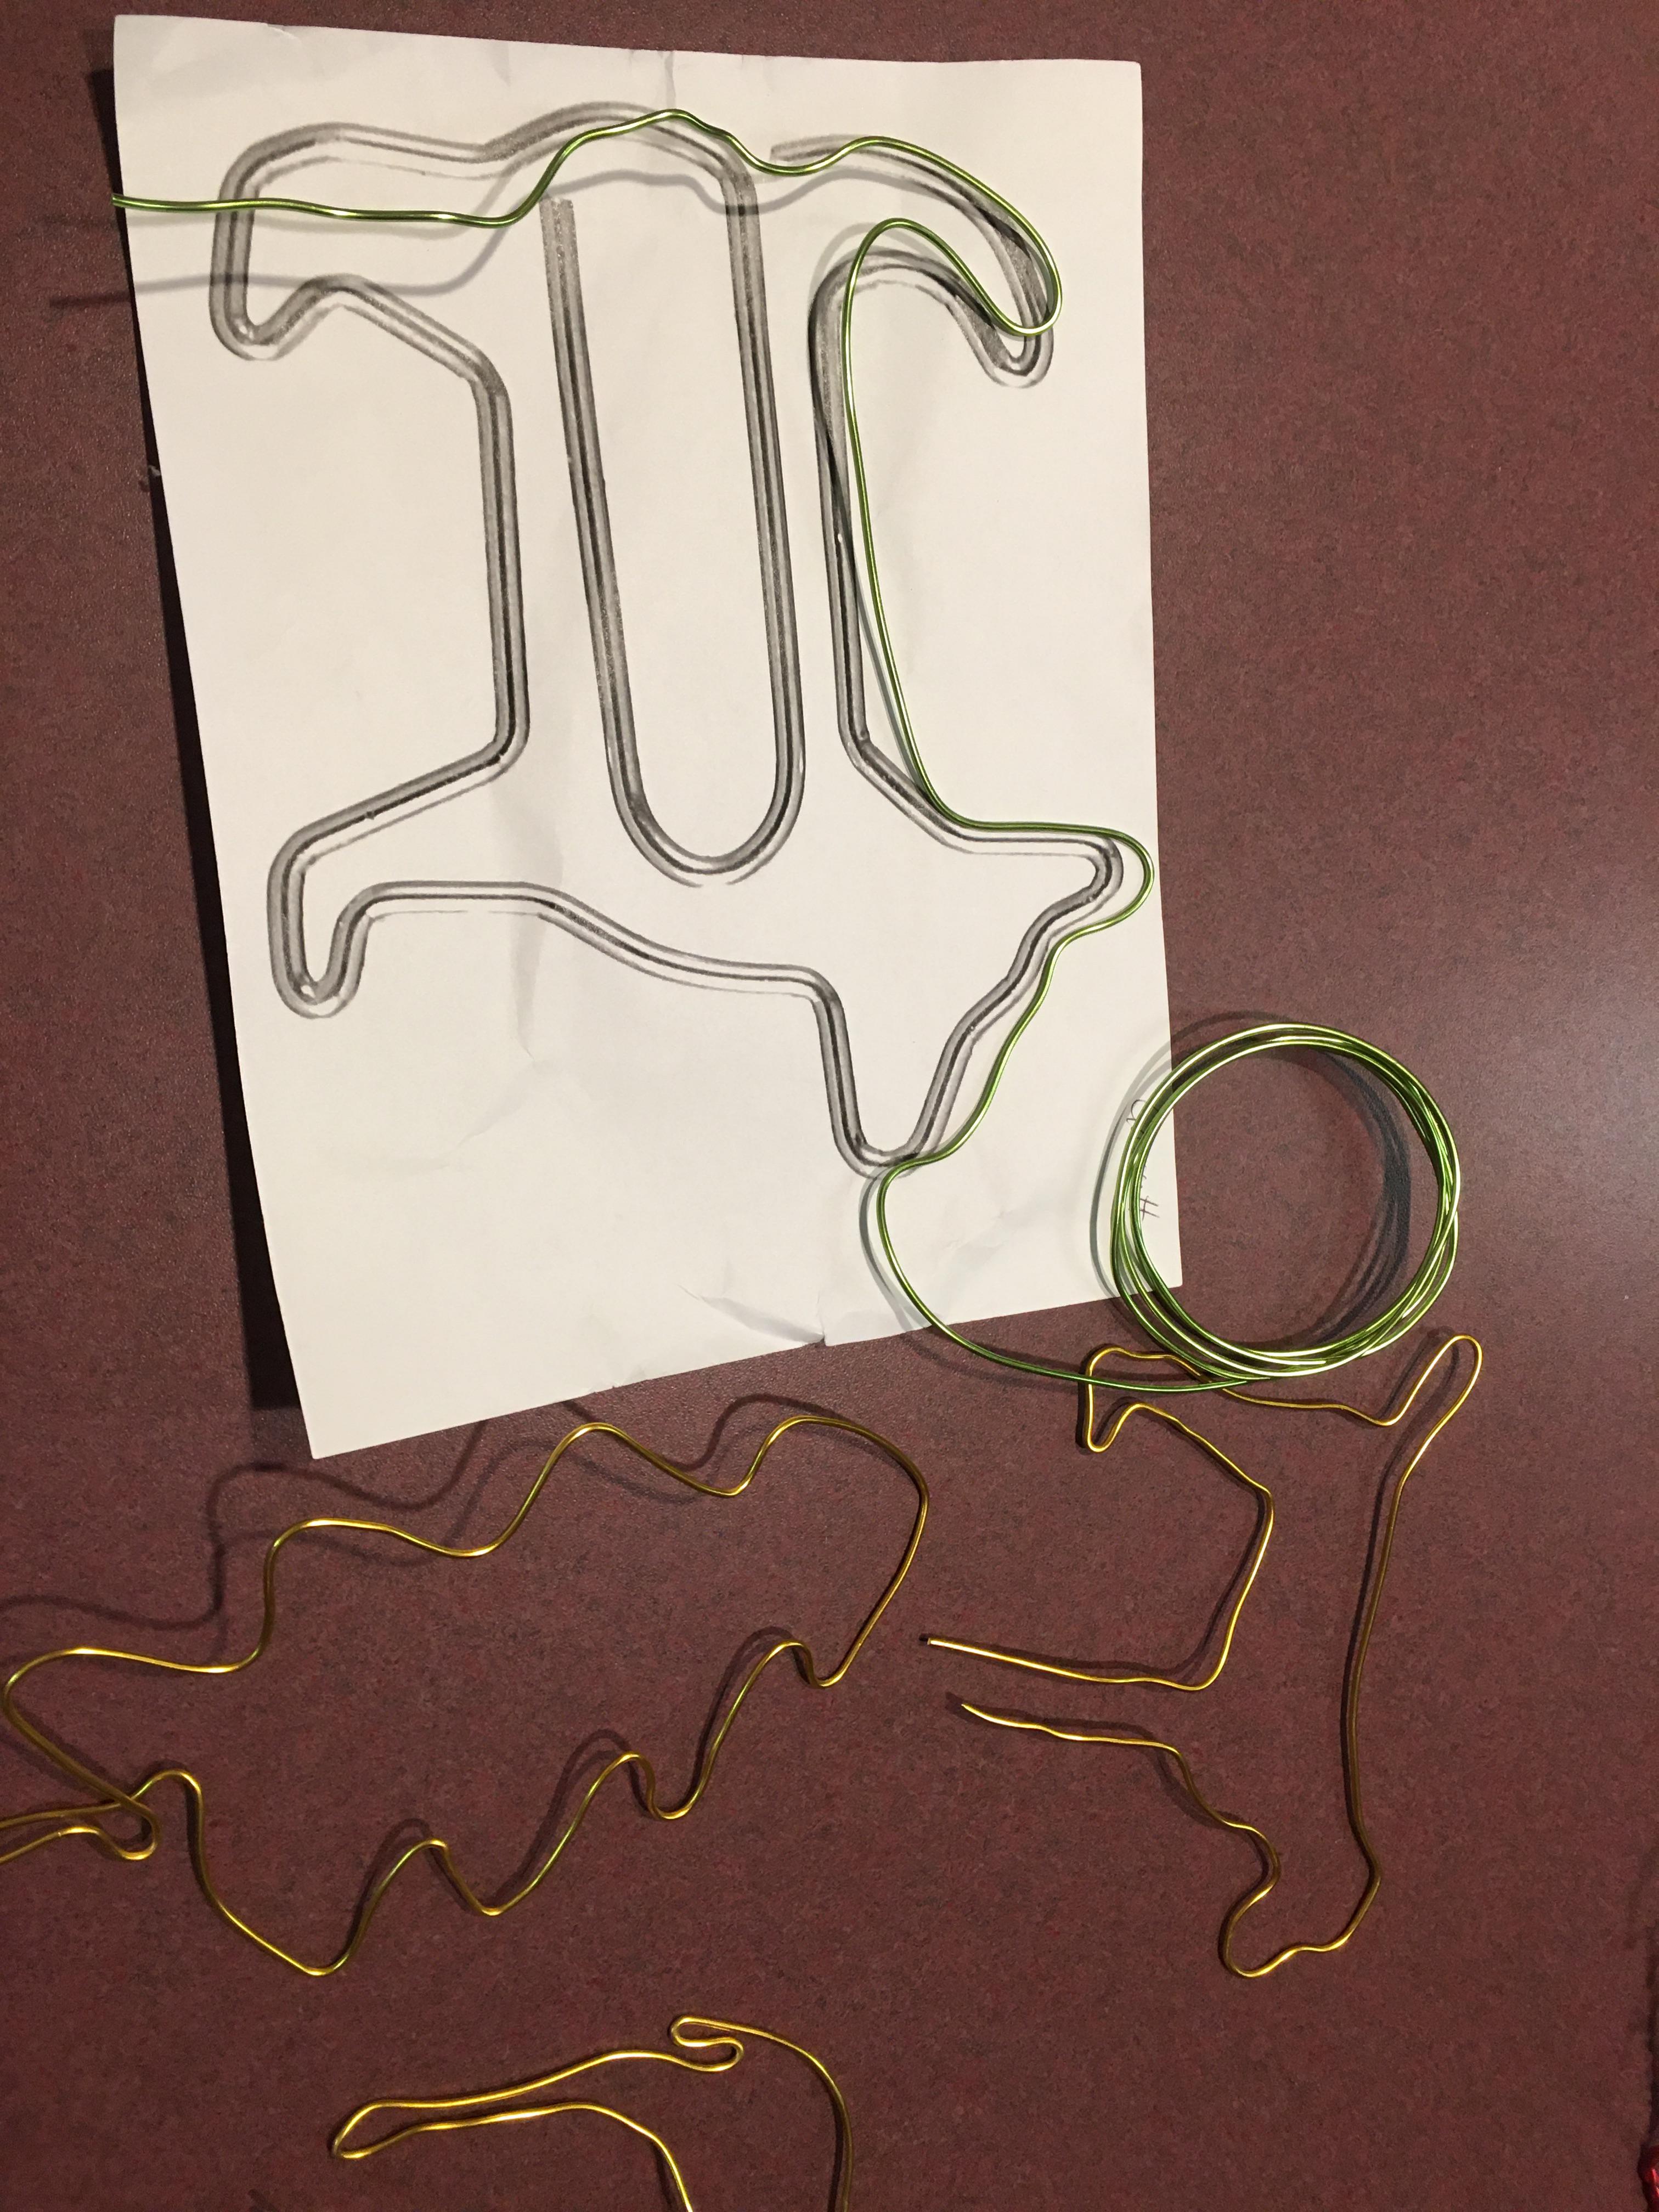
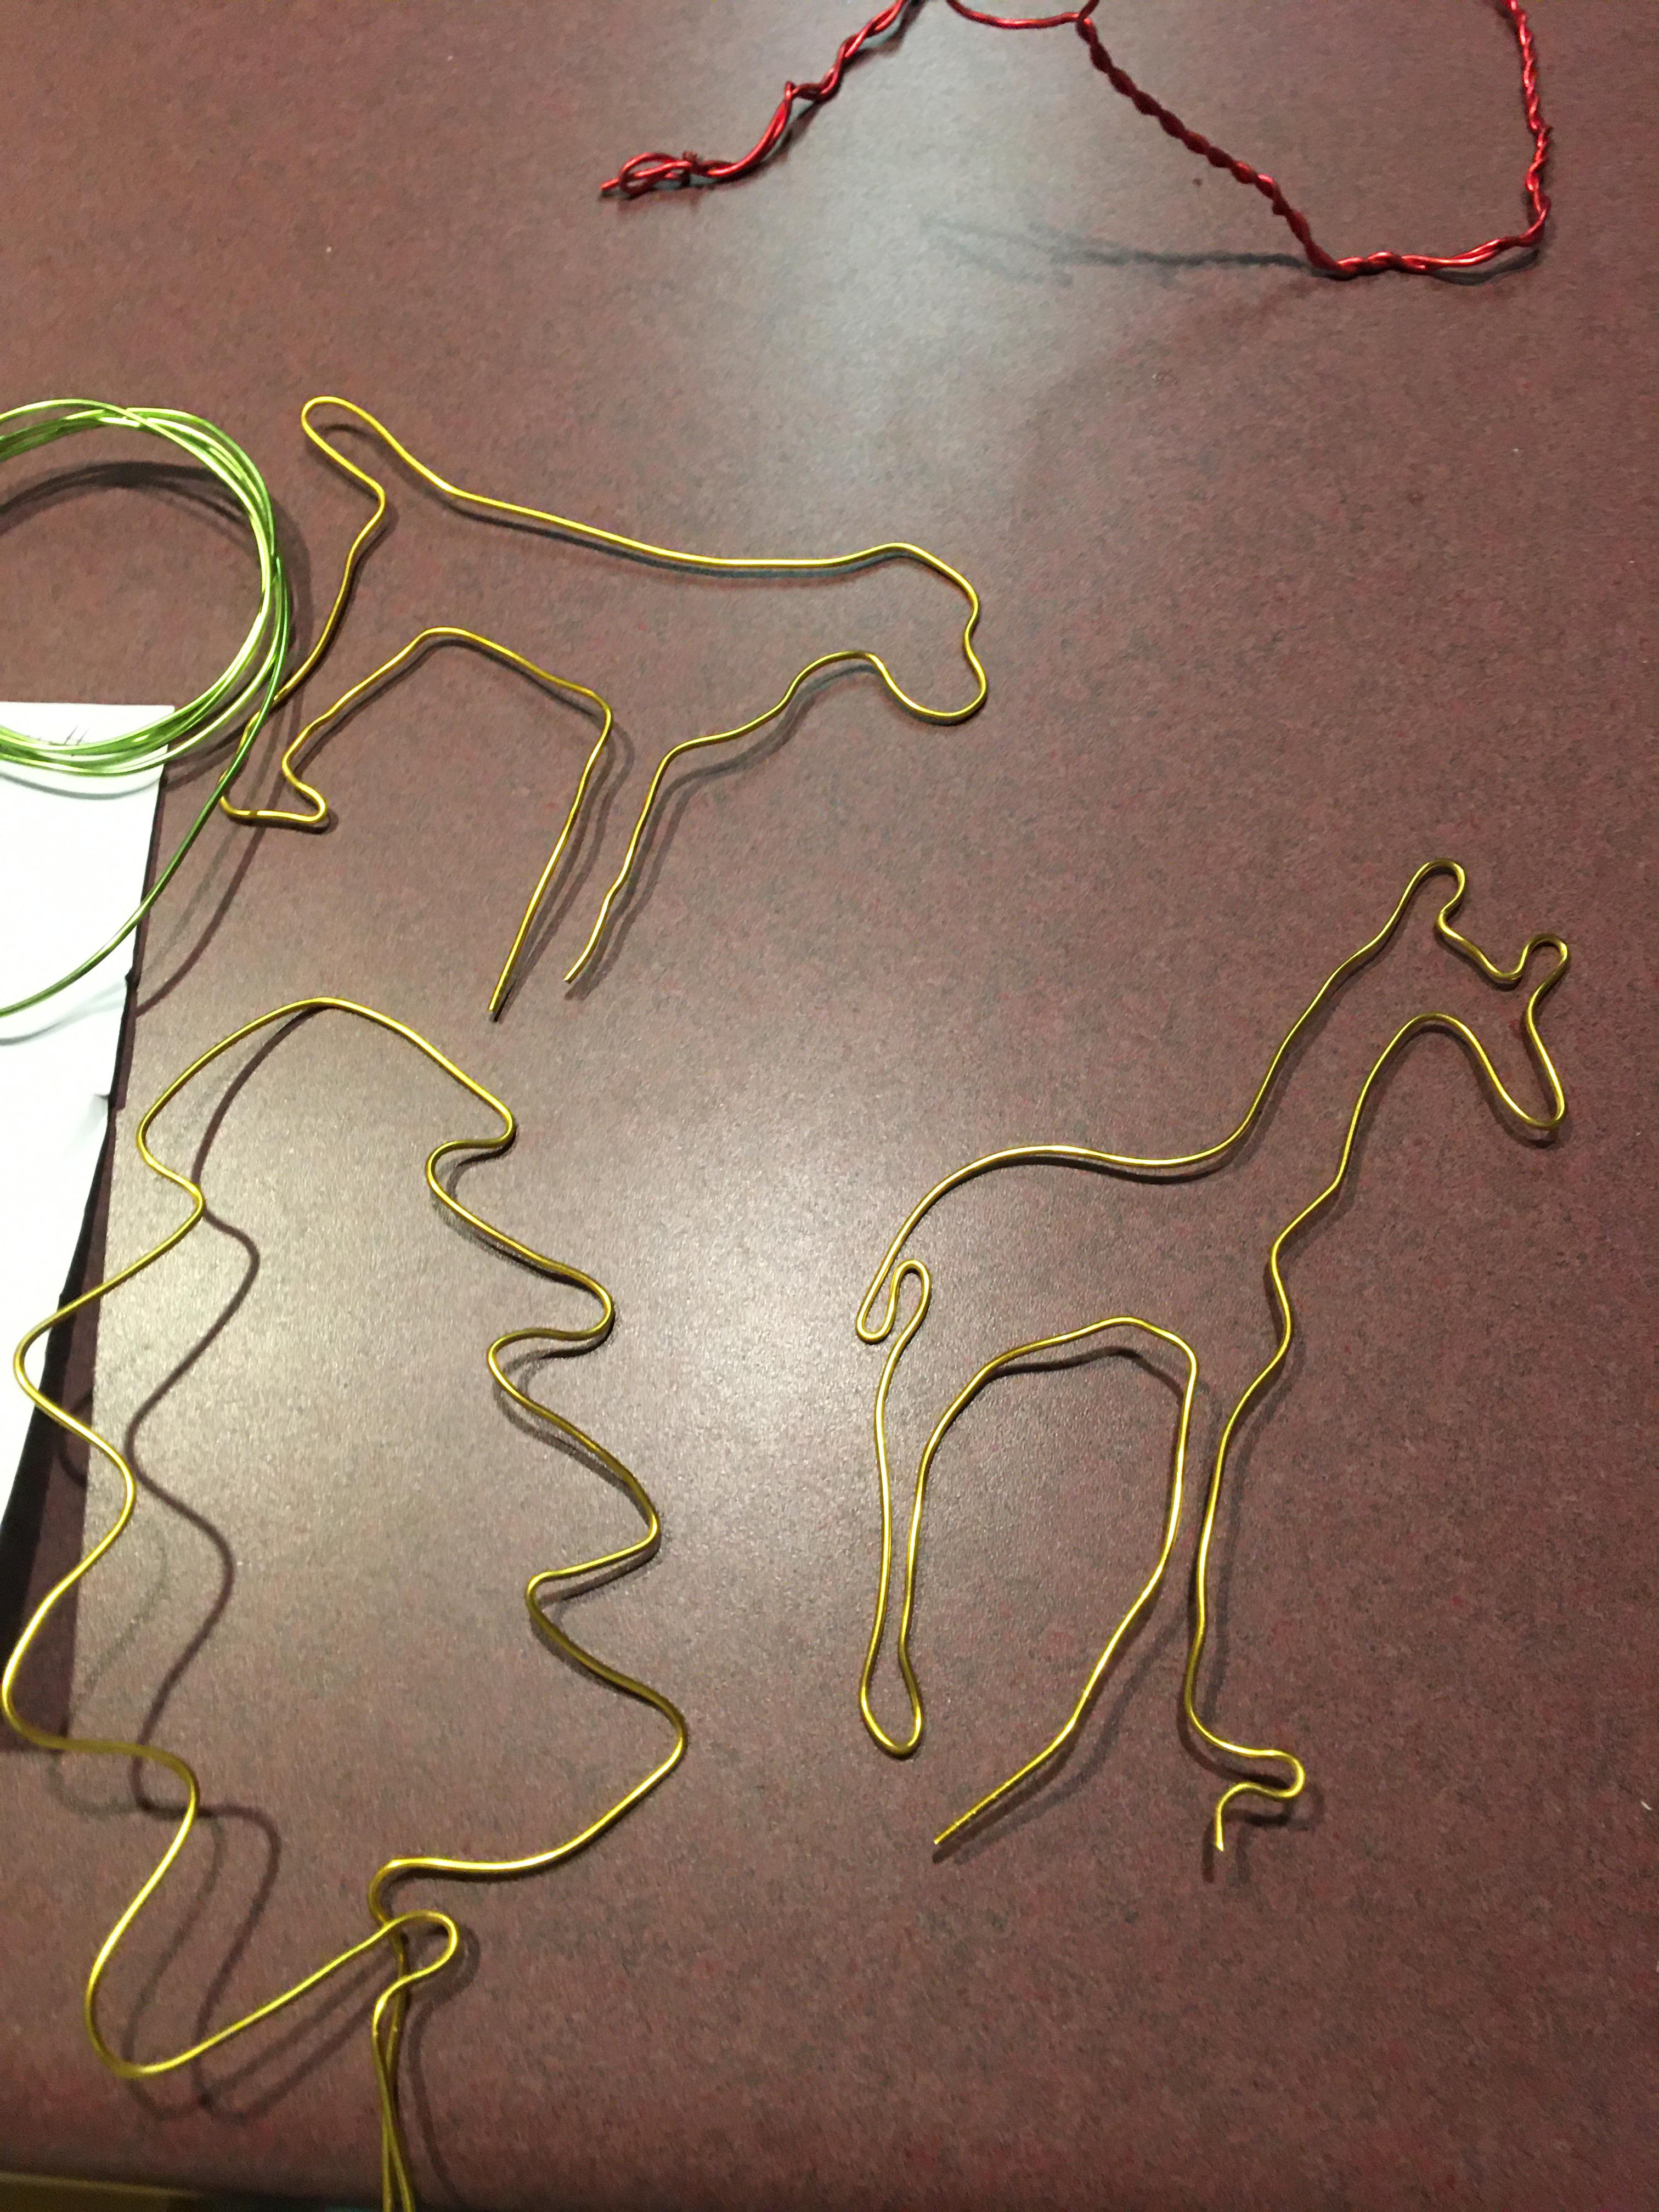
I used floral wire from the Dollar Tree and searched Google to find paperclip shapes, you can also search for silhouettes. While this shape has a nice outline, I only need the outline and would want the start and stop point to be around the foot, so it will stand on my base. Start by bending your metal around your outline to make your shape. You need to have an extra couple inches hanging down from your shape for the beginning and end. This will allow you to connect the alligator clips to the shape. (I find it helpful to print the image and bend wire on a flat surface.
2. Make a Wand
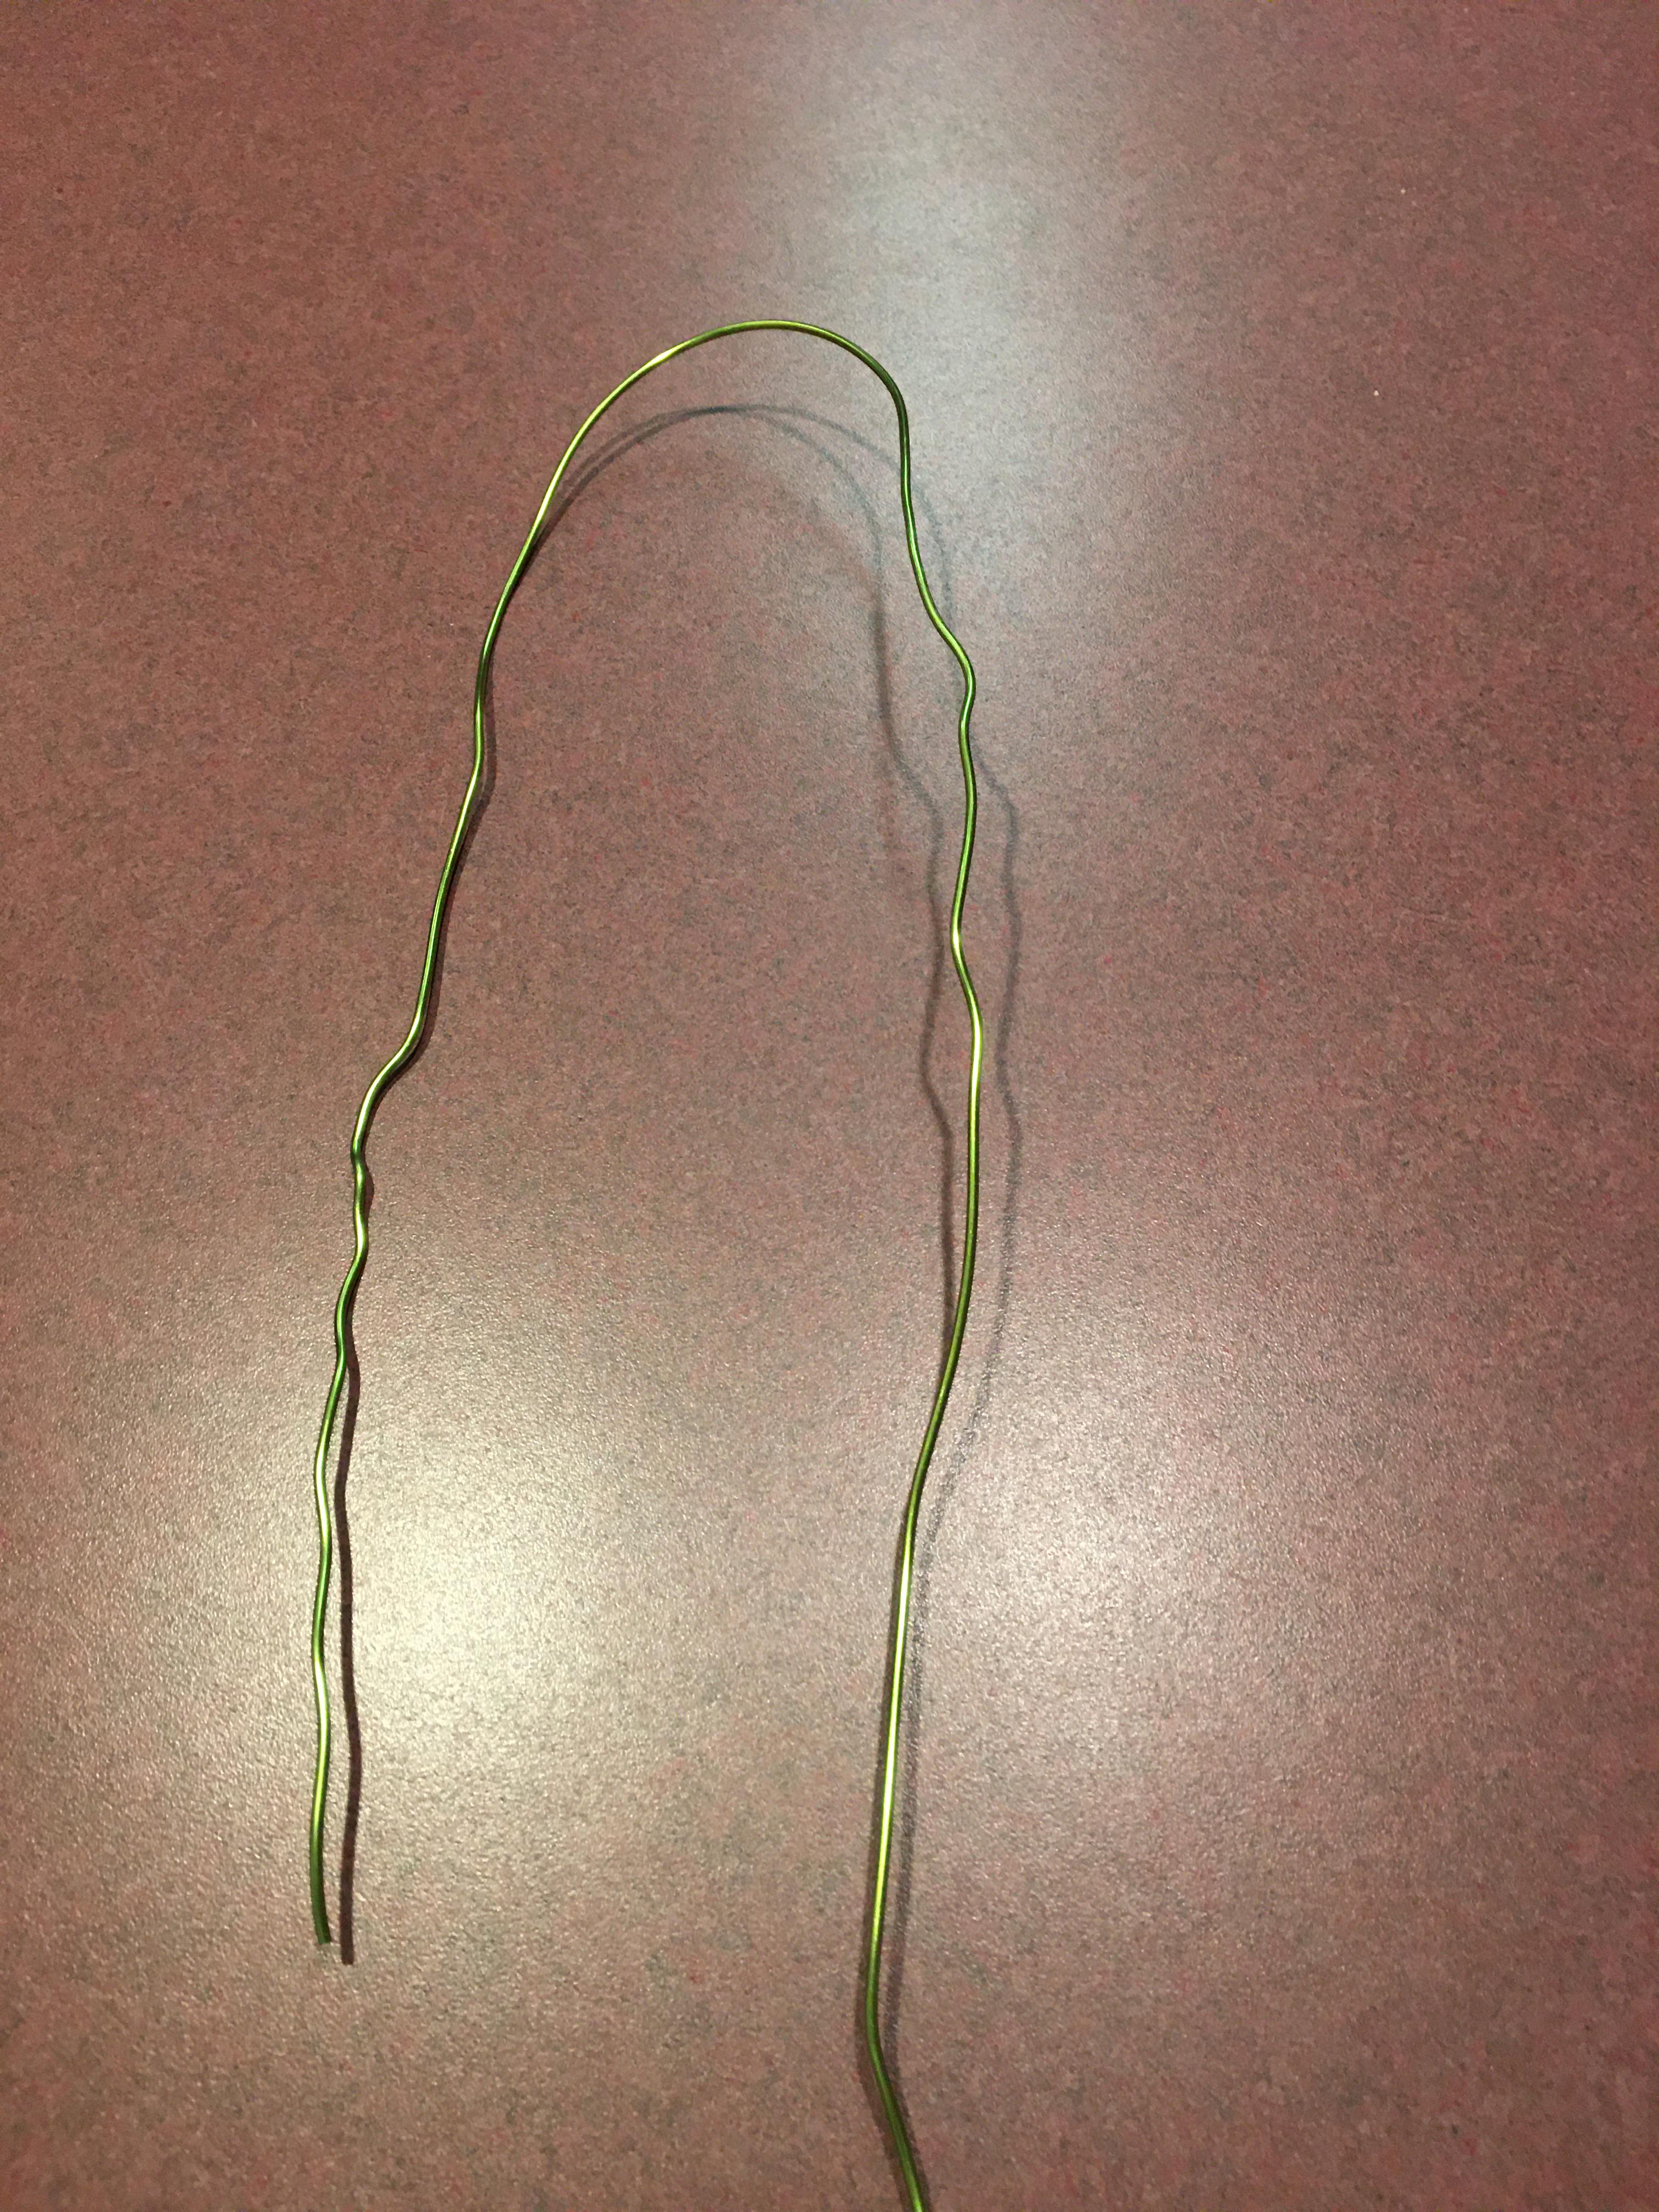
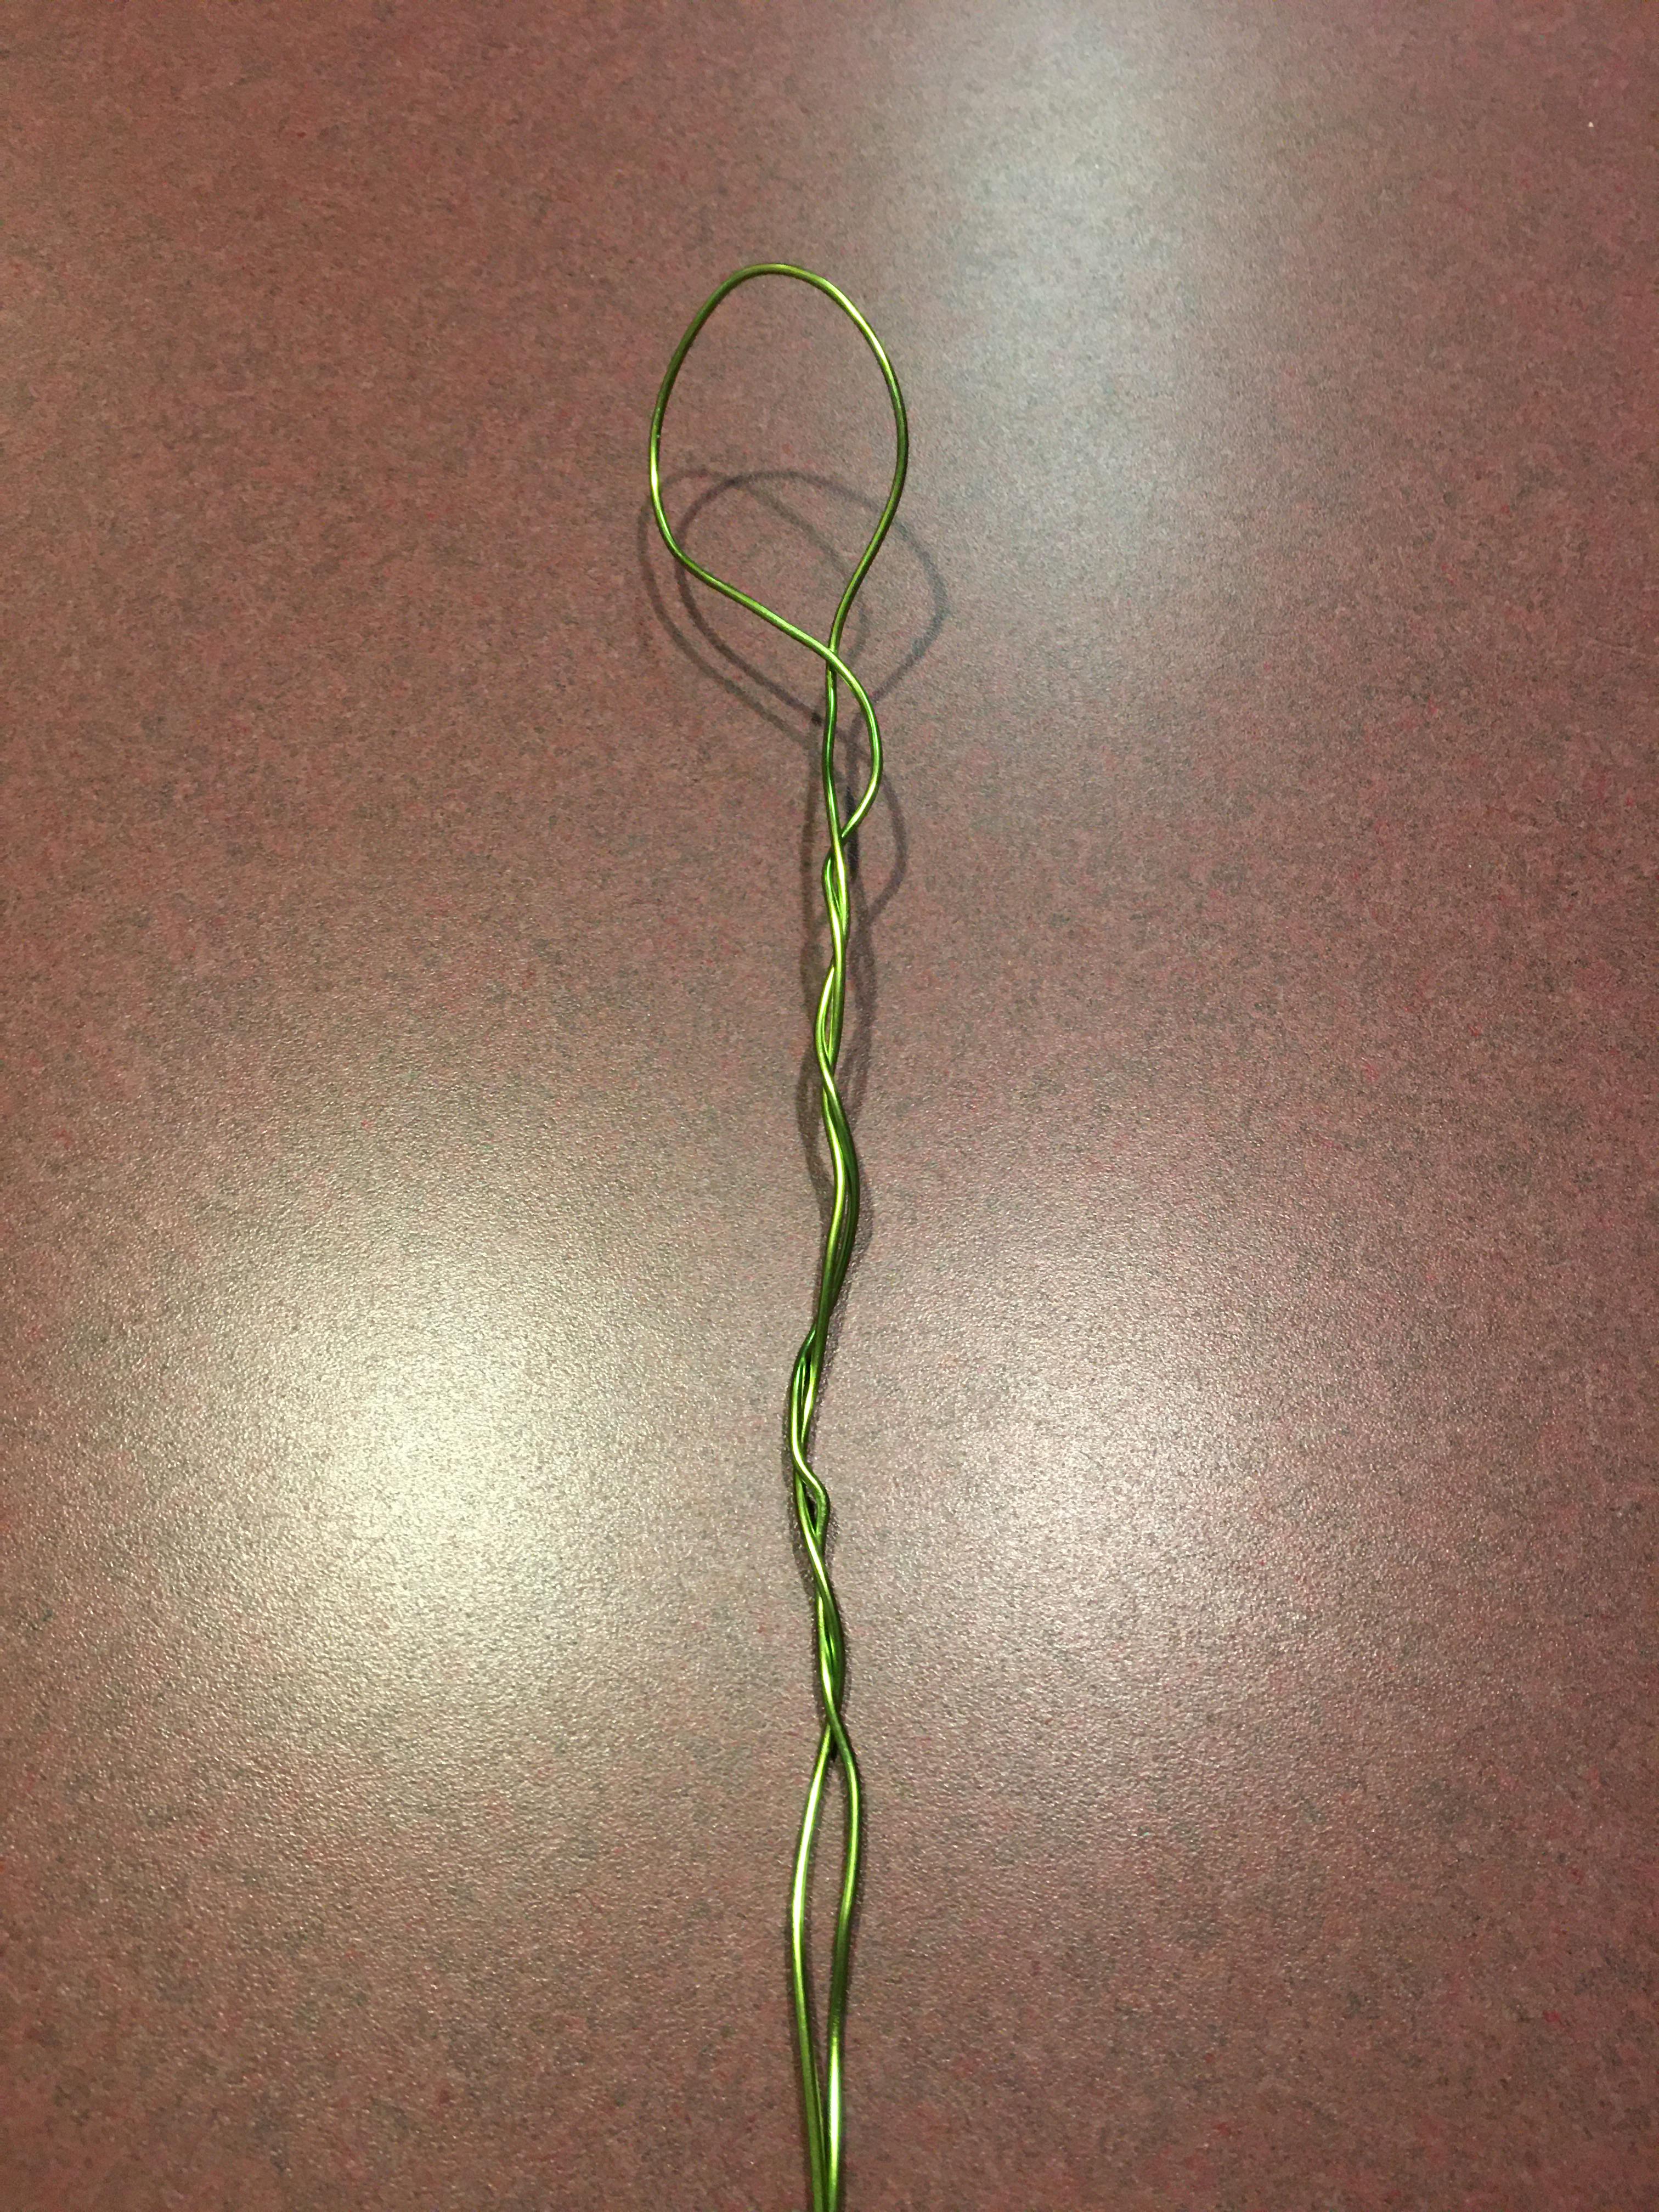
Next you will need to make a wand. I use the same floral wire as in the first step. I just took a long piece of wire and bent in half turning the wire around to make the handle. Make sure to leave the loop large enough to go around the metal figure. You can also just make a loop at the end if you are short on wire.
3. Make the Base to Hold Everything
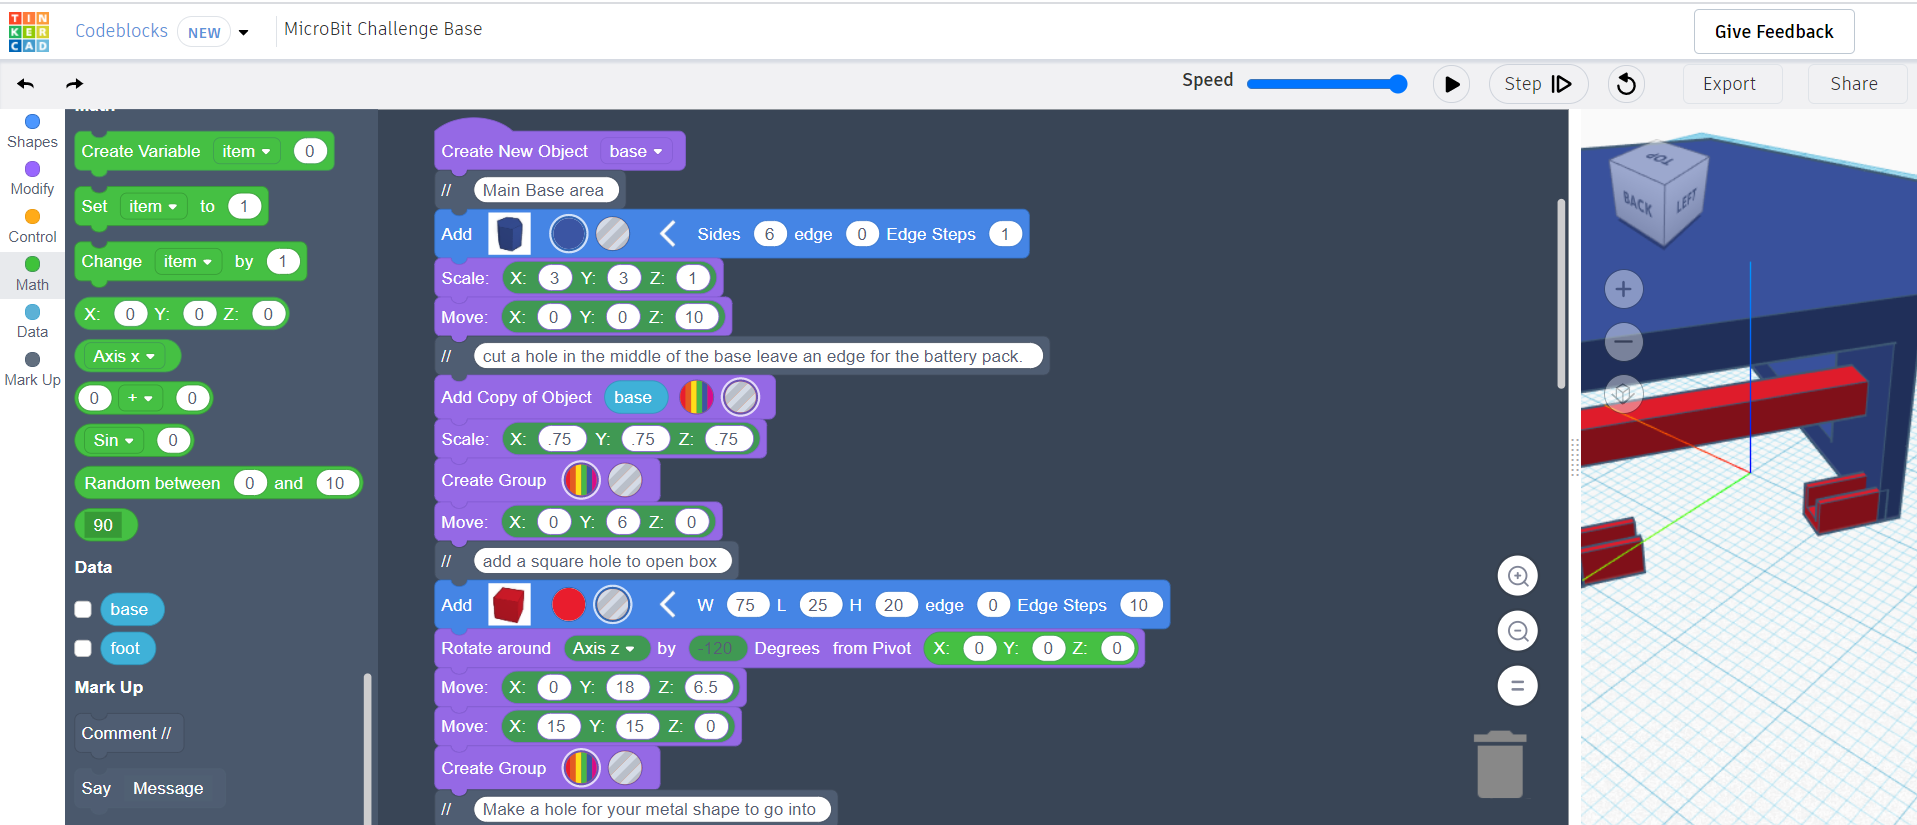
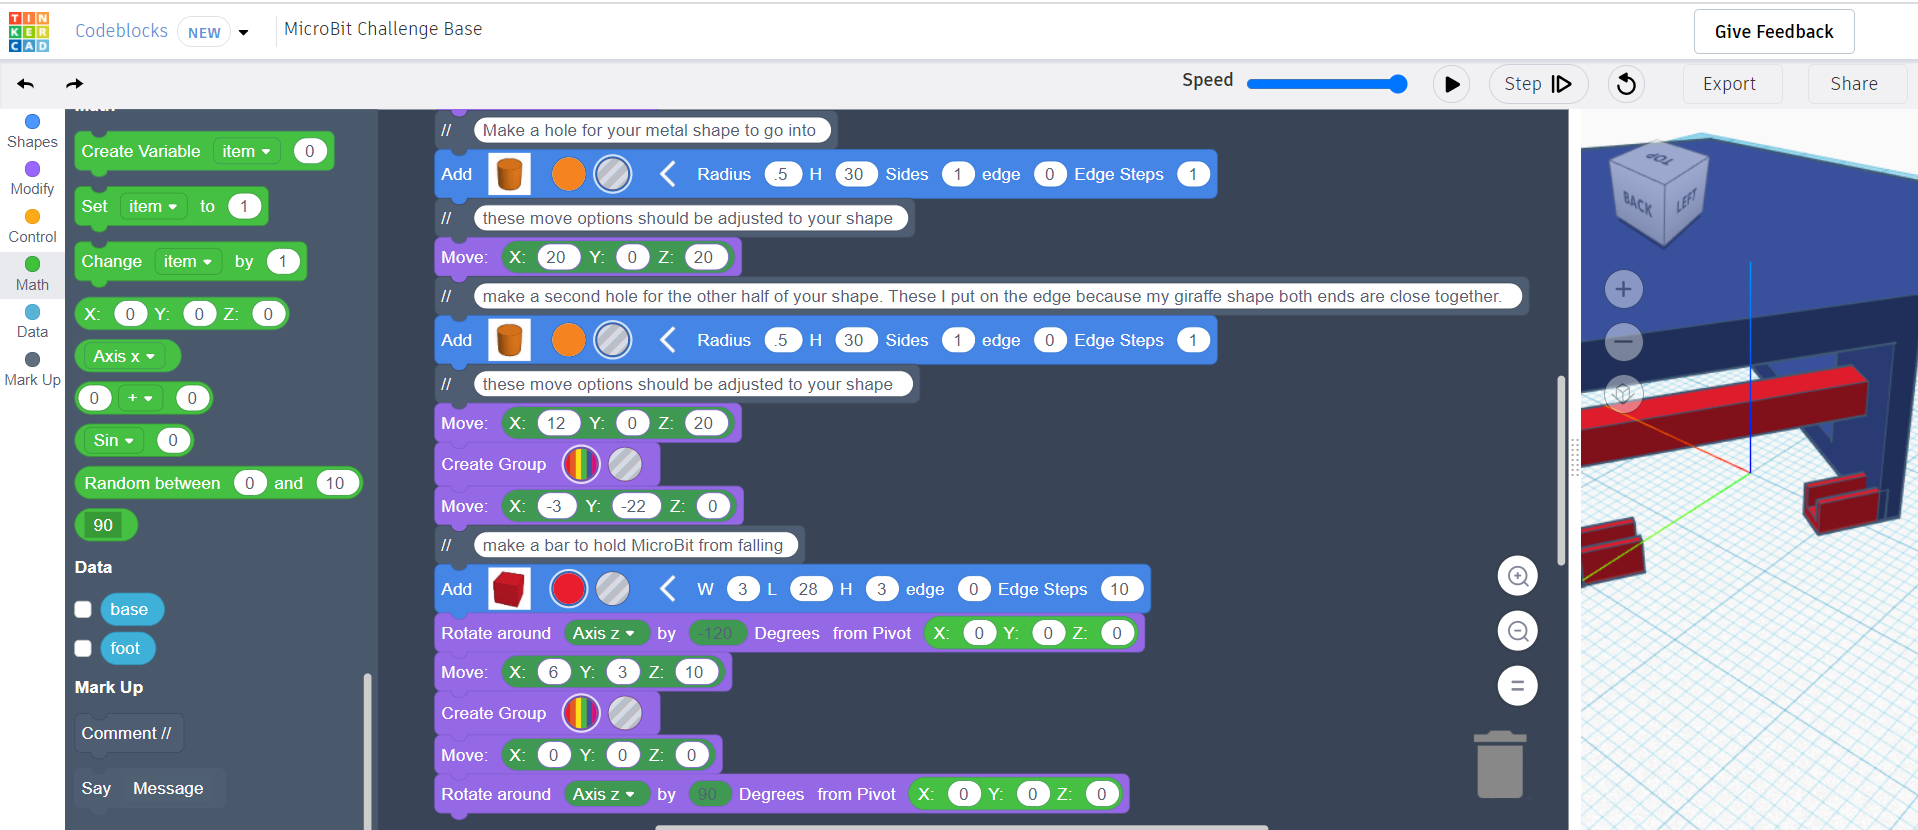

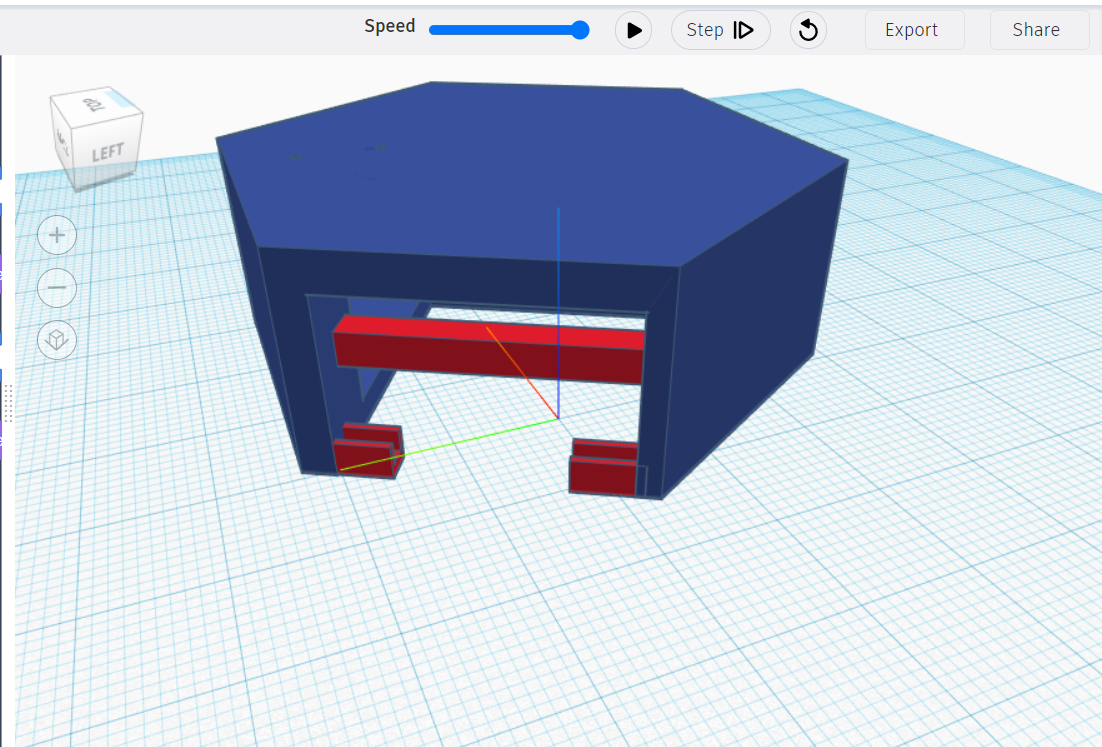
I used TinkerCad CodeBlocks to make this shape. The STL files are also attached.
You will need to Click on "CodeBlocks" on the left hand side. Then you can use my code, I have made comments where you may need to change the code. I also made a base in regular TinkerCad ("Baker MicroBit Challenge Base") also attached.
4. Program Your MicroBit
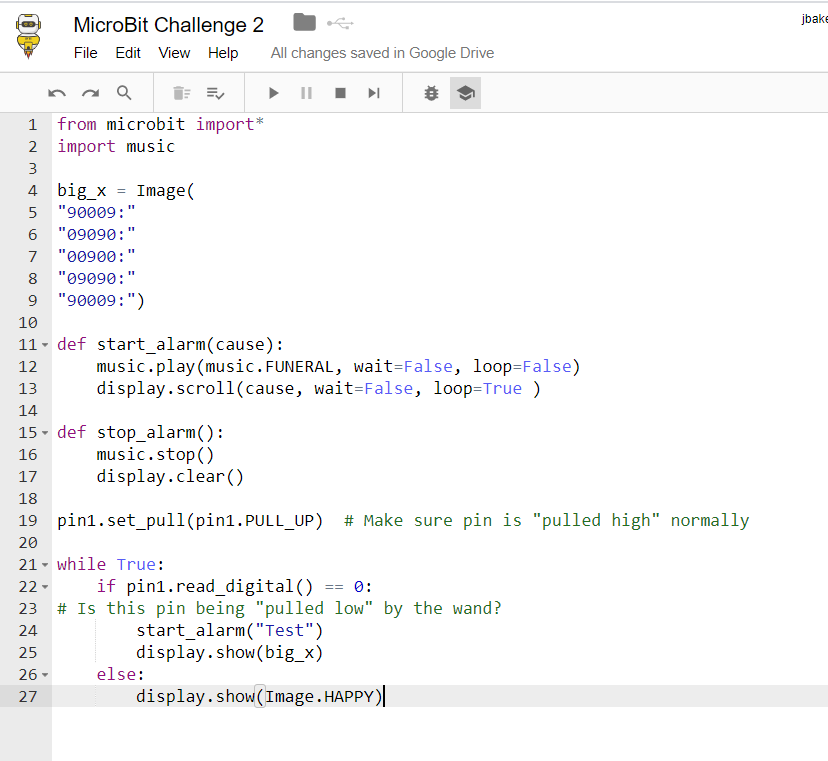
I used Firia Lab's CodeSpace to write my code. This program has a free option but lessons and more options come when you purchase your MicroBit from them. This is a Python based code and you can see the code below. The code says to make a big X turning lights on and off. Then start with a smile face, if the wand (Which is attached to port 0) touches the shape (which is attached to port 1) then show X and make a sound.
from microbit import*
import music
big_x = Image( "90009:" "09090:" "00900:" "09090:" "90009:")
def start_alarm(cause): music.play(music.FUNERAL, wait=False, loop=False)
display.scroll(cause, wait=False, loop=True )
def stop_alarm():
music.stop()
display.clear() pin1.set_pull(pin1.PULL_UP) # Make sure pin is "pulled high" normally
while True: if pin1.read_digital() == 0: # Is this pin being "pulled low" by the wand?
start_alarm("Test")
display.show(big_x)
else:
display.show(Image.HAPPY)
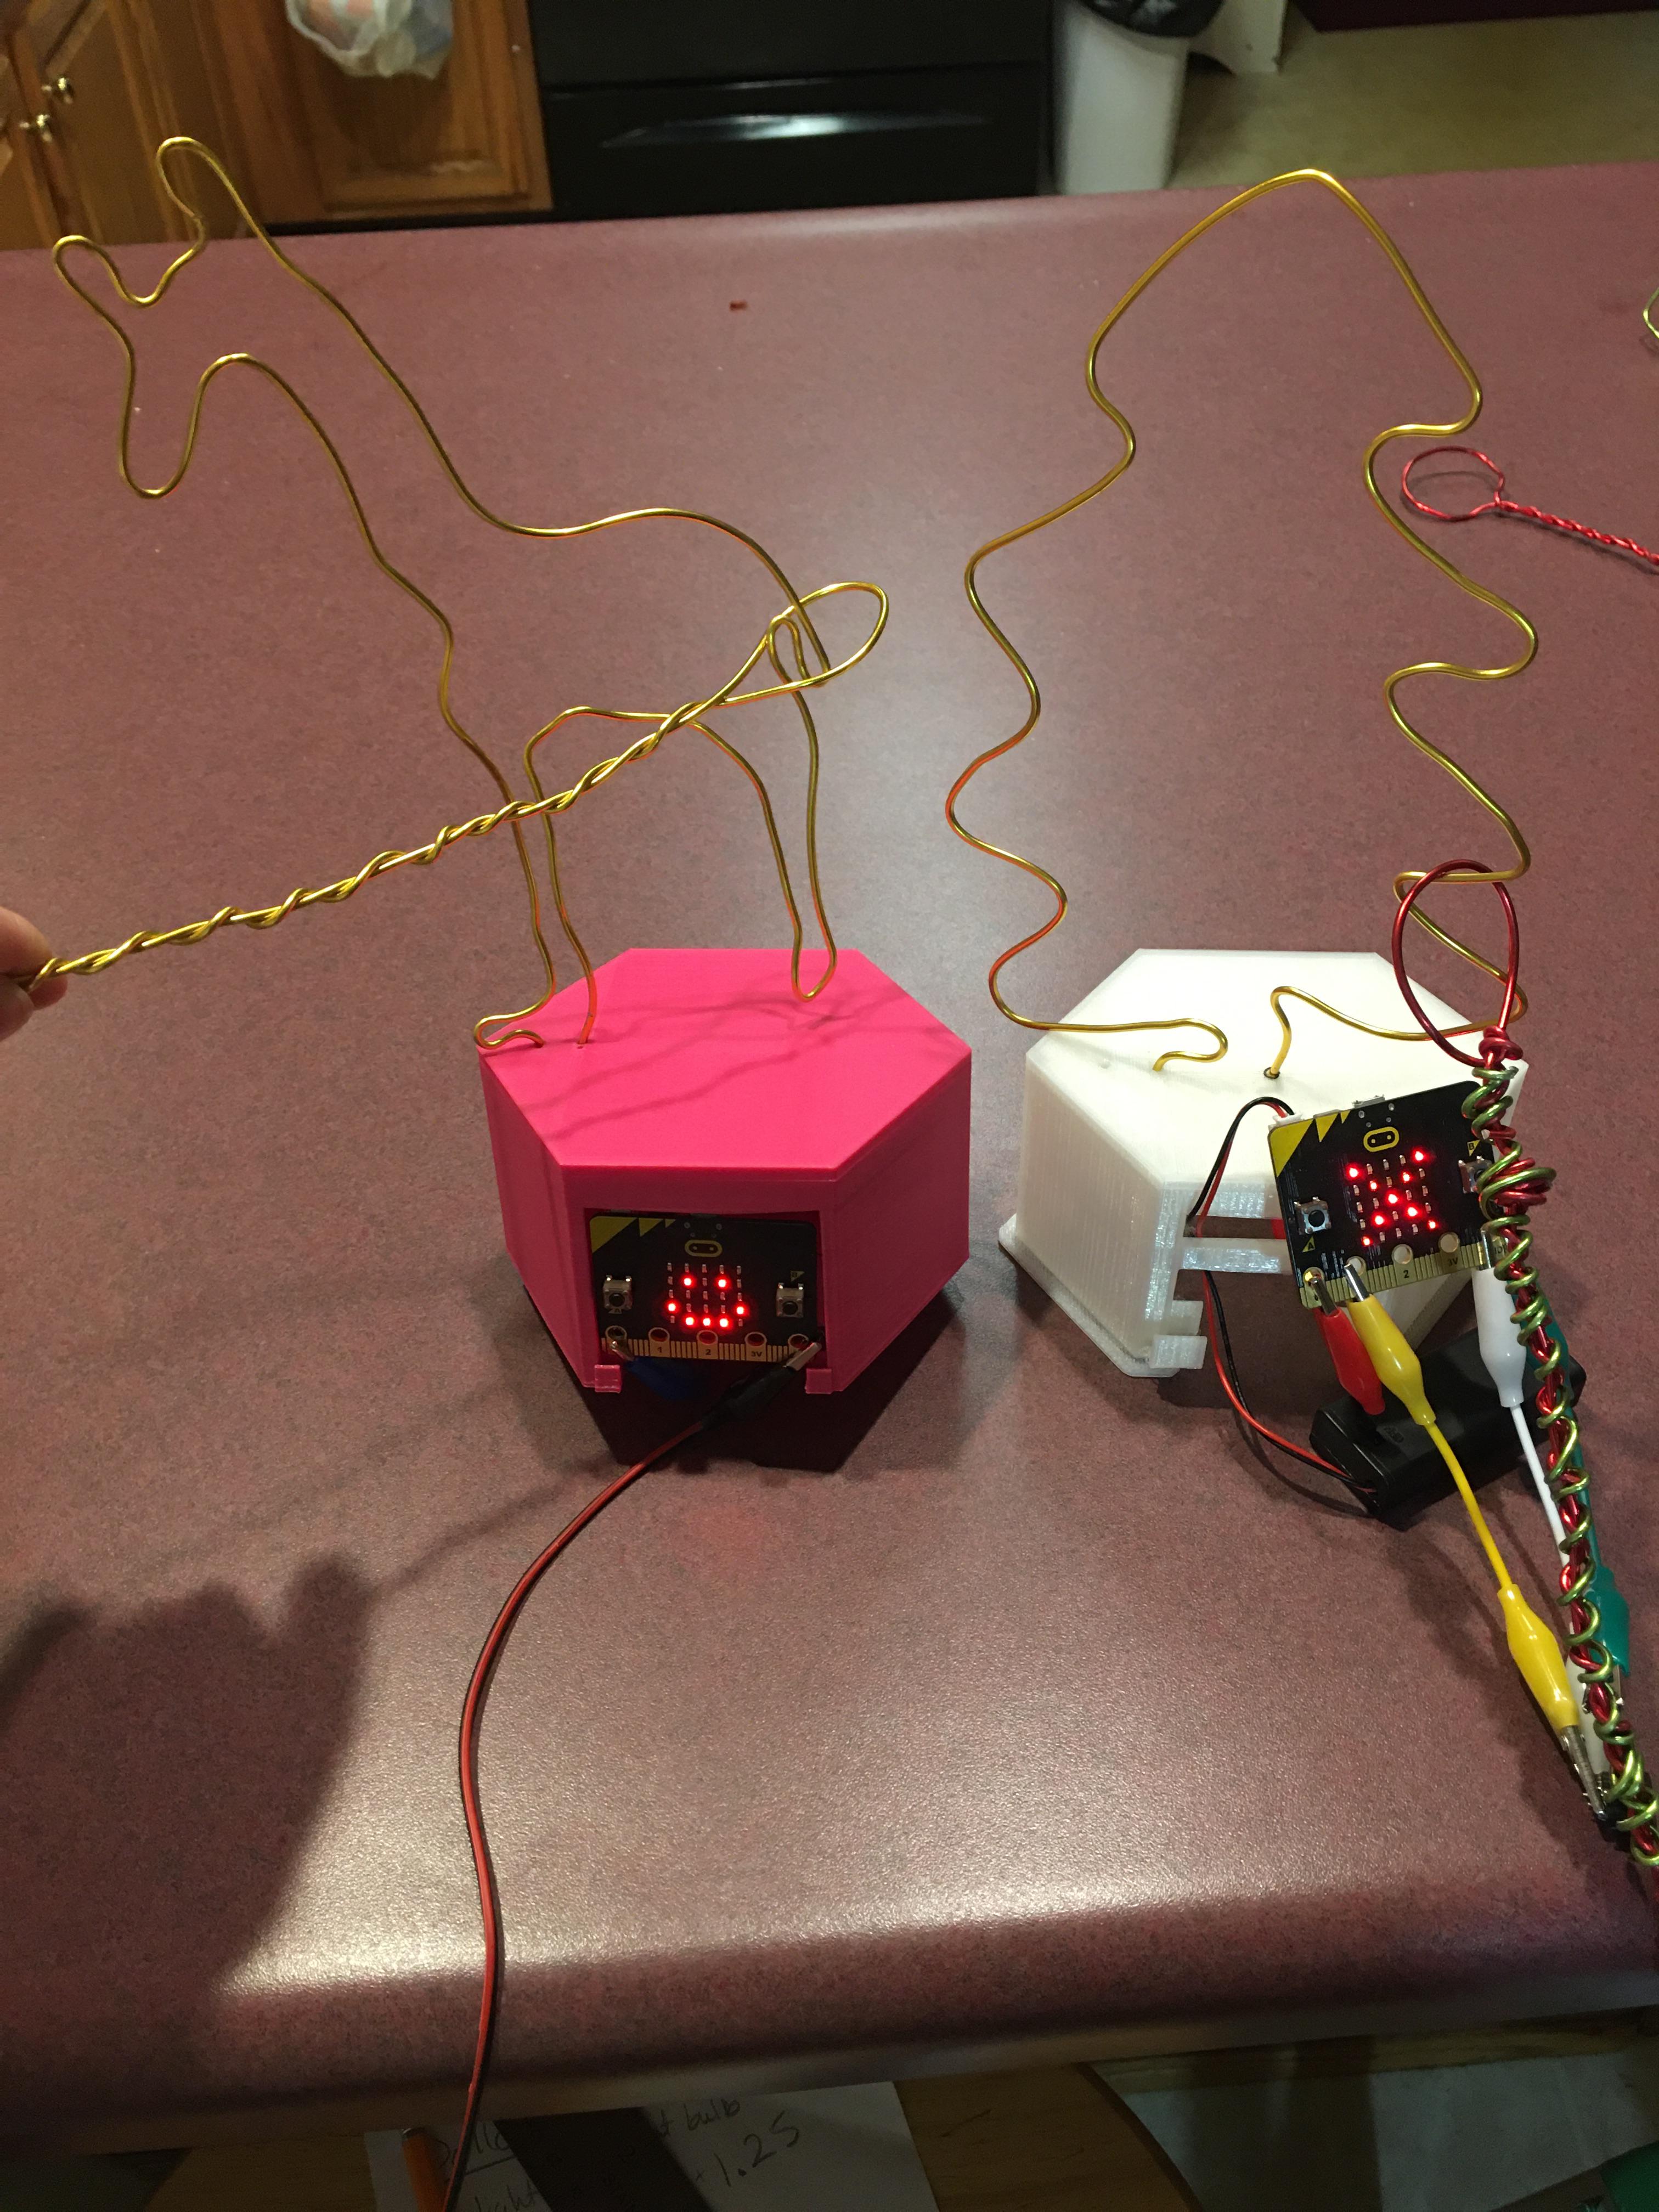
5. Connect Everything
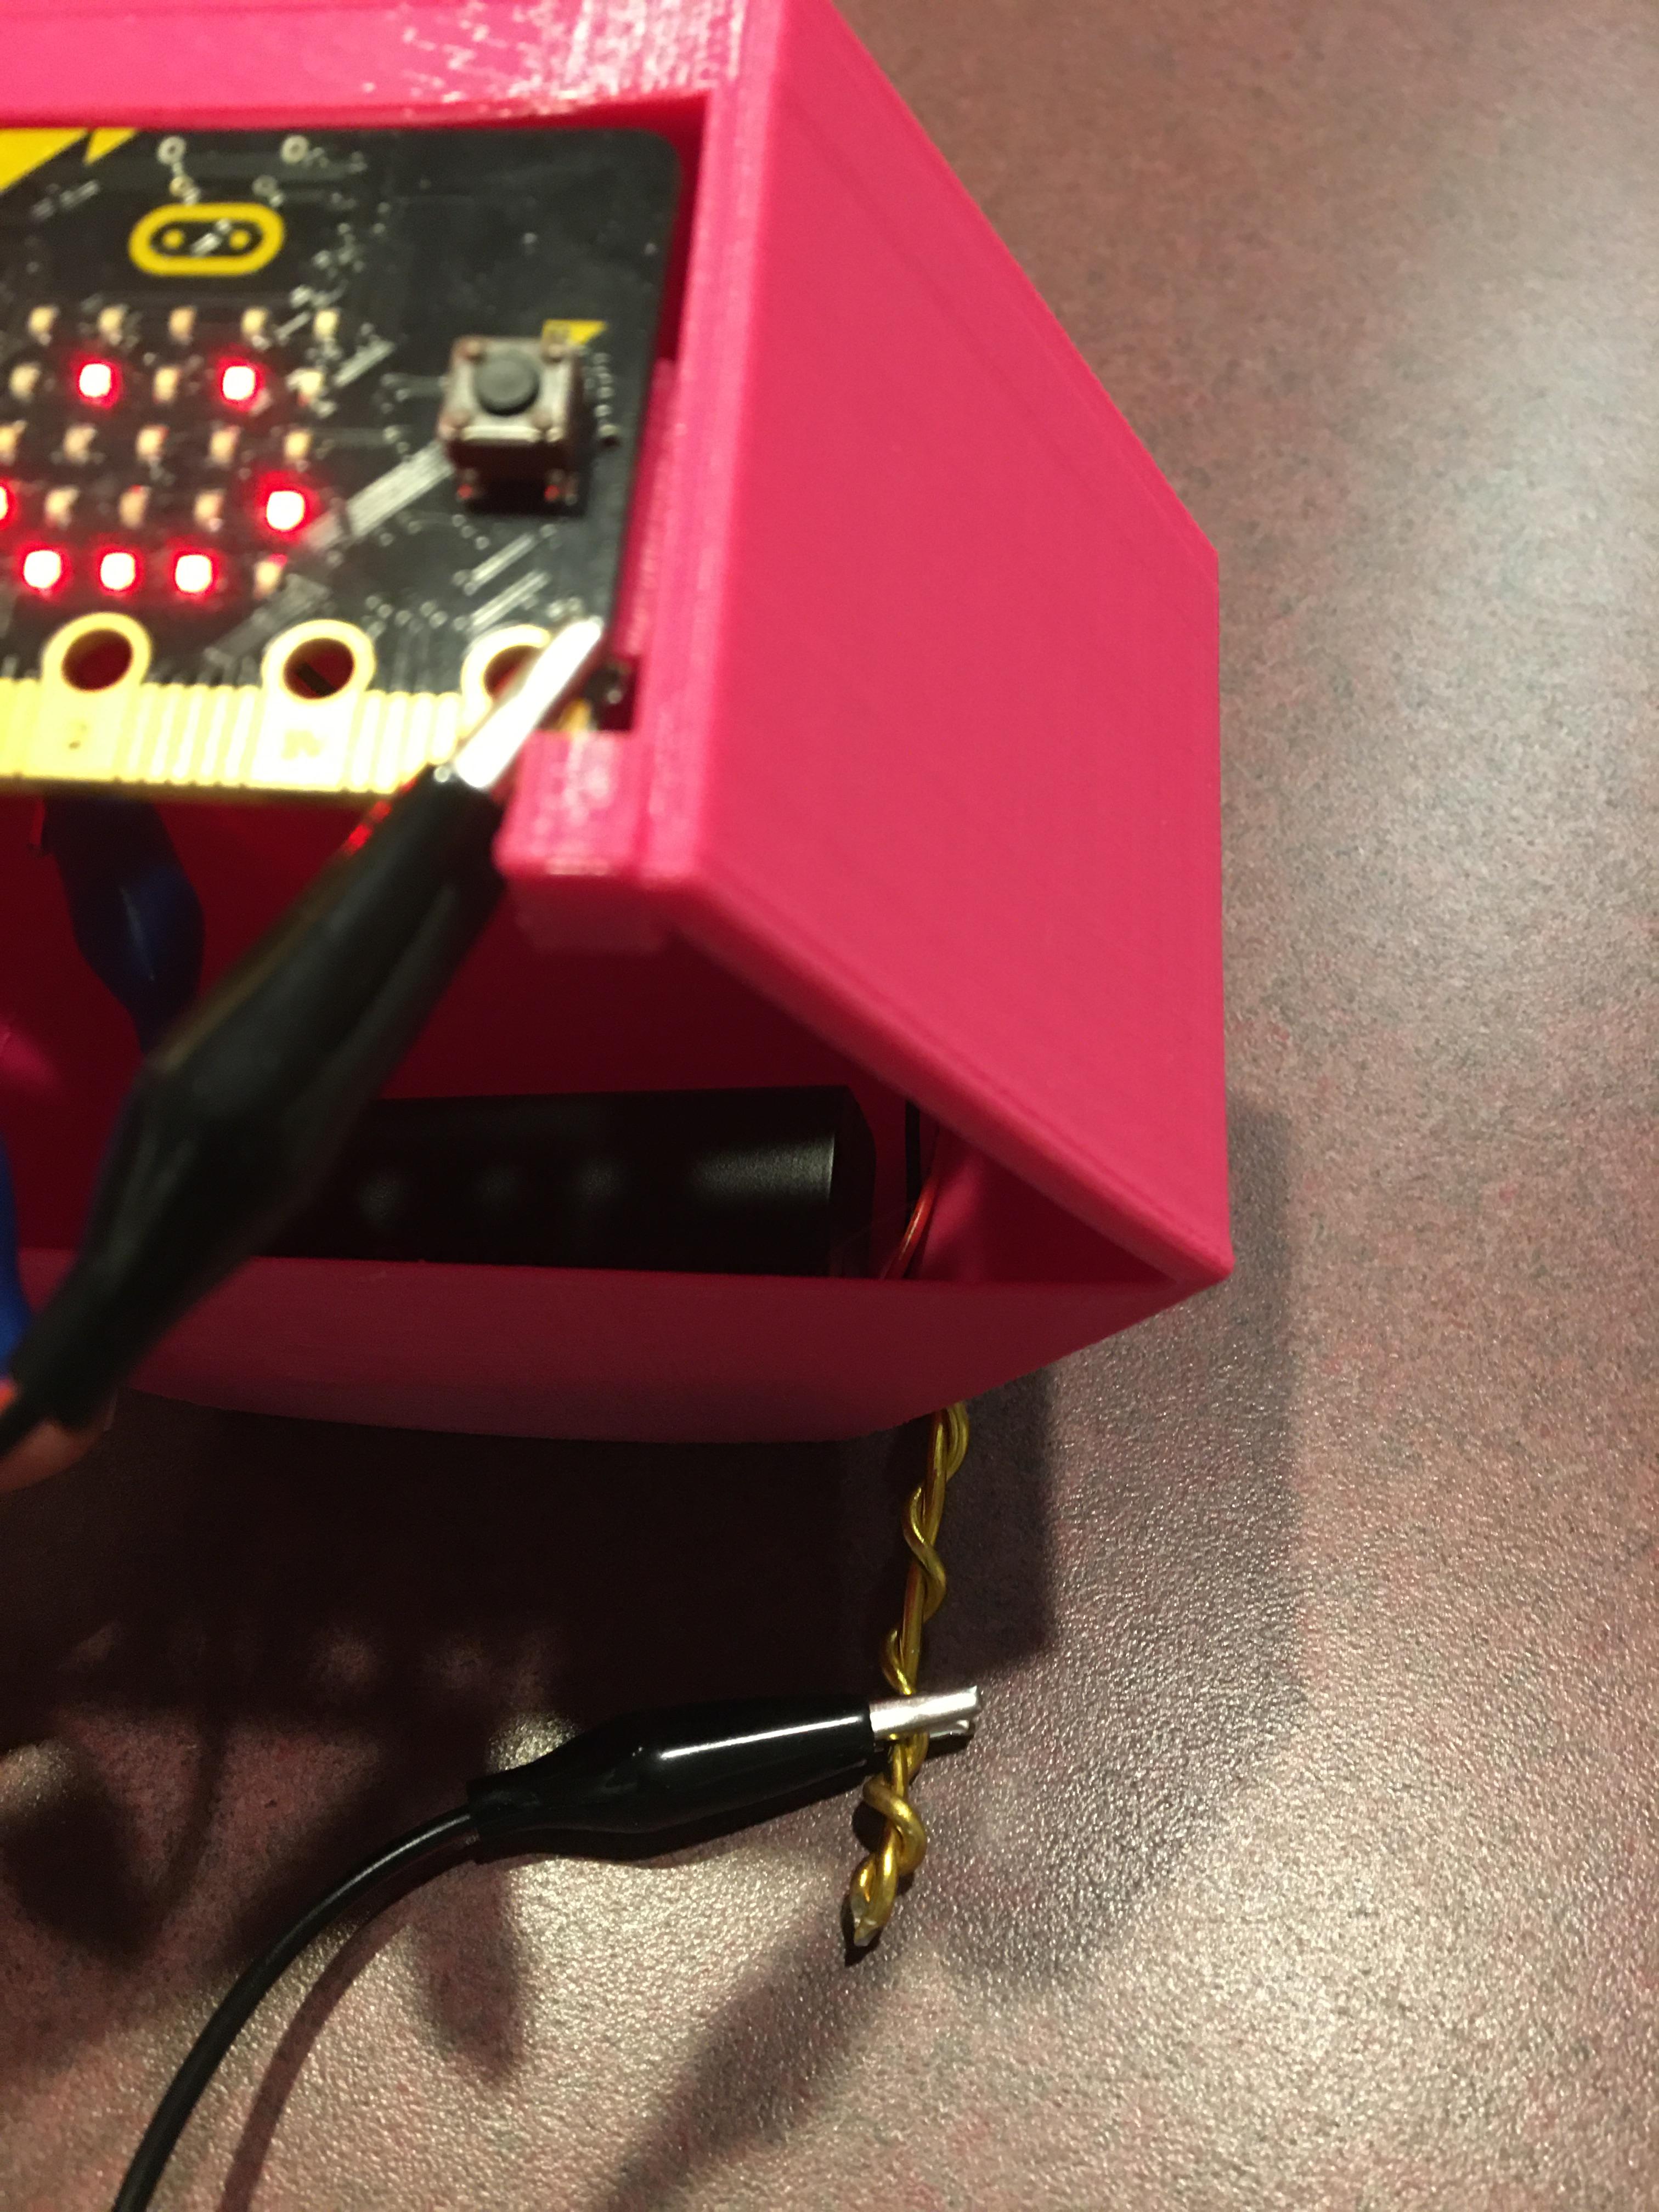
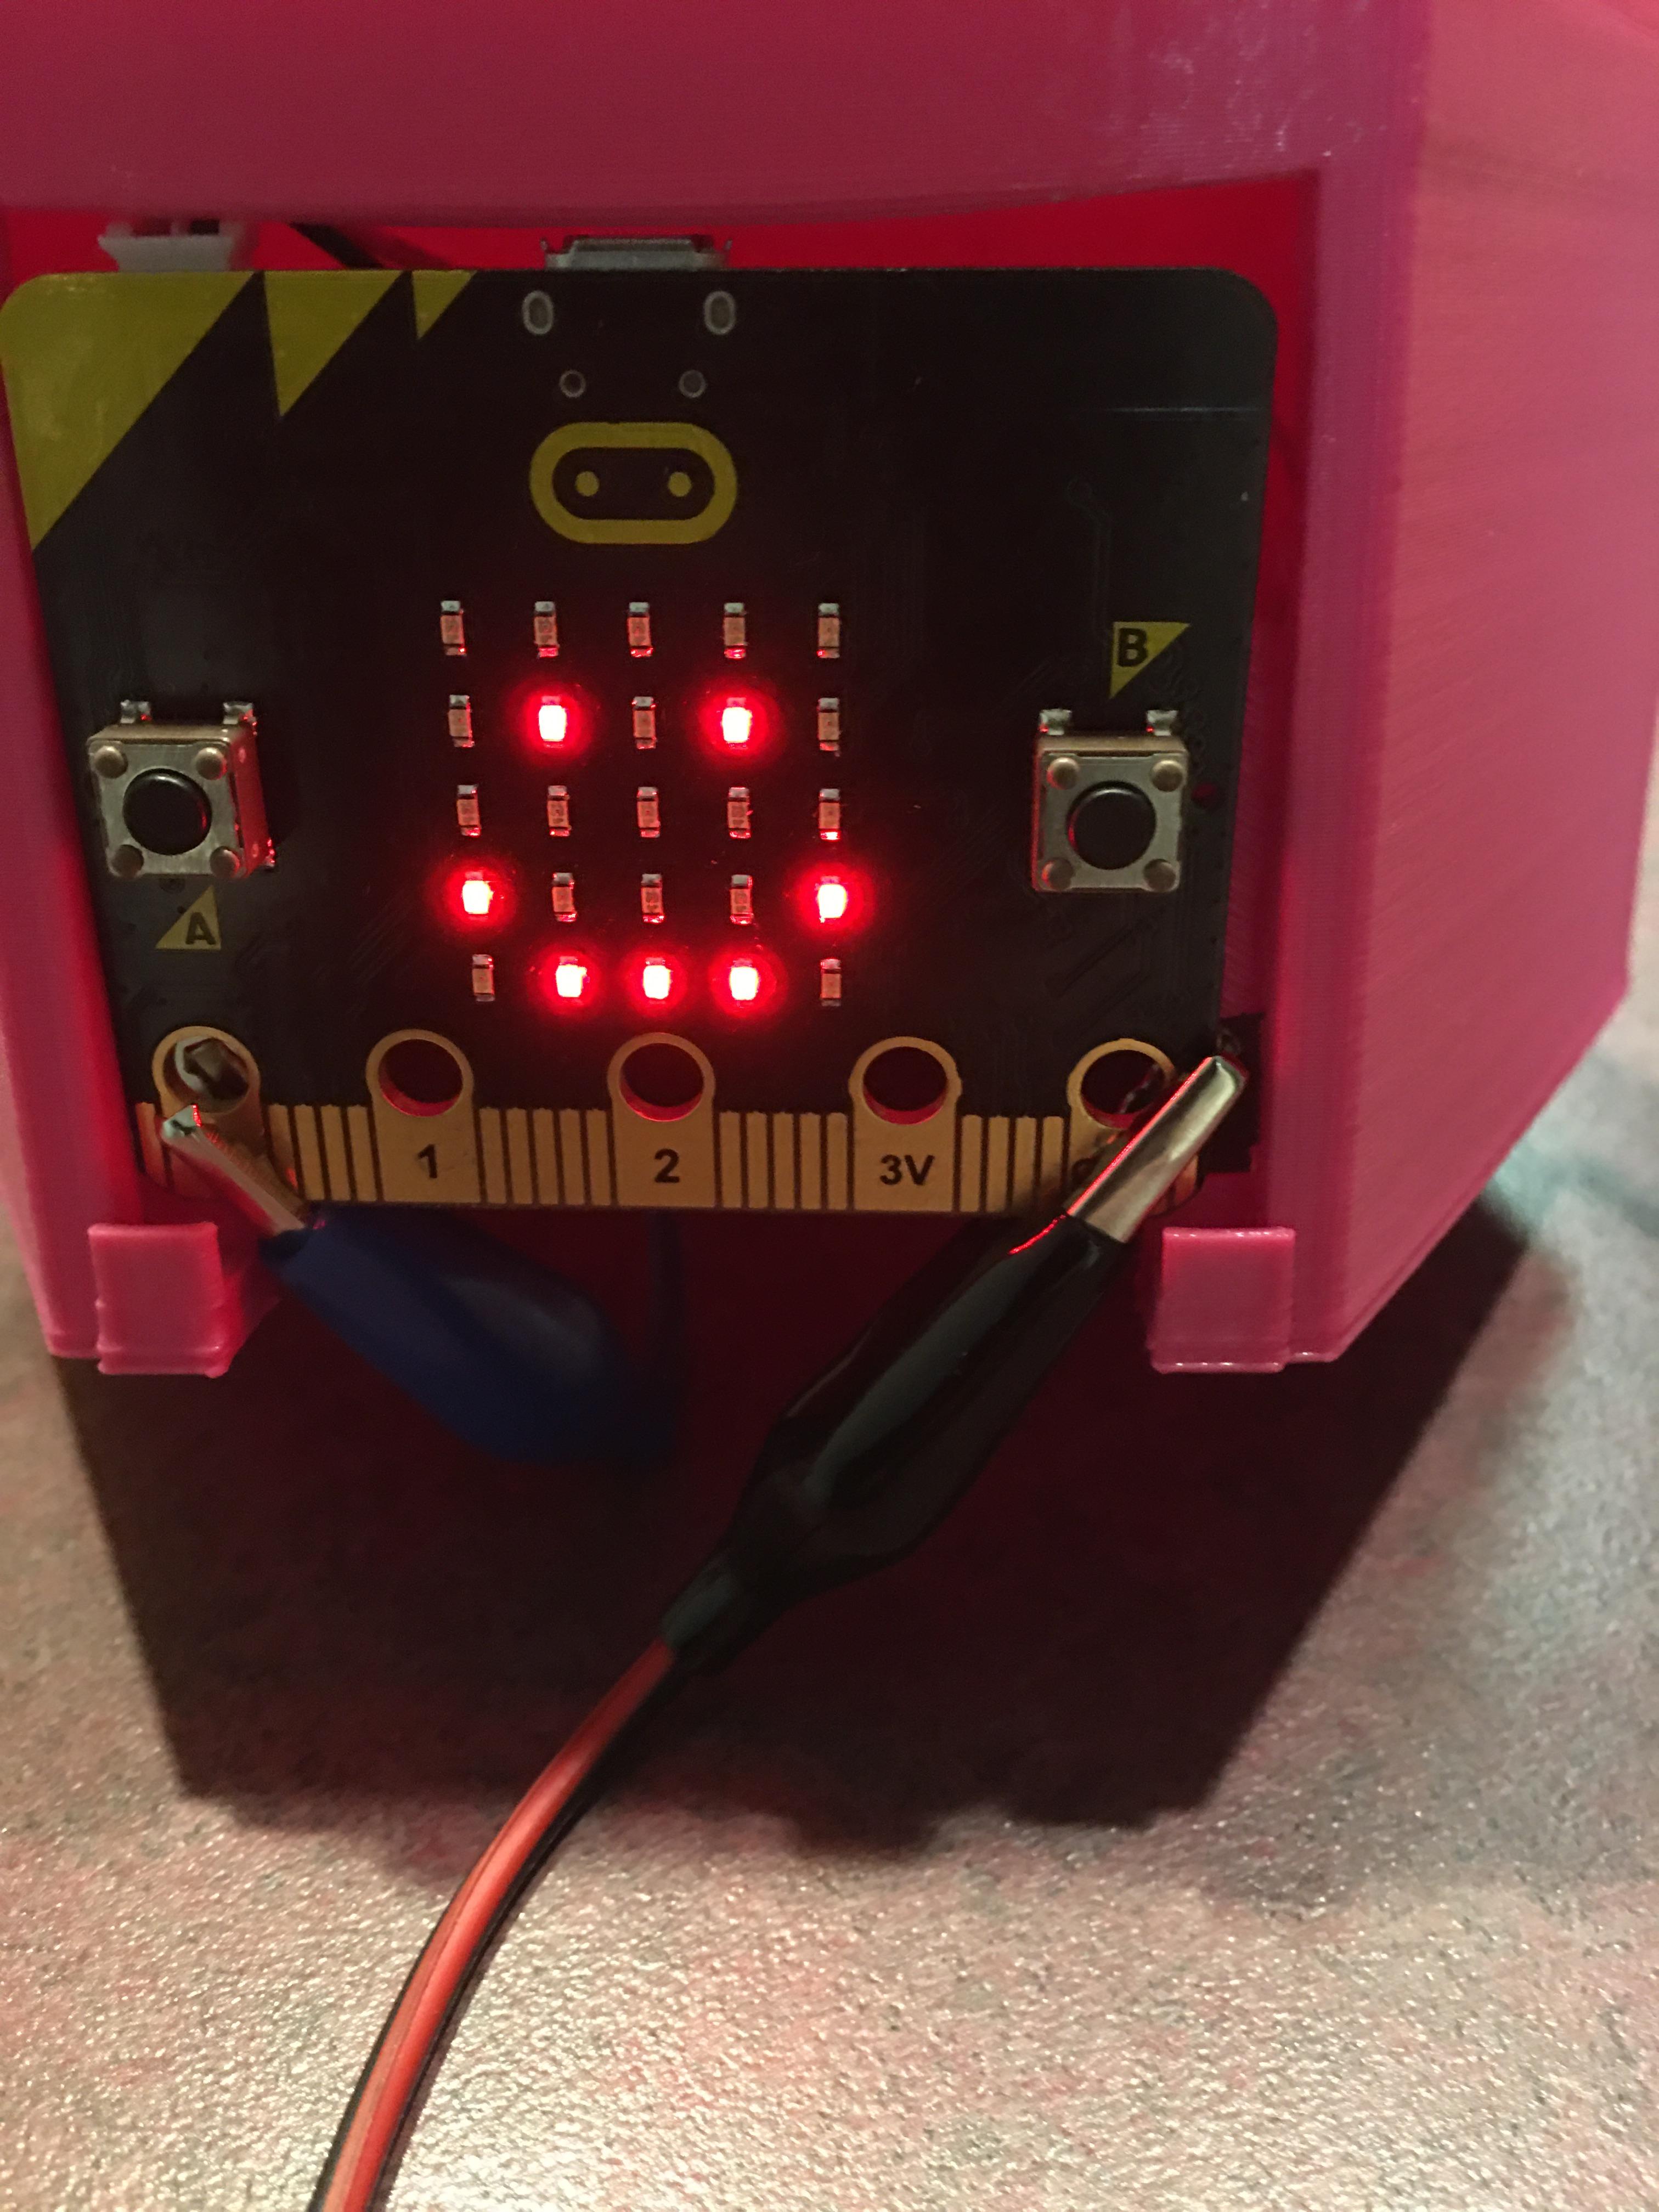
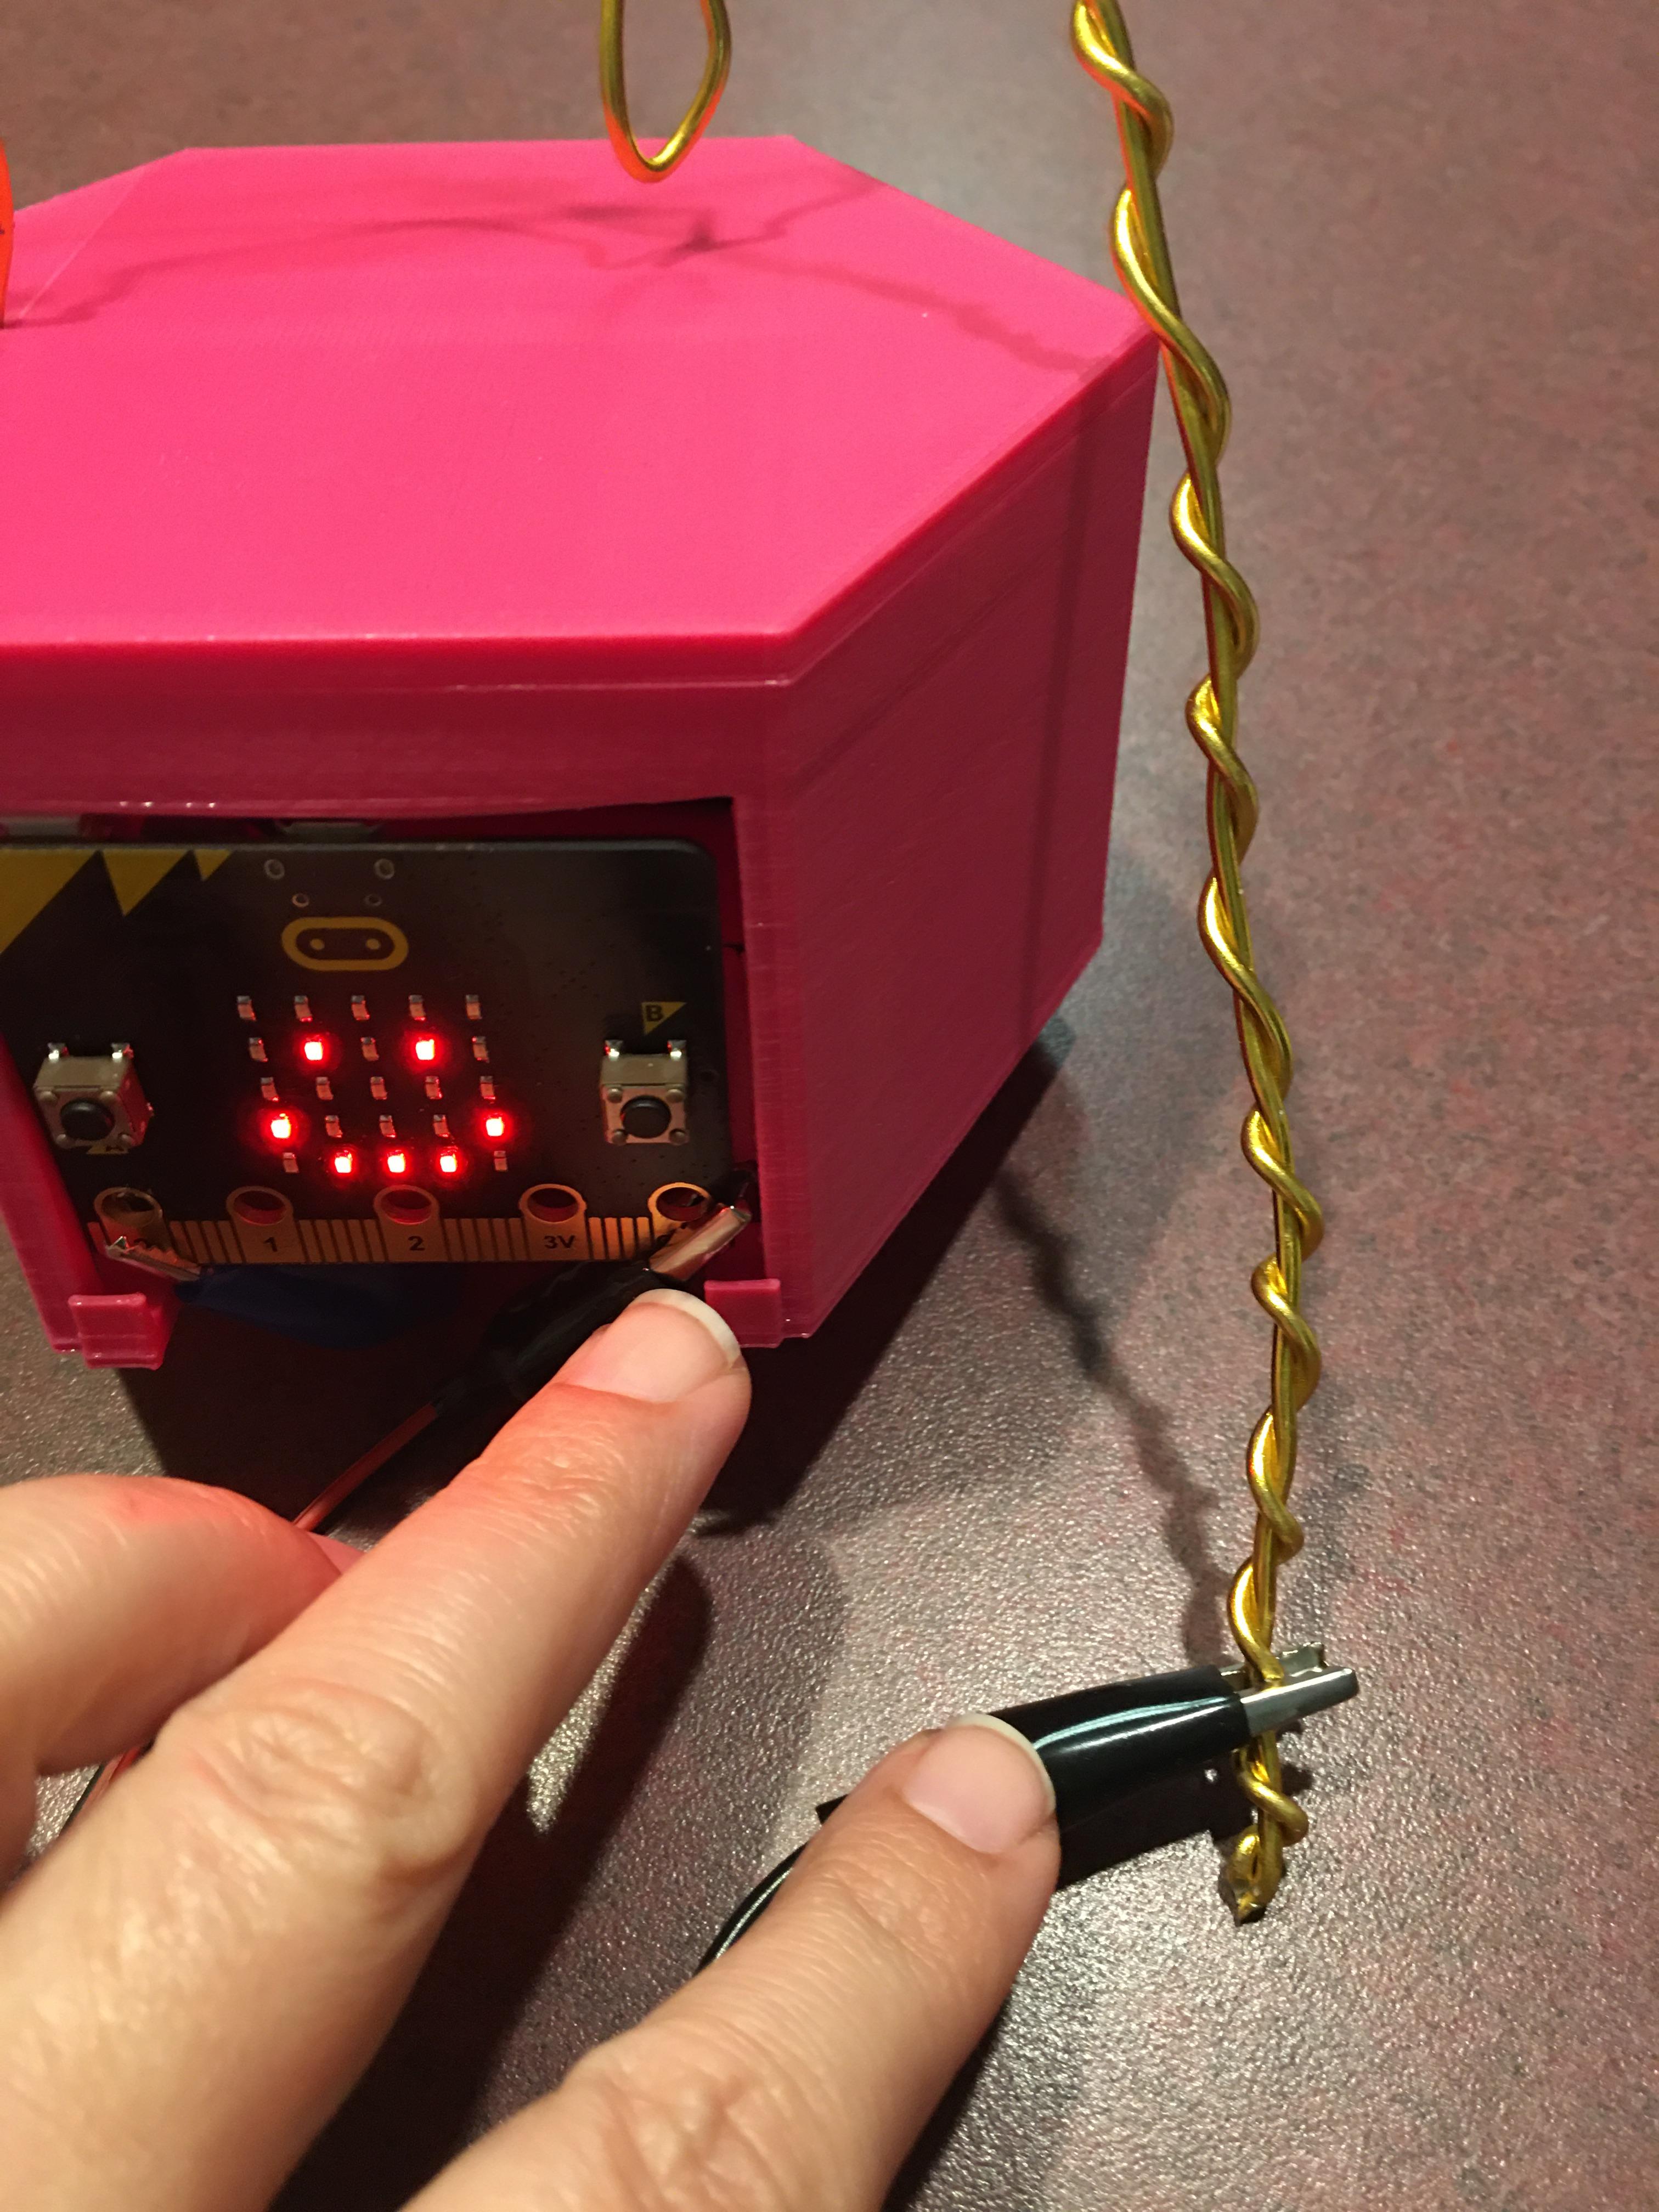

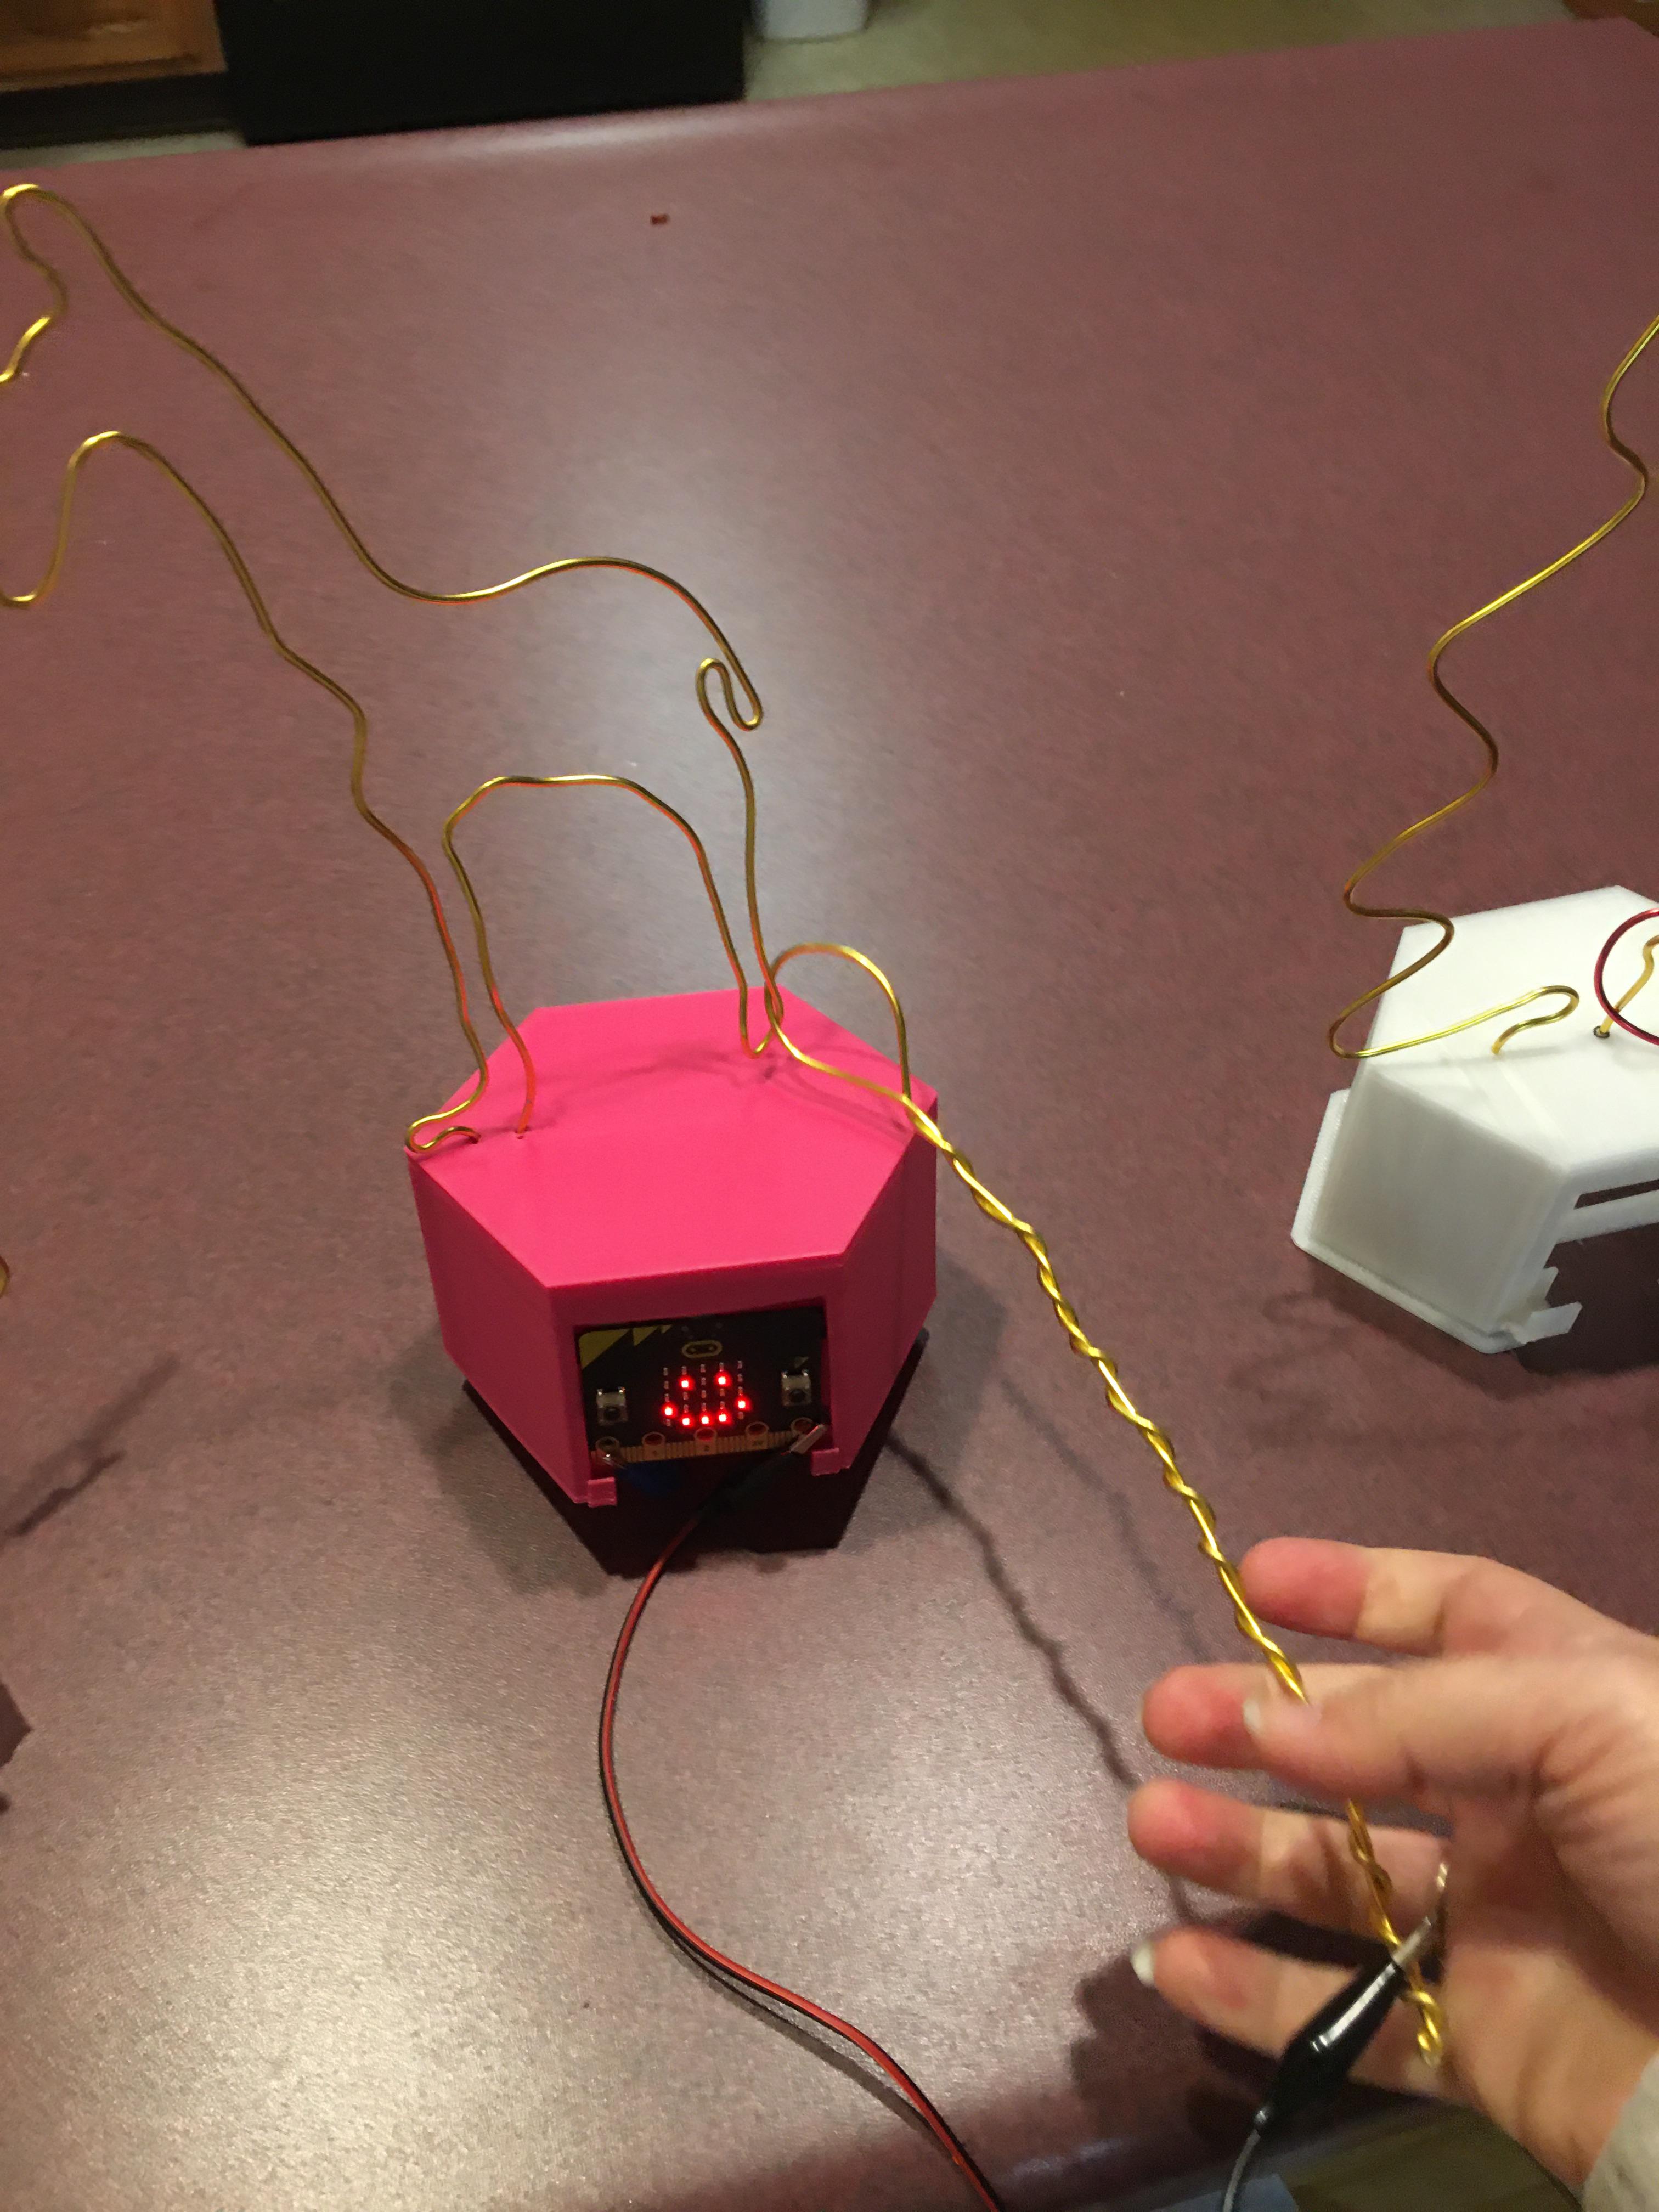
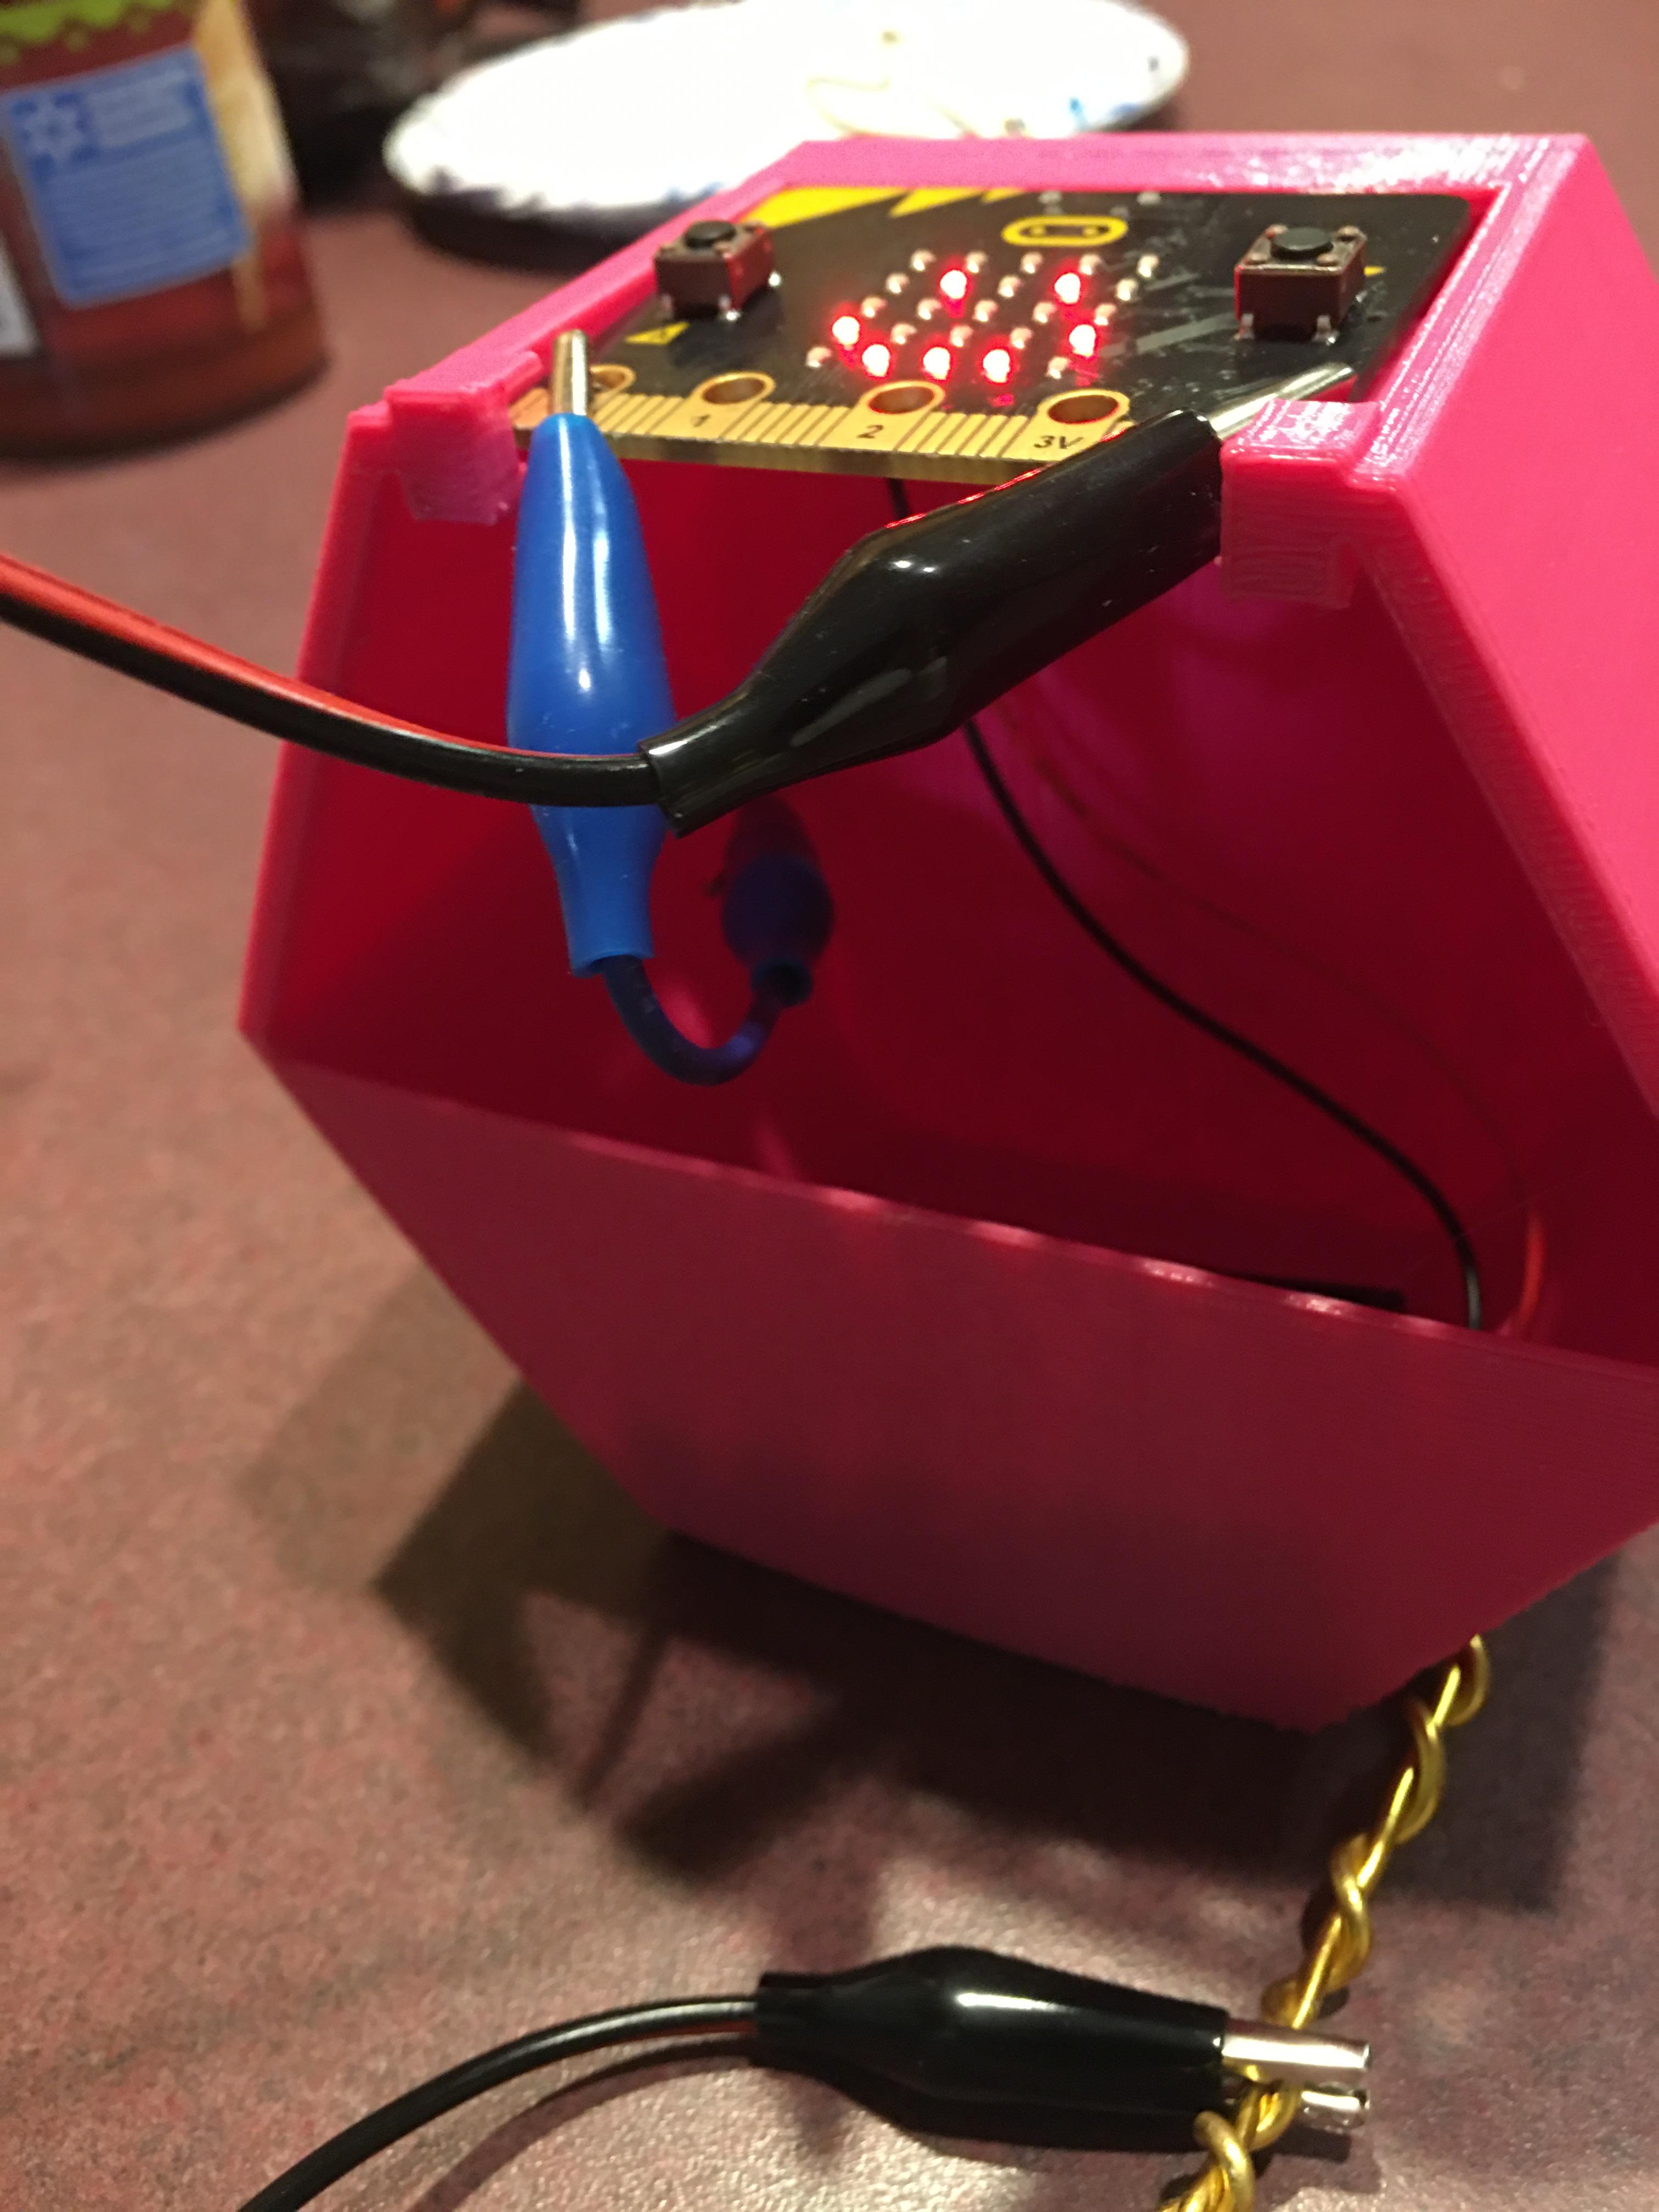
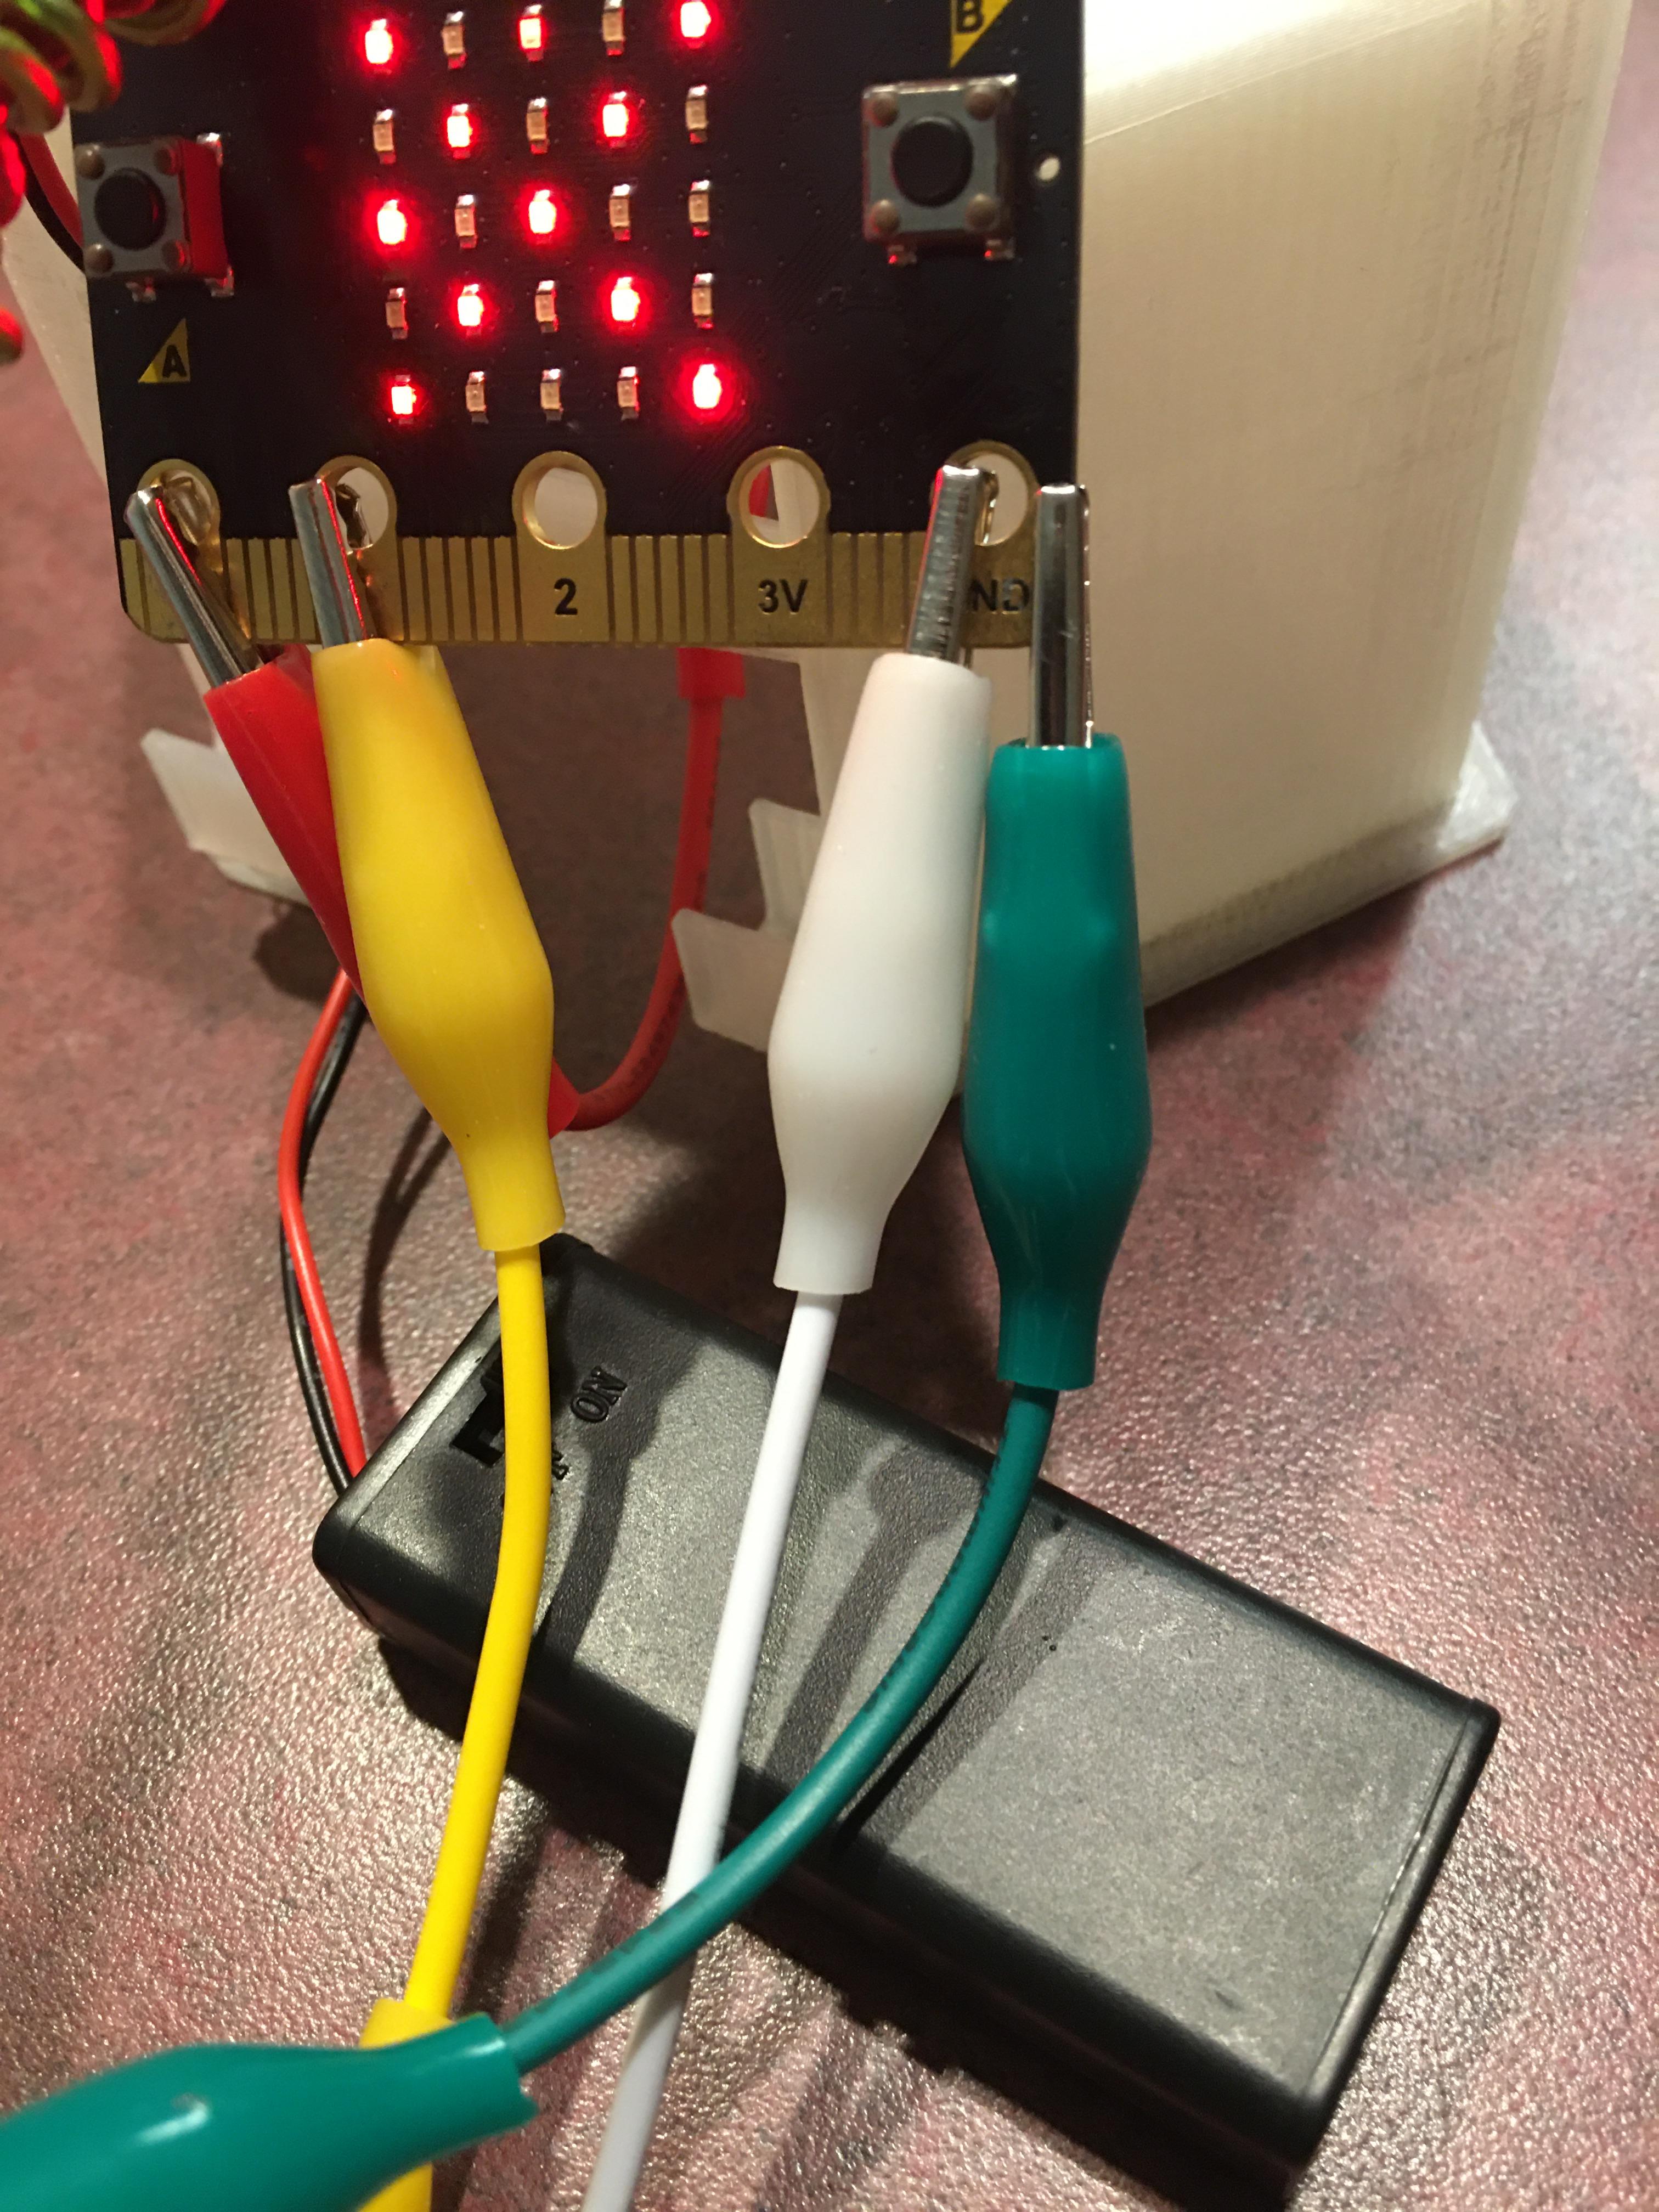
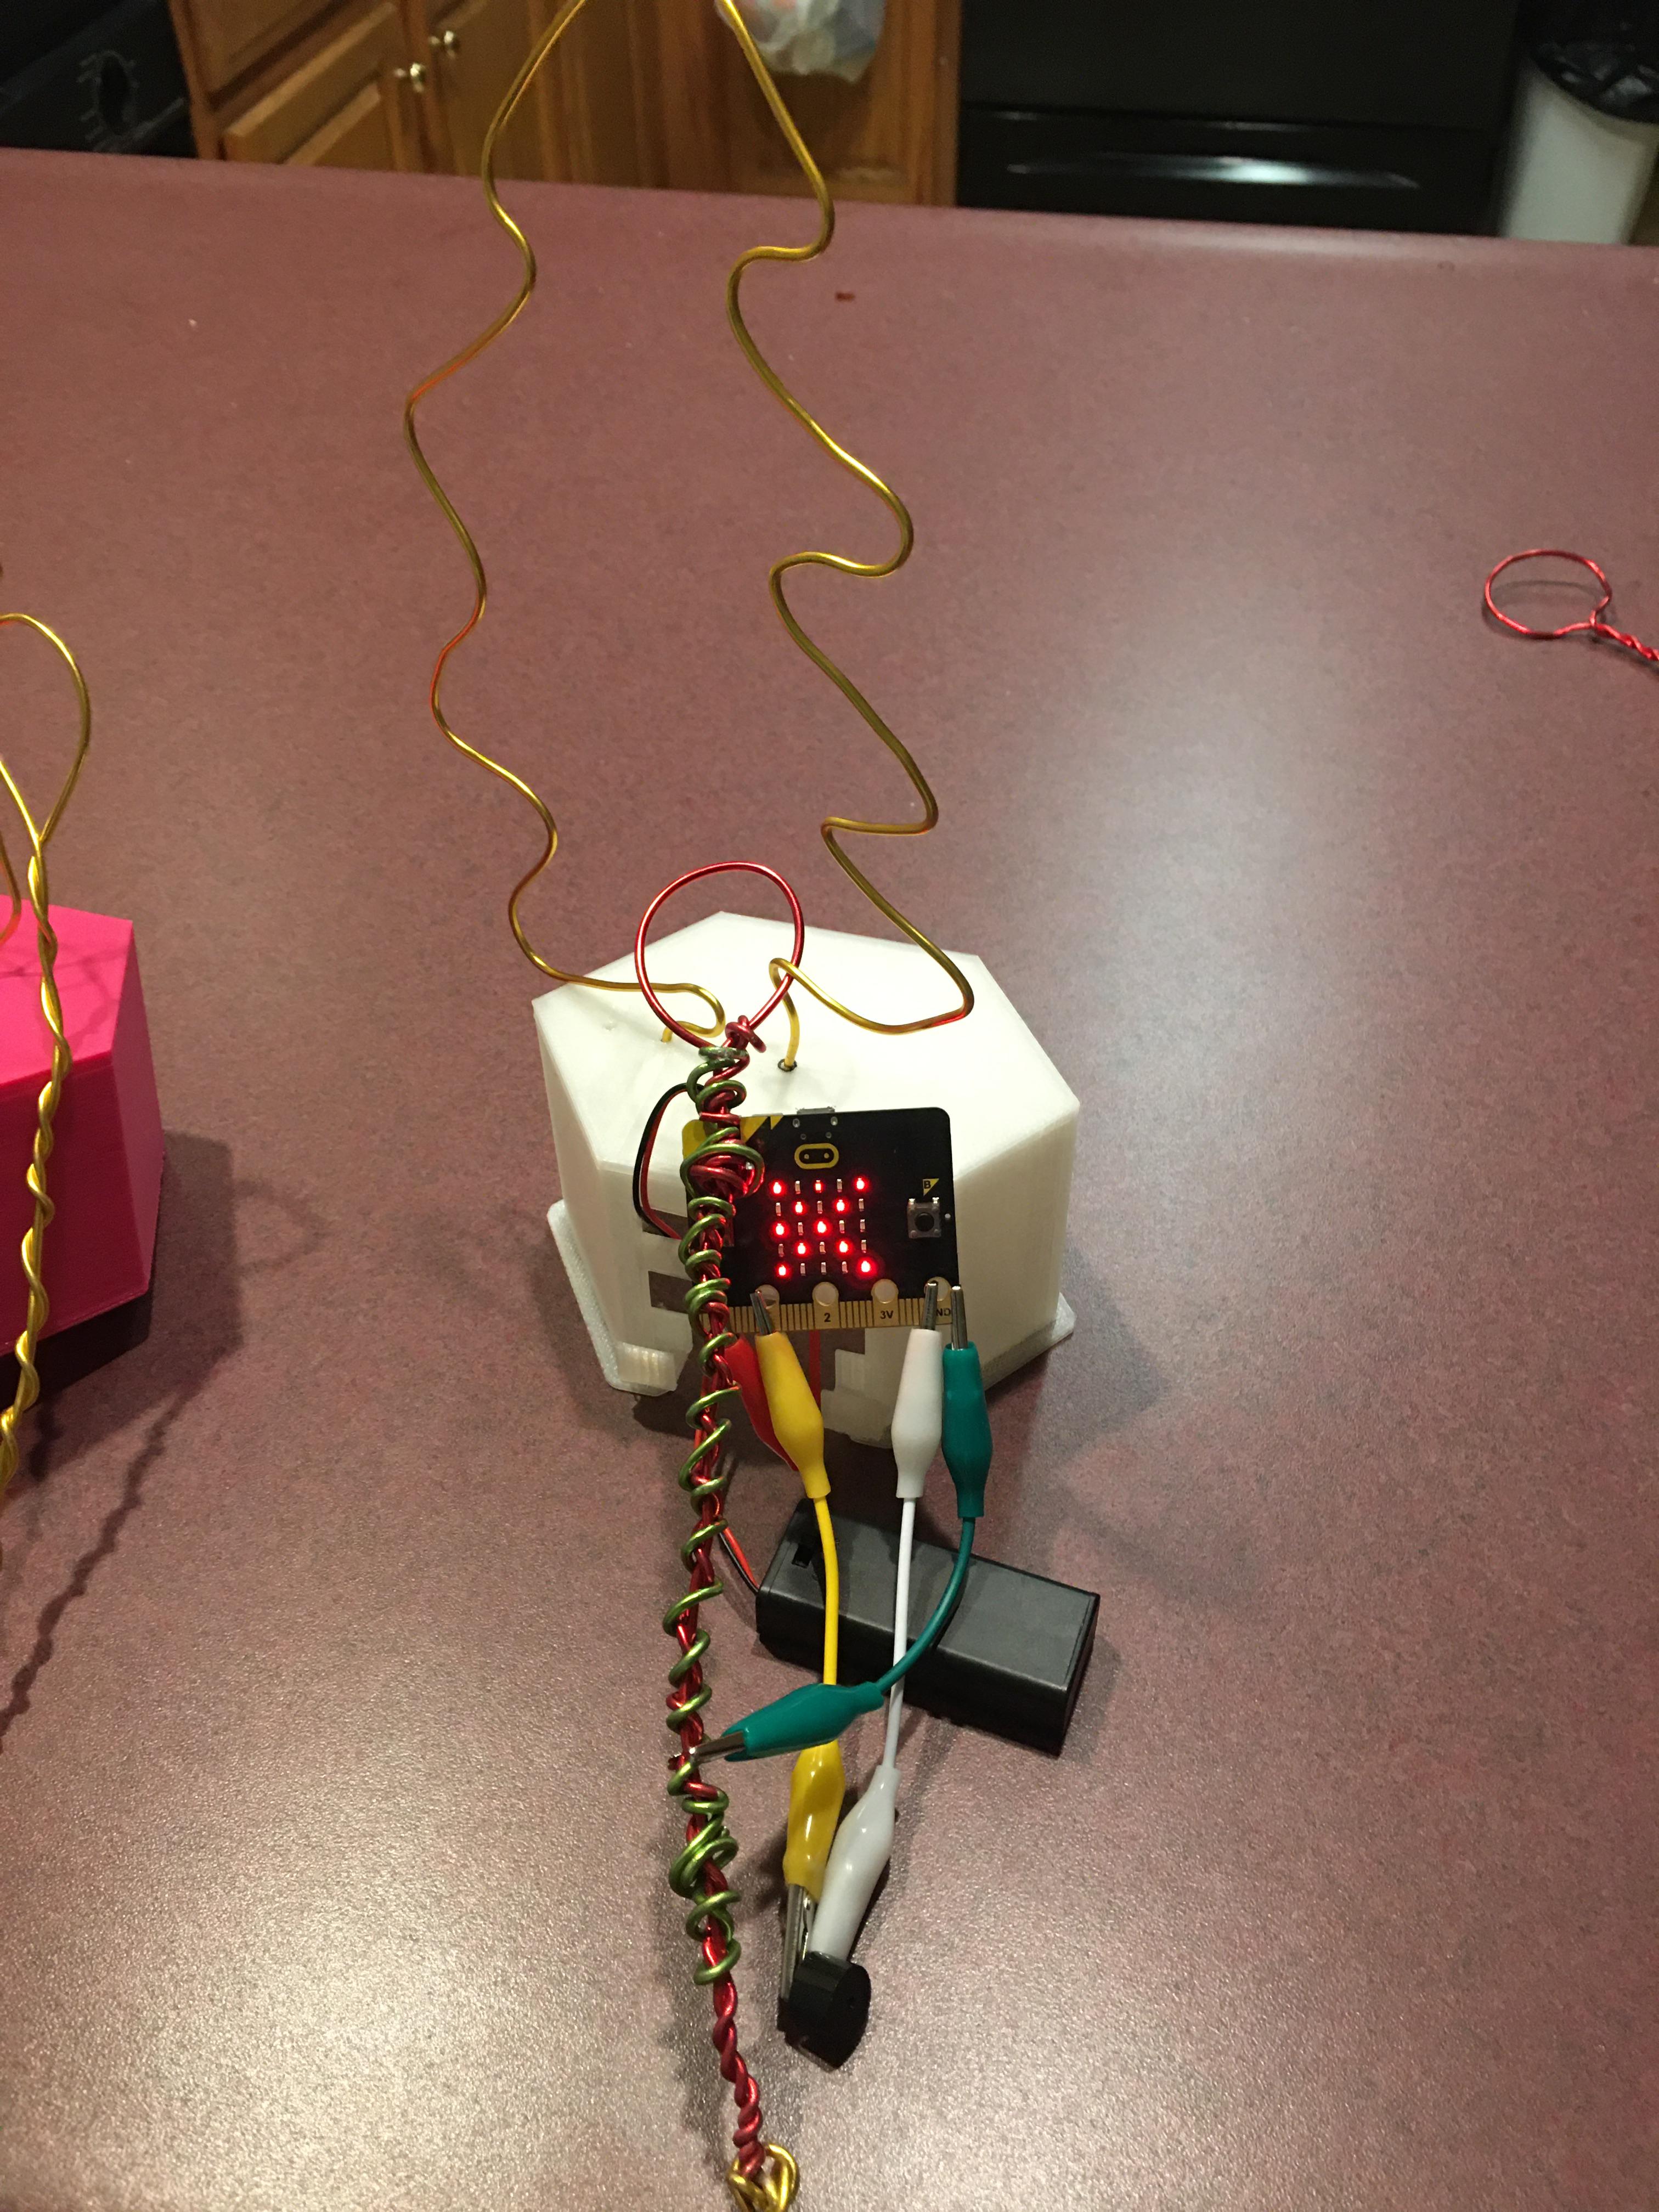
The metal shape will fit in the holes on the top of the base. You need to have the wire feed through the hole, connect an alligator clip to port 0 and the other end to the metal shape(there should be some hanging down inside the base). Then connect the wand to the GND (ground), I find it helpful to have a long alligator clip for this, it allows you more flexibility to go around the shape. If you are wanting to add sound, you will need to add a speaker with alligator clips to port 1 on one side and the other side of the speak is also clipped to the GND. The battery pack fits on the shelf in the bottom of the base.
MicroBit will show a Smile until the wand touches the shape. Then you will see an X and if you have the speaker attached it will make a sound.