Micro:Bit Blockchain! - Micro:Python
by spootjk in Circuits > Microcontrollers
1093 Views, 3 Favorites, 0 Comments
Micro:Bit Blockchain! - Micro:Python
I have made a blockchain that not only functions as a record of hashed cryptocurrency - but also mines the currency! This was done using Micro:Python, the special version of Python code made for Micro:Bits.
Supplies
.png)
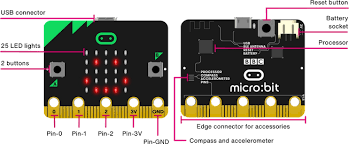
All that's needed for this is a Micro:Bit and something to code with it on! This can be either a laptop, or something that can utilise Microsoft Makecode's website.
Import Your Radio Blockchain Extension.
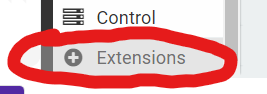
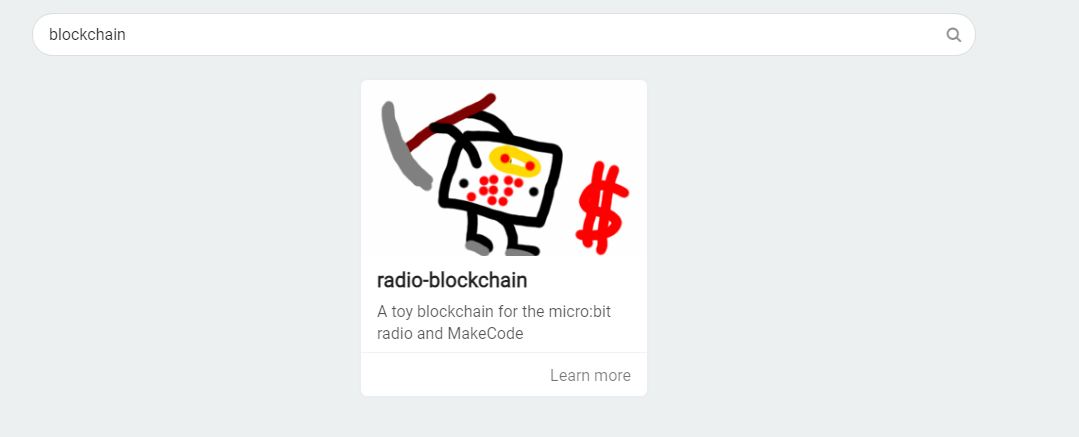
This can be done via blocks using the MakeCode software by going to extensions and finding it from there. There are various commands that will be in a Pastebin below that outline the code needed to use this extension.
Pastebin password: 3WDmzffJie
https://pastebin.com/Yq27e12q
Source: https://makecode.microbit.org/pkg/microsoft/pxt-radio-blockchain
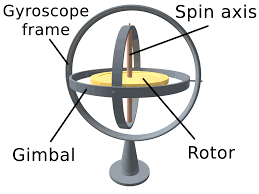
Blockchain Emulation
.png)
In order to create a blockchain, we need to first decide how we will activate it. With our Micro:Bit we will activate the blockchain via a shaking motion, utilising the Micro:Bit's gyroscopic feature.
def on_gesture_shake():
led.stop_animation()
basic.clear_screen()
basic.pause(200)
# display a short pause
if randint(0, 2) == 0
blockchain.add_block(1)
basic.show_icon(IconNames.DIAMOND)
else:
# missed!
basic.show_icon(IconNames.ASLEEP)
input.on_gesture(Gesture.SHAKE, on_gesture_shake)
^ Micro:Python code for our mining code. What this does step by step is: On a shake gesture, it will clear LED's and the screen. This is done in order to reduce screen clutter and overlay of code. It generates a random integer and then pauses, which offers a 50/50% chance of getting a coin. We can change this by making our; if randint(0,2) into more and more integers, offering variance for our chance. If the mining is successful it will display a diamond, (can change if you want!), and as shown by our else function, otherwise will show a 'sleepy face', clearly in disappointment.
Checking Your Balance!
.png)
Step 3 involves the code used to actually check the balance of all Micro:Bitcoin miners on the same network. We will do this by simply pressing the 'A' button!
def on_button_pressed_a():
led.stop_animation()
coins = len(blockchain.values_from(blockchain.id()))
basic.show_number(coins)
basic.show_string("COINS")
input.on_button_pressed(Button.A, on_button_pressed_a)
On our button press of 'A', the LED's will stop flashing and instead run this program. The 'coin' variable is linked to the blockchain ID of our Micro:Bit and with the code line of ' coins = len(blockchain.values_from(blockchain.id()))' we can now interact with our coins. The 'show_string' function will display the amount of coins mined on our blockchain network in a simple side scroll of numbers, and there are also far more we can do with this!
Blockchain Size!
The next step will allow us to view the size of our blockchain so far, that is how many times it has been interacted with. This can give us a lot of information such as how many times our Micro:Bitcoin miners have been shaked!
def on_button_pressed_b():
led.stop_animation()
basic.show_number(blockchain.length())
basic.show_string("BLOCKS")
input.on_button_pressed(Button.B, on_button_pressed_b)
On the button press of 'B' this code will run, showing the length of our blockchain, and a string of text showing that we are talking about the size of our chain.
Finale - Adding Some Helpful Advice!
The last bit of our code is just some instructions on how to actually mine on our program - because it wouldn't be very useful otherwise!
basic.show_string("A=COINS B=CHAIN SHAKE=MINE")
This is a basic string showcasing the controls for our Micro:Bitcoin miner
Sources
https://makecode.microbit.org/pkg/microsoft/pxt-radio-blockchain
https://github.com/microsoft/pxt-radio-blockchain
https://github.com/nominetresearch/microbit-networking-book/blob/master/index.md
https://microbit.org/get-started/first-steps/set-up/
https://microbit.nominetresearch.uk/networking-book-pdf/networking_with_the_microbit.pdf
https://medium.com/@lhartikk/a-blockchain-in-200-lines-of-code-963cc1cc0e54