MetriScale: the Modern Reinvented Version of the Geometry Box
by Asray Gopa in Workshop > Tools
8225 Views, 58 Favorites, 0 Comments
MetriScale: the Modern Reinvented Version of the Geometry Box
Hi Everybody,
In this Instructable, I will show you how to make my newest invention, the MetriScale !! What is a MetriScale, you might ask, let me make it easier by giving the actual Oxford Dictionary Definition of it-
MetriScale - Meh-Tree-Scale - A card-like structure having all the functions and capabilities of a geometry box in a much smaller and higher functioning way. Made by Me.
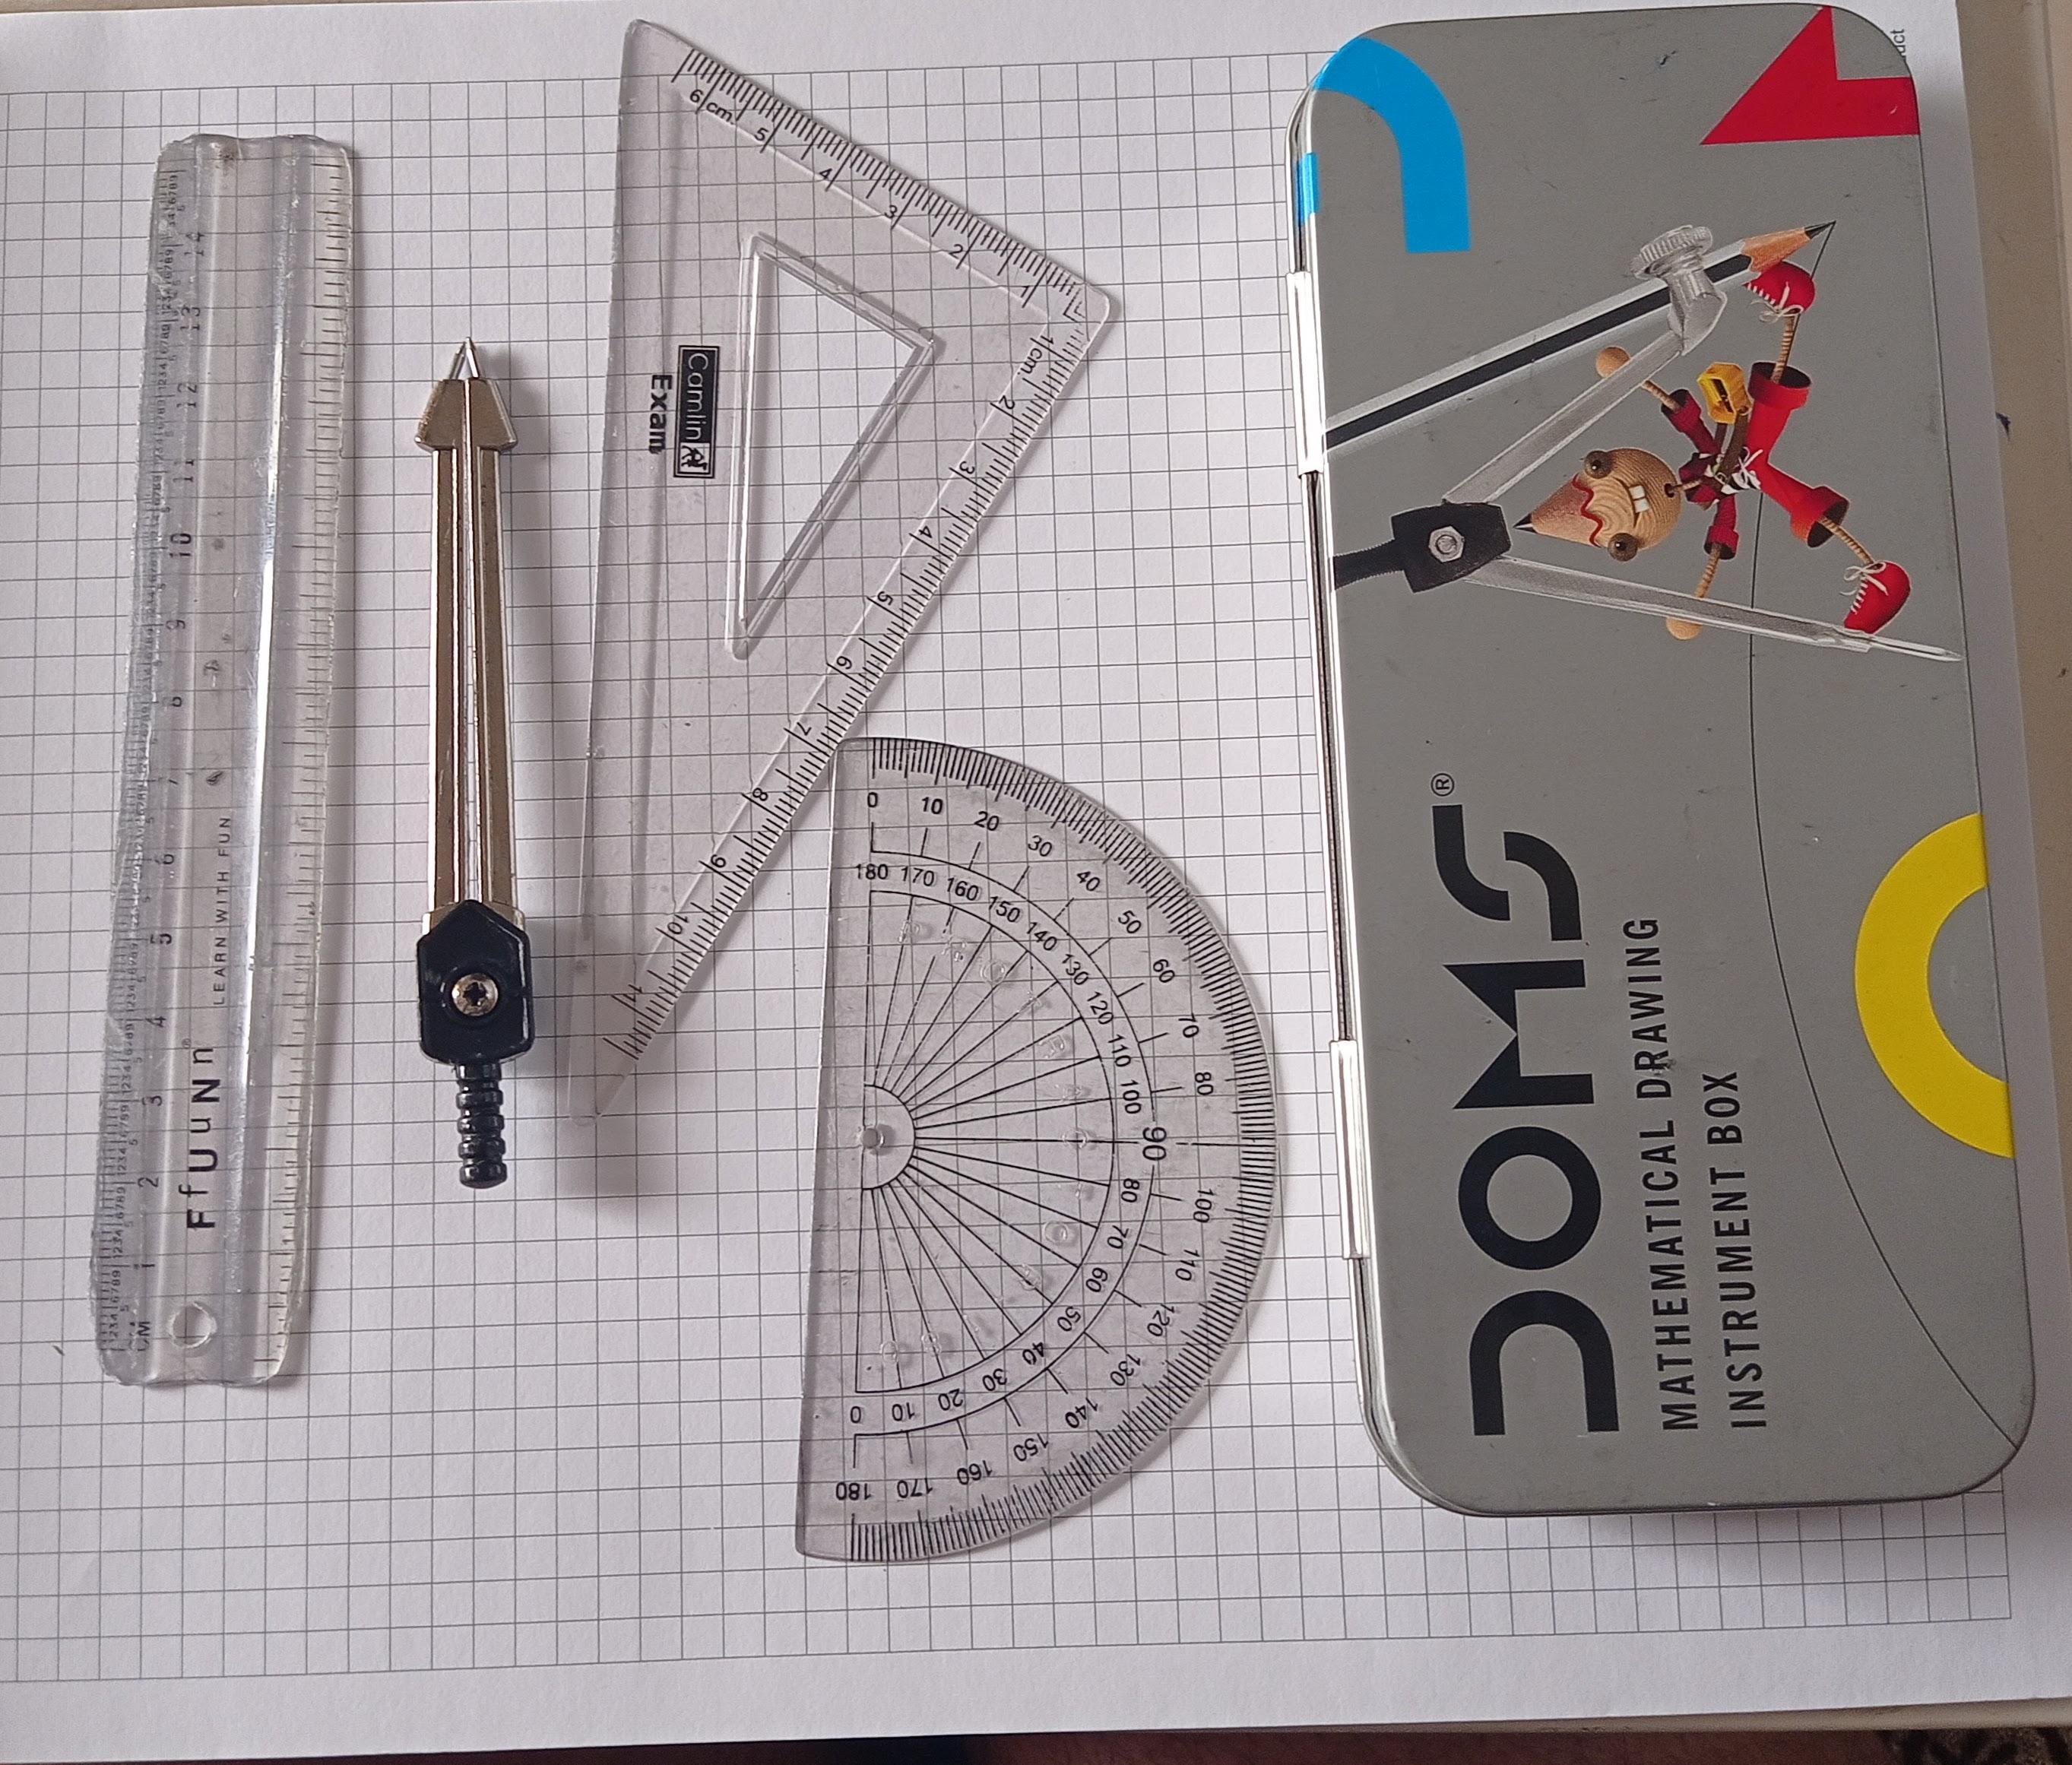
Enough with the definitions, to say it in layman's terms, the MetriScale is basically a card which is basically a geometry box. But this card is foldable and can fit in your pocket while still doing the same functions as a geometry. No more carrying or forgetting your bulky geometry box anymore, kids. It has a protractor, compass, Vernier calipers, set squares, and scales all built into it. This new invention is just a better and smaller geometry box.
I had this idea when I was 10 years old and made it into reality just recently; I am now 16 years old. It was really cool to see something I had in my brain come to exist in real life. This was also a learning process because I made 2 prototypes and from those prototypes, I learned from my mistakes which lead to my final version, which you are can see in the pictures. I finally understood what inventing was and it was an inspiring moment to me.
I am also entering this into the Instructables Anything Goes Contest. Please do vote for me by clicking on this hyperlink. :)
Here is the YouTube link for the MetriScale: www.youtube.com/watch?v=fIgxzXrSSK4&t. Please make sure to like and subscribe.
So hold on to something because I am going to take you through the exciting process of inventing and making the MetriScale.
Supplies
- Plastic (=>2mm)
- X-Acto Knife
- Blade
- Scissors
- Glue
- Superglue
- Paint (Acrylic)
- Scales
- Micron Pen
- Varnish (Optional)
Design & Thinking Process: the Key Steps for Creating an Invention
Every invention starts with a problem. The selfie stick was invented because the inventor couldn't take a proper picture of him and his family. Benjamin Franklin created the flexible urinary catheter because his brother suffered from kidney stones and his invention helped his brother and countless others. I say this again, any invention has a problem behind it. It could be simple, like the invention of the Sticky Note: an engineer from 3M had a problem with piling up his notes on tiny pieces of paper or it could be big, like the invention of the modern-day computers. Problems are what help create a great invention.
You might be wondering, what is the problem I am trying to solve. When I was in 6th grade, I was writing a Geometry test, and as you must be aware all the questions were to draw various geometrical figures. The worst part of that day, apart from the geometry test, was that I forgot my geometry box.
Every invention has to solve a problem: Once you identify the problem, you got to find a solution. The solution has to be simple enough so that anyone can use it and it should be easy to produce a plan and make it. If you don't follow these parameters, the solution becomes the problem and you get stuck in a loophole.
After writing that test, I got to thinking, there got to be a better alternative to the multiple components (compass, scale, protractor, etc..) in the geometry box. I got to thinking and decided to cut the middleman and make one by myself, so I kept 2 parameters in mind: It should have all the functions of the components in the geometry box and it should easy to store so it can in a pocket or a pencil case.
I later abandoned the idea of that project because I didn't have the drive to make stuff back then.
But, 10 months ago, when this quarantine started, I recollected from memory and started thinking and then I came up with an idea, an early prototype and I made it with paper but as you know paper is weak and it tore, but that was okay though, the idea worked immensely with a few bugs and it gave me a rough feel on how it worked.
Your first idea will not always be the best solution, try, try again: You can always make more prototypes and make your invention better and easier to use. The first invention is usually the beta version and you can usually find the bugs you want to fix in it.
After a bit of time, I realized I could make this even better, so I made one with even thicker paper and piled and glued them up together, in this version I added features you wouldn't see in a geometry box but then after finishing that prototype, I realized it was too thick and bulky and didn't work, also the features I added didn't make sense and also didn't work. I realized the features didn't work because they weren't even related to the geometry box.
For the third prototype (my final one and the current one I'm on), I totally re-changed the design and only kept features related to the geometry box. This time it was made from plastic(from a binder I found), plastic solved the limitations I had with paper and it was just much better. I also re-designed it to make it more aesthetically pleasing, this was kind of interesting because my other two prototypes were more focused on function rather than looks, I made sure this prototype was looking good and had the same focus on function as the other two, here I noticed aesthetics are important too in an invention. And I was finally done with Prototype 3. I would call it done here, but in the future, I hope I can make the best possible version of this invention.
Prototyping

Prototyping is absolutely important for any invention as you can find out the flaws or bugs before you make your final one.
In the pictures above you can see the prototypes for the MetriScale. As I mentioned before, I made 2 prototypes which lead to the final version. You can out check those prototypes in the pictures above. Prototyping is a learning process so make sure to keep an open mind when making something. Make sure to change at least a couple of things every time while prototyping, so you can make sure which features end up on the final version.
I really hated prototyping but it was really worth it in the end. Some projects don't need prototyping but it is the best way to make the best product. So always prototype!
Prototype 1 was made of 1 layer of paper and it was a basic version. It just tested out the concept of the MetriScale. It worked well but it was made of A4 paper and didn't last long and was just flimsy. This was a good learning piece and it gave me a feel and how it worked and looked like
Prototype 2 was made from a stack of cardstock so that it would be thick but this version was messy and very thick that I had to get to rid of it. This prototype had a lot of unnecessary features and just 'felt' bad, so I decided to scratch it.
Considering whatever I learned from these prototypes, I put all the good features into the final version.
Now I will teach you how to make the MetriScale!
Cutting Out the Pieces
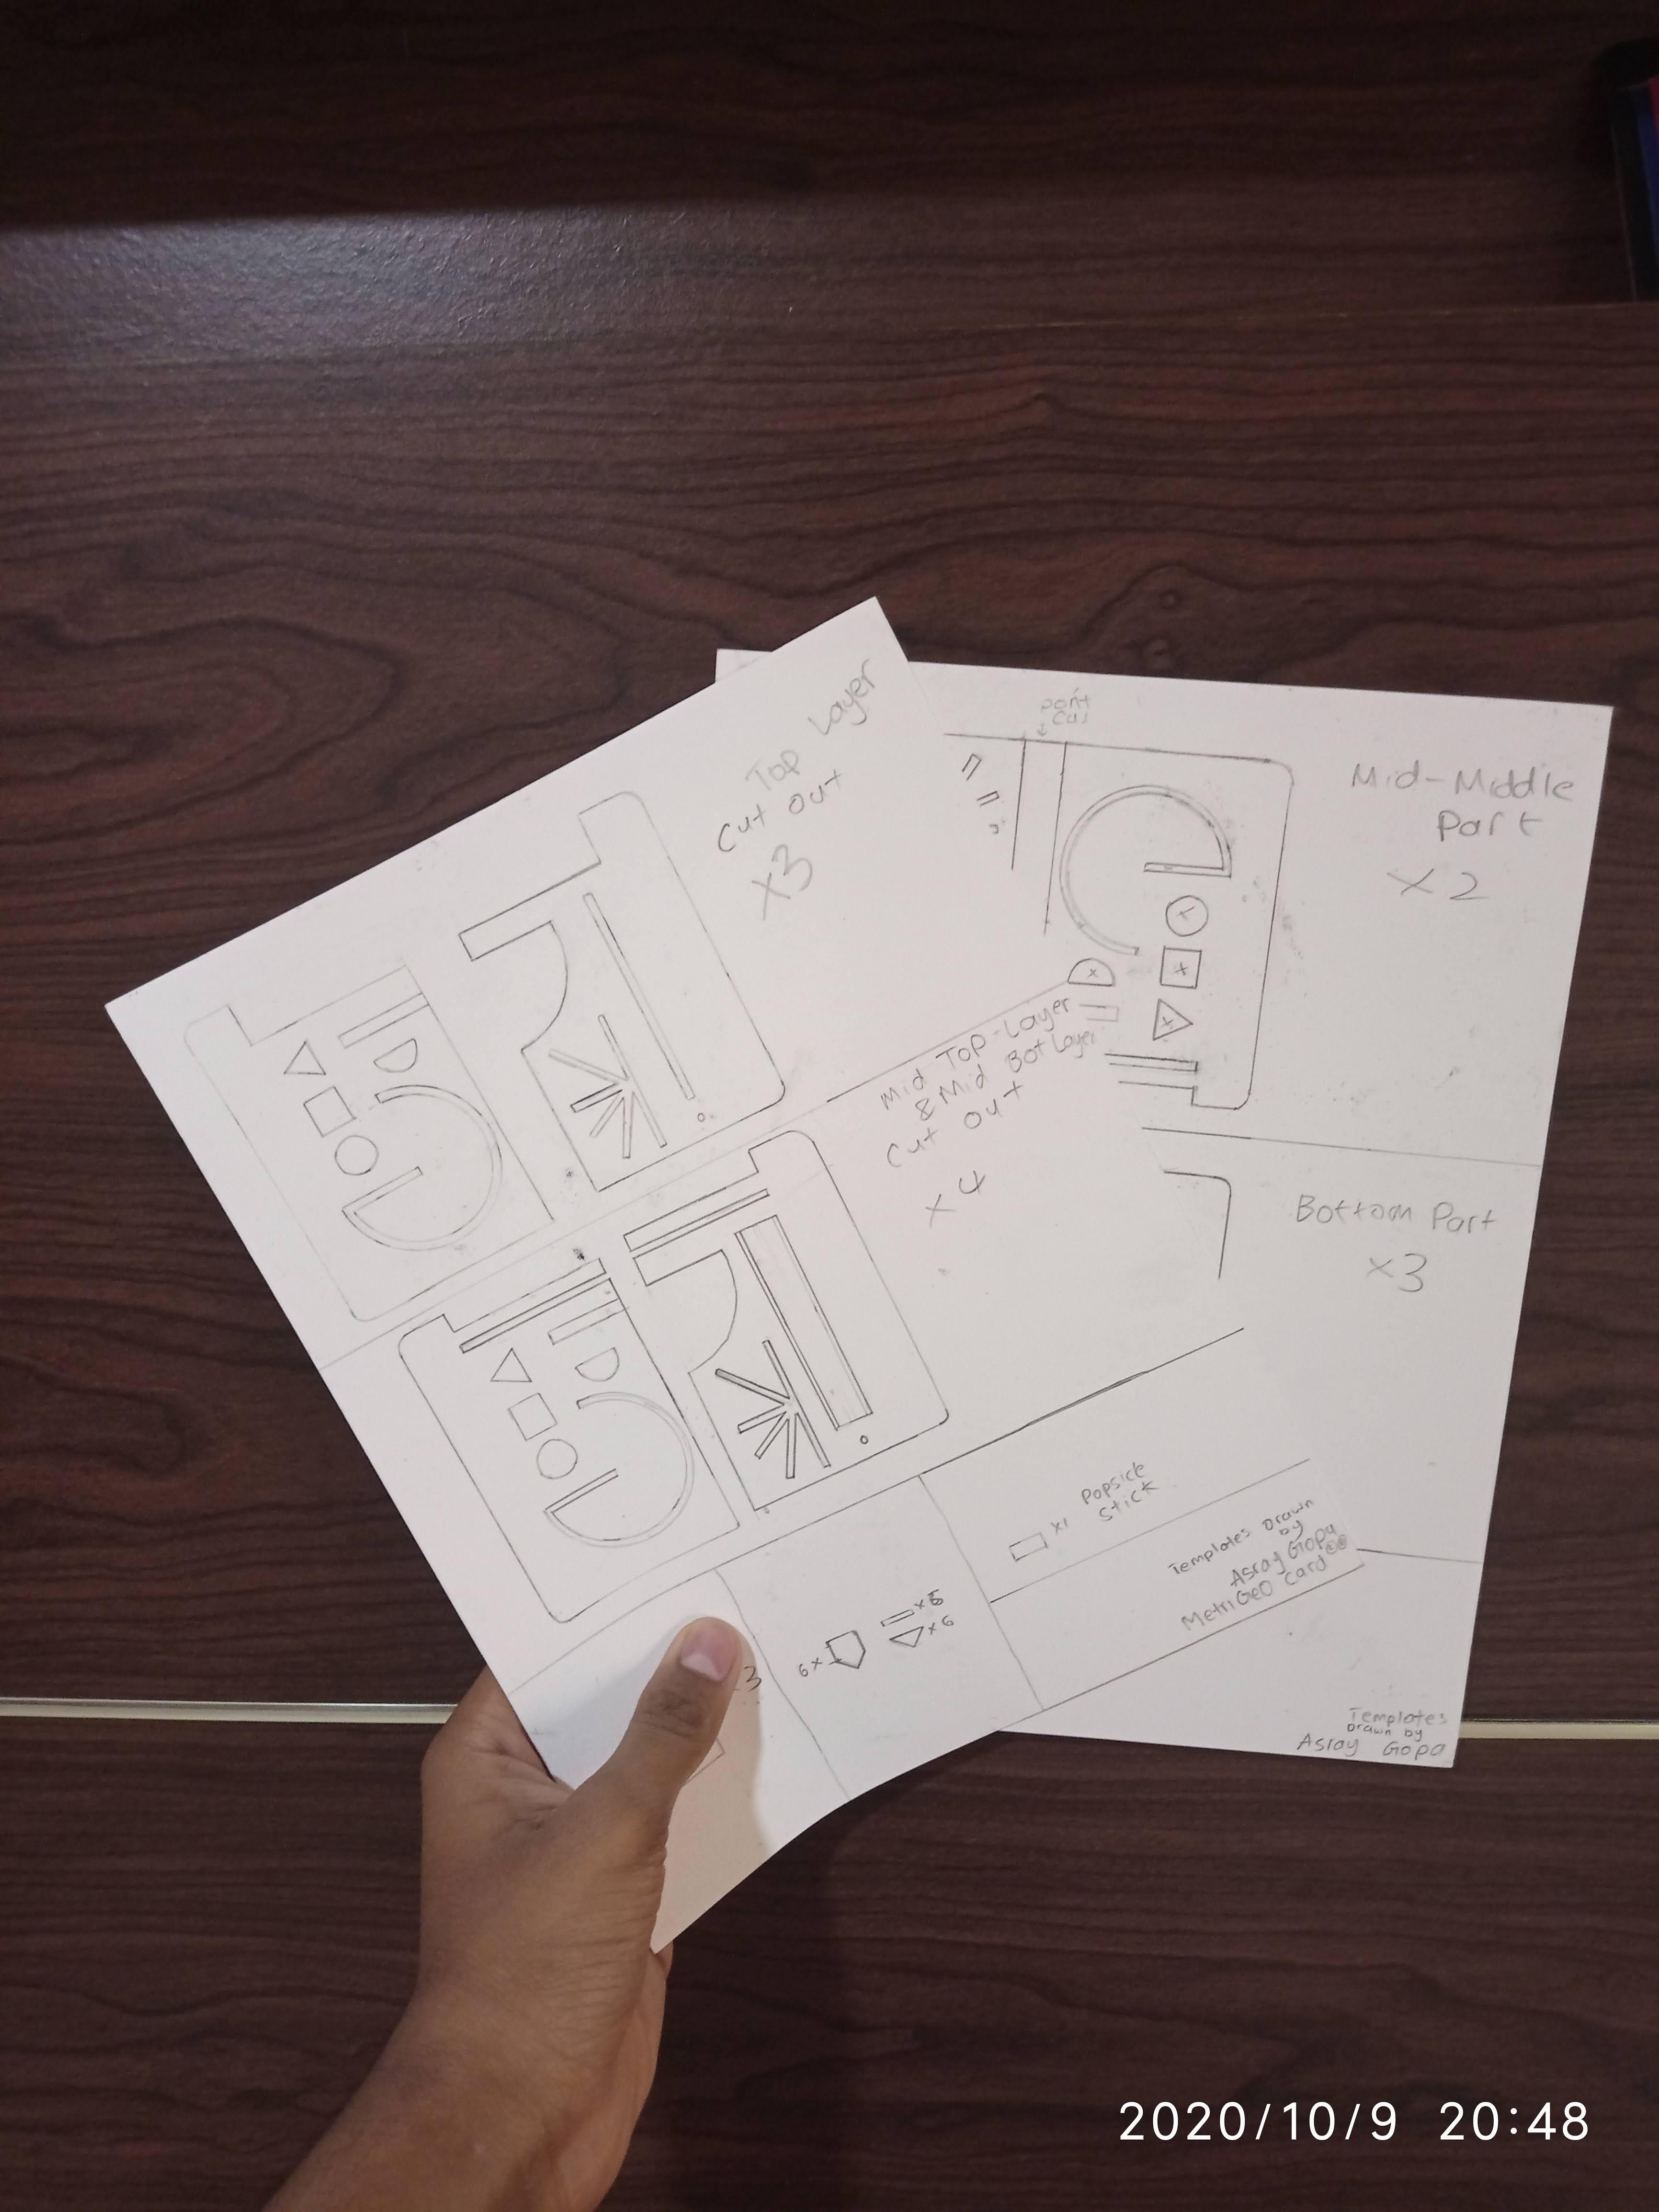
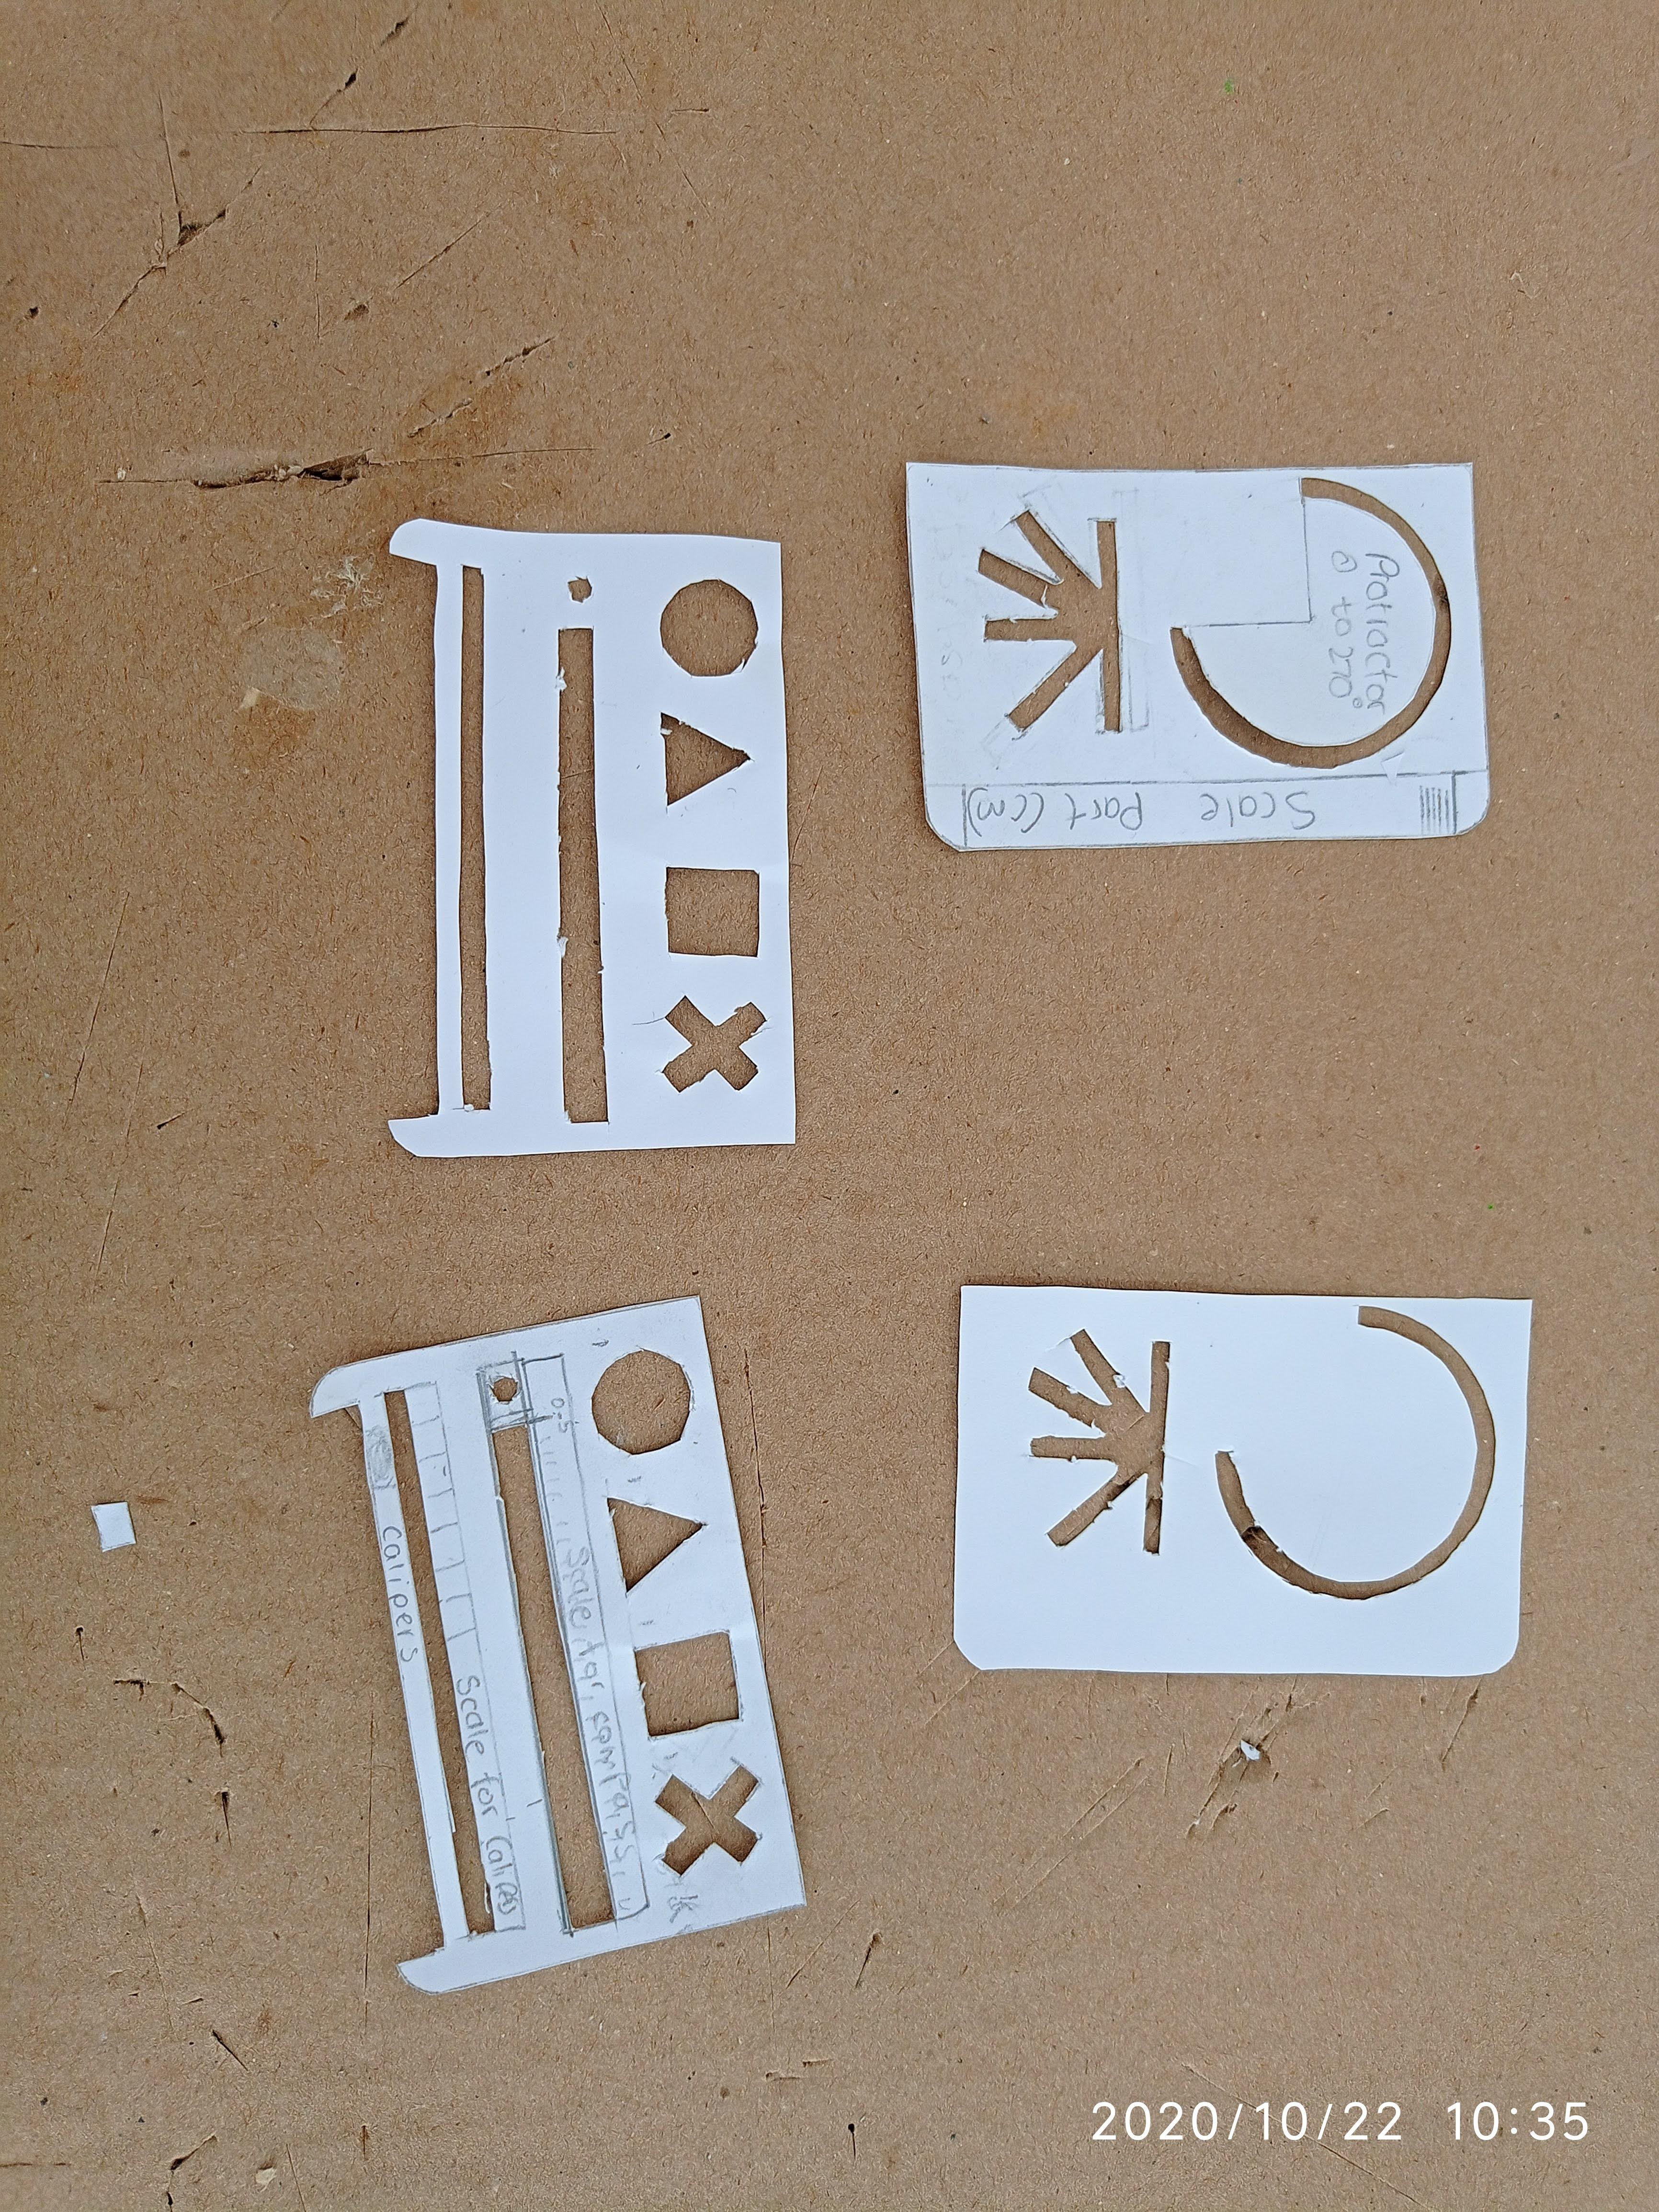
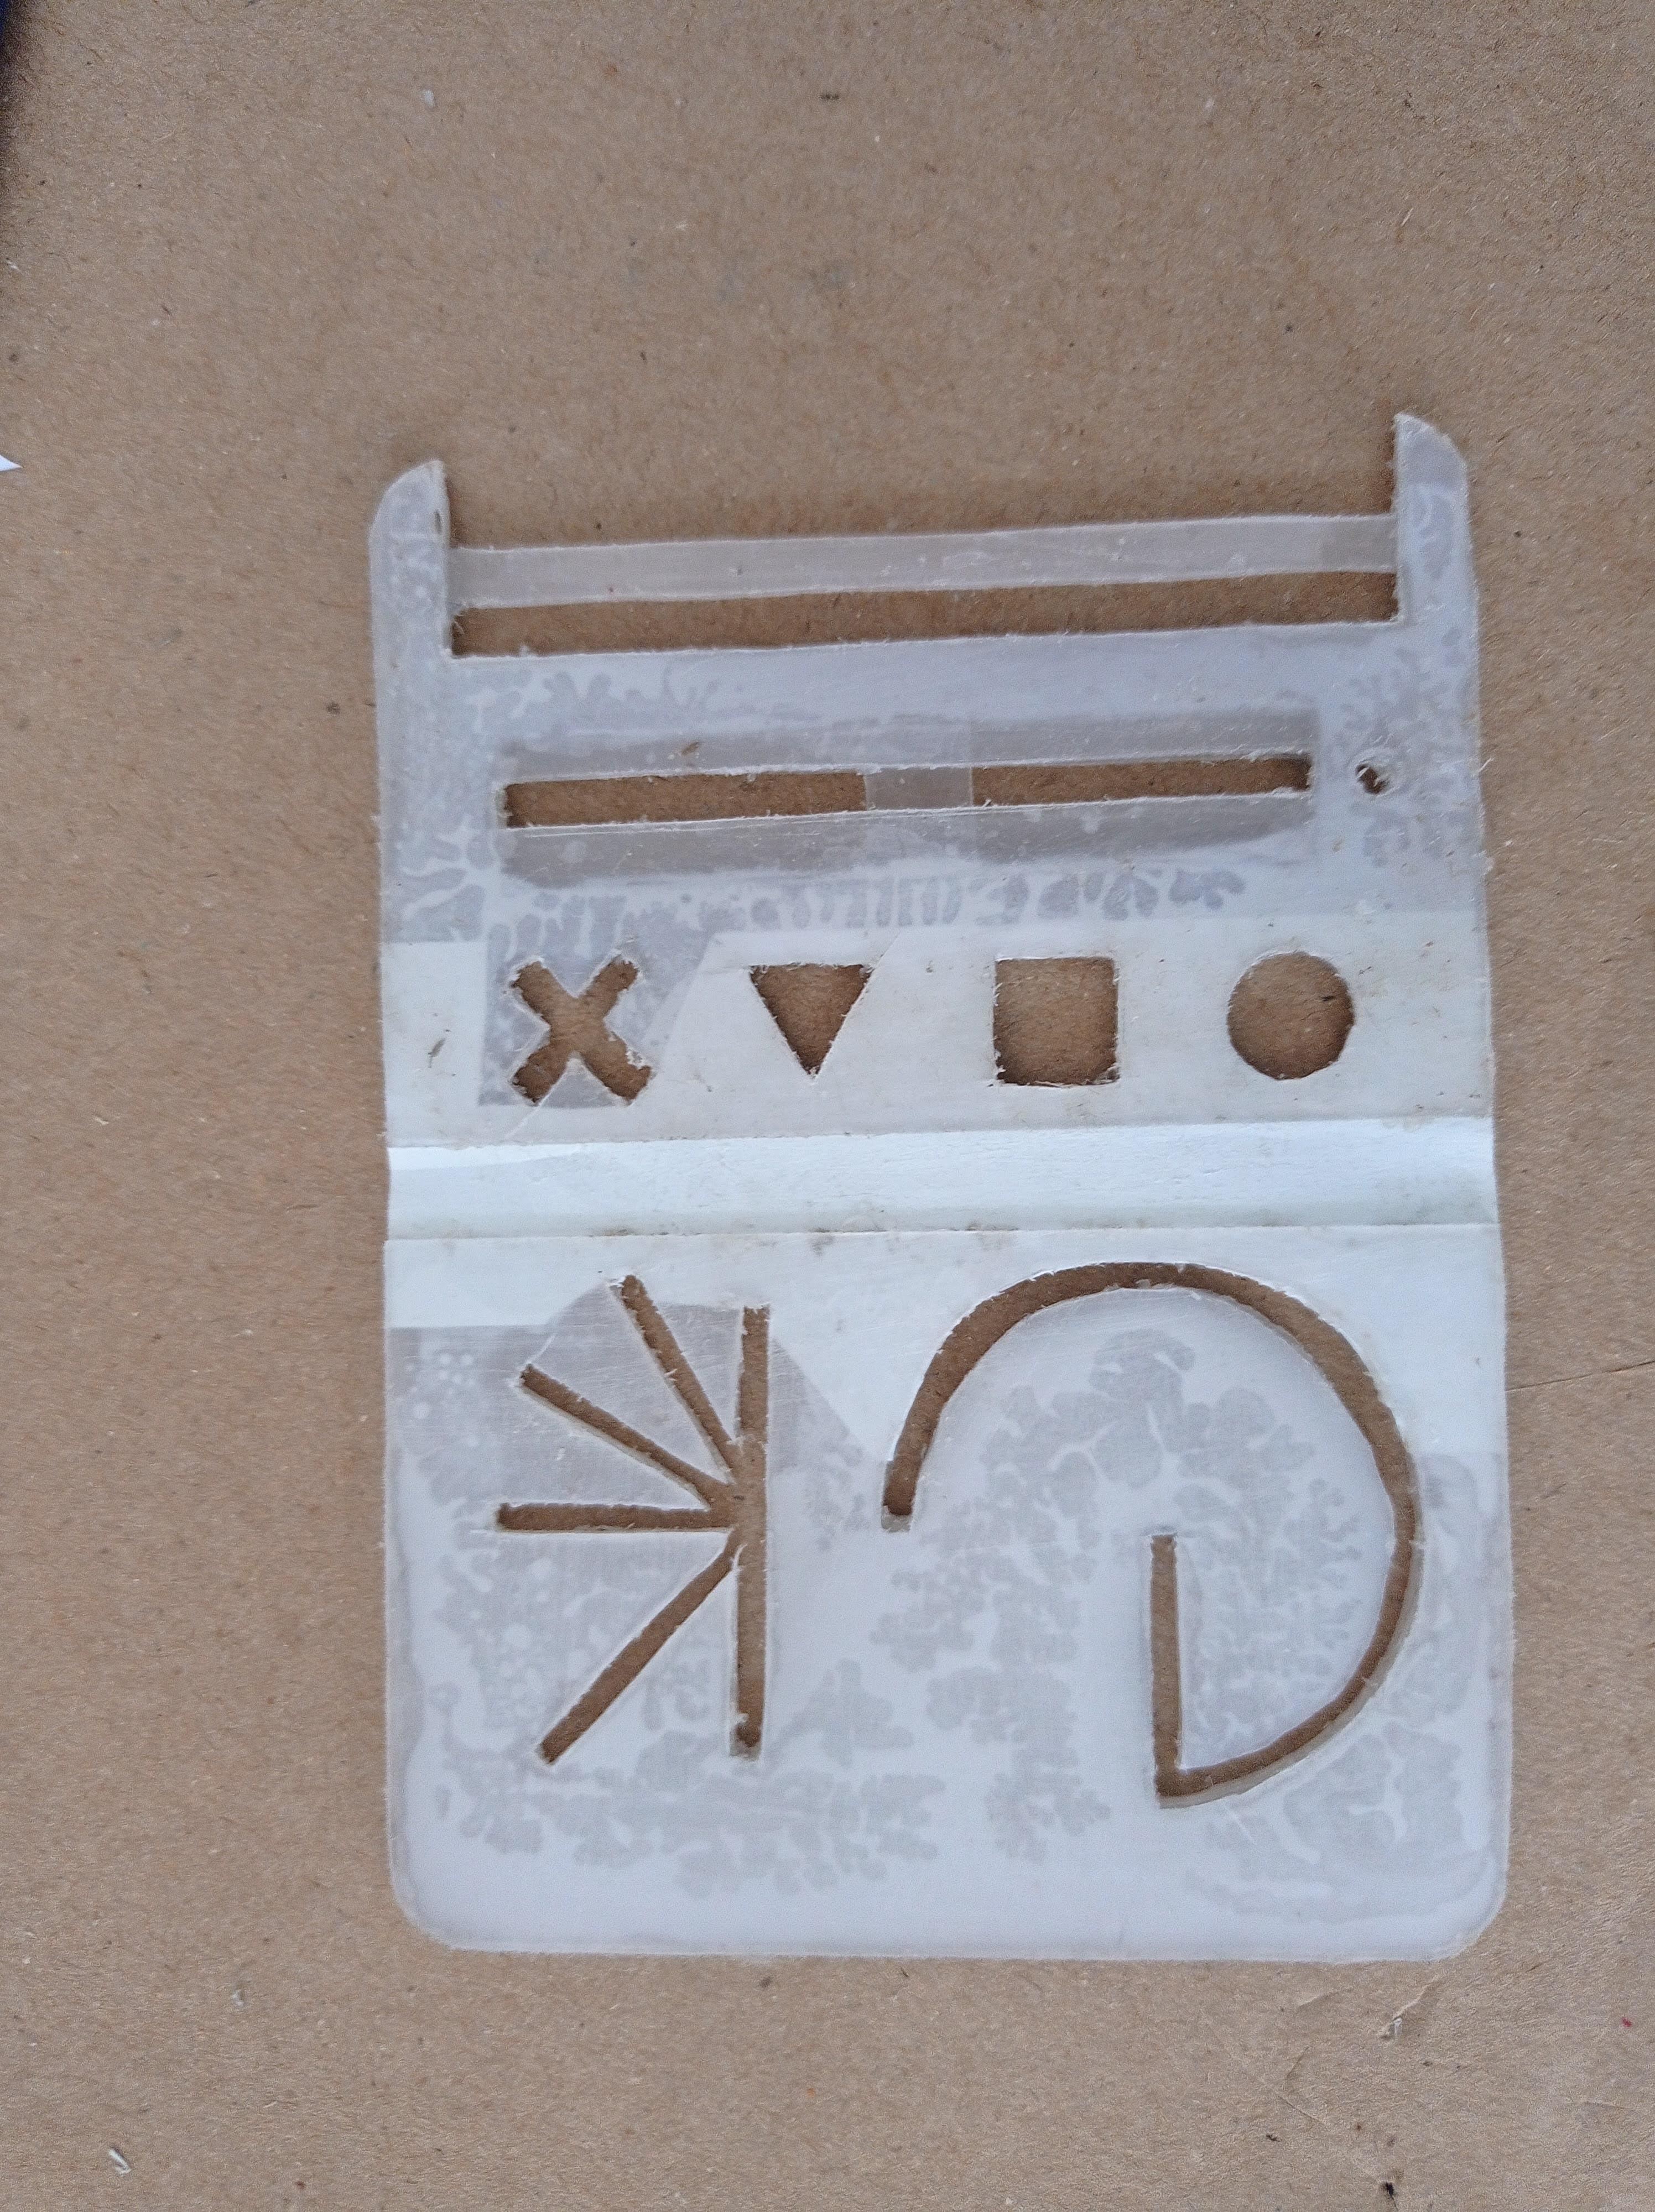
I first drew out the pieces on paper and cut them and traced them out onto plastic which I got from a binder. You can get the schematics/blueprints from the file given.
Drawing out the blueprints is drawing a 2D version of your 3D product. But in my case, these blueprints were a 1:1 model so they had to be accurate. I basically had to deconstruct the final version in my head and plot it out on paper.
I used plastic to cut out the pieces, but you can use any hard thin material to cut it out from.
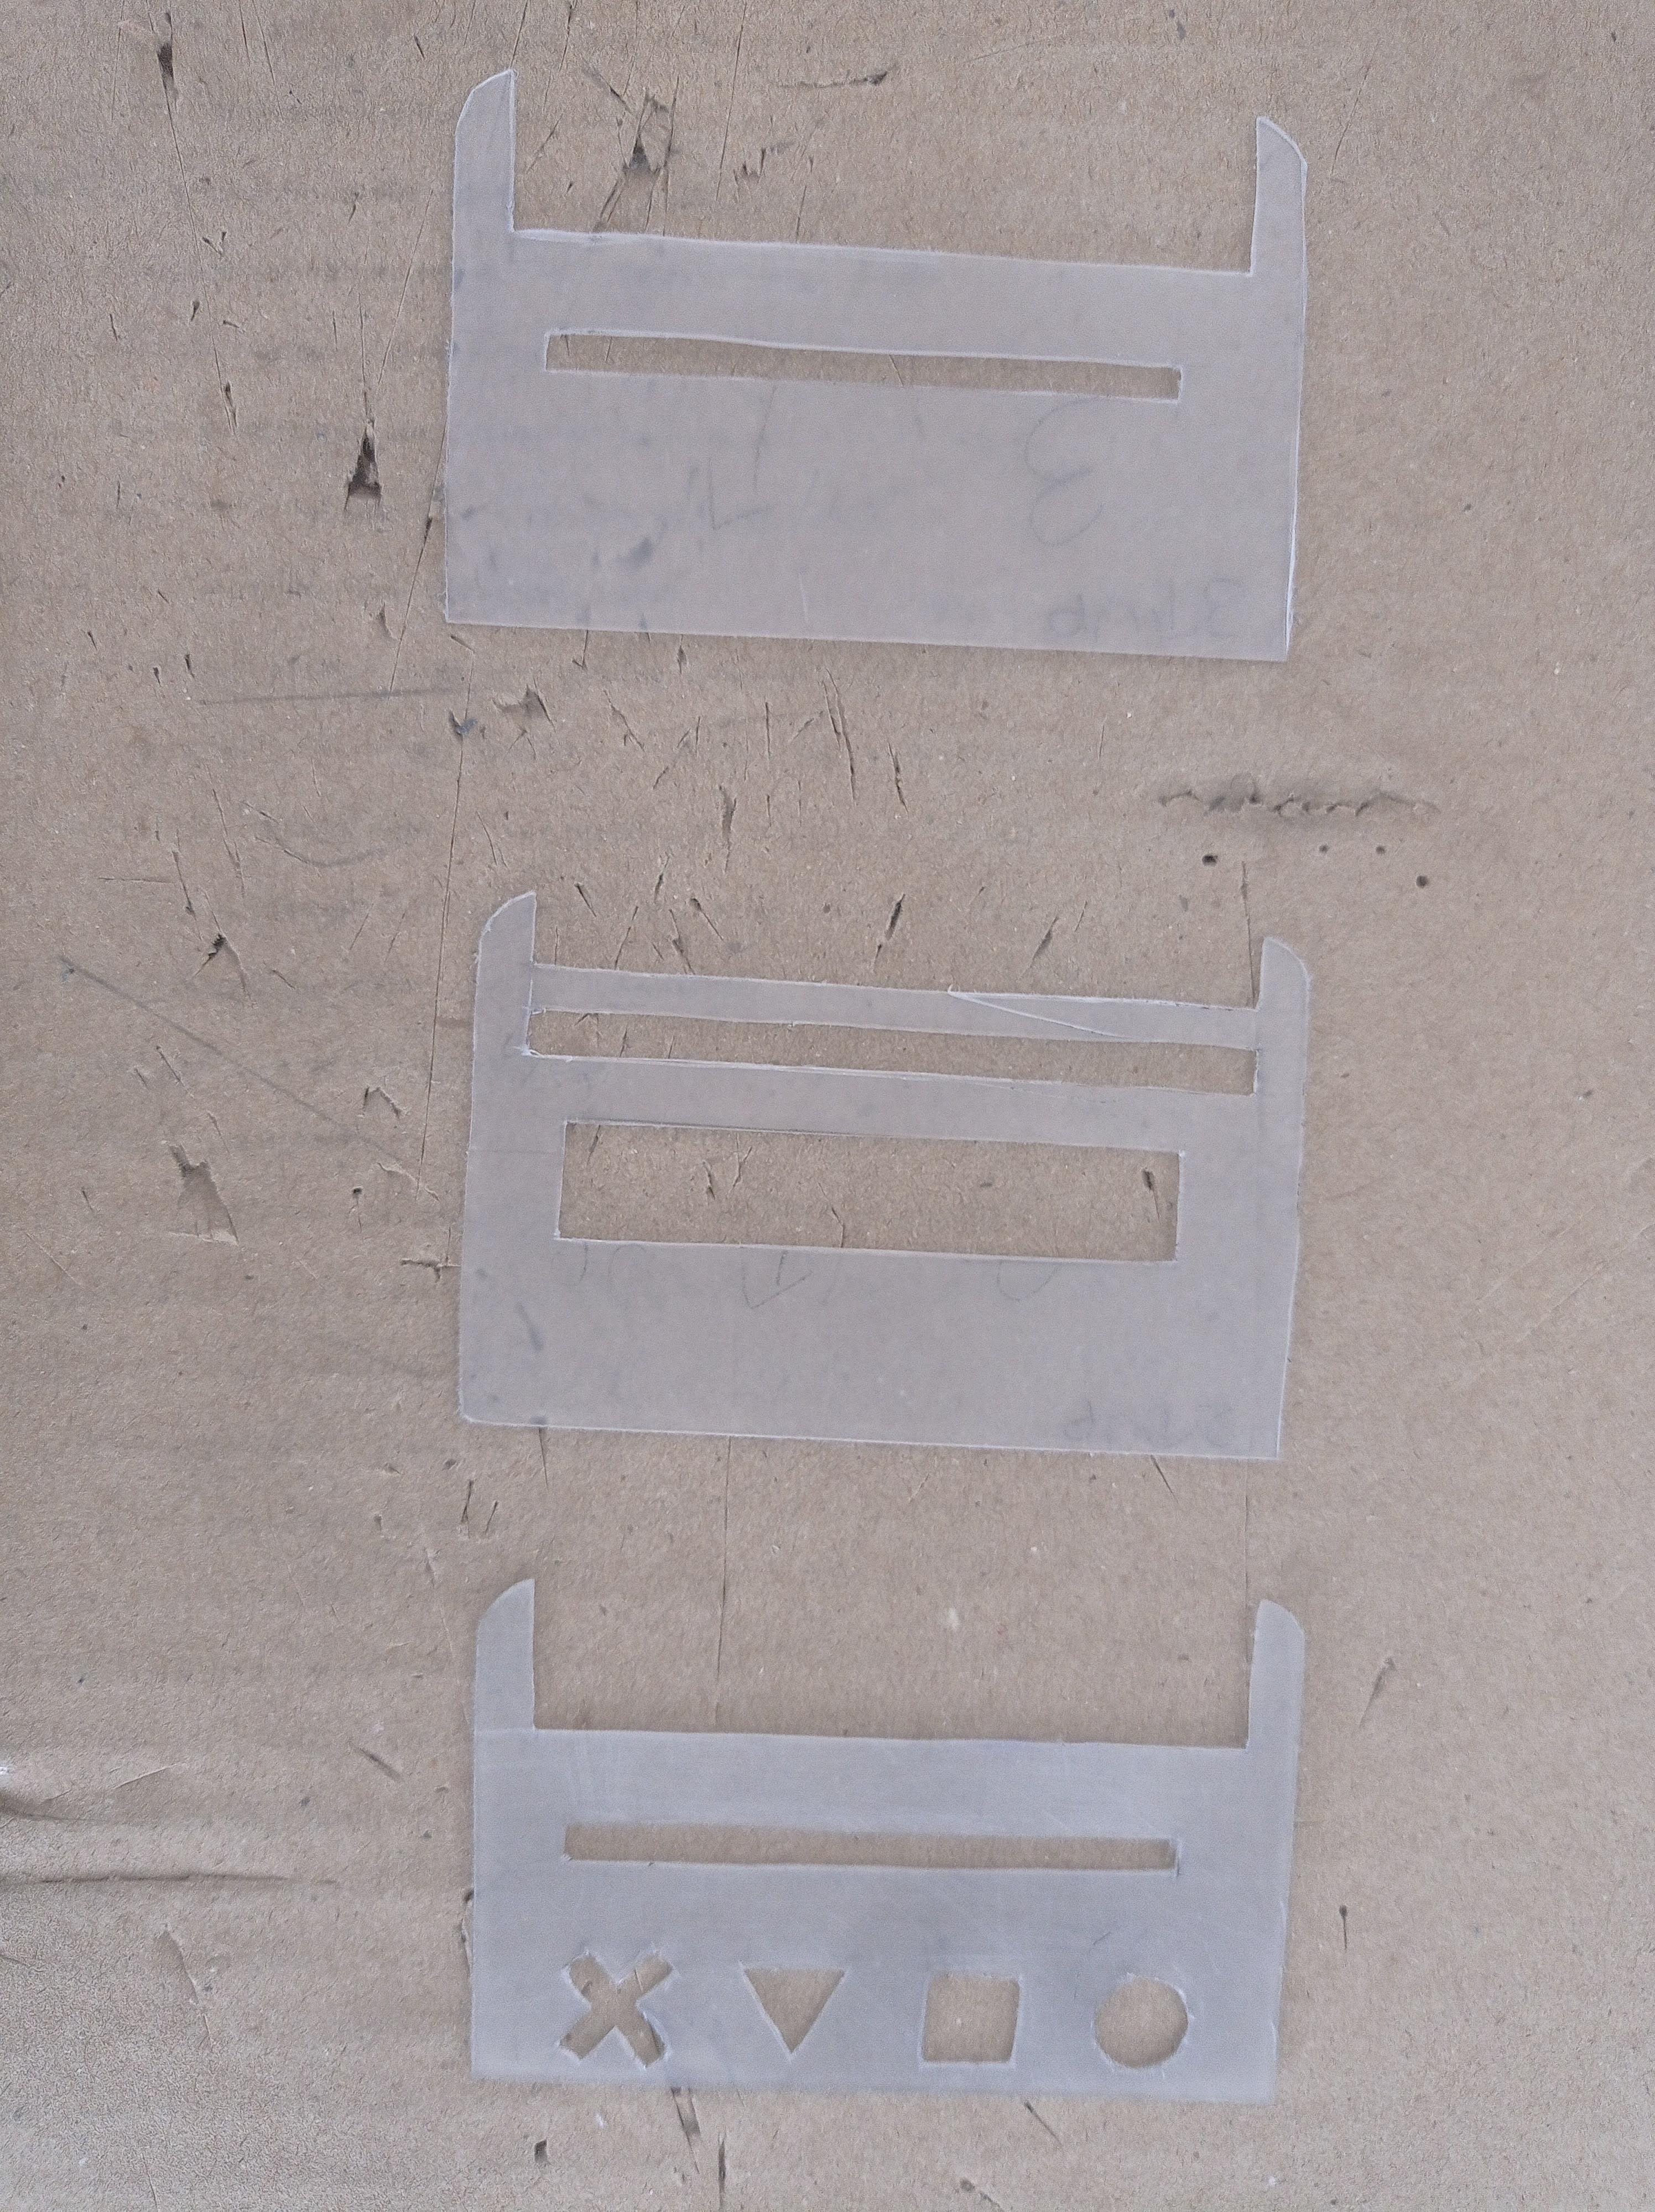
The instructions to cut out the pieces are in the pdf and make sure to cut them out properly. Make sure to cut out the proper amount of pieces. Also, cut the flap (the small rectangular piece) out of thin plastic
Make sure to sand everything so that it's easier for gluing and painting.
Also, use an X-Acto knife to cut out the tiny details and use scissors to cut the nice long straight sides to make sharp and nice cuts. Don't cut too hard otherwise, the plastic will crack (it happened to me, but I used superglue to fix it).
Check out the pictures for reference.
Happy Cutting!
Downloads
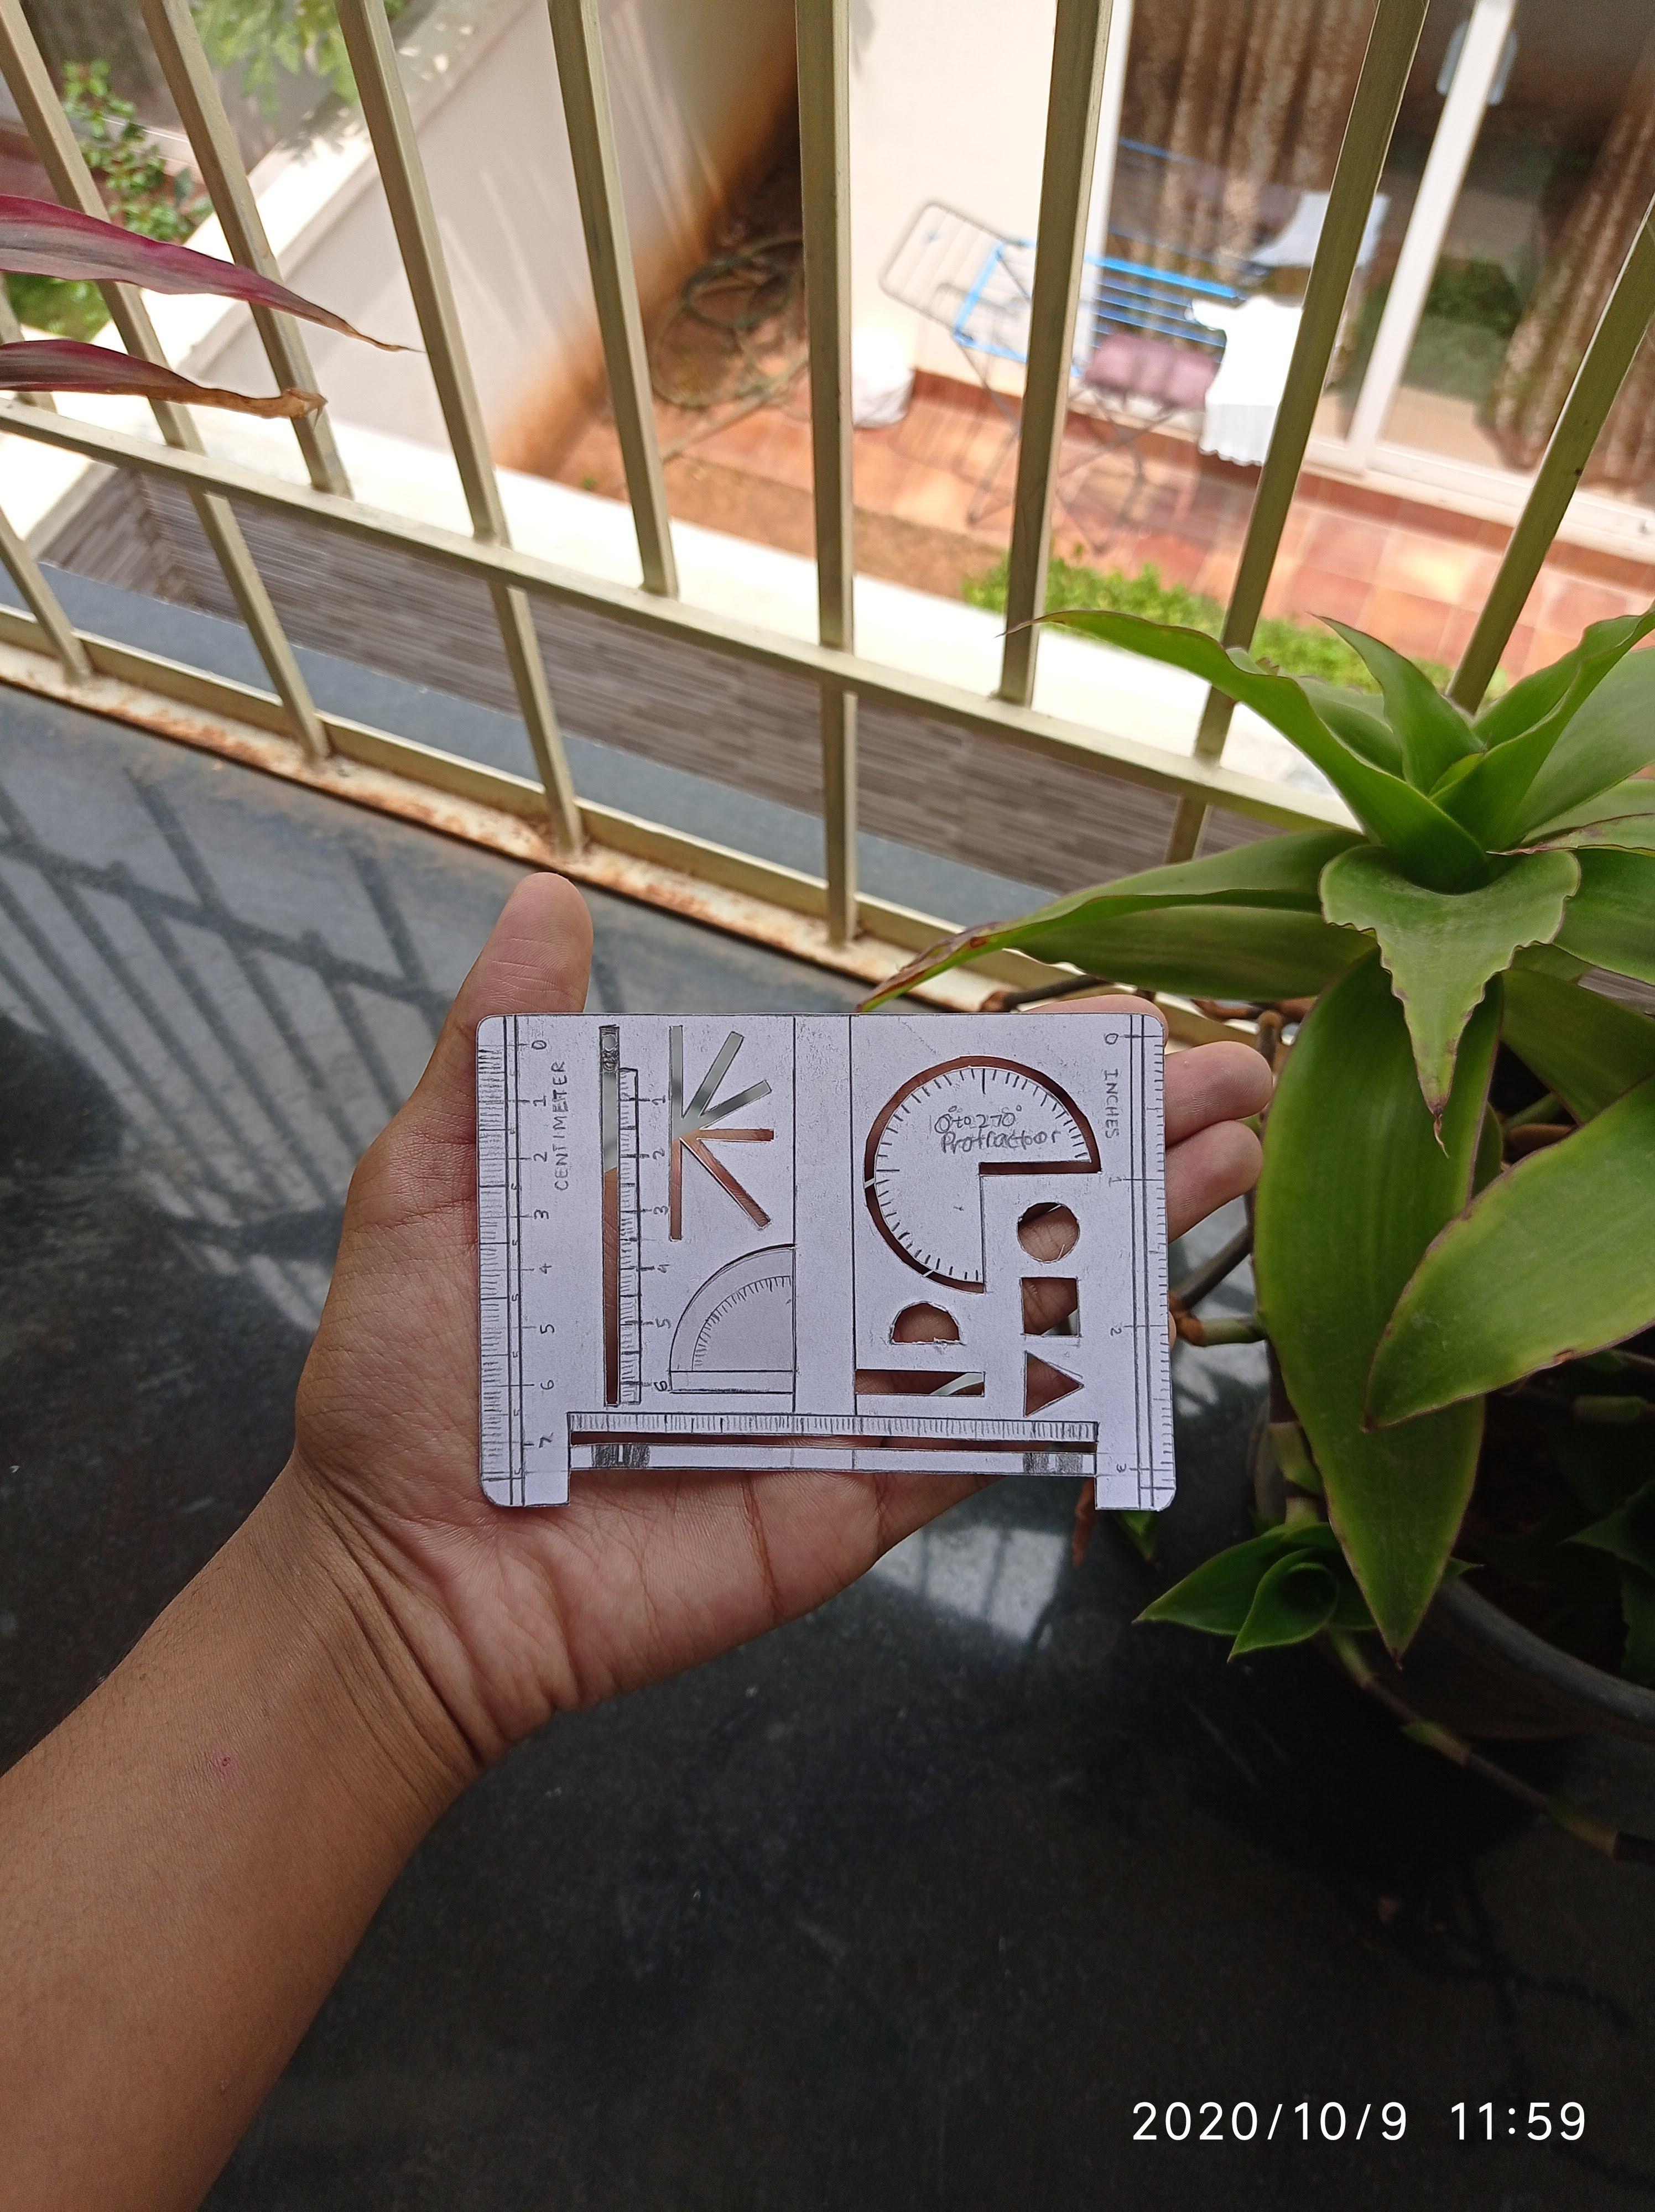
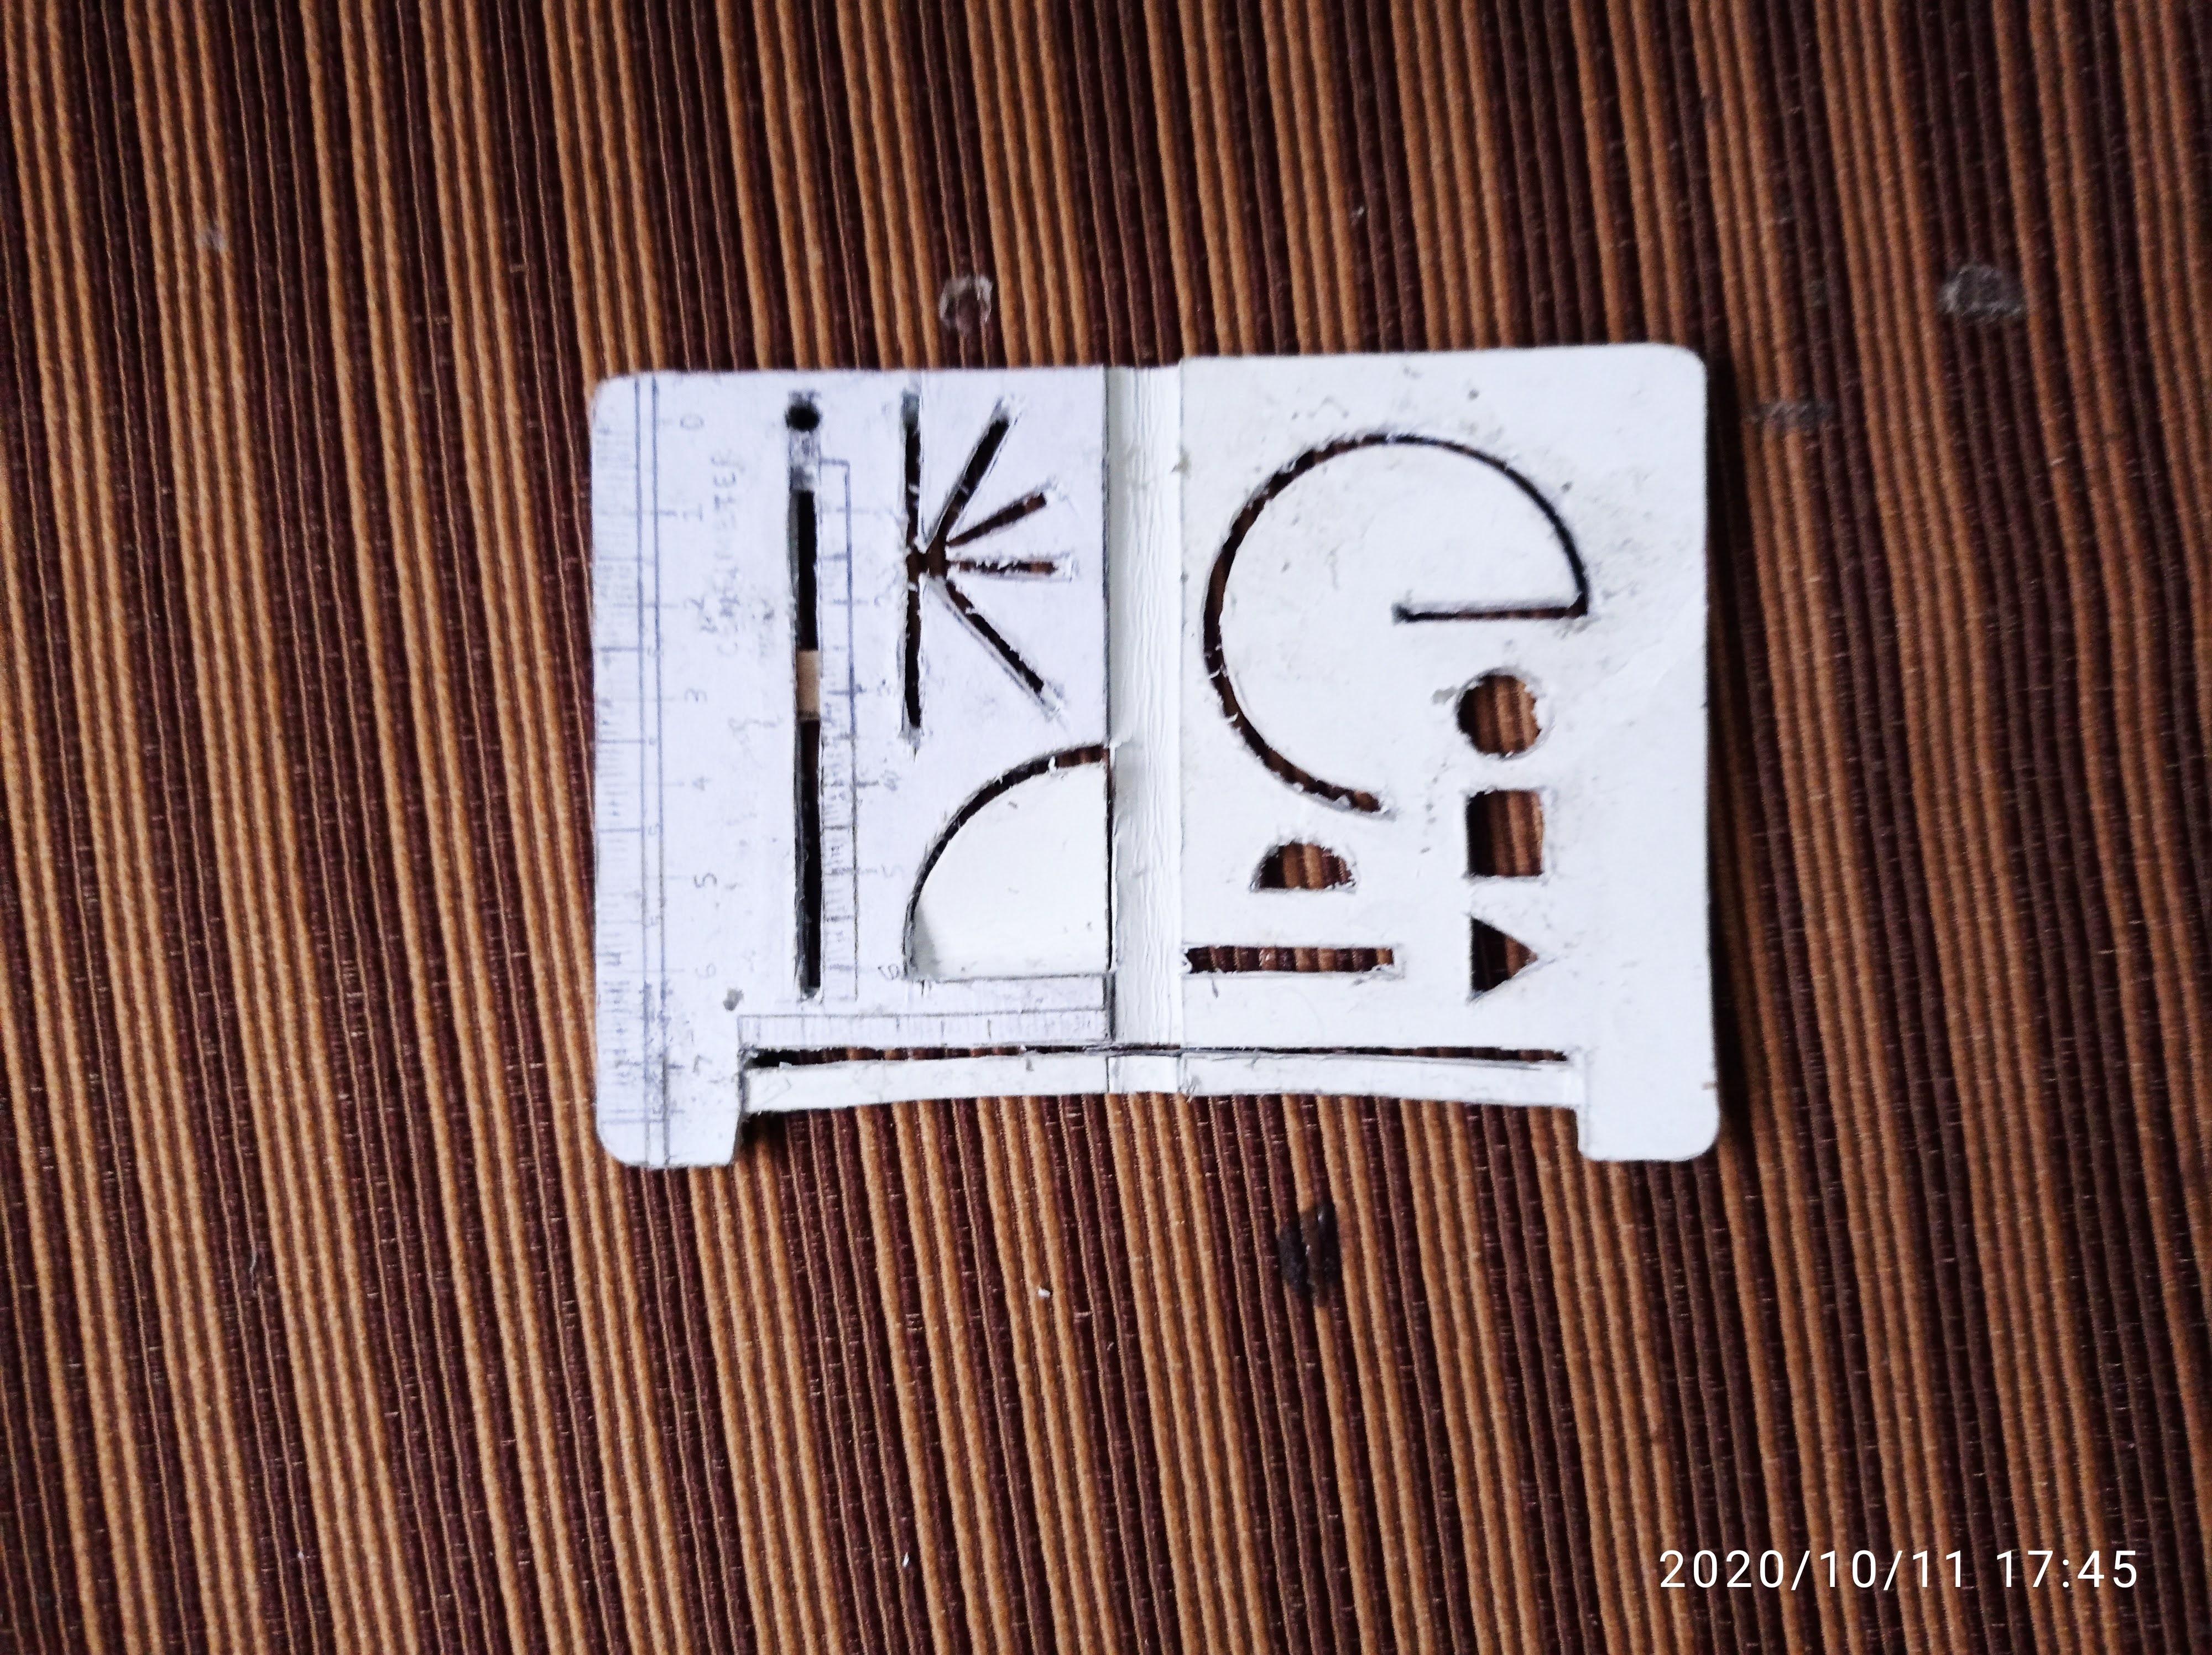
Components of the Geometry Box and How I Integrated It Into the MetriScale


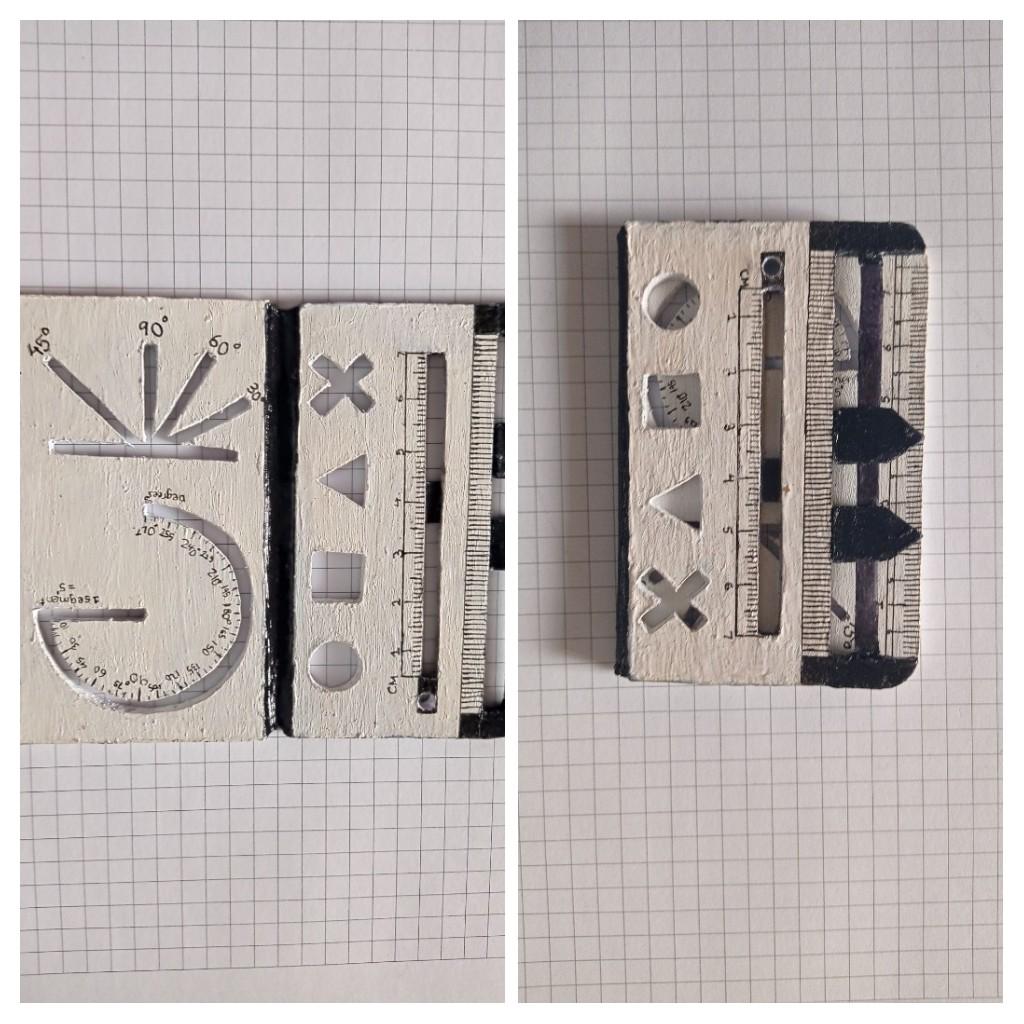
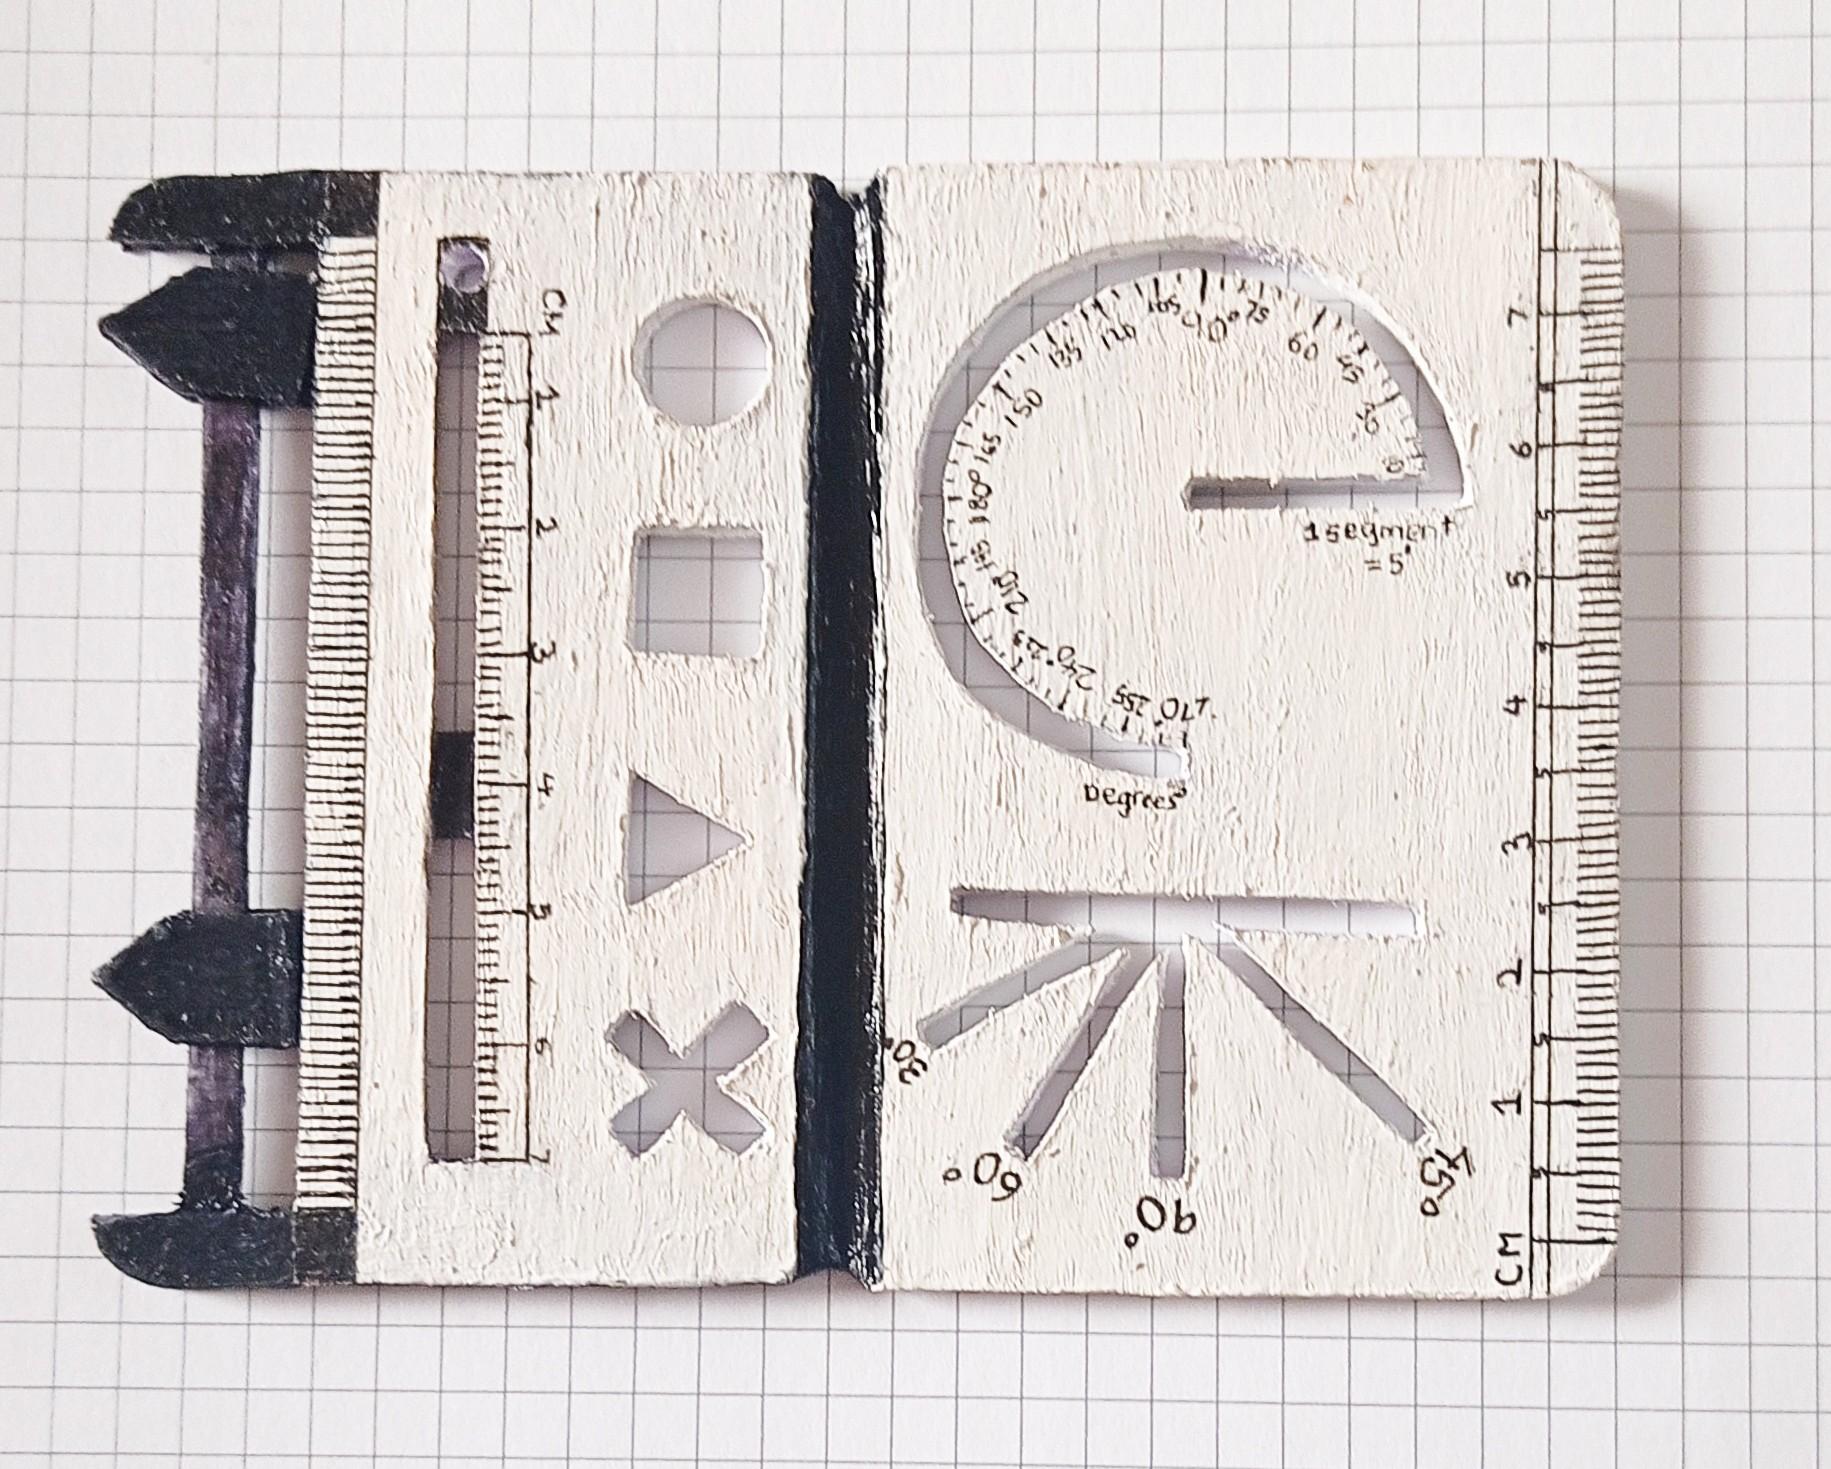
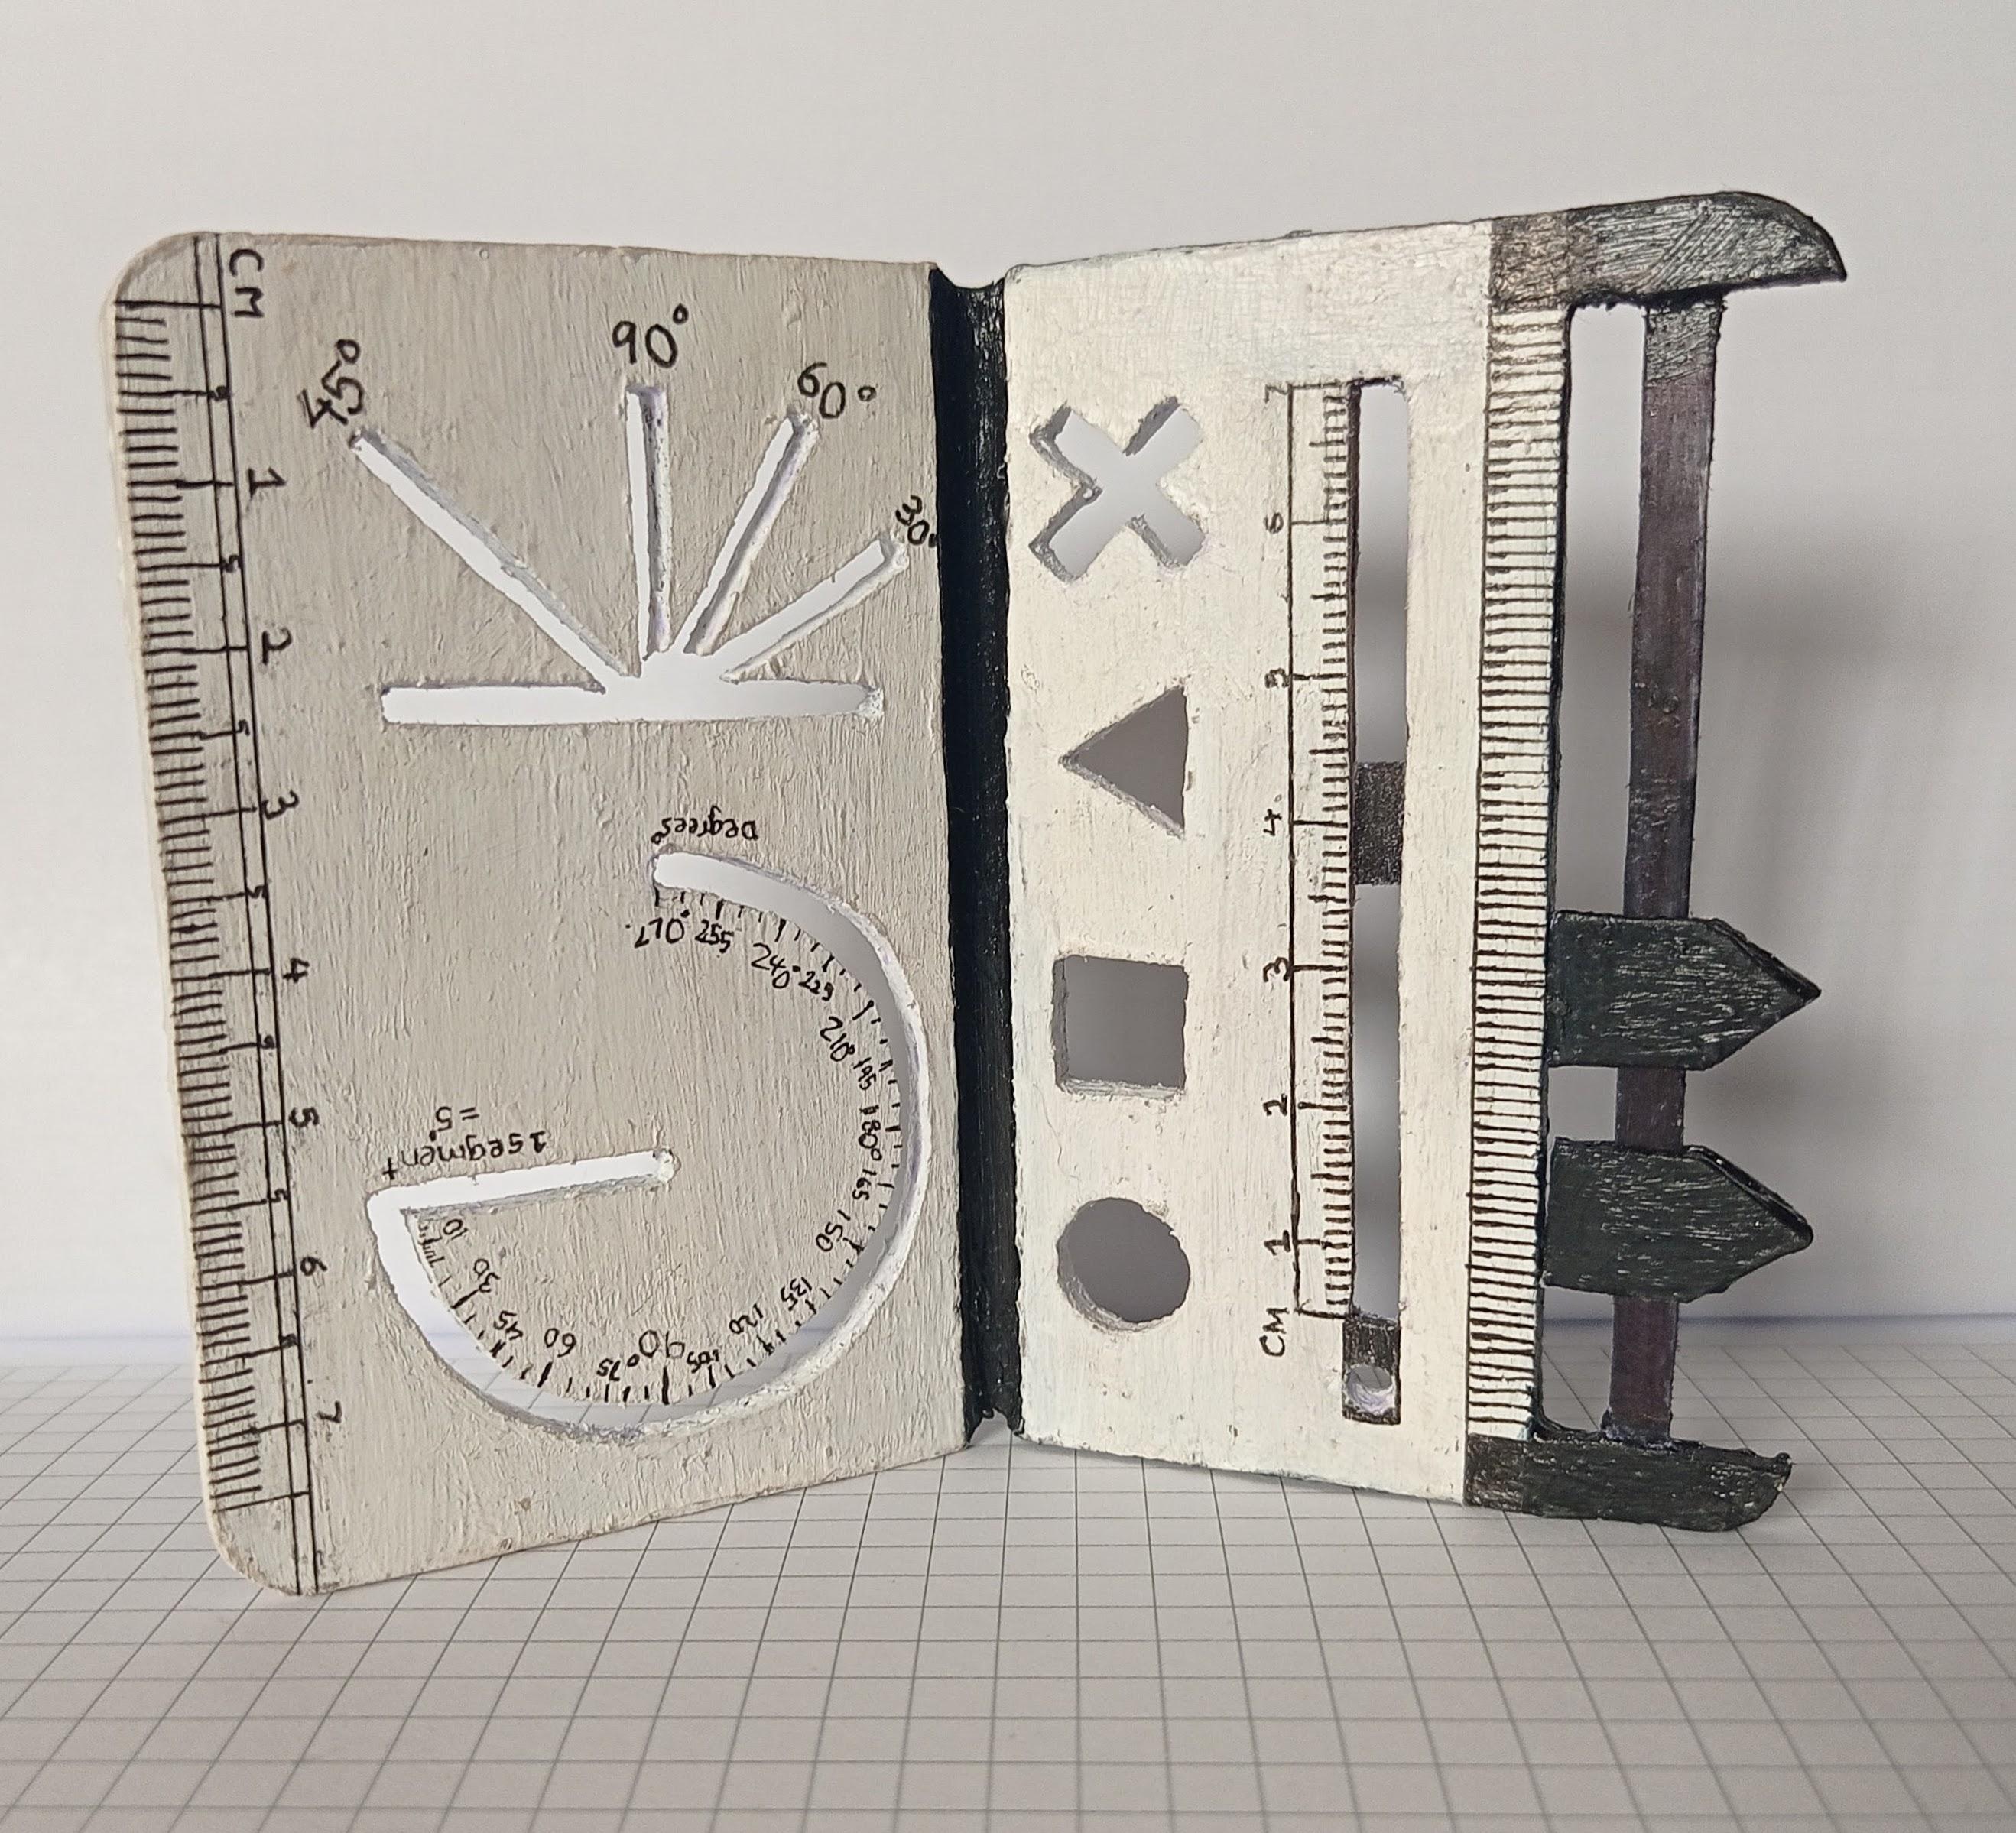
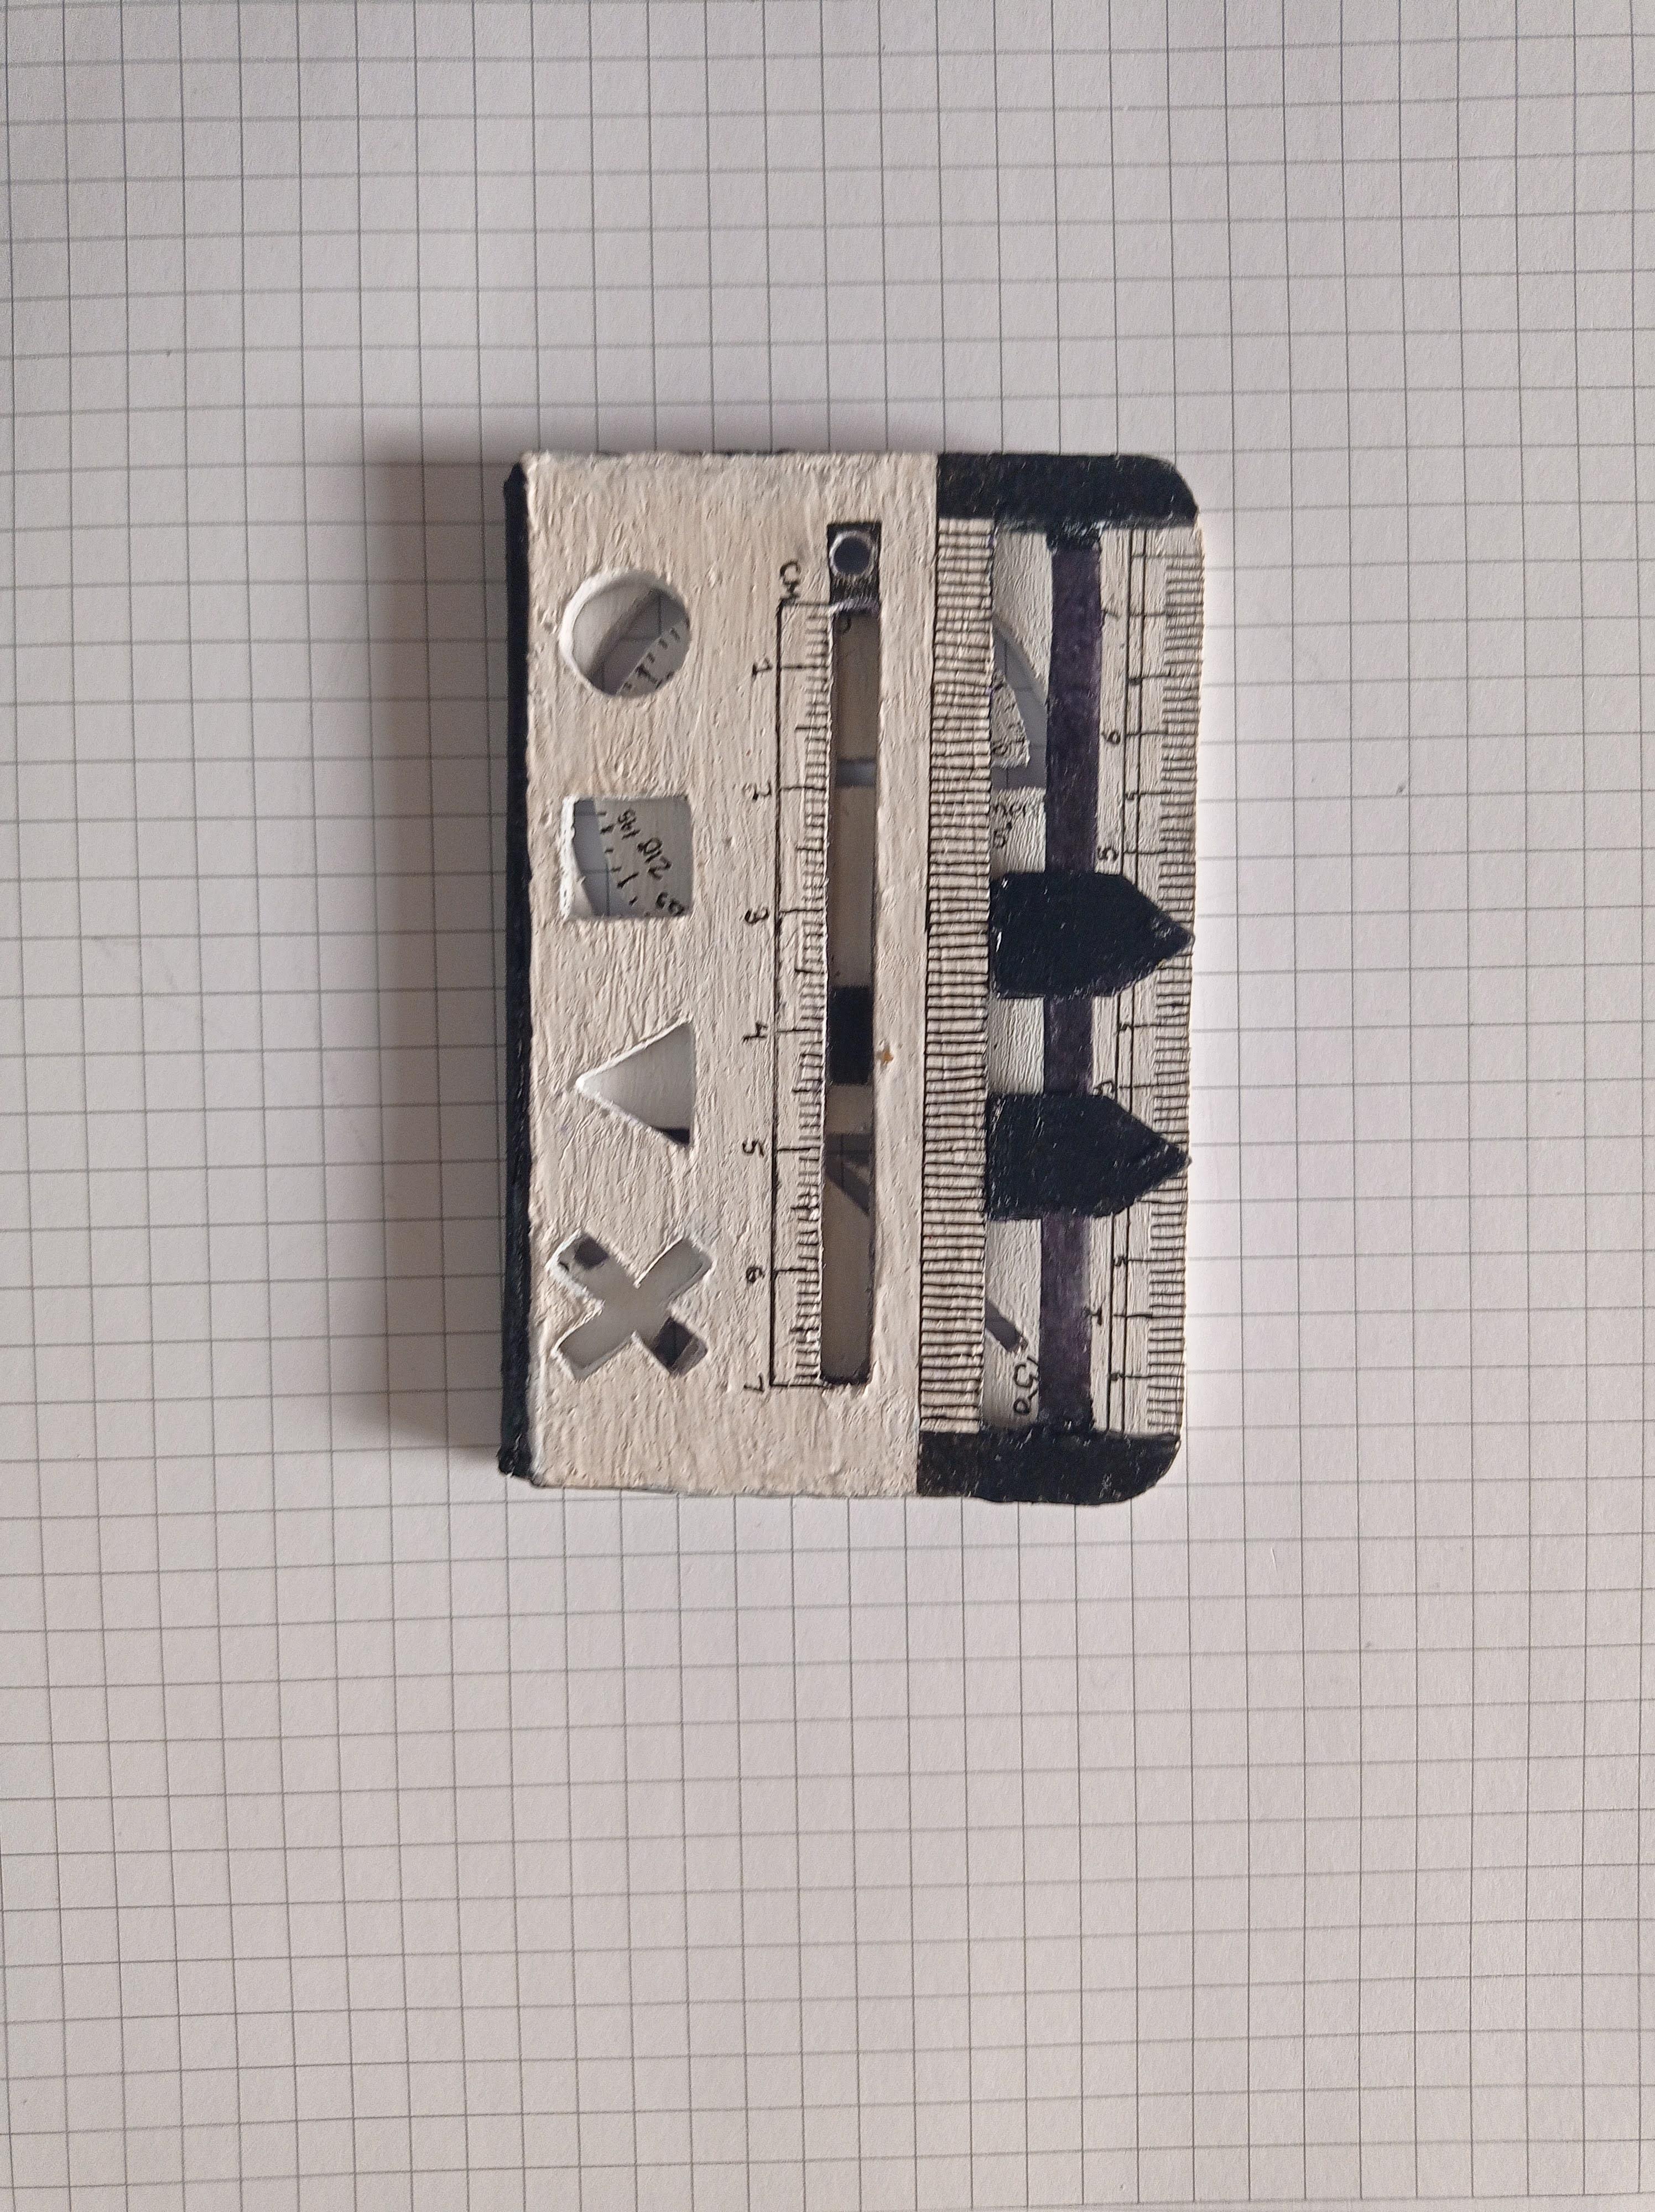
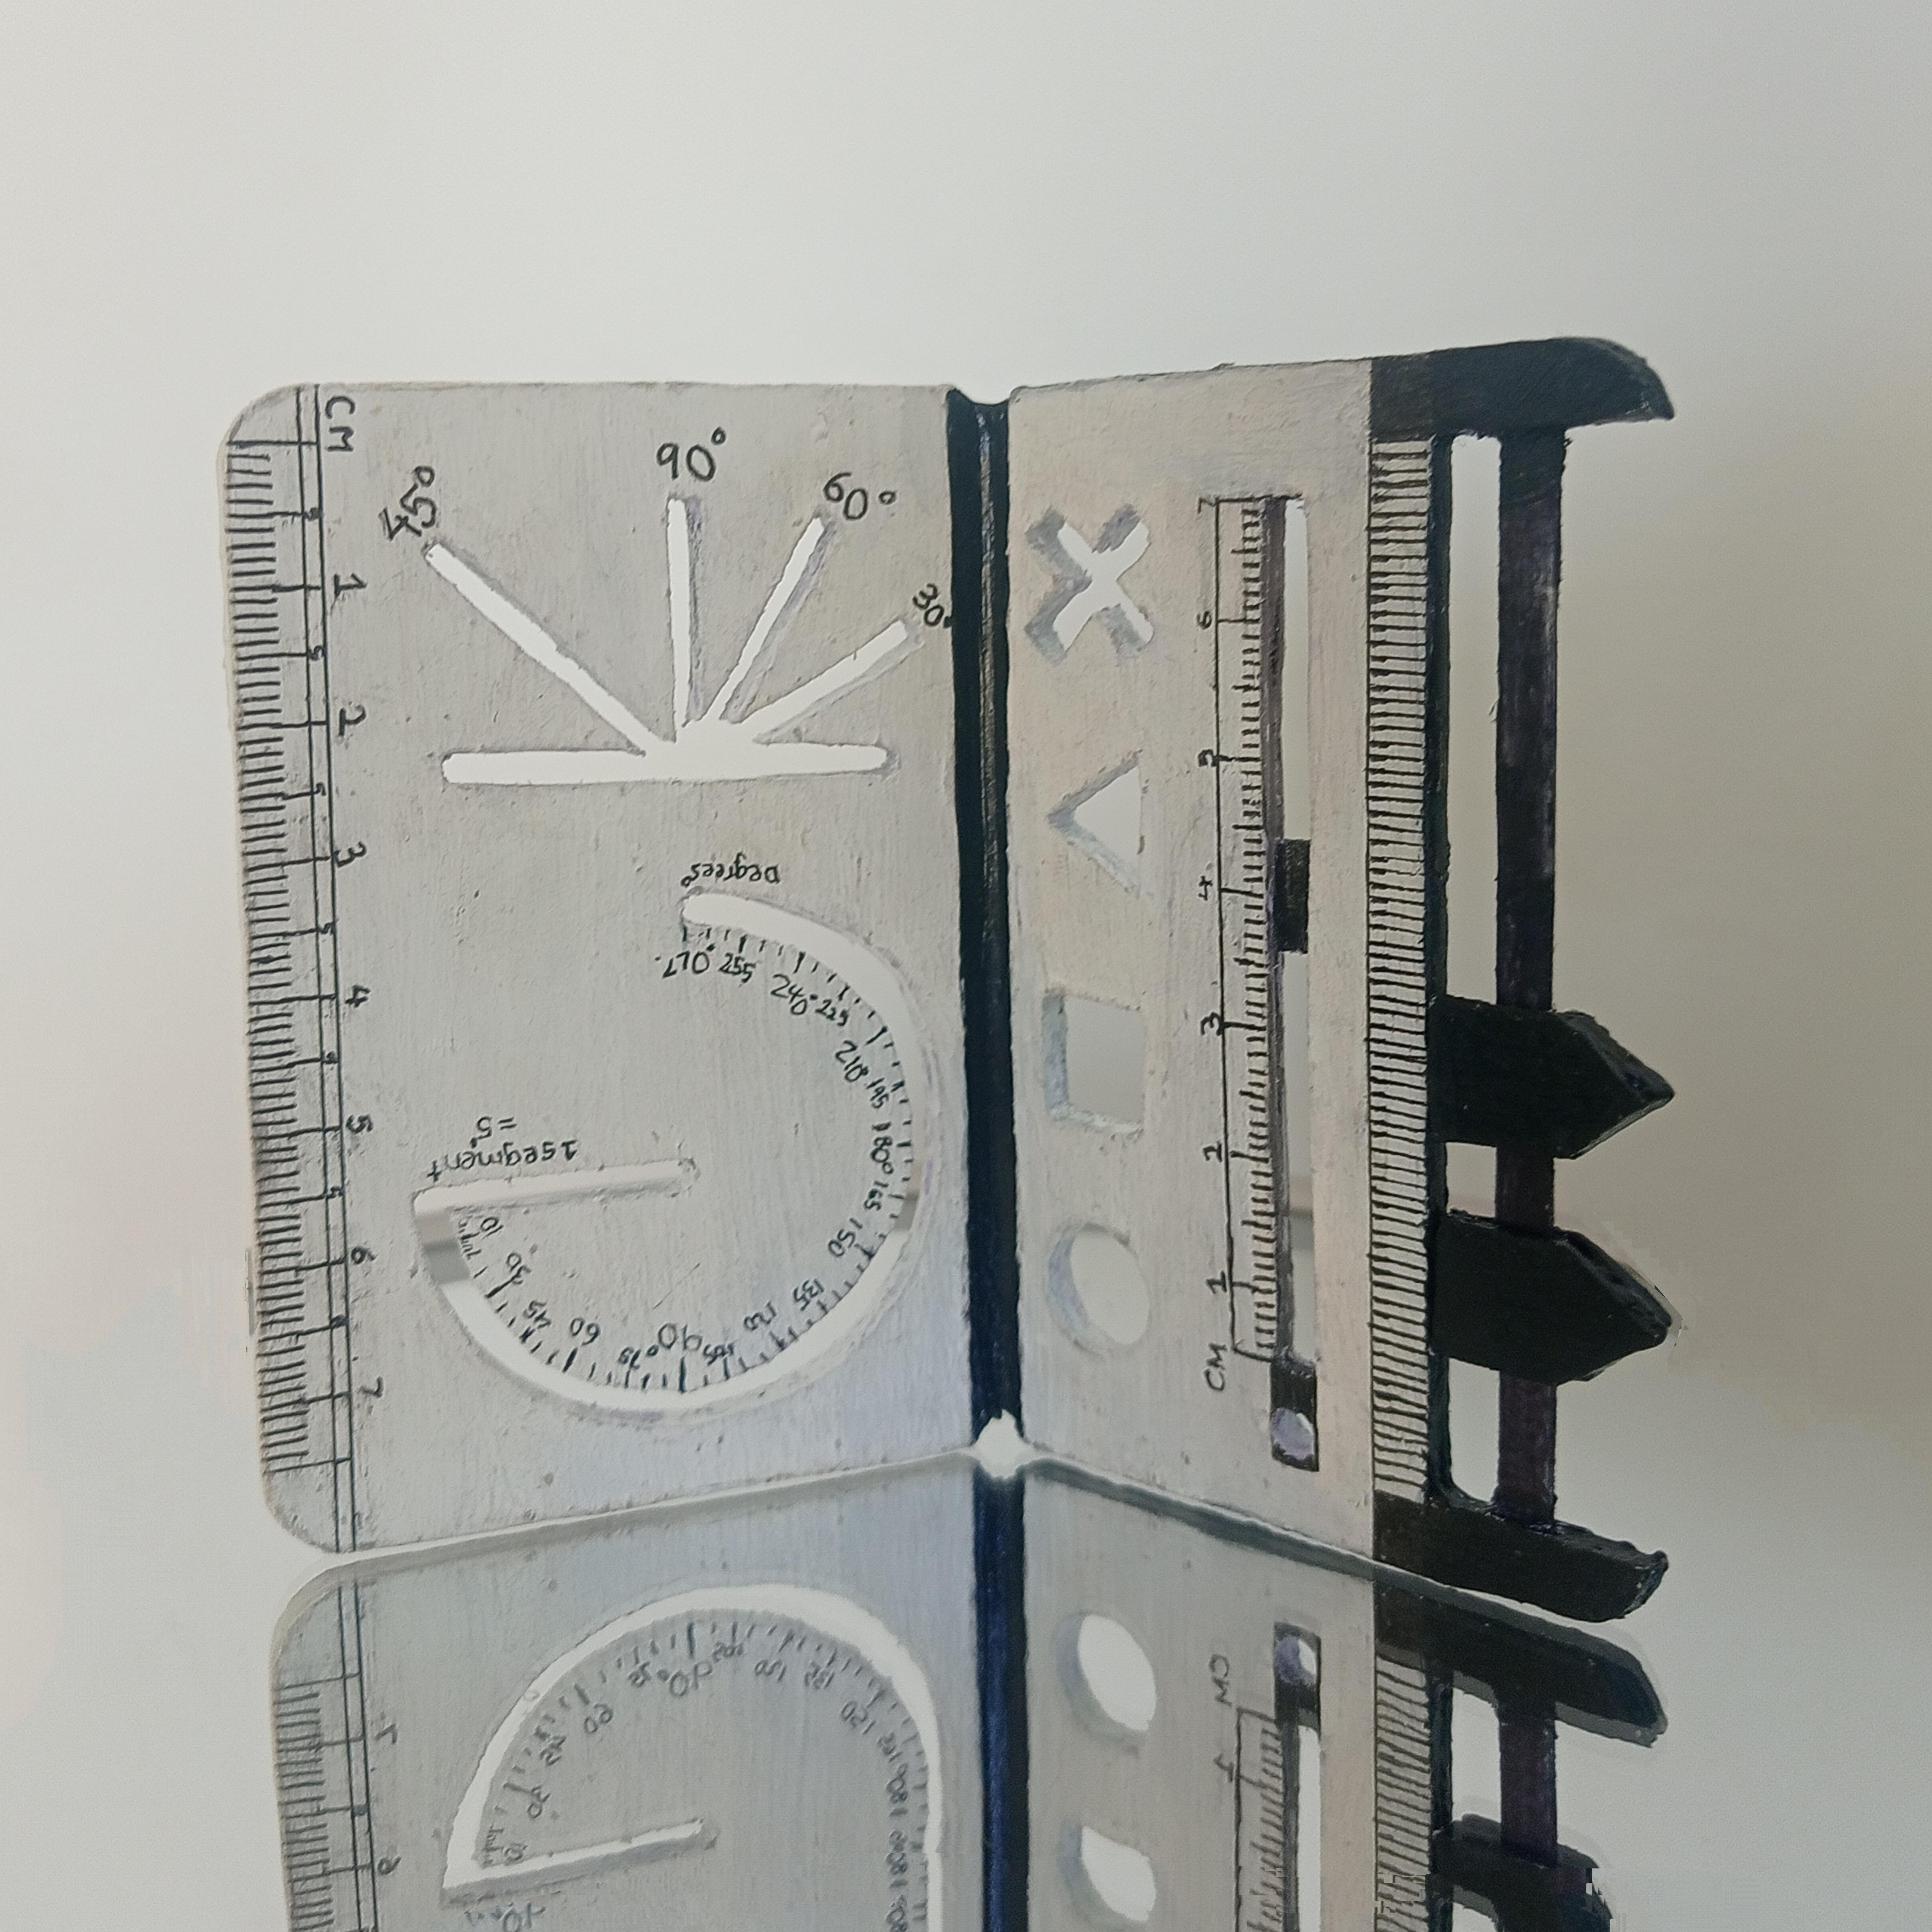
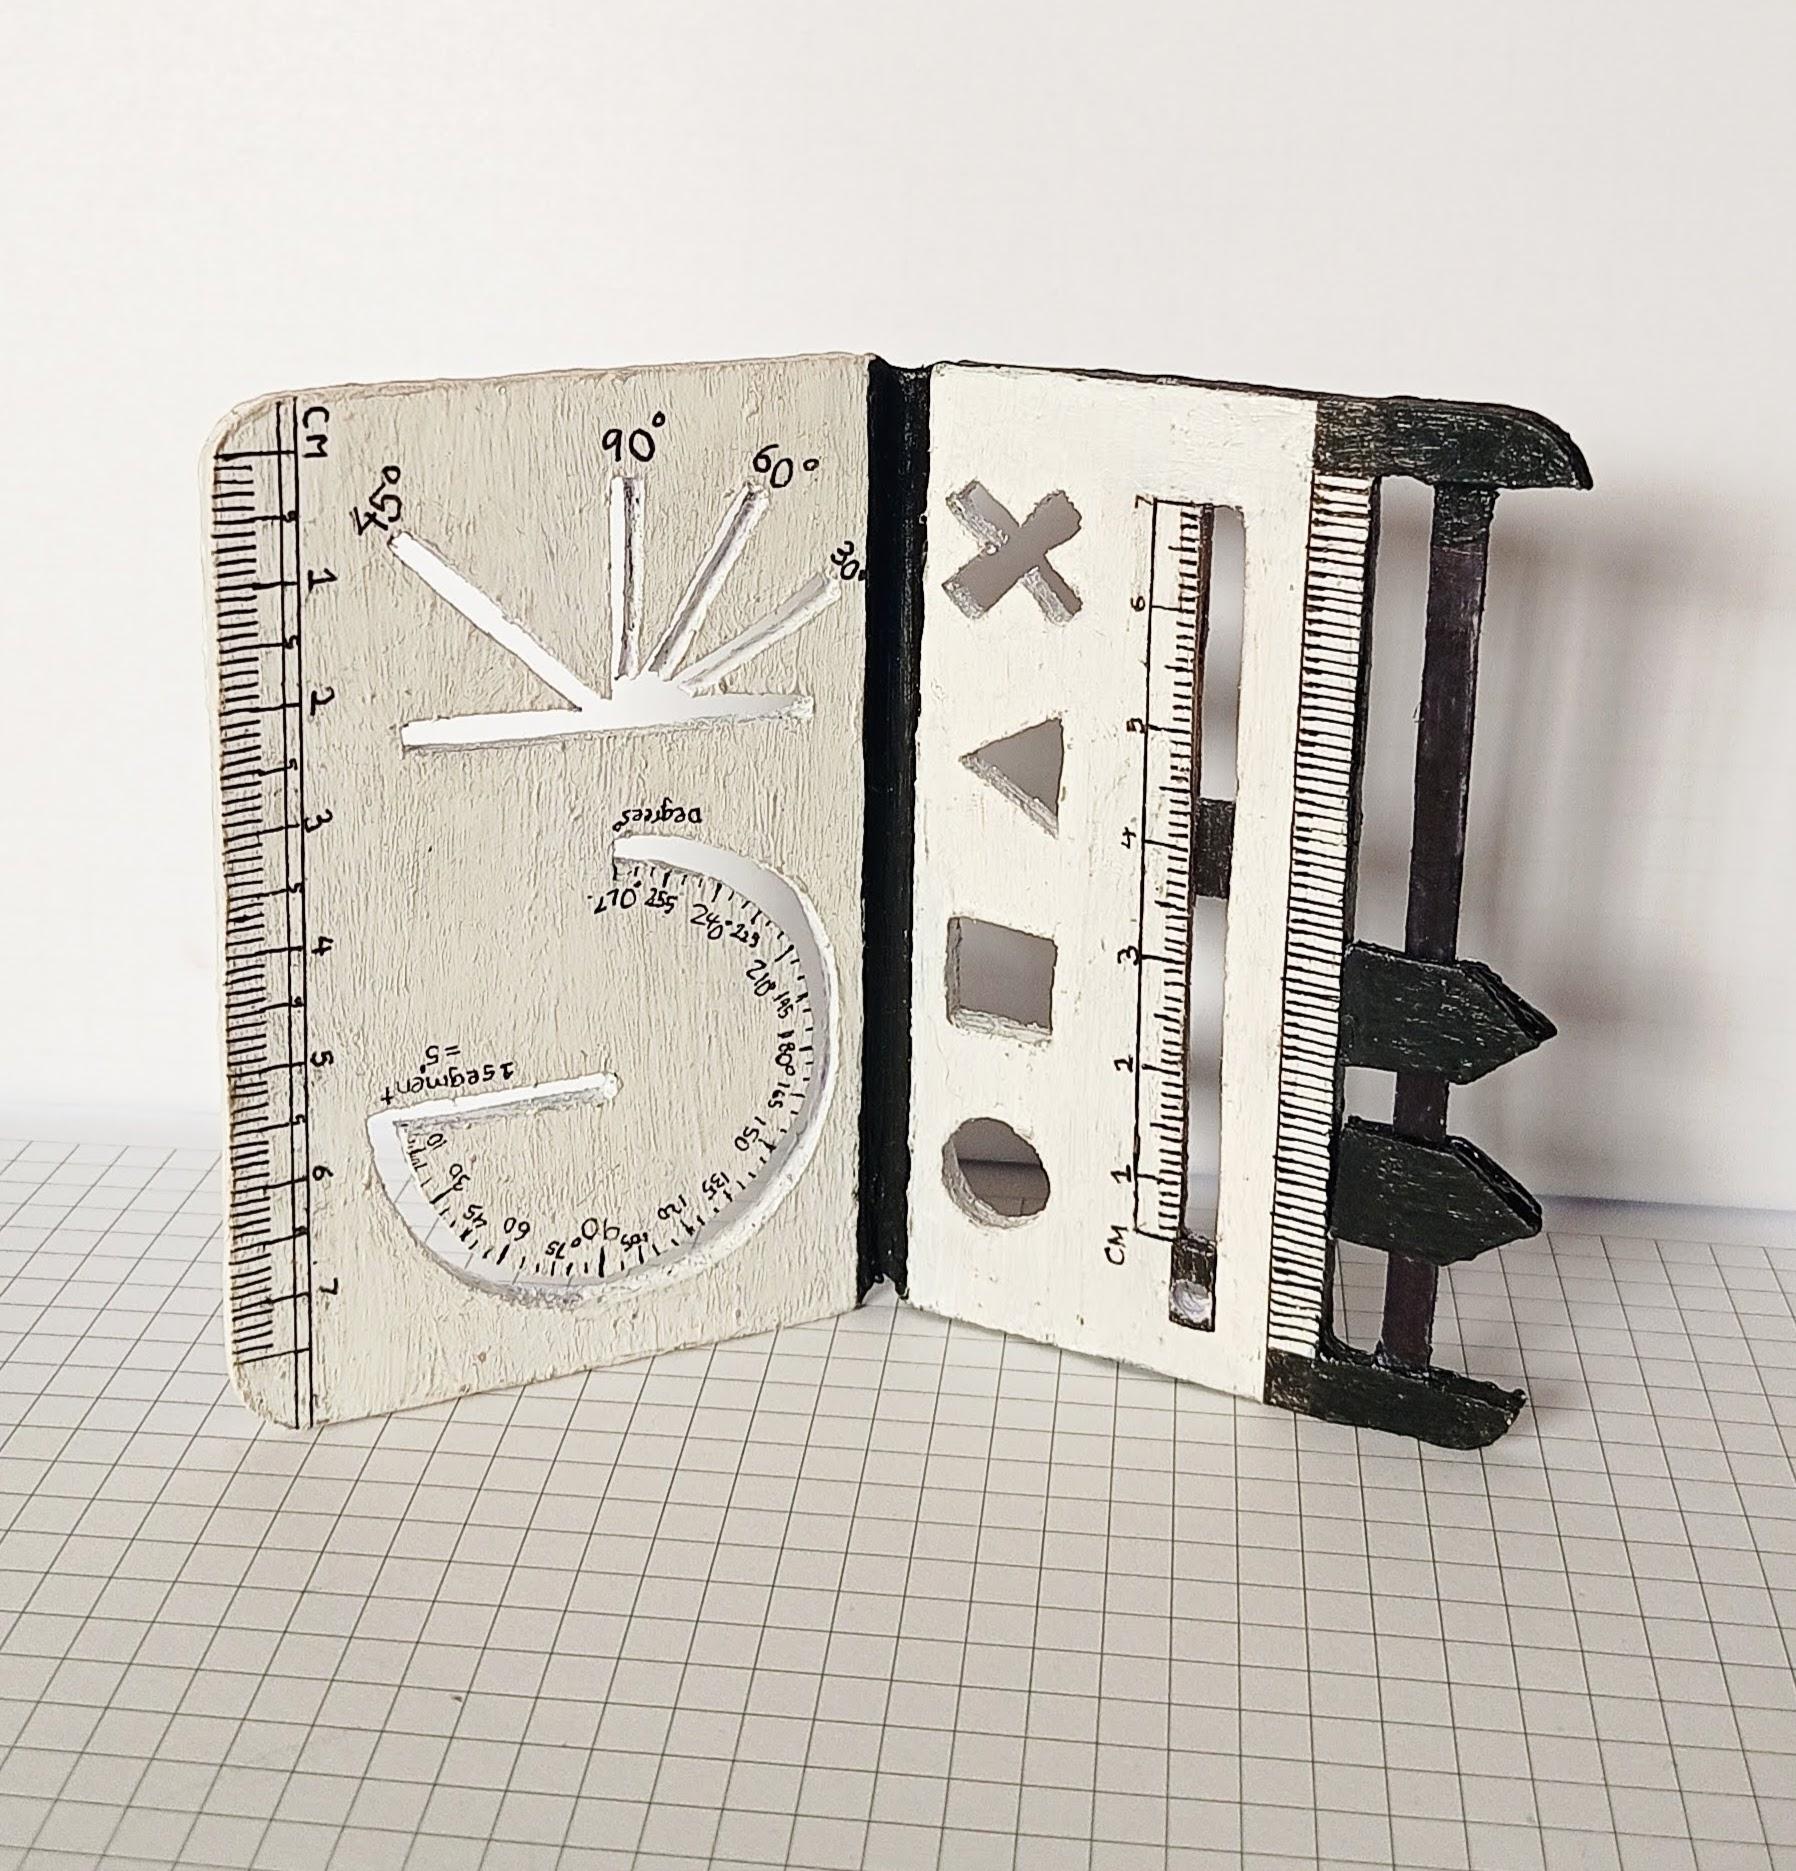
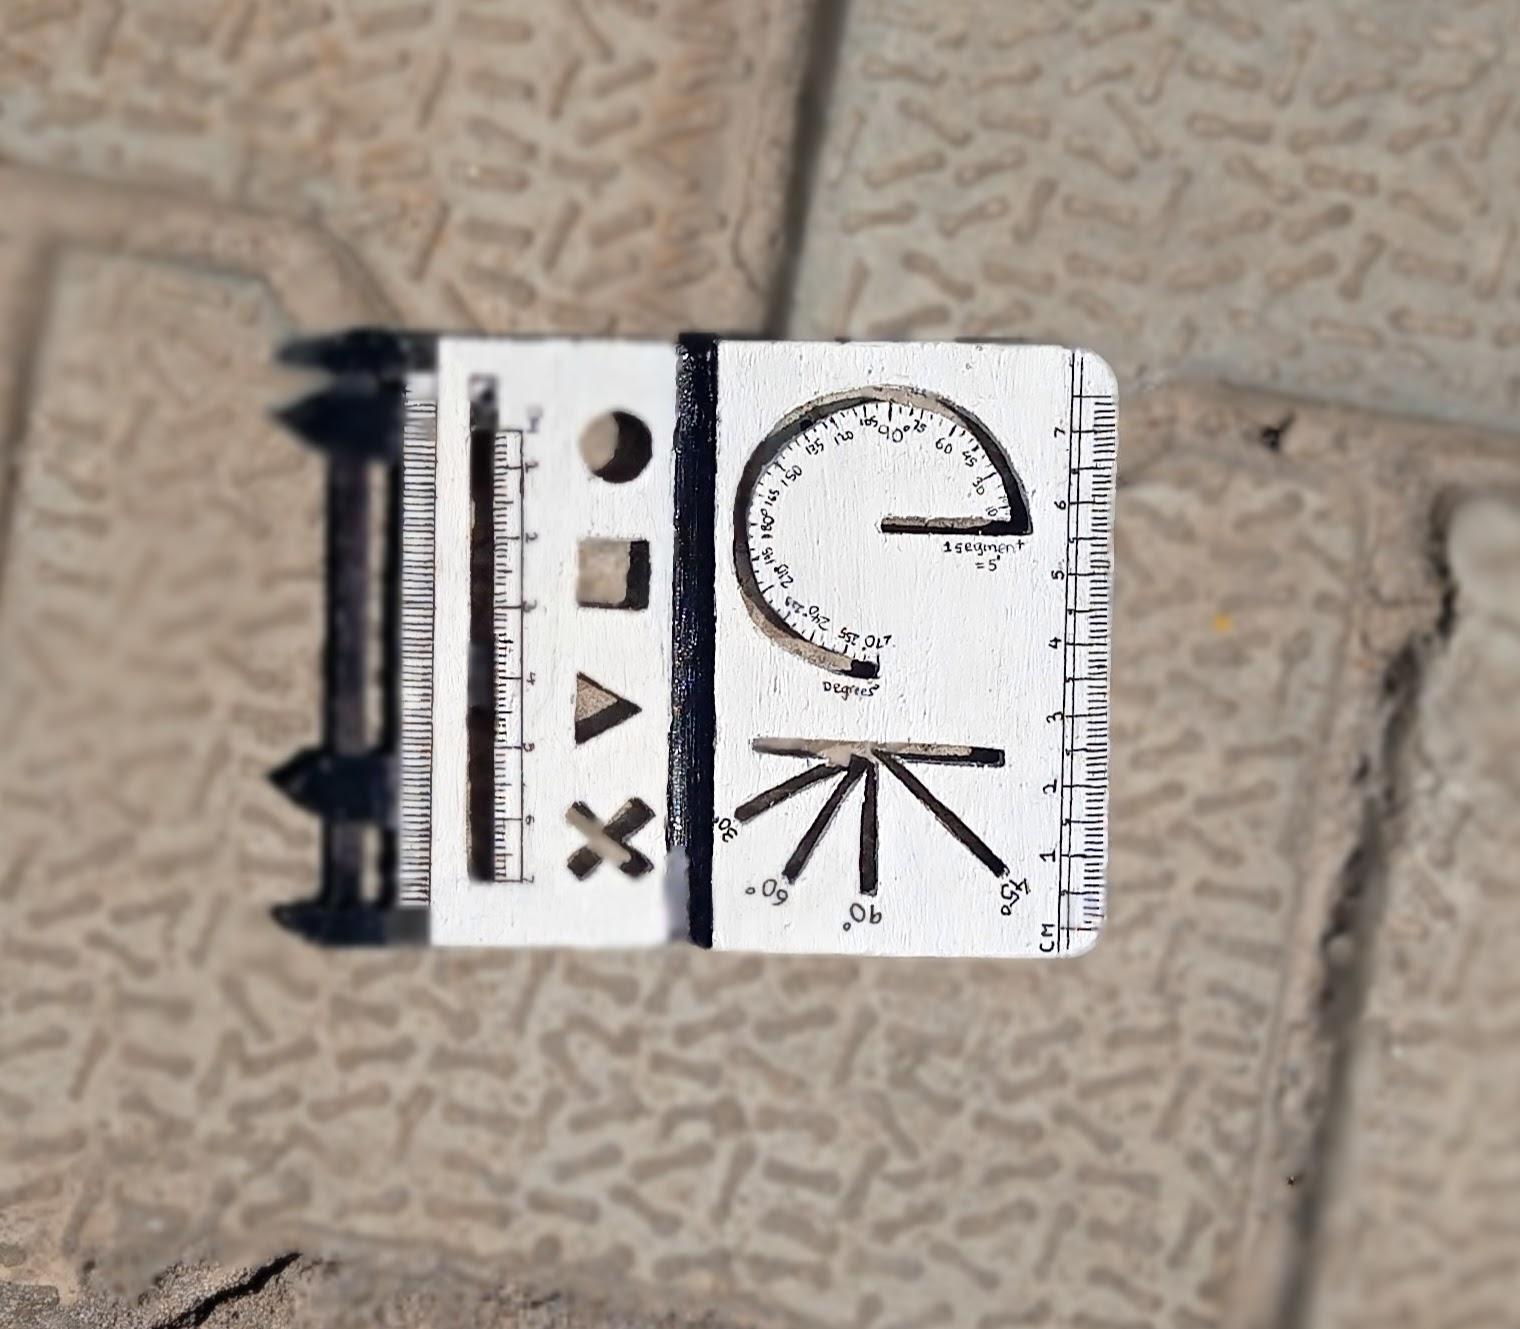
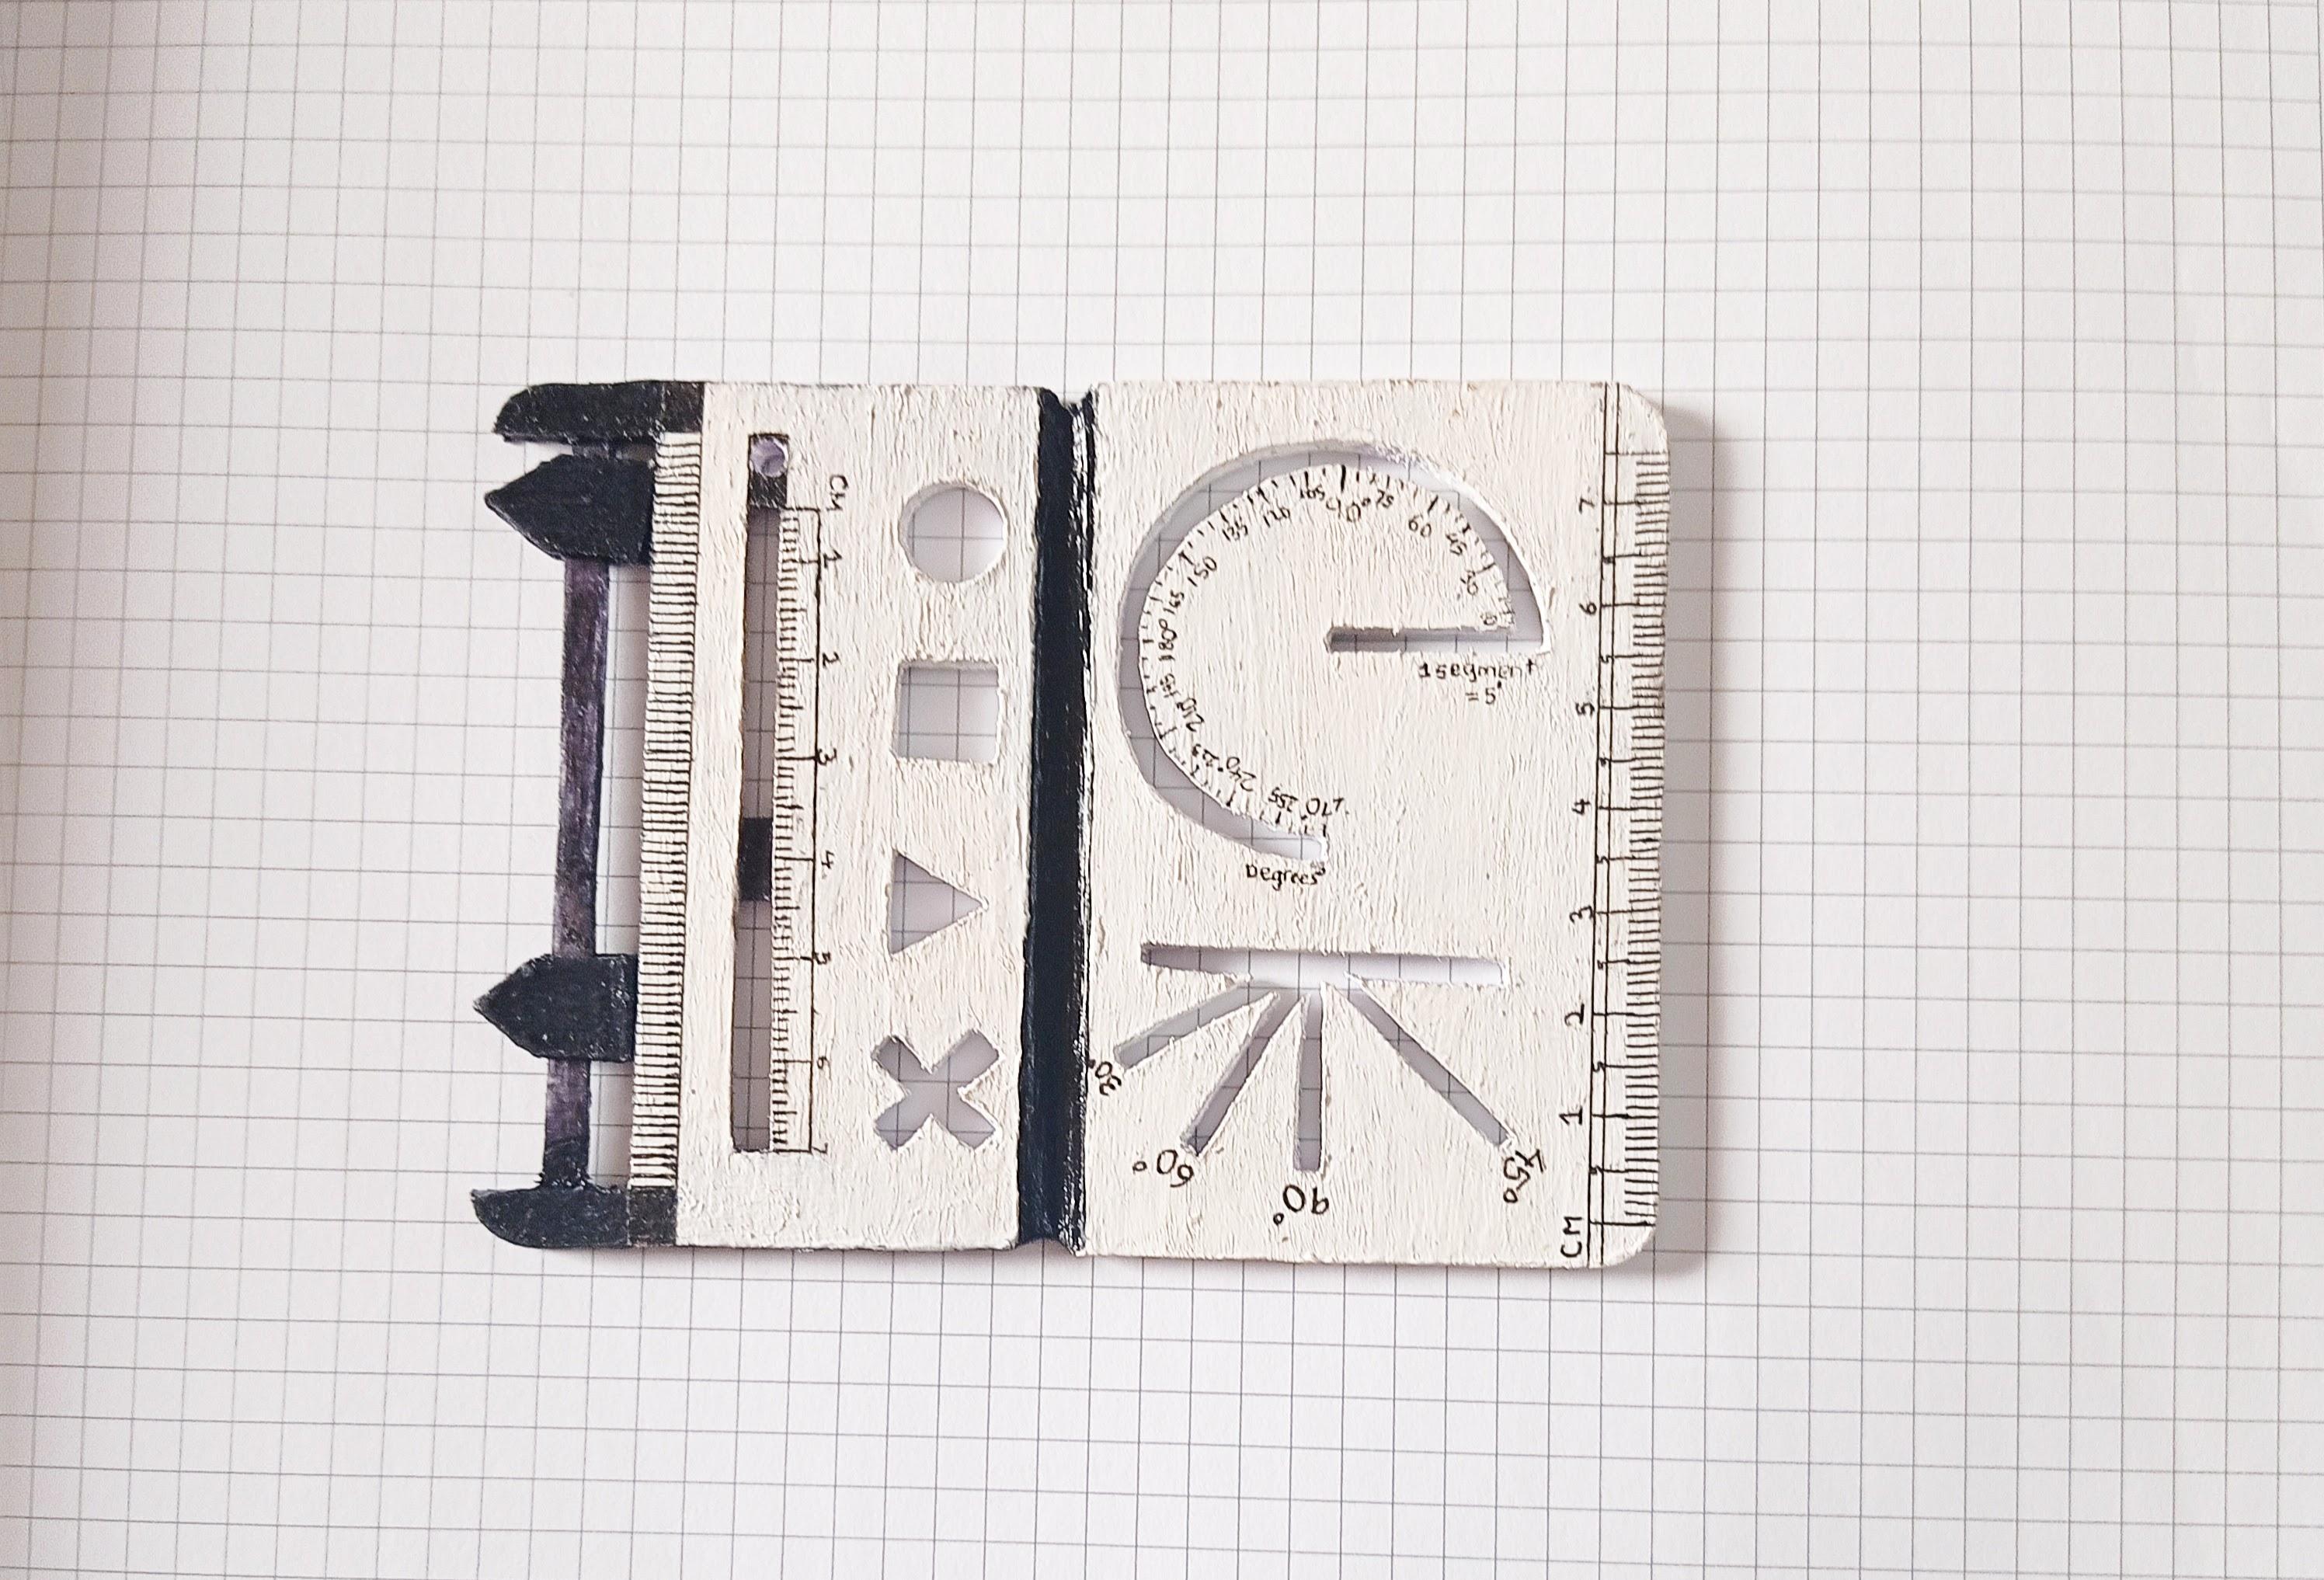
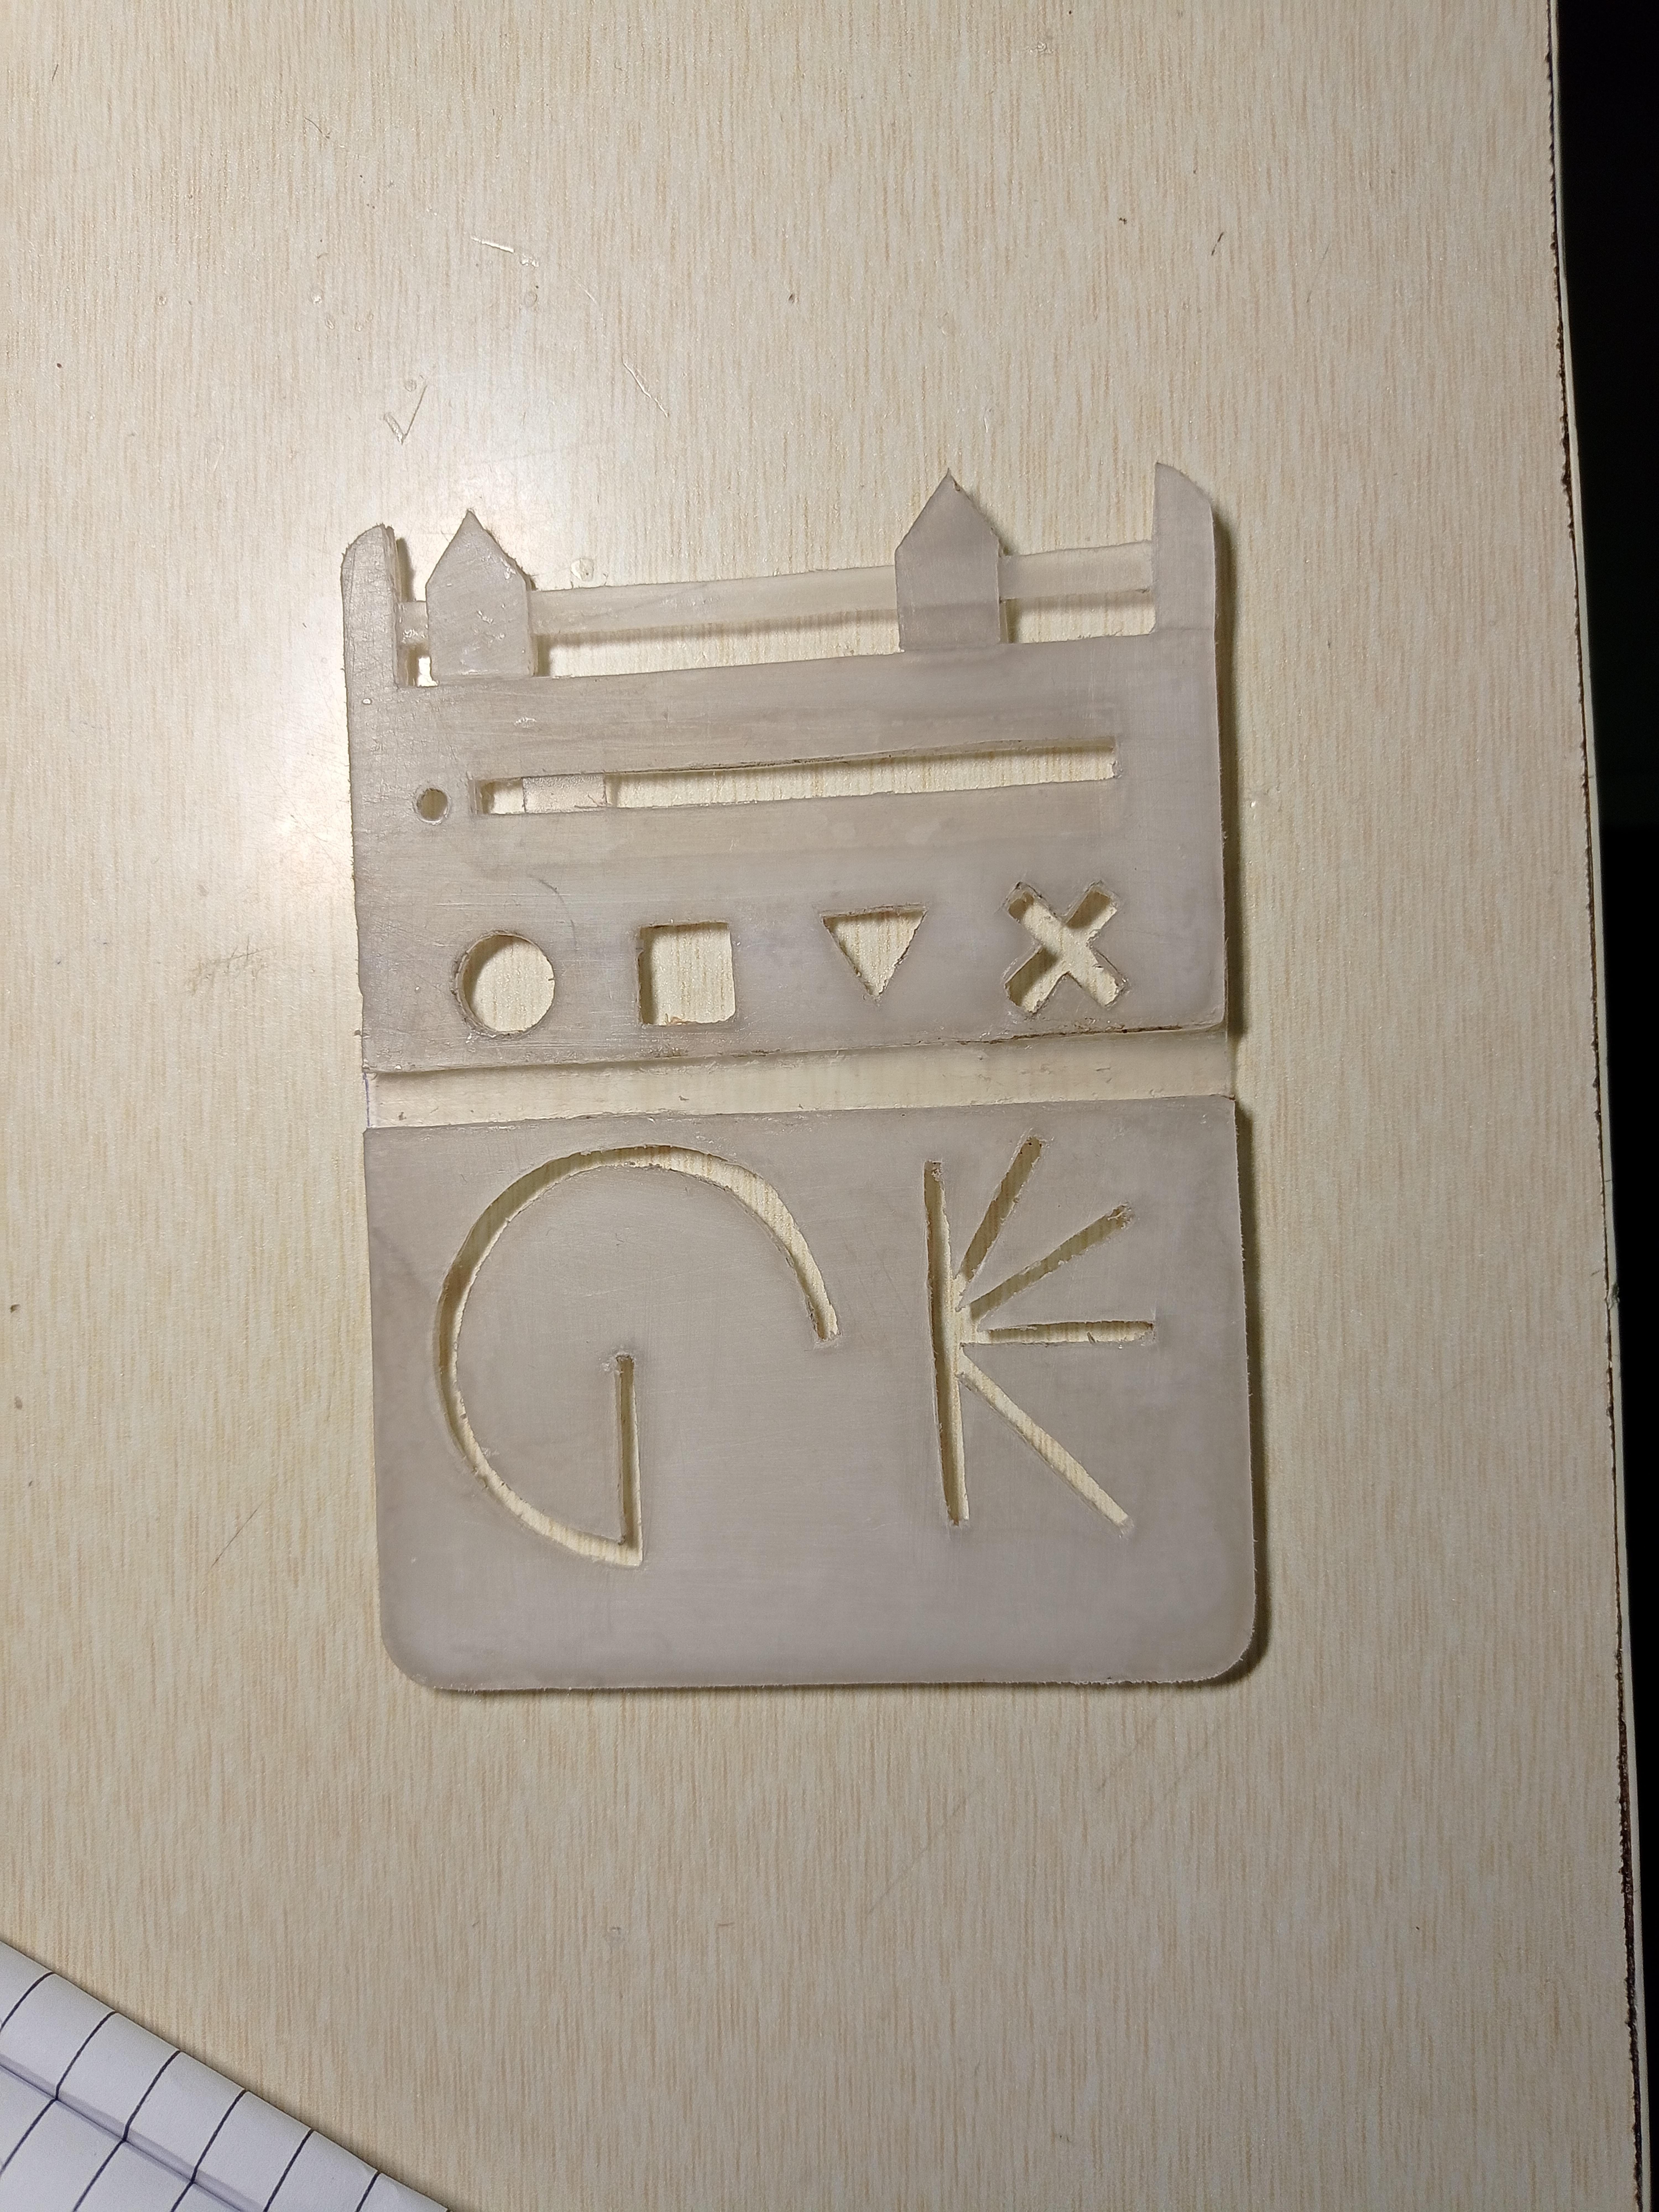
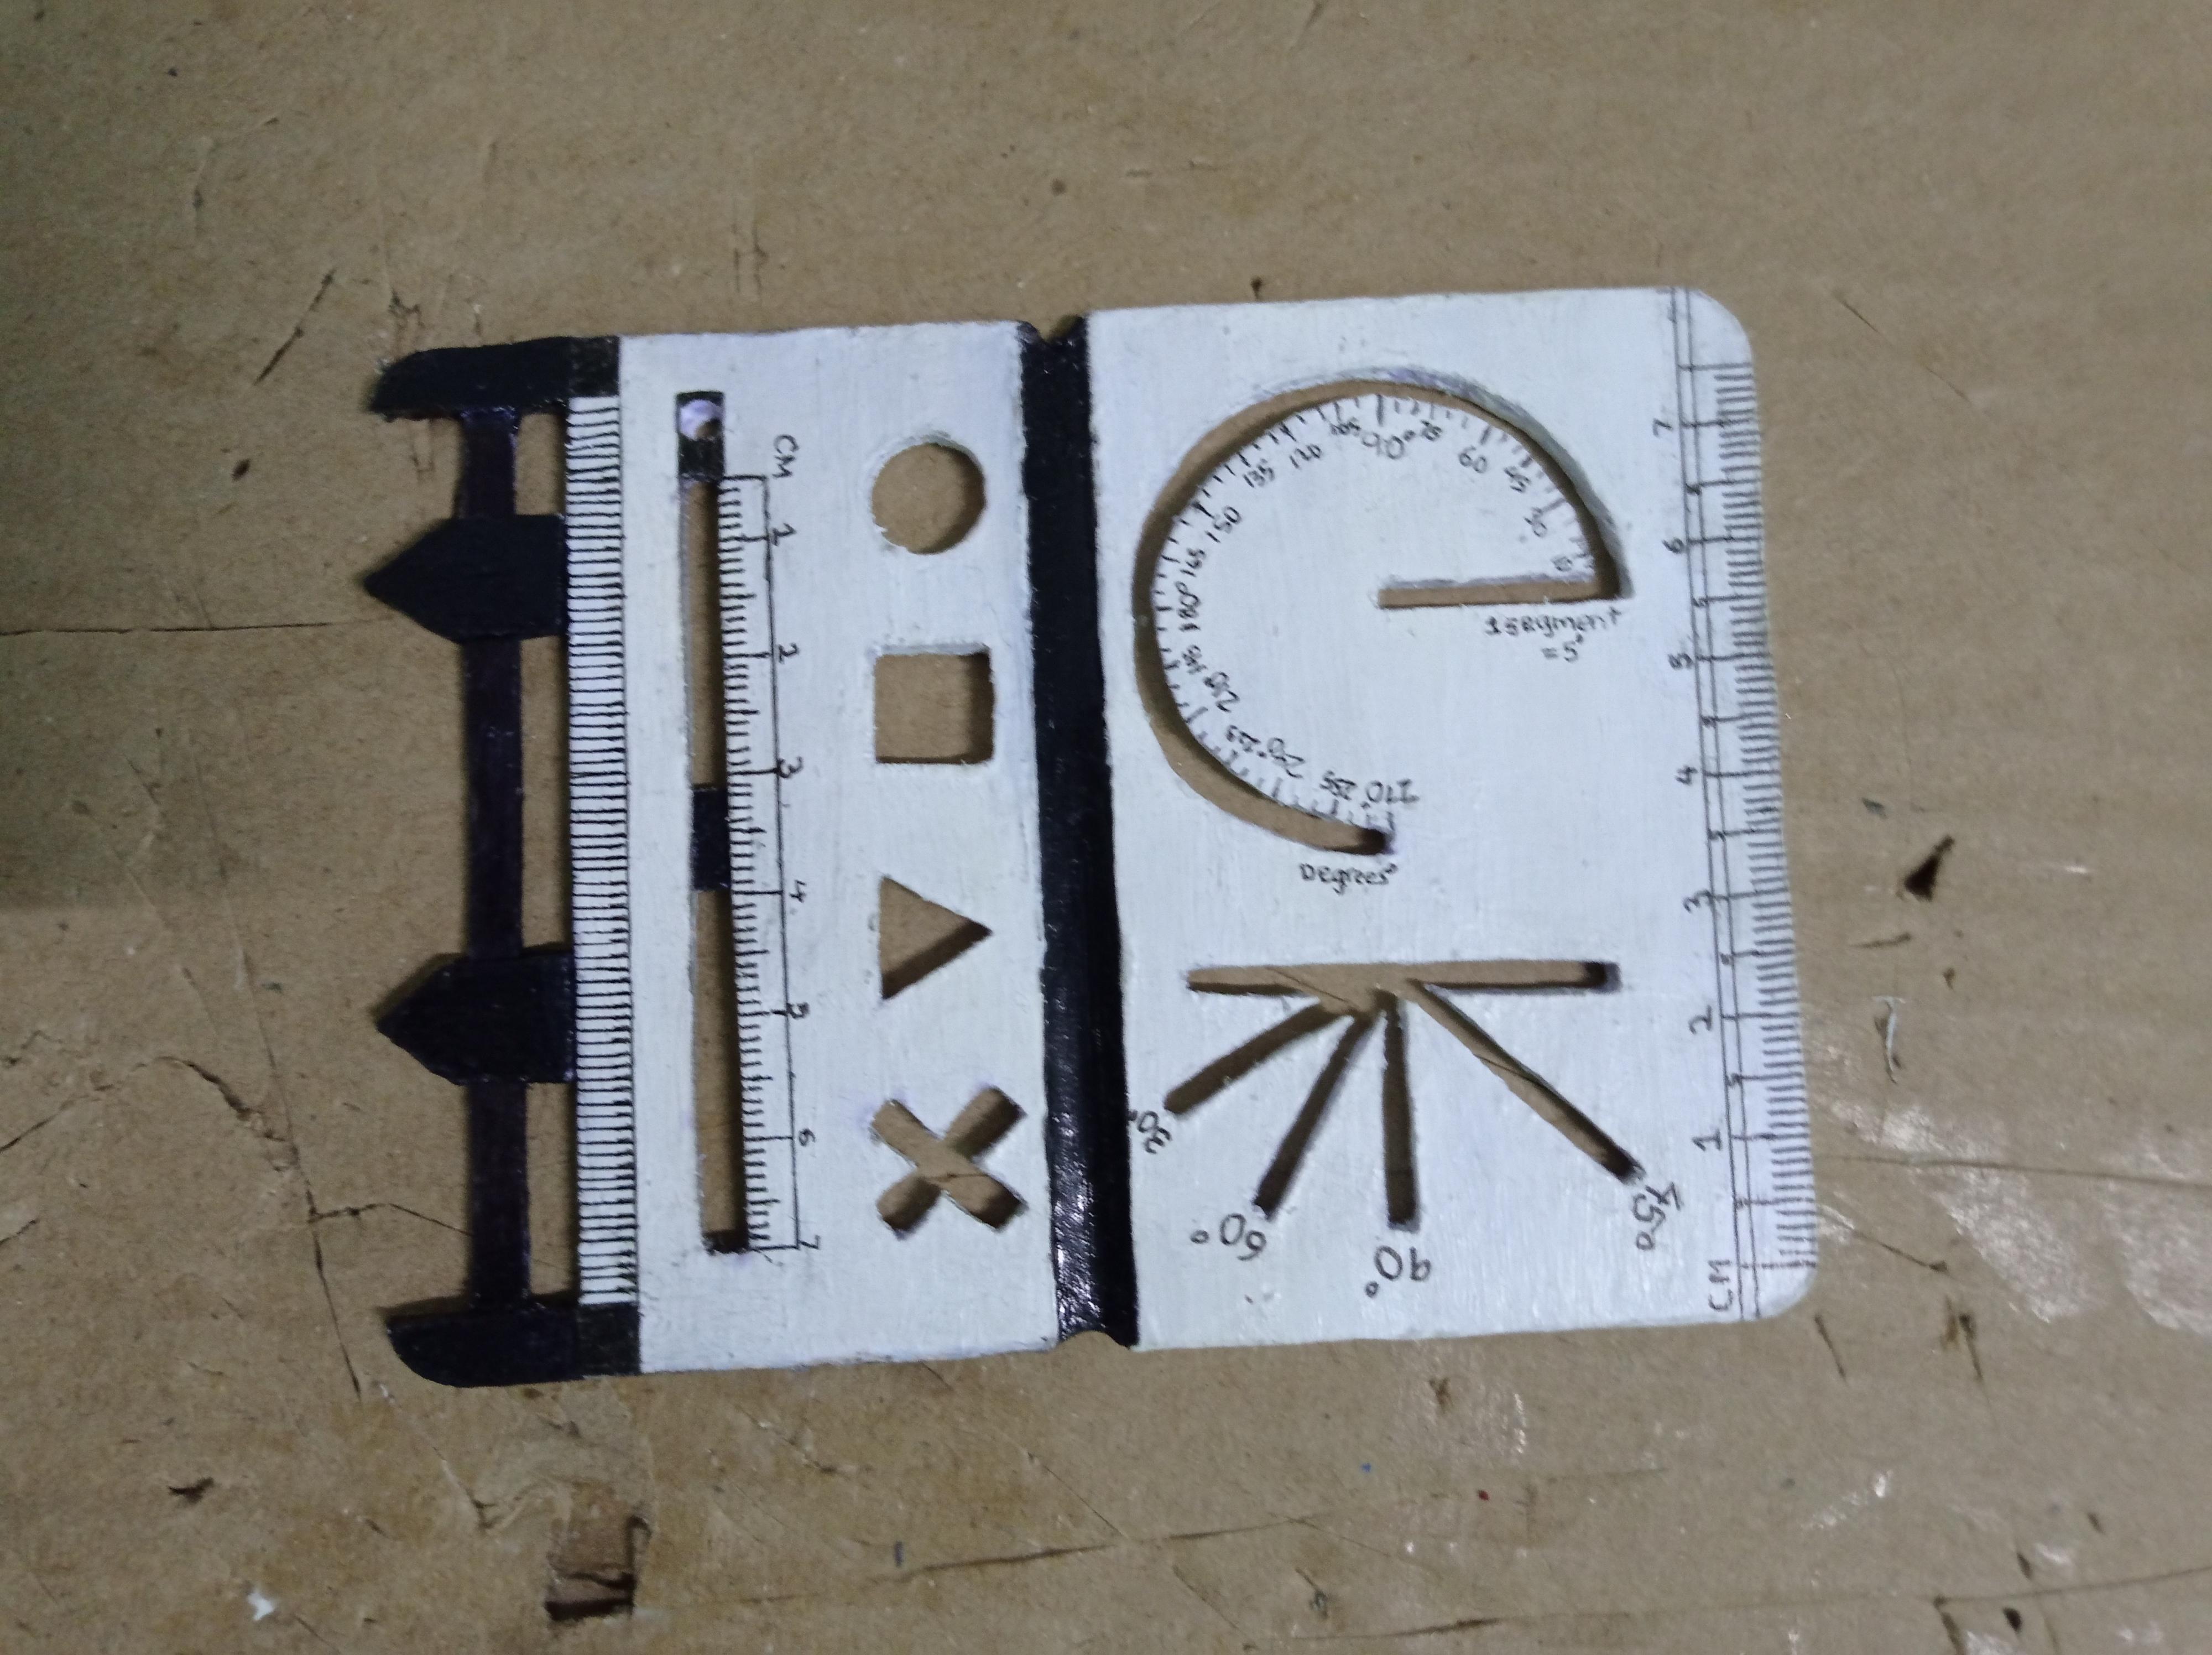
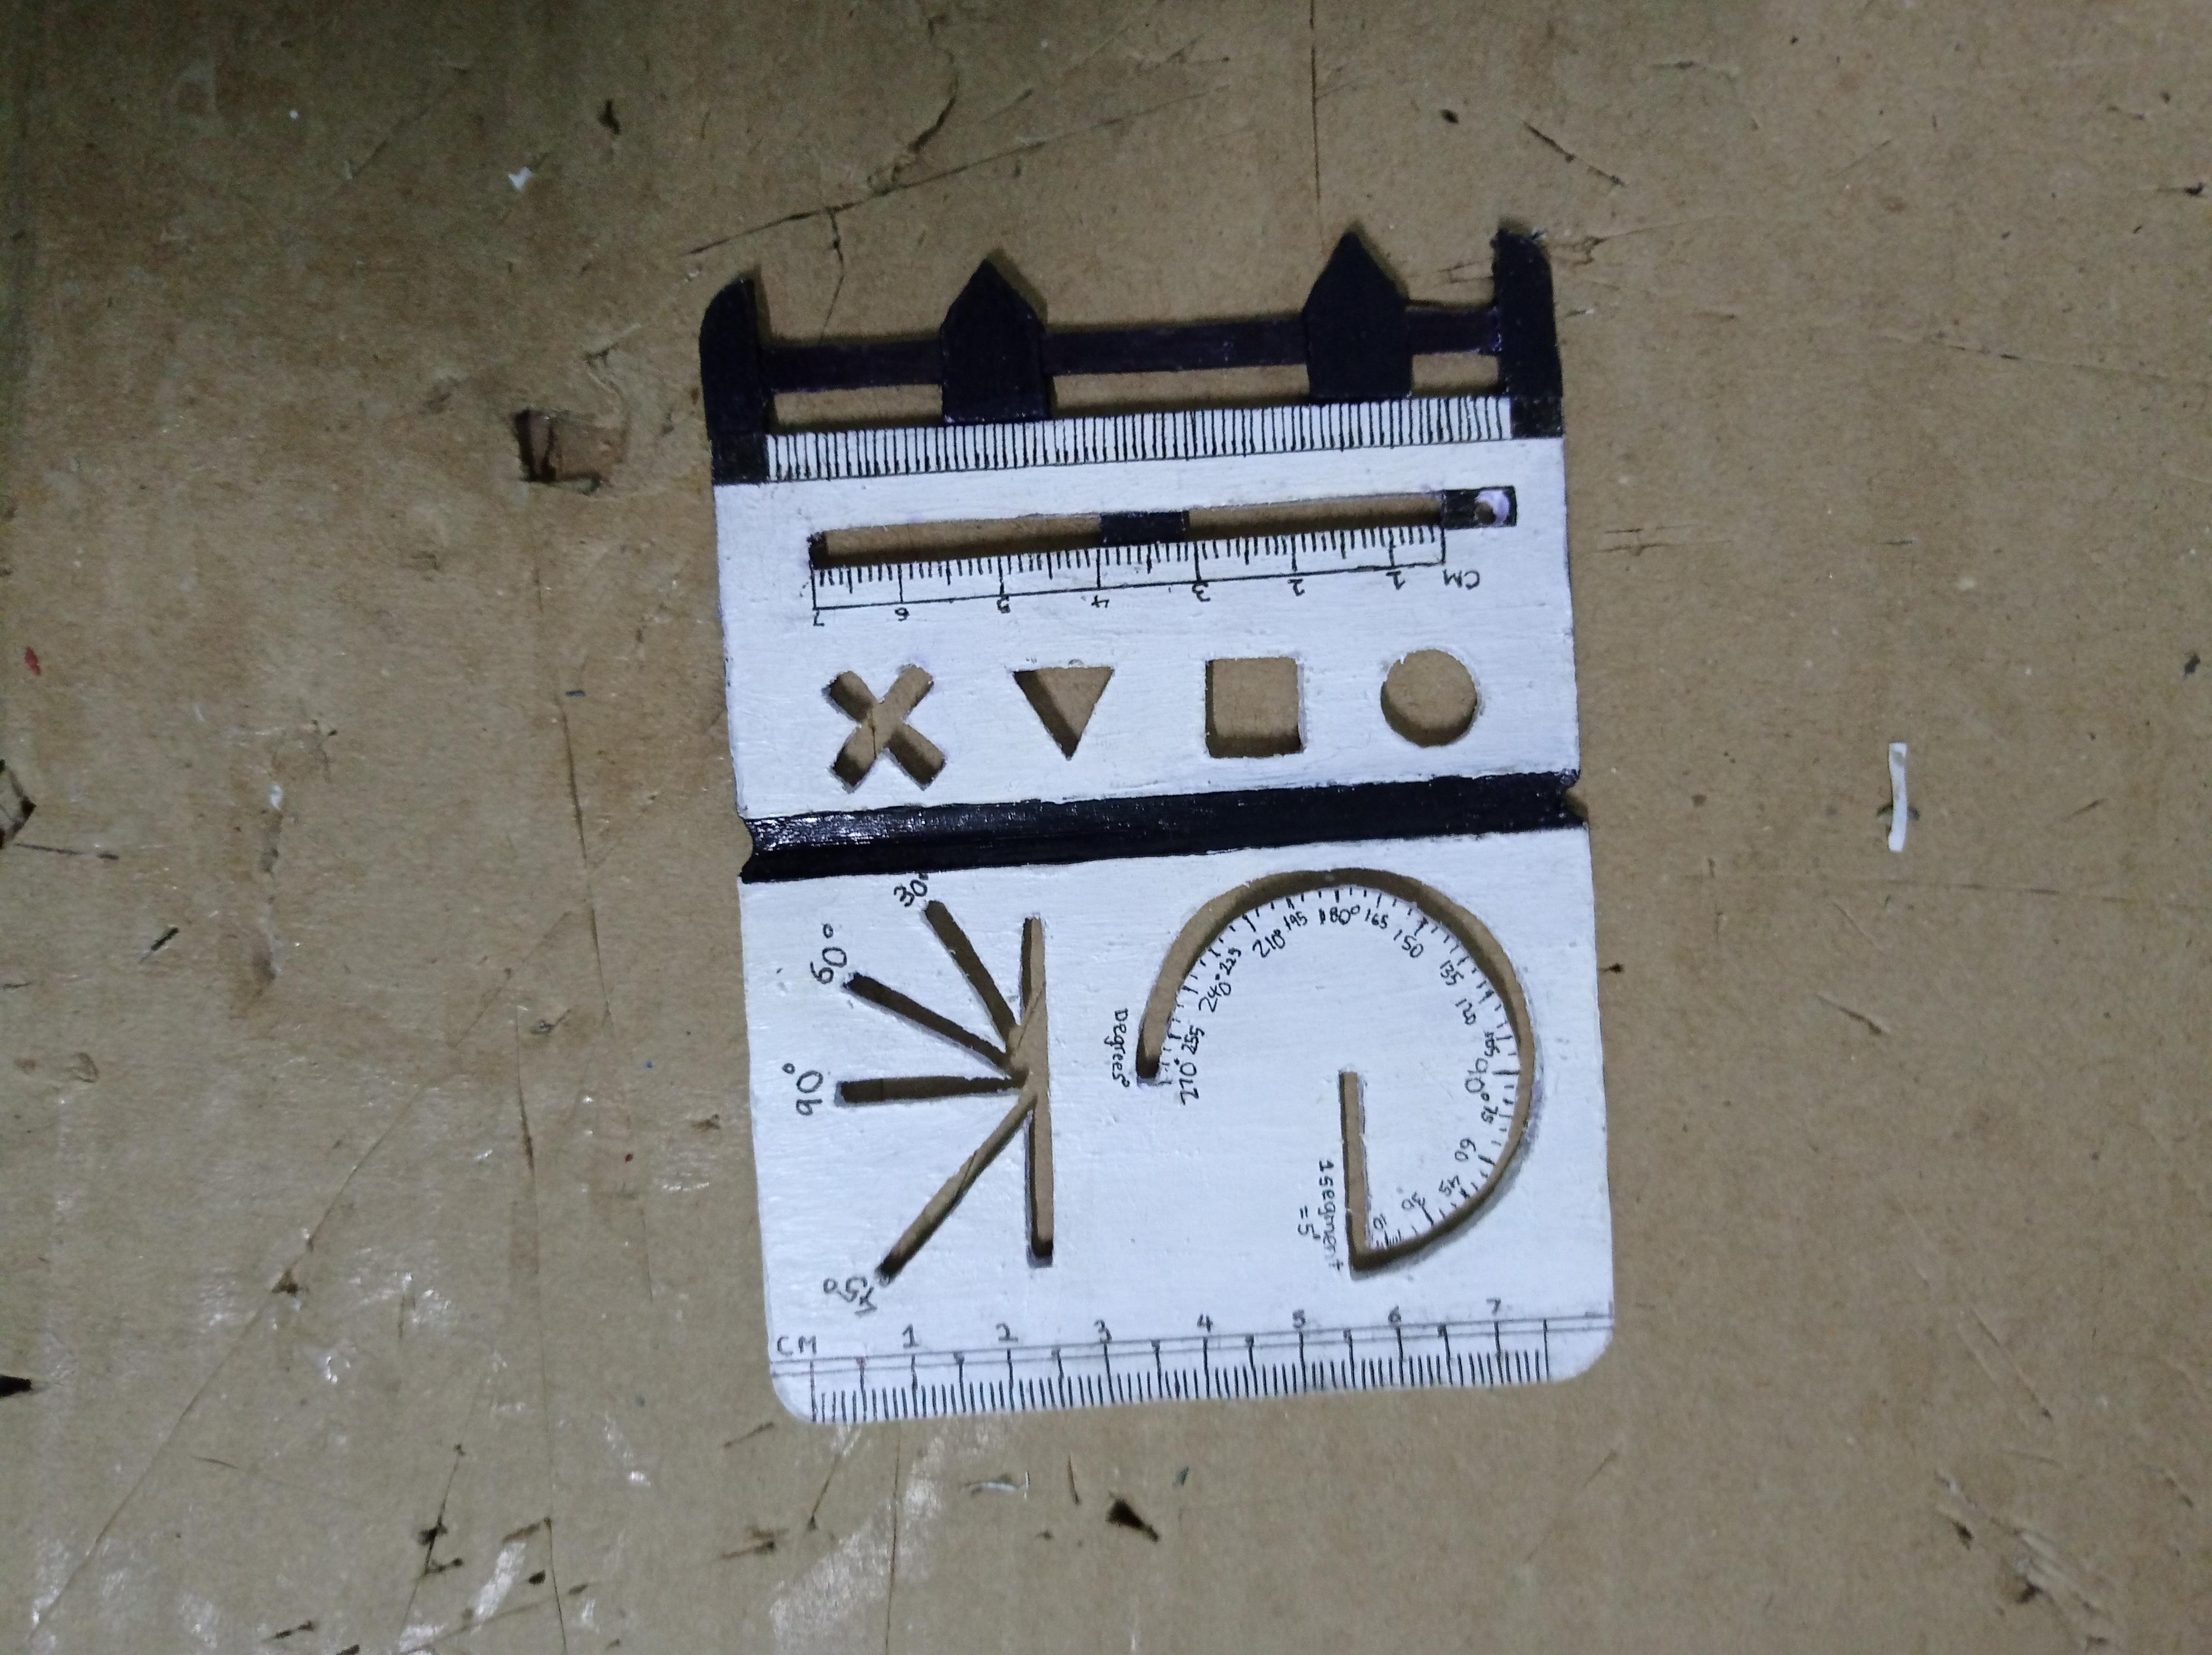
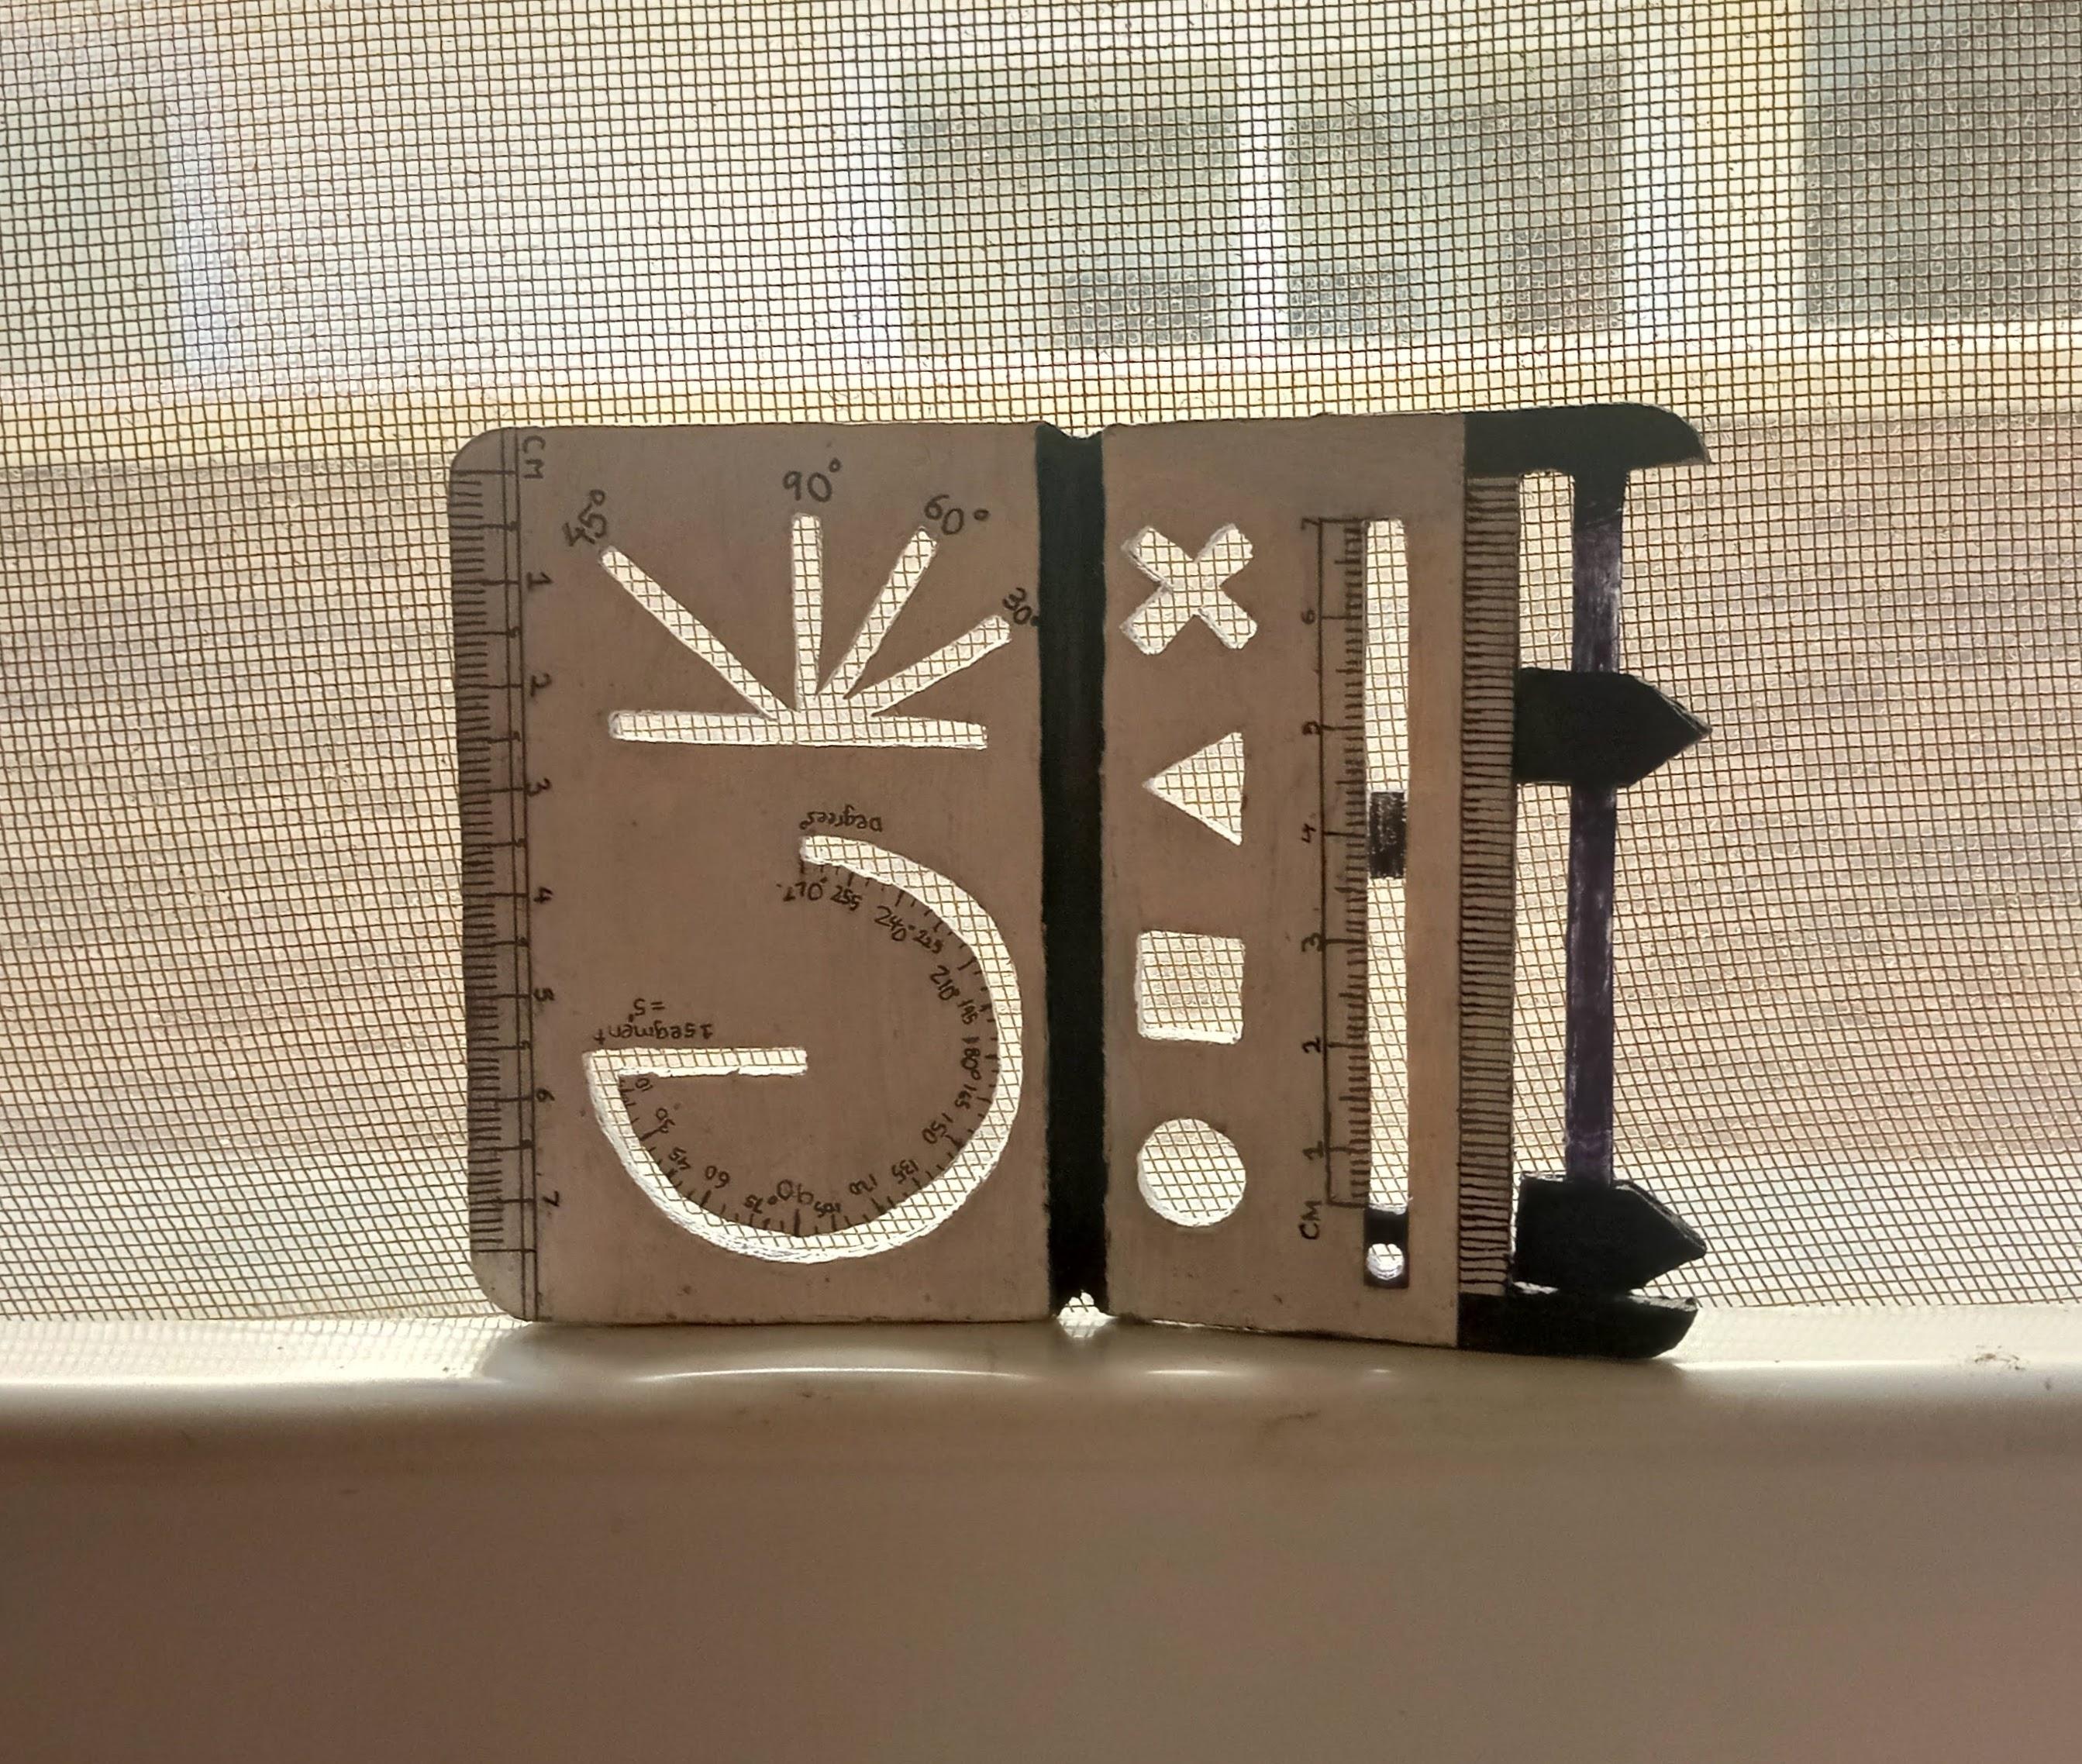
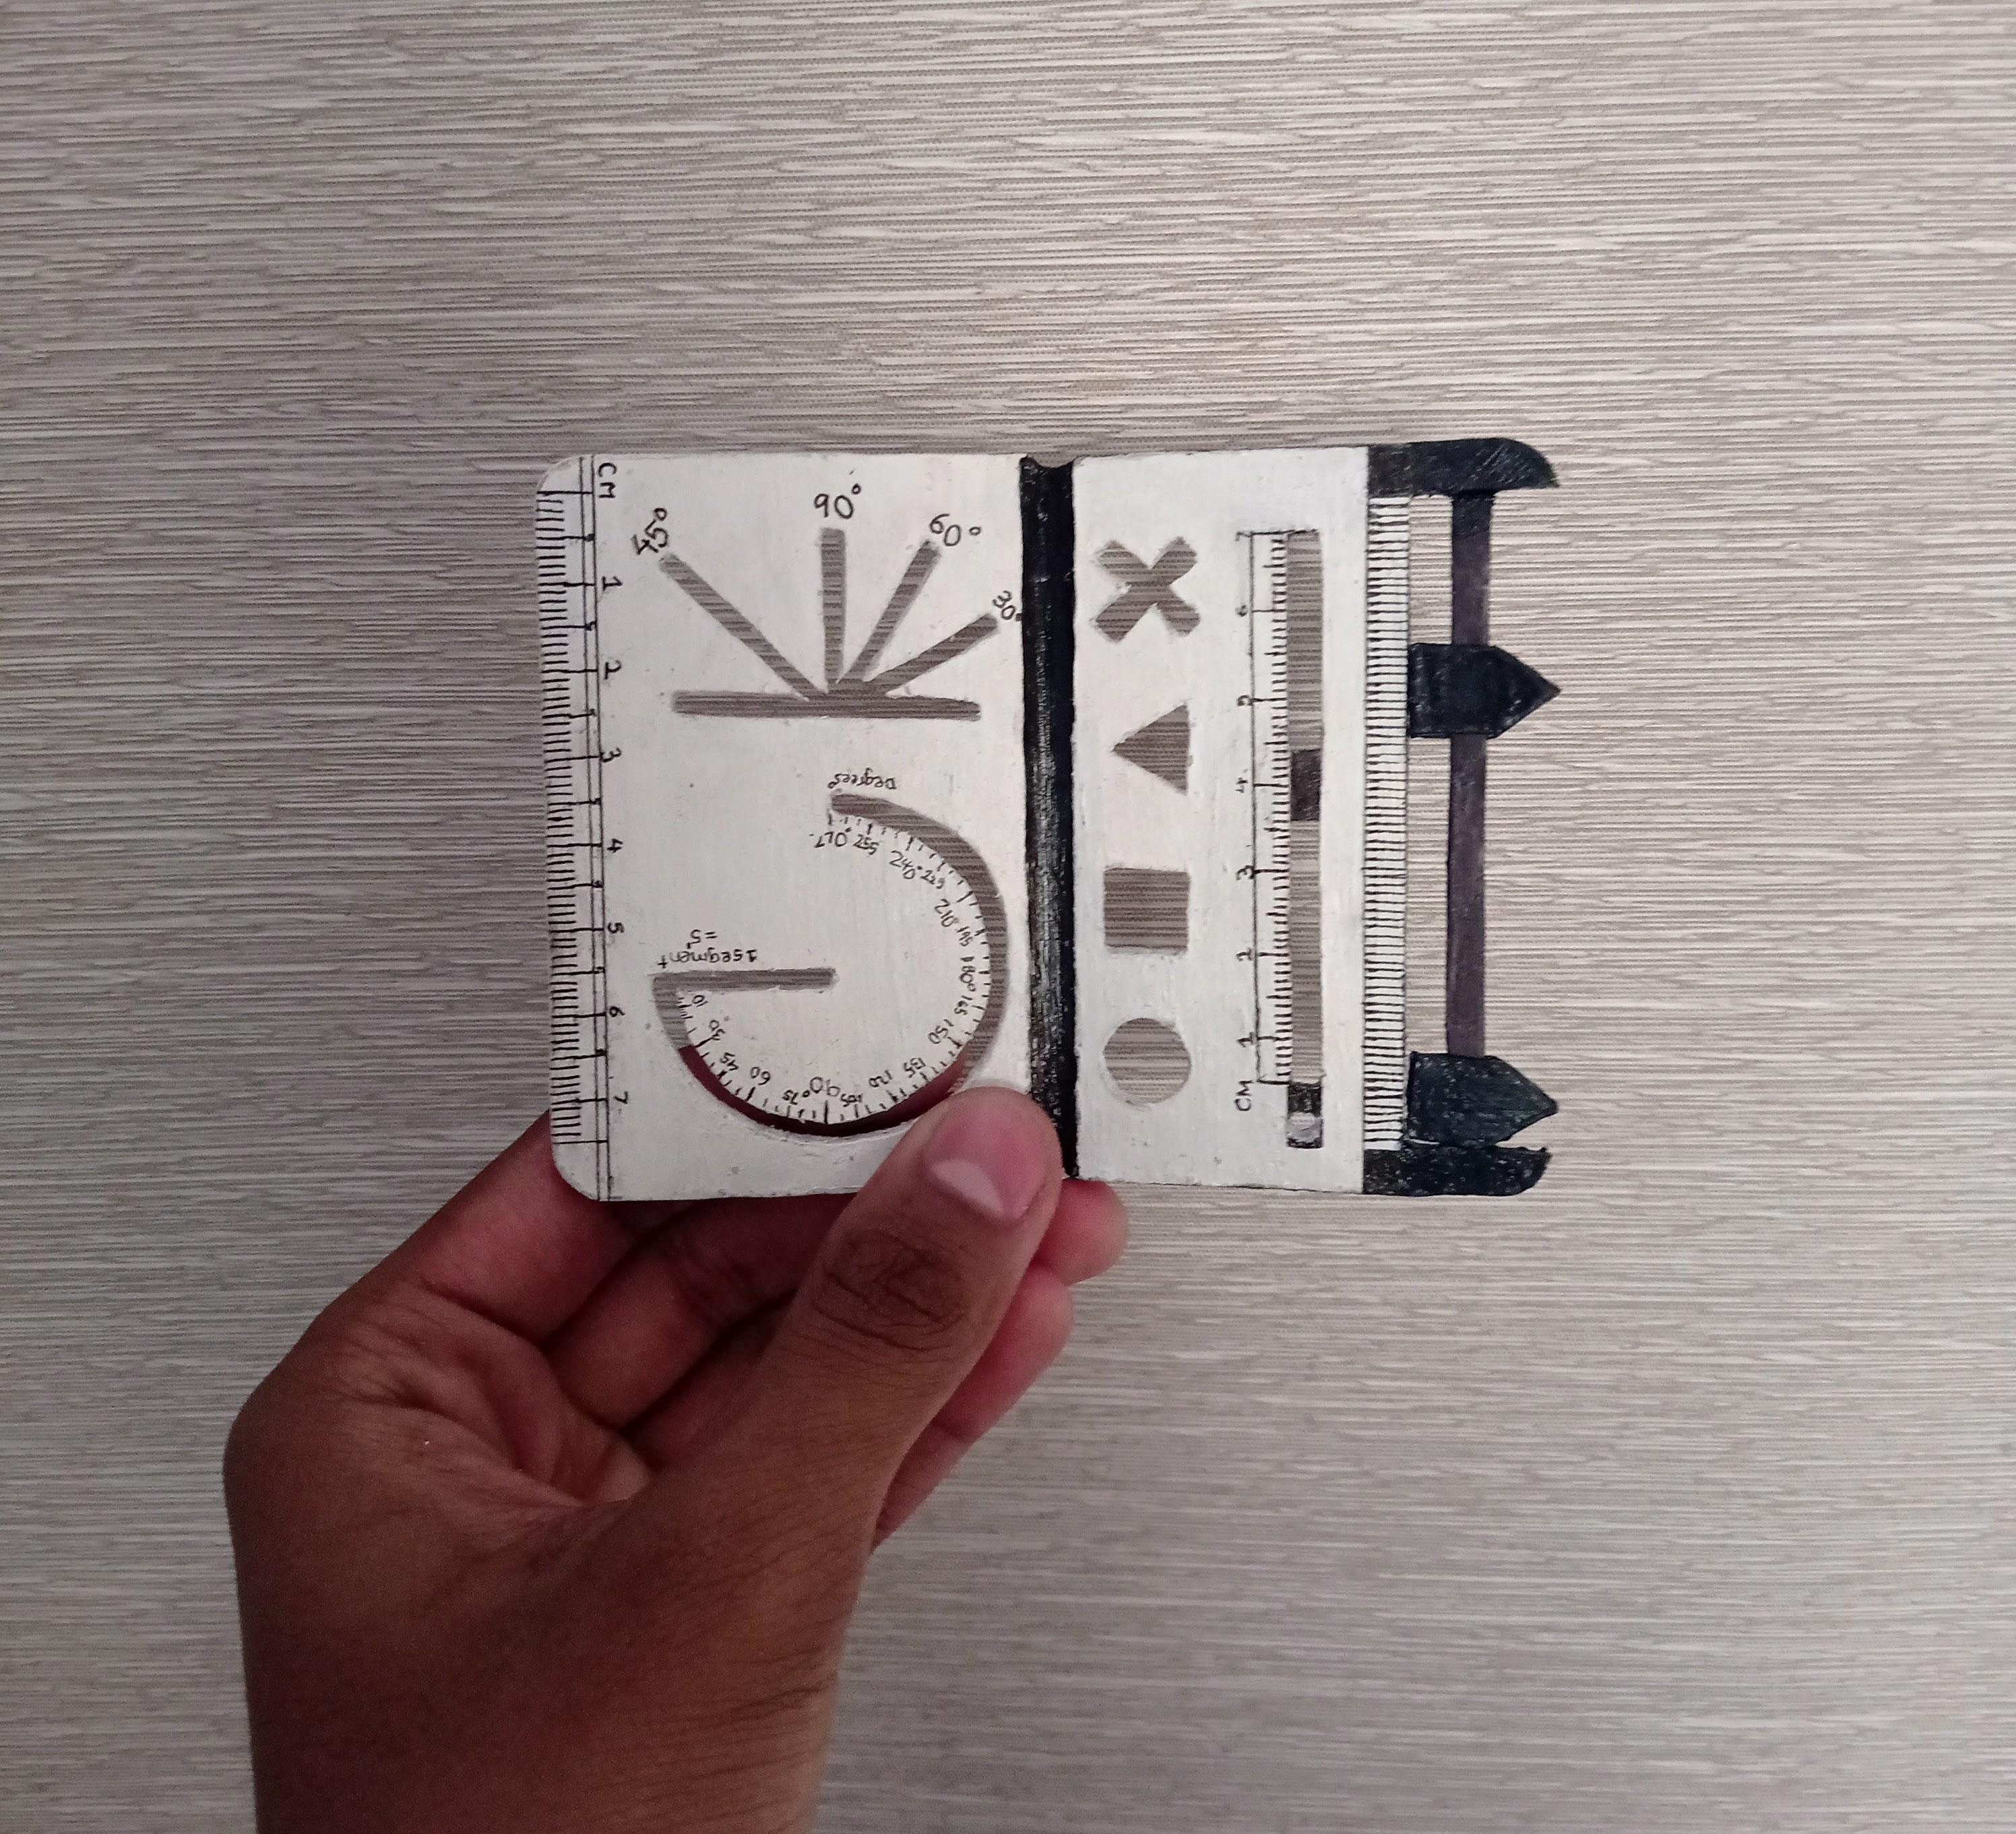
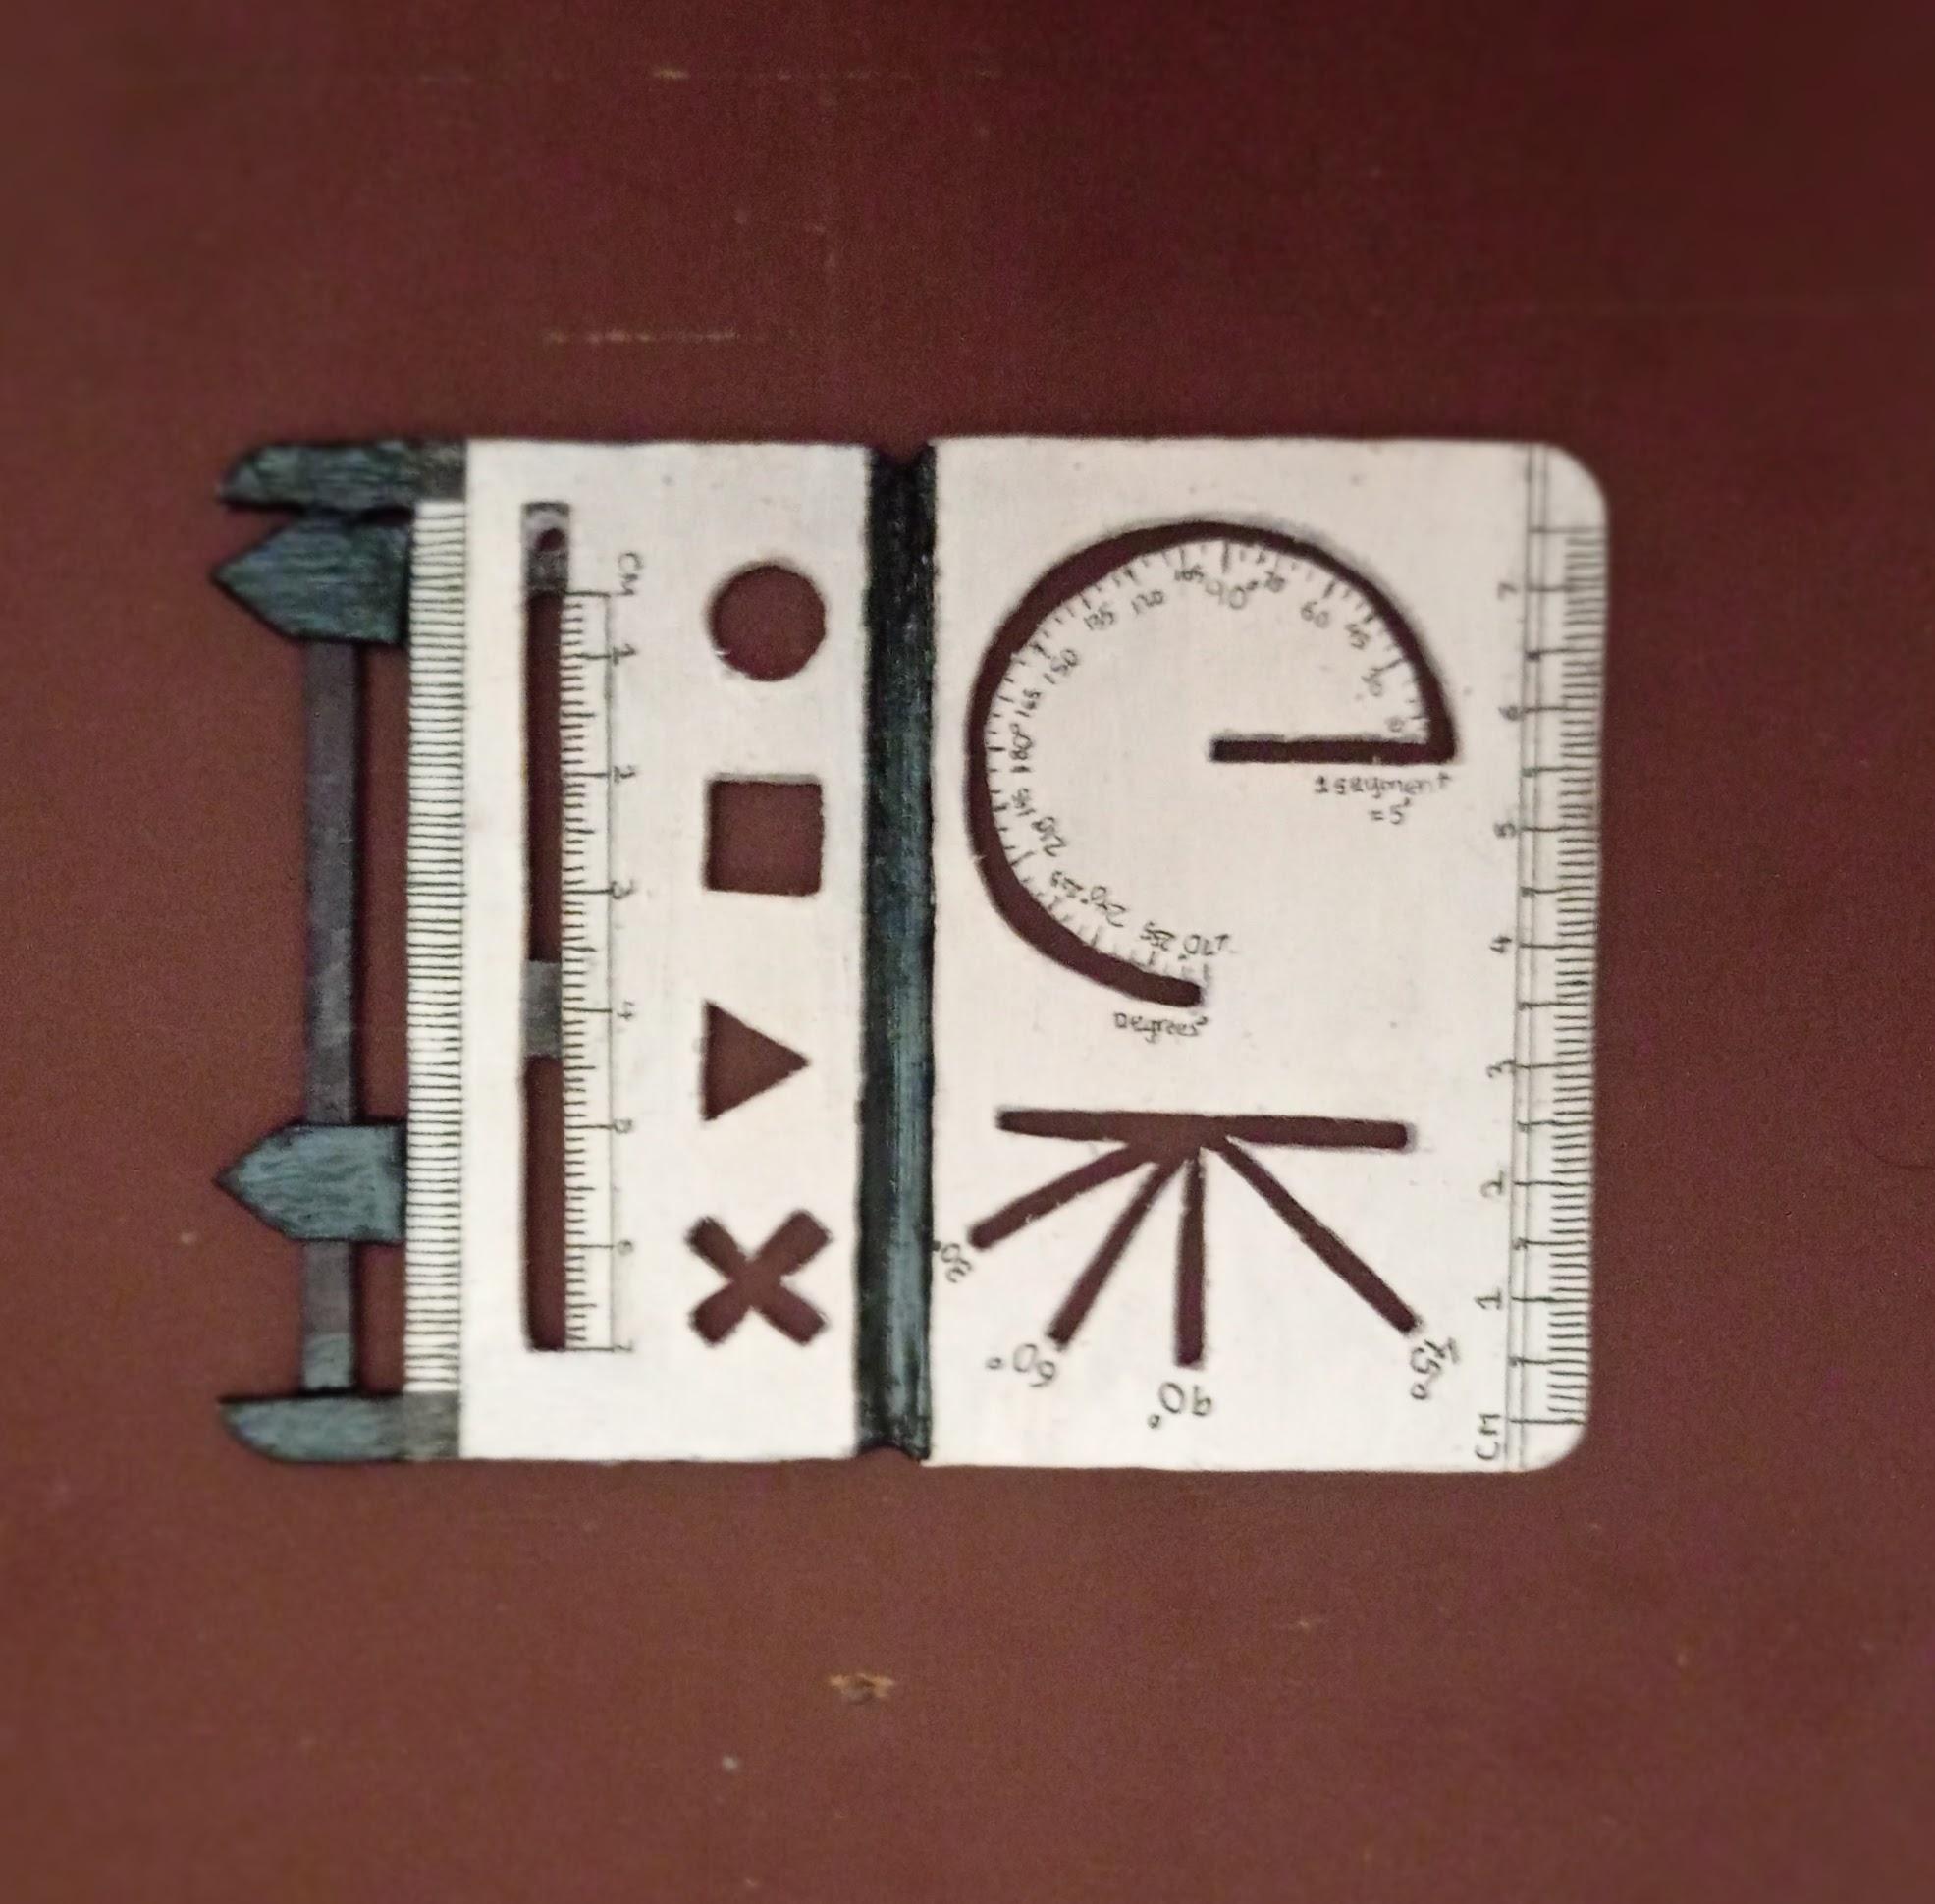
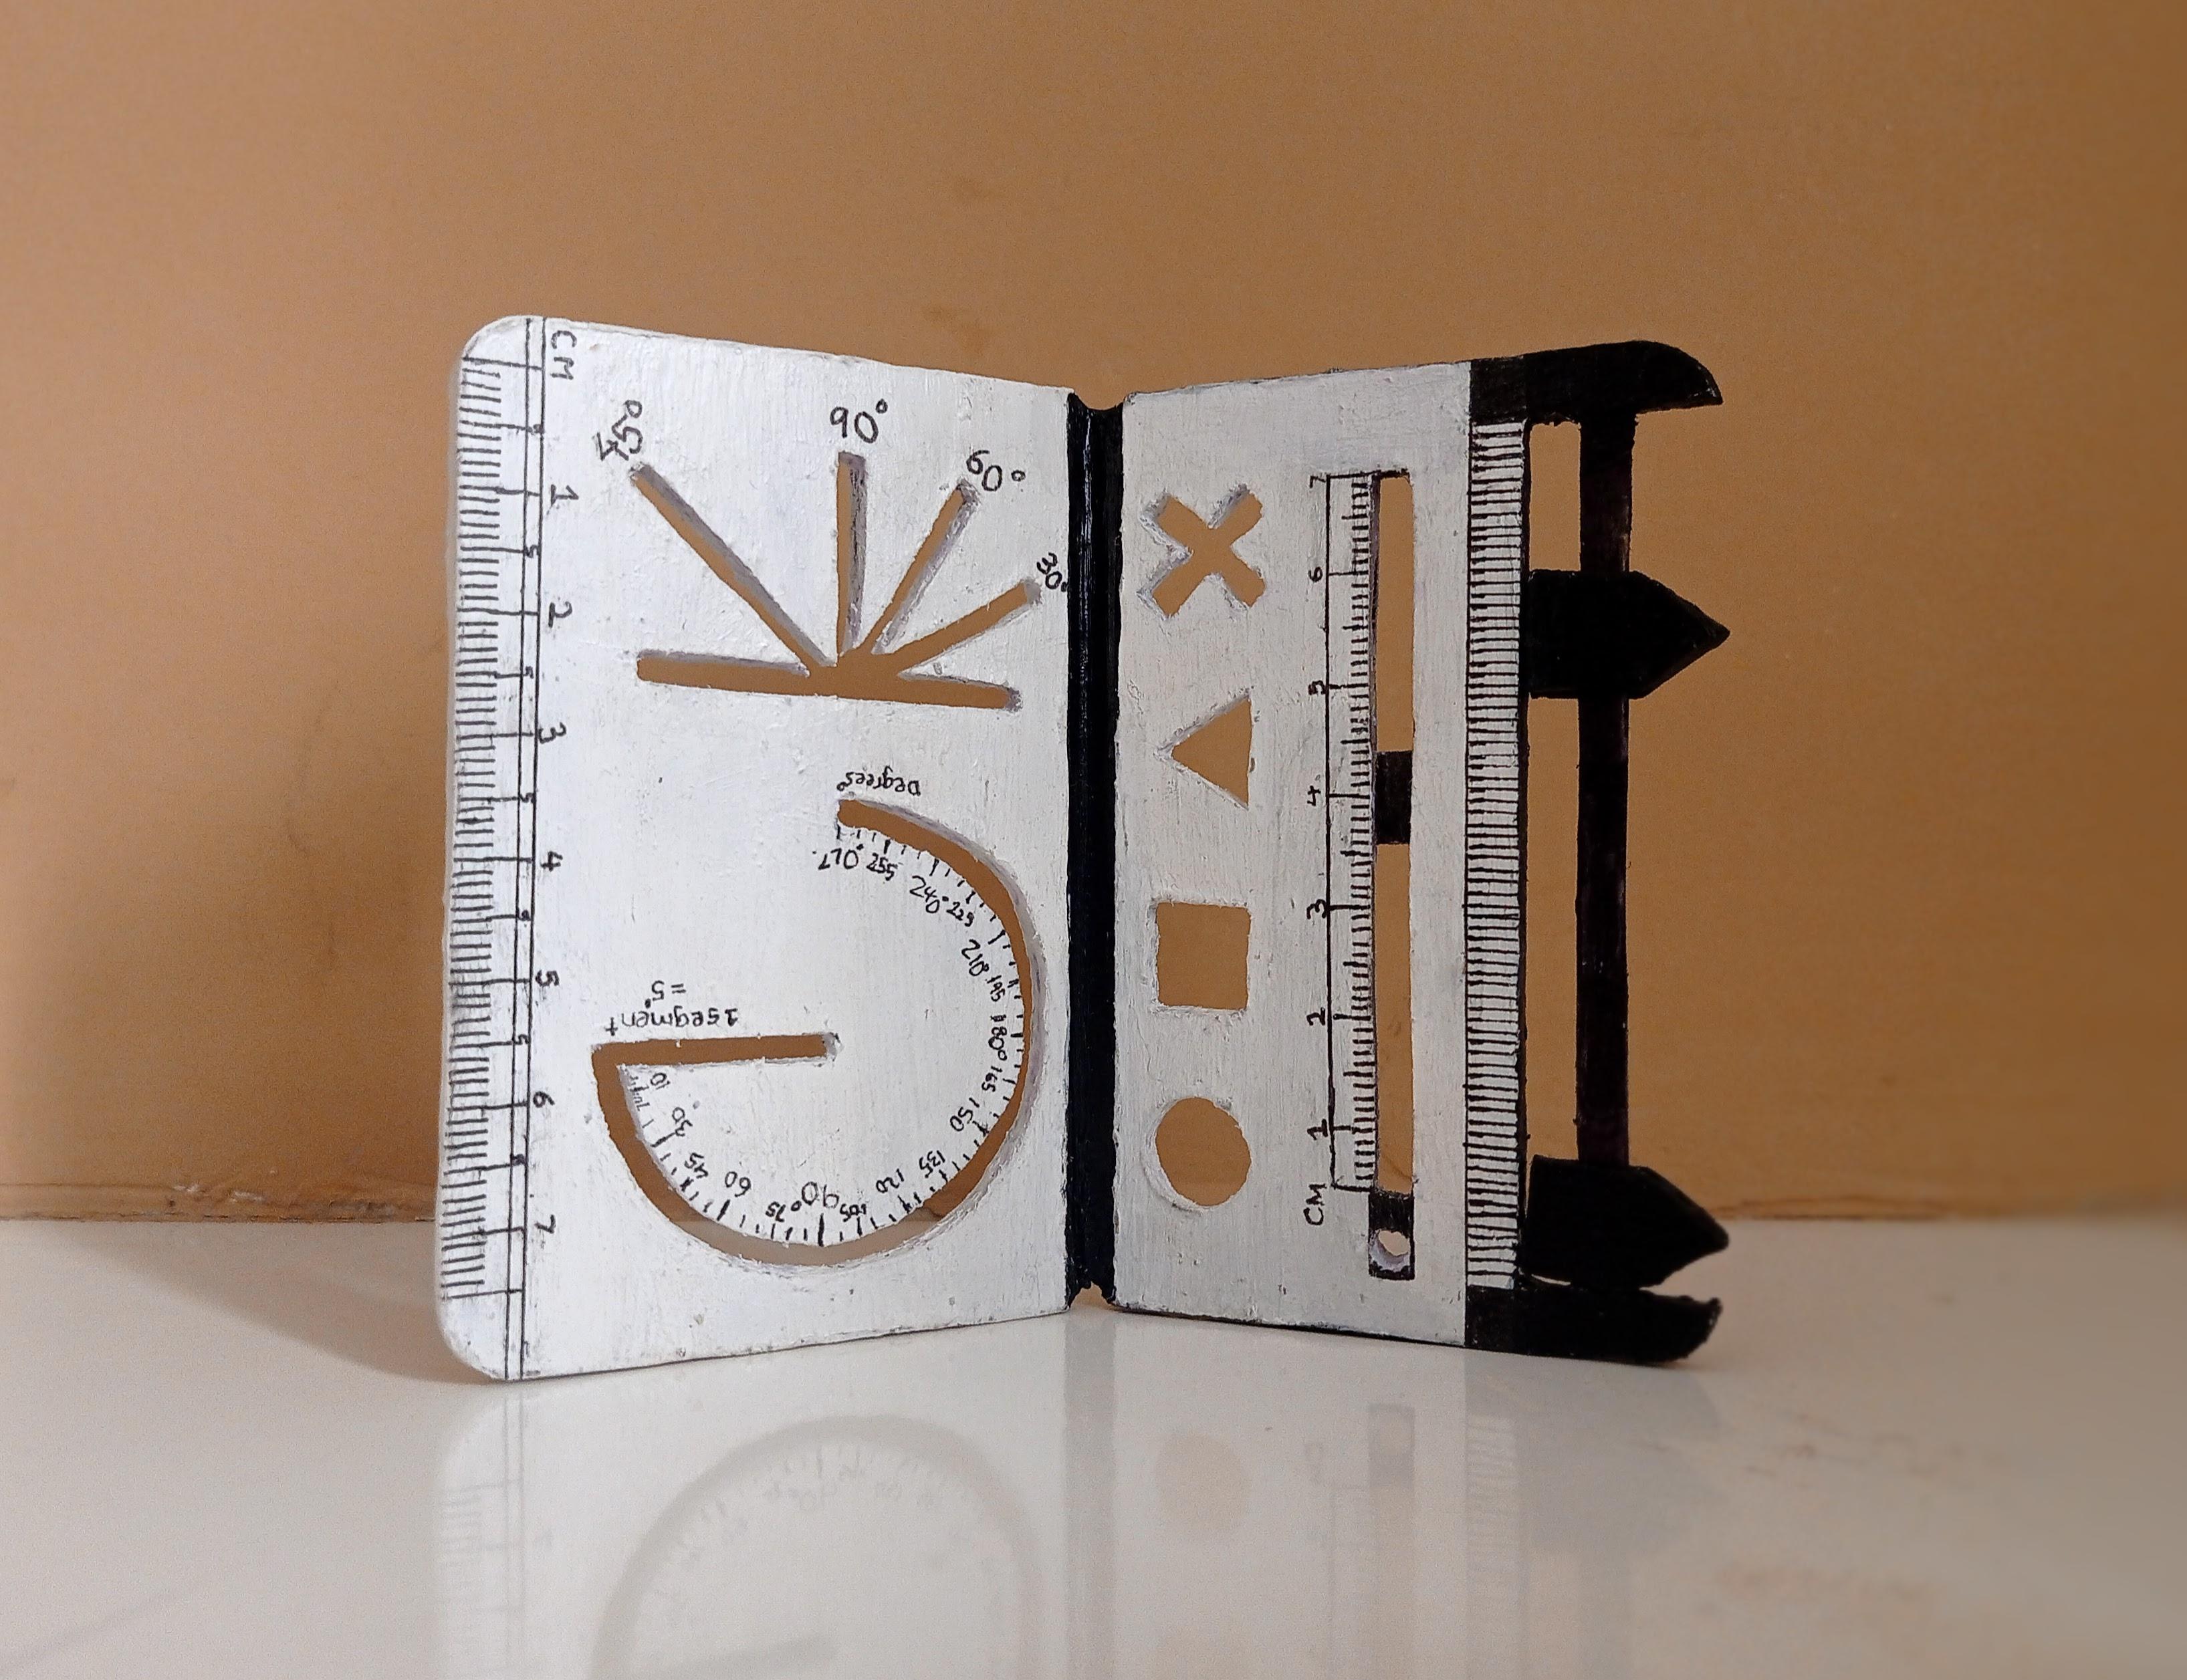
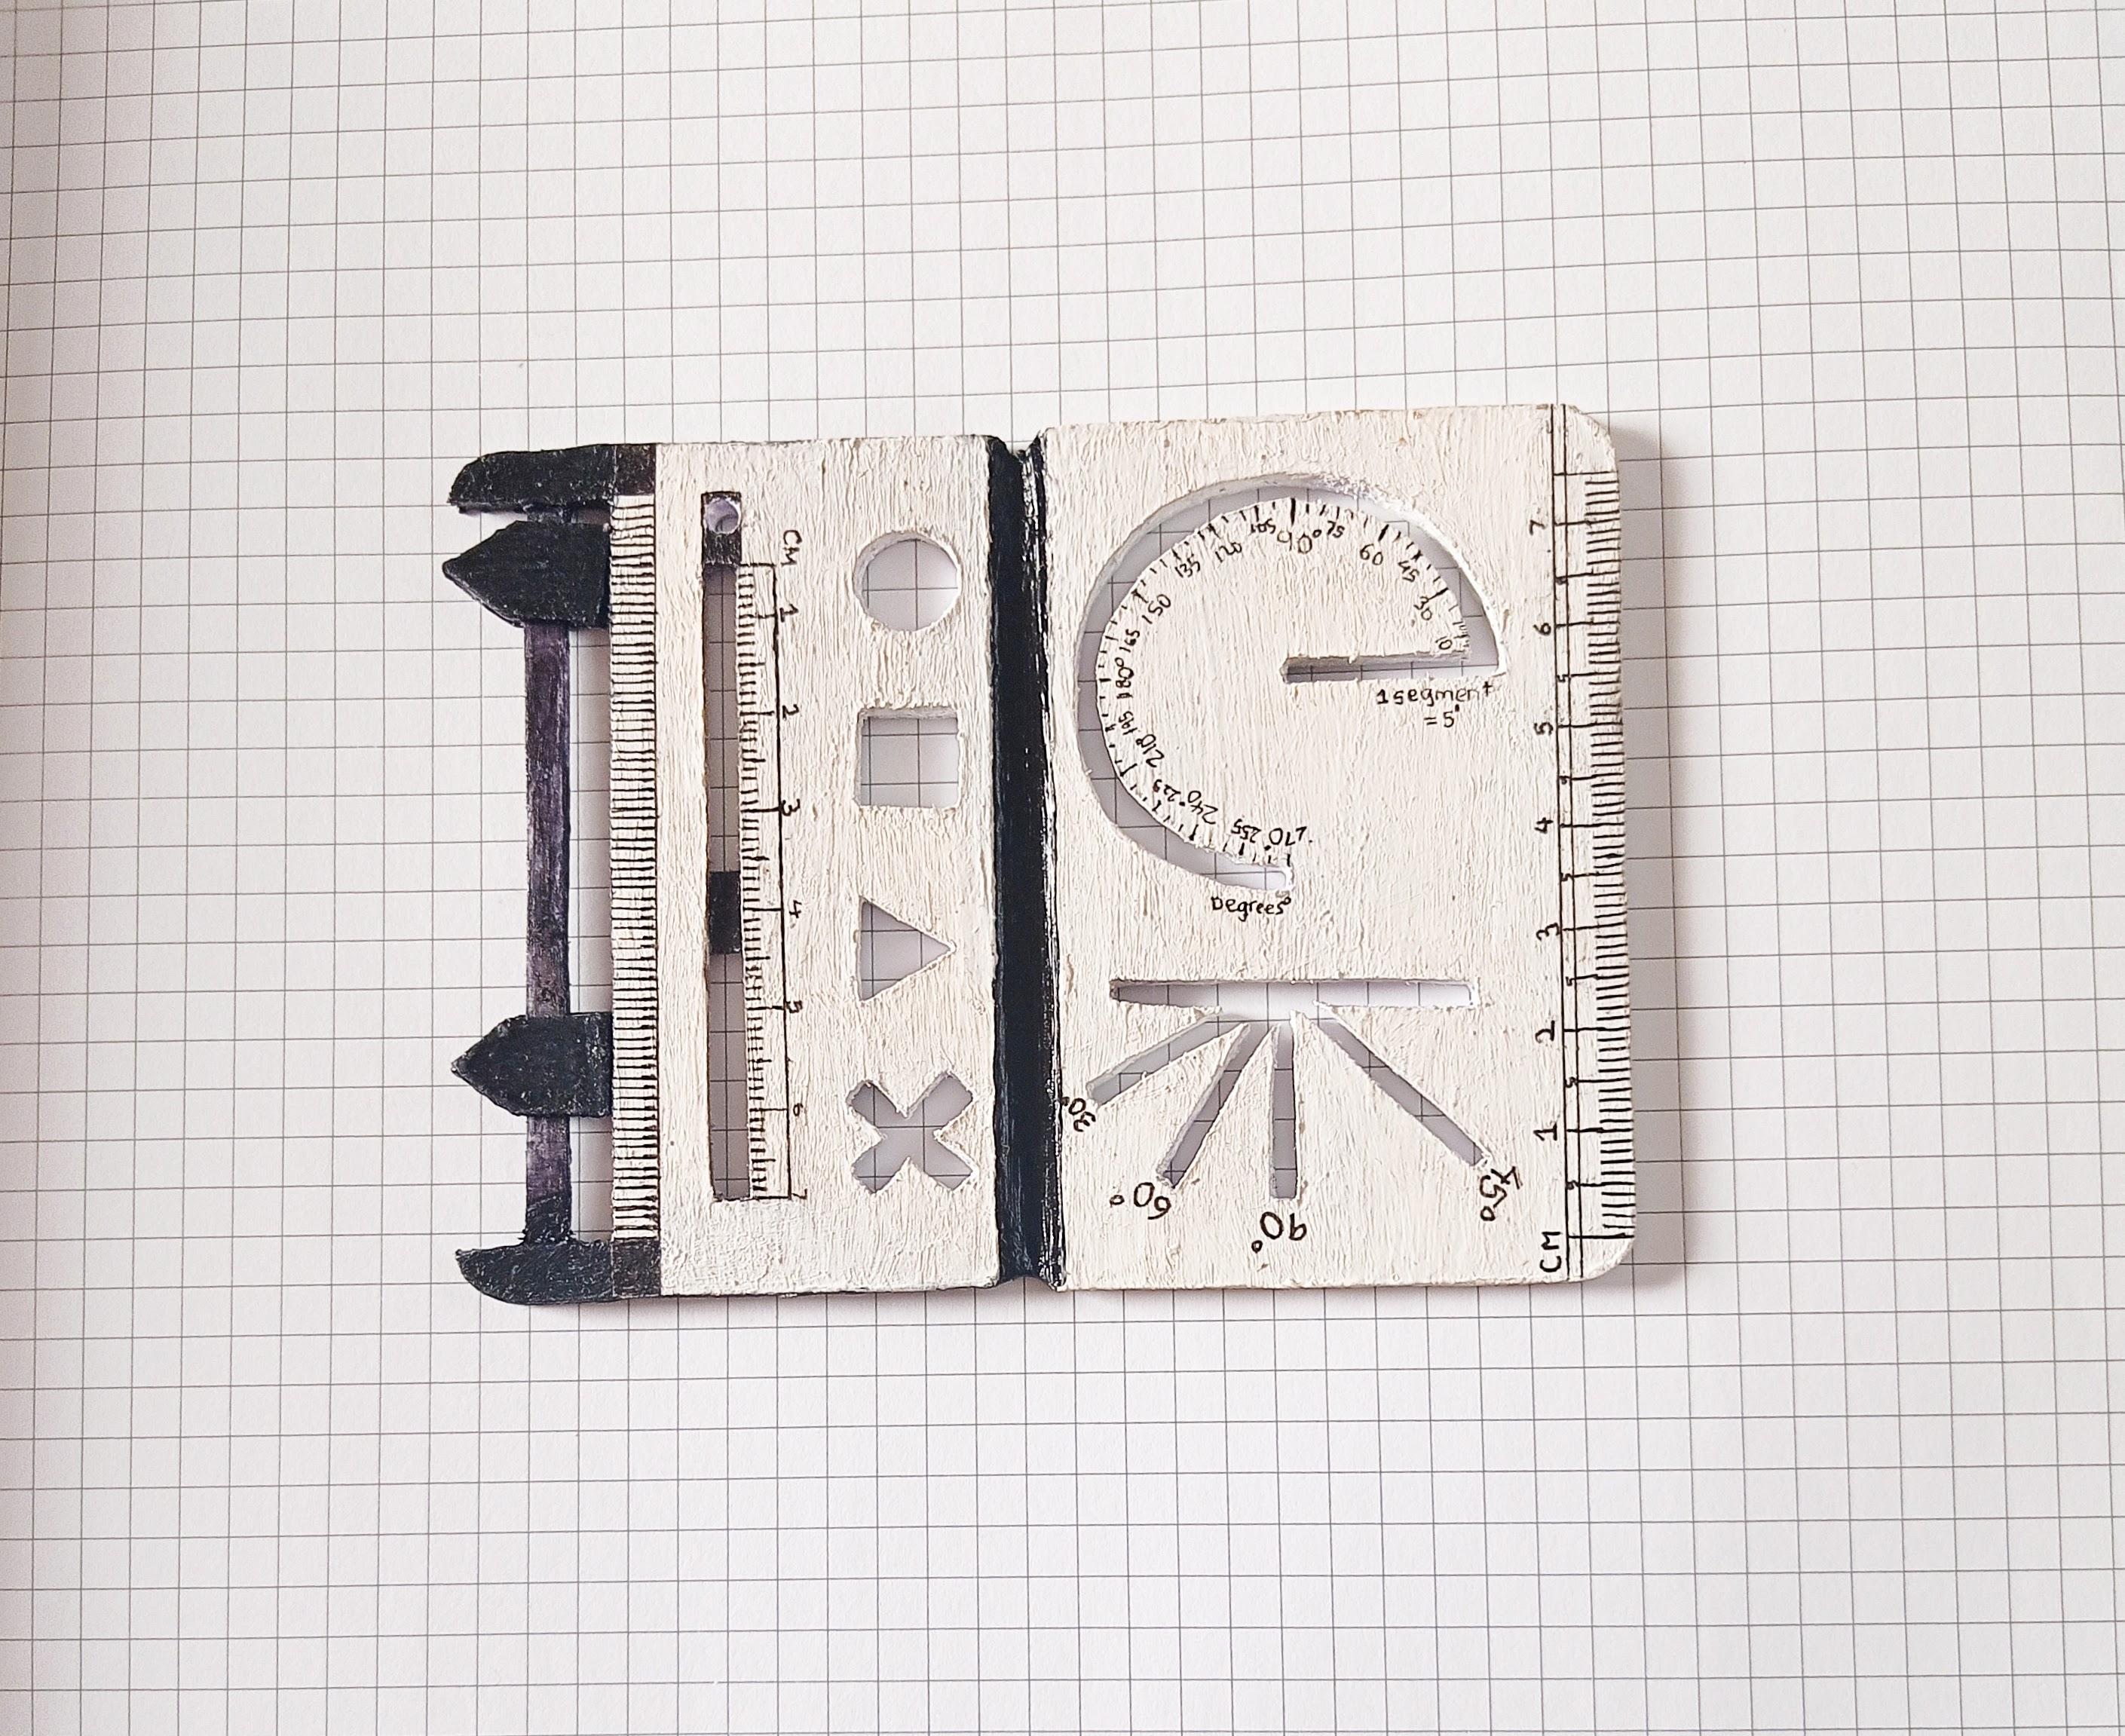
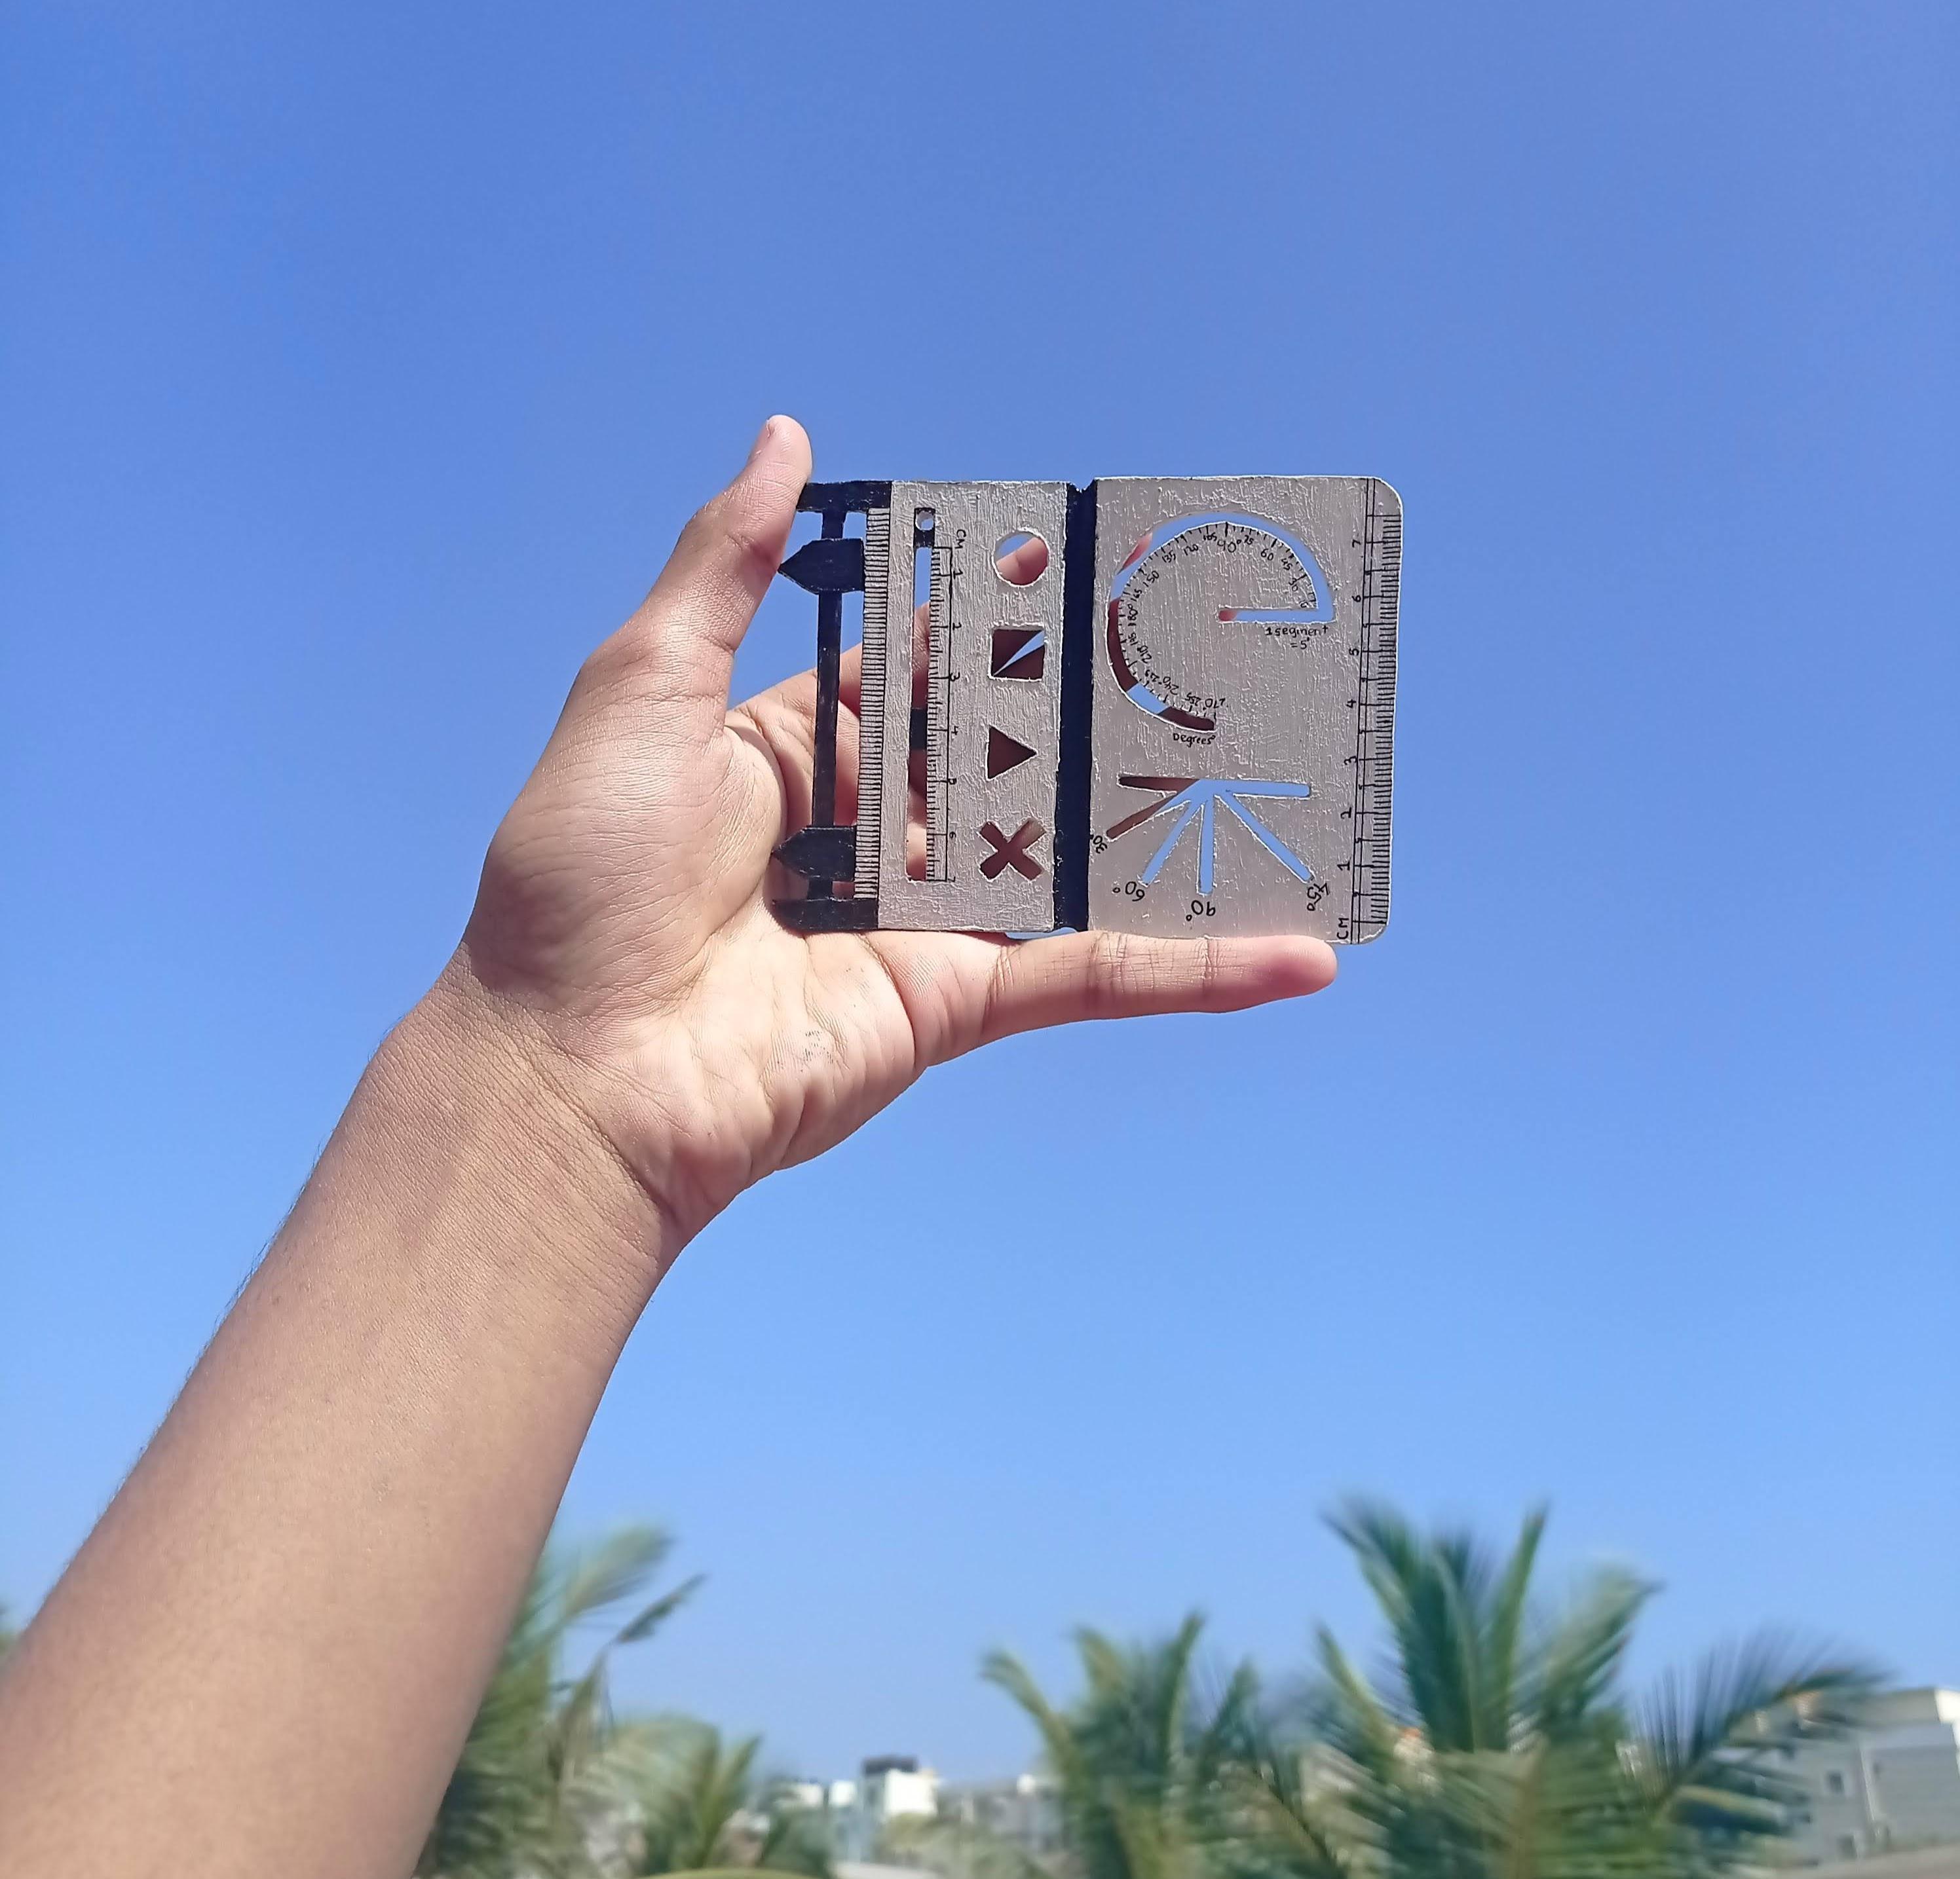
- Scales (Inches and Centimeter): I sanded off some of the plastic to make a beveled edge. I drew out the scales using a 0.02 mm micron scale. Ironically, I used a scale to draw out another scale. Check out Picture 1 to see how it looks like.
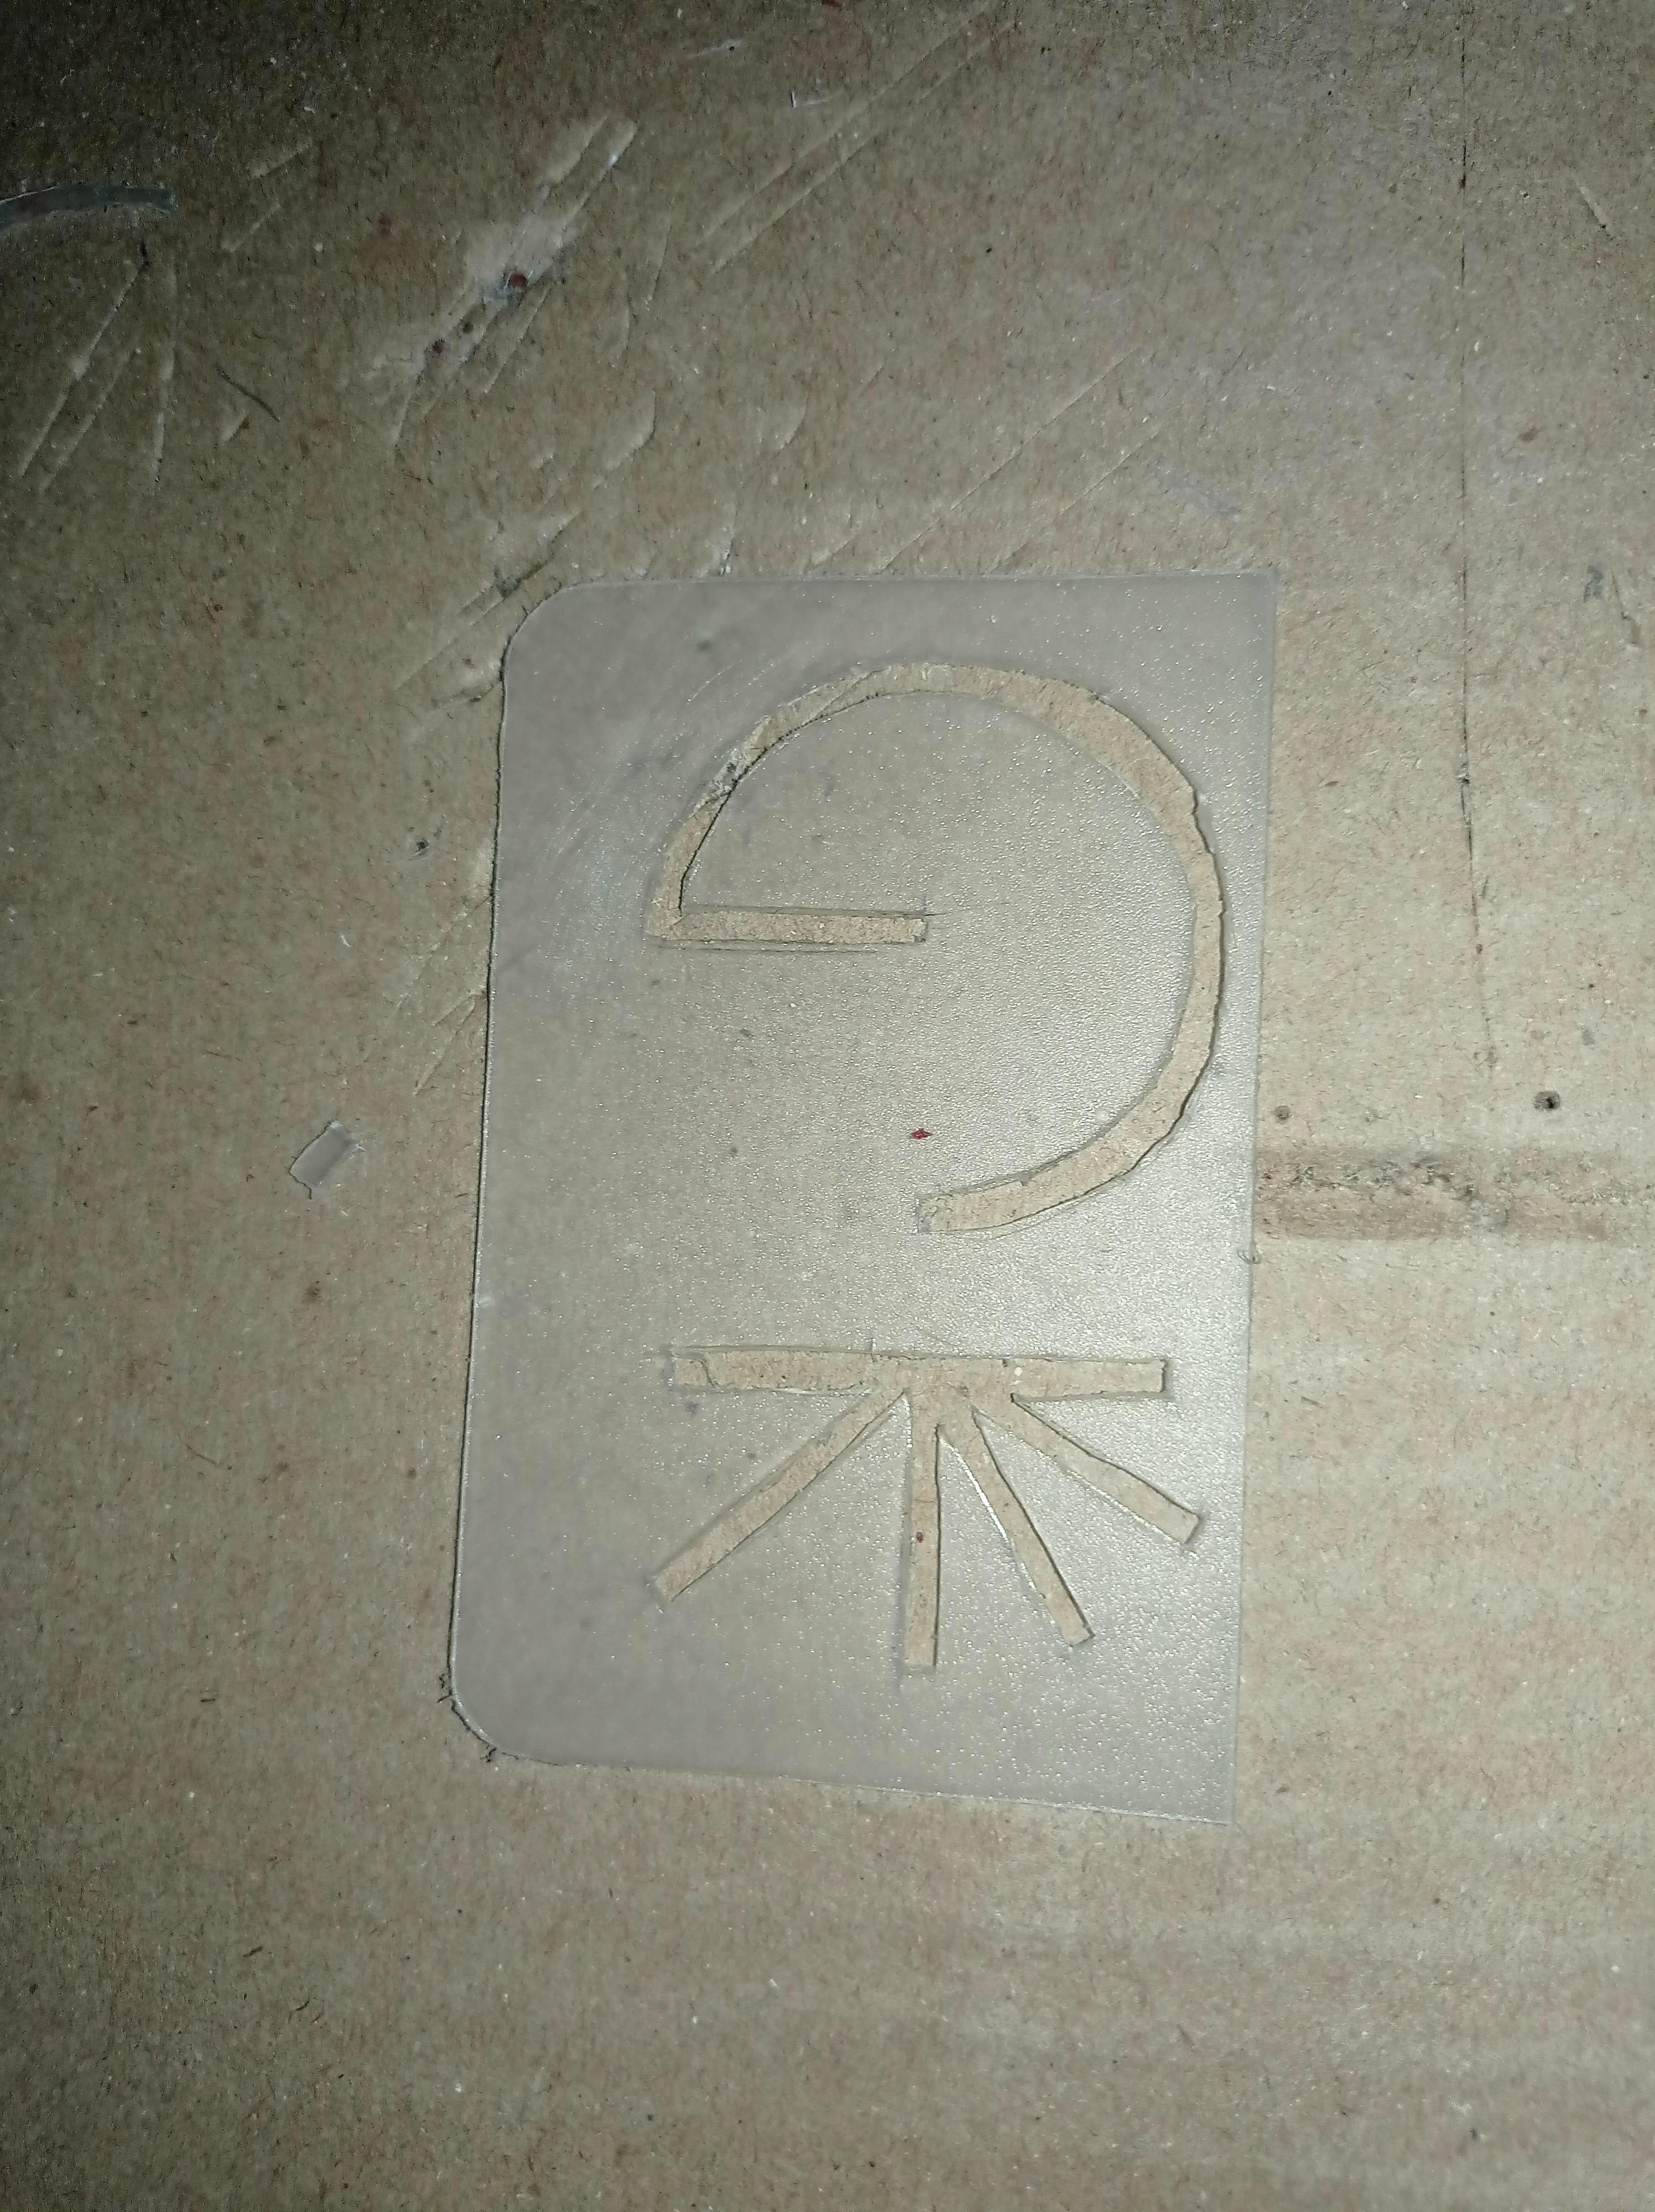
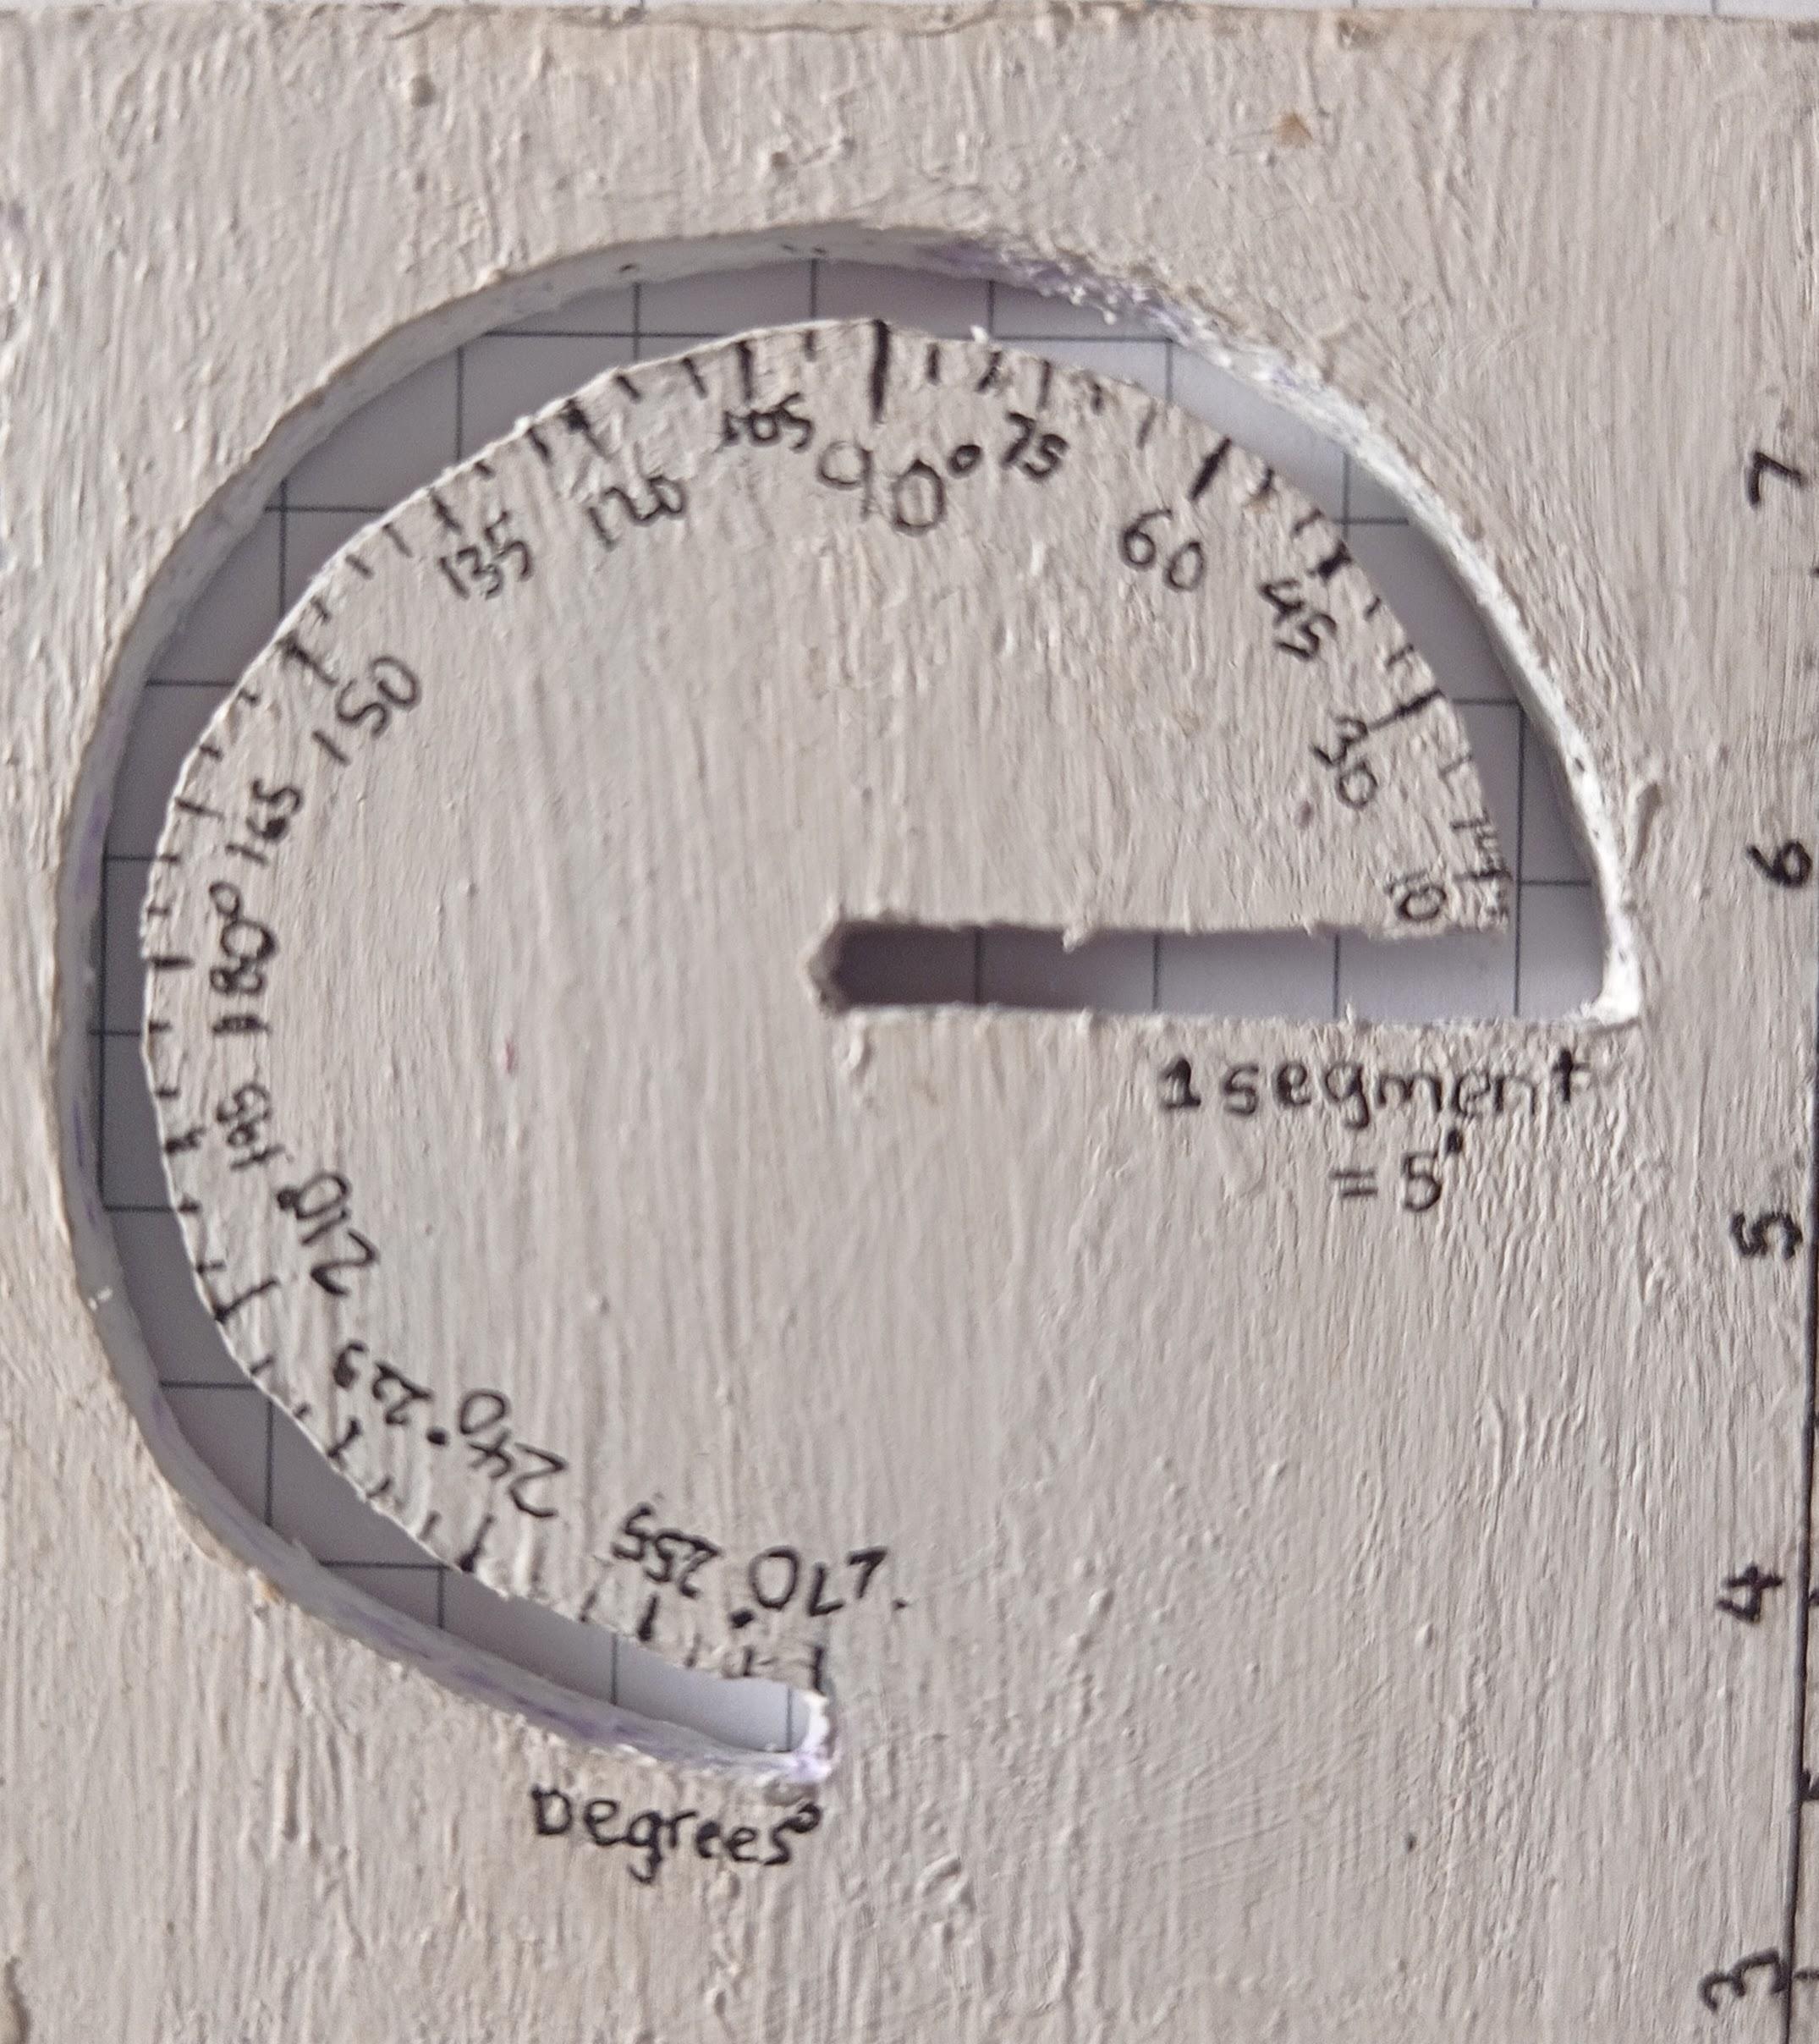
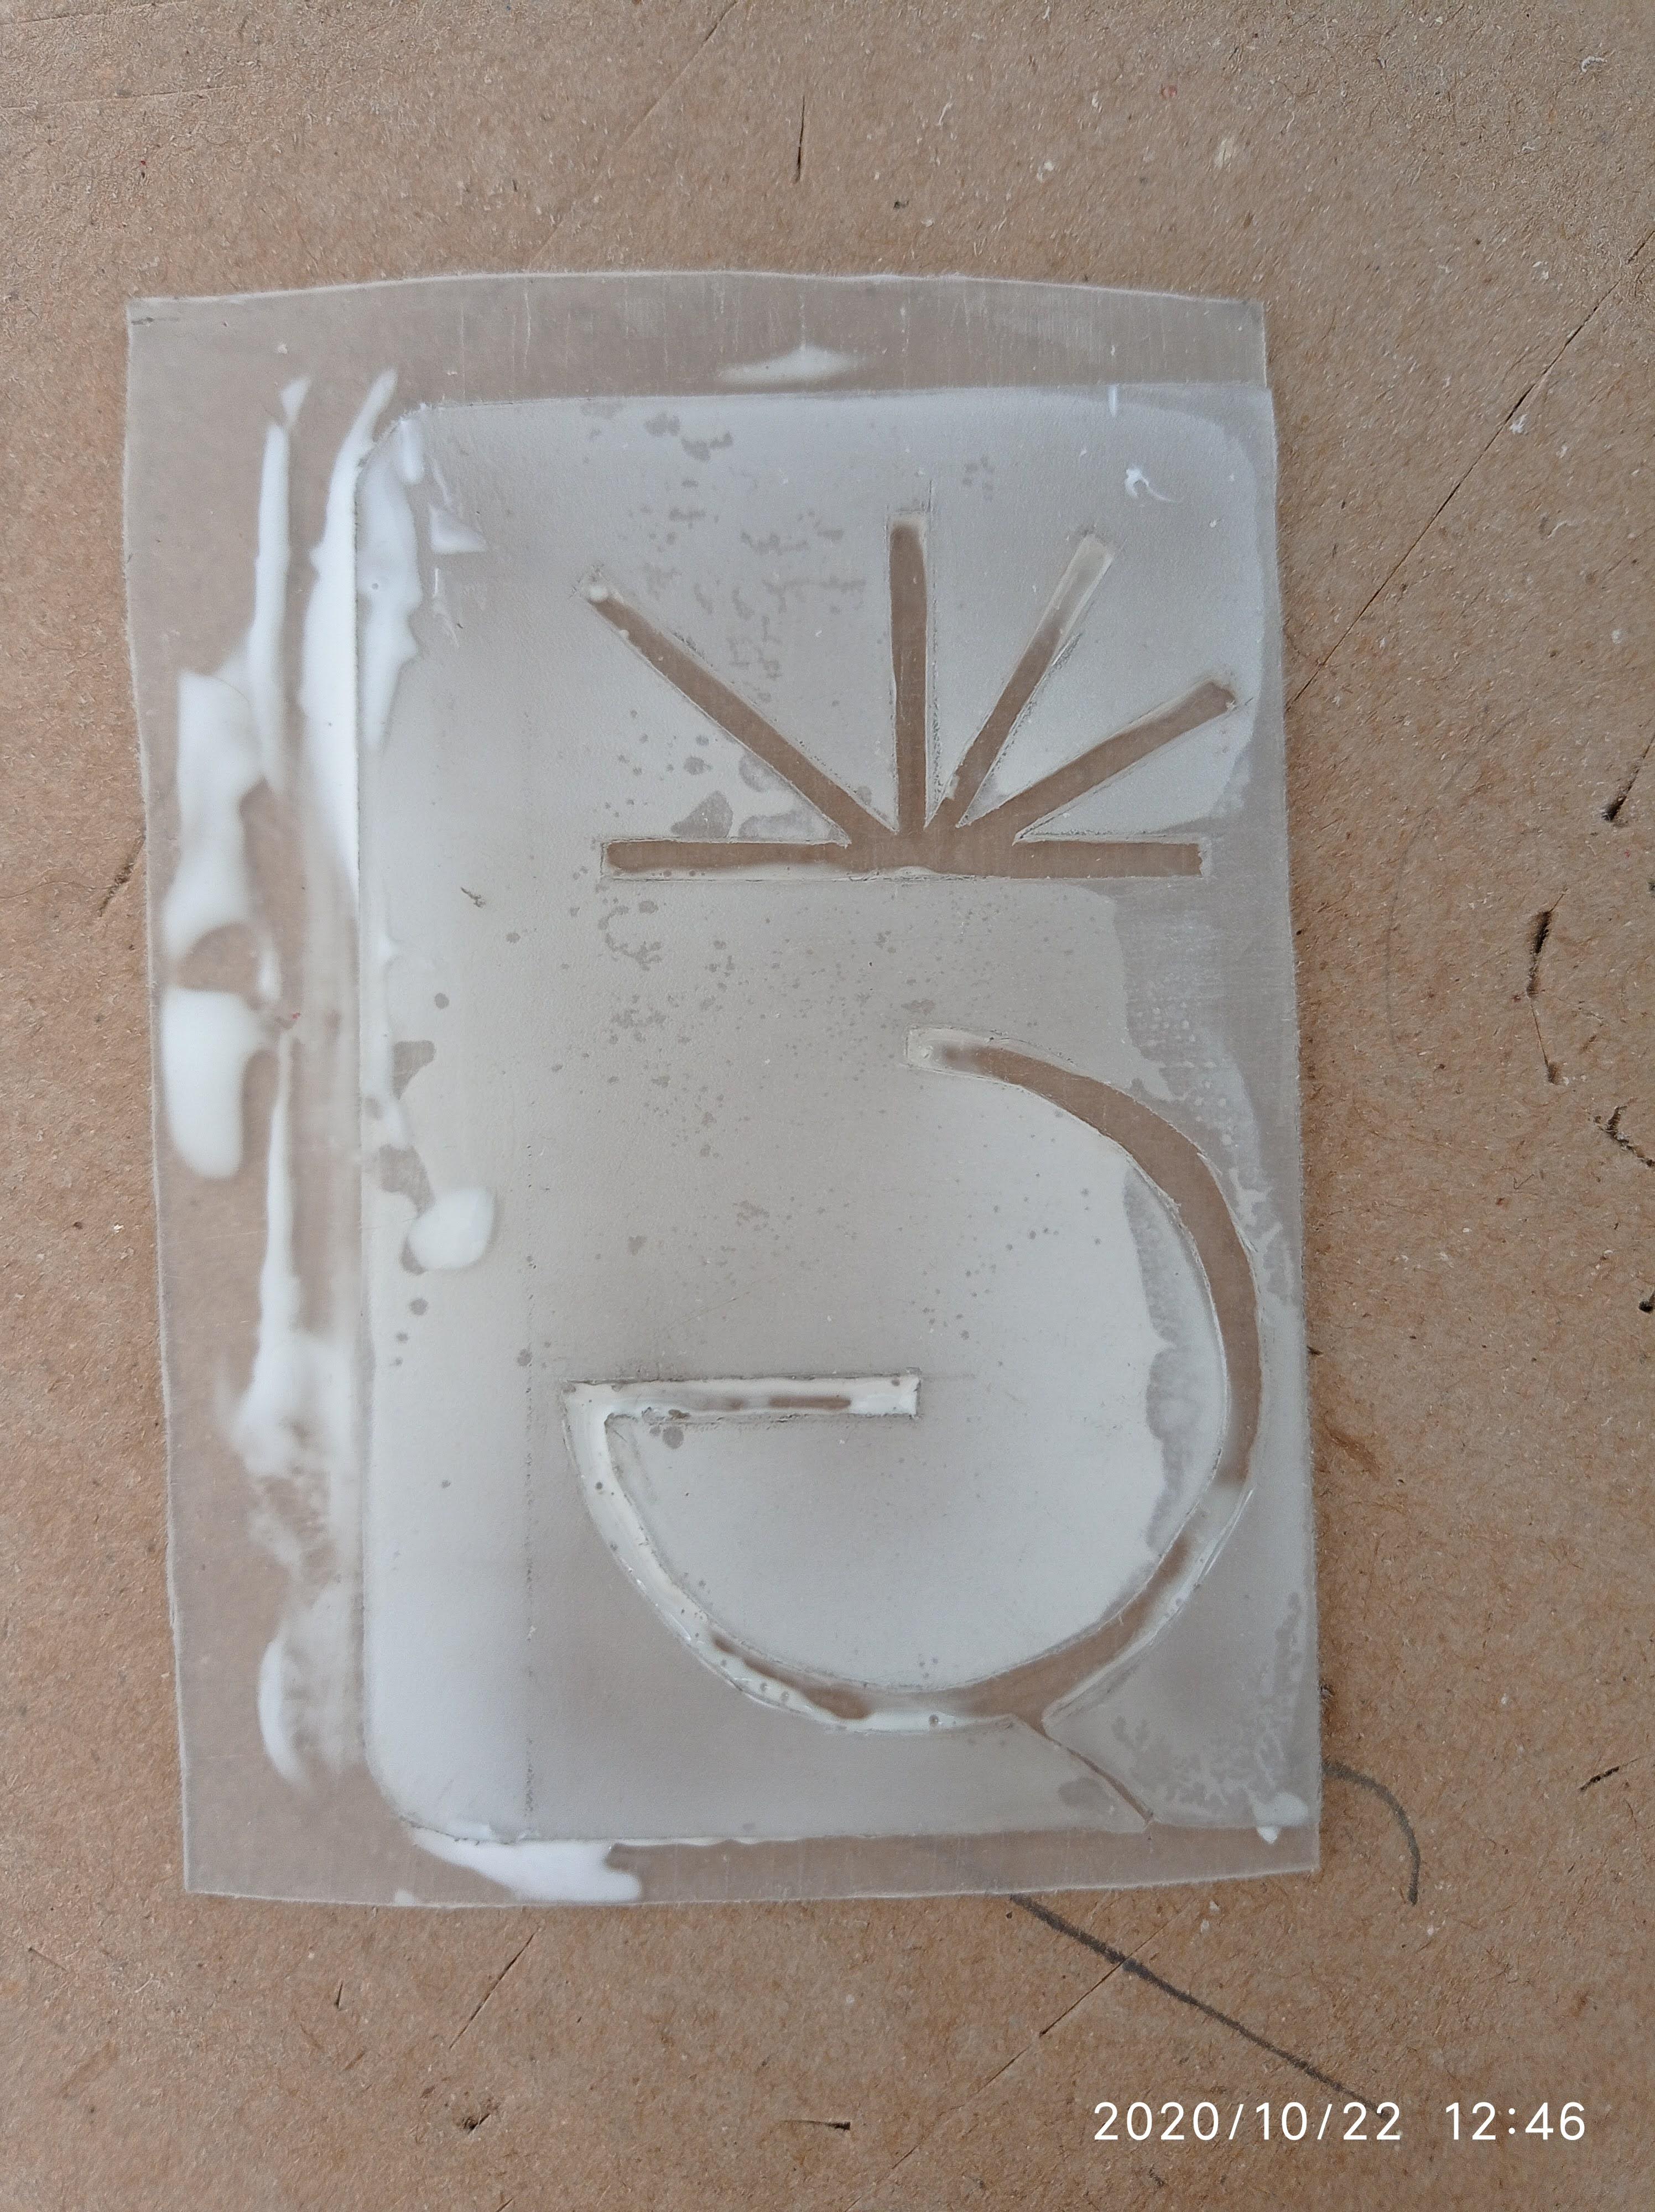
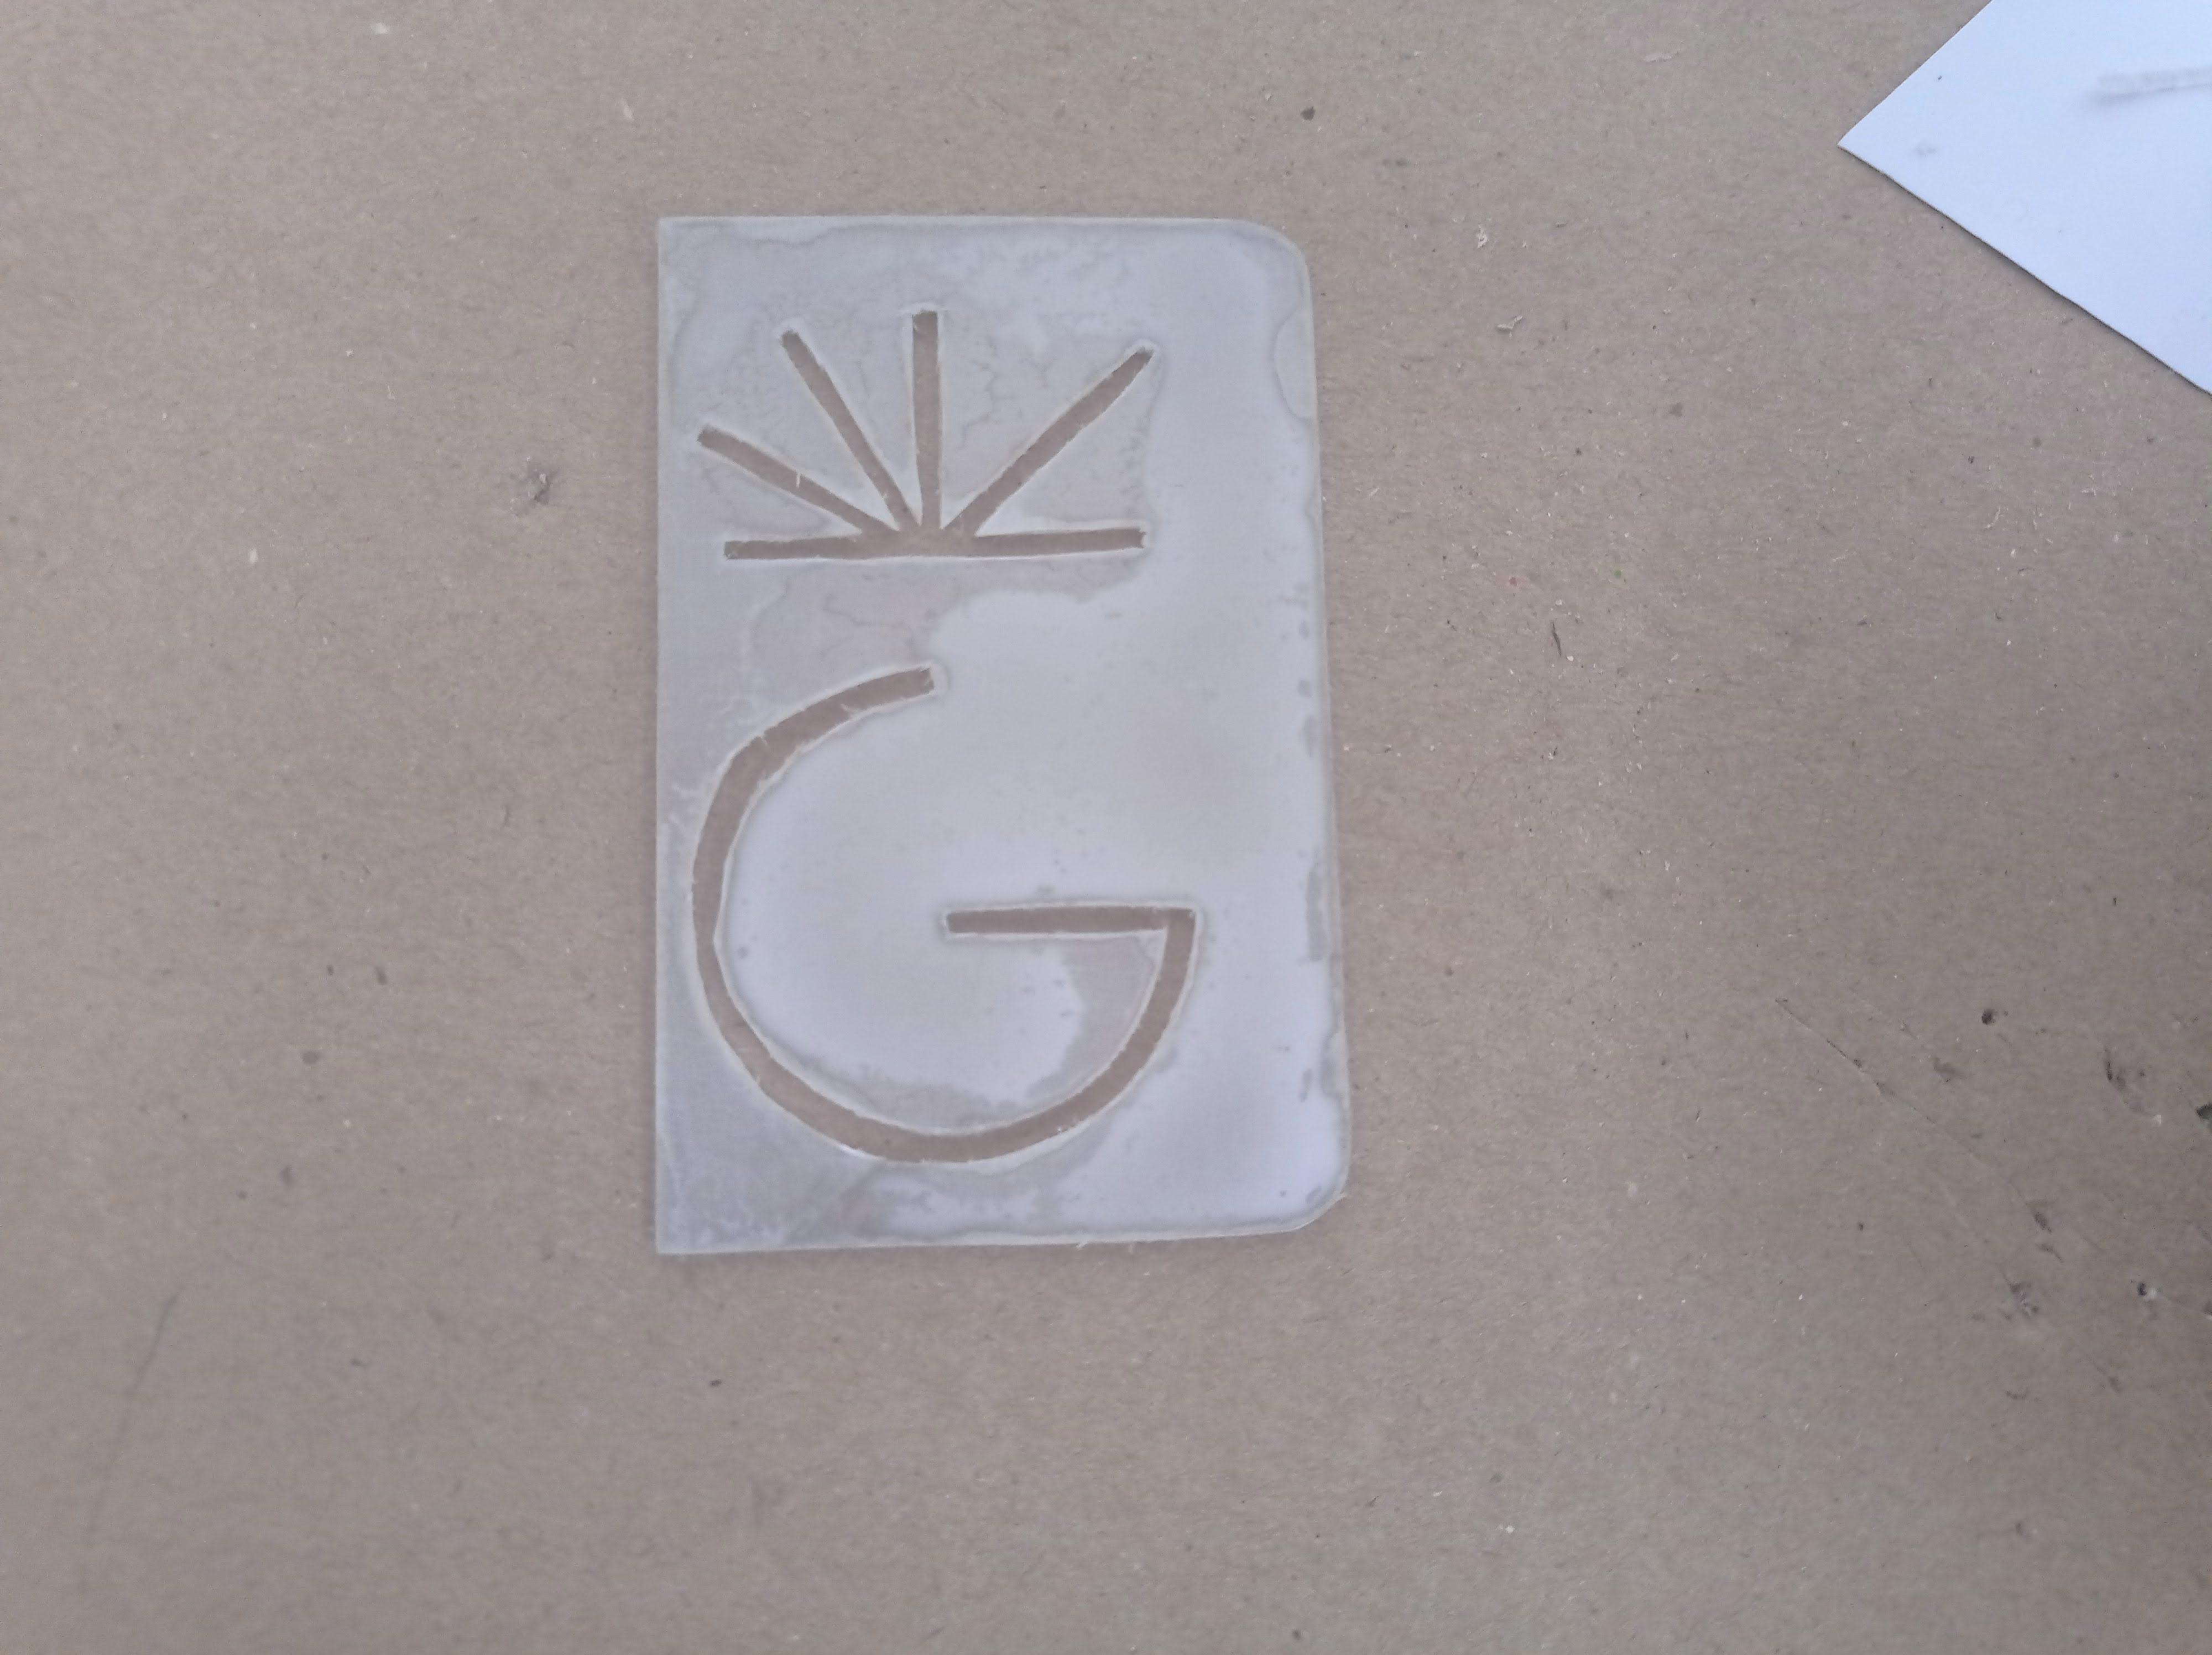
- Protractor (0 to 270 degrees): I drew two circles varying in radius of 3 mm ( A gap wide enough for pencil or pen to exactly fit, I did a bit of testing to find that out) and made those circles 3/4th of a circle such that it forms 270 degrees. Check out picture 2 to see how it looks like.
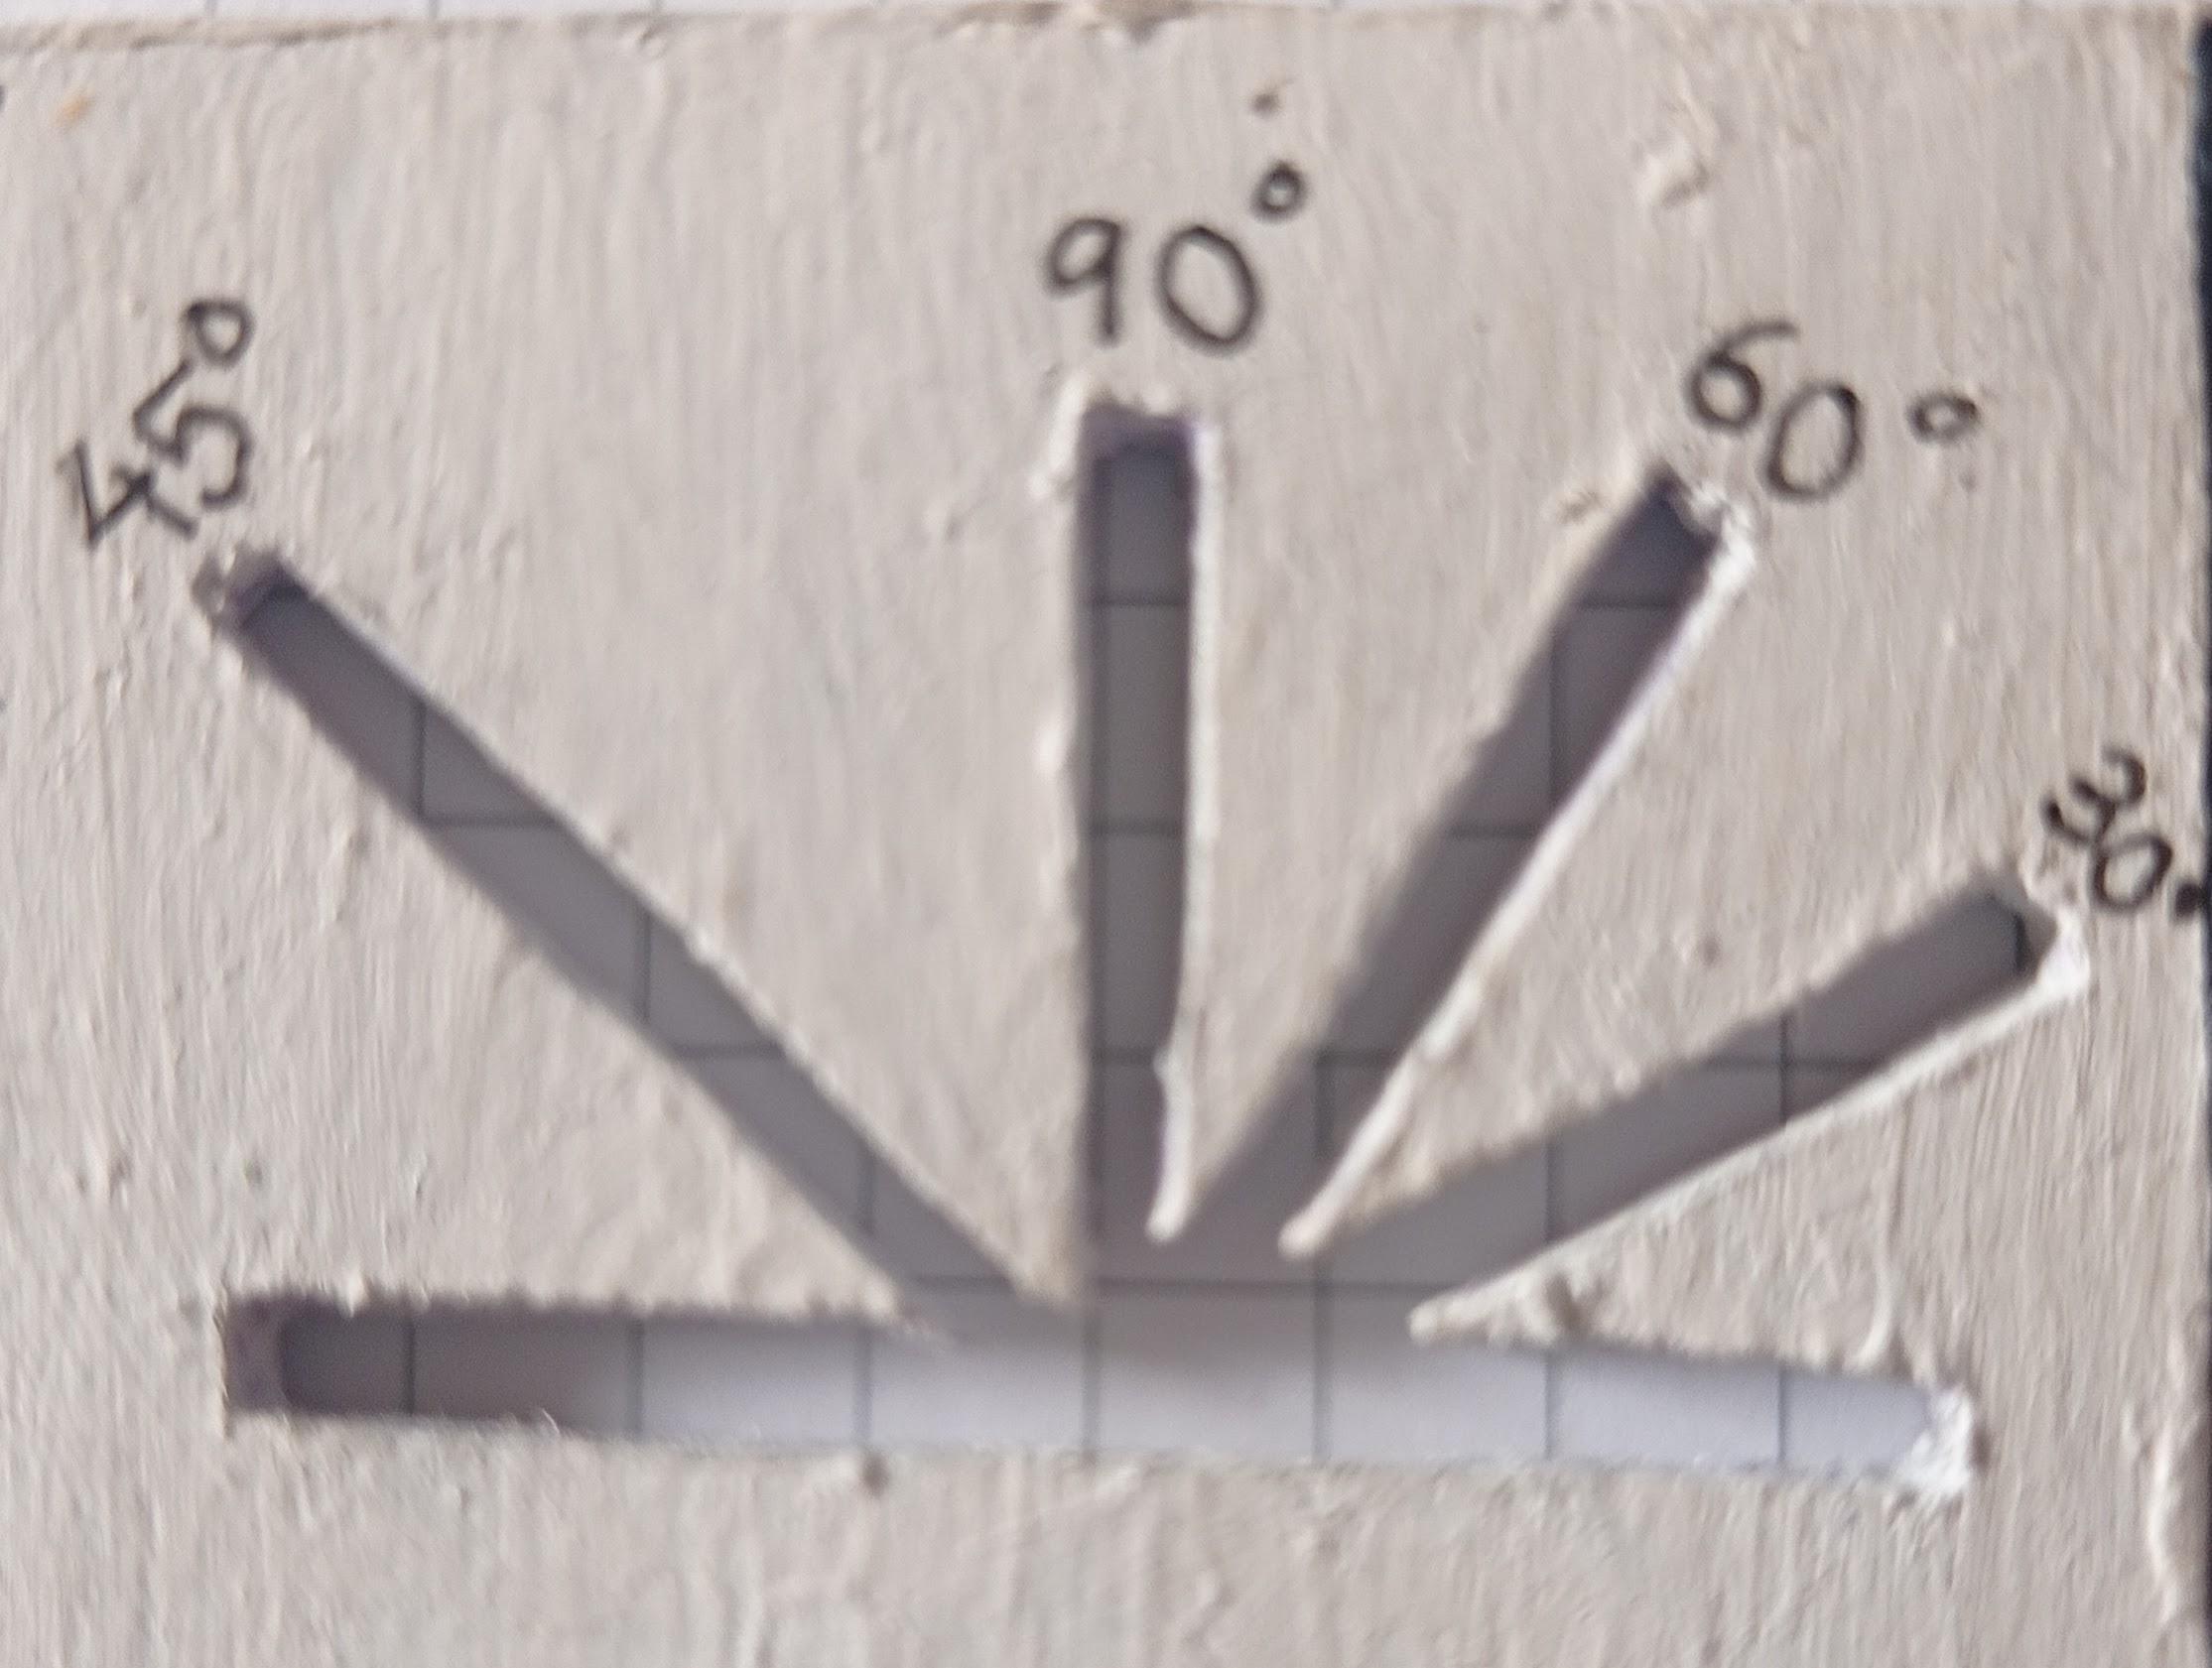
- Set-squares: I realized set squares would take up too much space so I would have to invent a new method to make sure they were all together and would fit in a small amount of space. So I created the Quick Angle Drawer (Trademark, JK), its a combination of the angles you would find in a set square but all-in-one. It has 30,45,60 and 90 degrees so that you can construct them much easier. Check out Picture 3 to see how it looks like.
- Compass: This was a hard part to integrate into the MetriScale because the compass is big and bulky. So I had to think outside the box. I made one hole at one side and then made a long rectangle next to it with a slider in it. The slider would change the radius of the circle depending on how you move it. You keep 1 pencil in the hole and another pencil in the slider and turn it around to draw a complete circle. Check out Picture 4 to check out how it works.
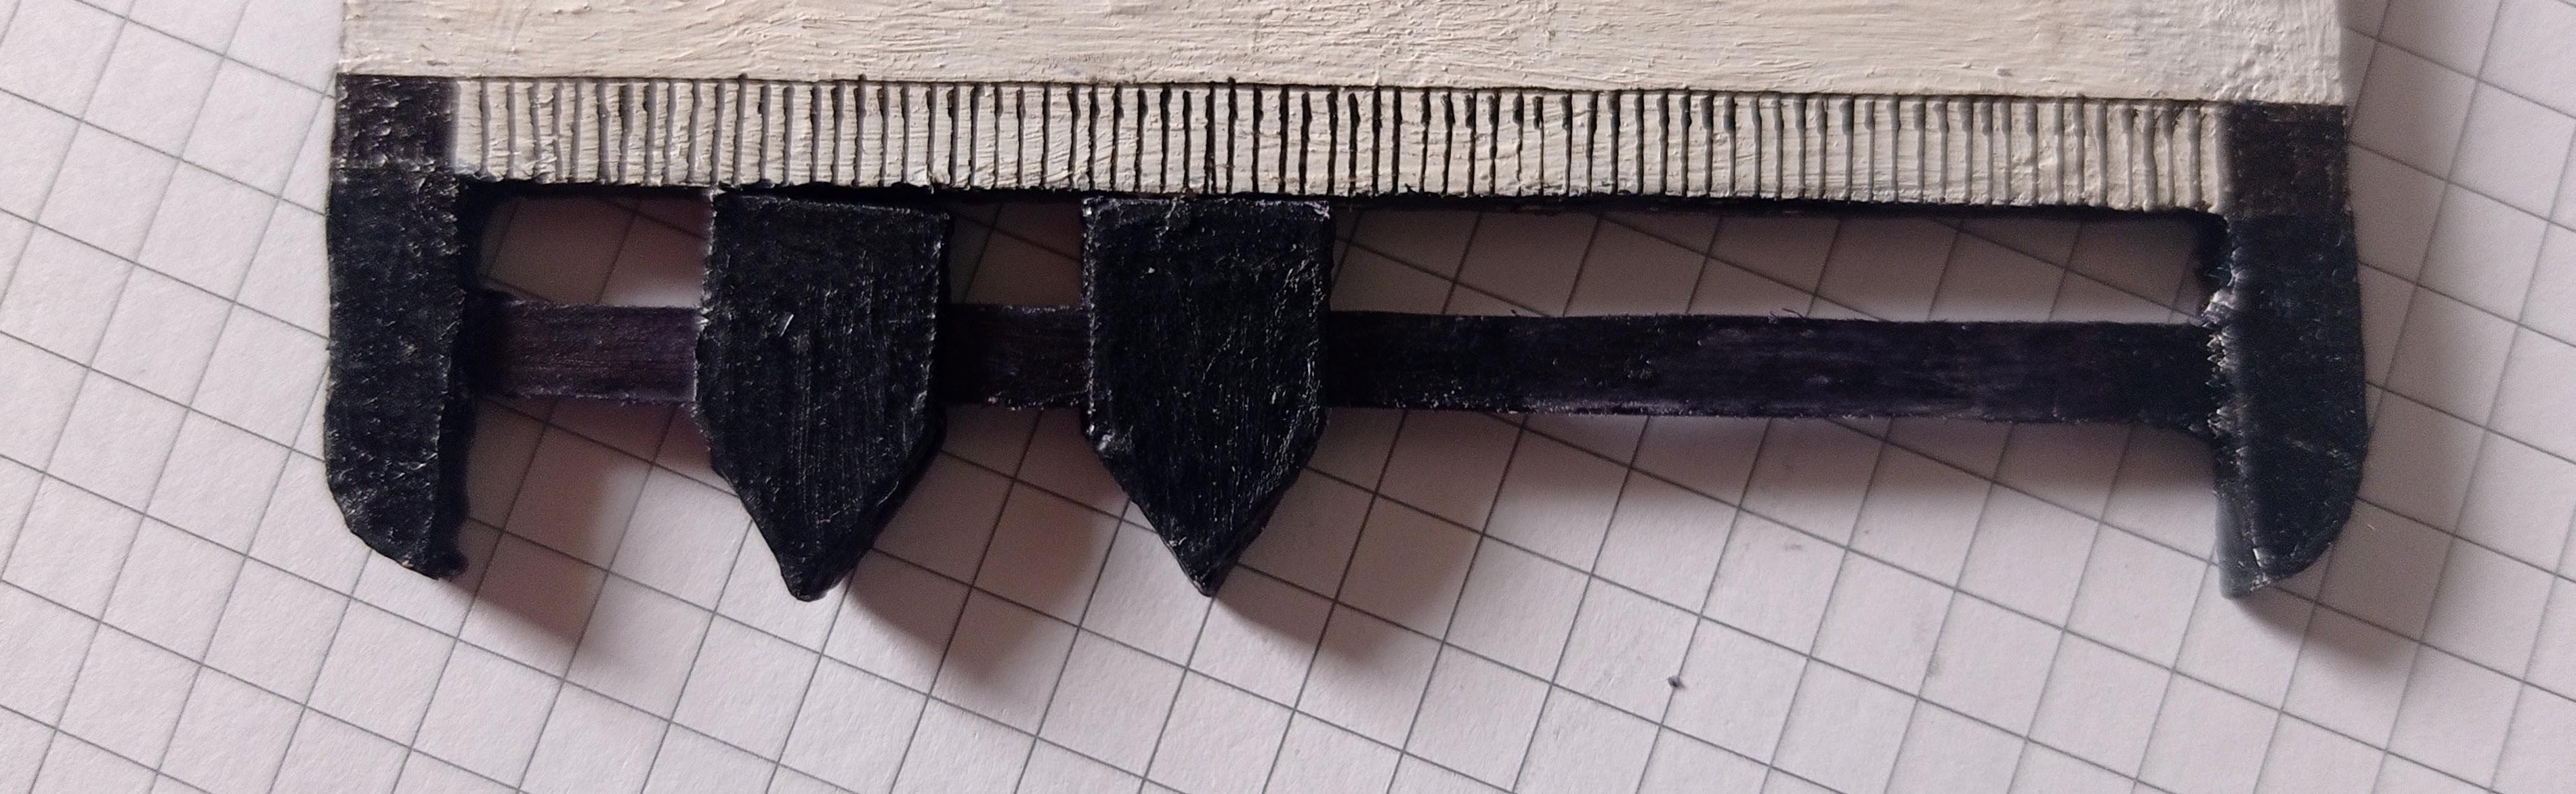
- Vernier Calipers: I made a sliding mechanism for the calipers to slide on and made 2 individual calipers that can slide on that sliding mechanism. Once you measure something using the calipers, you can use the scale to find out how long it was. Check out Picture 5 to check out how it works.
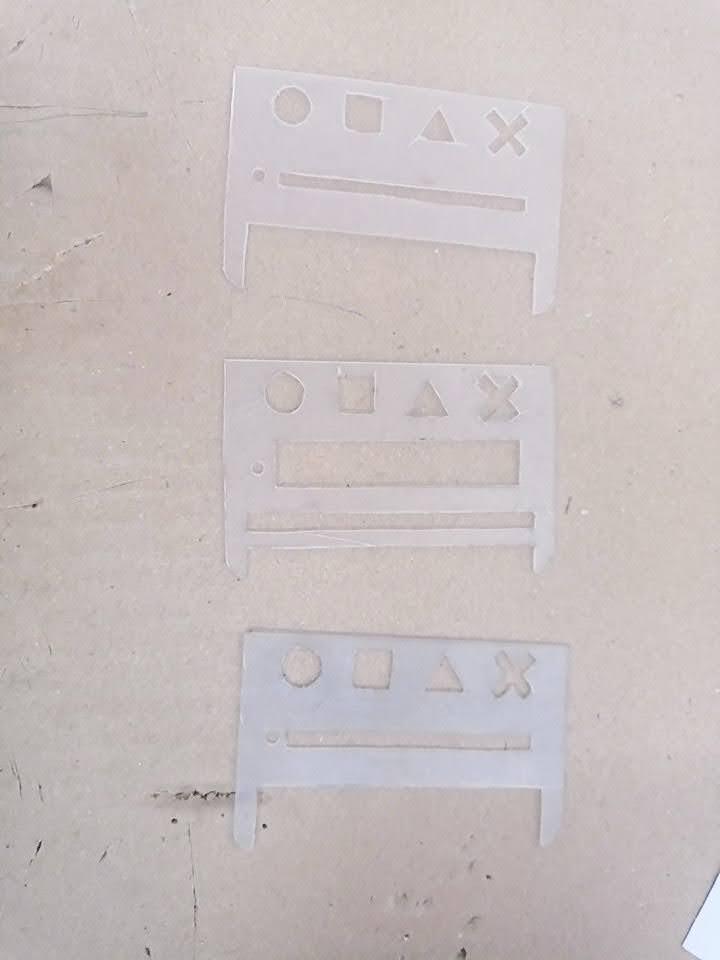
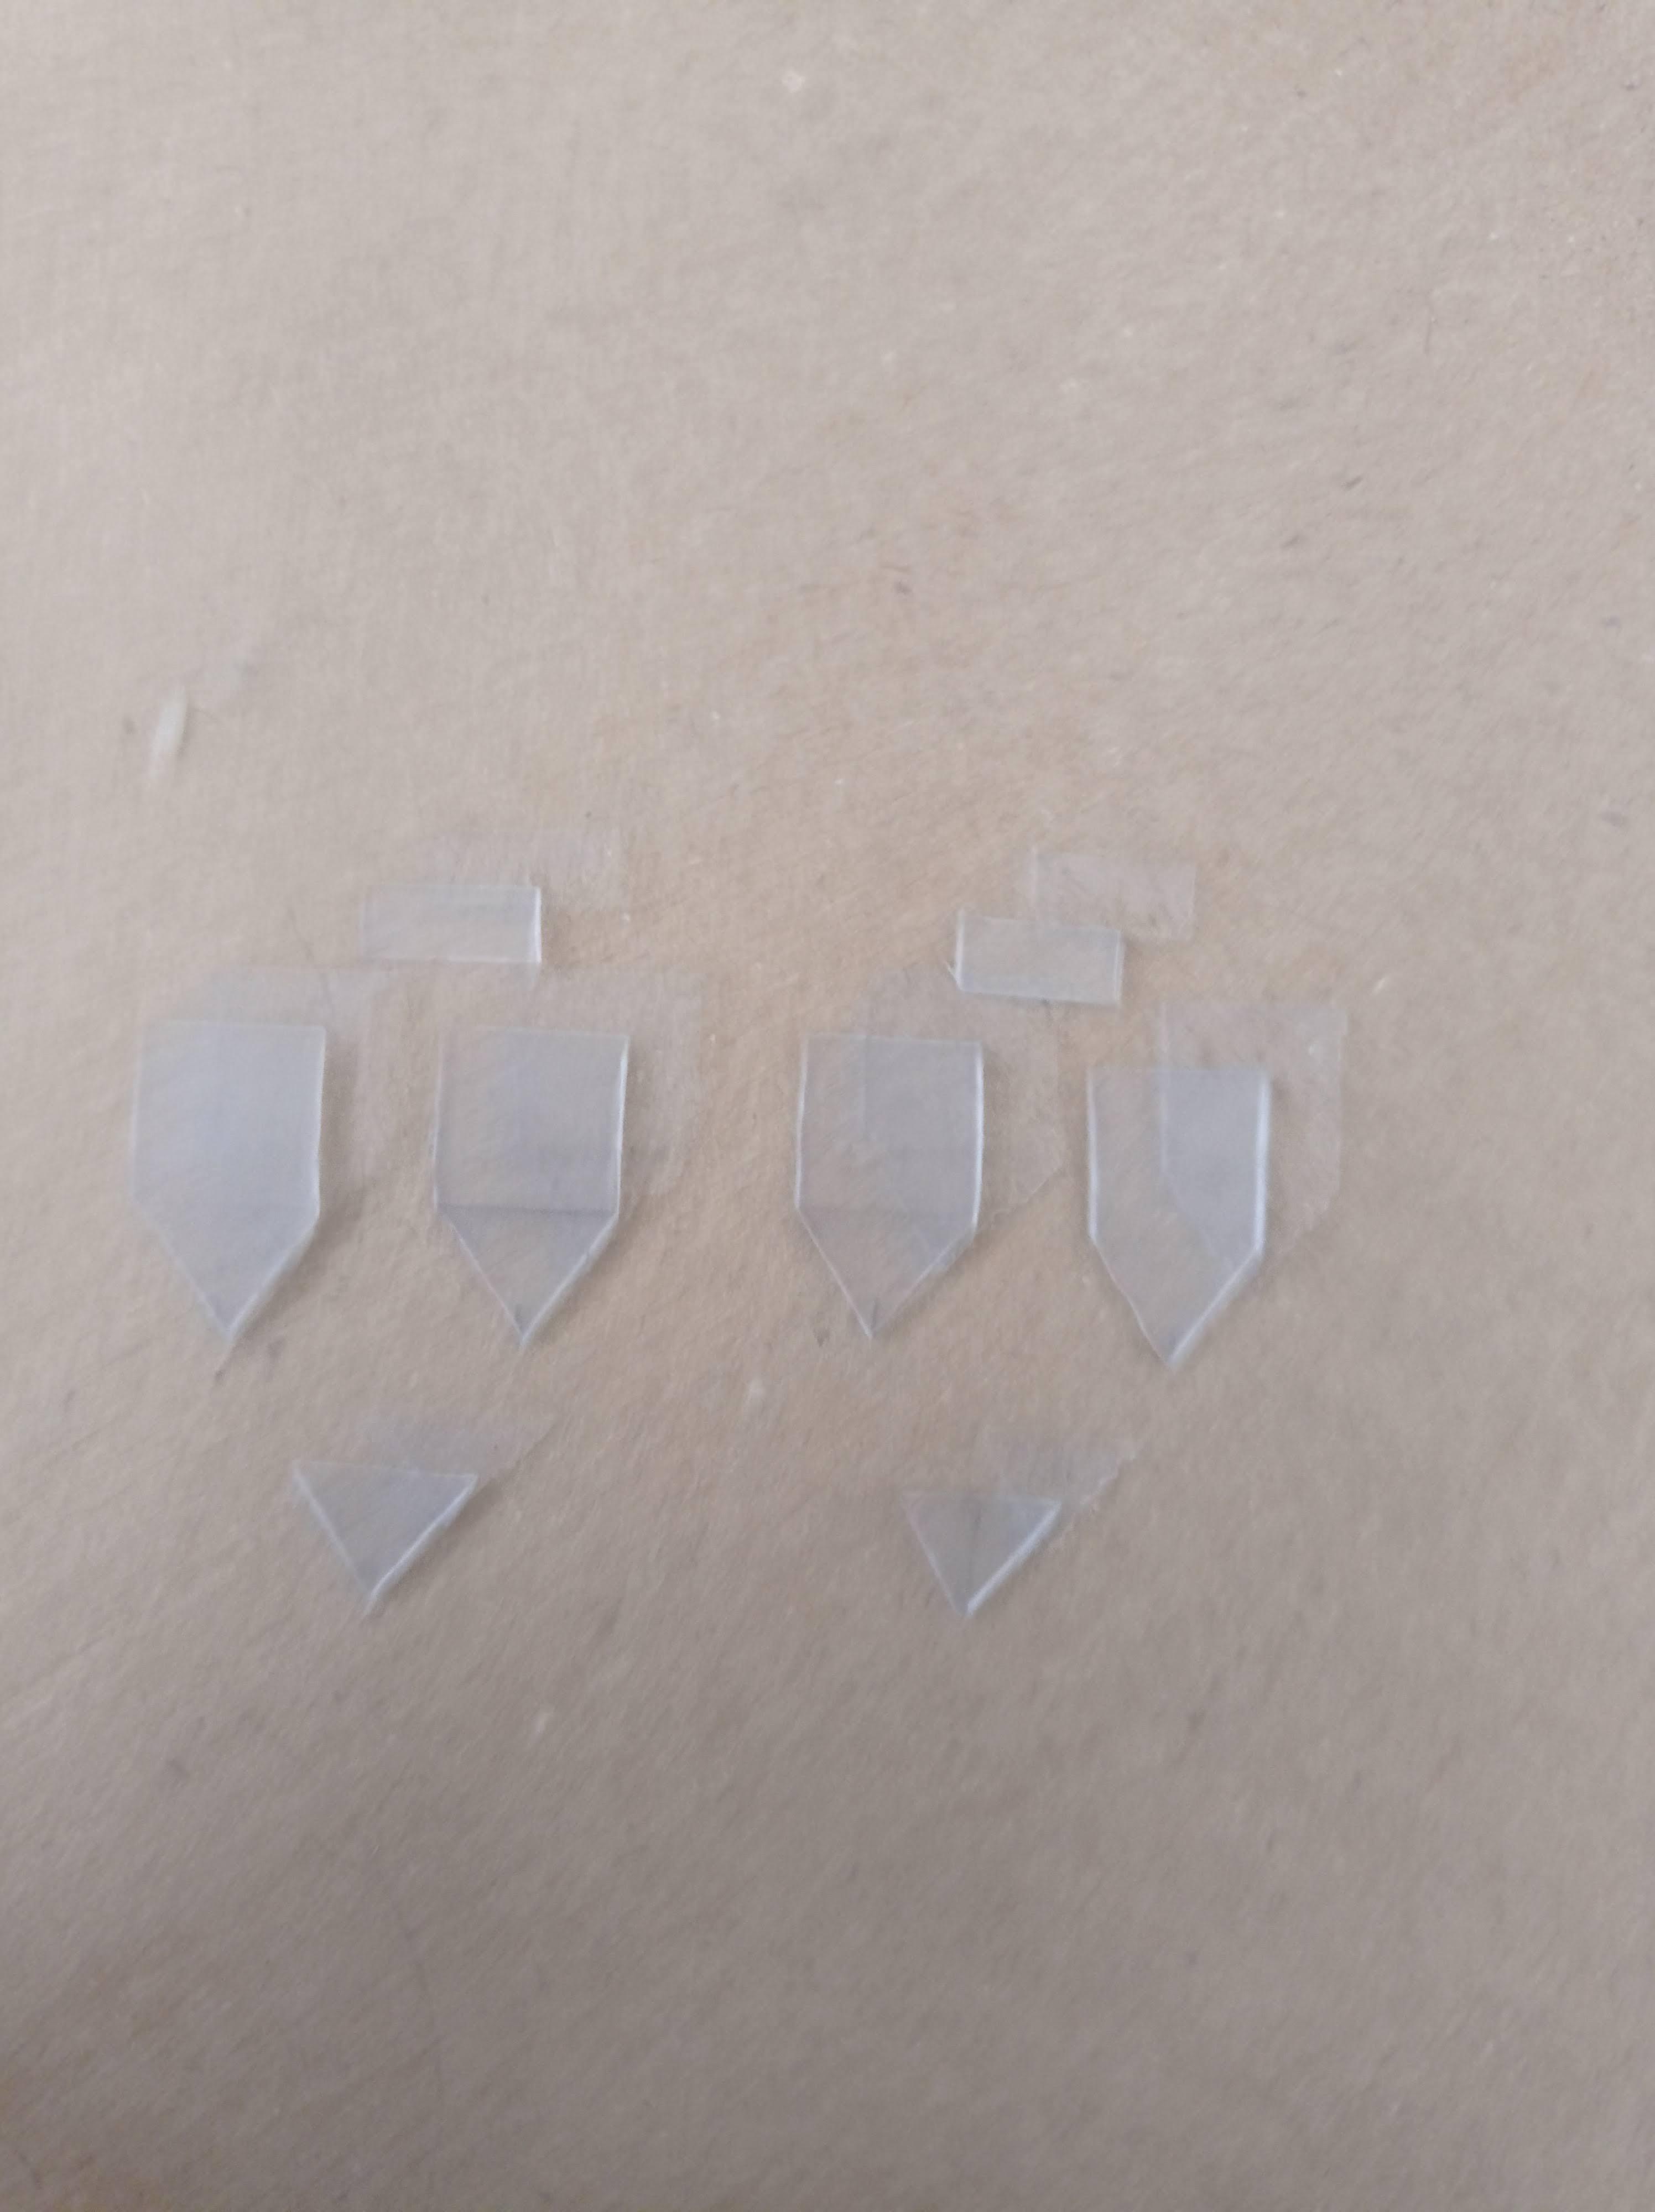
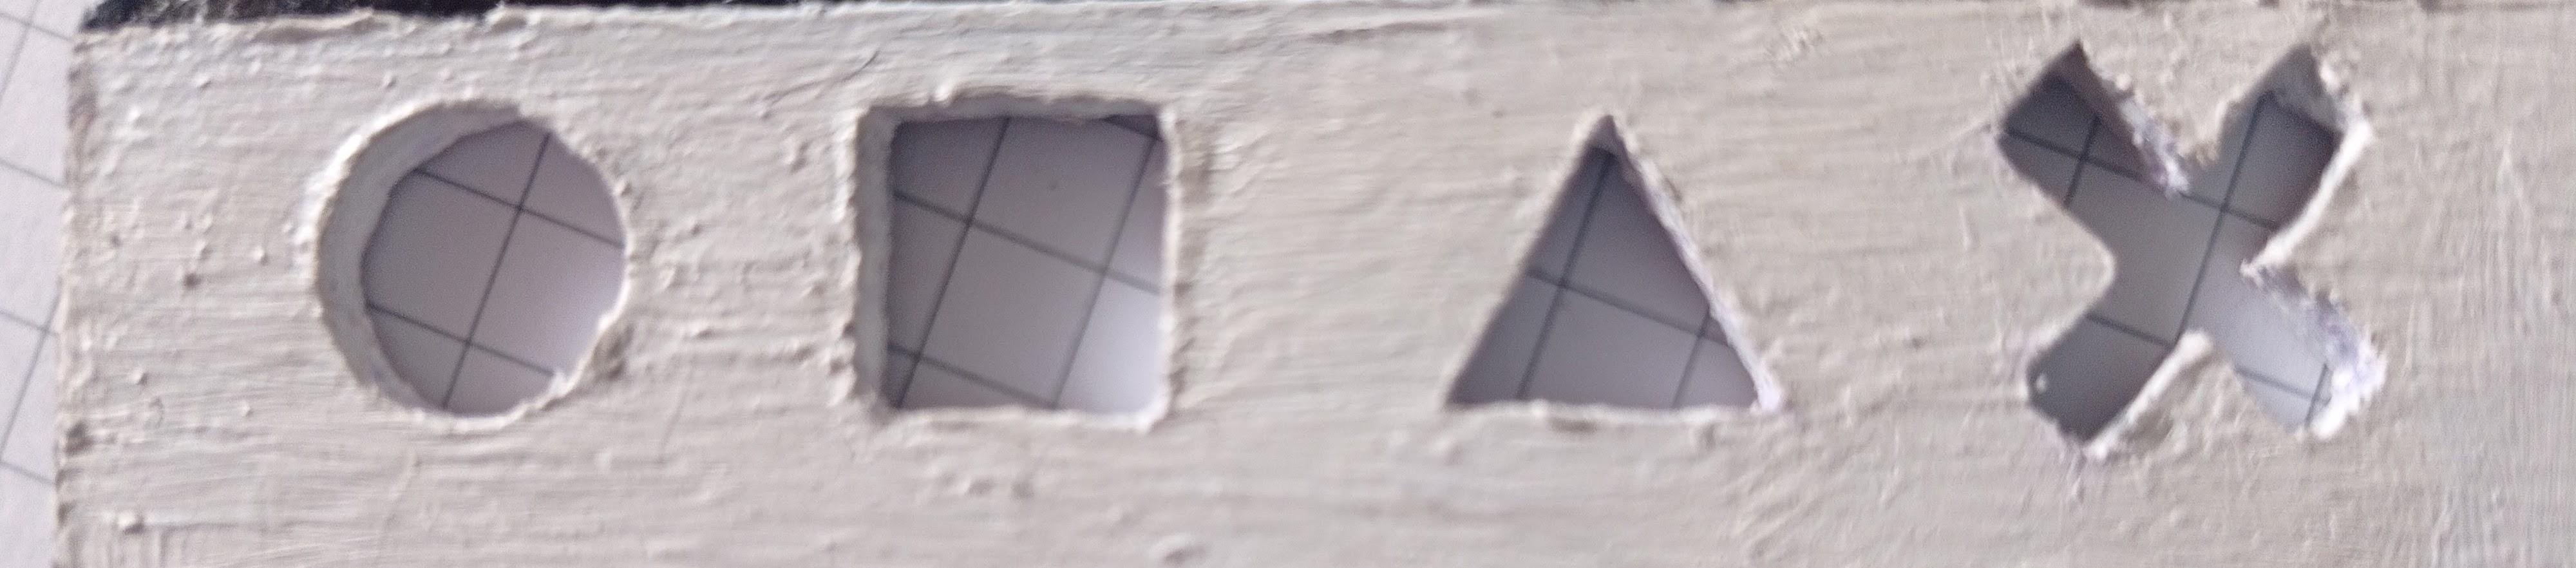
- The Fun Shapes: Although this part is not part of a geometry box, usually when you are drawing out geometrical figures, you need to draw a rough diagram first and these fun shapes can be used to trace it out. They look like the X-Box buttons and I did that on purpose to make it look better. I also needed this feature to draw out the borders on my school projects. Check out Picture 6 to check out this feature.
There were a lot of features to integrate into the invention but I designed it in such a way that it was very self intuitive and easy for anyone to use. My first thought was this was going to be a big card but then I realized I could make it into 2 cards that can fold. The whole point of this product is that it is compact, serves the purpose, and appealing. So, I thought of the idea of connecting the 2 cards with a very thin flexible piece of plastic, such as one from plastic bags. This would solve my problem and help the MetriScale fold in half. Check out picture 7 to see how this works.
Gluing Up All the Pieces

The instructions for gluing up the pieces are given in the pdf but further details are given below. Cross-check with the pictures to make sure you are the steps properly. Before gluing, make sure everything is sanded down. Also, wait for the glue to dry with each step (That's important); I used white wood glue to stick them together.
- First glue up the first two layers for each of the halves of the cards.
- Once it dries up, add the compass slider into the gap we made for the compass.
- Then glue up the thin flexible plastic piece to each of the cards and wait for it to dry up. Make sure to let everything dry before you start the next step!
- Then Glue the third and final layer of plastic together. Make sure everything lines up.
- Glue the caliper pieces by first gluing the base to the structural support piece and then attaching it to the sliding mechanism and finally adding the top base pieces.
- Sand everything and sand the edge of the plastic where the scale is going to be at an angle so that it's beveled. It is important as this gives you proper measurement from the scale.
- Superglue the edges of the MetriScale so that the edges stay sharp and even and do one final sand.
You are done gluing it! During each step, make sure each piece is lined up together properly and definitely make sure each piece is sanded properly.
Downloads
Painting the MetriScale
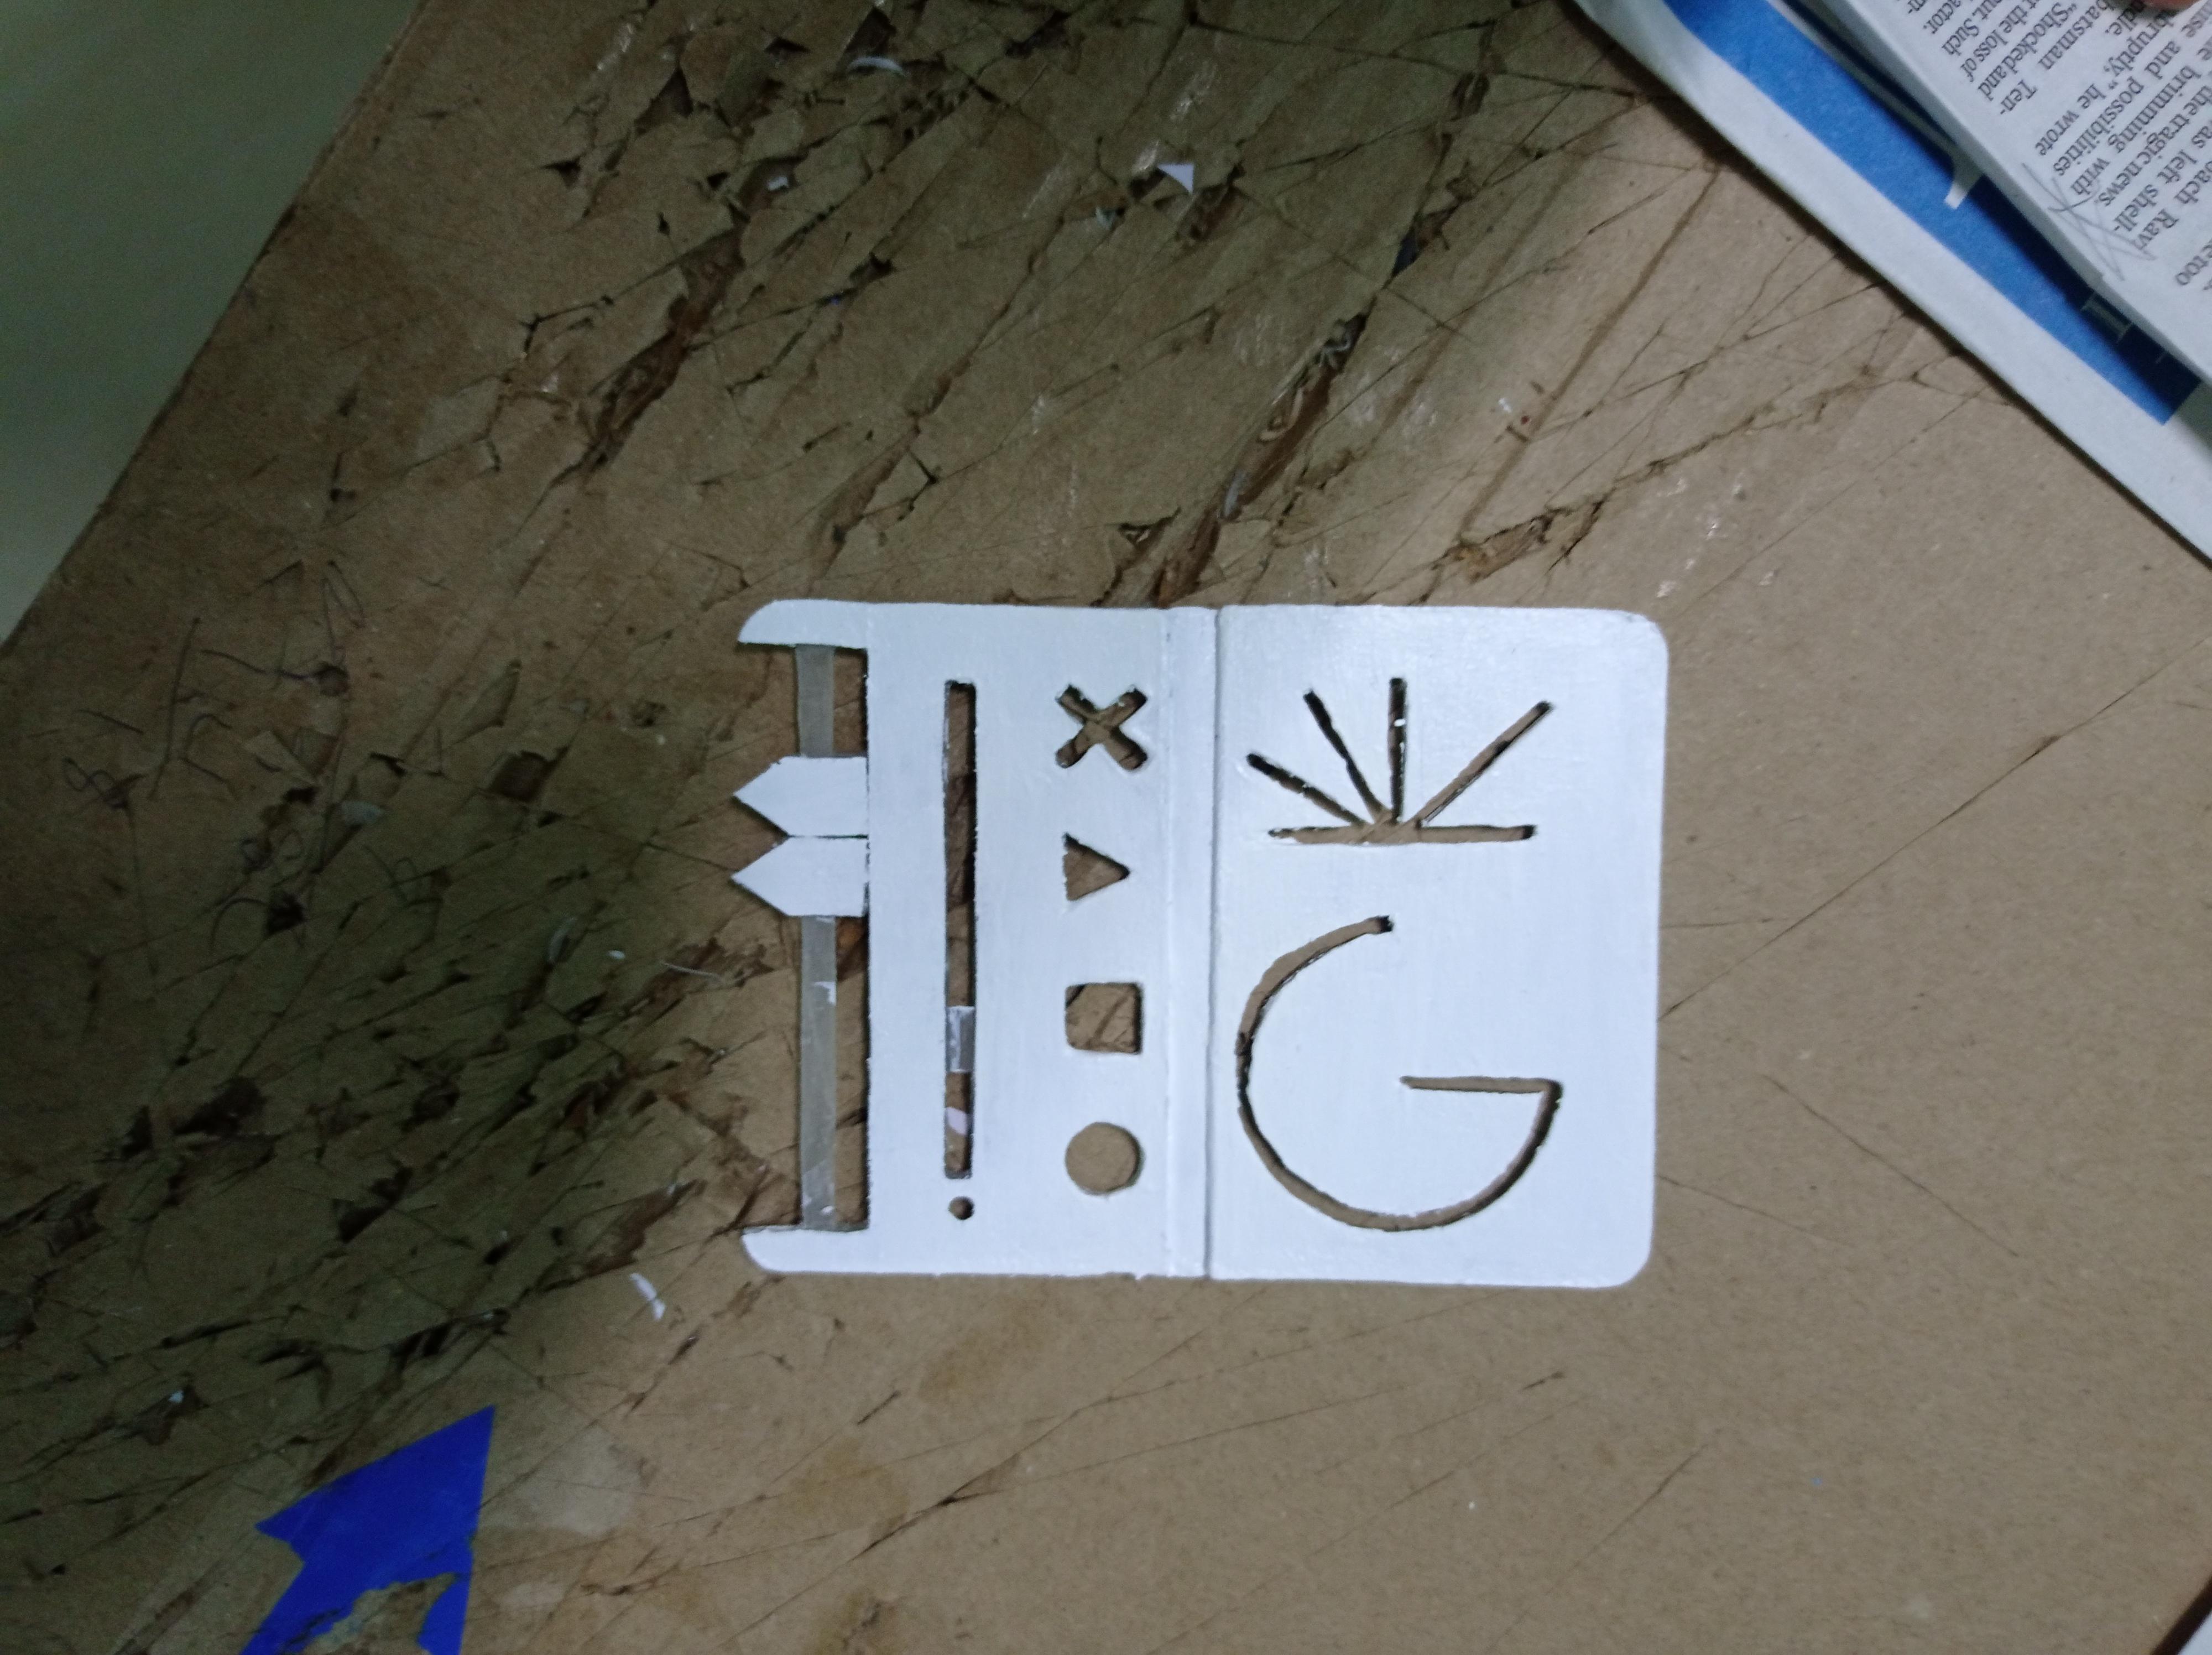
I went with a basic paint scheme because this is a highly functioning tool meant for geometry, not a flashy new toy. So it should be basic colors and should look like a tool. I chose white and black.
I painted it with a base color of white and I added black detail from which you can see in the pictures. I first sandpapered the unpainted MetriScale and then painted it with acrylic white paint, I painted it three times to give it a nice coat of paint. You can paint it any way you want but make sure to keep a nice even thin layer of paint. Use acrylic paint on plastic as it absorbs pretty well and is easy enough to peel off if you make mistakes (trust me, it happens). For the black details, I used a tiny paintbrush and filled it in.
For the places where the pencil needs to fit in, I cut off the excess paint with an X-Acto knife and painted it with a thin layer of white paint with a tiny paintbrush. Also if you want the inner parts a different color, make sure to mask out the top and paint inside.
Paint the flap with one coat of point as it needs to be flexible enough to fold and for the compass slider, don't use any paint at all, use a marker to fill it in otherwise you're going to ruin the paint job.
You are also going to be marking the measurements later so make sure the paint color goes along with the fine tip pen color.
Check out the pictures for further reference
In the end, just choose a sensible color scheme and paint the MetriScale as even as possible.
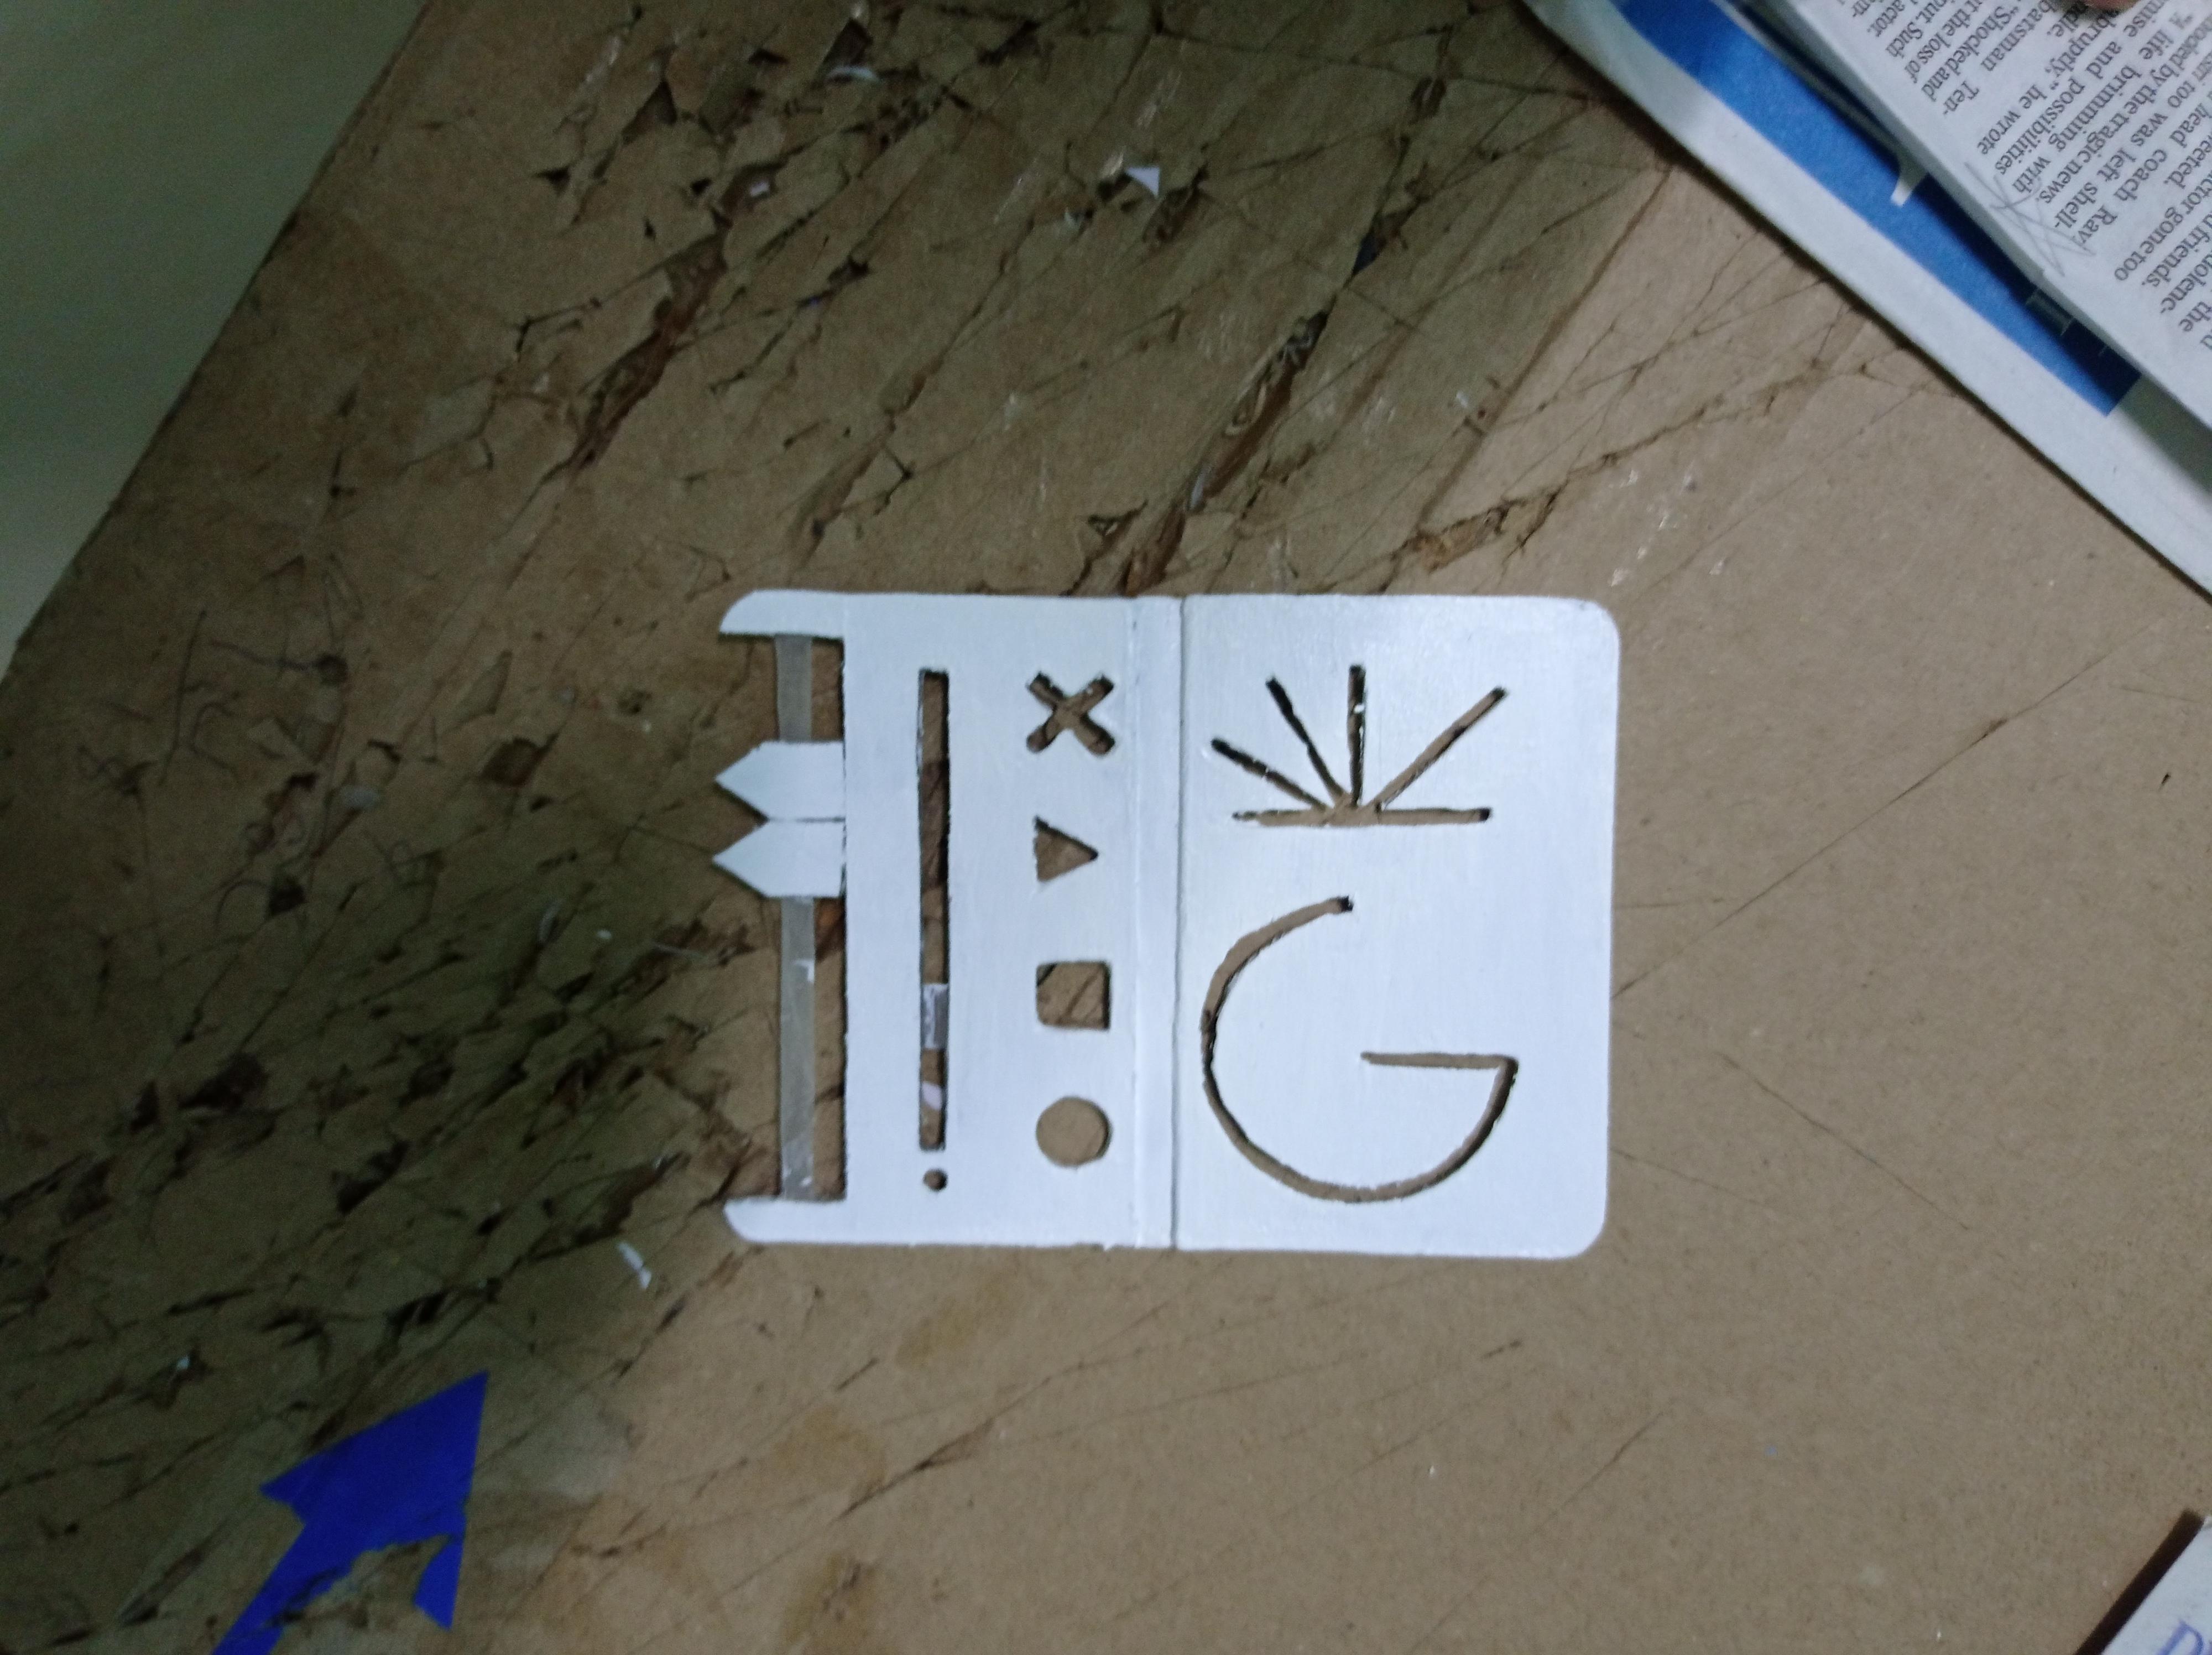
Marking All the Measurements
So here comes the last step - marking all the measurements. I used a micron pen (a pen with a very fine thin tip), the thickness of the micron pen I used was 2 mm. And also you're gonna need a scale too.
- For the scale, just copy the measurements from the actual scale. Make sure that lines are straight and every millimeter/inch is of exact measurement. Make sure to mark the numbers with the measurements. Also, try to keep it to the nearest whole number cm or inches when drawing the ends.
- For the protractor, which was tiny, I couldn't think of the right way to draw out the tiny markings without ruining it. So I thought of it mathematically, the protractor was 270 degrees, so I would divide it by 3 to make 90 degrees then again divide each segment by 3 to make 30 degrees and repeat that step to make each segment 10 degrees. Finally divide each segment by 2 to make 5 degrees and finally each segment by 5. This process was the easiest and the most efficient for me to do and it worked out real nice. Make sure to mark out the number for every 5 degrees
- For the compass, it was basically like the scale, but the distance of the hole from the slider was half a centimeter, so I drew next to the slider part and started with 0.5cm first and gradually marked the rest. This helps you to find out the radius of the circle so make sure to line up the measurements properly.
- For the set squares, I marked out the angles with their prospective degrees- 30,45,60,90.
- For the Vernier Calipers, I drew out each millimeter next to them and didn't mark any of them with any numbers.
You can mark out the measurements any way you want, but these steps are the best and easiest ways to do it. Always use a thin-tipped marker and double-check whatever you're marking. Check out the pictures for further reference.
After finally marking out all the measurements, I used a hairdryer to heat the markings so they wouldn't smudge. And the final step of this project is to add varnish to it, I used a medium gloss varnish on it. I added one even smooth coat on it, the varnish protects the MetriScale from stray pencil marks (you can wipe them off) and makes sure the markings of measurements don't fade away or smudge. This step is optional.
You are finally done making the MetriScale!
Testing It
The last and final step is testing the MetriScale. The compass slider was snug and tight and lets me draw a proper circle. The Quick Angle Drawer, the solution to the grouping of the set-squares worked out great. Everything was perfect.
I did some focus testing with my family and friends and they all loved it. I really hope you guys will love it too.
This started as a solution to a problem I had about the geometry box to a really awesome tool. I think I could have added extra features in but I just wanted the features of a geometry box. You could add a pencil holder or a level to it or you can customize it any way you want to.
Constructive criticism is pretty helpful when making a new invention. Other people could see a better way to something from their own persective. This really helped me through making the MetriScale.
Uhhhhhhhhh, Not a Step.
Thank You for viewing my Instructable. I mostly talk about how to make stuff in my other Instructables, but in this one, I got to explain how to invent something by providing detailed instructions to make the MetriScale. The MetriScale turned out really great and I hope some of you will make it. If you do pls mark it as "I made it" and I will feature your work.
In the end, it was a really fun project for me to make and had a nice learning process.
Any kind of advice is appreciated. I think it's better to learn and make myself better at making stuff.
I am submitting this project to the Instructables Anything Goes Contest. Please do vote for me by clicking on this hyperlink. :)
Check out the YouTube video on the MetriScale: www.youtube.com/watch?v=fIgxzXrSSK4&t
Check out my YouTube videos: https://www.youtube.com/channel/UCcu0AbsG0LjzM5cmmLvkAUw
Check out my Instagram Account: https://www.instagram.com/create_with_asray/?hl=en
Check out my other Instructables: https://www.instructables.com/member/Asray%20Gopa/
Thank You!
Happy Crafting!