Merging Objects in Meshmixer
by crystalywen in Workshop > 3D Printing
11722 Views, 1 Favorites, 0 Comments
Merging Objects in Meshmixer
On this page, you'll find the tutorial and process for merging files in the application Meshmixer.
Supplies
Meshmixer is an application that can be downloaded from this website.
This tutorial is a text description largely derived from the video "How to mesh mix! - Detailed tutorial on merging STLs in Meshmixer." uploaded by YouTube user Teaching Tech.
This tutorial describes the process of combining multiple OBJ files in Meshmixer, which can be downloaded from this website.
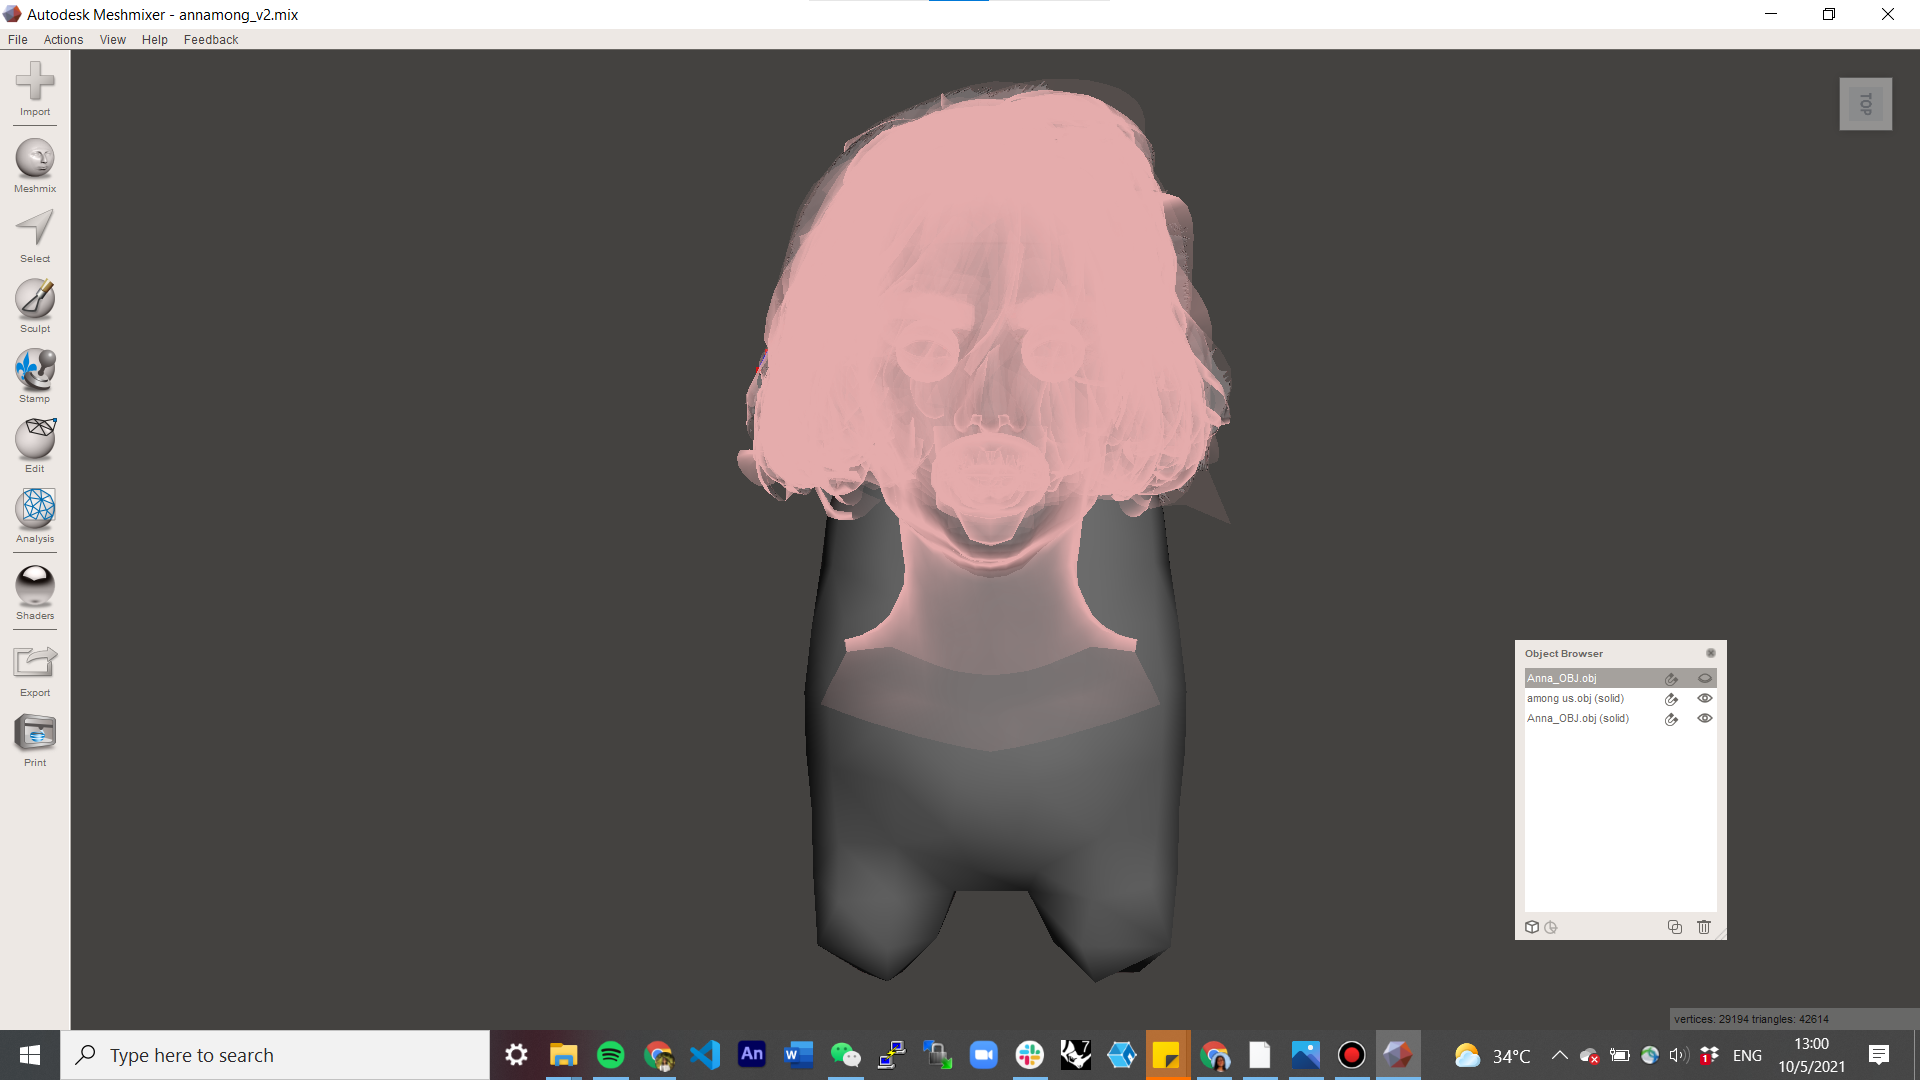
Import Objects
Import > select 1 or 2 files from the file explorer (.obj, .ply, .stl, .amf, .3mf, .off, .mix)
- Note: if this step is being repeated (you've already gone through steps 1-3 at least once): Import > Append > select 1 file from the file explorer
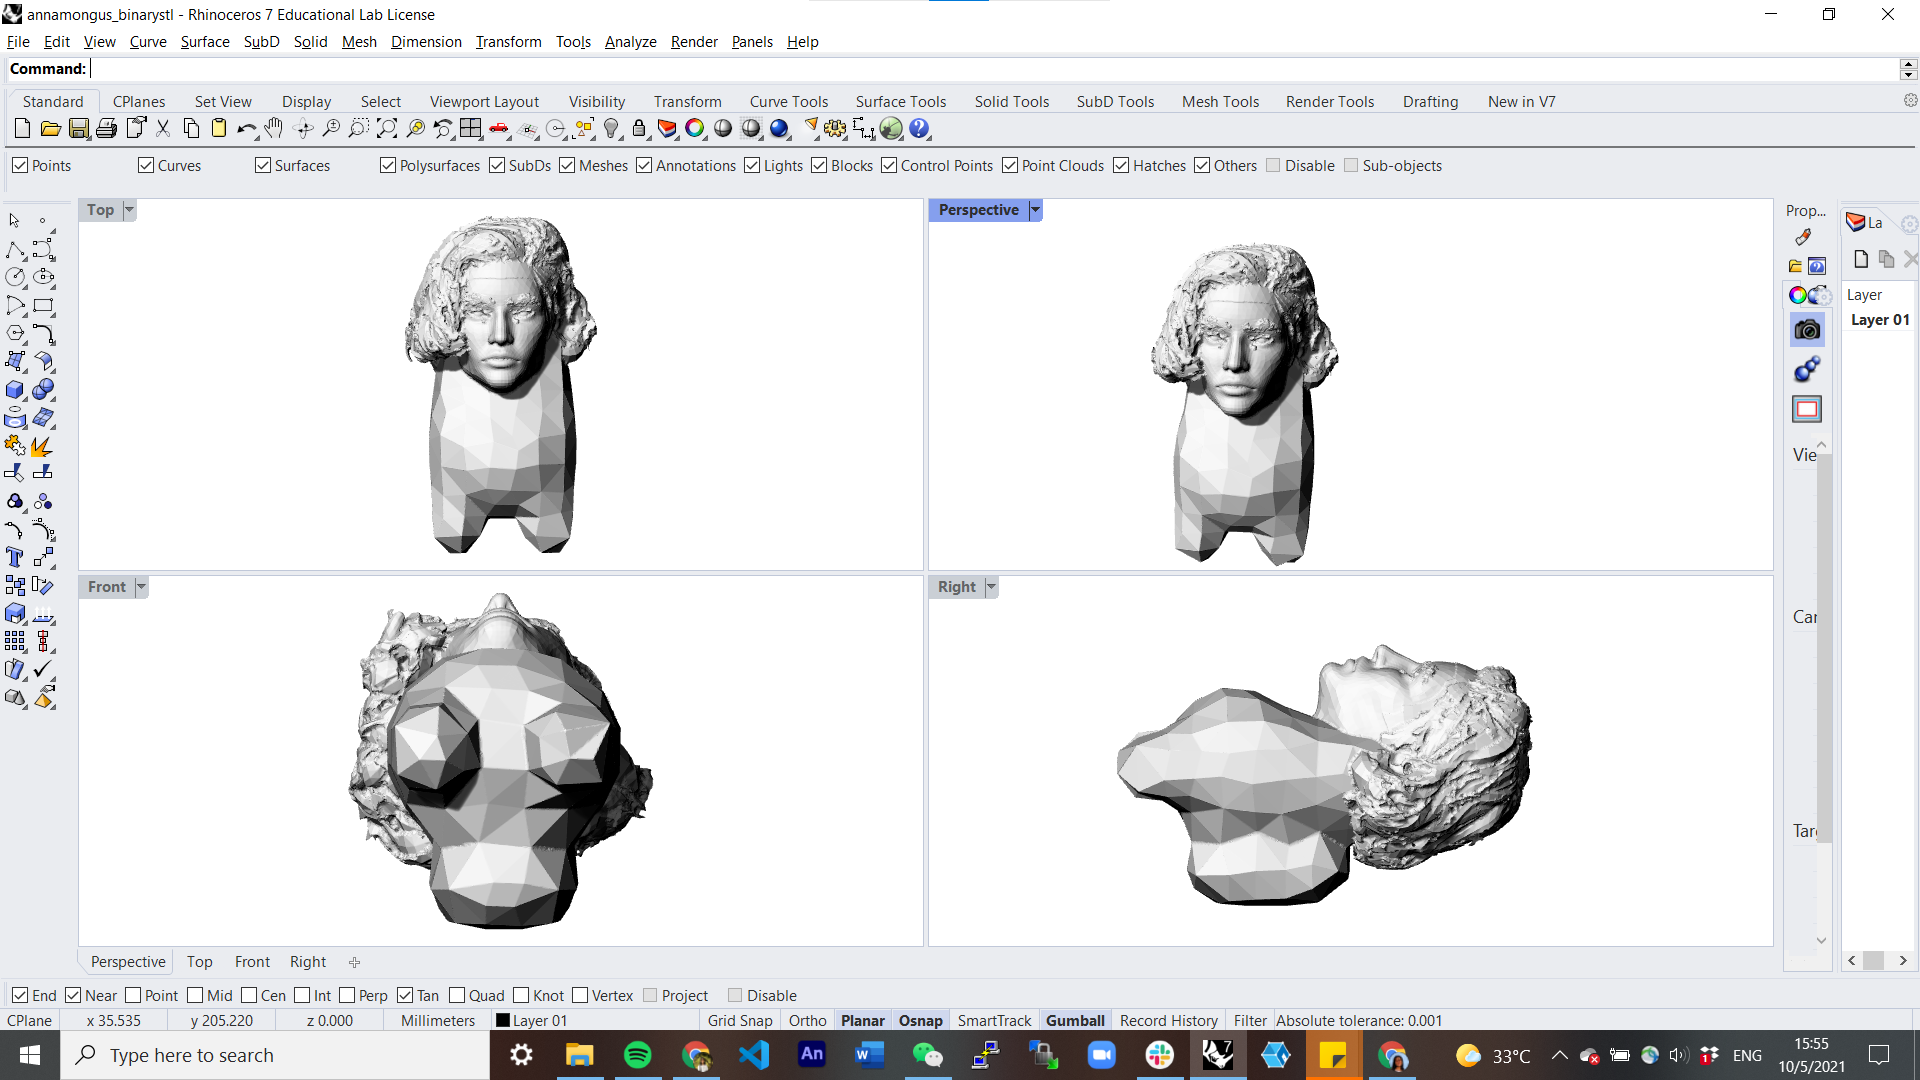
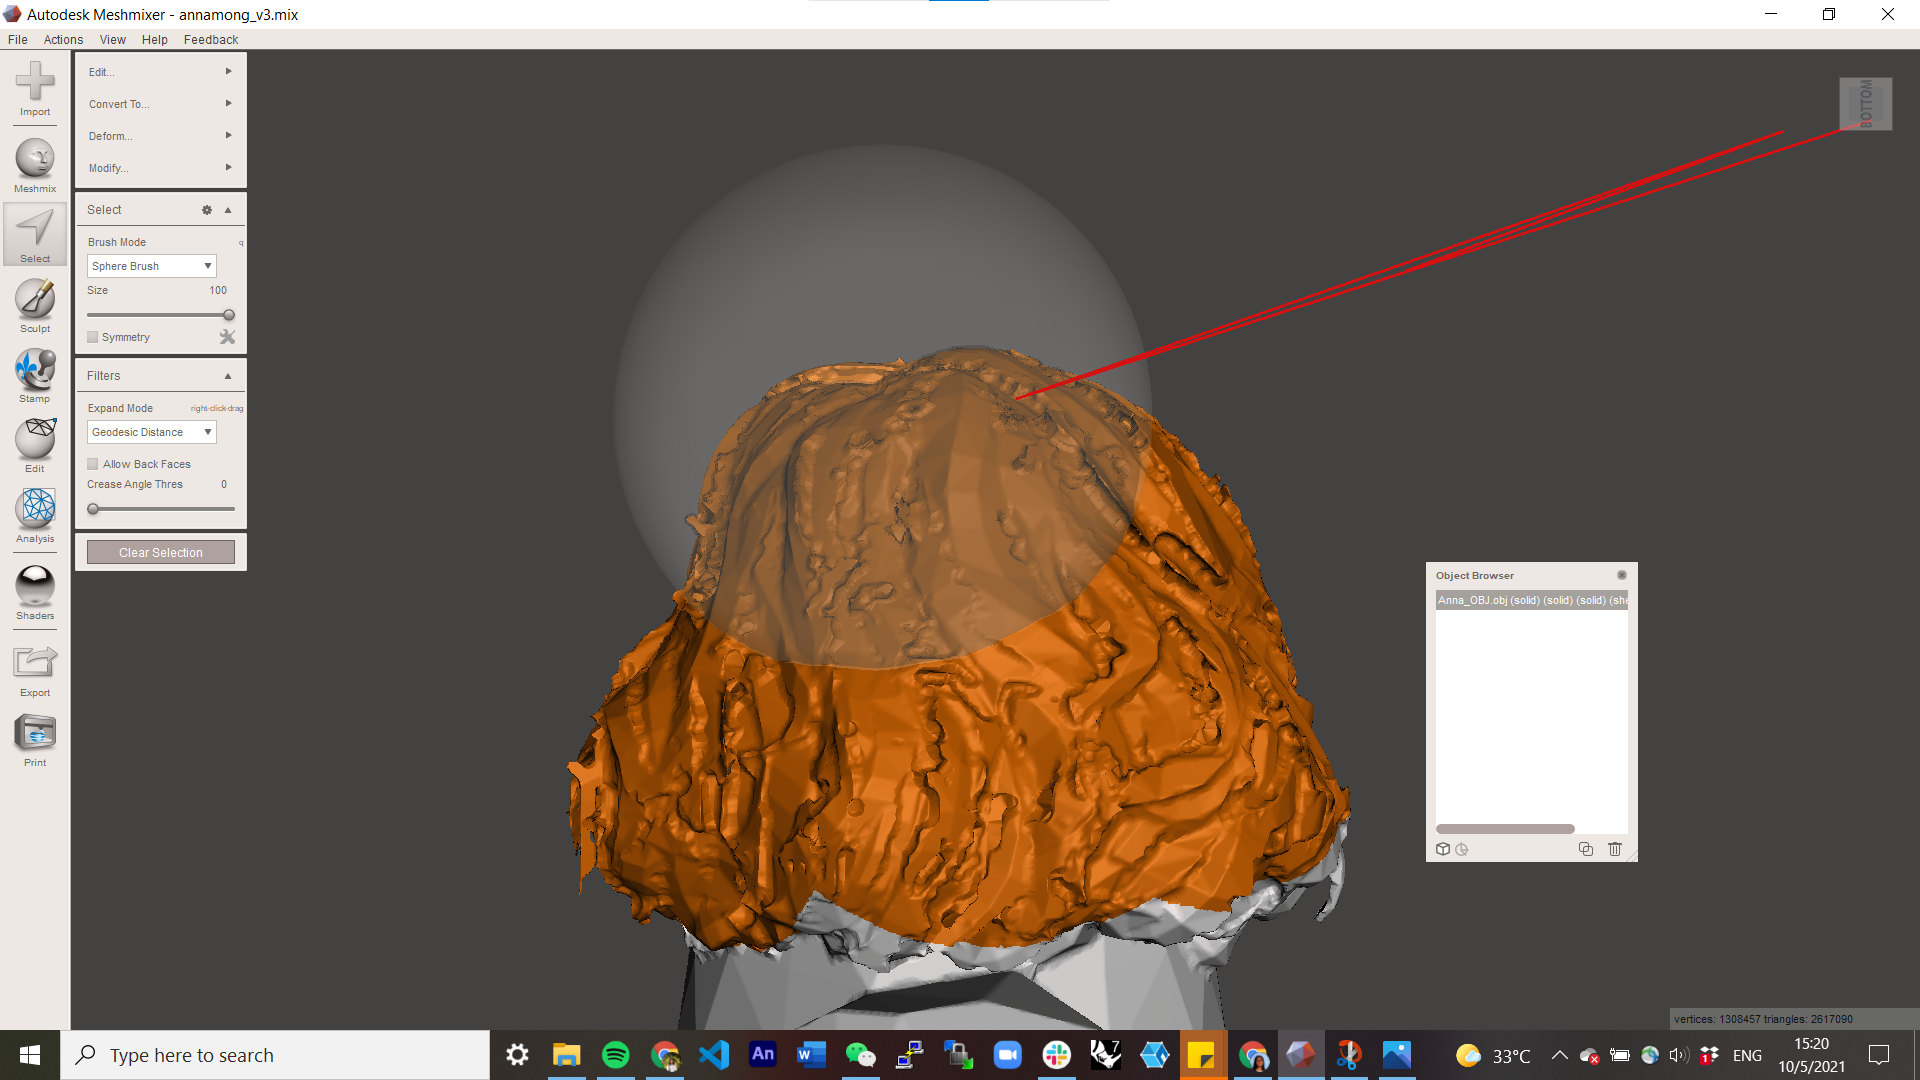
For the merged object you'll see in this tutorial, I used these 2 OBJ files:
3D Realistic model of female head Anna published by user loki31
3D model Among Us character published by user Vilitay
Adjust Objects
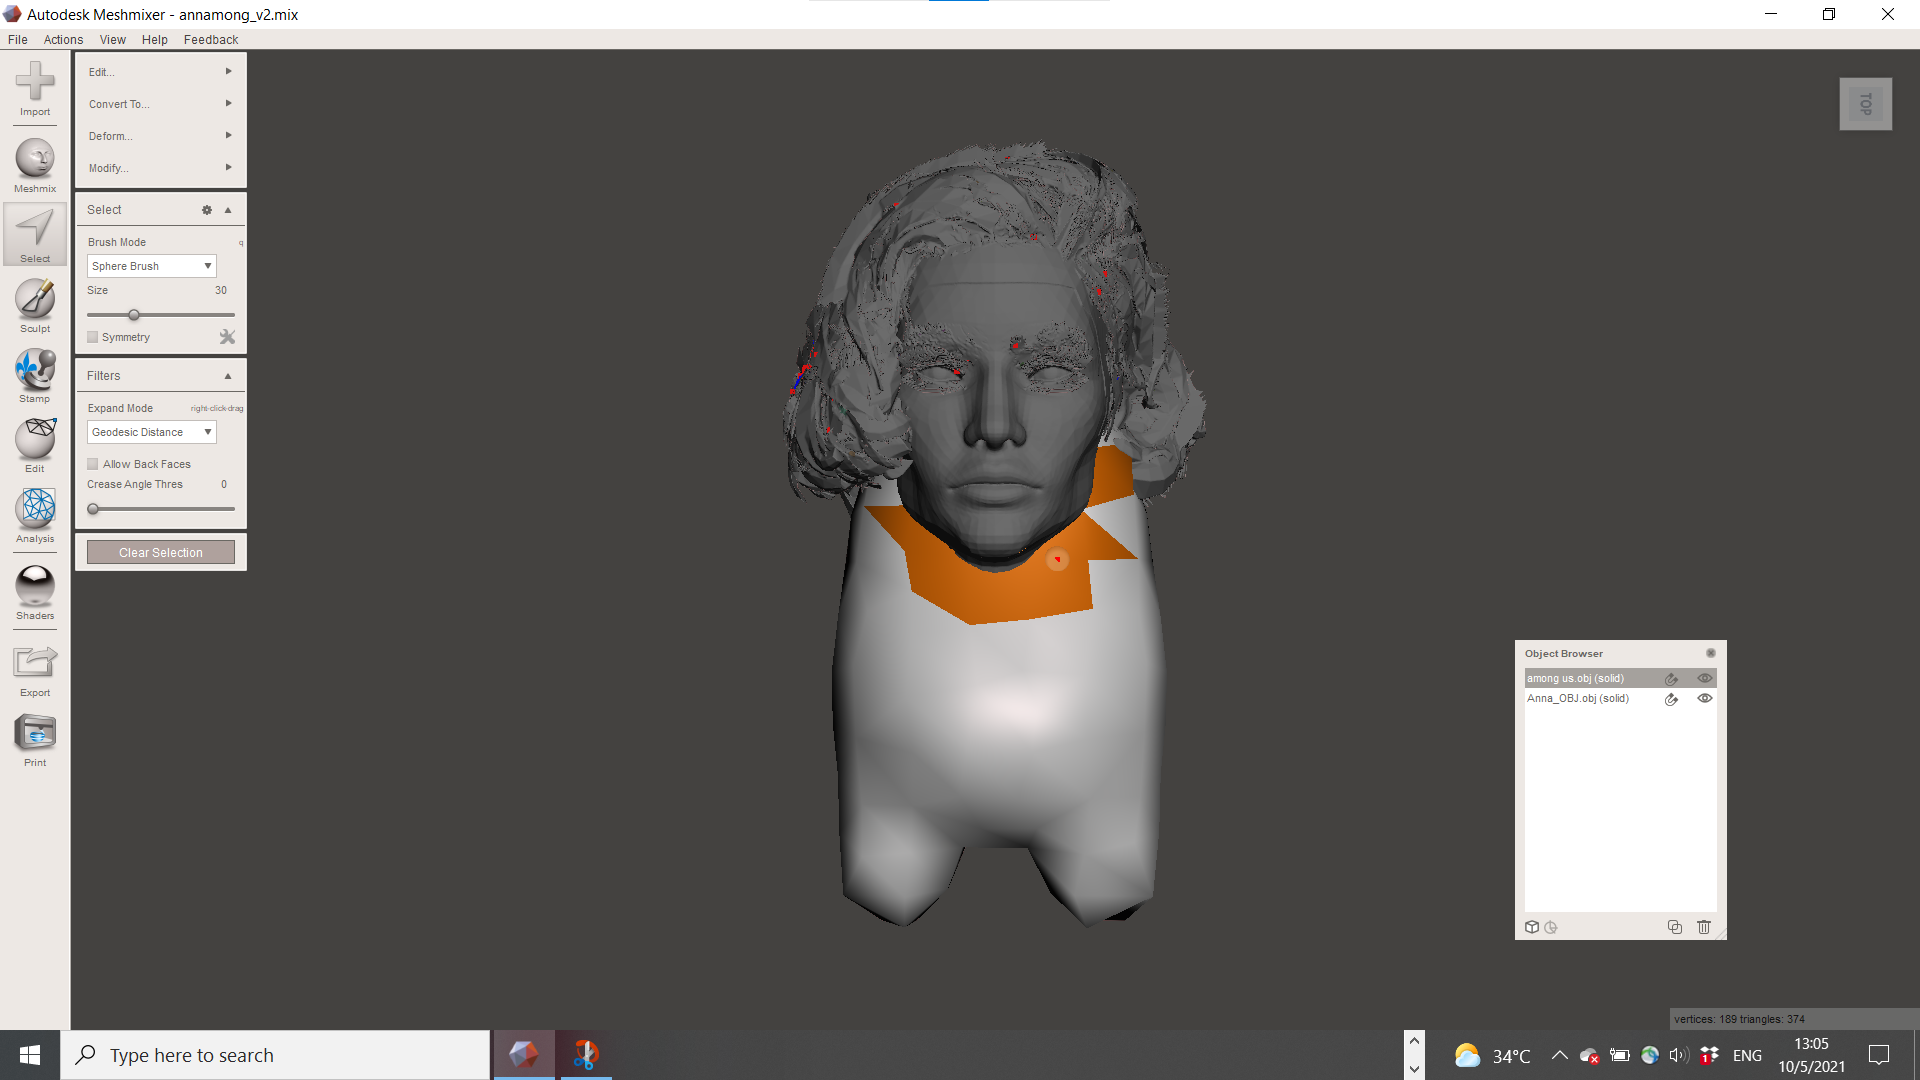
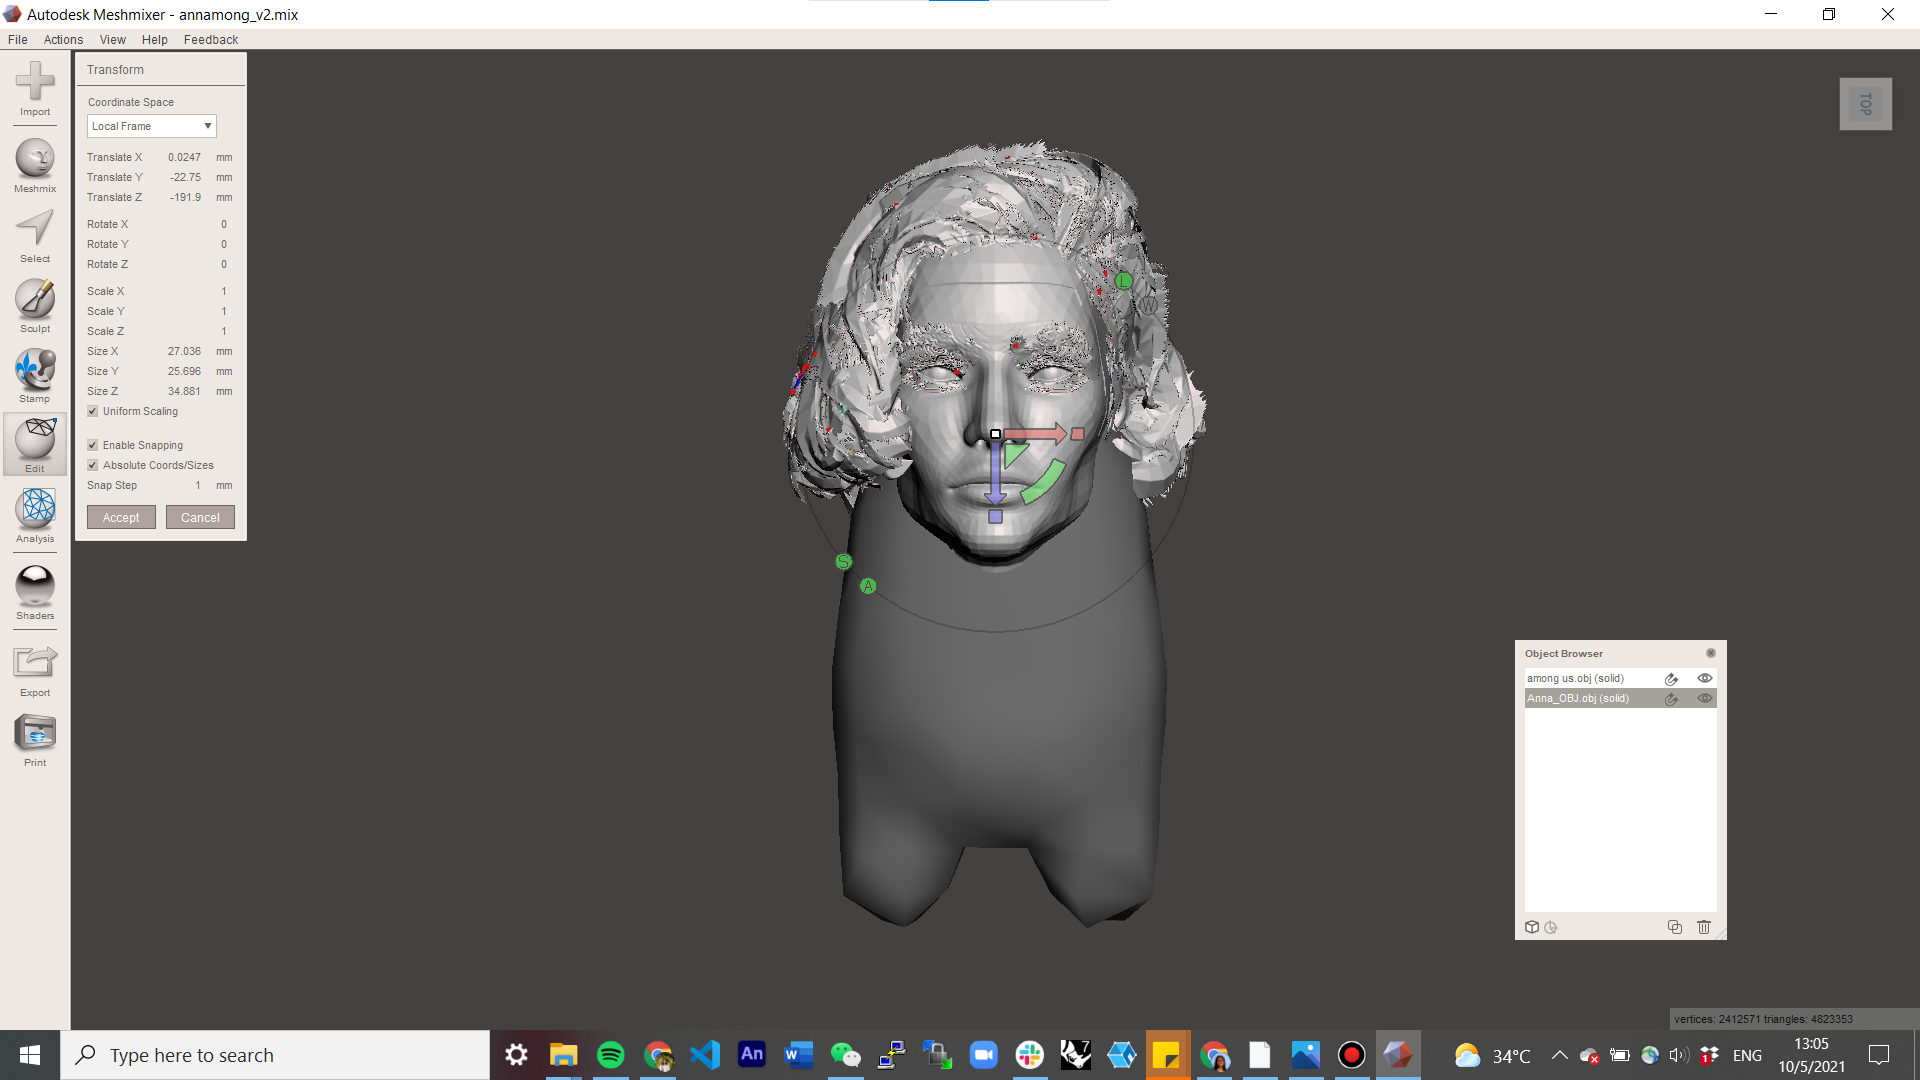
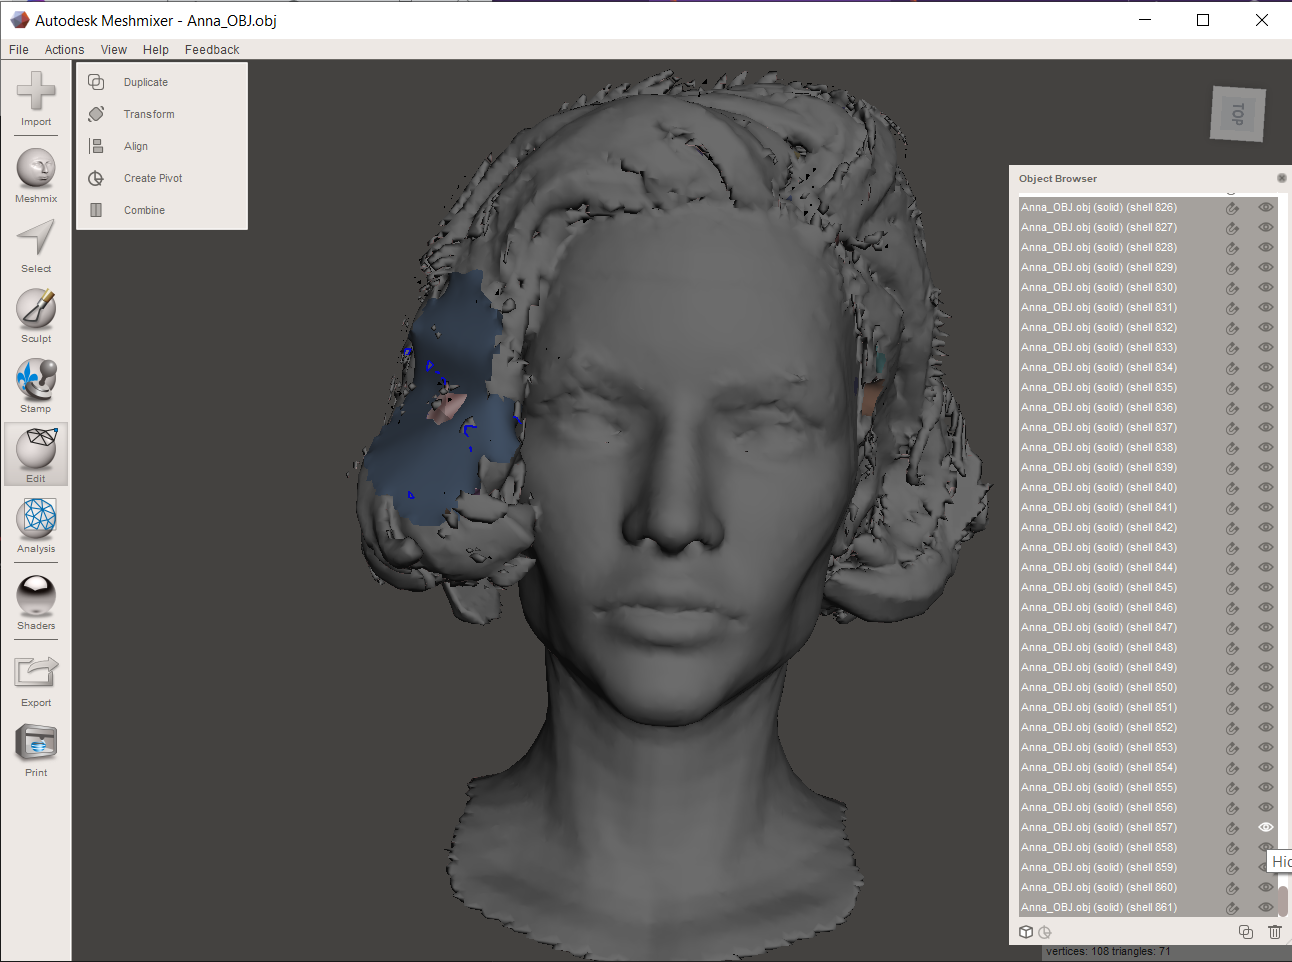
For each file that you have just imported in the last step, click on the object, then complete all of the following actions, in any order, repeated as many times as necessary:
- Change the shape of the object to what should be kept for the final merged object
- Select > select the portion of the object that you would like to remove > Edit... > one of the following 2 options:
- Erase & Fill - round the object without the selected portion
- Discard - delete the selected portion without making other adjustments
- Select > select the portion of the object that you would like to remove > Edit... > one of the following 2 options:
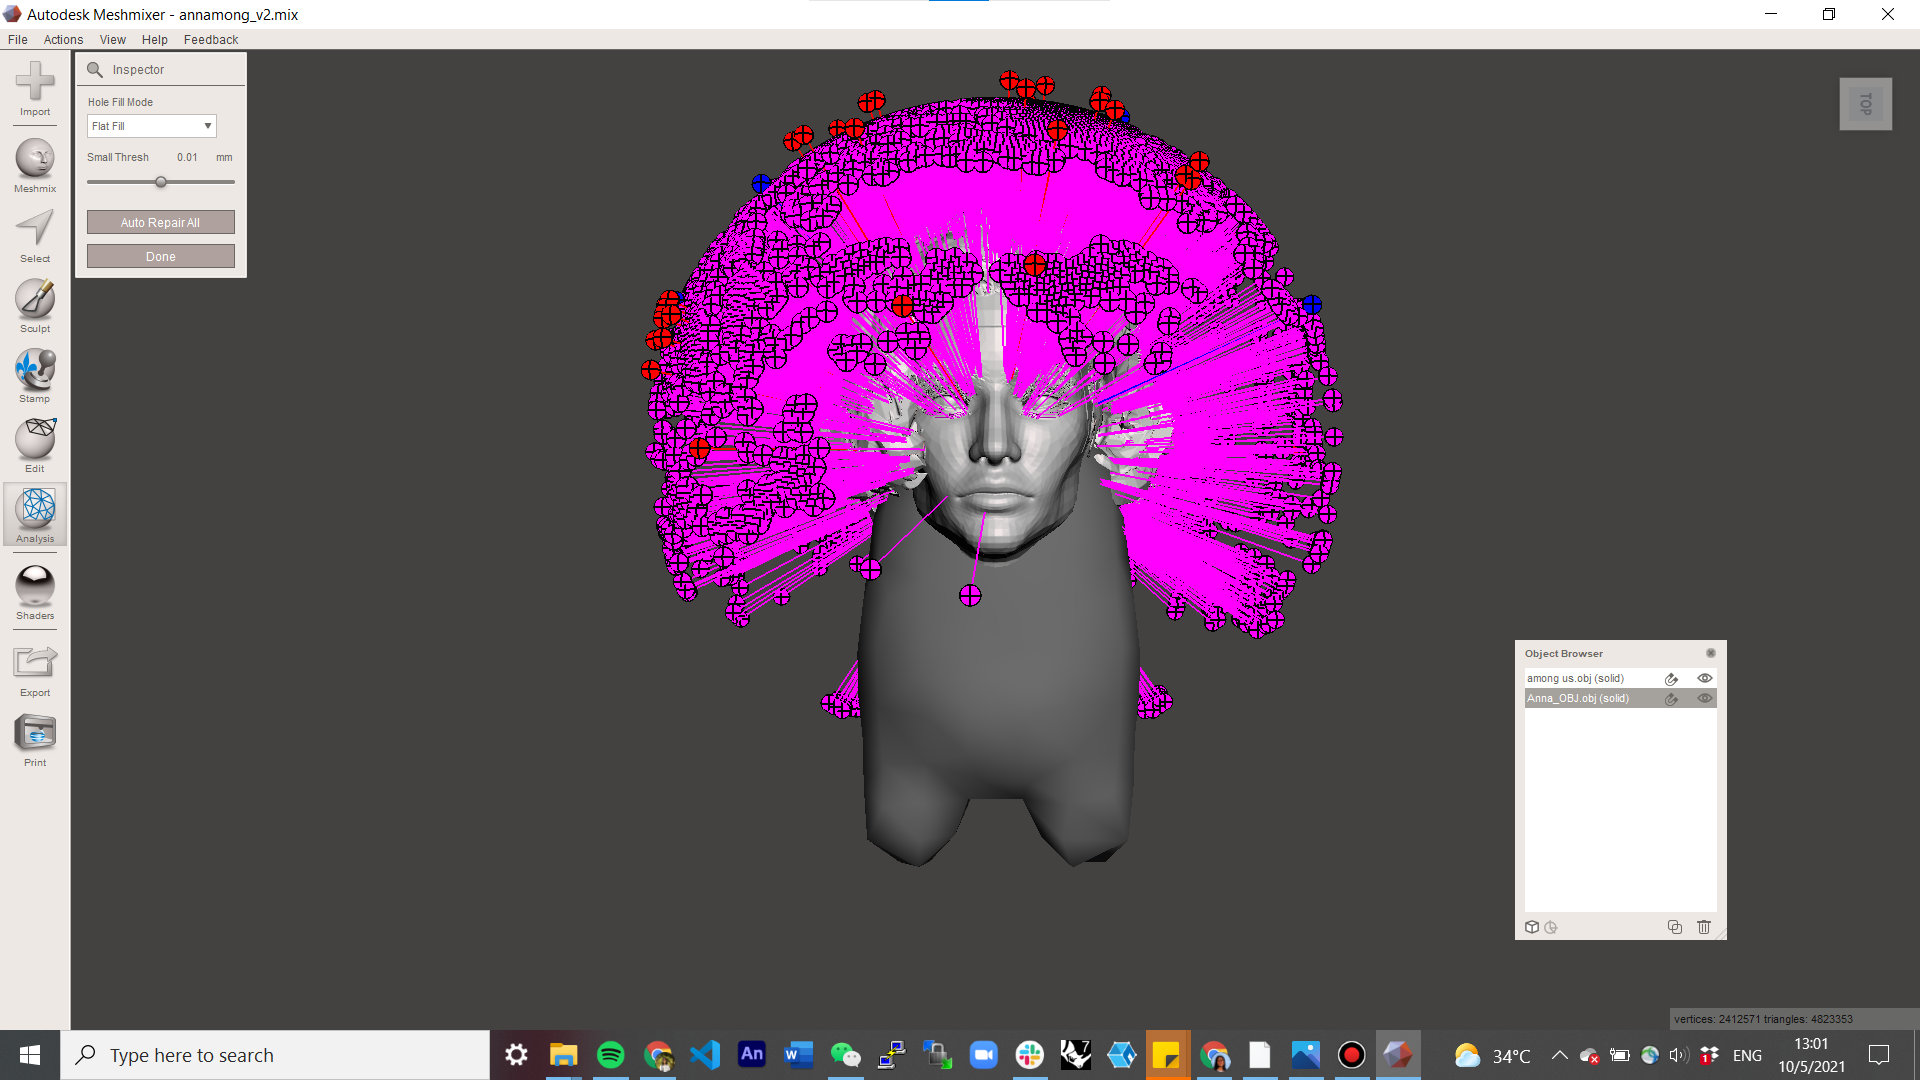
- Check for issues that you may need to fix
- Analysis > Inspector > note that colorful orbs pointing to your object indicate issues
- you may choose to 1) click Auto Repair All, 2) change the shape to fix the issues, 3) ignore the issues and deal with it through more iterations of these steps, which will be explained later.
- Analysis > Inspector > note that colorful orbs pointing to your object indicate issues
- Fill in hollow objects
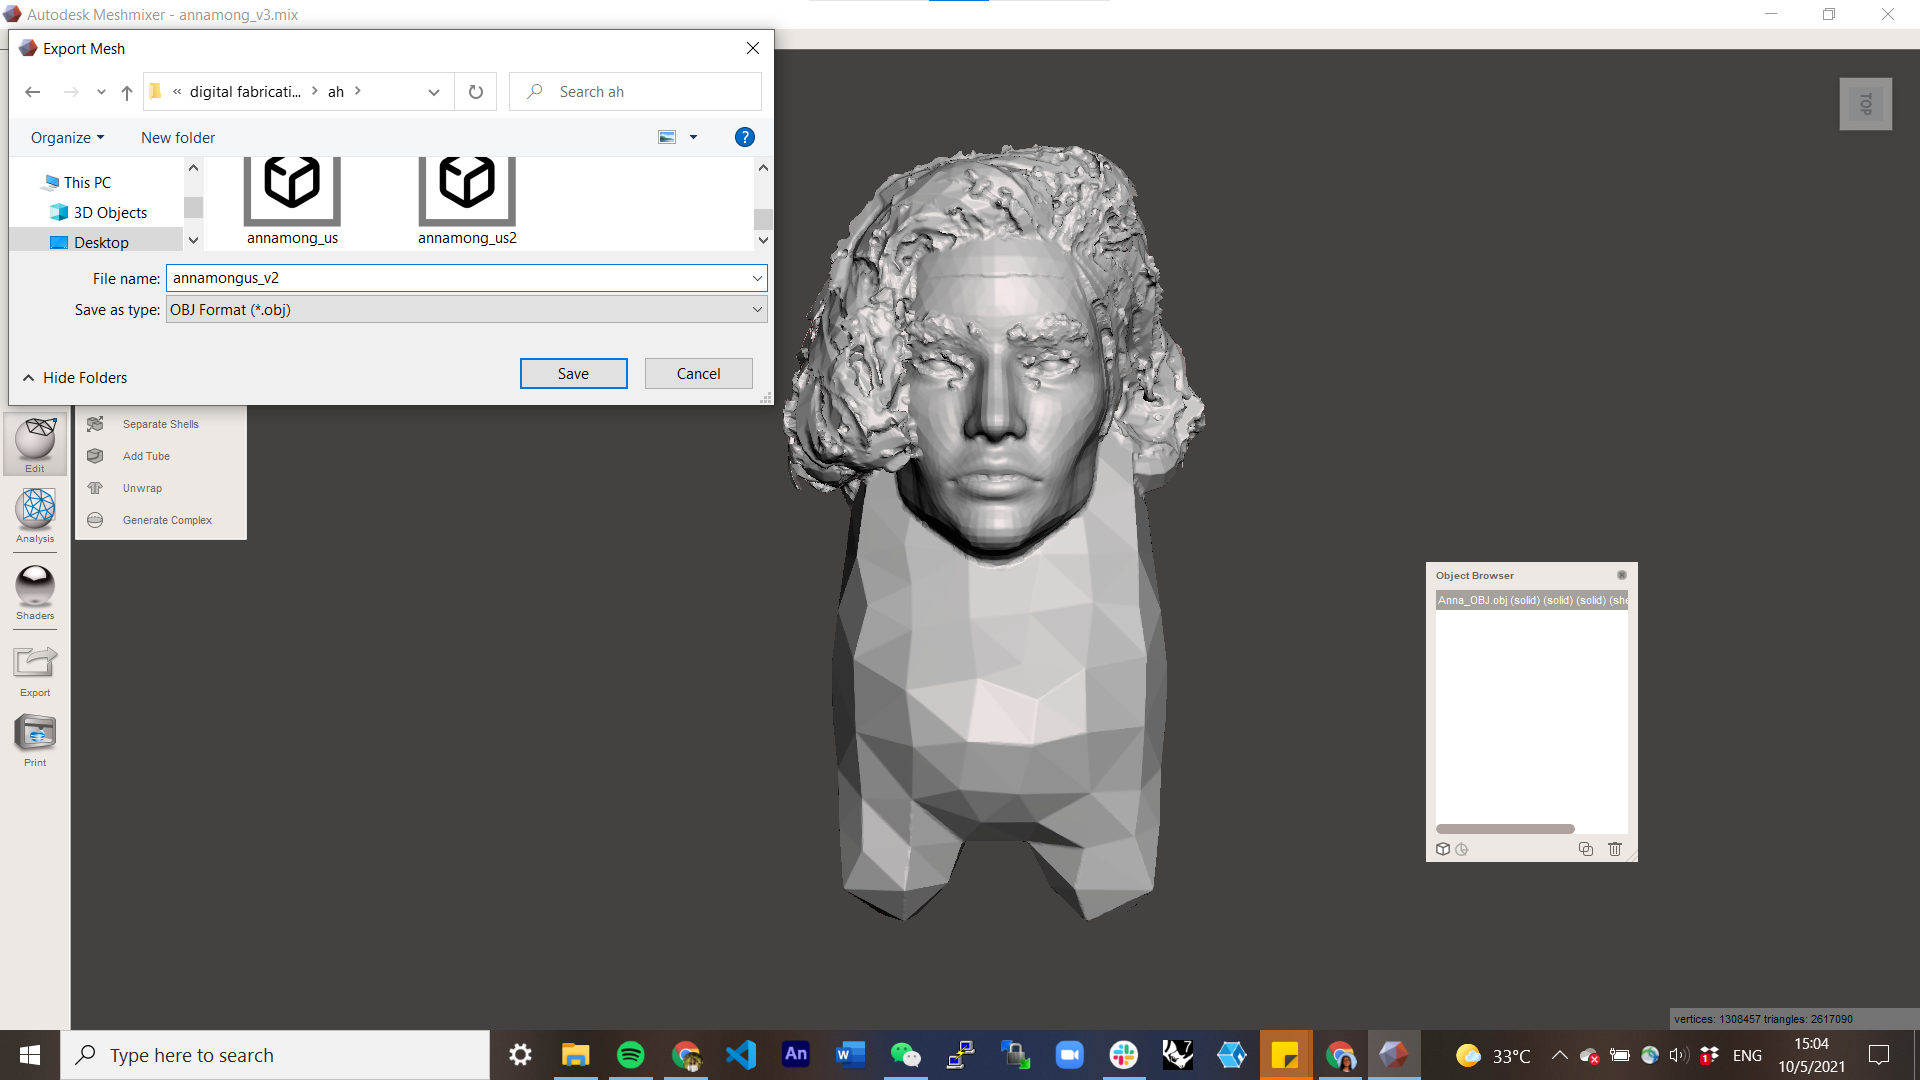
- Edit > Make Solid > adjust the parameters and click Update - as many times as necessary until satisfied or optimized > Accept
- Object Browser > select the old version (new version will say (solid)) > Delete (trash icon)
- Transform the object as necessary to match orientation and position with the other object
- Edit > Transform > Translate, Rotate, Scale
Merge Objects
At this stage, there should be 1 or 2 objects. If there are 2, complete the following actions in the given order:
- Object Browser > Ctrl + click both objects
- Edit > Boolean Union > Accept > 2 possible options:
- Success >
- you're done
- Failure (e.g. An unknown fatal error has occurred in the current Tool. Aborting.) >
- Ok
- Edit > Combine (there should be one object in Object Browser)
- Optional step: with the 1 object - Fill in hollow objects (see step 2)
- you may choose to repeat this substep as many times as you like, to remove details, before continuing
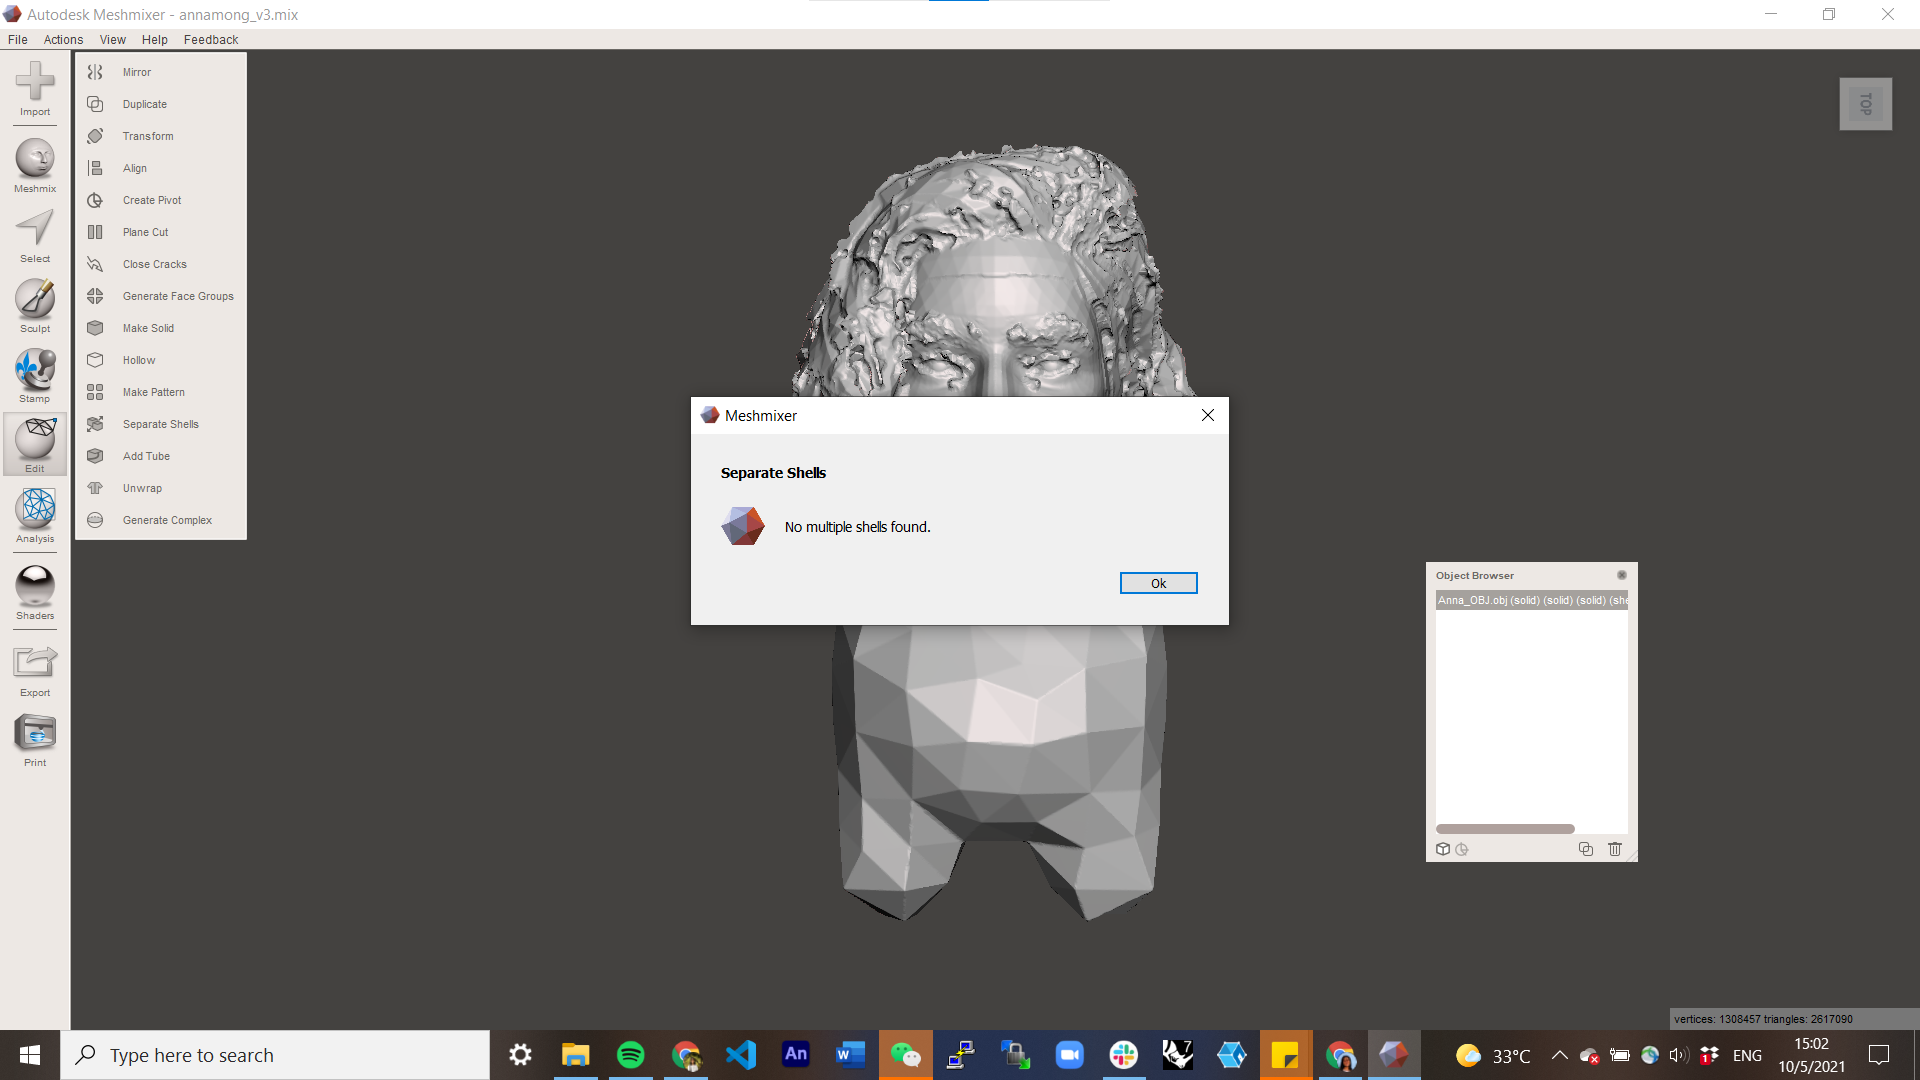
- Edit > Separate Shells > 2 possible options:
- No Multiple Shells Found >
- you're done
- Success (there are now 2 or more shells in the Object Browser) >
- Identify in the Object Browser which object(s) you need. It may be helpful to toggle visibility on and off - most likely, the objects you need are the first one or two.
- Delete all objects you don't need (if the ones you need are the first one or two, click shell 2 or 3 in the Object Browser, scroll to the bottom, shift + click the last shell, Delete)
- 3 possible options:
- Exactly 1 object is remaining >
- you're done
- One necessary object was split (there are now more than 2 objects are in the Object Browser) >
- You probably need to repeat steps 1 and 2 for the original object, or change the object entirely.
- Necessary objects are still separate (there are now exactly 2 objects in the Object Browser) >
- Fill in hollow objects (see step 2)
- Repeat this whole step (starting from 3.1)
- Exactly 1 object is remaining >
- No Multiple Shells Found >
- Success >
Repeat
Repeat steps 1-3 until all objects used in the final merged object have been integrated.
Export
Make any touch ups necessary, likely with select or sculpt to smooth the final object.
Export the one remaining merged object.
File > Export > Save
The example used in this tutorial is still quite detailed and cannot be uploaded directly because of the file size, but you can download the files using this link.
Note on Make Solid Tool
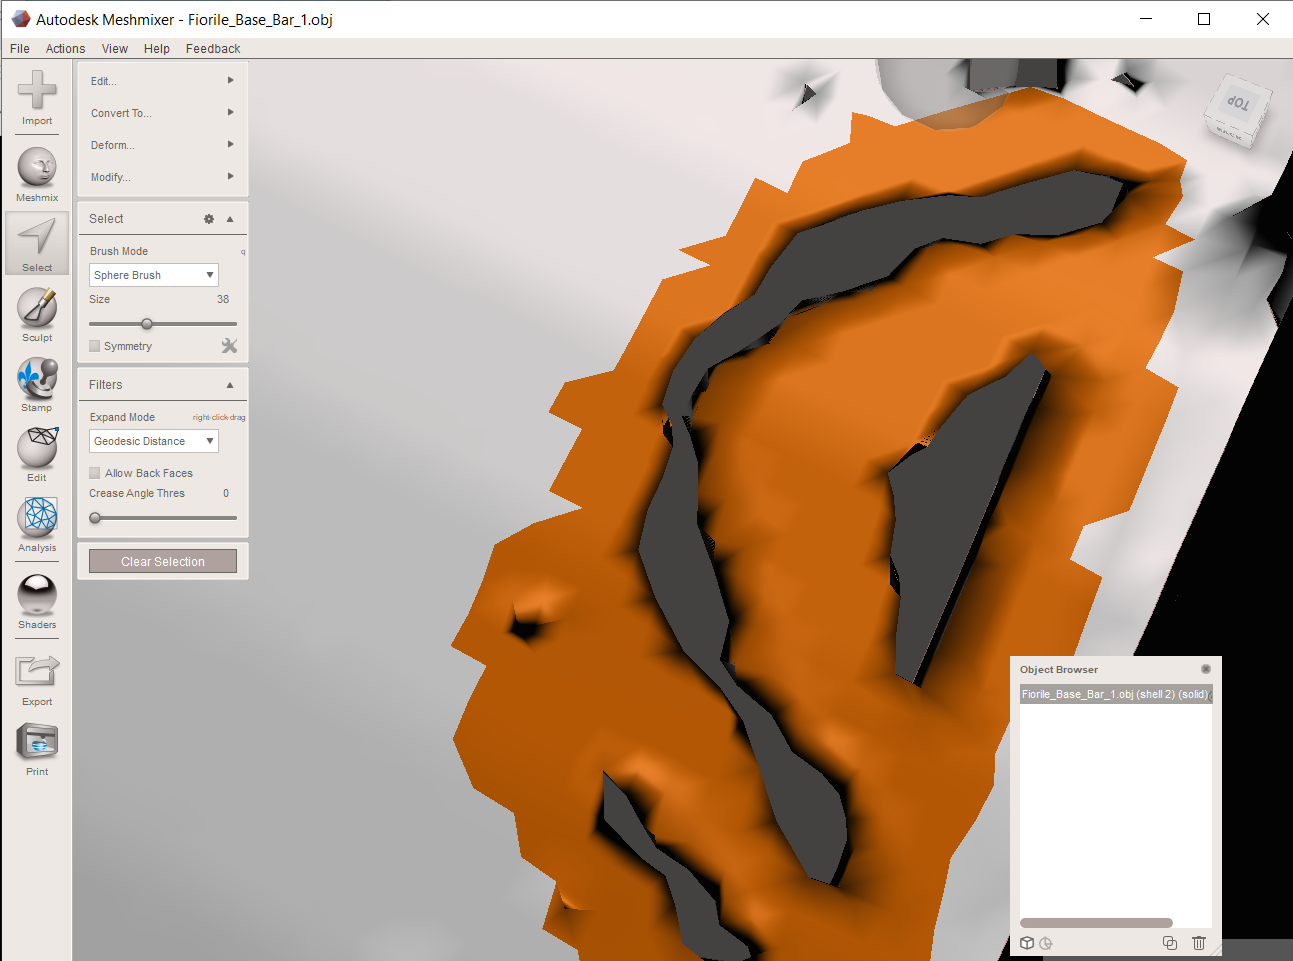

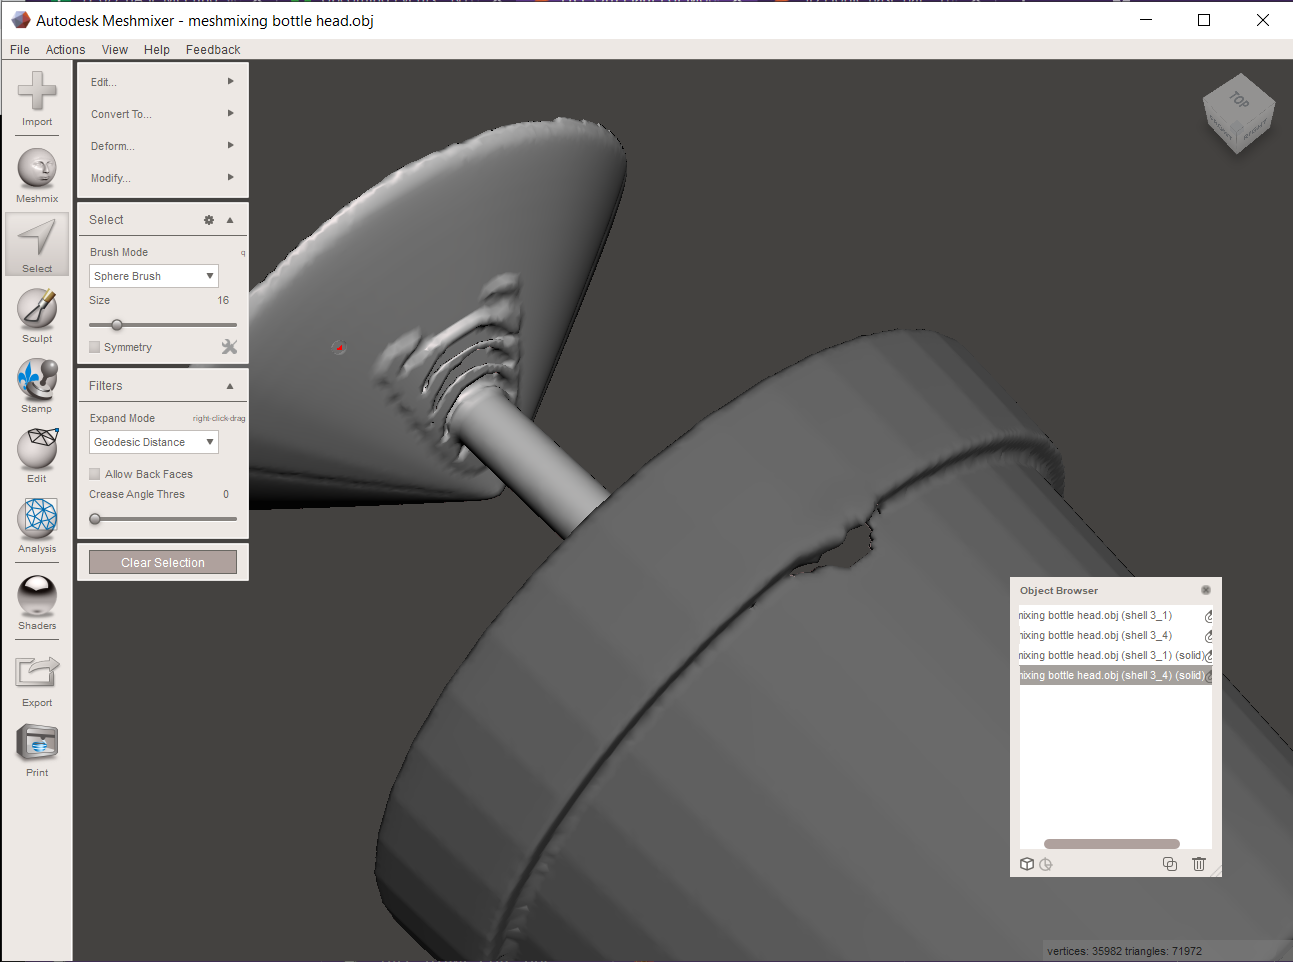
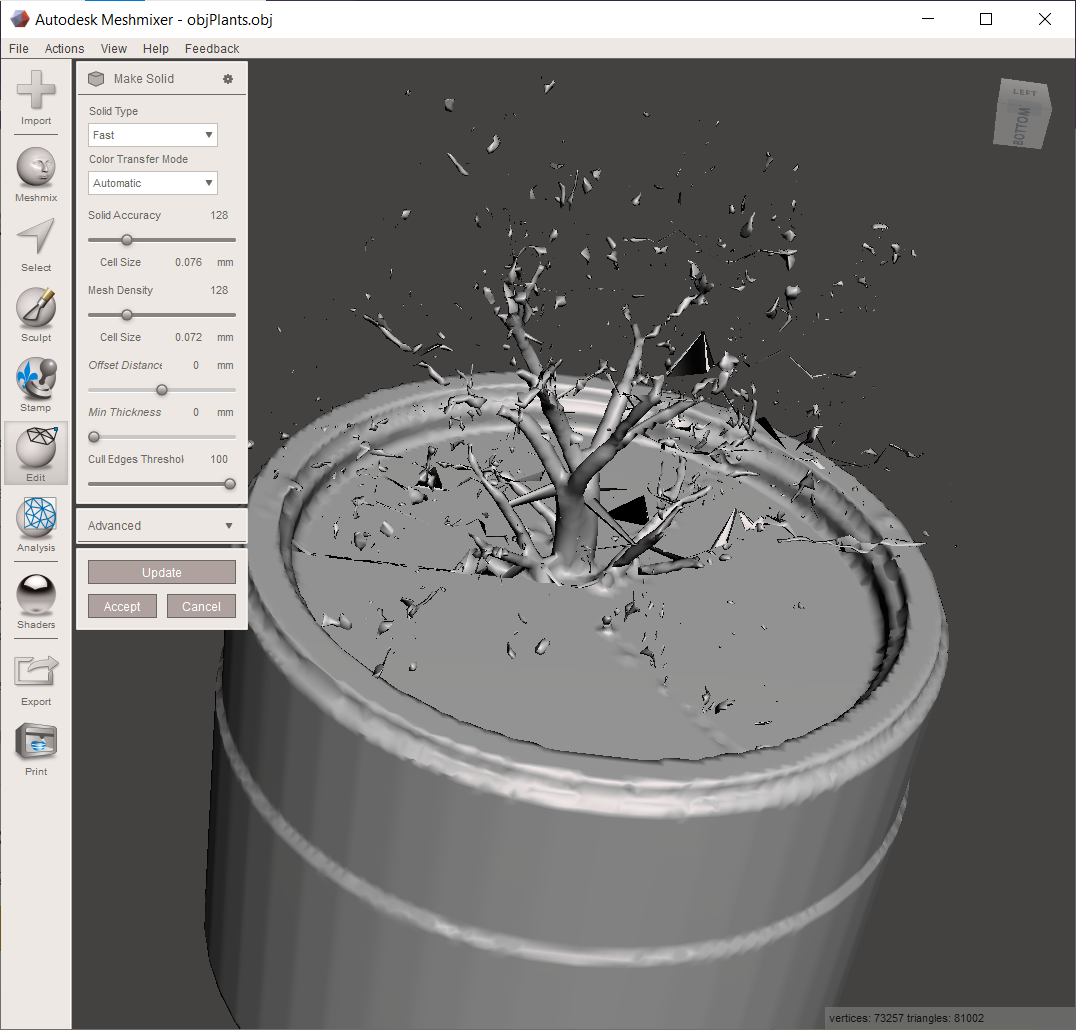
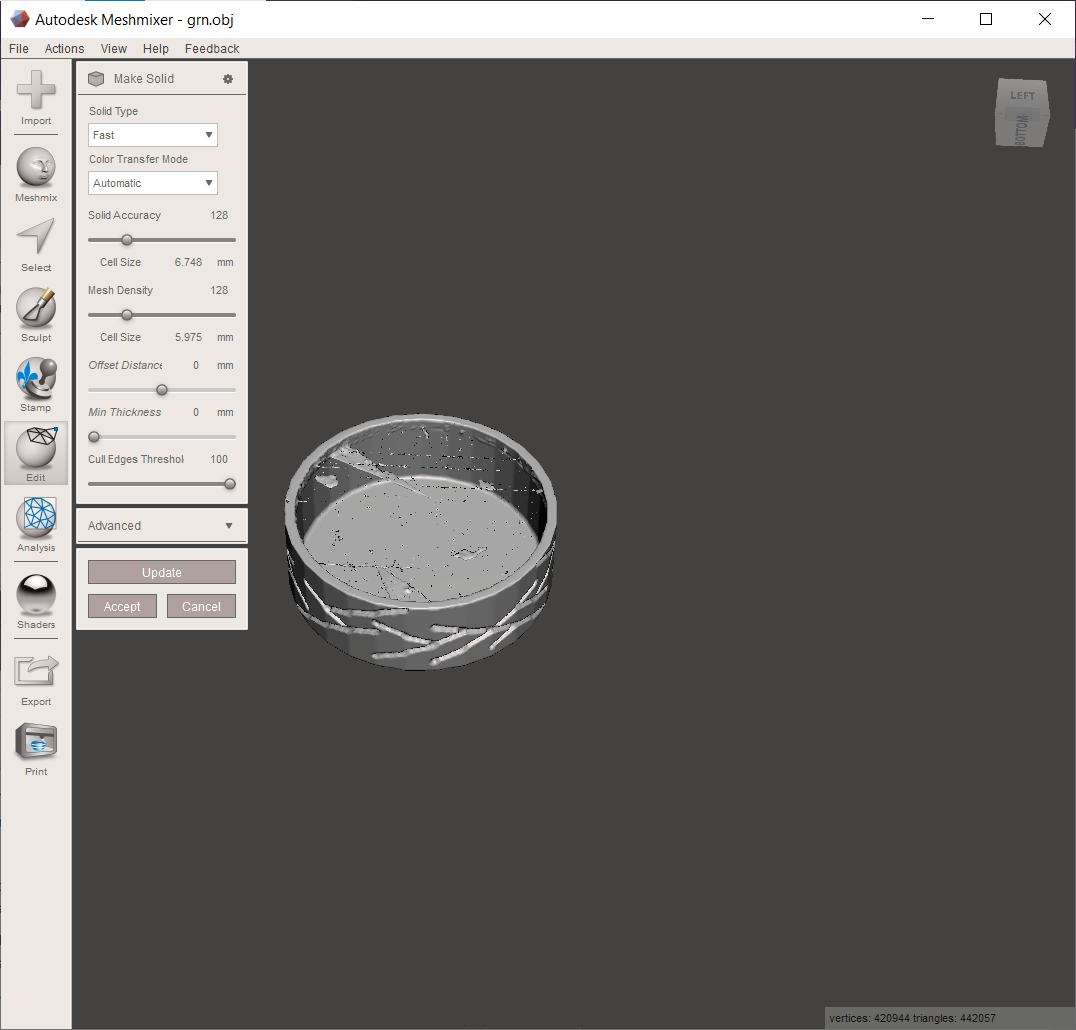
The Make Solid tool which needs to be used in steps 2 and 3 reduces a lot of specificity and detail in meshes.
Sometimes, using the tool on an object may even be impossible, such as when the object is completely planar
Sometimes, the object may be split into different pieces, if certain parts are especially thin.
Sometimes, the object may be thinned out, and for reasons I can't explain, may be inconsistent even if the original object was a consistent thickness, resulting in holes or just complete separation of an object.
With objects that have sizable volume, the Make Solid tool does still reduce specificity, but there's much more leeway with these, and so are much easier to repair.
I've included some images above, of just a few of the models I tried, to explain the issue.