Measuring the IV Curve of Semiconductors With an Arduino
9560 Views, 24 Favorites, 0 Comments
Measuring the IV Curve of Semiconductors With an Arduino
Ohm's law is not valid for semiconductors: the current is not linear to the voltage applied. Light-emitting diodes (LEDs) in particular need a minimum voltage to start giving light, but if a voltage is applied that is 1 Volt higher, it is likely to destroy the device. Therefore, when driving an LED from a voltage source, a series resistor is always applied. The value of the series resistor depends on the voltage source and on the type of LED. In practice, the right value is often found by trial and error: starting from a resistor with a high value, it is replaced by a smaller-value resistor until the brightness seems about right.
To design well a circuit that contains LEDs, it is essential to know the relationship between the voltage (V) applied and the current (I) that runs through the device. This is the IV-curve. It will be in the data sheets, but unlike diodes or transistors, the product name (or number) of LEDs are often not specified, so you may not have access to the data sheet. The IV-curve can be made by hand by using one or two multimeters, a variable resistor, and a lot of stamina. Wouldn't it be nice to produce such a curve automatically?
Here follow the instructions to produce these curves in a few seconds, using an Arduino, a few common passive components and a computer to display the results.
The picture above shows the IV curves for some LEDs and one diode. From left to right:
- 1N4148 small signal diode (grey)
- infrared LED (dark red)
- red LED (red)
- orange LED (orange)
- green LED (green)
- white LED (white)
- blue LED (blue)
Note how not only the minimal voltage differs from 0.5V for the diode to 2.6V for the blue and white LED, but that there is quite some variation in the slope: the voltage on the IR LED rises only by 0.2V going from 0 current to 10mA, while the voltage on the green LED increases by 0.8V for the same rise in current.
Downloads
Working Principle

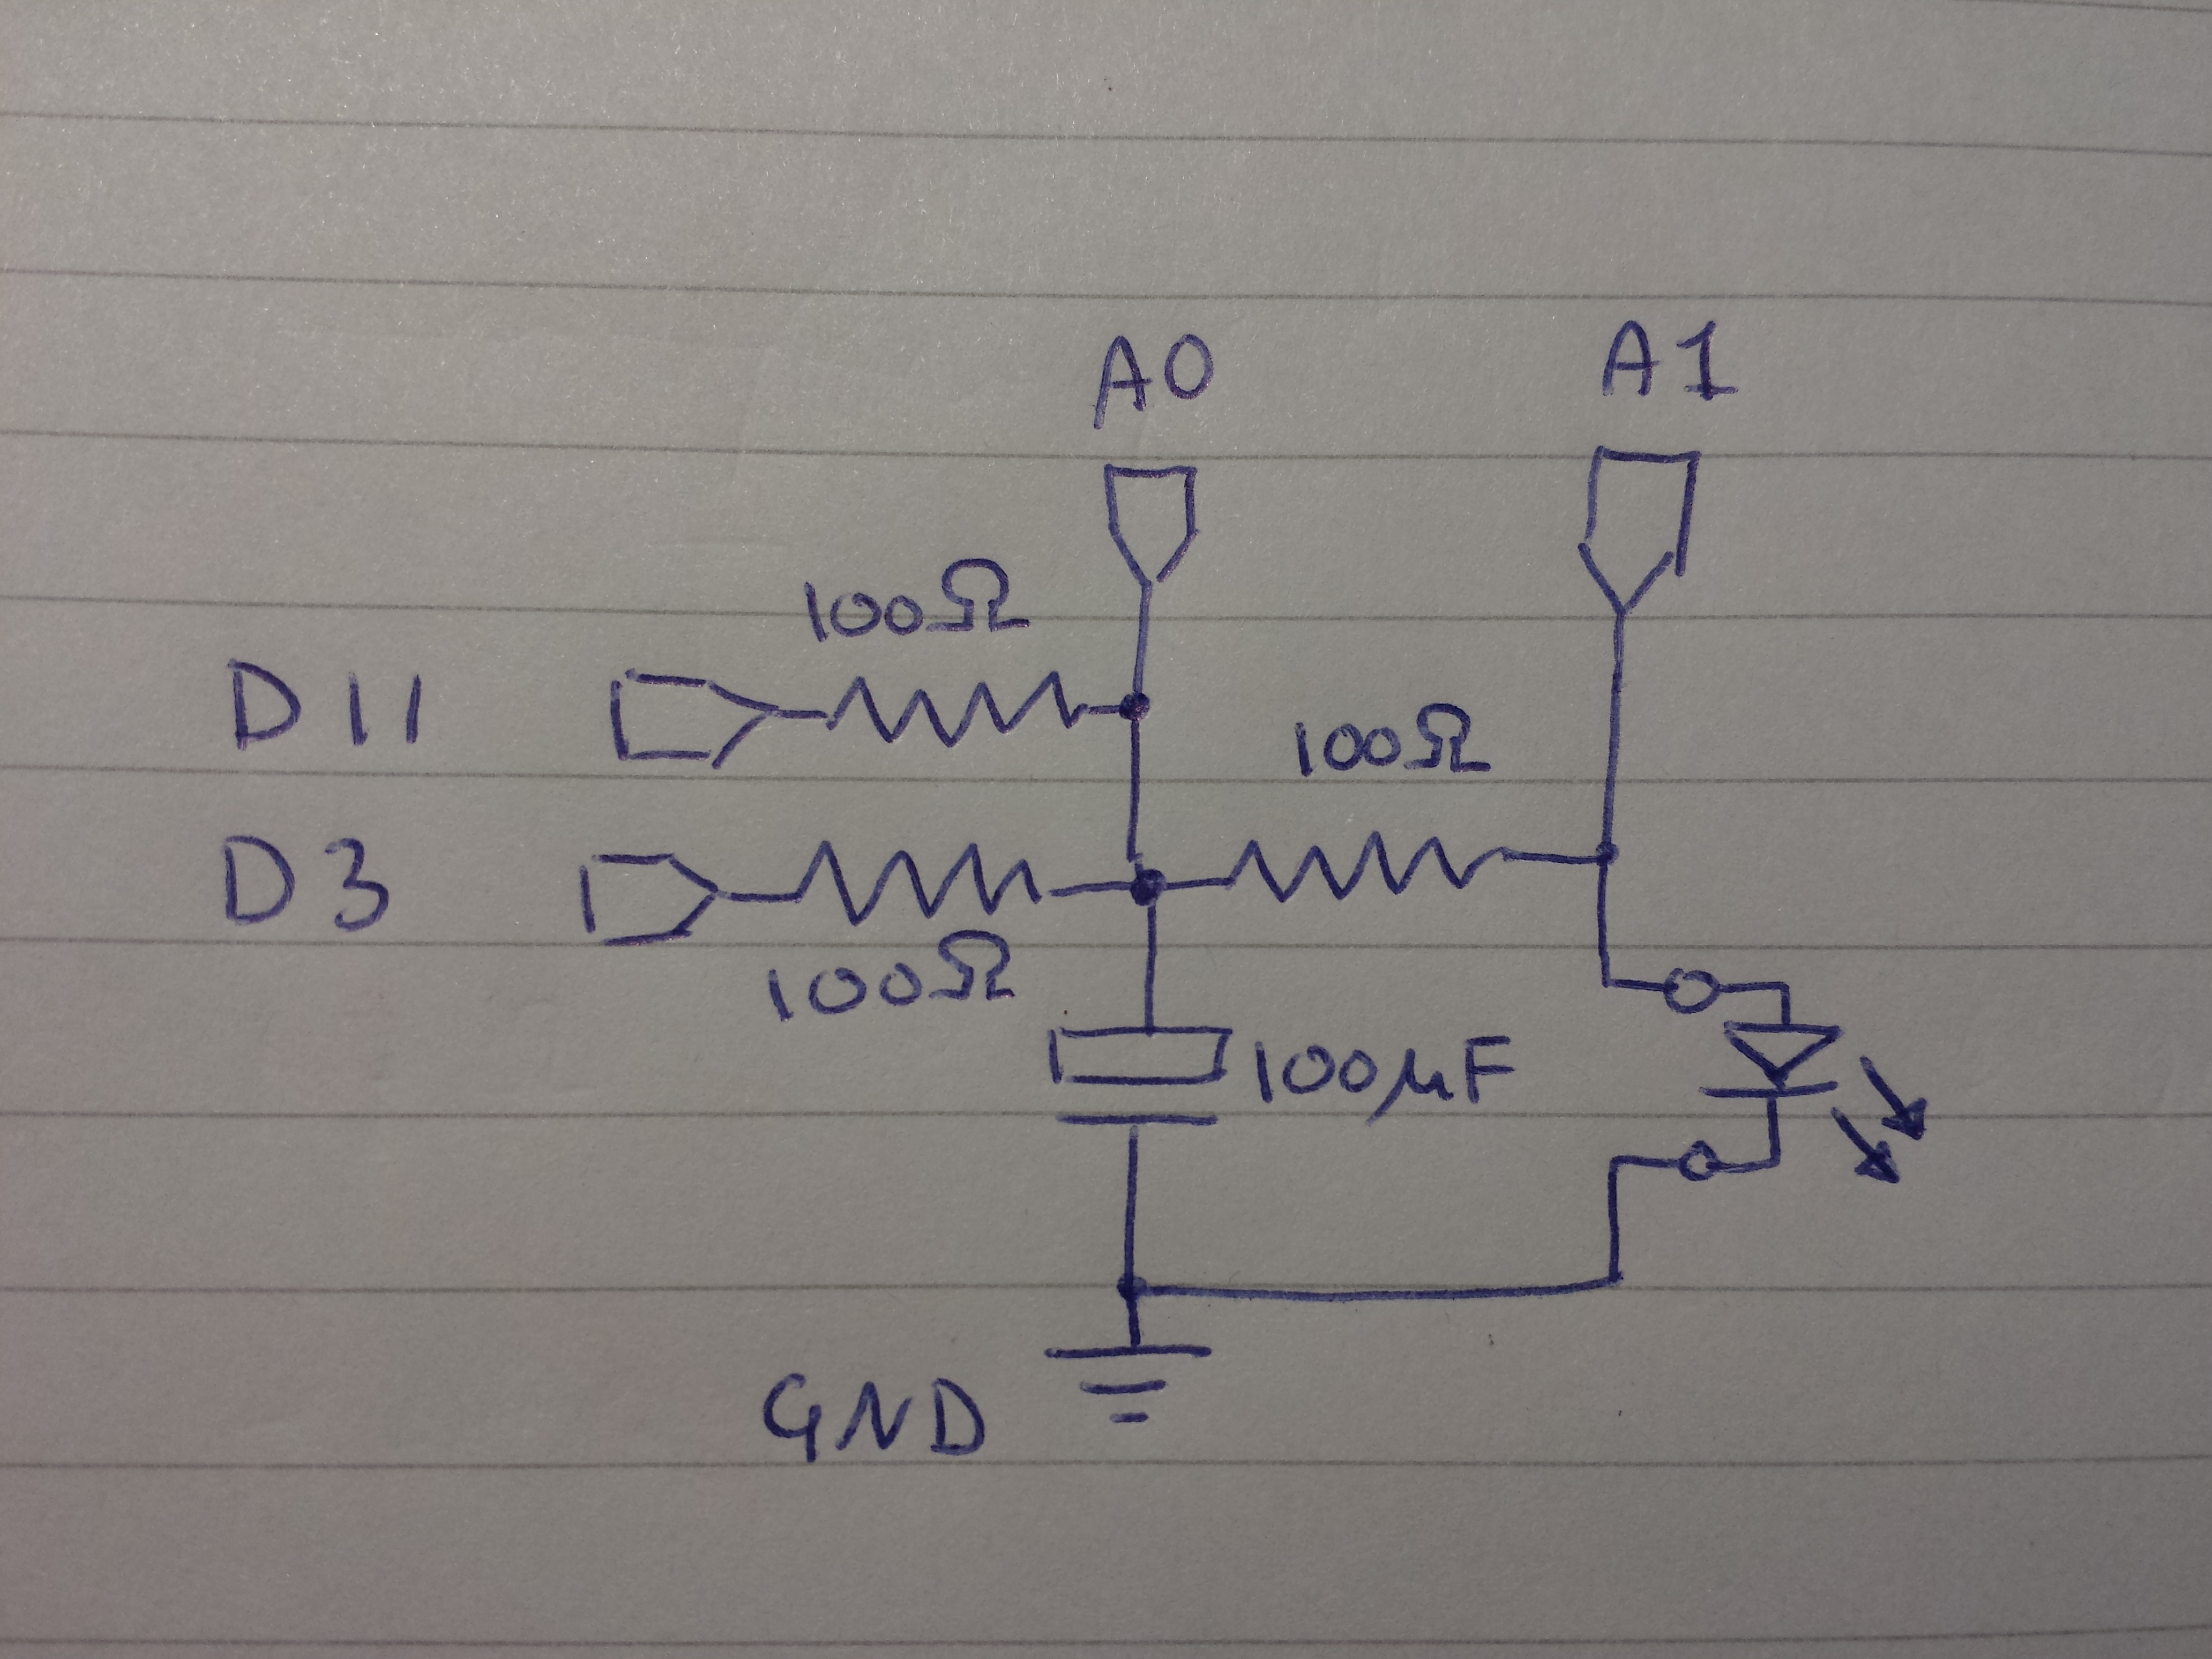
The Arduino does not have a digital-to-analog converter (DAC). Normally, the intensity of LEDs is regulated with pulse-width modulation (PWM). However, for the IV-curve, we really need to apply a constant analog voltage and current to the LED. This can be done by filtering the PWM output with a low-pass resistor-capacitor (RC) filter.
To get a ripple-free voltage with a current that is sufficient to light up an LED, both outputs of Arduino timer2 are used, and no prescale is applied, resulting in a 64kHz PWM signal. A 100Ohm resistor and 100muF capacitor correspond to a 10ms time constant so the ripple will be less than 1%.
The device under study is connected in series with a 100Ohm resistor to measure the current. The analog input A0 measures the output of the RC filter, A1 the voltage on the device. The current can then be measured as I=(A0-A1)/R.
The PWM duty cycle is increased from 0 to 1 in 256 steps and at each step I and V are measured. If I exceeds the maximum, the measurement is interrupted. The I,V points together give the shape of the IV curve.
The Hardware

The hardware
Required components:
- Arduino or compatible with prototype shield
- 100muF electrolytic capacitor
- 3x 100Ohm resistor
- LED or other semiconductor to test
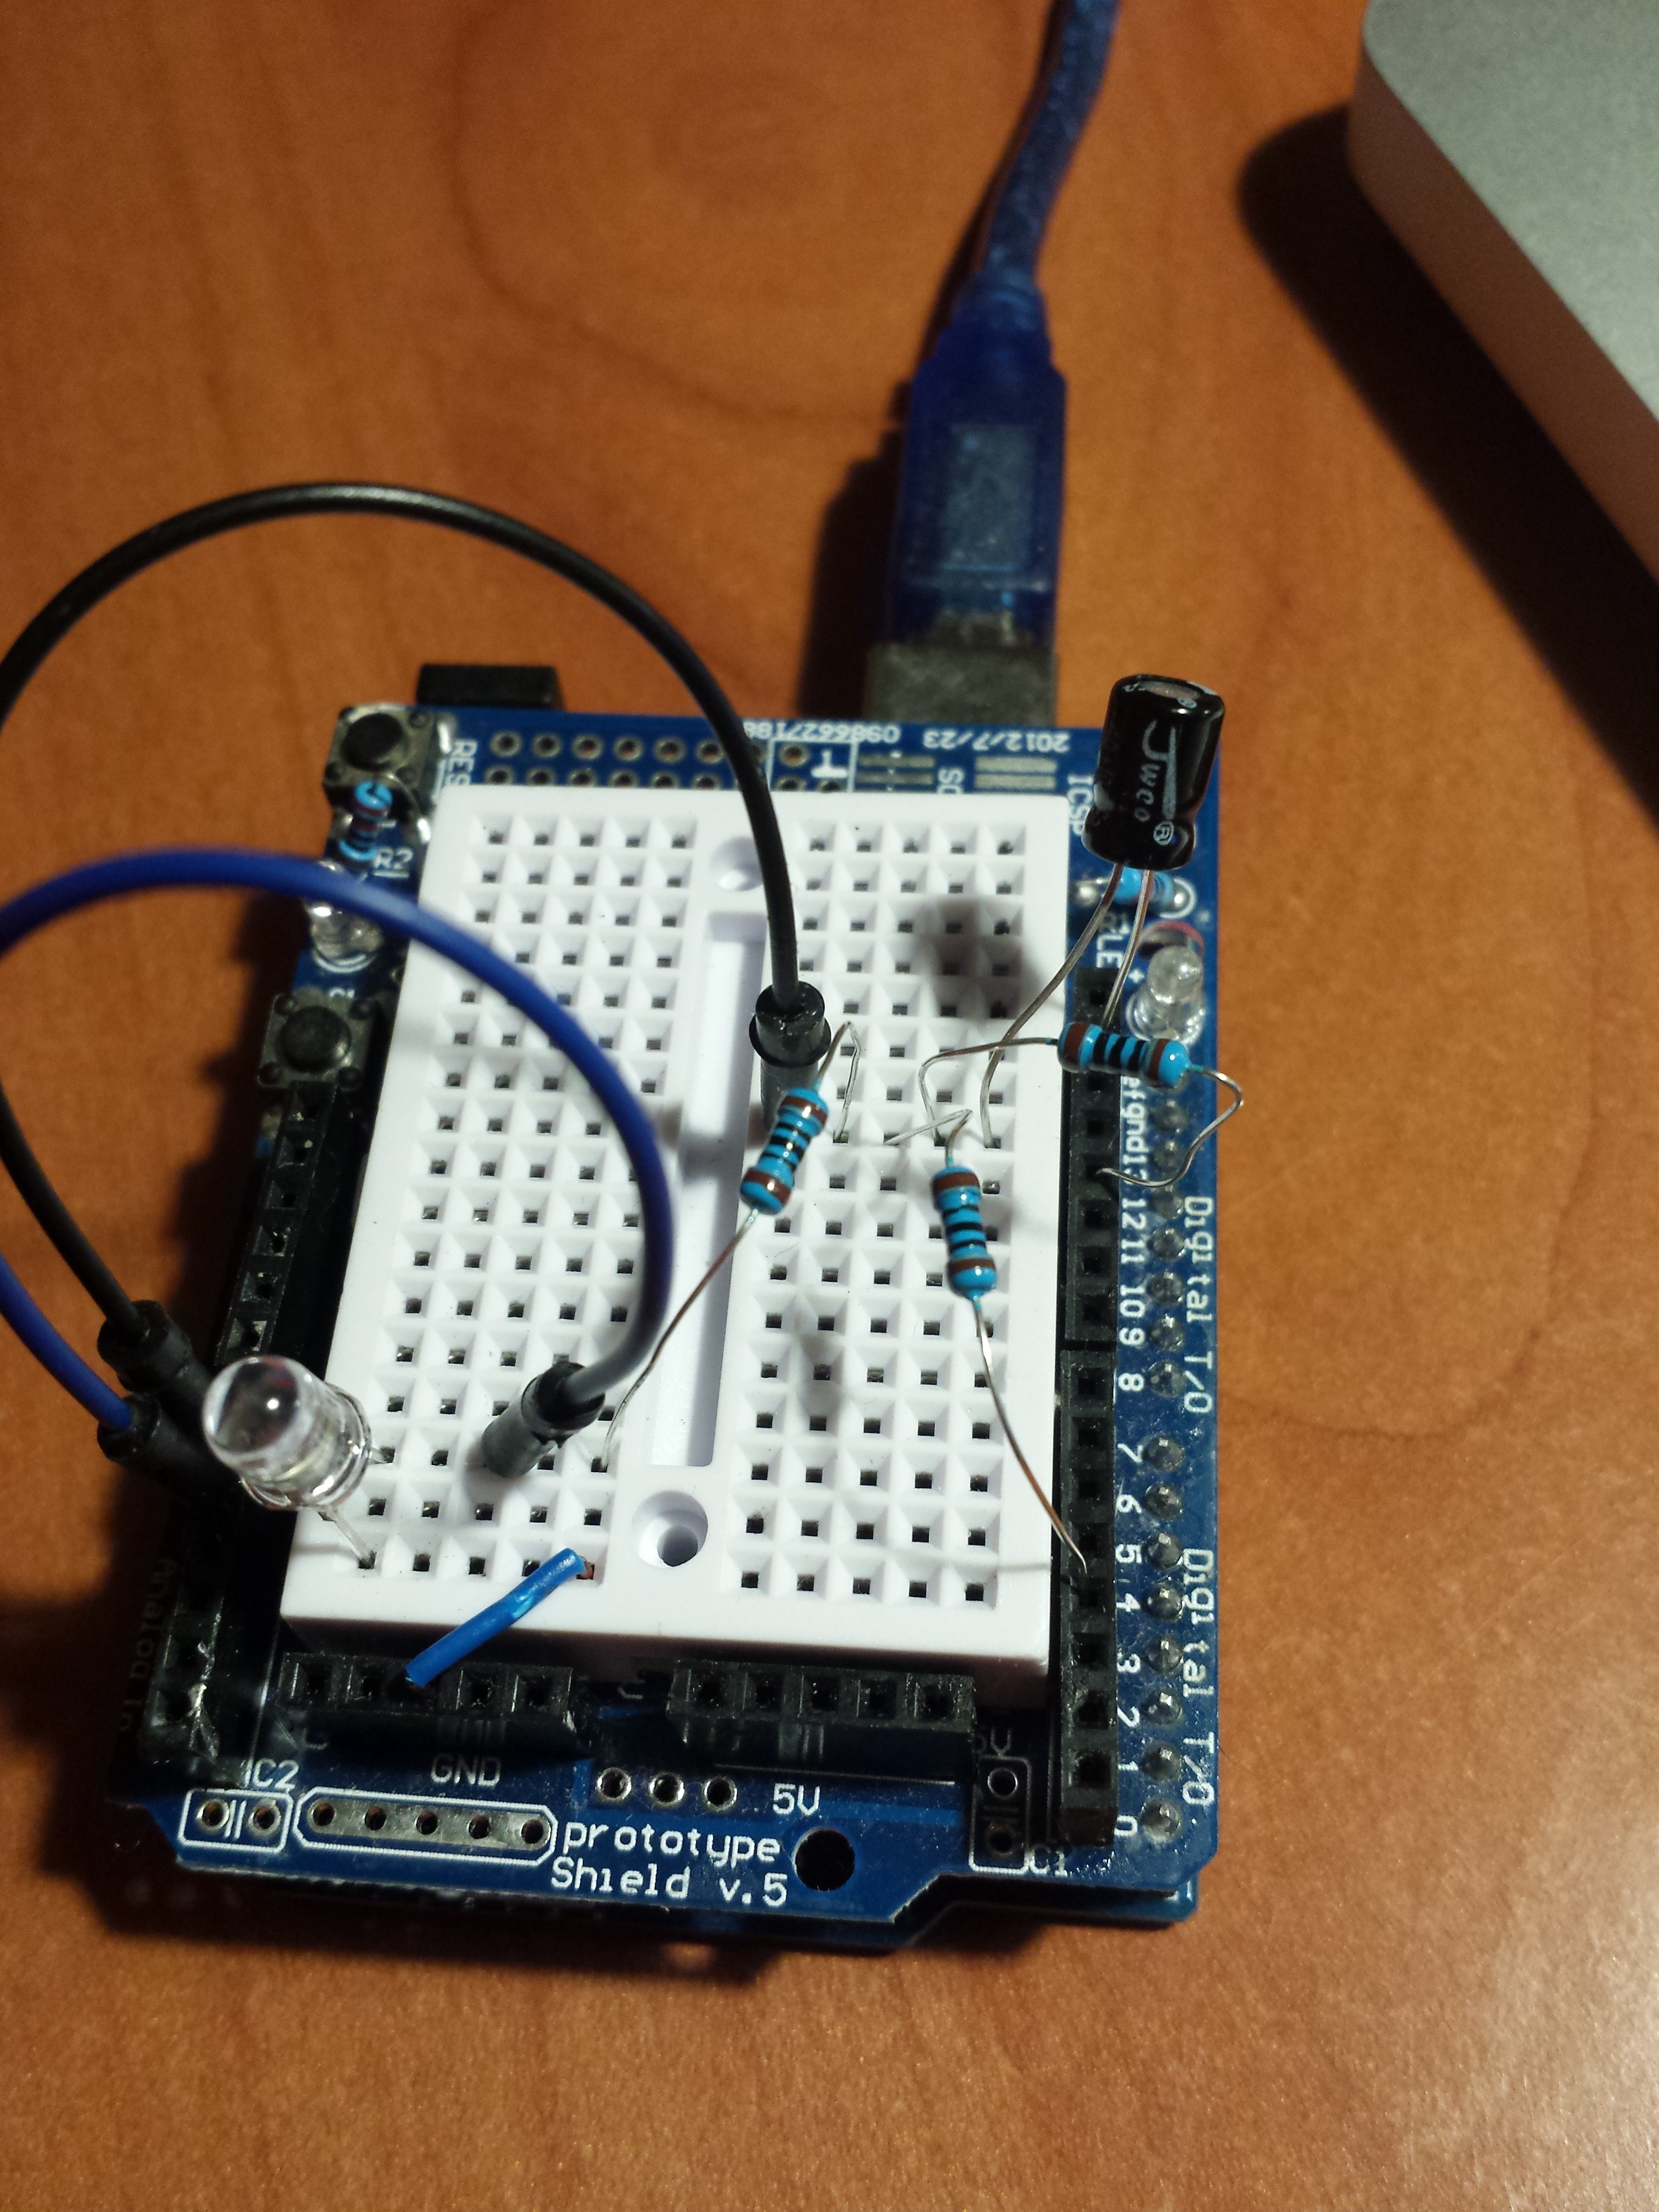
Connect the components according to the scheme on the previous step, or according to the picture:
- connect the capacitor between ground (-) and the breadboard (+)
- connect 100 Ohm resistors from D11 and D3 to the capacitor +
- connect the LED between ground (-) and the breadboard (+)
- connect another 100 Ohm resistor from the capacitor + to the LED +
The Software
The Arduino runs some code (IVcurve_v1_0.ino) to set the PWM output on timer 2, wait for the analog voltage to settle, measure the analog voltages on A0 and A1, and send the results to the computer. The computer runs a program (IVcurve_v1_0.pde) under the open-source 'processing' package. It varies the PWM duty cycle from zero to one in 256 steps and plots the results.
How to Use
Download the code for the Arduino and upload it to the Arduino. Start the processing script. By default the maximum current is 10mA. Reduce this if you have a particularly tiny LED. Click on one of the colours on the top right. Numbers with measurement results will start to appear in the processing log window. After a few seconds the LED will start to glow, gradually increasing brightness. After about ten seconds the LED goes off and the points of the IV curve appear on screen in the colour that had been selected before.
To get overlaid curves, the device can be replaced by another and a new measurement started. When the vertical range is changed or reclicked, the screen is cleared.
The screenshot above correspond to the three channels (red, blue and green) of an RGB LED.