Mathic: You Really Think You Know Math?
by Blue_chip in Craft > Cardboard
452 Views, 4 Favorites, 0 Comments
Mathic: You Really Think You Know Math?

Math + Magic = Mathic.
While maths is too broad to make a puzzle that utilizes all its core principles, a certain area can be focused on to create brain teasers.
One of such brain teasers is the Mathic Puzzle.
Here, you are required to rearrange the puzzle pieces inside the puzzle board in order to "magically create two extra square holes for the two square (red) pieces to comfortably fit in.
The solution to this requires both logic and some basic math knowledge.
Note: To make this, you're required to know how to create perpendicular/right-angled lines with a set square (and a ruler).
NOTE Solution is present in step 7, the last step, so don't scroll down !
Supplies
Corrugated cardboard box.
A pair of scissors.
A ruler.
A set square.
A blade/ scissors.
An eraser.
A pencil.
Super glue.
Higher exercise notebook.
Red marker/pen.
Cutting the "canvas" From the Cardboard.


Take the cardboard box and cut along the edges to get an opened flat surface, one large enough to accomodate a higher exercise note
Put a higher exercise note on the cardboard surface and trace out its edges with a pencil on the cardboard. Take a scissors and cut out the cardboard piece.
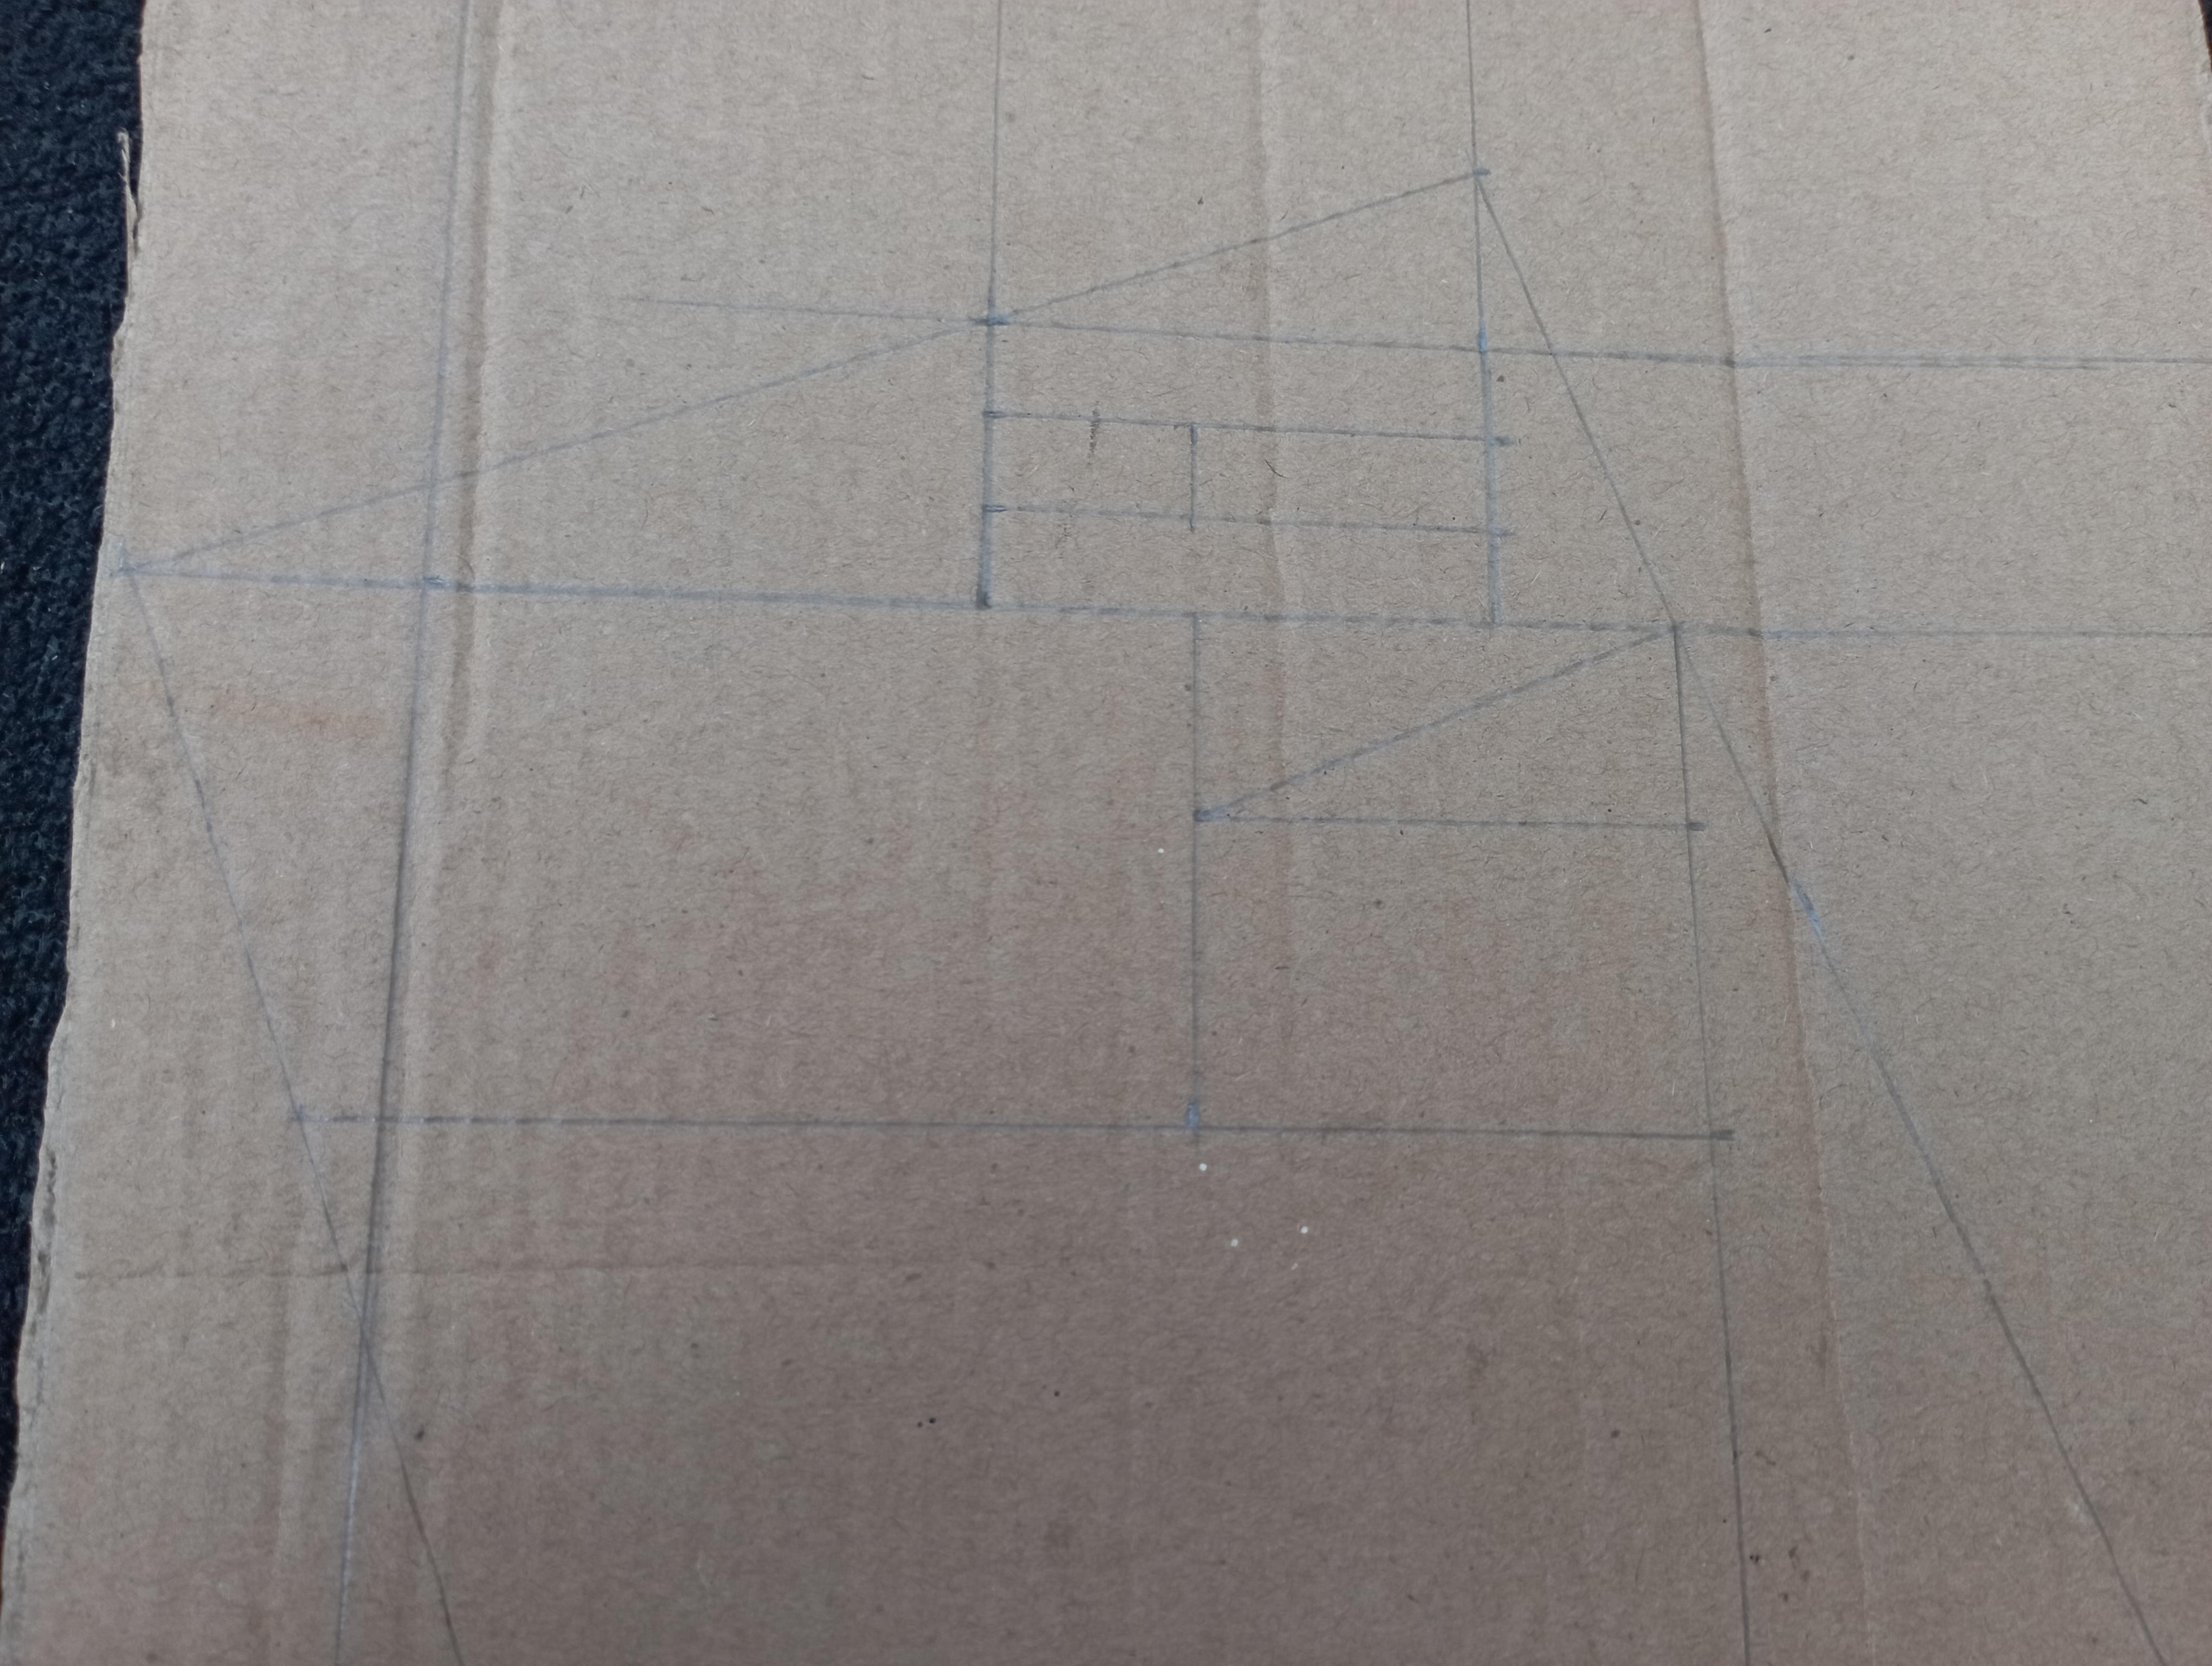
Drawing the First Triangle.


Take a long ruler and rule a straight line margin at one side of the cardboard: Measure 11 cm from bottom up along the drawn margin of the cardboard piece and mark it. Now we have to draw a straight line /jb/ at right angle from the 11cm marked point. Get your set square and ruler to rule a straight line from the extreme left end /j/ of the cardboard through the marked point to the other right hand end /b/.
From the extreme left end /j/, measure 8cm towards the right and mark it /d/. Set the set square and ruler to draw a vertical line /cd/ up to 12cm extending out of point /c/ in length at right angle through the 8cm mark/d/, measure 3cm along the vertical line and mark it /cd/. Now, from the 3cm marks, rule a line /ch/ parallel to the first horizontal line.
Measure 5cm along the horizontal line and mark it /cf/. Set your setsquare and rule a vertical line up from the 5cm mark /f/, rule it as long as possible, measure 2 cm along the vertical line /fa/, mark it, then draw a line with your ruler from the marked point to the top/apex of the first triangle /ac/.
Now we have two triangles, one below /jcd/ and one on top of it /caf/, but if we look closely, we see a third triangle /jab/ formed by the two triangles and the rectangle /cfed/ within them. The height of the rectangle /cfed/ is 3cm, divide it into three parts of 1cm each, on both sides of the rectangle. Now rule a line across the marked points through both sides to form 3 equal smaller rectangle within the one big rectangle.
Set your set square and ruler to draw a line at right angle through the apex point /a/ of the upper smaller triangle. Again, set your setsquare and ruler to draw a line at right angle through the marked end /j/ of the bigger triangle at the extreme left end.
Drawing the Second Triangle.


Set your set square and ruler to draw a line /br/ at right angle to the base of the first triangle /jab/ through the point of intersection /b/ of the top line and the extended baseline of the triangle /jab/. Measure and mark 5cm /br/ along the drawn line. Now, set your set square and ruler to rule an horizontal line /qr/ at right angle through the 5cm mark to reach the baseline /CD/(step 5) of the puzzle rectangle. If measured, it should be 13cm. Measure 5cm from the right and mark it /rt/, draw a right angled line through the point marked /t/ up to the base of the upper triangle /jab/. Along the two verticale lines /br/ and /st/, measure 2cm /bu/ from the base of the upper triangle /sbu/, rule a line through it. Now rule a straight line from the point /b/ to /s/, then from /s/ to /q/. Divide the rectangle D into 3 equal divisions of 1cm height, mach it and rule it.
Measure 13cm along line /ai/ (step 2) and line/ jk/ and mark them, rule a straight line /BD/ (step 5) through both marks. Now, all we need is the two big triangles.
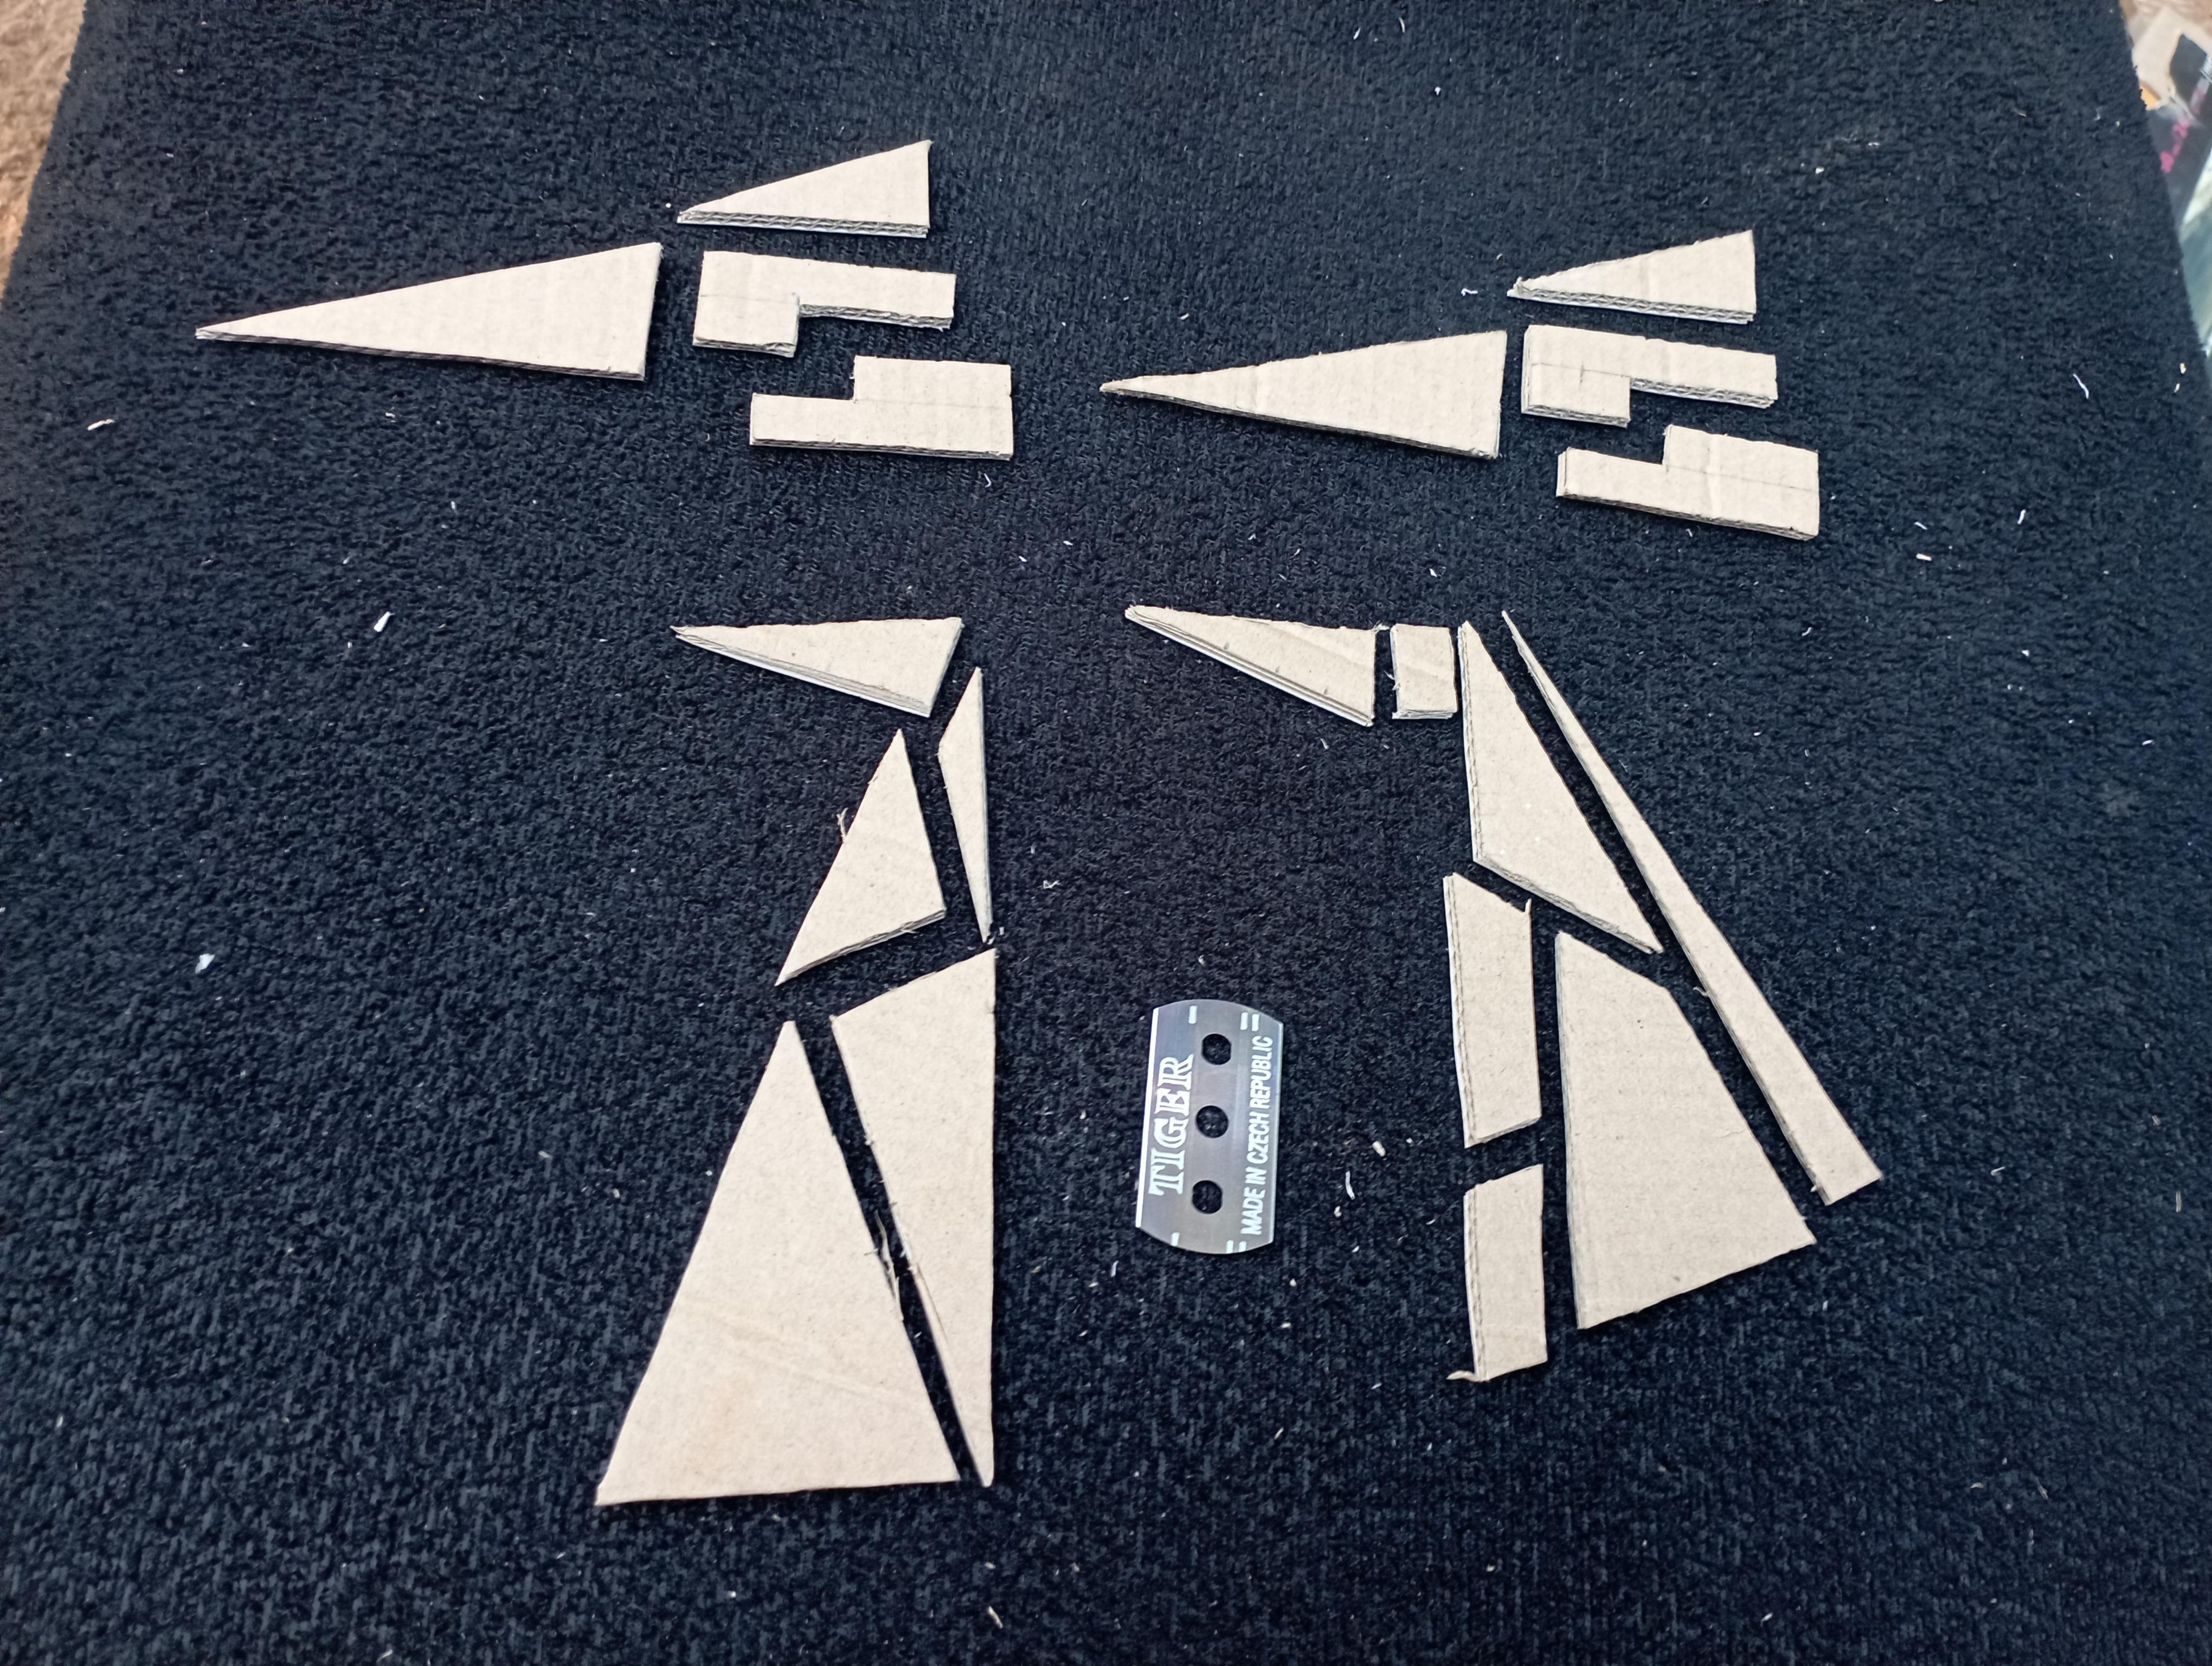
Dividing the Spaces


Cutting the Pieces.


Making the Puzzle Board and the Two Magic Squares.


Now, knowing the length and height of the triom rectangle is 11cm and 13cm respectively, add 2.2cm to the heigth to make it 15.2cm and 2cm to the length to make it 13cm.
Cut out a rectangular piece of cardboard of dimension 15.2cm (Height) by 13cm (Breadth). Draw a margin of 1cm at each of the sides.
Cut two cardboard pieces of 15.2 cm by 1cm and two other pieces of 11cm by 1cm.
Glee the cardboard pieces of 1cm width to the sides of the rectangle piece WX. Now arrange the puzzle pieces inside to fit like it was before cuttng it into pieces.
Note: There would be a little space on top and bottom due to the additional 2mm/0.2cm added to the height
Now cut two cardboard preces of side 1cm by 1cm, you might want to colour it differently, I used a red pen to colour the two squares red.
As shown in picture 7, find a way to re-arrange the puzzle pieces to allow the two 1cm squares to comfortably fit into the puzzle board.
Challenge Yourself!


Solution.


