Mastering STM32CubeIDE: a Step-by-Step Guide to Activating the On-Board LED of the STM32 Black Pill
by Arshjottt in Circuits > Microcontrollers
118 Views, 2 Favorites, 0 Comments
Mastering STM32CubeIDE: a Step-by-Step Guide to Activating the On-Board LED of the STM32 Black Pill

Welcome to our technical tutorial on harnessing the capabilities of STM32CubeIDE to control the on-board LED of the STM32 Black Pill microcontroller. This guide is meticulously crafted to provide professionals with a clear and concise walkthrough for engaging the LED, demonstrating the STM32 Black Pill's functionalities and the versatility of STM32CubeIDE. As we explore the essentials of embedded development, you will learn to configure your environment, understand the Black Pill's hardware specifics, and write effective code to manage the LED. This foundational exercise is not only crucial for proficiency in embedded systems but also serves as a stepping stone for more advanced projects. Join us as we illuminate the principles of microcontroller programming with precision and professionalism.
Supplies
To commence with the embedded programming, the following equipment and software installations are essential:
1. A laptop or desktop computer equipped with STM32CubeIDE and STM32CubeProgrammer.
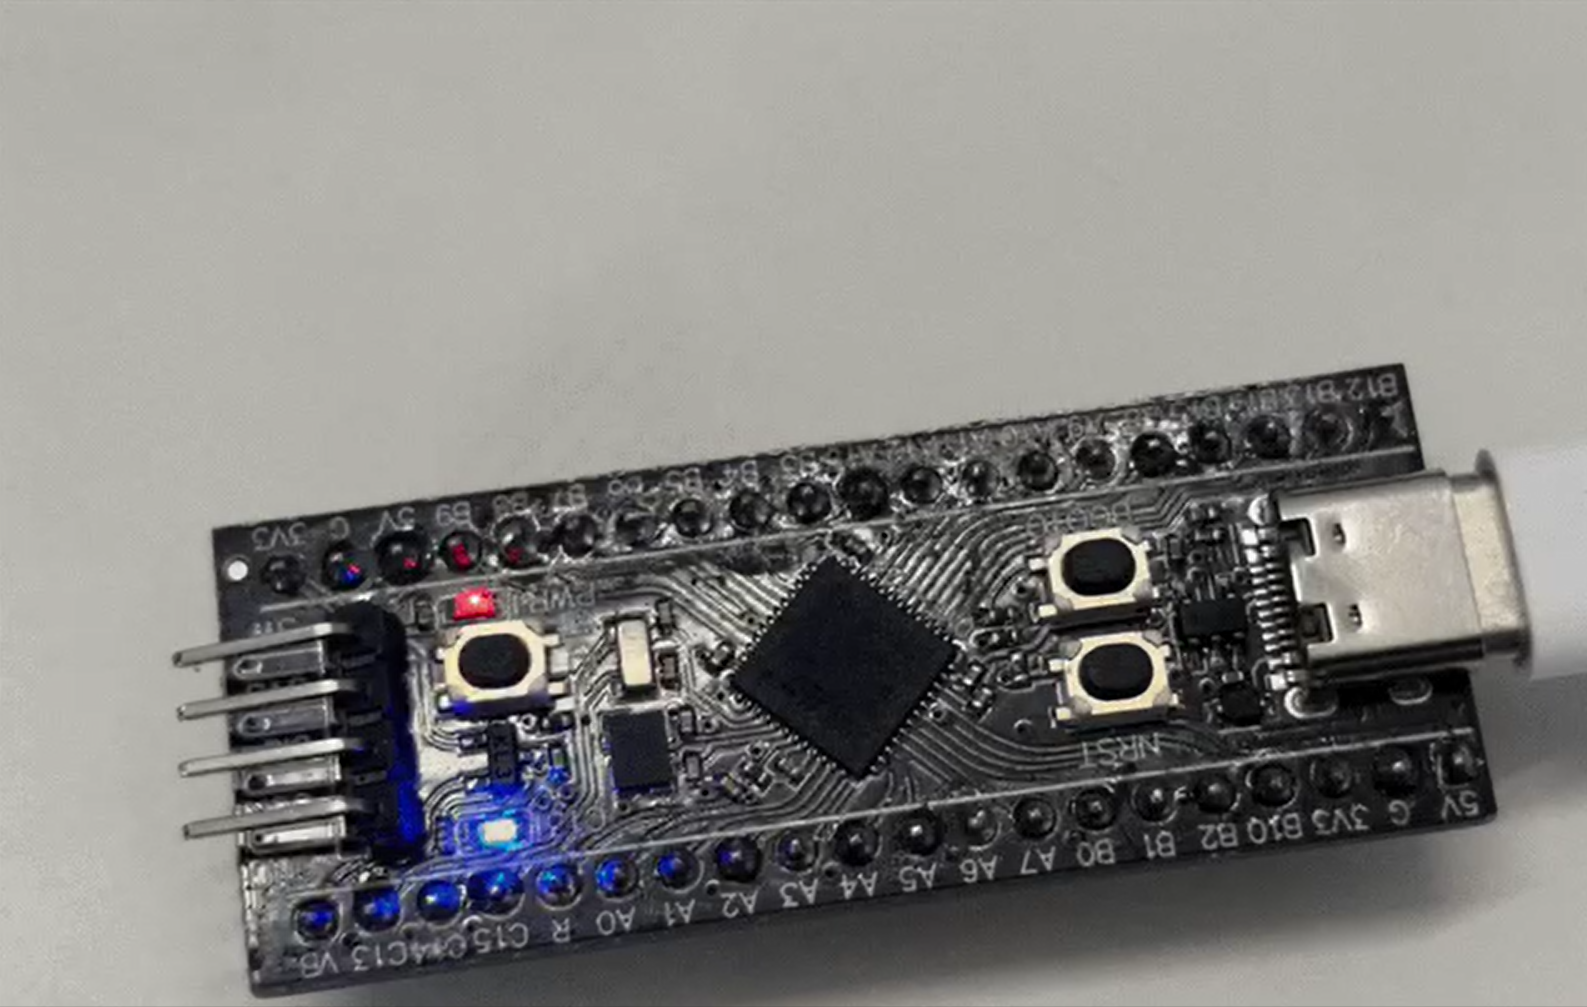
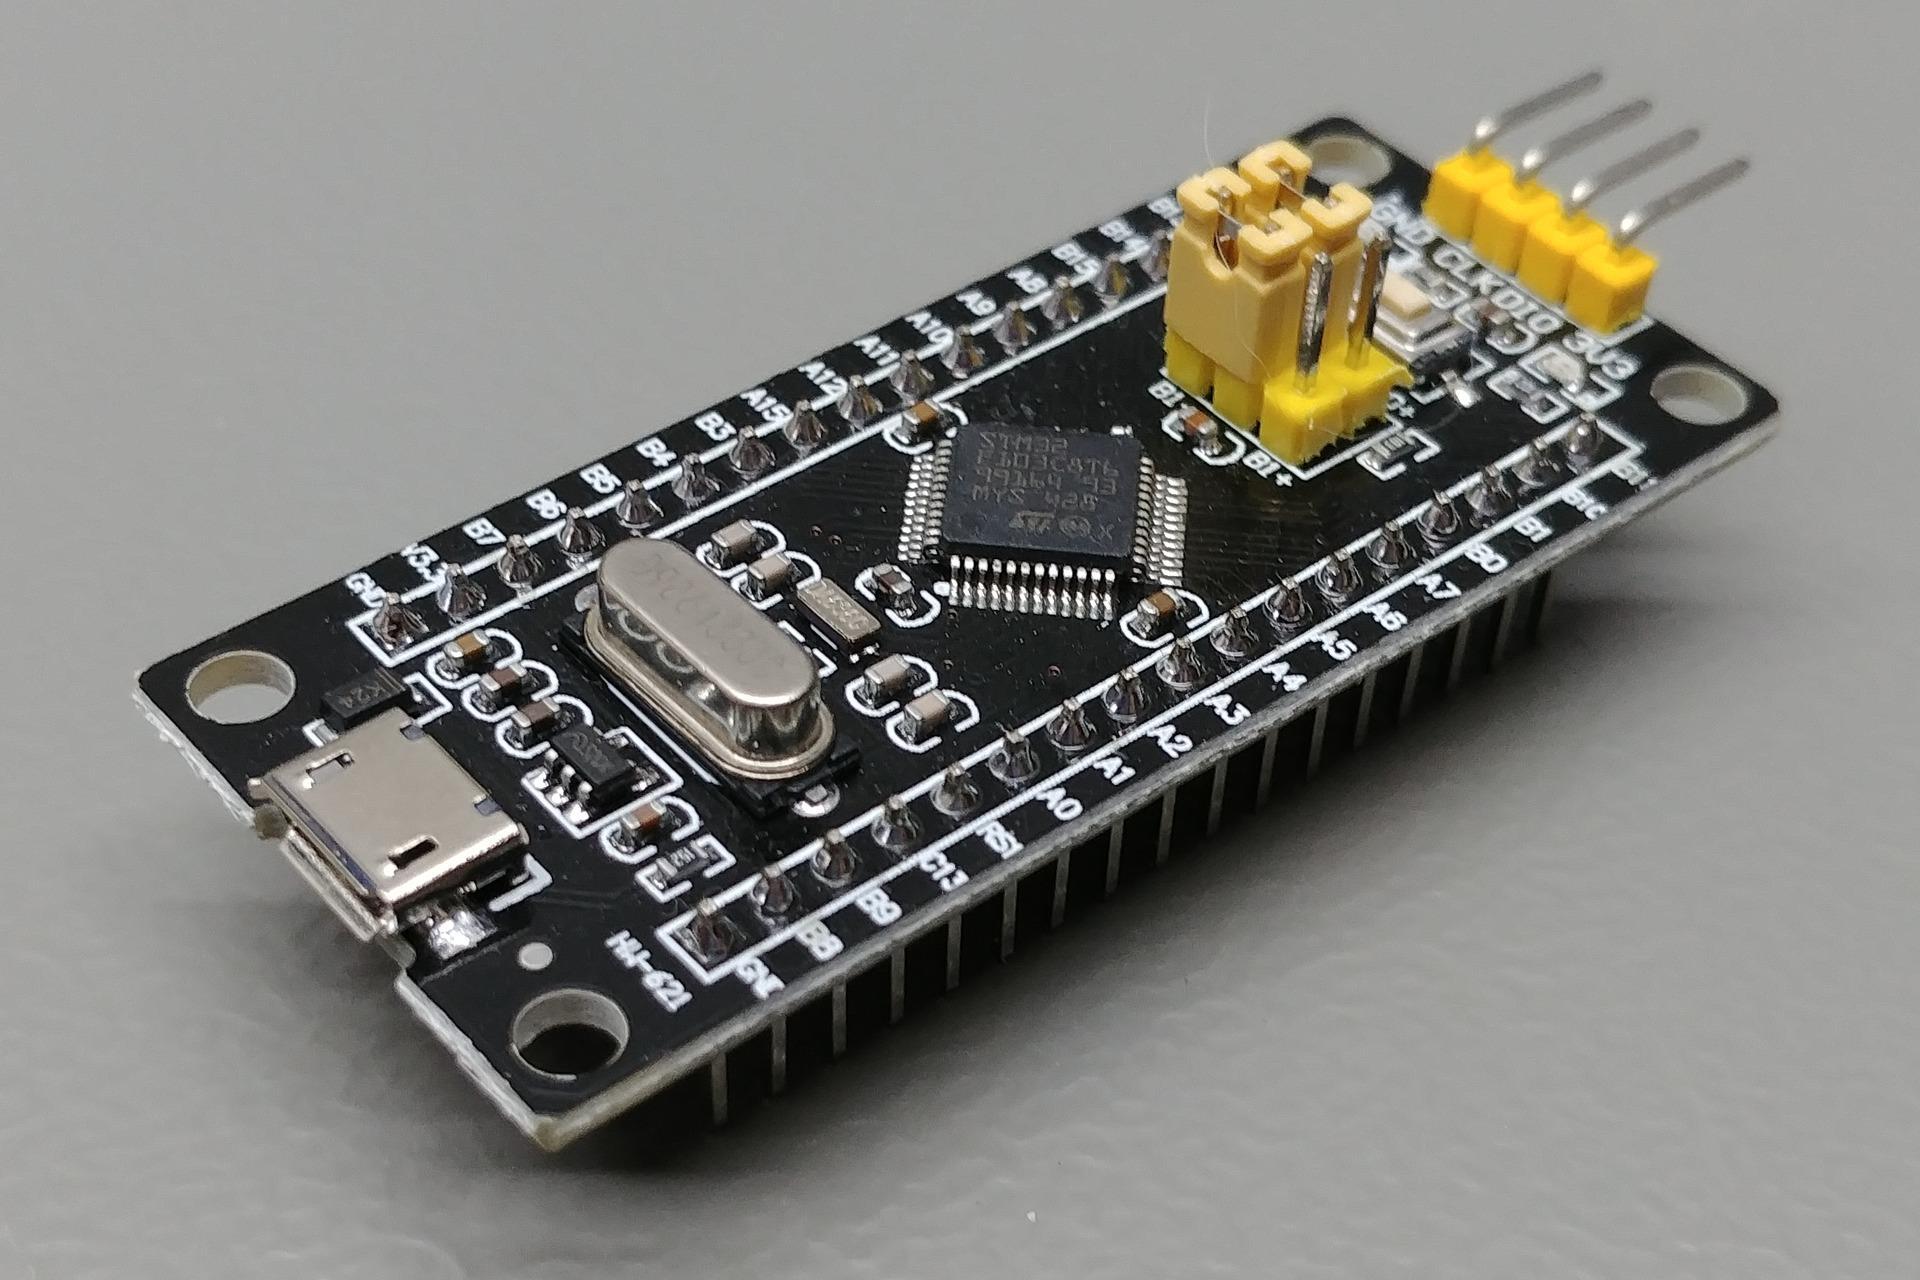
2. An STM32 Black Pill development board.
3. A compatible USB cable for connection and programming purposes.
Please ensure that these prerequisites are met prior to beginning the tutorial to facilitate a smooth and efficient programming experience.
Downloads
Making a New Project File in STM32CubeIDE
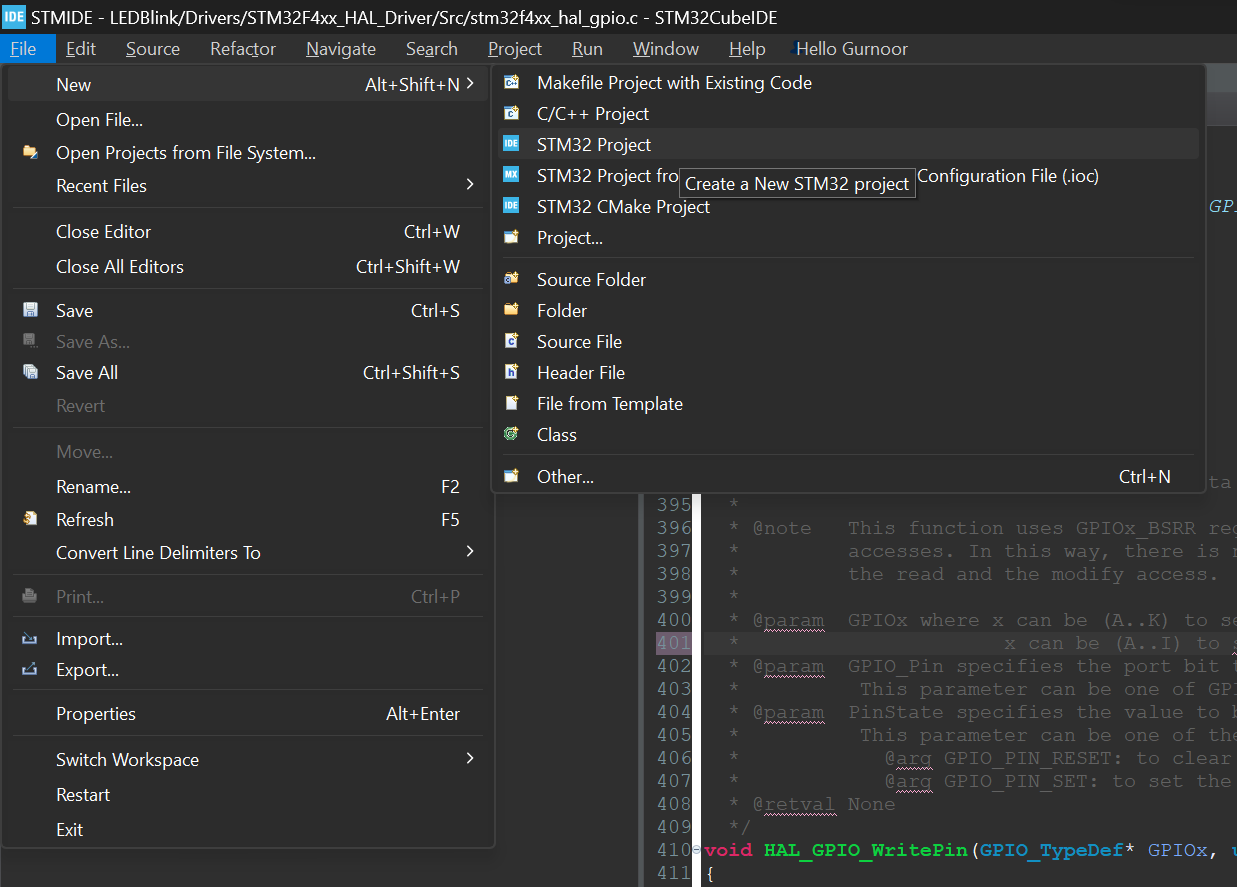
GOTO---->> File>New>STM32 Project
ADD Configurations for Your STM Board
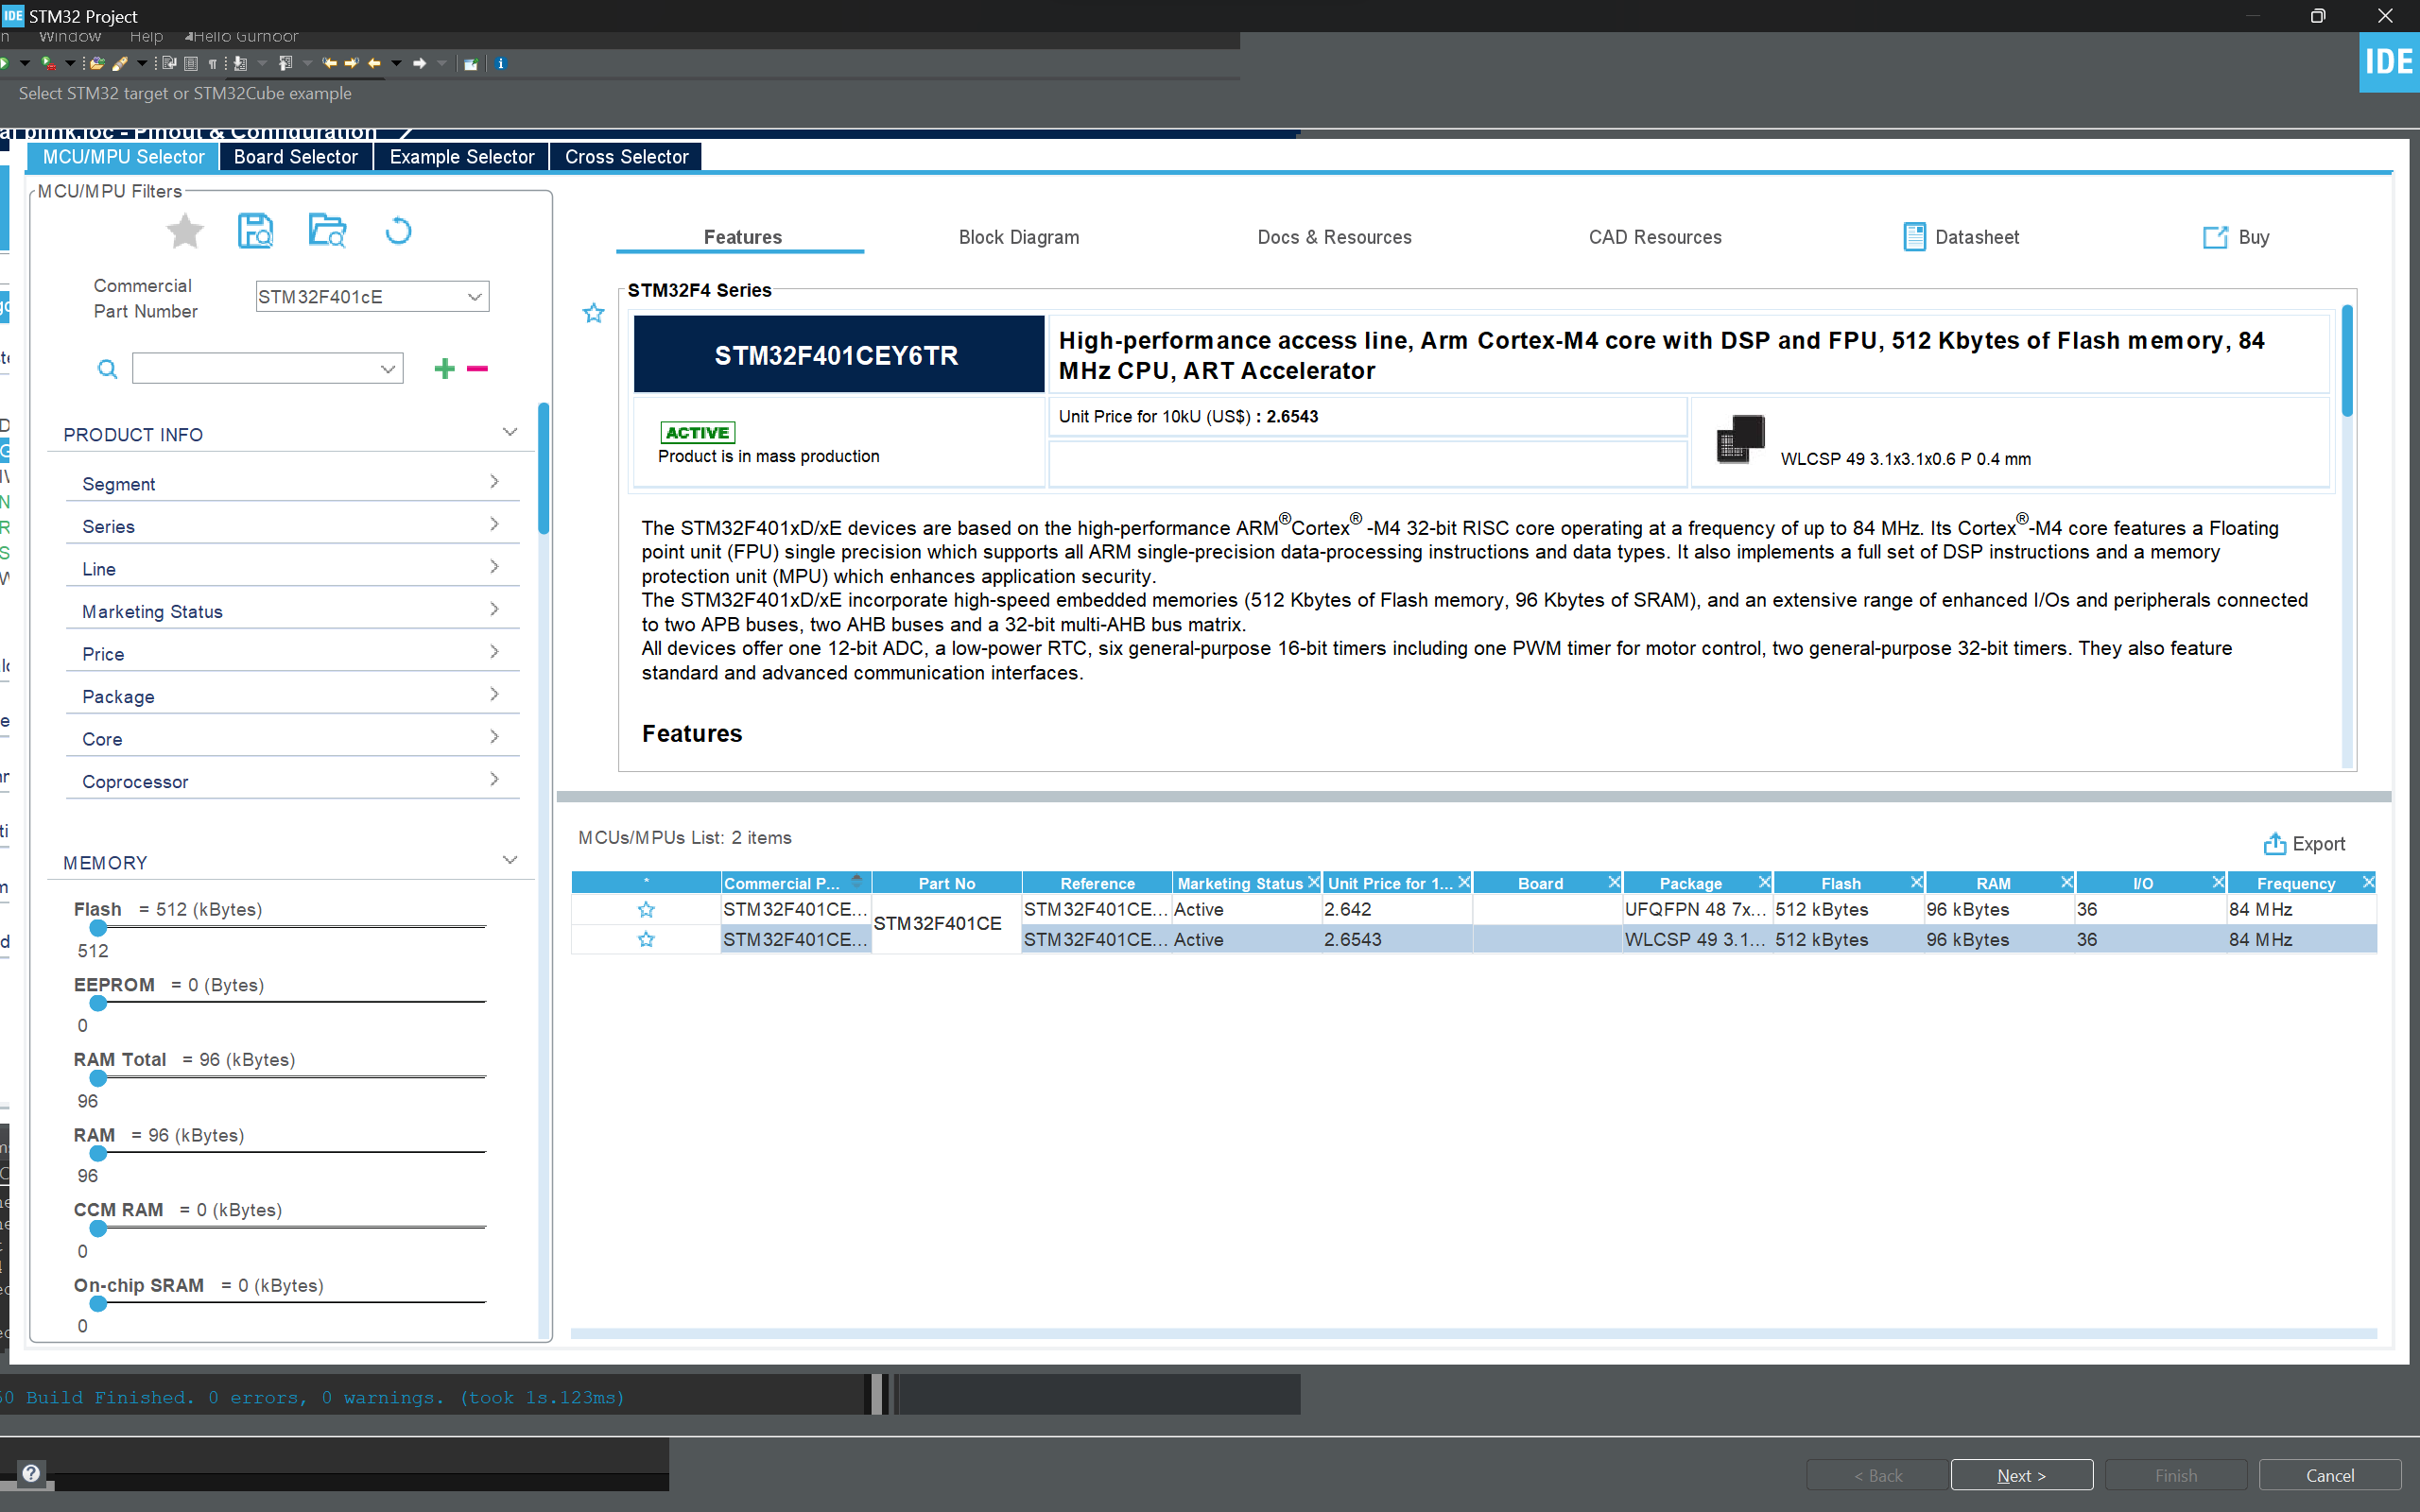
Search For Component- STM32F401CEY6TR click on "Next"
Configuring Your Board
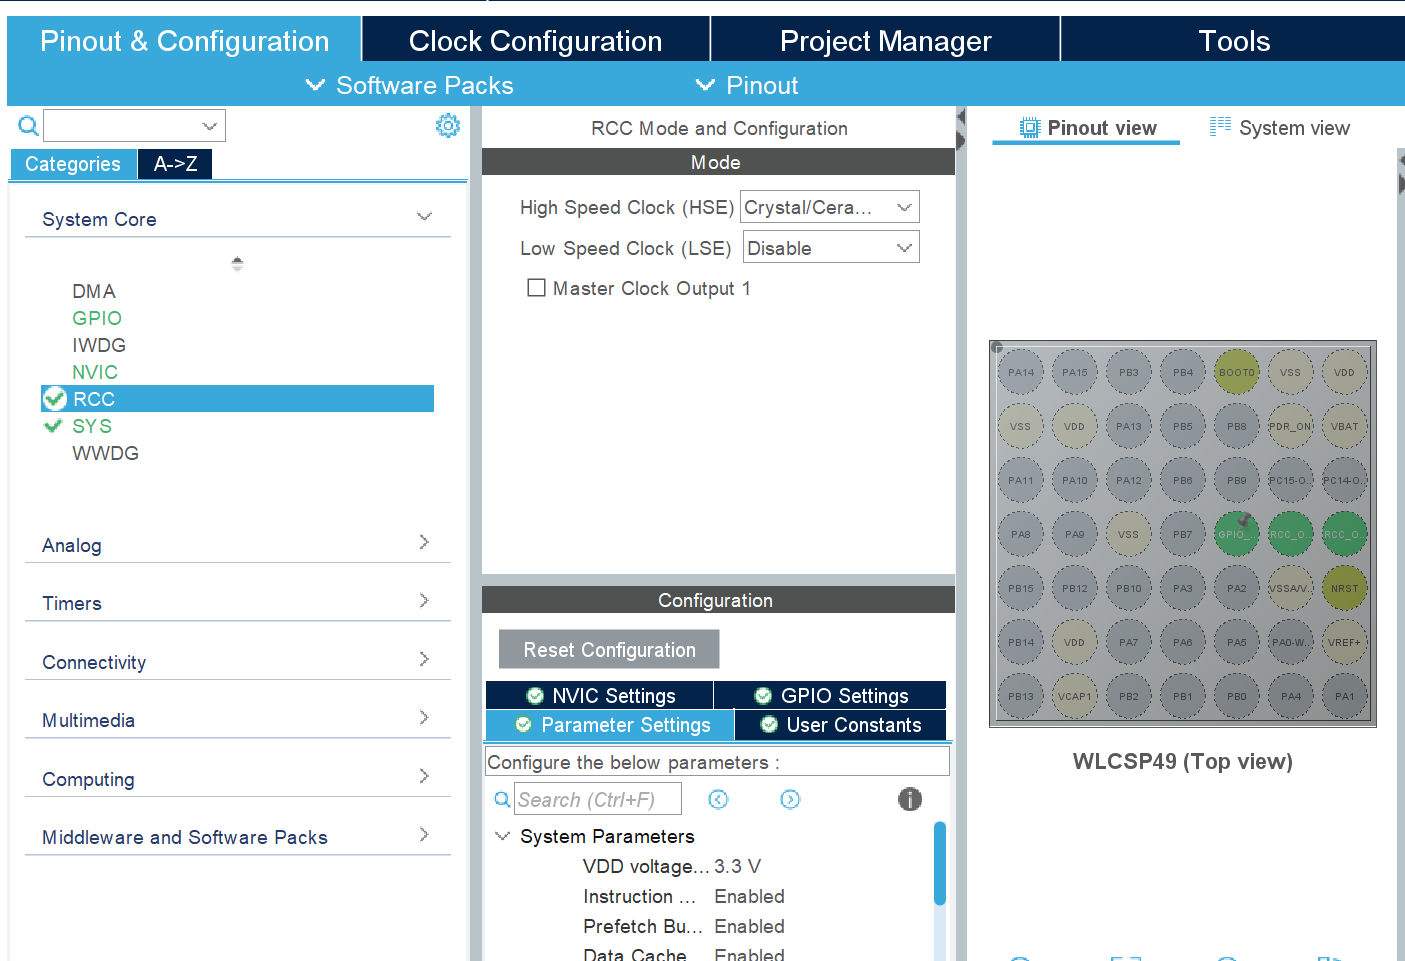
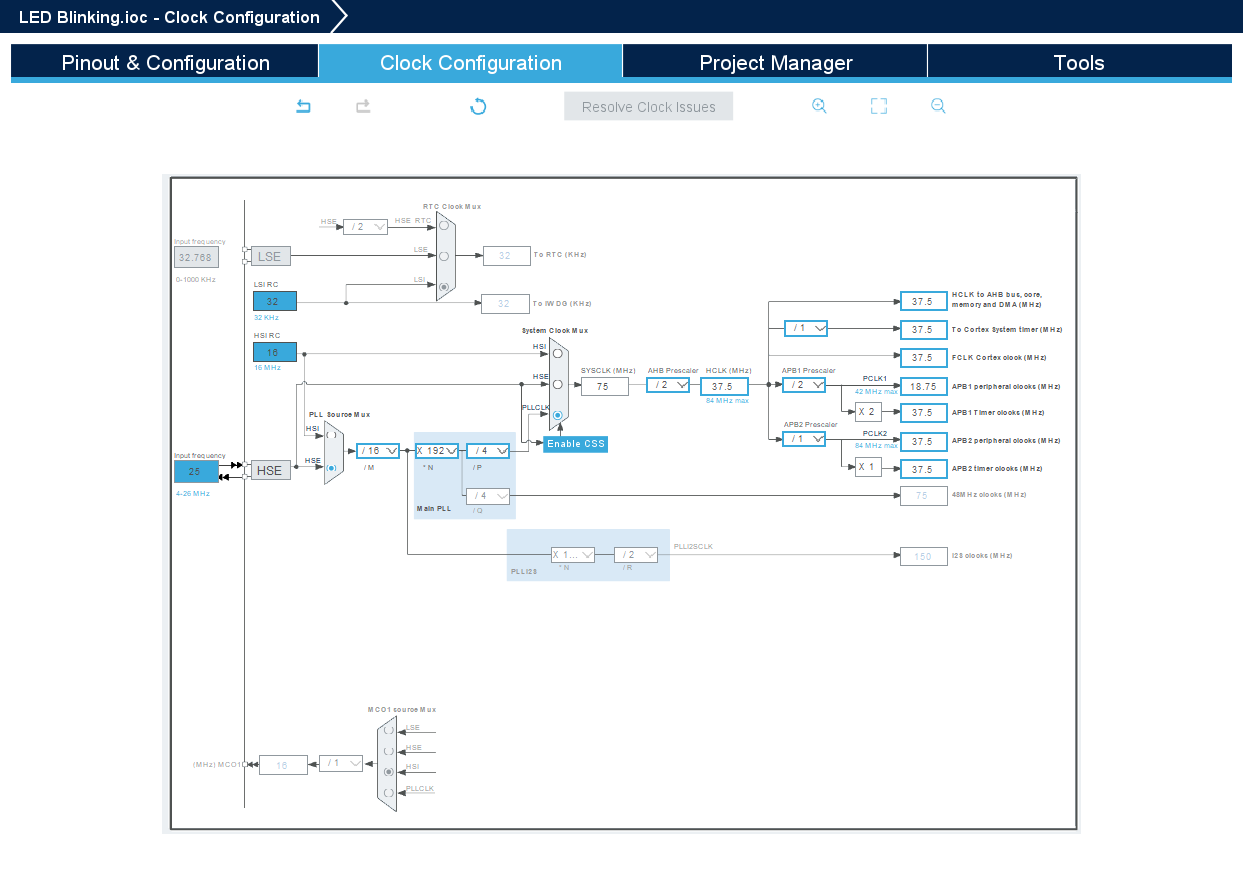
Configure Your Clock
Open Main.c File
.png)
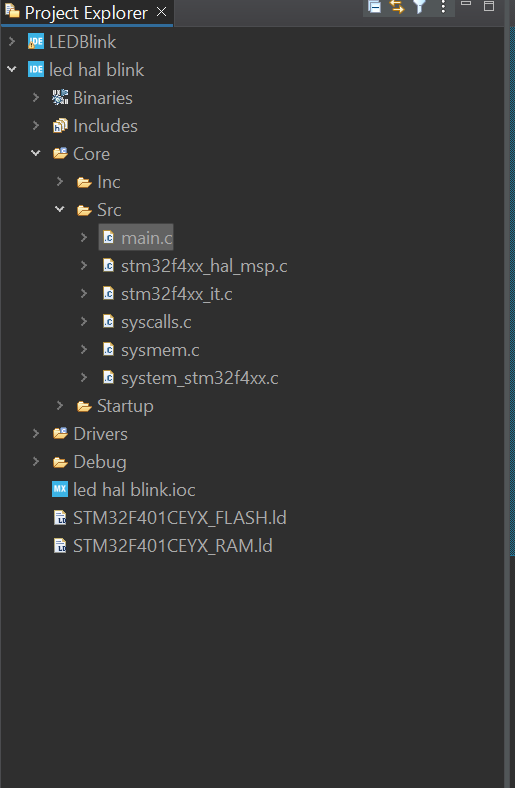
GOTO Project and find main.c file
Goto While(1) in Main() and Add Your Code
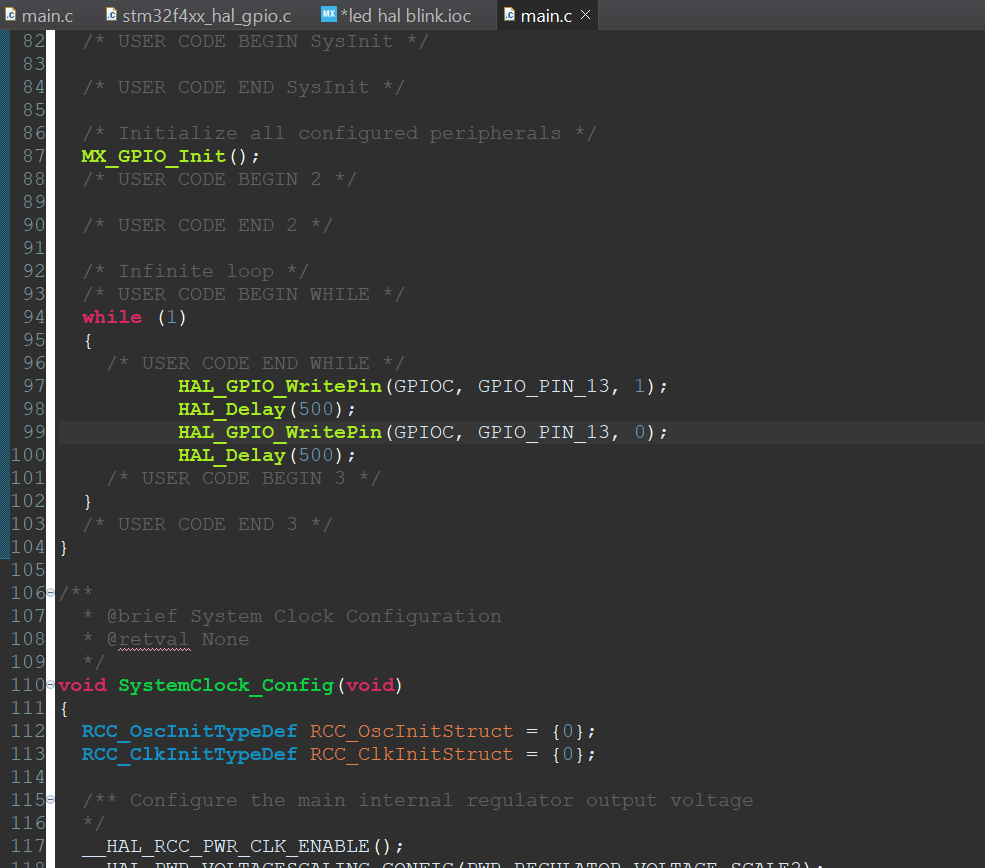
I use GPIO Pin 13 you may use other GPIO Pins
HAL_GPIO_WritePin(GPIOC, GPIO_PIN_13, 1);
HAL_Delay(500);
HAL_GPIO_WritePin(GPIOC, GPIO_PIN_13, 0);
HAL_Delay(500);
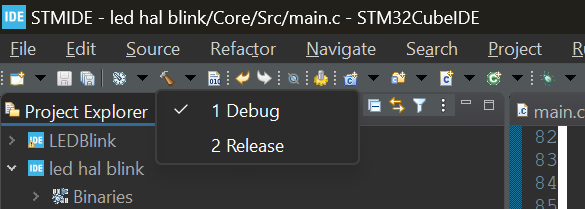
Debug
.png)
Open and Click On Debug(1)
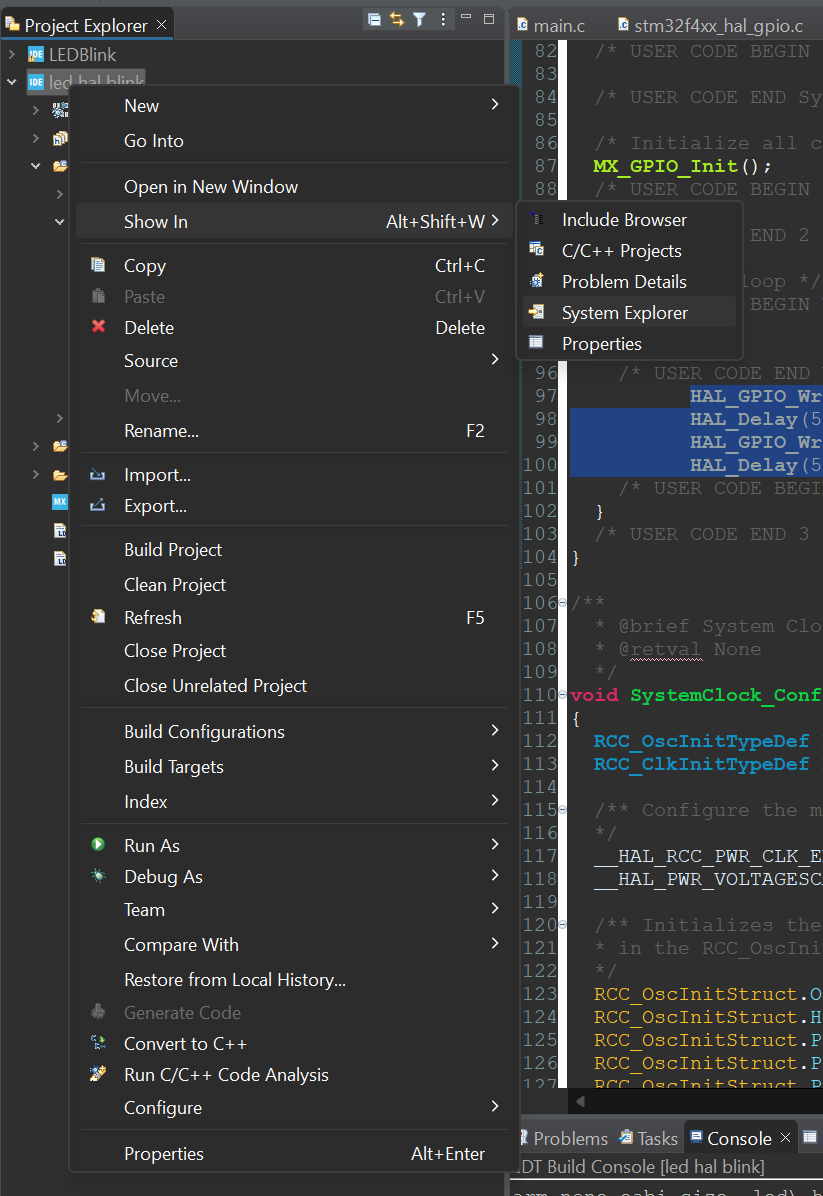
Copy Path of .elf File Generated
.png)
Right click on Project and click on show in system explorer and copy the path.
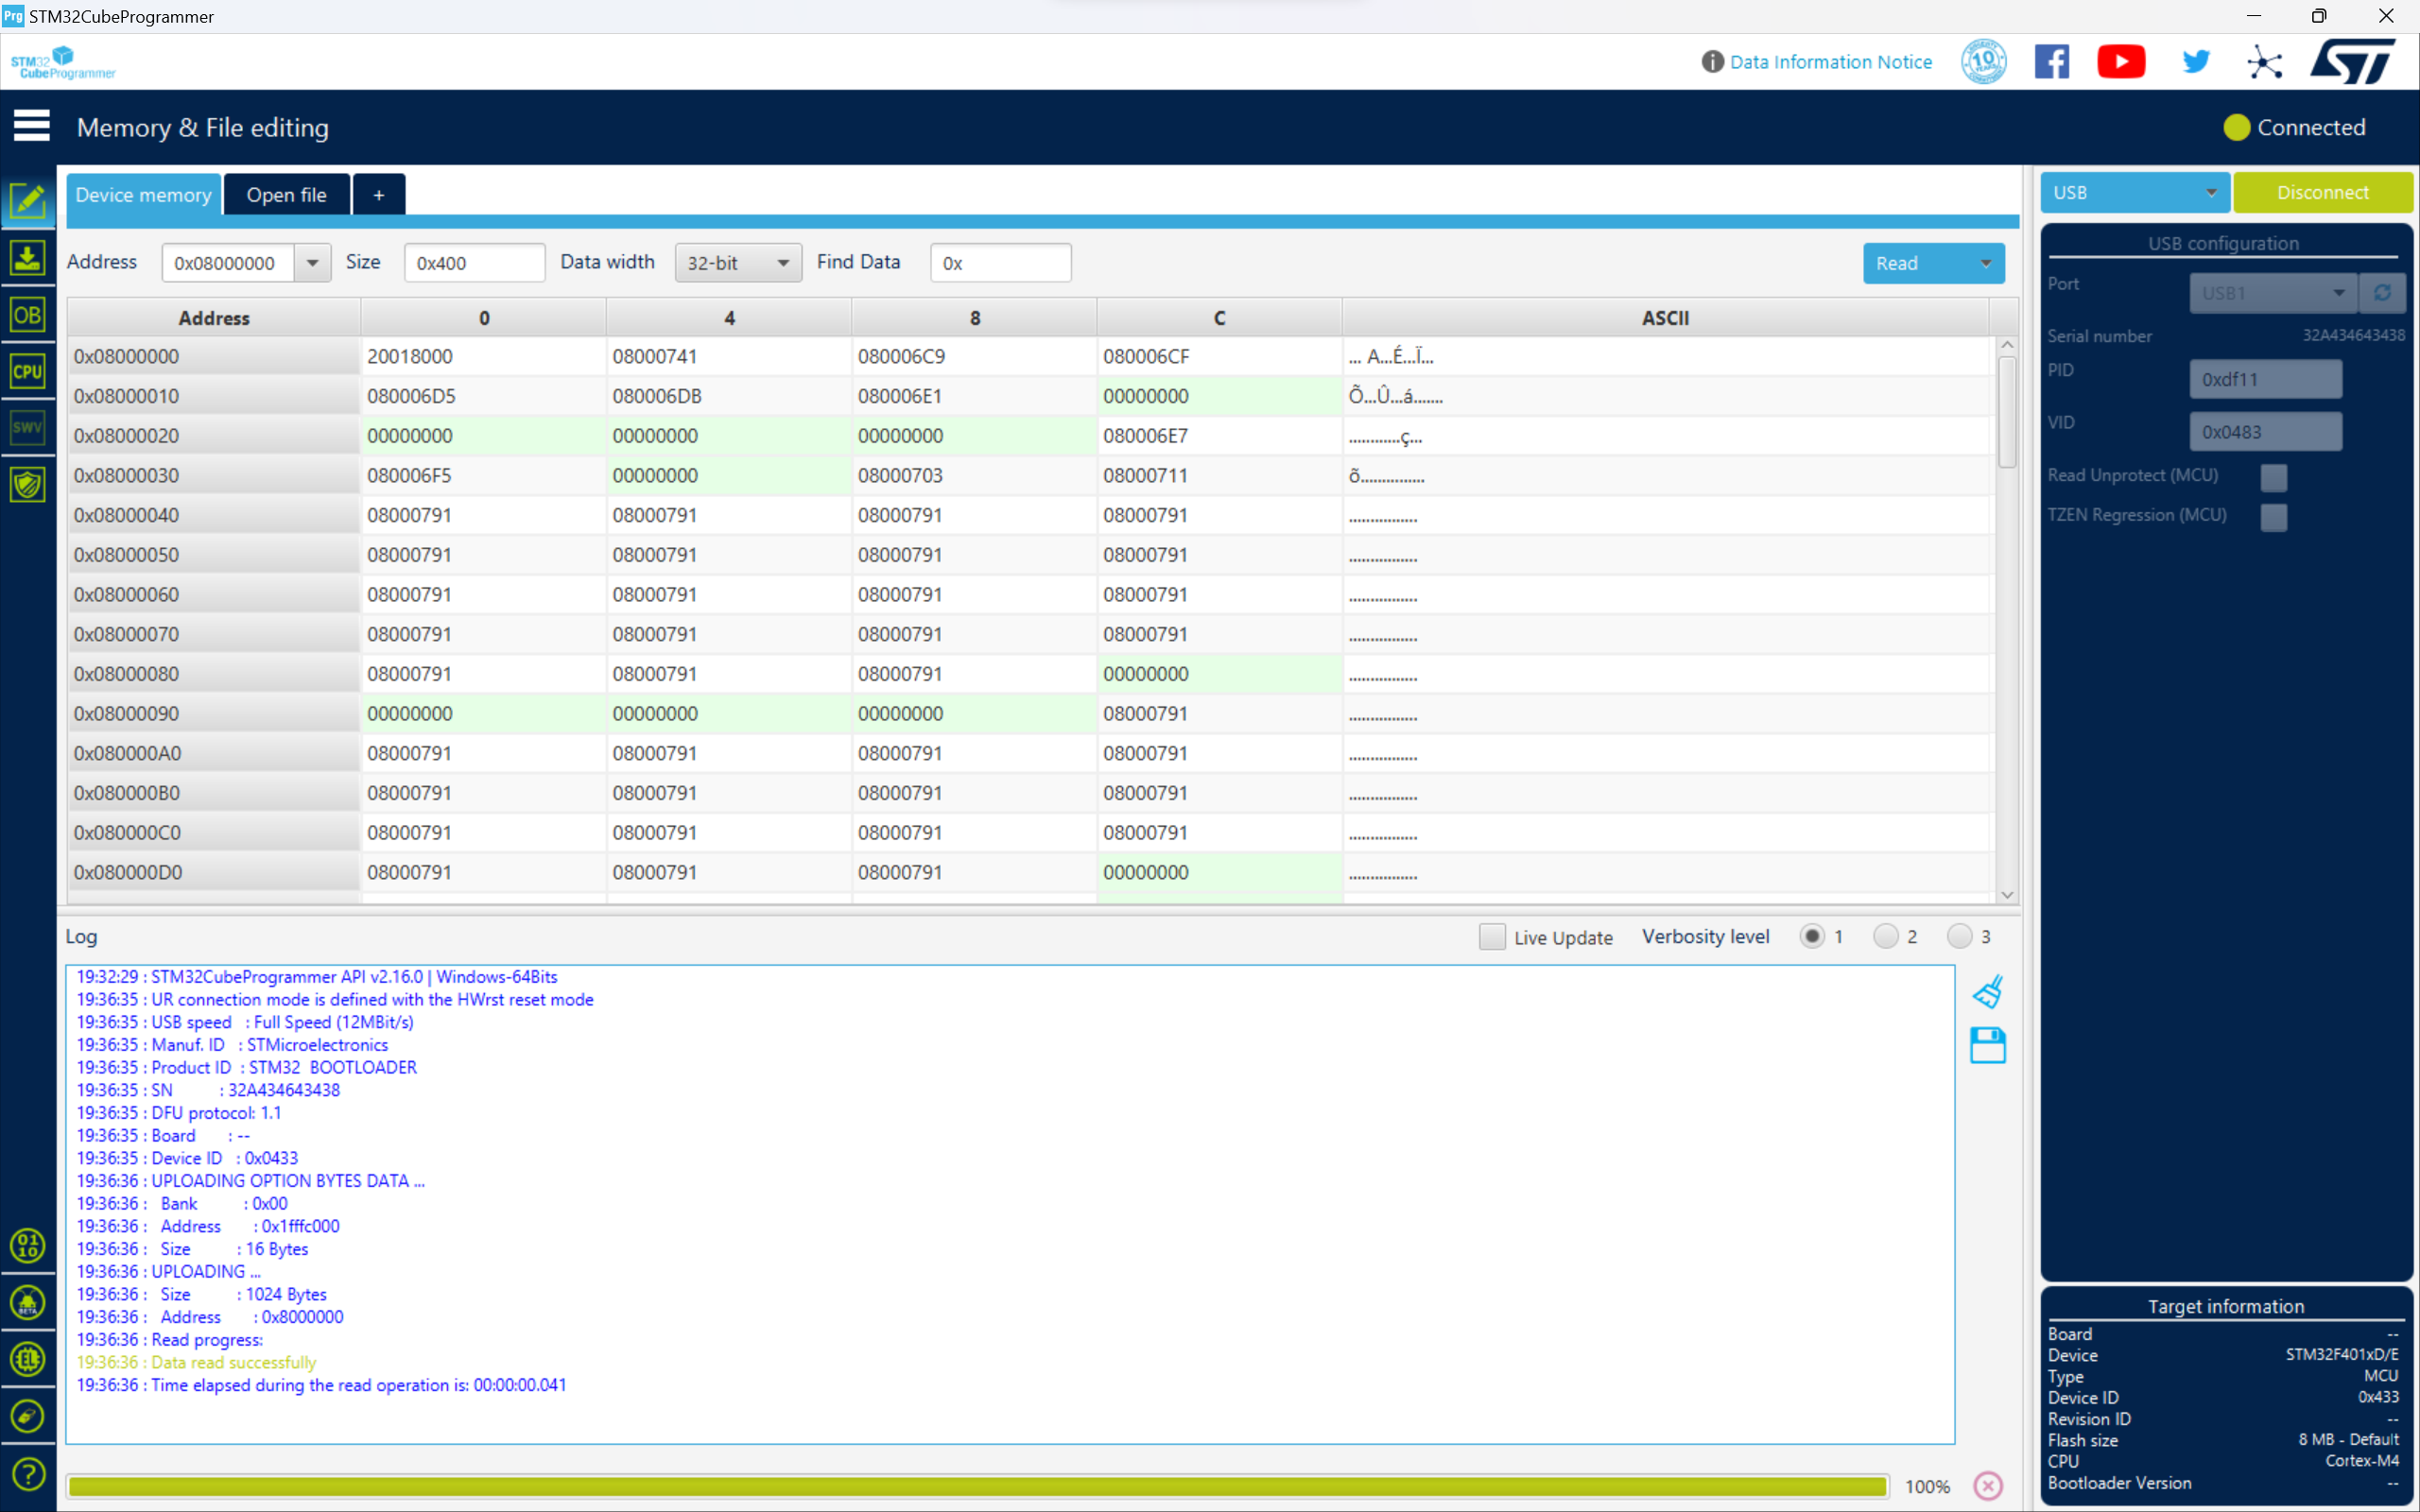
Open STMCubeProgrammer and Connect to STM Board Via USB
.png)
Click on Open File and Paste the Copied Path
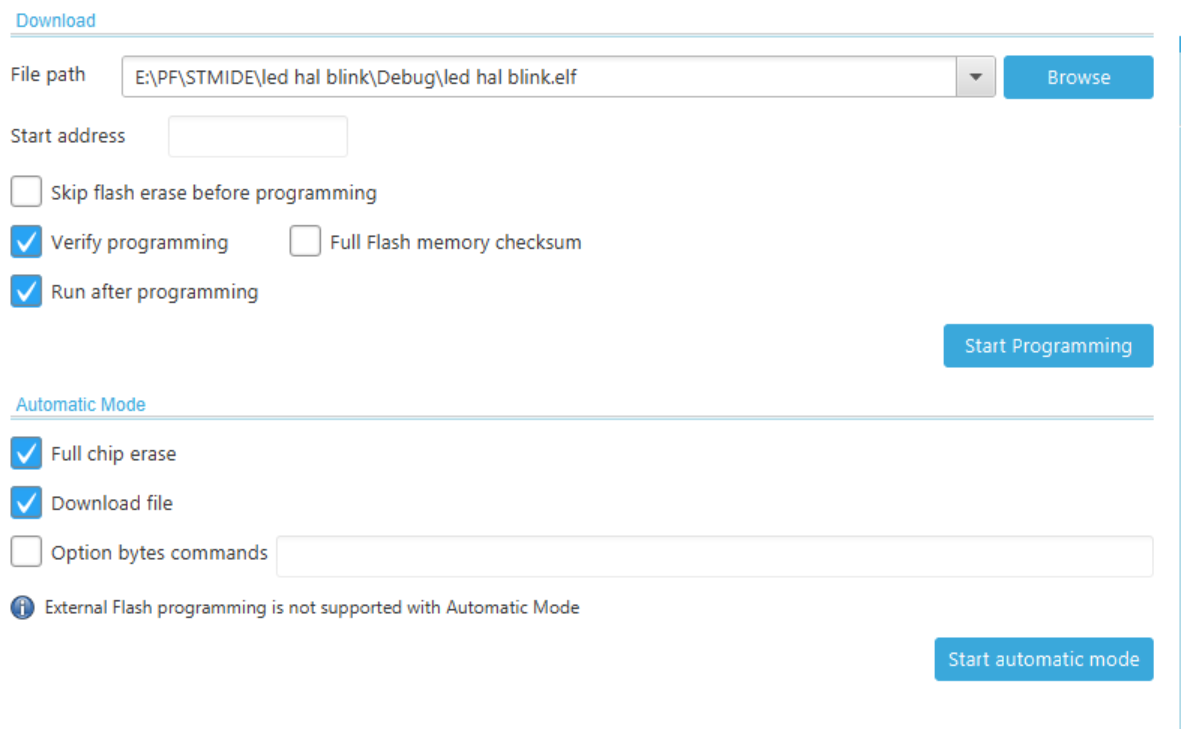
Go to Download Options (Found in Toolbar on the Left)

Change Download Options and Click on "Start Automatic Mode"
.png)
OUTPUT