Mask Detection on Raspberry Pi With Stepper Motor Access Control
by Augmented Startups in Circuits > Raspberry Pi
3493 Views, 22 Favorites, 0 Comments
Mask Detection on Raspberry Pi With Stepper Motor Access Control
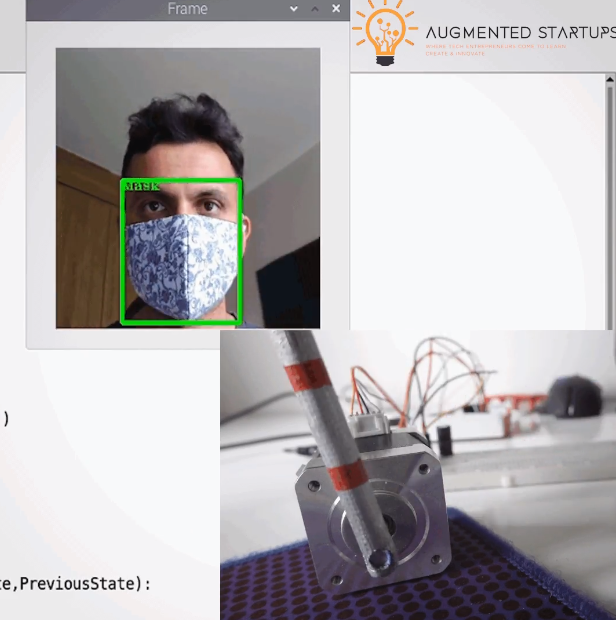
So Im going to show you how you can build your own Real-time Mask Detector Access controller using a Raspberry Pi, OpenCV AI Kit camera connected to Stepper Motor. So if the mask is on it will grant access otherwise it will close and stay closed if the if a person takes off their masks. Simple!
What You Will Need
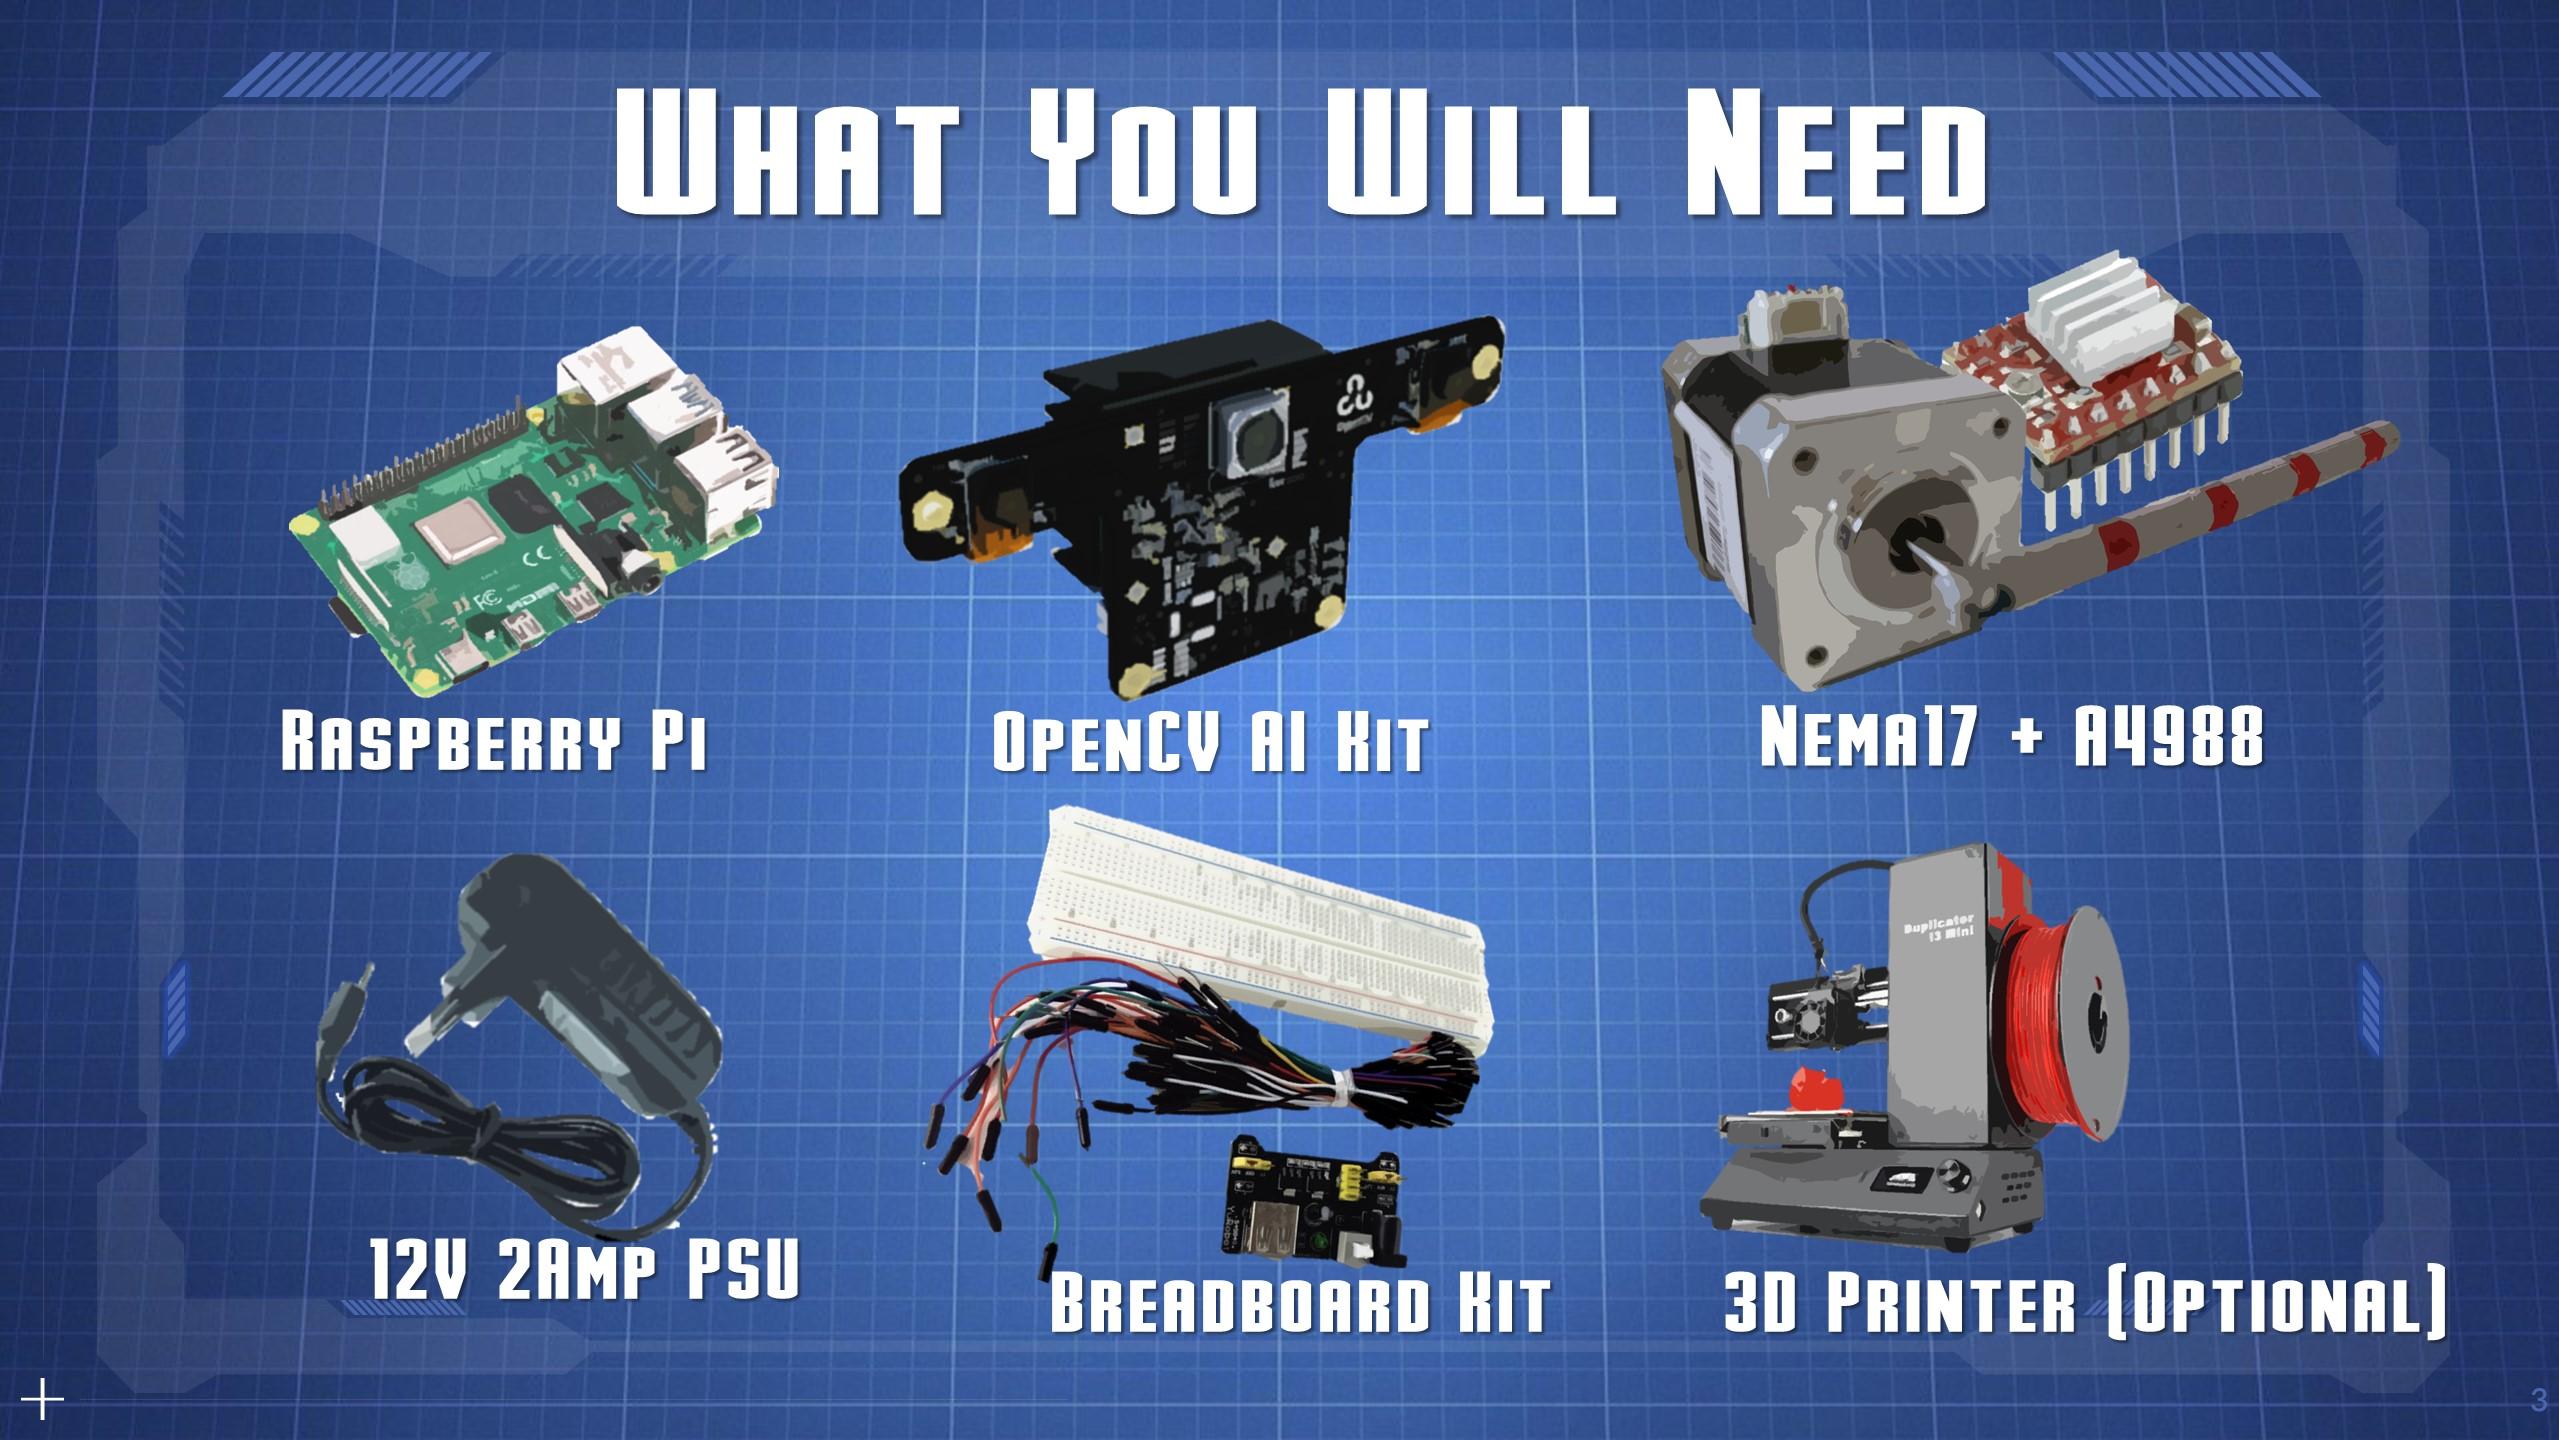
You will need the following:
- A Raspberry Pi with all the accessories
- The OpenCV AI Kit, Im using the OAK D but you can use an OAK-1 as well
- You will a Stepper Motor — Im using the NEMA17 Stepper Motor
- To drive this motor you will need a stepper motor controller — I am using the A4988 Stepper Motor Driver
- Make sure that you also have a 12V 2-Amp Power supply and Jack to power the motor
- Electronics essentials such as a breadboard, capacitors and some jumper wires
- Whats optional is a 3D printer for printing out the Boom Gate arm. I will show you how to get step files, that I created for this tutorial
How It Works
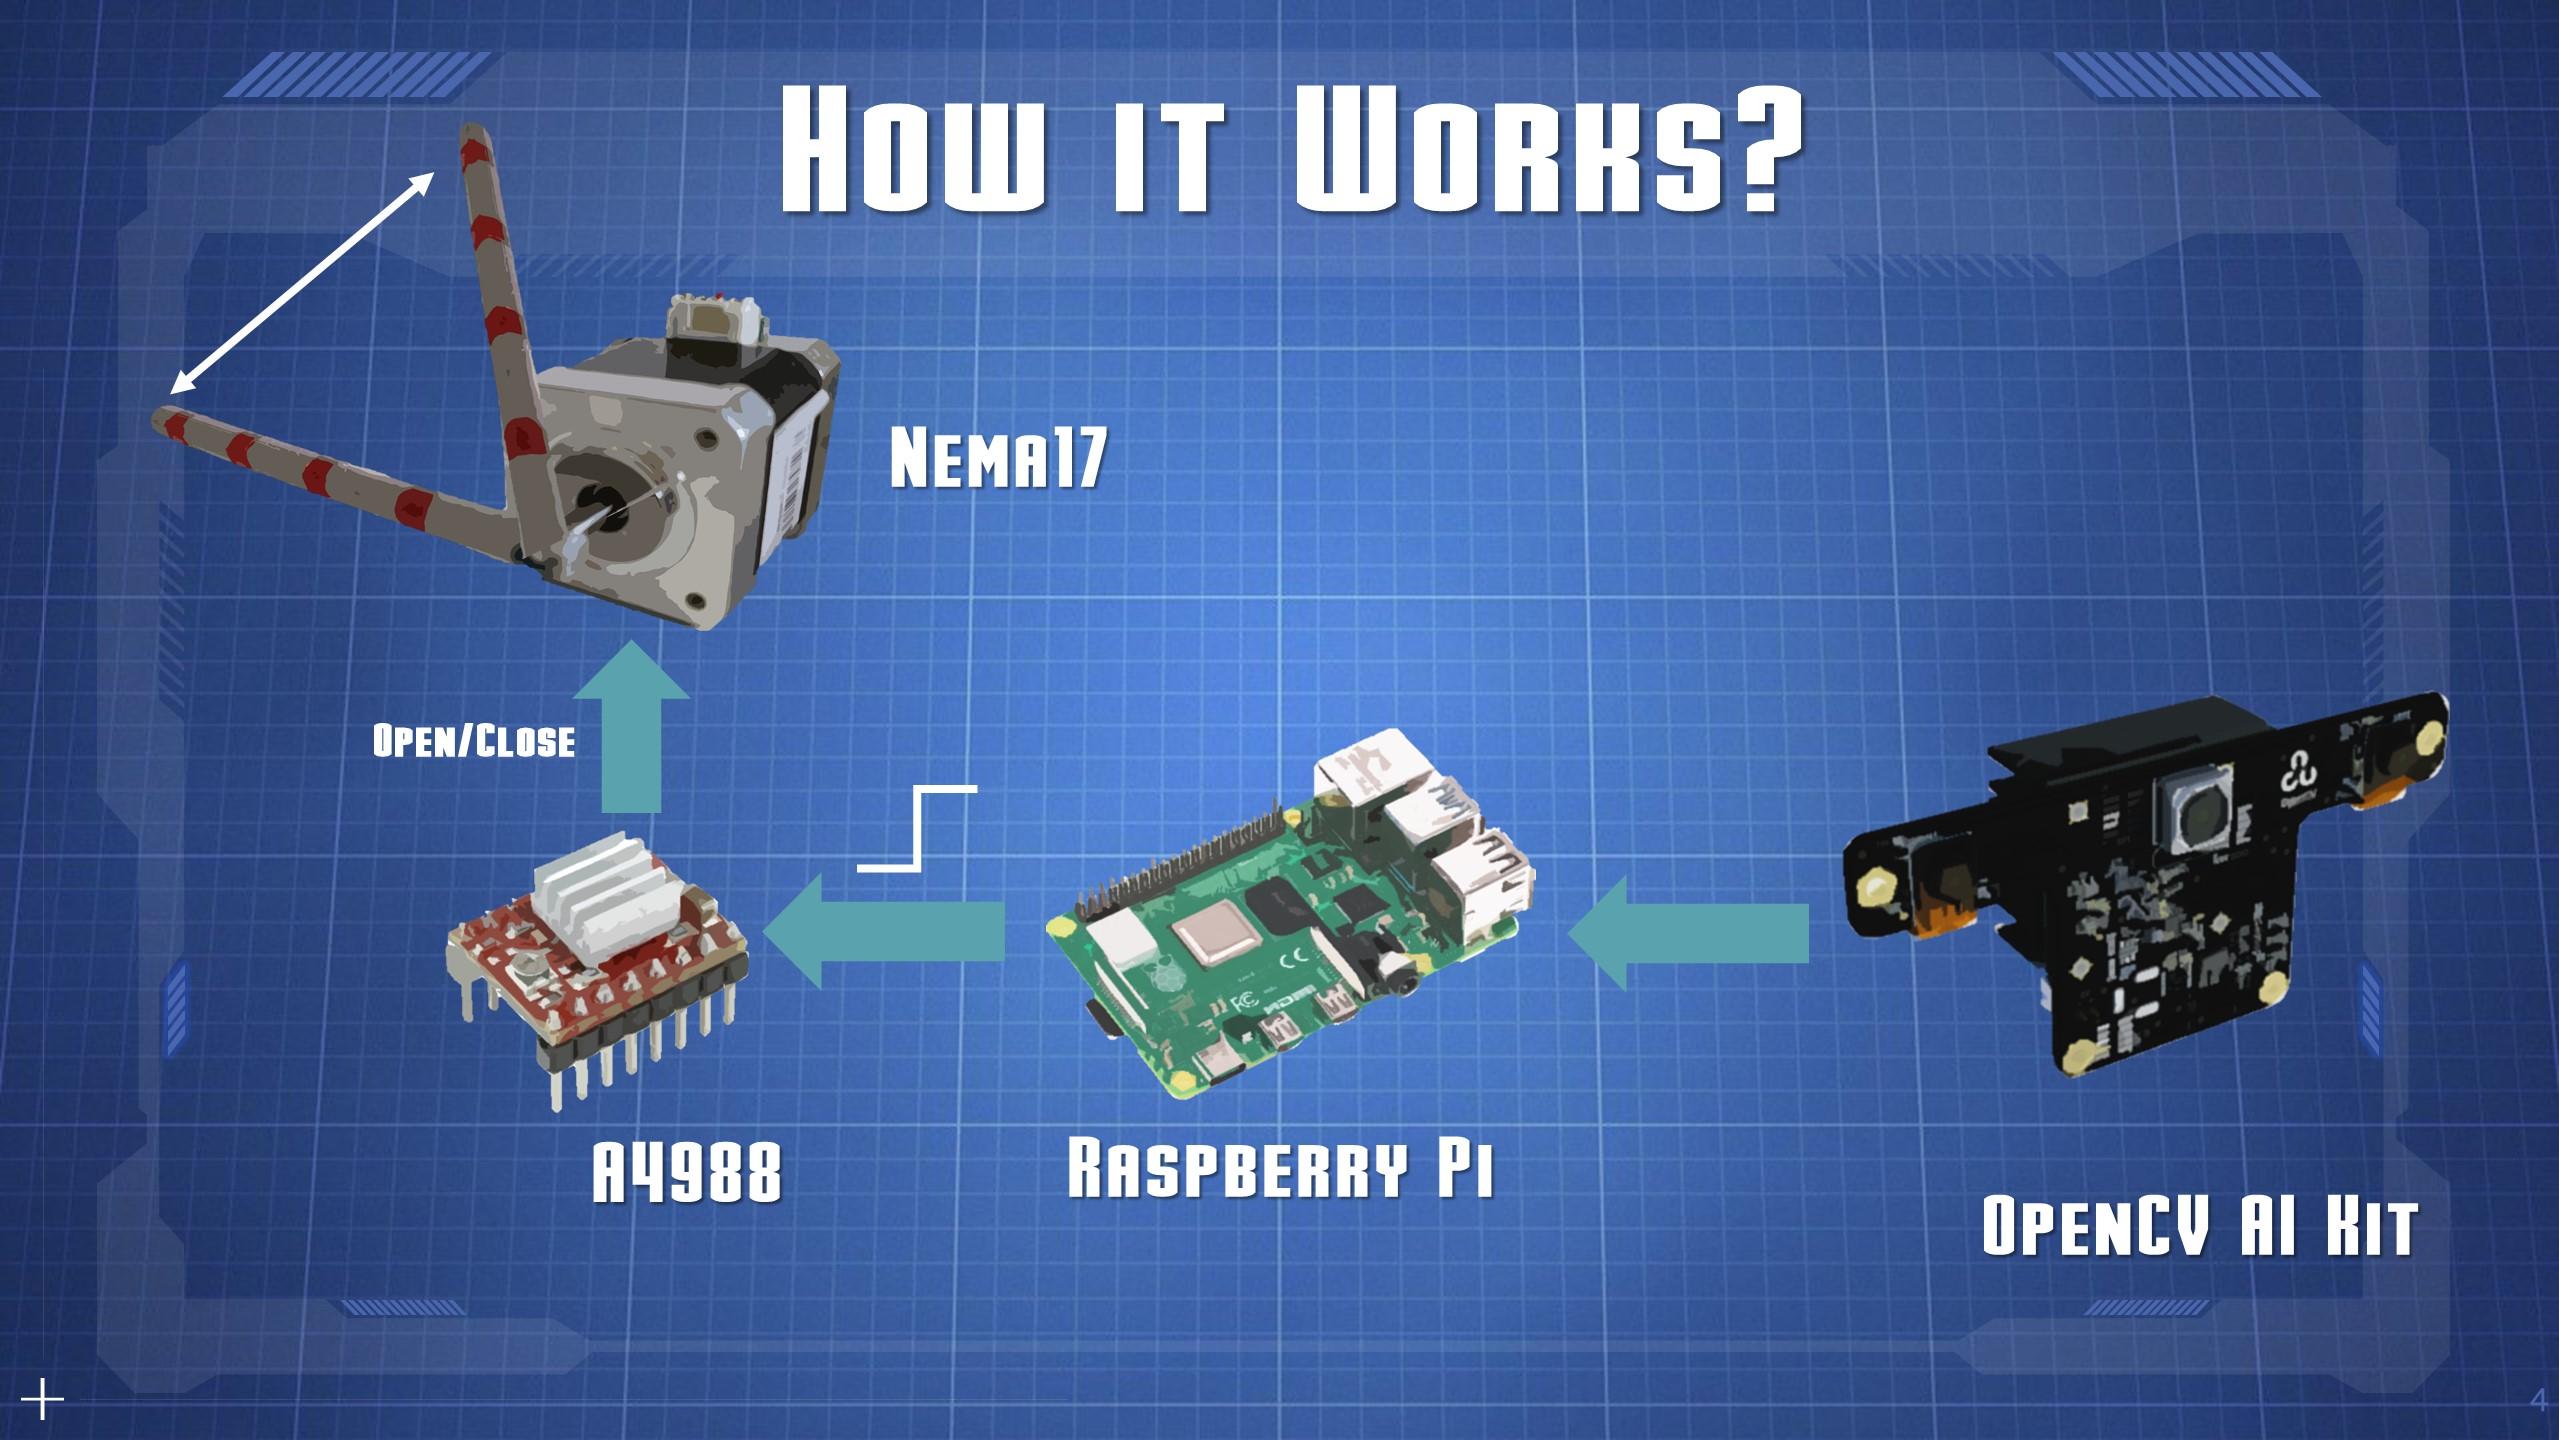
So the picture is captured the OpenCV AI Kit and model for mask detection at 30 FPS. This sends the image to the raspberry pi which we coded the logic for Access control. Stay till the end where I will explain how this logic works towards the coding section of this video, I will also show you a really easy way to annotate your dataset using the Roboflow platform. Anyways, the output of logic is then sent to the Stepper motor controller which triggers the signals to open or close the gate.
Schematic
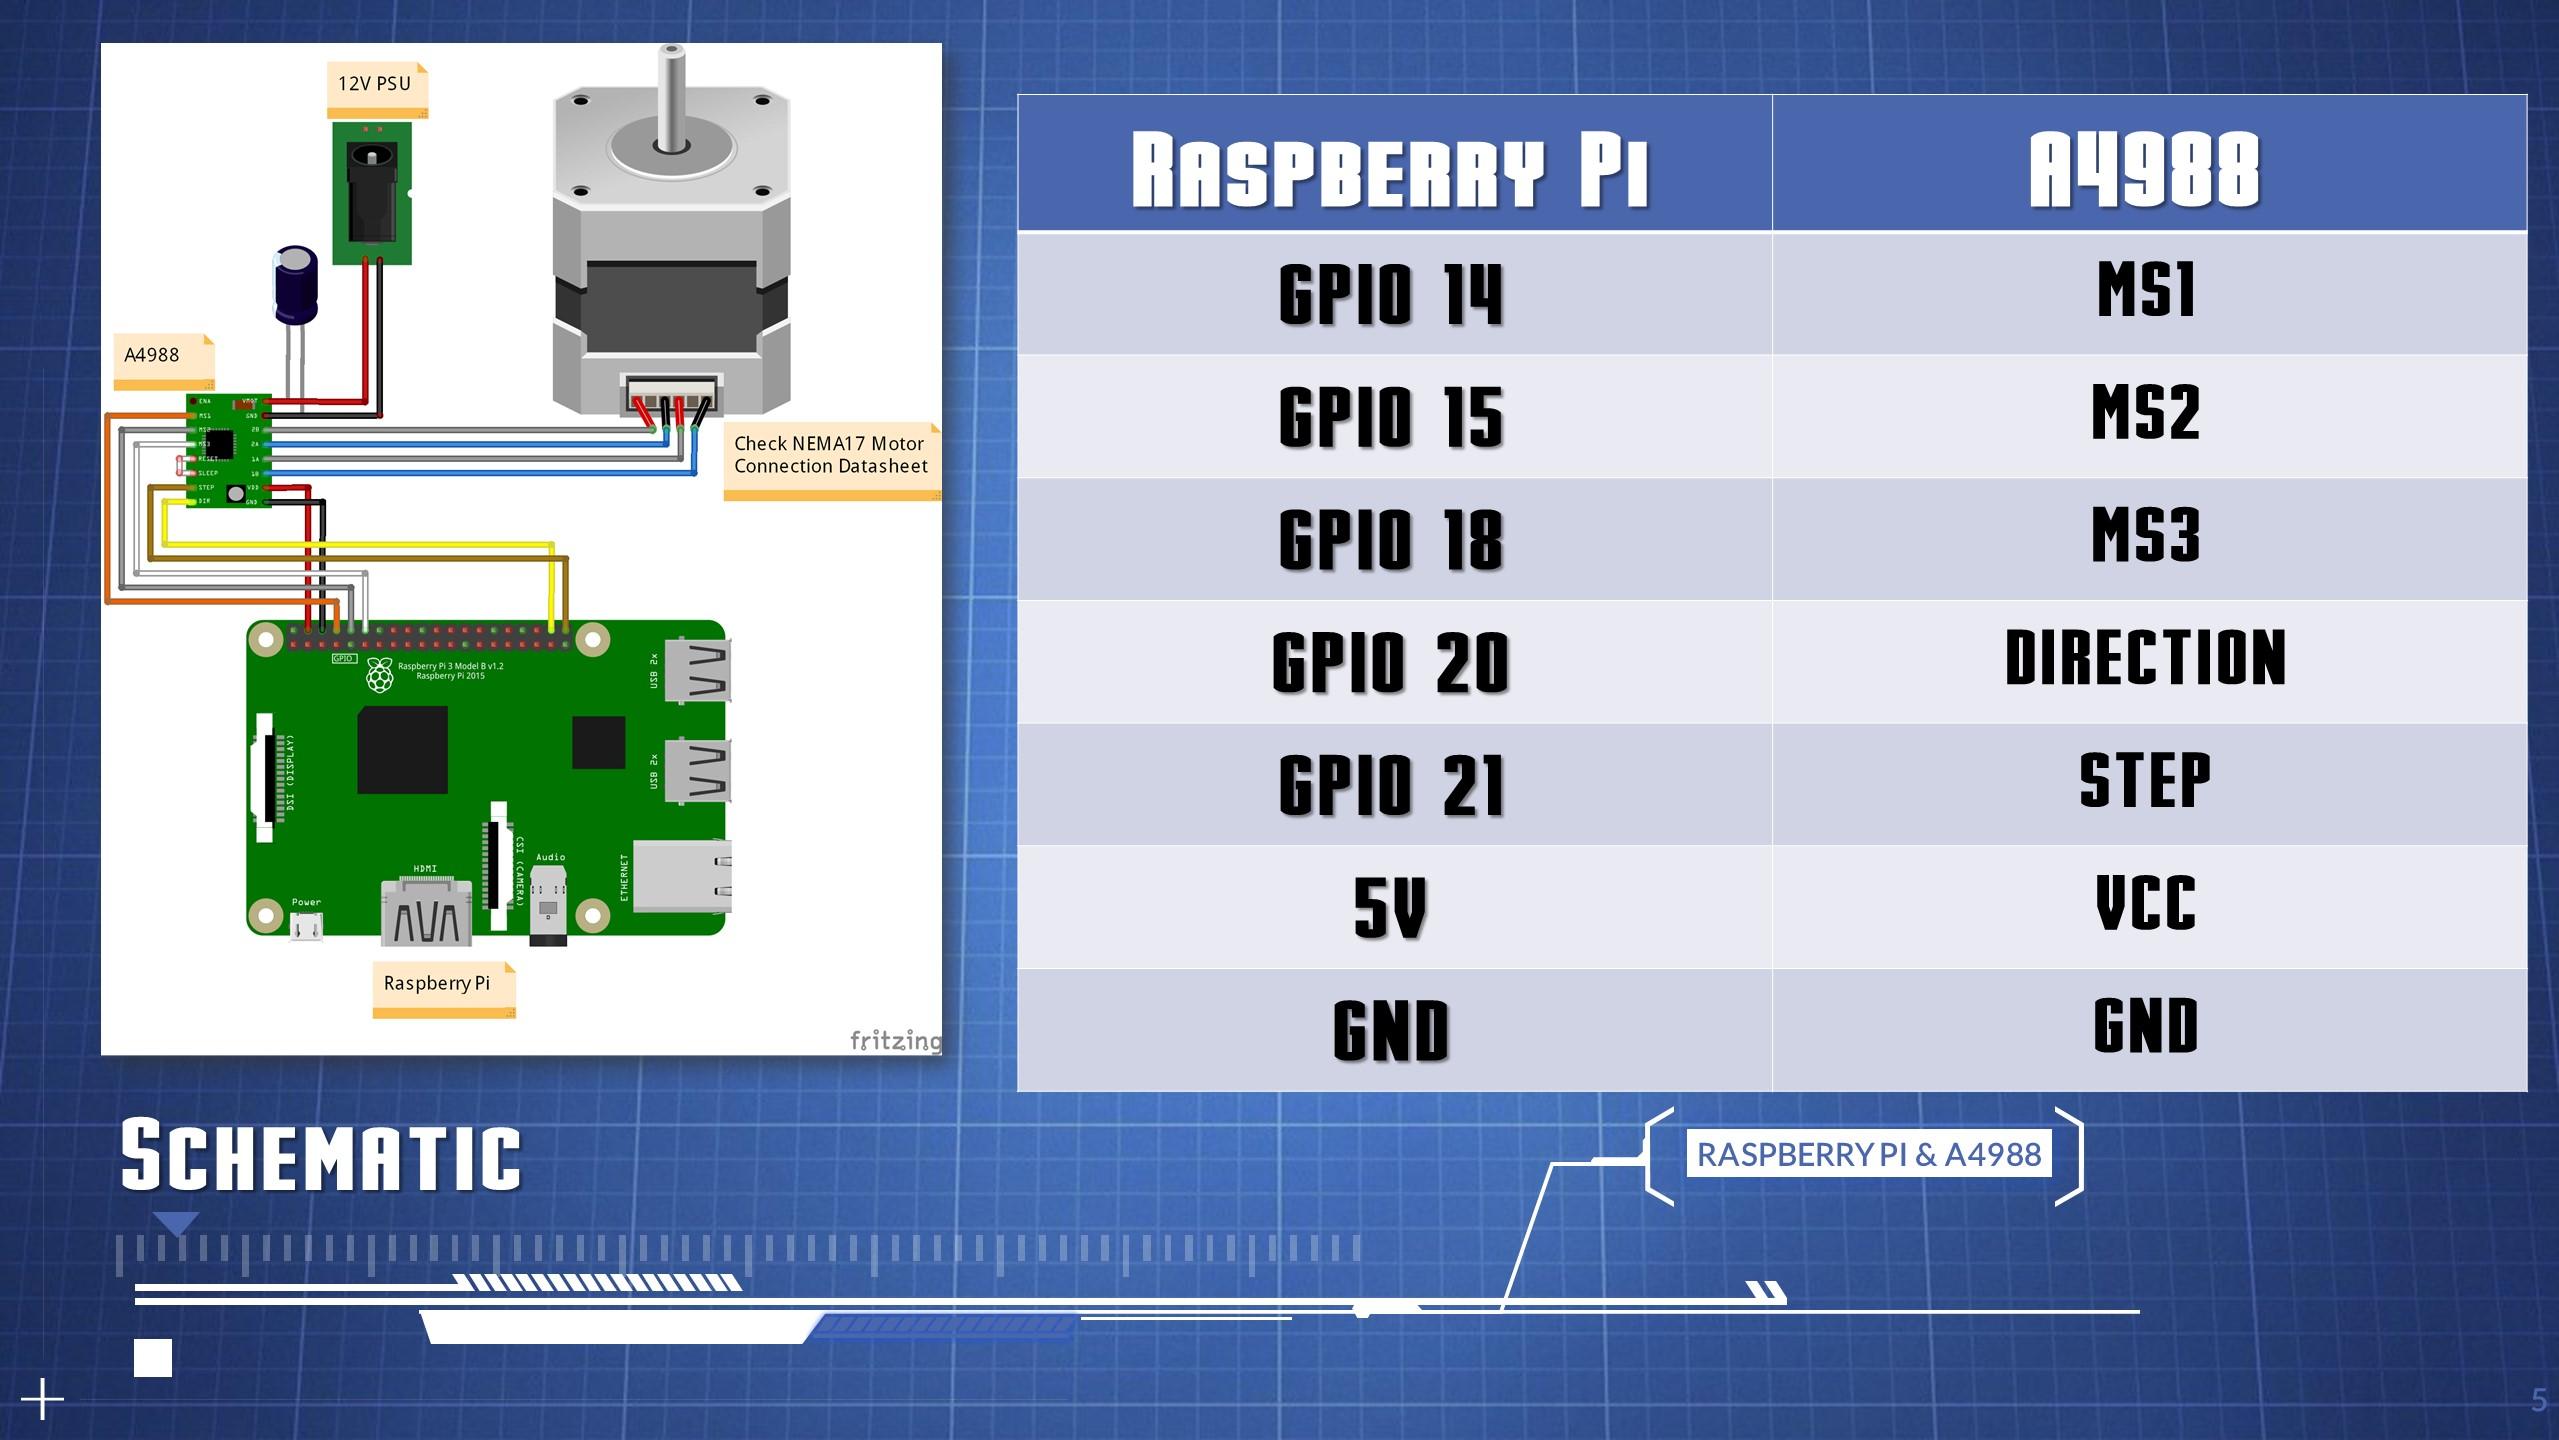
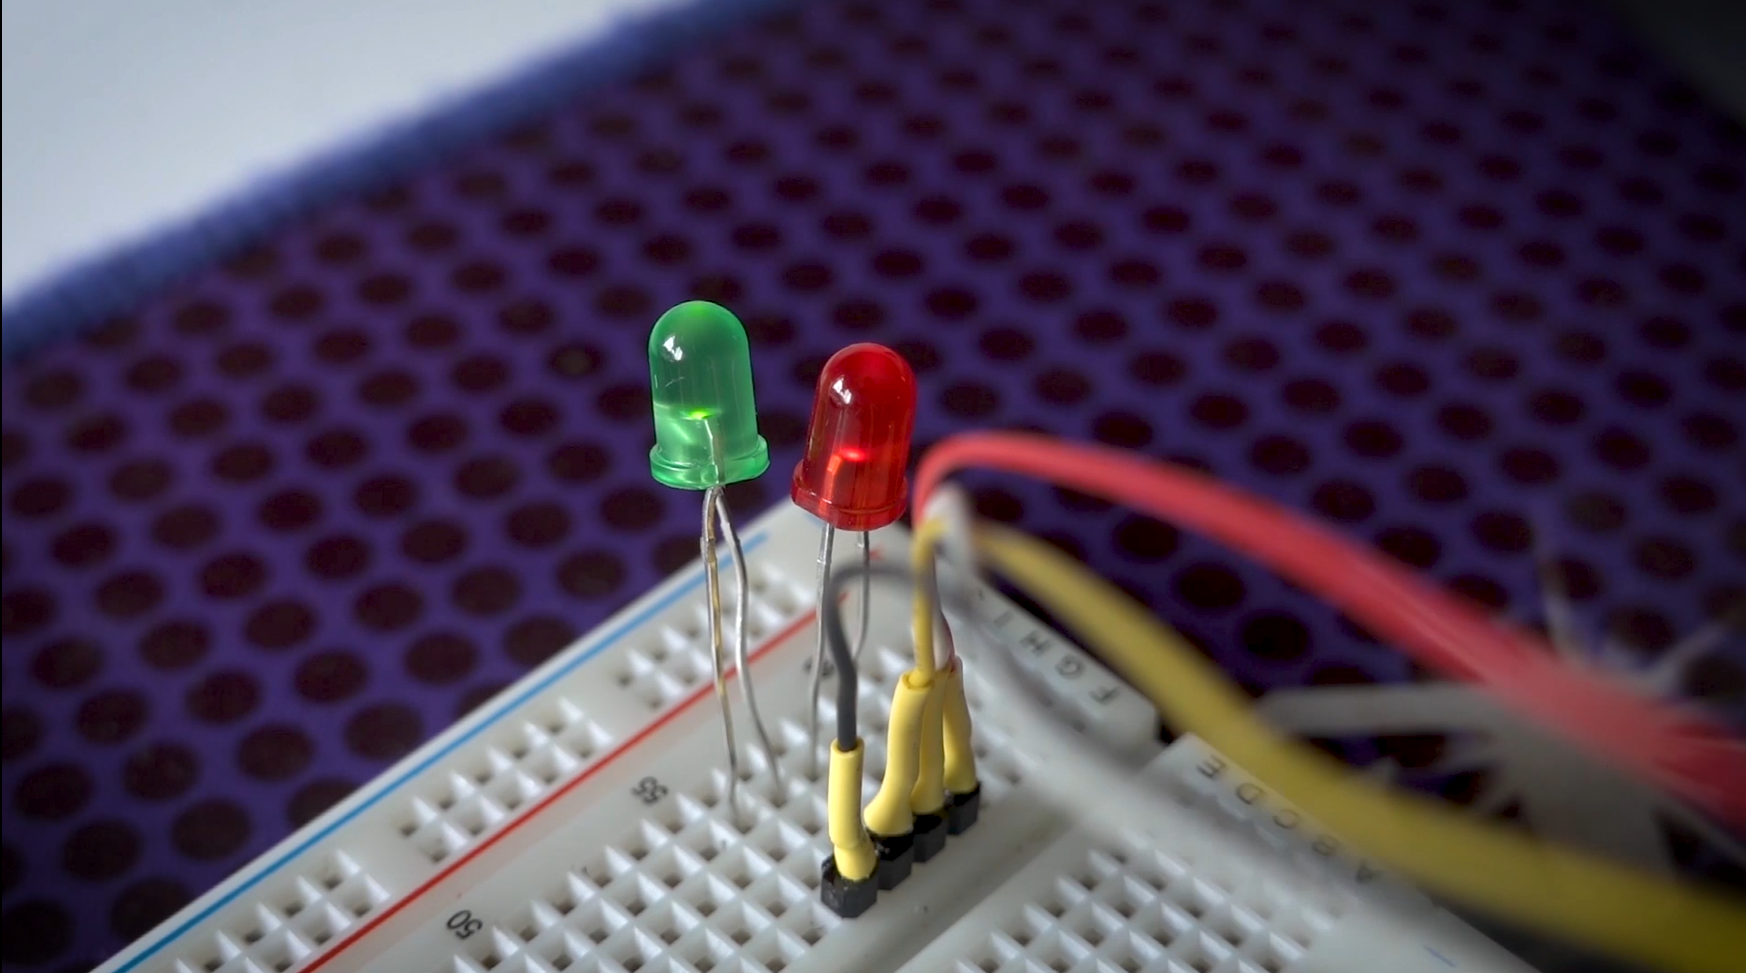
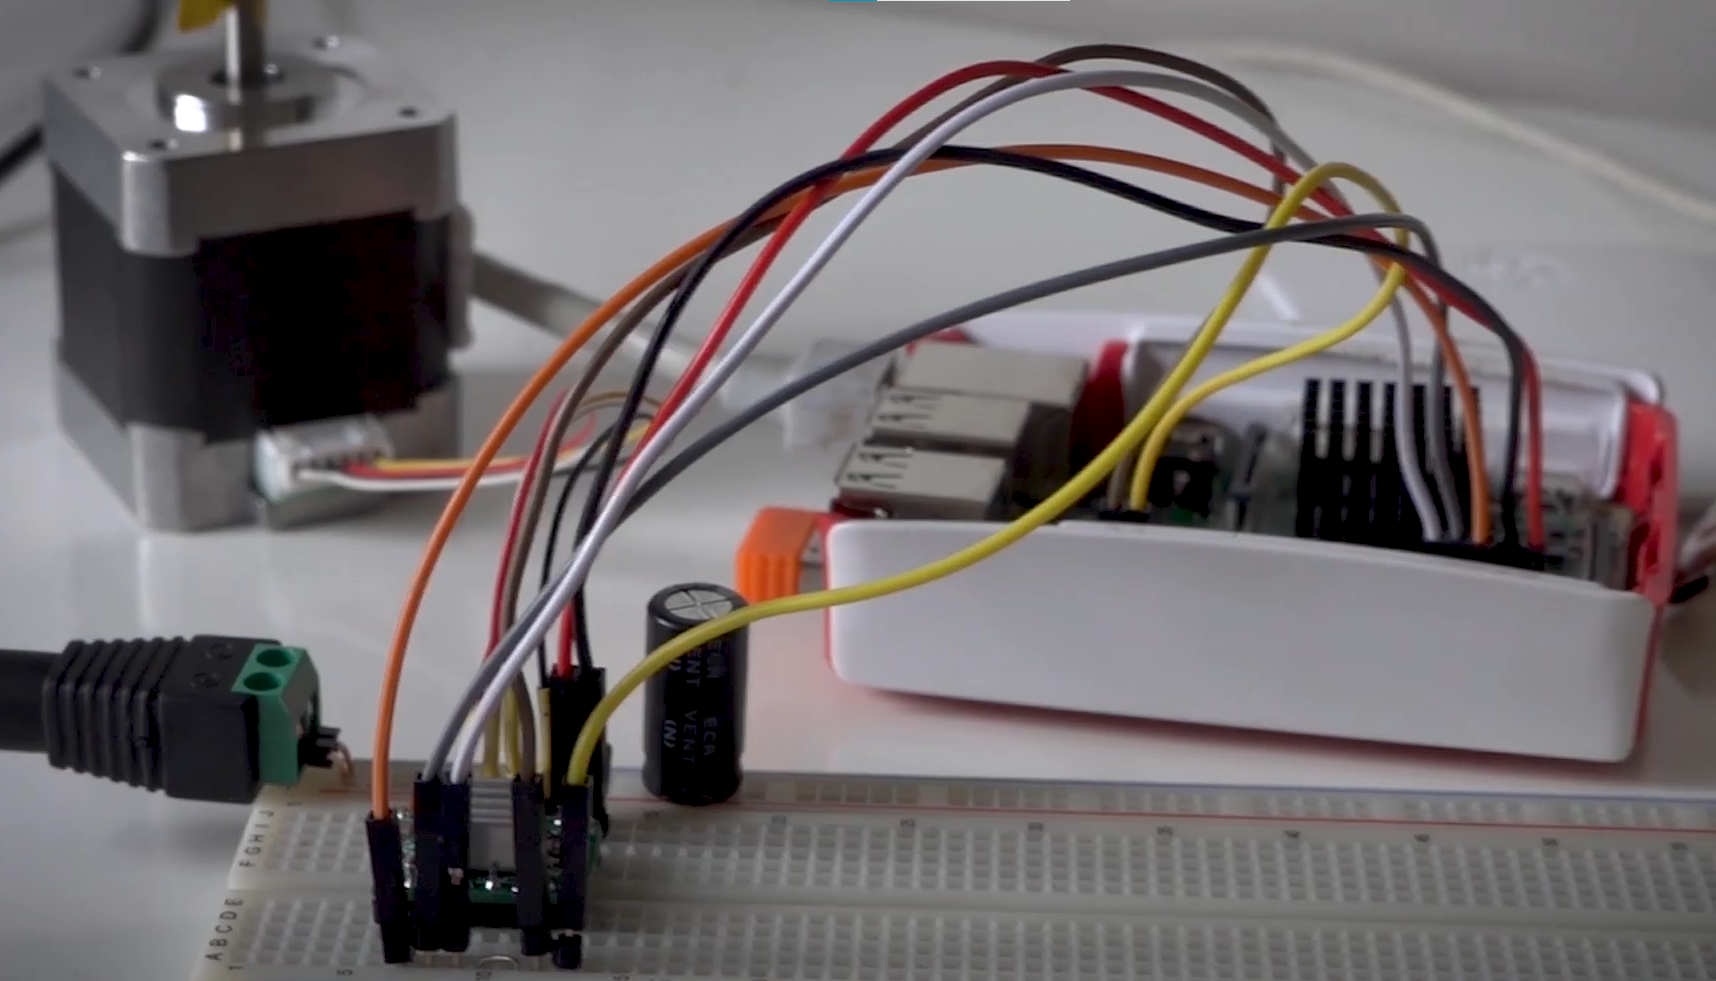
The Schematic is very simple which you can see. Let me walk you through the connections:
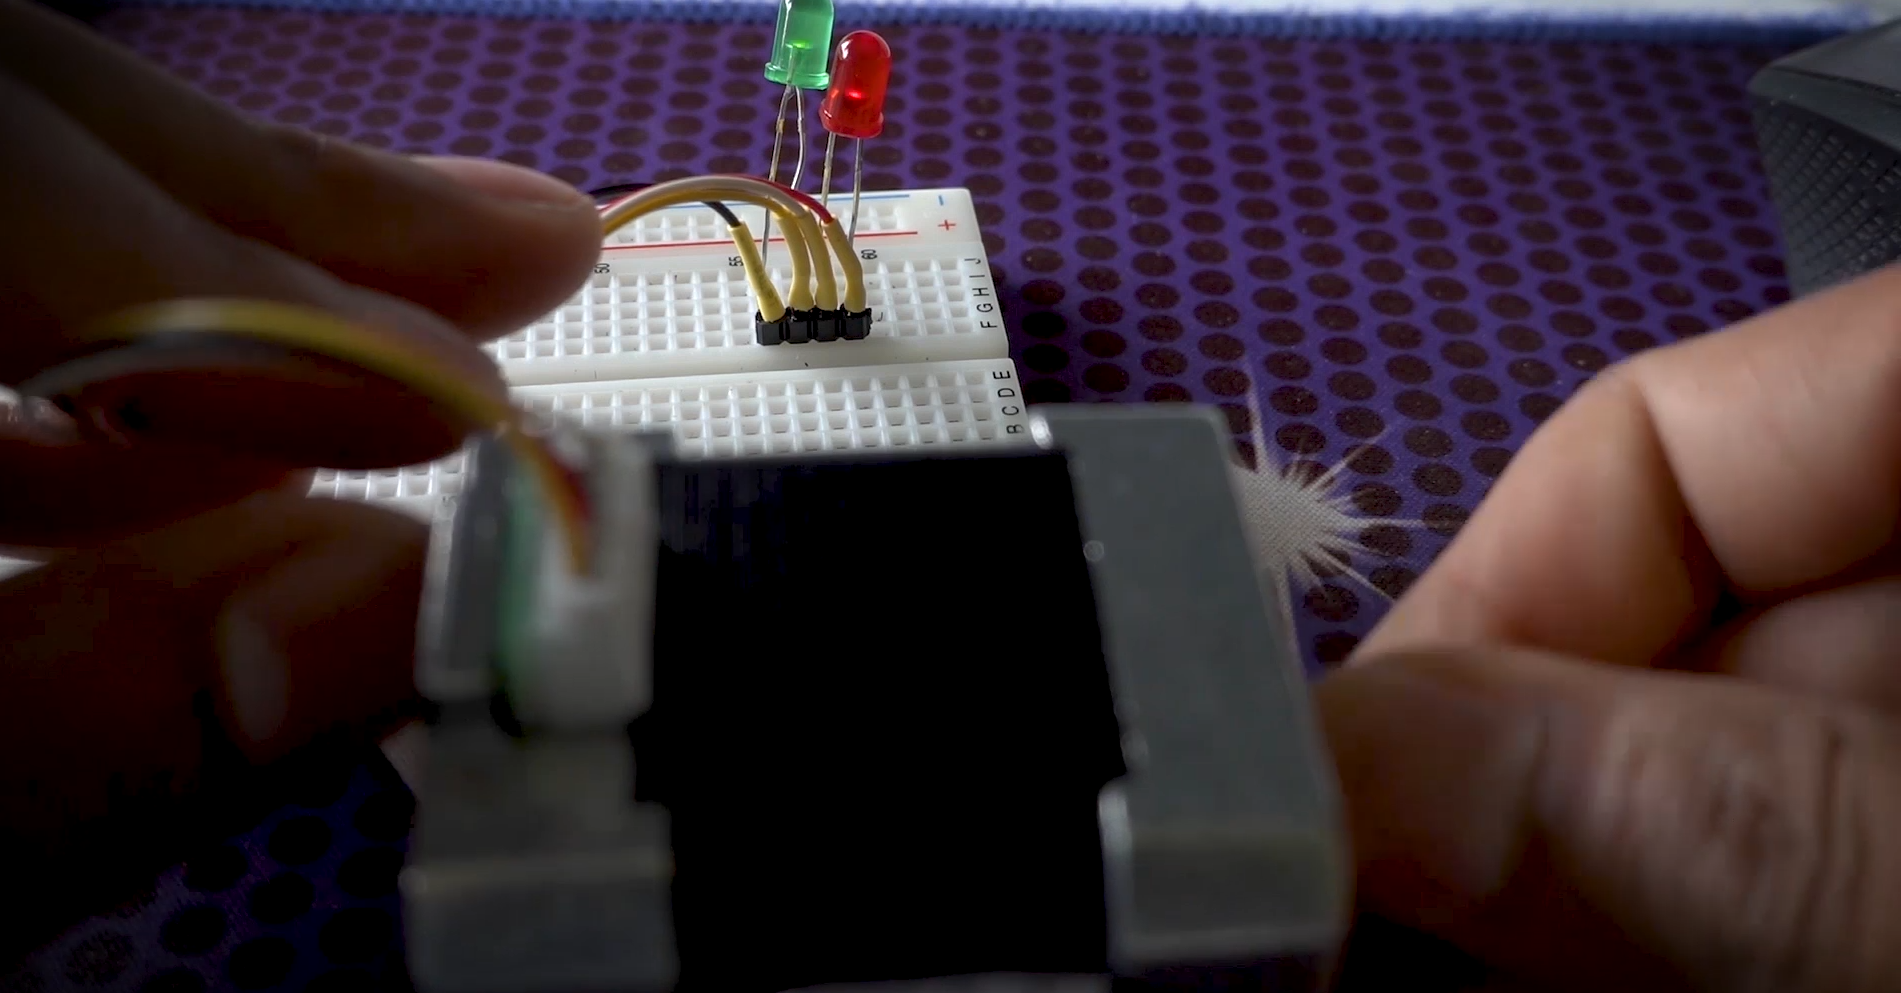
To connect your OpenCV AI Kit, just simply connect it up via the provided USB C Cable. To check if your stepper motor is connected properly you can test this with an LED, If you have the first coil pair connected to an LED and spin the motor in any direction, the LED will light up. You can repeat this with the second coil pair – Very simple way to test.
Current Limit Adjustment
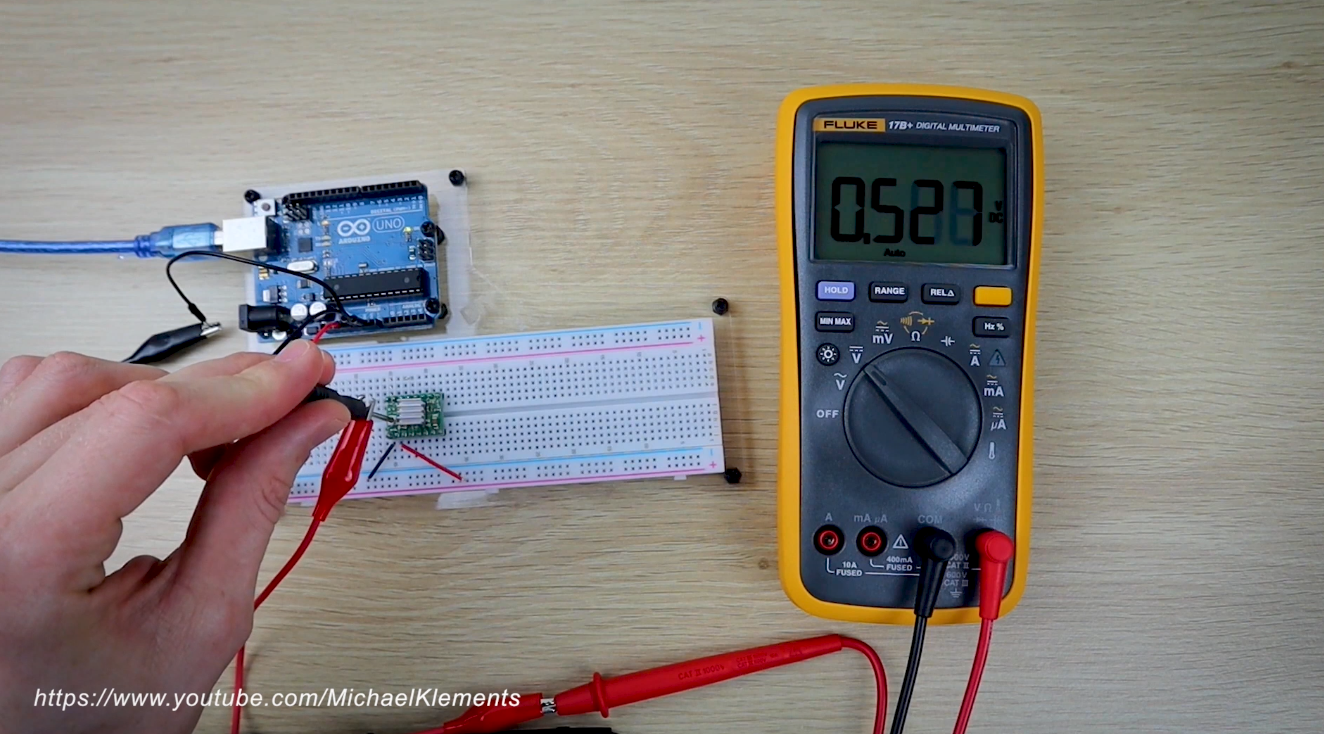


Ensure that you have adjusted the onboard potentiometer for the Current limit on the A4988 stepper motor controller. You can adjust the reference voltage
VREF to around 0.5V which translates to 0.5x 2 which equals 1 Amp. The commonly used equation is:
Current_Limit = VREF x 2
Just note that this equation may be different for various brands of the A4988 boards and may get a different current output that expected.
3D Printing Boom Pole
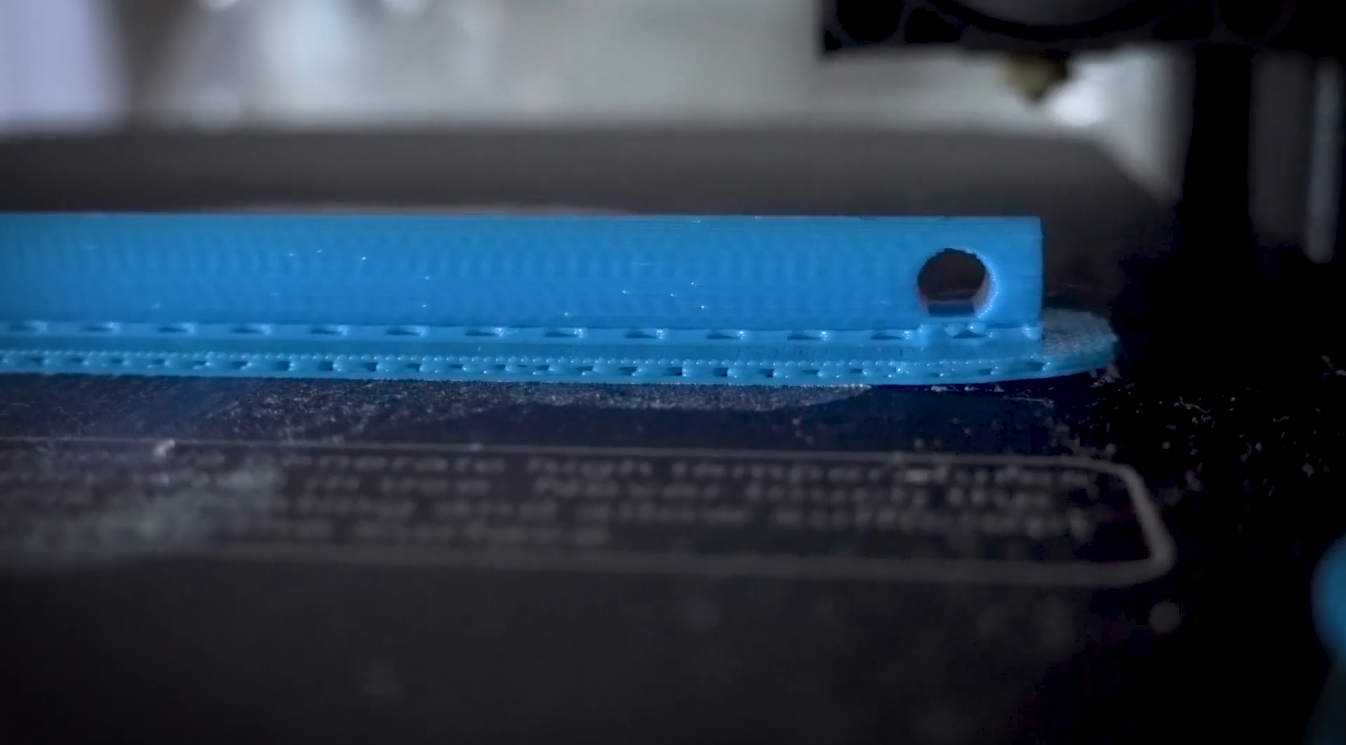
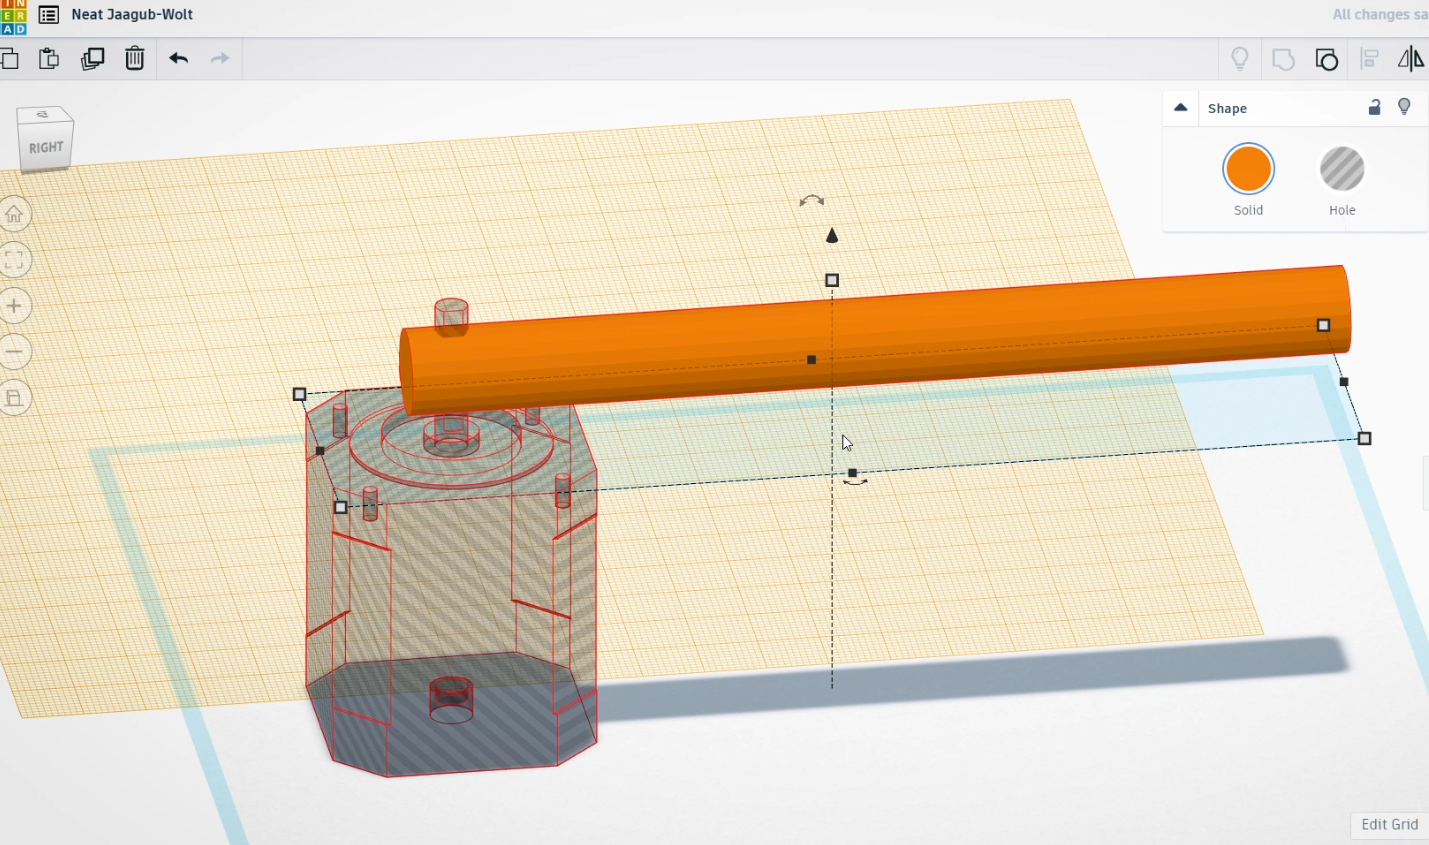
To get this shape of the hole. I got a CAD version of the NEMA motor, imported it into TinkerCAD, which is a free CAD software, and then I subtracted the motor shaft from a really long cylinder. Export into Ultimaker Cura and we can get printing.
You will find the CAD files HERE
How the Logic Works
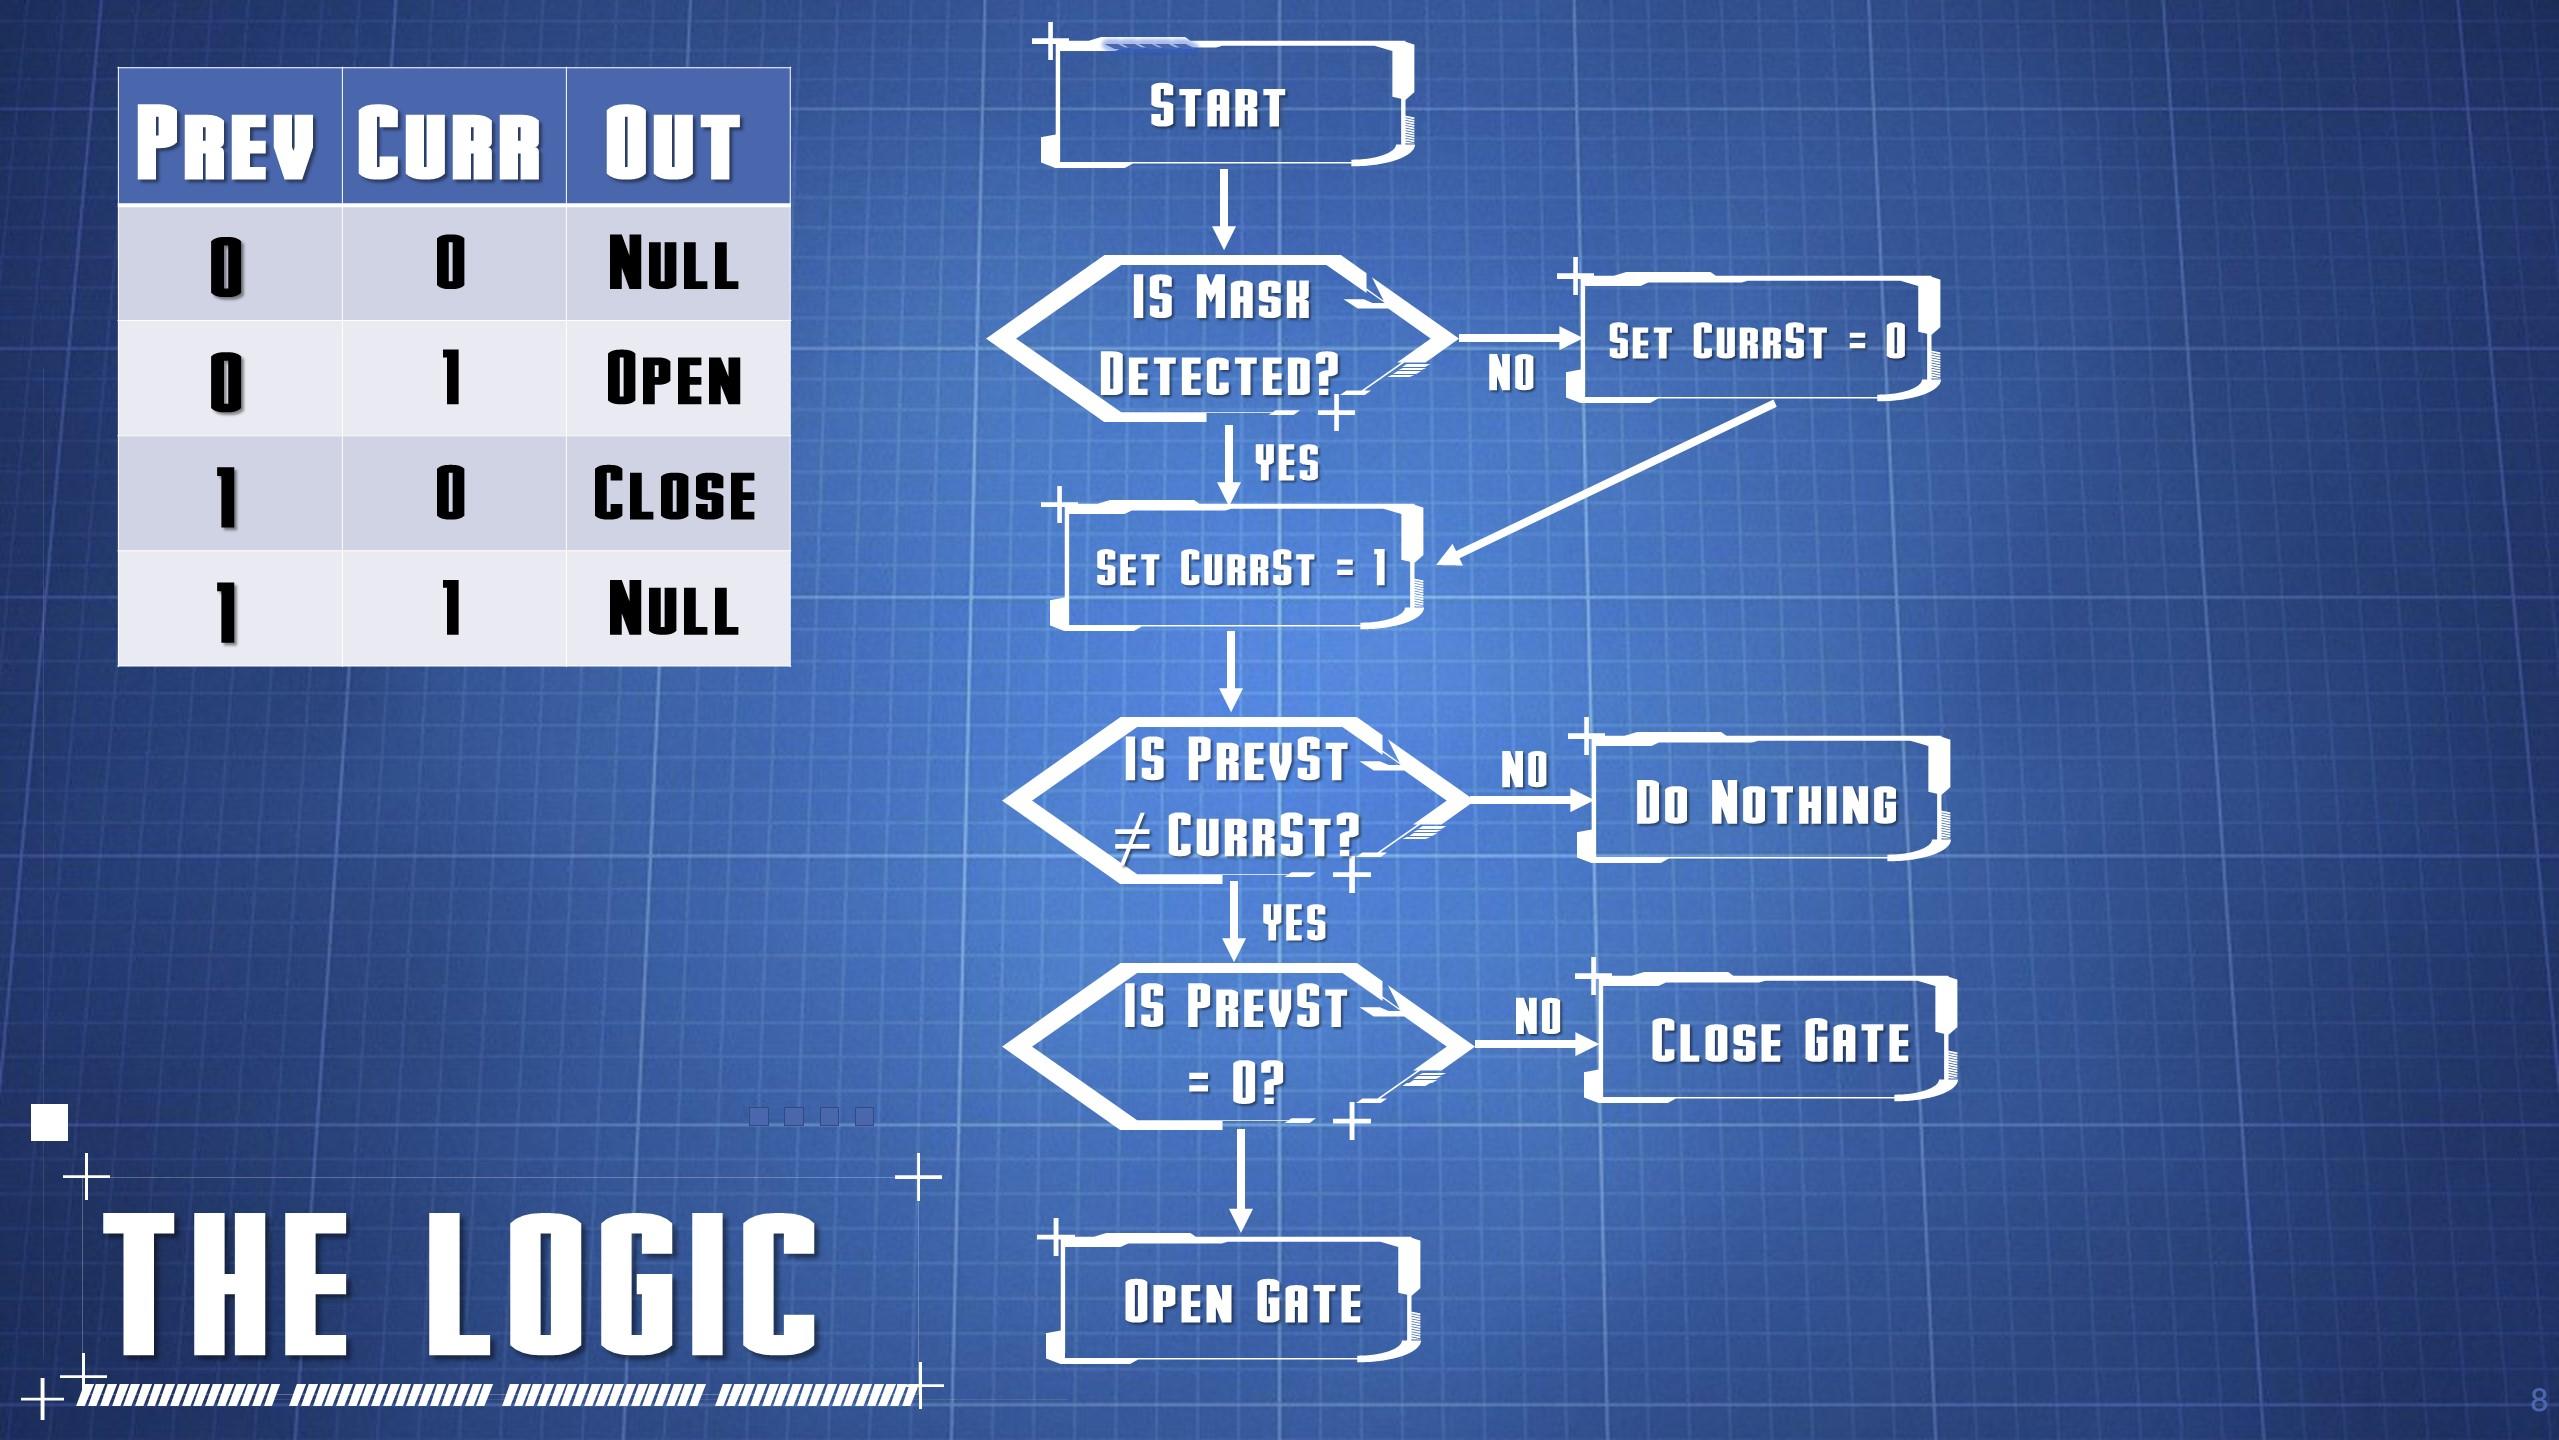
We start here and wait till the mask is detected. If a face is detected, we will check if the person is wearing a mask or not. If not then we will set the current state = 0, other wise if detected we set current state to 1. The next stage in our flow diagram, we compare if previous state = Current state. We are essentially looking for the transition or the edge trigger event. If we do not have a transition, we do nothing. But if we do detect this trigger, we will do a check as to whether Previous state = 0. You can perceive this better from the table. If both previous and current state = 0, it means that no mask was detected and the gate remains in the closed position.
If however, current state = 1 meaning mask detected, then that will trigger the gate to Open. The inverse is true for when previous state is 1 and current state is 0, the gate must close if the person takes off their mask. And then finally if previous and current state = 1, It means that a mask is being detected and thus the gate remains in the open position. Now you must be ask “Ritz, this is all nice and all, but cant we just say if mask detected then open gate, if not close the gate. “ haha, yes we can do that, but the problem with this is that we don’t want the gate to open again while its still open meaning that instead of being at the 90 degree mark the pole will extend to the 180 degree angle and viz versa. So this logic ensures that that motor does not over extend the pole in either direction. An easier alternative is that you can open the gate when mask is detected and close it after a set amount of seconds, and then open again when mask is detected. Let me know in the comments down below as to how you would apply this tutorial in your own projects.
Code
Cool So first up you going to head over to this GitHub repo: https://github.com/augmentedstartups/OpenCVAIKitApps
Git clone it to the folder wherever you’d like. Now It is important to note that you have to first complete the App 1 tutorial for this to work, if you haven’t already watched the video here:
In this repo you will be able to clone the necessary files that we will use in this tutorial series. So Apps 1-6. Some of the app tutorials and source will only be available in the membership area of YouTube and on Patreon.
You can Join Here:
For now We will focus on the contents of app 3. There will be 4 files to be aware off, the base files called depthai_utils.py and main.py.
If you want to skip the coding part then you can also skip to the Testing step of this tutorial using the already coded files here in this full folder Cool so if you are following along with me on the coding. Ensure that you have the following dependencies, by typing in
python3 main.py
To run the code, simply type in
And you will see the Mask Detection controlling your Stepper motor :D Woohoo!
And you will see the Mask Detection controlling your Stepper motor :D Woohoo!
Summary
.gif)
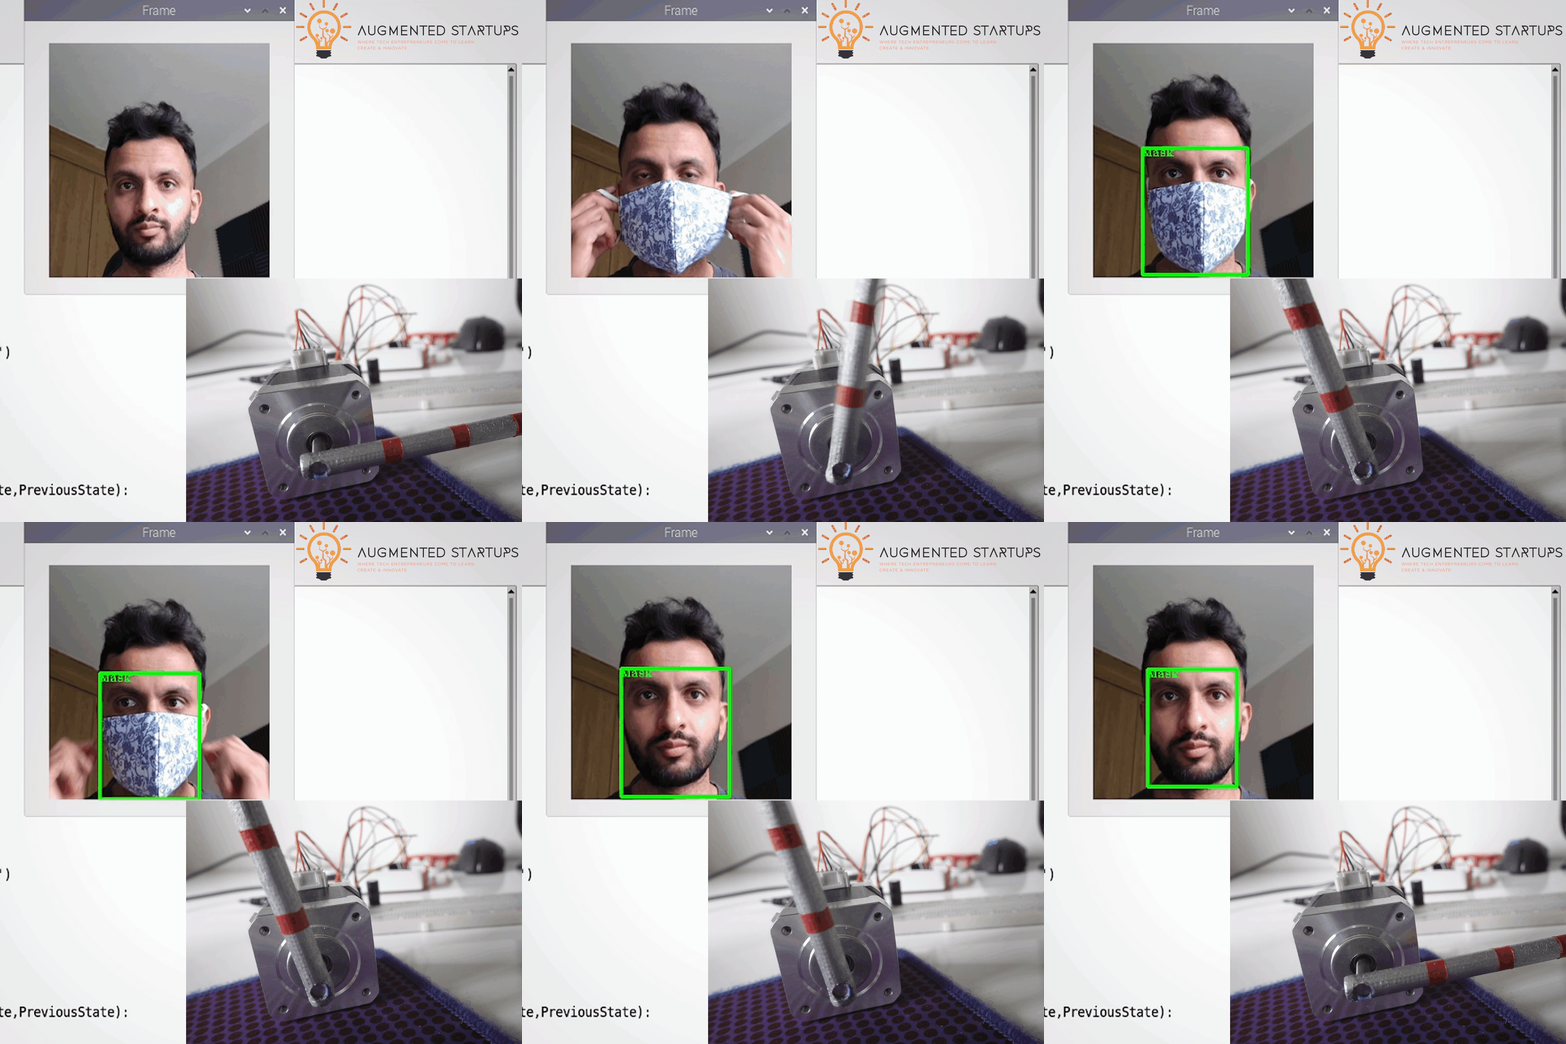
Cool so when there is just background, nothing happens, when I place my face infront of the camera with out a mask the gate stays closed. When I put on my mask, the logic triggers and opens the gate which stays open as long as I have the mask on.
Perfect. It all worked as expected. Comment down below if you got this working on your Raspberry Pi as well as what you would like to see next on Augmented Startup. Now I want your notice, that there is bit of latency when the trigger event happens. This is because we are stopping our video temporarily to execute the stepper motor commands. The way you can mitigate this delay is by using threading. The completed code with threading you can find when you join YouTube membership or become a Patreon Supporter.
You can Join Here: