Mary Had a Little Arduino
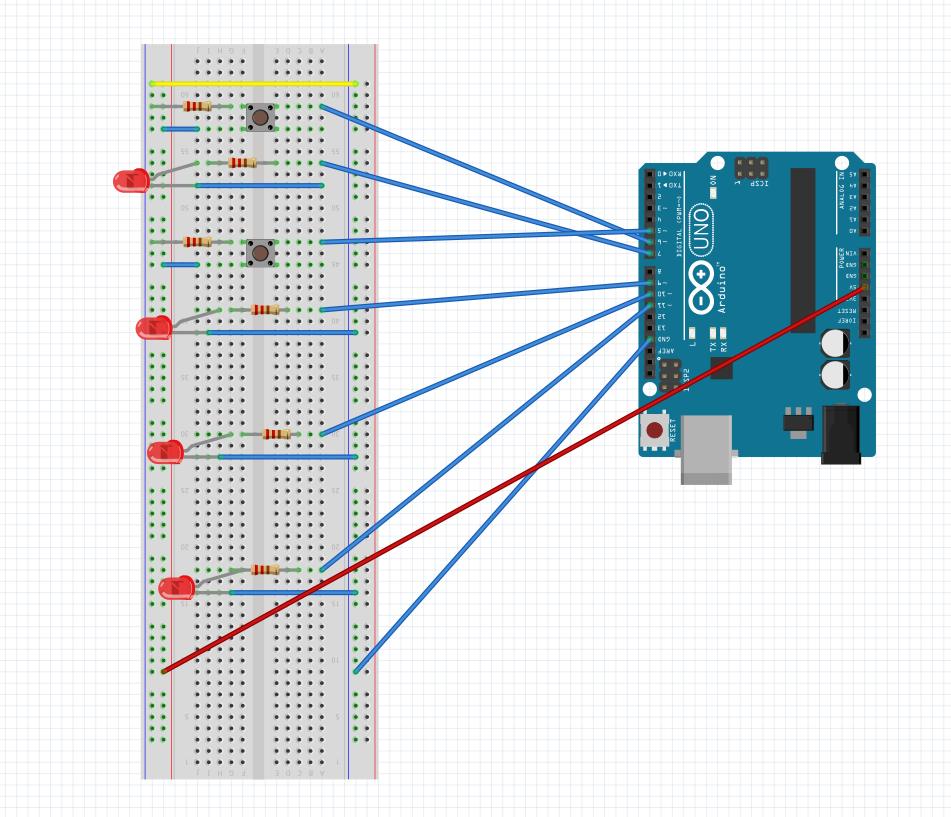
This project will assemble a collection of LEDs that will flash to represent the notes C, D, E, and G for the song Mary Had a Little Lamb.
Things you will need
- An Arduino Uno board
- A bread board
- 15 jumper wires
- 6 resistors
- 4 LEDs of a color of your choice
- 2 small buttons
Attach an LED
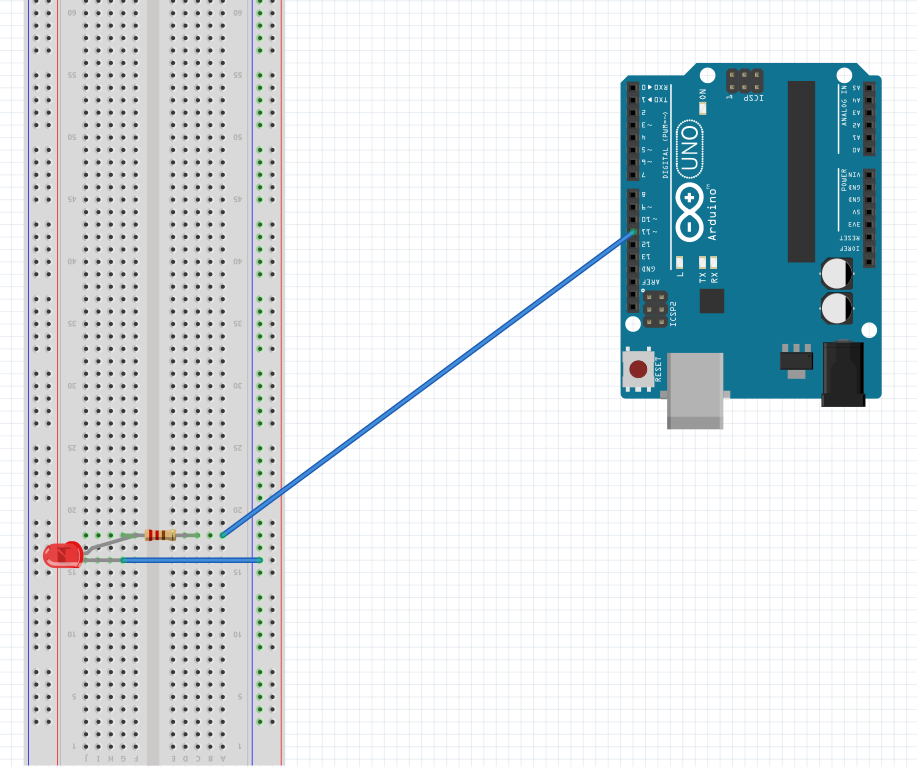
- Attach one LED using a jumper wire and a resistor. Remember that the resistor goes on the longer end of the LED. View the image for a reference.
- Next, attach the jumper wire to the ground on the bread board
- Lastly, attach the resistor to slot number 11 on your Arduino
Add the Other Three
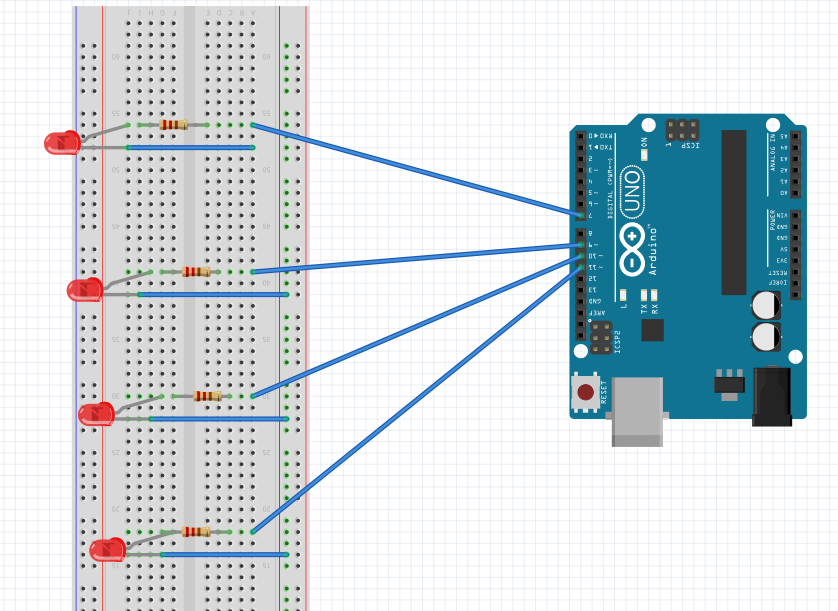
- Using the first step as a reference, attach the other three LEDs in a similar fashion. The placement does not matter too much as long as they are not on the same number of the same side. Mine are staggered the way they would be on sheet music.
- Make sure that all the jumper wires are attached to the ground on the bread board
- Now attach the LEDs of 2, 3, and 4 to slots 10, 9, and 7 respectively. I left slot 8 out in case you want to add another pin to represent the F key
The Buttons
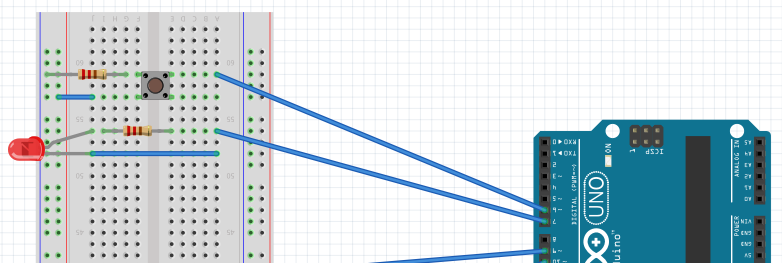
- Attach a button to the bread board along the bridge to split the signal.
- Next, attach a jumper wire to one lead on one side of the button, and then to the hot rail of the bread board
- After that, we need to attach a resistor to the other lead on the same side of the button, and then to the cold rail
- Finally, we need to attach the same lead but on the other side of the bread board to slot 6 on the Arduino
Add the Other Button
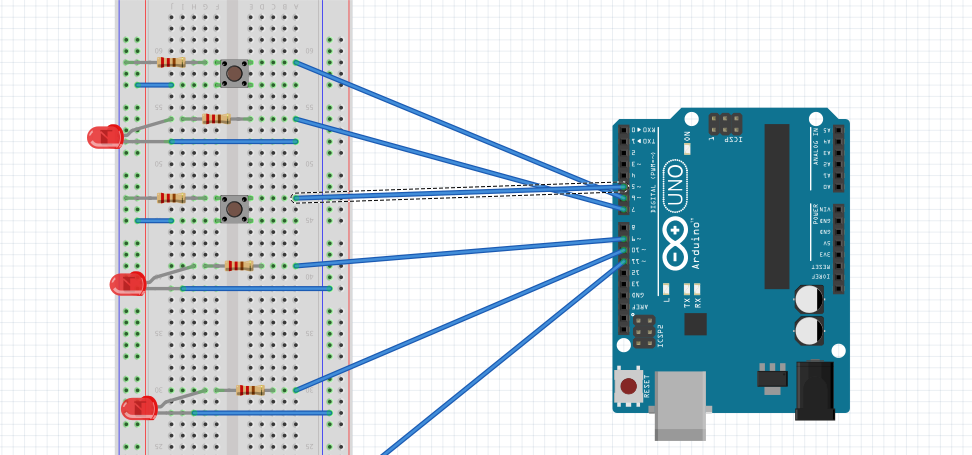
Repeat the previous step to attach another button to slot 5 on the Arduino
The Ground Wire
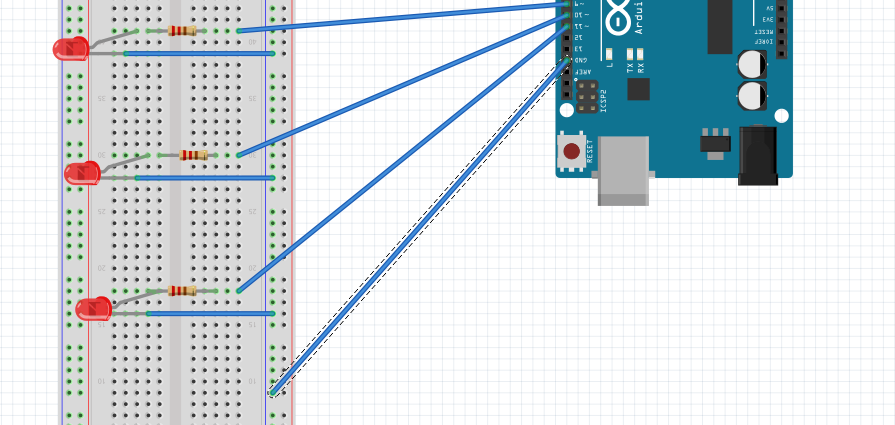
- Attach one wire from the ground rail in the bread board to the ground slot on the Arduino
- In the image, it is the bottom most wire.
Connect the Two Ground Rails
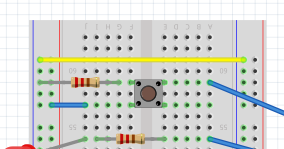
- If you followed what I did and had the resistors on the buttons lead to the ground rail on the other side of the bread board, you will need to connect the two rails or connect both rails to individual ground slots on the Arduino. I went ahead and connected the two.
The Final Wire
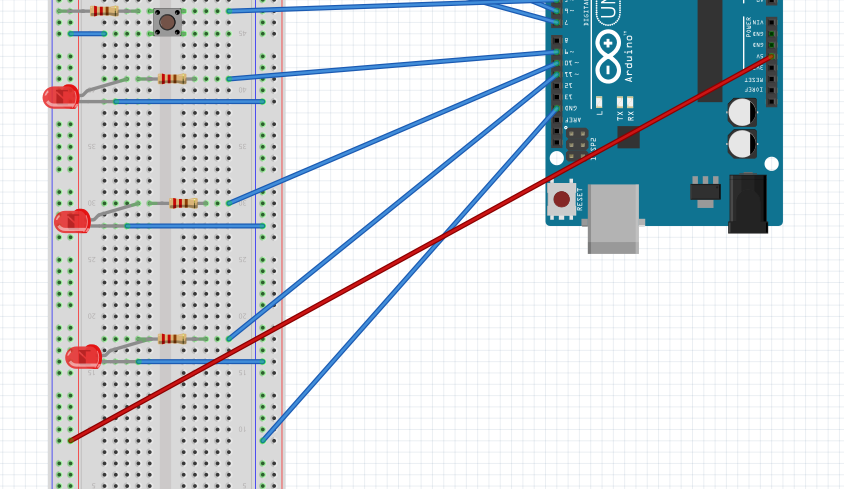
- And finally, we attach a jumper wire from the hot rail to the 5v slot on the Arduino. Since there is a cluster of blue wires in the diagram, I went ahead and made this wire red so you can see it better.
The Code
All that's left to do is run the code I have provided
Downloads
Important Information
The way the code is set up, slot number 5 corresponds to a test button to test if your LEDs are working and slot number 6 on the Arduino does an auto play of Mary Had a Little Lamb