Map Sliding Puzzle 3D Printed - Fusion 360
by Nikolas Babetas in Workshop > 3D Printing
35649 Views, 149 Favorites, 0 Comments
Map Sliding Puzzle 3D Printed - Fusion 360
.png)
.gif)
.jpg)
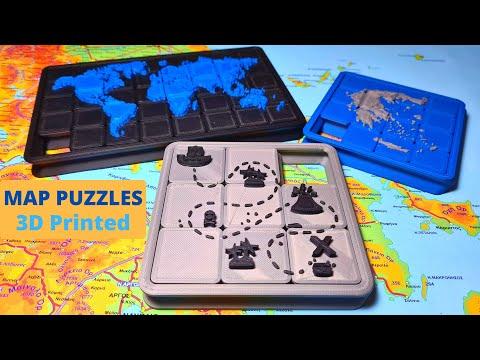
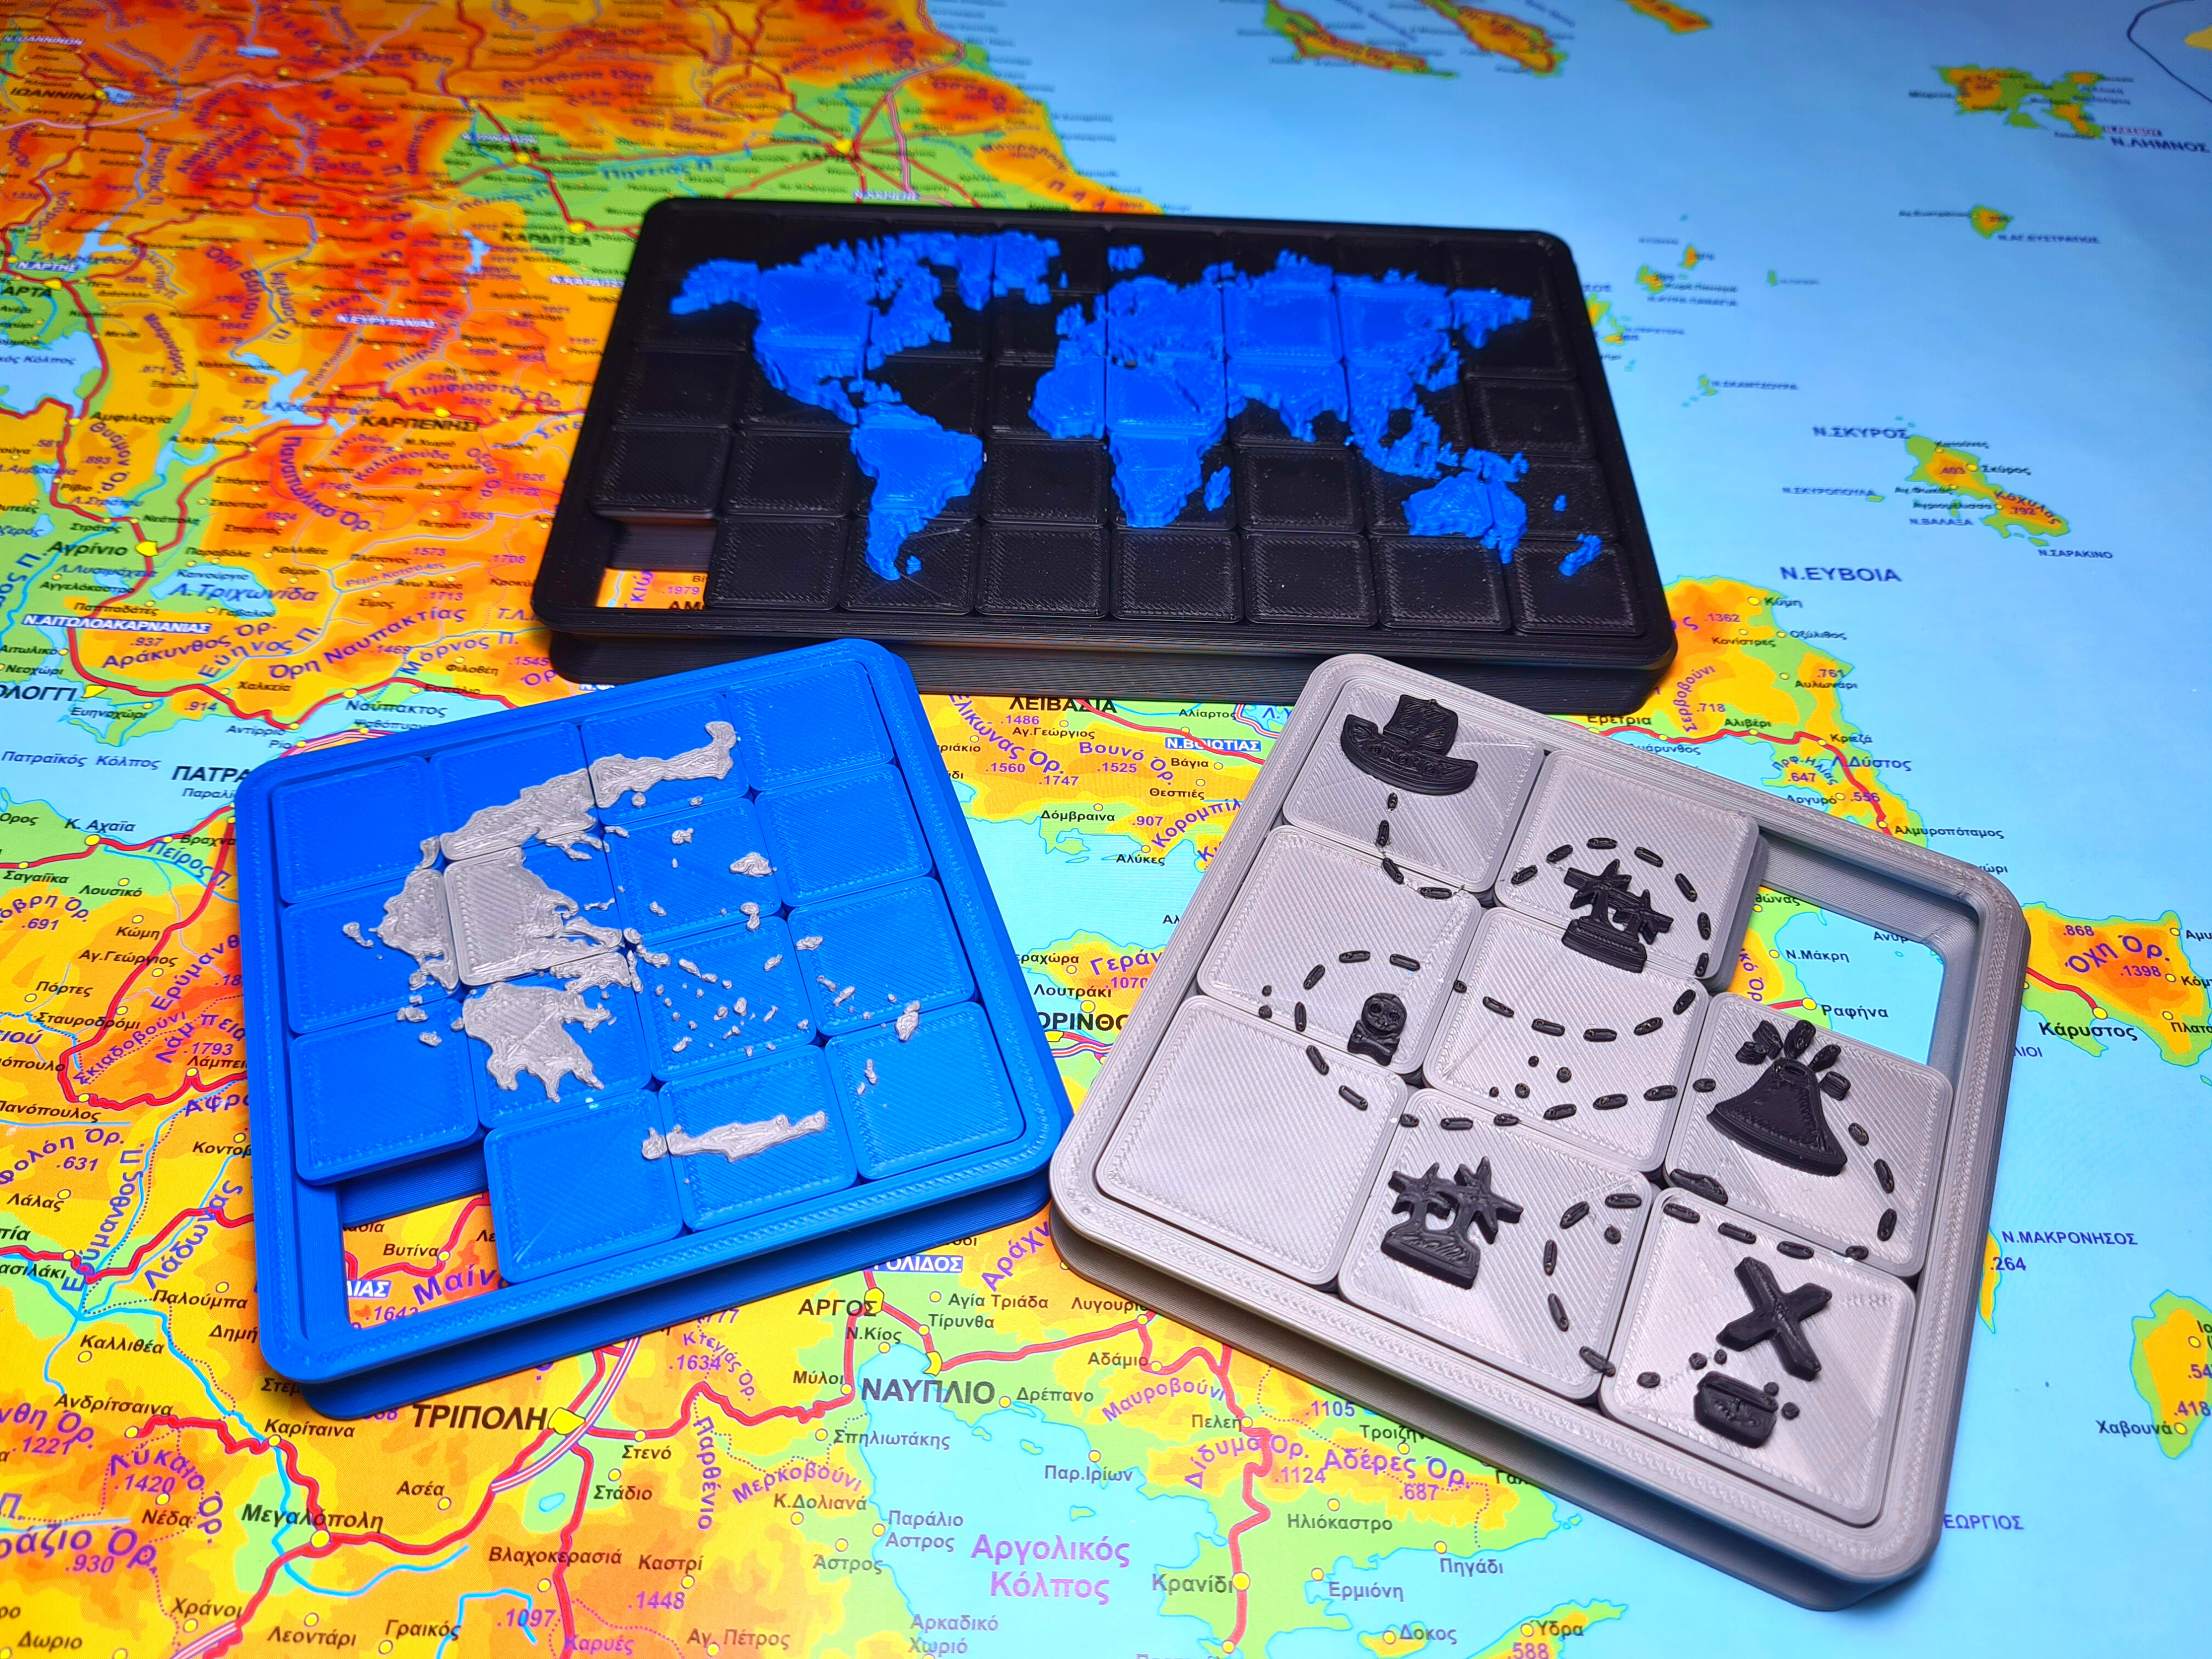
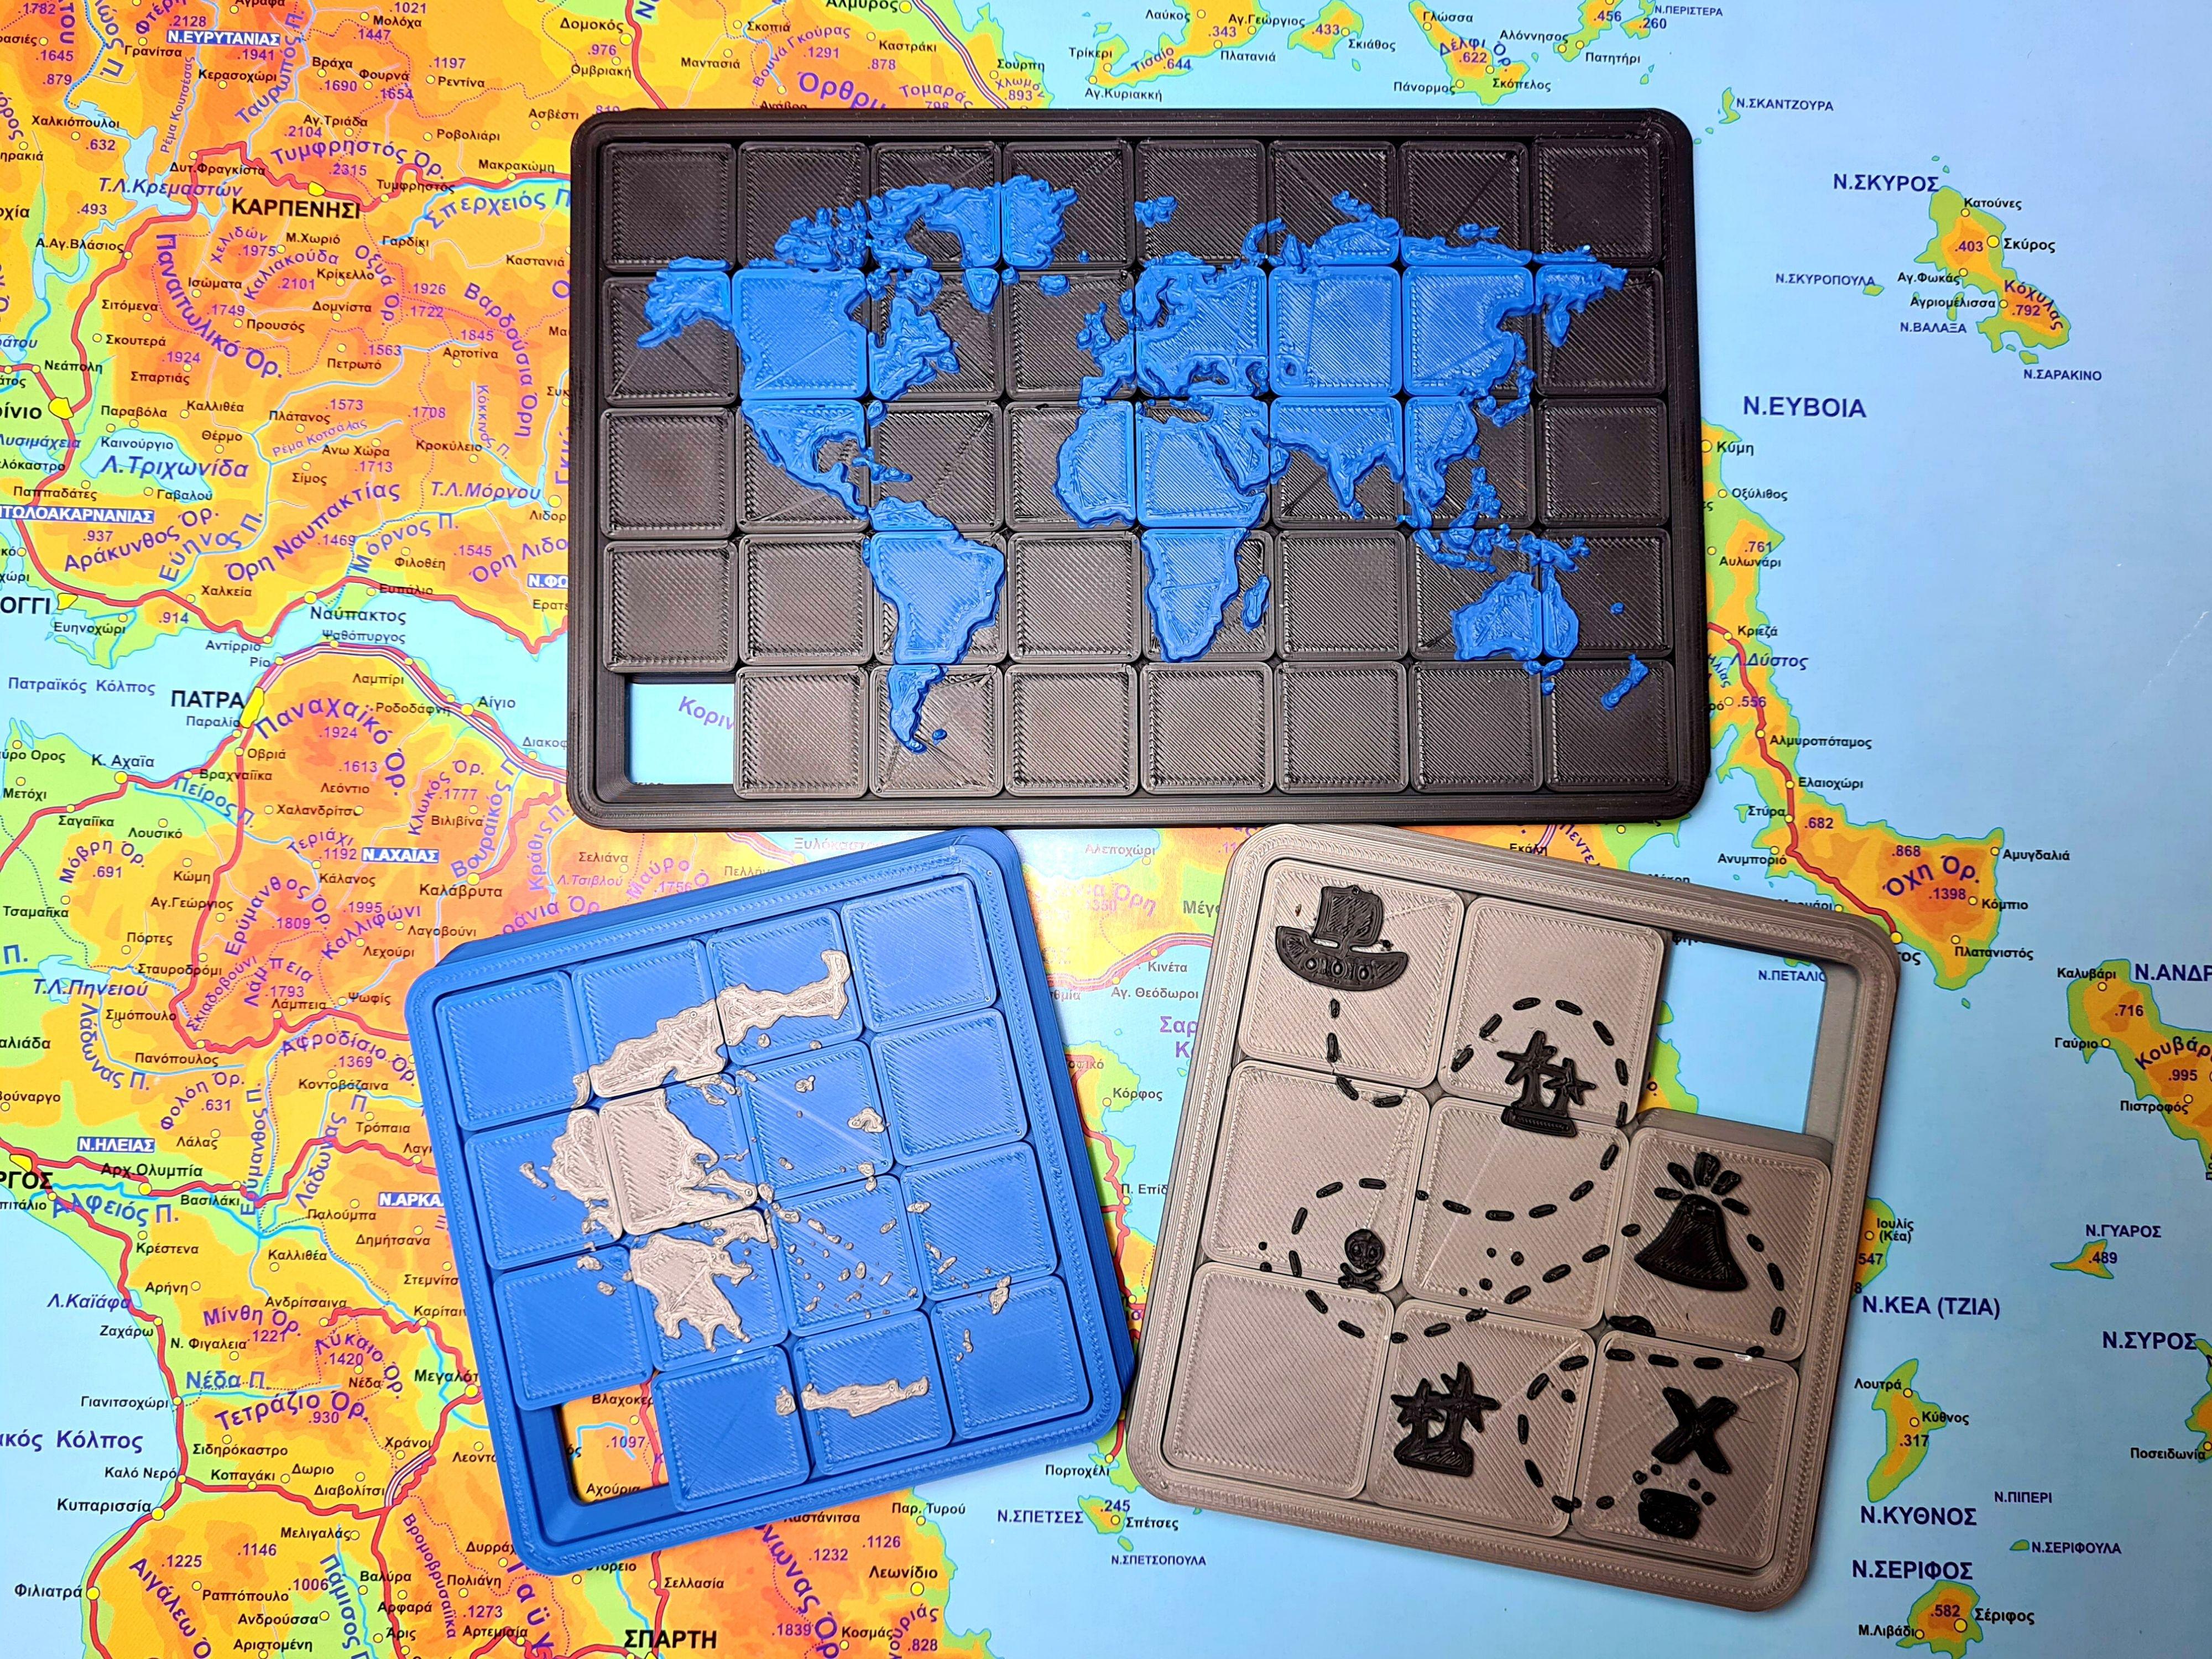
Hello friends! My name is Nikolas and I am 15 years old. Today in this Instructable I'll show you how to 3D design a Print-In-Place (PIP) Sliding Puzzle in Fusion 360 and how to add any picture or, in this case, map to it! These puzzles are a great way to spend some and learn a bit of geography! Additionally the 3D texture makes them accessible to visually impaired people too!
Make sure to watch the linked video above to see the Puzzles in action!
I've had my 3D printer for almost a year now and my favorite things to print have always been print-in-place designs. That means designs that print in one go but take advantage of the layer by layer printing to create parts which are mechanically connected to each other as gears, joints etc. Some examples are this Gyro Heart Keychain I made, this Flexi Rex, this Planetary Gear Bearing, or this Planetary Phone Stand which is an amazing design and in my opinion best showcases how PIP designs can be used.
I love experimenting with such designs from time to time and lately I've been quite interested in making PIP Sliding Puzzles and it has been a really interesting journey!
Supplies
- A 3D printer (I am using the Ender 3 V2)
- Some 3D Printing Filament, you can use any material you are comfortable with, but I would suggest having at least two colours of it.
These links are Amazon Affiliate links which means that if you purchase the products using them I'll get a small commission of the sale at no extra cost for you! This way you can help me make more and cooler projects and I really appreciate it! Thank you!
What Are Sliding Puzzles?
.gif)
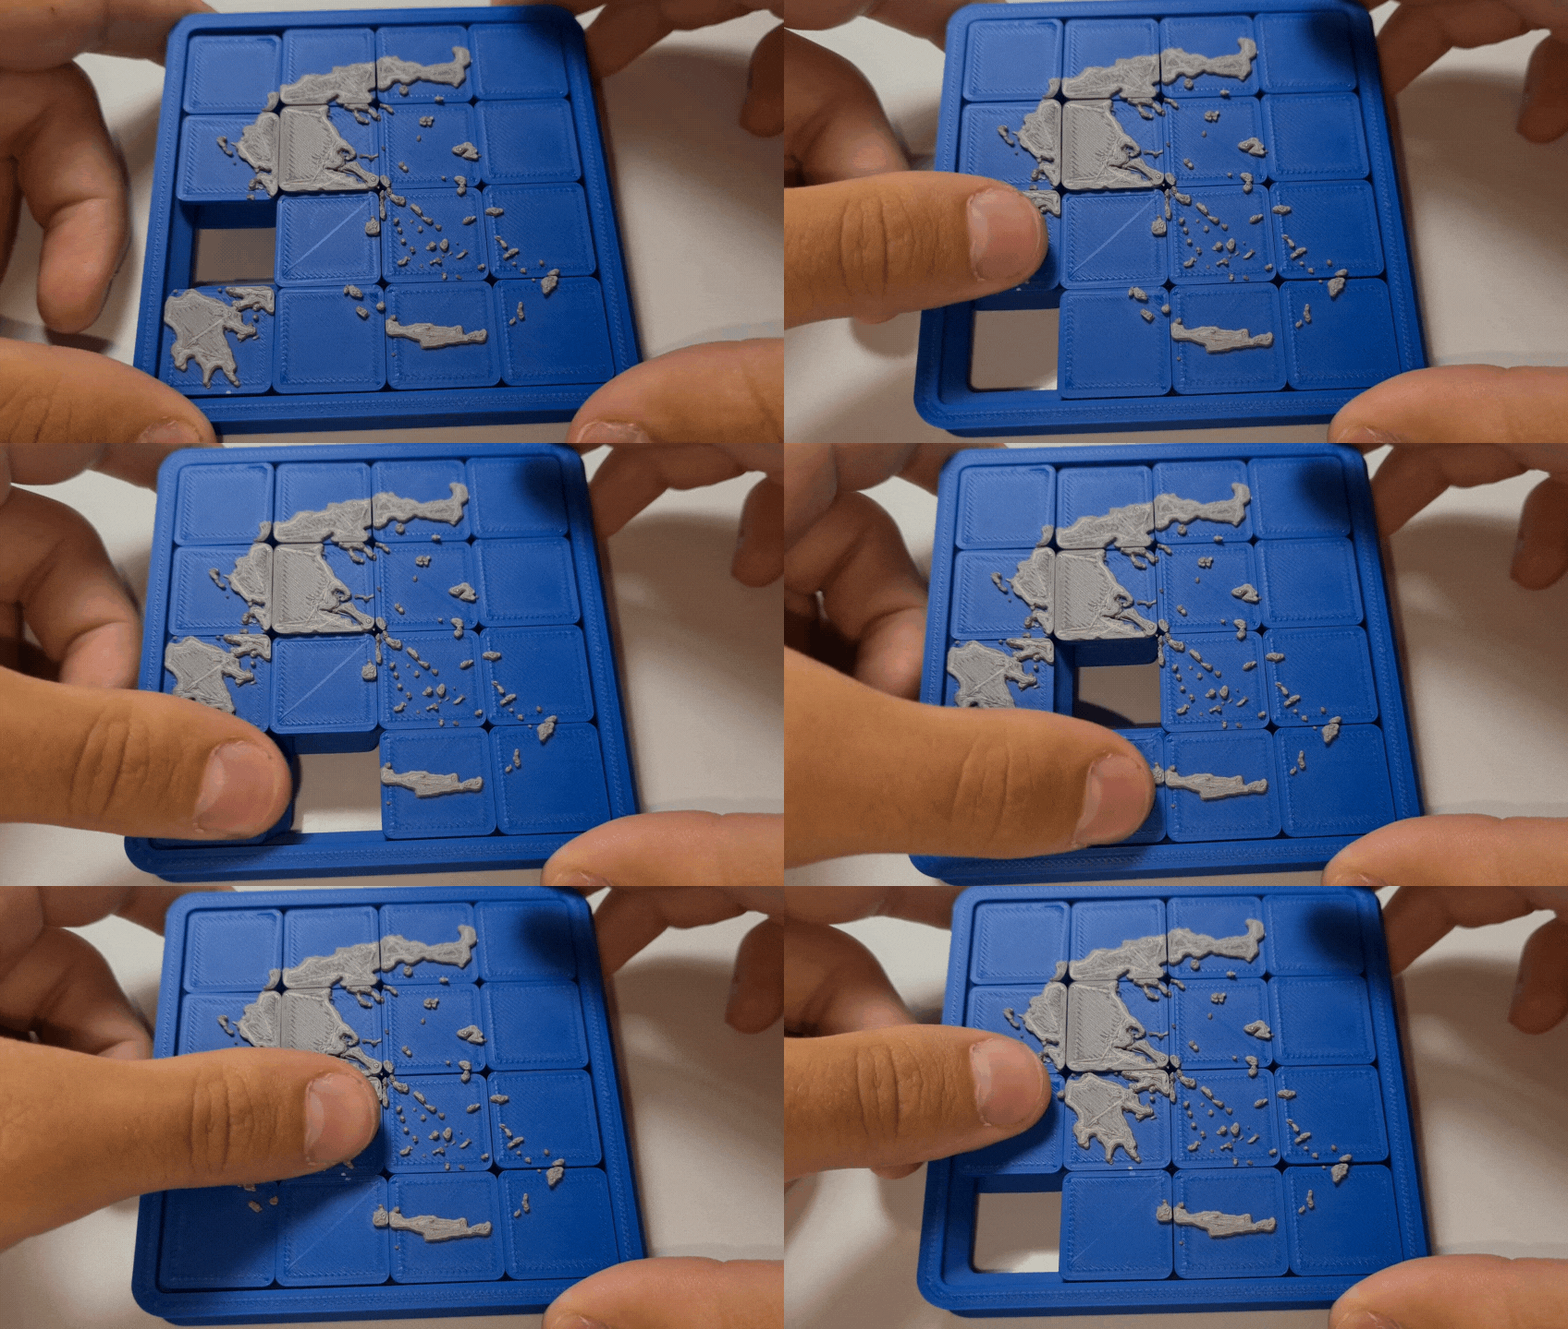
You most likely are accustomed with Sliding Puzzles but for those who are unaware they are a combination puzzle, usually made from wood or plastic, that challenges a player to slide pieces along certain routes (usually on a board) to establish a certain end-configuration. The pieces to be moved may consist of simple shapes, patterns, sections of a larger picture, numbers, or letters.
To get a better idea you can also check out this Free Online Sliding Puzzle Game.
How Do They Work?
.gif)
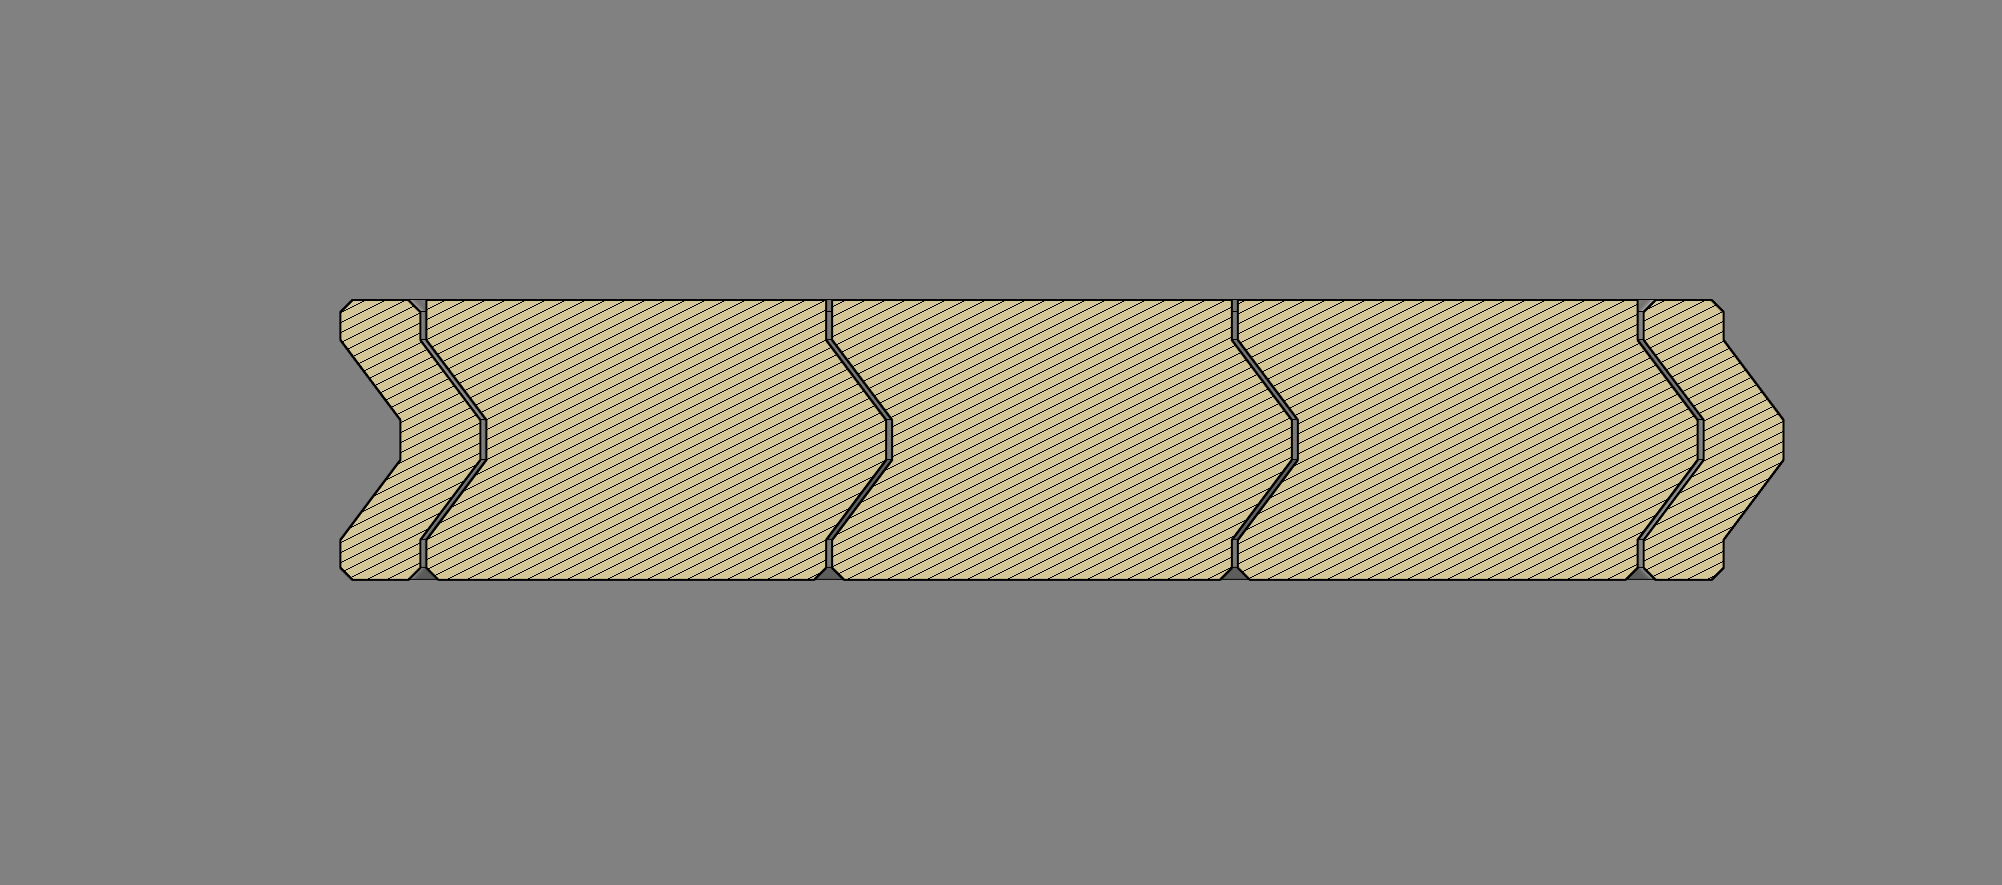
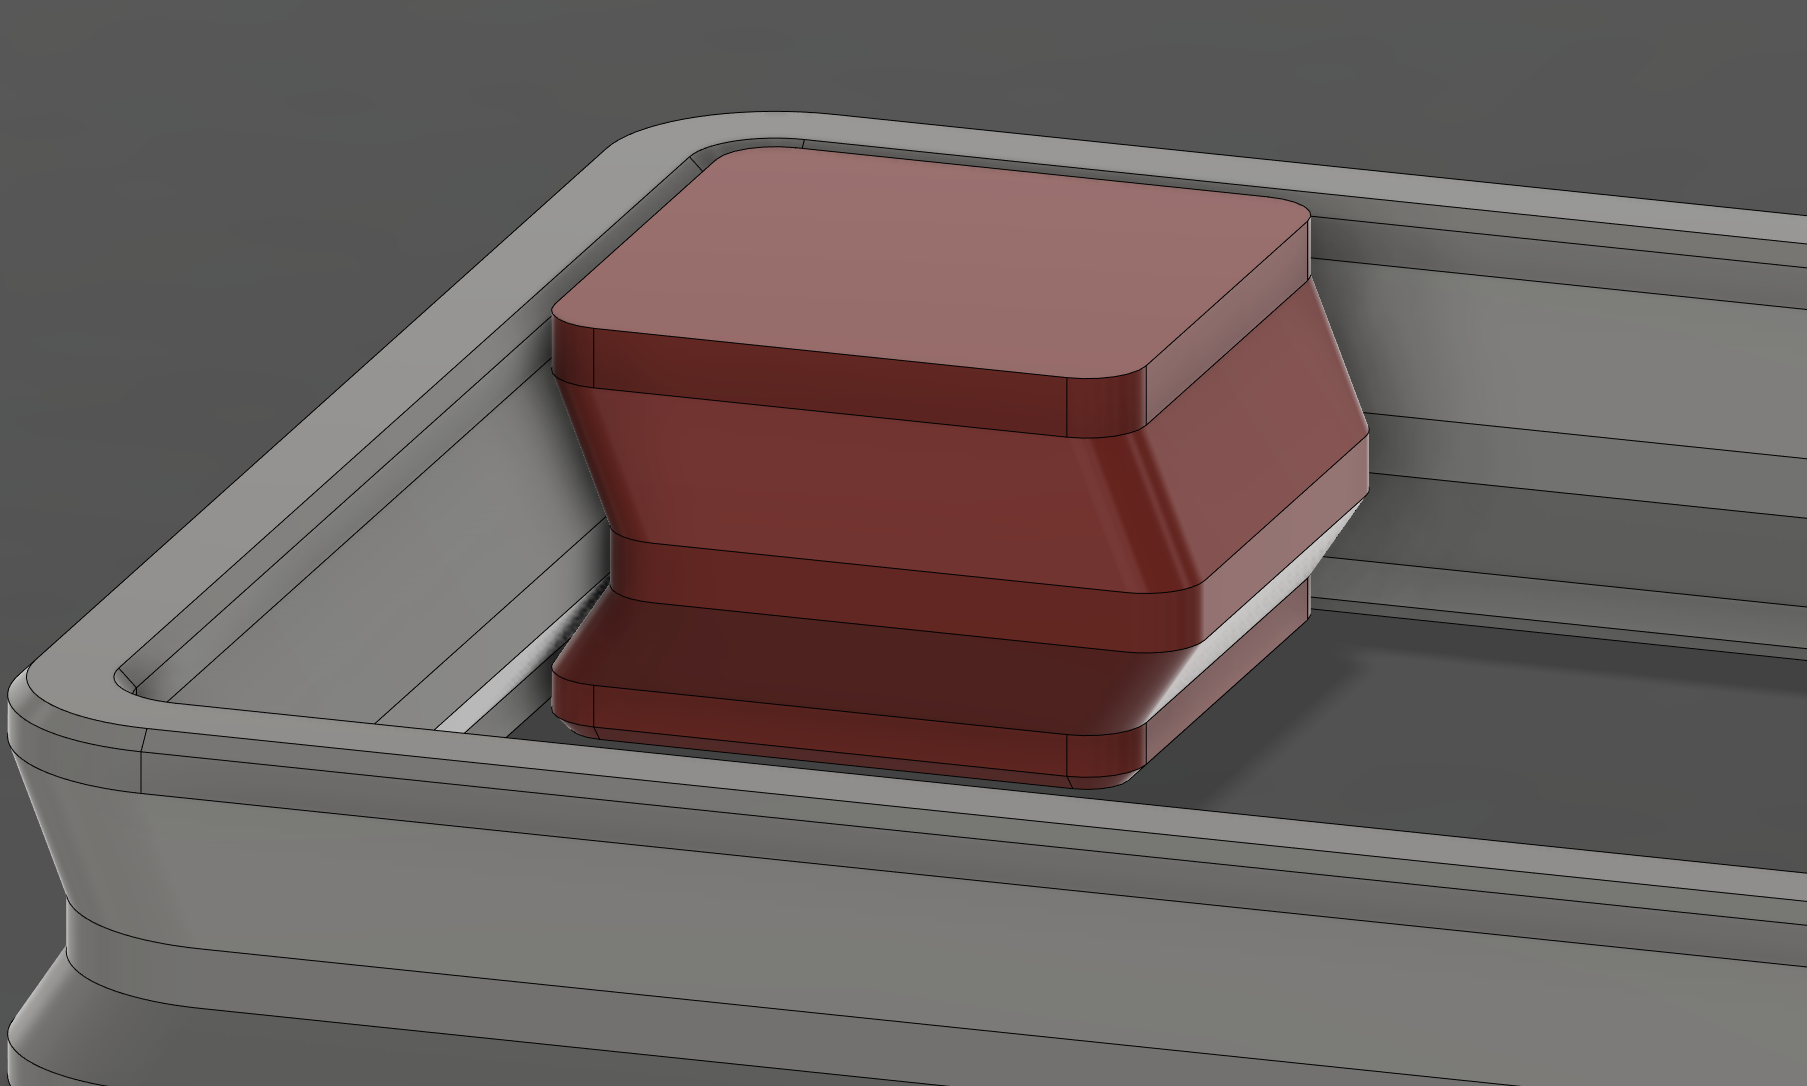
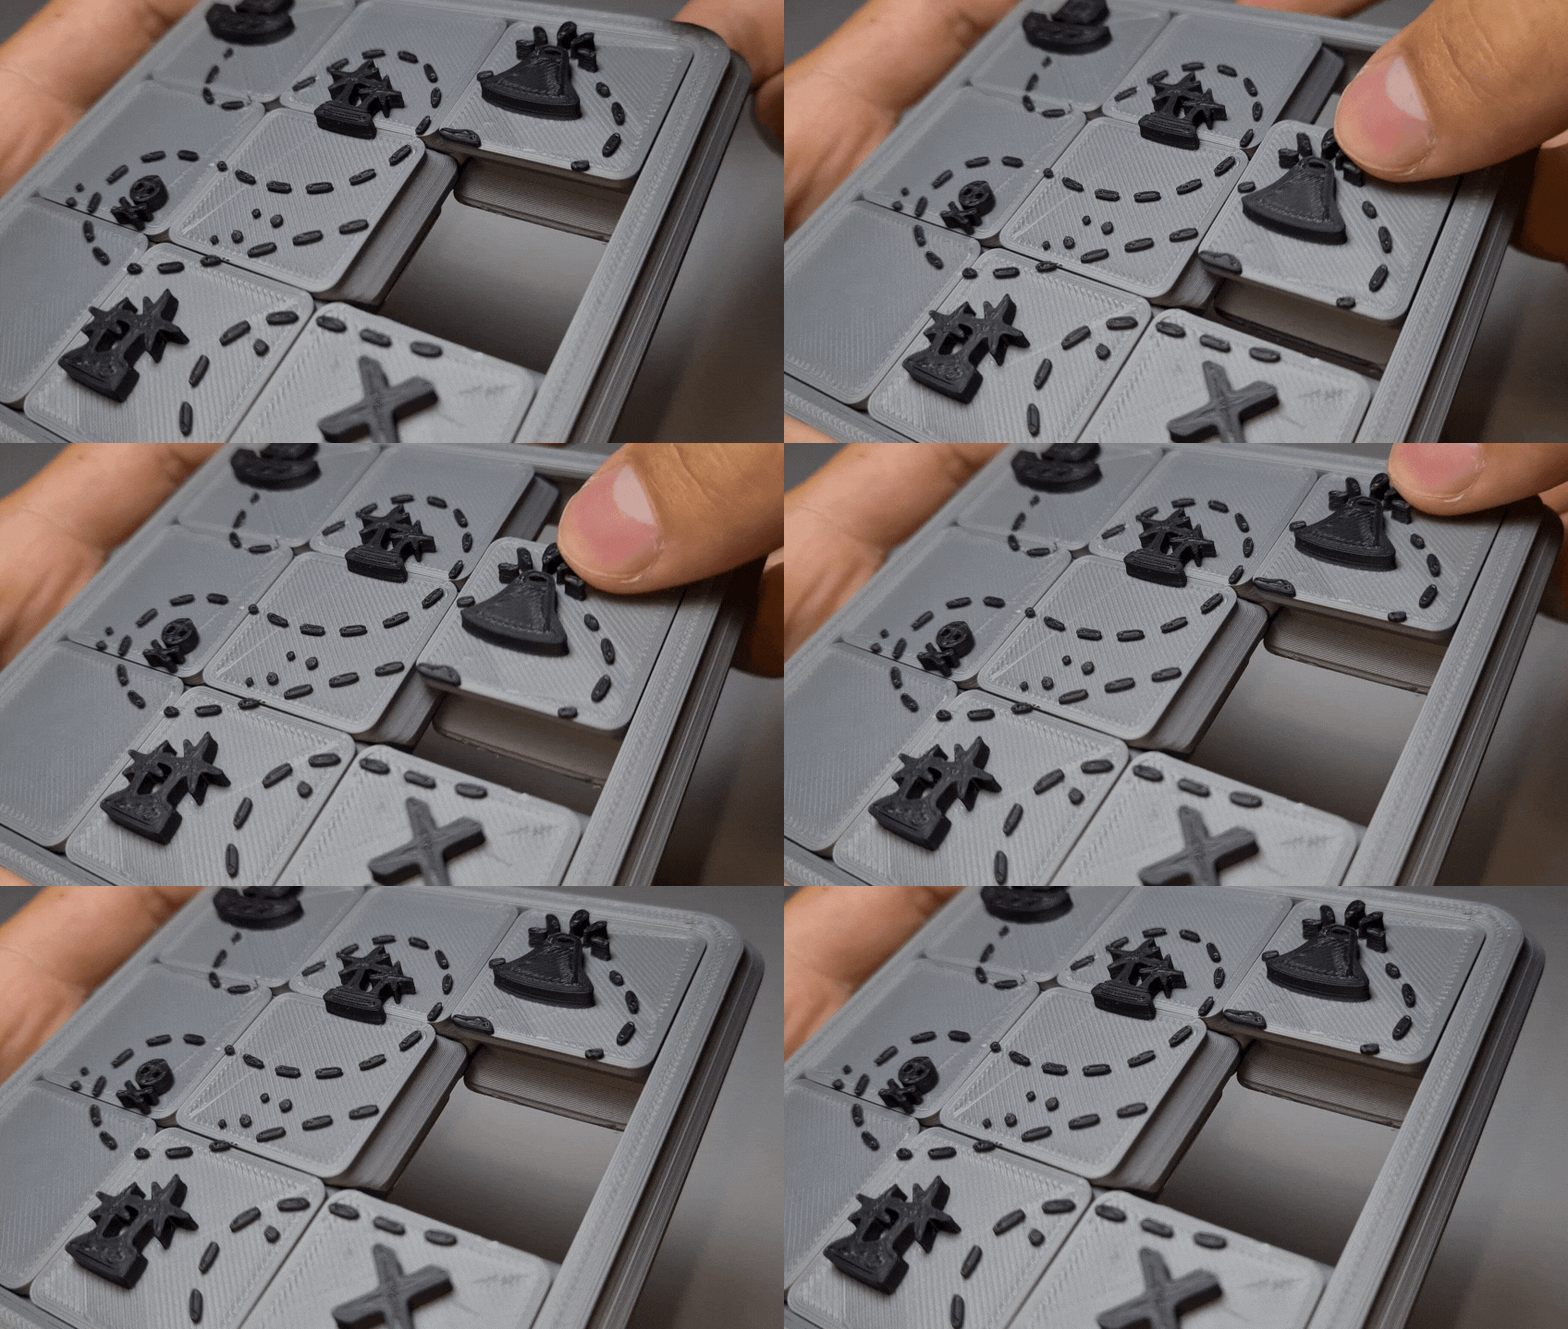
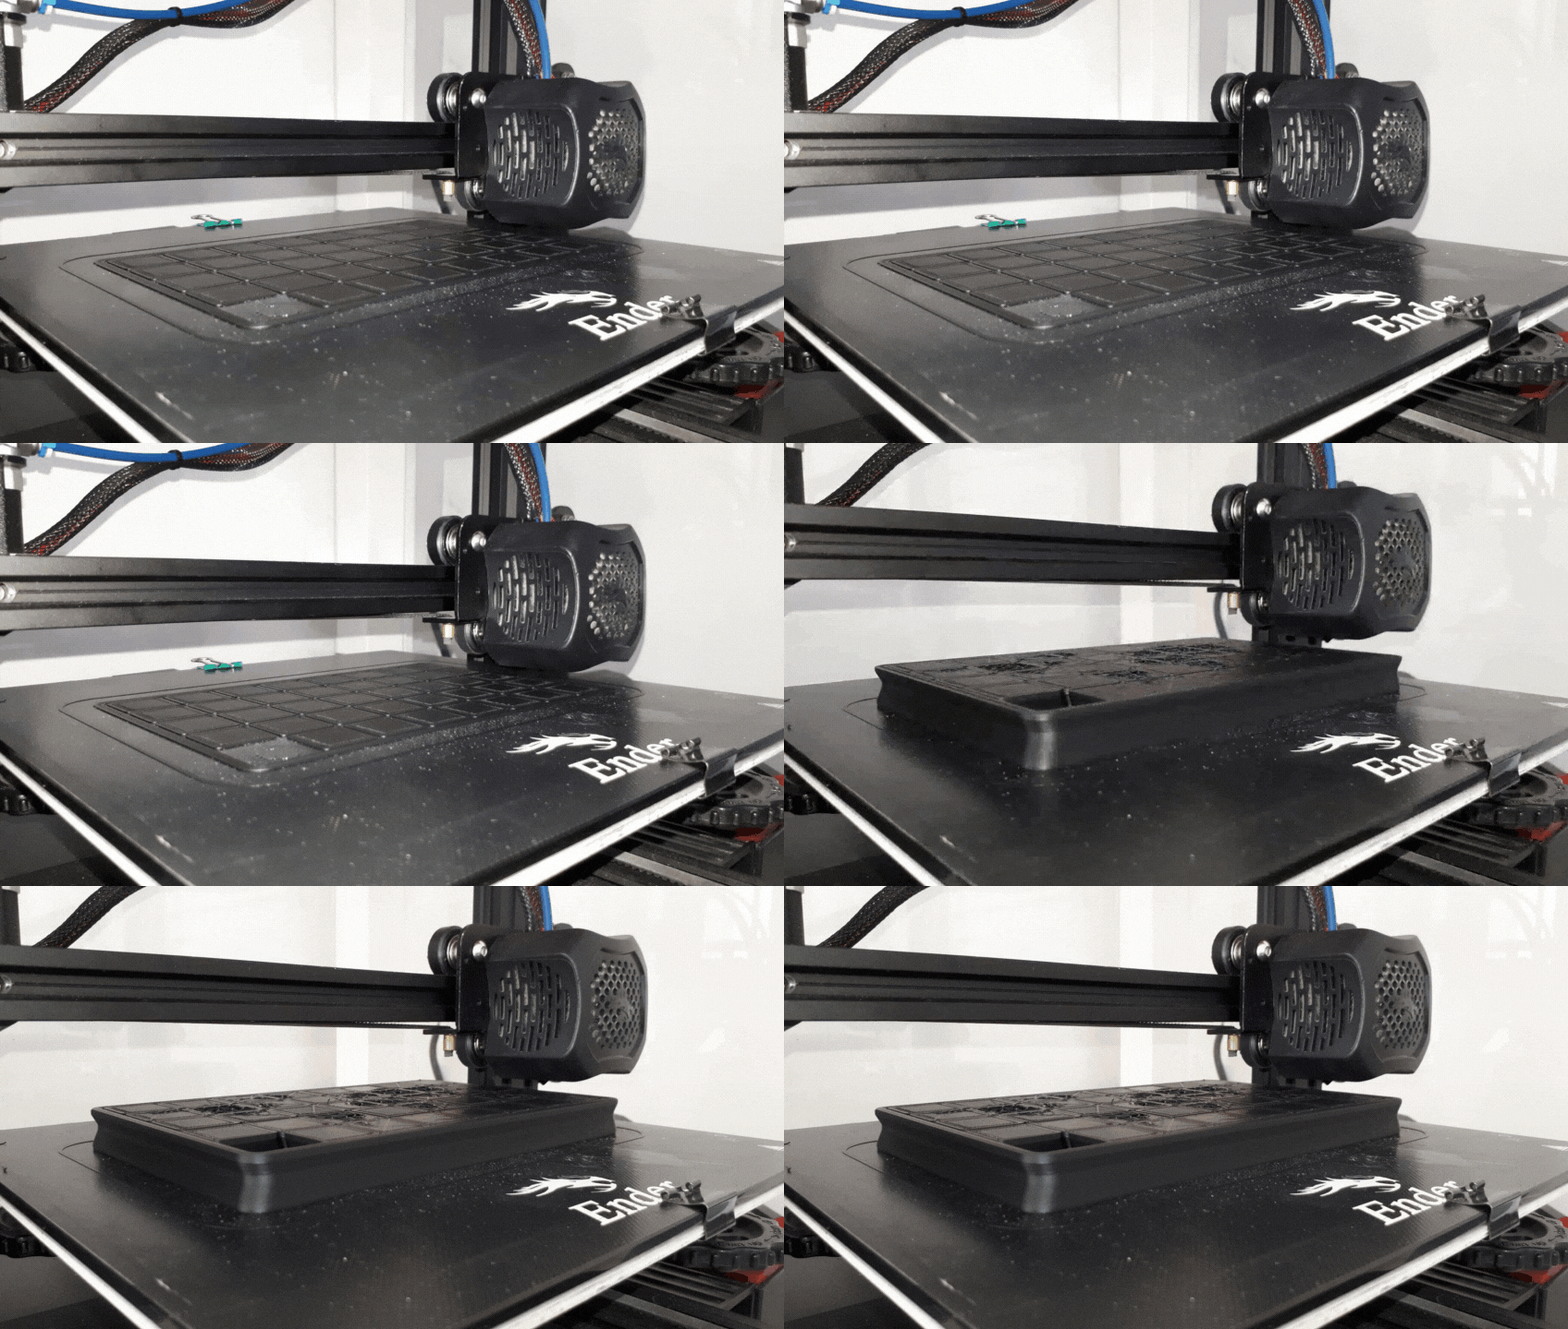
The pieces cannot be lifted out of the frame or rearranged in any way, except by sliding them into an empty space. But how is this achieved? Well, the blocks cannot fall because they have a built in angle that allows them to interact with the frame and the other blocks simply by sliding.
3D Printing
.gif)
.png)
.png)
.png)
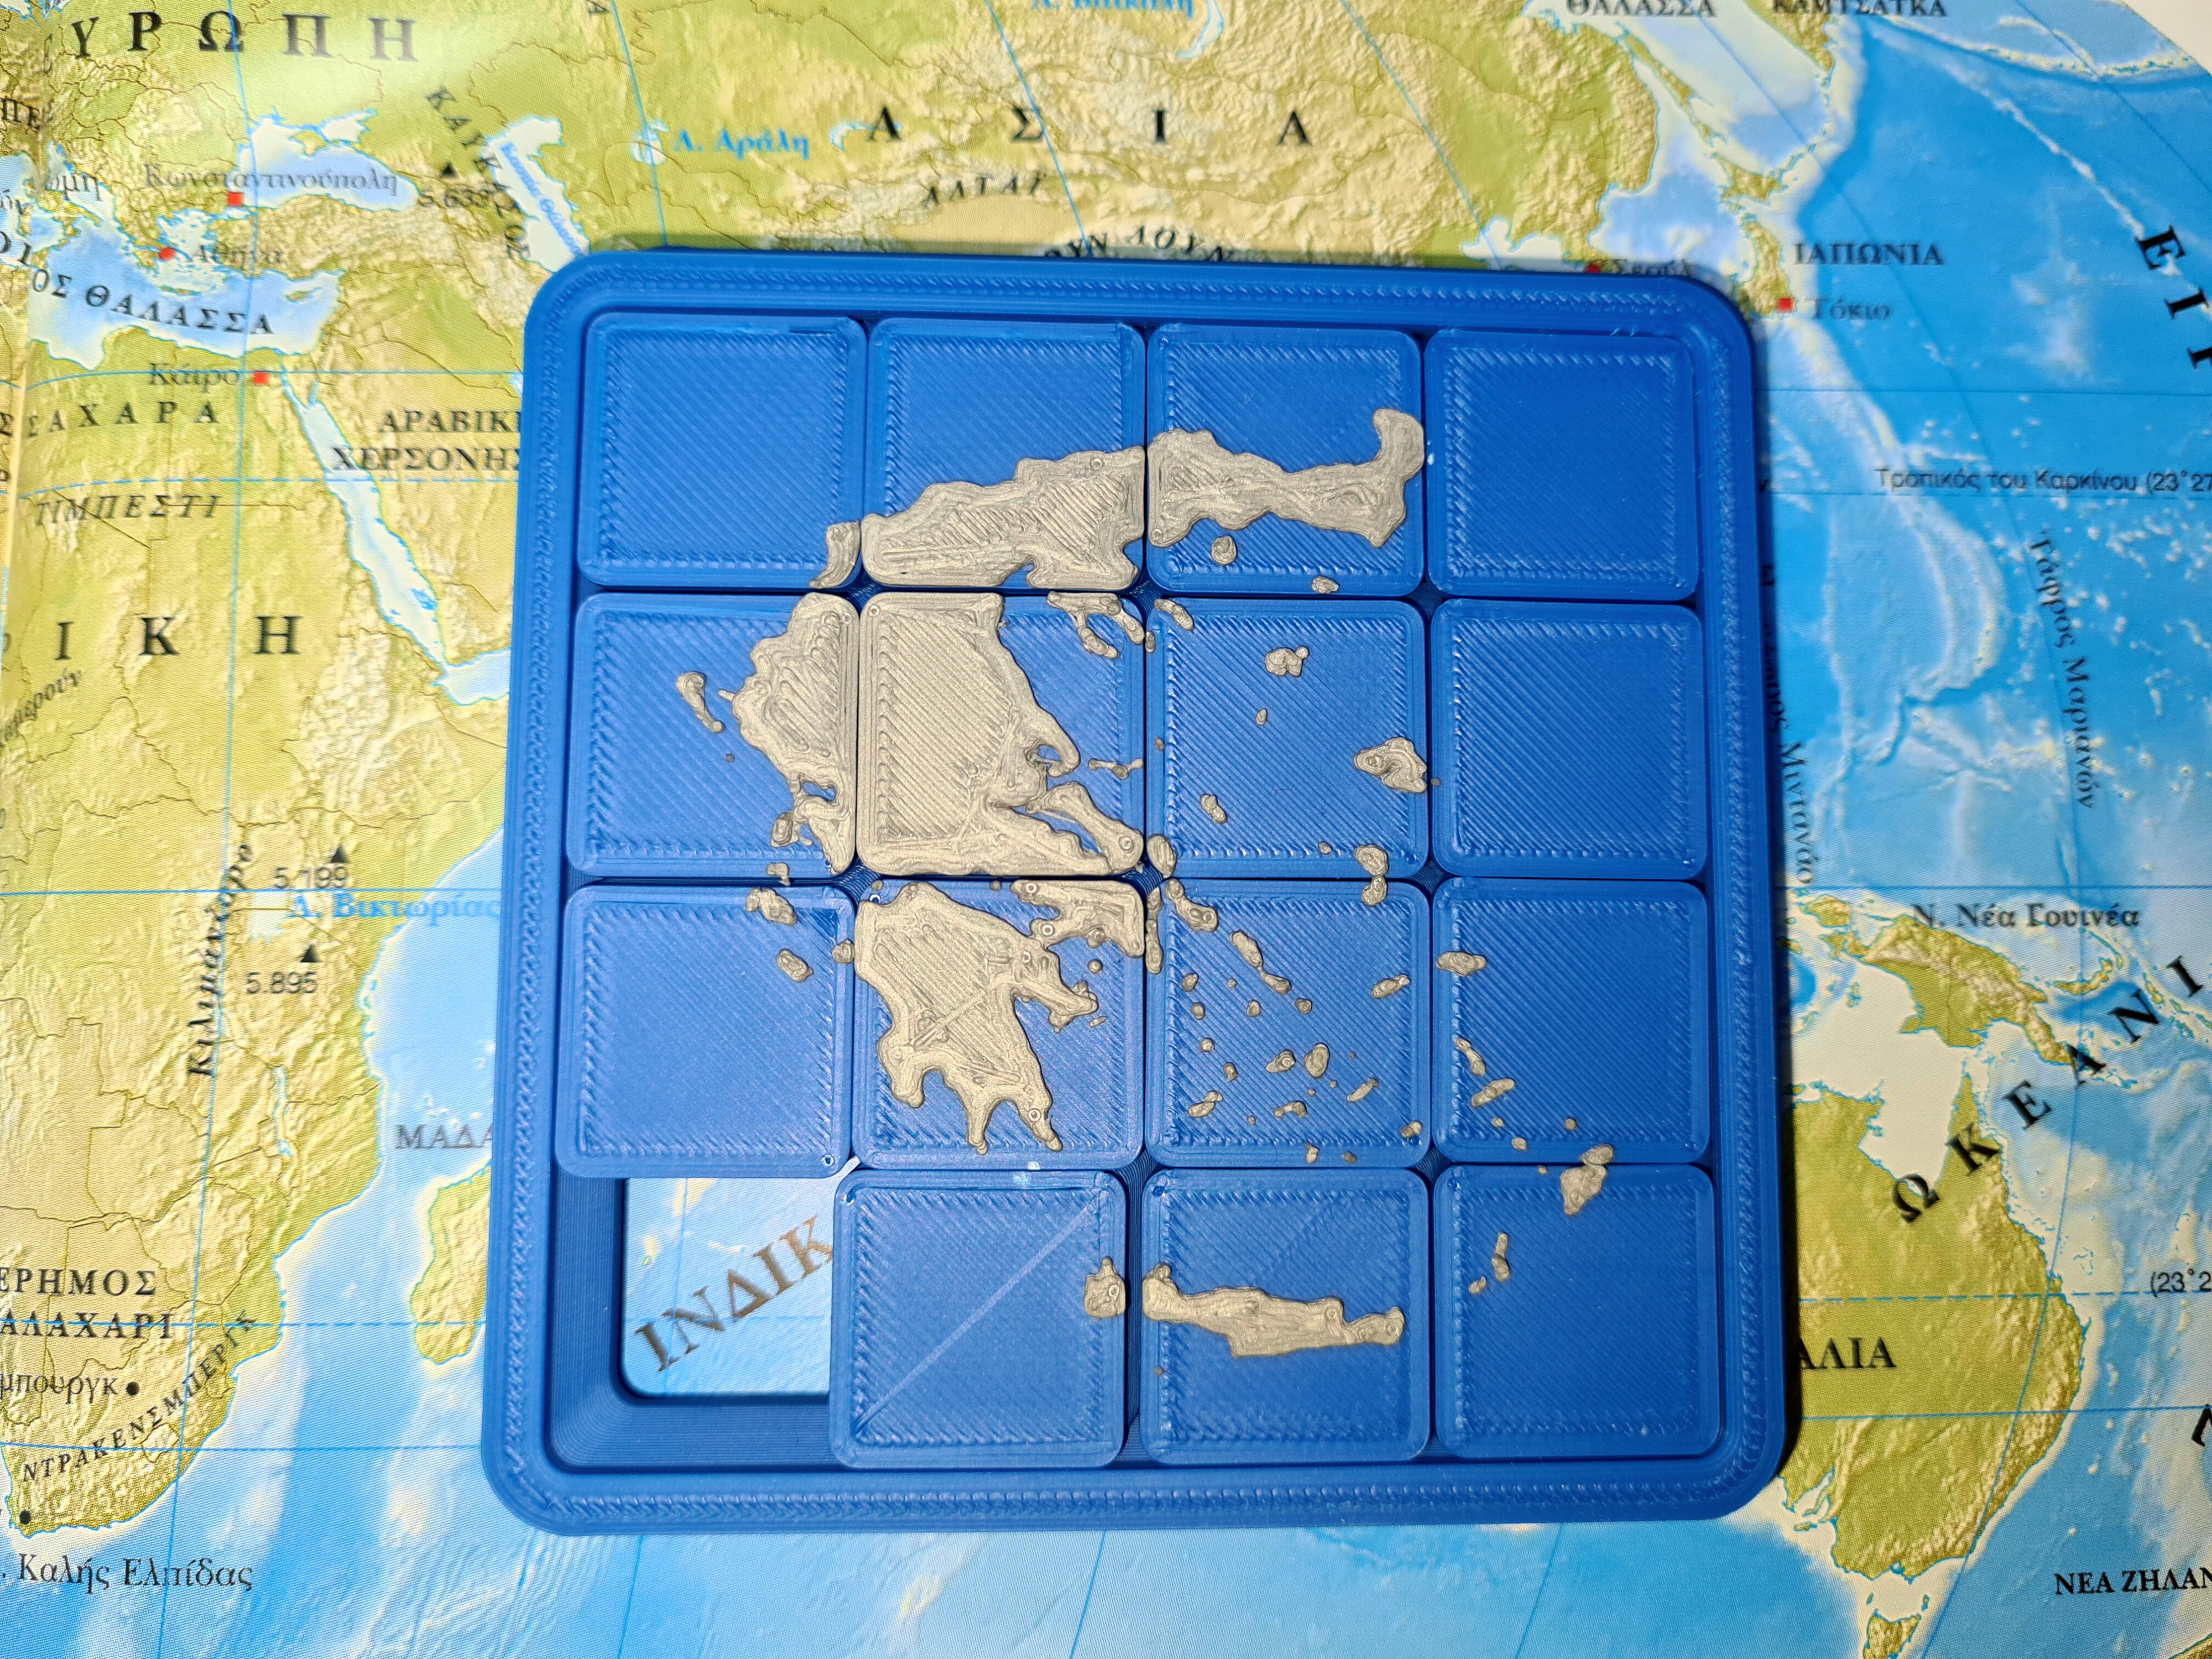
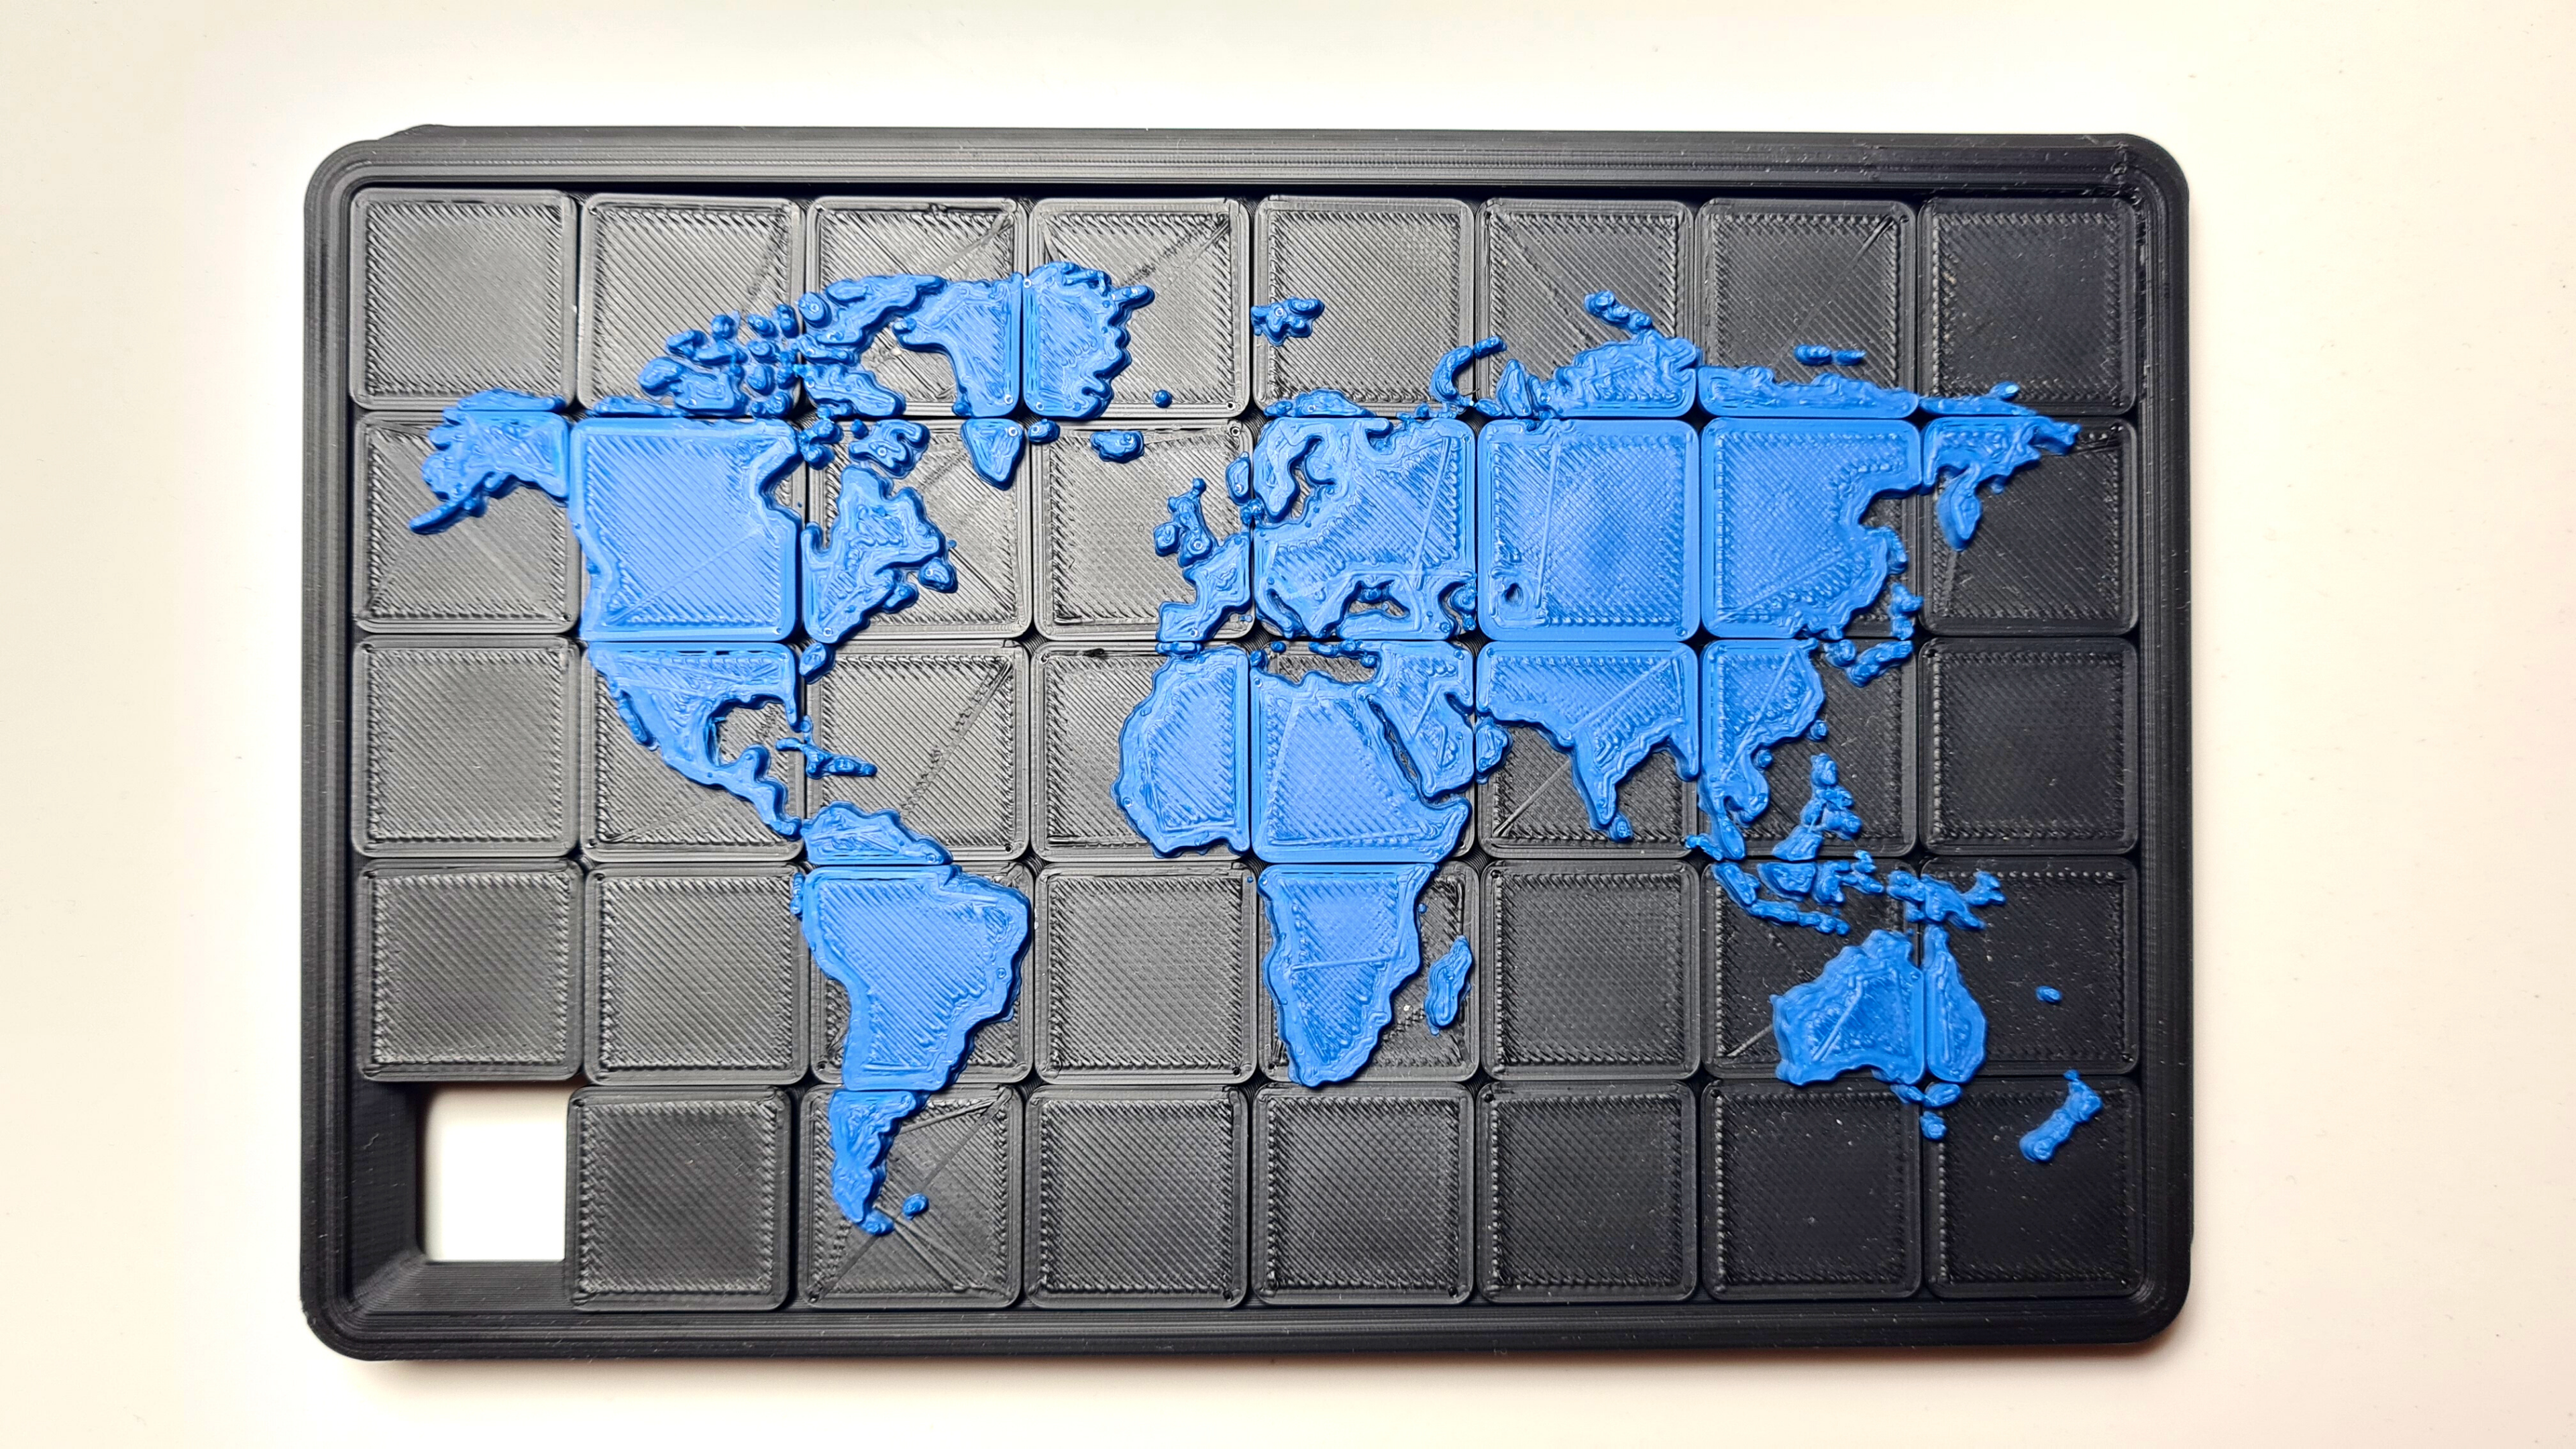
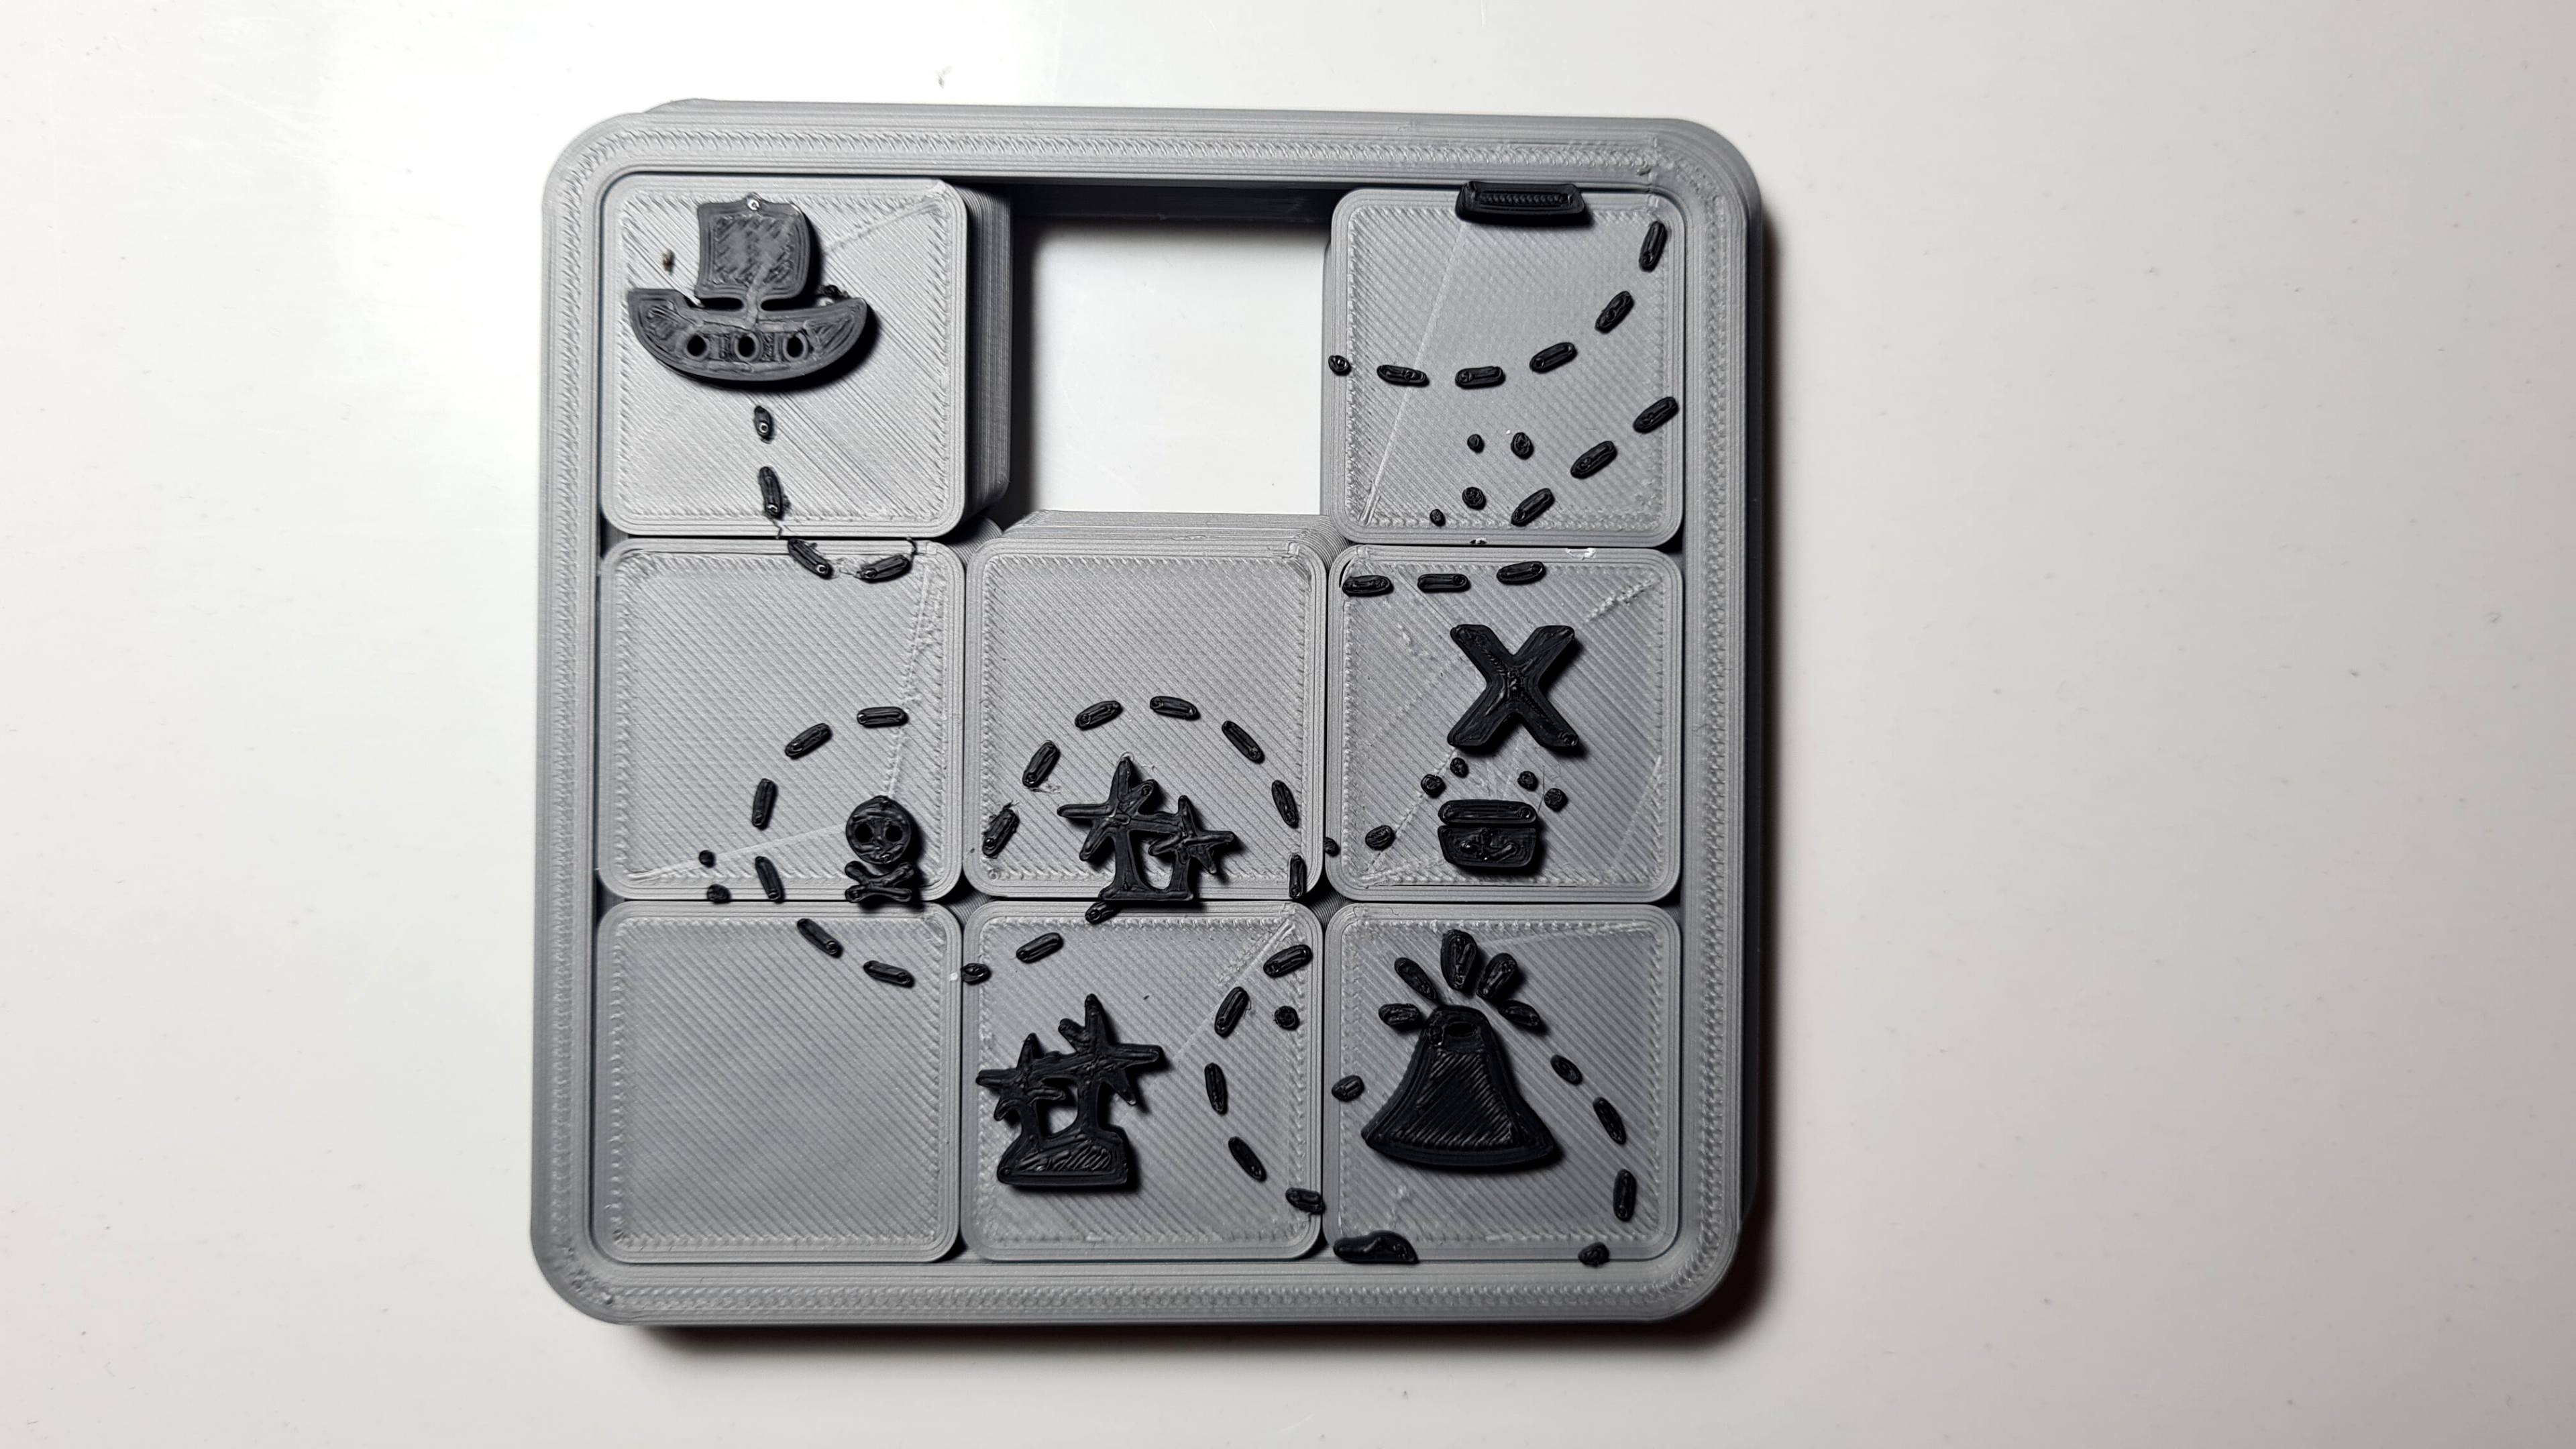
Before we start designing you can find all the puzzle maps I've made so far HERE
There are few print files you can find.
- A 3x3 Treasure Map Puzzle
- A 8x5 World Map Puzzle
- A 4x4 Greece Map Puzzle
- FullyParametricSlidingPuzzle (.f3d/.step). These allow you to import the design into your CAD program and edit it like you would any other design of yours! If you import it into Fusion 360 using the .f3d file you'll also be able to take advantage of the fully parametric nature of the design
- For those who like to use Tinkercad or don't feel like messing with the design much I have also added a 3x3 and a 4x4 puzzle without any image or map as .stl files for you to add whatever you like on top of!
You can print them in any material you feel comfortable with and at a layer height of 0.2mm or finer.
Additionally, I would suggest making a colour change before the map texture to really make it pop out!
Parameters
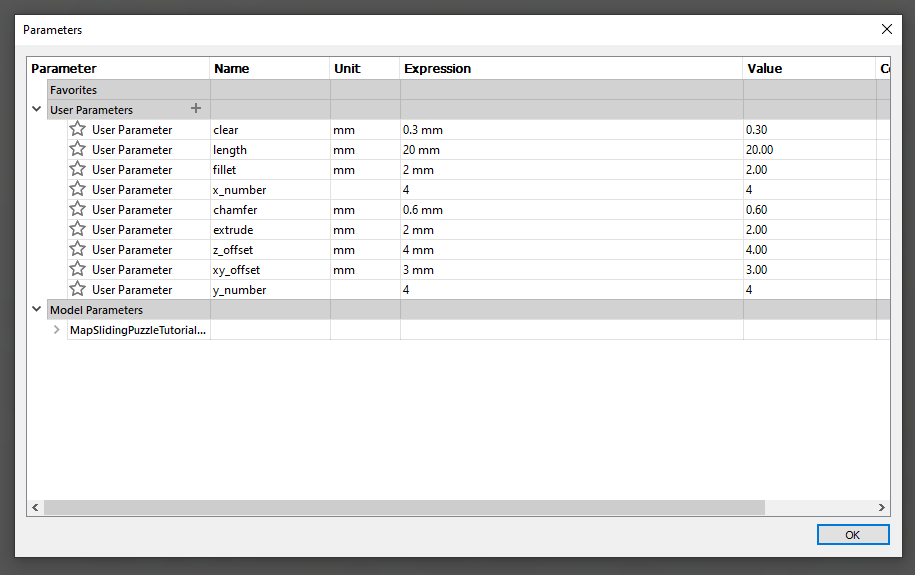
I figured this project would be a great opportunity for me to start using parameters. Parameters allow you to quickly change values of different things. This way you can easily change clearances, lengths, widths, heights, fillets, or in this case even the number of blocks without having to go back in your design's history but simply by changing the value of the assigned parameters.
Of course, you don't have to use parameters, (although I would advise you to do so) they are more difficult and time consuming, but definitely result in a cleaner and more efficient work-flow. For example, after designing one puzzle I was able to make the other two quickly solely by changing the parameters.
Go to Solid > Modify > Change Parameters and click the cross to add new parameters. Above you can see a picture with all the parameters I used.
Time to Start Designing!
.png)
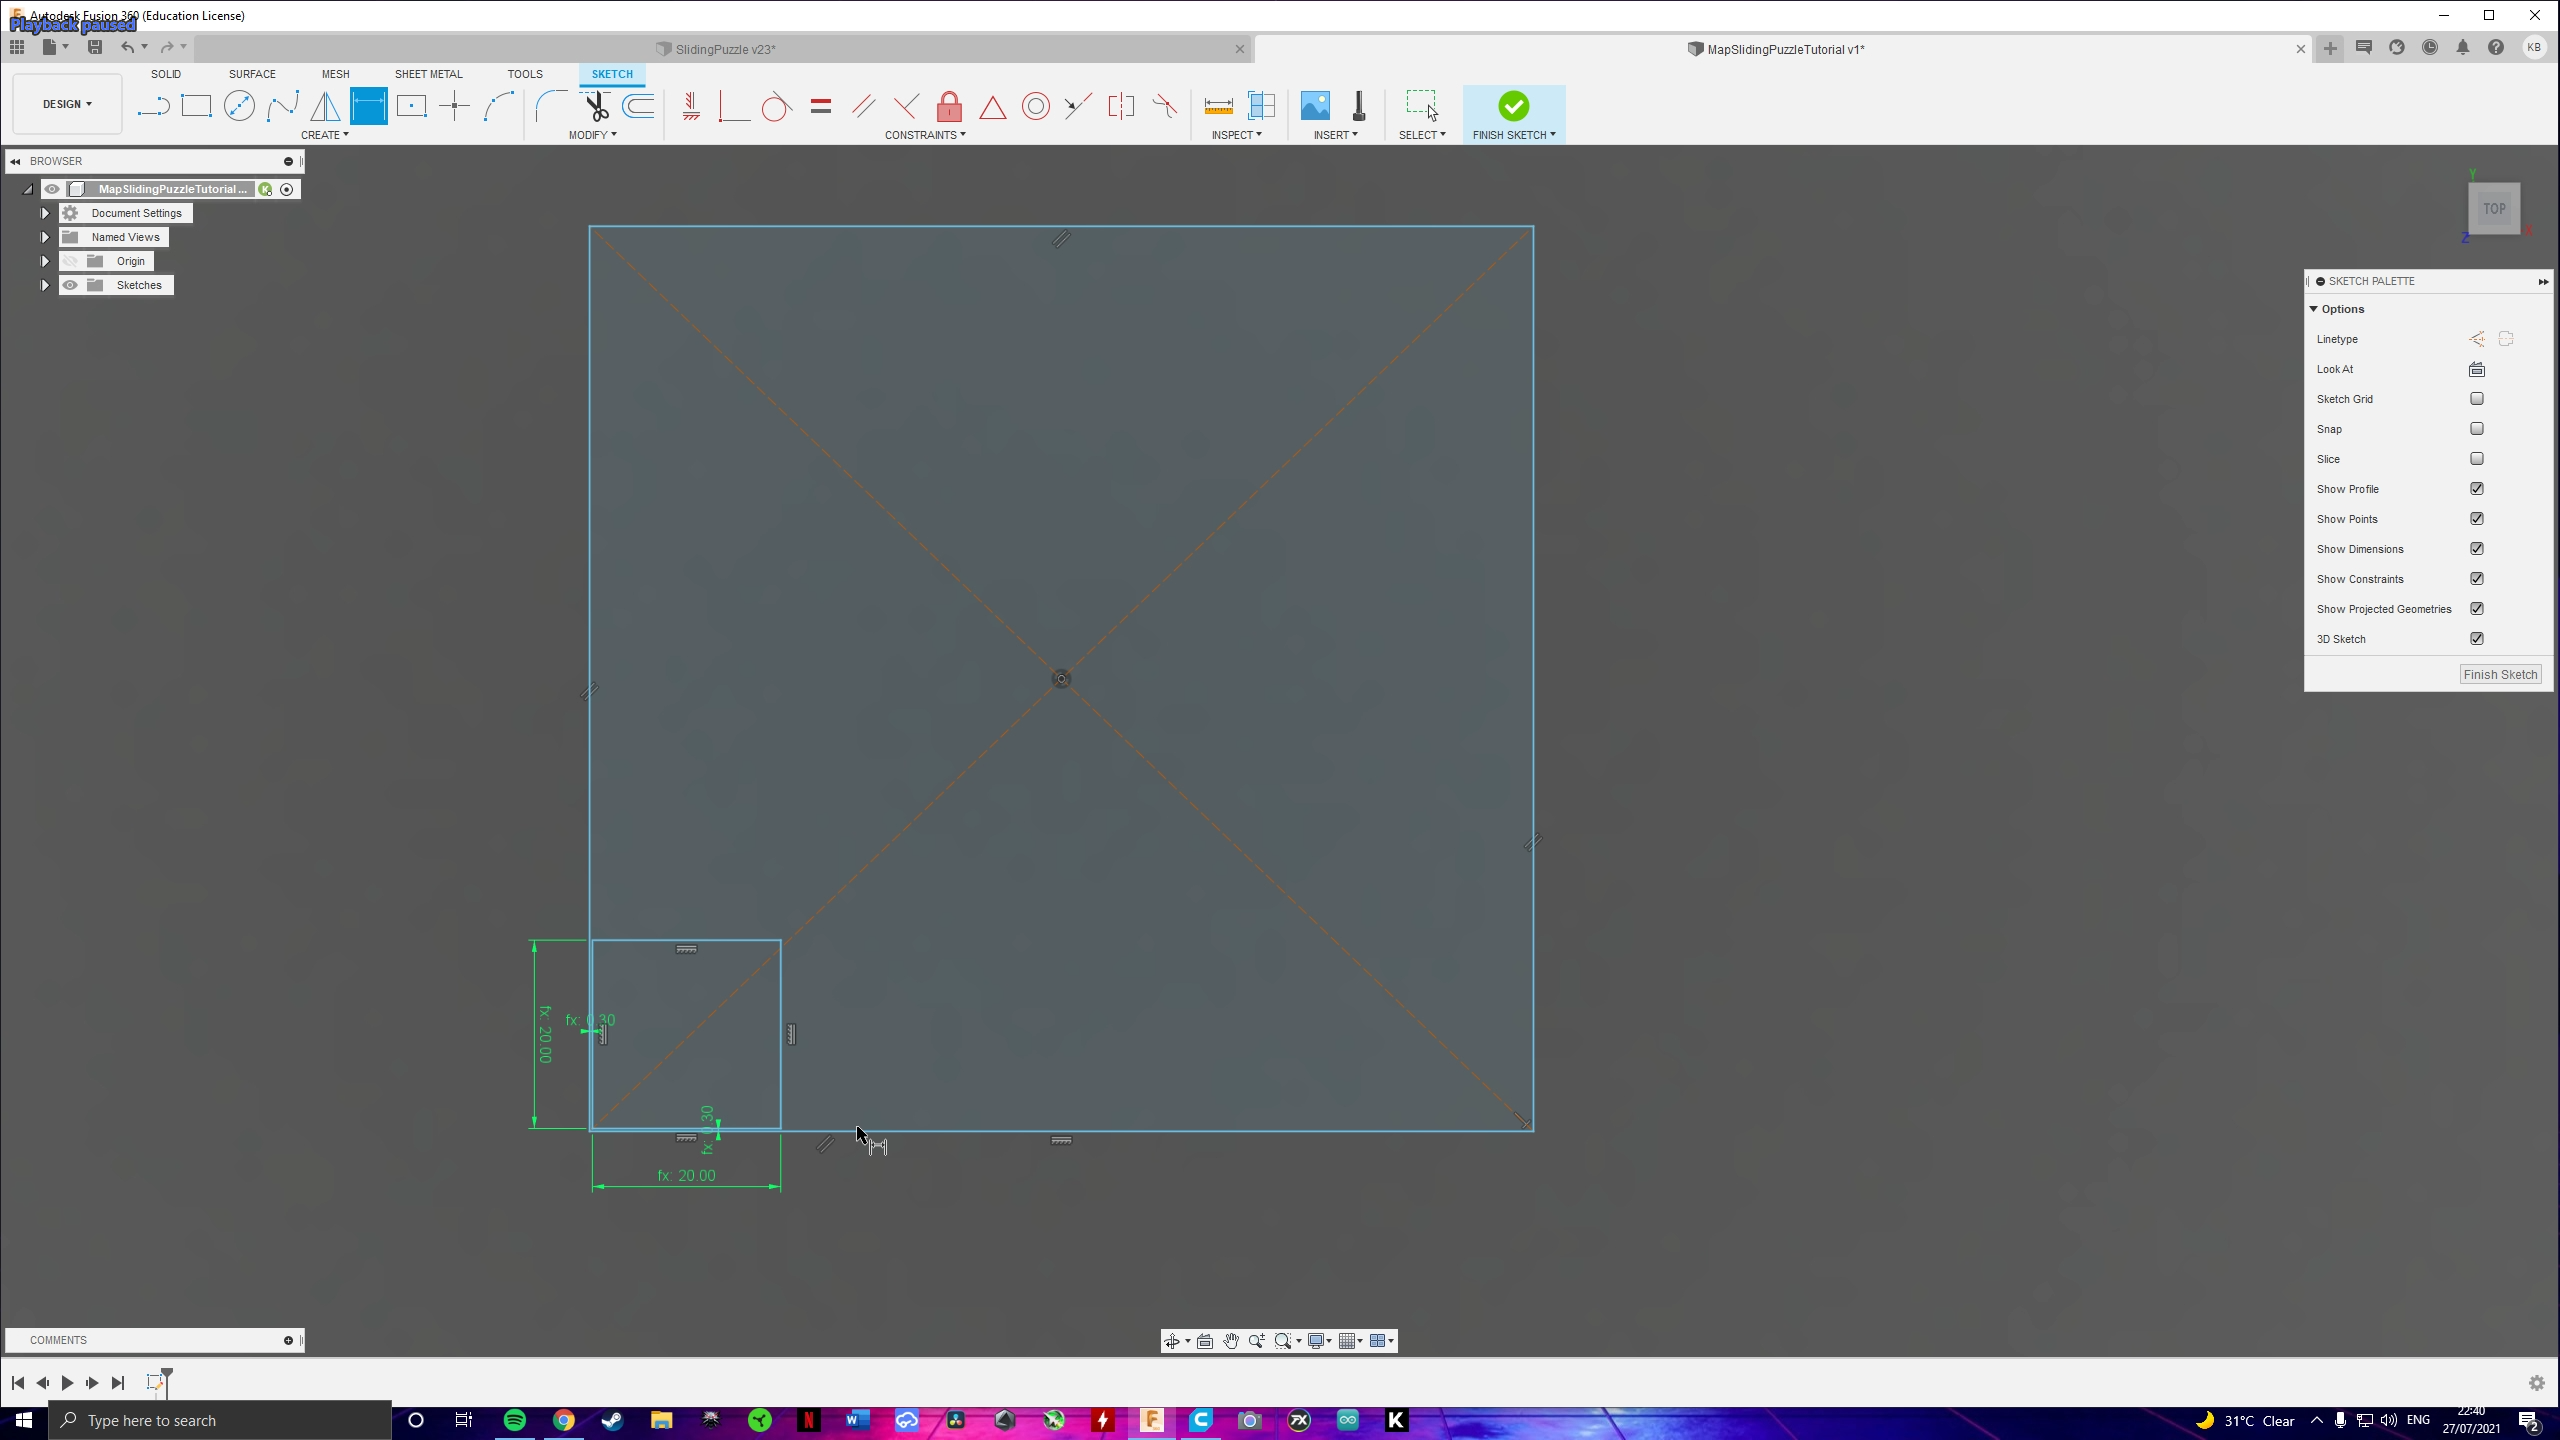
Create a sketch on the top plane and make a big square and a smaller one with a 20mm side (length par.). Also set a distance between the two squares. I used 0.3mm (clearance par.) because I know it works well with my printer. But that's what's nice about parametric designing, if I see that the clearance is not enough I can easily go back and change it to, let's say, 0.4mm or 0.25mm within a few seconds!
Frame Dimensions
.png)
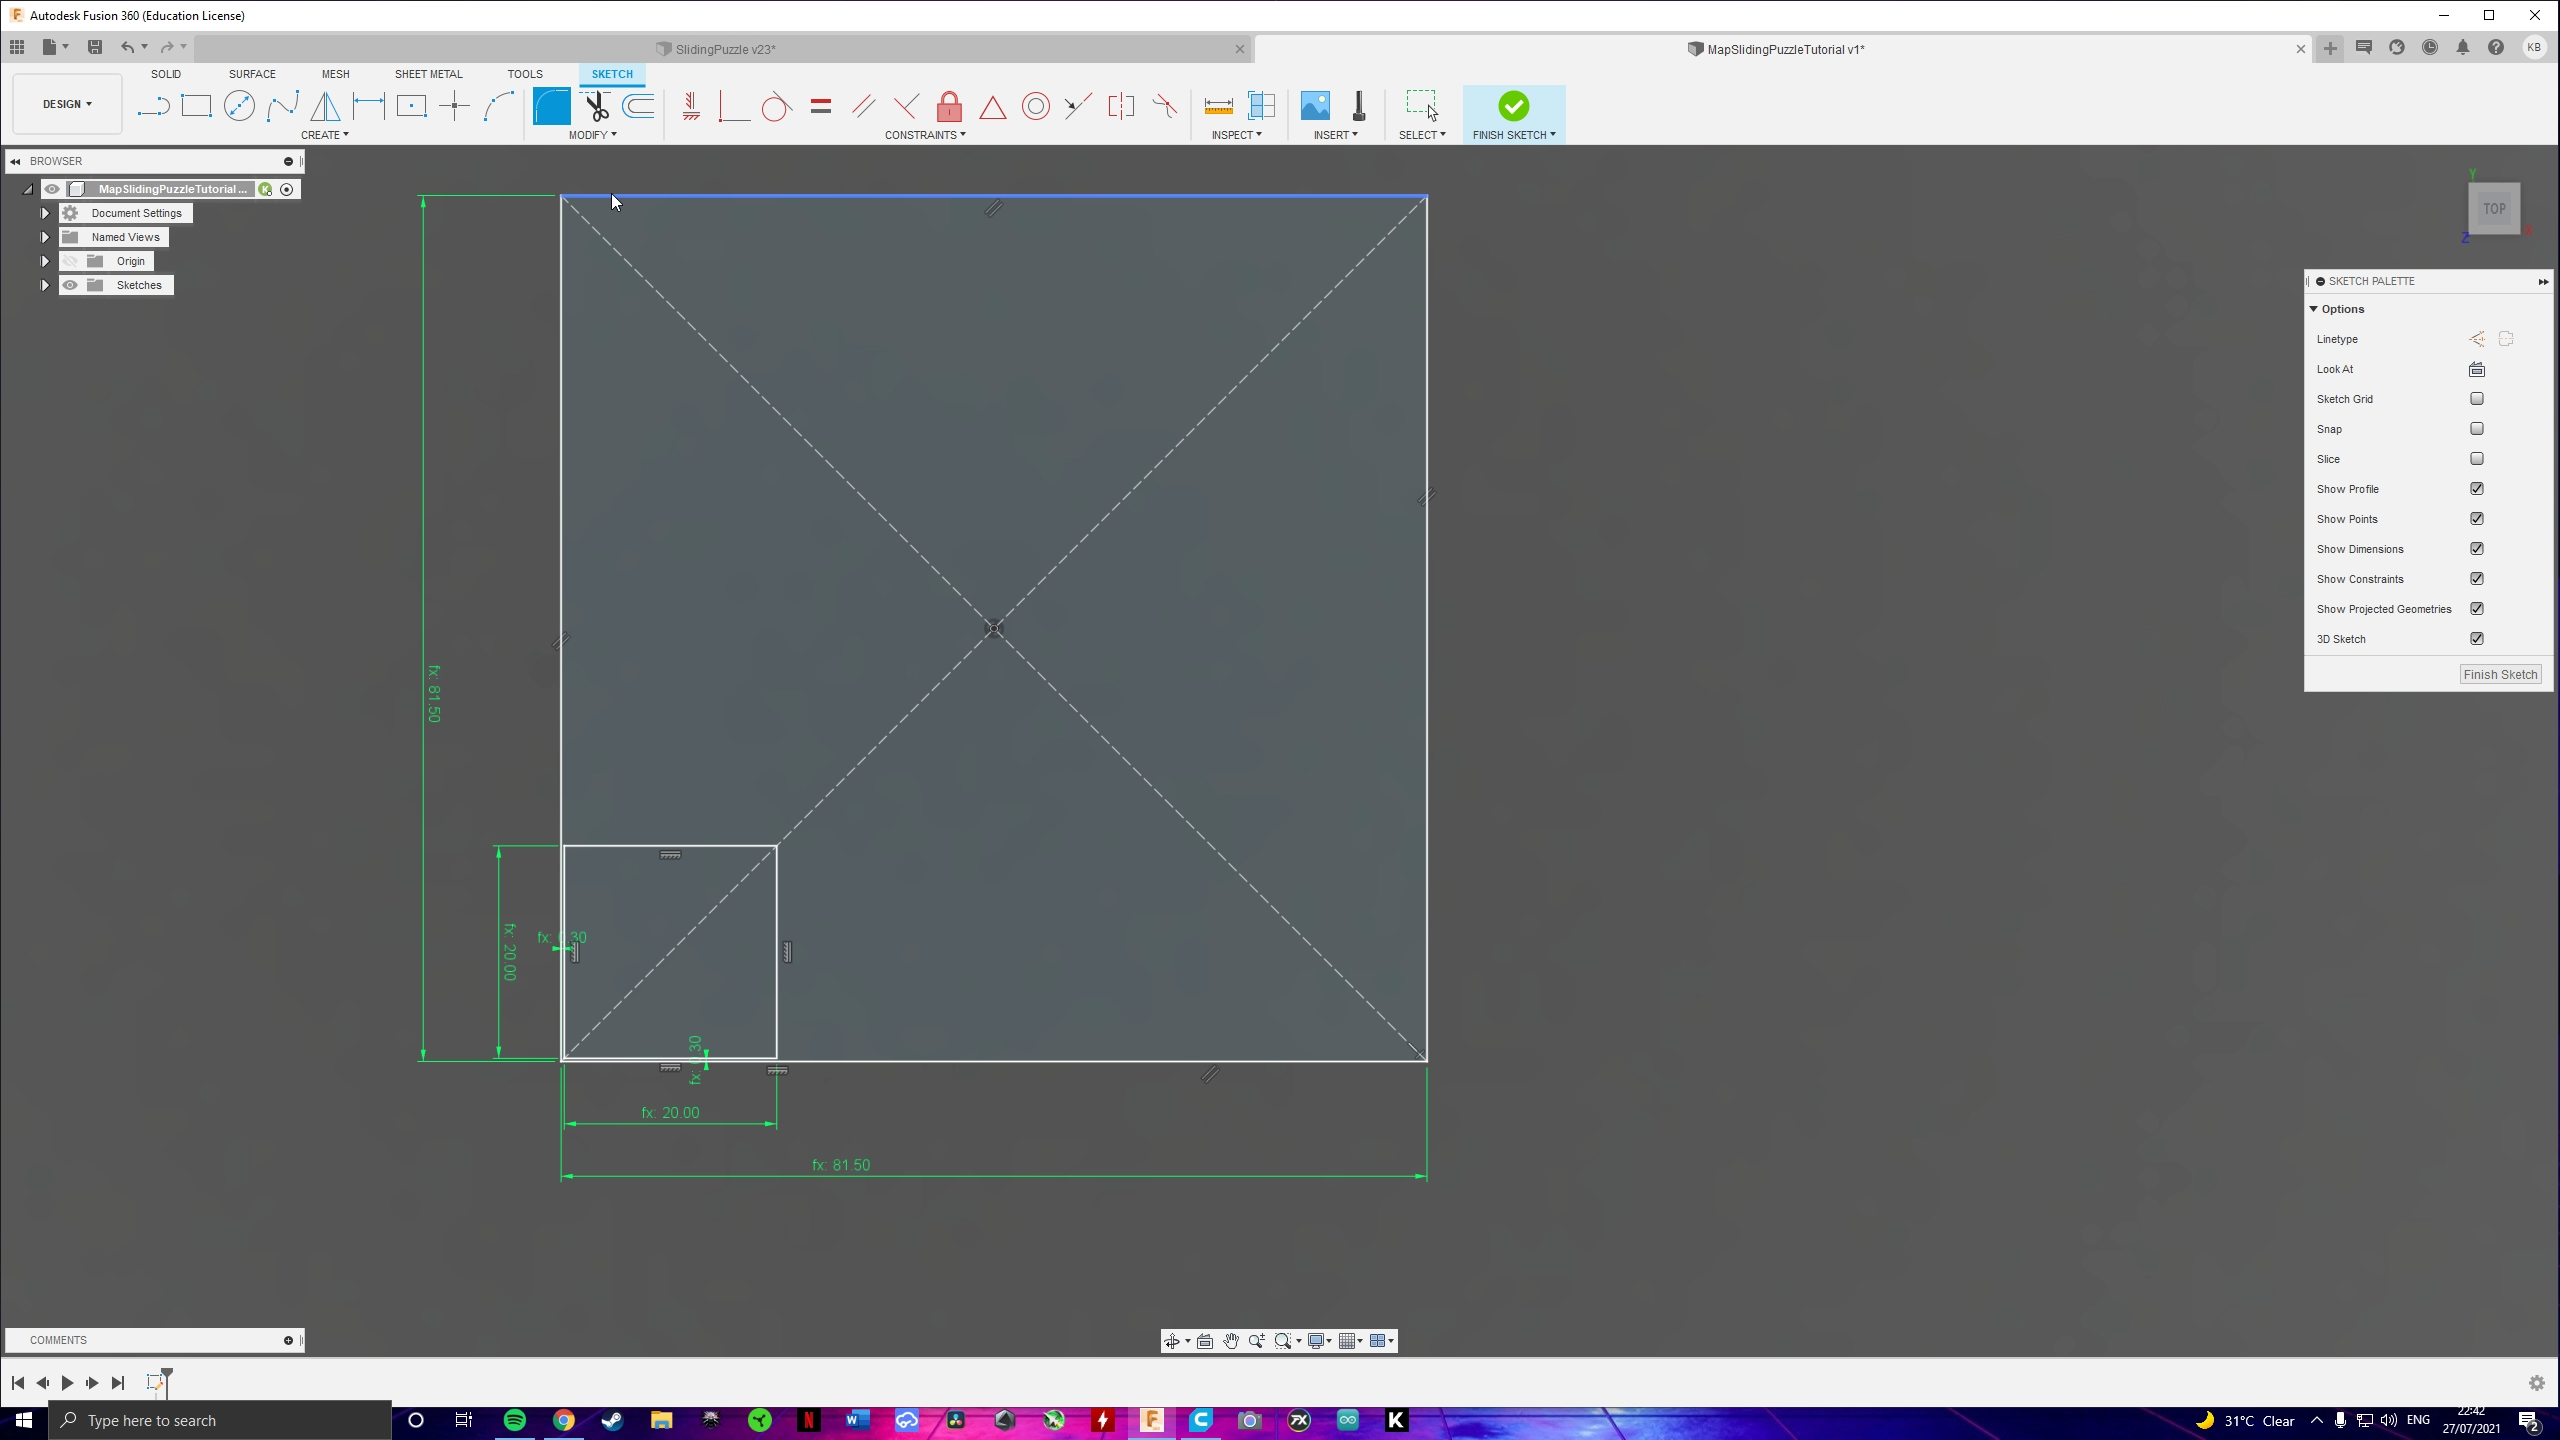
We are designing a 4x4 grid puzzle, with 20mm sized blocks and 0.3mm clearances. This means that the inner length of the frame should be 4*20 + 5*0.3 = 81.5mm. Since we want the model to be fully parametric we need to make a parametric equation as follows:
- for the width: x_number * length + ( x_number + 1 ) * clear
- for the length: y_number * length + ( y_number + 1 ) * clear
Fillets
.png)
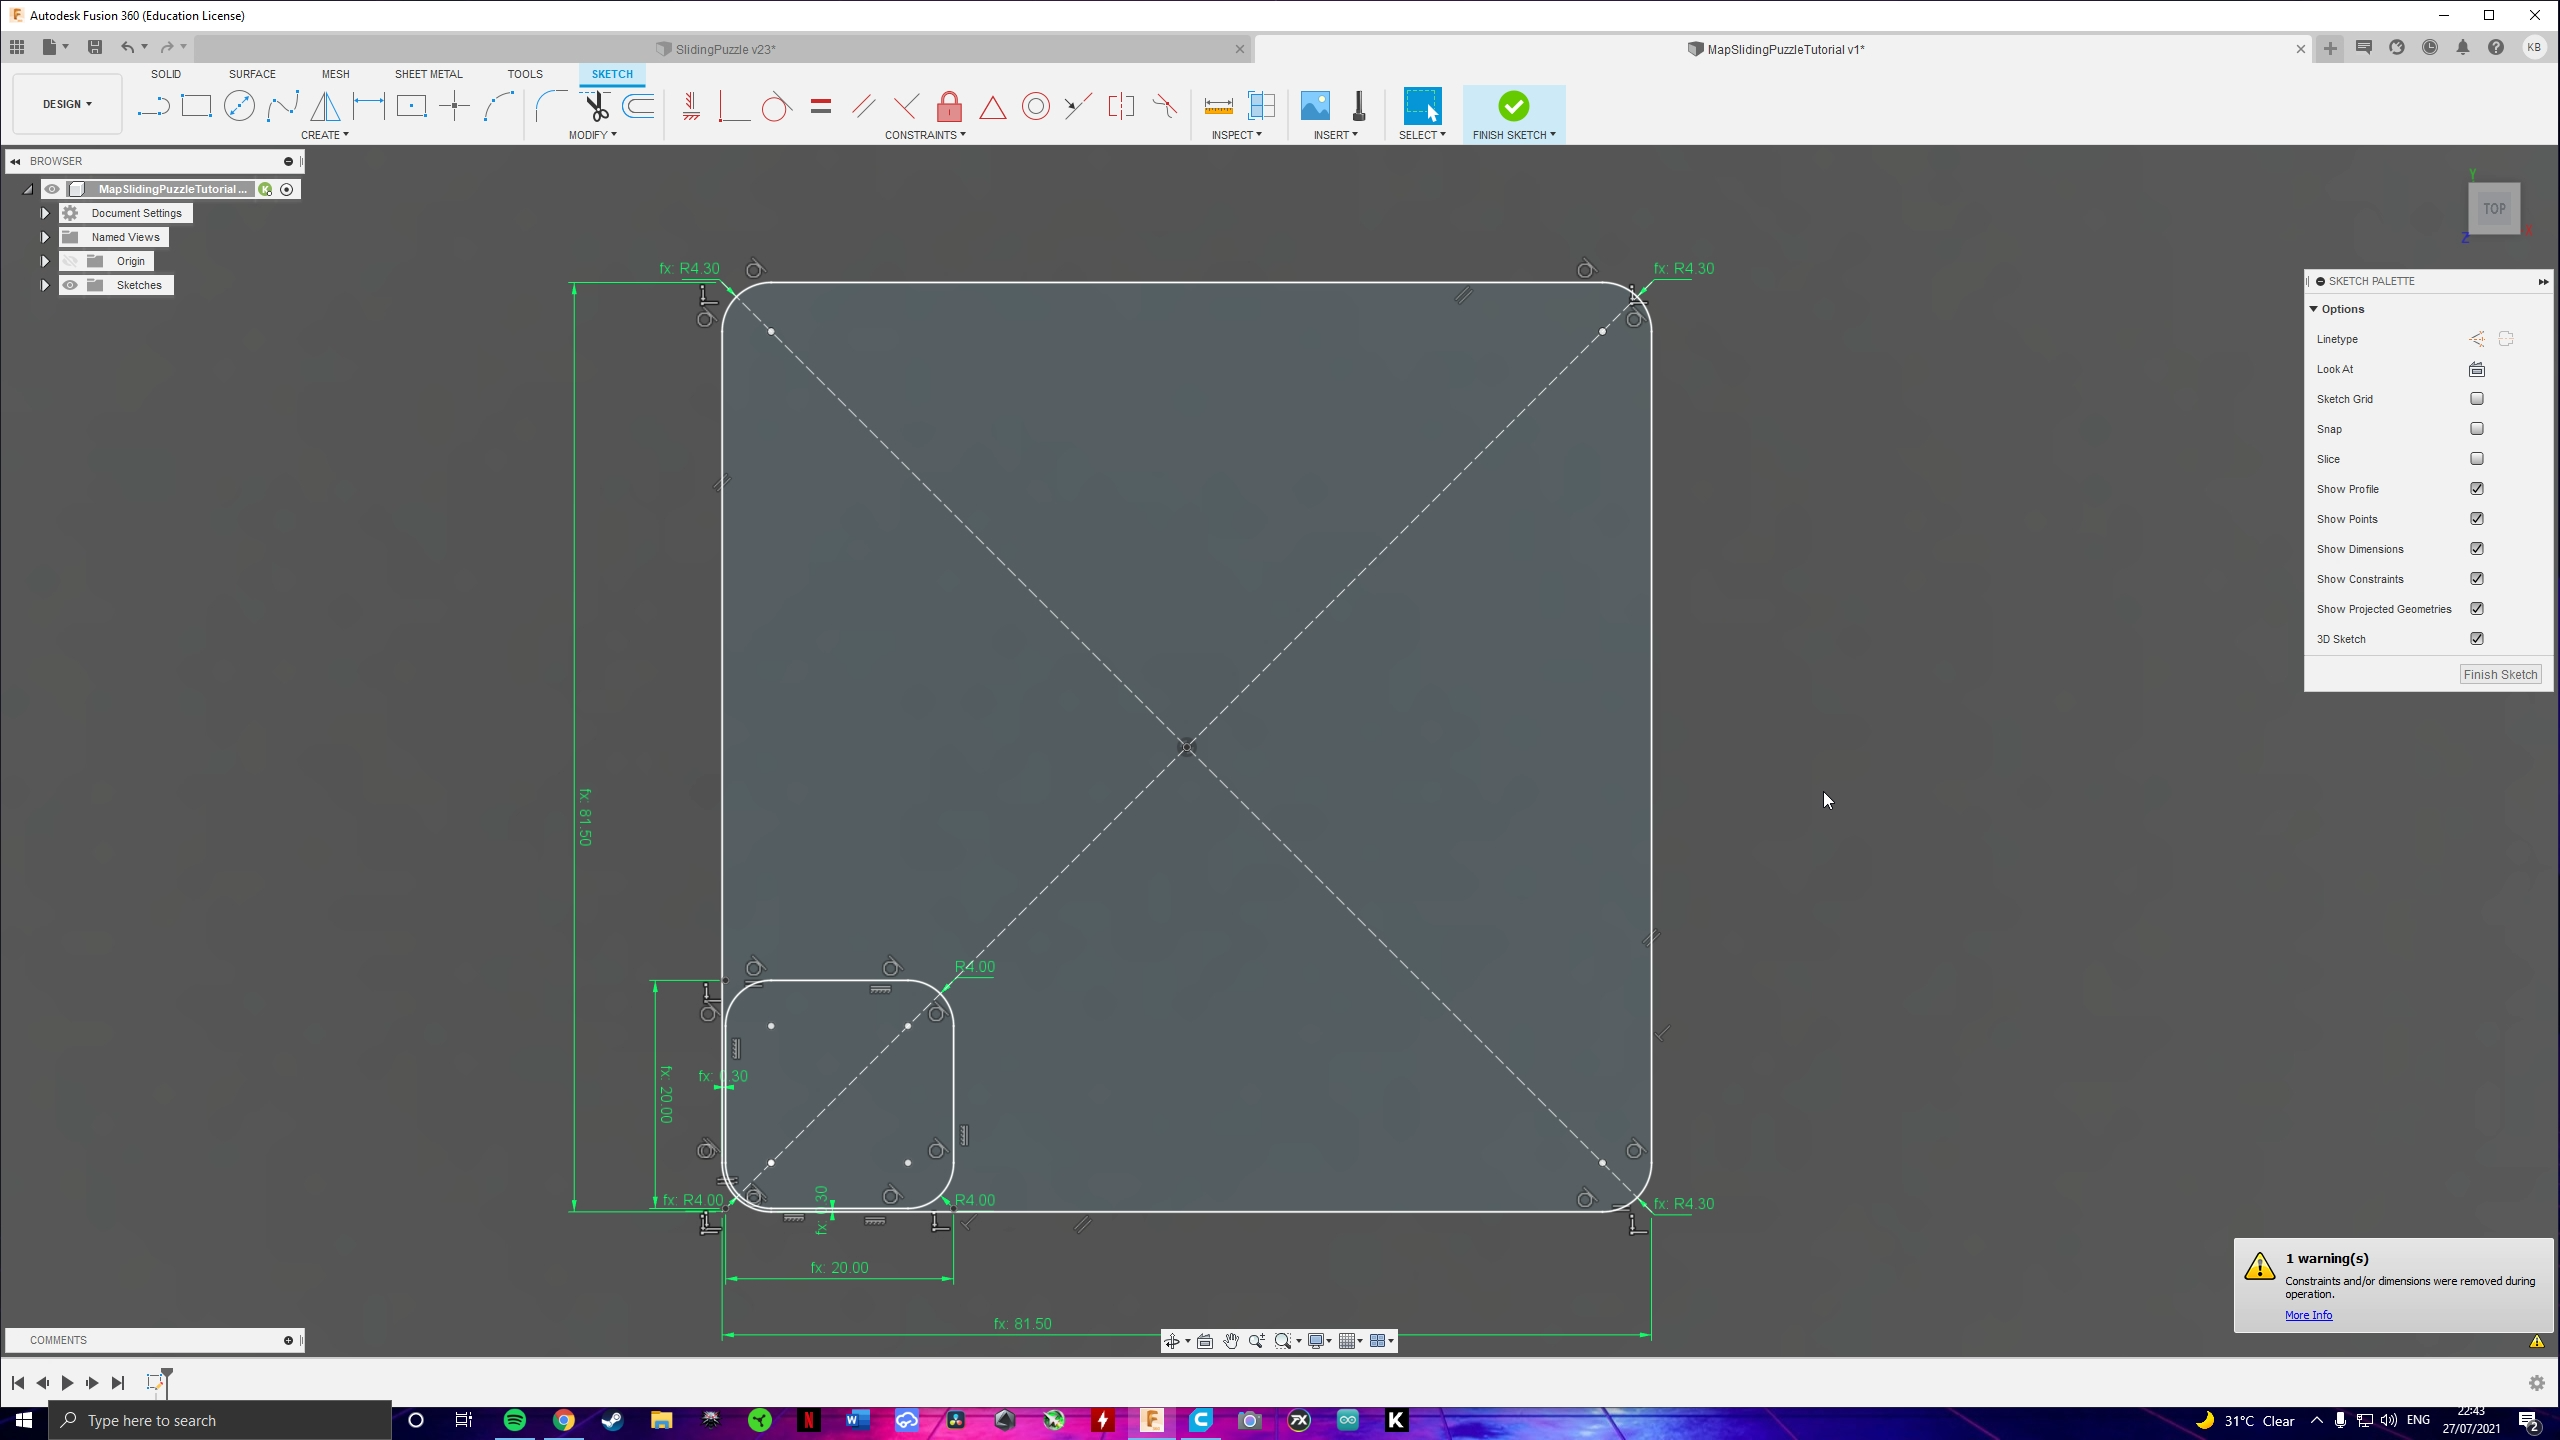
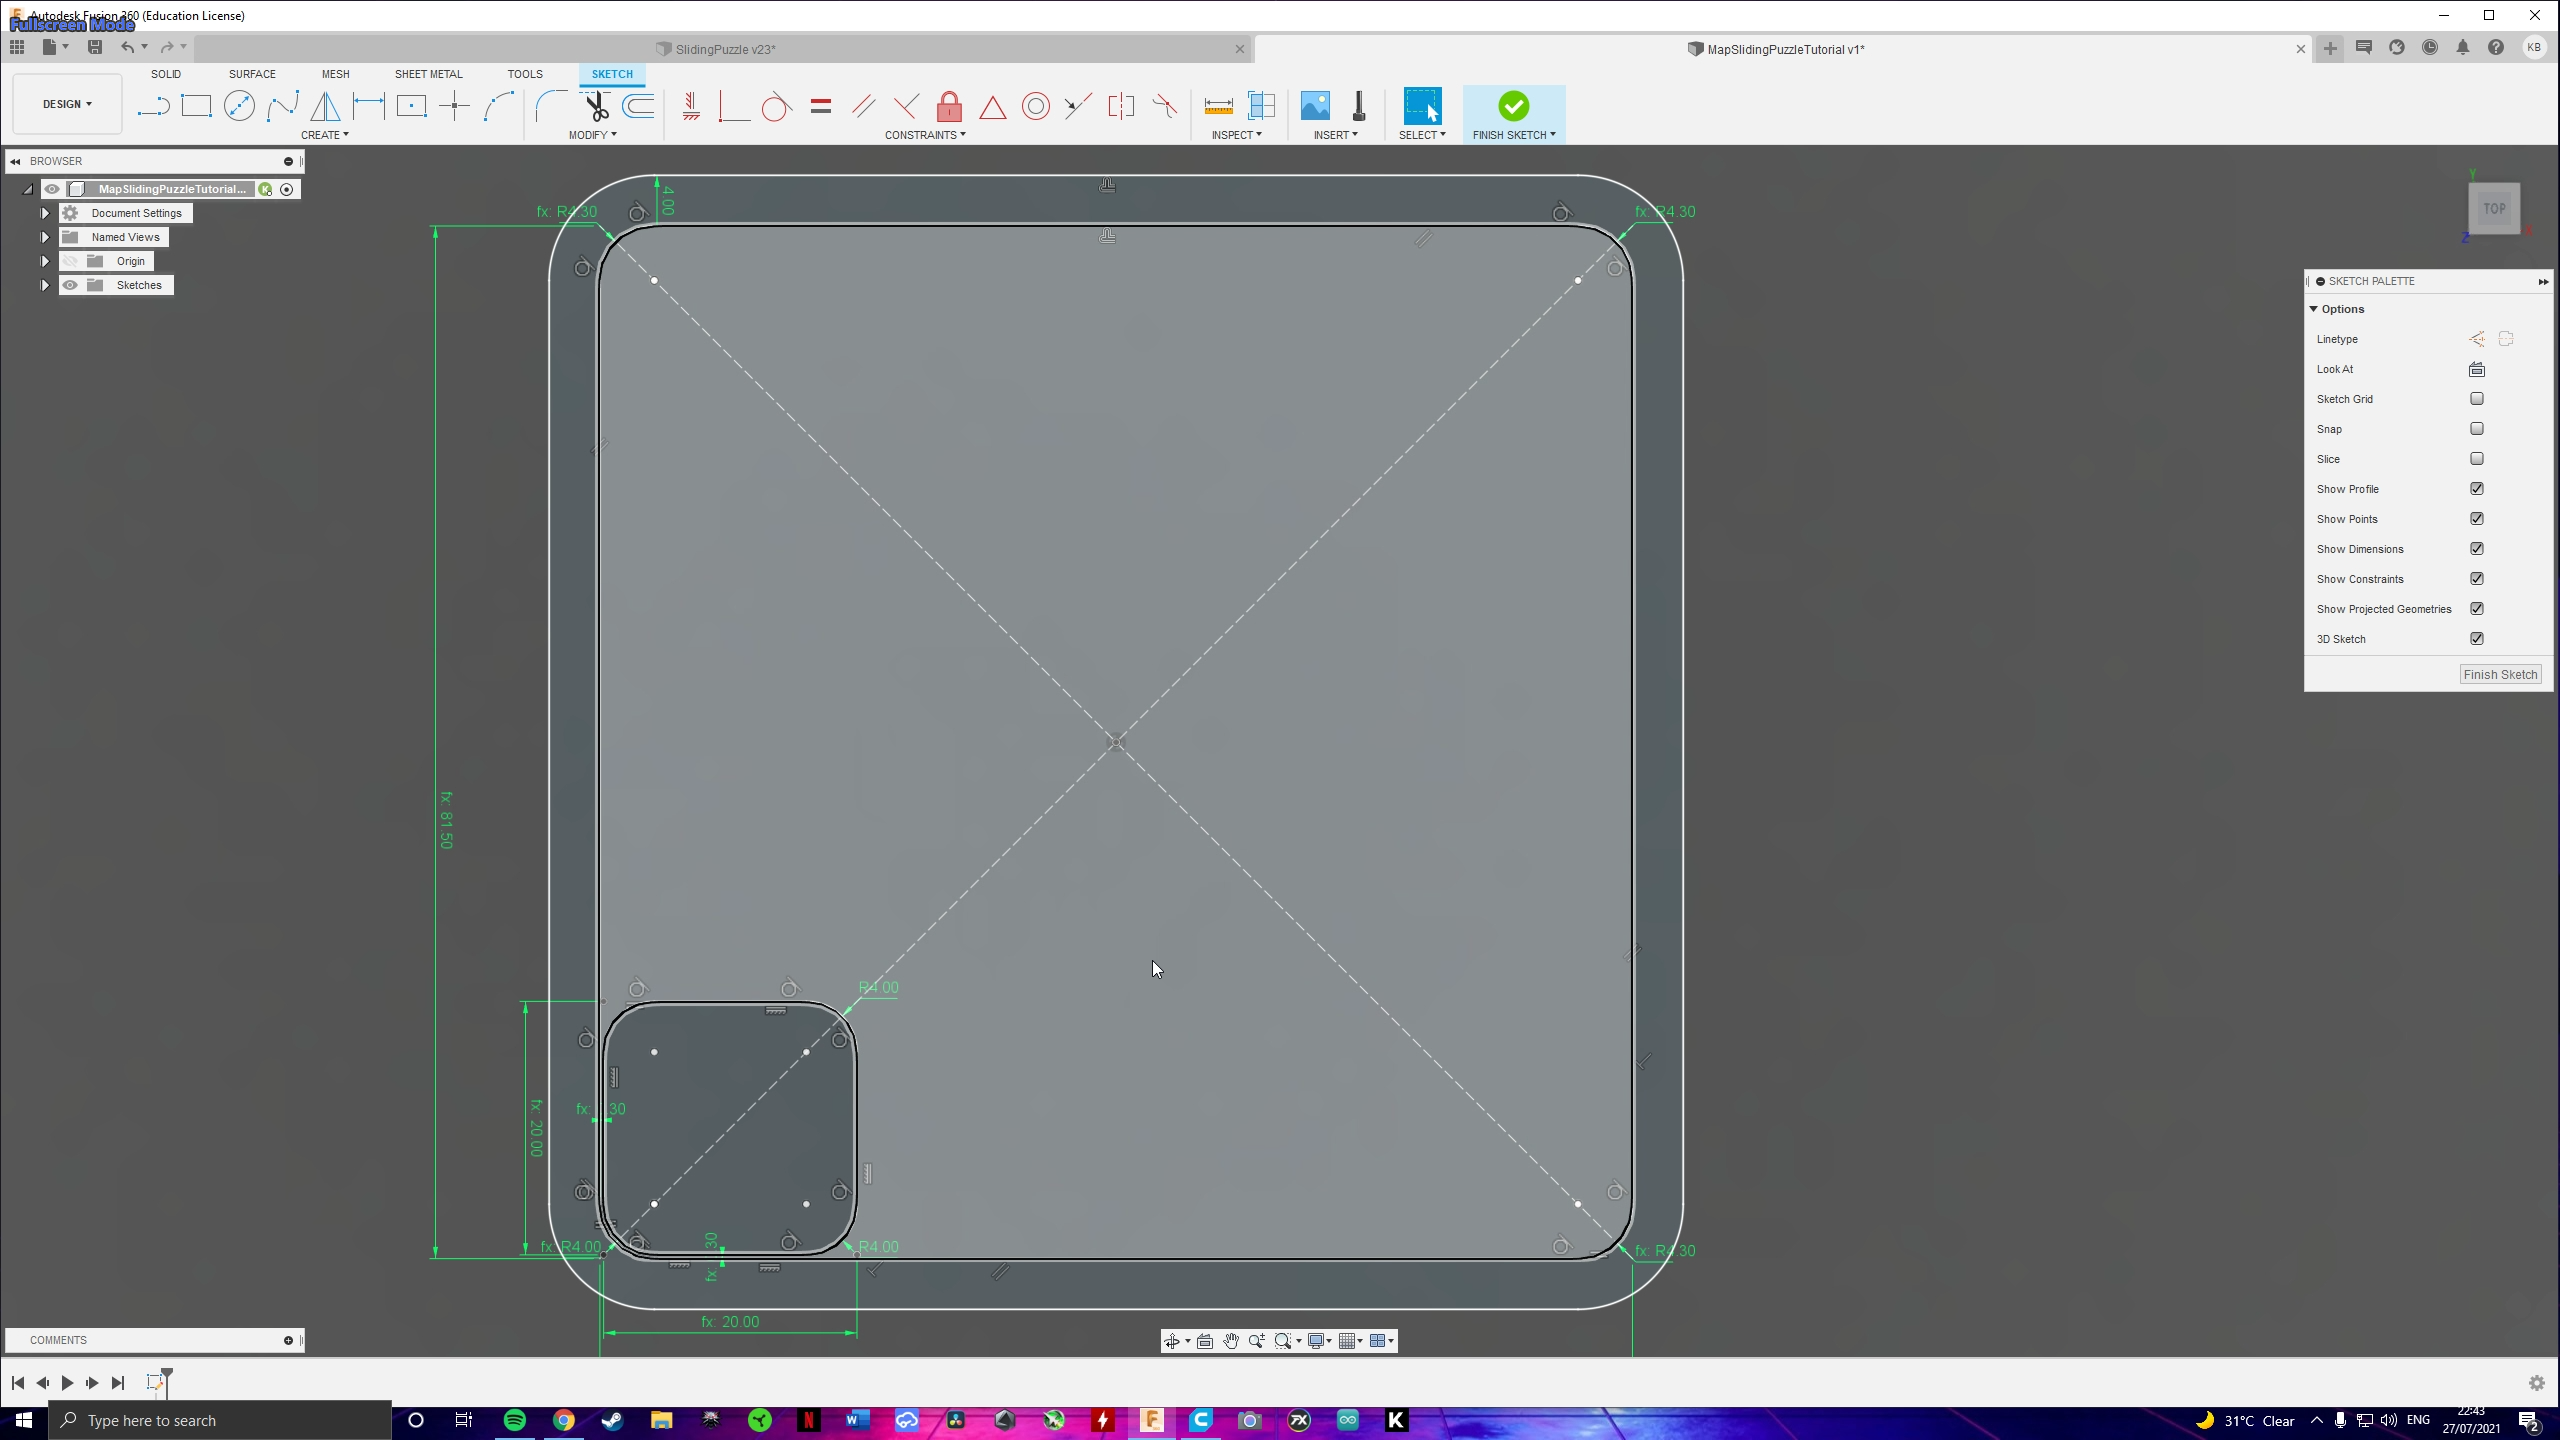
Sharp corners greatly decrease tolerances, rarely print well and are unsatisfying to the eye and touch. For this reason I always use fillets in my projects. Add some fillets to the block with a value you like, I went with 2mm (fillet par.). The frame is (clearance) mm away from it has a value of "fillet + clearance" (= 2 + 0.3).
Extrude
.png)
.png)
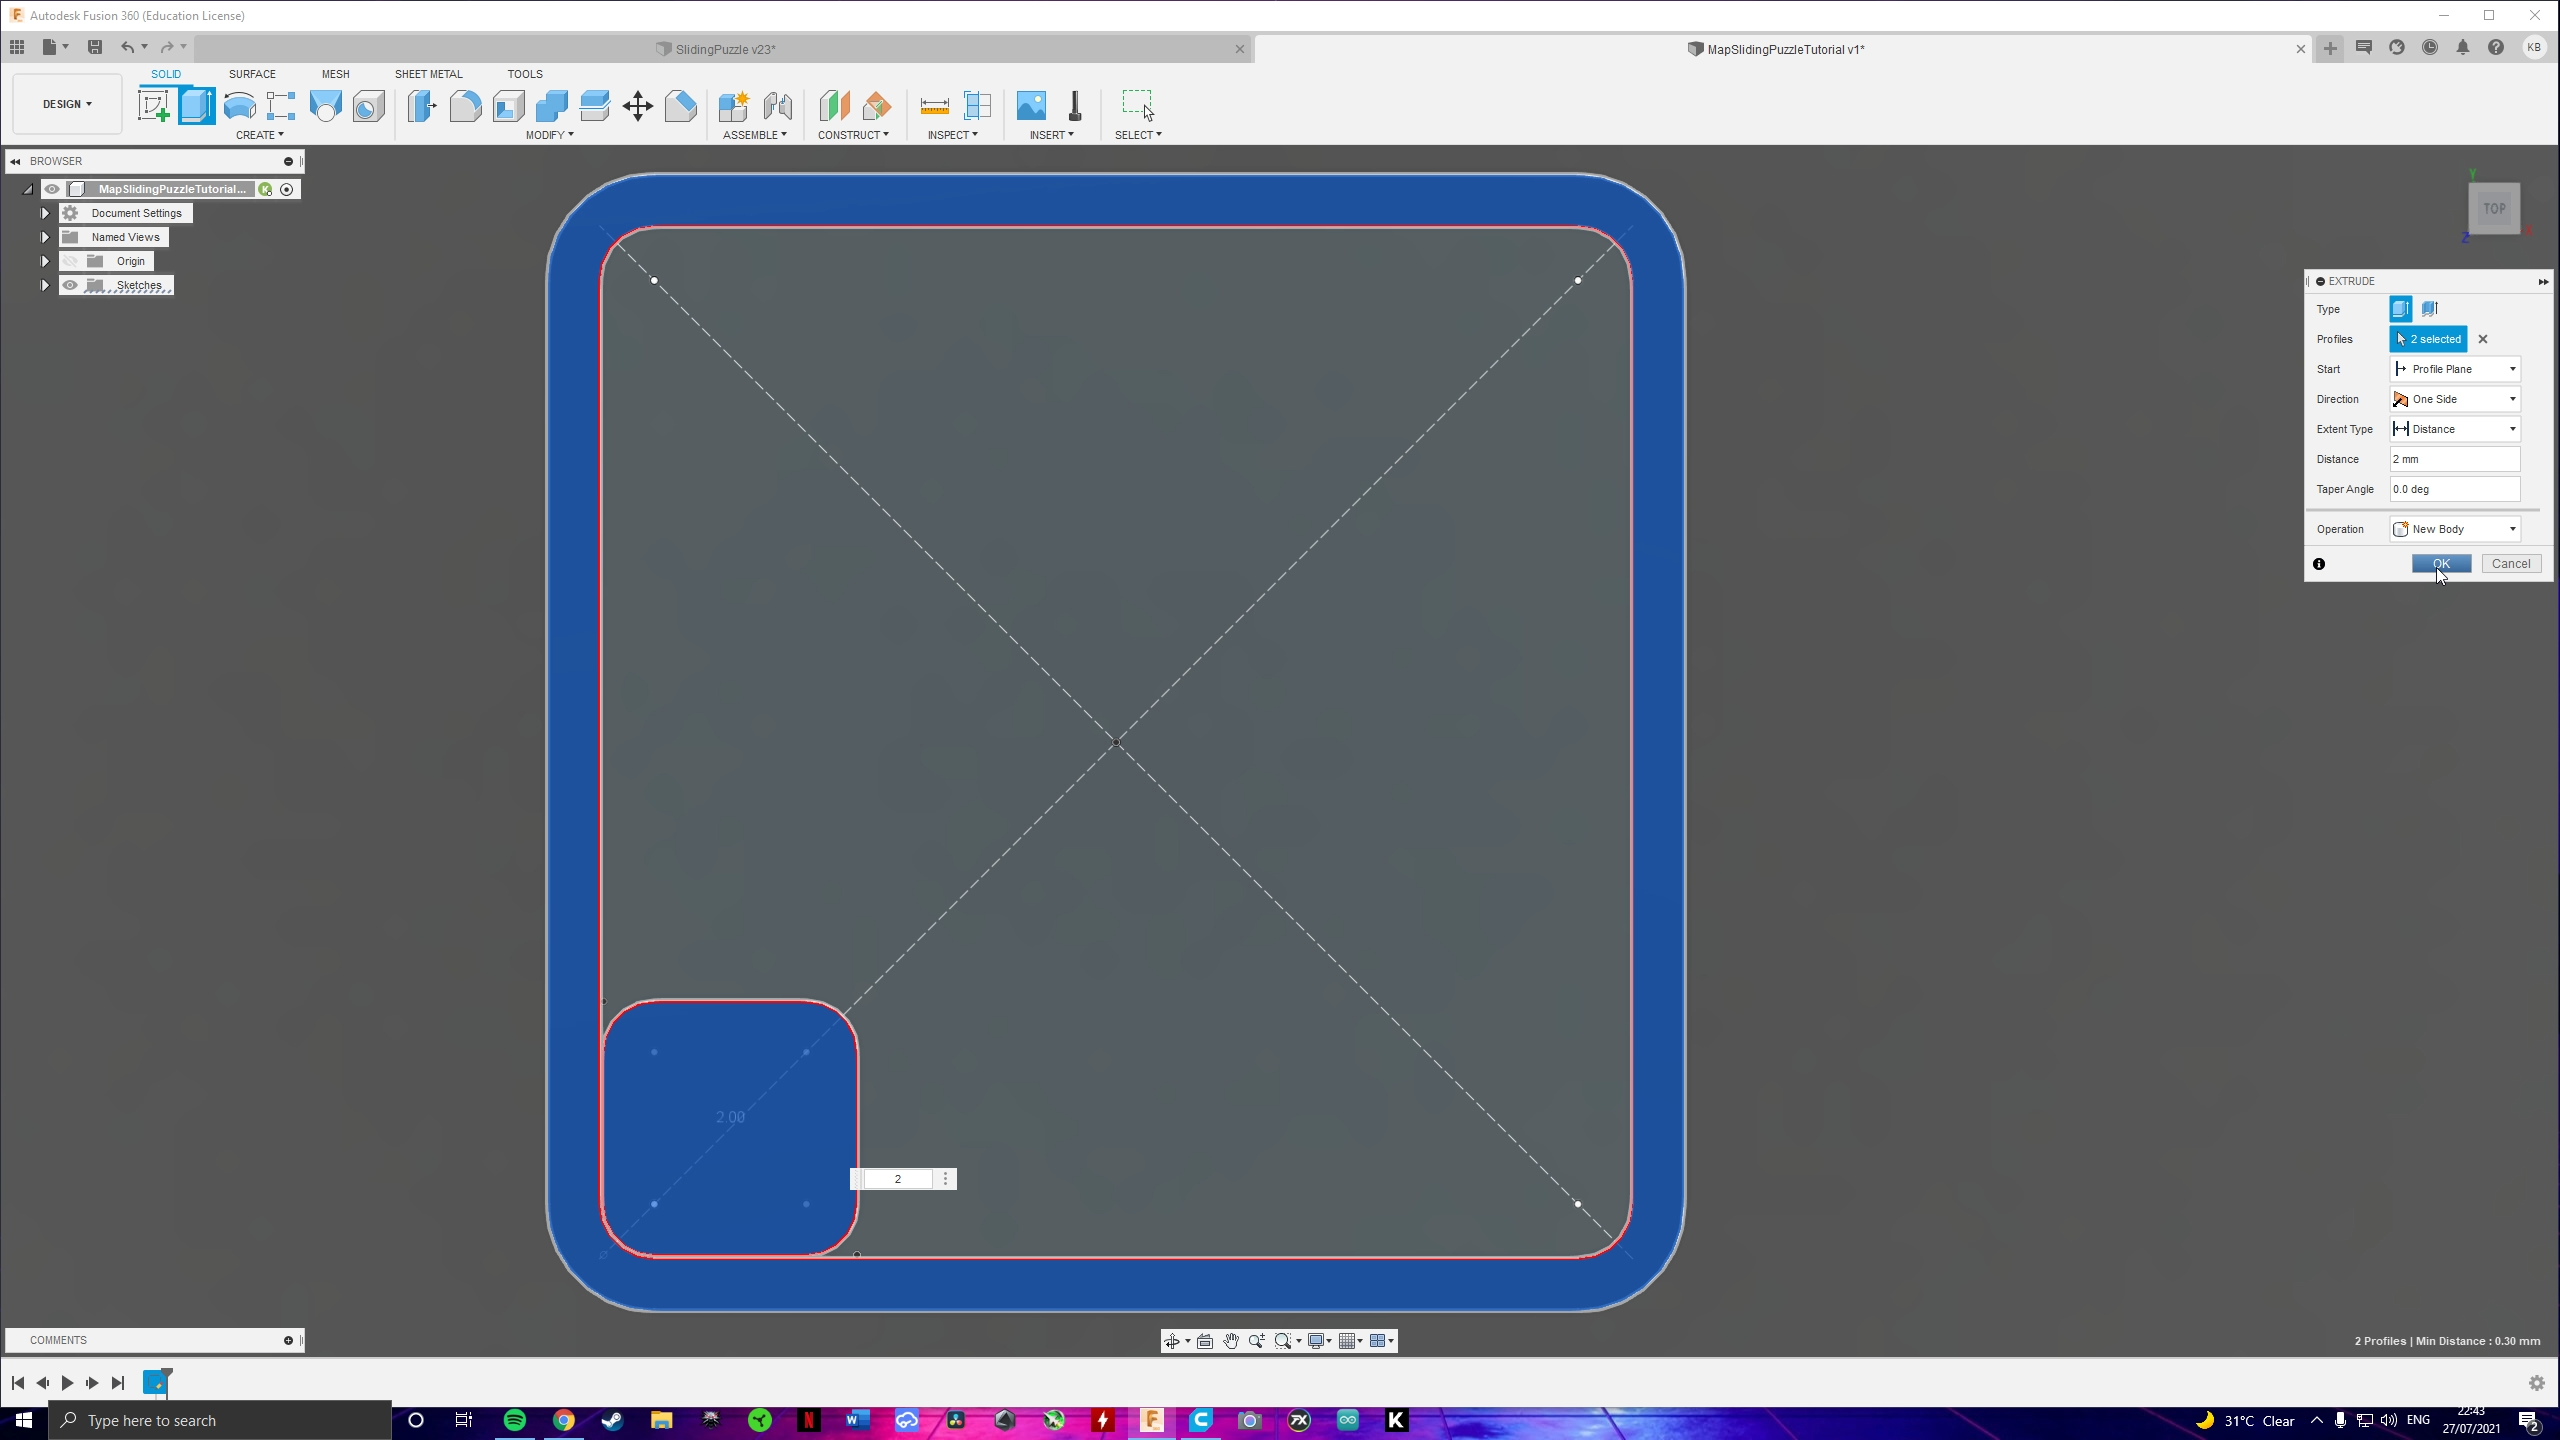
Go to Modify > Offset and offset the frame by 4mm (I haven't made a parameter for this but feel free to add your own!). Now extrude both the block and the frame with a value of 2mm (height par.).
Offset Plane
.png)
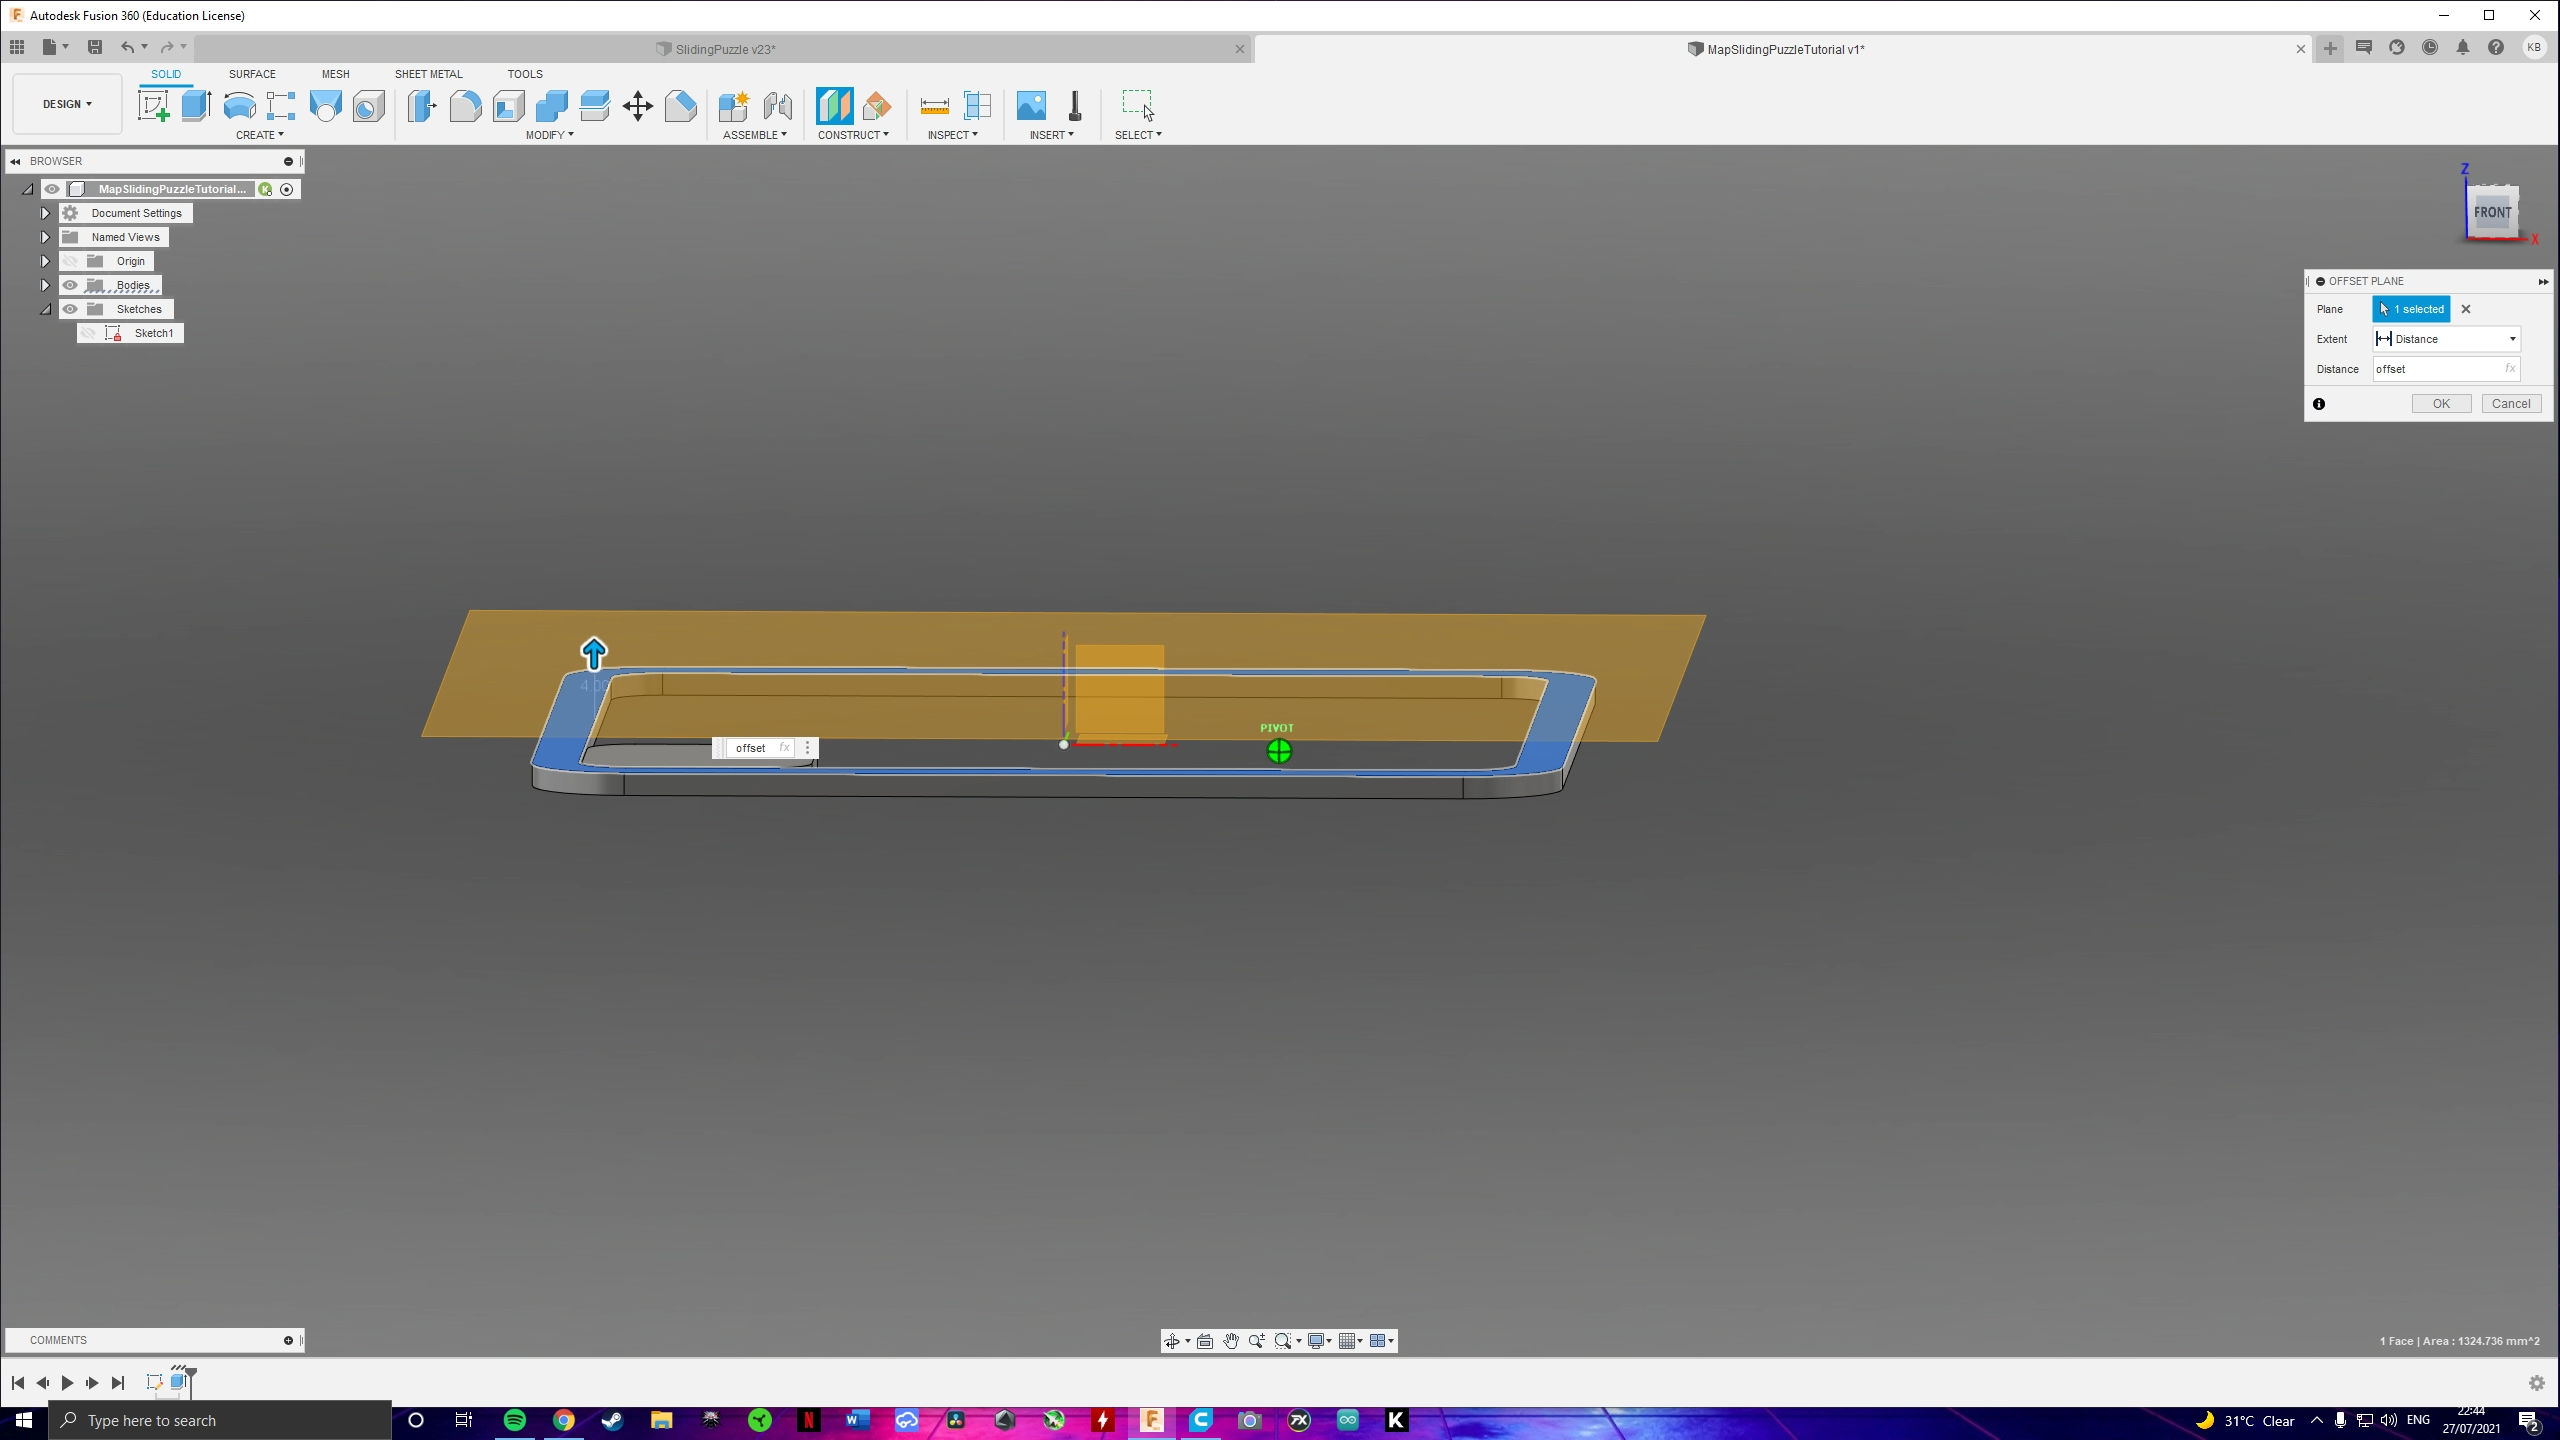
Time to start working on the sliding mechanism! Select all the geometry in your sketch and hit CTRL+C (copy). Then go to Construction > Offset Plane and make a plane 4mm (offset par.) above of the faces of the puzzle.
Offset Sketch
.png)
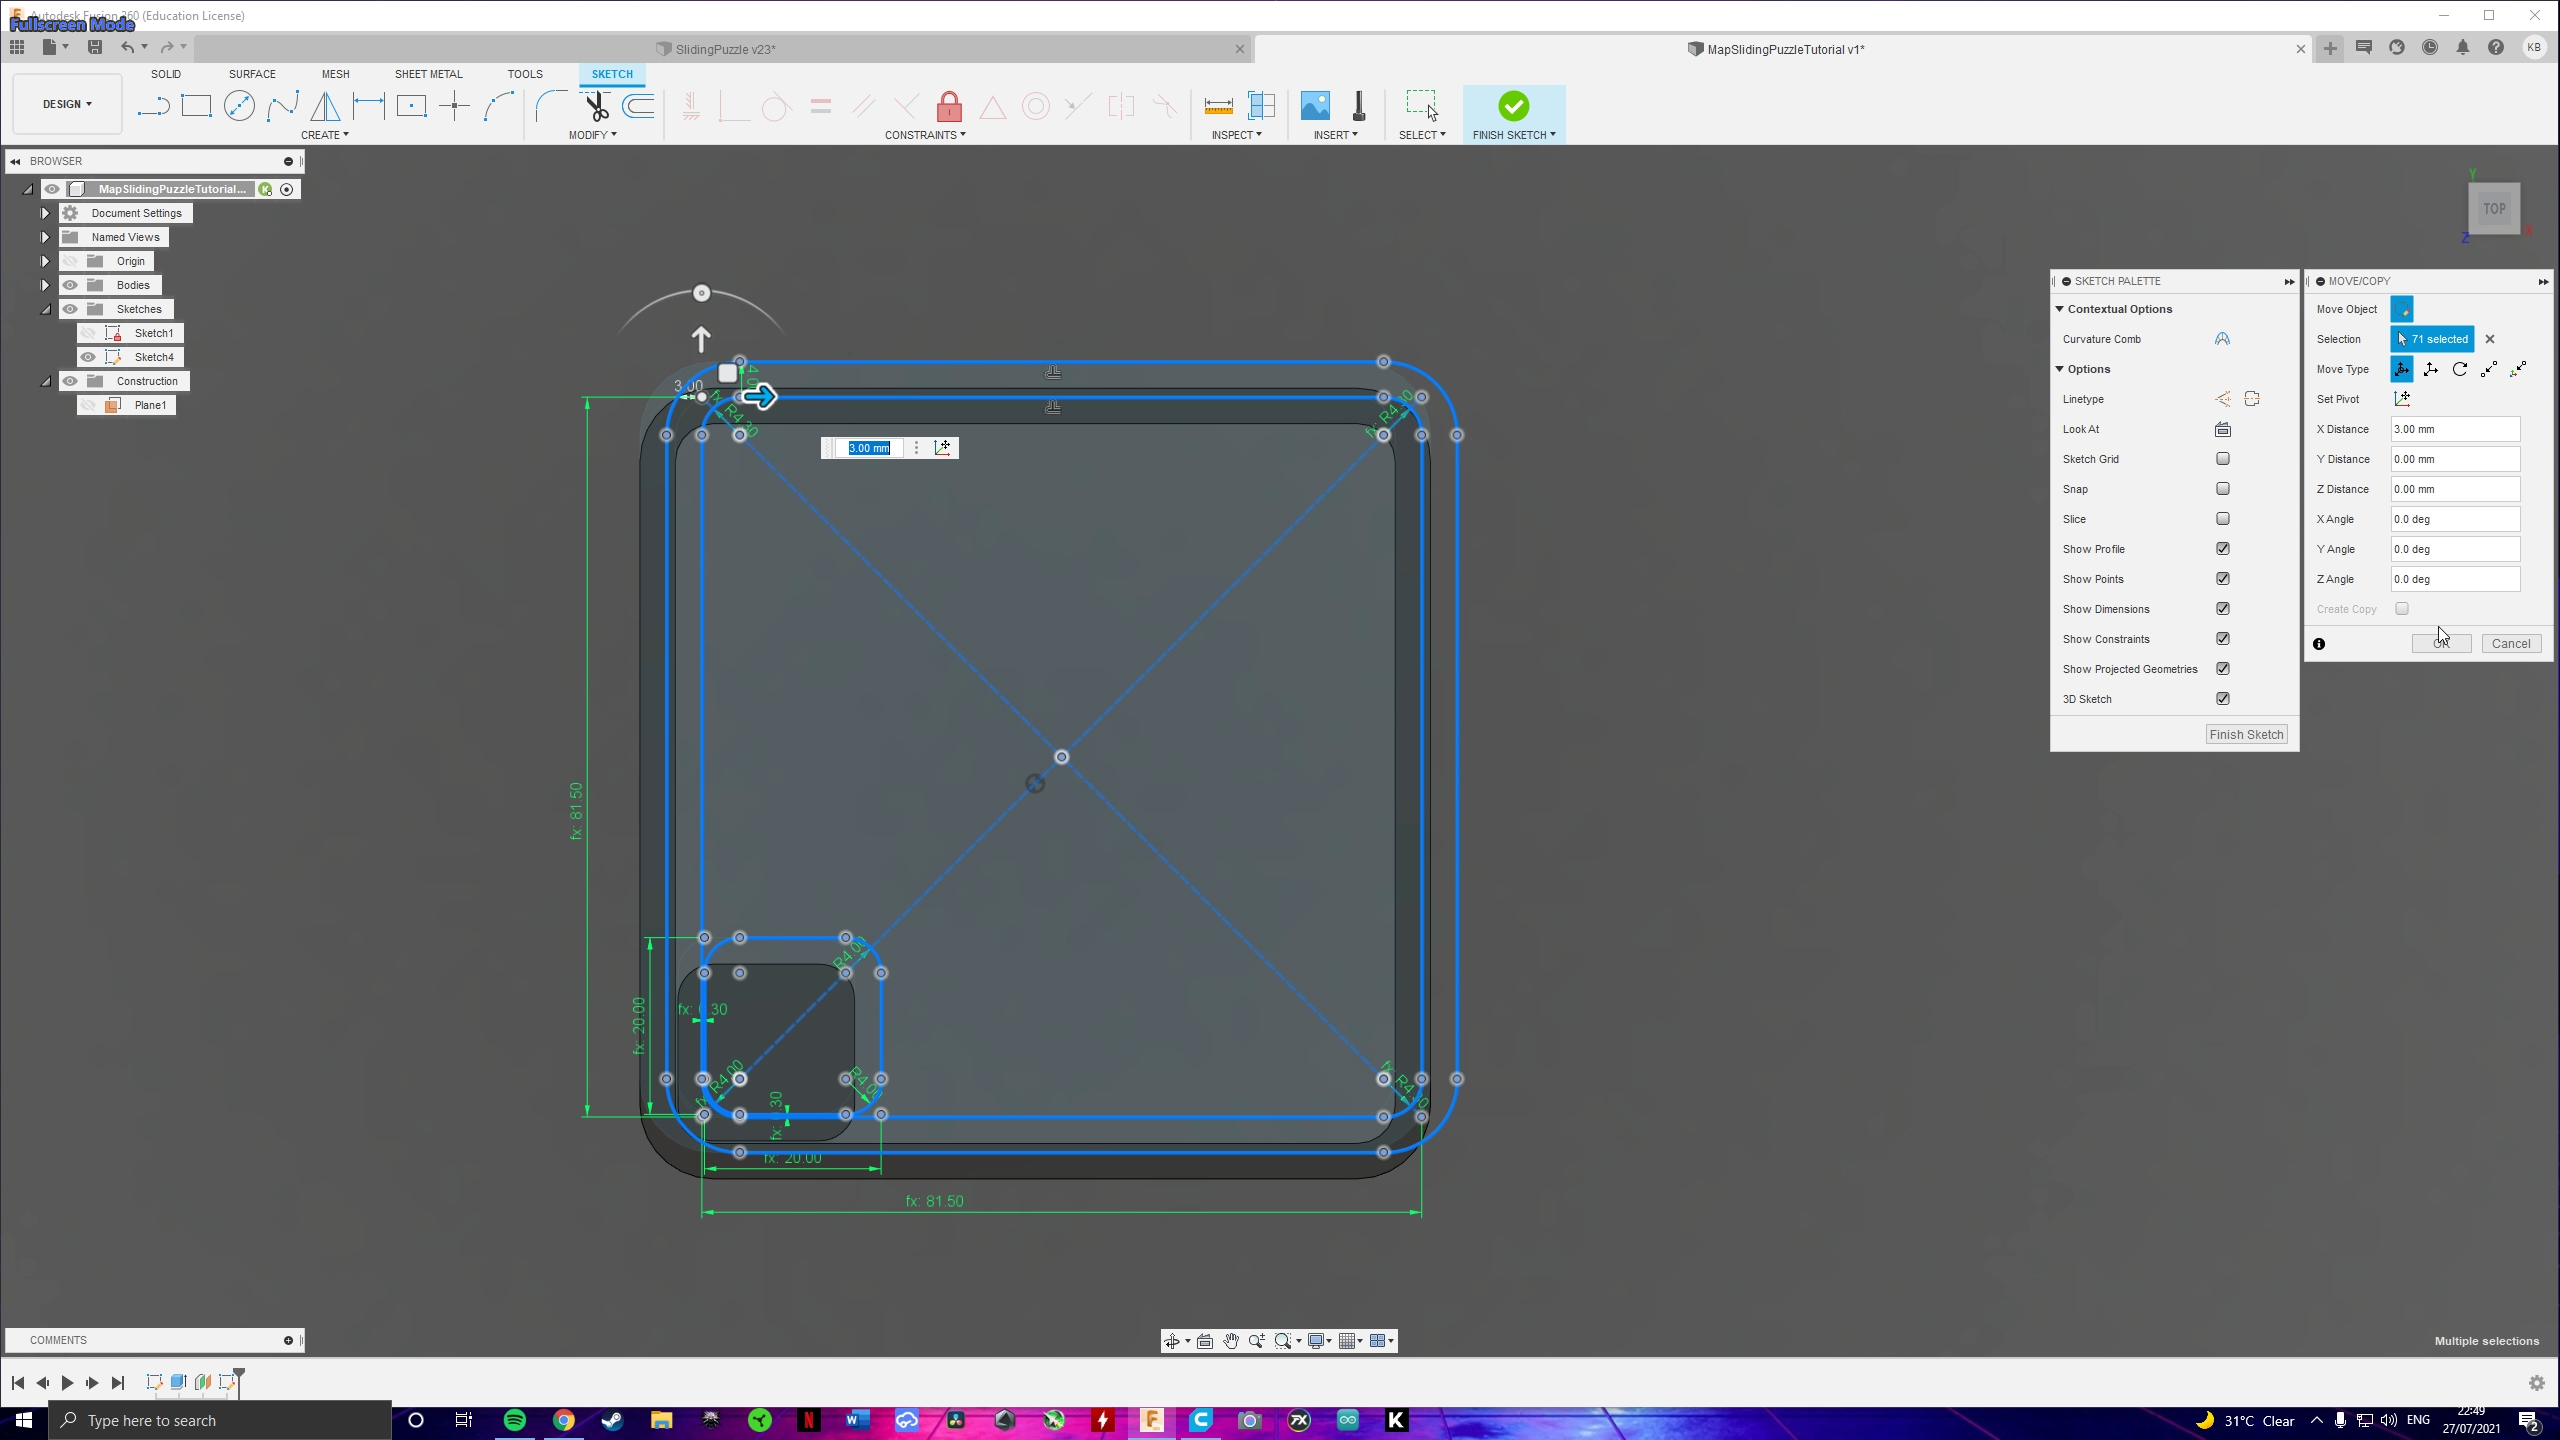
Create a sketch on the plane you just created and hit CTRL+V (paste). Move the sketch using the arrows around 3mm (xy_offset) on both x and y directions. To make sure that the new component is fully constrained find the centers of both the old and new square and re-add the 3mm dimensions.
Loft
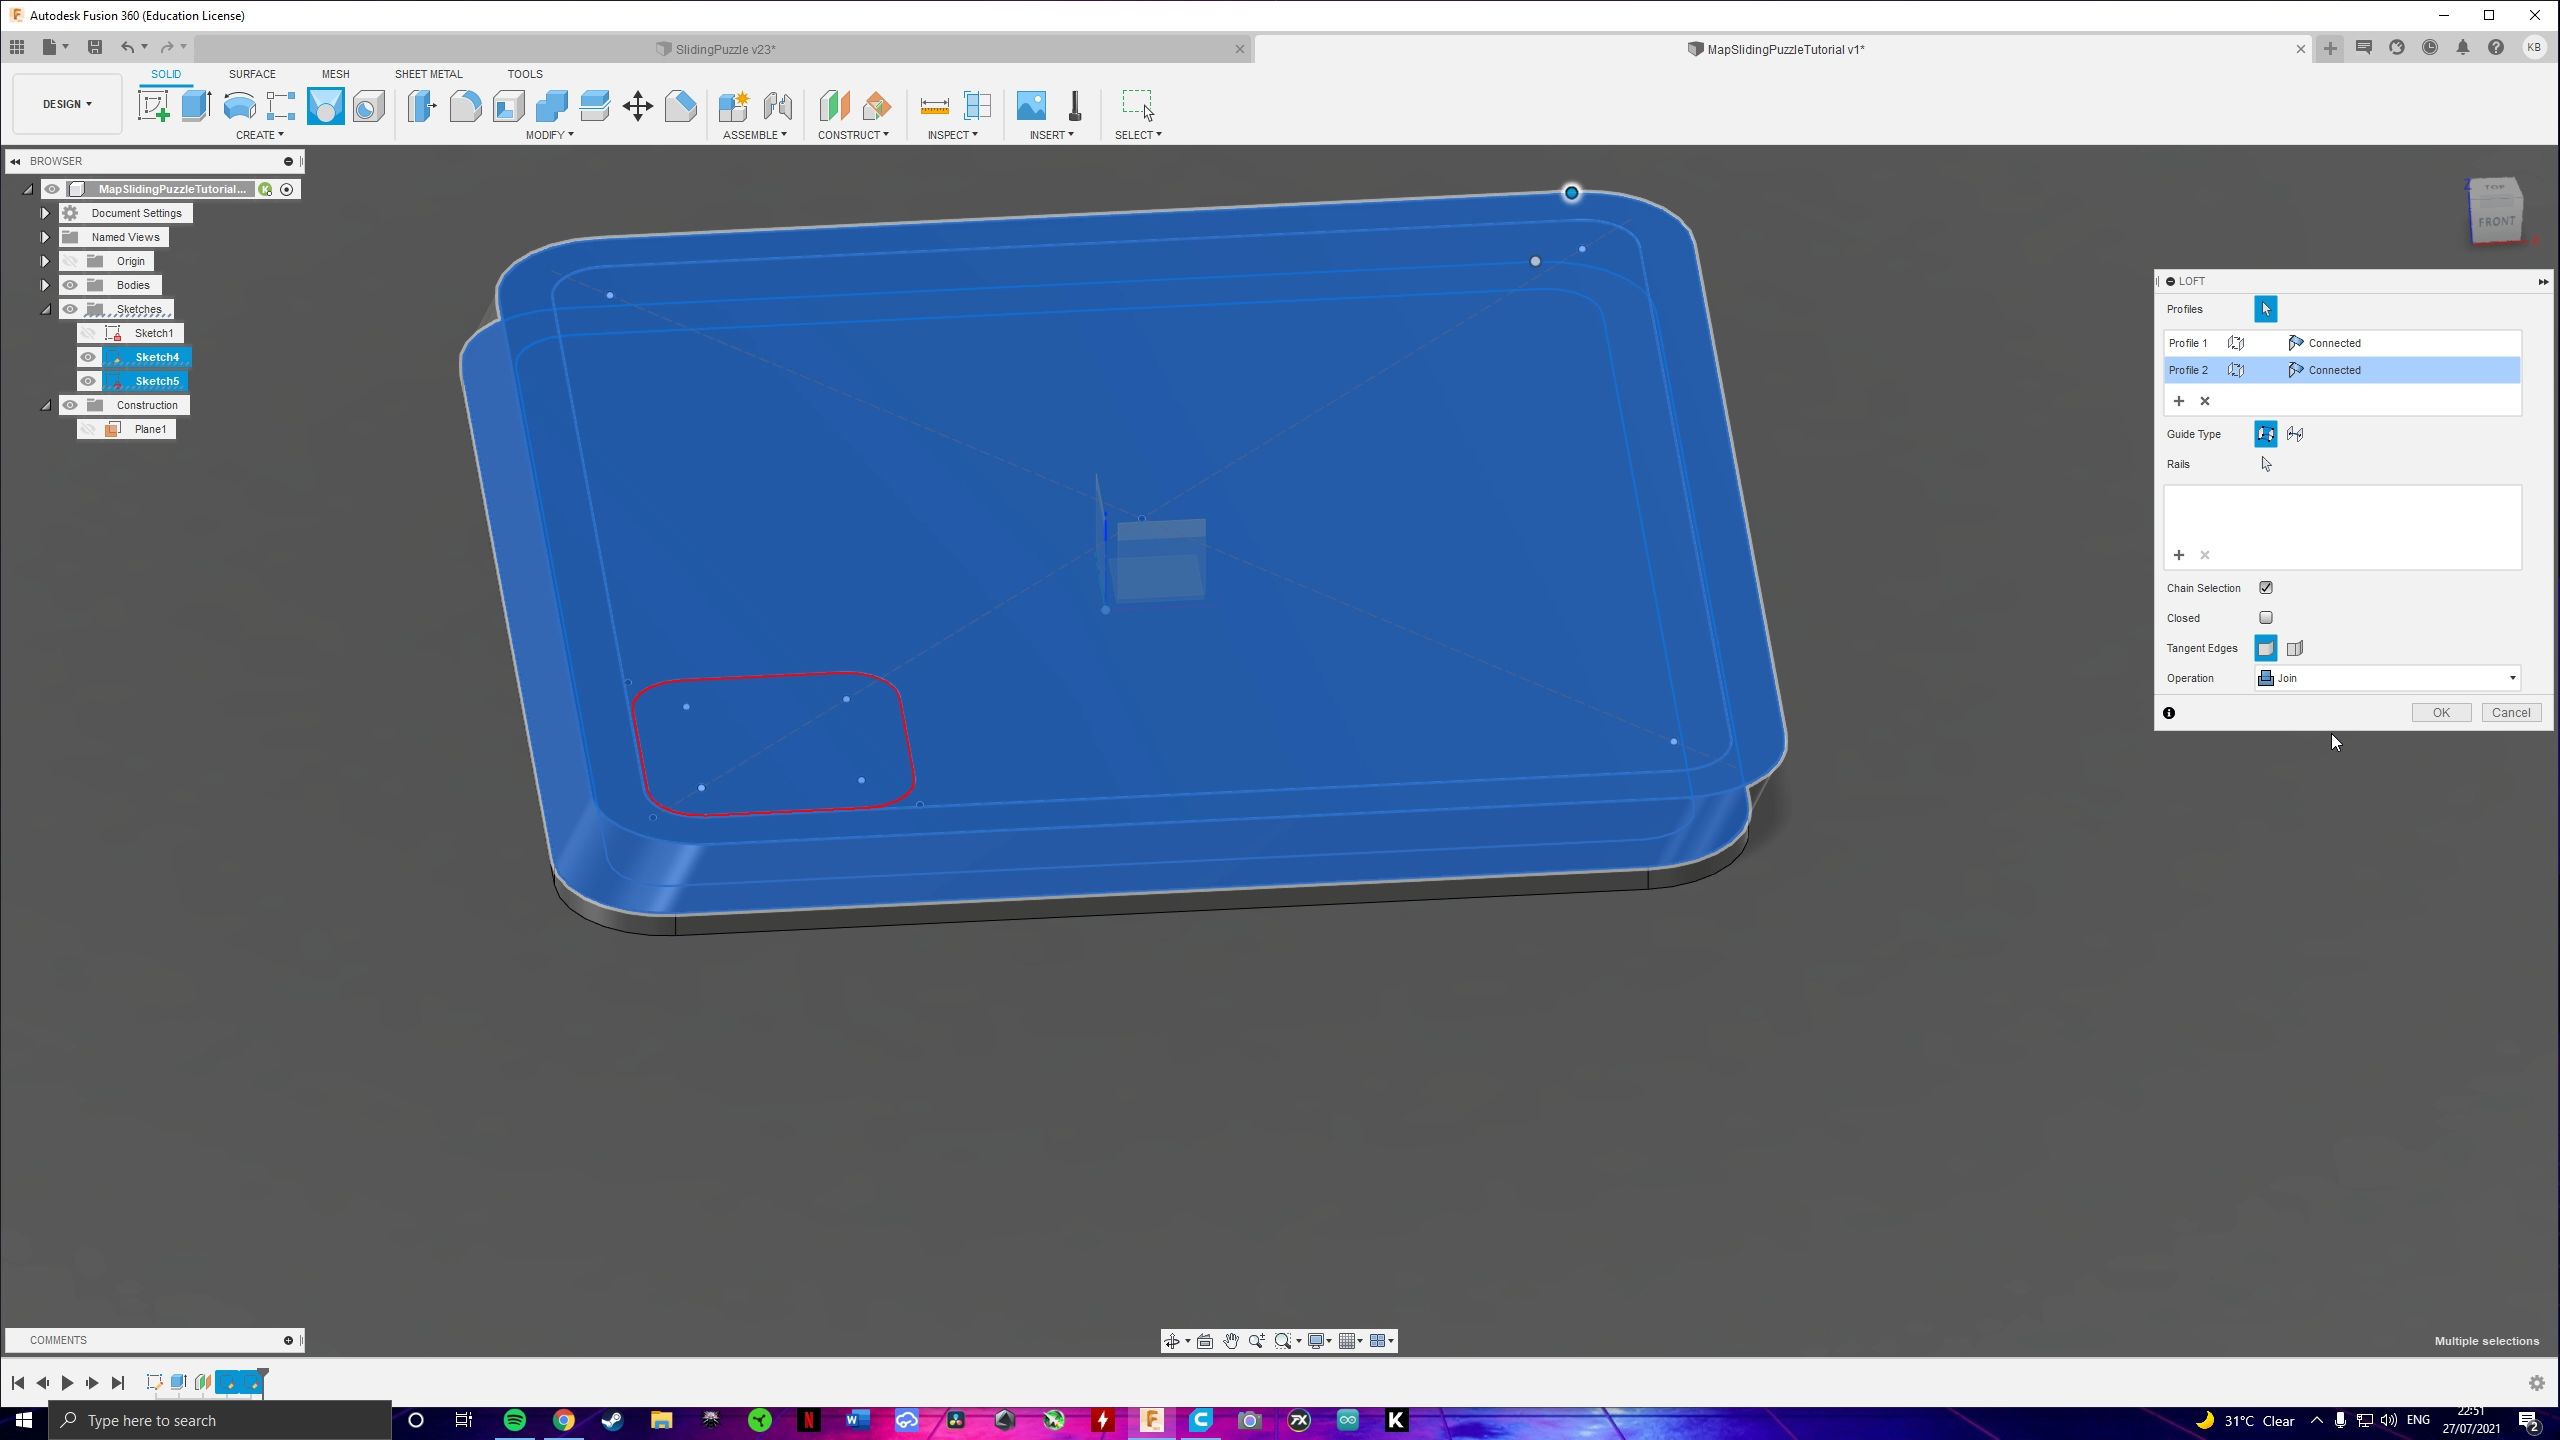.png)
.png)
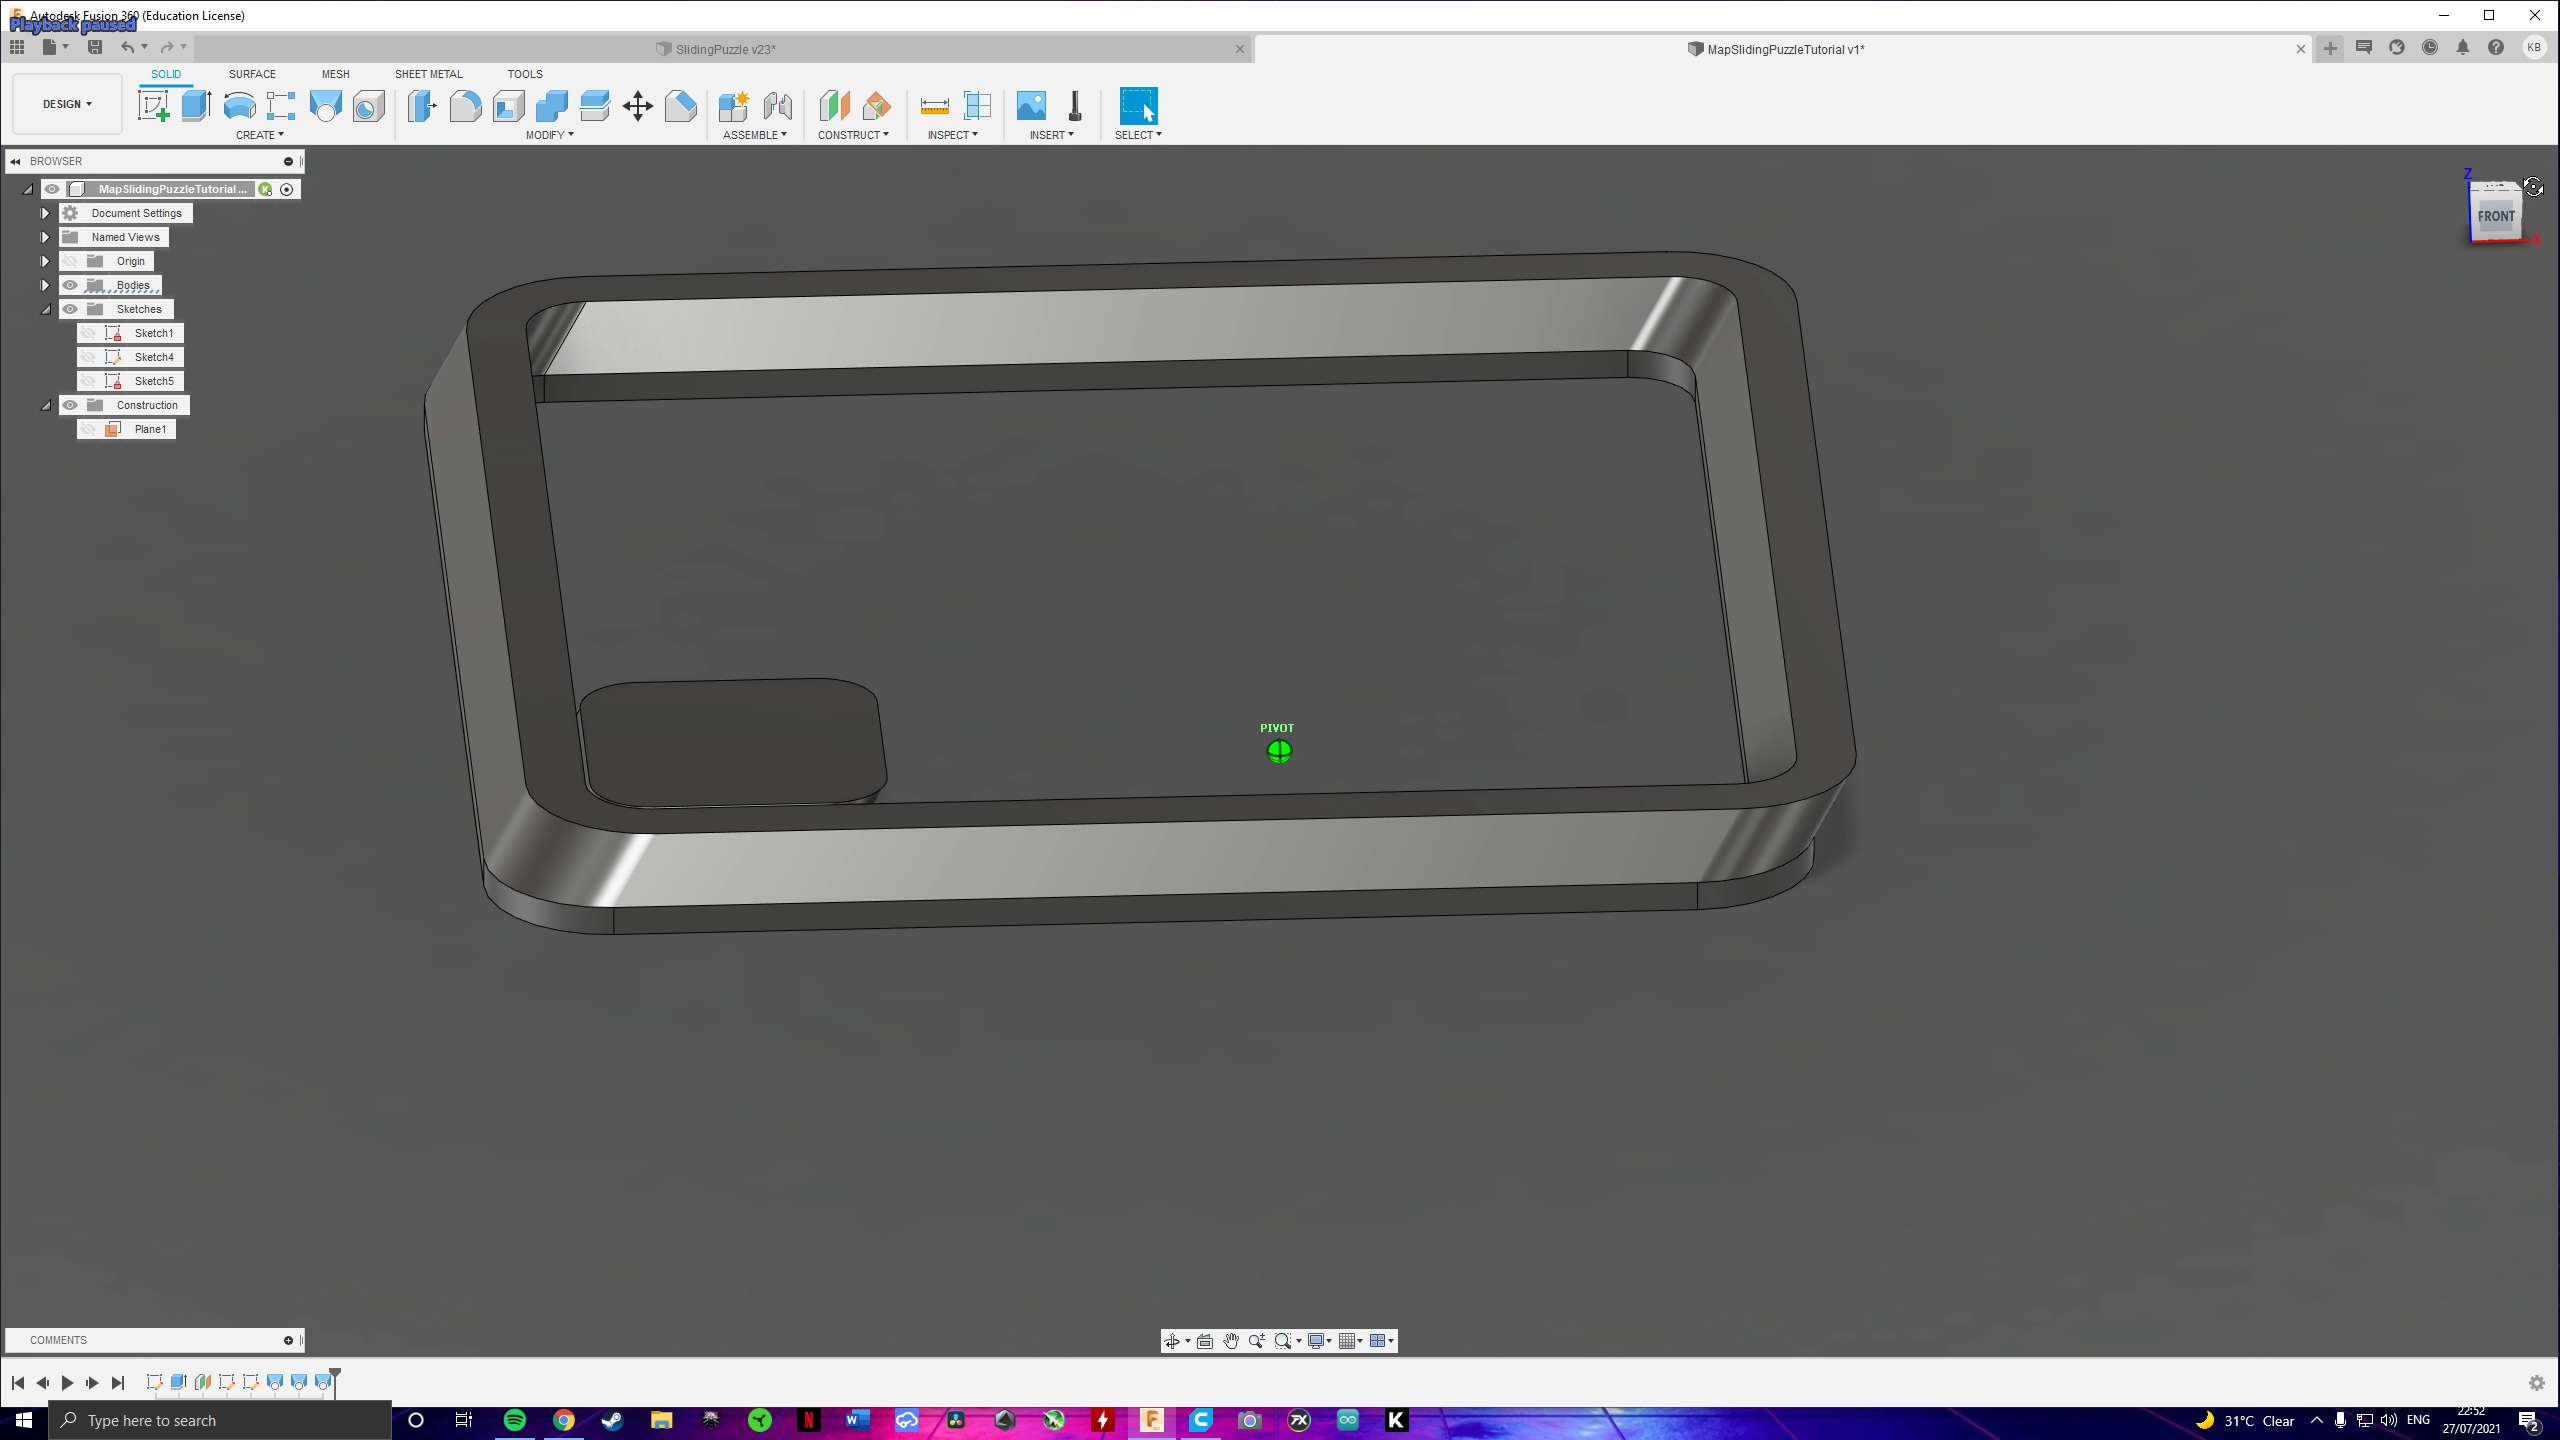
Go to Create > Loft and select the frame in both sketches. I am often having issues lofting shapes like this and for this reason I had to first select the whole "square" and then use an other loft as a cut to remove the inside. After that use a new loft for the block.
Extrude
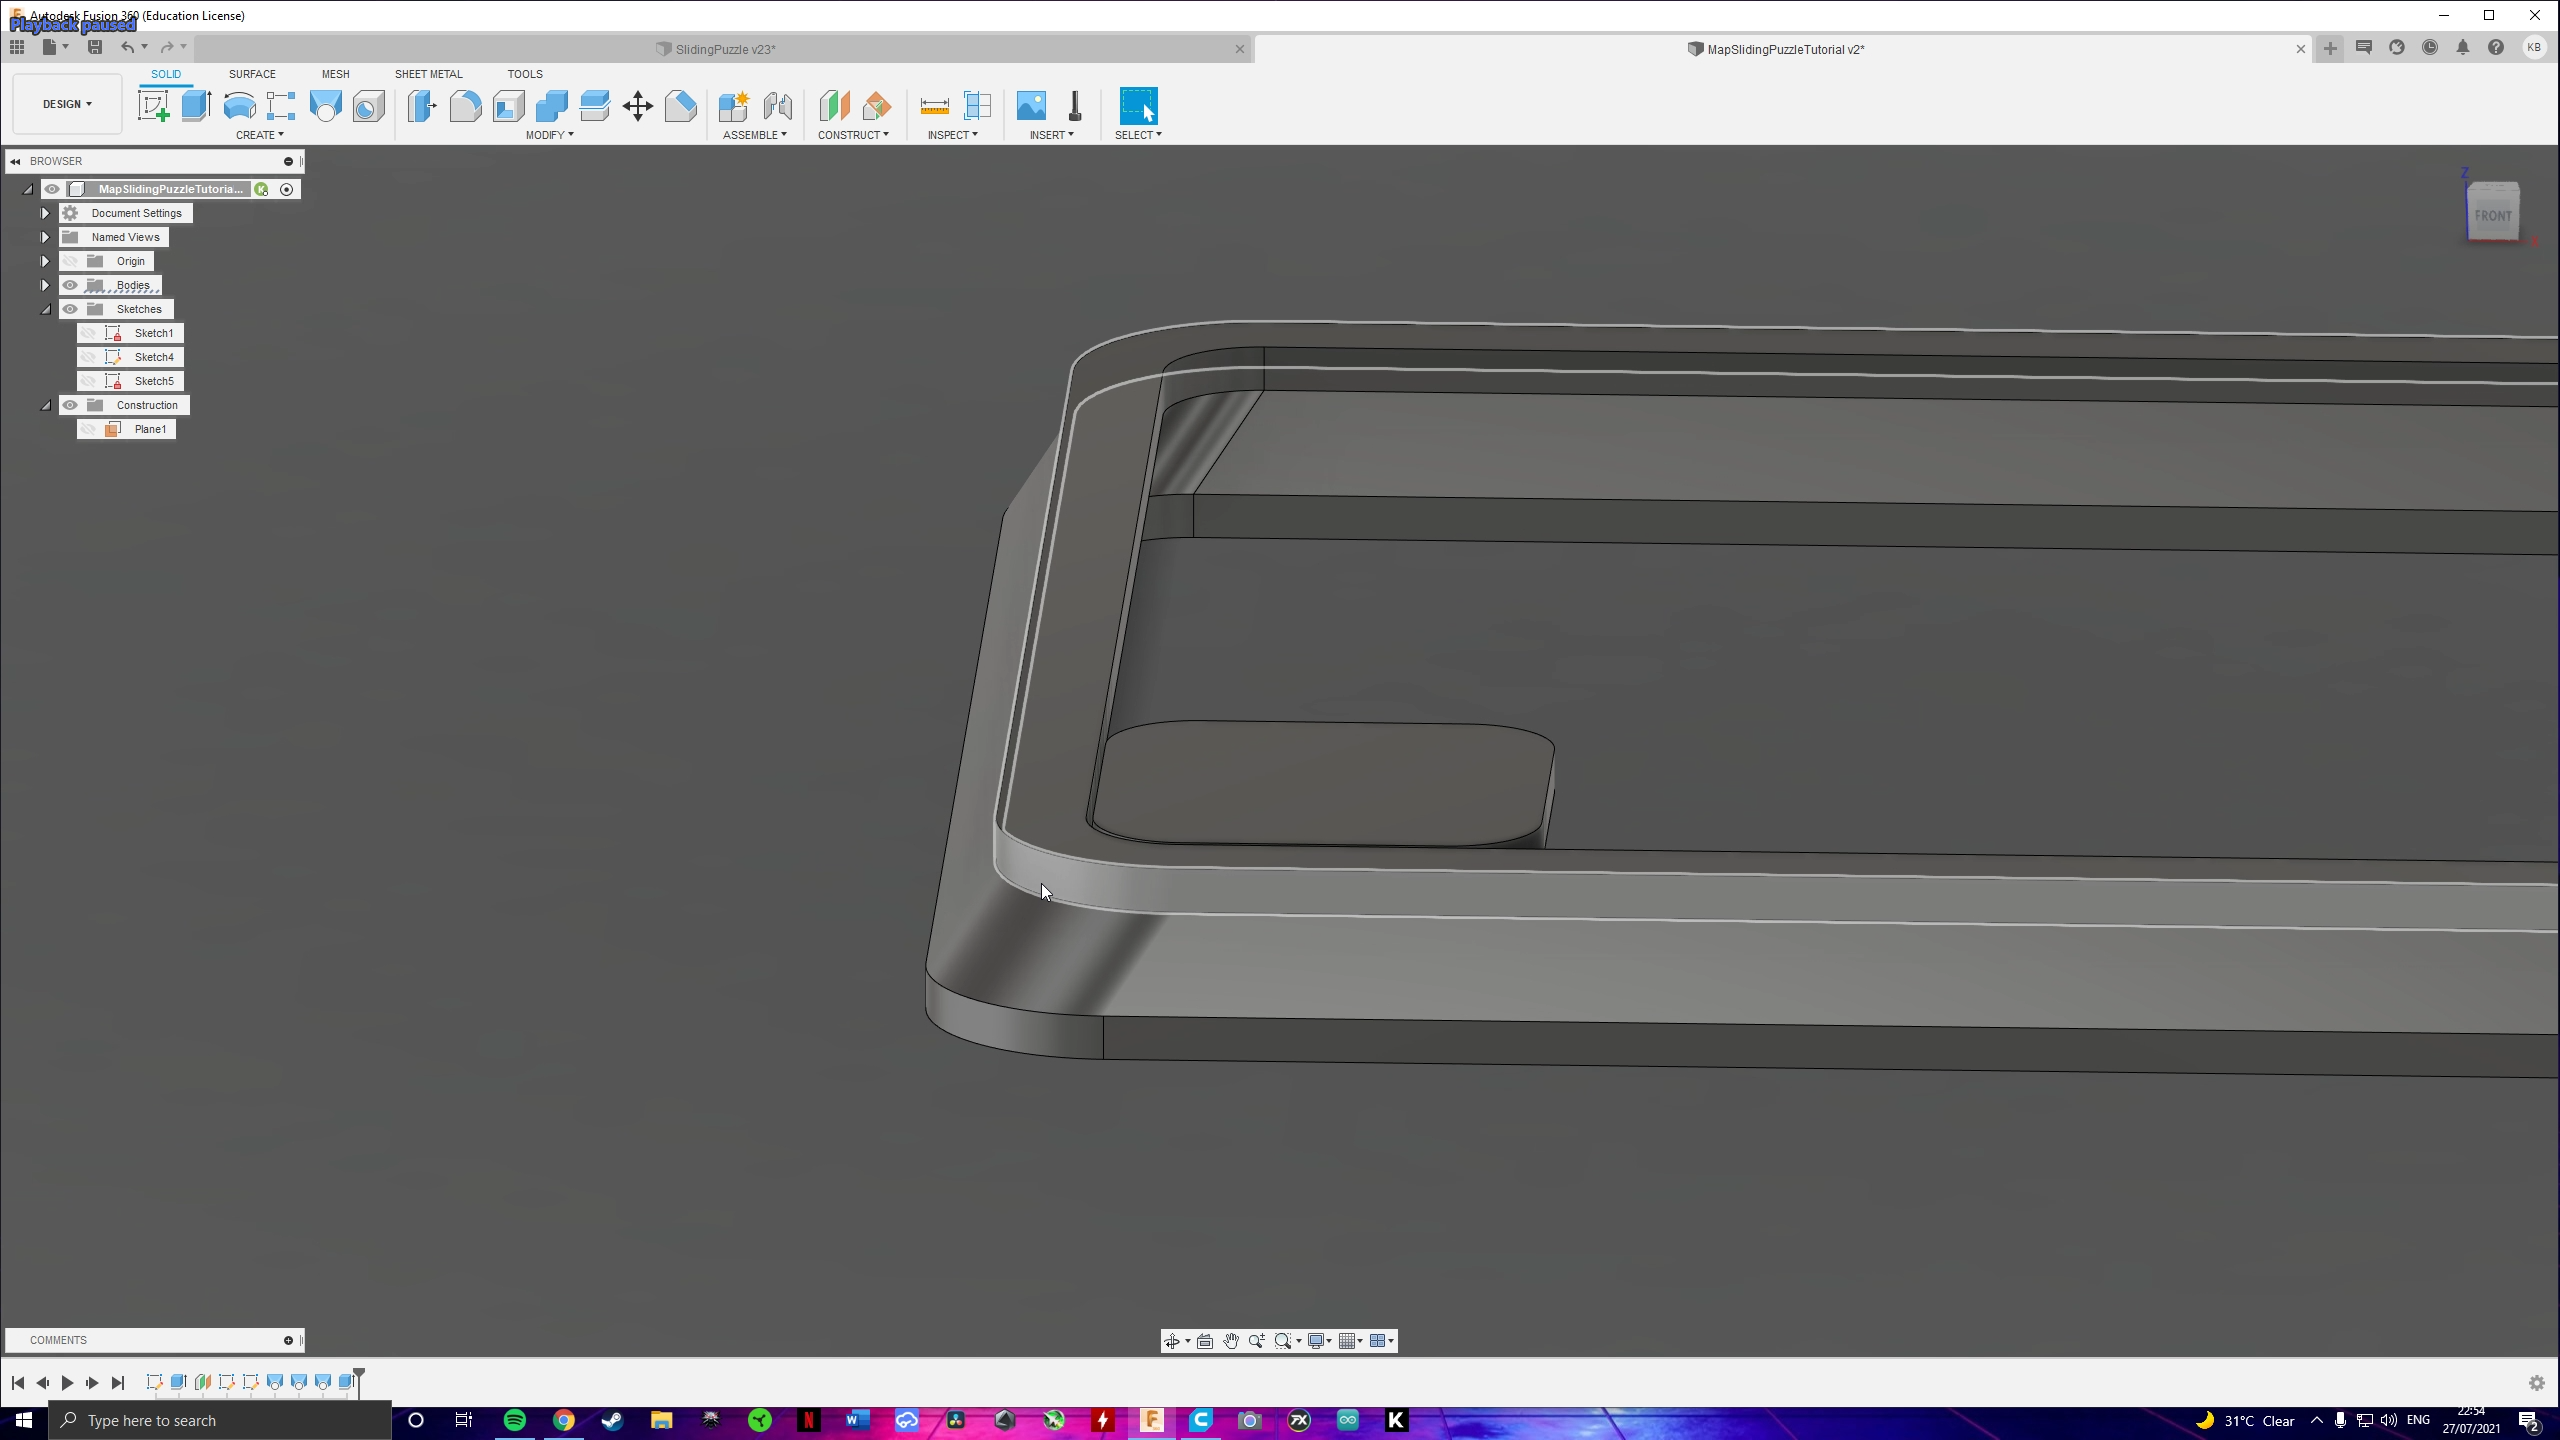.png)
Extrude both faces by a value of "extrude/2" = 1mm.
Mirror
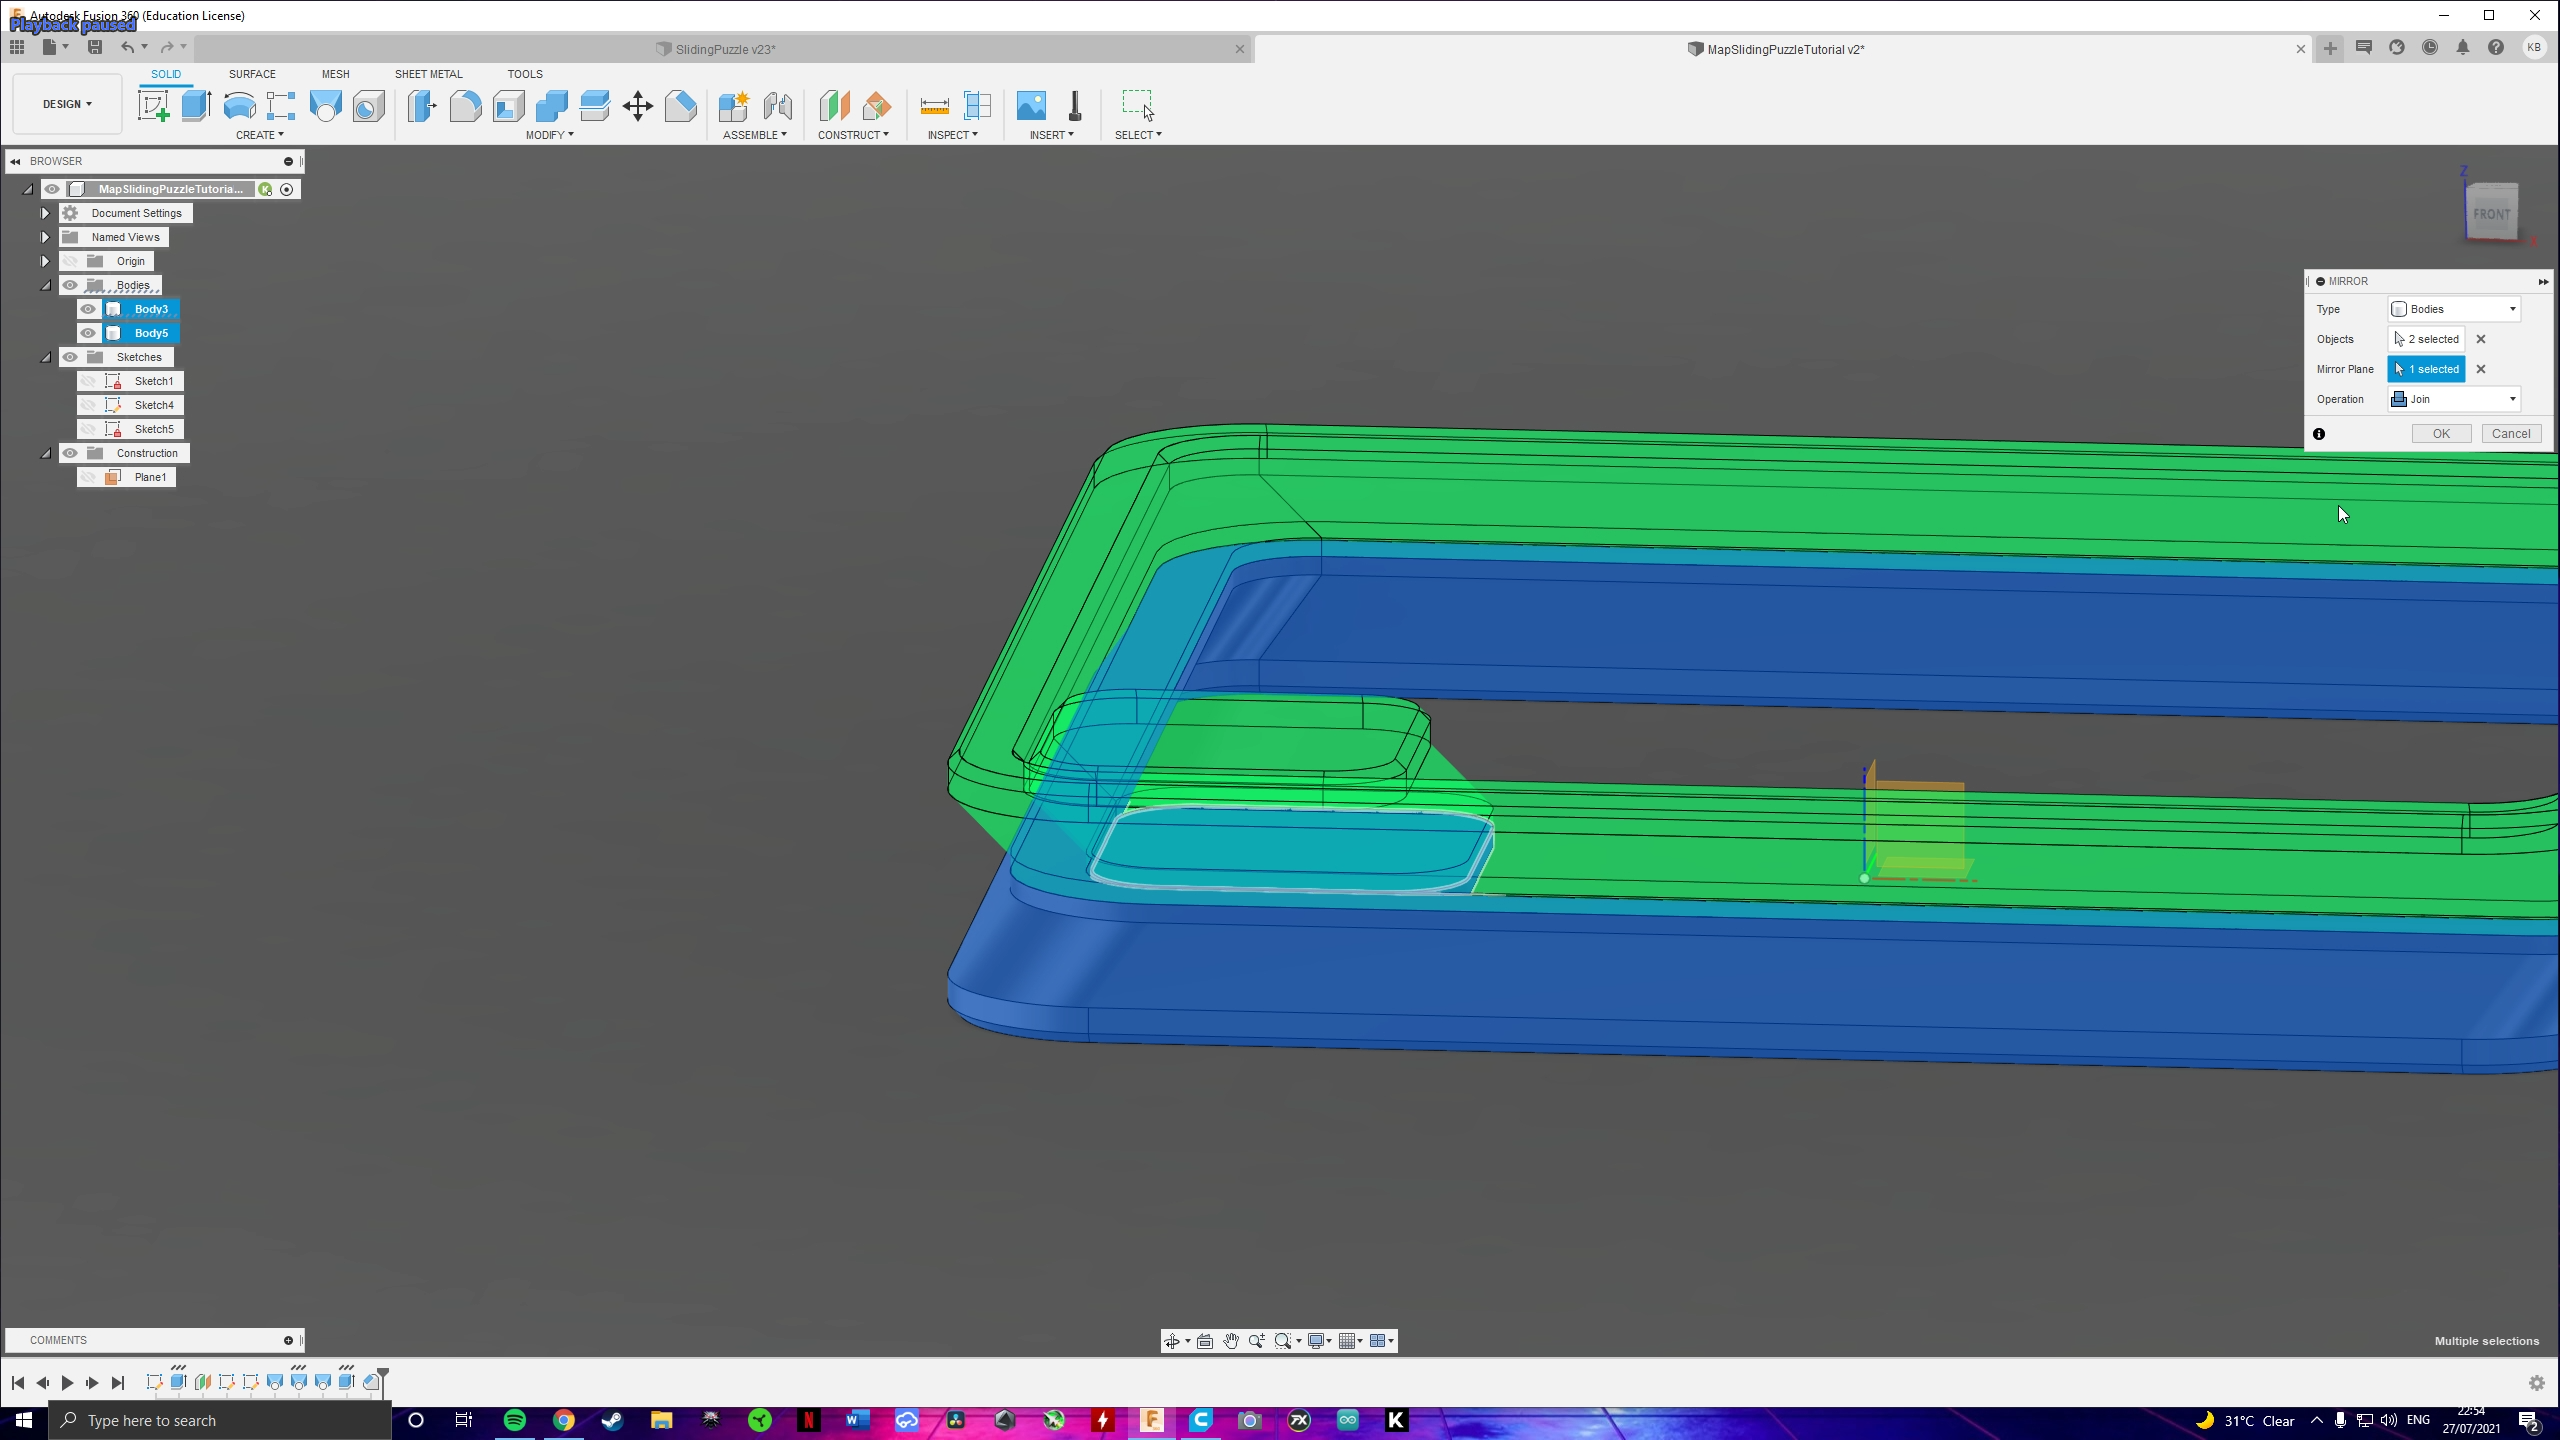.png)
Go to Create > Mirror and select both bodies as a mirror object as well as the top face of our previous extrusion as the mirror plane.
Chamfers
.png)
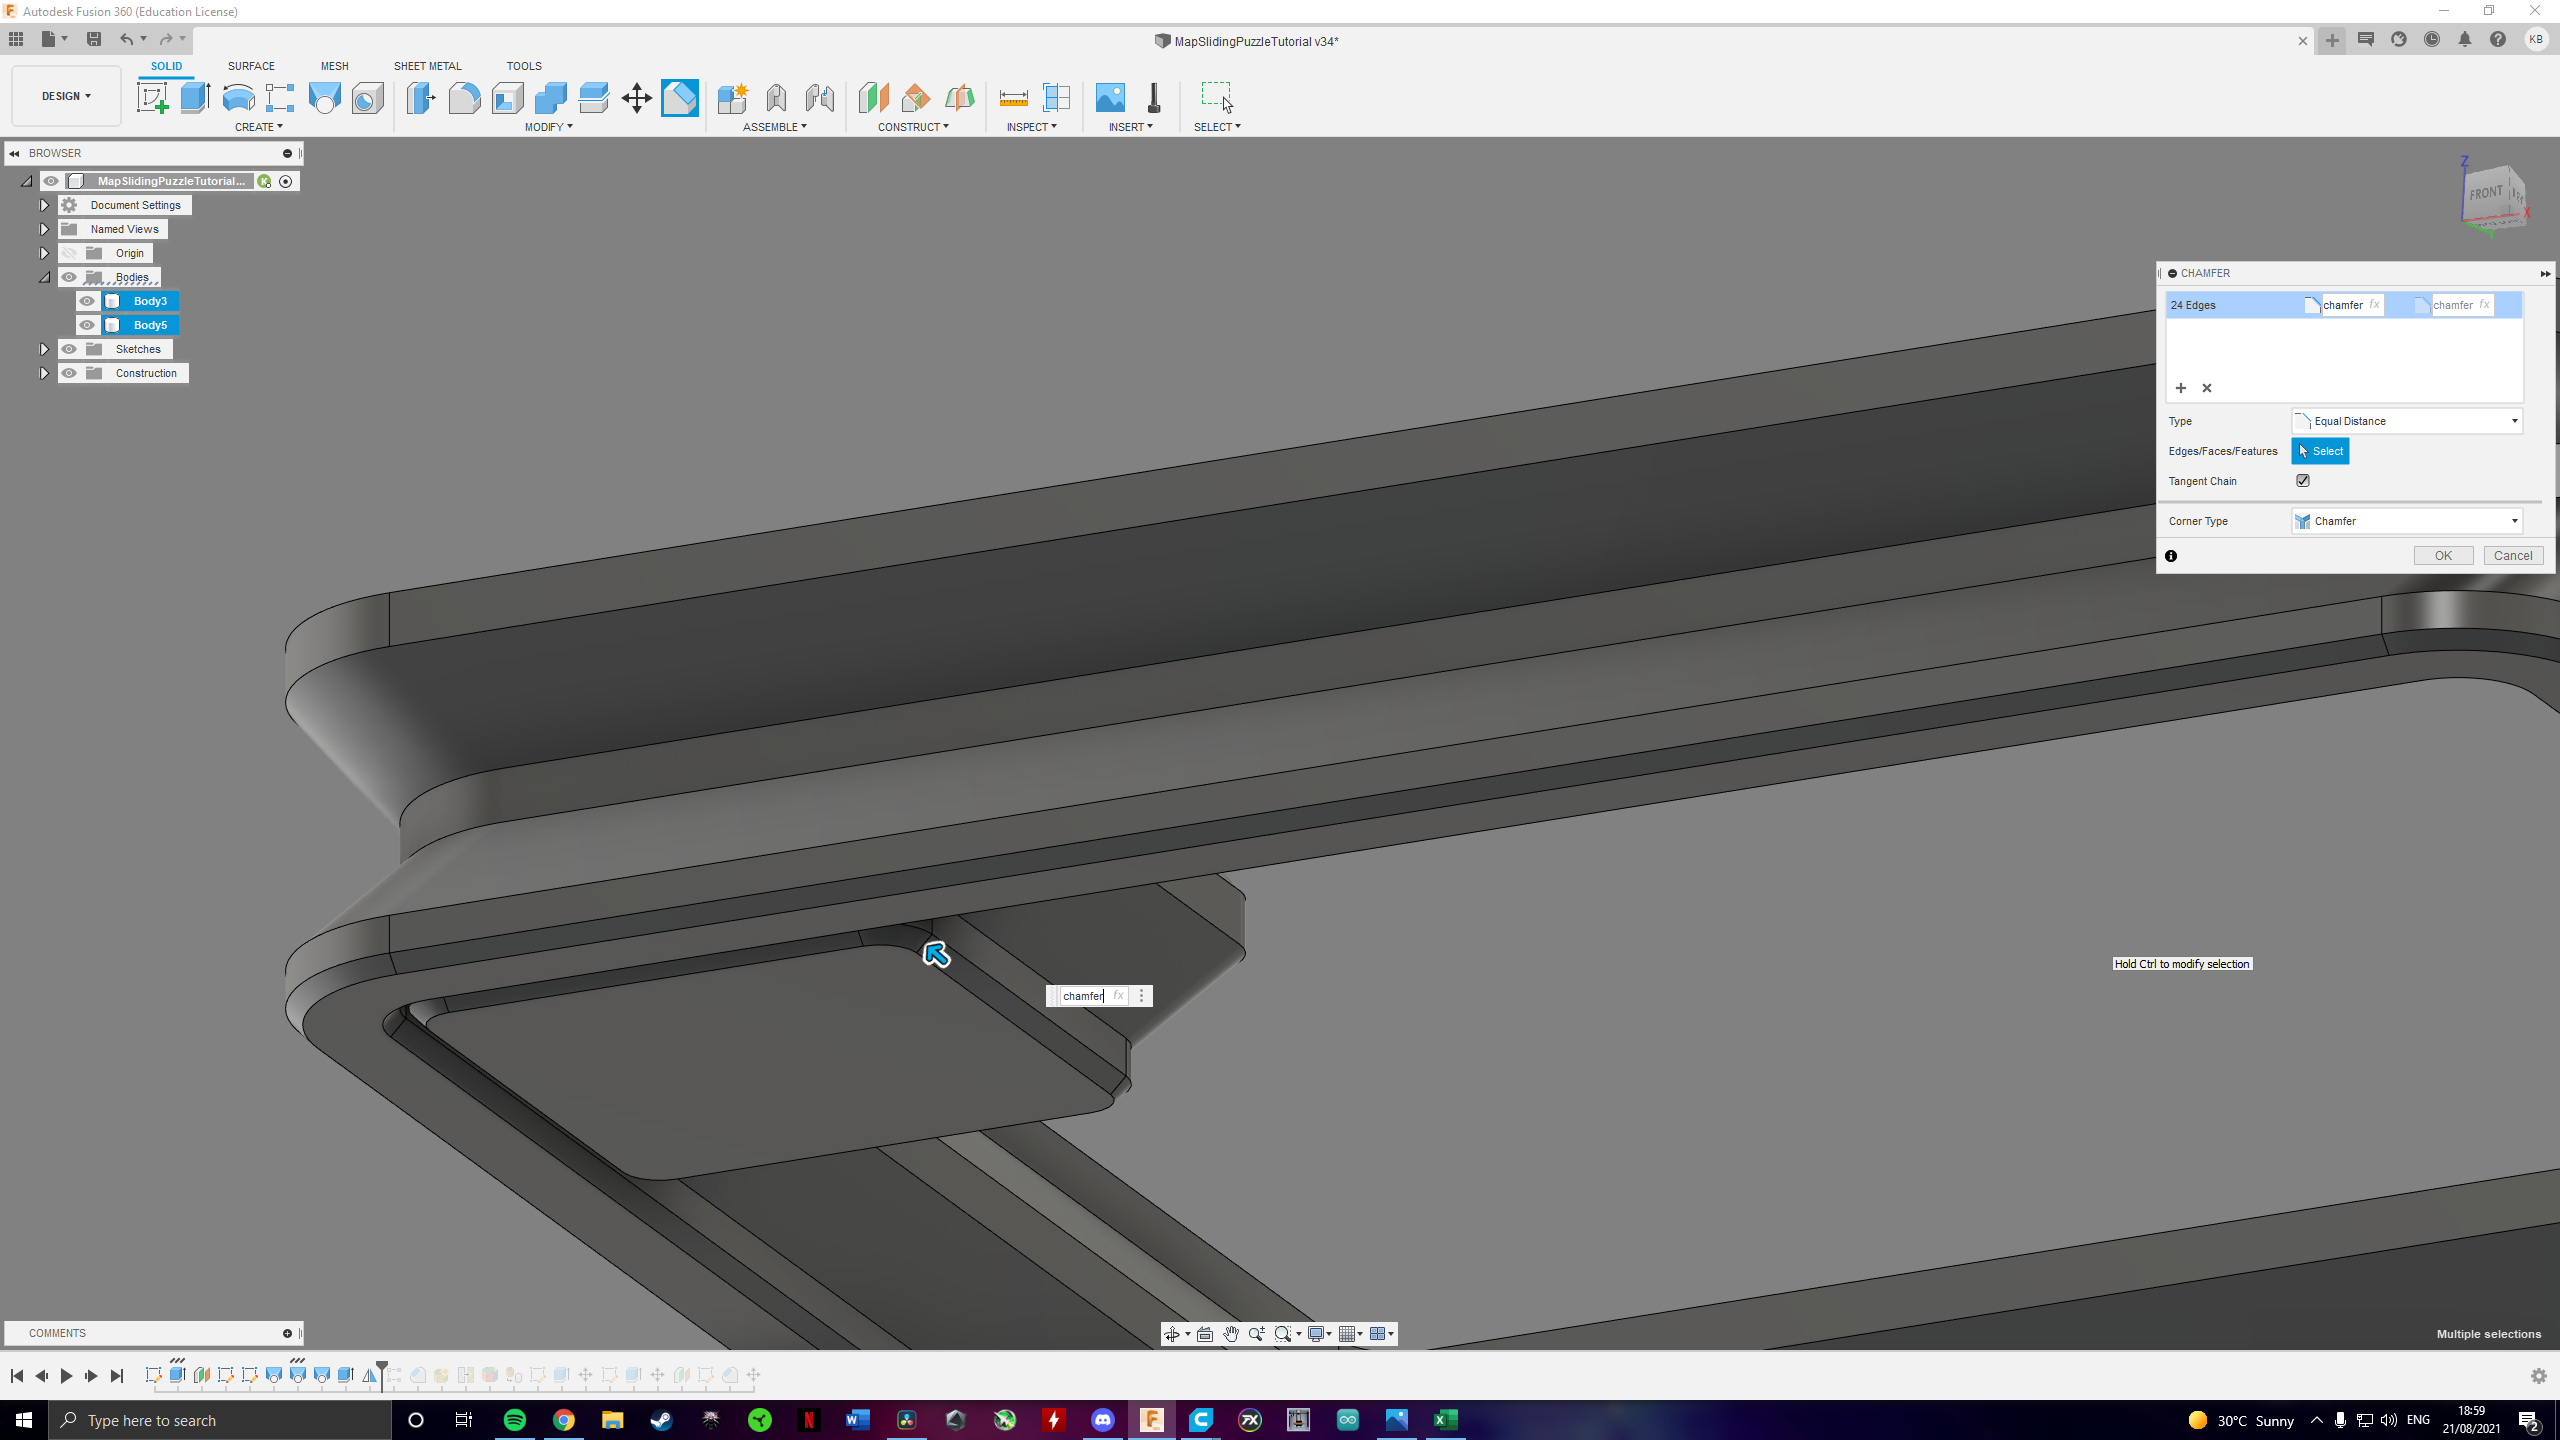
I've already told you how much I like fillets; well I like chamfers just as much. I always use them in the Z axis of my designs since because due to the layer by layer FDM 3D printing process they tend to print way better than fillets. I added chamfers with a value of 0.6mm to the top and bottom edges of the frame but only to the bottom edges of the block.
Rectangular Pattern
.png)
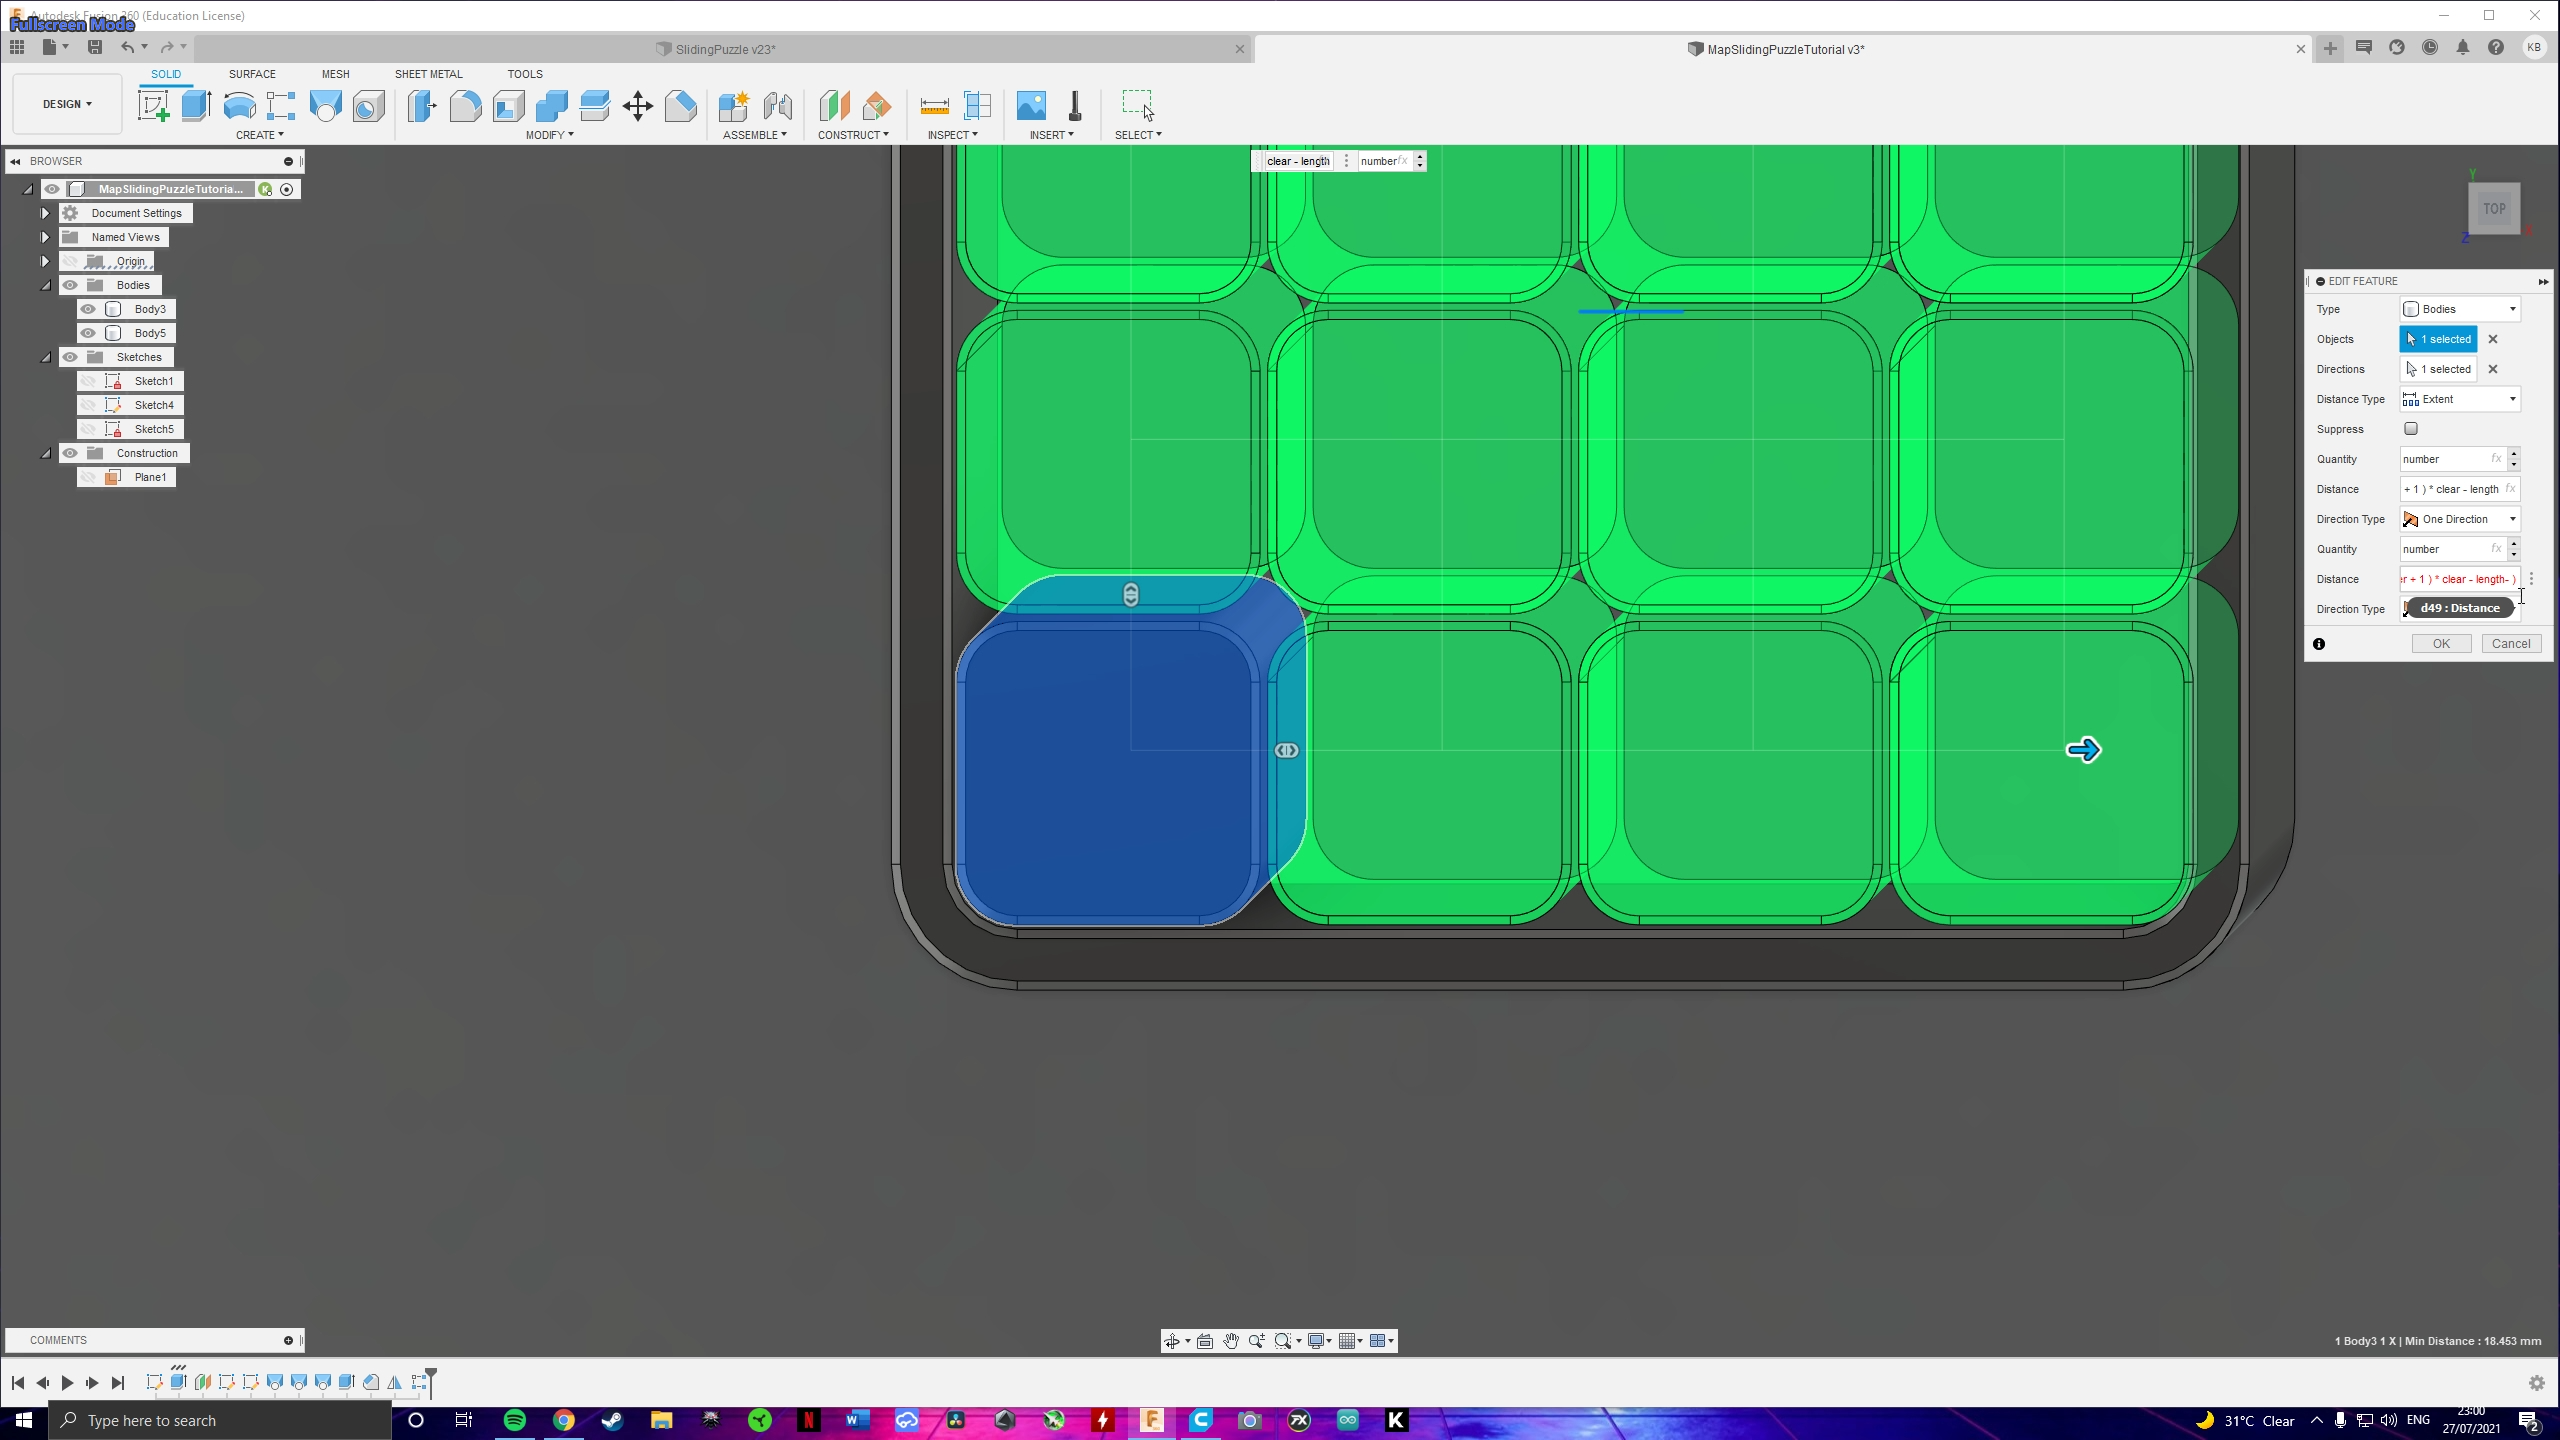
Go to Create > Pattern > Rectangular Pattern. Click on the 20mm block set the first quantity as the x_number (4) and the second as the y_number (4). Set the first distance as:
x_number * length + ( x_number + 1 ) * clear - length - 2 * clear
and the second as:
- ( y_number * length + ( y_number + 1 ) * clear - length - 2 * clear )
Maps!
.png)
Well done! Other than the map the puzzle is practically complete! As far as I am concerned there are two ways to add the map, both using images from the internet.
1st Way - SVG Pictures (The Easy Way)
.png)
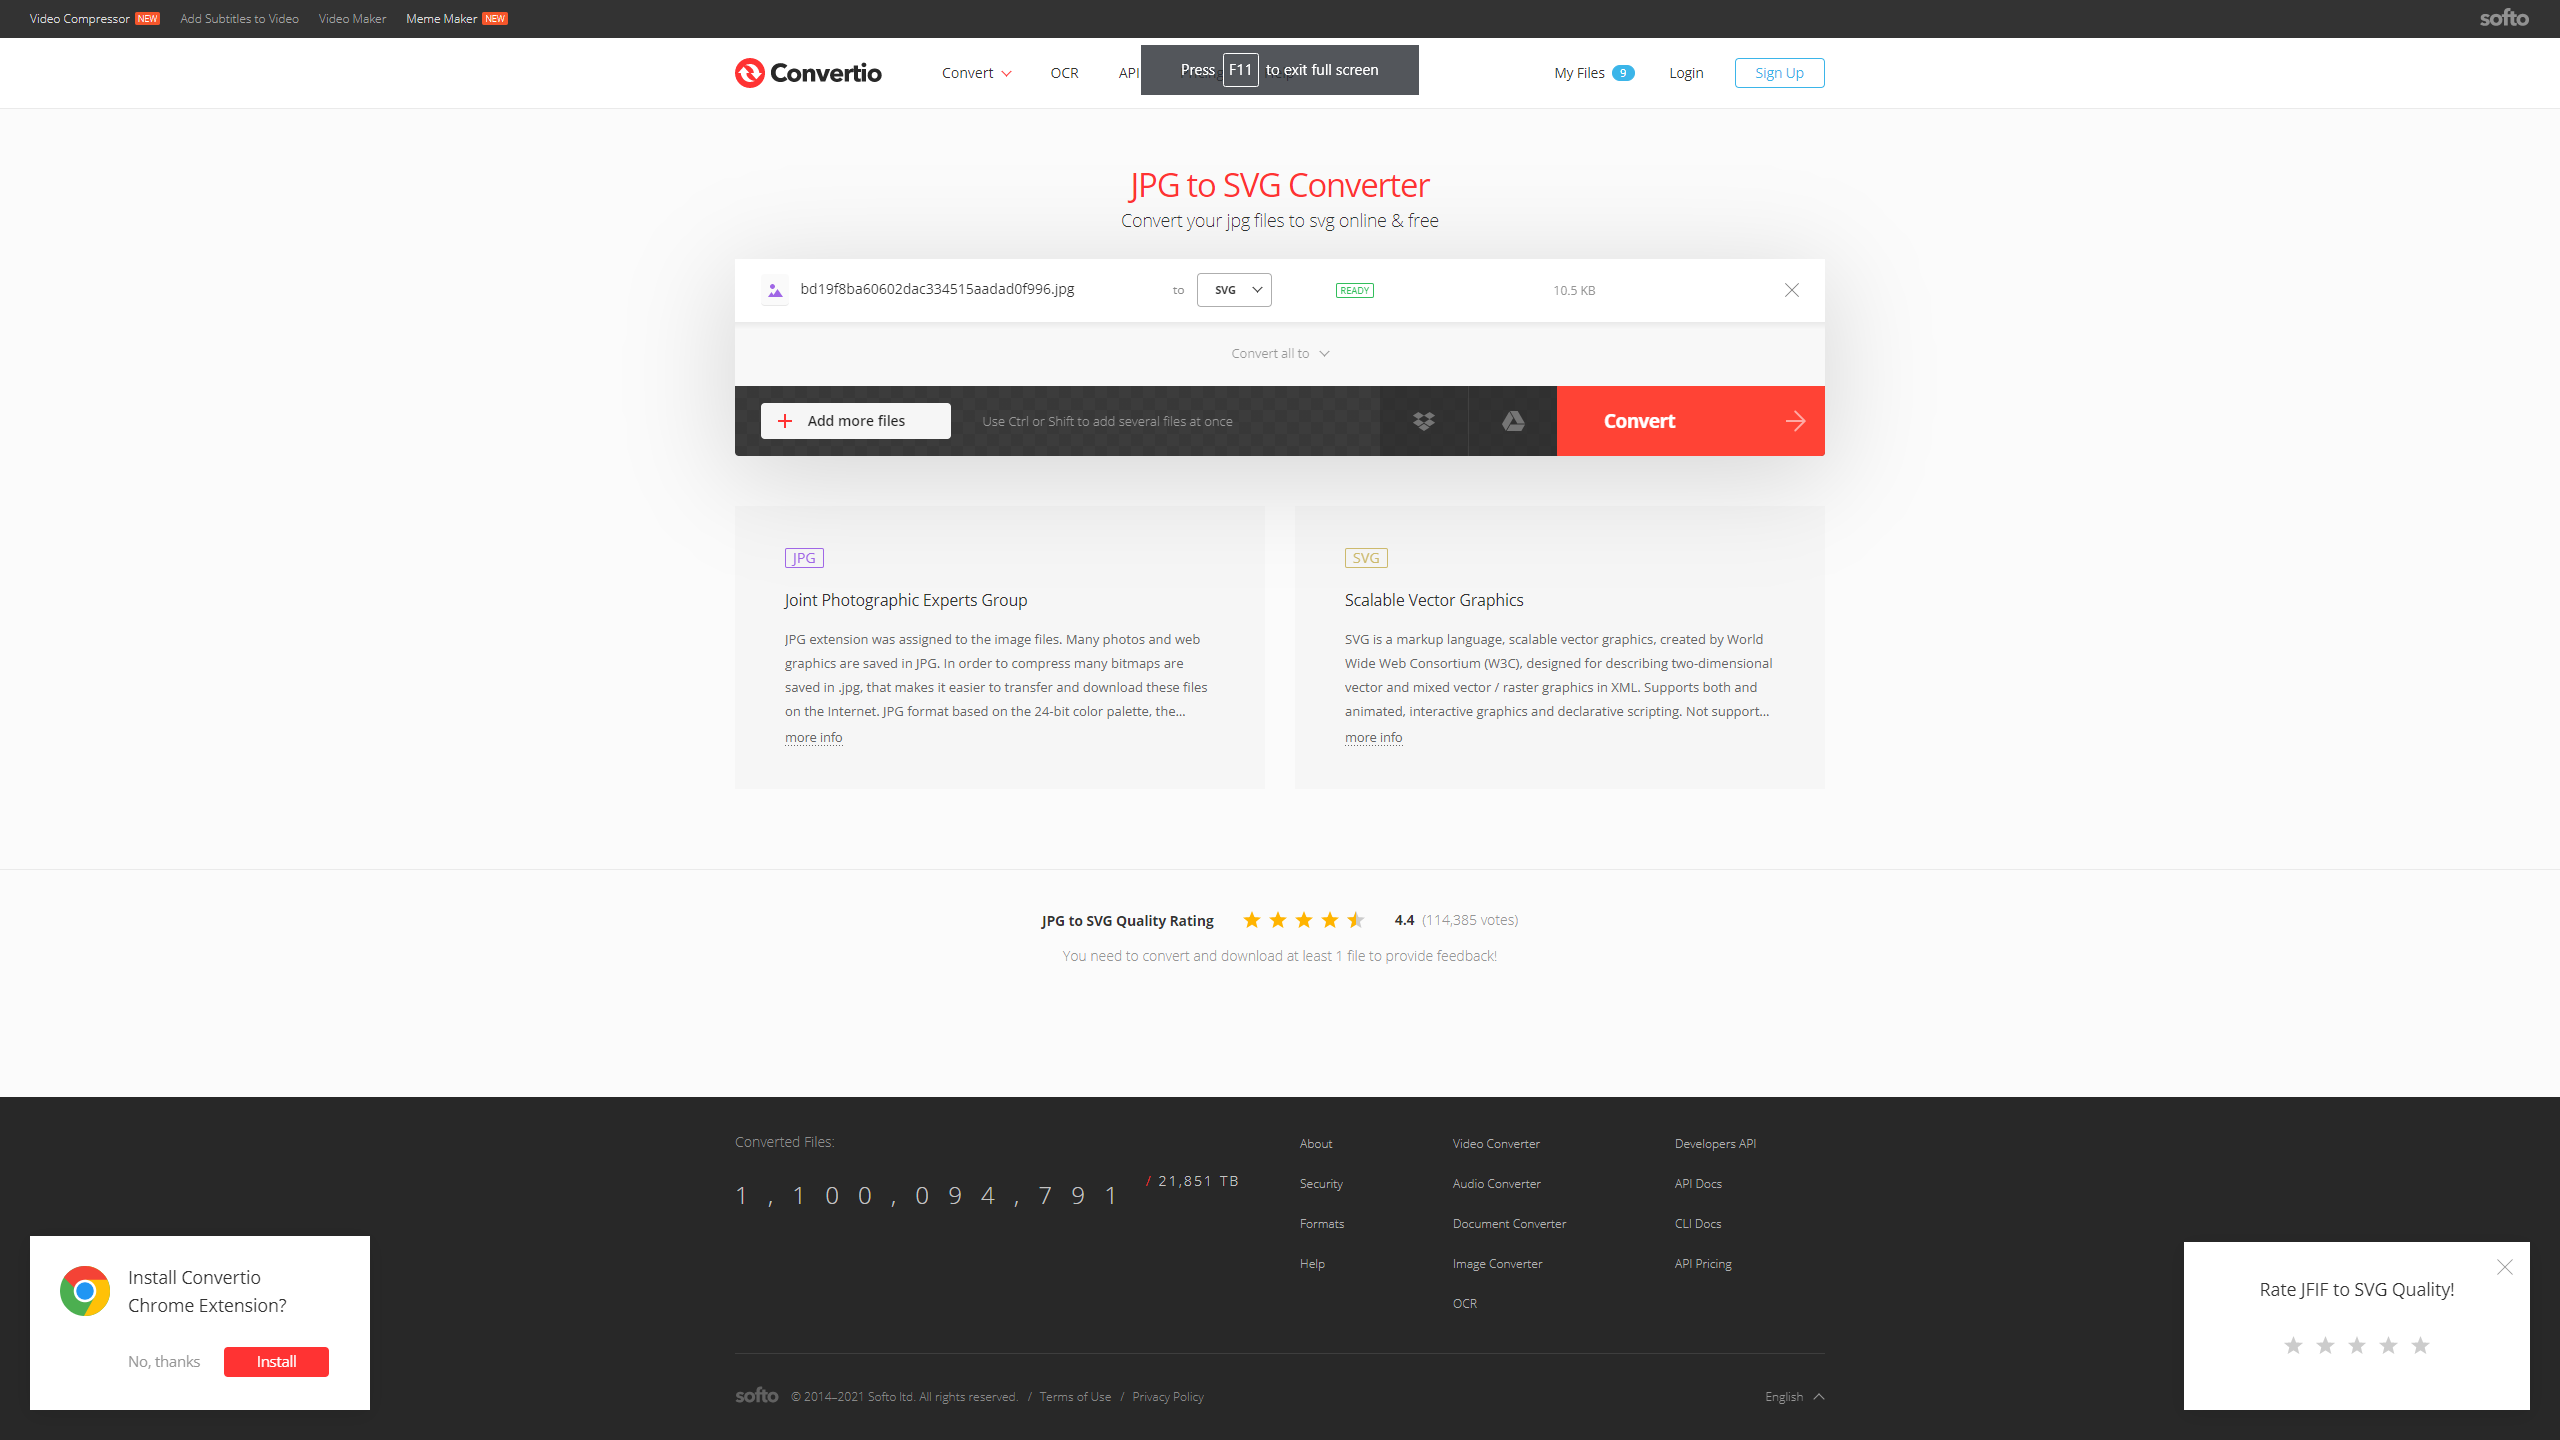
SVG files are a type of picture that can be directly imported into Fusion and work as a sketch with outlines. You can find plenty SVG images on the internet but you can also convert the common JPG and PNG files to an SVG using a simple online tool like this. I really loved this simple treasure map I found. It was a JPG Image but I easily converted it into an SVG using the linked tool!
I suggest trying this method first!
PROS:
- Easy and Simple
- Fast
CONS:
- Can't do complex images
- Might not work
- Can only do "2D" texture
Import SVG
.png)
.png)
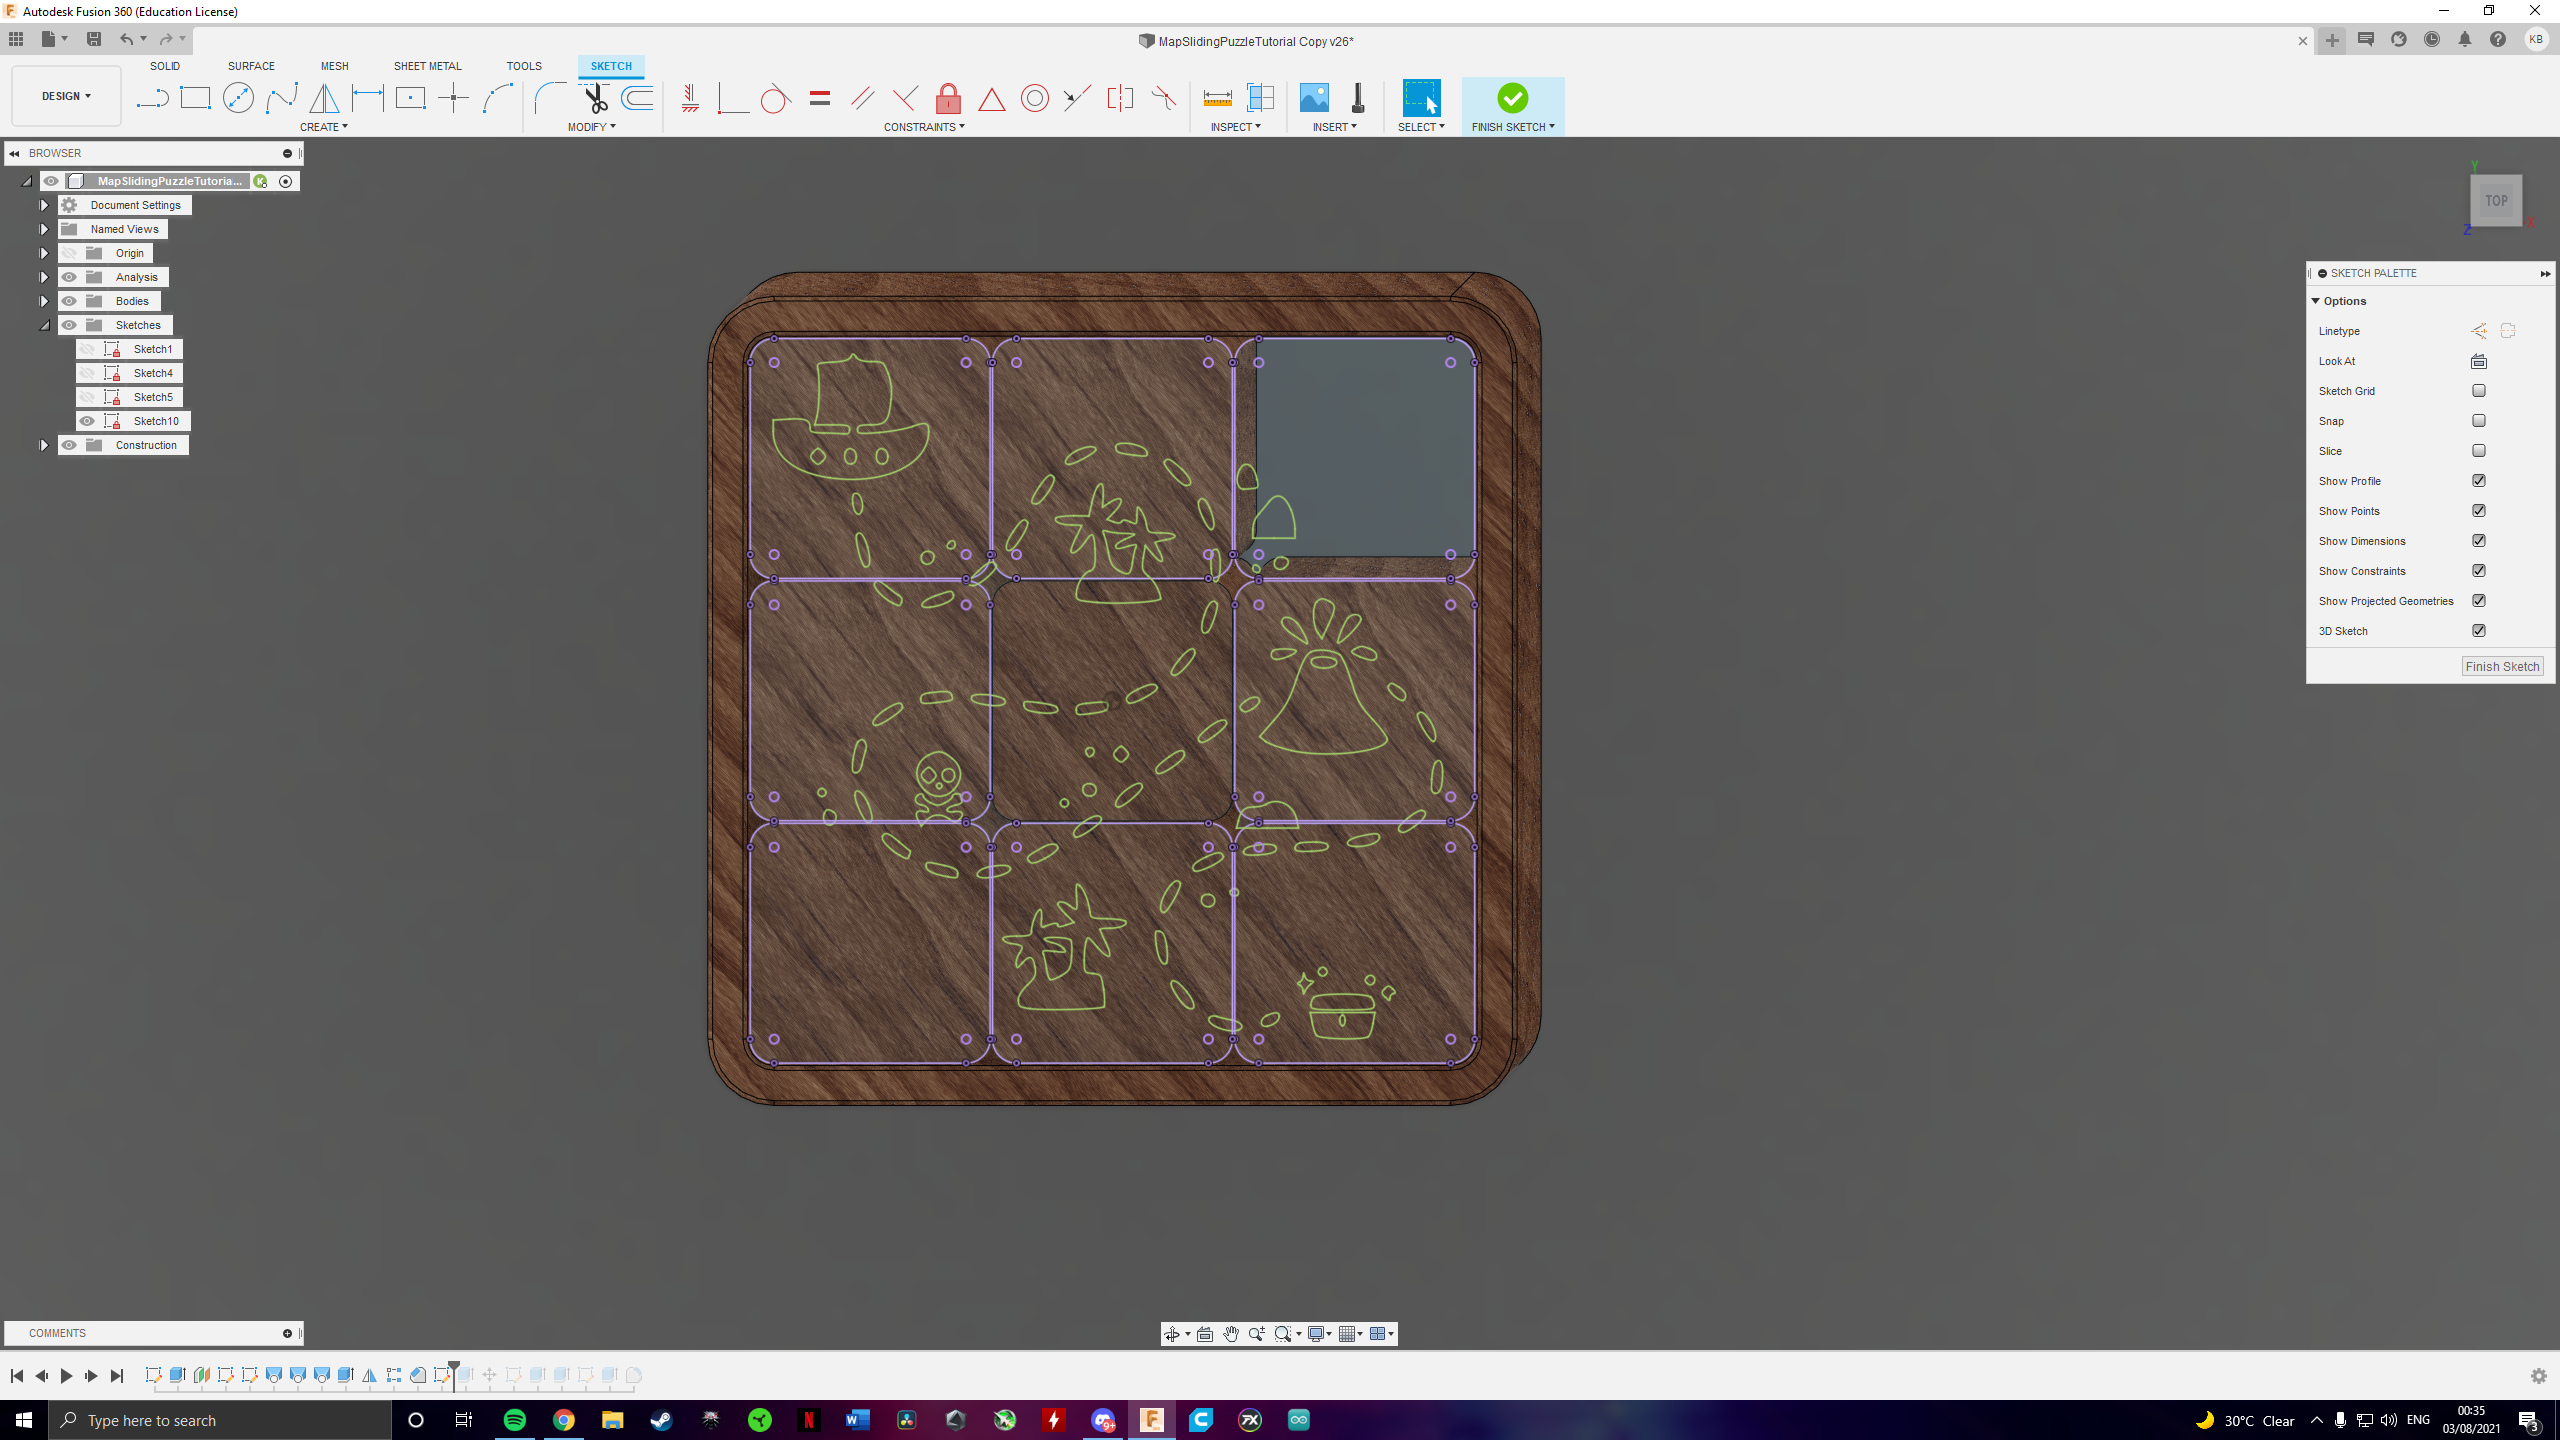
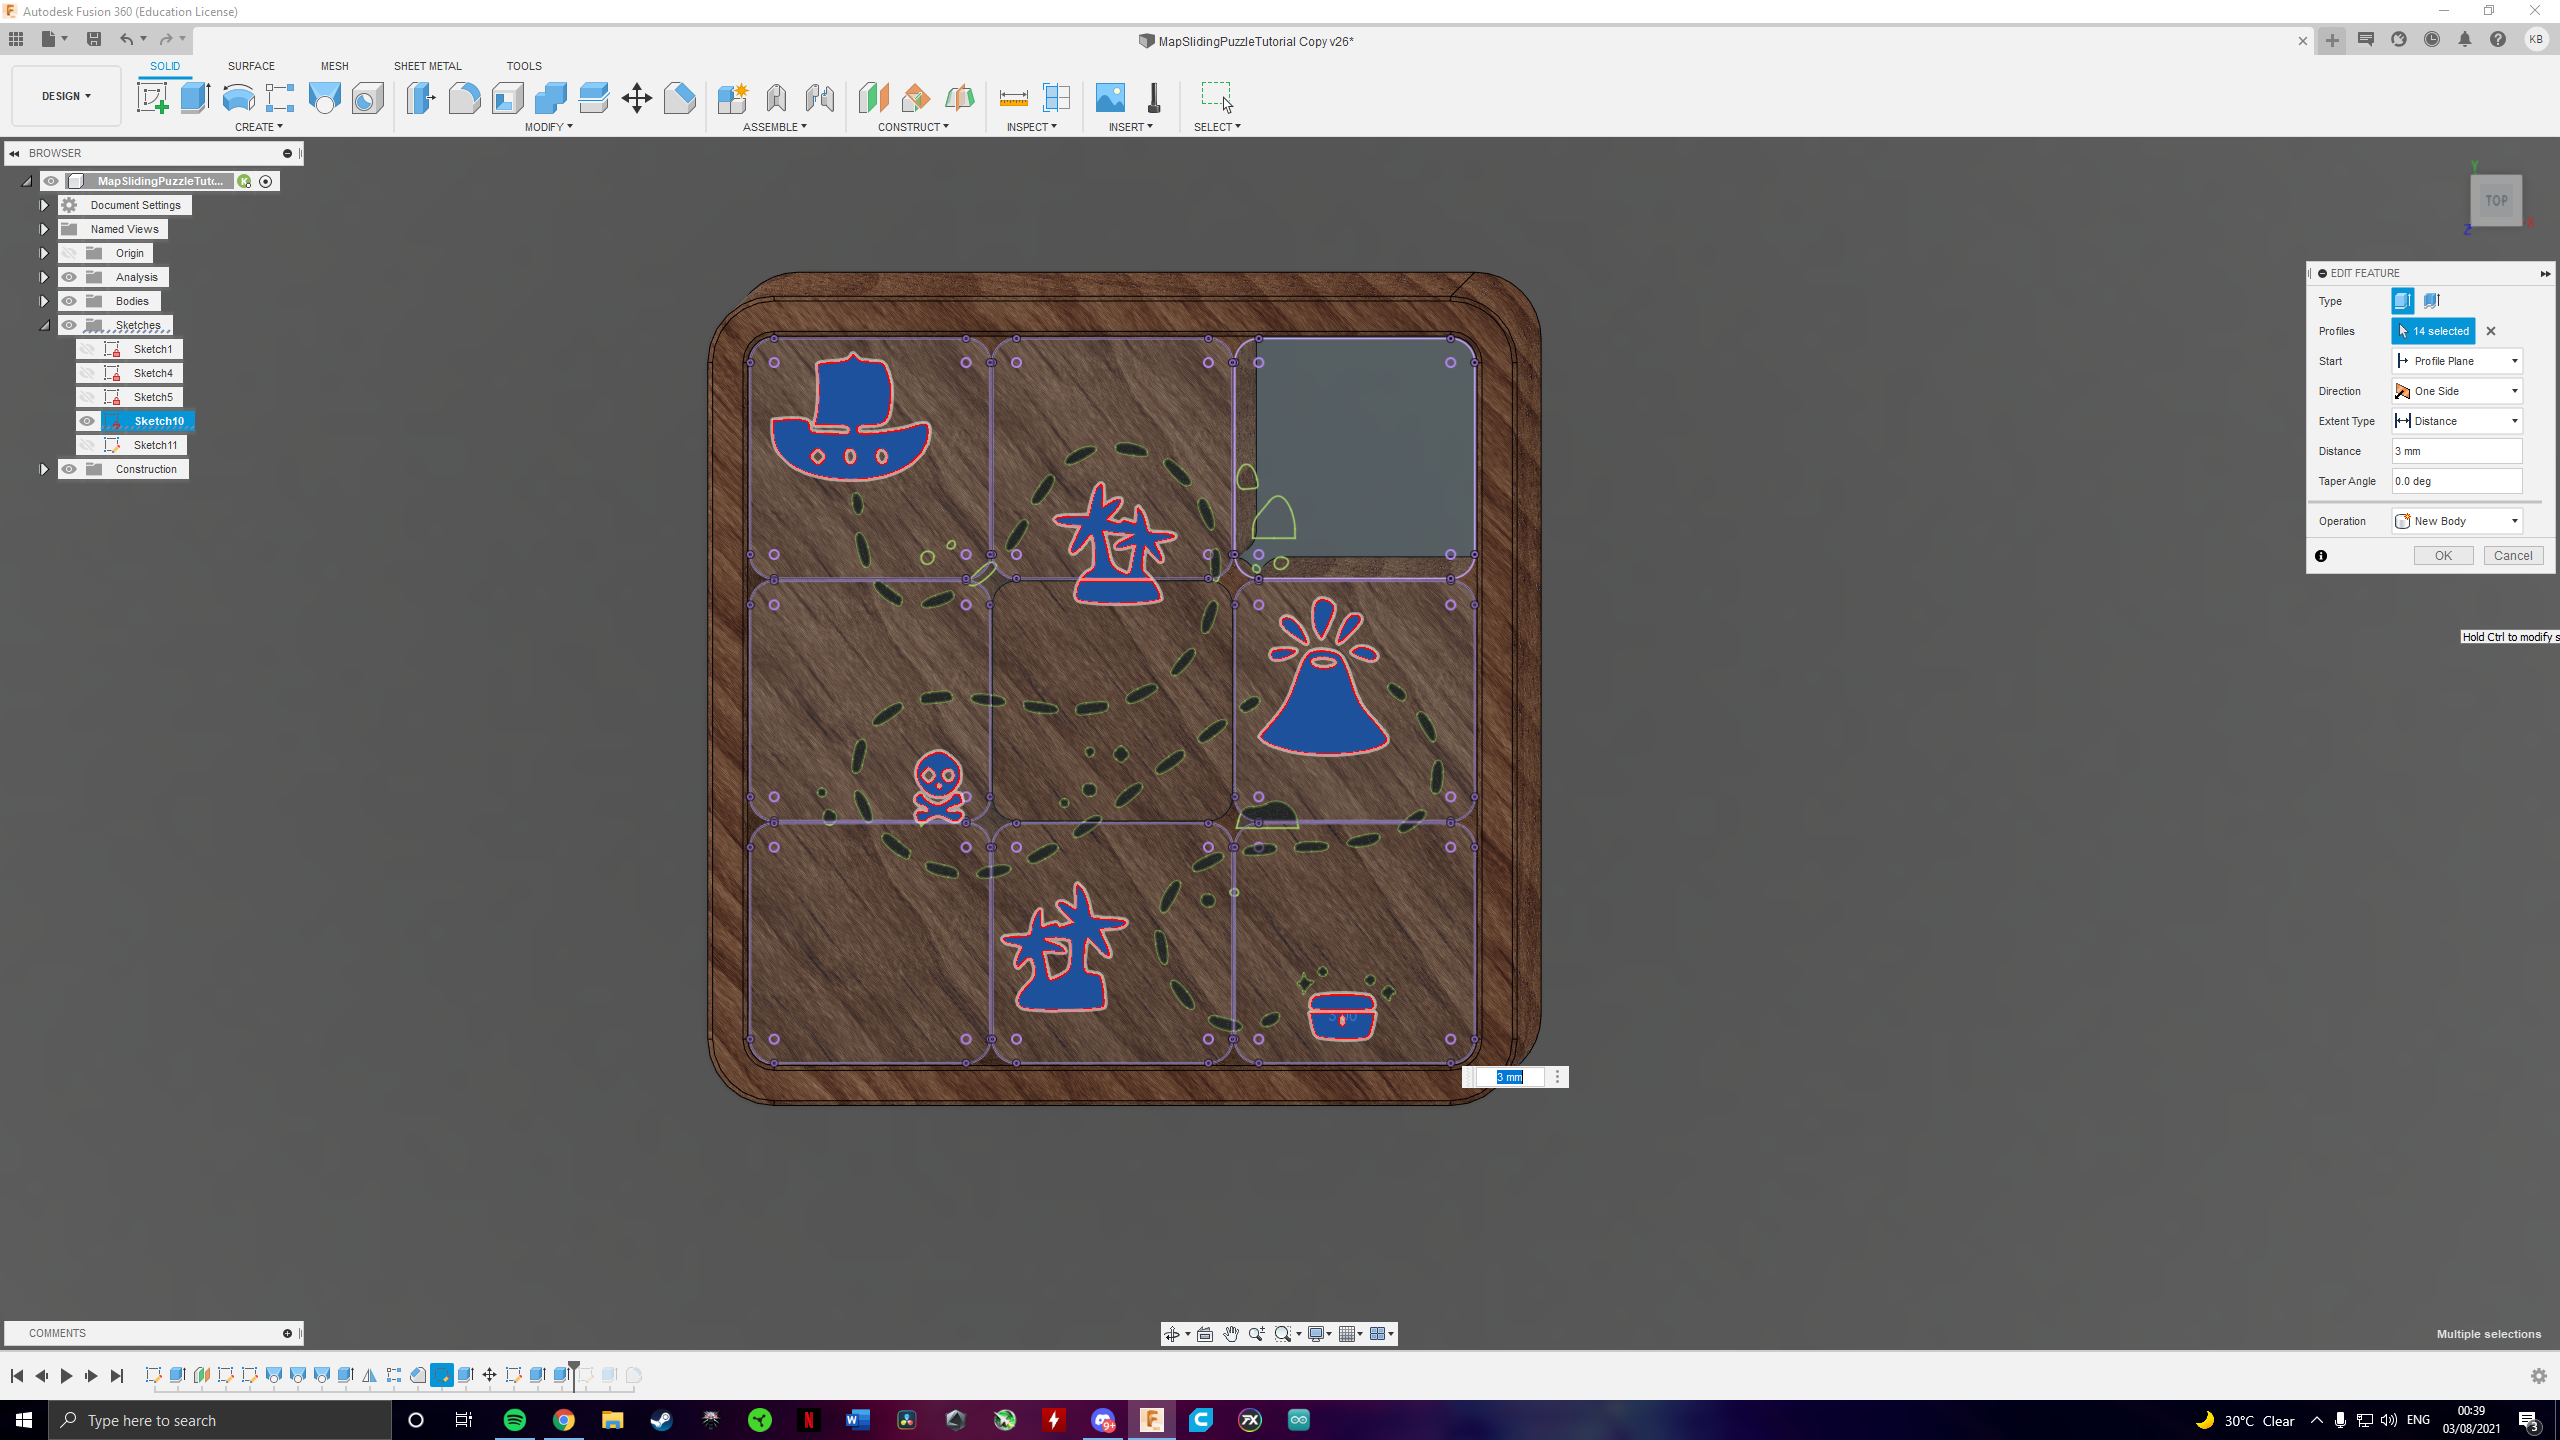
Create a sketch on the top face of the puzzle and project the outlines of all the faces by selecting them and clicking "P". Then go to Insert > Insert SVG, select the .svg file scale/move the picture according to your liking. Finally click "OK" and extrude the features of the sketch (Make sure not to select anything in between the blocks, that's why we projected the outlines)
2nd Way - Lithophanes (The Hard Way)
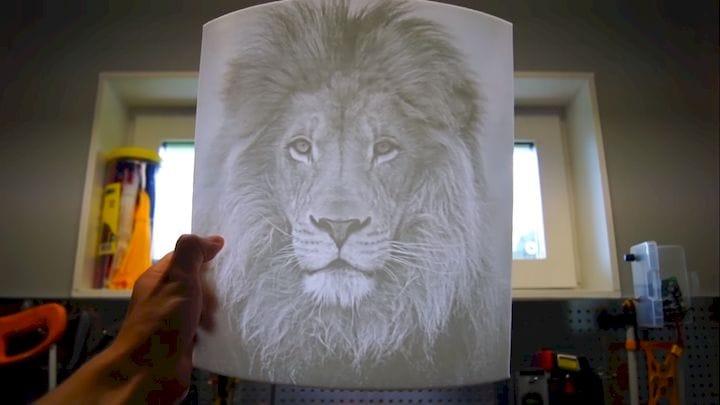
Lithophanes are essentially embossed photos generated by a 3D printer. The print results don’t show much at first, but shine some light through one and you’ll be amazed by the details. The way it works is that light passes through the thin parts while being blocked by the thick parts. In this way, the differences in light bring out the details of the image.
PROS:
- Can do 3D Texture (Lithophanes)
- Works with every kind of image I've tested
- Takes more time
- Fusion may crush a few times
Image Source: RCLifeOn
Image to Lithophane
.png)
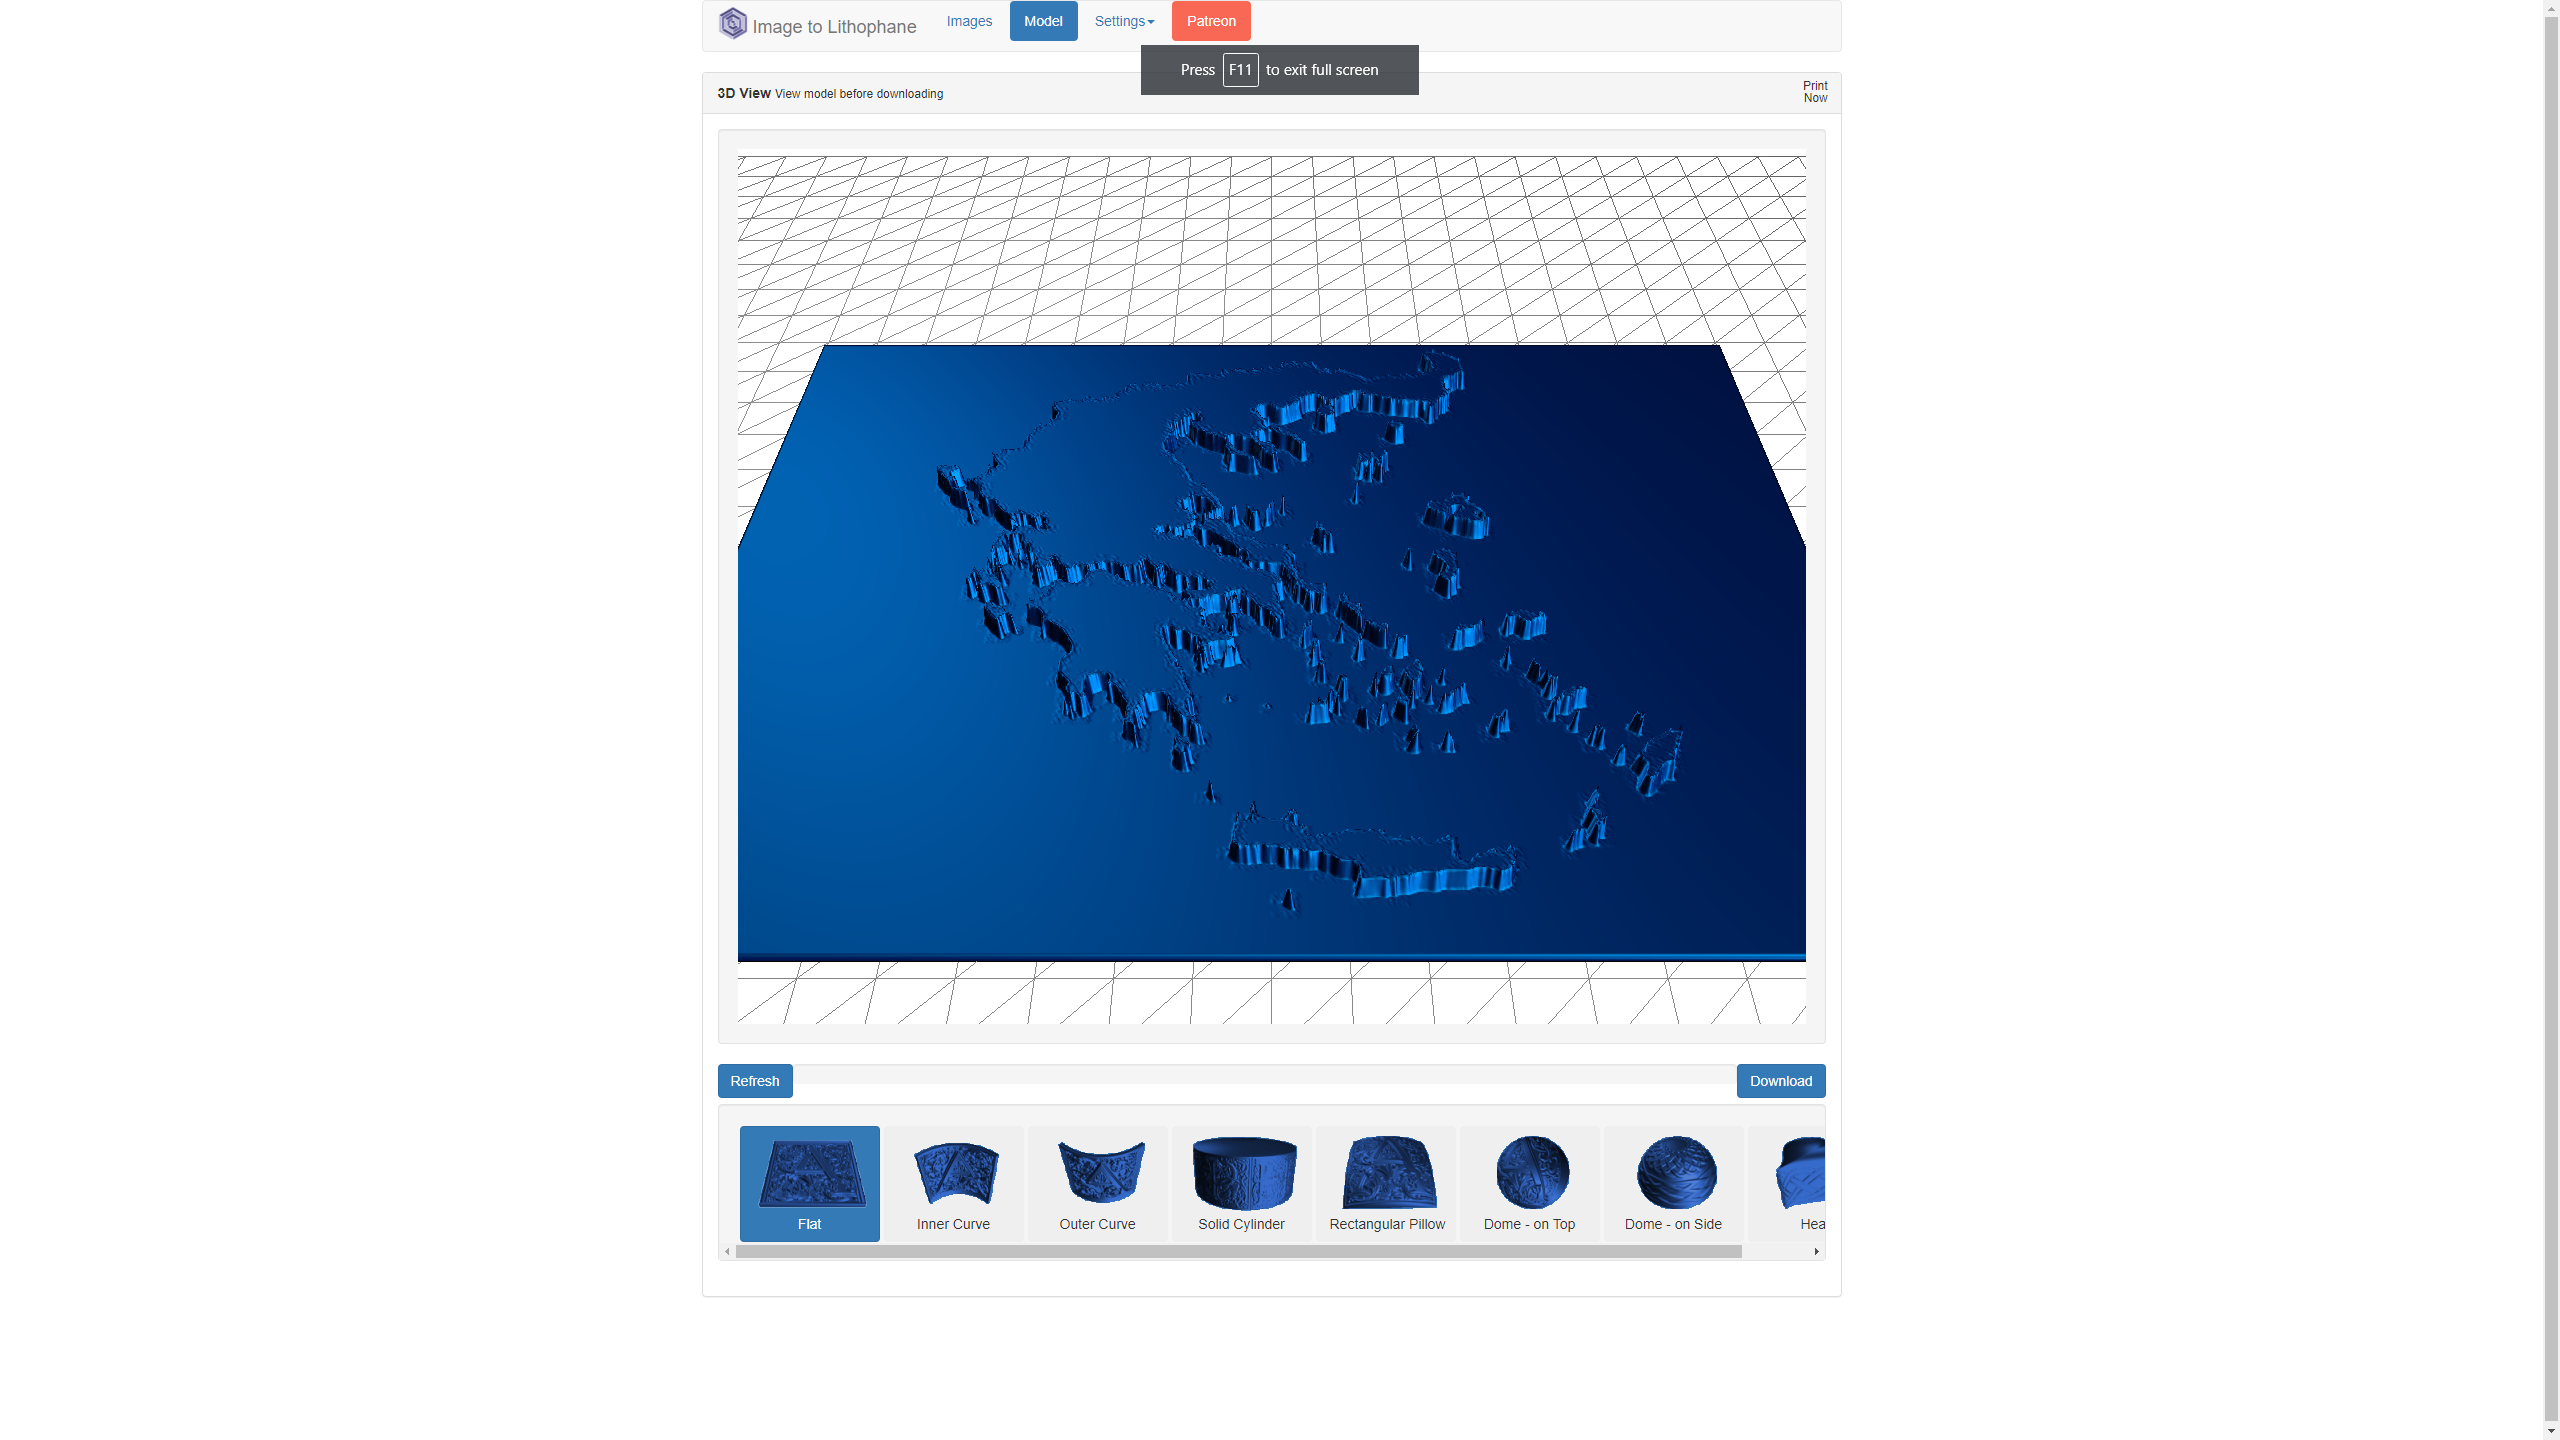
I suggest using 3dp.rocks to create lithophanes.
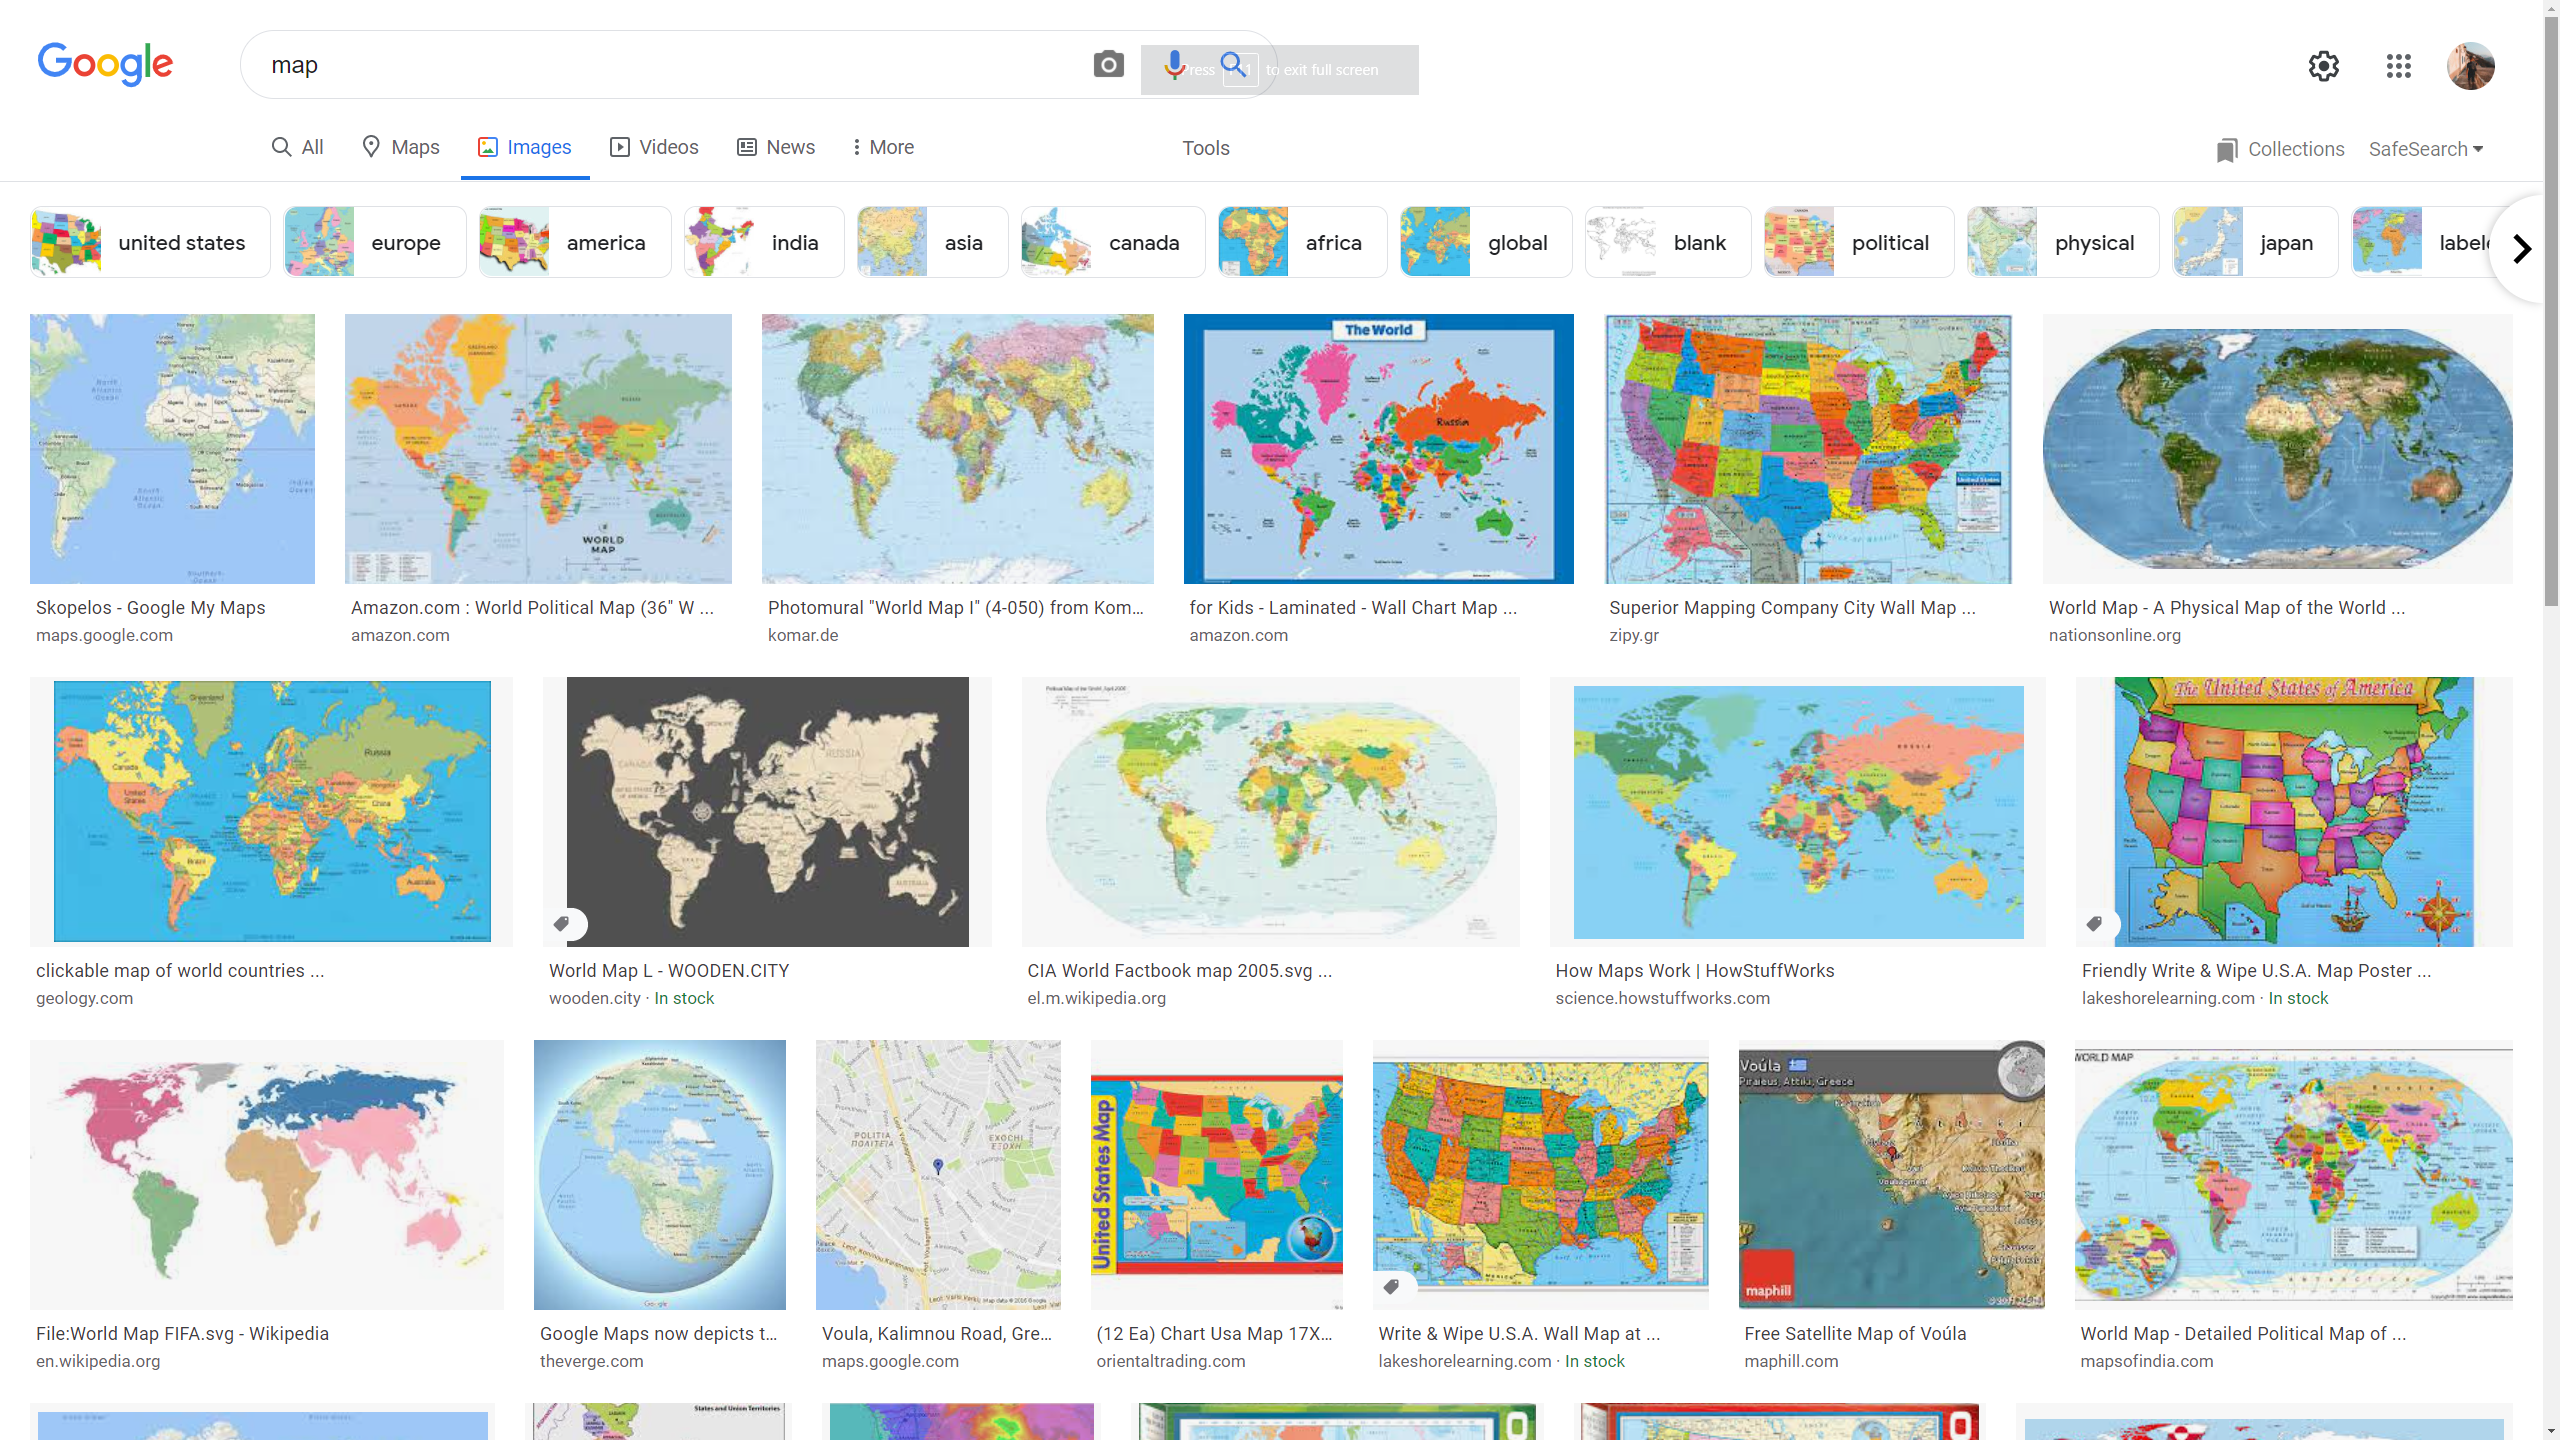
Search on Google for maps for your preferred location. Keep in mind that if you use terrain maps that extra depth will also appear in the lithophane so that's something you may like! I decided to go with this simple map of Greece. To import it go to Images > Choose files and select the image you just downloaded. Wait a few seconds until your lithophane model renders.
Lithophane Settings
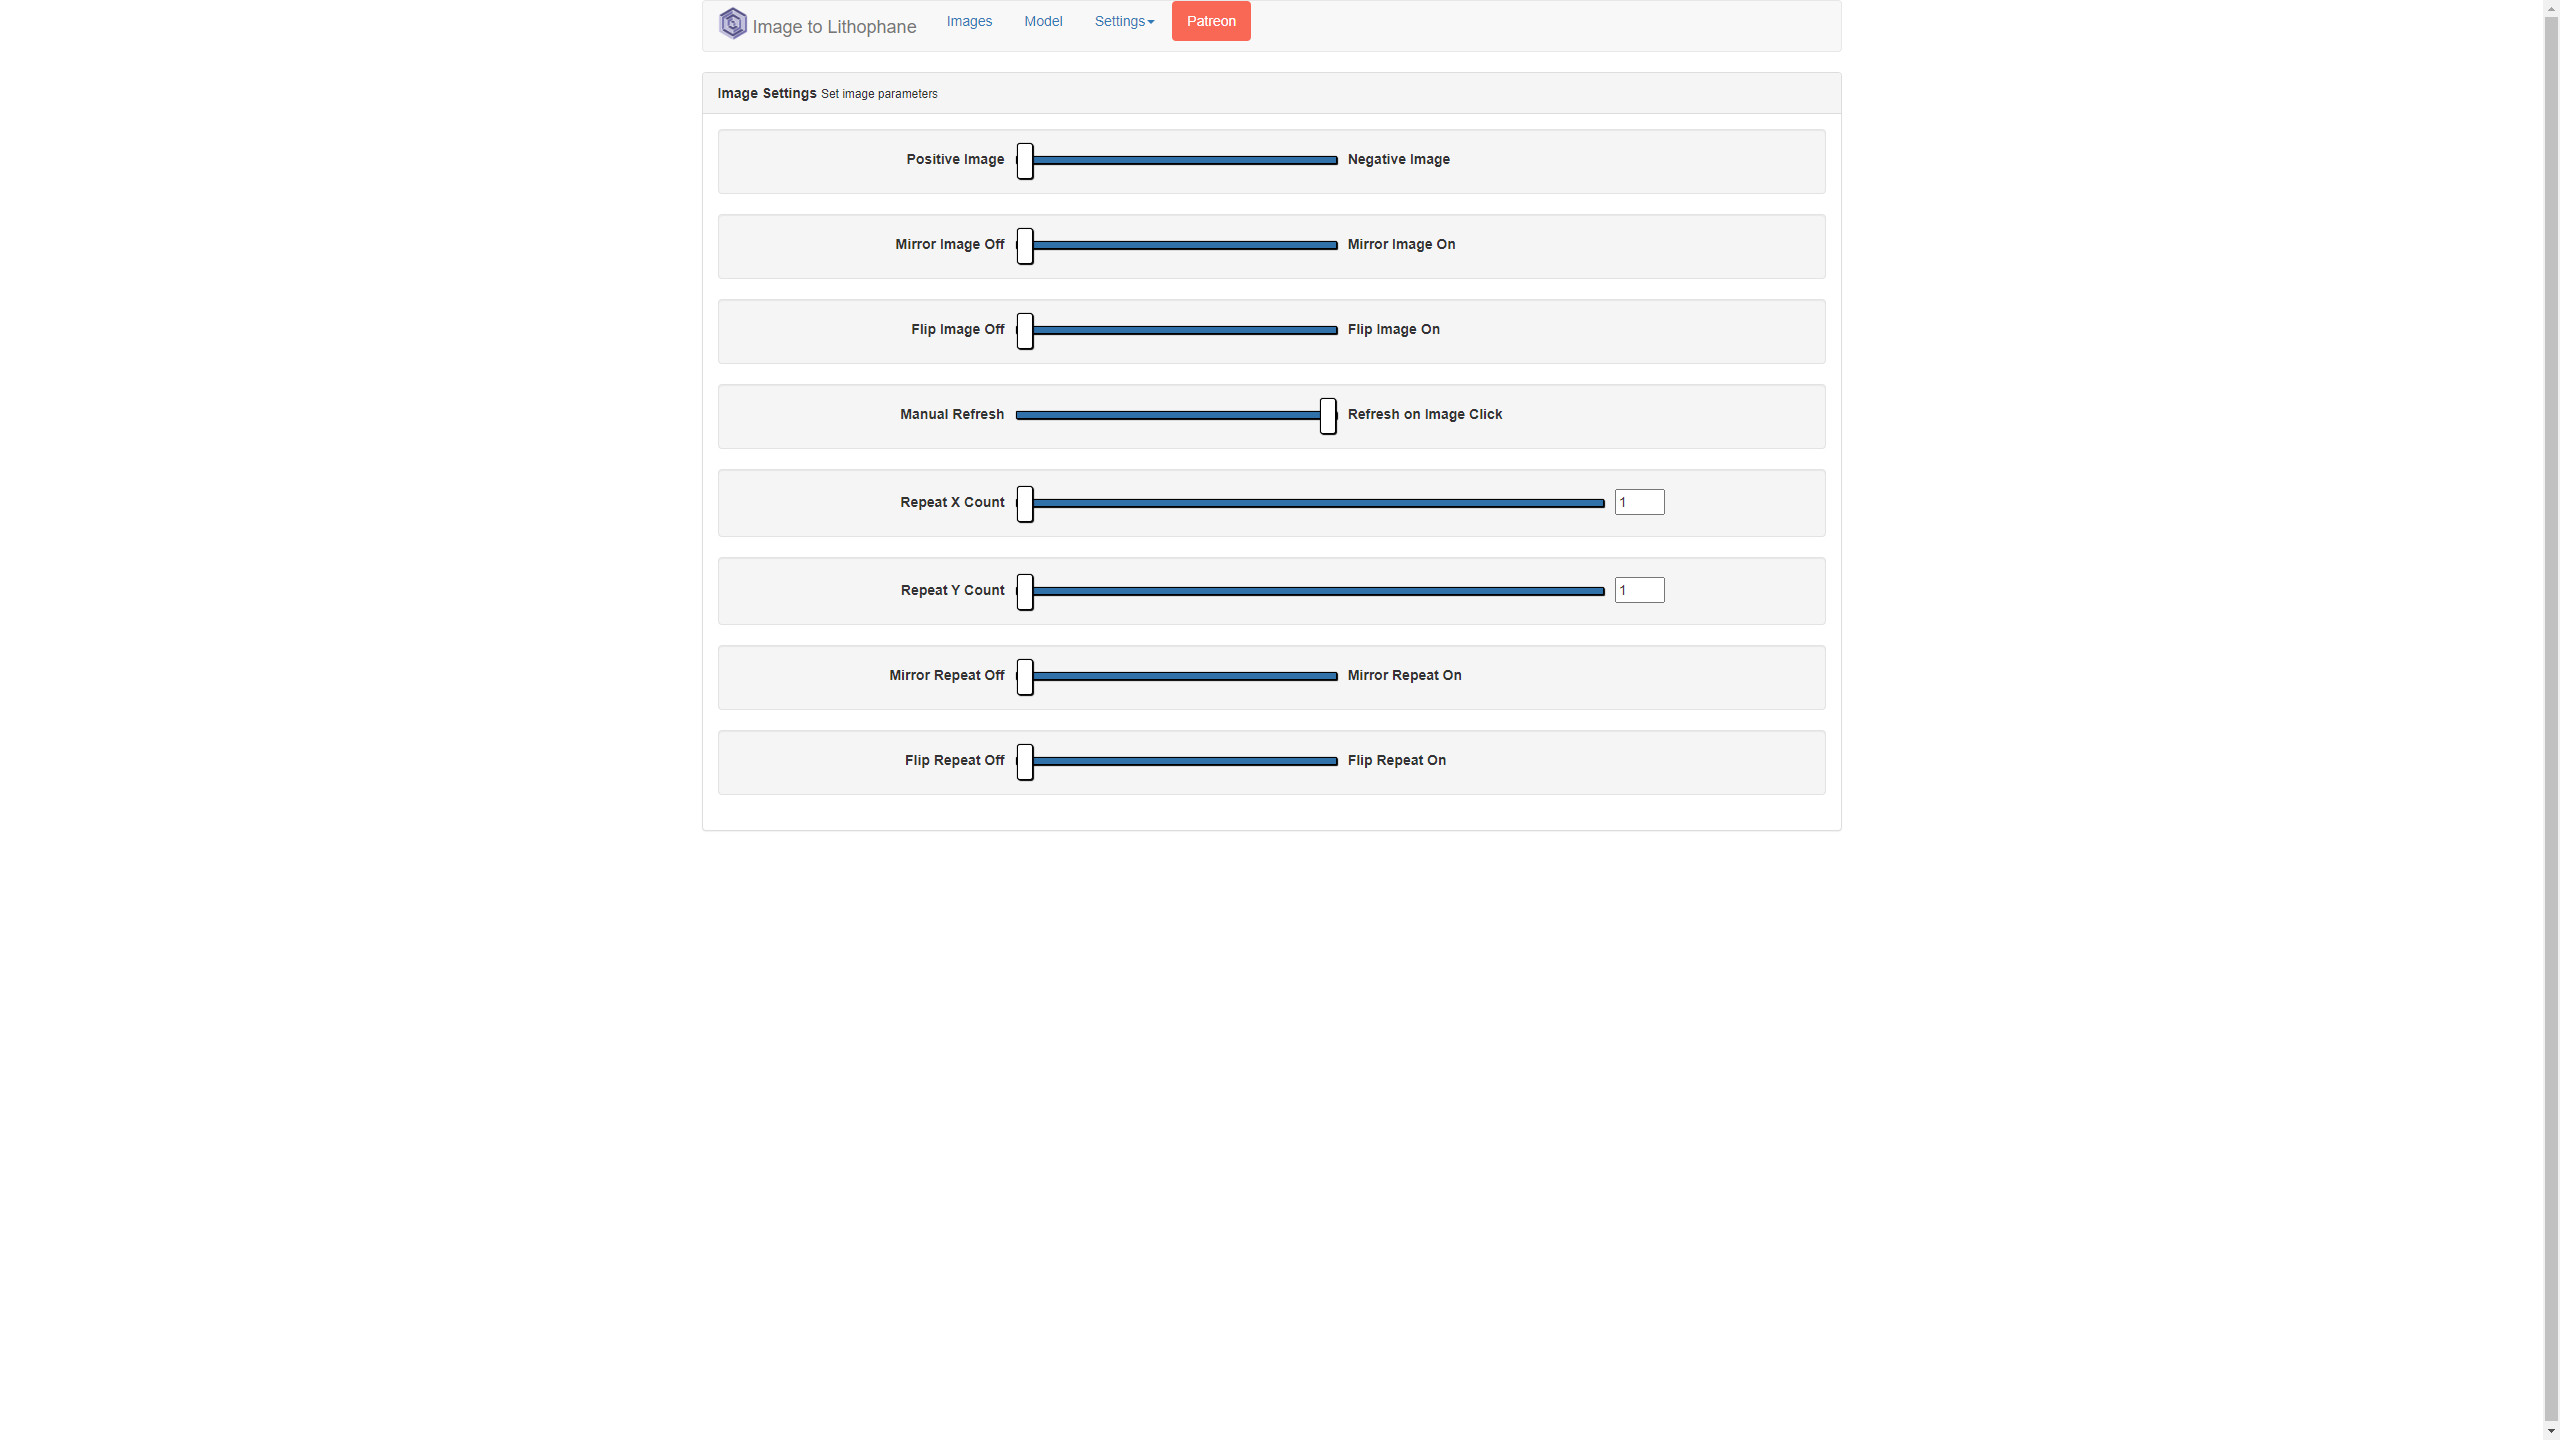.png)
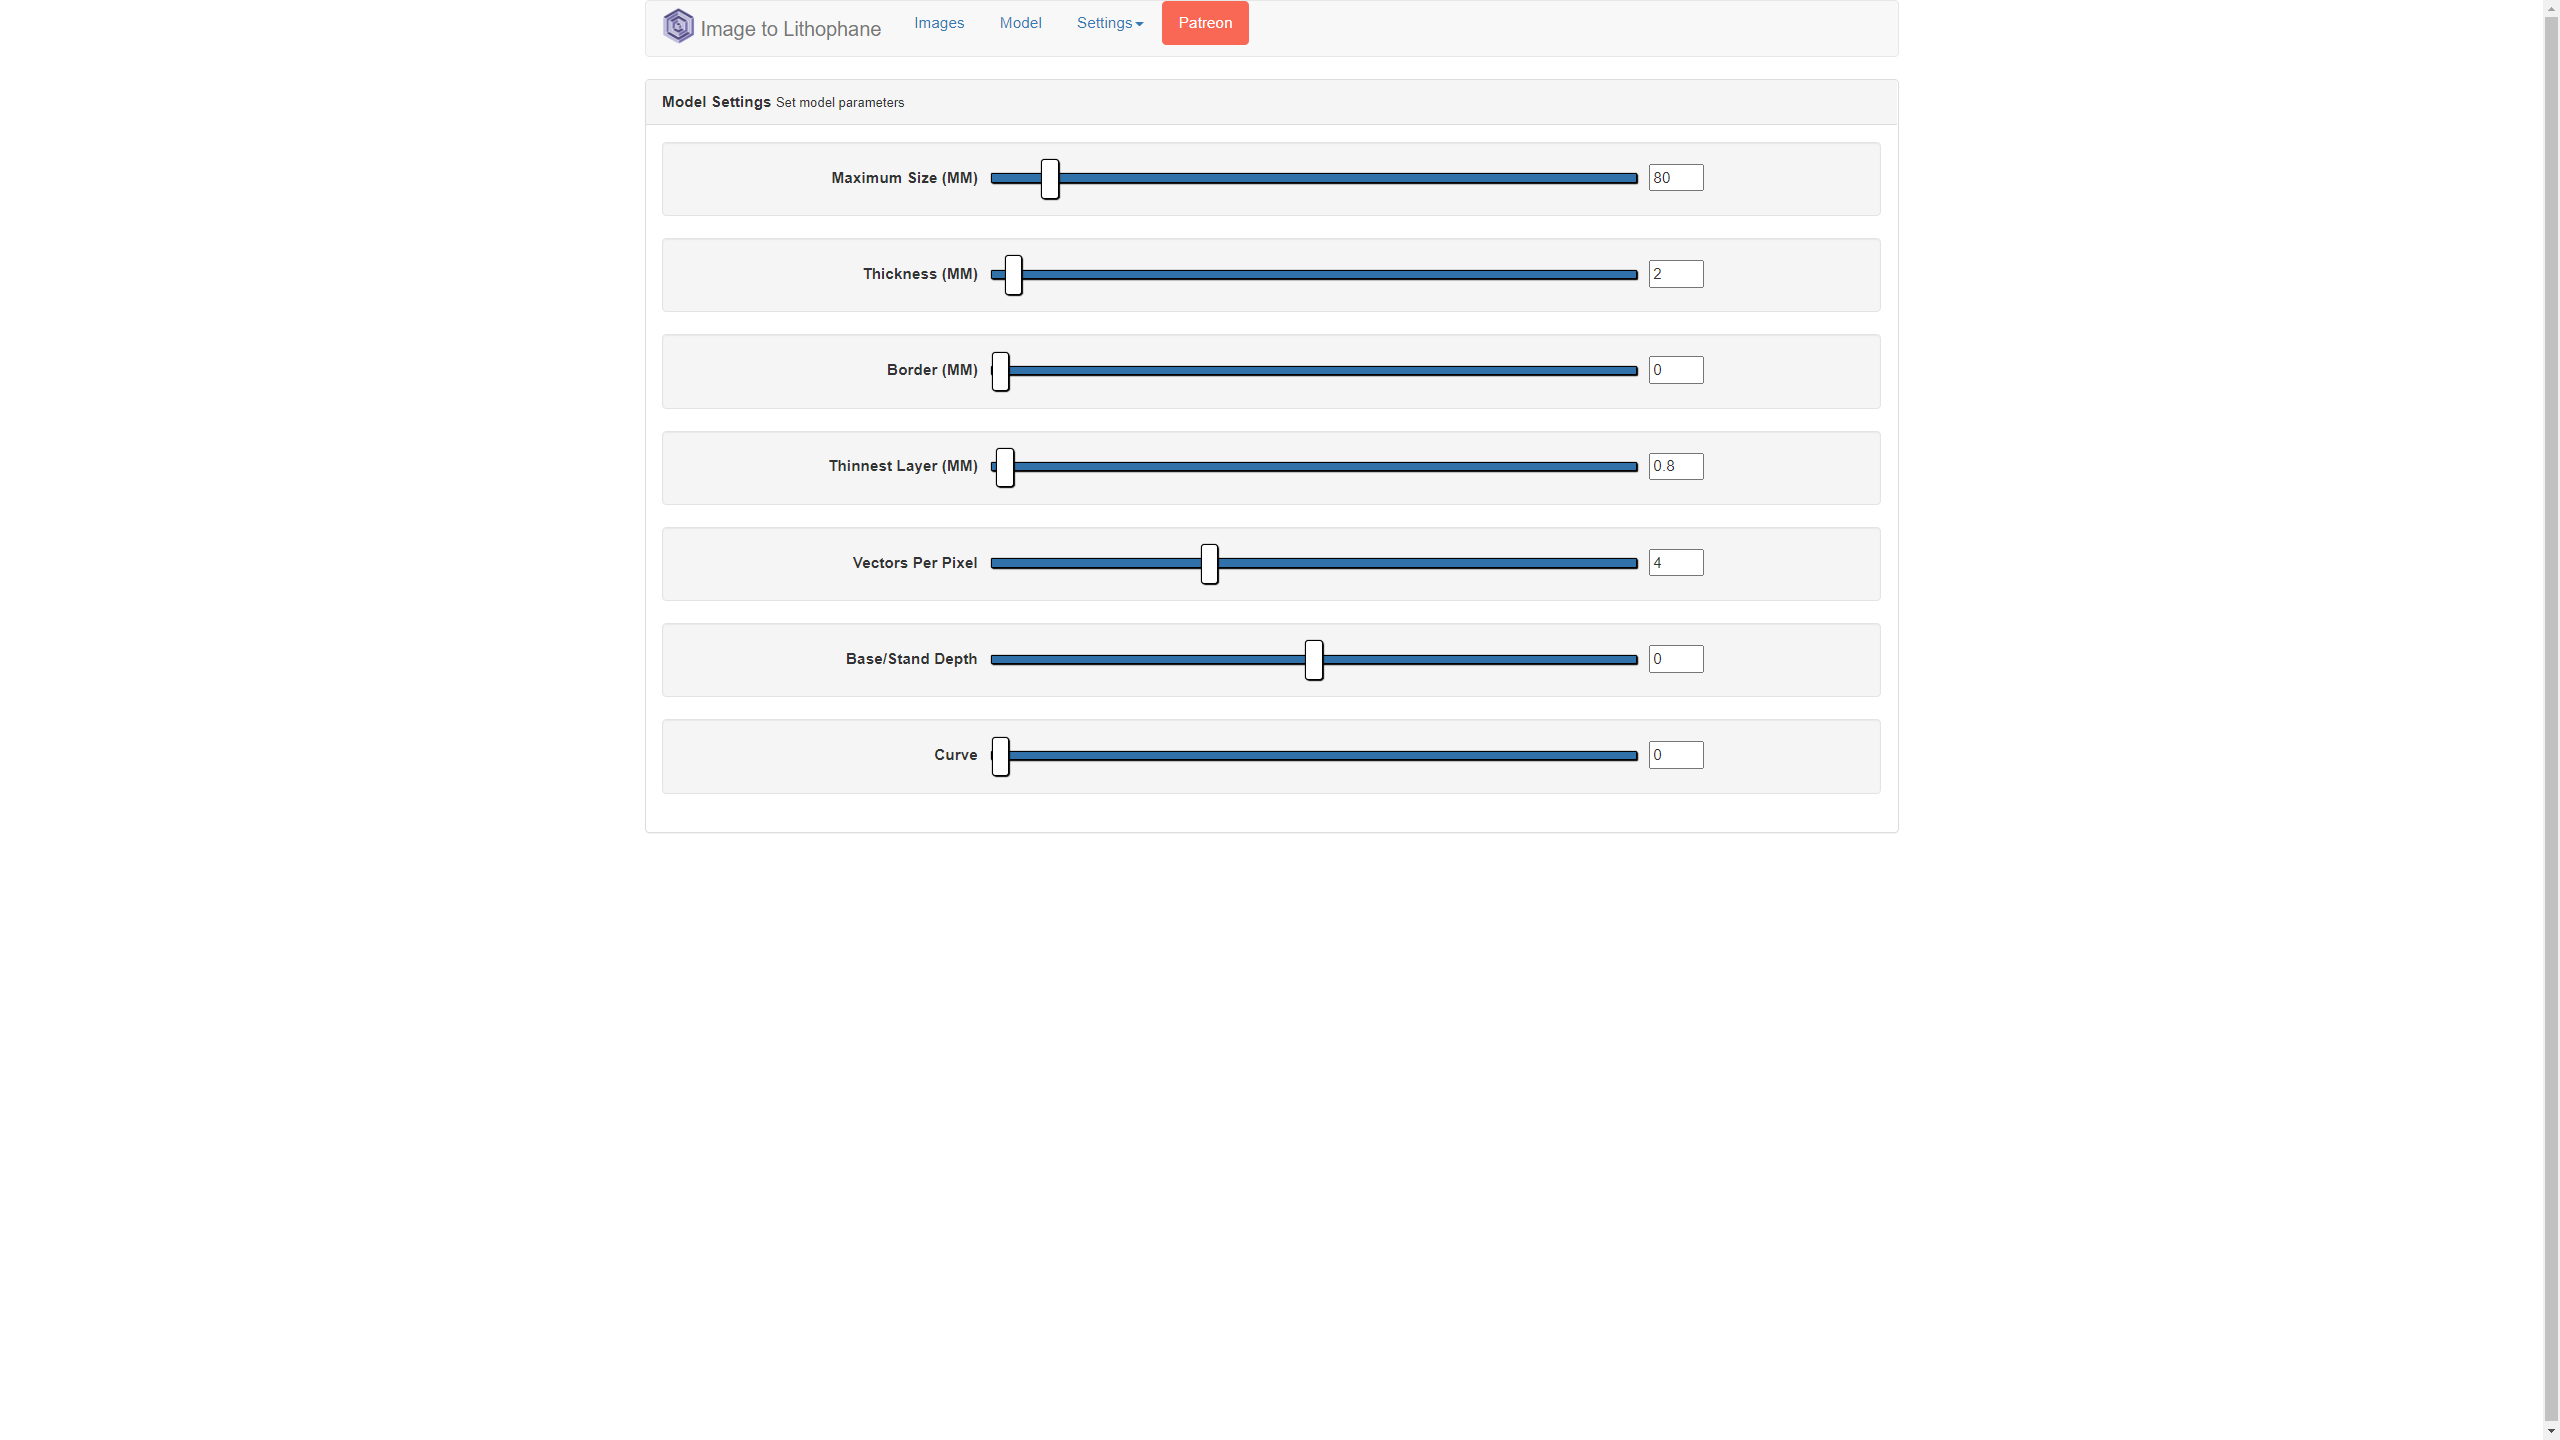.png)
The website offers a plethora of settings to satisfy all of your needs! I'll talk to you about the most significant ones. If you look at the picture in the previous step you'll see that the map is properly extruded, exactly what we want for a 2-color print, however this is not always the case, sometimes the colors/depth of the image will be reversed. If this happens to you, you can easily fix it by going to Settings > Image Settings and dragging the first bar all the way from Positive Image to Negative Image or vice versa and then clicking refresh on the model tab!
By going to Settings > Models Settings you'll find some really important settings, the first is maximum size, you'll likely need it to set it to something smaller than your puzzle. The next one is the thickness this really depends on the image you chose and the dimensions of your puzzle so feel free to experiment with it to get the level of 3D texture you like. (I prefer around 2-6mm).
Once ready, hit the download button and go back to Fusion 360!
Importing STL
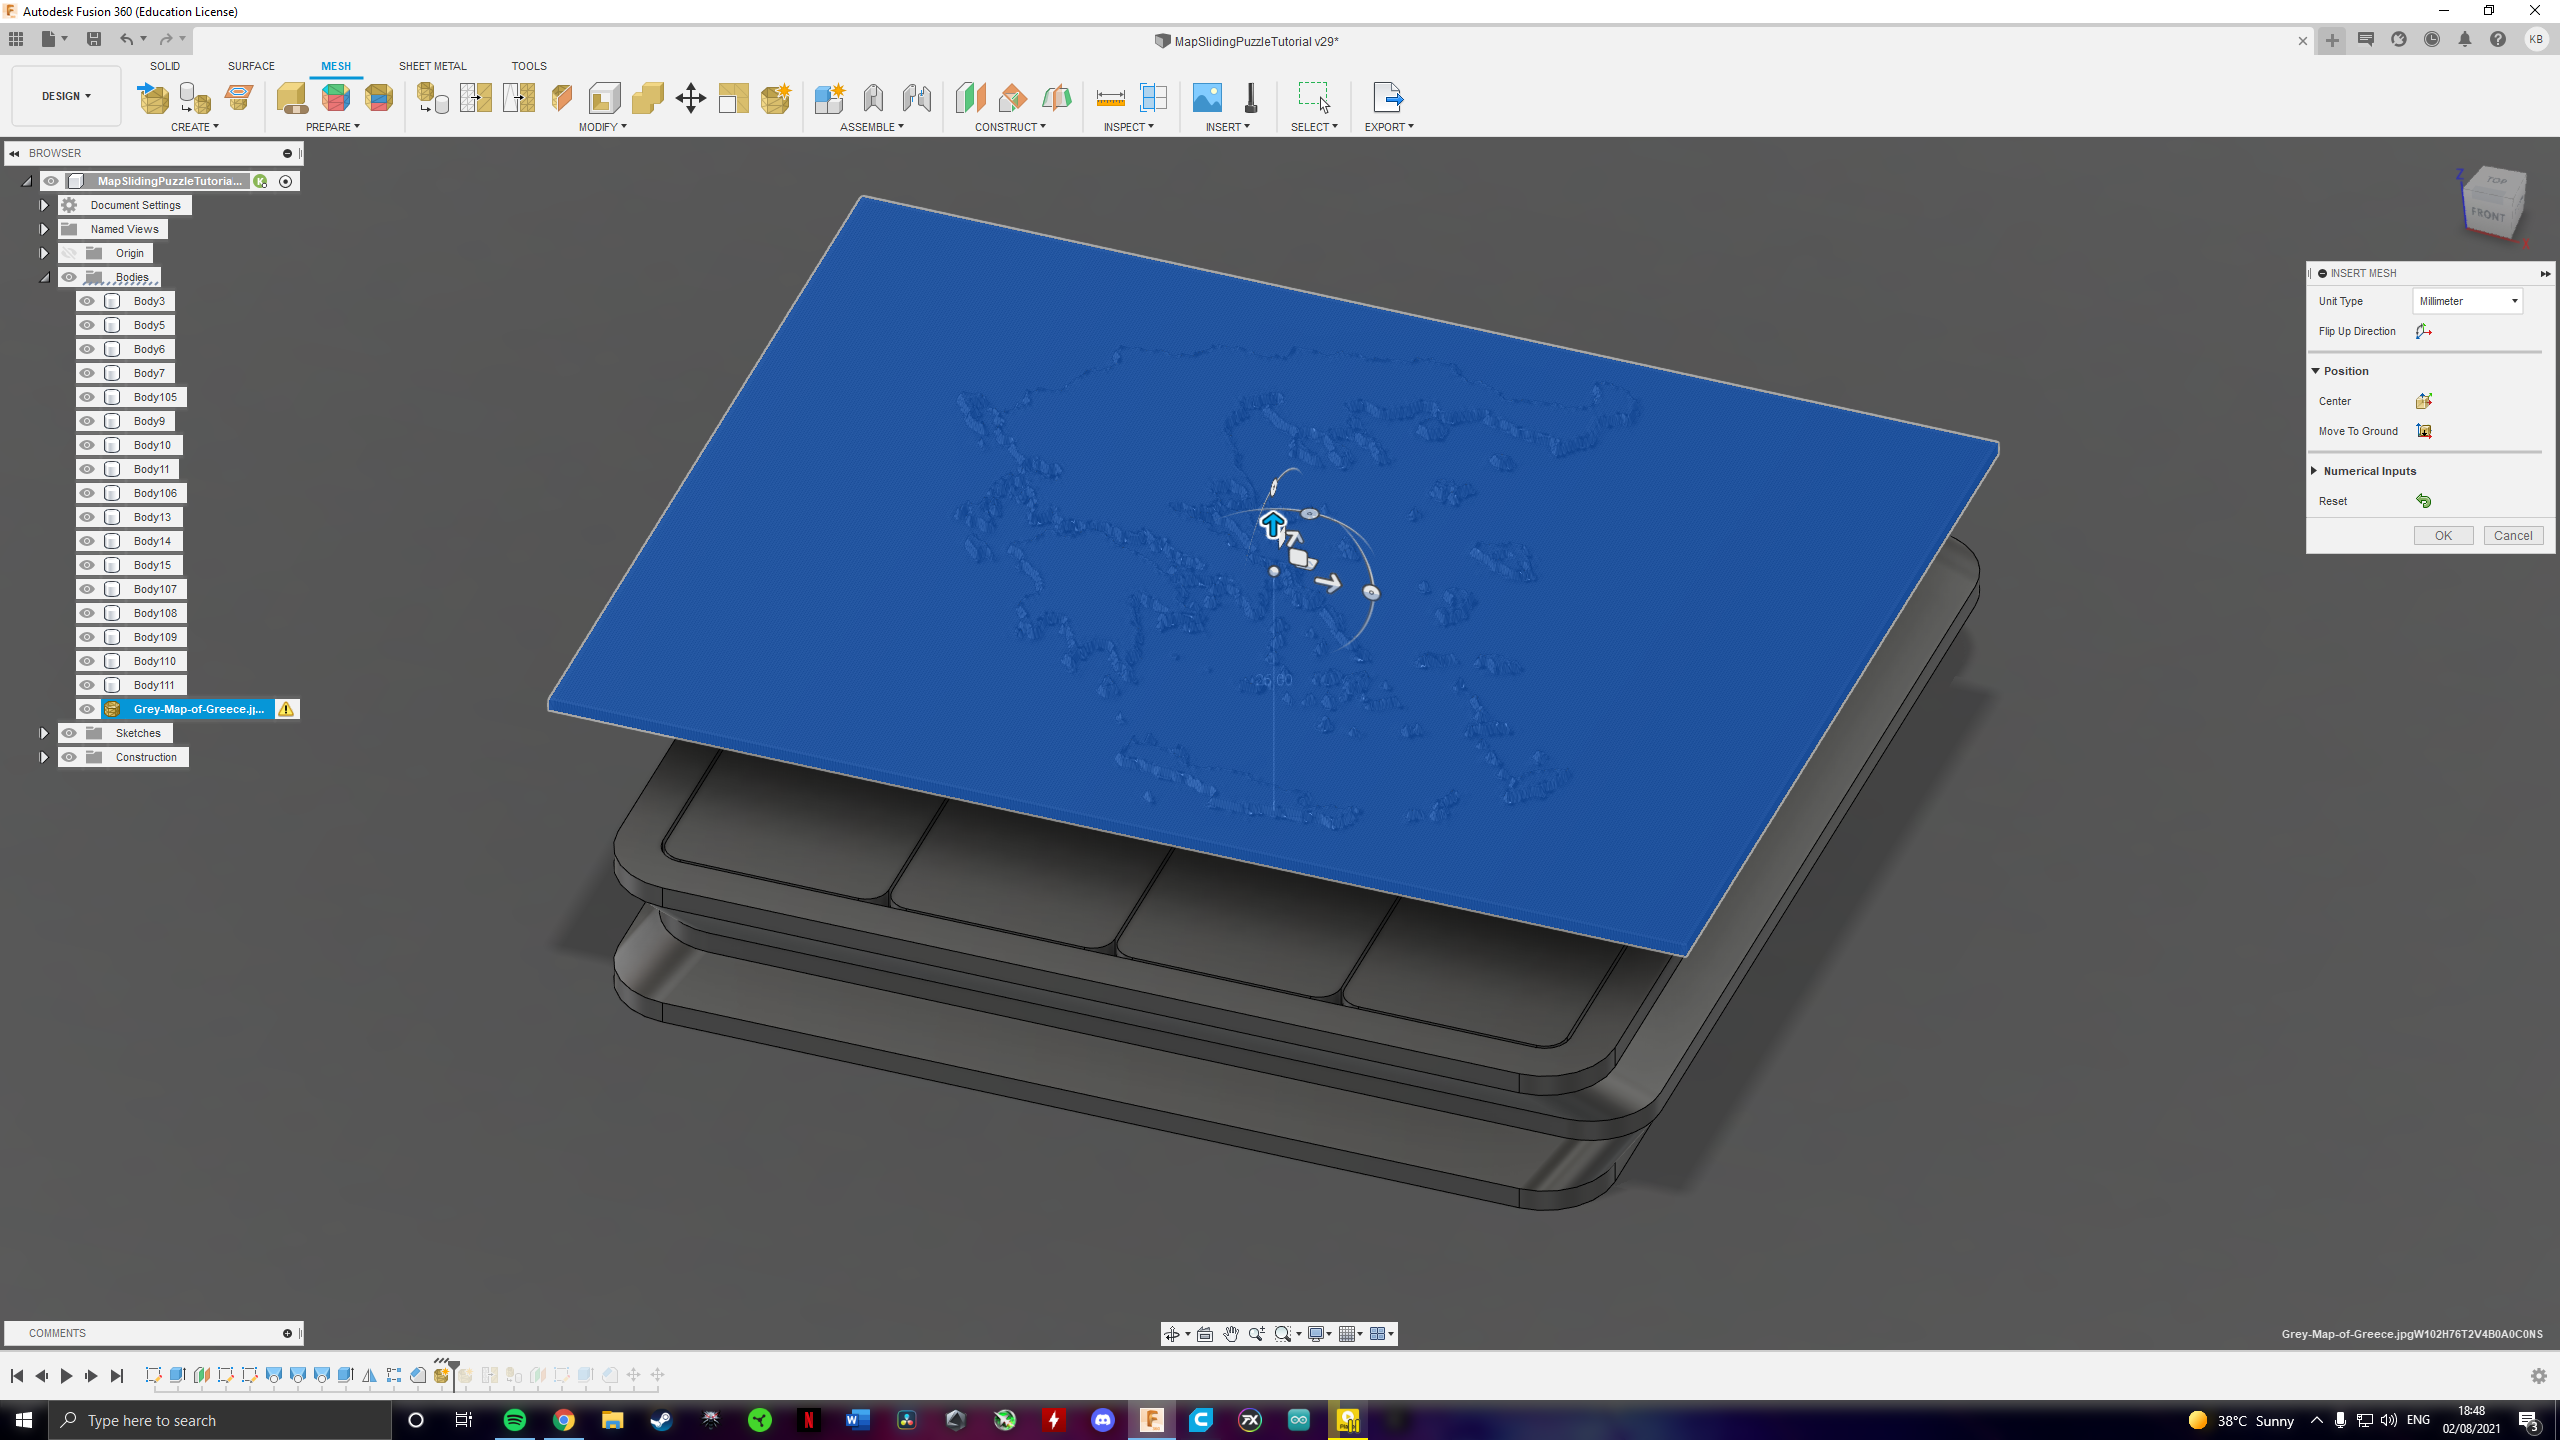.png)
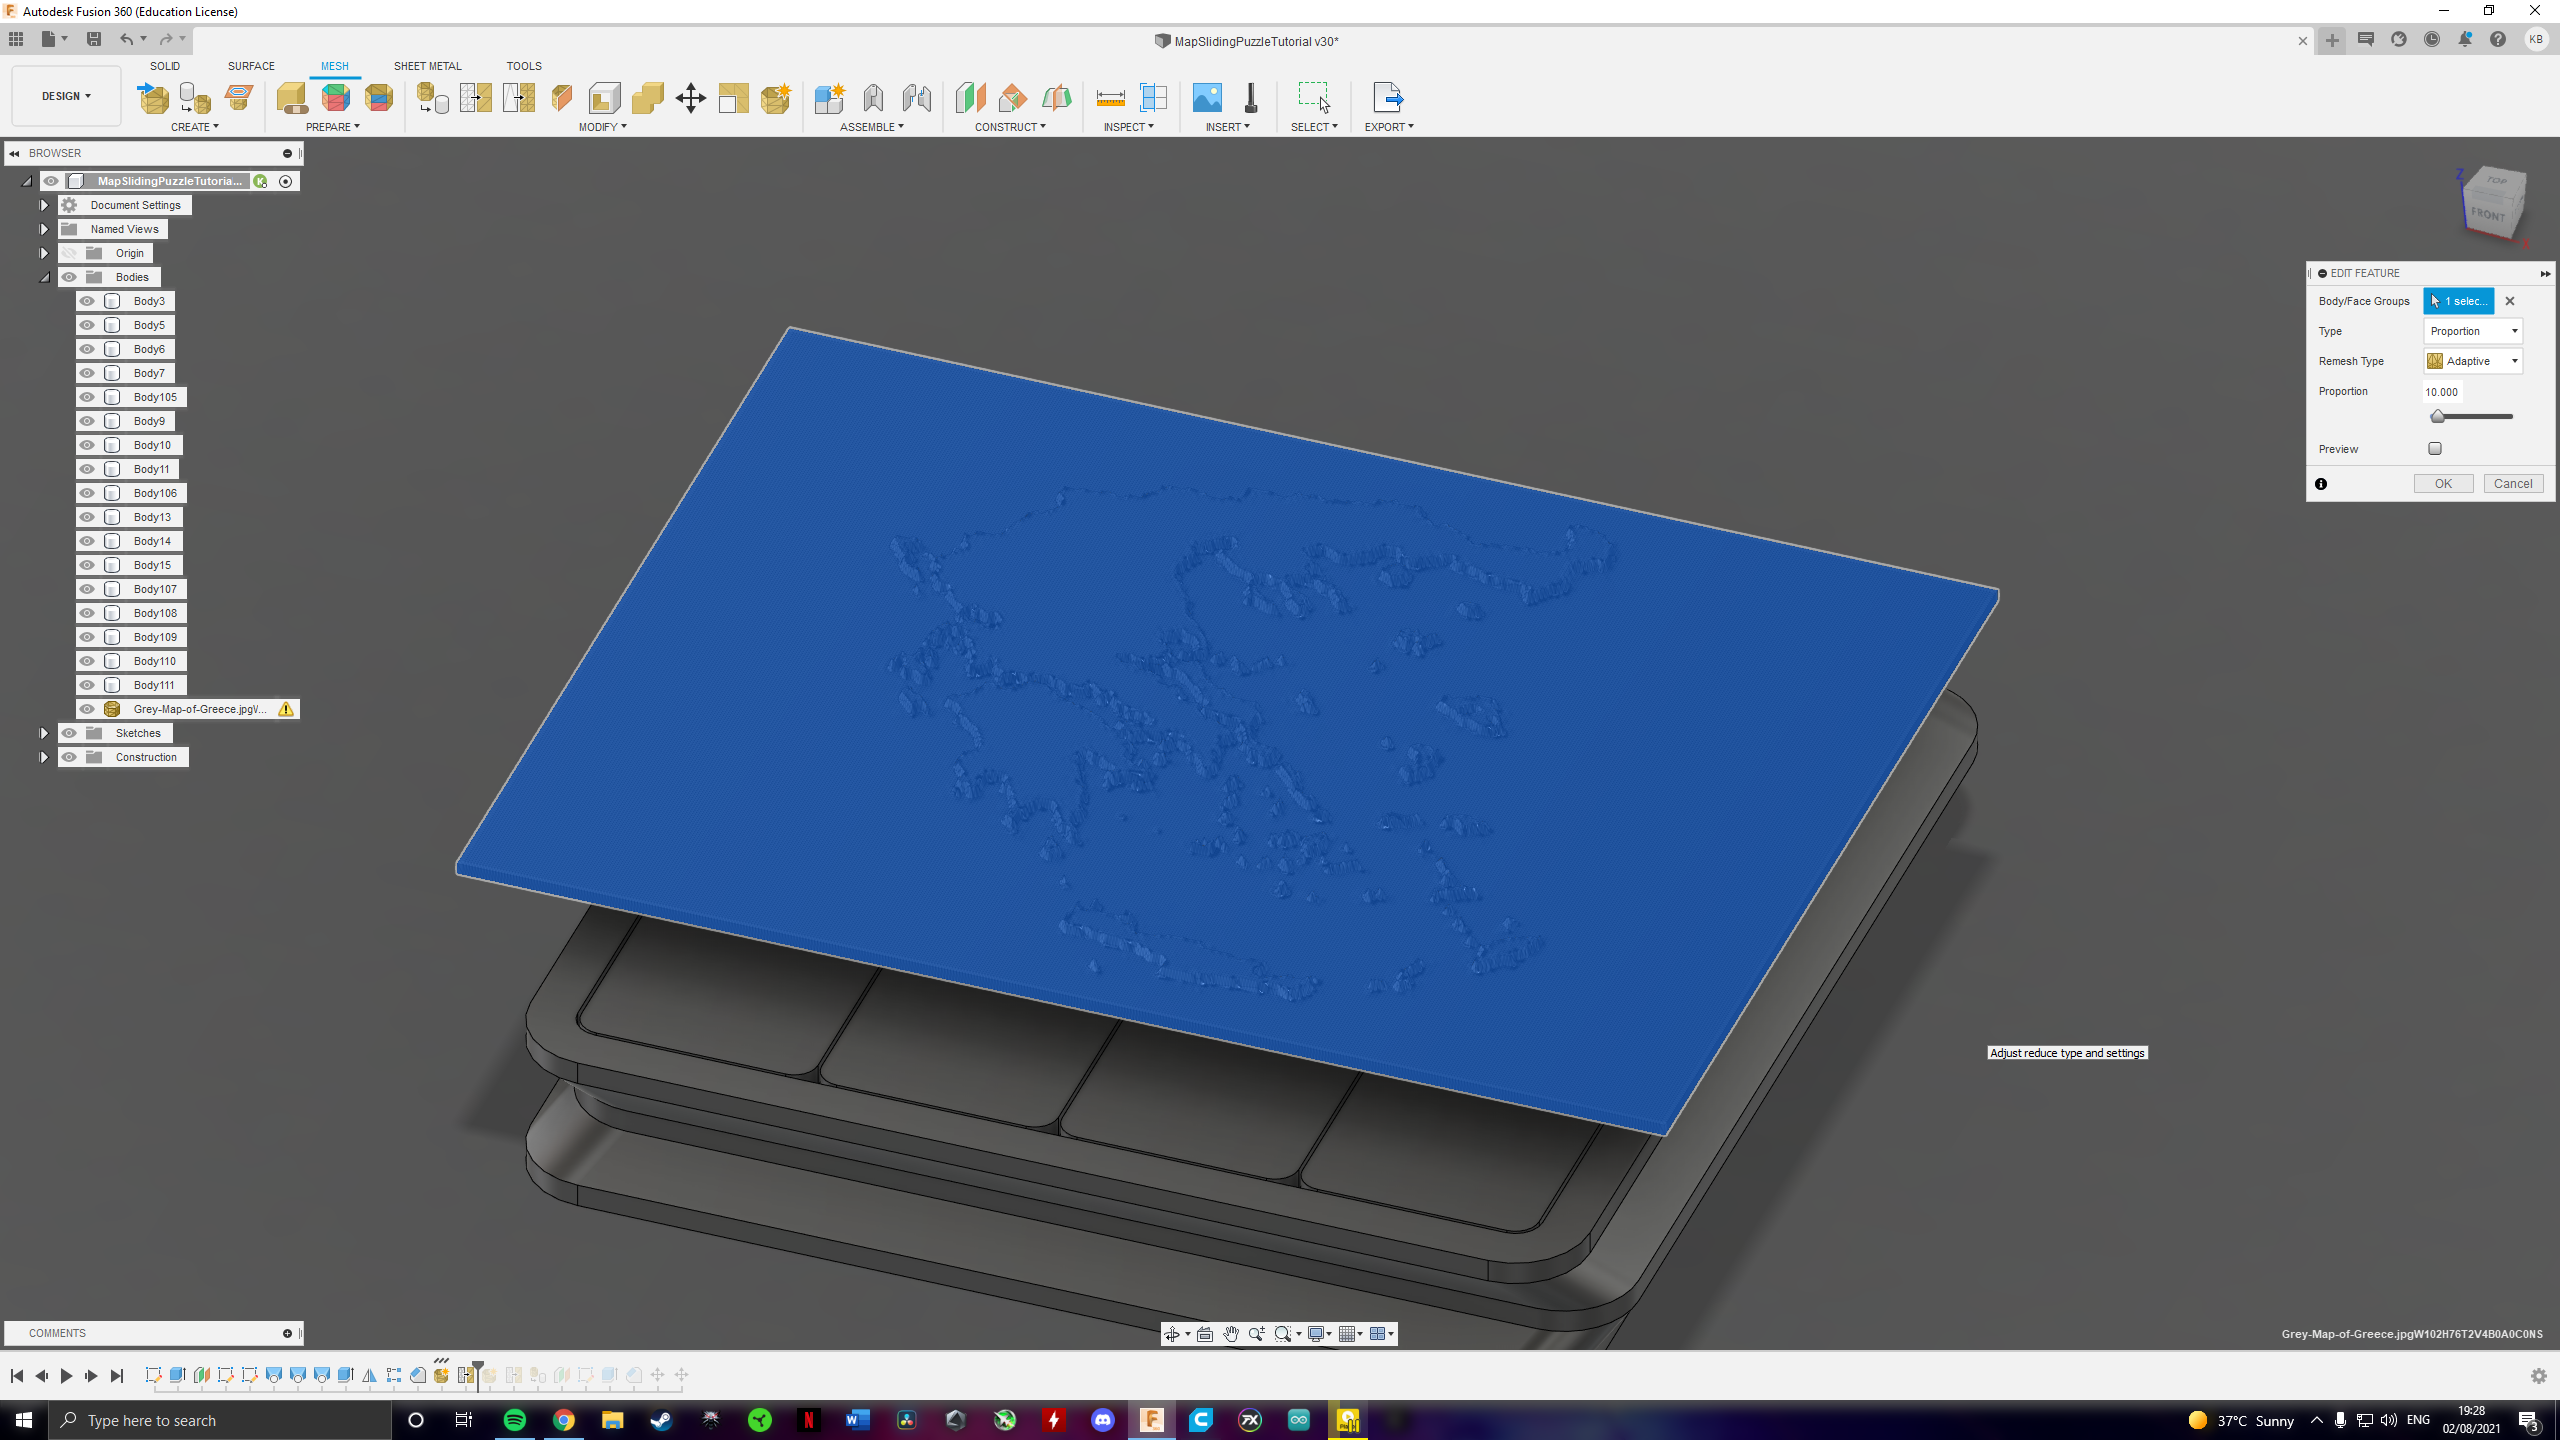.png)
While 3D designing you should be saving your progress frequently, this is especially important in this part of the design as Fusion 360 might crash, it definitely crashed a LOT of times while I was doing this stuff.
Go to Mesh > Create > Insert Mesh, select the STL file you previously downloaded and move it a little above your puzzle. You can't do a lot with meshes in Fusion so we'll have to convert it into a Solid Body. Fortunately Autodesk updated the whole process in the last update in July 2021 and now the process is a lot cleaner. Imported meshes tend to have a huge number of polygons and that greatly limits the performance of Fusion.
Go to Mesh > Modify > Reduce and select the imported mesh. The slider adjusts the percentage of the meshes that will be kept, I went with 10%.
Converting STL to Solid Body
.png)
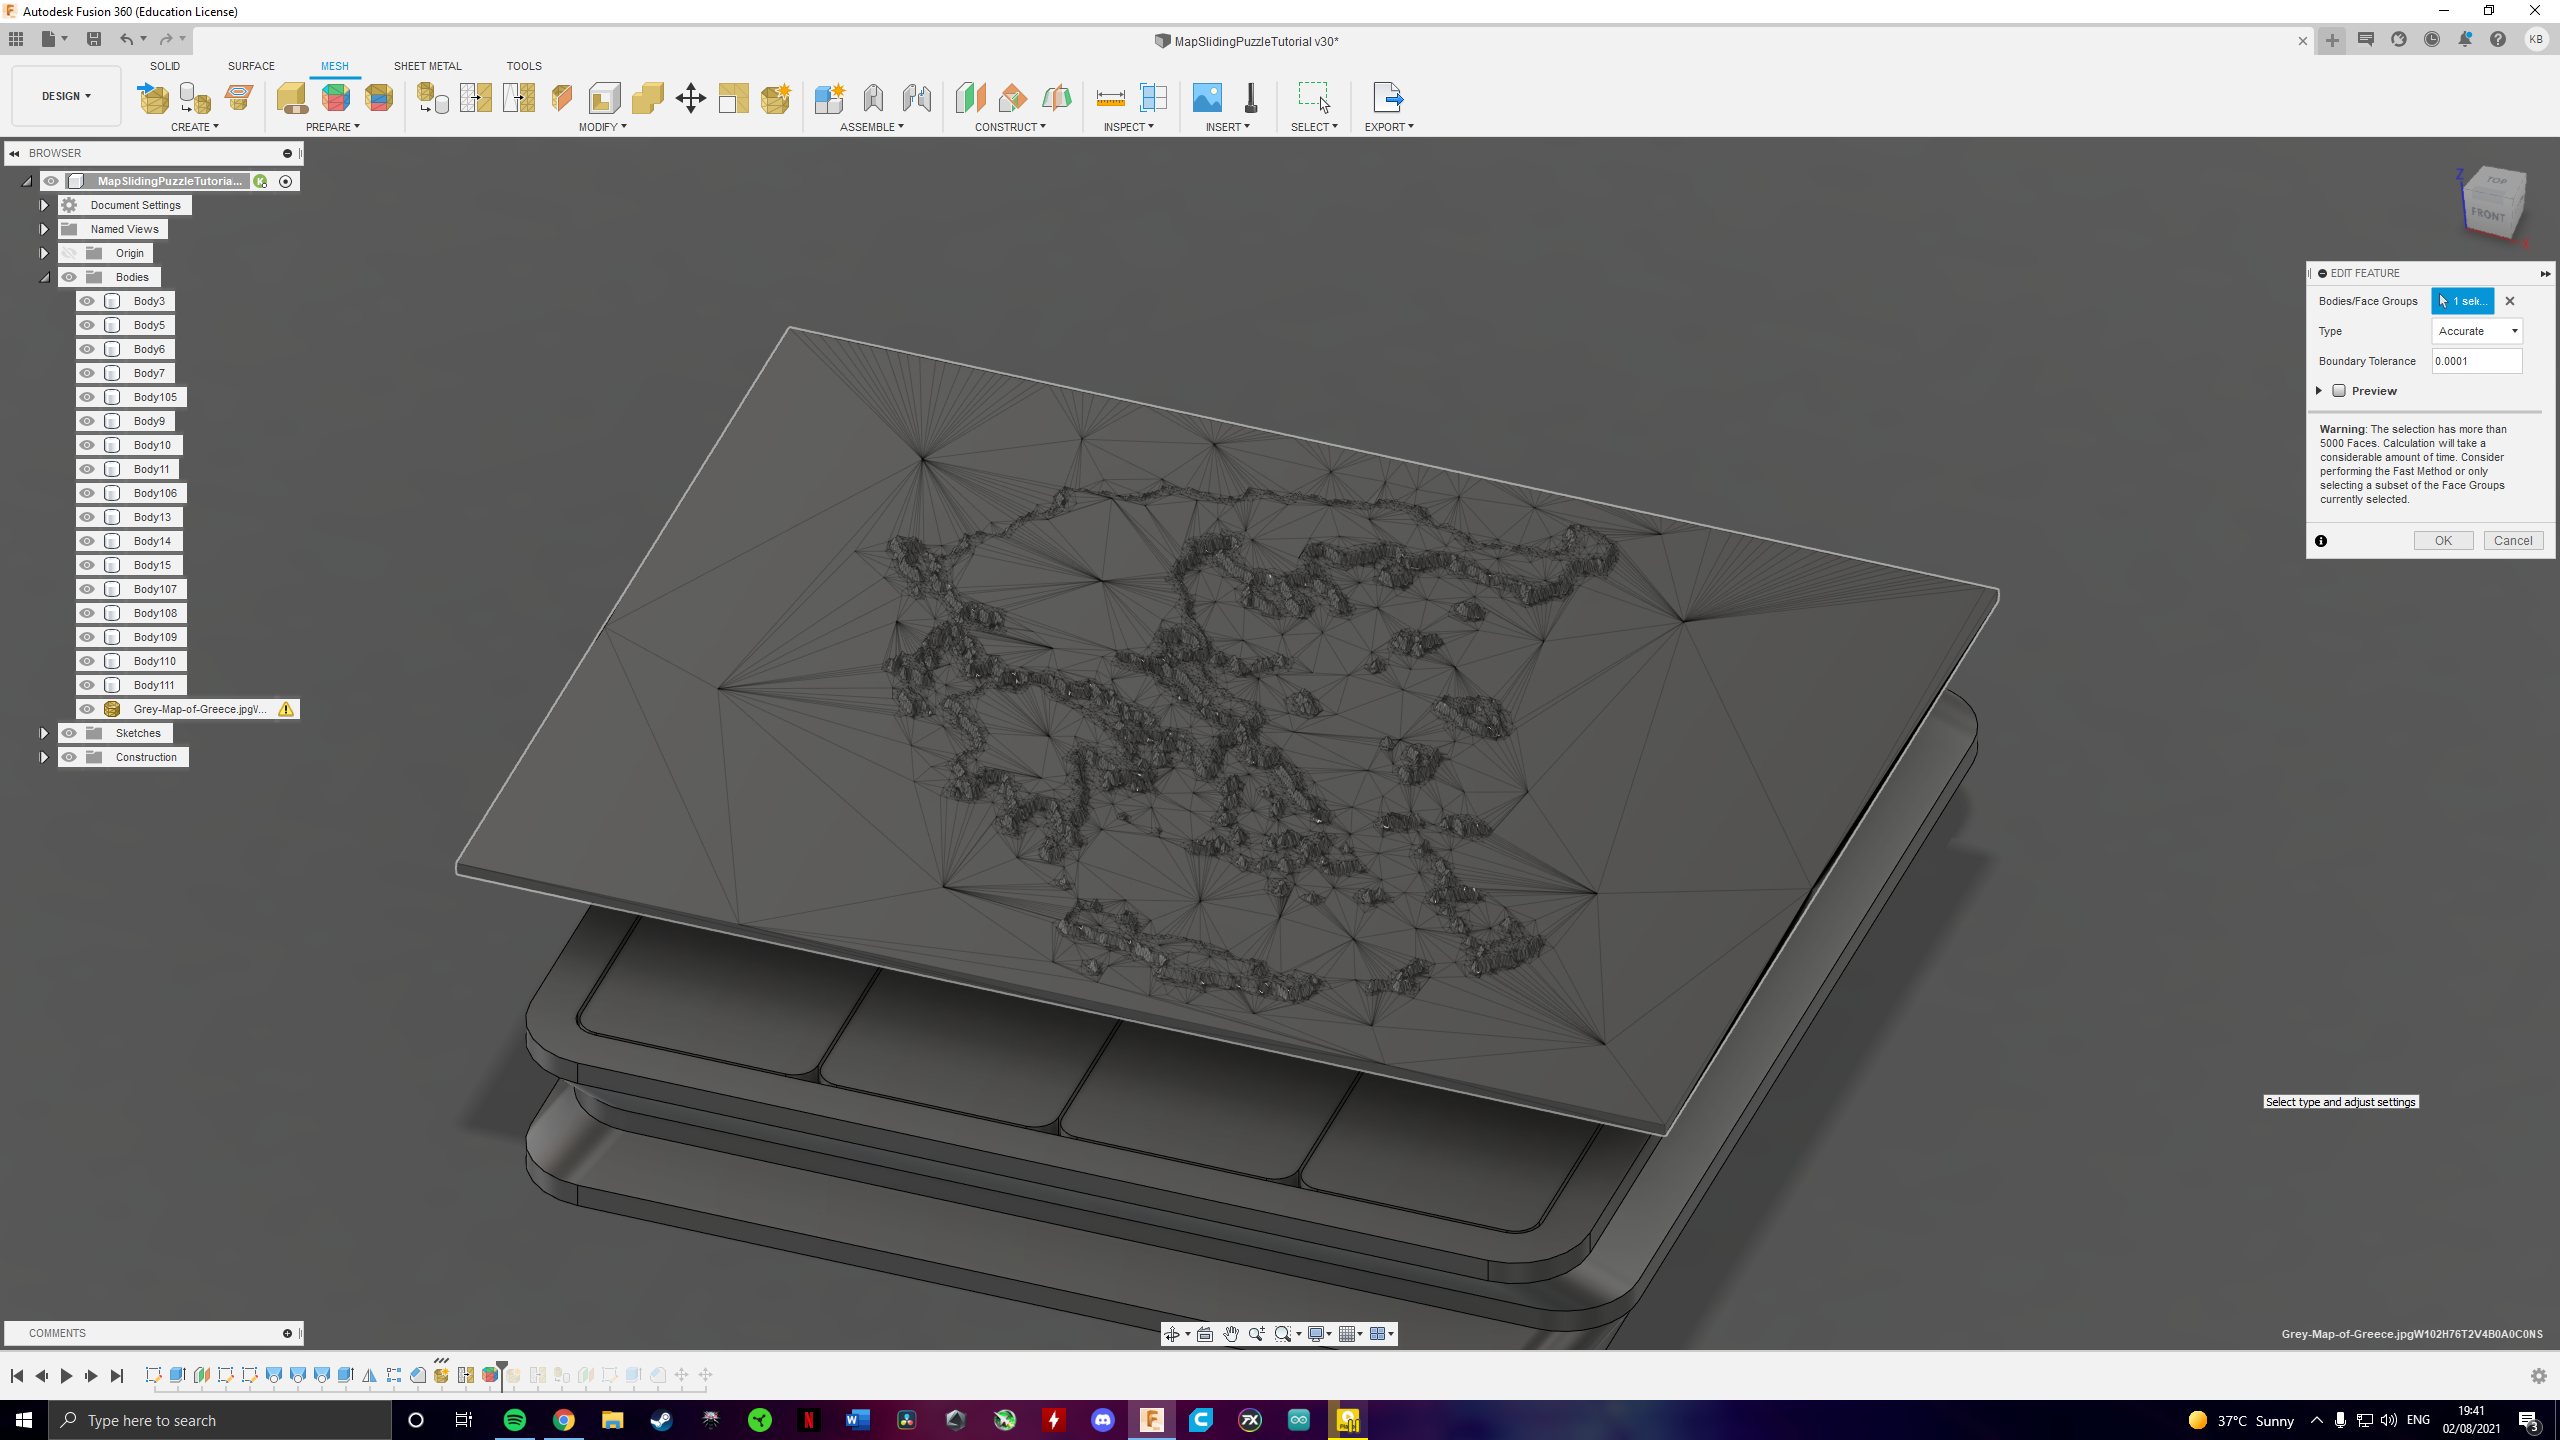
Before converting there is one last step. Select the Mesh and go to Mesh > Prepare > Generate Face Groups, choose the "Accurate" type and click "OK". The process will take a few seconds.
After it's done go to Modify > Convert Mesh and click "OK". If it takes a very long time to process and eventually Fusion crashes, like it did in my case, go back and change the Reduce percentage to something lower such as 5%.
Remove the "Sea"
.png)
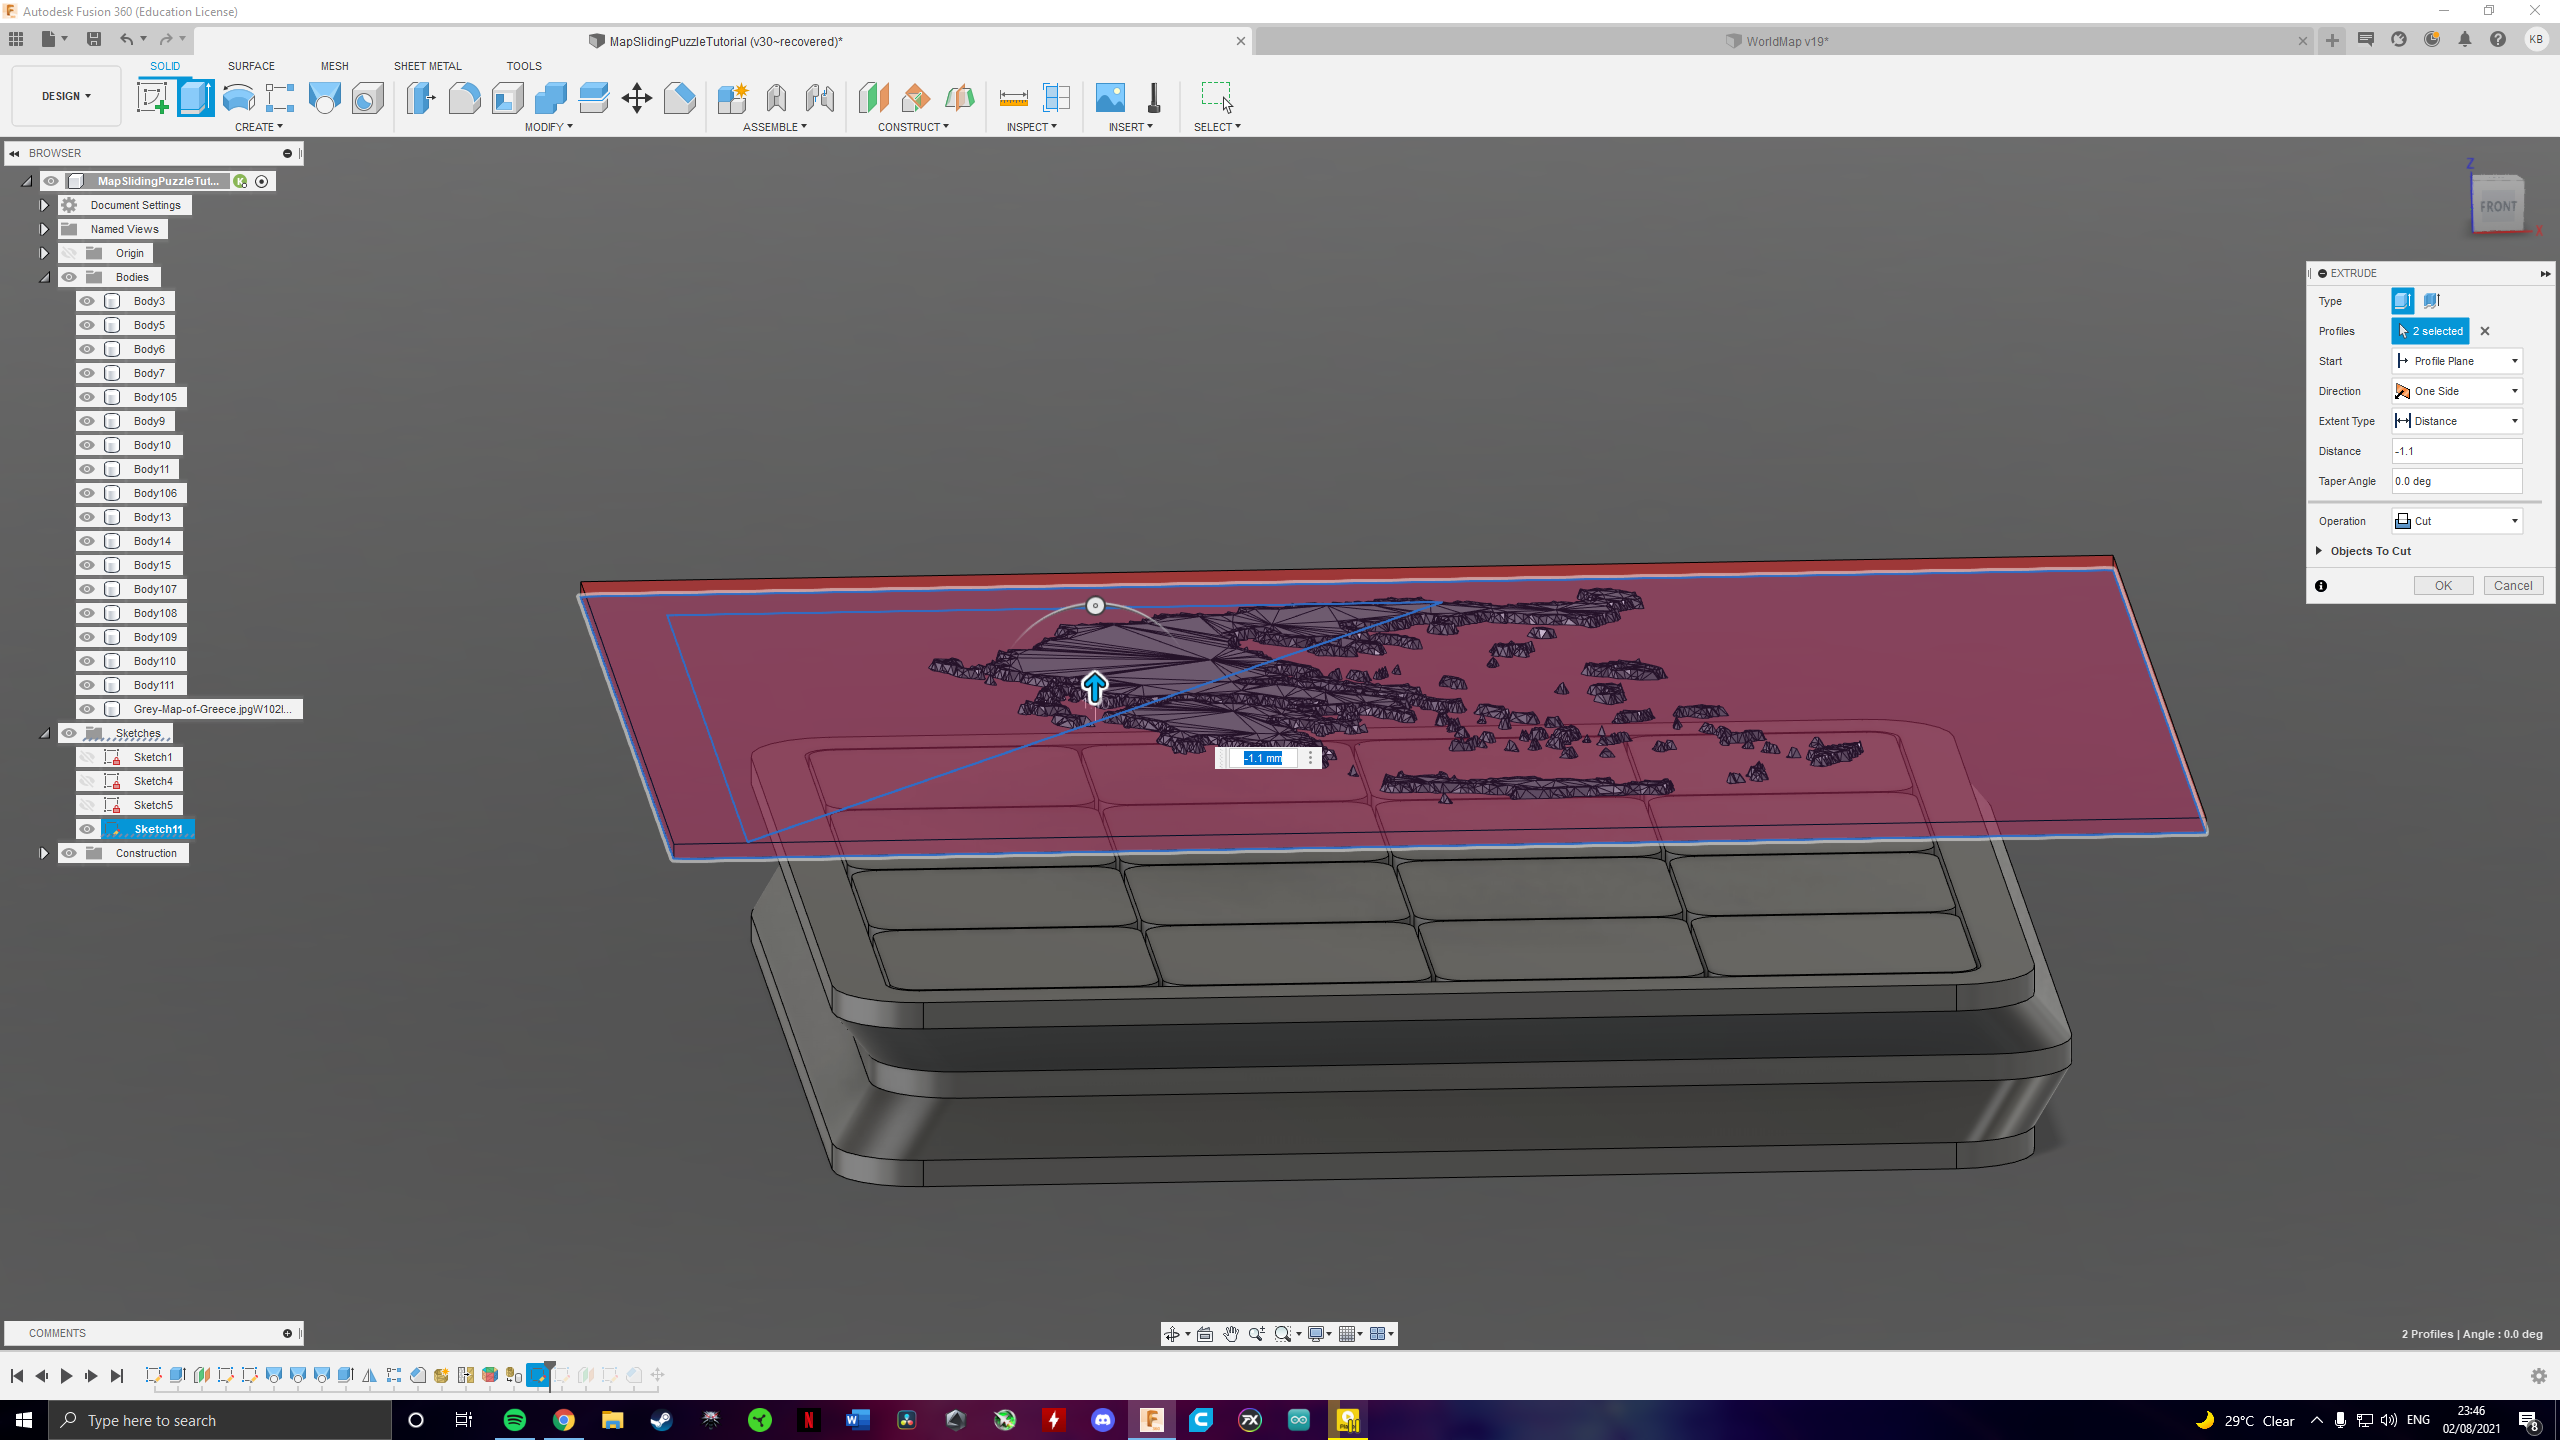
We only want the land/texture for our puzzle, for this reason select the under face of the map and extrude as a cut until only the "land" is left!
Move Map
.png)
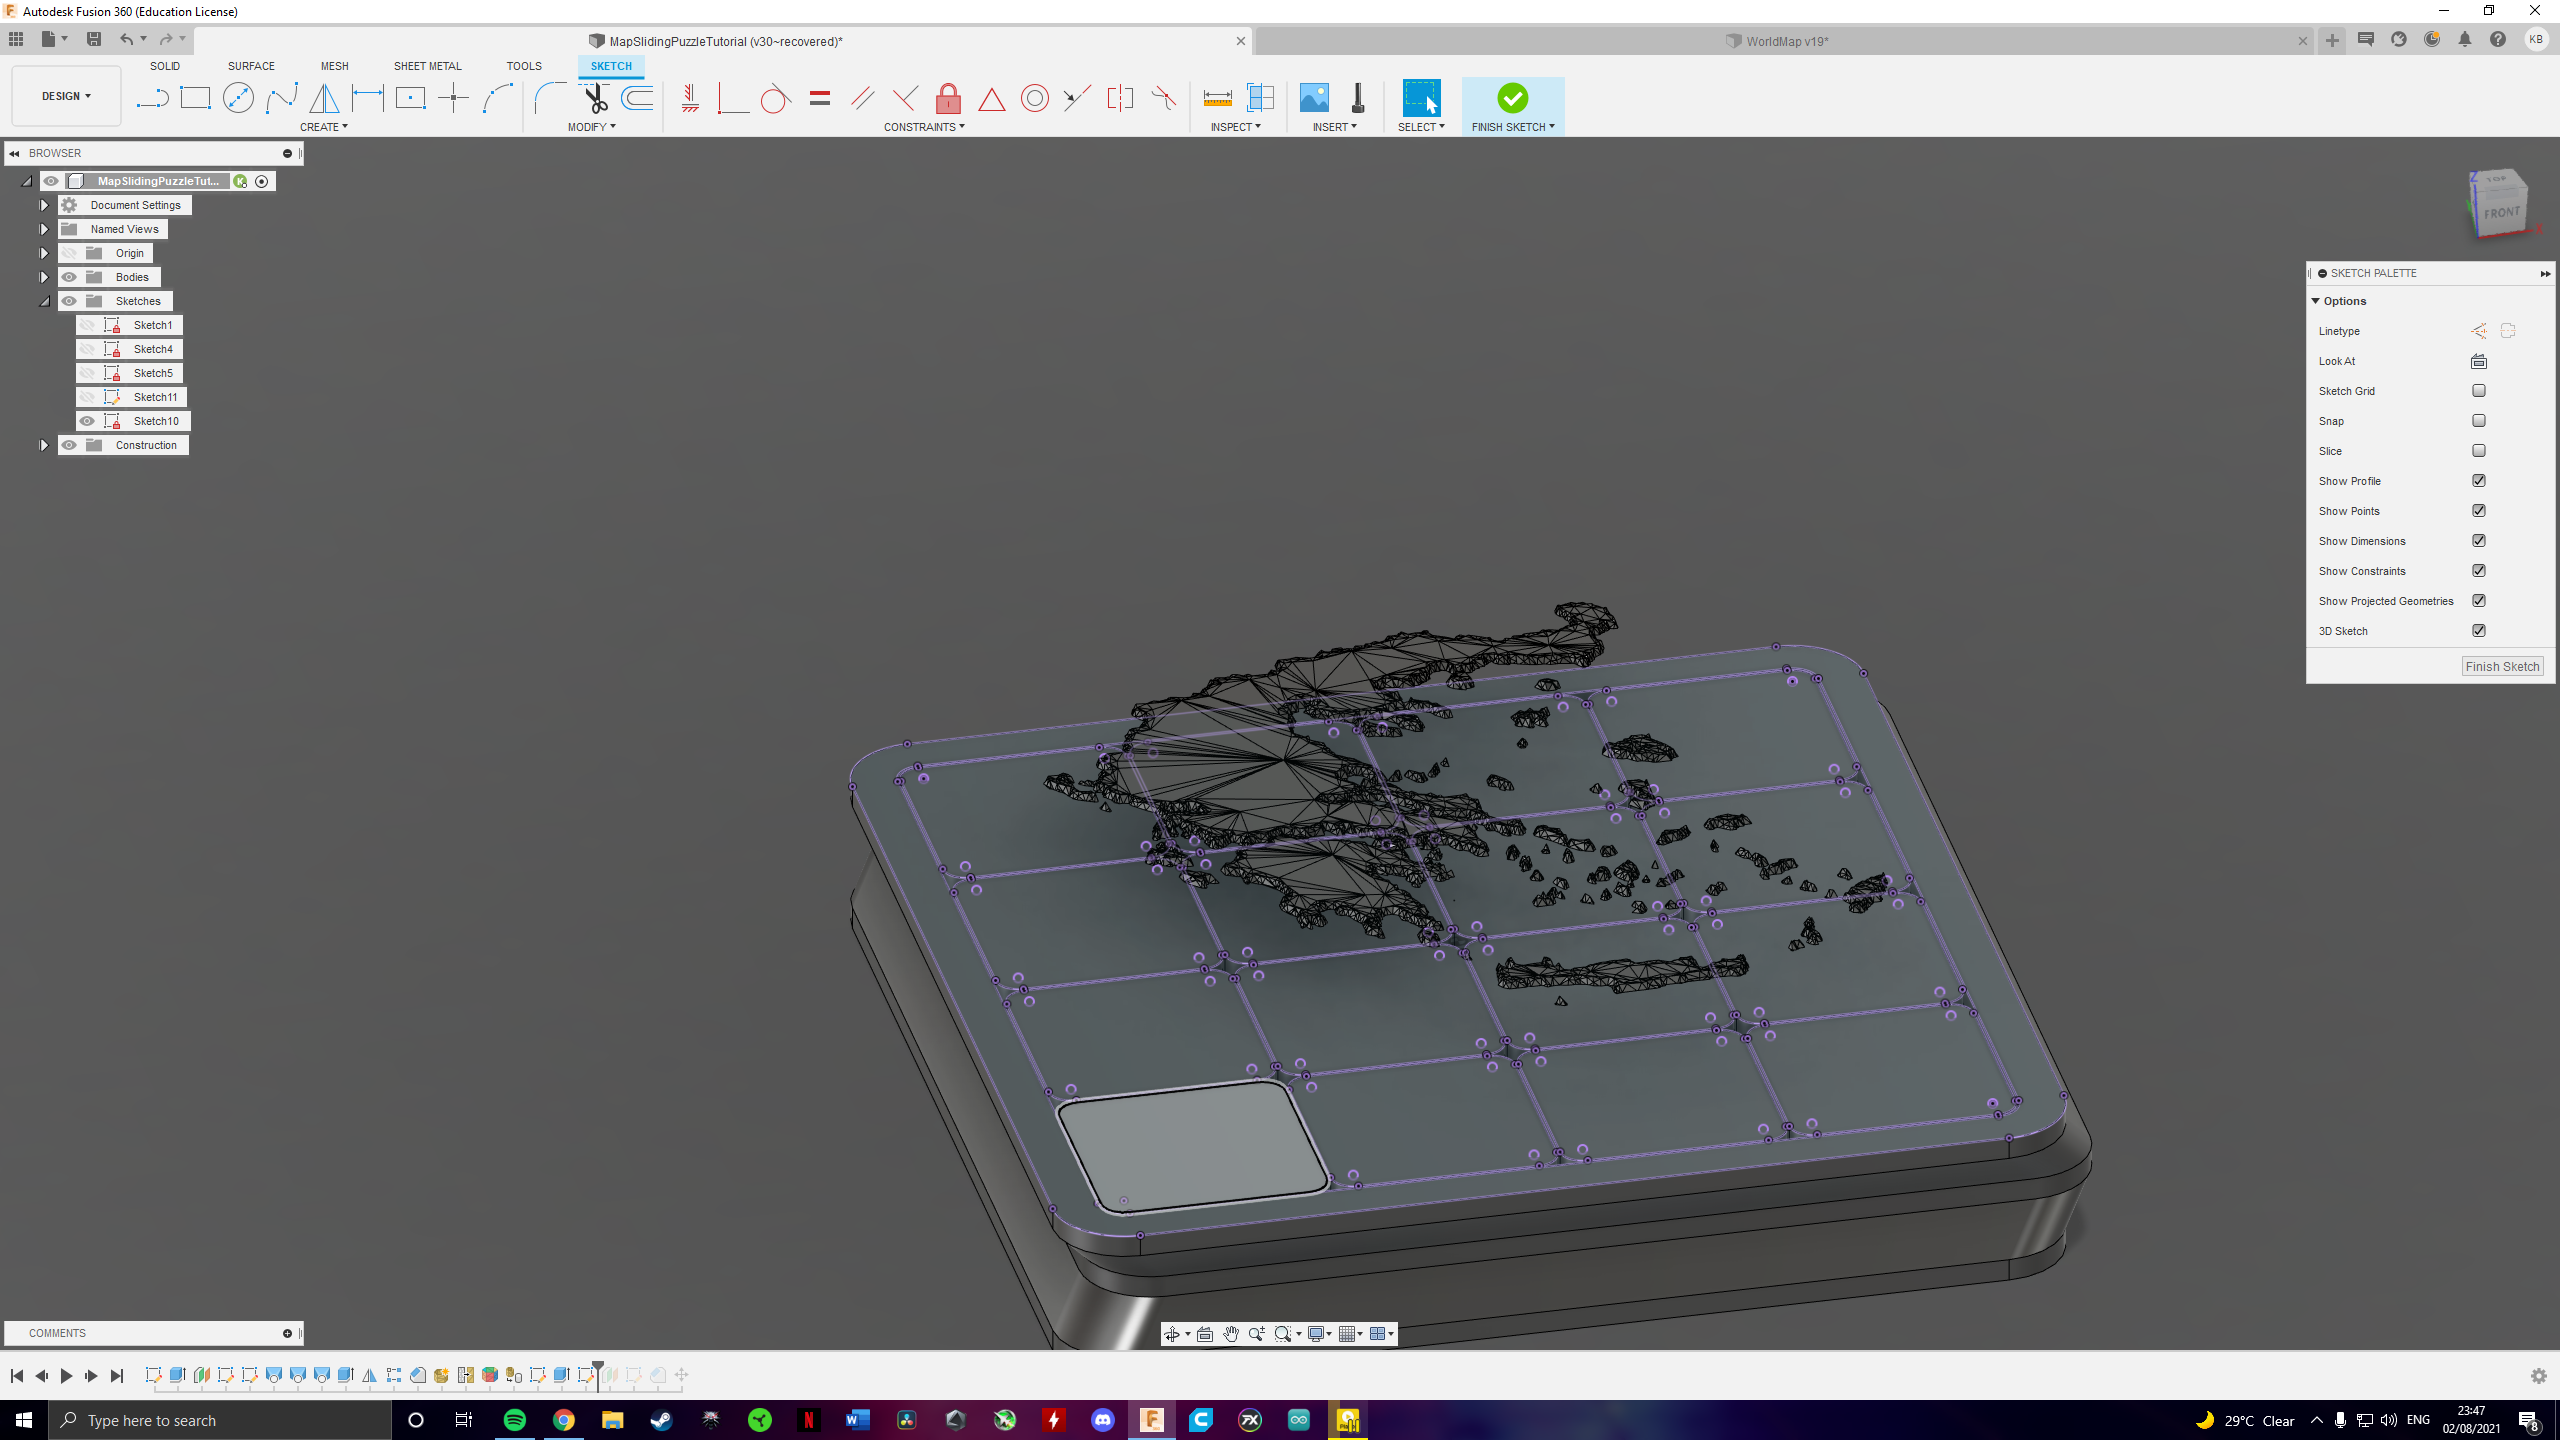
Create a sketch on the top face of the puzzle click and project the outlines of the blocks and frames by clicking "P", we will need this sketch in a few minutes to clear out the excess map material. Now select Move/Copy and move the map on top of the puzzle.
Remove Excess Material
.png)
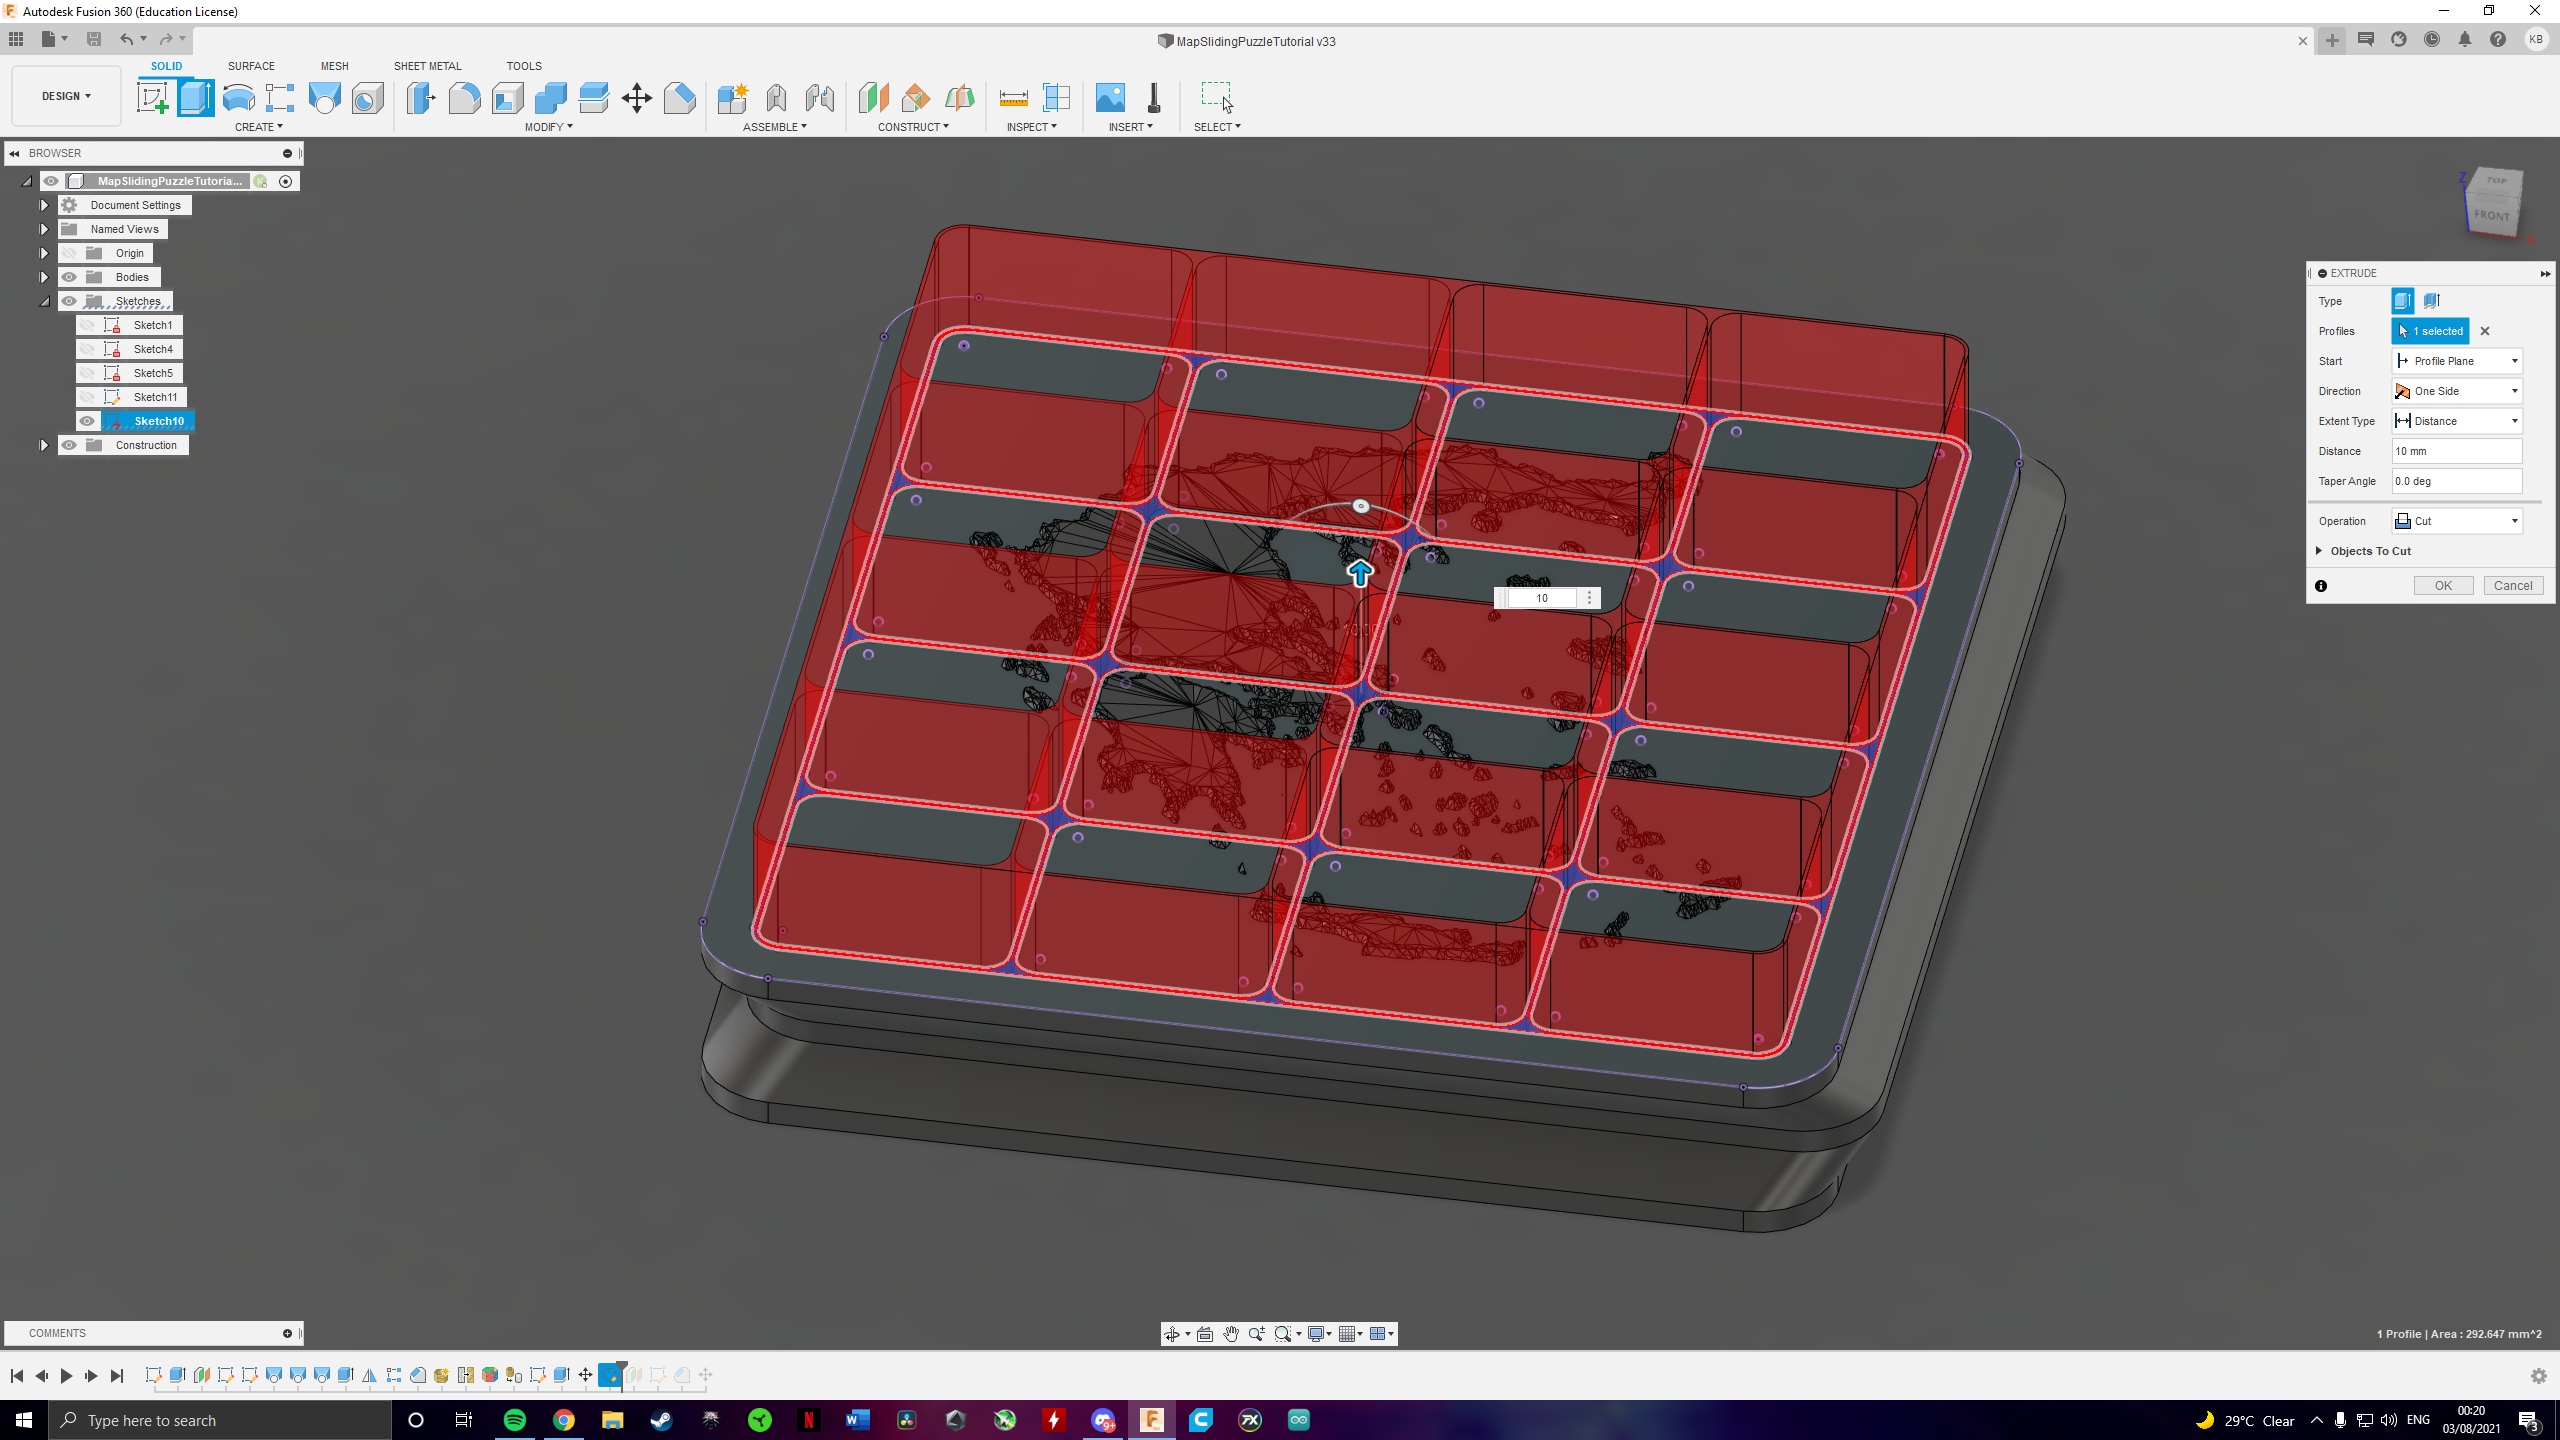
Select the sketch we made a bit ago and extrude it as a cut!
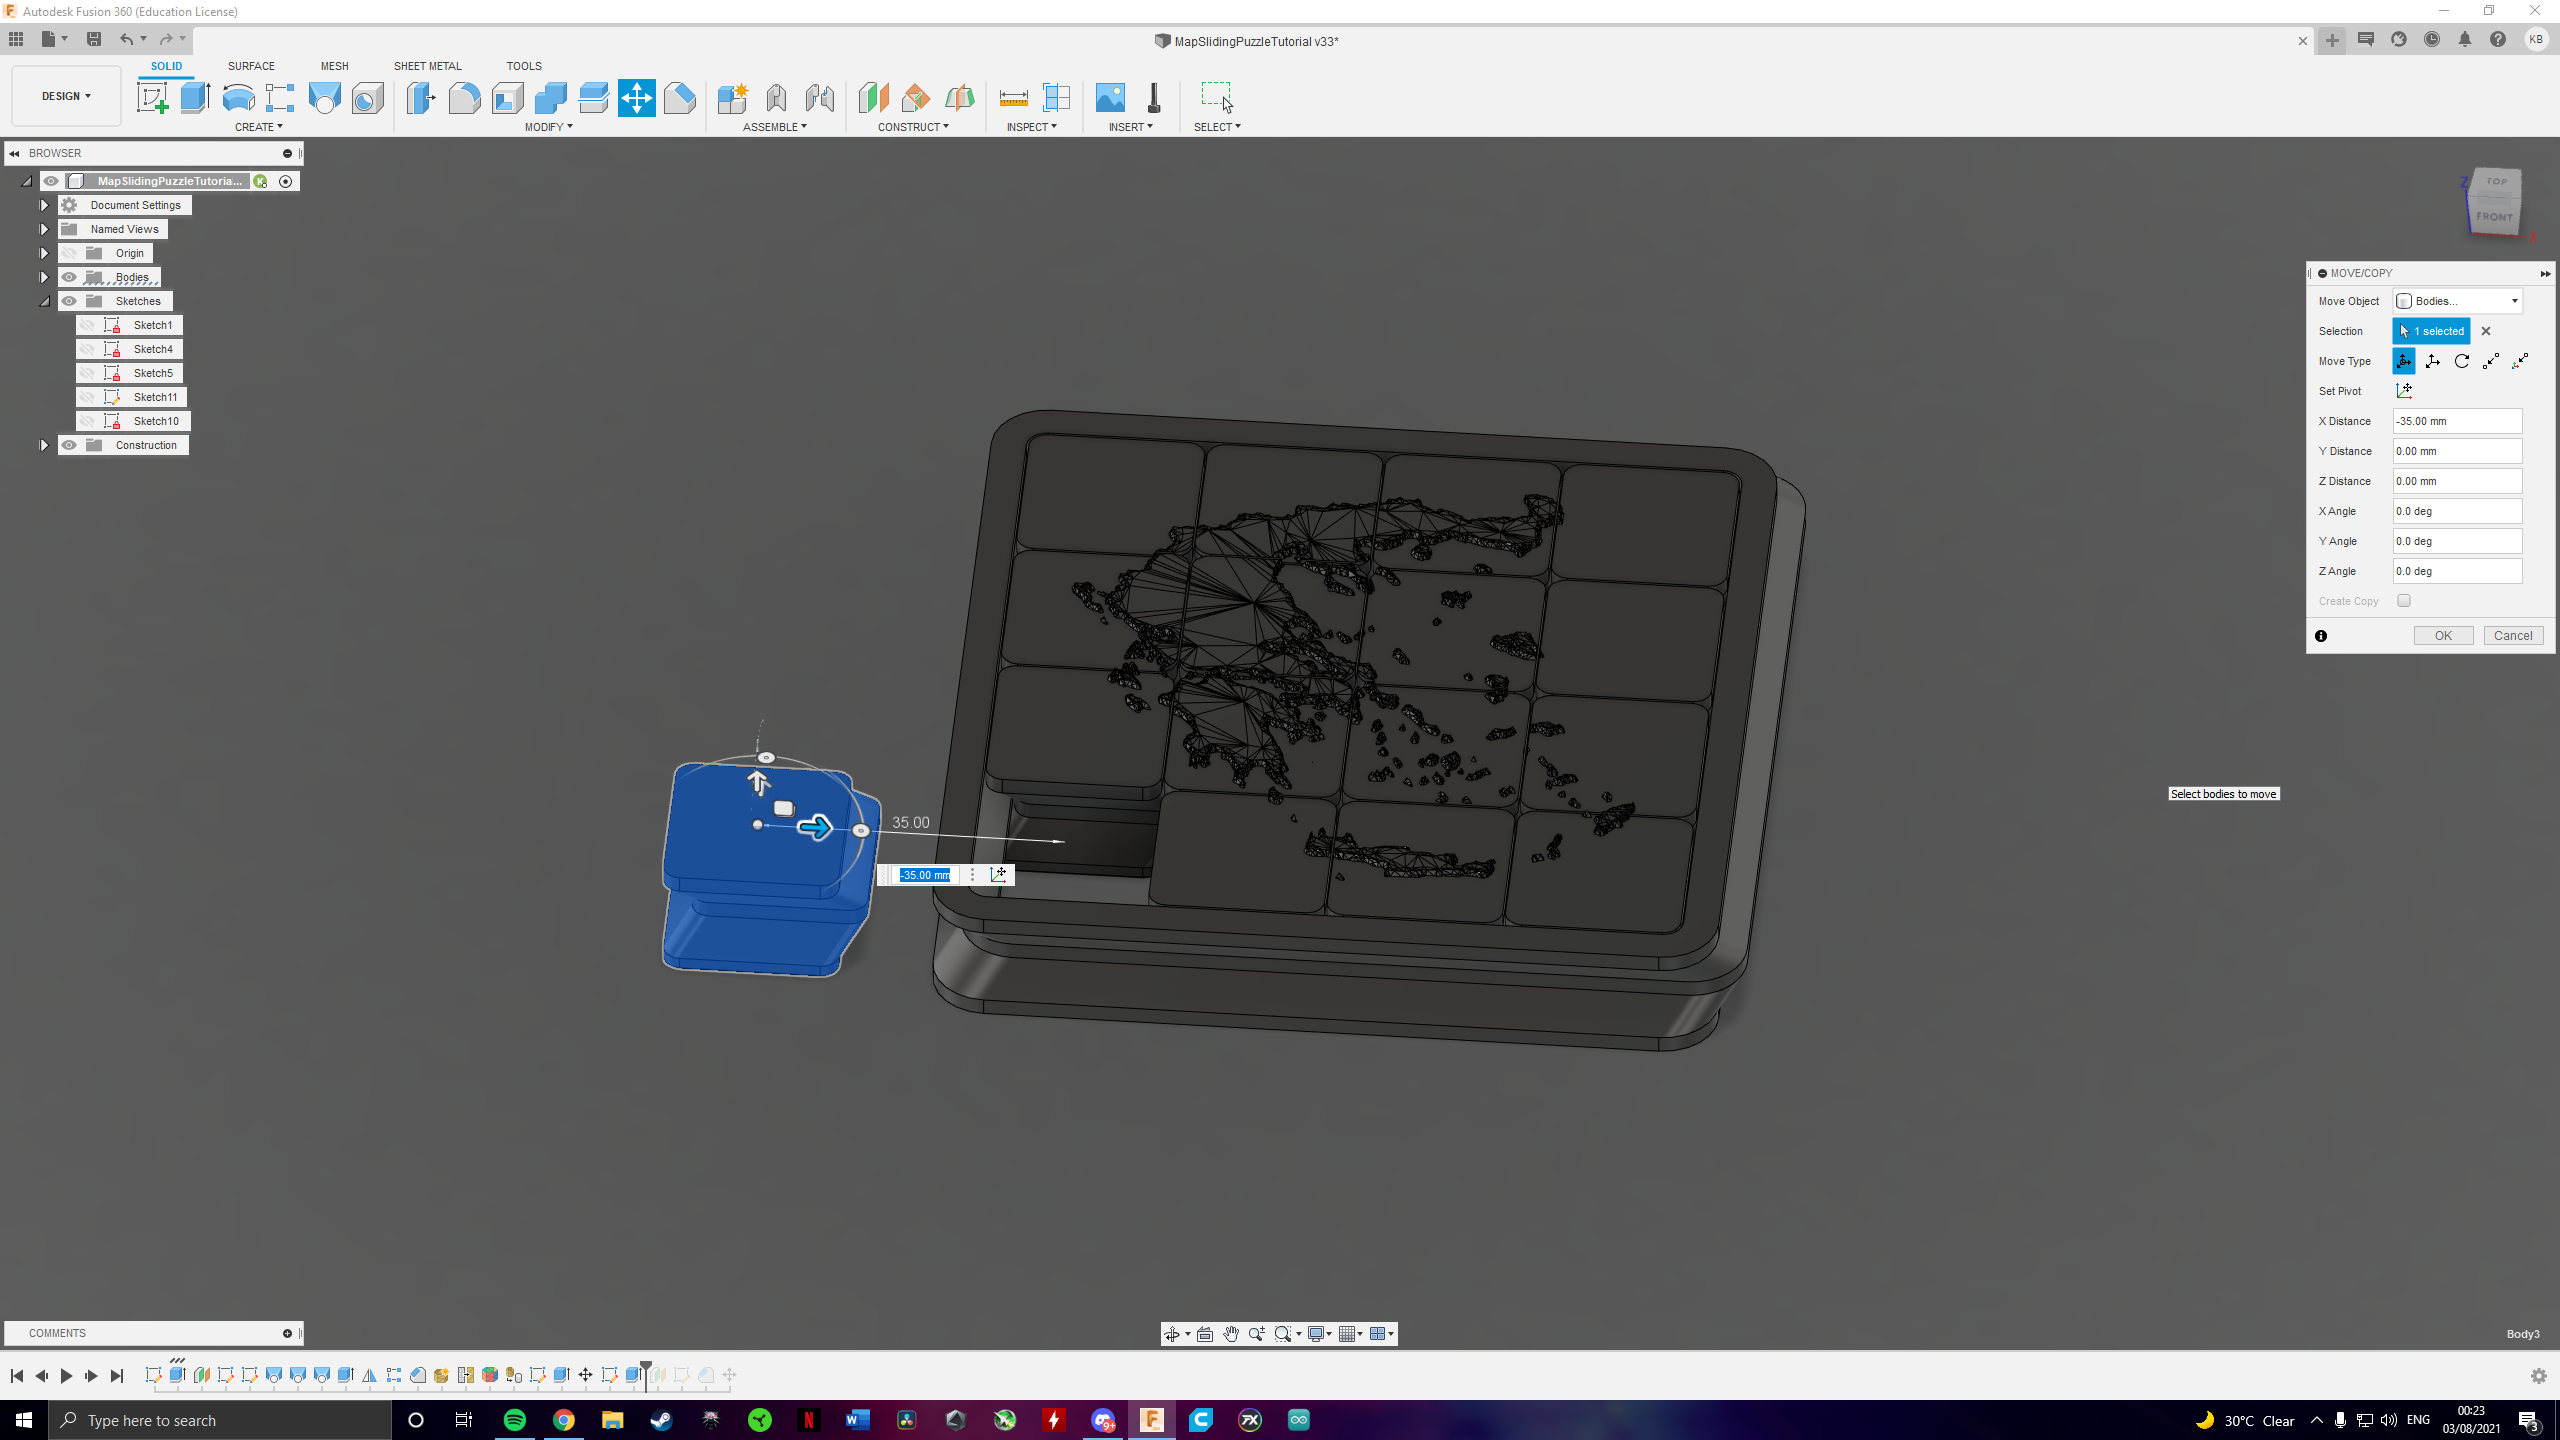
Remember to REMOVE One of the Blocks
.png)
Well it would really be a pity to send it out to the printer, only to figure out a few hours later that you forgot to remove a piece of the puzzle and thus it is completely unusable. For this reason you need to remove one of the blocks, I like to move it out of the puzzle and then select hide.
Enjoy Your Puzzle
.gif)
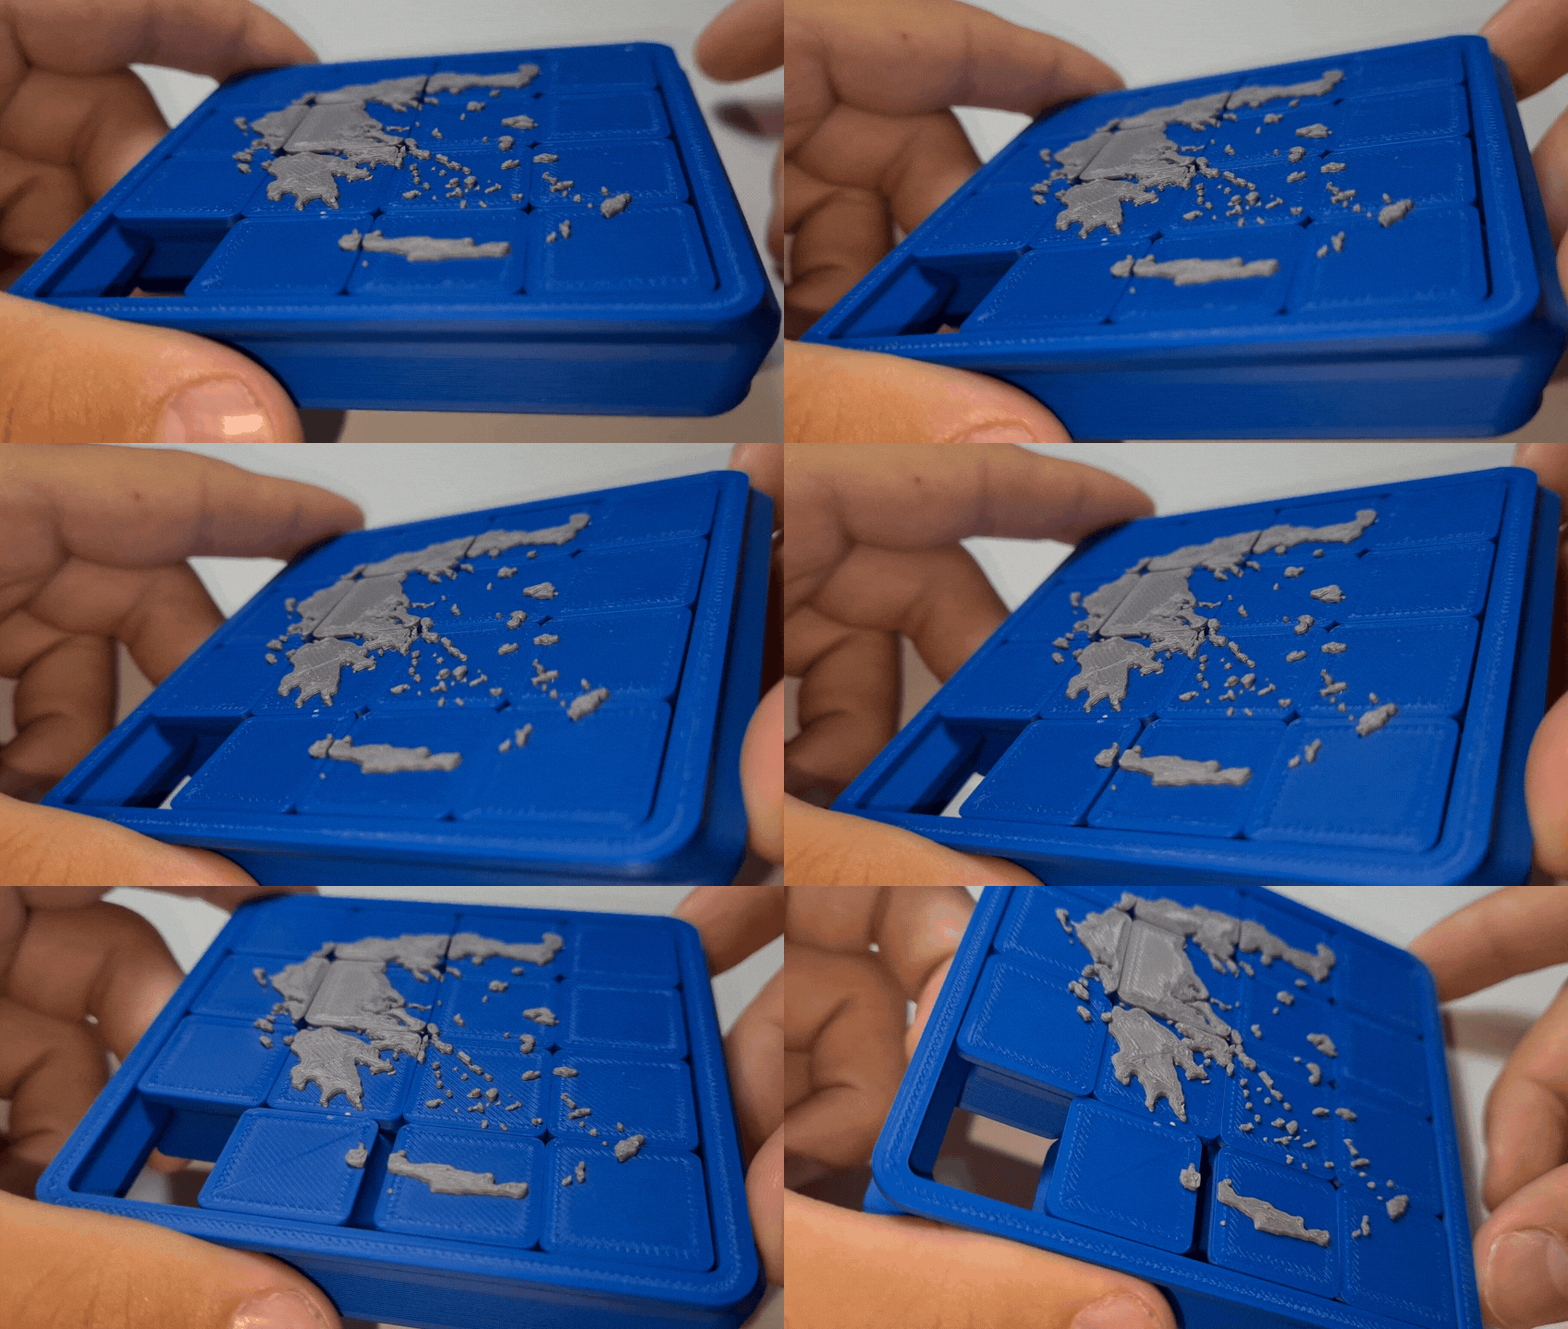
Congrats! You have now designed your own sliding map puzzle, it's now time to play with it! Go ahead and try out different grid sizes and most importantly customize the puzzle with the map of your country, a picture with your loved ones or whatever else you like, I think these would also make for a decent gift! I hope you enjoyed my Instructable as much as I did making it! If you liked this Instructable and want to support my work consider subscribing to my YouTube Channel, I didn't make a video for this project but there will be many exciting creations in the near future! If you have any questions or suggestions let me know! Have a great day and have fun creating!