Making Panorama Photos With Any Digital Camera
by marijnkampf in Circuits > Cameras
21655 Views, 22 Favorites, 0 Comments
Making Panorama Photos With Any Digital Camera

My first instructable looks at the best way to take a panorama photo using multiple pictures taken on any digital camera. The individual photos are stitched together into a single panorama photo using image editing software on your computer.
Panoramas and Your Digital Camera
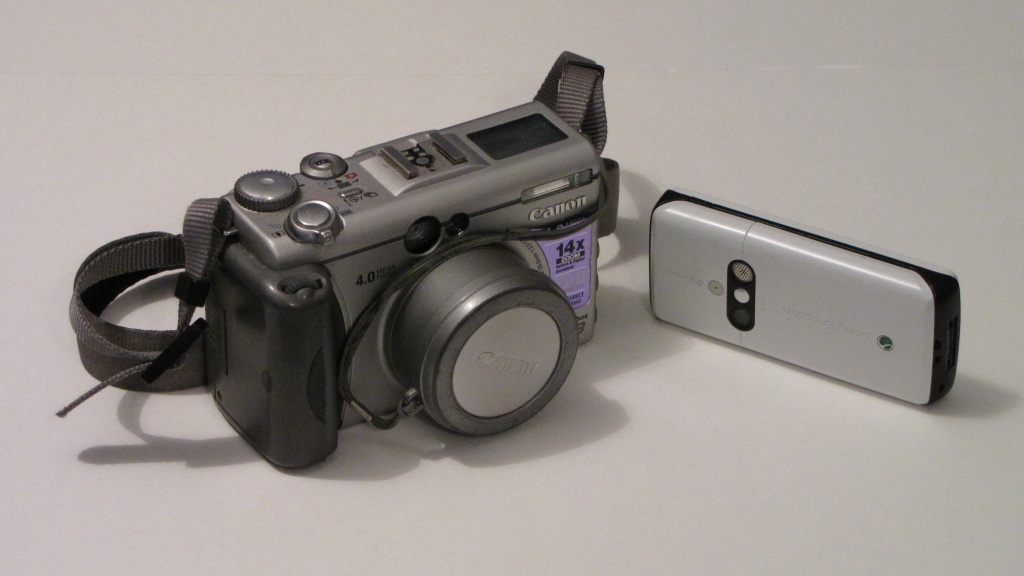
With the advance of digital cameras there is no need for special panorama cameras or lenses any more. It is possible to create great looking panoramas from multiple images taken with any digital camera by putting them together on a computer.
The first step is making the separate photos. Many modern digital cameras offer a panorama setting that makes this even easier. Before you set out though, check how your camera records the panorama. Do not use the inbuilt setting if it combines the pictures into a single panorama in the camera. The quality of the automatic photo stitch functions I've seen leave much to be desired and, worst of all, they do not offer the opportunity to adjust the image manually at a later stage. It can be very frustrating if you believe you've taken the greatest panorama ever only to find out that there are visible connections between the photographs.
Only use your cameras panorama function if it stores each individual photograph separate.
Ensure that you choose the panorama function that stores each separate photograph. If there is no separate option, use the camera as if it didn't have a panorama function. Because, even if your camera doesn't have a panorama function you can still create cool panoramas. You may just need to be a bit more careful when moving your camera from picture to picture.
Taking the Panorama Photo(s)


When taking a panorama photo, the aim is to take a series of photographs that overlap each other. Use your camera's panorama guide if it features one. If it doesn't, fix the exposure settings to give you an evenly lit end result, that avoid visible banding and gradients, which can be especially obvious in sky.
When taking your panorama, each photo should ideally be perfectly level with all photos taken on the same horizontal plane.
Try to avoid angling the pictures. This will not only greatly reduce the size of the final panorama, but it also makes stitching the separate photos into a single panorama more difficult. It will require additional rotation of the images to get everything lined up.
Keep the camera in the same position after taking each picture until you see the live preview on your camera's screen again. Then pick a point towards the edge of your scene and move your camera to the side. Move your camera on a horizontal plane keeping the horizon in the same position as the previous picture. Make sure that the point you picked is still visible to create an overlap between the two pictures. Repeat this process until you've finished your panorama.
View the pictures you've taken on your camera to ensure that the horizon is level and all pictures are on the same horizontal plane. Also ensure there is enough over lap between the pictures. If you spot mistakes take the whole panorama again.
To Tripod or Not to Tripod
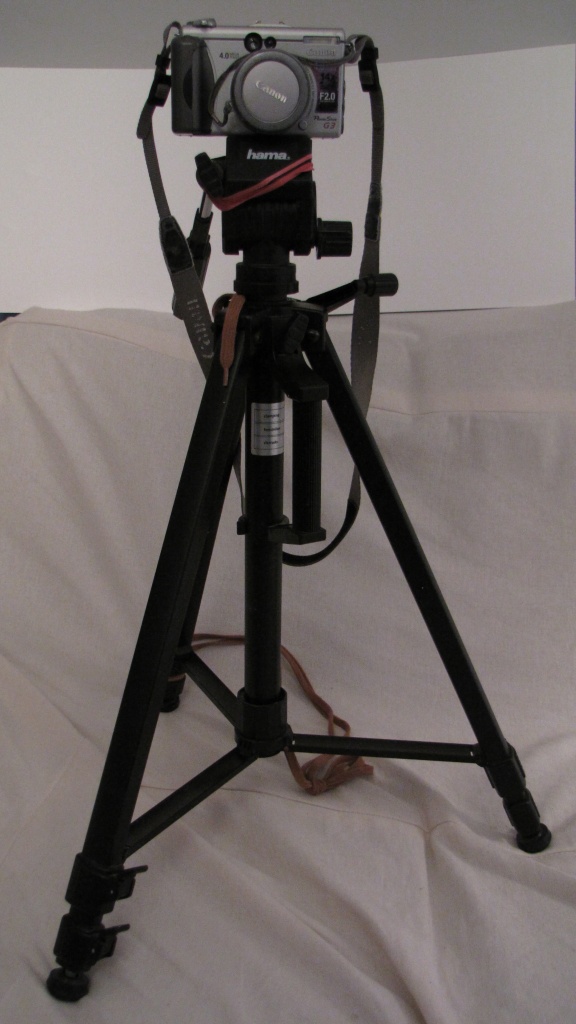
Using a tripod however has several advantages. It's easier to keep each picture level, the horizon will be on the same height in each picture and you automatically rotate the camera around a fixed point.
In practice however, I hardly ever use a tripod when taking panorama photos. Because I often take photos on hiking trips or other inaccessible places, and I find carrying a tripod is just too cumbersome. I also find that it can be difficult to see the screen of your digital camera on a low down tripod. It also makes taking panoramas on eye level difficult as you will need a very high tripod.
I recommend trying a few panoramas both with and without a tripod and see which results you like best.
Stitching the Panorama Together
To create a panorama, I start with creating a quick preview using a programme to automatically stitch the photos together. This allows me to quickly review the results and select the photos I'll stitch manually.
It would have been great if the programme's results were good enough, but unfortunately I don't think they are. You can often see stitching artefacts, especially in prints.
I think the best panorama software is the photographer combined with a bit of Photoshop or other graphics programme.
It would have been great if the programme's results were good enough, but unfortunately I don't think they are. You can often see stitching artefacts, especially in prints.
I think the best panorama software is the photographer combined with a bit of Photoshop or other graphics programme.
Using Adobe Photoshop CS
I use Adobe Photoshop CS to manually stitch my panorama photos together, but this method can also be used in other programs. At the bottom of this article there are brief instructions on how to create panoramas with the free open source image editor GIMP.
Adobe Photoshop offers functionality to stitch panoramas together automatically (File > Automate > Photomerge...). You can use this for the initial layout, but as with all the other automated panorama stitching software I've seen, most panoramas still need manual retouching. In this photo stitch tutorial I'm making the entire panorama manually for the best result.
1 Open all the individual photos that will form your panorama.
2 Select your starting photo. It doesn't really matter whether this is the first photo of the series, the last, or one from the middle.
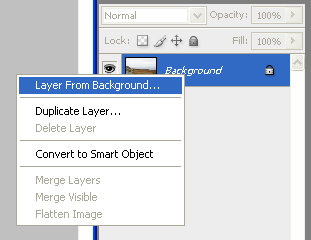
3 Create a layer from the background
(In the layers palette right click layer and select 'Layer From Background...')
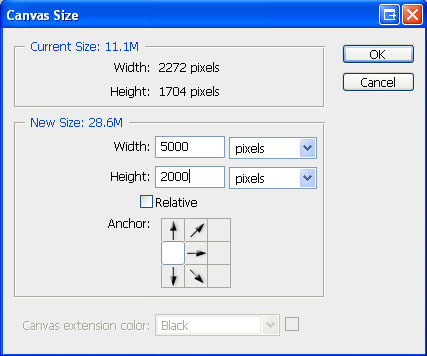
4 Enlarge the canvas size
(Image > Canvas size ...)
You can guestimate the size of your final panorama. It doesn't matter if you get it wrong, as if you run out of canvas you can always increase it later. Make sure to set the right anchor depending on the position of your starting photo in the panorama. Don't forget to increase the vertical size a little too as the horizon may not be at exactly the same level for each photo.
5 Save your intermediate work as a .PSD file to avoid accidentally overwriting your JPG file half way through.
(File > Save as...)
6 Copy and paste the adjacent photo into your PSD file.
Stitching
6 Copy and paste the adjacent photo into your PSD file.
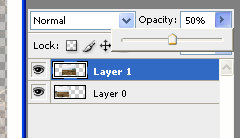
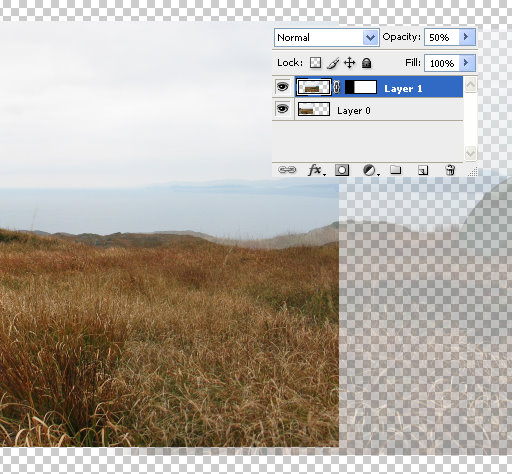
7 Set the opacity of the pasted layer to 50%.
Set layer opacity / transparency in Adobe Photoshop
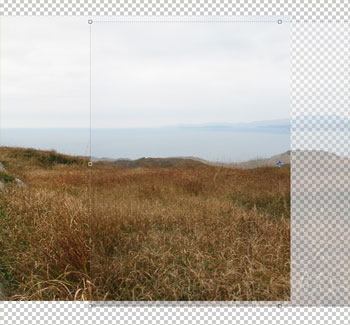
8 Position the semi-transparent layer for it to match the background in a vertical column. Moving the picture around will make it easier to see when you have a good fit.
Moving semi opaque / transparent layer in Adobe Photoshop
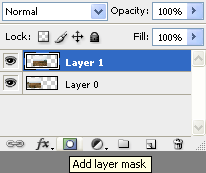
9 Add a layer mask to the transparent layer by clicking on the 'Add layer mask icon': Add layer mask in Adobe Photoshop
Add mask to layer in Adobe Photoshop
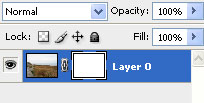
After adding the mask you will see the mask thumbnail next to the layers thumbnail Layer with mask in Adobe Photoshop
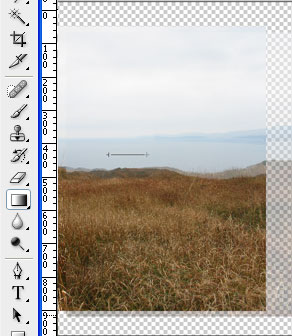
10 Select the gradient tool [G]
Apply gradient to layer's mask in Adobe Photoshop
Apply the gradient to your photo on the area that you lined up with the underlying photo. If you find your gradient erases the wrong side of your picture you can either reverse the front and background colours (X) or reverse the direction you pulled the gradient in.
Most pictures work with a vertical gradient - you can ensure the gradient is vertical by holding down the shift key - or slightly slanted gradient. The advanced panorama stitching section gives some tips and tricks to work with objects in the foreground.
Gradient applied in Adobe Photoshop
11 Set the opacity of the layer back to 100%.
12 Repeat steps 6 - 12 for all remaining photos.
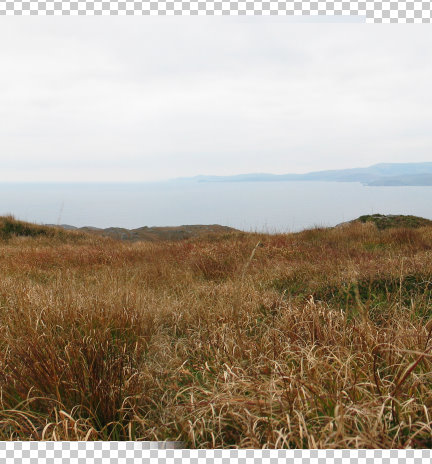
13 Finally create a selection to crop the panorama photo into shape
(Image > Crop ...)
Advanced Panorama Stitching

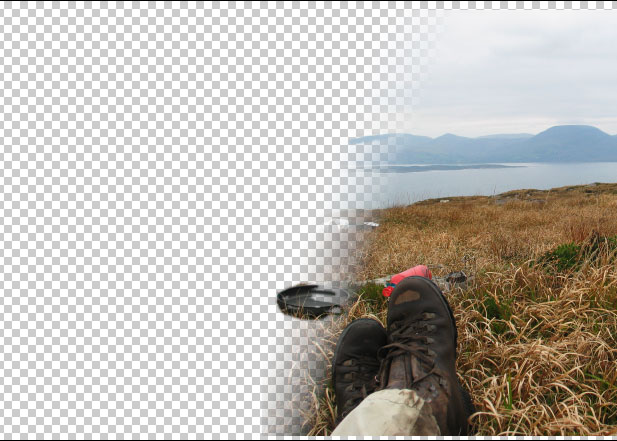
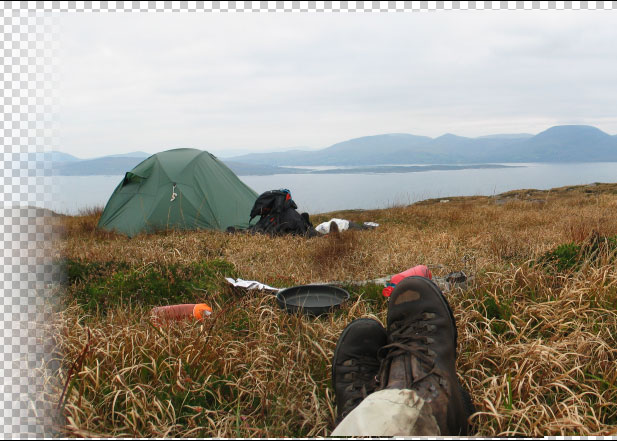
After creating the gradient on the layer mask you can adjust this by drawing onto the mask. Black erases parts of your layer and white paints your layer back again. This will allow you to fine tune how your panoramas are stitched together and fix any visible seams. Make sure you select a 'soft' brush for best results.
The example shows the stitch with only a slanted gradient. You can clearly see that the frying pan next to my boots is off. This can be easily fixed by painting on the layer mask.
To show the end result below is a screenshot of only the right hand side photograph after adjusting the layer mask.
The example shows the stitch with only a slanted gradient. You can clearly see that the frying pan next to my boots is off. This can be easily fixed by painting on the layer mask.
To show the end result below is a screenshot of only the right hand side photograph after adjusting the layer mask.
Using GIMP (free)
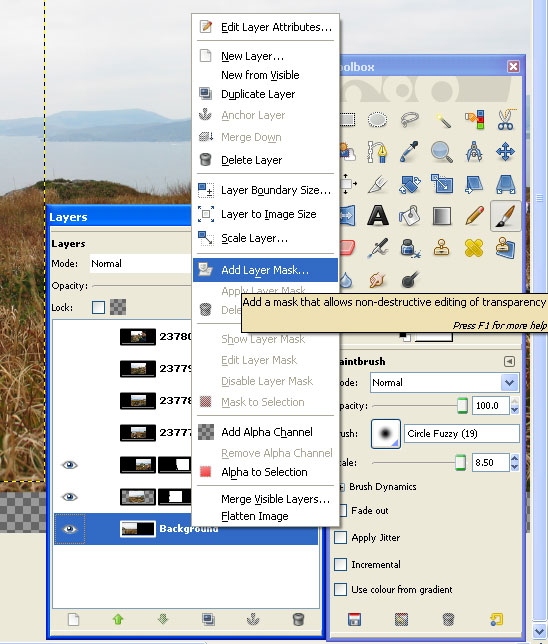
GIMP is a free graphics editing program, I don't use it very often and there may be quicker ways of doing some of these things. There are plugins available which do part of the stitching process automatically. All you need to do is the fine tuning in the end.
These instructions show the old fashioned manual way using GIMP 2.6.3. Follow the instructions as for Adobe Photoshop, but use the following commands/shortcuts.
1. Use File > Open as layers to open all the photographs that will form your panorama.
2. Resize the canvas with Image > Canvas size
3. Right click the image in the Layers panel and select 'Add layer mask'. You can select the mask by clicking on it.
4. Use the Blend Tool (L) to create the gradient
5. Fine tuning can be done using the Paintbrush tool (P)
Finished Panorama

This instructable is based on two articles I've written: Part1: How to make a great panorama photo with any digital camera and part 2: Stitching panorama photos together for free.
Feel free to reuse this instructable for non commercial use as long as it's attributed to: Marijn Kampf www.digii.eu.
I hope you've enjoyed my instructable. See below for the answer to where the example photo has been stitched together.
Feel free to reuse this instructable for non commercial use as long as it's attributed to: Marijn Kampf www.digii.eu.
I hope you've enjoyed my instructable. See below for the answer to where the example photo has been stitched together.