Making and Literacy With Makey Makey, Scratch, and Doll-E 1.0
by MakeyMakey in Teachers > 3
6560 Views, 30 Favorites, 0 Comments
Making and Literacy With Makey Makey, Scratch, and Doll-E 1.0
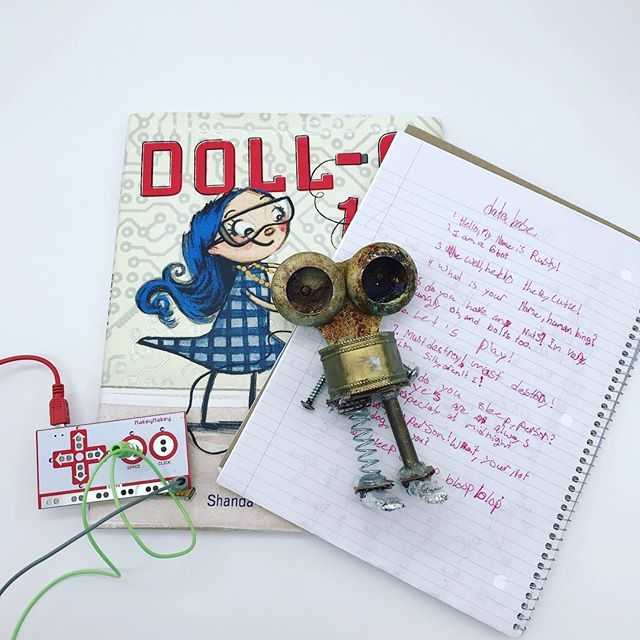
In this guide, you will be inspired to make your own creation after reading Doll-E 1.0 by Shanda McCloskey. Then you'll program your creation with Scratch!
Supplies
Makey Makey, Bricolage, Conductive tape, Scratch
Project Overview: Literacy and Making
In this guide, you will use a picture book to inspire your making! Read Doll-E 1.0, then dig through your pile of spare parts to create your own doll or robot. After building, you'll create a program in Scratch to increase your doll's database!
So the first step is to read Shanda McCloskey's Doll-E 1.0 book!
After reading, you have to make some design decisions. How do you want to program your creation? How do you want to trigger the creation's sound effect?
(You could also turn this into a design thinking toy unit like teacher Helen Kardiasmenos, by having students create toys for one another. See this tweet for more ideas on this unit. )
Educator Tip:
This is a fun book for a class read aloud! Make sure to stop and point out all the fun hidden gems in the illustrations! Can you find the dog playing the banana piano? How is he grounded to EARTH?
Create a Doll or Robot Out of Spare Parts
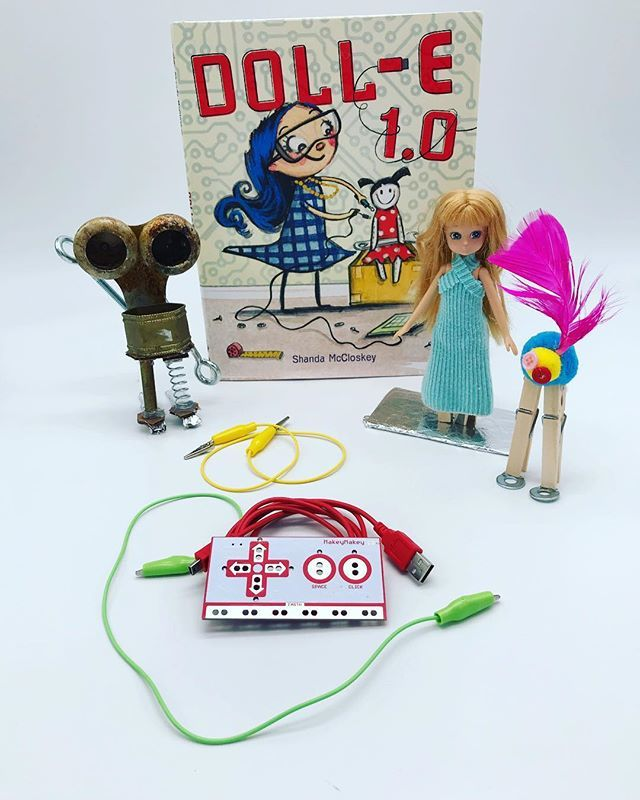
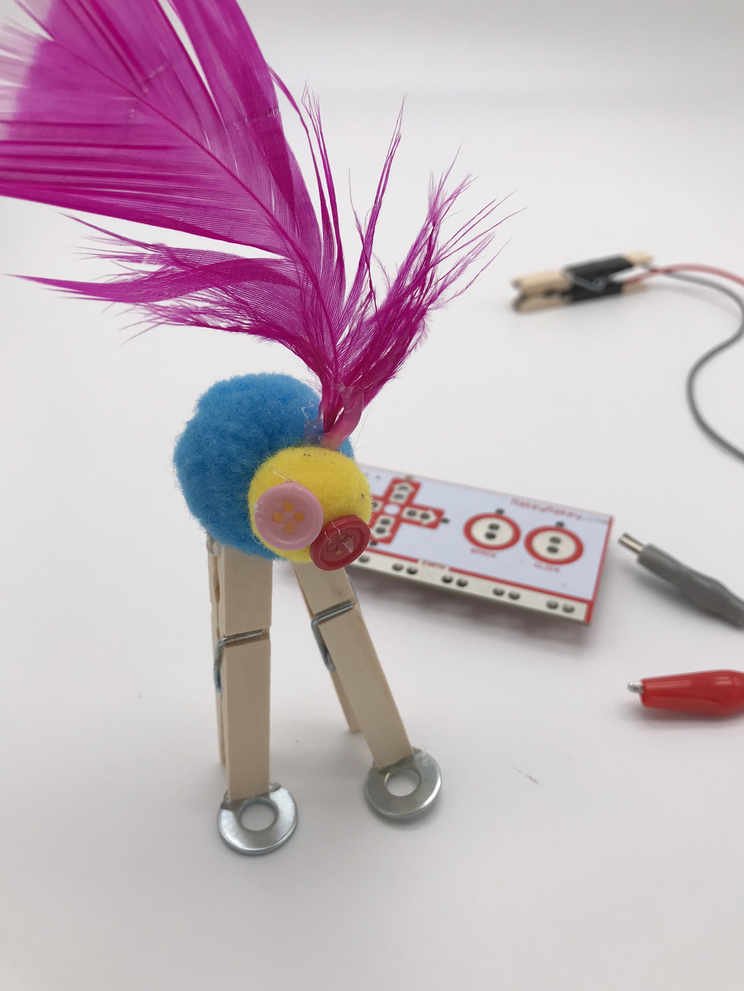
Create a doll out of spare parts using conductive and non-conductive materials. (Just so ya know, non-conductive materials are an insulator.) Make sure to have two spots on your doll that are conductive that do not touch.
You can make your doll look like a robot or whatever you'd like it to look like! If you are hot-glueing your spare parts together, make sure to be safe and ask for an adult's help.
You'll be attaching your Makey Makey to the two conductive parts of your robot.
Did you know that your spare part invention could also be called a bricolage artwork? (It sounds like "brick-o-lazh.")
Check out this definition from Dictionary.com for this fun word:
bricolage
- a construction made of whatever materials are at hand; something created from a variety of available things.
Educator Tip:
Get a huge pile of stuff for kids to dig through and make their creations. The more junk, the better! Have craft supplies and conductive things, so they can easily build a cute doll or robot AND make it conductive easily.
Alternatively, you could have them build whatever they'd like and then add conductive tape (or foil) afterwards.
Create a Database
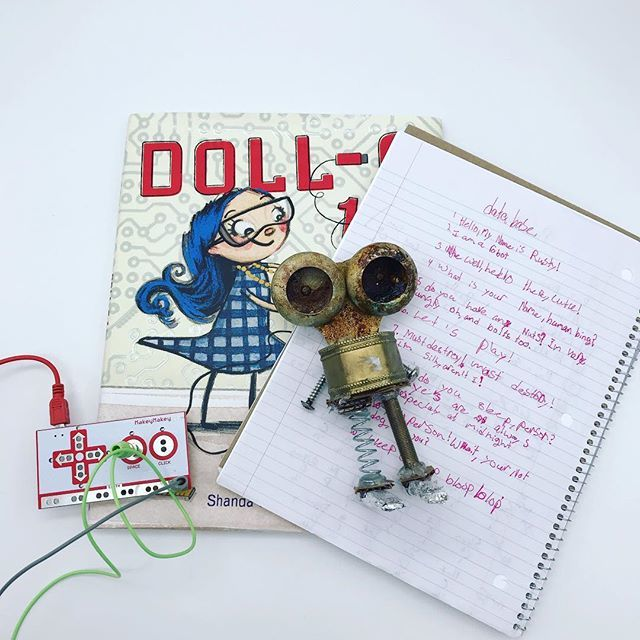
In your inventor's notebook, write a list of sayings you would like to add to your doll's database. (The funnier the better!)
Educator Tip:
Let kids have fun here creating fun sayings for their doll. They can make jokes, or just talk about favorite things. If they are having trouble, you might suggest asking your students, "What would you tell someone you just met? Maybe your doll/robot can tell us a little bit about themselves?"
Record Your Database in Scratch
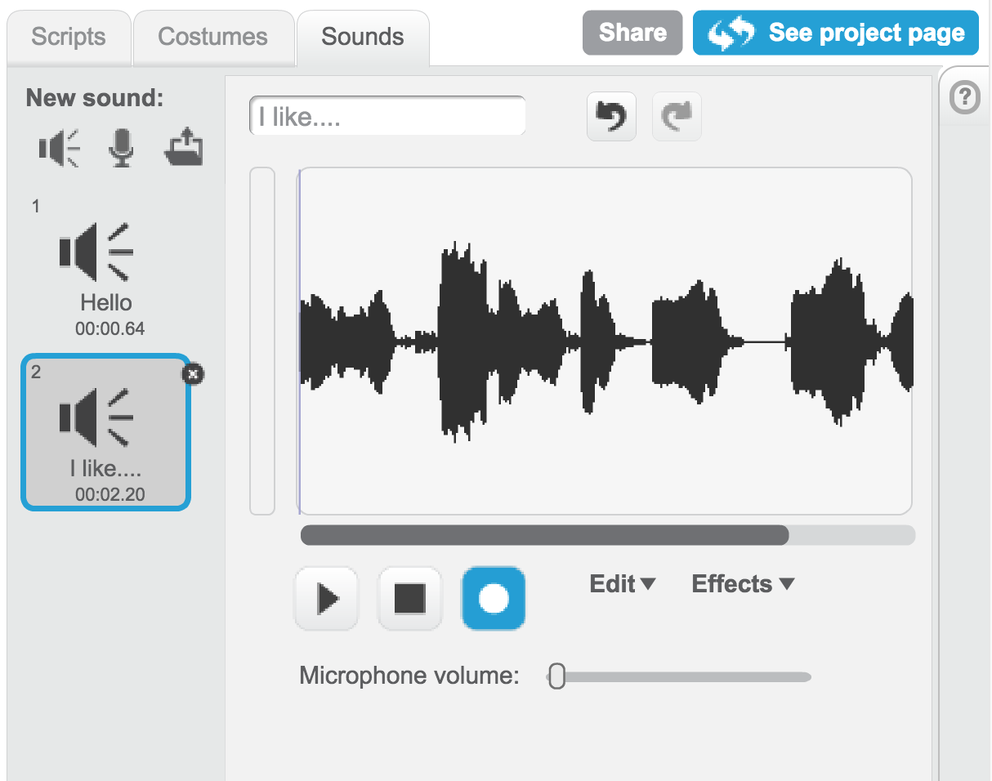
You can create your own sounds in Scratch really easily. Watch the video for the full instructions if you've never used Scratch for recordings before.
- Once you've started a game, click on the "Sounds" tab.
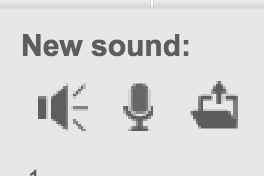
- Under "new sound" you have 3 options: Choose a sound, Record a sound, and Upload a sound. Click on the "microphone" icon to record a sound.
- In the "recording" workspace, there is a triangle to play your sound, a square to stop your sound, and the circle is how you record your sound.
- Once you hit record, make sure to "allow" Scratch to use your microphone and make sure your recording stays "green."
- After recording, you can select your sound to edit or add effects. (Watch the video if you need help!)
Educator Tip:
Kids generally figure out the sound effects in Scratch pretty quickly, but if they need help, the video will show them how to record, edit, and add effects to their sounds.
Create a Program in Scratch
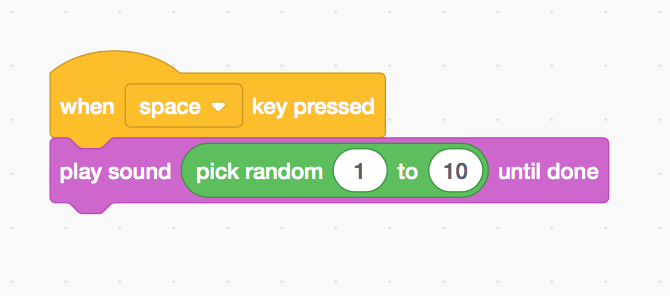
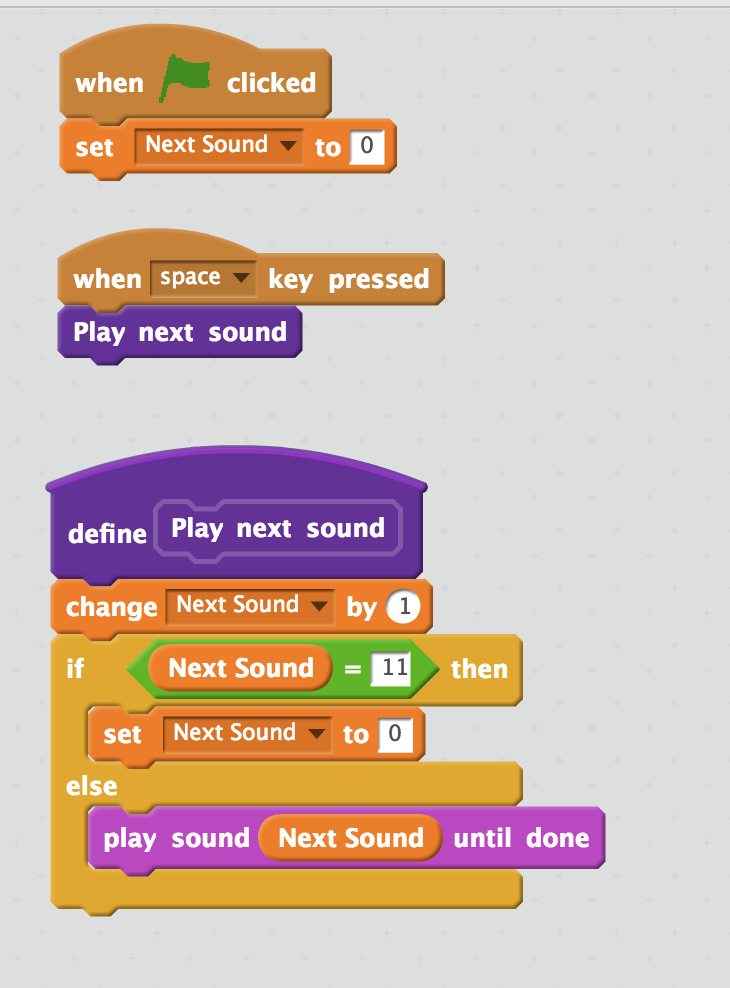
You have two options for programming your doll/robot in Scratch. Watch the video for step by step instructions on how to program your creation in Scratch!
The simple (and random) way:
Watch Video Part 1
Picture 1: Trigger an event by attaching a "play sound __ until done" block to a "when space key pressed" block. You can find the green "pick random __ to ___" in the operator palette of Scratch. Change the number to the amount of recordings you created. (For instance, if you created 5 recordings, then put "pick random 1 to 5" as your variables.)
Another way: Defining a Block and/or Creating a Variable
Watch Video Part 2
Picture 2: Define a block: Did you know you can create your own blocks in Scratch? By making and defining your own block, you can have even more control of your programs! Watch the video to learn how to define your own block.
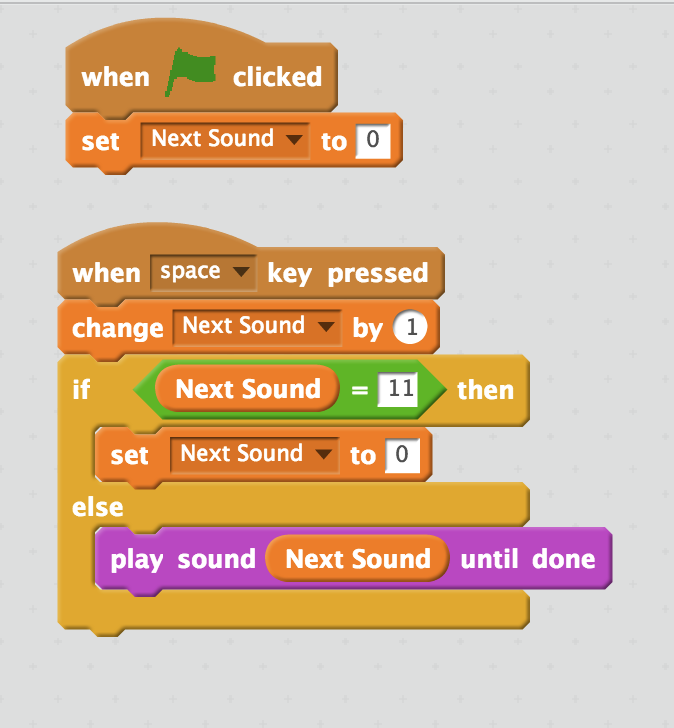
Picture 3: Create a Variable: In the "Data" palette, you can "make a variable" that will help you control when your creation speaks! To use this feature, follow these steps:
- Create a variable called "Next Sound"
- Set "next sound" to zero at the start of the game.
- When a key is pressed, change your variable by 1.
- Use an If/Else statement to control the sound effects. If the variable is larger than the amount of recordings you have, set it back to zero. Otherwise, play "next sound" until done!
Now you are ready to hook up your Makey Makey!
Educator Tip:
Let students experiment with creating their own programs. There are other ways to create this same program in Scratch. If they want to write a different program, that's okay!
Hook Up Makey Makey!
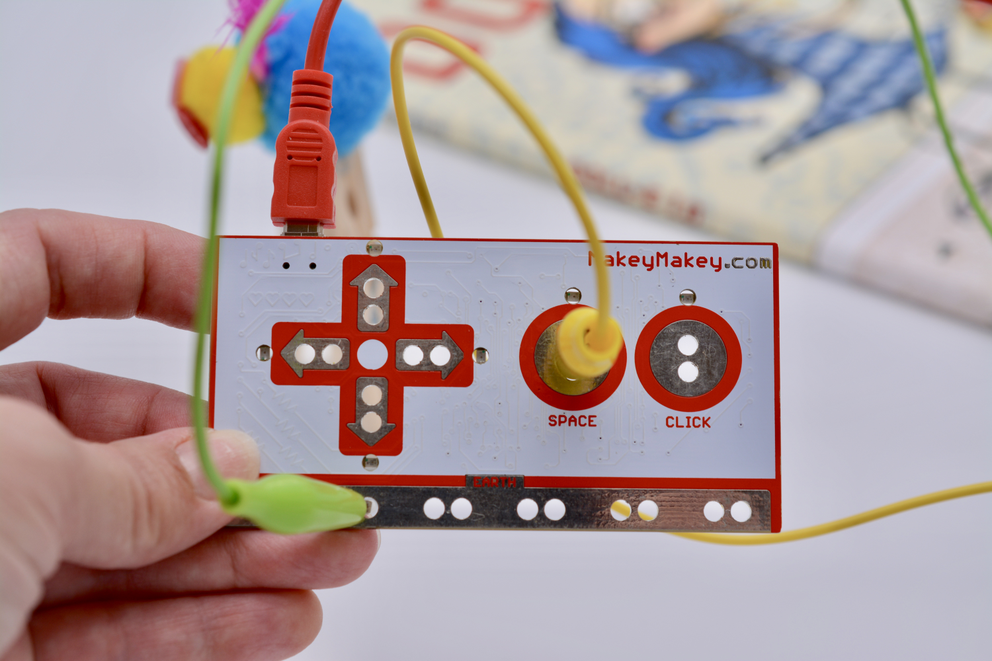
Picture 1: Hook one alligator clip to the SPACE input on your Makey Makey and another alligator clip to an EARTH input on your Makey Makey.
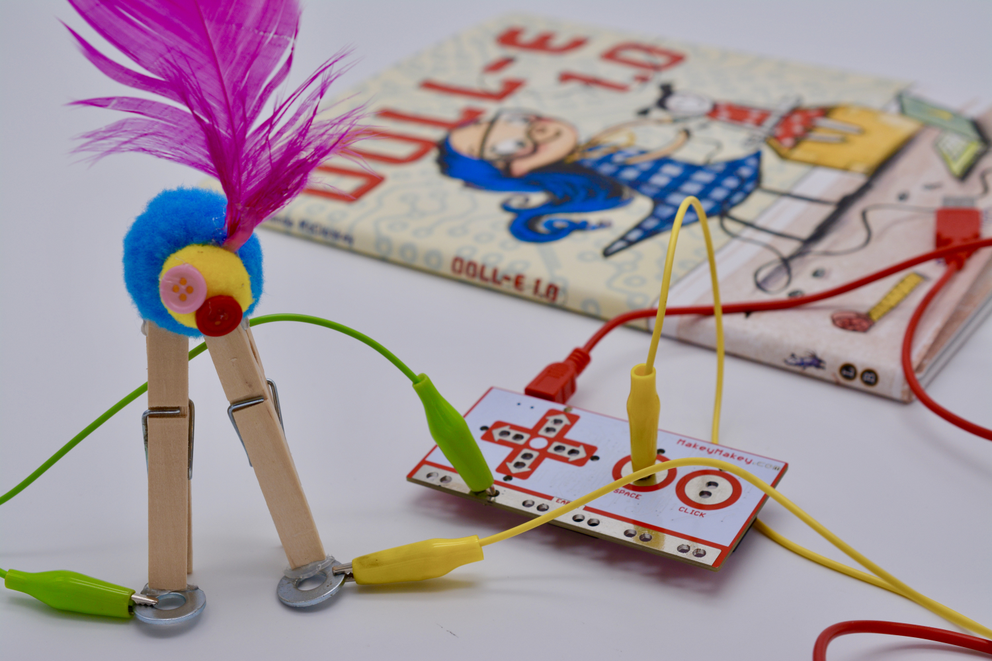
Picture 2: Clip one alligator clip to one conductive spot on your doll/robot and the other alligator clip to the other conductive spot.
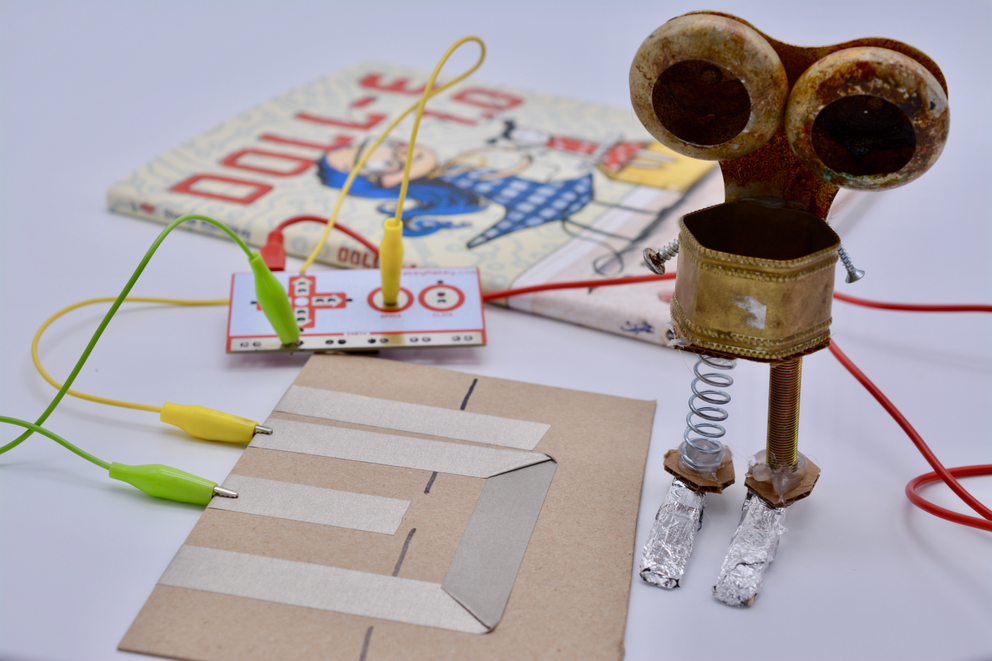
Picture 3: Alternatively, you could make a conductive sidewalk for your doll/robot by putting conductive tape or foil on a cardboard. Make sure your SPACE alligator clip is hooked to one conductive track and the EARTH alligator clip is hooked to the other conductive track. Now when you place your doll/robot on the track, Scratch will be triggered. (Make sure the conductive spots will bridge the gap otherwise, it will not trigger Scratch.)
Educator Tip:
Let students play with how they complete the circuit as this will help them with the concept of an open and closed circuit.
Play and Share!
Share your creation with your friends! How did they make theirs? What other way could you trigger your sound effects in Scratch? Is there another way to code it?
Keep playing and learning!