Making a Cardboard Devil With 123D Make
by andrewt in Living > Halloween
14738 Views, 76 Favorites, 0 Comments
Making a Cardboard Devil With 123D Make

HAlloWeEn!
I'm making some things live scary-up the office and I came across a really great model of the devil character from Legend. The Tim Curry-Satan guy. All I can remember is him hissing at Tom Cruise, 'Boiyyyyy...'.
This particular model is cool because it started out as a Darth Maul bust by Adam Beamish, then Kaj Steveman took the wireframe and ran with it to create The Darkness.
Anyway, here's a guid to using laser-cut cardboard and spray paint. You can scale it however you like, I just wanted about 1 cubic foot, so I used 24x36" cardboard and our 70w Epilog Lasers. You could also just use a desktop printer to print the plans on paper and just use an Exacto knive or jigsaw.
Pick a Model From the 123D Gallery.


There are sooo many great models coming out of 123D Creature - and most users are happy that you use their work. (Just attribute the original creator, it's considered polite.) Browse through the gallery and find one that is relatively simple - not a lot of overhangs or negative space. Also, the material thickness and scale are directly related to the resolution. In other words, the bigger the model and the thinner the material, the better the resolution of your final piece. So, don't pick a model that would rely on the detail coming through.
I figured the two giant horns are not going to get lost, so let's do it to it.
I figured the two giant horns are not going to get lost, so let's do it to it.
Import Into 123D Make


If you haven't already, create an Autodesk 123D account and download 123D Make
There are a few ways to get a model into 123D Make, but first, you'll need to launch the browser version or download it directly to your Mac desktop. Whichever platform you prefer will dictate how to get the model to open.
- (Browser) Directly from the model's page, via the Edit In... dropdown on the right - click 123D Make
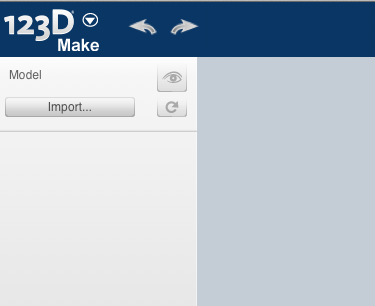
- (Desktop) Save/Download the STL to your computer then use the Import button at the top left when 123D Make opens
I prefer the desktop version - it allows me to work on something and walk away without gumming up memory in Chrome.
Once you've imported your model, some new settings menus will populate on the left sidebar.
Settings in 123D Make


Start with Manufacturing Settings - I knew I would be using 1/8" cardboard sheets @ 24"x36", so those are the first values I plugged in. Fortunately, there is a preset for 24"x36" cardboard (it actually says 0.1772", but that's close enough for me).
Jump down past the Object Size to Construction Technique. For my devil, I used Stacked Slices. I start here so I can see the output's resolution as I rescale the model. You'll also see on the right where 123D Make already starts to lay out the cut paths, based on the current settings.
Now go back and play with Object Size, balancing the scale you want with resolution and material size. For example, I wanted an 18" wide model, but if I bump it down to 17.75", I would save an entire sheet of material. That reduction would not cause very much loss in resolution, so I'm okay with it.
I didn't use Dowels, so skip it. Larger, more complicated models benefit from these, but not so much for this little guy.
The Slice Direction can be confusing, because the directional arrow doesn't snap to any axes and depending on your view, so it might not slice how you think it will. Just remember to move the model around so you can see the actual layer directions from multiple angles. You can also undo with the arrow at the top.
It's actually pretty fun to play with the settings - try making your model really big with the same material settings.
ALSO - your material size doesn't have to dictate your model scale. 123D Make will create numbered pieces that dovetail together in the gluing process. I'm doing a BIG model in another Instructable that'll need some splicing.
Get the Plans and Get Lase-y

Once you're done playing around, click Get Plans. I use Adobe more than anything else, so I used EPS plans.
That directly opens in Illustrator and Epilog allows for prints to be sent directly to their driver. I'm not going to break down the Epilog process, but I used a speed of 50, power of 30 and resolution at 500.
15 sheets of cardboard later, I have a BUNCH of little cardboard pieces on the work table.
ORGANIZE. Group sections into 10's. Put all the 40's together, all the 30's, 20's, etc.. If there are multiple sections to a cut plane, the number will have a dash-number (see the plans here). That can get confusing if you have a lot of similar pieces.
Grab your glue.
Start With a Shape You Recognize...


...and dry fit first. I like to start in the middle and build out. 123D Make numbers the slices from one side to the other, starting with 1 as the first, face up piece. You can start anywhere, but just keep track of which direction you're building. For this guy, I started with the head profile (around #35) and laid the next pieces on it to get an idea of how he was going to come together.
There are also little cut-line guides when a piece fits within the perimeter of another piece - very handy.
Then just start gluing them in order. A little dab will do you, but be sure to get the entire perimeter of the profiles - otherwise it could split at that seam later.
I don't recommend grouping more than 2-3 sections. If the cardboard warps or glues together crooked, it will look weird and disjointed when you put them all together.
I did the horns independently, so I could lay the main head on its side while gluing. Of course I had to hold the last horn in place for 10 minutes while it set...
And There You Go...

Next, I'm going to paint him red and black like the original model - I'll update to show pix then.
I'm also going to do some other prints at a much bigger scale, to see how much detail I can get. Stay tuned.
I'm also going to do some other prints at a much bigger scale, to see how much detail I can get. Stay tuned.