Making a Variability Chart Using JMP
by weasnqj1 in Circuits > Software
8673 Views, 4 Favorites, 0 Comments
Making a Variability Chart Using JMP
A variability chart is one of many ways to visually represent data in a easy to read and interpret manner. In industry variability charts are used in numerous ways from measurement system analysis to general problem solving techniques.
Introduction

A variability chart is one of many useful tools that can be used to measure variation. For this Instructable we are going look at defects by line, operator and shift to gain a better understanding of where, when and who are generating the best and worse results.
A good way to think of this is: You are seeing a lot of defects and want to understand where they're coming from; line, shift operator etc...
JMP software which can be purchased at: JMP.
Note there are other free software's available but I find JMP to be very user friendly and this is the software I use a work.
Tools Needed and Disclaimer

- Computer
- Organized data
- JMP Software
Disclaimer:
- All data must be in a numerical fashion
- Data must be composed vertically as seen in the attached images
- Ensure your data is properly sorted to reduce the chance of inaccurate results
Open the JMP Software
Double Click on the JMP Software
Opening a New Data Table
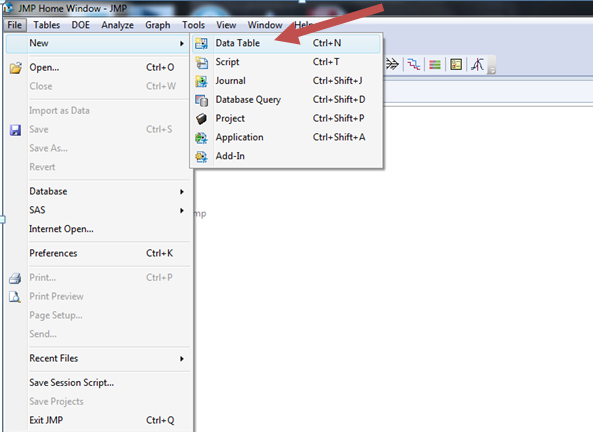
Click-File
Hover over- New
Click- Data Table
Shortcut- Click ctrl+n
Compose Your Data
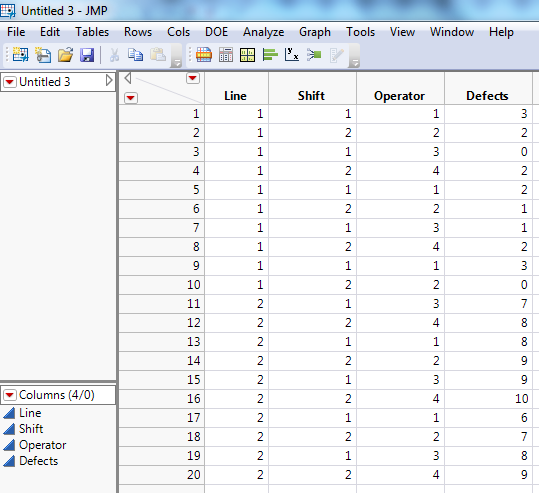
Compose your data vertically as seen in the picture and be sure to label your column names.
Create Your Chart
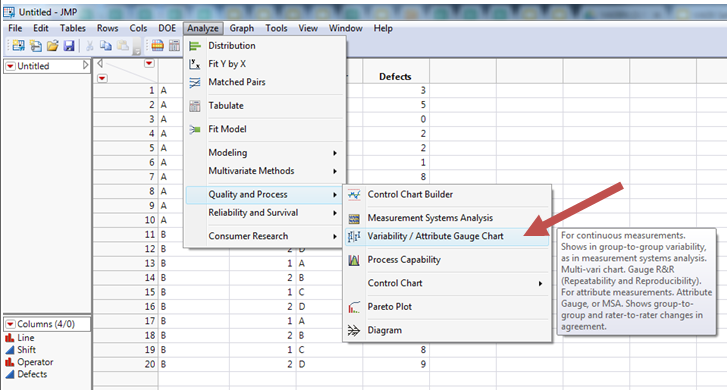
Click- Analyze
Hover over- Quality and Process
Click on- Variability / Attribute gauge Chart
Video on How to Set Up Your Chart
Final Chart
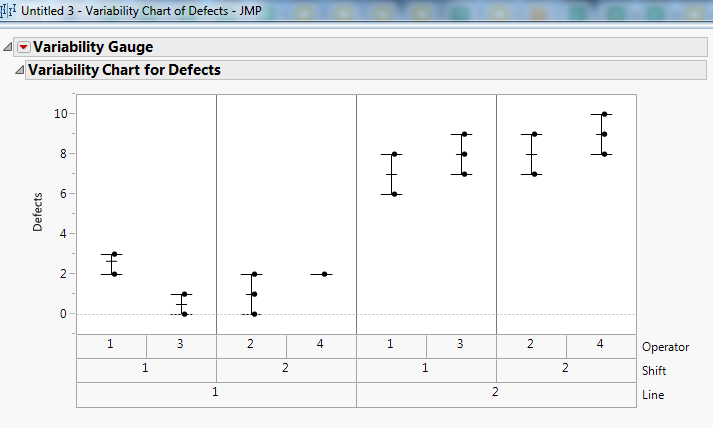
In this case you can see the following:
Line 1 has fewer defects and the overall distribution is much smaller
Line 2 has higher defects and the distribution between points is much higher.
How to Save
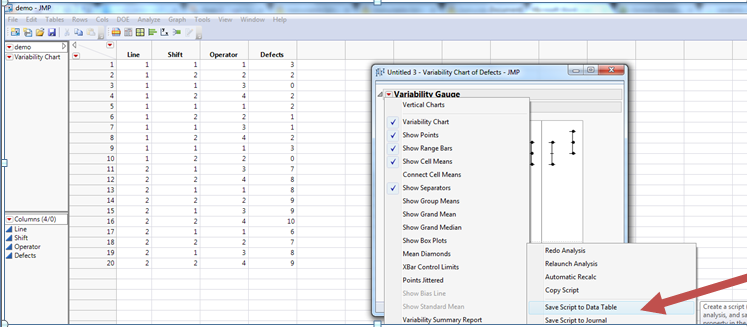
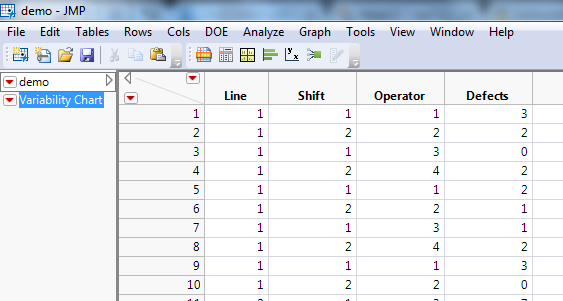
- Click the small red arrow in the top left corner of the chart
- Hover over "Script"
- Click "Save Script to Data Table"
Failure to follow this step will result in your chart not being saved
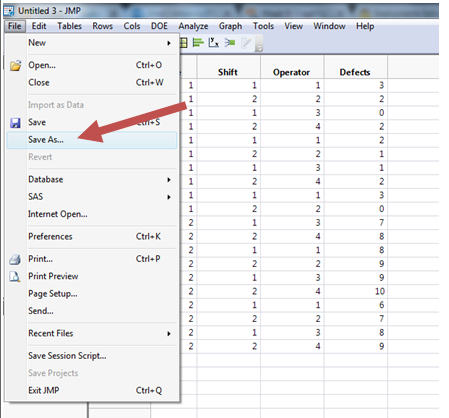
Saving everything:Start at the data page
- Click File >Save as
- Name your file
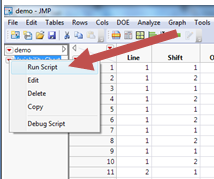
How to reopen the chart:
- Go to your data table
- Click the little red arrow beside the words "Variability Chart"
- Click "Run Script" and your chart will reopen
